



The belly pooch after baby is usually not a crunch problem. It’s a pressure problem, a posture problem, and sometimes a tissue problem all mixed together.
Pregnancy changes the whole front of the body. The ribs can stay flared, the pelvis can tip forward, the deep core can go quiet, and the lower belly can look soft even when you are doing everything “right.” If you keep attacking it with hard ab work too soon, the midsection often pushes outward more, not less. Annoying. Also true.
I’d start with the boring-looking moves. The ones that teach your abs to work with your breath, your glutes, and your hips instead of against them. That’s where real postpartum core recovery tends to begin, and it’s why the first few exercises in this list are gentle on purpose.
One warning before the list: if you notice doming down the center of your belly, leaking when you move, a heavy or dragging feeling in your pelvis, or a sharp tug near a C-section scar, back off and get checked by a clinician or pelvic floor physical therapist. Those are signs to scale down, not to push through. Small load first. Then more.
1. Diaphragmatic Breathing and Rib Stack Reset
This is the first workout I’d choose after baby. Not because it looks impressive, but because it helps the deep core remember how to turn on without your neck, shoulders, or low back trying to do the job.
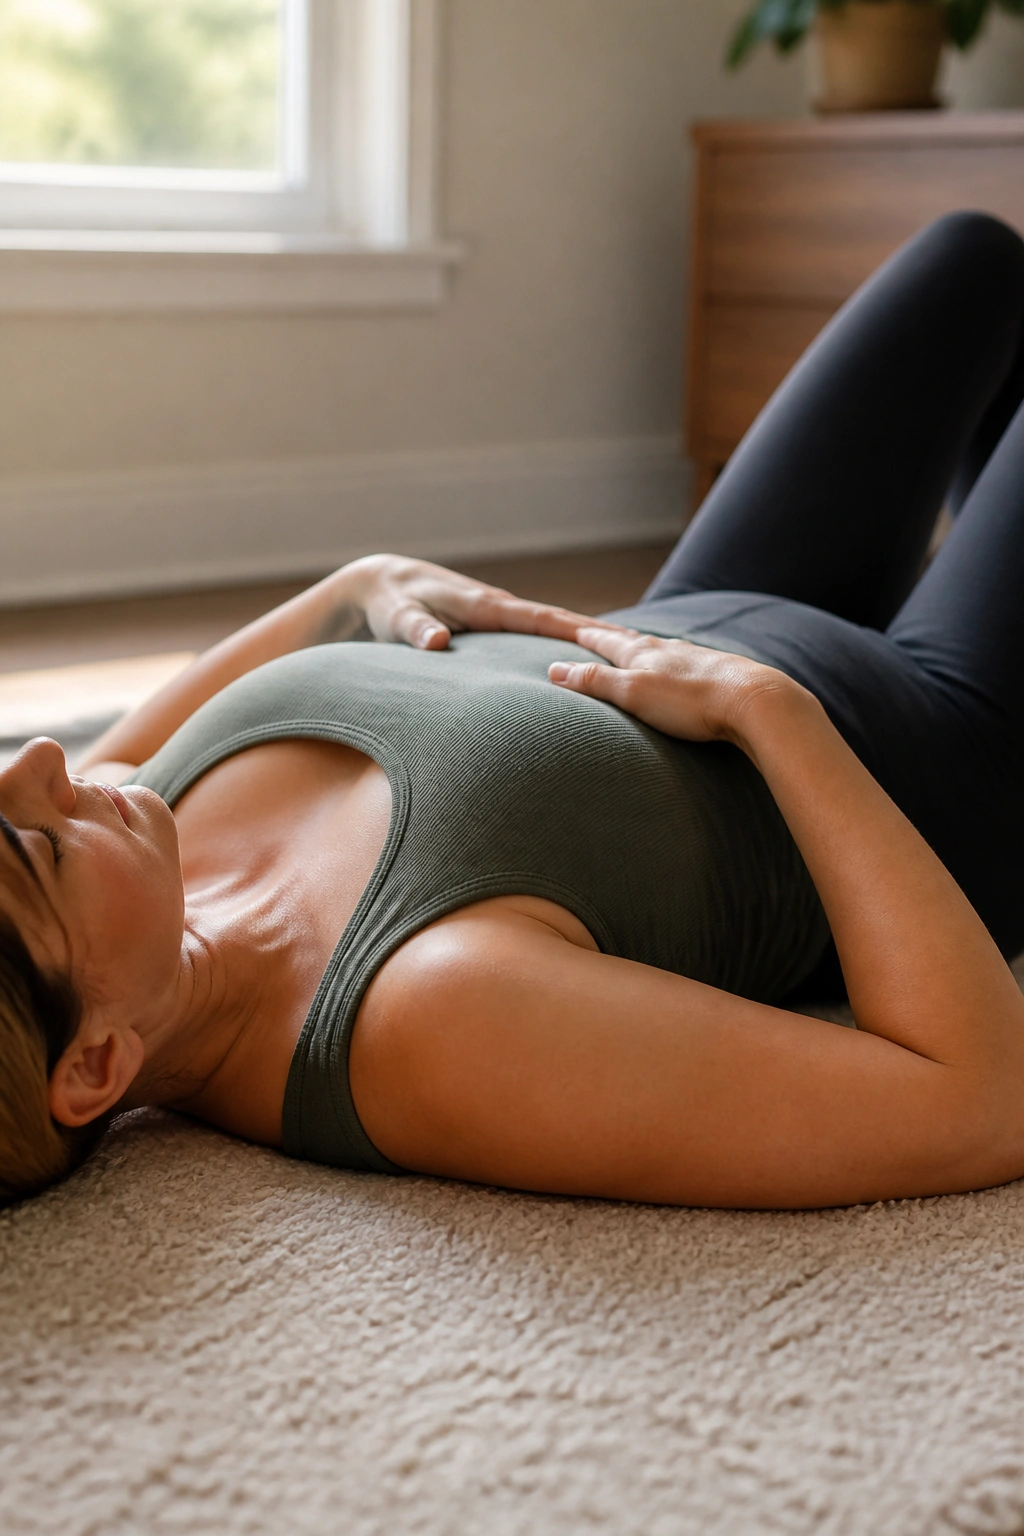
Lie on your back with your knees bent, or sit tall in a chair if the floor feels like too much. Breathe in through your nose and let the air widen your lower ribs, sides, and back. Then exhale slowly through your mouth and feel the ribs soften down while your lower belly gently firms. That last part matters.
What to feel
- The breath should spread wide, not just lift your chest.
- Your lower belly should flatten a little on the exhale.
- Your shoulders should stay quiet.
- Your jaw should stay loose.
Do 5 to 8 slow breaths for 2 rounds. If you want a cue, think long exhale, soft ribs, light brace. Not a hard squeeze. Not a stomach vacuum. Just enough tension to stack the ribs over the pelvis again.
A lot of postpartum women skip this because it feels too simple. It isn’t. If your core can’t manage breath and pressure, harder moves will leak all over the place.
2. Pelvic Tilts on the Floor
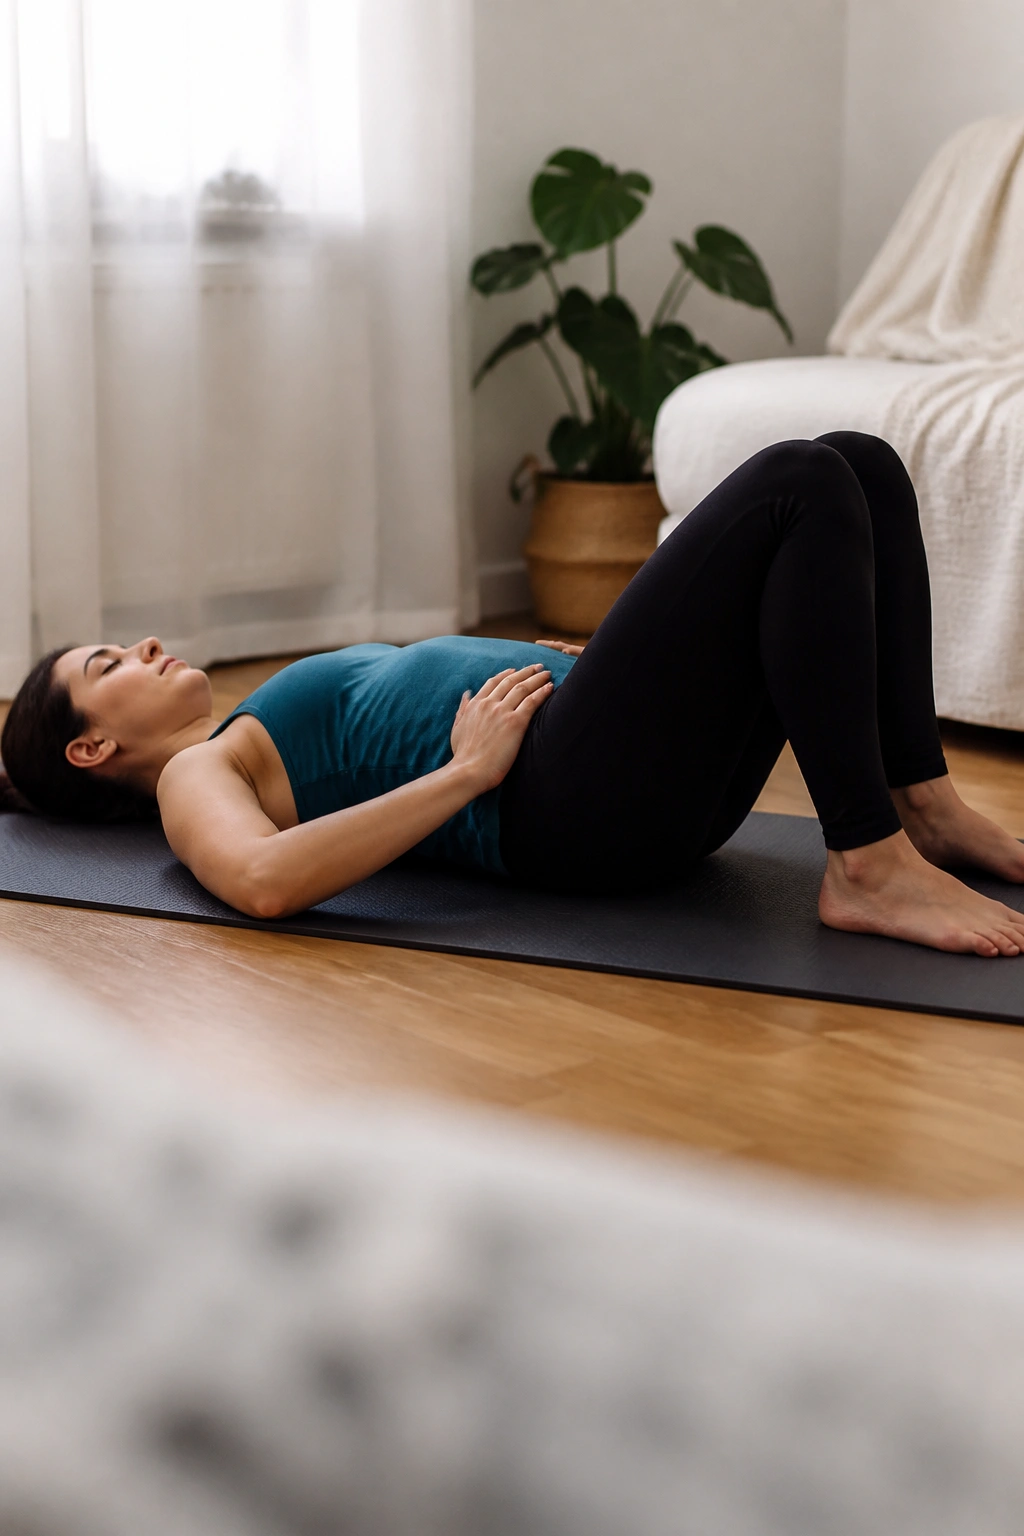
Pelvic tilts look tiny, and that is exactly why they work so well. You are not trying to flatten your back into the floor with force. You are teaching your pelvis to move a little, then settle, without the abs grabbing or the glutes clenching like mad.
Lie on your back with knees bent and feet flat. On an exhale, gently tip your pelvis so your low back comes a bit closer to the floor. On the inhale, return to neutral. That’s the whole deal. Smooth. Quiet. No jerking.
How to keep it clean
- Move only a few inches.
- Keep your ribs from popping up.
- Let your thighs stay relaxed.
- Stop if you feel pressure downward.
Do 8 to 12 reps for 2 sets. If your back arches a lot when you stand or carry your baby, pelvic tilts are one of the fastest ways to remind your body what neutral feels like again. They also pair well with breathing, which is no accident.
Tip: If you feel your belly dome, make the tilt smaller and slow the exhale down.
3. Heel Slides With a Slow Exhale
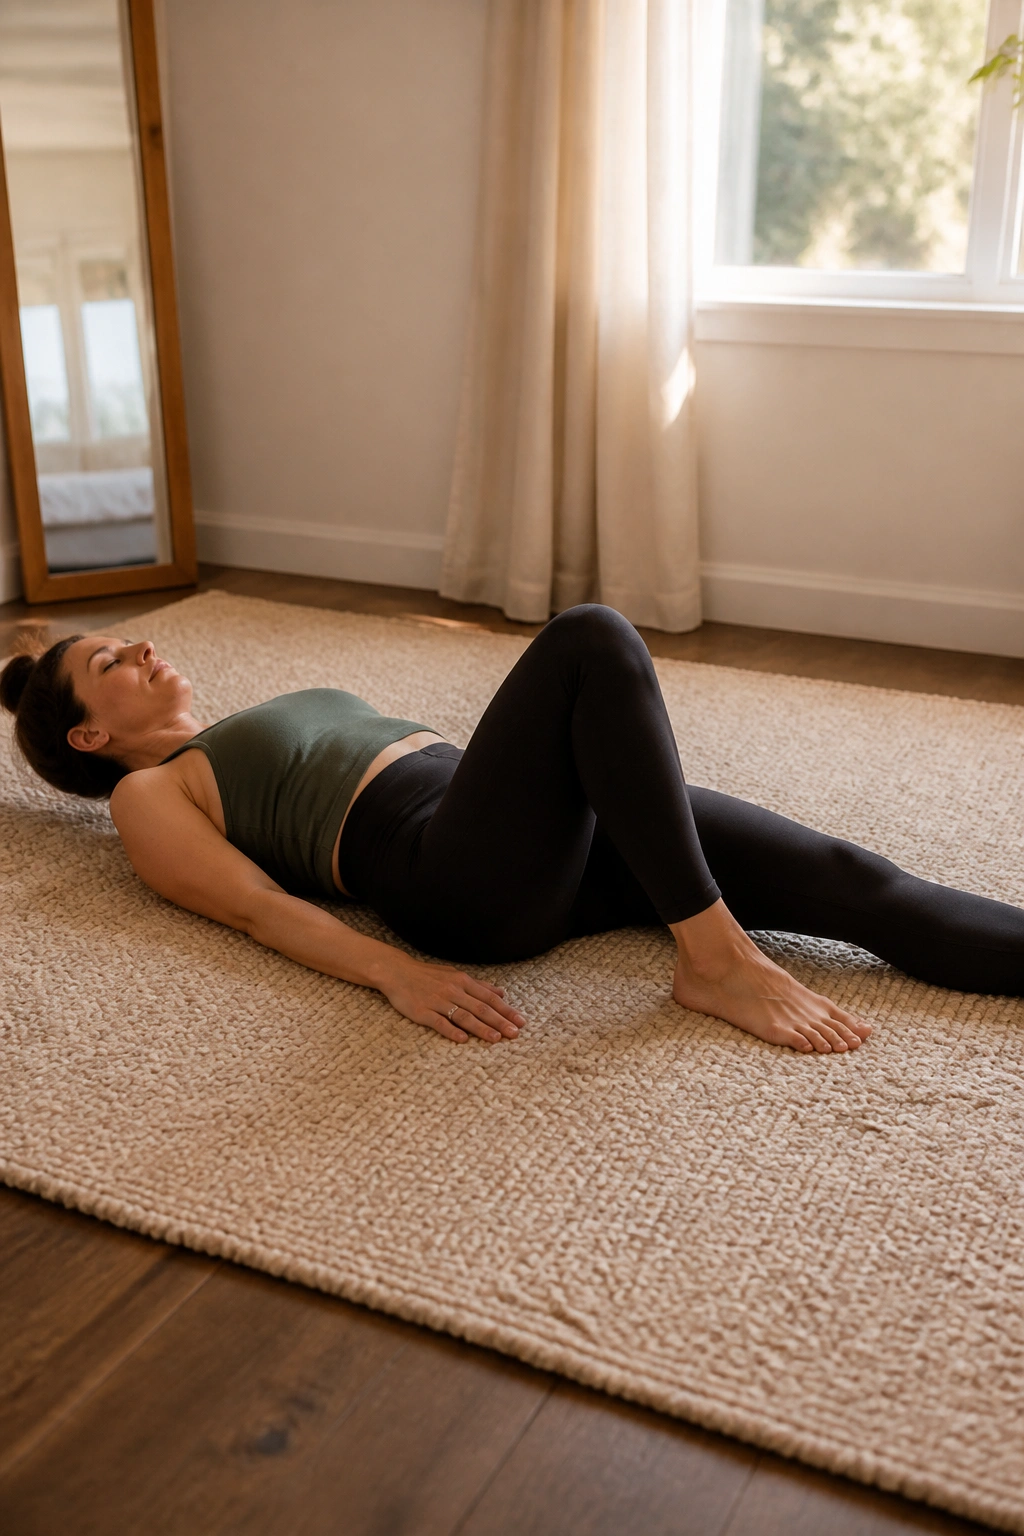
Heel slides are one of those postpartum core exercises that looks almost foolish until you do them with control. Then you feel the whole front of the torso wake up.
Lie on your back, knees bent, feet flat. Exhale first, then slowly slide one heel away from your body until the leg is almost straight. Keep your low back heavy and your belly quiet. Inhale to slide it back in. Switch sides. If you rush this, your hip flexors will take over and the abs will clock out.
What makes them useful
A heel slide asks for more stability than a pelvic tilt, but less than a full dead bug. That makes it a very nice middle step when your core is ready for more, but not ready for drama.
Do 6 to 10 slides per side. If the lower belly pokes out or forms a little ridge down the center, shorten the range immediately. That is your body telling you the lever is too long for now.
One trick I like: place a towel under the heel. It makes the movement smoother and keeps you from yanking the leg back with your hip flexors.
4. Glute Bridges for Pelvic Support
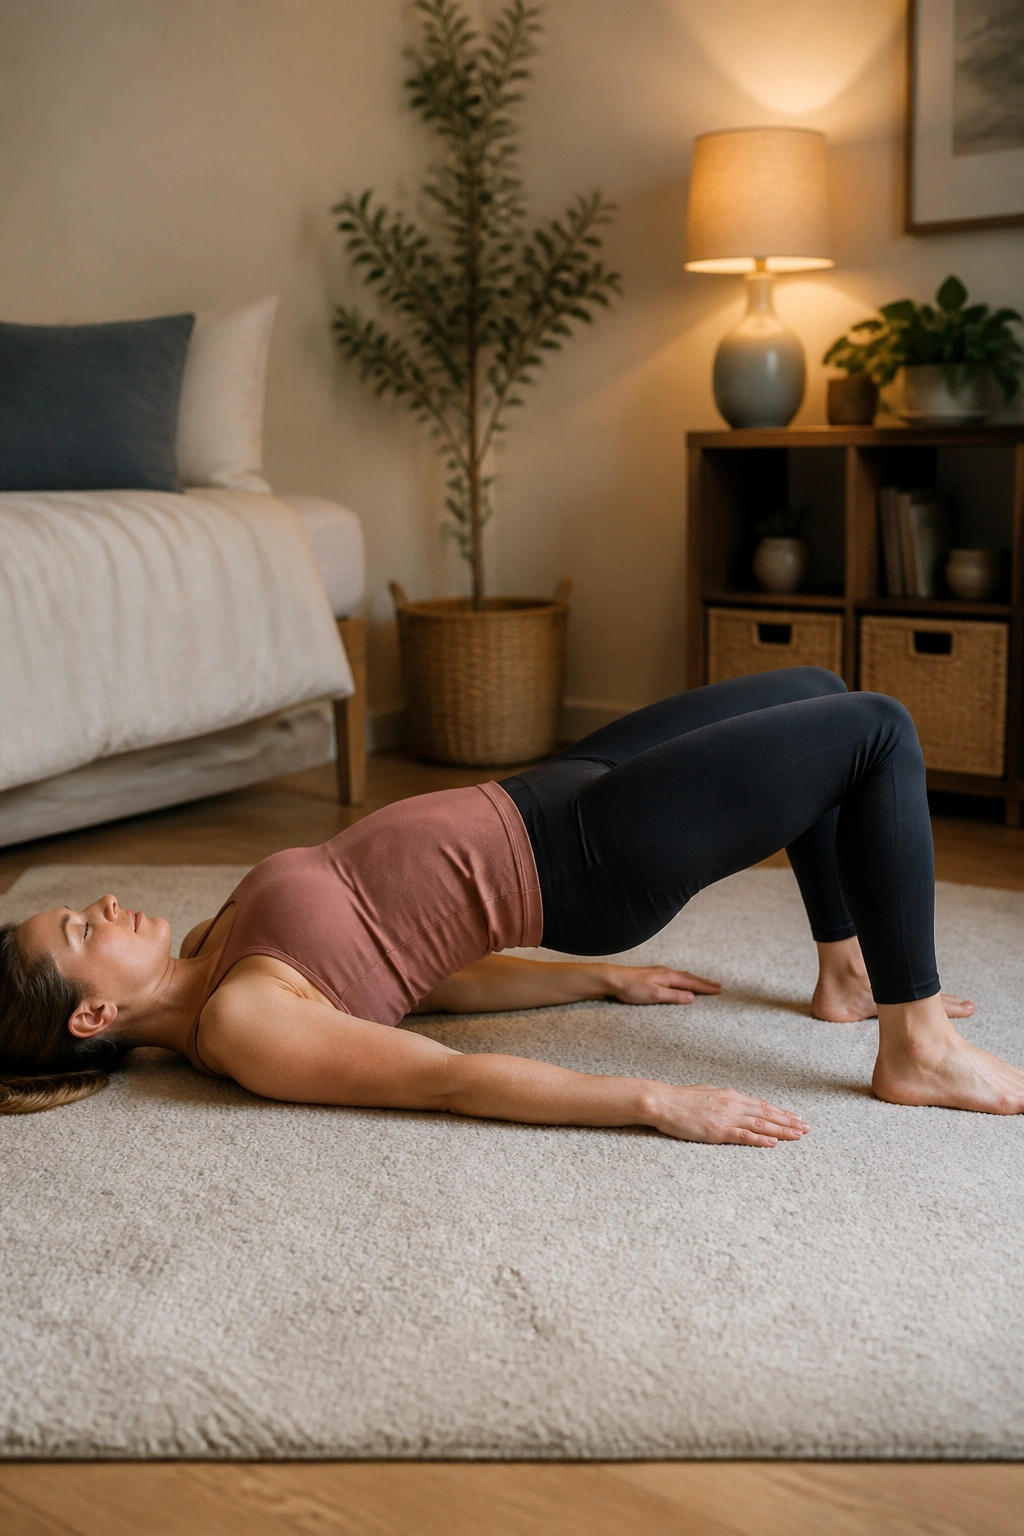
A stronger backside helps the front of the body relax. That sounds backward until you feel it. When the glutes wake up, the pelvis tends to sit in a better position, and the belly does not have to hang on so hard.
Lie on your back with knees bent, feet about hip-width apart. Exhale, press through your heels, and lift your hips until your body makes a straight line from shoulders to knees. Pause for a beat. Then lower with control. The ribs should stay stacked, not flare up like you are trying to impress someone.
Glute bridges are good, but sloppy bridges are not. If you thrust the hips high and arch the lower back, you miss the point entirely.
Do 8 to 12 reps for 2 to 3 sets. Once the bodyweight version feels clean, you can add a mini band above the knees and press gently outward as you lift. That gives the outer hips a little more work, which can help with pelvic stability.
A bridge should feel like the hamstrings and glutes are sharing the load. If it feels like your low back is doing a solo performance, lower the height and slow down.
5. Bird Dogs for a Quiet Waistline
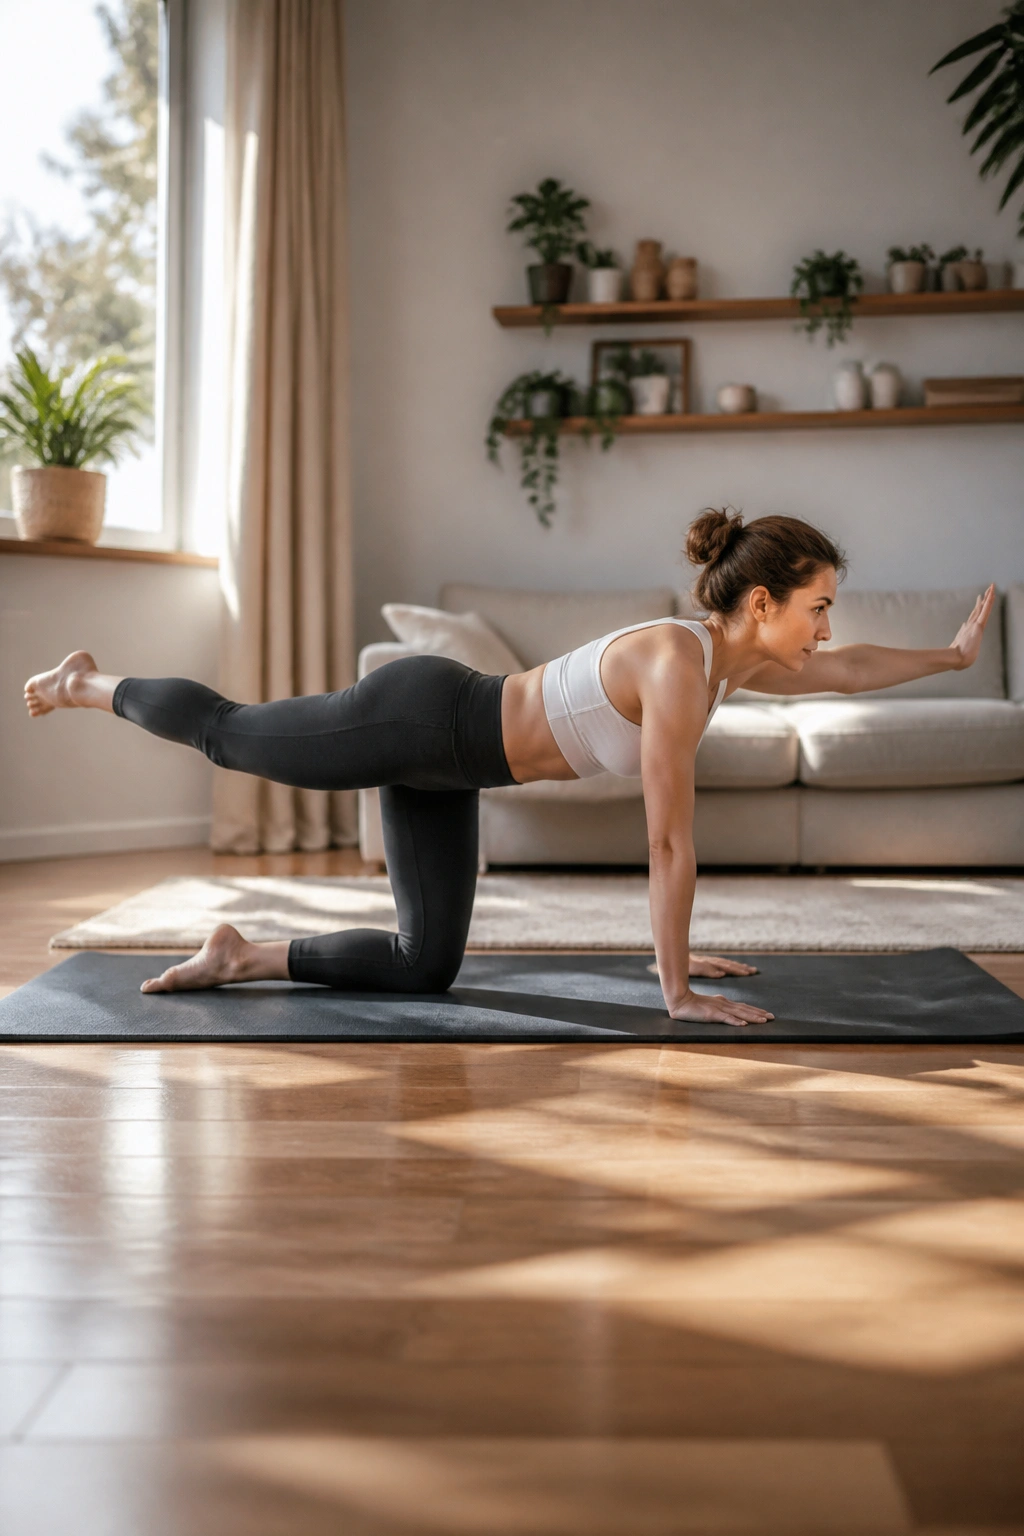
Can one move really train the core, hips, and posture at the same time? Bird dog comes close.
Start on hands and knees with your wrists under shoulders and knees under hips. Exhale, reach one leg straight back while the opposite arm reaches forward. Keep the hips level and the belly steady. Hold for 2 counts, then return and switch sides. The goal is not height. The goal is stillness.
Why it matters
Bird dog teaches the trunk to resist twisting, which is a big deal after pregnancy when everything has been stretched and shifted. It also puts gentle load through the shoulders and hips without smashing the midsection.
- Reach long, not high.
- Keep your neck in line with your spine.
- Pause before you move again.
- Stop if your low back pinches.
Do 5 to 8 reps per side. If the full reach feels too shaky, start with just the leg or just the arm. That is not “cheating.” That is good training.
I like bird dog because it rewards patience. Rush it, and it falls apart. Slow it down, and it suddenly starts to feel like the whole torso is learning how to hold itself together again.
6. Modified Dead Bugs
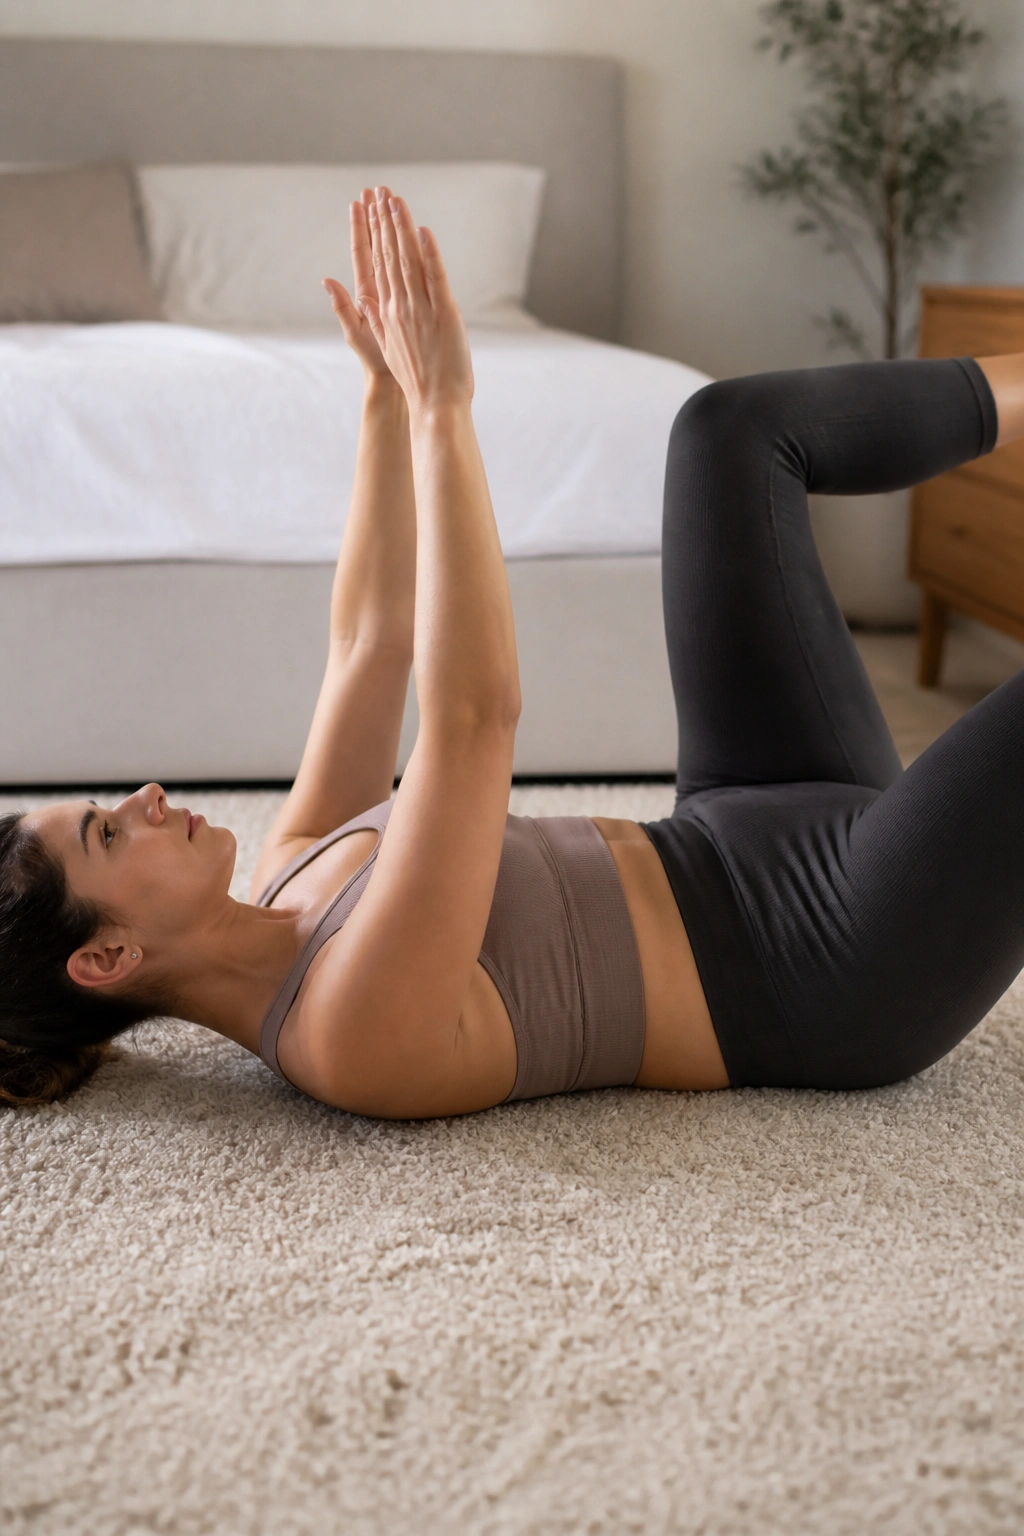
Dead bugs are a better choice than crunches for most postpartum bodies. They train the abs to brace while the arms and legs move, which is exactly the skill you want when you are lifting a baby, buckling a car seat, or hauling a diaper bag.
Lie on your back with knees bent and shins lifted, or keep one foot on the floor if table-top position feels too hard. Reach your arms toward the ceiling. Exhale as you lower one heel toward the floor or slide one arm overhead, then return and switch sides. The back should stay mostly still.
Start here if the full version feels like too much
A smaller lever is easier to control. One foot-down dead bugs are often the right place to begin if you notice doming or your low back arches hard off the floor.
- Keep the exhale long.
- Move one limb at a time.
- Do not let the ribs pop.
- Keep the motion slow enough to control.
Try 6 to 8 reps per side for 2 sets. If the belly forms a ridge, shorten the range or keep both knees higher. That simple adjustment often makes the exercise useful again.
Dead bugs are not flashy. Good. Postpartum core work should be boring enough that you can repeat it without dread.
7. Heel Taps When Your Core Is Ready
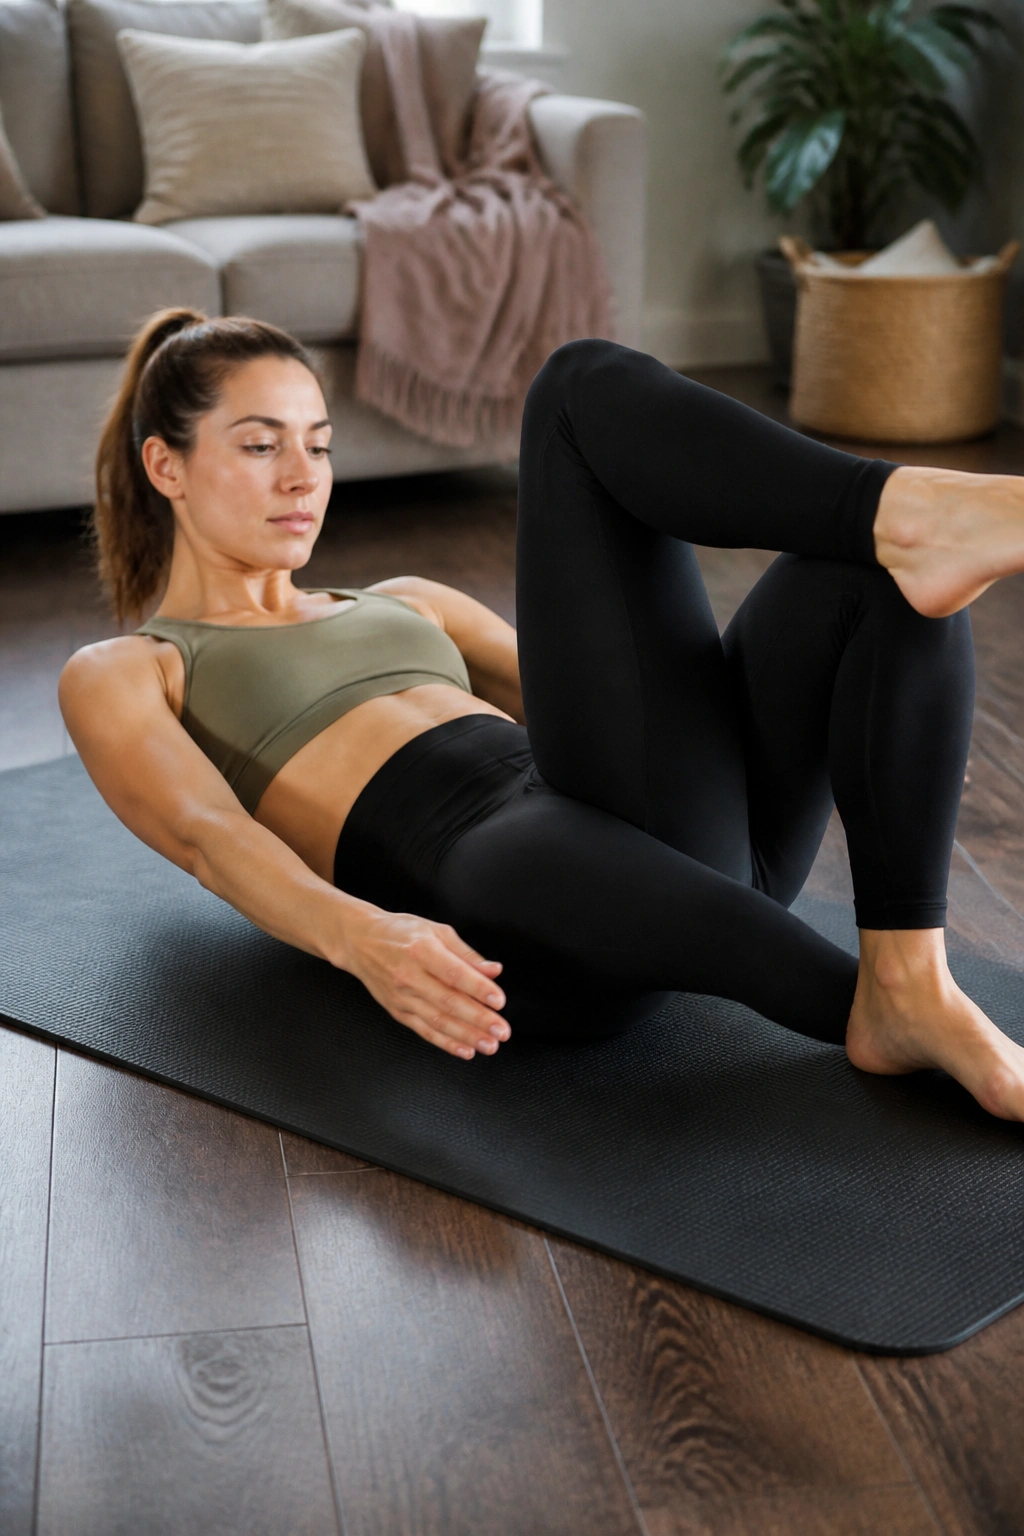
Heel taps are the next step up from the easier dead bug variations. They ask for a little more control, and they will tell you fast if your trunk is not ready yet.
Set up on your back with knees bent over hips. Exhale, brace gently, and lower one heel to tap the floor before bringing it back up. Alternate sides. The movement should be tiny and precise. If you slam the heel down, your core has already lost the game.
Why choose heel taps over a full crunch? Because they train the lower abs to hold the pelvis steady while the legs move, which is closer to real life. You are not curling up for looks. You are building control.
Do 6 to 10 taps per side. If your belly domes or your back lifts, reduce the range and slow the breath down. You can also keep one foot on the floor and tap only one side at a time until the motion feels easier.
This is a good “ready for more” move. Not forever. Just long enough for the deeper core to get its act together.
8. Side-Lying Clamshells
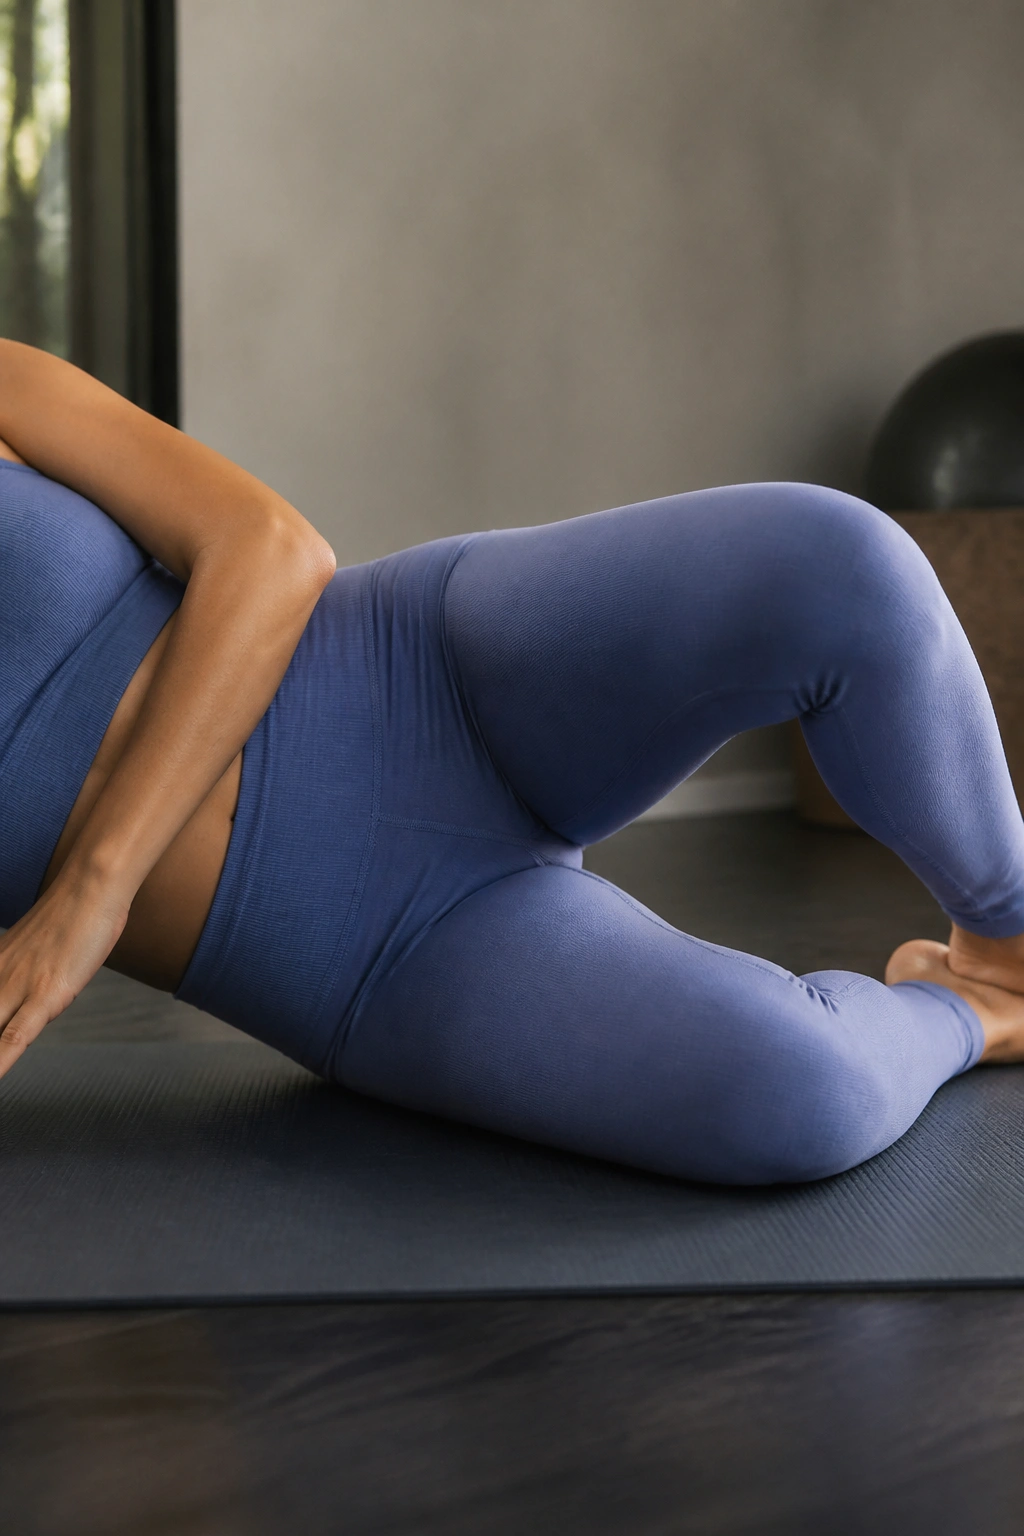
Clamshells don’t look like belly work, and that is precisely why people underestimate them. The glute medius, the muscle on the outer hip, helps keep the pelvis steady. When that muscle is weak, the whole middle section works harder than it should.
Lie on your side with knees bent and feet together. Keep your pelvis stacked and open the top knee without rolling the hips back. Pause, then lower. The movement should be small and controlled, like you are opening a stiff book a few inches at a time.
If you want more challenge, loop a mini band above the knees. Not below. Above is usually easier to keep clean.
Do 12 to 15 reps per side for 2 sets. The burn should land in the side hip, not the front of the hip or the low back. If you feel your waist twisting, you have gone too far.
Clamshells help more than they get credit for because they support alignment. Better hip control means less wobble through the pelvis, and less wobble makes the midsection work from a steadier base. That matters when you are rebuilding after pregnancy.
9. Knee Side Planks
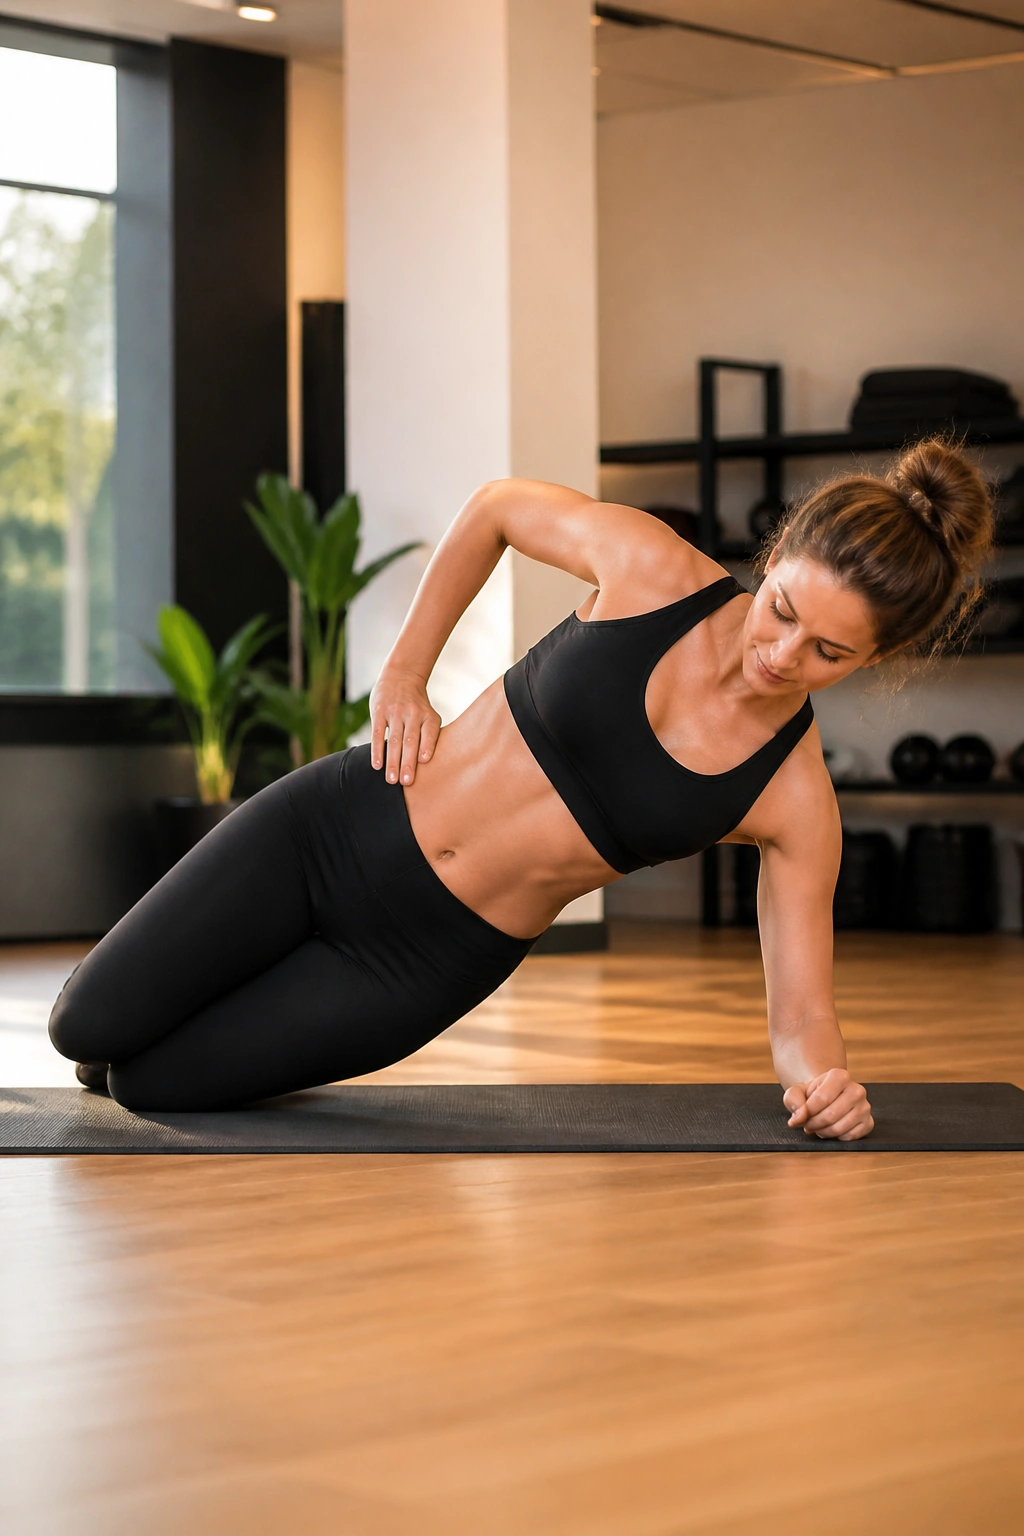
Can a side plank help a postpartum belly? Yes, if you start with the knees down and keep your ego out of it.
Set one forearm on the floor, stack the knees, and lift the hips so your body forms a straight line from shoulder to knee. Hold the position while breathing steadily. The obliques should work, but the shoulder should not shrug up toward your ear.
How to make it feel manageable
- Keep the knees bent.
- Lift the hips only as high as you can hold.
- Breathe while you hold.
- Stop if you feel pressure in the pelvic floor.
Start with 10 to 20 second holds for 3 rounds per side. If that’s easy, straighten the top leg first before you try a full side plank. That gives you more load without a wild jump in difficulty.
Side planks train the side body, and the side body matters more than people think. The waist is not just a front-and-center story. It’s a wraparound system. When the obliques can hold steady, the belly often looks and feels more supported.
10. Sit-to-Stand Squats
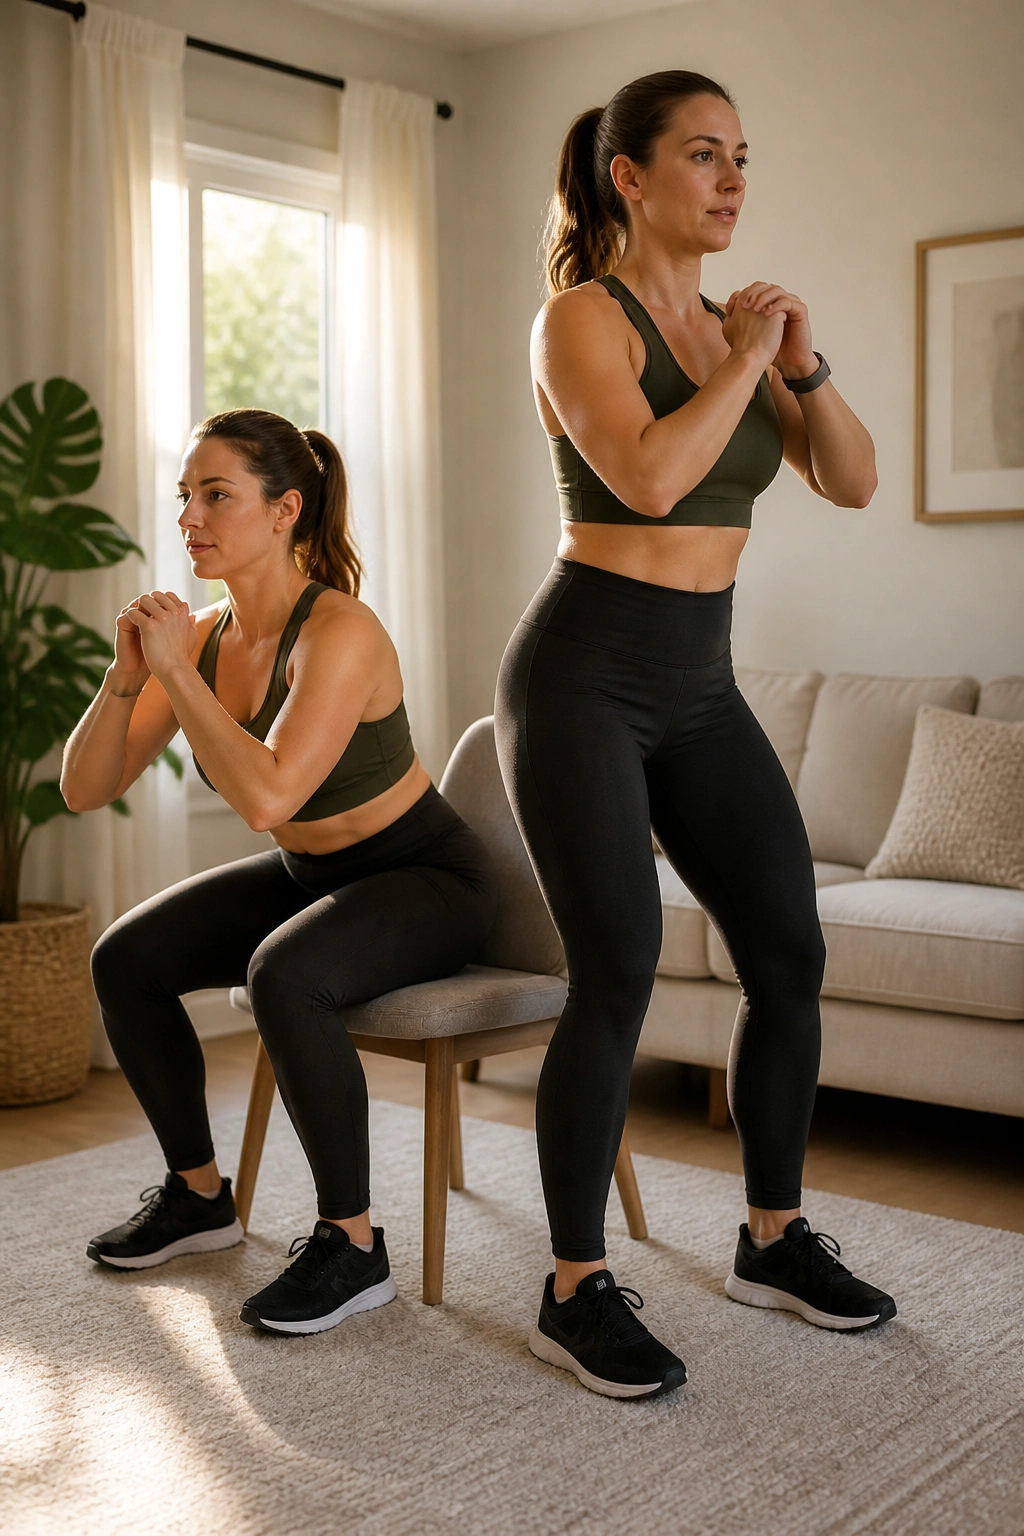
Get out of the floor for a minute. Seriously.
Sit-to-stand squats are one of the most useful postpartum strength moves because they train the legs, hips, and trunk together in a pattern that shows up all day long. You sit, you stand, you carry a baby, you sit again. The body knows this pattern already. We’re just making it stronger.
Use a sturdy chair. Sit down with control, keep your feet flat, and stand up by pressing through the whole foot. Exhale as you rise, and keep the ribs from flaring. If the chair is low, place a folded towel on it to raise the seat a little.
A few details that matter
- Feet about hip-width apart.
- Knees track over the toes.
- Chest stays tall.
- Do not throw your weight forward.
Do 8 to 12 reps for 2 to 3 sets. If bodyweight is easy, hold a light dumbbell at the chest. Not the baby. Please not the baby. Your balance deserves better than that.
A solid squat pattern supports the pelvis and the deep core better than people expect. Plus, it makes getting up from the couch feel less like a personal insult.
11. Brisk Stroller Walk Intervals
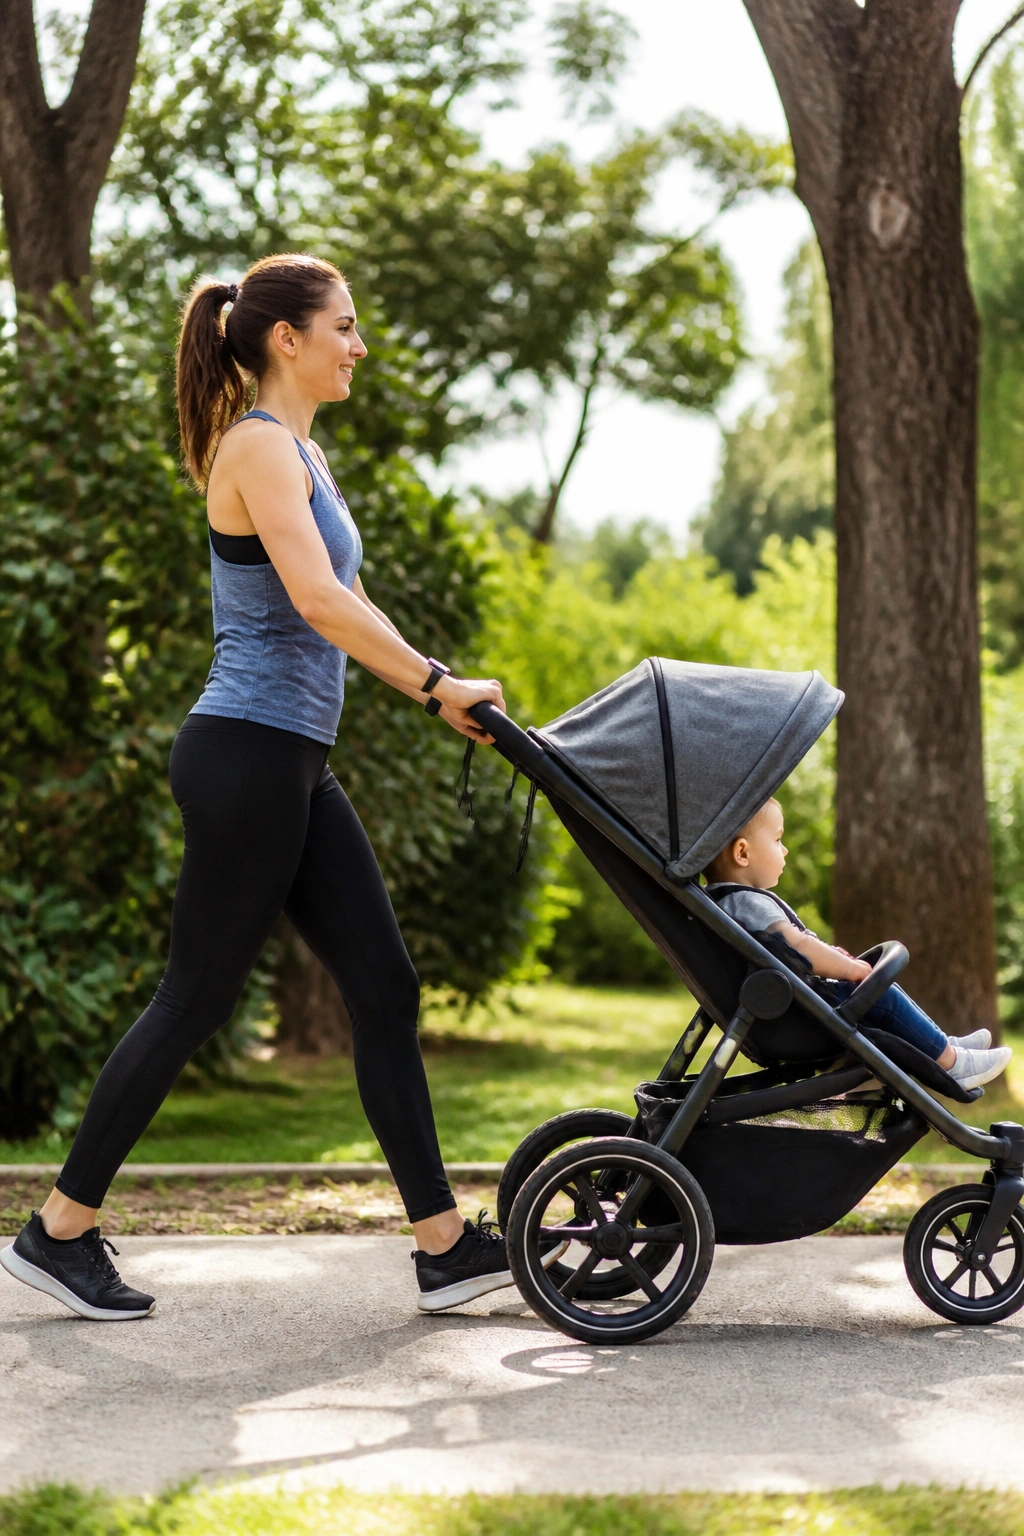
Walking is not glamorous. It is also one of the best things you can do for postpartum recovery.
Take the stroller, lace up your shoes, and walk at a pace where you can still talk, but you wouldn’t want to sing. If you like structure, try 2 minutes brisk, 1 minute easy for 20 to 30 minutes. That little shift in pace makes the walk feel more like training and less like drifting around the block.
The posture cue matters here. Keep the ribs stacked over the pelvis, let the arms swing naturally, and avoid leaning back while pushing the stroller. That leaning-back position can make the lower belly stick out more and put extra stress on the low back.
One sentence is enough: walk tall.
If you are tired, anxious, or sleep-deprived, a walk can do more for your midsection than another hard core circuit. It gets blood moving, helps recovery, and gives the body a gentle reminder that movement does not have to be punishing to count.
12. Farmer Carries
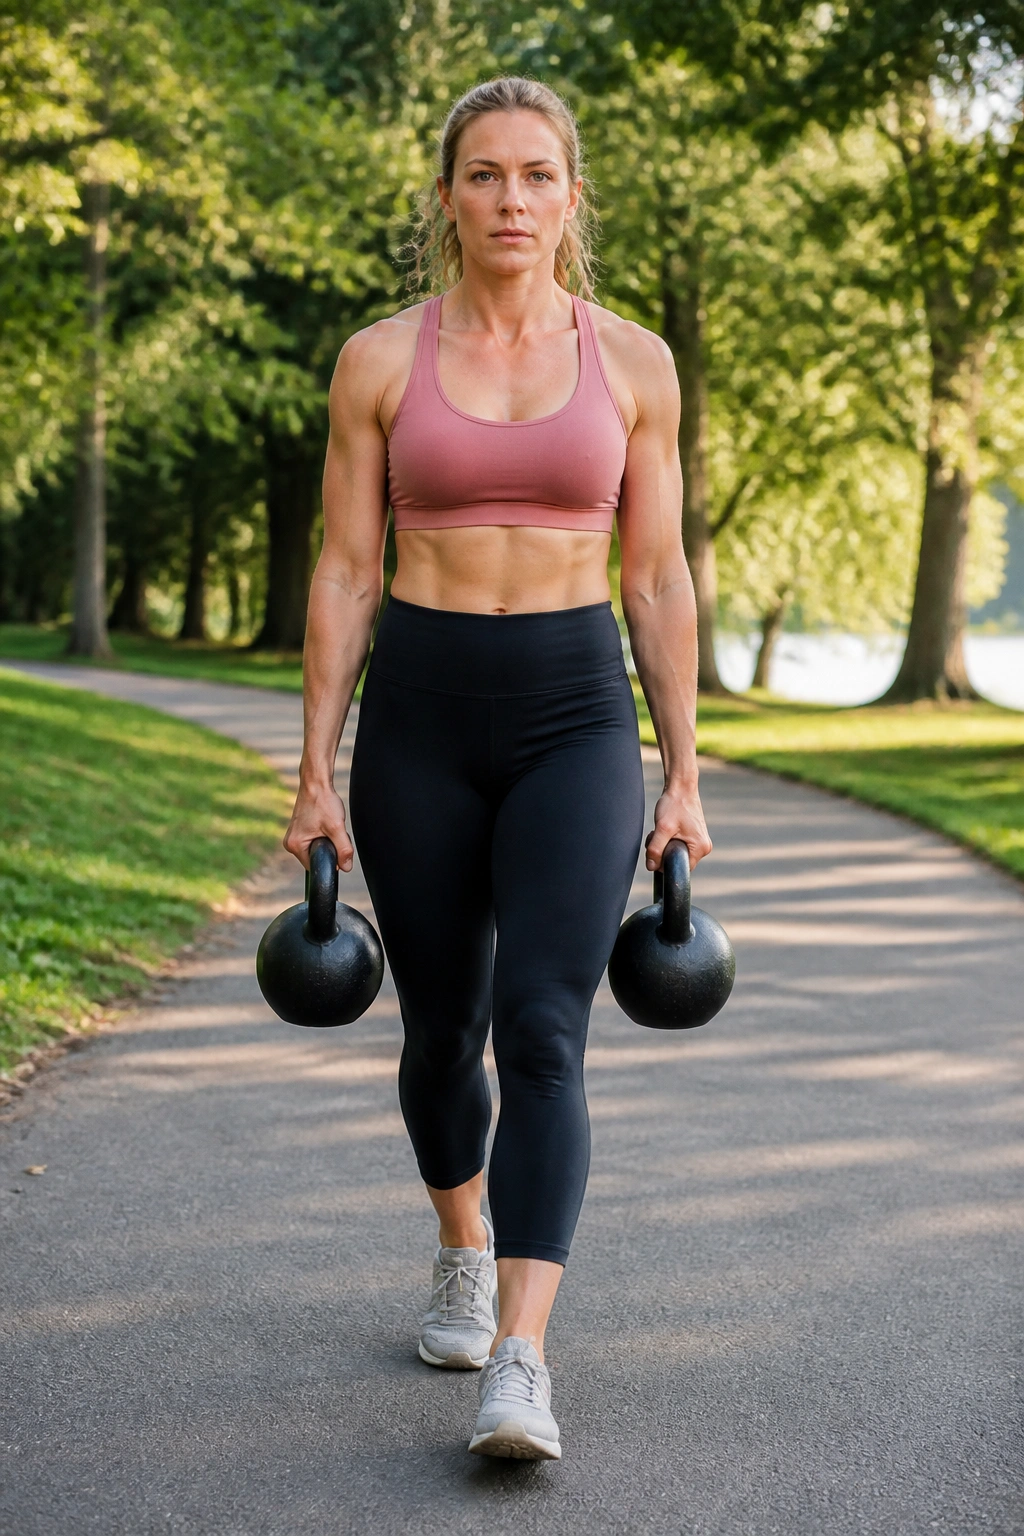
Farmer carries are the underrated powerhouse move in this whole list. Pick up two moderate weights, or use two full grocery bags if that is what you have, and walk with them for a short distance while staying tall.
The idea is simple. Your core has to resist side-bending, your shoulders have to stay packed, and your breathing has to keep going even under load. That is real-life core work. It looks plain. It is not plain at all.
What to do
- Stand tall before you lift.
- Keep the weights close to your sides.
- Walk for 20 to 40 seconds.
- Rest, then repeat for 4 to 6 rounds.
If your ribs pop forward or your lower back arches, the load is too heavy. Drop the weight and keep the walk clean. A carry should feel steady, not sloppy. You want a firm middle, not a strained one.
This move is also useful for postpartum posture because it teaches the body to stack under load. Baby on one hip, diaper bag on the other, groceries in one hand—your core has seen worse. Farmer carries help it handle the mess with less wobble.
13. Resistance Band Rows
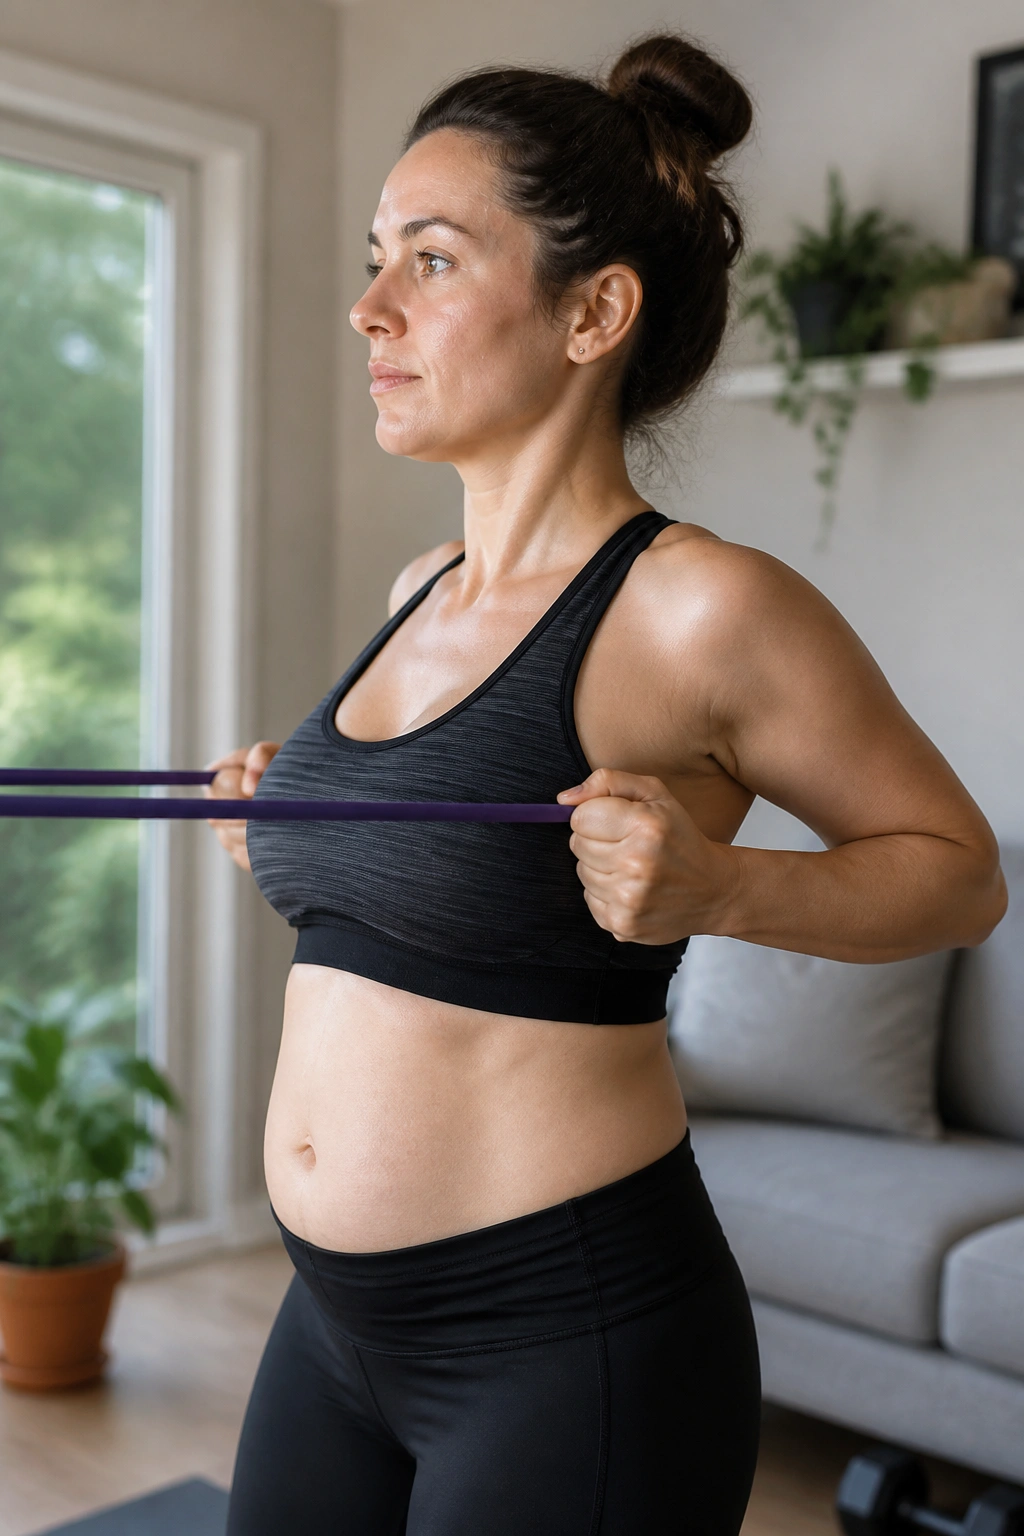
A lot of belly pooch after baby has a posture component. Rounded shoulders, a forward head, and flared ribs all make the lower belly look softer than it really is. Rows help fix that, which is why they belong on this list.
Anchor a resistance band at chest height. Hold the ends, step back until there’s tension, and pull the band toward your ribs while squeezing the shoulder blades gently back and down. Pause. Then return with control. Do not jerk the band or shrug your shoulders up to your ears.
How to keep the row useful
- Pull with the back, not the neck.
- Keep the ribs from opening.
- Stand with soft knees.
- Exhale on the pull.
Do 10 to 15 reps for 2 to 3 sets. If you want, split your stance a little for more stability. That often helps keep the low back from taking over.
Rows are not a belly exercise in the obvious sense. They are a midsection exercise in the real sense. Better upper-back strength changes how the ribs sit, and ribs that sit better take pressure off the front of the body. That’s the whole trick.
14. Wall Push-Ups
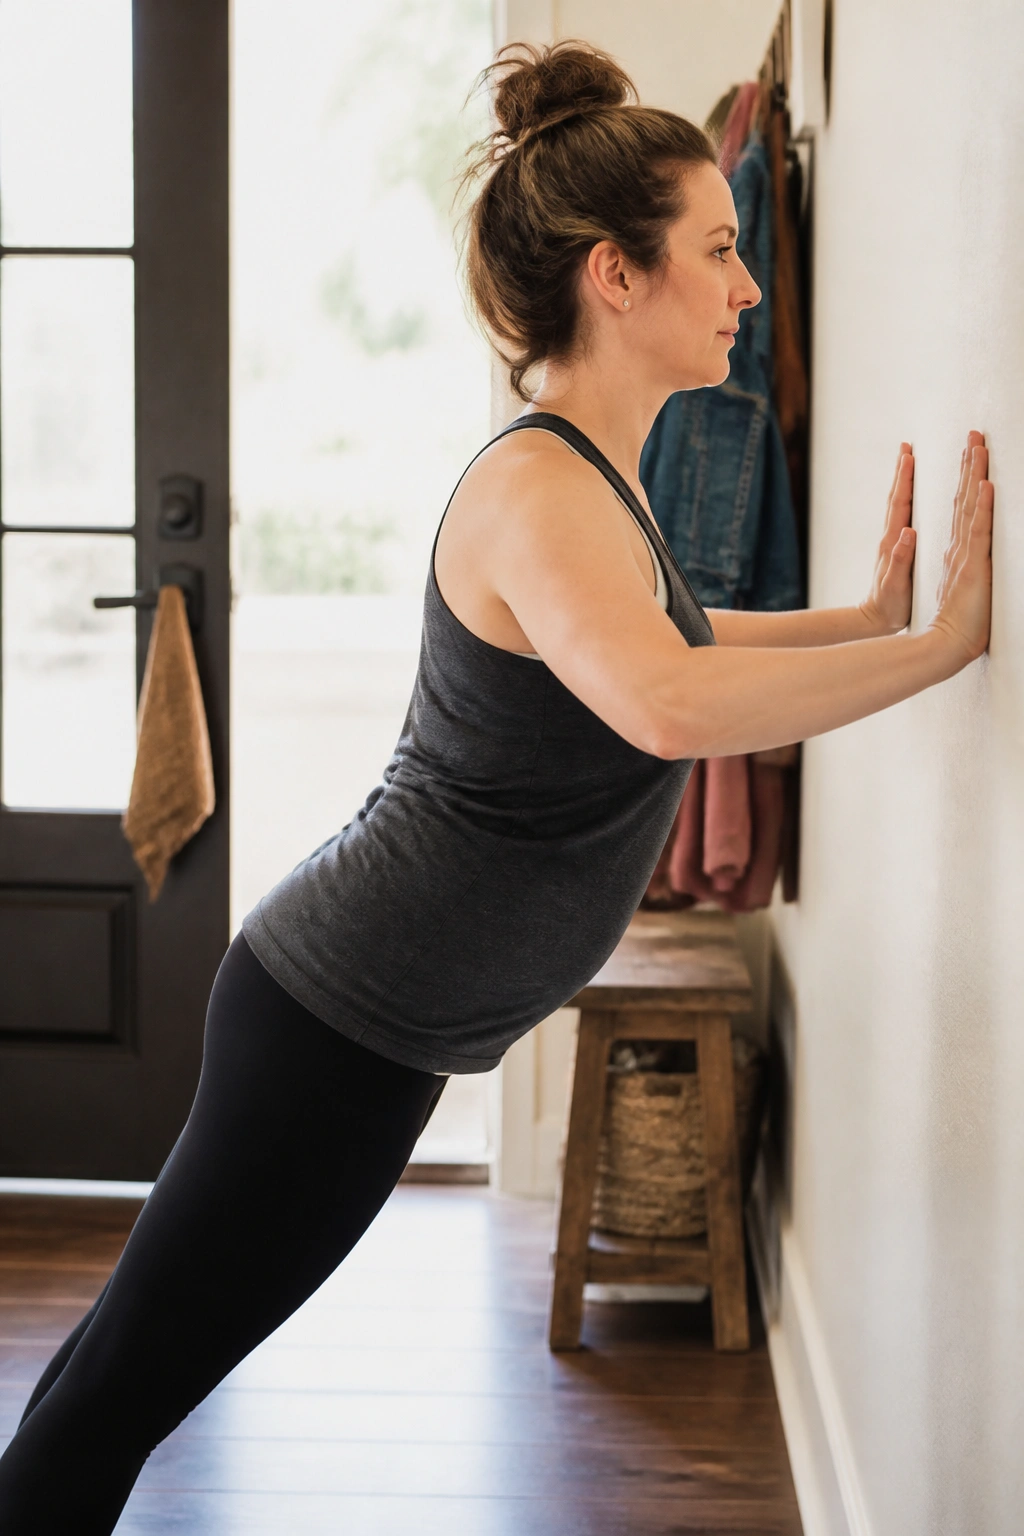
Wall push-ups are a clean way to build front-body strength without dumping pressure into the belly too fast. They work the chest, shoulders, triceps, and the core that has to stay firm while the body moves as one piece.
Stand arm’s length from a wall, place your hands on it at chest height, and walk your feet back until your body forms a straight line. Bend the elbows, lower your chest toward the wall, then press back out. Keep the ribs quiet and the hips from sagging.
Comparison time: wall push-ups are a lot kinder than floor push-ups when you’re still rebuilding. You get the same basic pushing pattern, but with less load and less chance of turning it into a back-arching mess.
Do 8 to 15 reps for 2 to 3 sets. If wall push-ups feel easy, move your feet farther back or use a countertop instead of the wall. That small shift raises the difficulty without jumping straight to the floor.
A smooth push-up pattern helps the entire front line of the body cooperate. That includes the abs, which means yes, this belongs on a postpartum belly list.
15. Standing Pallof Presses
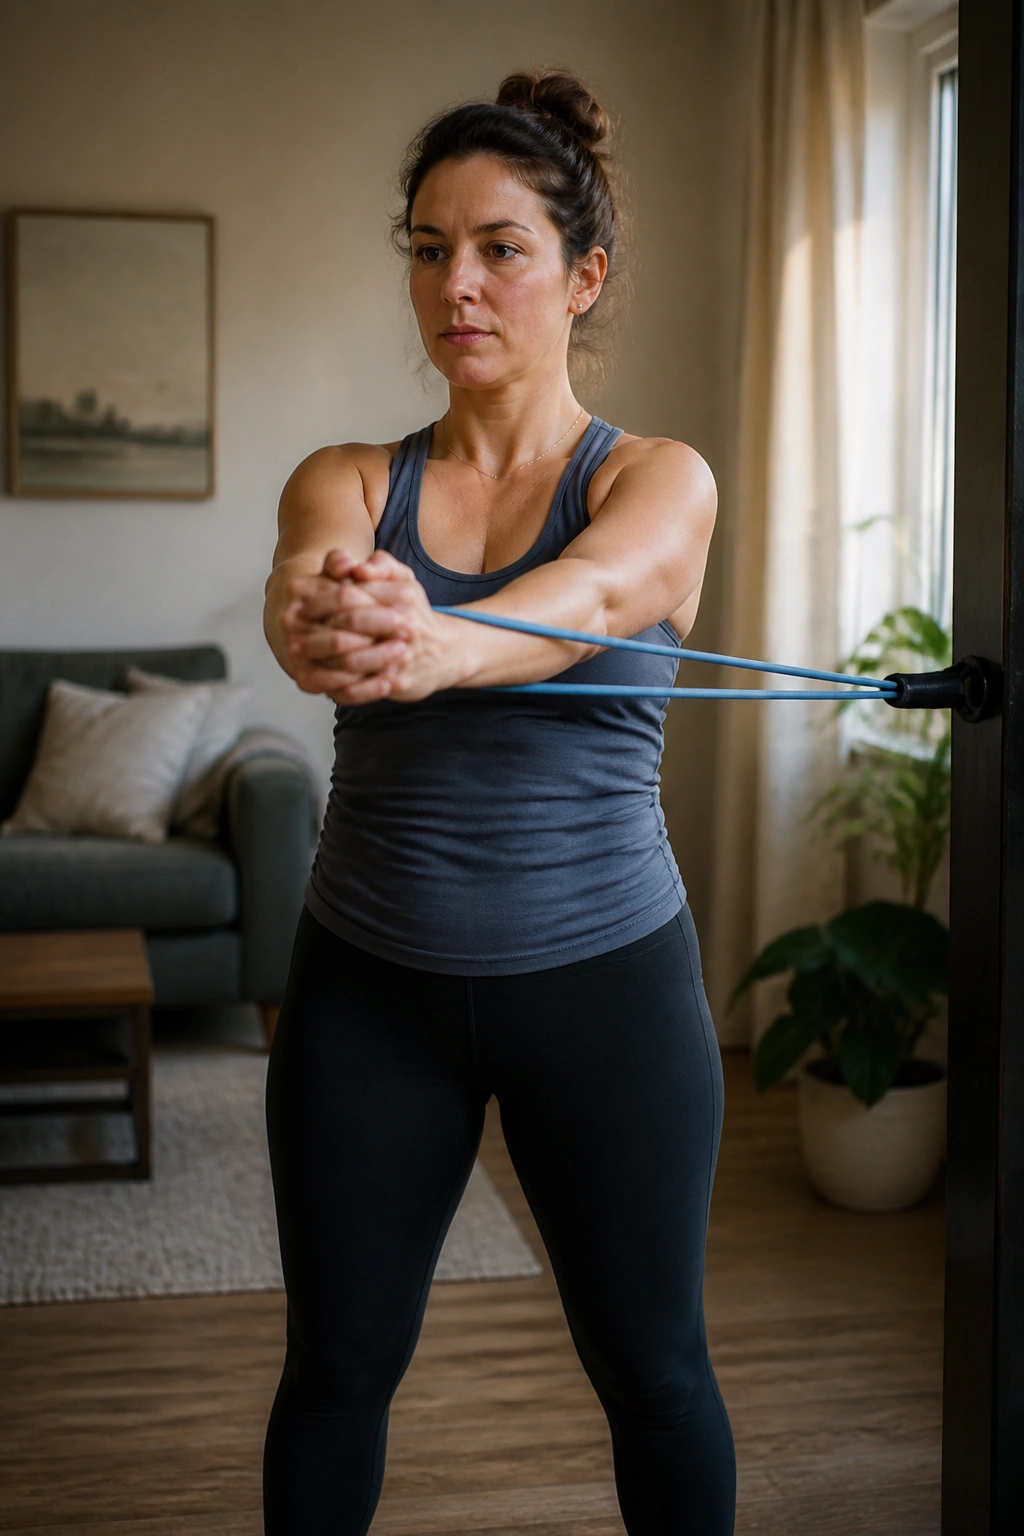
If you have one resistance band and a little wall space, you have enough. Standing Pallof presses are one of the best anti-rotation exercises for a postpartum core because they teach the trunk to resist twisting while the arms move.
Anchor a band to the side of your body at chest height. Hold the handle with both hands, step away until the band wants to pull you sideways, then press your hands straight out from the chest and bring them back in. Your job is to stay square. No leaning. No turning. No cheating with the hips.
What it should feel like
- The obliques turn on.
- The hips stay level.
- The ribs stay stacked.
- The low back stays calm.
Try 8 to 12 presses per side or 10 to 20 second holds if you prefer an isometric version. If the band feels too strong, step closer to the anchor point. That’s not a downgrade. It’s the right load.
Pallof presses are a smart finish because they bridge the gap between rehab and real life. They train the torso to stay steady while force pulls from the side, which is exactly the kind of demand that shows up when you’re carrying a child, opening a heavy door, or twisting to grab something from the car seat.
The Bottom Line
The best workouts for belly pooch after baby are the ones that rebuild pressure control, not the ones that punish the front of your body. Breathing, gentle core drills, hip strength, posture work, and a little loaded walking usually do more than a pile of crunches ever will.
If a move makes your belly dome, your back arch, or your pelvic floor feel heavy, shrink the range or skip it for now. That is not failure. That is feedback.
And if the lower belly still feels soft after you’ve been consistent, that does not mean the work is pointless. It often means the deeper core is getting stronger before the mirror catches up, which is exactly how it should go.
