



The best workouts for ab separation are the ones that make your core quieter, not louder. If you’ve had a baby, are pregnant, or feel that soft ridge or dome along the midline when you try to sit up, you do not need more crunches. You need better pressure control.
That gap down the center is often called diastasis recti, and the fix is rarely dramatic. The work is small, almost boring at first glance: breathing, rib position, slow leg movement, steady load. But boring is good here. Boring means your deep core is learning to hold things together again instead of bulging forward every time you move.
A lot of people make the same mistake. They chase burn, sweat, and “hard” exercises, then wonder why the belly still domes or the lower back starts complaining. Better moves feel controlled. They often look too easy. That is exactly why they work.
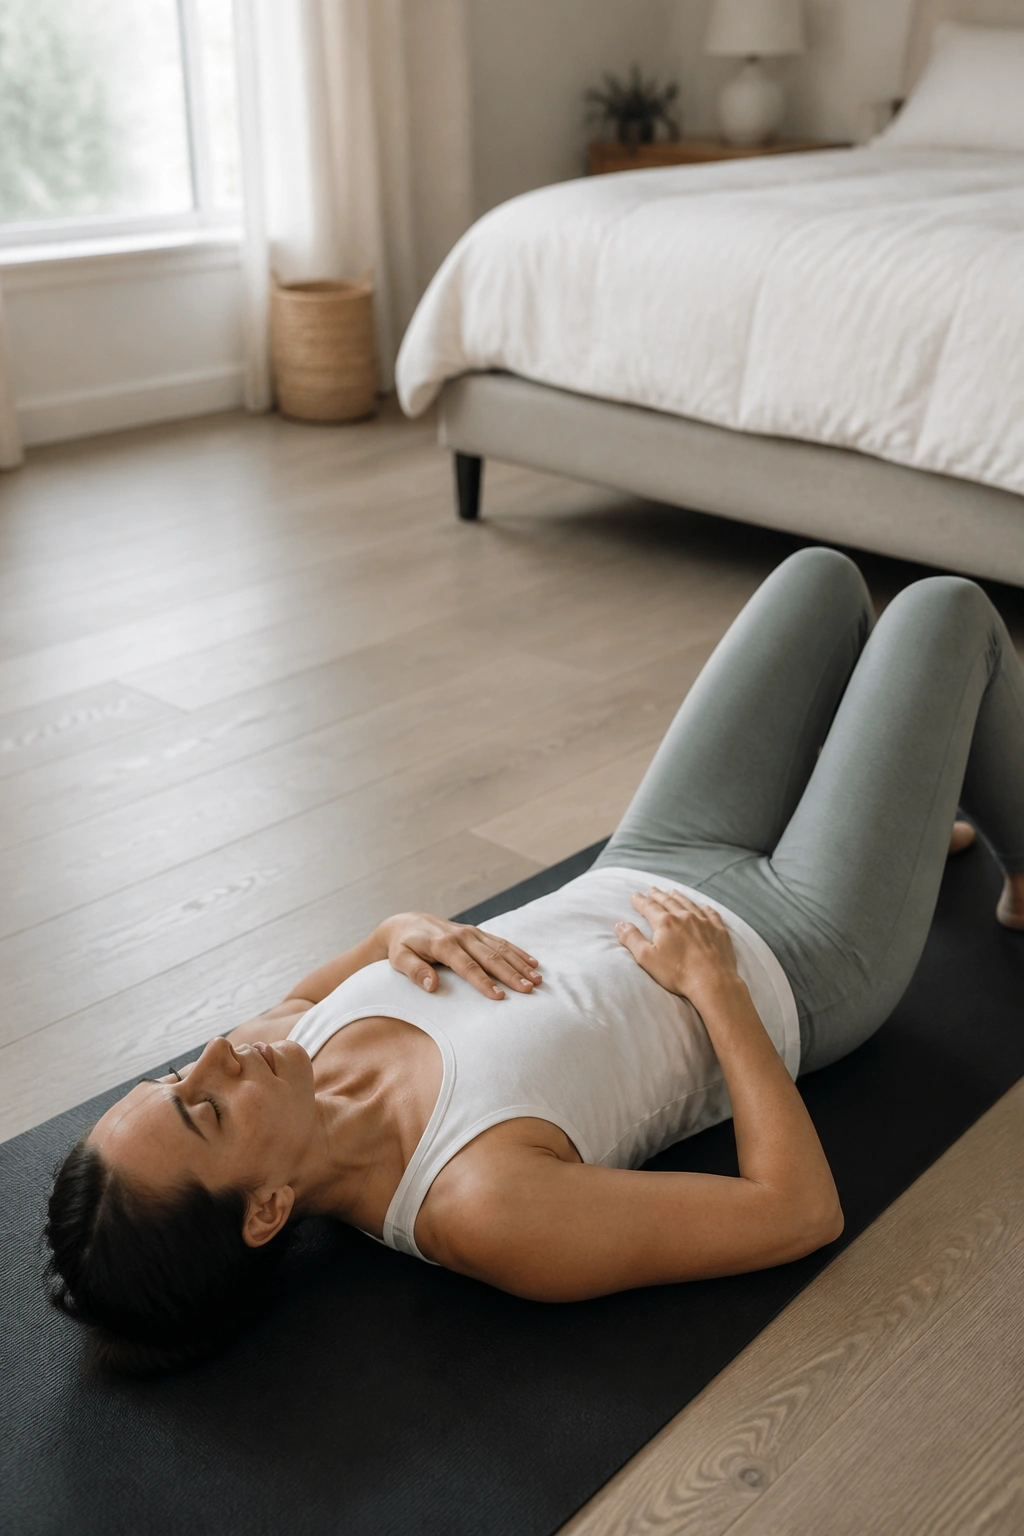
1. 360-Degree Breathing With Rib Expansion
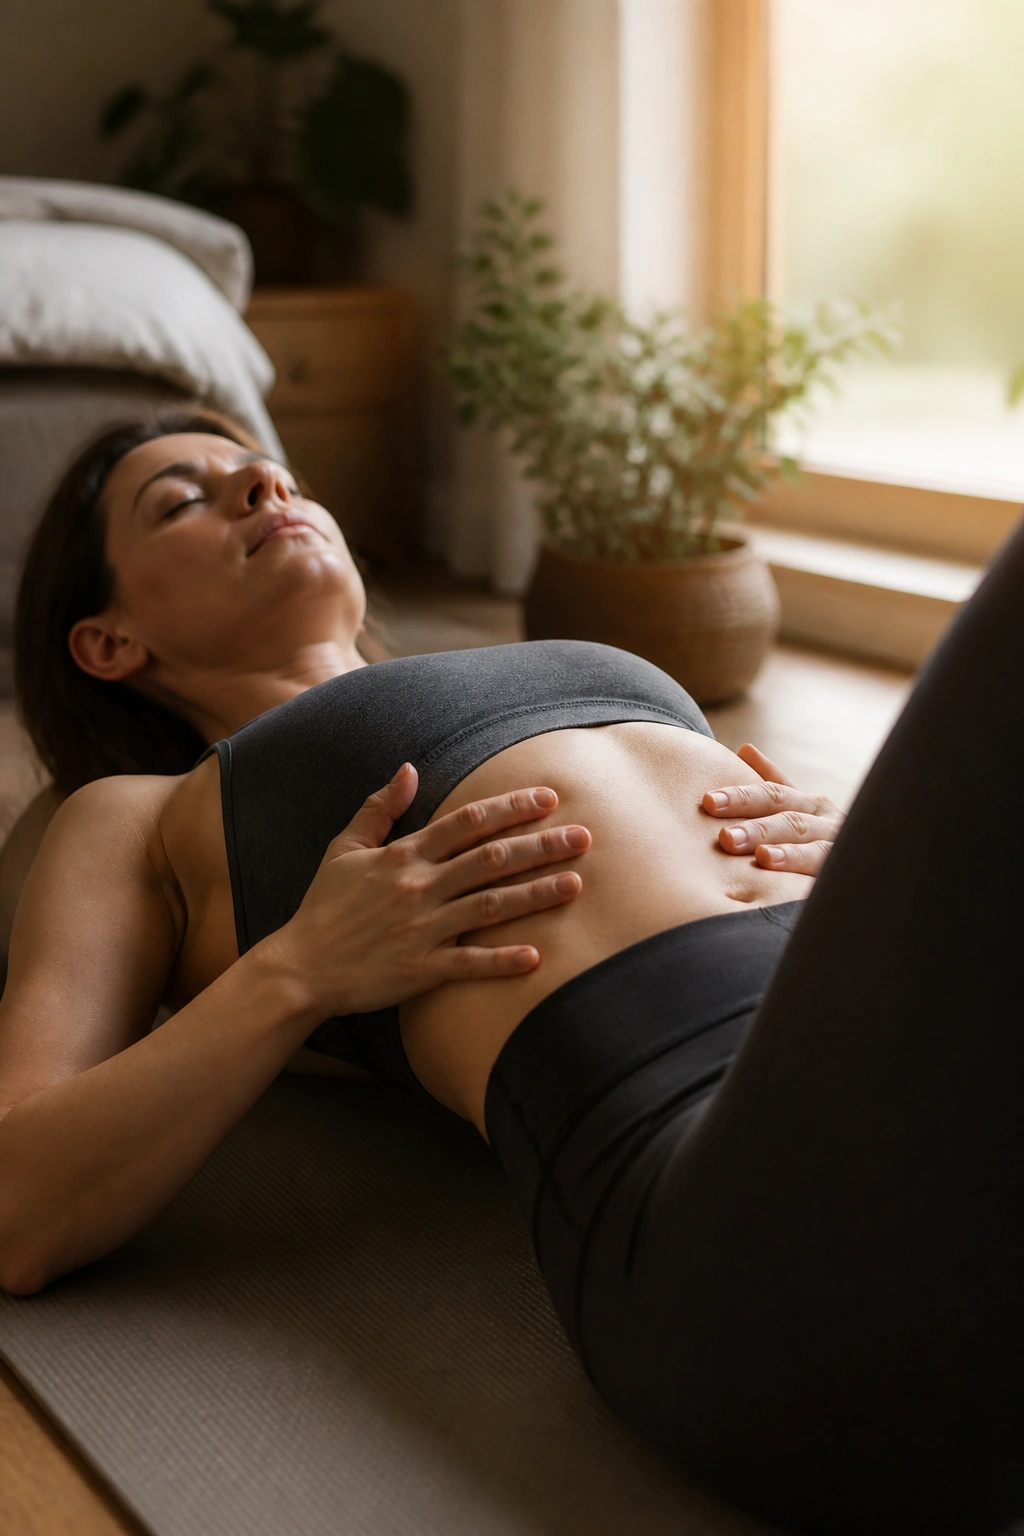
Breathing is the first workout because it changes everything that comes after it. If your ribs flare and your belly pushes out every time you inhale, the rest of the list gets harder than it needs to be.
Why It Matters
Lie on your back with your knees bent, or on your side if that feels better during pregnancy. Put one hand on your lower ribs and one on your belly. Inhale through your nose and try to send the breath into the sides of your ribs, the back of your waist, and the low belly all at once. The chest should stay soft. The neck should stay quiet.
Exhale through pursed lips for about 4 to 6 seconds. Feel the ribs settle down and the lower belly gently draw inward without a hard squeeze. That exhale is the real work. It teaches your body that pressure can move out and then come back under control.
How to Use It
- Take 4 to 5 slow breaths
- Rest for 20 to 30 seconds
- Repeat for 3 rounds
- Keep the exhale longer than the inhale
- Stop if you feel lightheaded or tense in the neck
One good breath done well beats ten rushed ones. If you only have time for one drill, make it this one. It sets up better heel slides, better marches, and a belly that stays flatter instead of popping up like a little tent.
2. Heel Slides With Exhale Control
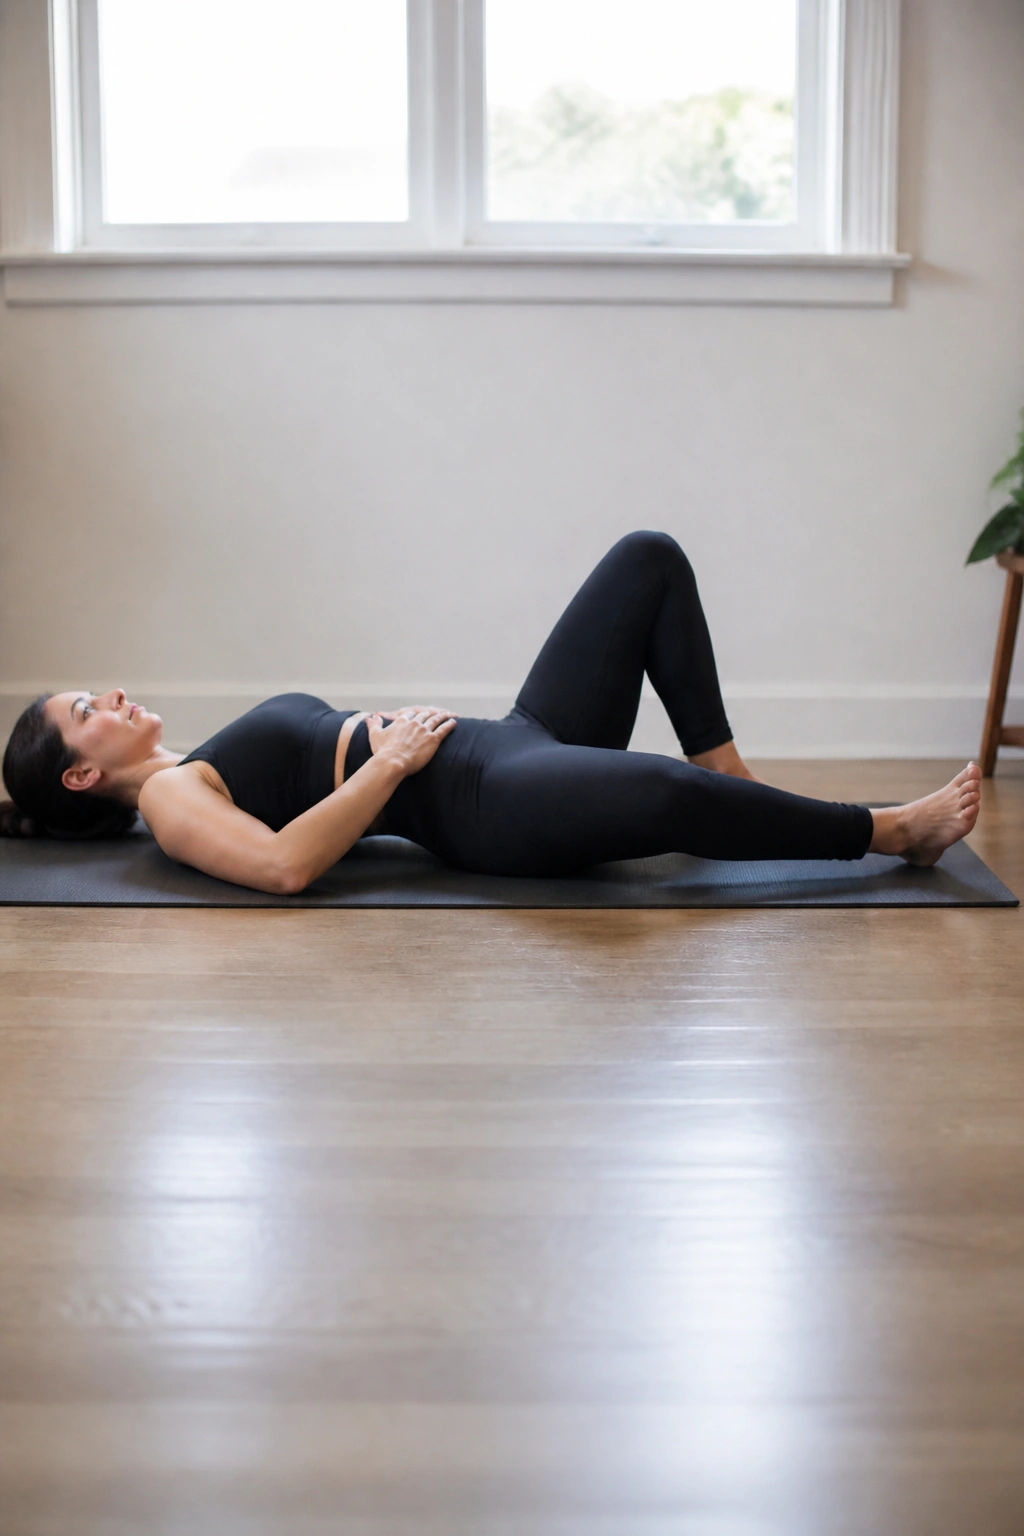
A heel slide looks tiny. That’s the point.
The drill starts on your back with both knees bent and feet flat. Before one heel slides away from you, exhale and gently zip the lower ribs toward the pelvis. Then slide the heel out only as far as you can keep the belly calm. If the midline domes or your back arches off the floor, the range is too long.
Slow matters here. A smooth 4-second slide out and a 4-second slide back in usually works better than a fast glide. I like this move for people who feel strong enough to move a leg but not ready for marches yet. It teaches the deep core to stay organized while one leg gets longer.
Do 6 to 8 reps per side. If the movement feels shaky, shorten the slide by half. If it still feels clean, pause for one second at the farthest point before returning.
No heroics. Just control.
3. Bent-Knee Marches That Keep the Belly Flat
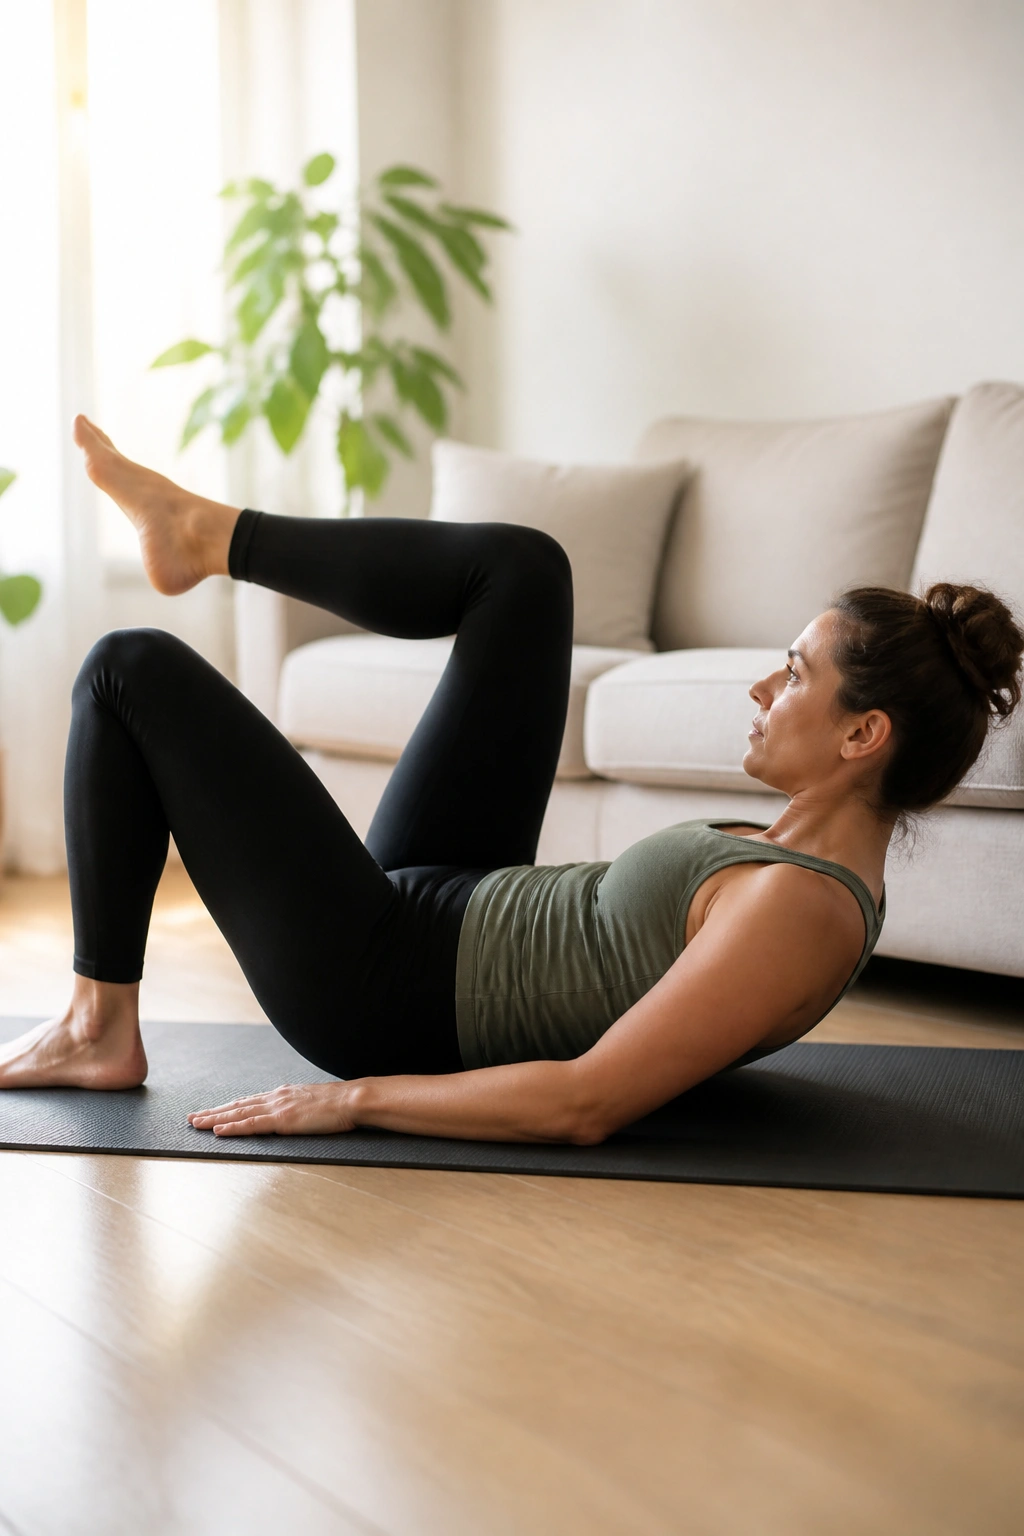
Why do marches show up in almost every postpartum core plan? Because they ask one leg to lift while the rest of you stays quiet. That is a real test.
Start in the same bent-knee position you used for heel slides. Exhale first, then lift one foot a few inches so the knee comes toward tabletop. The opposite side of the pelvis should not tip, twist, or rock. Lower the foot slowly on the next inhale and switch sides. If your stomach puffs out the moment the foot leaves the floor, the movement is too big or too fast.
How to Keep the Pelvis Quiet
- Lift only 1 to 2 inches at first
- Keep the knee bent at about 90 degrees
- Move one side at a time
- Pause for 1 second at the top
- Stop the set the moment the midline starts to dome
Bent-knee marches are one of those drills that feels almost laughably gentle. Then you do them with decent form and realize your core has been freeloading a bit. That’s normal. It also tells you exactly where to begin.
4. Toe Taps Near the Floor
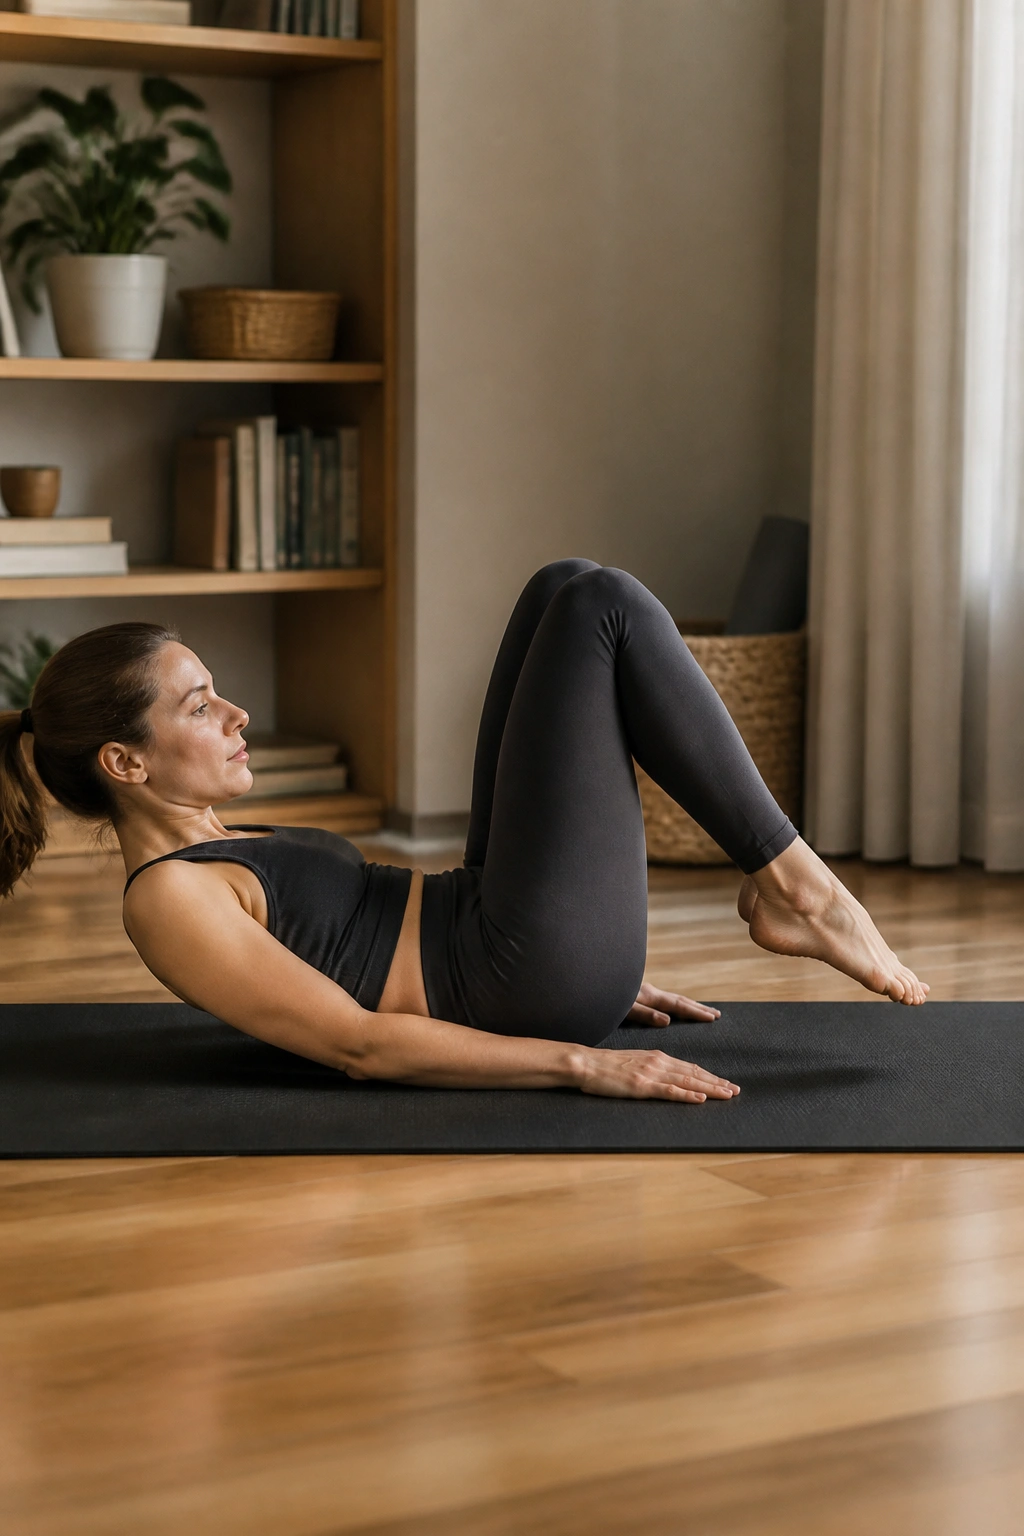
Picture someone lowering one foot toward the mat and watching the center of the belly puff up like a little balloon. That’s the version nobody wants, and it’s the version to avoid.
Toe taps are a harder cousin of the march. Start with both hips and knees in tabletop or one leg at a time if tabletop is too much. Exhale, then lower one toe toward the floor and tap lightly before returning to start. Keep the ribs stacked over the pelvis. If your low back arches or your belly domes, raise the legs higher and shorten the range.
What to Watch For
- The lower back should stay heavy, not pinched
- The ribs should not flare up
- The toe tap should be tiny at first
- The exhale should happen before the leg moves
This one rewards patience. A lot. If the drill feels clean, do 5 to 6 taps per side. If it feels messy, go back to marches for another week or two. There’s no prize for rushing past the level your core is ready for.
5. Dead Bug Arms Only
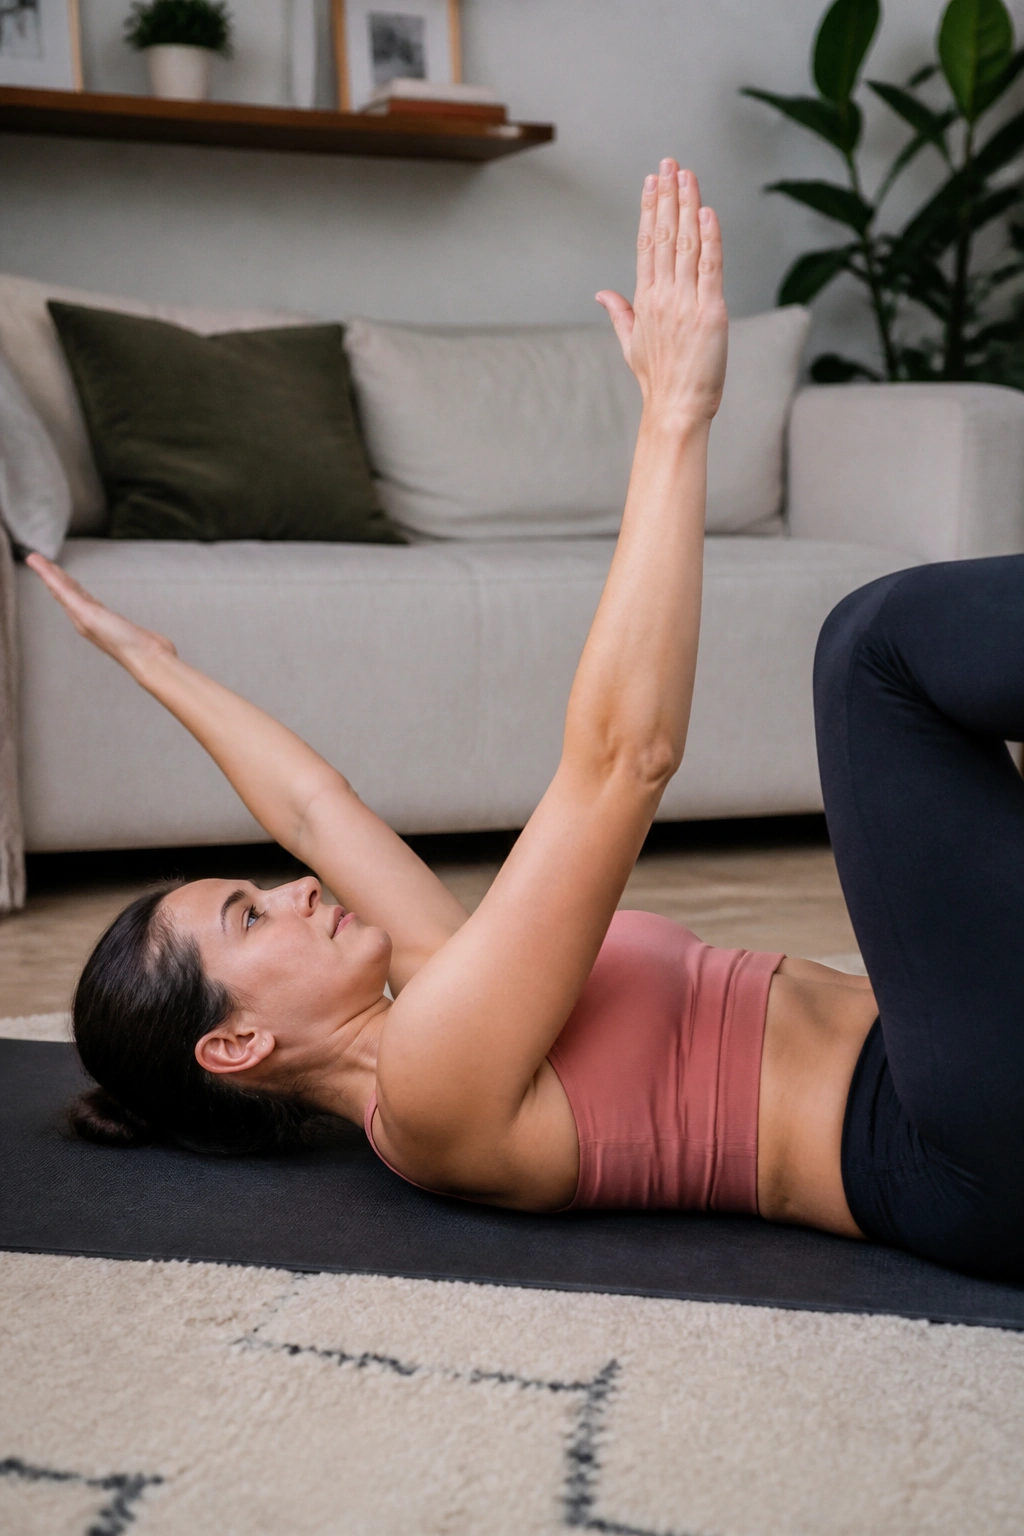
Arms-only dead bug looks almost too easy, and that’s exactly why a lot of people skip it. Bad move.
When the legs are taking a break, the arms can still teach the ribs and abs how to stay stacked. Lie on your back with both knees bent or in tabletop if that feels fine. Reach both arms straight toward the ceiling. Exhale and lower one arm overhead while the other stays up, then bring it back. Keep the rib cage from popping open. Keep the low back from arching.
A lot of postpartum cores need this “less is more” stage. If you jump straight into leg work and the belly domes every time, your body is telling you that trunk control is not ready for the extra load. Arms-only work lets you practice the brace without the pressure spike.
Don’t rush the reach. The arm should move like it’s sliding through thick air. If your ribs start to lift, shorten the range by 2 or 3 inches and try again.
6. Glute Bridge With Rib Lock
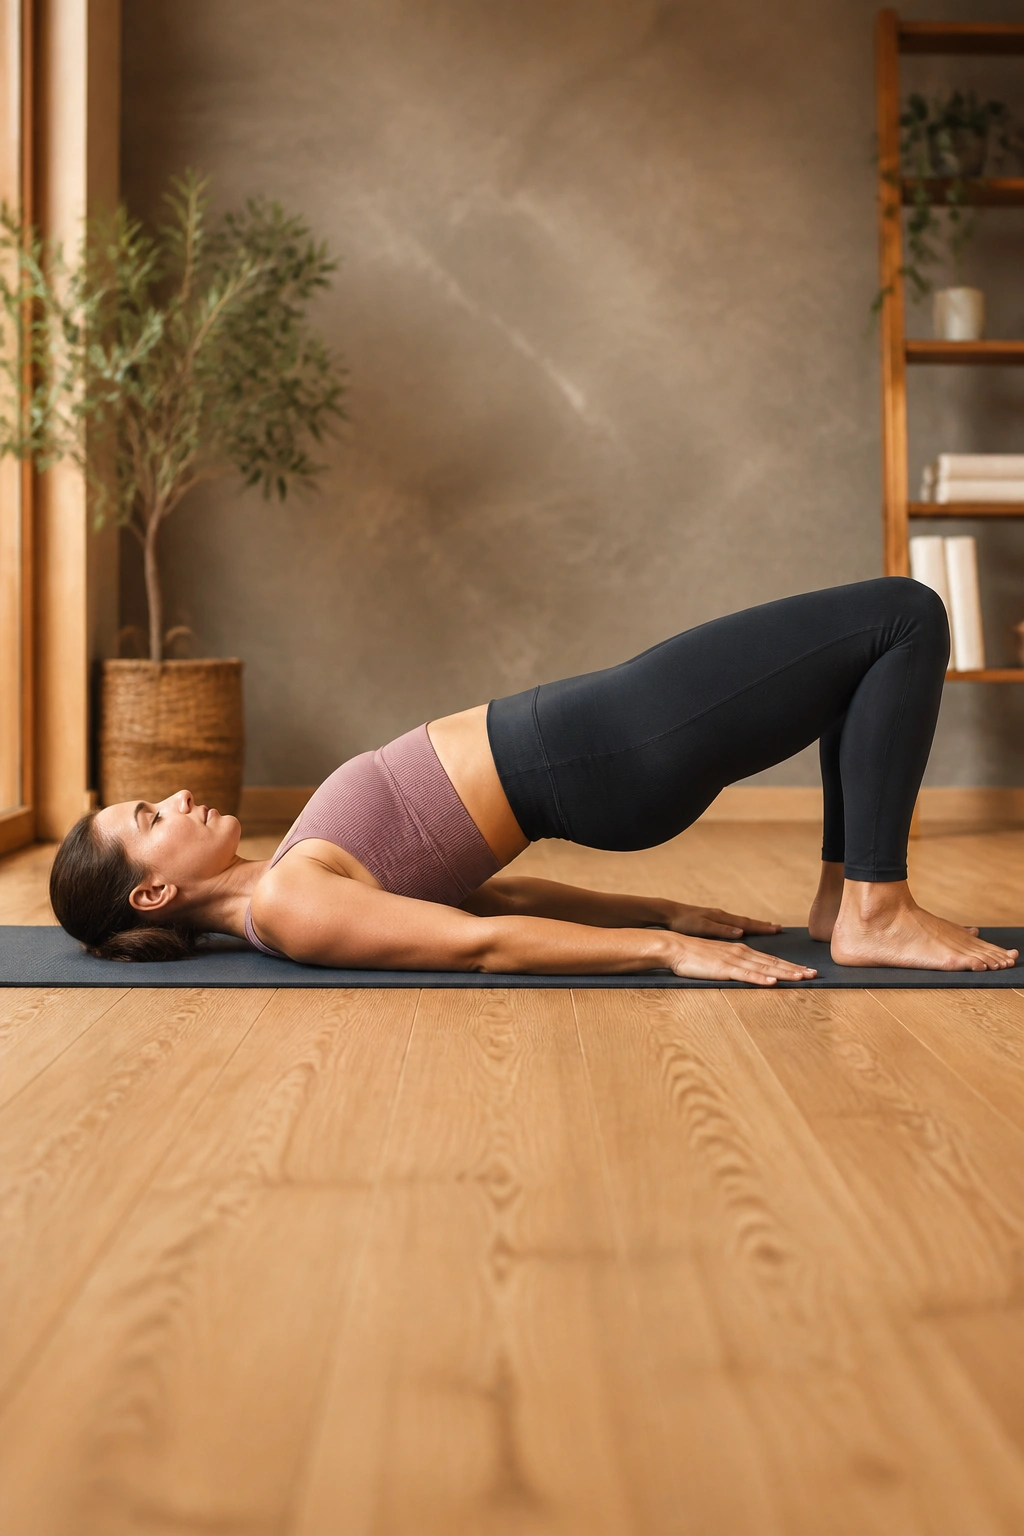
A bridge is not just a butt exercise. For ab separation, it becomes a way to train the back line of the body while keeping the ribs from flaring.
Lie on your back with knees bent and feet about hip-width apart. Exhale first, feel the lower ribs soften, then press through your heels and lift the hips until your body makes a long line from shoulders to knees. Stop before the ribs peel open. Hold for one breath, then lower slowly.
Why Bridges Help the Midline
The glutes and hamstrings share the load, which gives your front core a break from doing everything alone. That matters when the belly is tired, stretched, or slow to respond. It also helps people who feel their lower back taking over every time they try to do “core” work.
If your hamstrings cramp, walk your feet a little closer to your hips. If you feel your neck tightening, lower the bridge height by an inch. The bridge is only useful when the rib cage stays settled.
Try 6 to 10 reps, pausing for 2 seconds at the top. Smooth and steady wins here.
7. Bird Dog With a Long Exhale
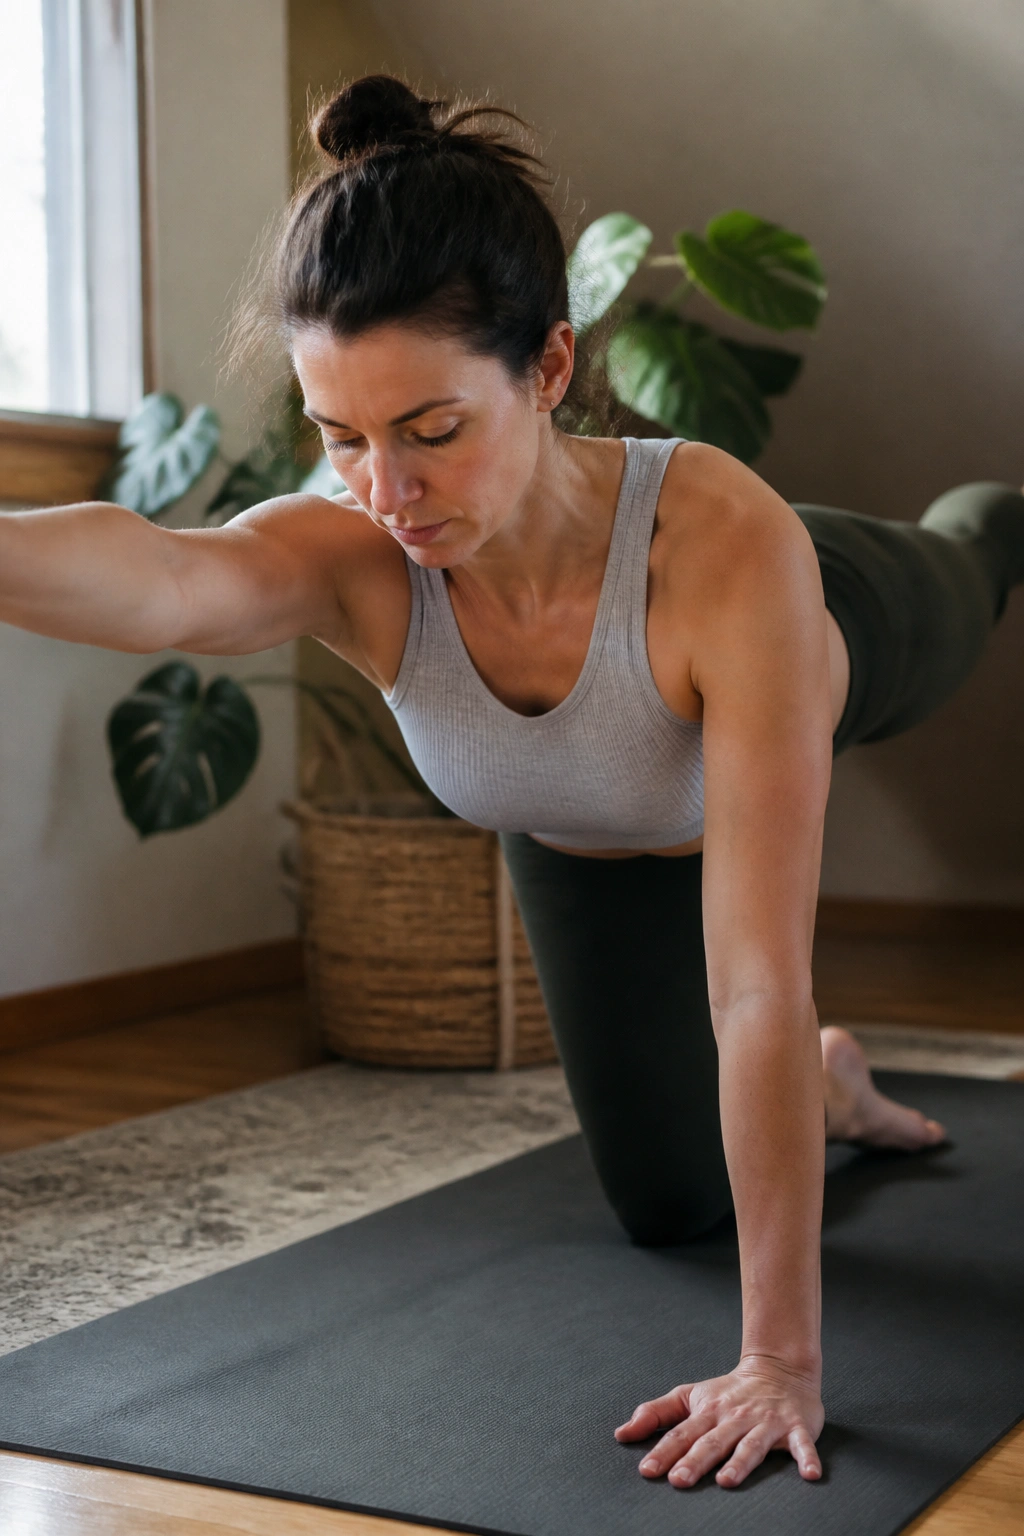
Bird dog is a balance drill and a core test. That’s why it earns a spot.
Start on hands and knees with your hands under your shoulders and knees under hips. Exhale, then reach one leg back and the opposite arm forward. The goal is not a huge stretch. The goal is a long, calm line with no belly bulge and no hip swing. Hold for a second or two, then return with control.
The Slow Version Works Best
A fast bird dog turns into a sloppy yoga pose in about five seconds. A slow one teaches your trunk to resist twisting while your limbs move. That anti-rotation skill is gold for ab separation, because everyday life is full of one-sided moves: carrying a baby, lifting a car seat, reaching into a crib, grabbing groceries from the trunk.
If the floor version feels too loose, keep the hand and knee closer to the mat. If it feels too hard, only move the leg back and leave the arm down. Either version can work if the midline stays calm.
Do 4 to 6 reps per side. Hold each rep for 2 to 3 breaths if you have the patience.
8. Quadruped Rock-Backs
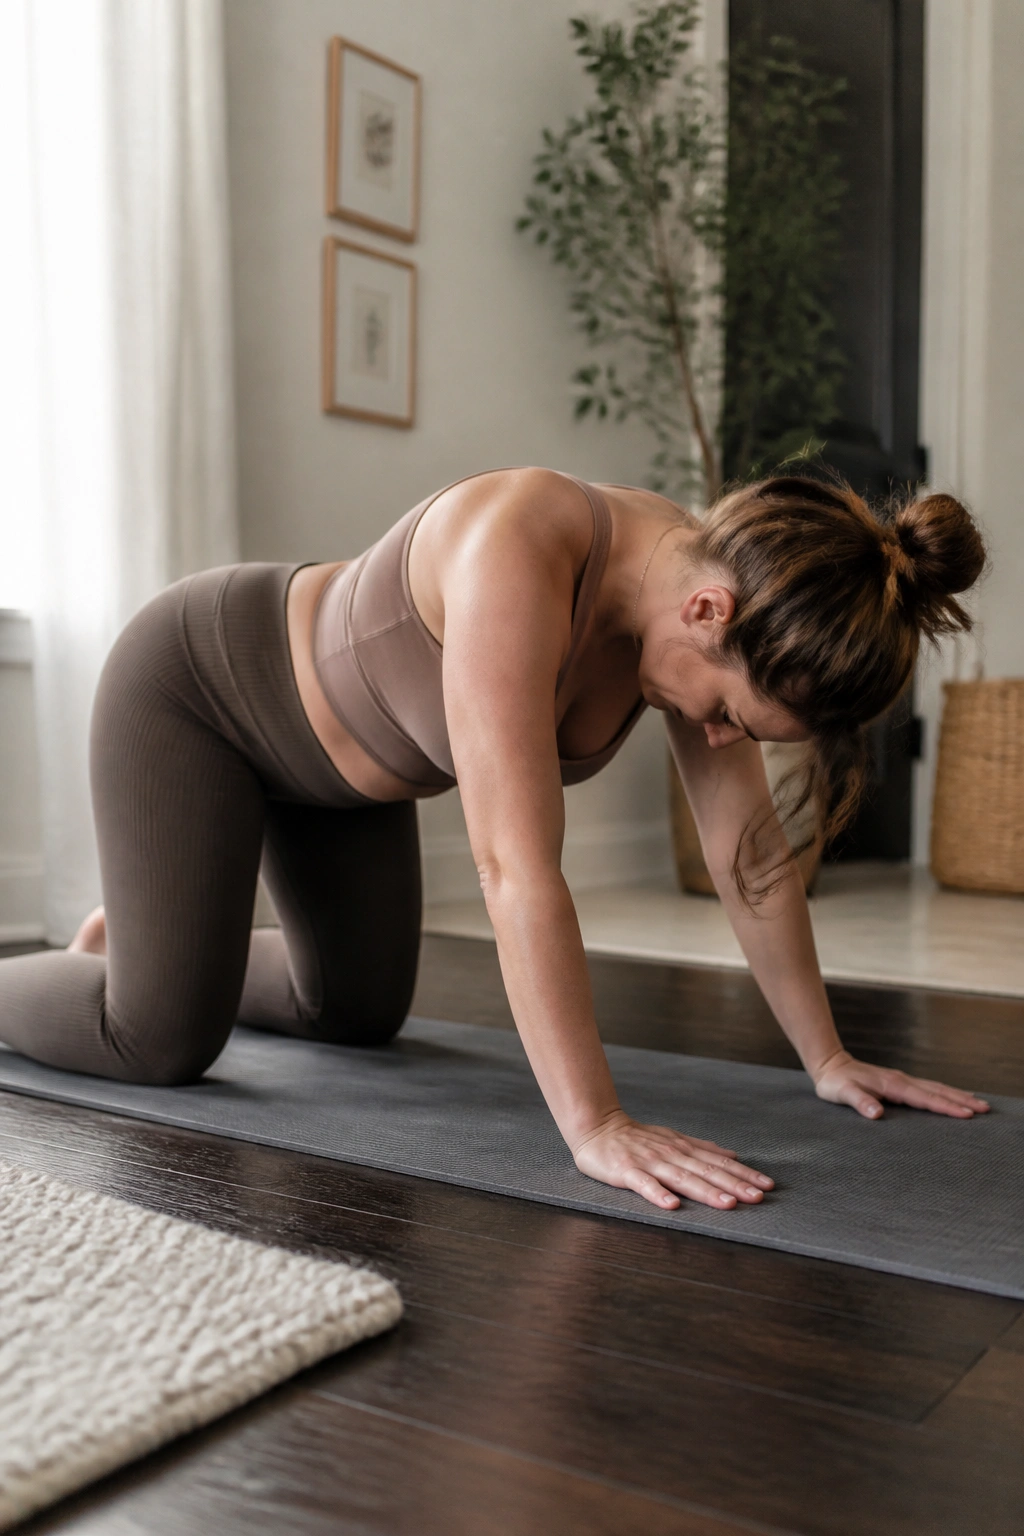
Why spend time rocking back and forth on hands and knees? Because the drill teaches pressure control with almost no drama.
Set up on all fours and keep a long line from head to tailbone. Exhale as you rock your hips back toward your heels, then inhale as you come forward. The belly should stay supported, not hanging. The ribs should not collapse toward the floor. The movement is small if your core is still learning, and that’s fine.
What to Watch For
- Keep the elbows soft, not locked
- Don’t sink between the shoulders
- Rock only as far as you can keep the midline smooth
- Move slow enough to feel the breath shift
This is one of the best warm-up drills for people who feel stiff after sleeping, feeding a baby, or sitting too long. It’s also a smart reset before more loaded work. If you feel any pulling at the center line, shorten the motion and slow the exhale. The body usually tells the truth right away.
9. Side-Lying Leg Lift With Waist Control
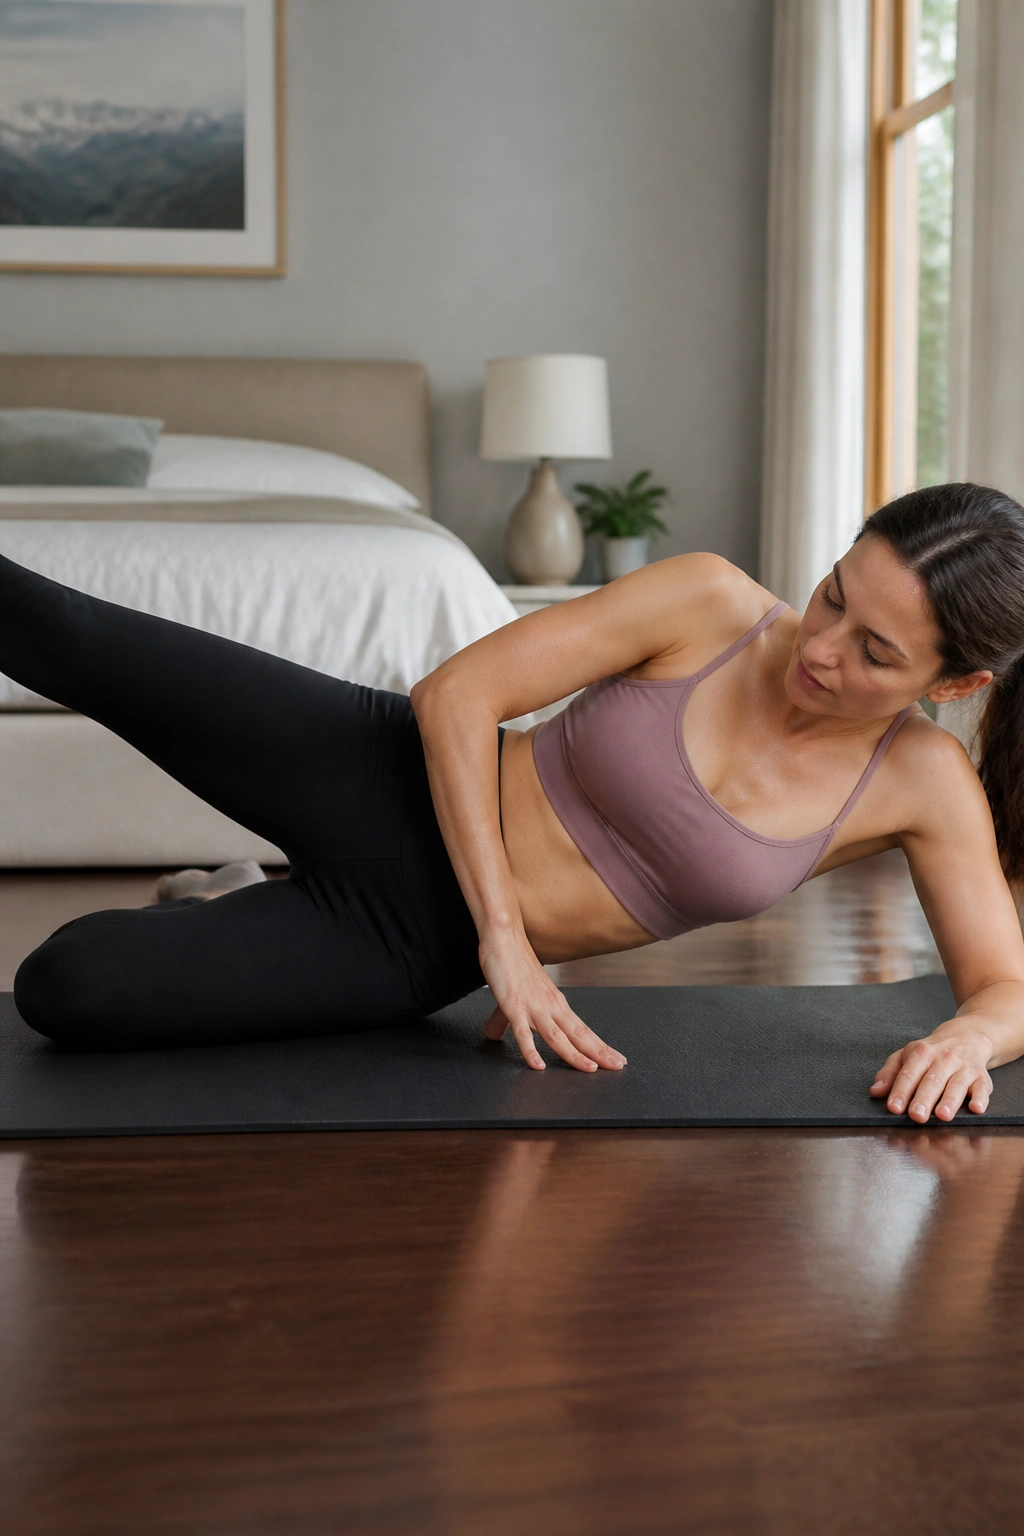
Some people do better once they stop lying on their backs. Pregnancy can make the supine position uncomfortable, and even after birth, a side-lying drill can feel friendlier.
Lie on your side with your knees straight or softly bent. Stack the ribs over the pelvis, then gently lift the top leg a few inches without rolling the hips backward. Keep the waist long. Keep the belly from collapsing toward the floor. A small lift is enough. Big swings usually turn into hip work with no core control at all.
A quiet side-lying lift helps train the side body, especially the obliques and the muscles that keep the pelvis from wobbling. That matters more than people think. The midline does not work alone; it leans on the sides of the trunk to keep pressure balanced.
Do 8 to 10 slow lifts per side. If your lower waist feels like it’s hanging, imagine gently drawing it up and away from the mat. Tiny shift. Big difference.
10. Wall Press Dead Bug
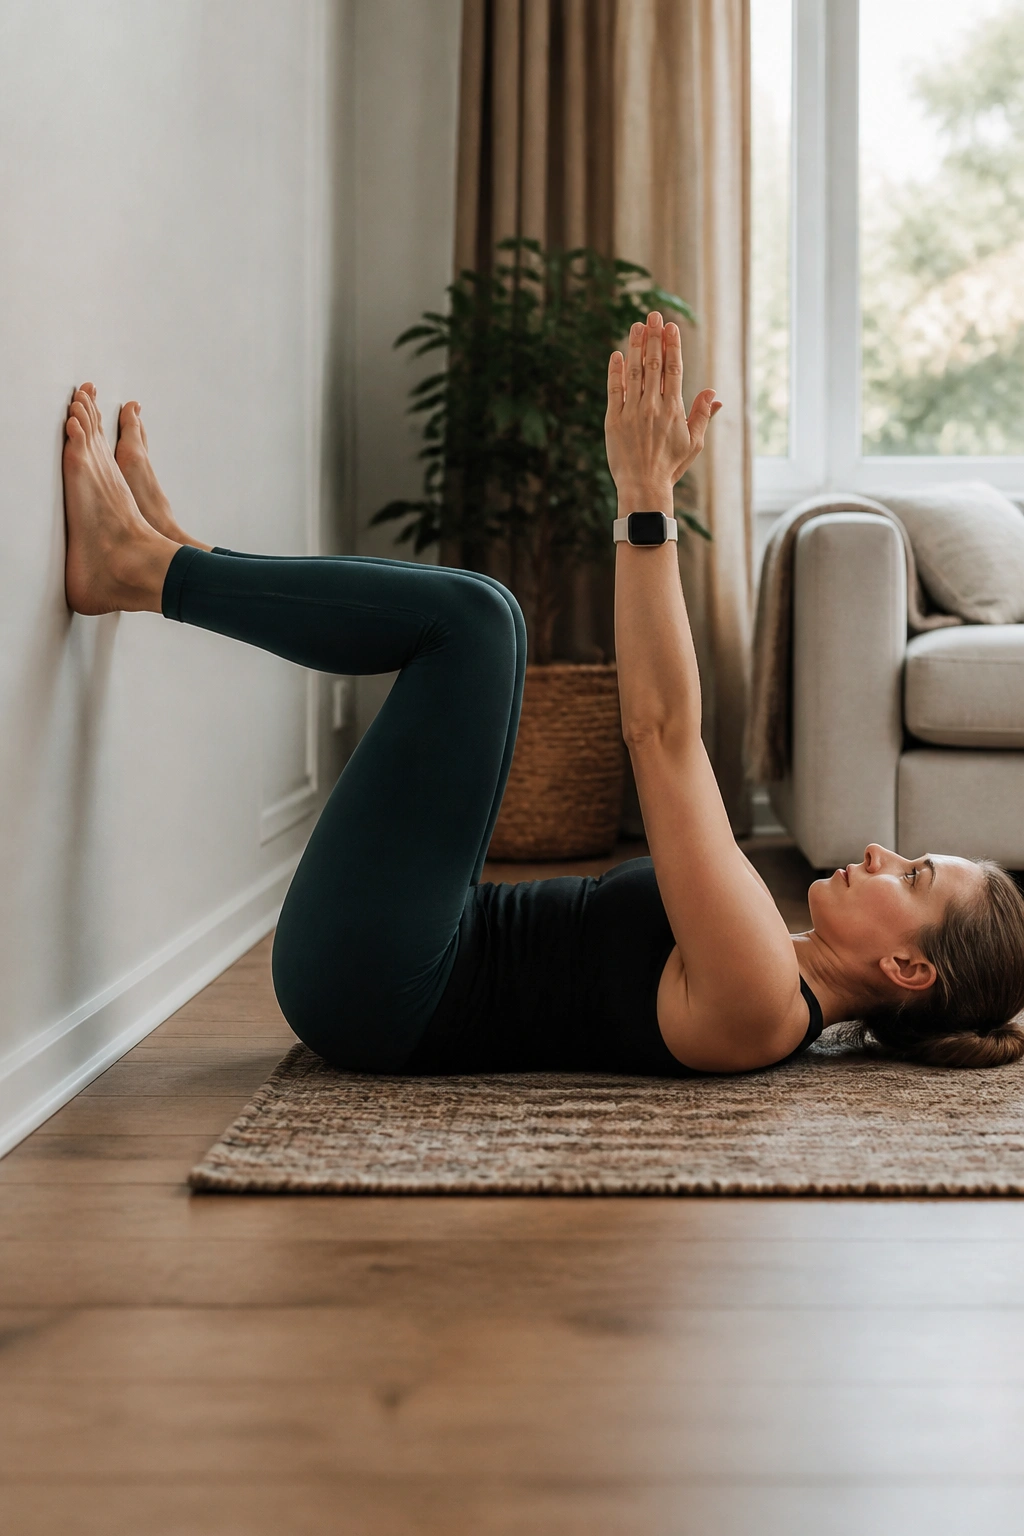
The wall changes the game.
Lie on your back with your feet on a wall, knees bent around 90 degrees, and arms reaching toward the ceiling. Press your feet lightly into the wall as you exhale, then lower one arm or one heel away from you while the rest of your body stays steady. The wall gives you feedback. Push too hard and you’ll feel your ribs flare or your back arch. Push too little and the drill loses purpose.
This is one of my favorite ab separation workouts because it’s so clear. If the belly stays smooth, you’re getting it. If it domes, the range is too much or the breath got sloppy. Simple. Honest.
The wall version works well when floor work feels too open or unstable. It also gives pregnant readers a safer angle than flat-on-back drills, especially later in pregnancy when full supine positions may feel wrong. Keep the movement slow, and stop the set before fatigue changes the shape.
11. Pallof Press With a Band
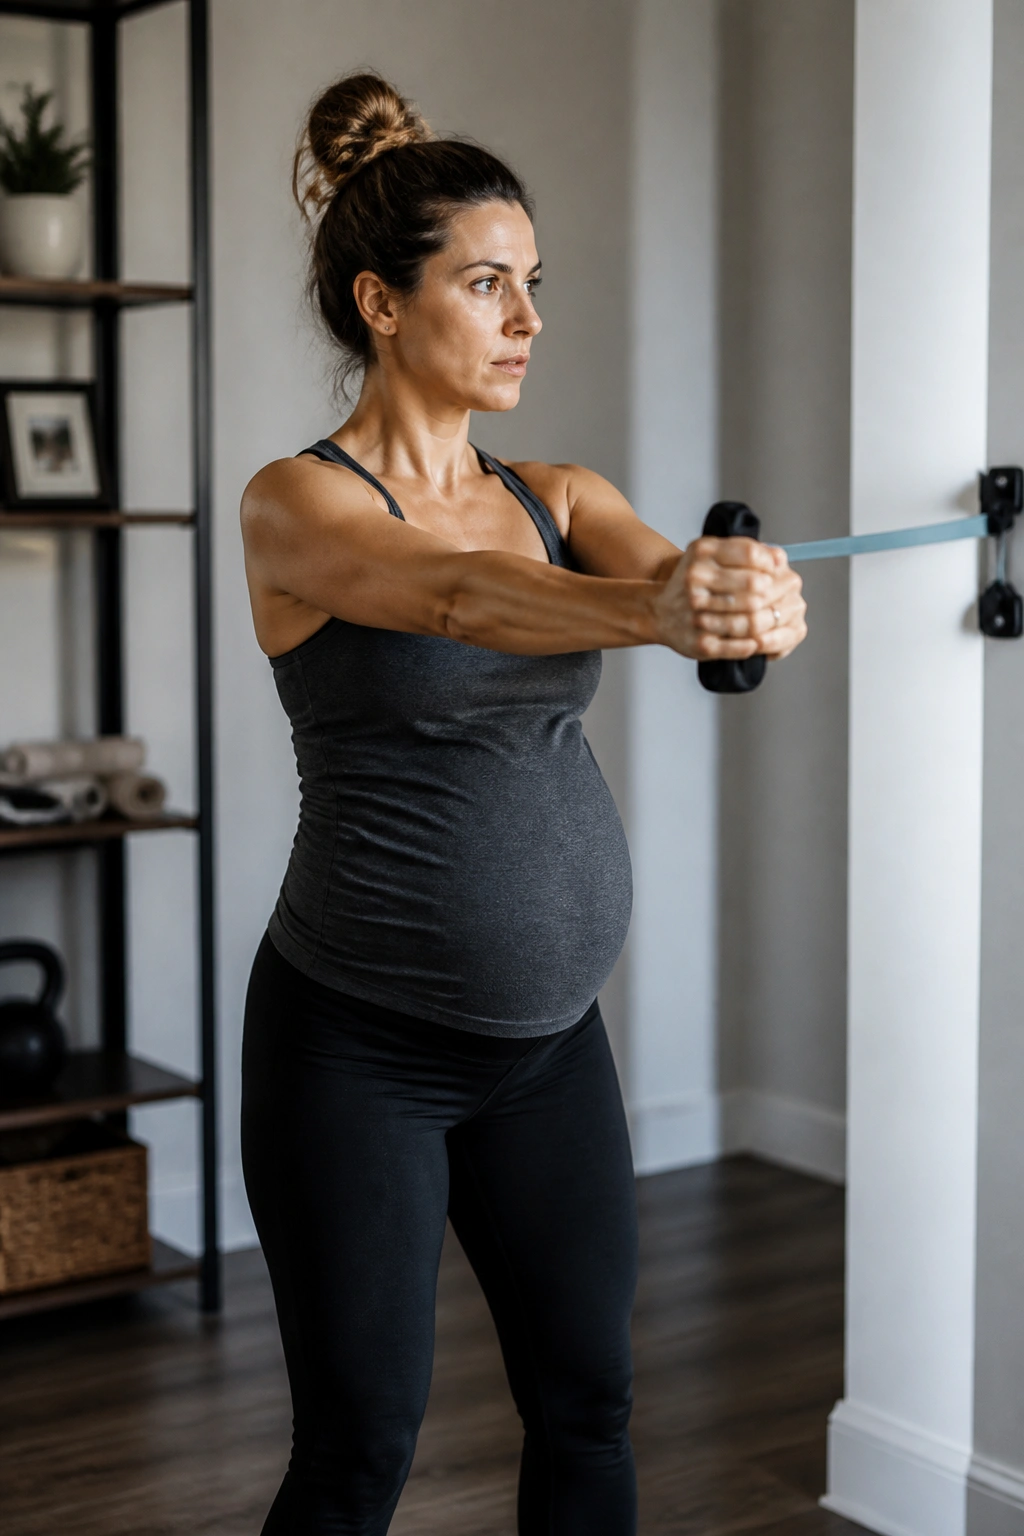
A Pallof press looks like a chest exercise, but the real job is resisting twist.
Stand sideways to a band anchored at chest height. Hold the handle at the center of your chest, exhale, then press the band straight out in front of you without letting your torso turn. Bring it back to your chest, repeat, and switch sides. The band should pull you into rotation. Your job is to refuse.
Why It’s Different From Floor Work
Unlike floor drills that mostly teach pressure control in one position, the Pallof press asks you to stand tall and stay square. That makes it useful once the earlier exercises feel easy. It also maps well to life, because nobody has a baby, laundry basket, or grocery bag that weighs the same on both sides.
Use a light band first. If you need to lean, sway, or clench your jaw to finish the rep, it’s too heavy. Six to eight presses per side is enough. The press should feel calm, not heroic.
12. Incline Plank on a Counter
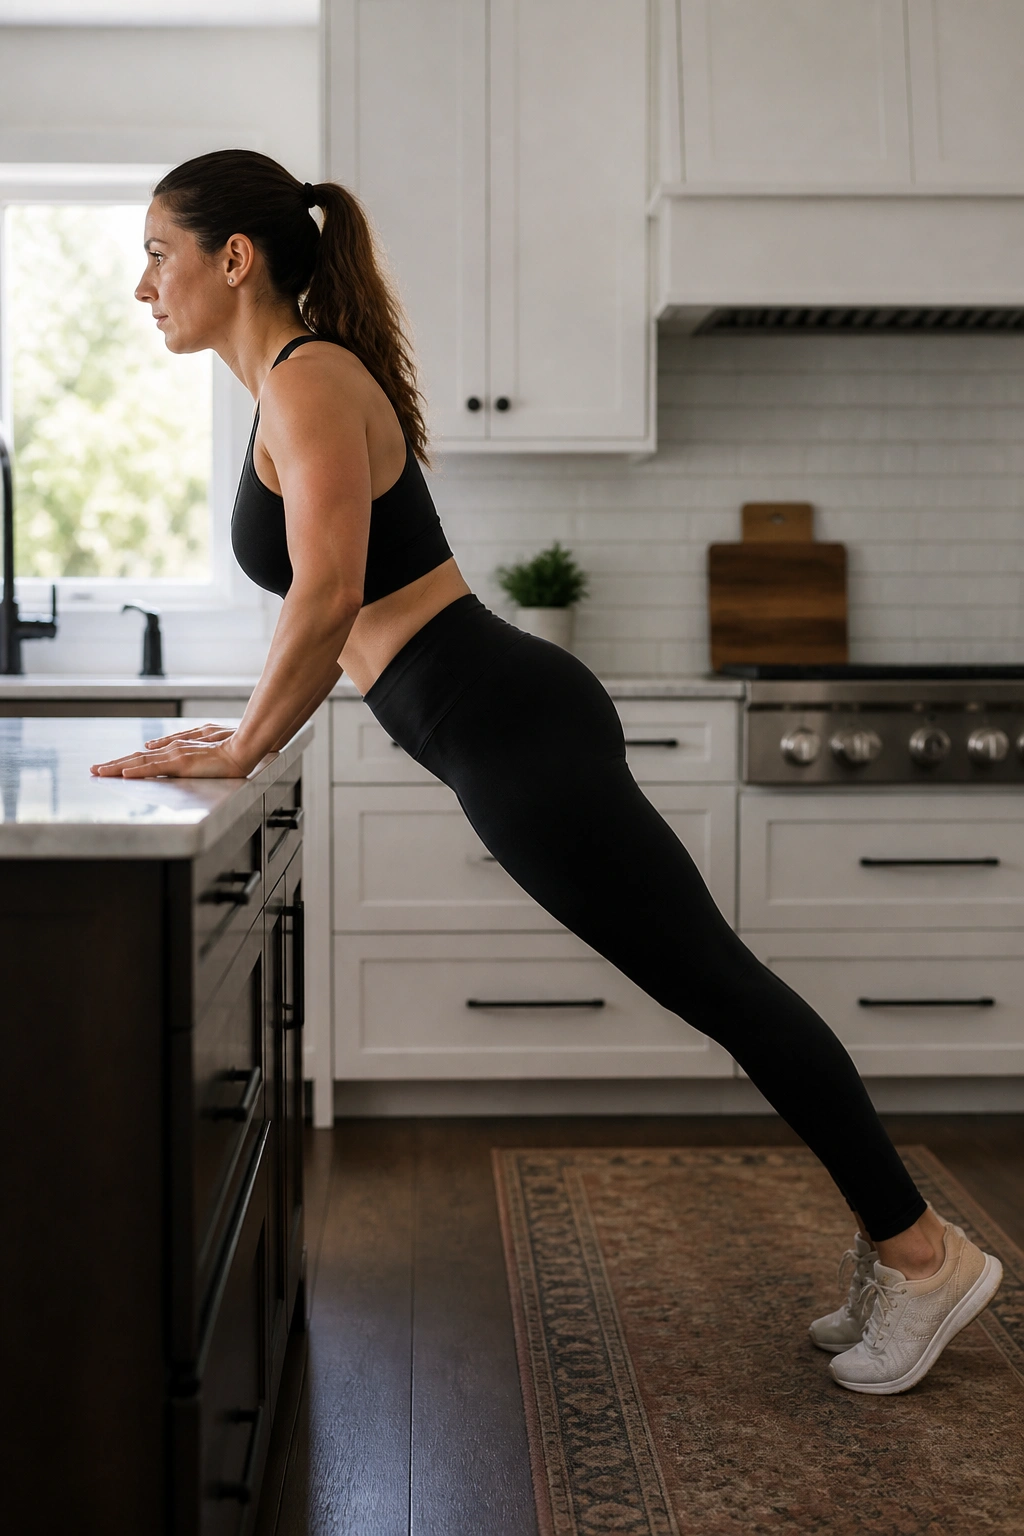
A full plank can be too much too soon. A counter or sturdy bench makes the same pattern safer and more usable.
Place your hands on the edge of a counter, step your feet back, and make one long line from head to heels. Exhale gently and feel the lower ribs come in. Hold for 10 to 20 seconds at first. If the belly domes, the surface is too low or the hold is too long. Raise the hands higher and try again.
A Few Details That Matter
- Keep your eyes a few feet in front of you
- Press the floor away through your palms
- Don’t let the shoulders sink toward the ears
- Stop before shaking turns into holding your breath
I like incline planks because they expose mistakes fast. You can tell when the core is leaking. You can also tell when it is solid. If the line stays clean, repeat for 3 to 5 short holds instead of grinding through one long one. Quality beats strain every time.
13. Side Plank From the Knees
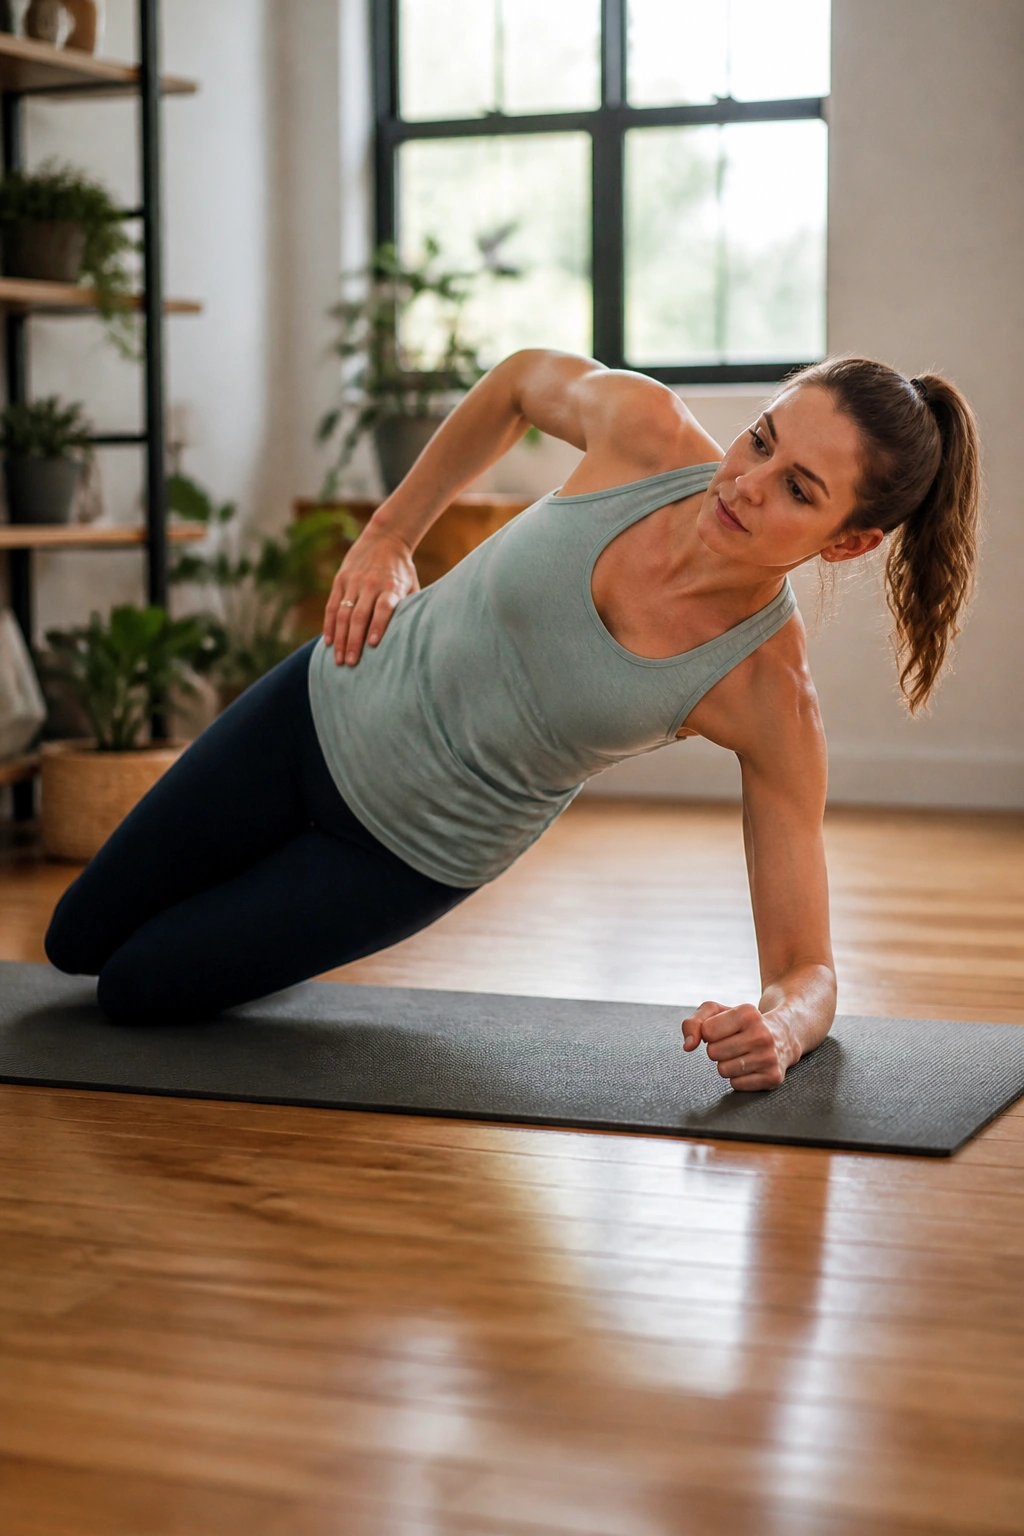
Side planks are where the side body stops being background noise.
Start on one elbow with your knees bent and stacked. Lift your hips so your body makes a straight line from head to knees. The top shoulder stays open, the ribs stay knitted down, and the belly doesn’t roll forward. Hold for a few breaths, then lower with control.
Make It Smaller Before Making It Harder
A lot of people think side planks need to be long, dramatic, or shaky to count. They don’t. A 5-second hold with perfect shape is better than a 20-second wobble-fest. If even the knee version feels too much, keep the hips a little lower and practice the side brace first.
This move is excellent for the obliques, which help stabilize the midline from the sides. That matters for ab separation because the center line likes support from all directions. If one side collapses, the whole system gets sloppy.
Try 3 to 5 holds per side. Rest between sets. Breathe during the hold. No breath-holding contests.
14. Suitcase Carry
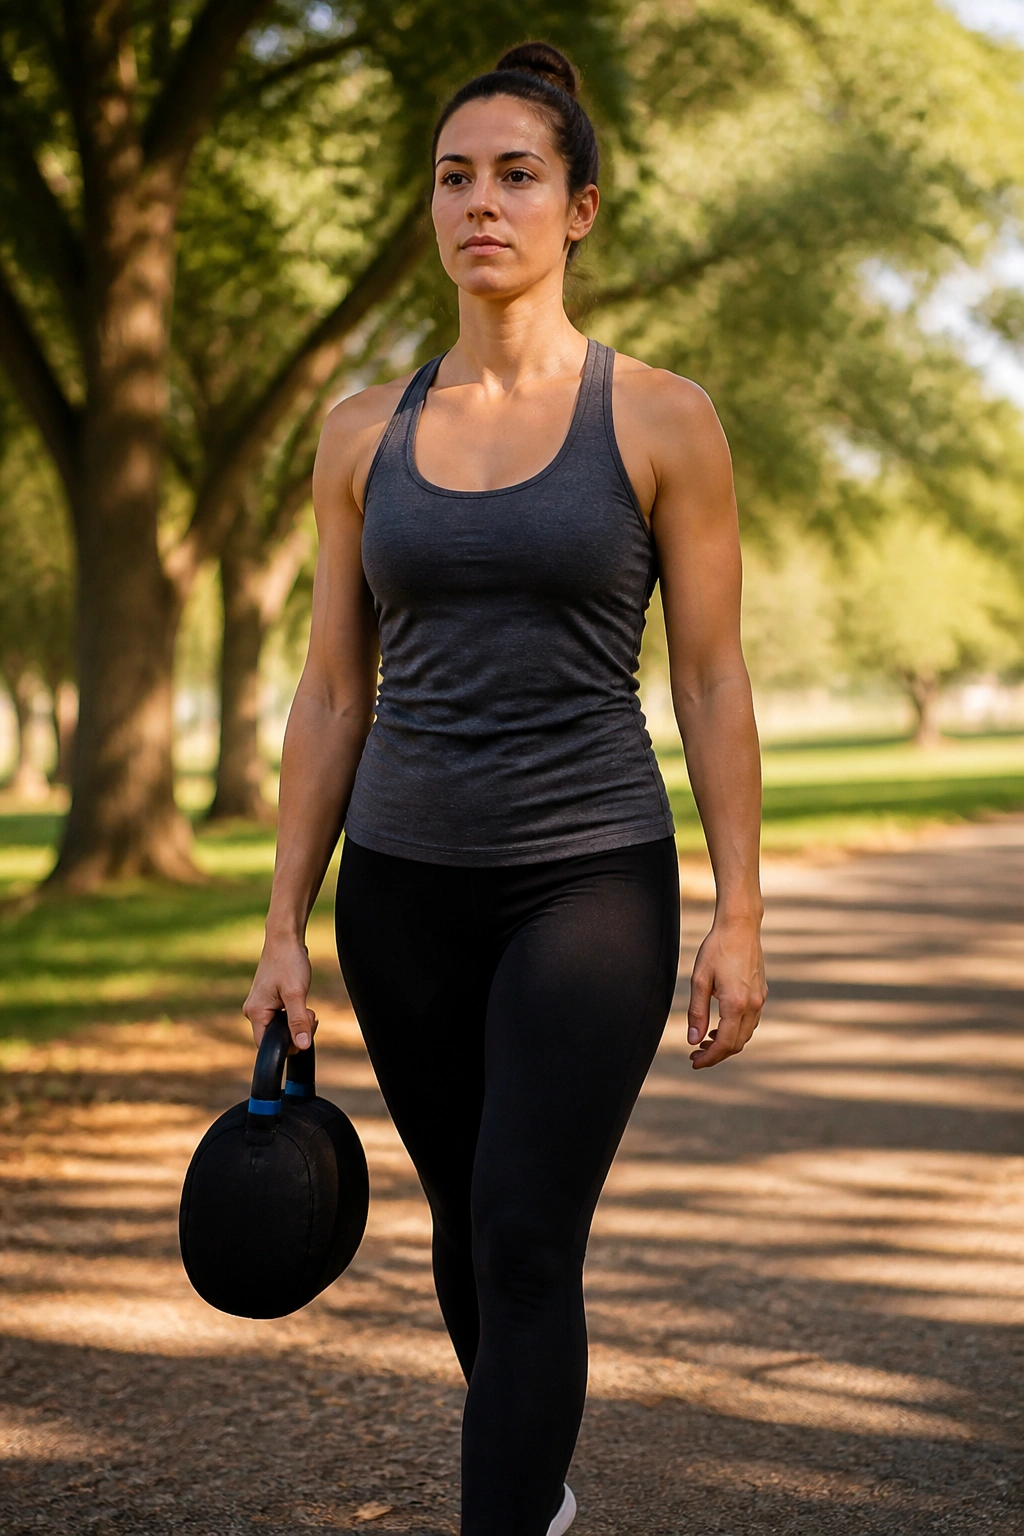
Why does carrying one heavy bag on one side help a split belly? Because the body has to resist side-bending and twisting while you walk.
Hold a dumbbell, kettlebell, or loaded grocery bag in one hand and stand tall. Exhale, stack the ribs over the pelvis, and walk slowly for 20 to 40 seconds before switching sides. The opposite side of the waist should not cave in. The shoulders should stay level. The belly should stay quiet even though the weight is trying to drag you sideways.
How to Keep It Useful
- Start with a weight you could carry for a full minute if you had to
- Walk in a straight line, not a zigzag
- Keep the steps short and even
- Stop if you lean hard or grip the handle like your life depends on it
Suitcase carries are one of the best “real life” drills on this list. They ask for strength, but not the loud kind. The torso has to organize itself around an uneven load, which is exactly the sort of thing postpartum life demands over and over again.
15. 90/90 Breathing With Reach
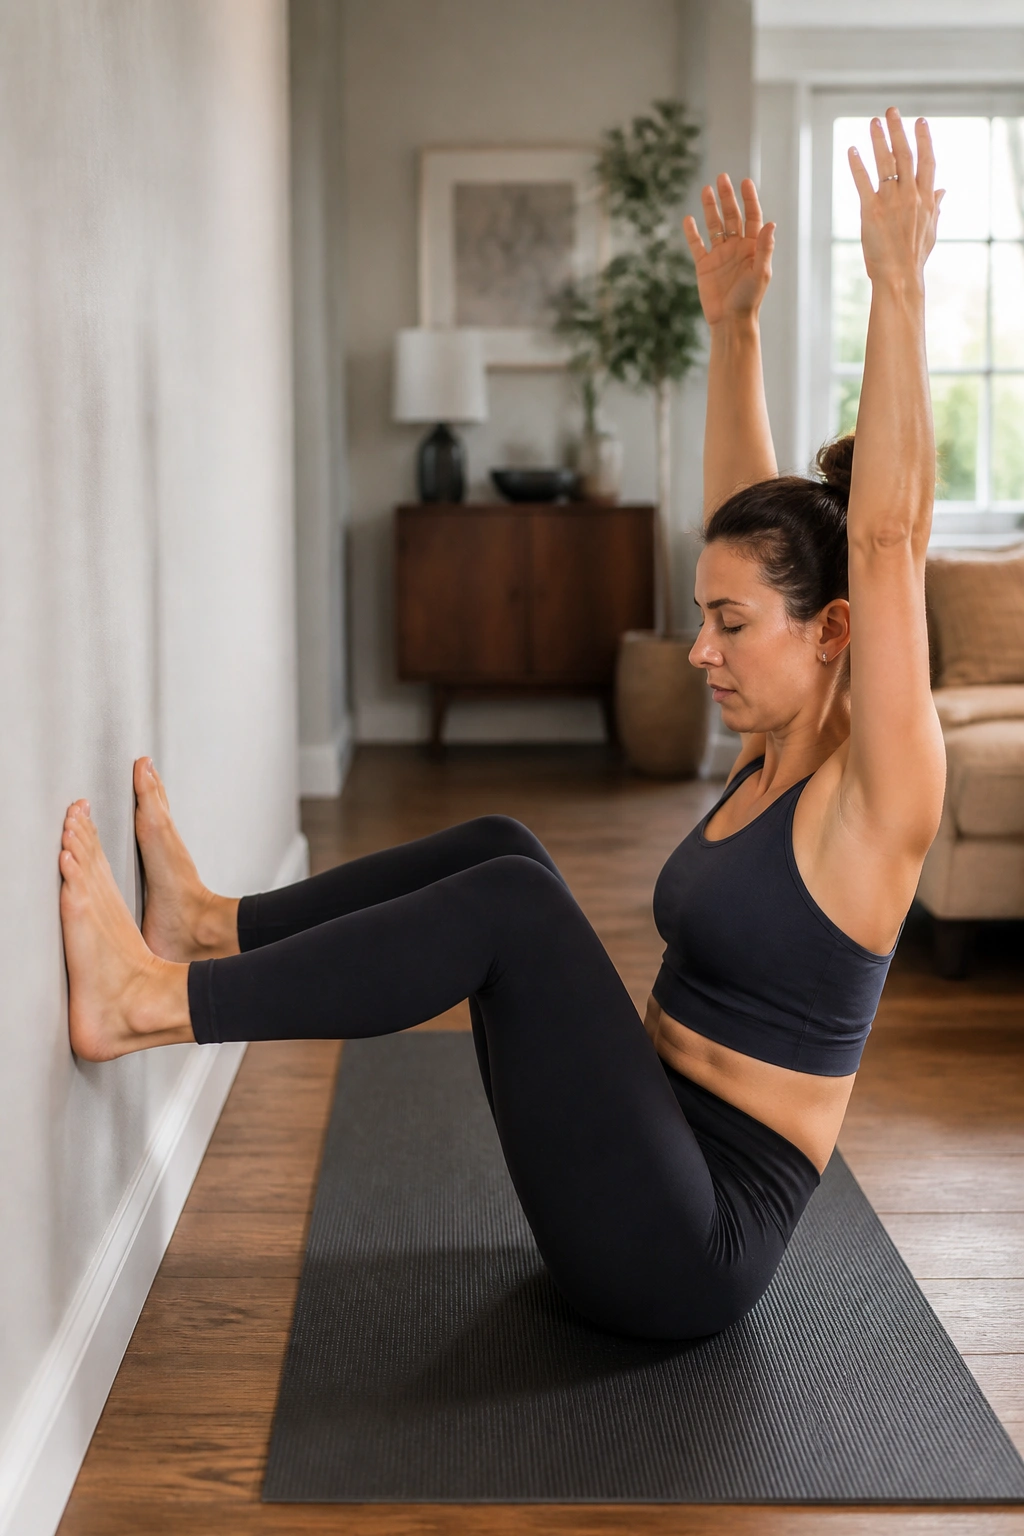
The quietest drill often wins.
Set your feet on a wall or chair so your hips and knees are at about 90 degrees. Reach both arms toward the ceiling, then exhale and gently reach your hands upward as the ribs slide down. You should feel the backs of the ribs and the low abs work together. Inhale softly through the nose, then repeat. The neck stays easy. The jaw stays loose. The lower back settles.
This is a strong ending because it gathers everything from the earlier drills into one calm position. You get rib control, belly control, and a little reset for the pelvic floor without needing to chase load. If a previous exercise caused doming, this is often the place to return to before trying again.
Do 5 to 8 breaths for a reset, or 2 rounds of 5 breaths if you want a longer finish. It works well after walking, after lifting, or before bed when the belly feels puffy and tired. Clean breathing is not glamorous. It does help.
Where to Start
Start with breathing, heel slides, and marches. Those three usually tell the truth fast. If they feel stable, add dead bug arms, bird dog, and bridges. If the body stays calm there, the standing work starts to make sense instead of feeling random.
The mistake I see most often is simple: people jump to hard core moves because they want their old strength back. I get it. But ab separation responds better to control than to aggression. Small reps. Slow exhale. No doming. That’s the lane.
And if a move feels off, skip it for now. Come back later. The goal is a core that works well when you carry a child, stand up from the floor, or bend for a laundry basket—not a stomach that wins a bragging-rights contest.
