



Strength comes back the slow way.
After surgery, the muscles that feel weak are often not the ones you expect. A knee can feel stiff because the hip stopped helping. A shoulder can feel useless because breathing turned shallow and guarded. The first post surgery workouts that matter are usually the ones people skip because they look too small to count: breathing, ankle pumps, gentle range-of-motion work, and then the first clean stand from a chair.
That part matters more than ego reps. If tissue is still swollen, the nervous system is still cautious, and the incision tugs when you move, the job is not to push through. The job is to teach the body that movement is safe again, with low-load exercises that bring back circulation, control, and a little confidence. Sharp pain, new swelling, fever, chest pain, shortness of breath, or drainage from an incision is not workout feedback. It is a stop sign.
The best rehab sessions are boring in the right way. They feel almost too easy until one day you realize you can climb stairs, carry groceries, or get out of bed without thinking about every joint in the chain. These 17 post surgery workouts rebuild strength from the ground up, starting with the smallest muscles that keep everything else honest.
1. Diaphragmatic Breathing and Rib Expansion
Breathing is a workout after surgery.
That sounds dramatic until you’ve watched a guarded body try to move. When the belly tightens and the shoulders creep upward, the diaphragm stops doing its full job, the ribs barely expand, and everything feels tighter than it needs to. Diaphragmatic breathing gives you a way to reintroduce motion without stressing the incision or the joints around it.
Why it matters early on
This is one of the first post-surgery exercise patterns many people can tolerate, because it doesn’t ask for load. It asks for control. A slow inhale through the nose should make the lower ribs widen, and a long exhale should soften the chest and belly without collapsing posture.
A useful dose is simple: 5 slow breaths per round, 3 to 5 rounds a day. Sit upright or lie with your knees bent. One hand can rest on the chest, the other on the belly. If the top hand moves more than the lower one, you’re breathing high and shallow. That’s common. It also means there’s room to improve.
How to do it well
- Inhale through the nose for about 4 seconds.
- Let the lower ribs expand sideways, not just the chest upward.
- Exhale through the mouth for about 6 seconds.
- Keep the shoulders loose and down.
- If the incision feels tender, brace it gently with a pillow or your hand.
The biggest mistake is turning it into a giant, forced breath. Small is fine. Smooth is the goal. If you can breathe quietly and keep the movement easy, you’re doing more useful work than a hard, noisy inhale ever will.
2. Ankle Pumps and Circles

Why start at the ankles when the surgery happened somewhere else? Because circulation does not care where the scar sits.
After a few days of guarded movement, the lower legs can feel heavy, puffy, or strangely asleep. Ankle pumps are a classic rehab move for a reason: they wake up the calf muscle pump, help move fluid, and remind the whole lower body that motion is back on the table. They are tiny. They also matter.
Do them sitting or lying down. Pull the toes toward the shin, then point them away. 10 to 20 pumps per side is a good place to begin, followed by 5 slow circles each direction. If the ankle feels stiff, move within a small range and let it open a little more only as it warms up.
The feeling should be easy and almost dull. That is the point.
A few practical notes help here:
- Keep the knee relaxed.
- Move both ankles, even if only one side feels tight.
- Do a set every few hours if you’re spending a lot of time in bed or on the couch.
- Stop if the calf becomes hot, sharply painful, or suddenly swollen.
People often underestimate this drill because it looks like nothing. Then they stop doing it and wonder why the lower leg feels wooden. It’s a small move with a real job.
3. Heel Slides for Gentle Joint Motion
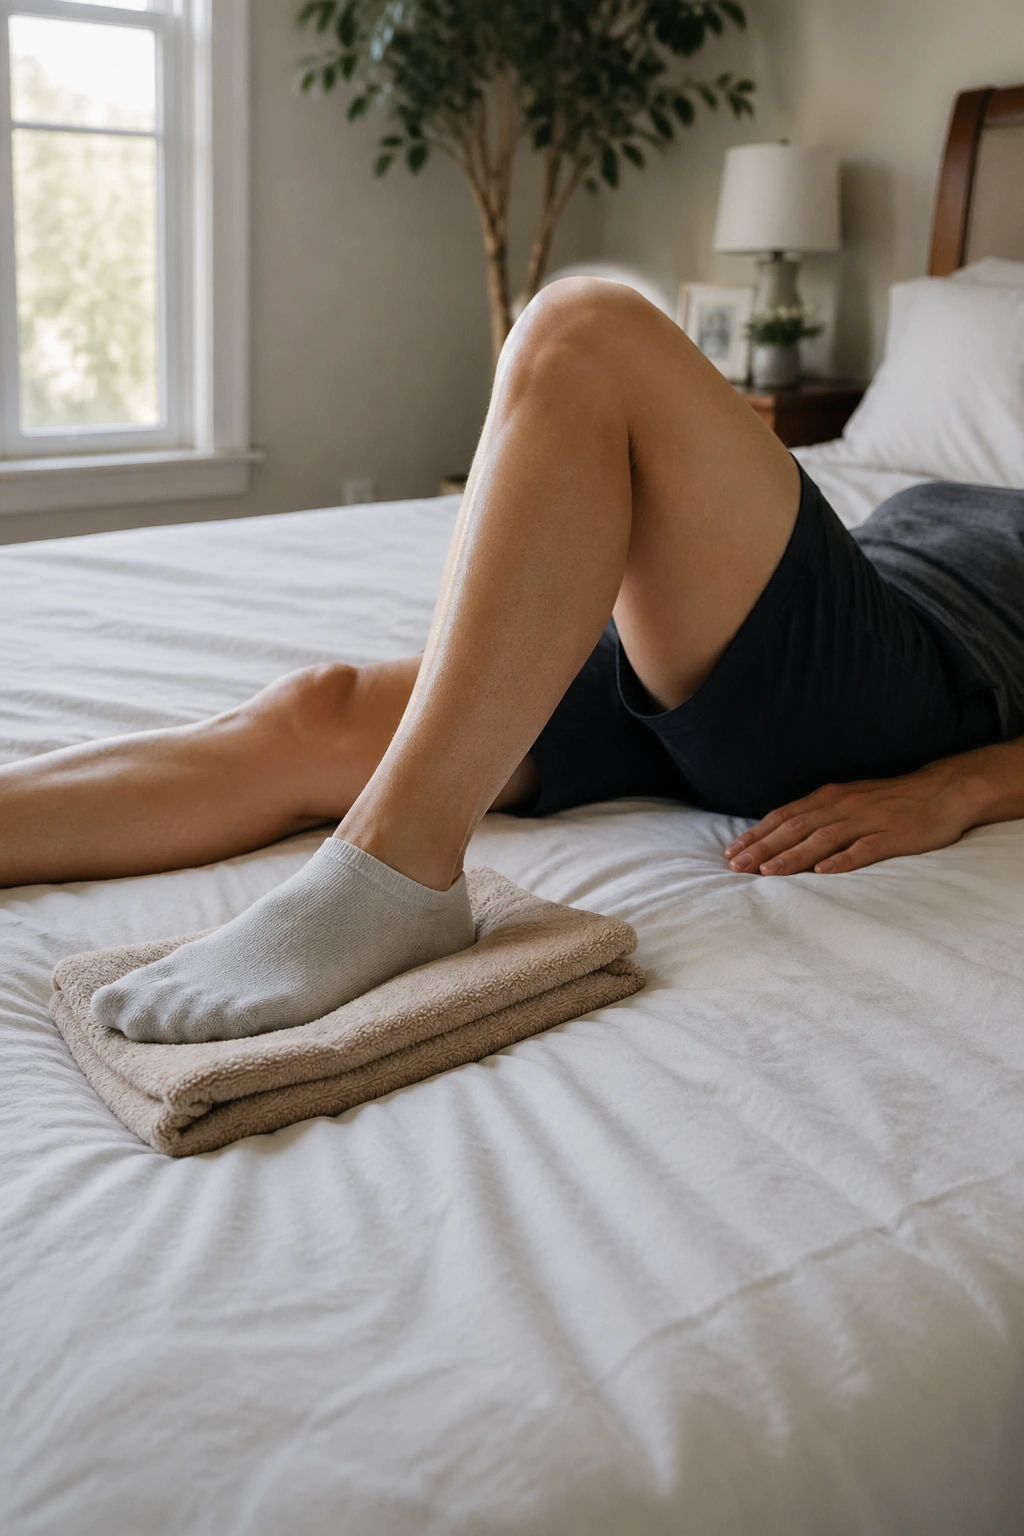
A heel slide looks almost too simple to count.
Lie on your back with your legs straight. Slide one heel toward your butt, then glide it back out. That’s it. But when a knee, hip, or lower abdominal area has been through surgery, that small bend-and-straighten pattern can be the difference between feeling stuck and feeling like the joint belongs to you again.
The goal is not to force range. The goal is to restore it without setting off swelling or pain. 5 to 10 smooth reps per side is enough at first. If the surgeon gave you a bend limit, stay inside it. If the movement feels sticky, use a towel or a sheet under the heel to make the slide easier.
What to watch for
- Keep the heel on the bed or mat.
- Don’t lift the whole leg and call it a slide.
- Stop at a mild stretch, not a sharp tug.
- Exhale as the knee bends so you don’t brace hard.
Heel slides are useful because they teach the joint to move without drama. They also give you feedback. If the motion improves once the tissue warms up, that’s a good sign. If the knee swells more after the session, the range was probably too big or the volume too high.
Use that information. It’s more useful than guessing.
4. Quad Sets to Wake Up the Thigh
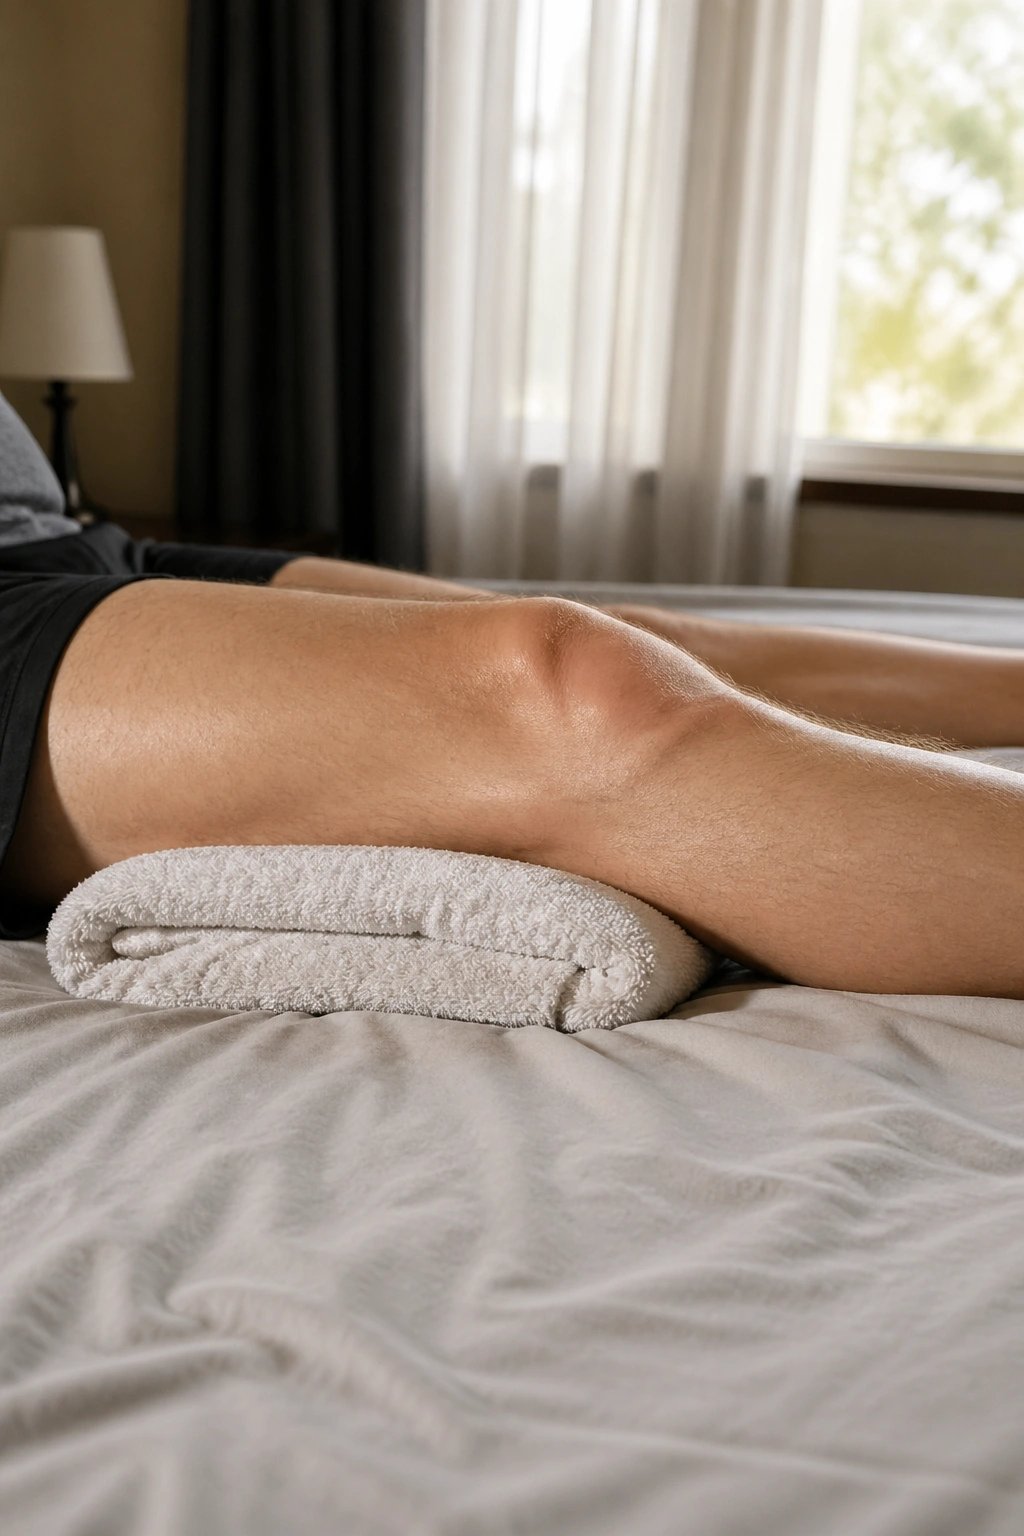
A strong thigh starts with a hard squeeze, not a squat.
That’s why quad sets show up so early in recovery plans. The quadriceps often go quiet after knee surgery, after long bed rest, and even after procedures that never touched the thigh directly. Pressing the back of the knee down and tightening the front of the thigh is a clean way to rebuild connection without a lot of movement.
The feeling you want
Lie down or sit with the leg straight. Tighten the thigh so the kneecap feels like it lifts a little, then press the knee gently toward the surface. Hold the squeeze for 5 to 10 seconds, then relax fully. Try 10 repetitions, and don’t rush the release.
A rolled towel under the knee can help you feel the muscle working. If the thigh trembles a bit, fine. If the knee joint pinches or the back flares up to help, the effort is too aggressive.
This move looks plain, and that’s part of its charm. It builds the habit of recruiting the right muscle again, which matters later when you start walking farther, standing longer, and finally loading the leg in a more normal way. A lot of people skip this because there’s no sweat. I’d keep it anyway.
5. Glute Squeezes You Can Do in Bed
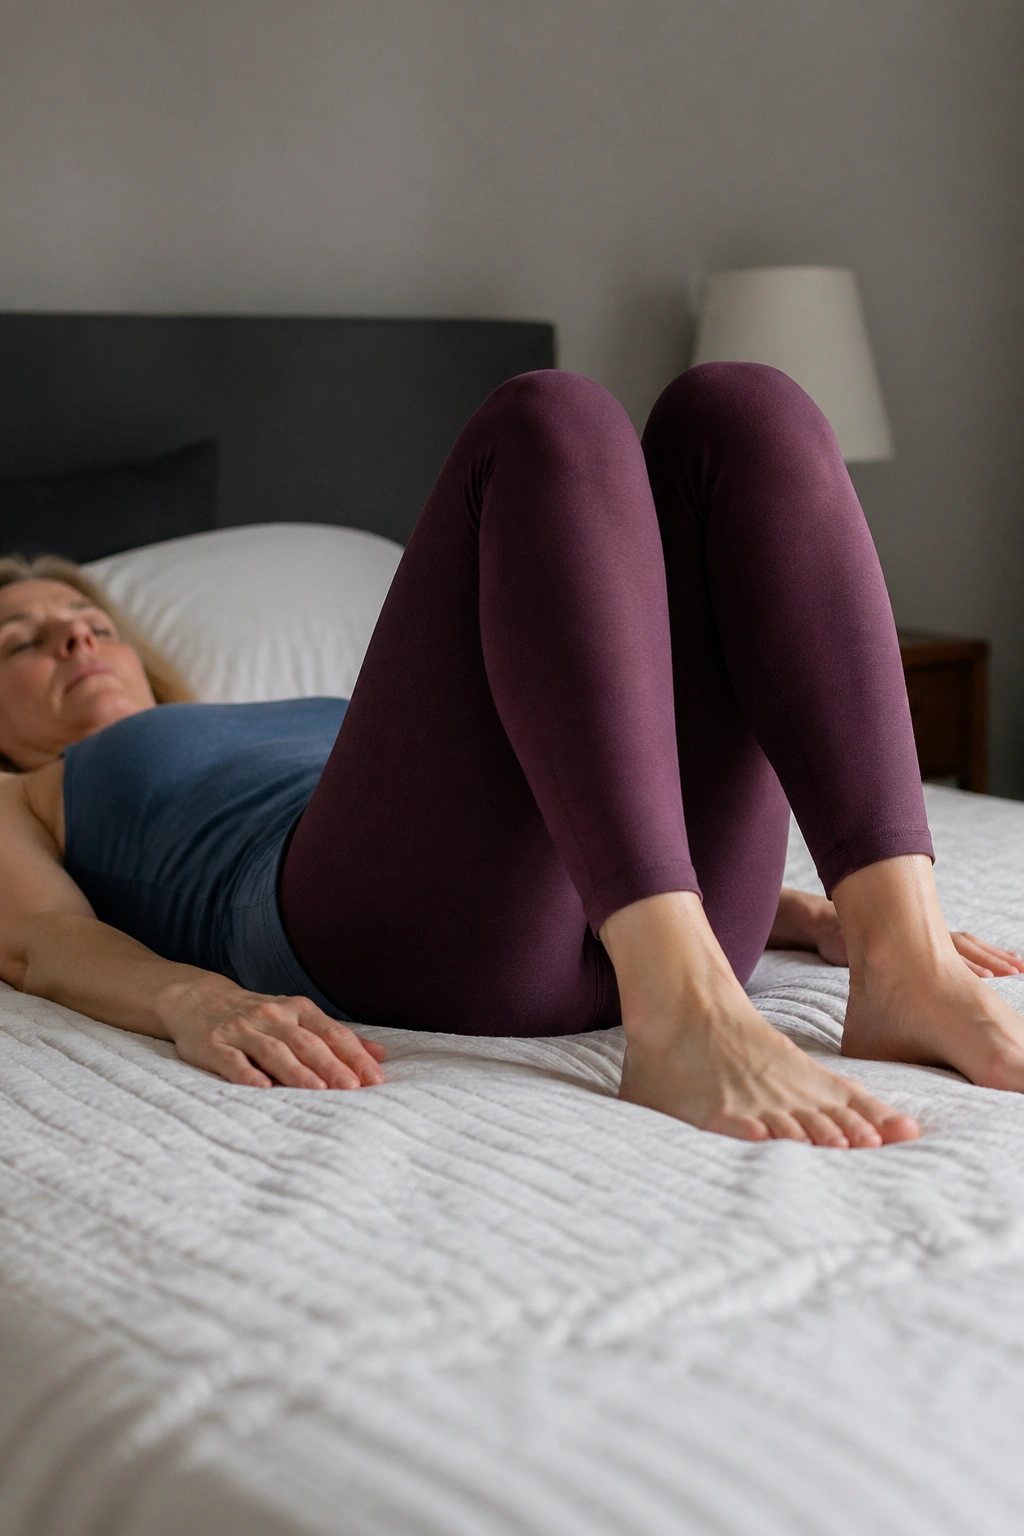
I like glute squeezes because they ask for almost no range and still wake up the hips.
The glutes get lazy fast when you’re lying down, sitting too much, or protecting a sore area by shifting every ounce of work somewhere else. A simple squeeze helps reconnect the back side of the body without asking the spine, knees, or incision to do much. If walking feels awkward, this is a clean place to start.
Squeeze both butt cheeks together, hold for 3 to 5 seconds, and let go fully. 10 to 15 reps is enough for a set. You can do it in bed, in a chair, or while waiting for the kettle to boil. That flexibility matters more than people think. Rehab works better when it fits into a normal day.
A few details make the difference:
- Keep the abs soft, not braced hard.
- Do not arch the lower back to fake a bigger squeeze.
- Breathe normally while you hold.
- Keep the effort around 3 or 4 out of 10.
This is one of those moves that feels laughably small until the first day you stand up and notice your hips fire a little sooner. That tiny timing change is the beginning of better walking mechanics.
6. Seated Marches for Early Core Control
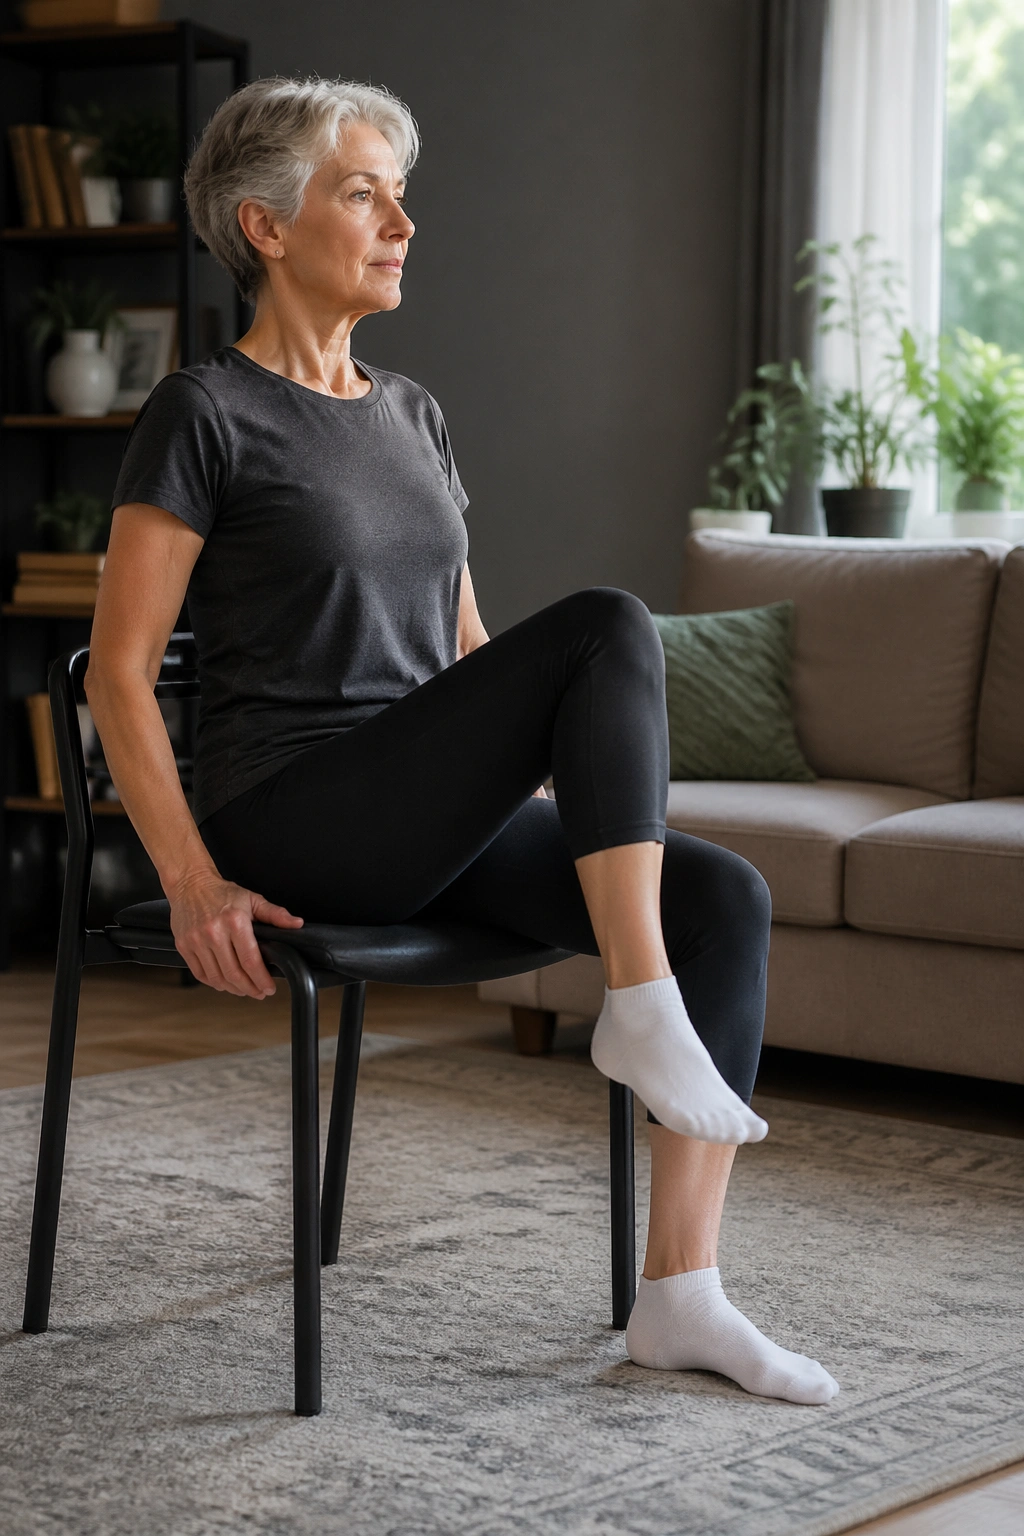
Sit in a chair, lift one knee, lower it, repeat. It sounds tiny. It isn’t.
Seated marches pull together hip flexors, lower-abdominal control, and trunk stability in a way that feels safe for a lot of post surgery bodies. They’re especially handy when standing work still feels shaky or when you need a way to wake up the core without adding impact. If you’ve been holding your torso stiff for days, this move can feel surprisingly honest.
Sit tall with both feet flat. Lift one knee a few inches, lower it, then switch sides. Start with 10 marches per side, then build to 20 if the movement stays smooth. Keep the rib cage stacked over the pelvis. If you lean back every time a knee comes up, the abs are losing the fight.
Keep it useful
- Hold the sides of the chair lightly if balance is off.
- Move slowly enough that you can feel each side working.
- Stop if the incision pulls or the pelvis rocks side to side.
- Breathe out on the lift.
This is a good bridge between bed-based exercises and standing strength work. It teaches control before load. That order matters more than almost anything else in recovery.
7. Wall Push-Ups for Upper-Body Strength
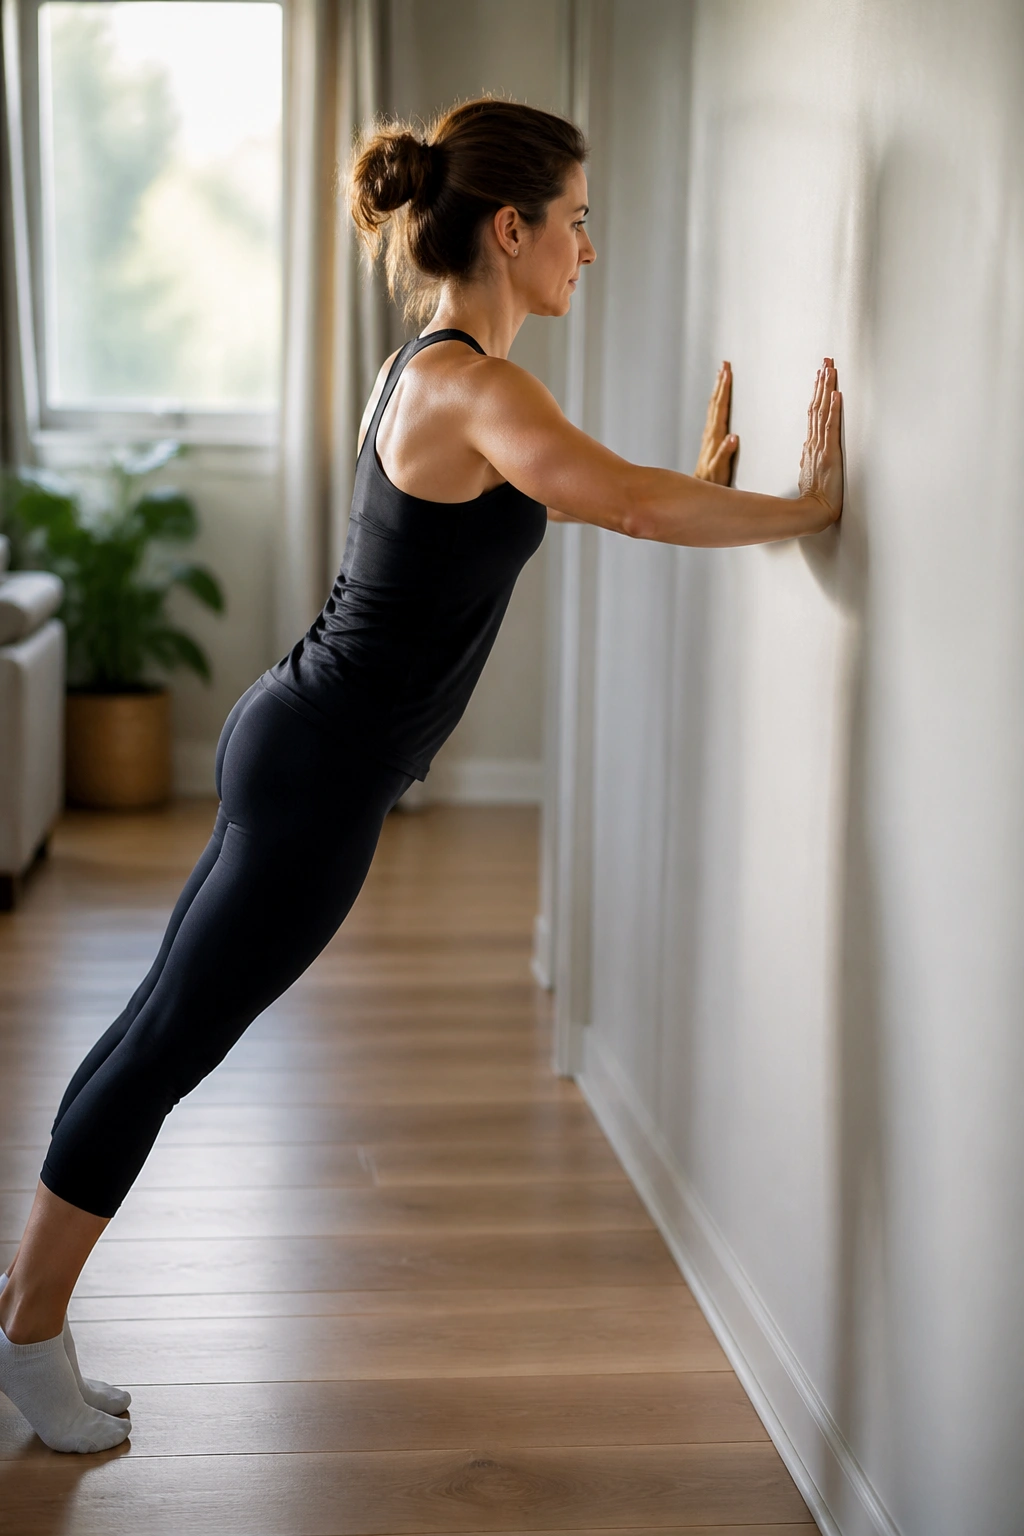
Wall push-ups are not a downgrade. They’re a smart first press.
If your upper body feels rusty after surgery, the wall gives you a way to load the chest, shoulders, triceps, and shoulder blades without dropping to the floor. The angle changes the difficulty. The more upright you stand, the easier it gets. Step your feet farther back, and the load climbs fast enough to matter.
Place your hands on the wall at chest height, walk your feet back a bit, and lower your chest toward the wall in one slow line. Press back out. 8 to 12 reps is plenty at first. Keep the elbows at a comfortable angle, not flared way out to the sides. If your care team limited pushing through the arms — common after chest, shoulder, or certain abdominal procedures — respect that.
A few useful cues
- Body stays straight from head to heels.
- Neck stays long.
- Hands press evenly through the wall.
- The return should be smooth, not a collapse.
If wall push-ups feel easy, move to a counter. Don’t jump to the floor because the internet told you to “progress.” Progression that skips steps tends to irritate healing tissue, and that’s a bad trade.
8. Resistance Band Rows for Posture and Back Strength
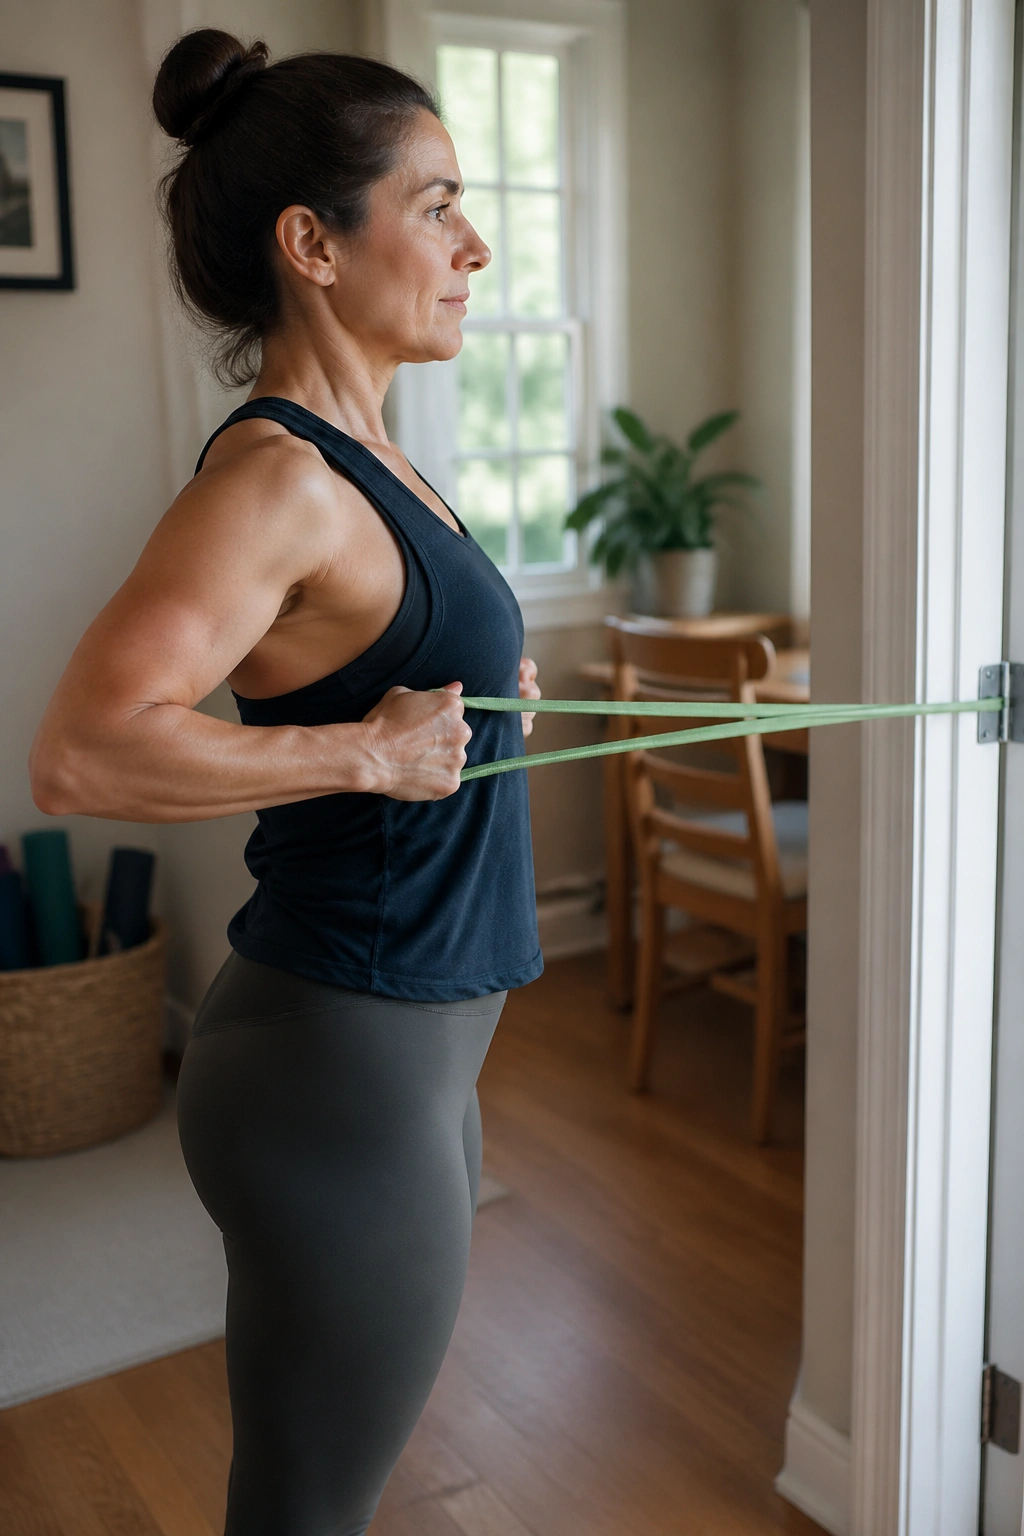
Most people want pressing strength first. I usually like rows before presses.
Rows help pull the shoulders out of that protective, rounded shape that shows up after surgery, long sitting, or weeks of guarding. They bring the shoulder blades back into the game, wake up the upper back, and make posture feel less like a struggle. Light resistance is plenty. Heavy pulling too soon is a mistake.
Anchor a band at chest height, hold one end in each hand, and pull your elbows back until the hands reach the sides of your ribs. Pause for a beat. Then return slowly. 10 to 15 controlled reps is a good start. The movement should feel crisp, not yanked.
What to look for
- Shoulder blades slide back and down, not up toward the ears.
- Ribs stay quiet instead of flaring.
- Wrists stay straight.
- You feel work across the mid-back, not a shrug in the neck.
If the band makes you hold your breath, it’s too much. If the pull feels so tiny that nothing changes, step back a little or use a slightly firmer band. The sweet spot sits right between those two errors.
9. Post Surgery Sit-to-Stand Practice to Rebuild Strength and Confidence
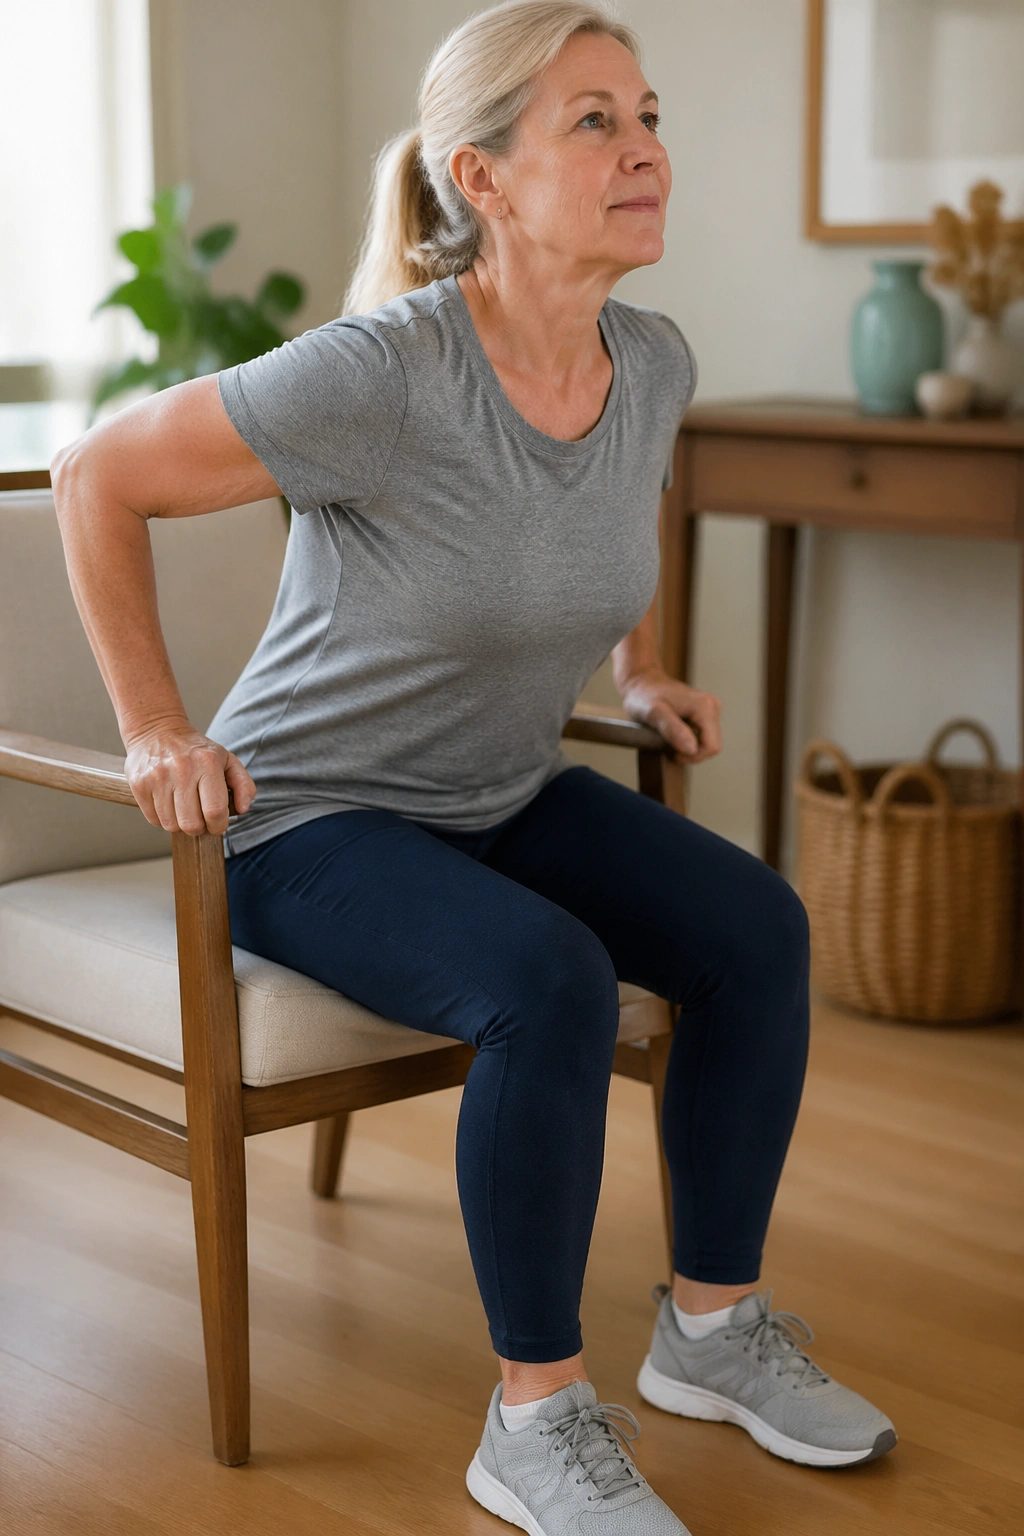
The first time you stand from a normal chair without using your hands, the room feels a little larger.
Sit-to-stand is one of the most honest post surgery workouts out there. It shows you whether the legs, hips, and trunk are sharing the work again. It also translates to real life in a way that exercise machines usually don’t. Bed, toilet, couch, car seat — all of them ask for this pattern.
Start on a sturdy chair with your feet about hip-width apart. Lean forward slightly, press through the feet, and stand. Then lower yourself back down with control. 5 to 10 reps is enough if you’re early in recovery. If that feels too hard, use a higher seat or lightly push through the armrests at first.
Make it easier without cheating
- Use a firmer, taller chair.
- Place feet a touch farther back so the shins angle forward.
- Keep the chest proud but not arched.
- Lower for a count of 3 if you want to build control.
A lot of people stand too fast and flop down on the way back. That wastes the eccentric part of the movement, which is where a lot of strength gets built. Slow down the lowering phase and you get more out of the same chair.
10. Mini Squats to a Box
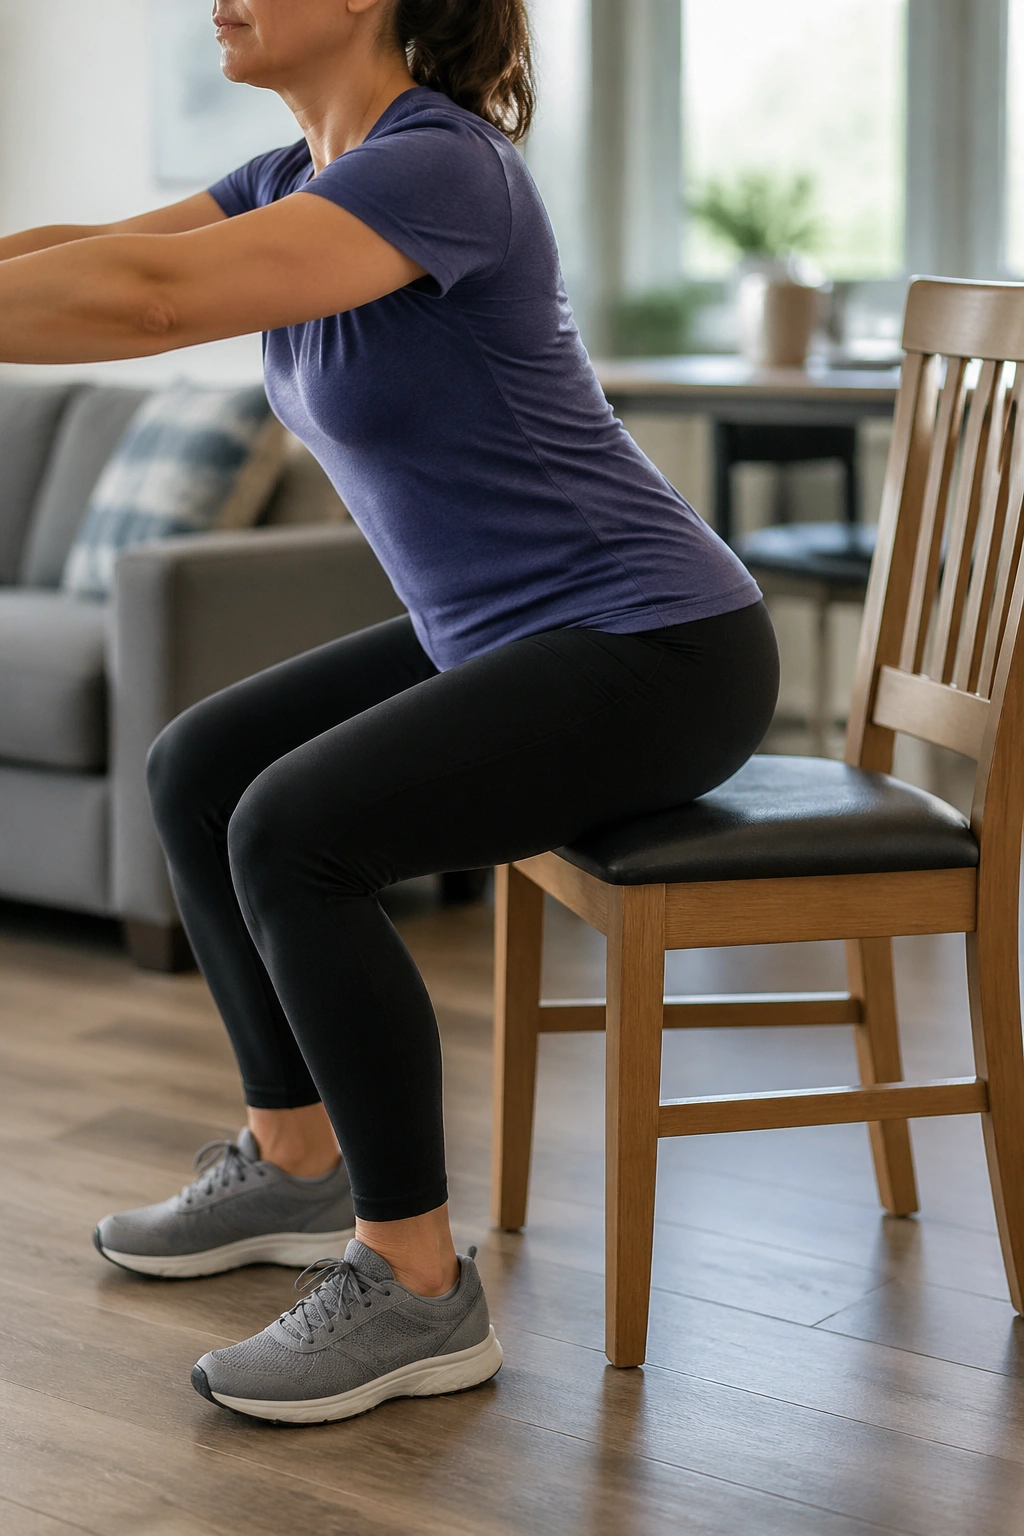
Squats are not the enemy. Bad squats are.
A mini squat to a box or chair gives you the leg-loading part of a squat without the depth that often turns recovery work into a grind. It’s a nice middle ground once sit-to-stand feels smooth. You still load the quads, glutes, and calves. You just do it with a smaller range and more control.
Stand with a box or sturdy chair behind you. Send the hips back a little, bend the knees a little, and tap the seat before standing again. The motion might be only a quarter squat. That’s fine. 6 to 8 reps can be enough when you’re learning the pattern.
Setup details that matter
- Keep the knees tracking roughly over the middle toes.
- Put weight through the whole foot, not just the toes.
- Stop before the lower back rounds.
- Use a countertop or rail nearby if balance feels off.
The mistake I see most is chasing depth before control. If the knees cave inward or the heels pop up, the squat is too ambitious for the day. Cut the range, keep the torso steady, and earn the deeper version later.
11. Heel Raises for Calf and Ankle Strength
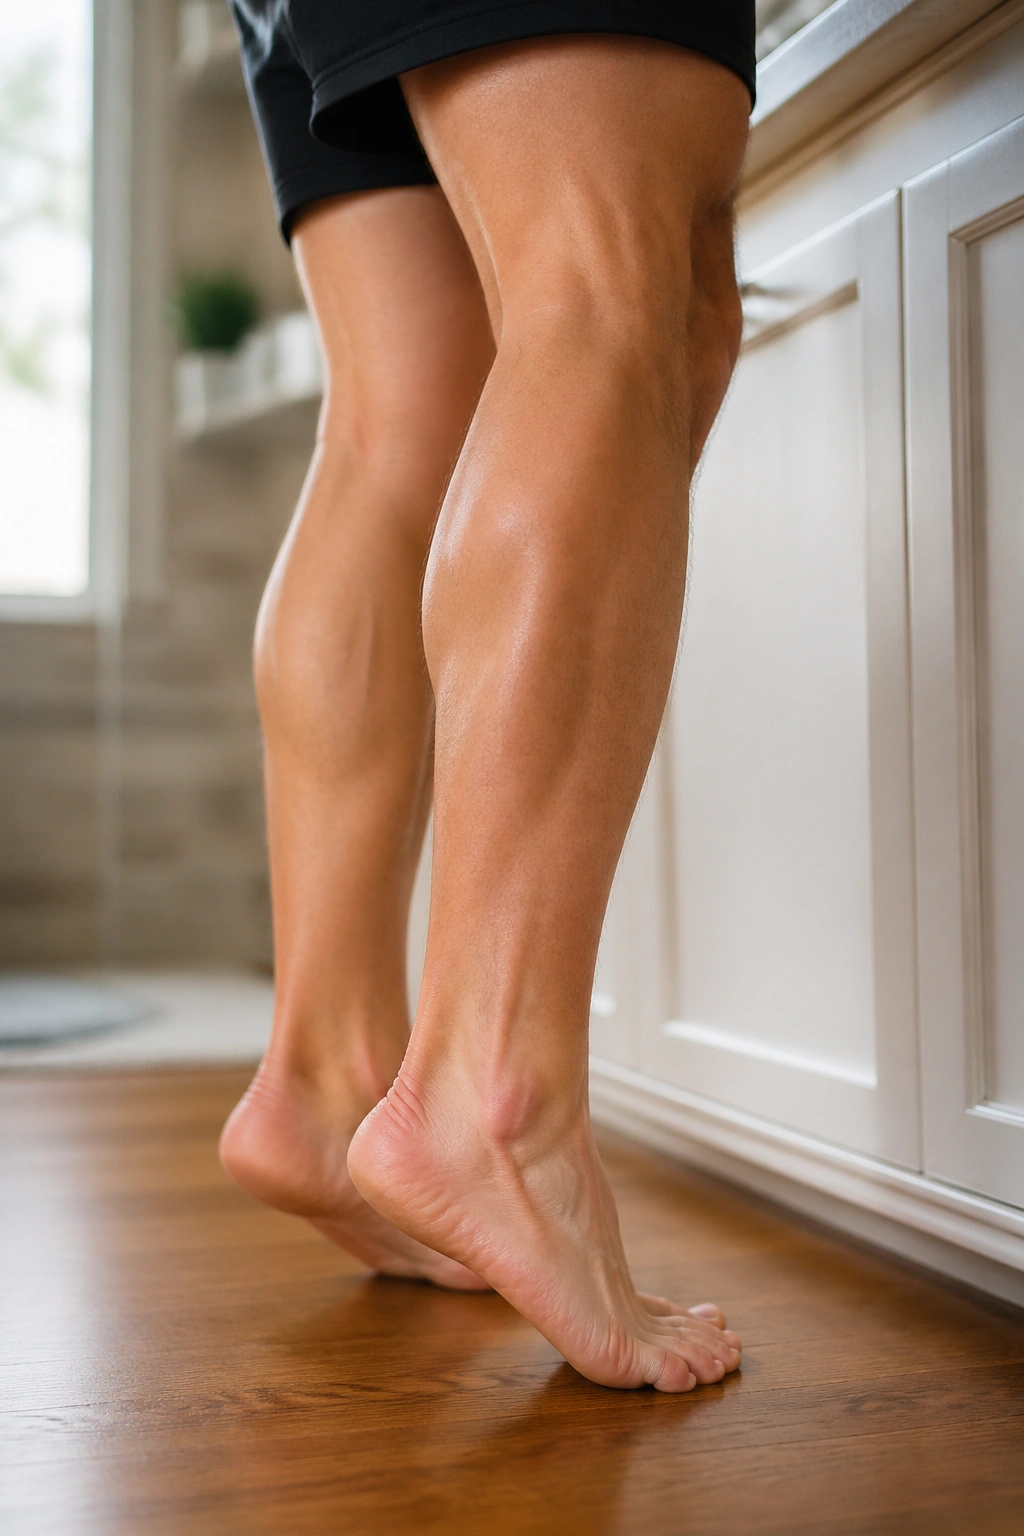
You feel this in the lower leg before you see it in the mirror.
Heel raises are a plain-looking exercise with a lot going on under the surface. The calves help with walking, standing, stair climbing, and ankle stability. They also act like a pump for fluid movement. After surgery, when everything has been a little too still, that matters.
Stand near a counter or chair. Rise onto the balls of the feet, pause for a second at the top, and lower slowly. Start with 10 to 15 reps using both legs. If that feels solid and pain-free, one-legged work can come later. For now, smooth control beats height.
A few cues I trust
- Keep the weight centered over the big toe and second toe.
- Don’t roll the ankles outward.
- Move through the full range you can own.
- Lower more slowly than you lift.
If your feet cramp, the toes are probably gripping too hard. Spread them a little and keep breathing. If the Achilles or calf feels sharply sore, back off and reduce the range. A little burn is one thing. A jolt is another.
12. Side-Lying Clamshells for Hip Stability
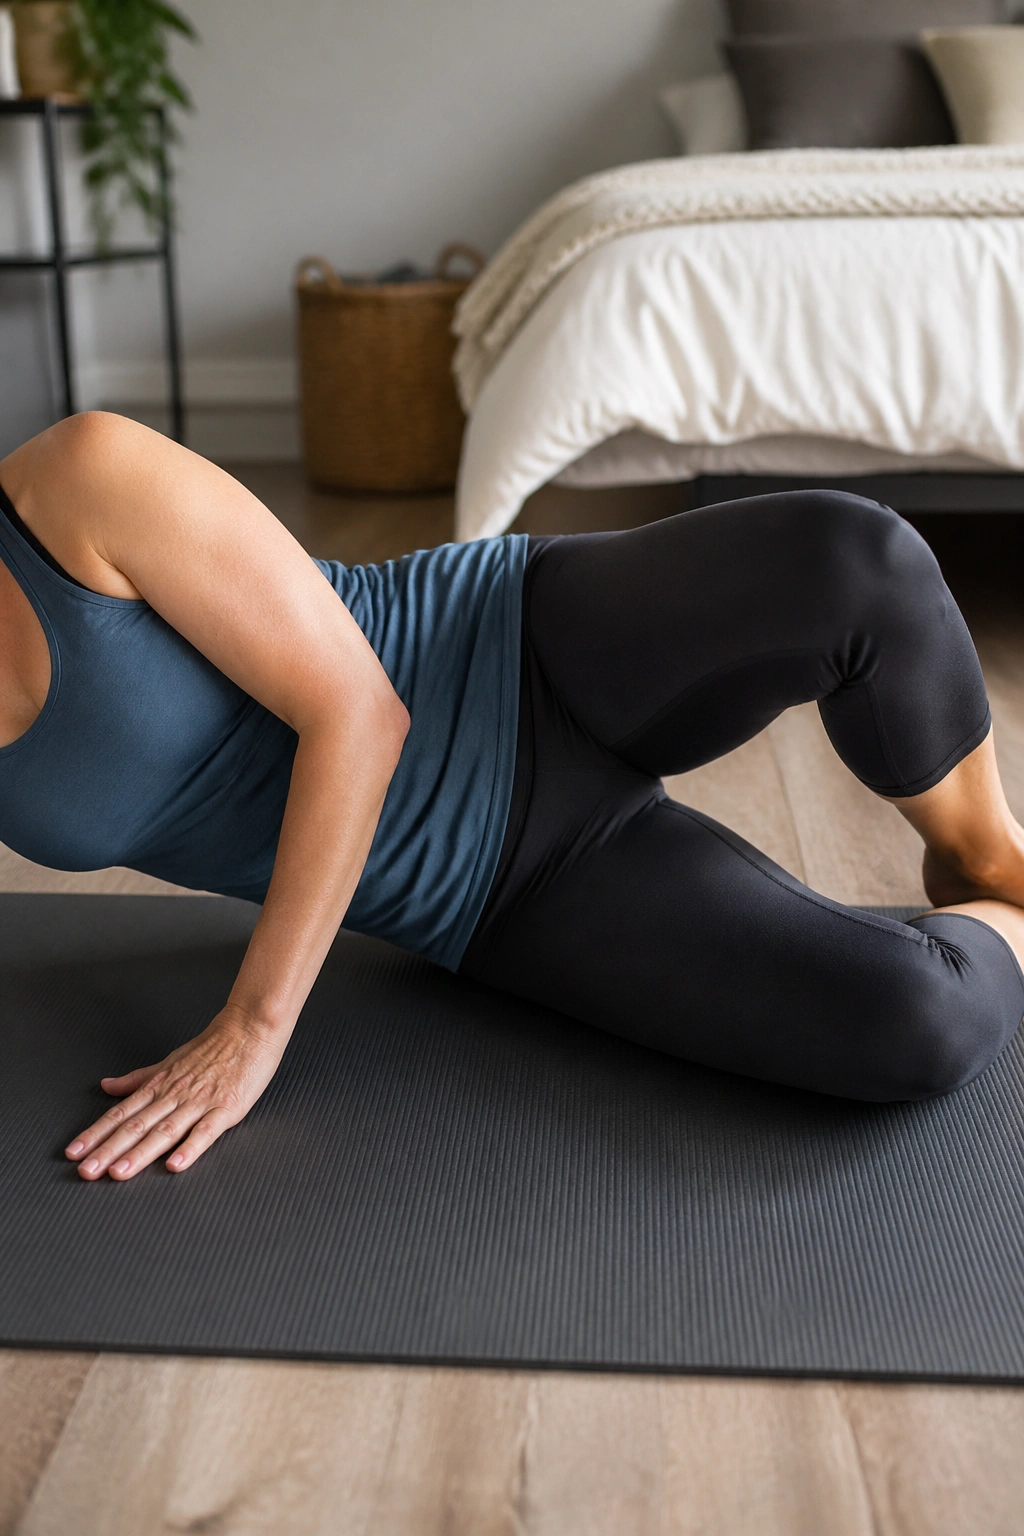
Tiny motion. Big payoff.
Clamshells are one of those rehab staples people dismiss because they don’t look impressive on paper. Then they try stairs, walking longer distances, or stepping off a curb and notice the hips wobble less when the glute med is doing its job. That little side-butt muscle is not glamorous. It is useful.
Lie on your side with knees bent and feet together. Keep the pelvis stacked, then open the top knee like a clamshell without rolling the hips backward. Pause at the top for a beat, then lower slowly. 10 to 15 reps per side is enough for a clean set. A mini band above the knees can make it harder later, but bodyweight is plenty at first.
What to avoid
- Don’t swing the top knee high.
- Don’t let the lower back twist.
- Don’t turn it into a hip-roll.
- Don’t rush the lowering phase.
If you’ve had hip, knee, or lower-back surgery, this move may need a smaller range than the internet photos suggest. That’s normal. The exercise works because of control, not because of how far the knee opens.
13. Glute Bridges for Posterior Chain Strength
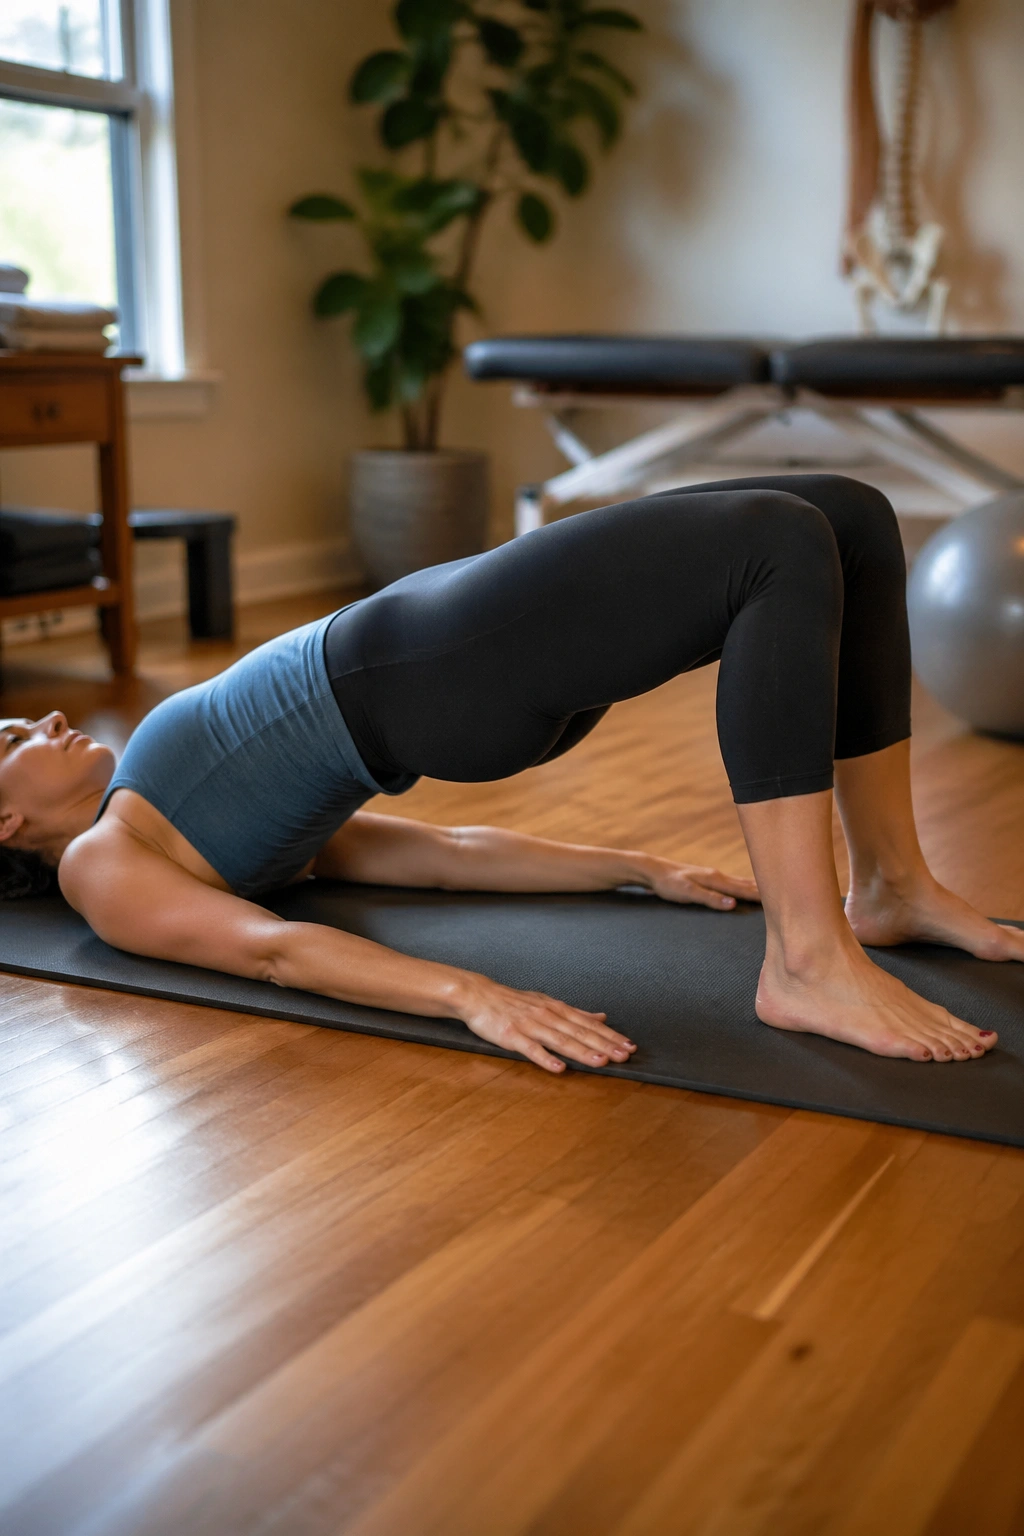
If the back side of your body has gone quiet, bridges bring it back online.
They load the glutes, hamstrings, and trunk together in a way that’s still fairly gentle. For a lot of people, that makes bridges one of the most useful recovery moves once lying on your back feels comfortable and your care team has okayayed it. The lift is small, but the job is real.
Lie on your back with knees bent and feet flat. Exhale, press through the heels, and lift the hips until the body makes a smooth line from shoulders to knees. Hold for 1 to 2 seconds, then lower slowly. 8 to 12 reps is a sensible start. If the lower back does most of the work, the bridge is too high.
Clean bridge cues
- Keep the ribs from flaring up.
- Squeeze the glutes at the top, not the low back.
- Keep the neck relaxed.
- Stop before the pelvis dumps forward.
If an abdominal incision or pelvic repair still feels tender, shorten the range or wait until your team says it’s appropriate. That caution matters. A bridge can be useful and still be too much for a specific procedure on a specific day.
14. Bird Dogs for Core Control
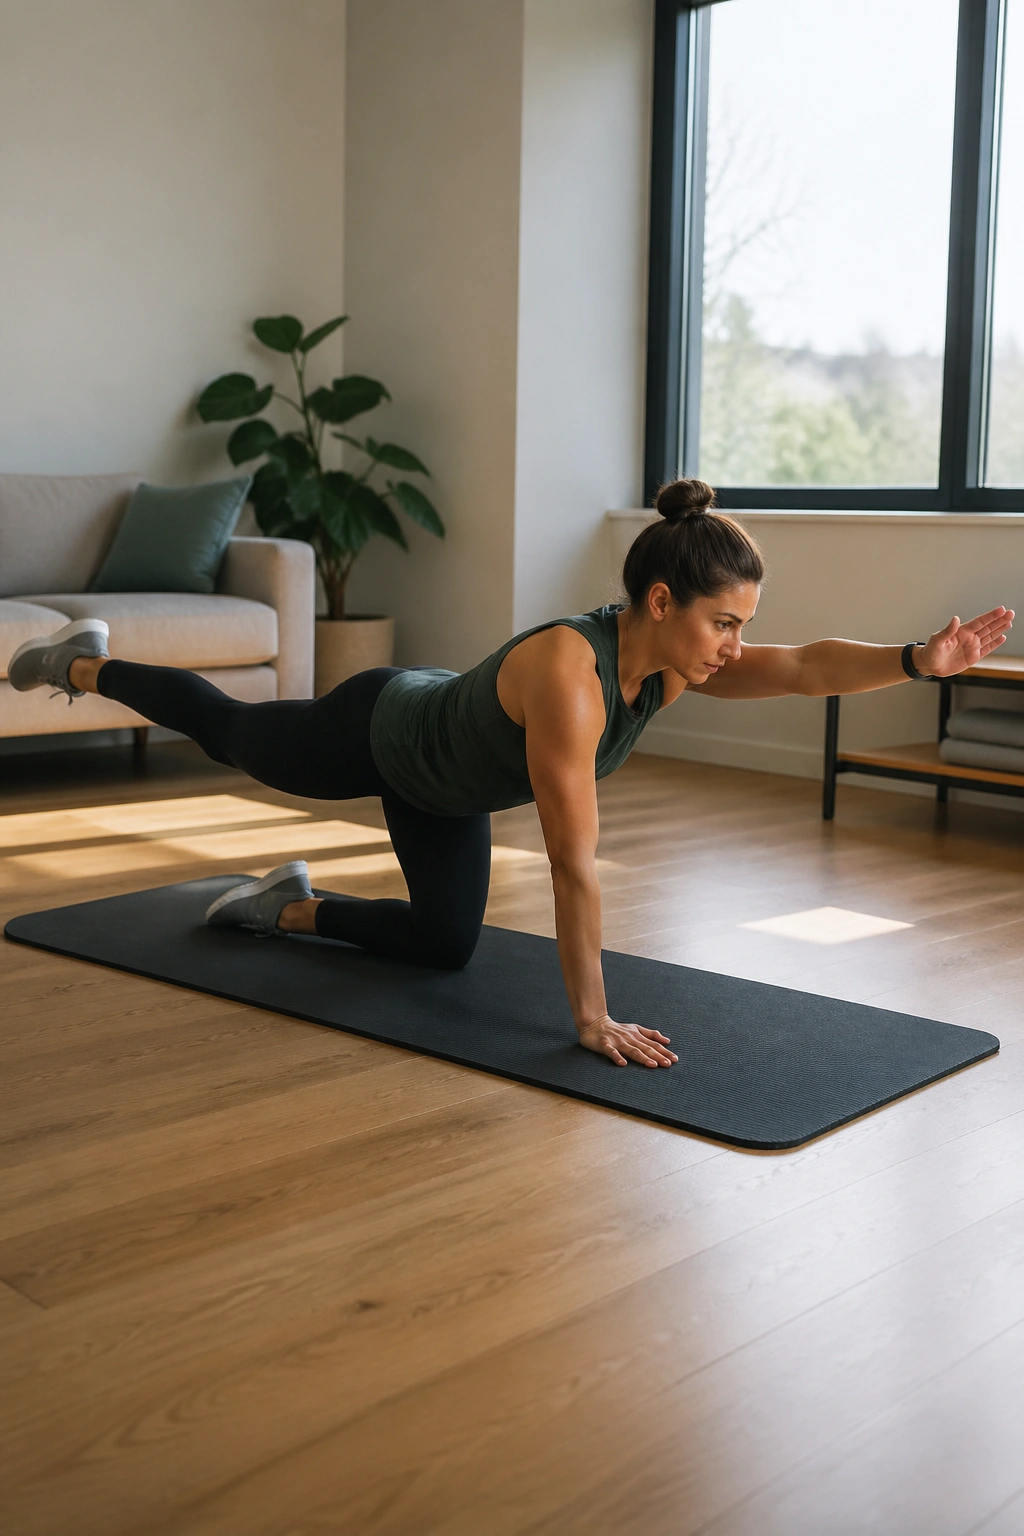
Why do bird dogs show up in rehab plans so often?
Because they teach the trunk to stay steady while the arms and legs move in opposite directions. That cross-body pattern is pure gold for post-surgery recovery. It trains coordination without pounding the joints, and it gives the spine a chance to learn how to resist wobble instead of chasing it.
Start on hands and knees. Reach one leg back and the opposite arm forward, keeping the hips level. Pause for a count of 2 to 5 seconds, then switch sides. 6 to 8 slow reps per side is enough to begin. If wrists hurt, come down to forearms or do only the leg reach. If kneeling bothers the knees, place a folded towel under them.
The mistake is chasing height. A leg lifted six inches with a quiet pelvis is better than a leg lifted high with the low back twisted. Keep the movement small enough that you can breathe through it. That’s the sweet spot.
15. Supported Step-Ups for Real-World Strength
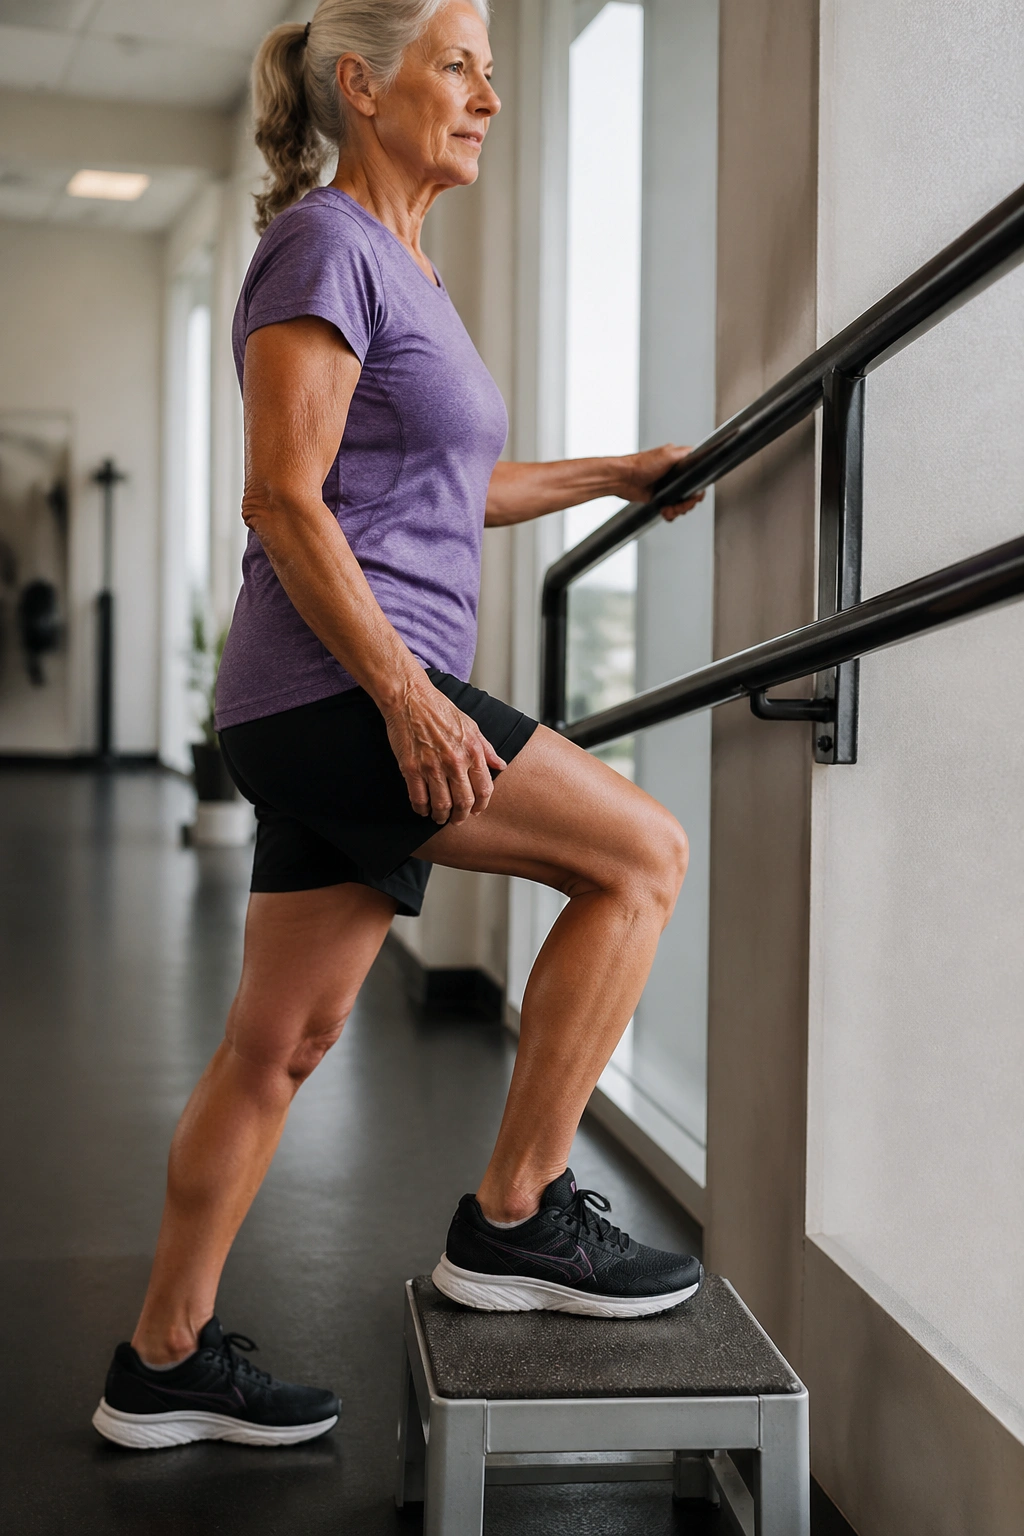
One stair can tell you a lot.
Step-ups are where recovery starts to feel a little more like life again. They train the quads, glutes, calves, and balance system all at once, which is why they’re so useful once walking has become easy and the joints are handling basic load well. Start low. Really low. A 4- to 6-inch step is enough for many people.
Hold a rail or countertop lightly, place one whole foot on the step, and drive through that foot to stand up. Step down with control. 5 to 8 reps per side is plenty to begin. If the knee caves inward, the step is too high or the pace is too fast.
Keep the step honest
- Use a low, stable surface.
- Keep the torso tall.
- Push through the heel and midfoot.
- Lower slowly so the working leg does the job.
This is a great place to stop and ask whether the movement feels smooth enough to repeat tomorrow. If the answer is no, reduce the step height or the reps. There’s no prize for making a rehab drill feel heroic.
16. Farmer Carry Walks for Grip, Core, and Posture

Carrying weight while walking teaches the torso to behave.
That’s the whole appeal of farmer carries. You pick up a pair of dumbbells, kettlebells, or even loaded grocery bags, and walk with good posture while the grip, shoulders, and trunk quietly do their work. It’s simple, but simple in a useful way. For many people, it’s one of the first exercises that feels like real strength coming back.
Choose a very light load at first — something in the 5 to 15 pound range per hand, or even less if your surgery involved the abdomen, shoulder, or chest. Walk for 20 to 40 seconds, rest, and repeat for 3 to 5 rounds. Keep the ribs stacked over the pelvis and the shoulders relaxed. No leaning. No waddling.
A few practical notes:
- Walk on a flat surface.
- Keep the steps slow and quiet.
- Switch to one bag at a time if your care team wants even less strain.
- Skip the load entirely if gripping hurts or your incision feels tugged.
If your posture falls apart halfway through the carry, the weight is too heavy. Reduce it and keep the walk clean. That’s the job.
17. Wall Slides and Reach-Throughs for Shoulder Recovery

Shoulders that have been guarded for weeks need smooth overhead work, not heroic pressing.
Wall slides are one of the cleanest ways to rebuild shoulder range while asking the shoulder blades to move well. They’re especially useful when the upper back has stiffened from sleeping oddly, sitting too much, or protecting a sore area. The motion is small at first, and that’s fine. Small often wins in recovery.
Stand with your back, head, and arms near a wall. Let the forearms rest against it, elbows bent, then slide the arms upward as far as they can go without shrugging or arching the lower back. Lower with control. 8 to 12 slow reps is enough. If overhead motion is still restricted, keep the slide shorter and stay below the point where the shoulder pinches.
What makes this one worth keeping
- It teaches upward rotation without heavy load.
- It opens the chest without yanking on the front of the shoulder.
- It exposes compensation fast, which is useful.
- It pairs well with the breathing work at the start of rehab.
A reach-through variation can add a little more thoracic motion: slide one arm up the wall, then gently rotate the rib cage as the hand reaches forward. Keep it calm. Keep it controlled. When this feels smooth and the shoulders stop bracing against every overhead reach, you’re not done, but you are moving in the right direction.
