



Crunches are usually the last thing a postpartum core needs. The best postpartum ab workouts for new moms often start with breathing, pressure control, and small, quiet movements that do not look like “ab day” in the old gym sense at all. That can feel odd at first—especially if you were active before pregnancy and expect your core work to burn from the first rep. Start smaller.
If you have tried to jump back into sit-ups, mountain climbers, or long planks and felt your belly push outward down the midline, your lower back grip up, or your pelvis feel heavy, that is useful feedback. Pregnancy changes rib position, stretches the abdominal wall, and asks the pelvic floor and deep core to handle pressure in a new way. A C-section can add scar sensitivity and a different healing timeline on top of that.
Pelvic floor physical therapists keep coming back to the same principle because it works: get your breath, ribs, pelvic floor, and deep abs working together first, then add load. The deep core is a pressure system—diaphragm on top, pelvic floor on the bottom, abdominal wall around the middle. When that system regains timing, a lot of things start to feel better: getting out of bed, lifting the baby carrier, standing up from the floor, even walking uphill with a stroller.
Use your clinician’s clearance and your own symptoms as guardrails. If exercise causes sharp pain, heavier bleeding, urine leakage that is new or worse, pelvic dragging, or visible doming that you cannot control, stop and get assessed. And do not try to cram all 20 of these postpartum ab workouts into one session. Pick 4 to 6, move slowly, and let the quality of each rep do the hard work.
1. 360 Breathing with Rib Expansion
This is where postpartum core training should begin for most new moms. 360 breathing teaches your ribs to move, your diaphragm to drop, and your deep abs to engage on the exhale without bracing like you are about to get punched.
Lie on your back with your knees bent and feet flat, or lie on your side with a pillow between your knees if being flat on your back feels rough. Put one hand on your lower ribs and the other low on your belly. Inhale through your nose for about 3 to 4 seconds and feel your ribs widen into your hands. Exhale slowly through pursed lips for 4 to 6 seconds, letting the ribs soften down while the lower belly gently firms.
What you should feel
You are not trying to suck your stomach in. You are looking for a soft wraparound tightening, almost like your torso is drawing inward from the sides, not a hard clench through the upper abs.
A few useful cues:
- Inhale wide, not high into your shoulders.
- Let your pelvic floor relax slightly on the inhale rather than gripping all the time.
- On the exhale, think “zip up gently” from the pubic bone toward the navel.
- Keep your jaw, neck, and glutes quiet.
Try 5 to 8 breaths, rest, then do a second round. If one thing from this whole list changes how your core feels, it is often this.
2. Supine Heel Slides
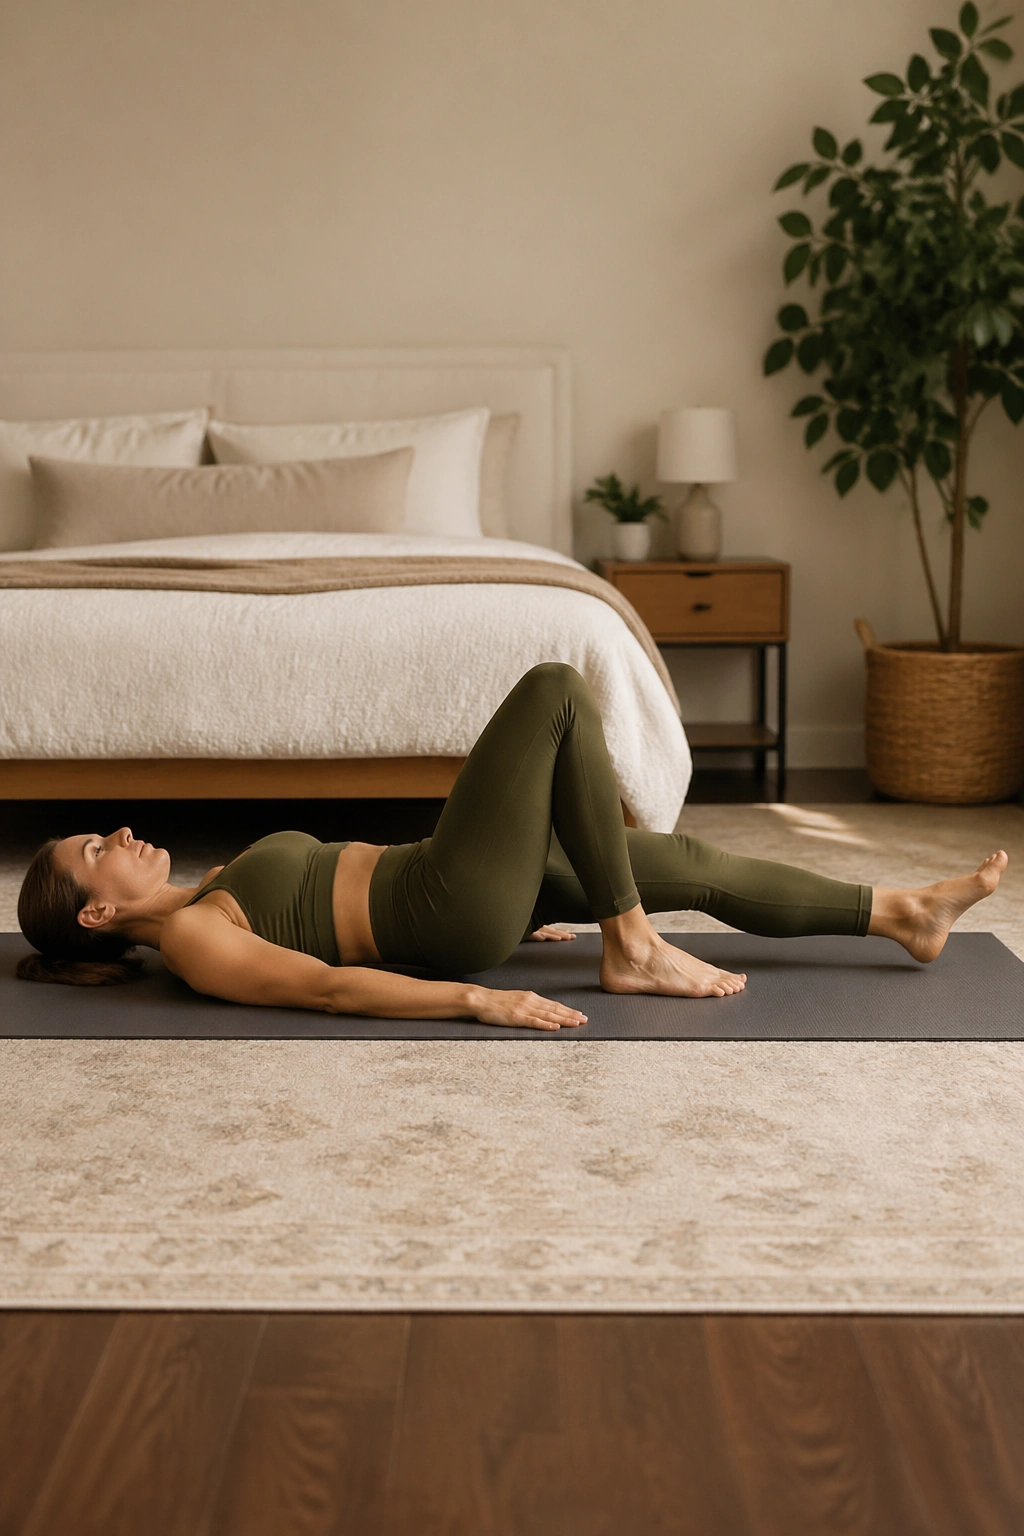
Heel slides look easy and expose sloppy pressure control fast. That is why they belong early in any list of postpartum ab workouts.
Lie on your back with knees bent, feet flat, and pelvis in a neutral spot—not jammed flat into the floor, not arched hard either. Take one breath in. As you exhale, gently brace your lower abs and slide one heel forward until the leg is almost straight, then inhale to bring it back. Alternate sides for 6 to 10 reps each.
The goal is not to slide far. The goal is to keep your ribs from popping up, your belly from doming, and your pelvis from rocking side to side. If the heel only moves 8 inches before you lose that control, stop there. That shorter range is your working range.
This move helps reconnect the lower abdominal wall while one leg changes position, which is close to what happens every time you walk, climb stairs, or shift your baby from one hip to the other. If you feel your hip flexors taking over, reset with a longer exhale and think about sliding from your core, not dragging from the thigh.
Three slow reps done well beat 12 rushed ones. Every time.
3. Pelvic Tilts
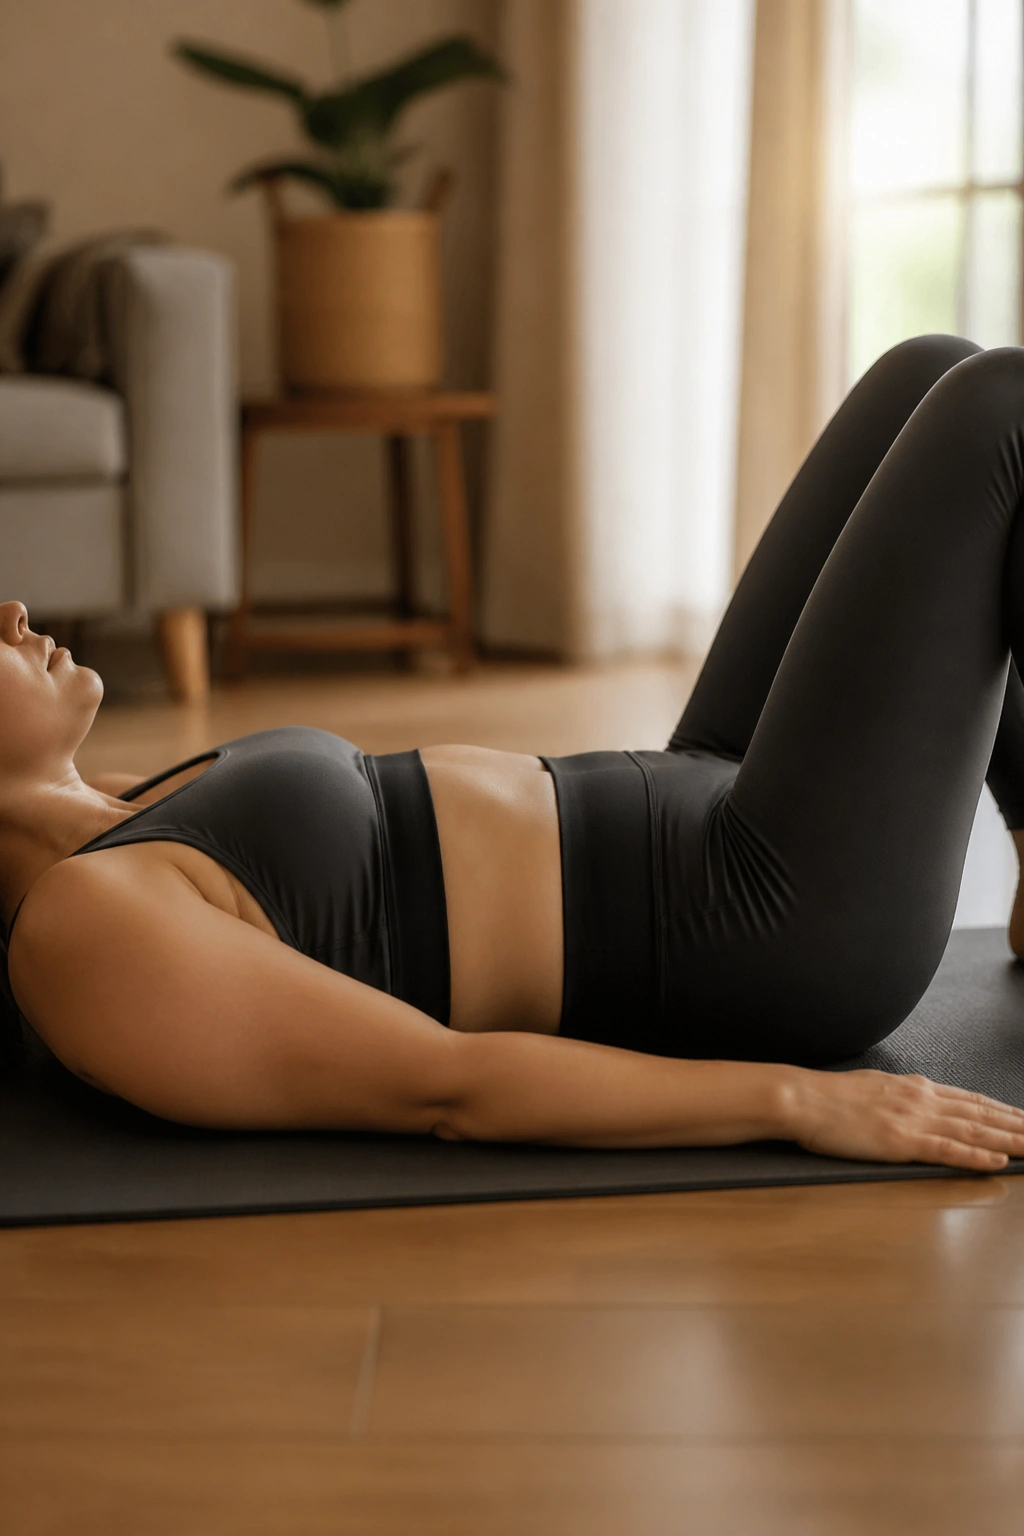
Can a movement that shifts your pelvis an inch count as ab work? Yes—when it teaches you how to move your pelvis without recruiting your whole body into the job.
Lie on your back with knees bent. Inhale to settle. As you exhale, gently tip your pelvis so your low back flattens a little into the floor; inhale and return to neutral. You are not chasing a huge range. This is a small rock, not a dramatic tuck.
Where new moms usually miss it
Some women squeeze their glutes hard and call it a pelvic tilt. Others shove with the feet and turn it into a mini bridge. Neither is what you want here. The abs should guide the motion, with the ribs staying quiet and the neck relaxed.
Pelvic tilts help you learn where neutral is again. After pregnancy, a lot of women live in either an exaggerated arch from feeding posture and carrying, or in a constant tucked-under position because someone told them to “keep the core on” all day. Neither feels good for long.
Try 8 to 12 slow reps, each one paired with a full exhale. If your lower back has been barking every time you stand up from a chair, this small drill often settles things down because it gives you back control over the pelvis-rib relationship.
4. Bent-Knee Fallout
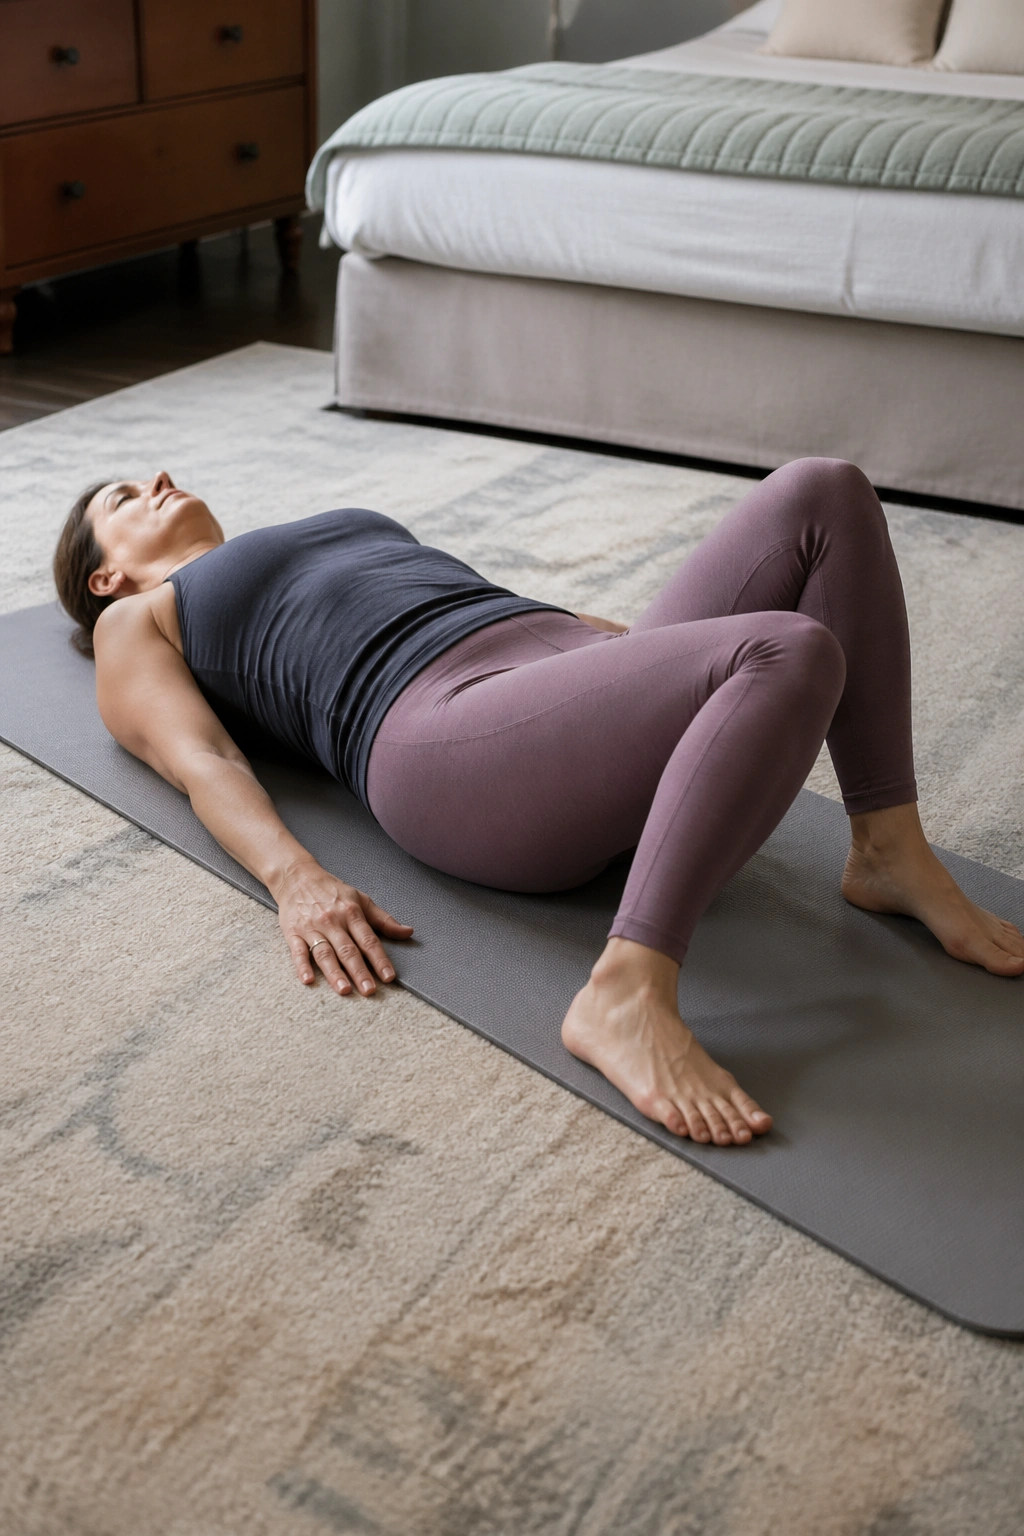
Picture getting one leg into leggings while standing and trying not to wobble. Bent-knee fallouts train that same anti-rotation job in a safer, smaller position.
Start on your back with knees bent and feet hip-width apart. Brace gently on an exhale. Let one knee open out to the side like a book cover, then bring it back in without letting your pelvis tip or your belly bulge upward. Switch sides. Go for 5 to 8 reps per leg.
This one humbles people fast. A knee only moves a few inches, yet the trunk wants to twist with it. That is the point.
Use these checks:
- Keep both sides of your pelvis heavy on the floor.
- Open only as far as you can without the ribs lifting.
- Move slower on the way back in than on the way out.
- Exhale during the hardest part if control starts slipping.
If you had hip tightness late in pregnancy, you may feel the outer hip wake up too. Good. The core and hips are teammates, and postpartum training gets better when you stop treating abs as a body part that works alone.
5. Glute Bridge with Exhale
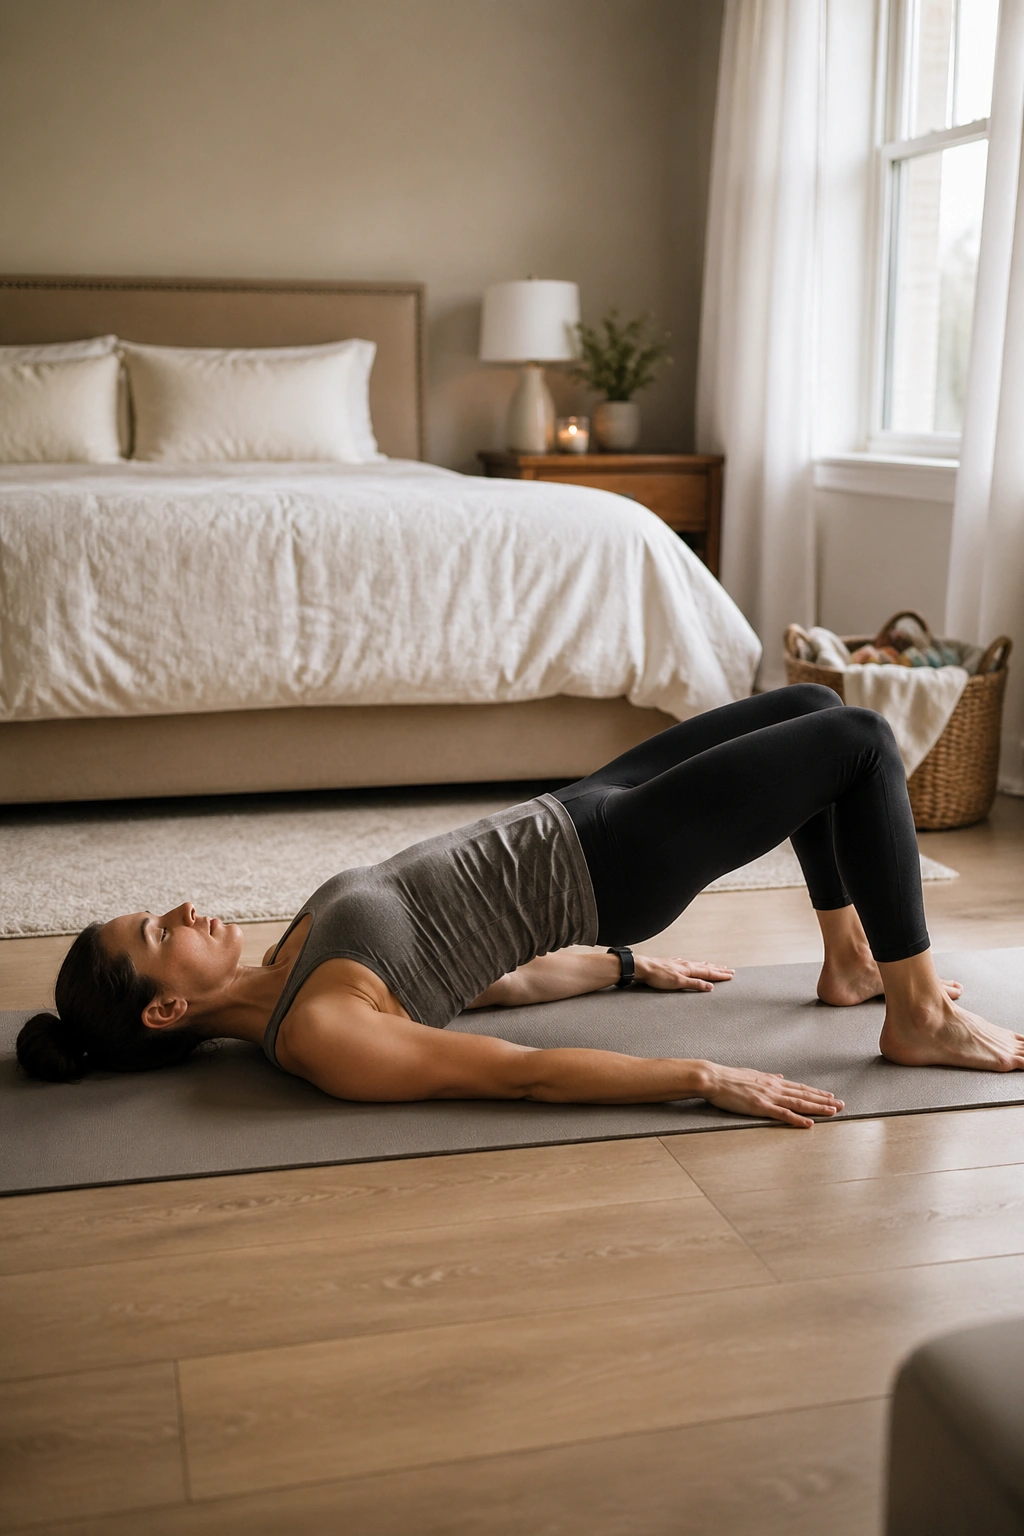
A good bridge is not a backside exercise with the abs added as an afterthought. It is a full trunk-and-hip pattern that teaches you to create tension from the ribs to the pelvis while the hips extend.
Lie on your back with knees bent and heels far enough from your hips that you can brush them with your fingertips. Exhale, gently engage the lower abs, then press through your heels and lift your hips until your body forms a line from shoulders to knees. Pause for 2 seconds. Lower with control. Start with 8 reps.
The mistake I see most often is chasing height. Women lift high, the ribs flare, the low back arches, and the whole thing turns into a lumbar hinge. Skip that. Stop the bridge where your glutes are working and your front ribs still feel knitted down.
If you had a C-section, this move can feel fine once your clinician has cleared you, though the scar area may feel odd before it feels normal. That tugging sensation does not always mean harm, but pain does. There is a difference.
Want more from it without making it messy? Exhale as you lift, inhale at the top, exhale again as you lower halfway, then finish the descent. That breathing rhythm keeps the abs in the conversation instead of letting the lower back steal the set.
6. Seated March with Core Brace
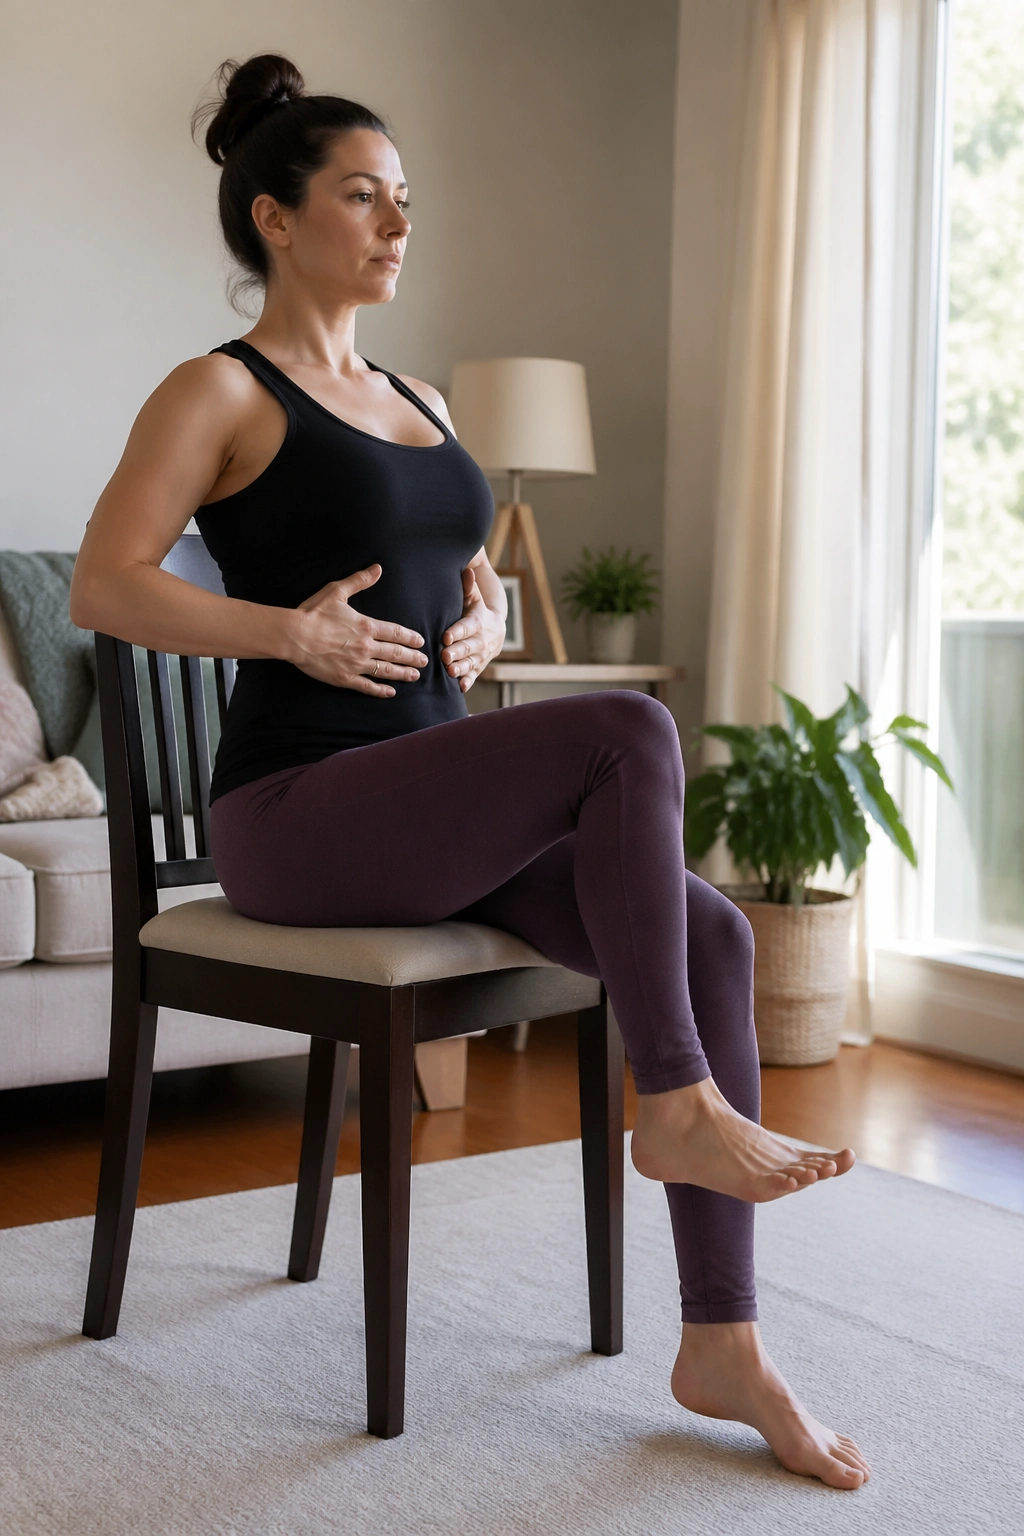
Unlike floor-based postpartum ab exercises, the seated march puts your core to work in a position you actually live in—feeding, rocking, driving, sitting on the edge of the bed after a rough night.
Sit tall on a firm chair or bench, feet flat, hands on your lower ribs. Stack your ribs over your pelvis instead of leaning back into the chair. Exhale, brace lightly, and lift one foot 1 to 2 inches off the floor without shifting your torso. Set it down. Alternate sides for 10 to 16 total lifts.
This sounds tame. It is not, once you do it with strict form.
The trick is to stop the lean. If your body rocks backward every time a knee lifts, the hip flexors are doing the heavy work and your abs are watching from the sidelines. Sit tall, move smaller, and think about narrowing the front of your waist on the lift.
This one is also useful for women who are not ready to spend much time on the floor, or who have wrist pain, scar sensitivity, or a clingy baby who only naps in a carrier. Two rounds of 30 seconds can be enough to feel the lower abs turn on in a clean way.
7. Dead Bug Heel Taps
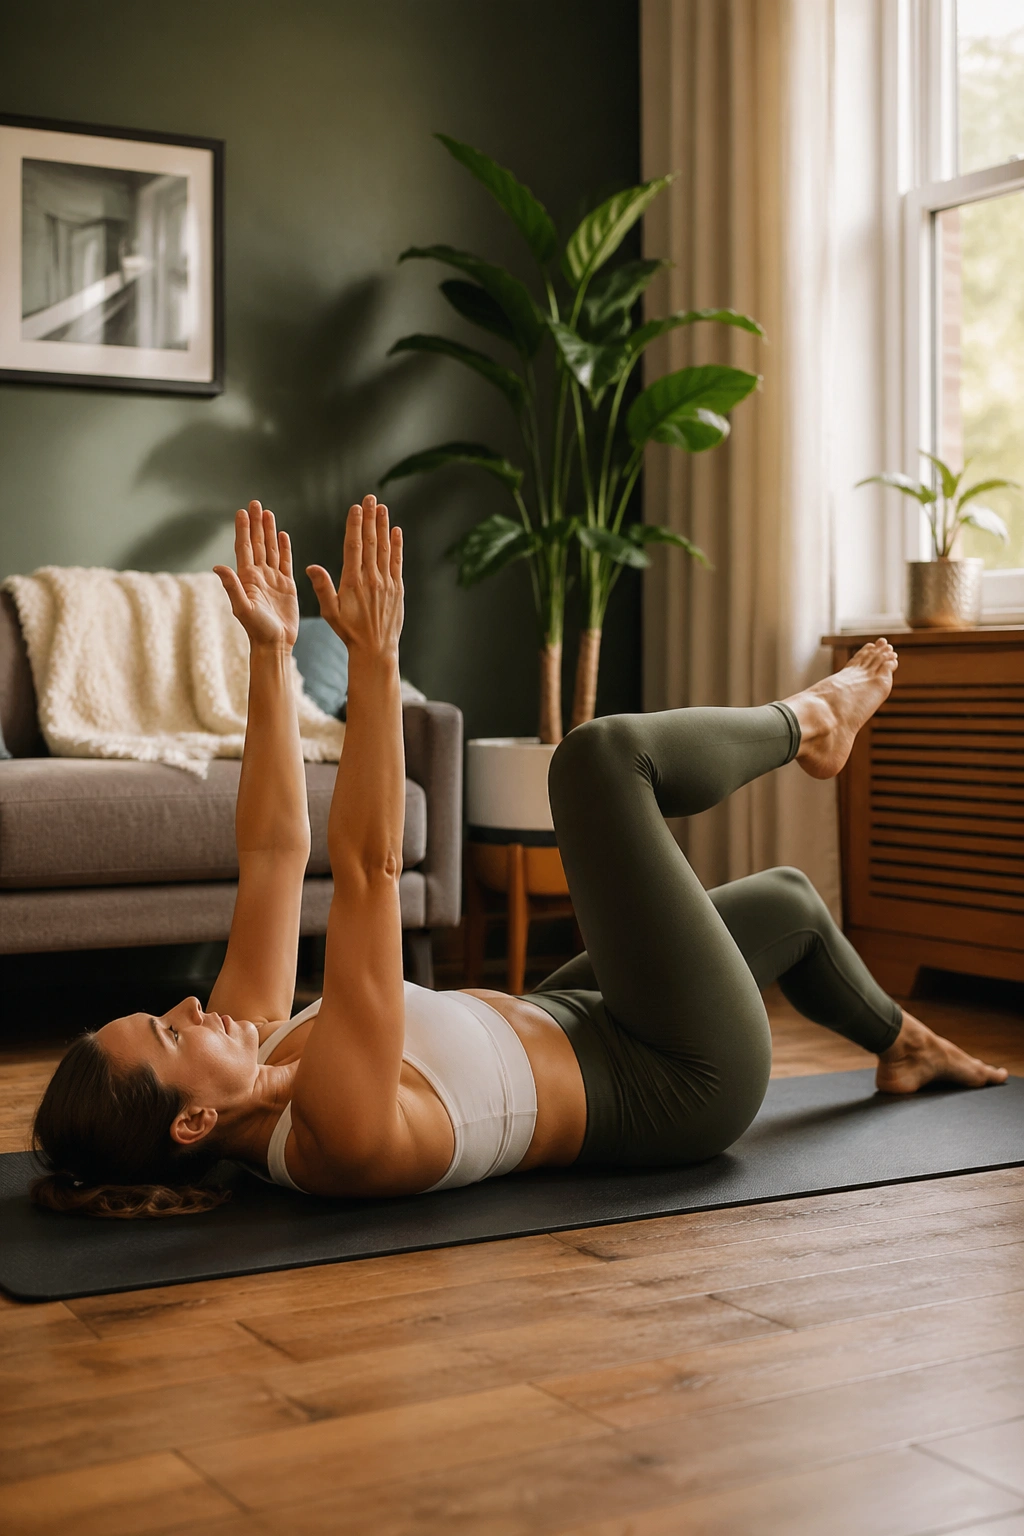
This move tells the truth. If your ribs flare or your belly tents upward, the challenge is too high and your deep core is not managing the load yet.
Lie on your back and bring both hips and knees to 90 degrees, shins parallel to the floor. Reach your arms to the ceiling or place your hands on your ribs if that helps. Exhale to brace. Lower one heel toward the floor, tap lightly, and return. Alternate for 5 to 8 reps each side.
Form checks that matter
The lower back should stay heavy but not smashed flat. Your breath should keep moving. And the tap should be quiet.
A few cues I like here:
- Start with one leg only. There is no prize for making it harder too early.
- Bend the knee more if the leg feels too heavy.
- Shorten the range before you lose rib control.
- Stop the set if you feel neck tension taking over.
Dead bugs are a staple in postpartum core rehab for a reason. They train limb movement against a steady trunk, which is what your body needs every time one arm reaches for a diaper wipe while the other holds a squirming baby.
8. Bird Dog Reach
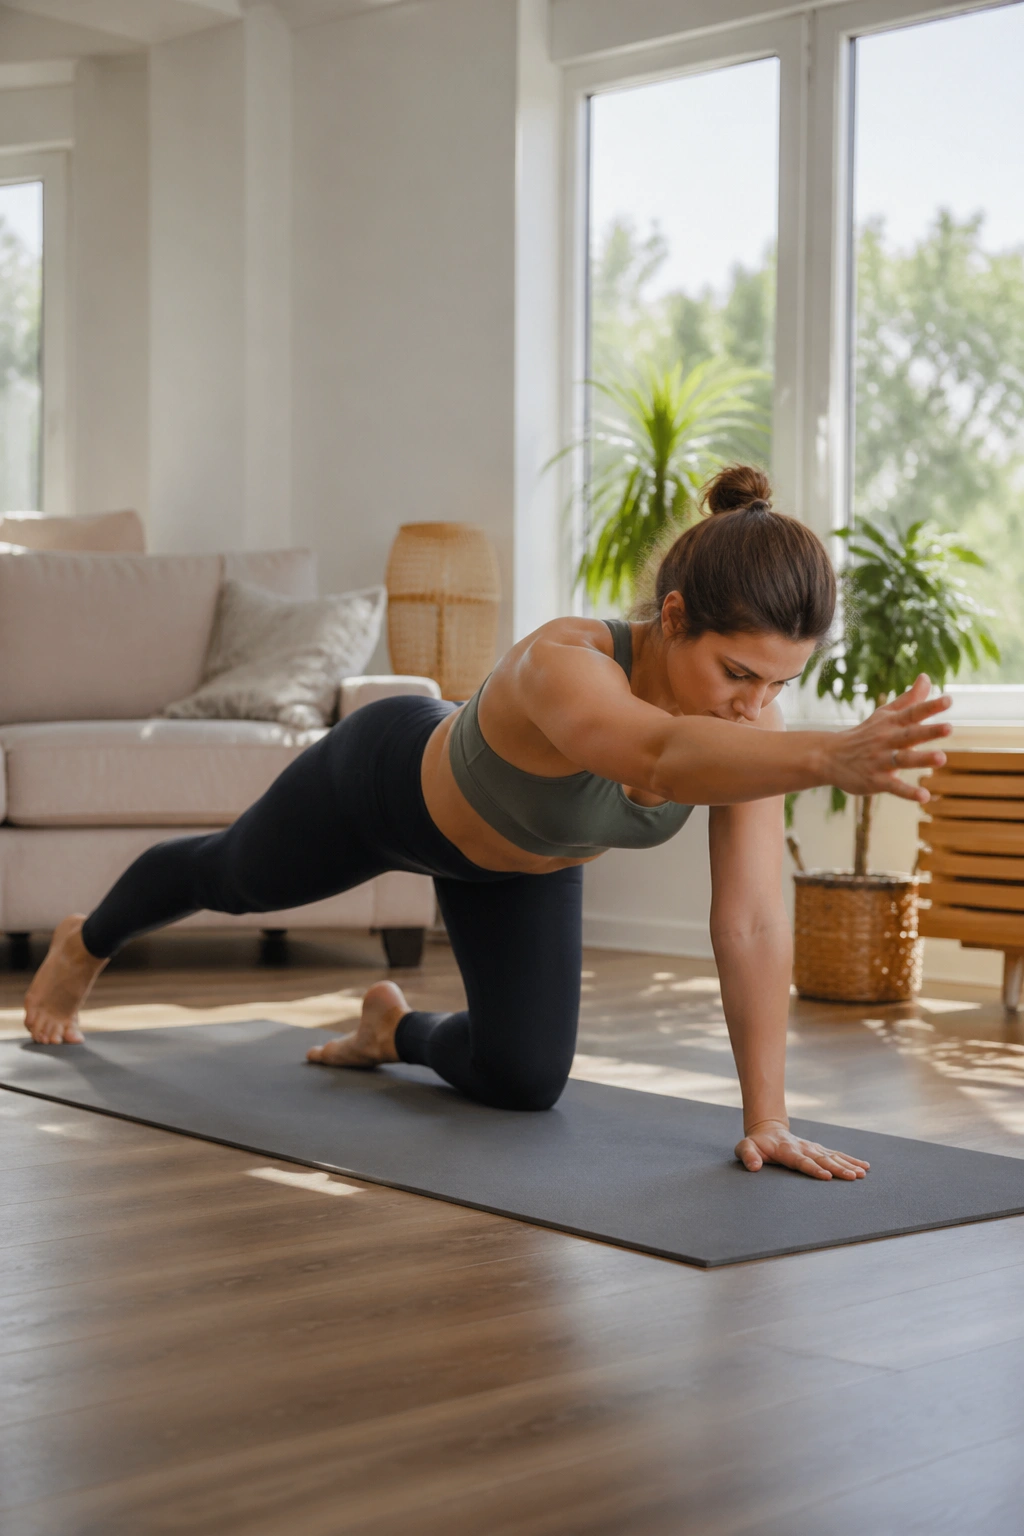
Four points on the floor can teach your abs a lot. Bird dog is less about lifting high and more about resisting rotation while breathing.
Set up on hands and knees with wrists under shoulders and knees under hips. Before lifting anything, press the floor away so the upper back is broad, then exhale and slide one leg straight back with the toes grazing the floor. If you can keep the ribs and pelvis steady, lift that leg slightly. Add the opposite arm only after the leg version feels controlled.
Many new moms rush to the full arm-and-leg version, and the result is a loose rib cage, a swinging pelvis, and a head craned up like they are posing for a photo. Bring it down. The long line matters more than the height.
This exercise shines because it ties together shoulder stability, trunk control, and hip extension. Those pieces matter when you carry a car seat one-handed, lean into a crib, or push open a heavy door while holding a baby on the other side.
Try 4 to 6 slow reps per side with a 2-second reach. If your wrists complain, make fists, use yoga wedges, or put your hands on a bench. There is no reason to suffer through wrist pain to train your core.
9. Wall Plank Hold
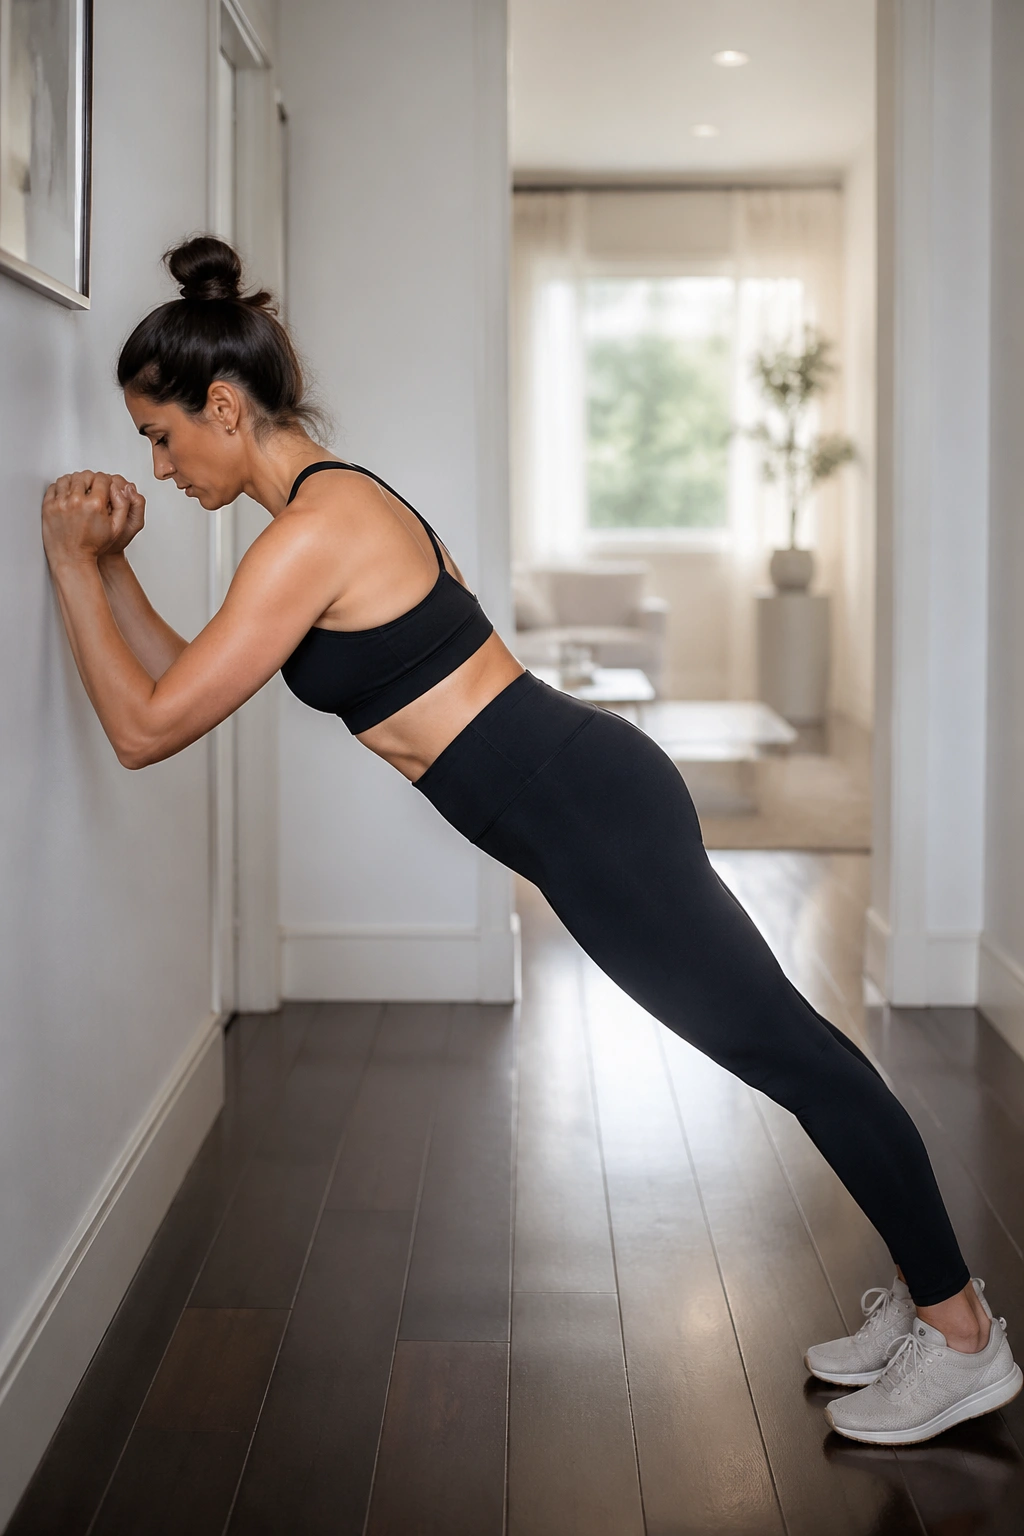
Not ready for floor planks? Good judgment. A wall plank lets you train the plank shape without dropping your entire body weight onto a healing trunk.
Stand facing a wall with forearms or palms on the surface at shoulder height. Walk your feet back until your body forms a straight line from ears to ankles. Exhale, tighten the front of your torso, and hold 15 to 30 seconds while breathing steadily.
The farther your feet are from the wall, the harder it gets. That makes progression easy and honest. A countertop plank is harder than a wall plank. A bench is harder than a countertop. The floor comes later, not first.
Your main job is to keep the ribs from drifting forward and the low back from sagging. Think about lightly tucking the front ribs down and pushing the wall away. If your shoulders shrug toward your ears, soften the neck and spread the shoulder blades.
Wall planks are one of my favorite postpartum ab workouts because they fit into real life. You can do a set while the kettle heats or after you brush your teeth. Small windows add up faster than one ideal workout that never happens.
10. Pallof Press with a Band
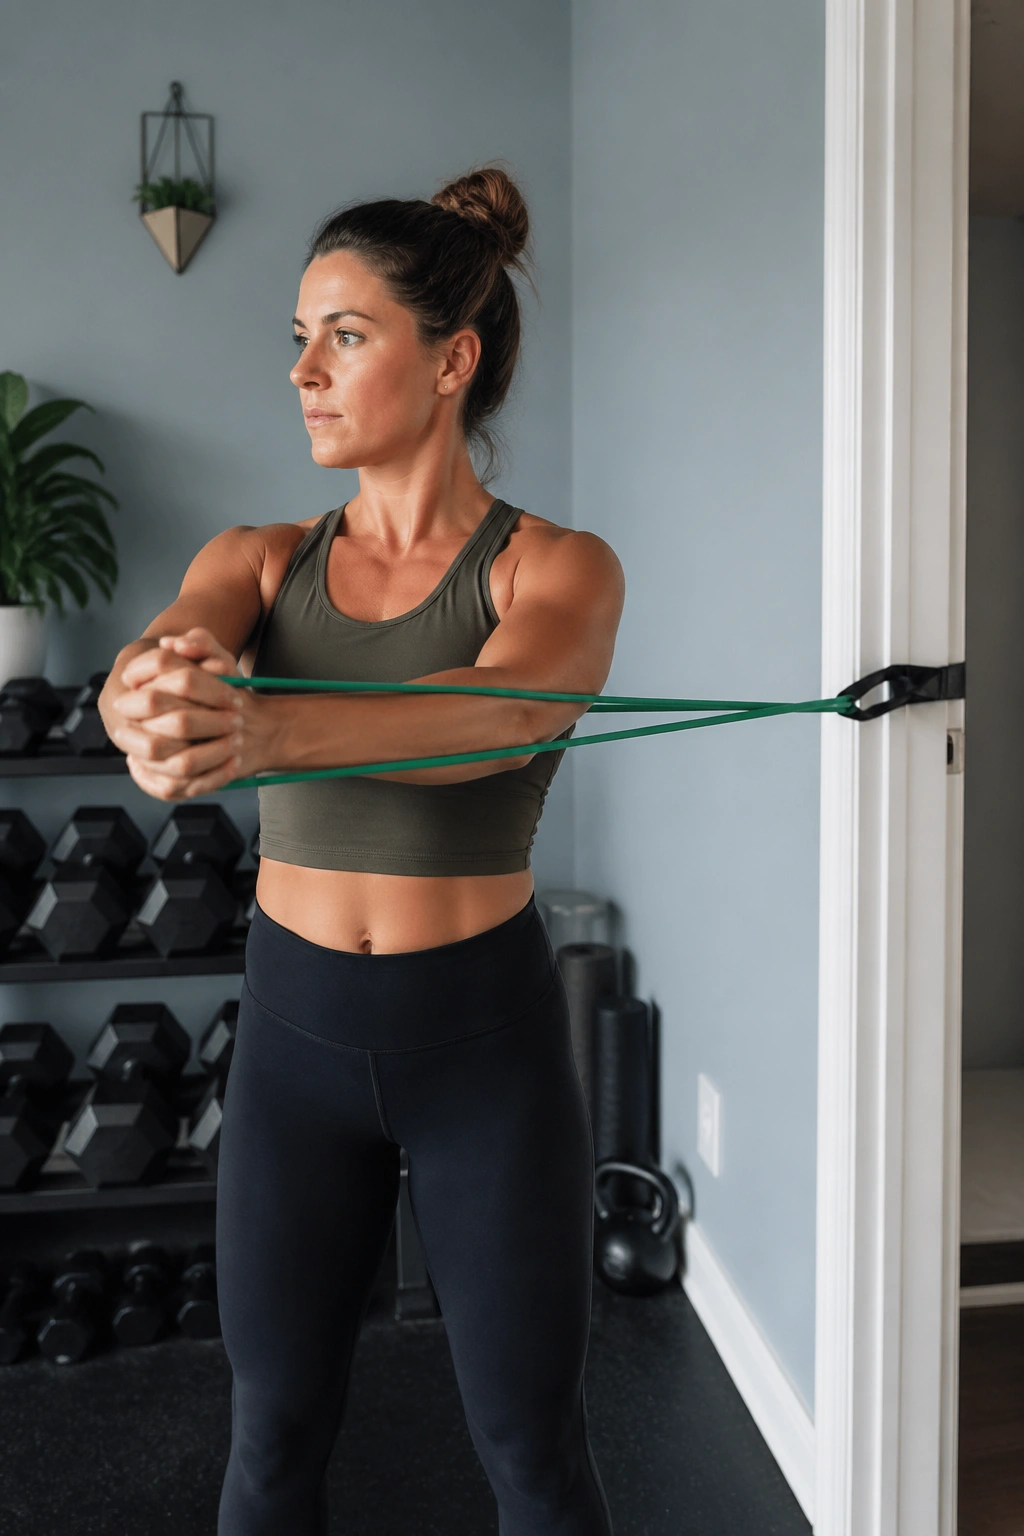
Tie a light resistance band to a solid anchor at chest height, stand sideways to it, and hold the handle or band at your sternum. The band wants to twist you; your abs say no. That is anti-rotation work in plain language.
Step away from the anchor until there is light tension. Stand with feet hip-width apart and soft knees. Exhale, brace, and press the band straight out from your chest. Hold for 1 to 2 seconds. Bring it back in without letting your torso turn. Do 8 to 10 reps, then face the other way.
This exercise earns its spot because postpartum life is full of crooked loads. Baby on one hip. Diaper bag on one shoulder. Laundry basket pulled from one side. Anti-rotation strength keeps those daily twists from dumping stress into your back or pelvic floor.
A few details make a big difference:
- Keep your breastbone stacked over your pelvis.
- Press straight out, not upward.
- Start with a thin band. Heavy tension can wreck form fast.
- Exhale as the arms extend if you need more support.
If standing feels shaky, try a half-kneeling version later in the list. Same idea. Less wobble.
11. Modified Side Plank from the Knees
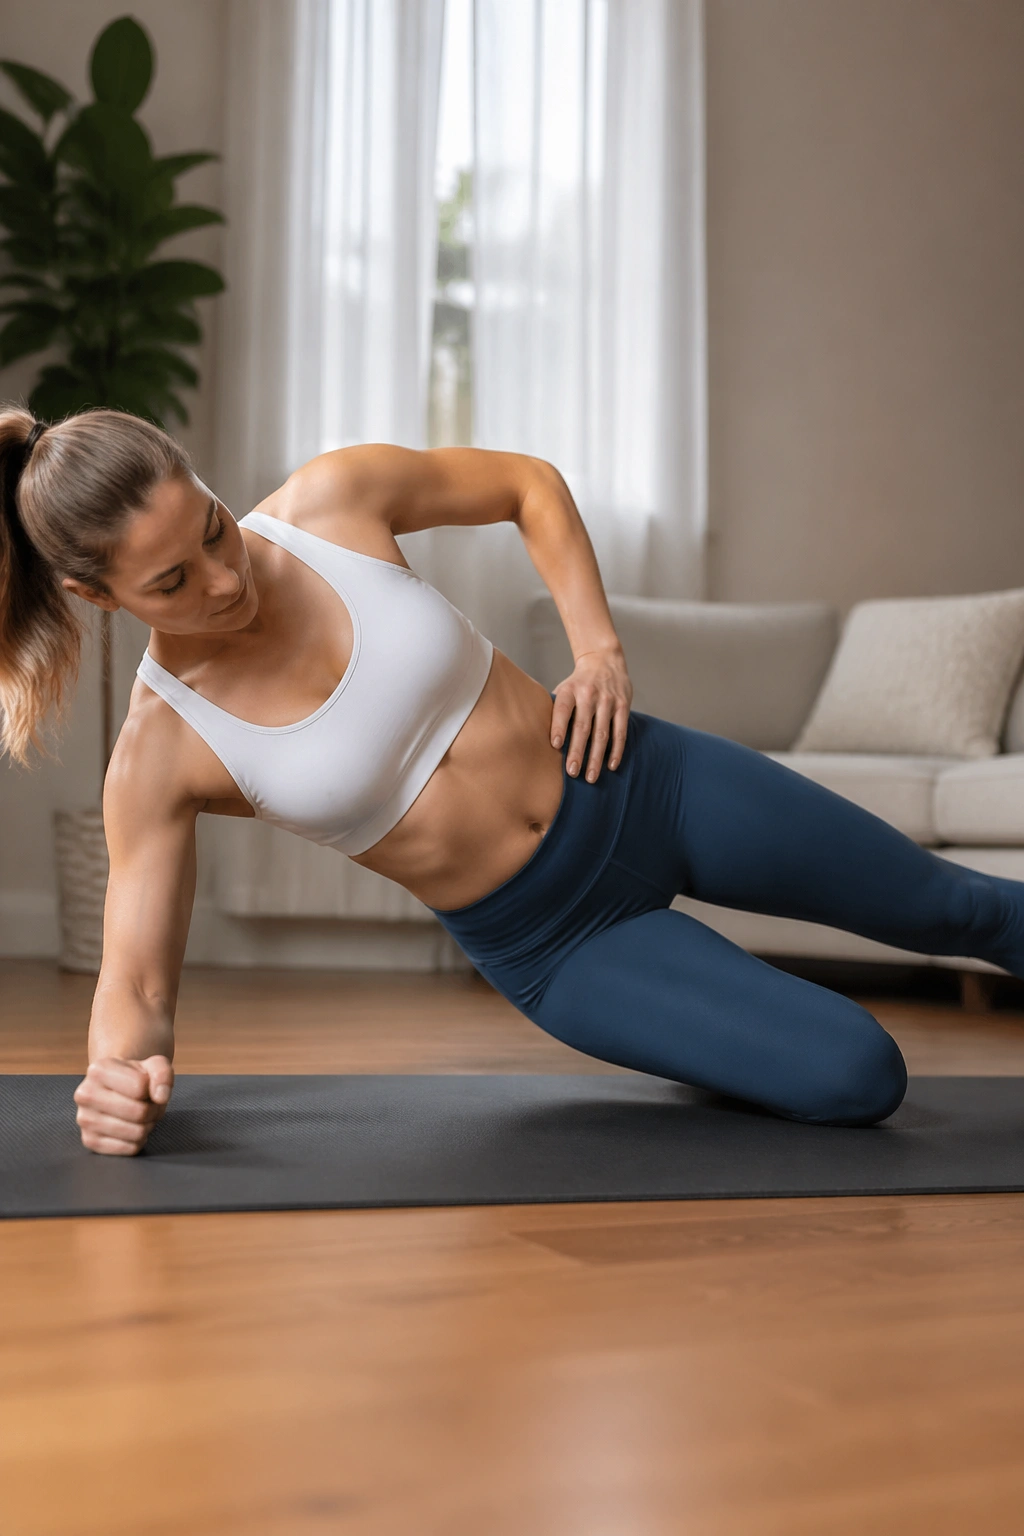
The side body gets ignored in a lot of postpartum training, and that is a mistake. Your obliques help manage pressure, support the trunk, and control side-to-side sway when life has you carrying things unevenly all day.
Set up on one forearm with the elbow under the shoulder, knees bent about 90 degrees, and hips stacked. Lift your hips so your body forms a line from shoulders to knees. Hold 10 to 20 seconds, lower, then repeat for 2 to 4 rounds per side.
This is one of those moves that looks harmless until you try to breathe in it. The bottom waist, top oblique, and shoulder all have to do honest work. If the top shoulder rolls forward or the hips drift back, reset before the hold gets longer.
Do not chase a long time here at the start. A crisp 10-second hold with steady breathing is worth more than 30 seconds of shaking and rib flaring. You can also place your top hand on your lower ribs to feel whether they are popping upward.
Moms with pelvic heaviness often do better with short holds than with high-rep twisting moves. Short holds give the deep system time under tension without the repeated pressure spikes that can show up with faster exercises.
12. Sit-to-Stand with Front Reach
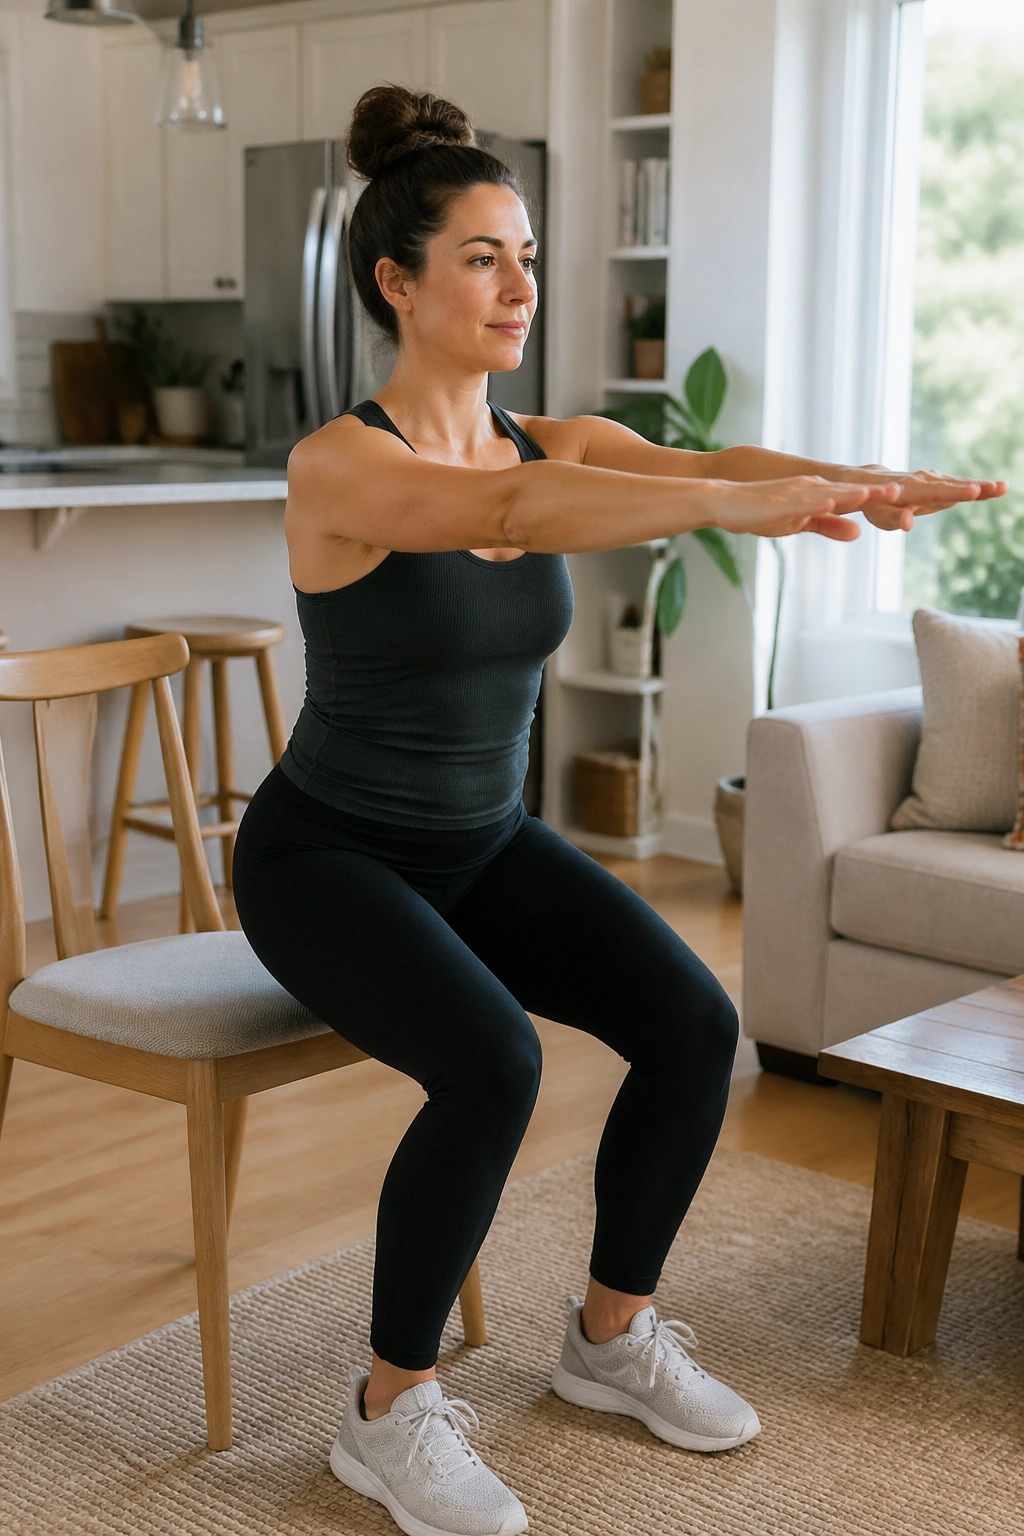
Unlike crunches, this one trains your abs while you do a movement you cannot avoid in daily life. Standing up from a chair while holding your trunk steady is useful strength, not decorative strength.
Sit on a chair with feet about hip-width apart and shins vertical. Reach your arms forward at shoulder height. Exhale, lean slightly from the hips, brace the lower abs, and stand without throwing your ribs upward. Sit back down slowly. Aim for 8 to 12 reps.
The arm reach acts like a counterbalance, which helps many new moms stand without yanking from the lower back. It also makes you manage the front of the trunk through the whole motion, especially on the way down.
If the exercise feels too easy from a tall chair, lower the seat height by an inch or two. If it feels rough, add a pillow to raise the seat. Tiny setup changes matter here. So does pace. A 3-second lower can light up the abs more than a rushed set with a heavier load.
This move also works nicely in the blur of home life. No mat. No floor transition. No fuss.
13. Toe Taps at 90 Degrees
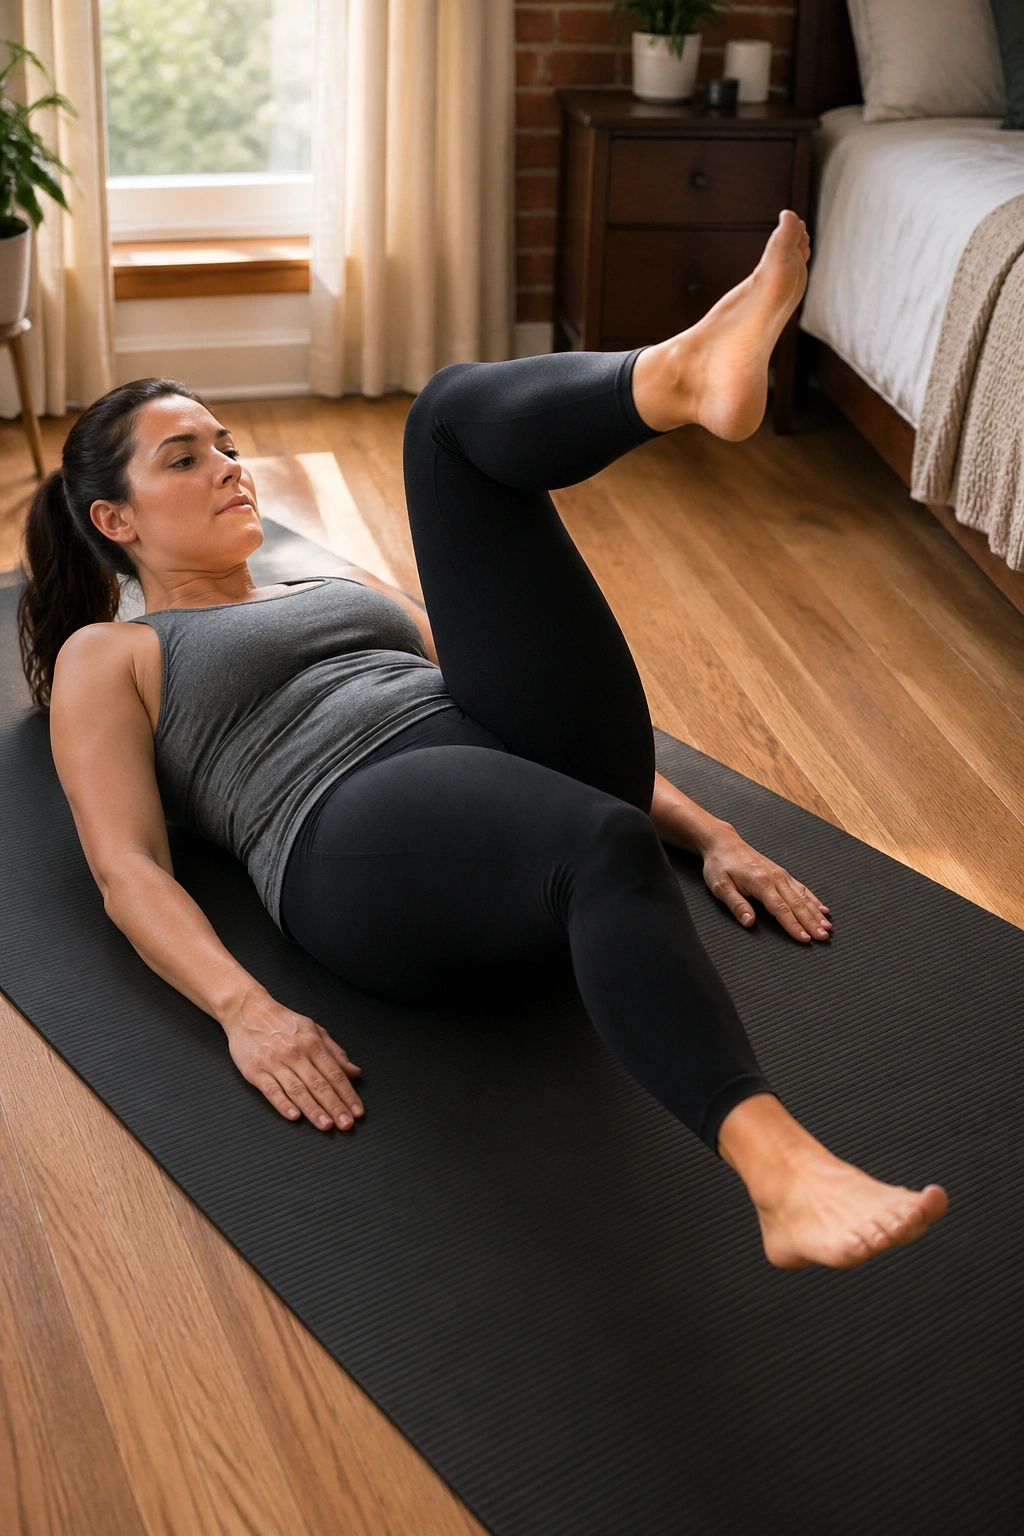
Lifting both legs is not the hard part. Holding your trunk still while one foot taps the floor is the hard part.
Start on your back with both hips and knees at 90 degrees. Exhale to brace. Lower one foot toward the floor by bending at the hip and knee until the toes tap down, then return to the start and switch sides. Move for 6 to 10 reps per leg.
Make this one work for you
If your belly domes, shorten the range. If your neck grips, support your head with a folded towel. If your back arches off the floor, reset and use a longer exhale before the tap.
Toe taps sit a notch above heel slides because both legs begin off the floor, which gives your abs a bigger anti-extension job. They are a solid bridge between early postpartum core exercises and heavier work later on.
You should feel the lower abs and deep front trunk doing the work, not a pinchy lower back or burning hip flexors. When done well, the movement is smooth and quiet—almost boring to watch, which usually means it is doing its job.
14. Suitcase Carry
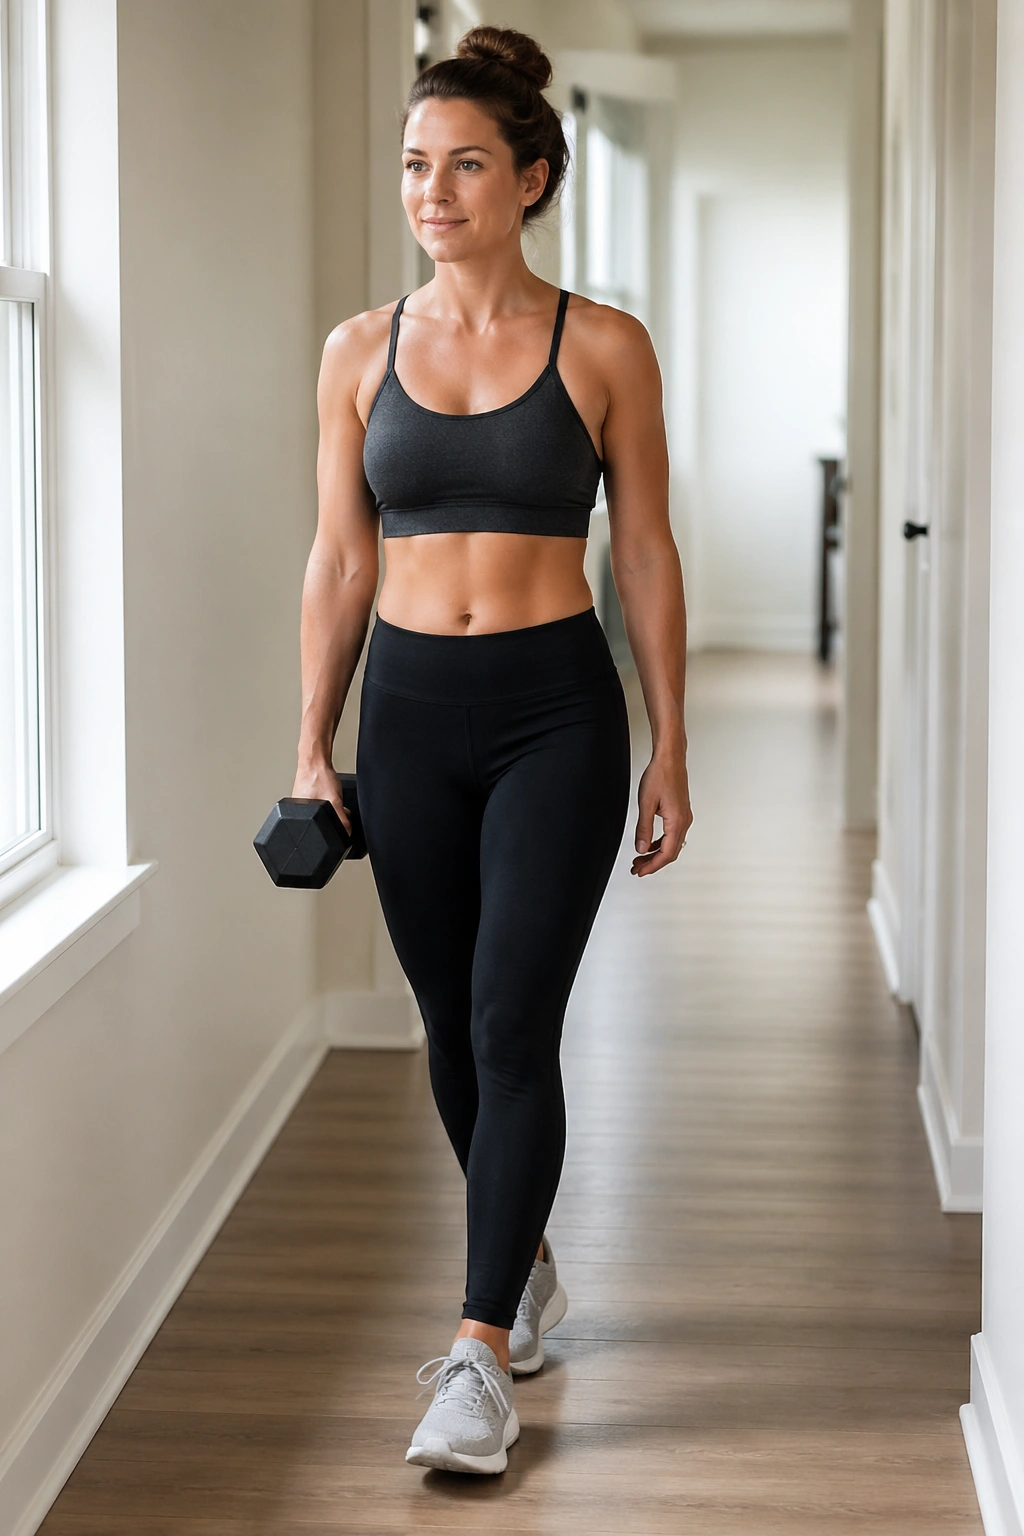
One dumbbell. One side. Walk. That is ab training.
Hold a weight in one hand at your side and walk 20 to 40 slow steps without leaning toward or away from the load. Switch hands and repeat. Start with a weight that feels noticeable by step 10 but does not drag your shoulder down—often 10 to 25 pounds works for a first pass, though body size and training history change that.
The abs, obliques, spinal stabilizers, and even the feet have to organize fast during carries. That is why this exercise feels so different from mat work. It is core strength standing up, which is how most of motherhood happens.
There is also a nice bit of irony here: many new moms already do crooked carries all day without thinking of them as training. A baby on one side, a bag on the other, a stroller handle pulled from the wrist instead of the back. The suitcase carry gives you a cleaner, more controlled version of that stress so your body can get better at it.
Walk tall. Keep the ribs stacked. Let the free arm swing like a normal gait. If you wobble, the weight is too heavy or the distance is too long.
15. Half-Kneeling Band Press-Out
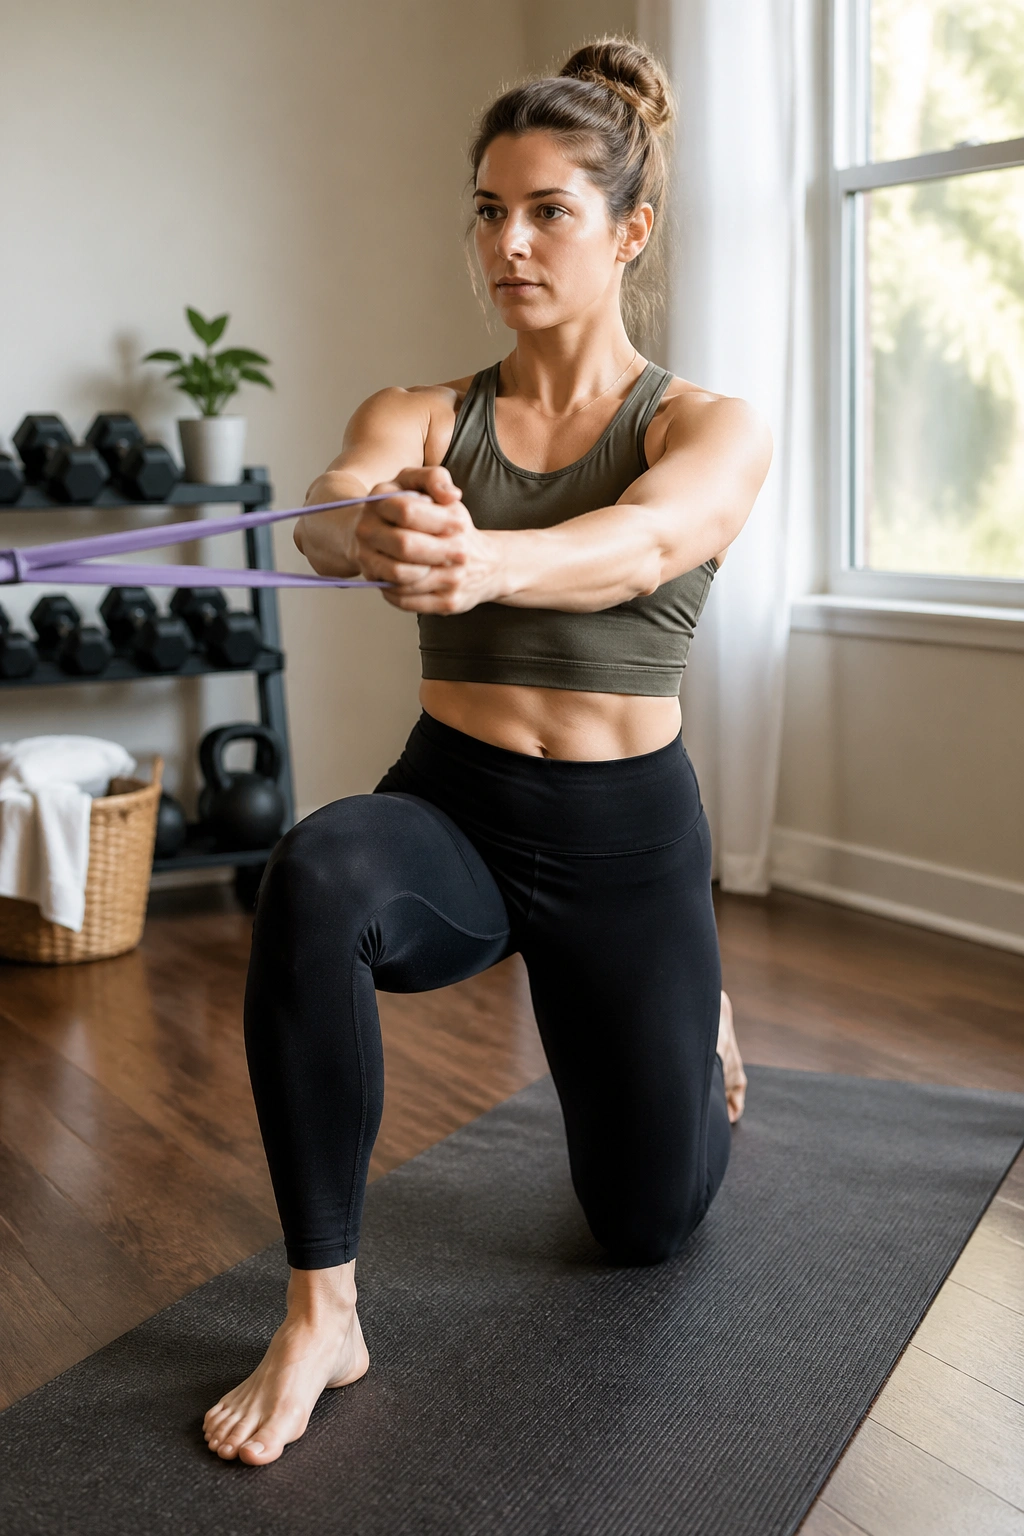
Why kneel for an ab exercise? Because half-kneeling narrows your base, lines up the pelvis under the ribs, and makes cheating harder.
Set up with one knee down and the other foot forward, both knees at about 90 degrees. Hold a light band at your chest, anchored to the side like a Pallof press. Exhale and press straight out. Pause for 2 seconds. Return for 8 reps, then switch sides and switch which knee is down.
This setup strips away momentum. You cannot lean back much, your glutes have to stay awake, and your trunk has to resist the band’s pull without shifting over the front foot.
If balance is shaky, widen your stance so the front foot sits a few inches farther from the midline. If kneeling bugs your knee, fold a thick mat or pillow under it. You should feel challenged, not distracted by pressure on the kneecap.
The half-kneeling press-out is a sneaky step up from standing anti-rotation work. It asks more of the hips and trunk while staying controlled enough for a postpartum body that is still rebuilding from the middle out.
16. Bear Hover Hold
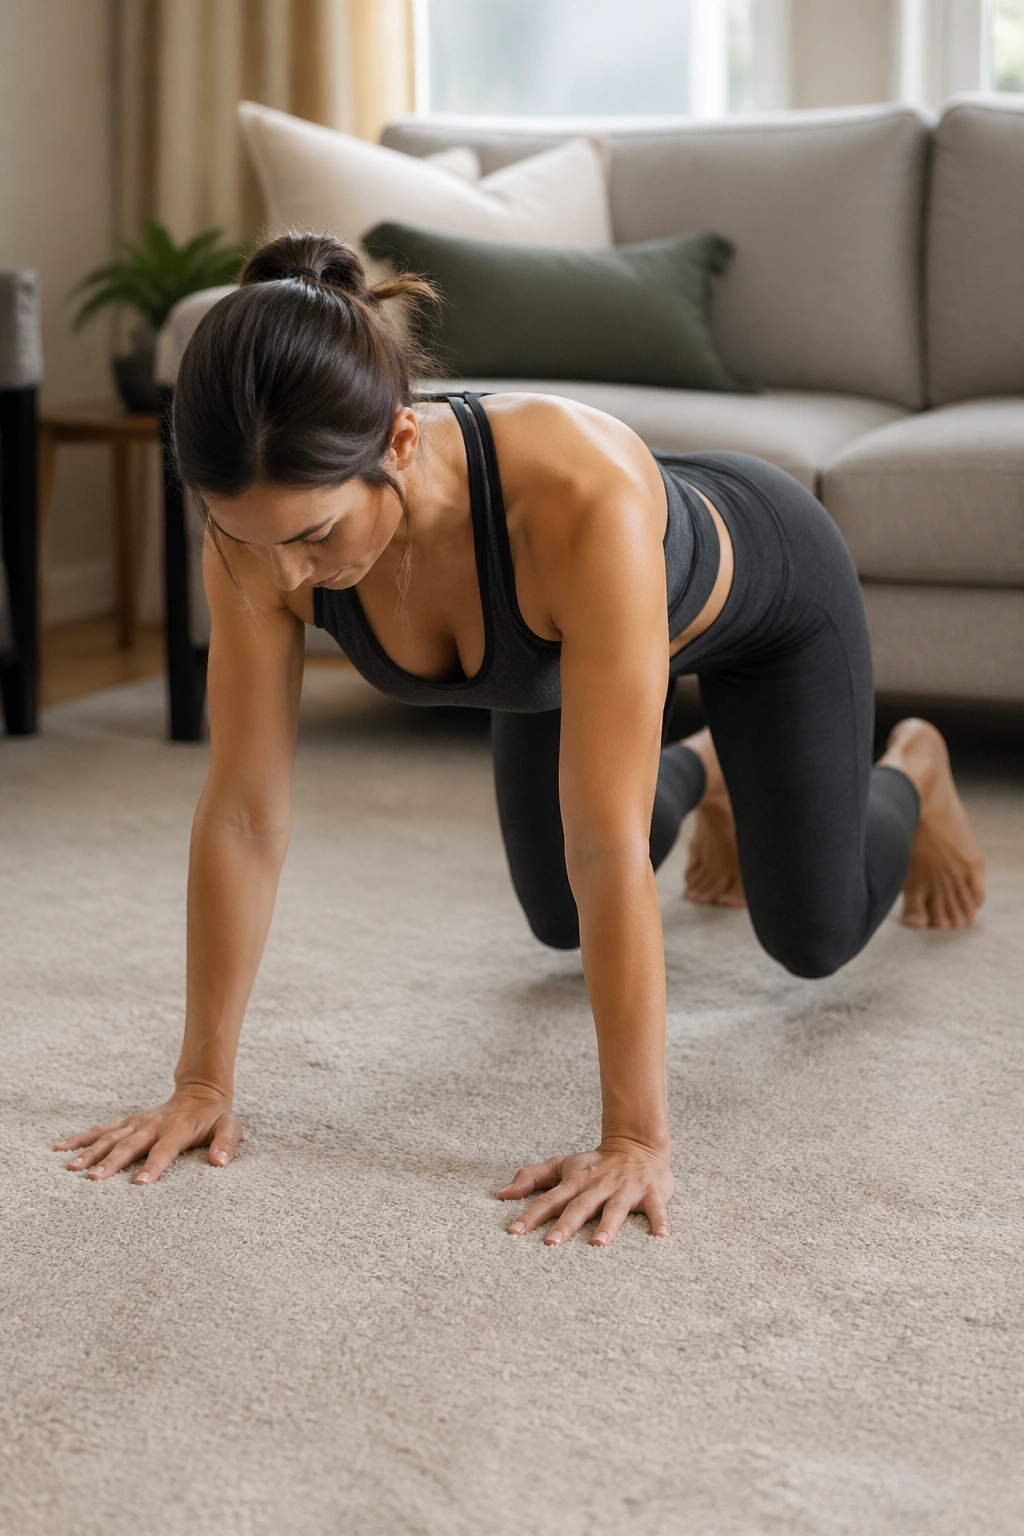
Few exercises light up the whole trunk faster than a 10-second bear hover. It is one of the clearest tests of whether your postpartum core can manage pressure under load.
Start on hands and knees with toes tucked. Exhale, brace, and lift your knees 1 to 2 inches off the floor. Hold for 5 to 10 seconds while breathing quietly, then lower. Do 4 to 6 rounds.
This is not an early move for everyone. If you still see doming, feel pelvic heaviness, or cannot keep your back flat without breath-holding, stay with bird dogs, wall planks, and dead bug variations longer. There is no rush.
When the bear hover fits, it is gold. The abs, obliques, shoulders, hip flexors, and deep spinal muscles all have to cooperate, and they have to do it without drama. That is harder than it sounds after pregnancy.
Your knees stay low. Your gaze stays down. Your ribs do not sag. And your breath keeps moving. If the body turns into one big shake within 2 seconds, that is a sign to shorten the hold or regress. A solid 6-second hover beats a sloppy 20-second grind every time.
17. Standing Band Chop
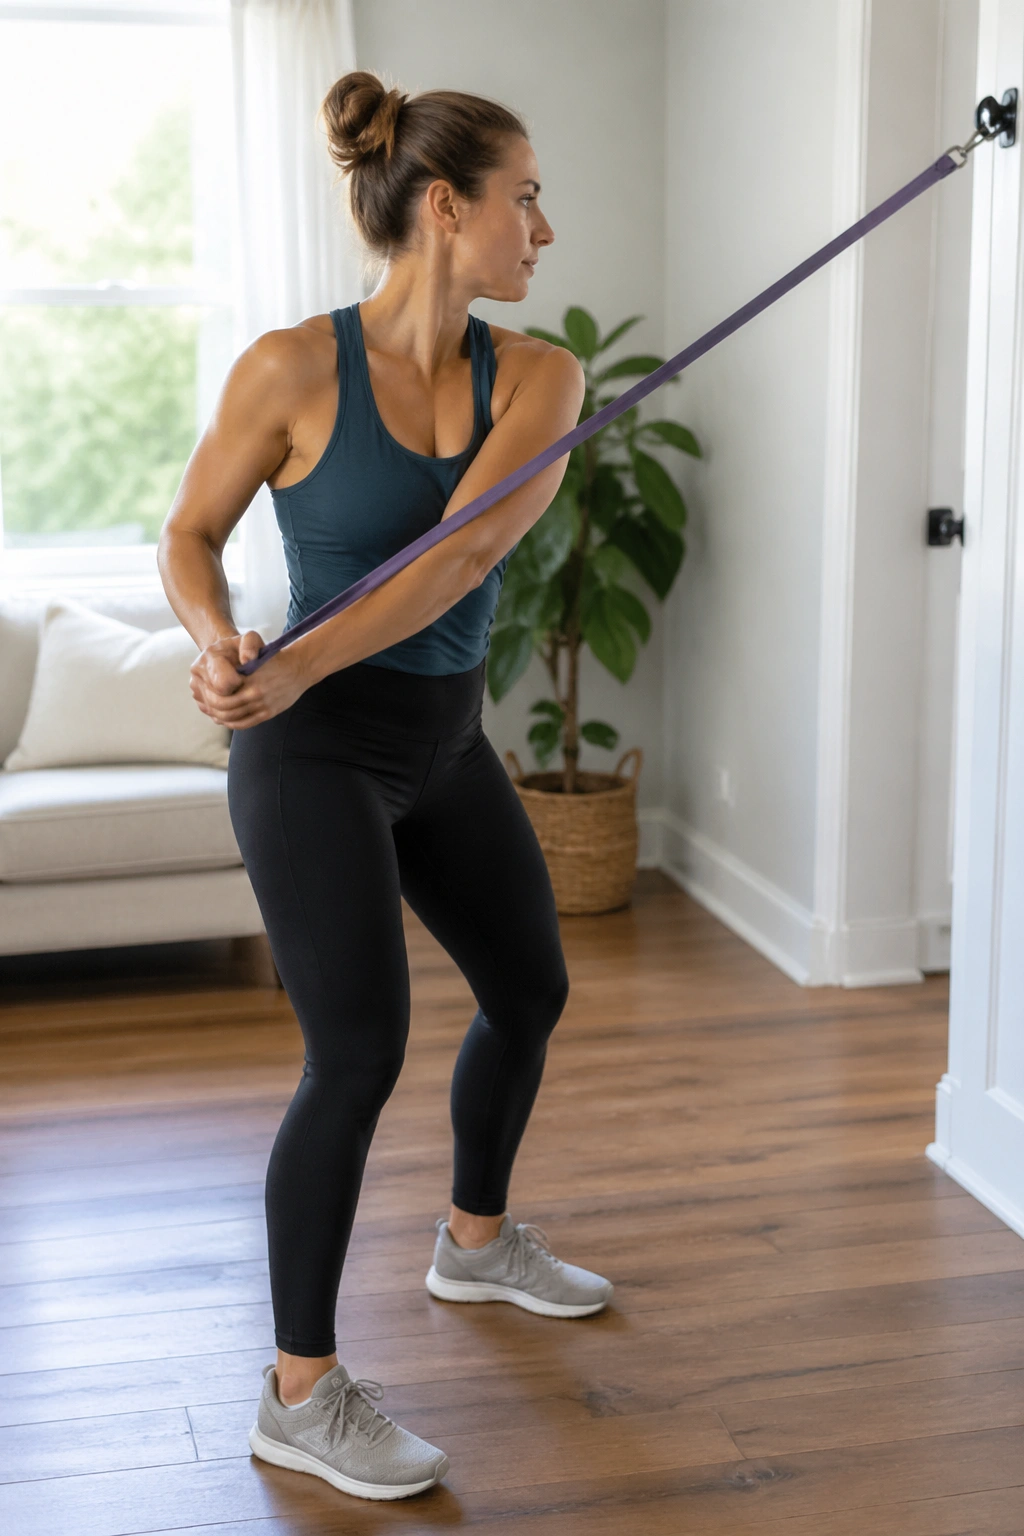
Reaching across the body and pulling down is a pattern you use more than you think—grabbing a wet towel from the washer, pulling a car door shut while turning, hauling something from a shelf. The standing band chop trains rotation with control rather than letting the low back absorb it.
Attach a light band above shoulder height. Stand sideways to the anchor and hold the band with both hands. Pull it diagonally across your body toward the opposite hip while exhaling and keeping the ribs stacked over the pelvis. Return with control. Do 8 to 12 reps per side.
The mistake here is turning it into a wild torso swing. The chop should come from the shoulders moving over a steady trunk with a small, controlled body turn if you choose to add one. If the lower back twists first, the load is too high or the range is too big.
Use these guardrails:
- Keep your feet planted at first.
- Let your eyes follow your hands.
- Finish near the hip, not behind it.
- Move slower on the return.
This is one of the first rotational postpartum ab workouts I like after anti-rotation work feels solid. You earn rotation by proving you can resist it first.
18. Incline Forearm Plank
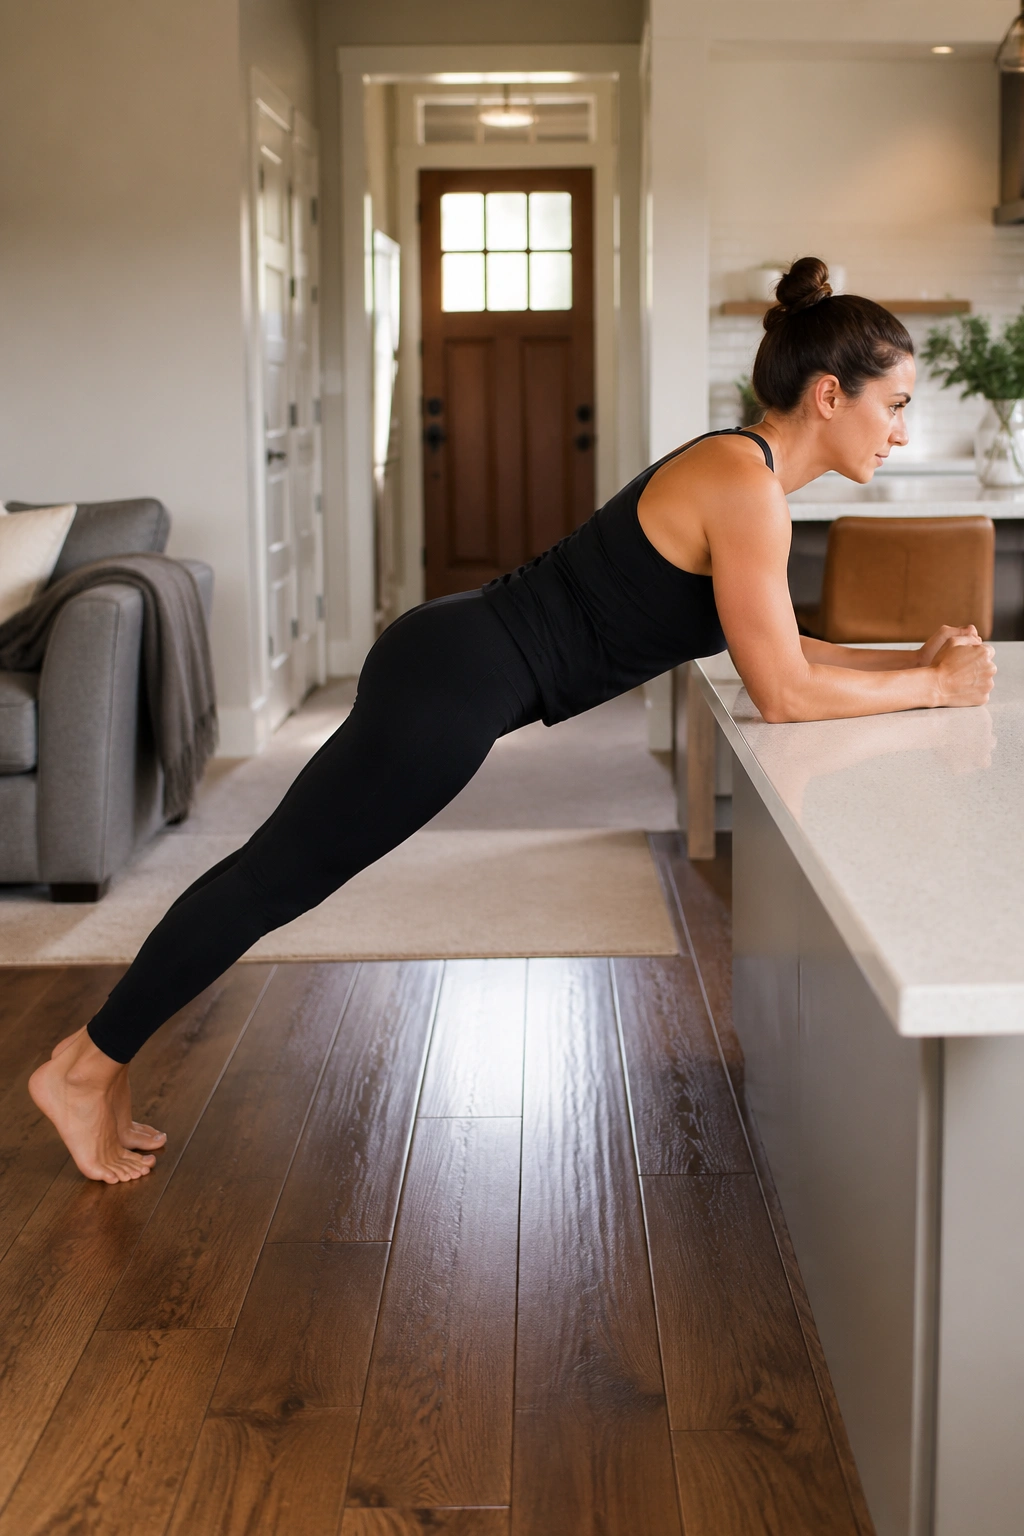
Want a plank that respects healing tissue more than a floor plank? Raise the surface. An incline changes the load enough that you can train the pattern without dumping pressure into the abdominal wall.
Place your forearms on a bench, sturdy couch edge, countertop, or even a dresser that will not slide. Step your feet back until your body forms a straight line. Hold 15 to 30 seconds, breathing in through the nose and out through pursed lips. Repeat 2 to 4 times.
The incline lets you dial the challenge with precision. A high kitchen counter is easier than a low bench. That small change can be the difference between a clean set and a belly that domes by second five.
I like forearms here because they stop people from overusing the chest and shoulders, though hands-on-bench planks work too. Push the surface away, keep your glutes lightly on, and think about drawing your front ribs toward your pelvis without curling into a ball.
If you had a strong plank before pregnancy, this regression may bruise the ego a little. Let it. The goal is not to prove anything to the floor. The goal is to rebuild pressure control so the next progression has somewhere solid to go.
19. Reverse Lunge with Cross-Body Reach
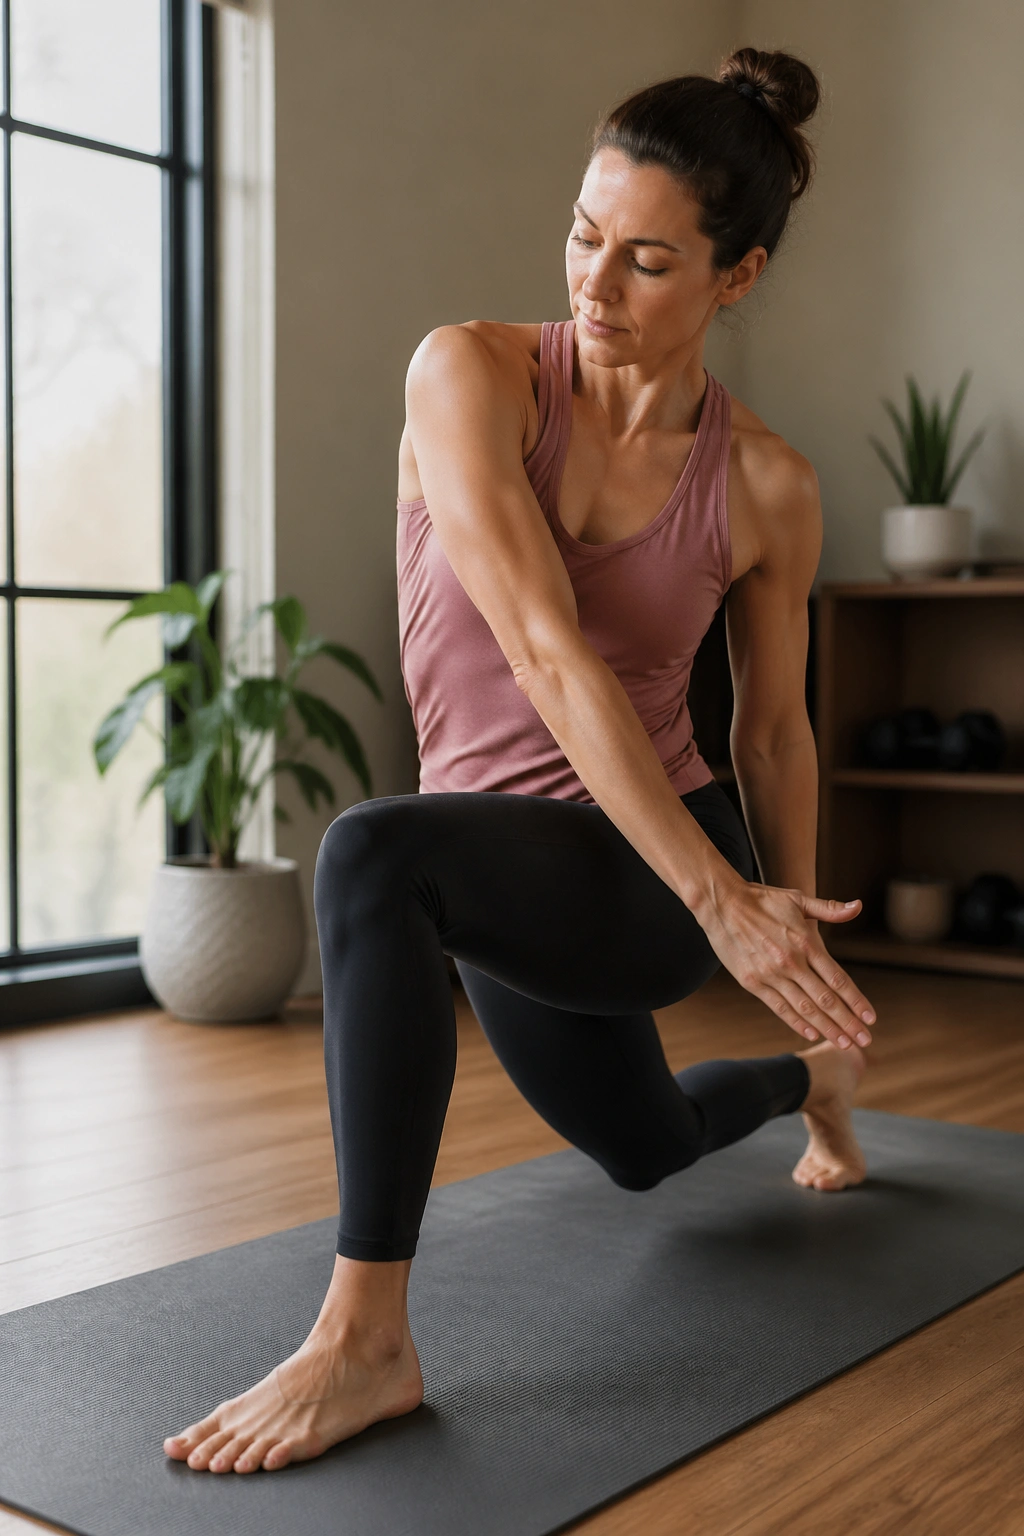
This is the first move on the list that feels like full-body training in the usual sense. The reverse lunge with a cross-body reach makes your abs stabilize while your hips and legs do real work.
Stand tall. Step one leg back into a small reverse lunge while reaching both hands across your front thigh, as if placing a light bag beside that front foot. Exhale as you rise back up. Do 6 to 8 reps per side. Start with body weight, then add a 5- to 10-pound dumbbell once your trunk stays steady.
The cross-body reach gives the abs a rotational challenge, but the lunge base keeps it grounded in a movement pattern that carries over to real life—picking things up, turning, standing, carrying, repeating. That is the whole job description of motherhood.
When this belongs in your plan
Use this after you can handle carries, incline planks, and anti-rotation presses without symptoms. If balance is messy, shorten the step back and reduce the reach. If the front knee caves inward, slow down and use a chair for support with the free hand.
The reps do not need to be high. Six clean lunges each side can be plenty.
20. Supported Curl-Up
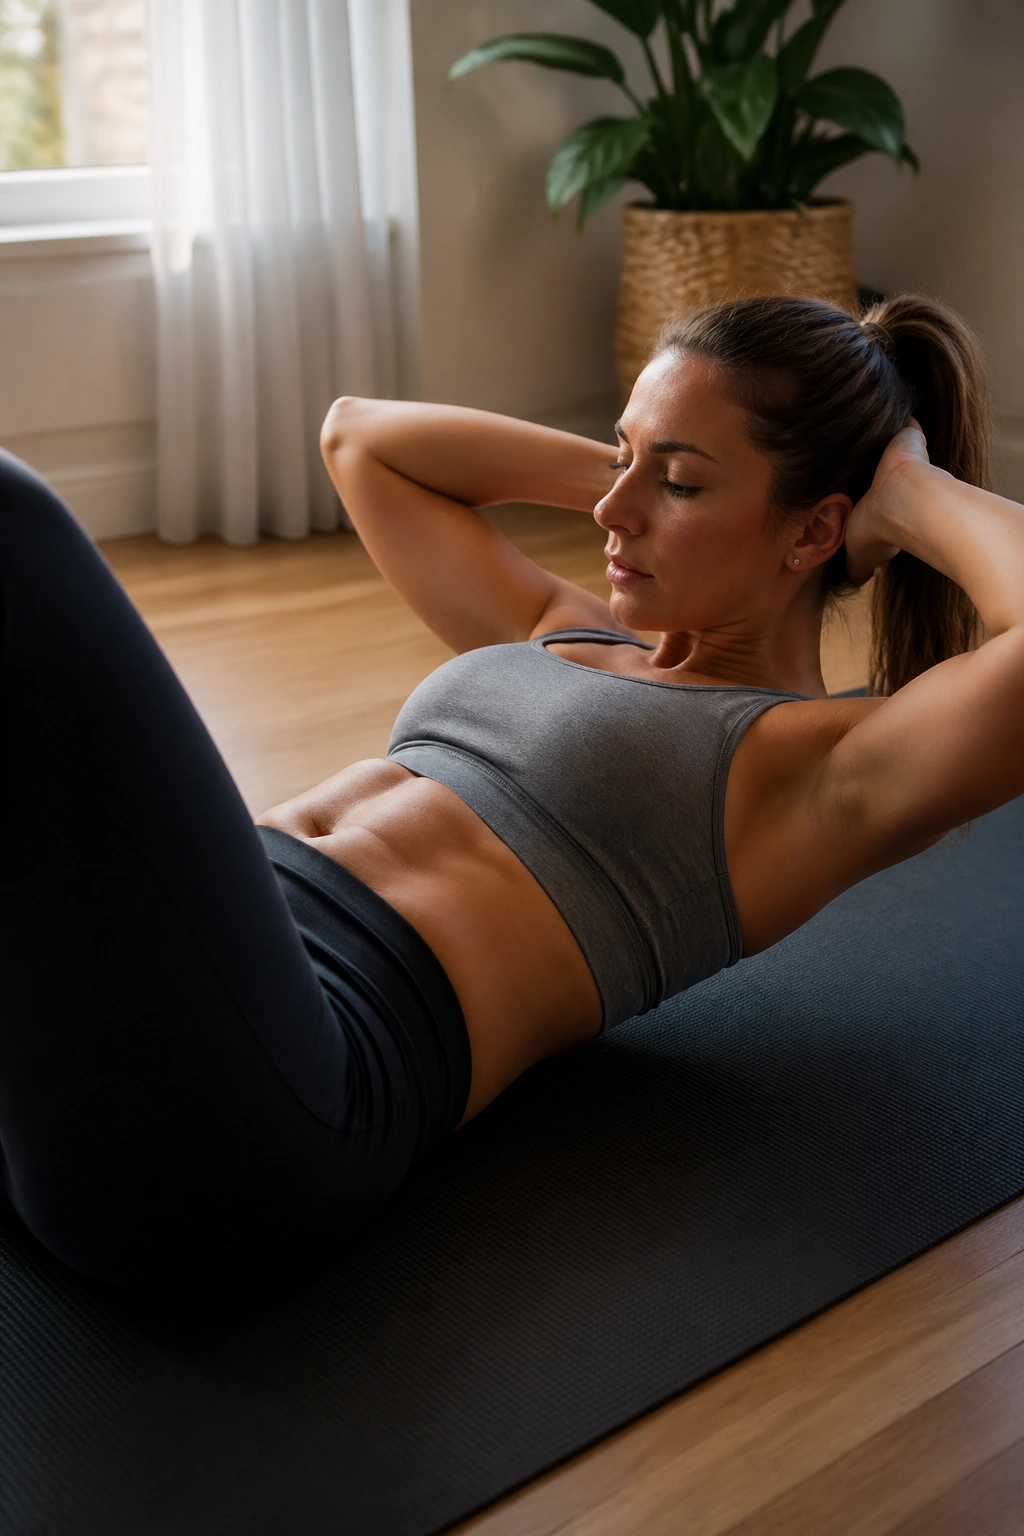
You do not need to ban spinal flexion forever. A supported curl-up can be a useful late-stage progression once you can manage pressure in dead bugs, planks, and loaded standing work without doming or heaviness.
Lie on your back with one knee bent and one leg straight, or keep both knees bent if that feels better. Place your hands behind one thigh or lightly support your head. Exhale, engage the lower abs, and lift your head and shoulder blades a few inches off the floor. Hold 1 second. Lower with control. Start with 5 to 8 reps.
The key word is supported. This is not a fast crunch. You are not yanking on the neck or trying to touch elbows to knees. The movement is short, controlled, and paired with an exhale so the abdominal wall can shorten without bulging forward.
Some postpartum bodies are ready for this sooner; some are not. A diastasis on its own does not ban all flexion, but poor pressure management does. If you see a ridge pop up down the middle or feel downward pressure in the pelvis, step back to an earlier drill and build more capacity there first.
For women who miss the feeling of direct ab work, this can be a useful return—measured, earned, and far more honest than jumping straight into 50 crunches because a six-week checkup is over.
Final Thoughts
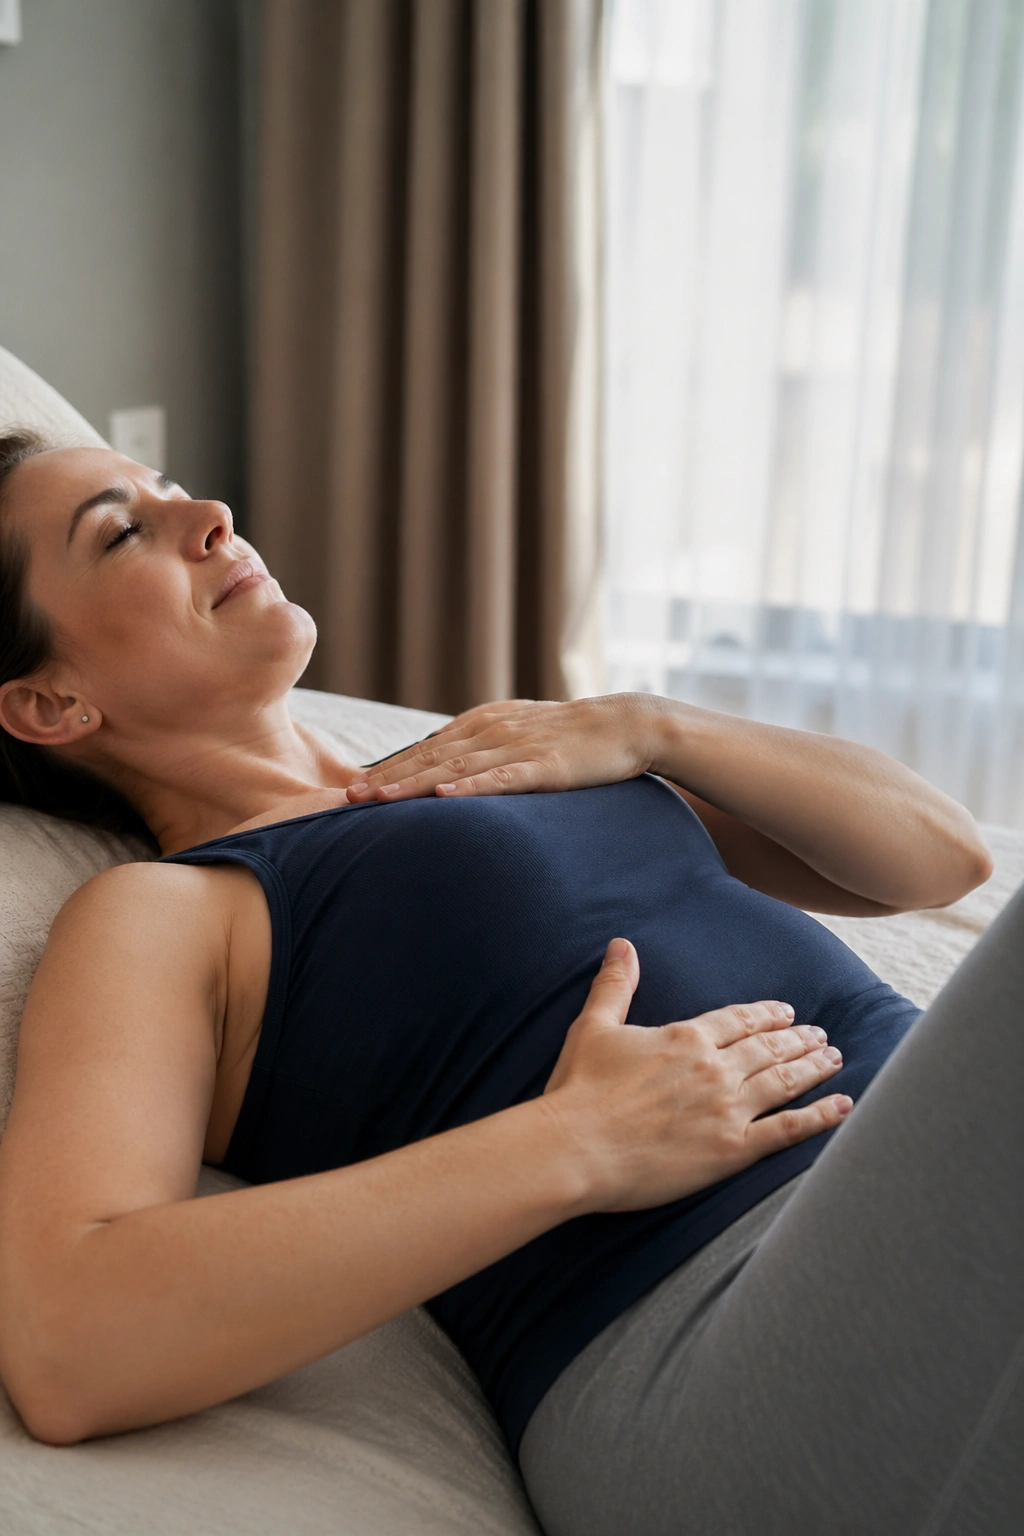
Postpartum ab workouts work best when they look a little boring before they look athletic. Breath, brace, alignment, and pressure control are not filler. They are the base that makes the stronger stuff possible later.
Pick a small group of exercises that match where your body is right now—maybe 360 breathing, heel slides, a wall plank, and carries. Run them 2 to 4 times a week, keep the reps clean, and move up only when your belly stays flat, your breath stays easy, and your pelvis feels supported.
And give the slow rebuild some respect. A postpartum core is not “weak” in a lazy sense; it is adapting after pregnancy, birth, feeding posture, sleep loss, and repeated daily lifting. Train it with patience, and it usually gives a lot back.
