



If your knees complain every time you lower into a chair, climb stairs, or kneel on a mat, a standard Pilates class can feel like a dare. The good news is that Pilates moves for people with bad knees do not need to be dramatic to work. The quiet drills—the ones that train your hips, core, feet, and breath—are often the ones that make walking, standing, and getting up off the floor feel less tense and less shaky.
“Bad knees” covers a lot of ground. For some people it means kneecap pain that flares on stairs. For others it is stiffness from arthritis, a tender old meniscus, or a knee that never felt the same after a sprain. Different causes matter, sure, but the same pattern shows up again and again in rehab rooms: when the hips are weak, the trunk is loose, and the foot collapses inward, the knee winds up doing more work than it wants.
Load matters more than labels. A move can be called beginner and still bug your knee if the bend is too deep, the speed is sloppy, or the shin shoots forward while the arch caves in. And a move can look advanced yet feel fine because you are lying down, moving in a small range, and keeping the joint calm.
Start small. Think 5 to 8 clean reps, an easy breath, and pain that stays mild and fades fast rather than sharp pain that lingers into the evening. If your knee swells, catches, locks, or gives way, stop and get it checked. Otherwise, these are the moves I keep coming back to because they build support around the knee without picking a fight with it.
1. Pelvic Clock on Your Back
This one looks like nothing. That is part of the charm.
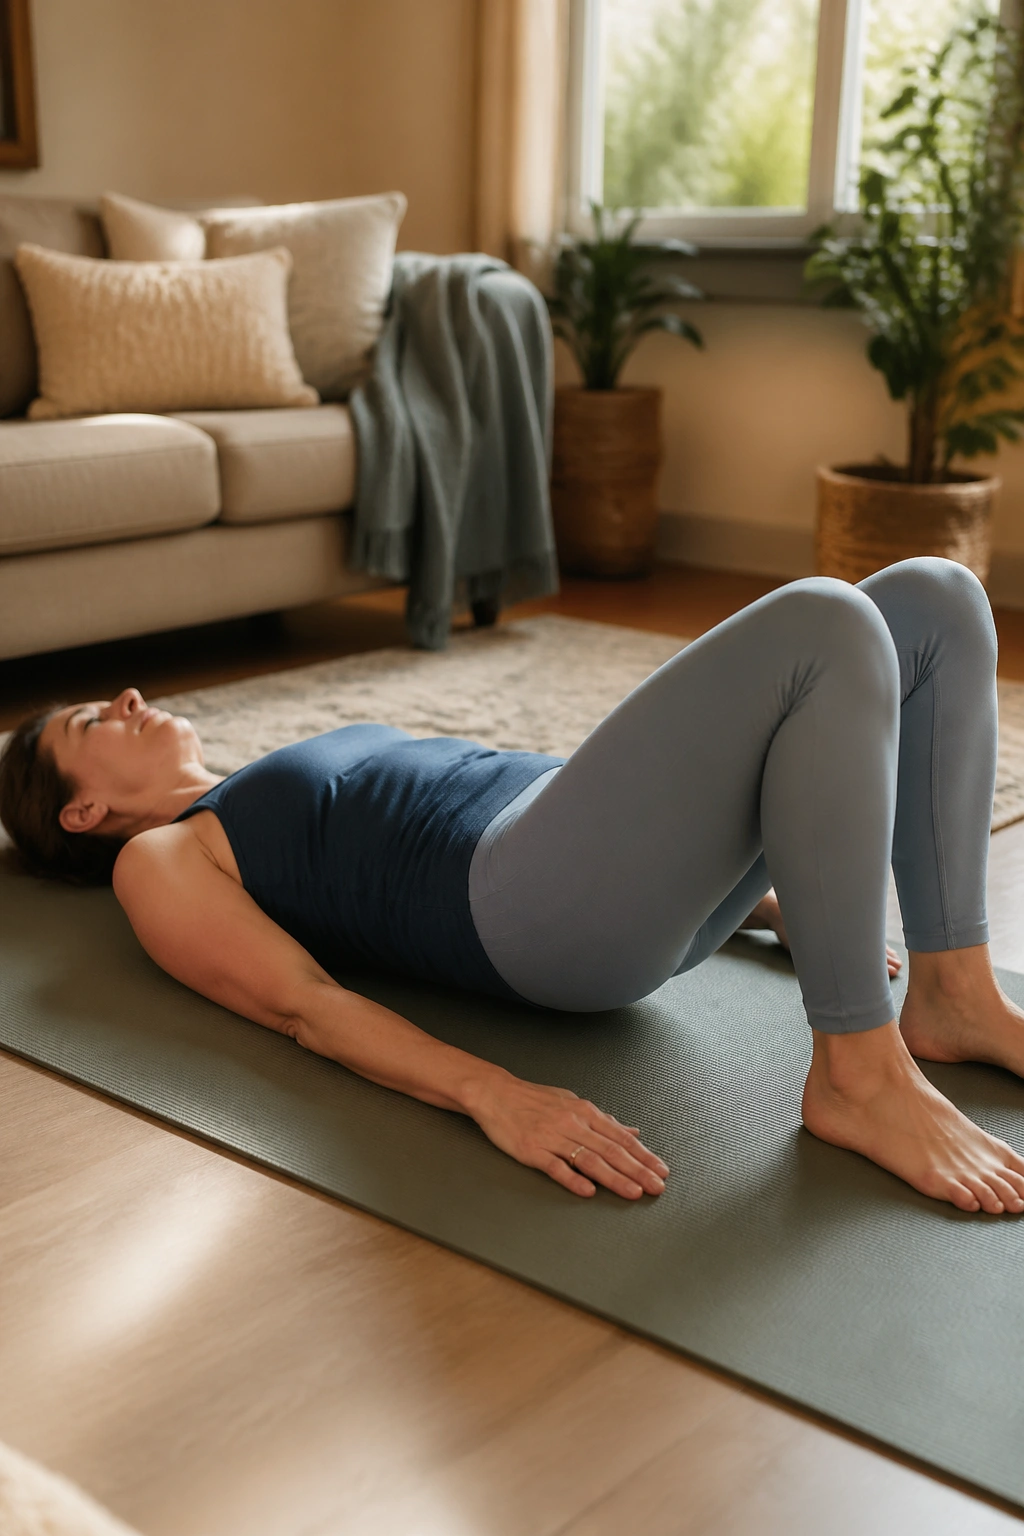
A pelvic clock teaches you how to move your pelvis without yanking on your knees, gripping your quads, or arching through your lower back. Lie on your back with your knees bent, feet flat, and heels about a foot from your seat. Picture a clock under your pelvis: 12 o’clock points toward your ribs, 6 o’clock toward your tailbone, 3 and 9 to each hip.
Why knees like it
Many people with knee pain brace by locking their thighs and flattening or over-arching the low back. Pelvic clock work breaks that habit. When your pelvis can tilt and settle well, your hips share the load better during standing, walking, and sit-to-stand moves.
Try this:
- Gently tip toward 12 o’clock by drawing your front ribs softer and letting your low back meet the mat.
- Roll toward 6 o’clock by letting the tailbone get a little heavier and the low back lift a touch.
- Move to 3 and 9 o’clock by shifting weight from one side of the pelvis to the other.
- Keep the range tiny. Your legs stay quiet.
Best cue: if your kneecaps start gripping upward, your range is too big. Back off and make the movement almost boring. That is usually the sweet spot.
2. Toe Taps in Tabletop
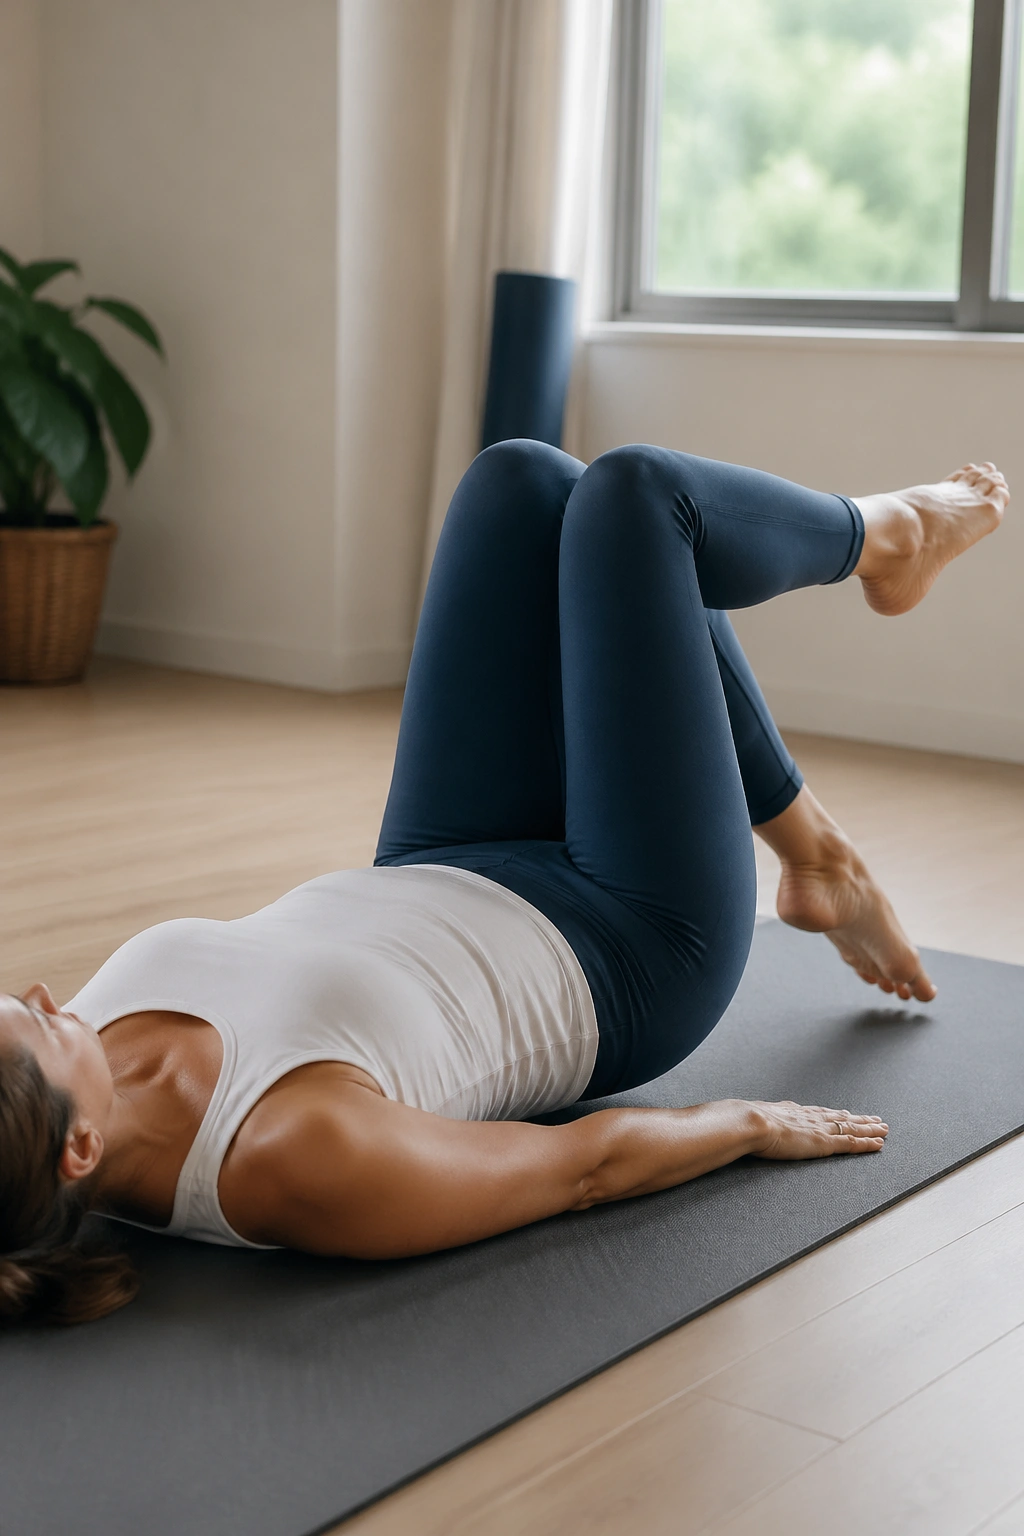
Toe taps are one of the cleanest ways to train deep core support without asking the knee joint to bear body weight.
Lie on your back, bring one leg at a time to tabletop, and stack your knees over your hips. From there, lower one foot toward the floor on an exhale, tap lightly, then bring it back up and switch sides. The move sounds like abs work—and it is—but the hidden win for sore knees is better control of the pelvis and rib cage.
When the trunk stays steady, the legs stop flinging the body around. That matters. During walking and stair climbing, poor trunk control can change the way force travels down the chain and leave the knee catching the bill.
There is a catch, though. If you yank the leg down from the hip and lose your pelvis the second the foot moves, you are training strain, not control. Start with 6 reps per side. Tap only as low as you can go without the low back popping off the mat or the front of the hips clenching.
A folded towel under the head helps if your neck feels busy. Hands on the low ribs can help too. You want the breath to feel wide and the stomach wall to stay firm, not shoved outward.
3. Bent-Knee Fallout
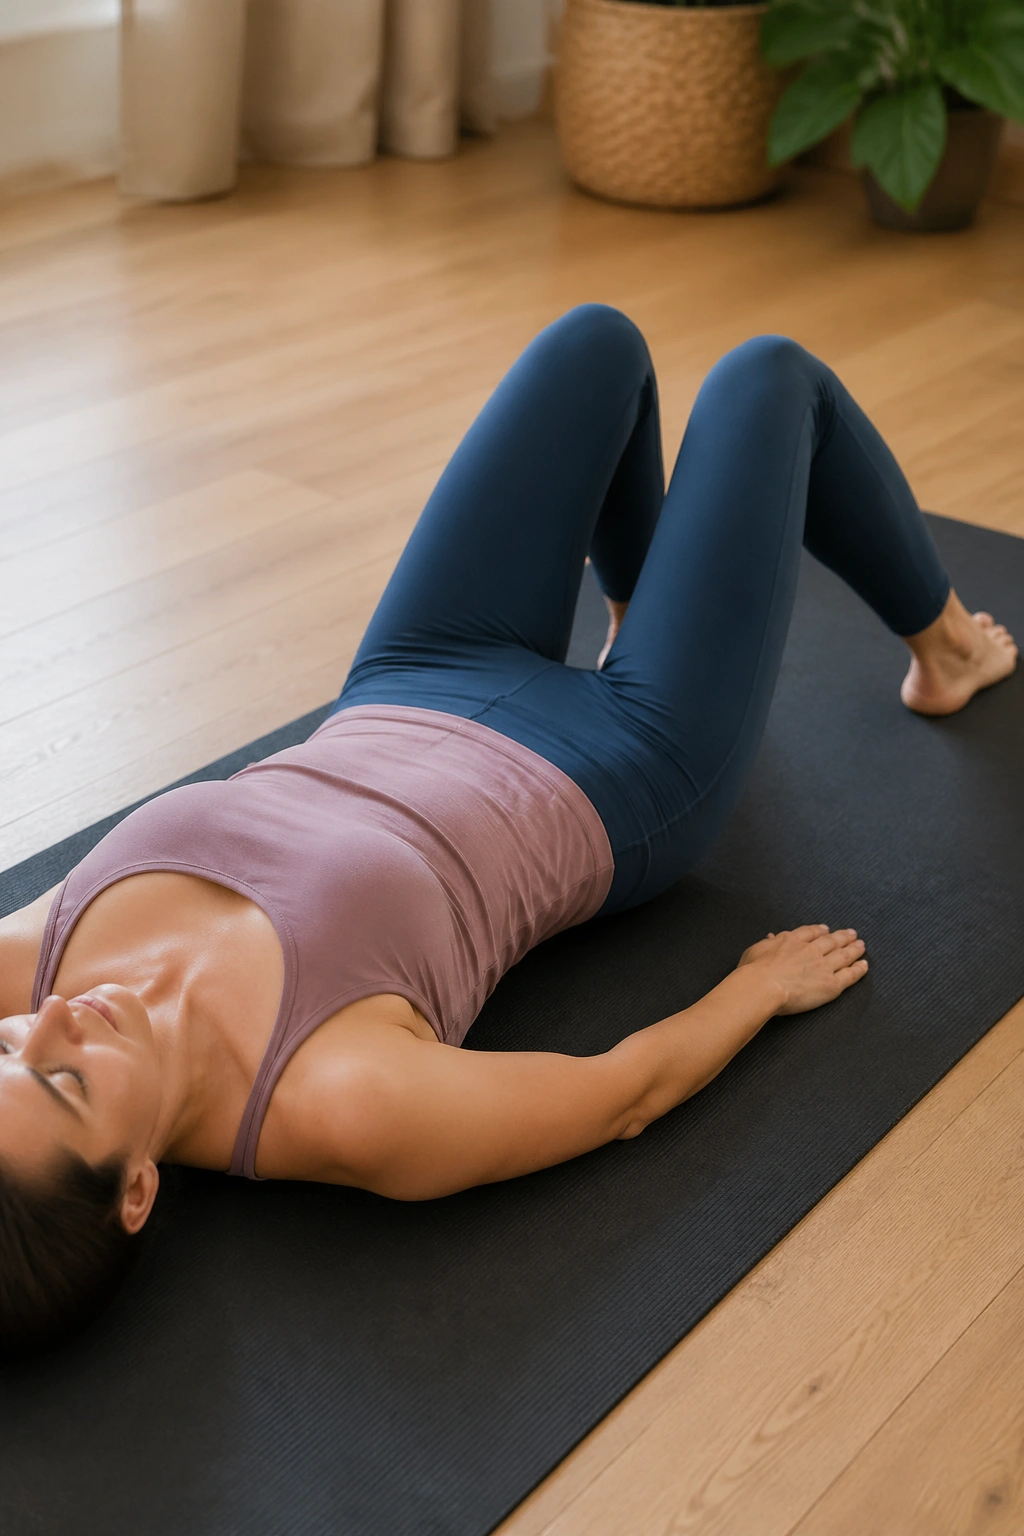
Why does such a small move help so much?
Because the knee often pays for hip weakness. Bent-knee fallout is a gentle way to train hip rotation while the foot stays on the floor and the pelvis learns not to wobble. Lie on your back with both knees bent and feet flat. Keep one leg still while the other knee opens a few inches to the side, then return it to center.
The point is not range. The point is control without rolling the whole pelvis with the leg. If your waistband shifts side to side, you have gone too far. A small, clean arc builds the deep hip muscles that help the thigh bone stay better centered when you stand on one leg, step down a stair, or turn around in a hallway.
How to use it
Do 8 slow reps on each side. Exhale as the knee opens, inhale as it returns. If the inside of the knee feels tugged, narrow the range or place the feet a little wider. Some people do better with a light resistance band above the knees, though I prefer body weight first. If you cannot keep the pelvis steady with no band, the band is only going to show you where things fall apart.
4. Heel Slides Across the Mat
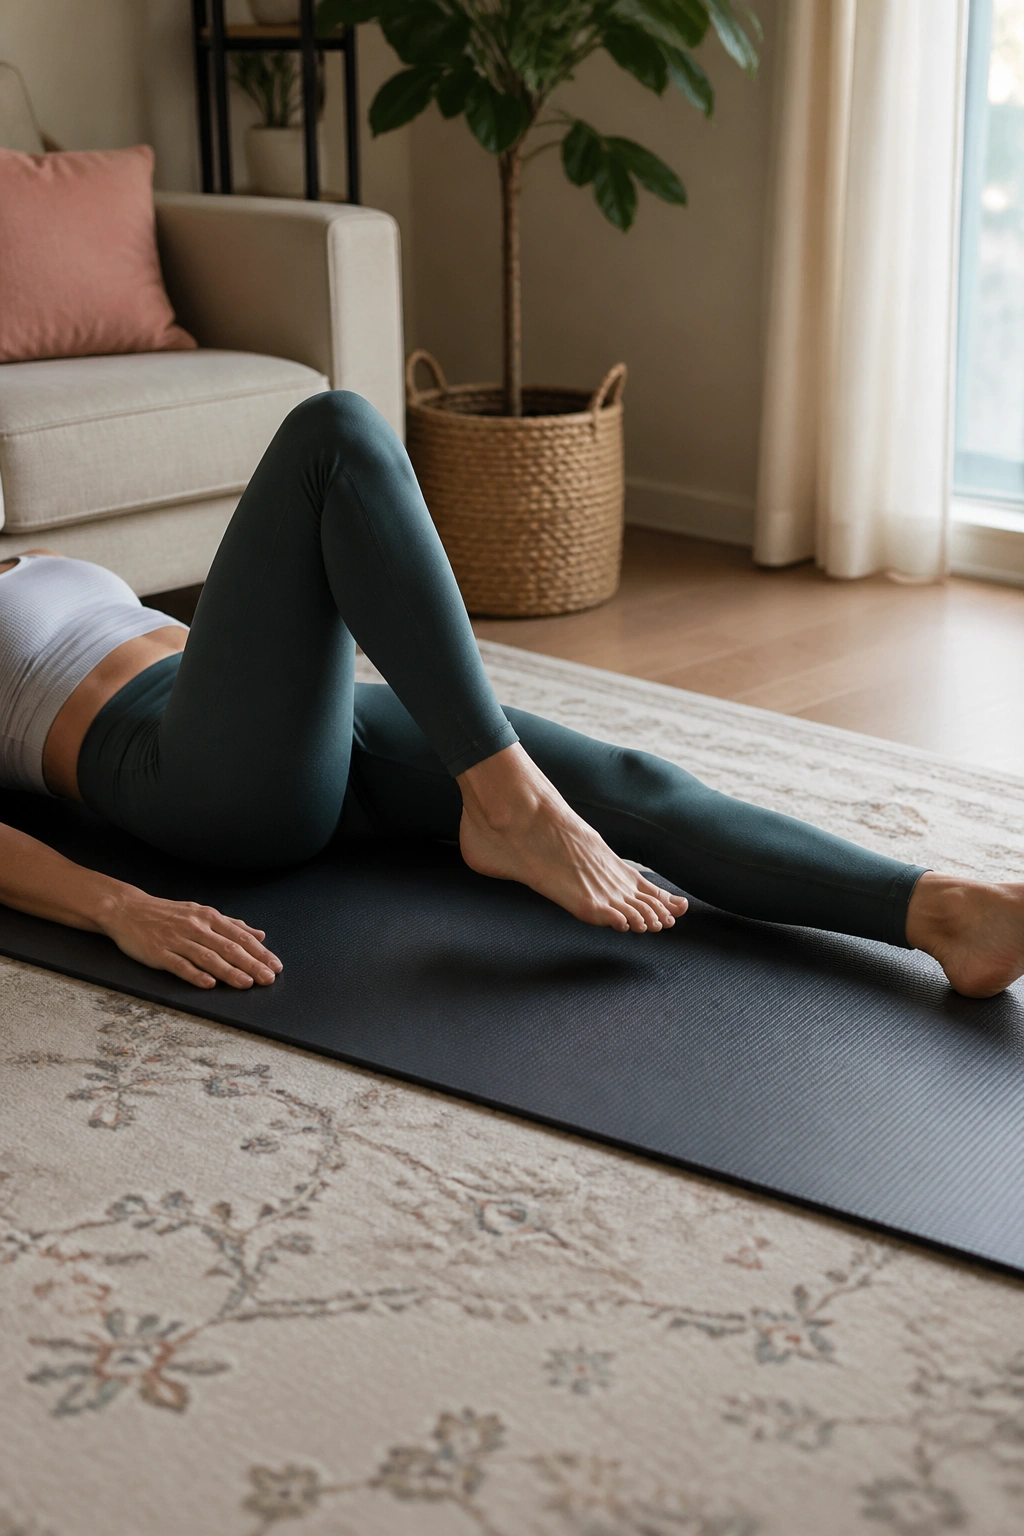
A stiff knee first thing in the morning has a certain look. You swing the leg instead of bending it, the foot drags, and stairs suddenly seem rude. Heel slides help with that.
Lie on your back with one knee bent and one leg long, or keep both knees bent if a straight leg feels cranky. Slowly slide one heel away from you until the knee reaches a comfortable level of extension, then draw the heel back in. You are asking for smooth motion, not a heroic stretch.
The move does three useful things at once: it gives the knee a low-threat bend-and-straighten pattern, wakes up the hamstrings to help pull the heel back, and teaches your pelvis not to twist around every time the leg moves.
A few details make a difference:
- Slide on a sock, towel, or paper plate if friction makes the motion jerky.
- Stop before the knee snaps straight.
- Let the heel stay heavy rather than lifting the foot.
- Try 6 to 10 reps per side.
If the kneecap feels pinchy on the way back in, shorten the range and slow down. The sound cue I use is a soft scrape, not a thump.
5. Glute Bridge with Heels Grounded
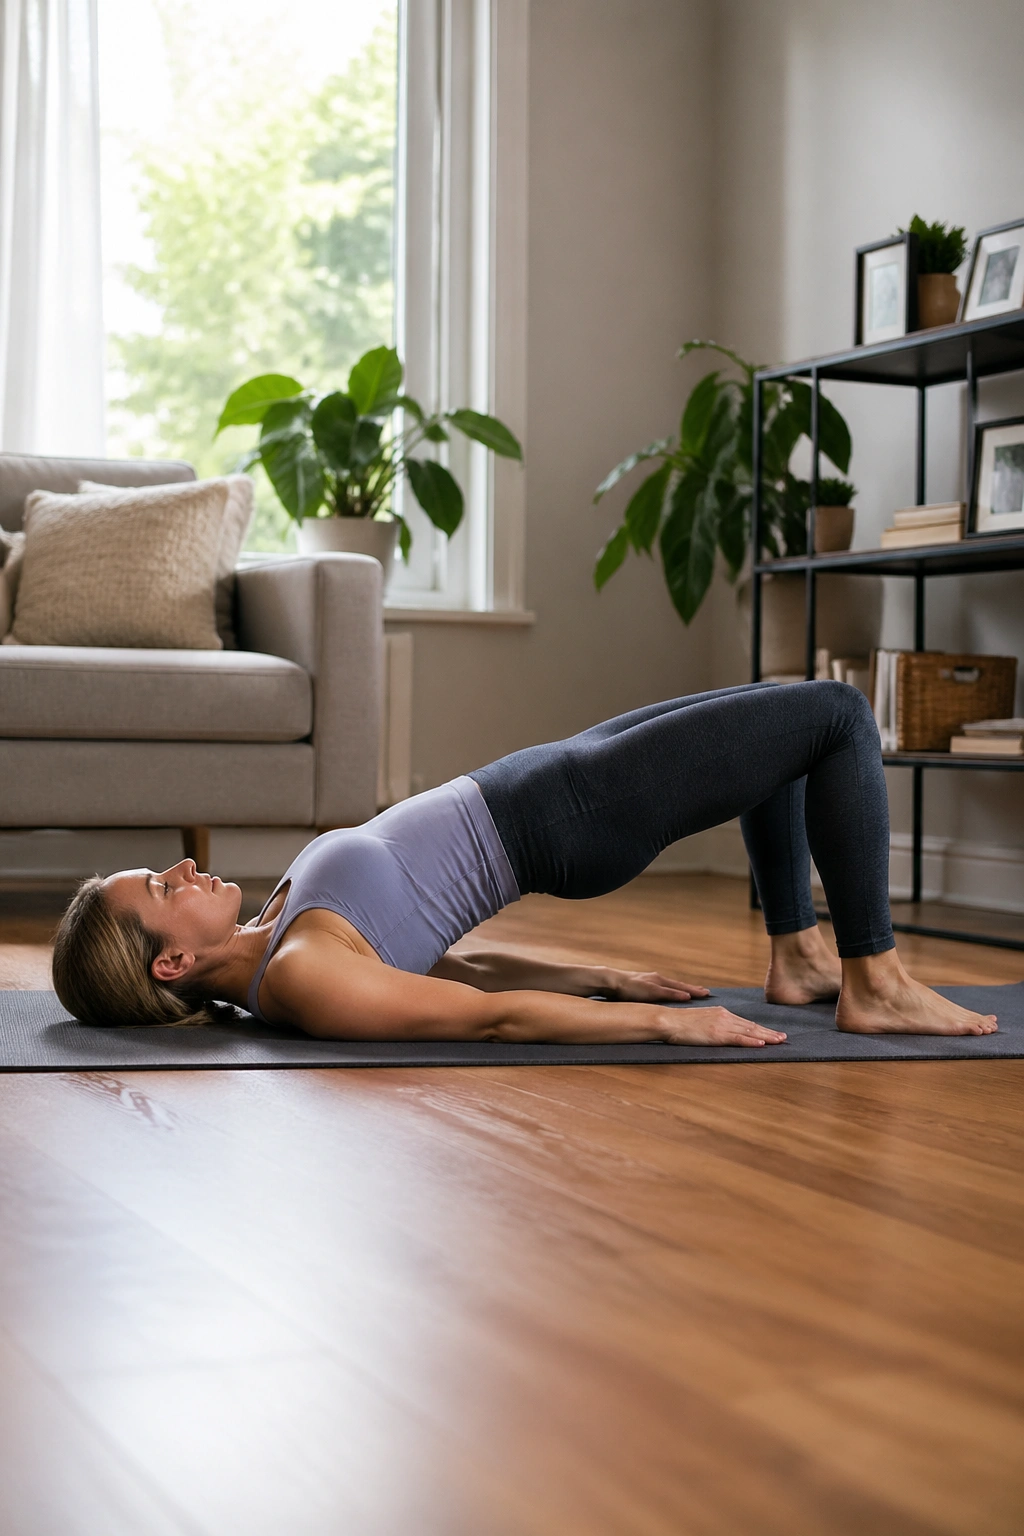
If I had to pick one move that earns its keep for achy knees, the glute bridge would be high on the list. It trains the backside—glutes and hamstrings—so the front of the knee does not have to dominate every lower-body task.
Set up on your back with your feet hip-width apart and your heels close enough that your fingertips can graze them. Press through the whole foot, peel the pelvis off the mat, and lift until your body forms a gentle slope from shoulders to knees. Then lower one bone at a time.
Height is not the goal. People chase height and wind up cramping the hamstrings or arching the ribs. A bridge that rises 6 inches with good control beats a sky-high bridge done with your low back.
I also like the way bridging teaches pressure through the foot. You want weight through heel, base of the big toe, and base of the little toe. That tripod matters for knee tracking. If you roll to the outer edge of the foot, the knees often drift out too hard. If the arches collapse, the knees cave in.
Start with 8 reps, pausing for 2 breaths at the top. If you feel the front of the knee instead of the back of the hips, move your feet a bit farther from your seat. Tiny change. Big difference.
6. Bridge March Without Pelvis Wobble
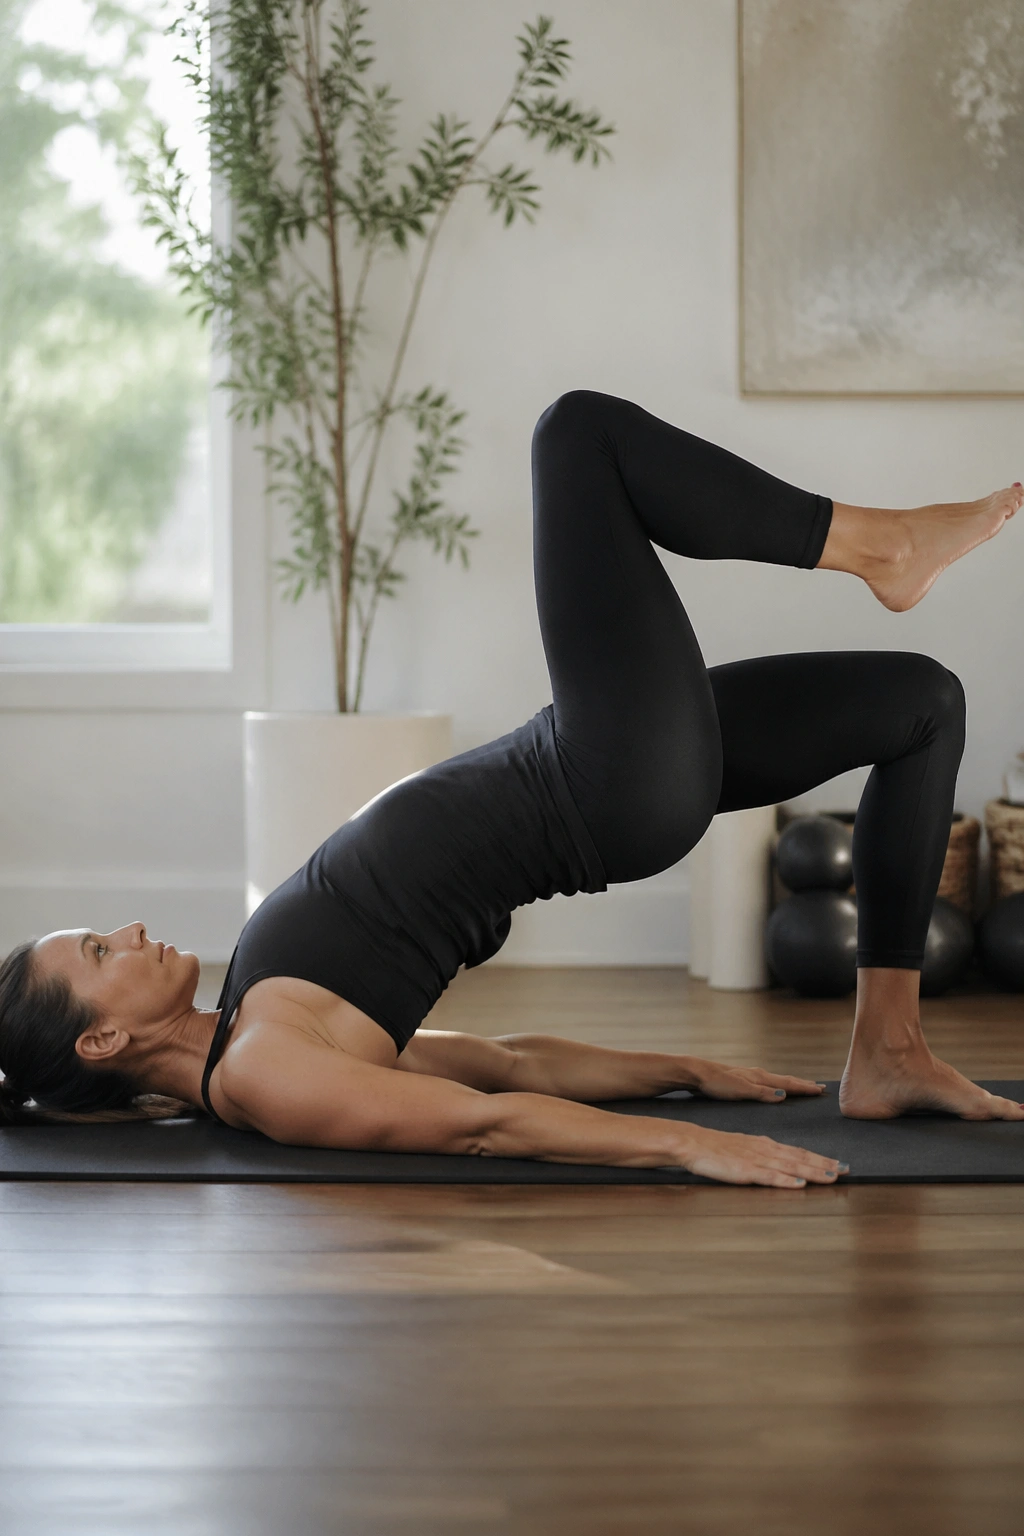
Unlike a regular bridge, the march asks your pelvis to stay level while one leg briefly unloads. That anti-rotation piece is gold for knees that hate stair climbing or feel shaky on one leg.
Lift into your bridge and hold. From there, peel one foot an inch off the floor without letting the hips drop, twist, or tip. Set it down. Switch sides. The movement is small on purpose. If your thigh has to hike high for it to feel like work, you are missing the point.
This move suits people who can already do a pain-free bridge for 20 to 30 seconds. If your hamstrings cramp in the basic version, stay there for another week or two before trying the march. No prize for rushing.
A few cues help:
- Think zipper up the front of the pelvis to stop the ribs from flaring.
- Press the standing foot down as the floating foot gets light.
- Lift the foot only 1 to 2 inches.
- Do 4 to 6 marches per side.
If the knee of the standing leg feels loaded, lower the hips a little. A lower bridge often spreads the work back into the glute where it belongs.
7. Clamshell with Hips Stacked
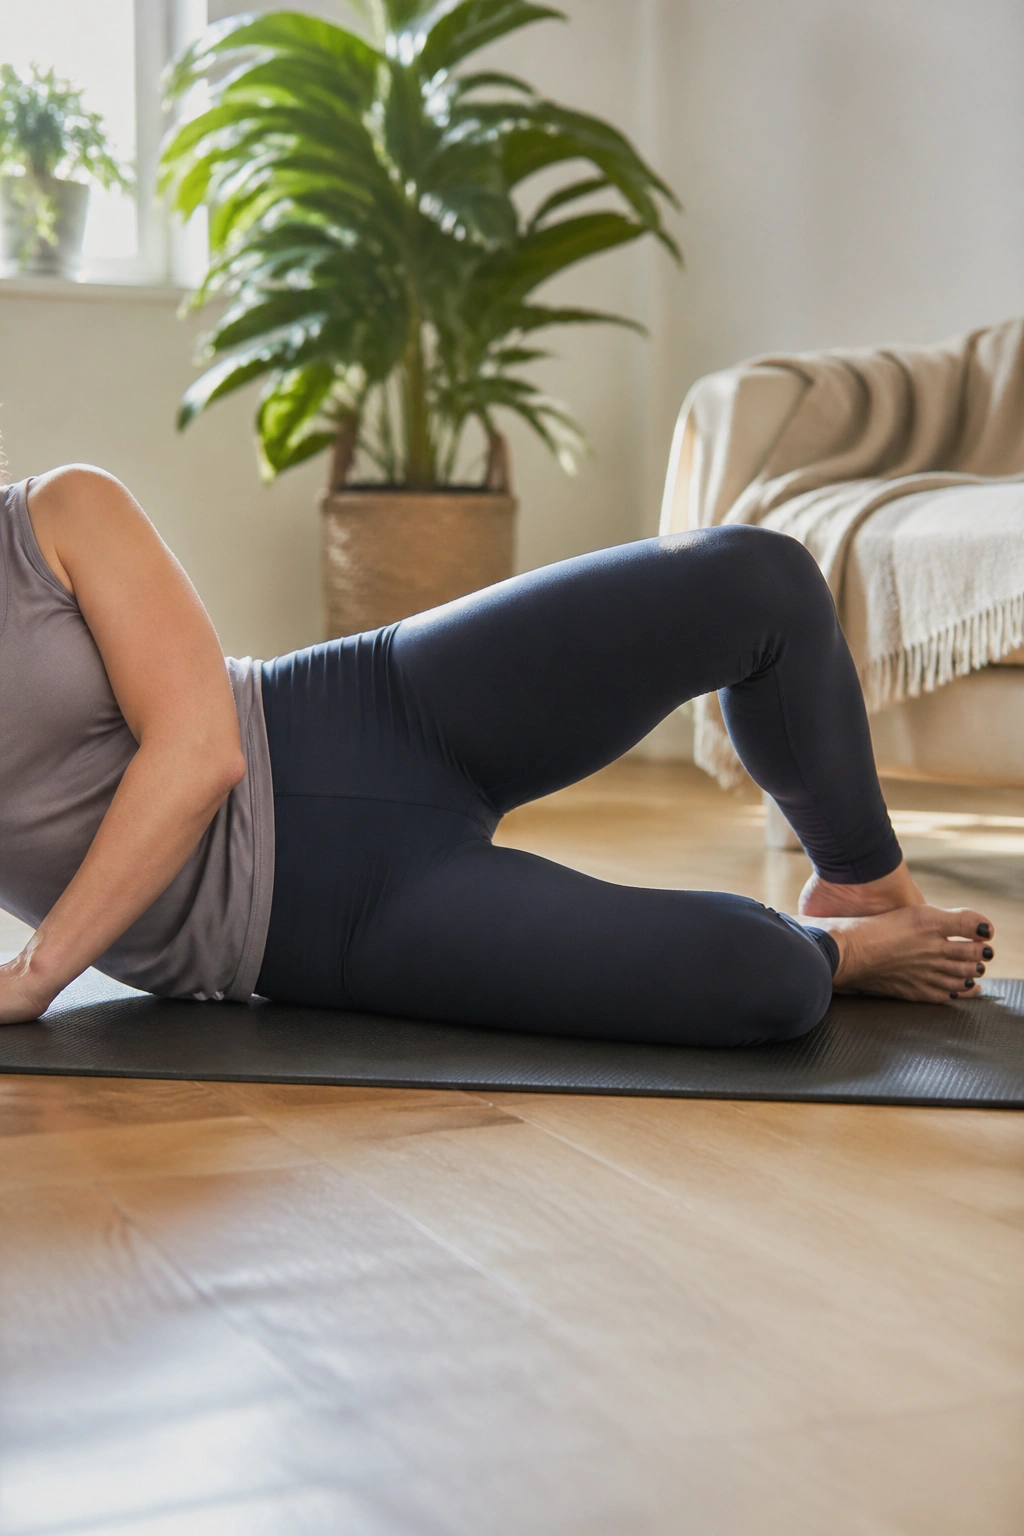
Clamshells get mocked because they look easy. Do them well and your side hip starts talking fast.
Lie on your side with your knees bent about 45 degrees and your heels lined up with your seat. Keep your feet together and open the top knee without rolling your pelvis backward. The top hip should stay stacked over the bottom hip. If you feel your waist rolling open, you are borrowing motion from the trunk.
What makes it work
The target here is the glute medius, a side-hip muscle that helps control the femur when you stand, walk, or step down. Weakness there often shows up as the knee drifting inward. That inward collapse is not the only reason knees hurt, but it is a common one.
Useful cues:
- Keep the heels touching as the knee opens.
- Place your top hand on the front hip bone; it should stay facing forward.
- Pause for 1 second at the top.
- Aim for 12 to 15 reps per side.
Pro tip: if you feel the front of the hip more than the side of the butt, bring your knees a bit farther forward and make the range smaller. Most people open too far.
8. Side-Lying Leg Lift with a Slight Heel Back
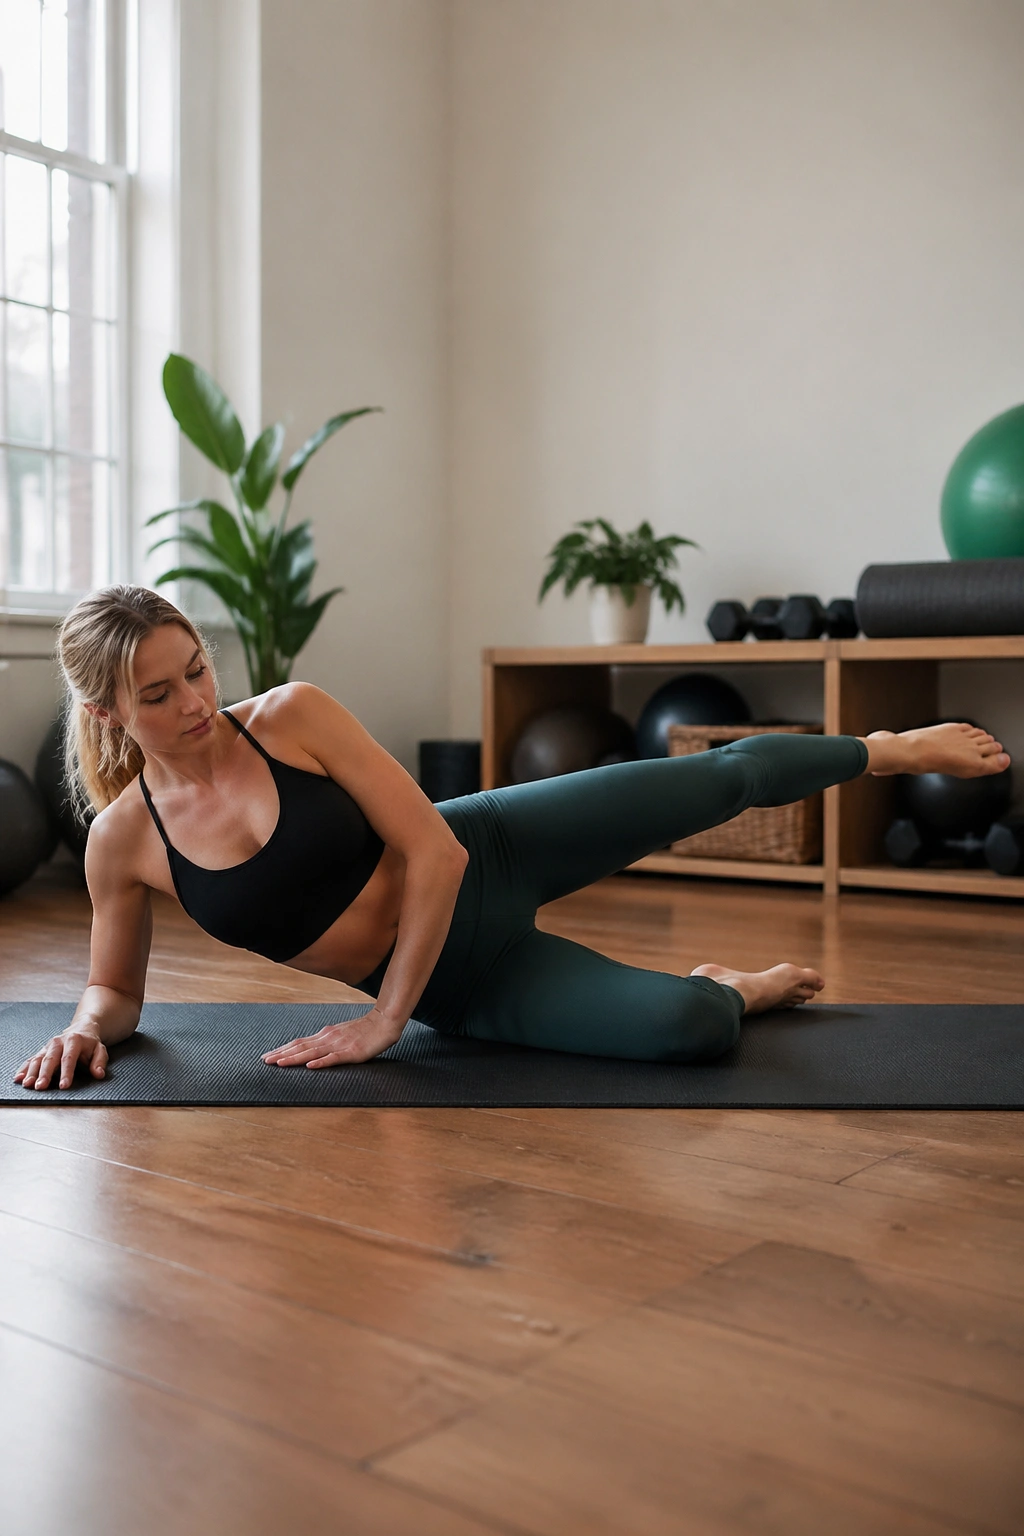
This move is a blunt, effective way to build side-hip strength without compressing a sore knee.
Lie on your side with the bottom leg bent for balance and the top leg straight. Reach the top leg long so the heel drifts a little behind the line of your body and the toes angle down a touch. Then lift the leg to hip height and lower with control. That heel-back setup matters. If the toes spin toward the ceiling, the front of the hip takes over.
A good rep feels long, almost like someone is pulling your heel away from you as you lift. A sloppy rep feels like a quick toss of the leg. The first one helps the knee by strengthening the hip abductors. The second one teaches nothing and can annoy the low back.
Use 8 to 12 reps per side with a 2-count lower. If the side of your waist cramps, prop your head on a pillow and make sure you are not trying to hover the whole rib cage off the mat. The burn should land in the upper outer glute.
This is also one of those moves that looks easier in photos than it feels in your body. Good. That means it is doing its job.
9. Side Kick Front and Back in a Small Range
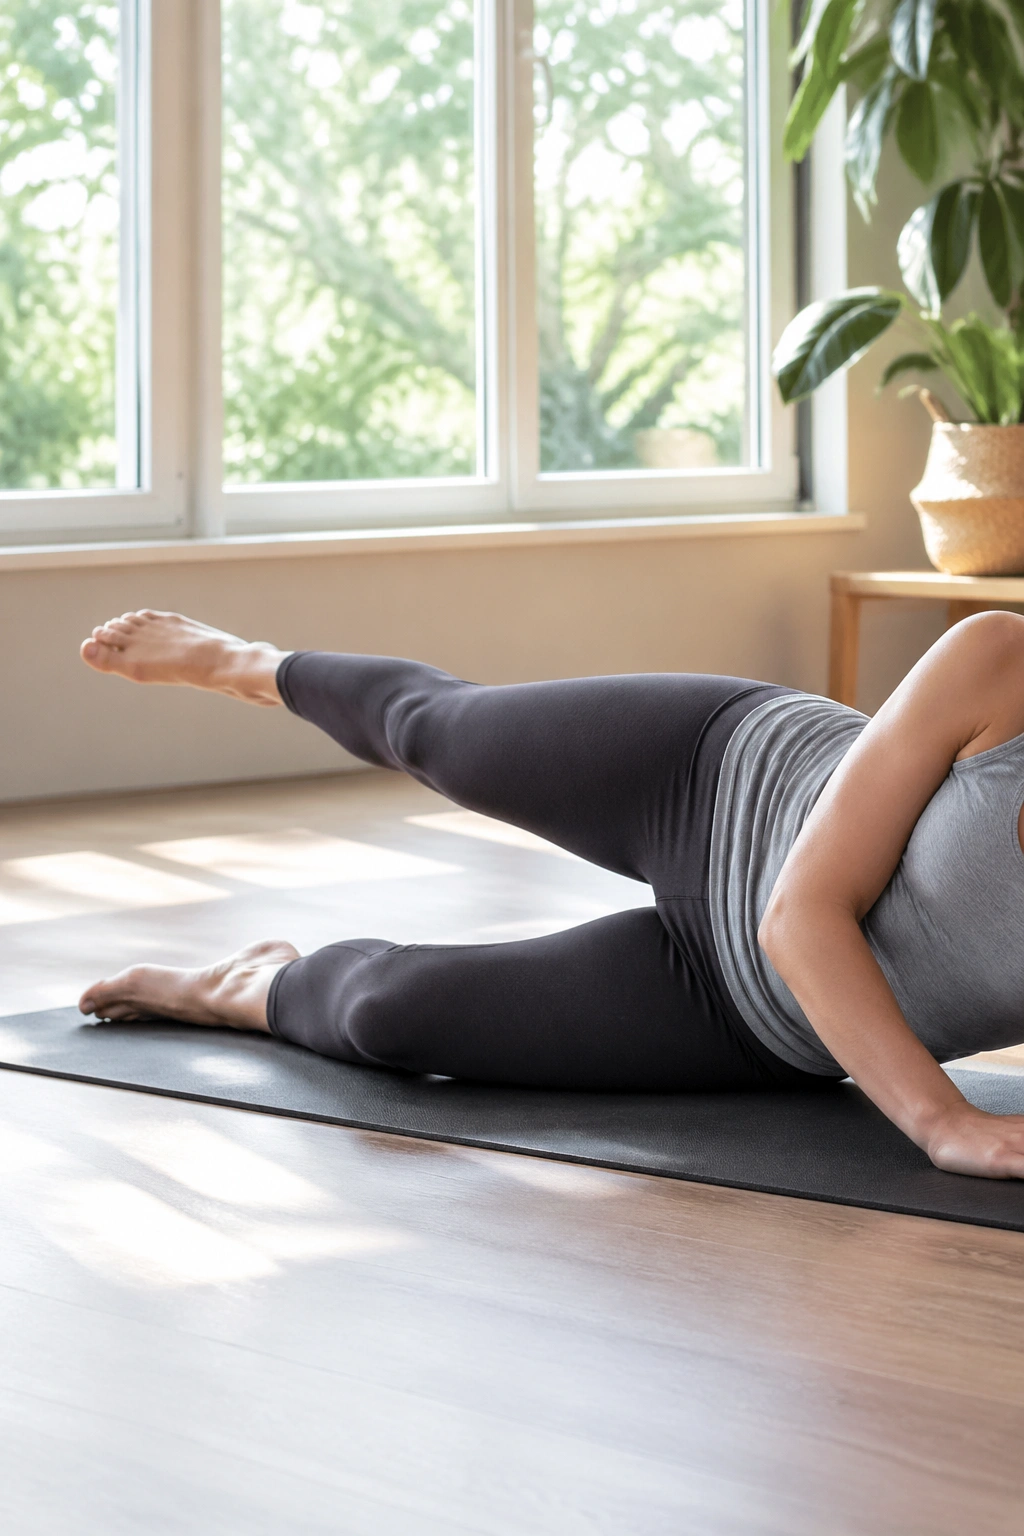
Can a classic Pilates move help bad knees if the knee barely bends? Yes, and this is a strong example.
Set up in the same side-lying position as your leg lift, with the top leg long and the trunk steady. Swing the top leg a short distance forward, then sweep it back behind you without arching your lower back. The range should be small enough that your torso looks almost frozen.
The front kick asks the hamstrings and trunk to control deceleration. The back sweep taps the glute and teaches hip extension. Together they improve how the thigh moves under a steady pelvis, which is a useful skill for walking and climbing. Many people with knee pain either lock the leg or swing it from the low back. This pattern cleans that up.
Best way to use it
Start with 6 kicks each direction. Flex the foot on the way forward, point or soften the foot on the way back if that feels natural. Put your top hand on the floor in front of your chest for balance. If you feel a pinch at the front of the hip, the leg has drifted too far forward. Pull the range back and think “longer,” not “higher” or “bigger.”
10. Inner Thigh Lift from Side-Lying
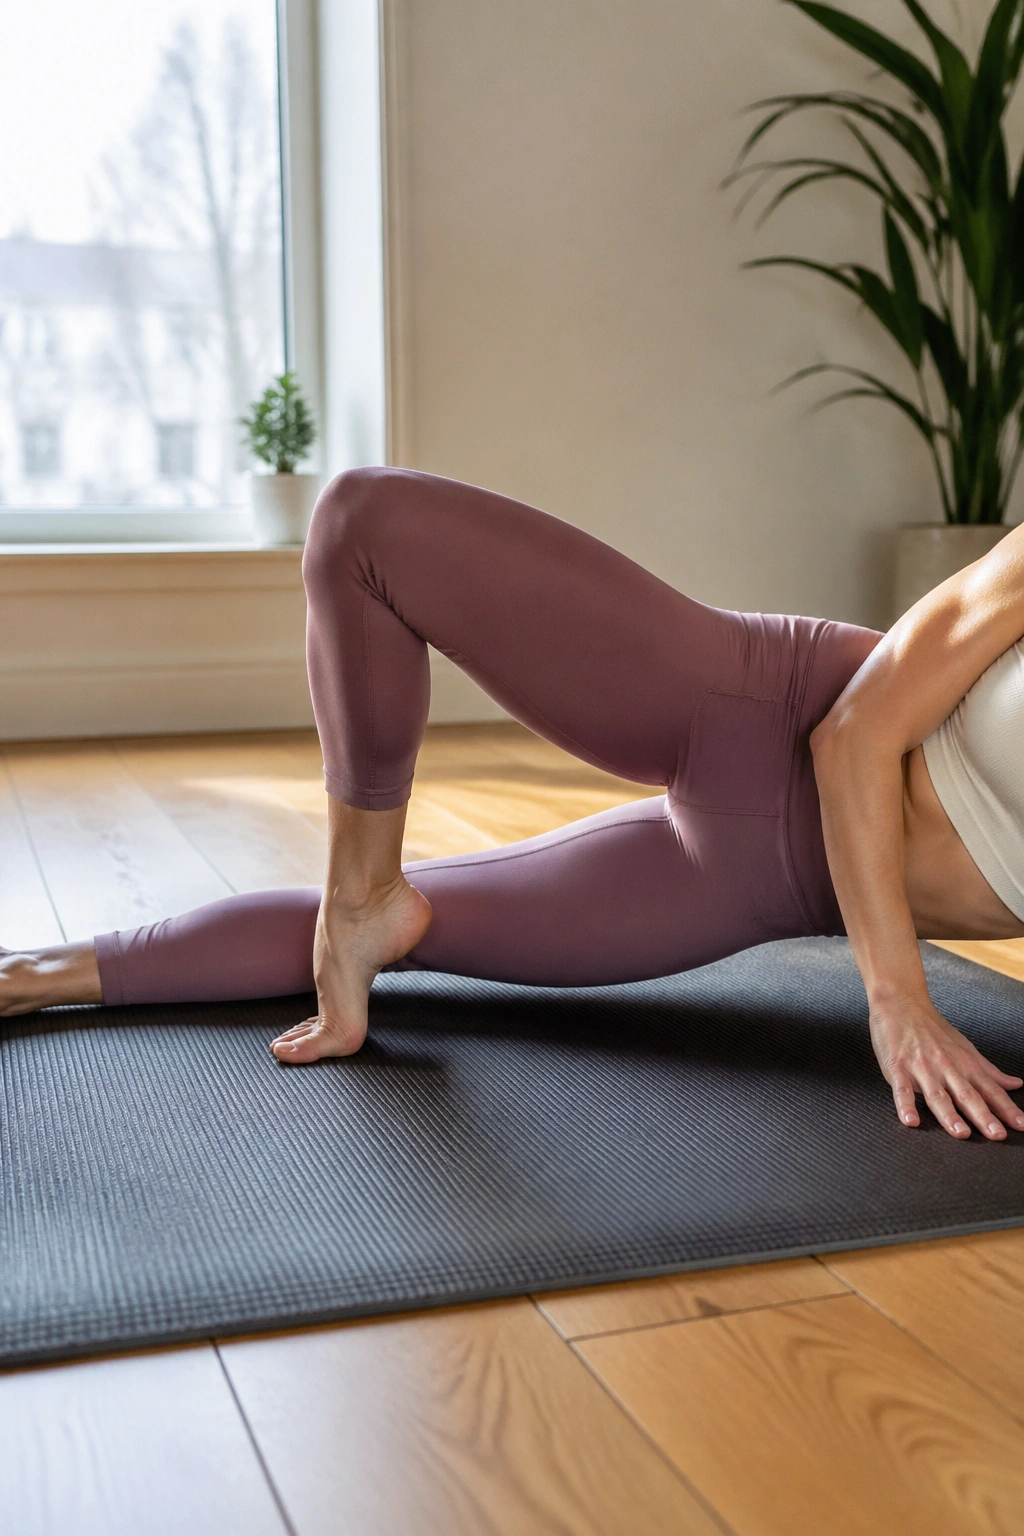
This move sneaks up on people. Two reps in, nothing. Eight reps in, your inner thigh is on fire.
Lie on your side with the bottom leg straight. Cross the top foot over and plant it on the floor in front of the lower knee or thigh. From there, lift the bottom leg a few inches and lower it without dropping heavily. You are training the adductors, the inner thigh muscles that help steady the leg and assist with knee control.
The reason I like this for sore knees is simple: medial knee support is not only about the quads. When the inner thigh is asleep, the leg can feel loose and underpowered during walking and side-to-side movement. This drill gives that area some honest work without loading a squat or lunge.
A few notes help:
- Keep the lower leg long, with the kneecap facing forward.
- Lift only 3 to 6 inches.
- Exhale on the lift.
- Do 10 to 12 reps per side.
If the inside of the knee feels pinchy, move the crossed foot lower, closer to the ankle, or place a folded towel under the lower leg so you start from a slightly raised position.
11. Seated Knee Folds at the Edge of a Chair
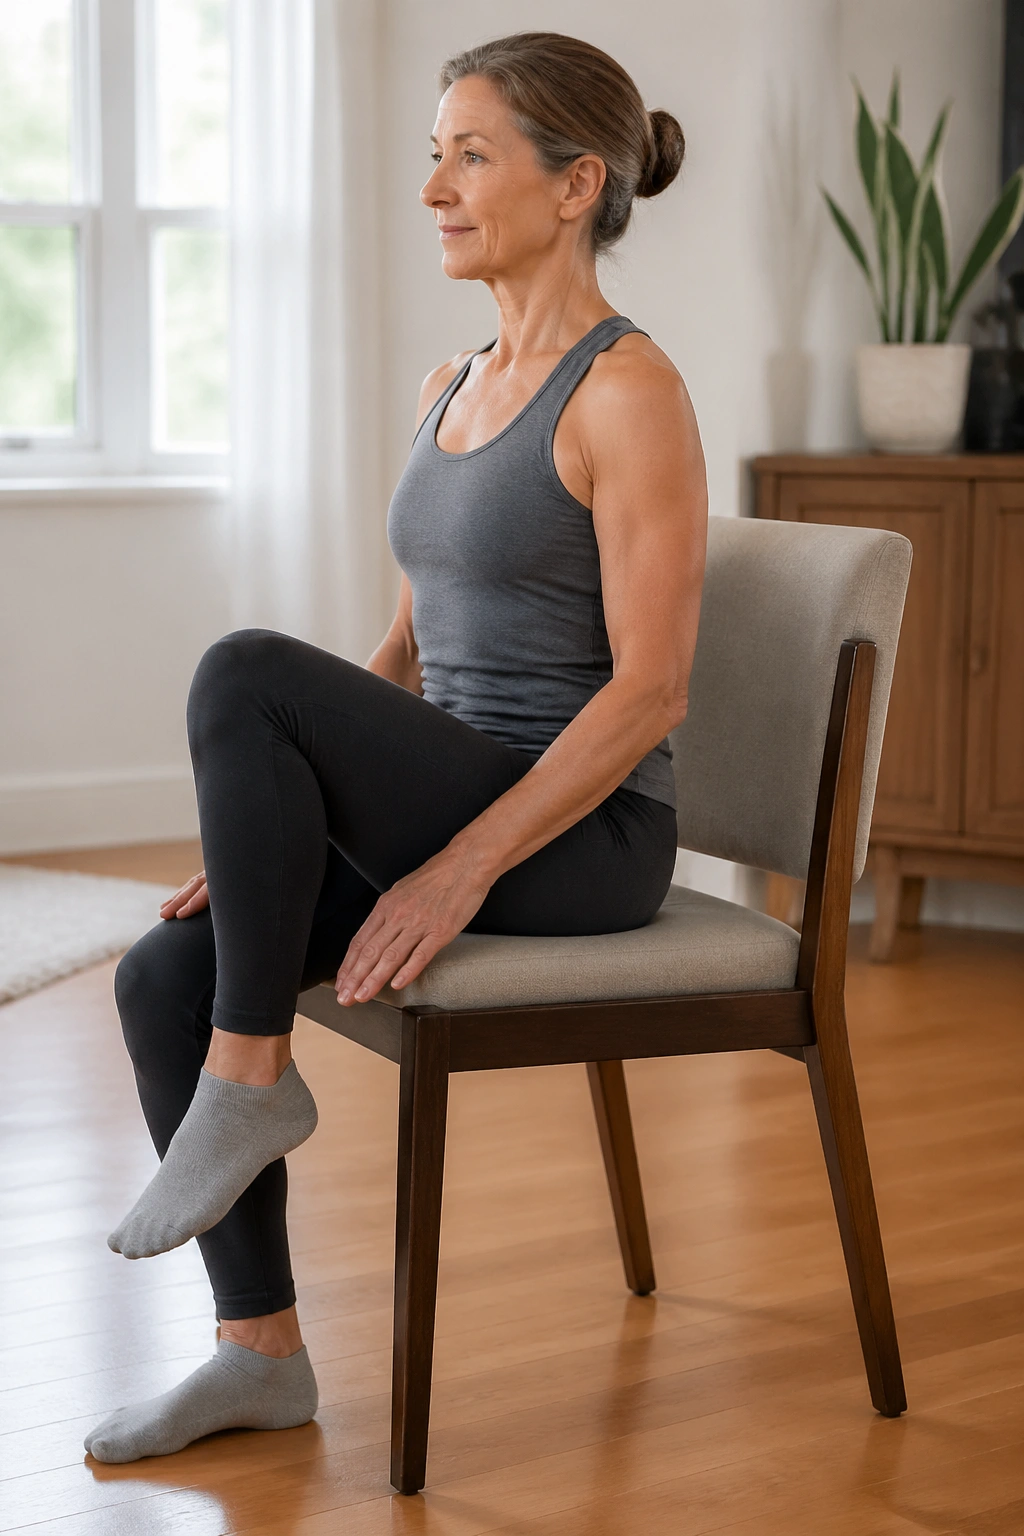
Not every useful Pilates move has to happen on a mat. Seated knee folds are a quiet way to train hip flexion, trunk control, and upright posture while the knees stay in a friendly range.
Sit near the front edge of a firm chair with both feet flat. Lengthen through the crown of your head, lightly hold the sides of the chair if needed, and lift one foot a few inches off the floor without leaning back. Lower it. Switch sides. The knee stays bent the whole time, which means you avoid the shear forces that bother some people during leg extension work.
This is one I use when someone’s knees hate floor transitions or kneeling pressure. It also helps people who feel wobbly lifting a leg to step into pants, get into a car, or clear a stair. The work is not flashy. It is useful.
If you want more challenge, exhale as the foot lifts and resist the urge to collapse through the chest. Your torso should stay tall, ribs quiet, and pelvis level. Start with 8 lifts per side. If your hip flexors grab, sit on a folded blanket so the hips are slightly higher than the knees. That little height boost often changes the whole feel of the move.
12. Bird Dog with a Folded Towel Under the Knee
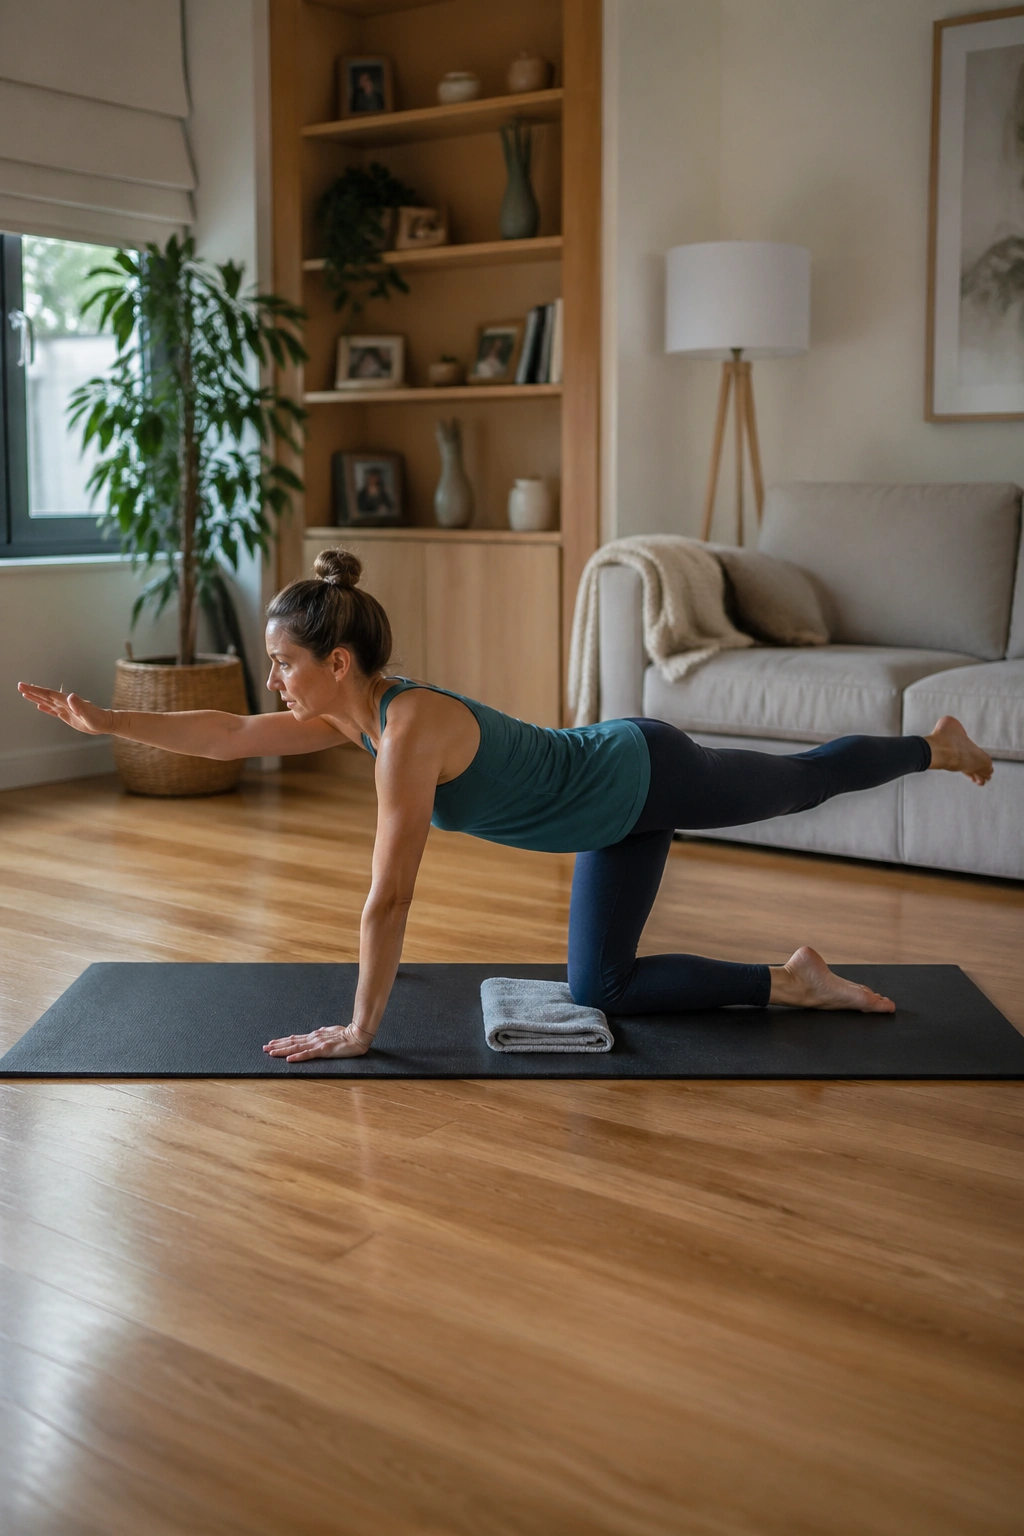
Compared with side-lying work, bird dog adds more balance demand and more trunk control. It also puts pressure on the supporting knee, so setup matters.
If kneeling is tolerable, place a folded towel or doubled mat under the knee that stays down. Come onto hands and knees with your hands under shoulders and knees under hips. Reach one leg back along the floor, then lift it to hip height while the opposite arm reaches forward. Pause. Return and switch.
The win here is cross-body stability. Walking is a cross-body pattern. So is climbing stairs. Bird dog trains the body to hold the pelvis and spine steady while limbs move in opposite directions. That can reduce the sloppy side-to-side sway that leaves a knee feeling unsteady.
Who should skip the floor version? Anyone whose kneecap hates direct pressure, anyone with a hot, swollen joint, and anyone who cannot kneel without holding their breath. Use a countertop instead: hands on the counter, stand back, and reach one leg behind you while the opposite arm reaches forward.
Try 5 to 8 reps per side, each with a 2-second hold. If your low back dips, lower the leg. Lower still. The longest line wins.
13. Swimming Prep with Forehead on Stacked Hands
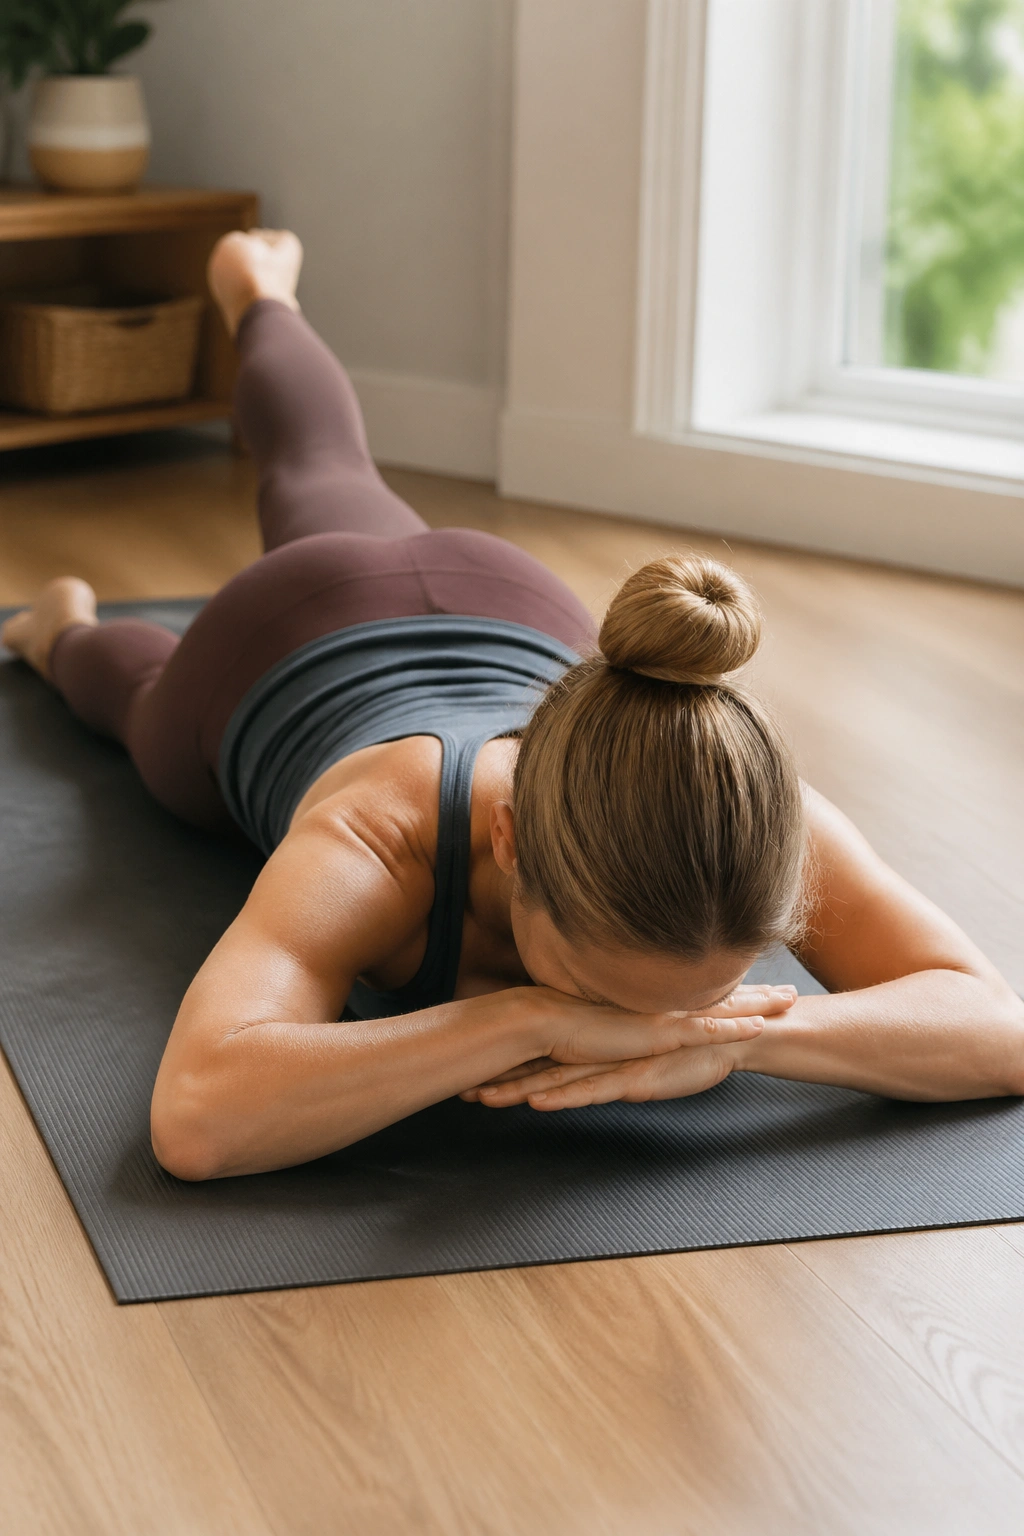
No kneeling. No deep bend. Strong backside work. That is why swimming prep stays in my rotation.
Lie on your stomach with your forehead resting on stacked hands or a small towel. Keep both legs long. Lift one leg a few inches, lower it, then switch. After that feels clean, add the opposite arm: right arm and left leg lift together, then change sides. The chest stays heavy. The neck stays soft.
Why it helps
People with sore knees often avoid using the glutes and hamstrings because the front of the leg has become the default worker. Prone leg lifts pull attention back where it belongs. They also give you hip extension without standing on one leg, which is handy on days when the knee feels touchy.
A few clean-up cues:
- Draw the lower belly gently away from the mat.
- Keep the kneecap facing the floor.
- Lift the thigh only as high as you can without pinching the low back.
- Do 6 to 10 alternating lifts per side.
Good sign: you feel the top of the butt and the back of the leg. Bad sign: you feel compression in the low back or a hamstring cramp right behind the knee.
14. Mermaid Side Bend from a Box or Chair
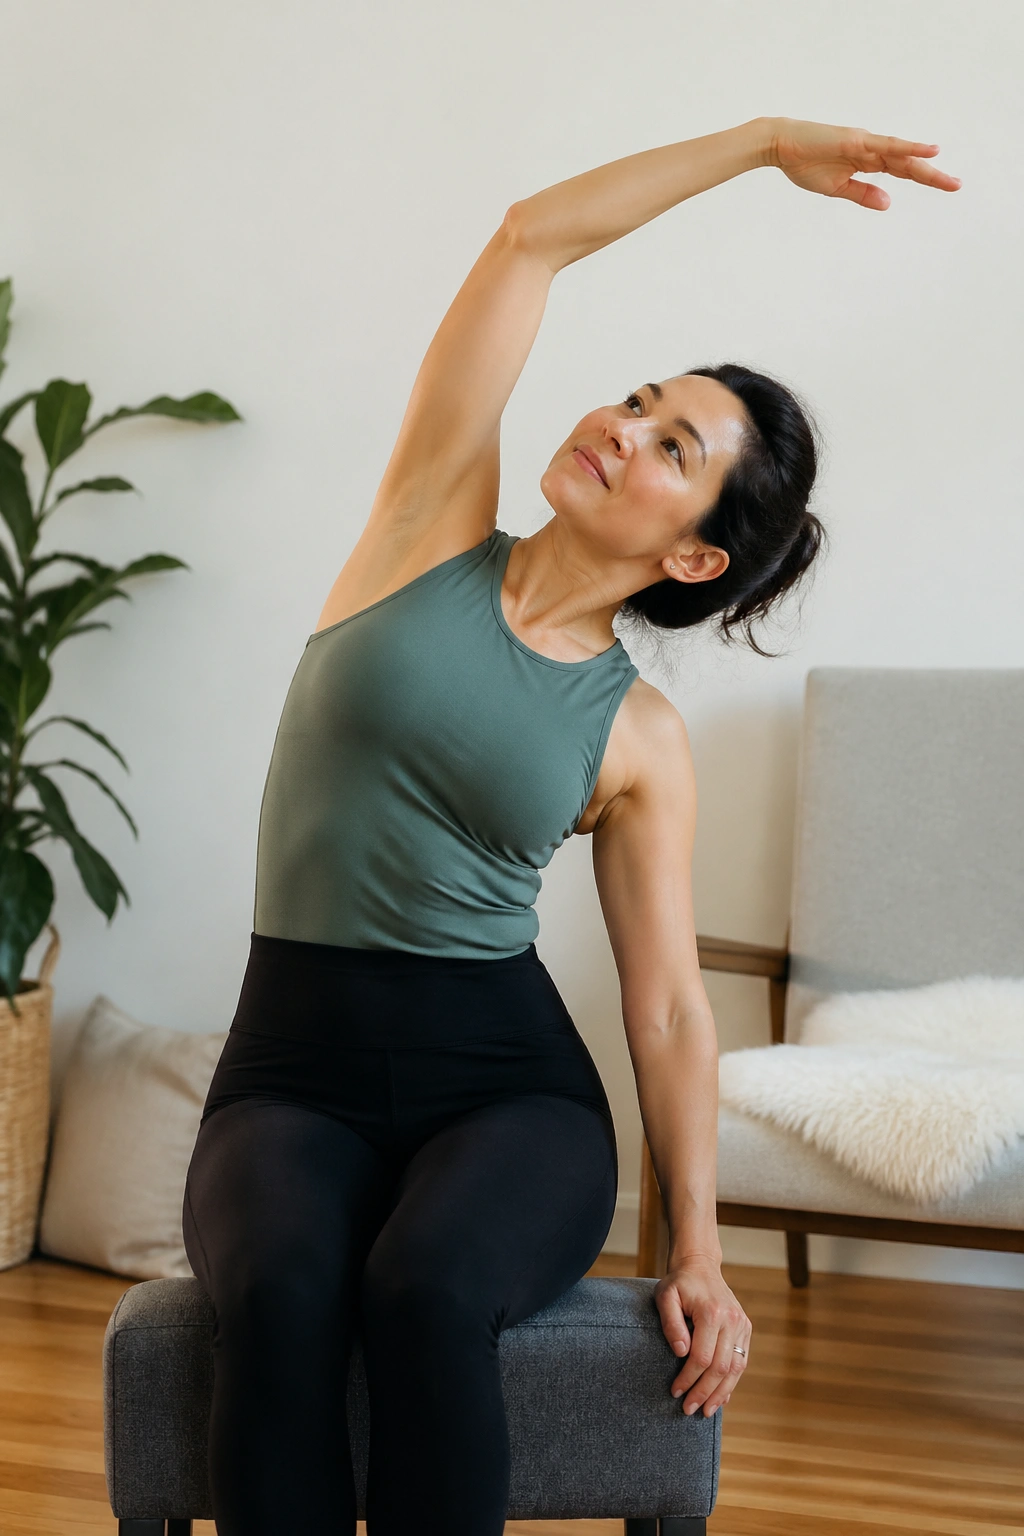
Here is the part many knee guides skip: a stiff rib cage and locked-up side body can change how you stand and shift weight, which feeds into the knee. Mermaid helps open that up.
Traditional mermaid is often done in a side-seated position on the mat. If your knees dislike that folded-leg setup, sit on a yoga block, a low bench, or a chair instead. Place one hand down for support and arc the other arm overhead into a side bend, then return to upright. Move slow enough that the breath can spread into the open side ribs.
This is not a knee strengthening drill in the obvious sense. It is a positioning drill. When your trunk can side-bend and stack better, you stop hanging into one hip and twisting through the knee every time you reach sideways, carry a bag, or stand with more weight on one leg.
Use 4 to 6 breaths per side. If you want more work, add a slight reach forward into the side bend and then restack tall. The stretch should land through the side ribs and waist, not as a pinch in the low back.
15. Wall Roll-Down with Soft Knees
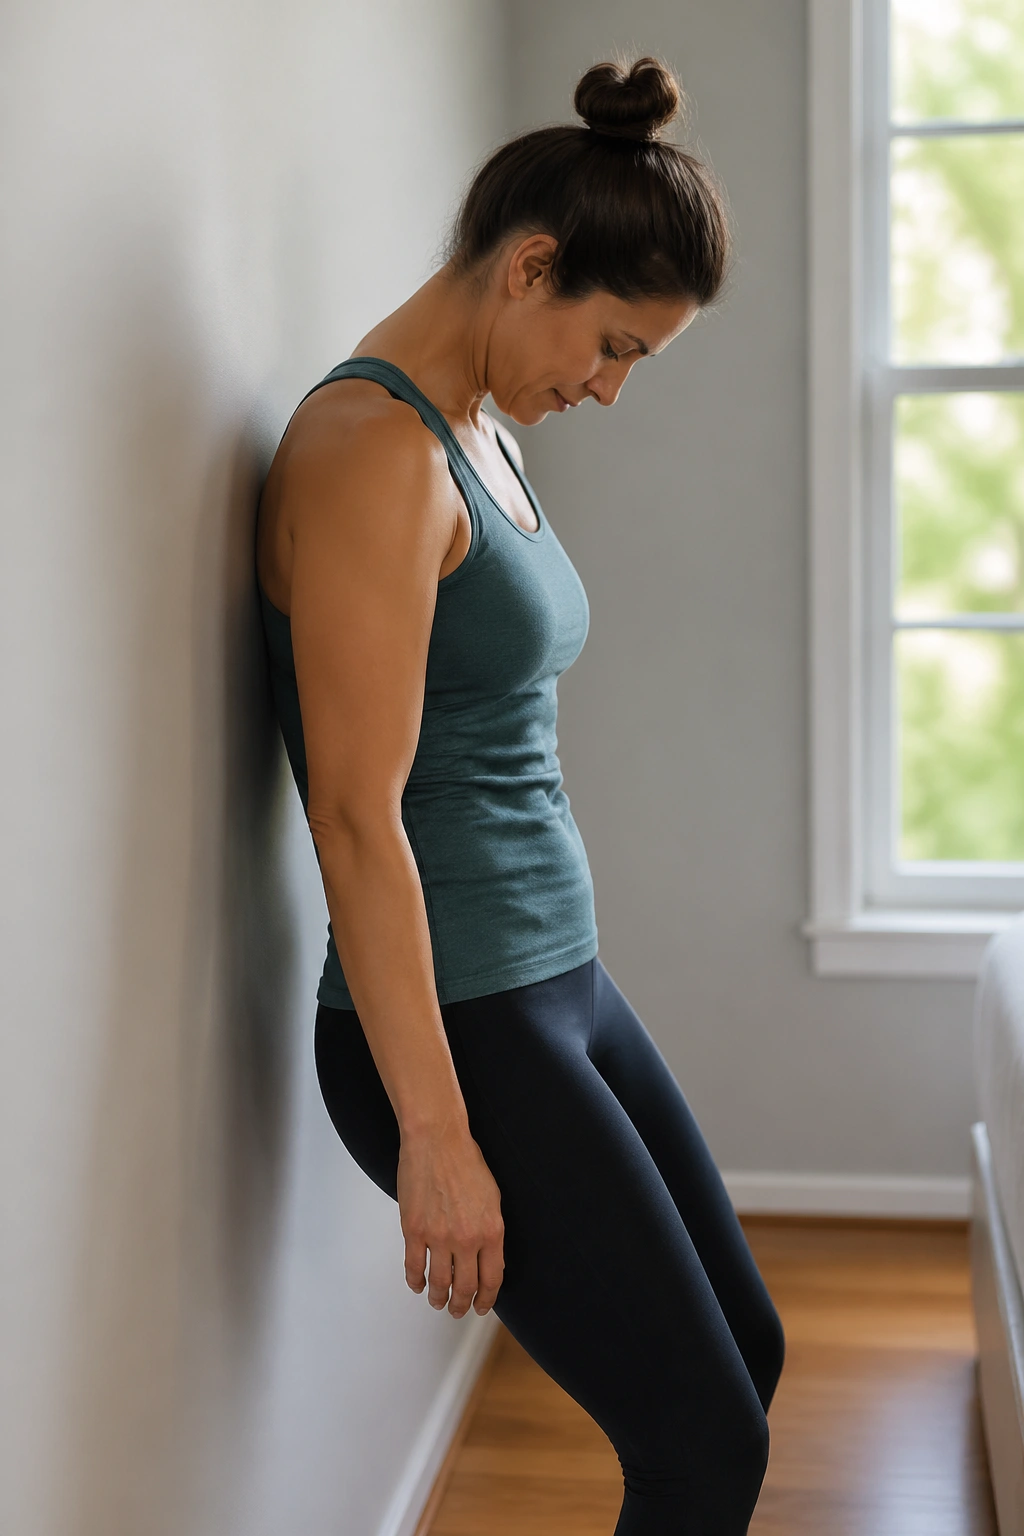
Why use a wall? Because the wall tells on you.
Stand with your back against a wall, feet 6 to 10 inches forward, knees soft rather than locked. Nod the chin, peel the head and upper back away one segment at a time, slide down into a small forward fold, then stack back up against the wall. The contact gives you feedback about where you are skipping past stiff spots and where you are gripping.
For people with bad knees, this move can be a bridge between floor Pilates and standing life. It teaches weight through the feet, a gentle hip hinge, and better rib-pelvis stacking without asking for a squat. You are learning how to bend without dumping all the work into the knees.
How to get value from it
Go slow enough that the peel-down takes 3 to 4 breaths. Keep the knees soft but still. If you feel pressure in the kneecaps, bring the feet closer to the wall. If your hamstrings scream, bend the knees another inch and shorten the fold. Three or four reps is enough. This is more about quality than volume.
16. Standing Side Leg Reach While Holding a Wall
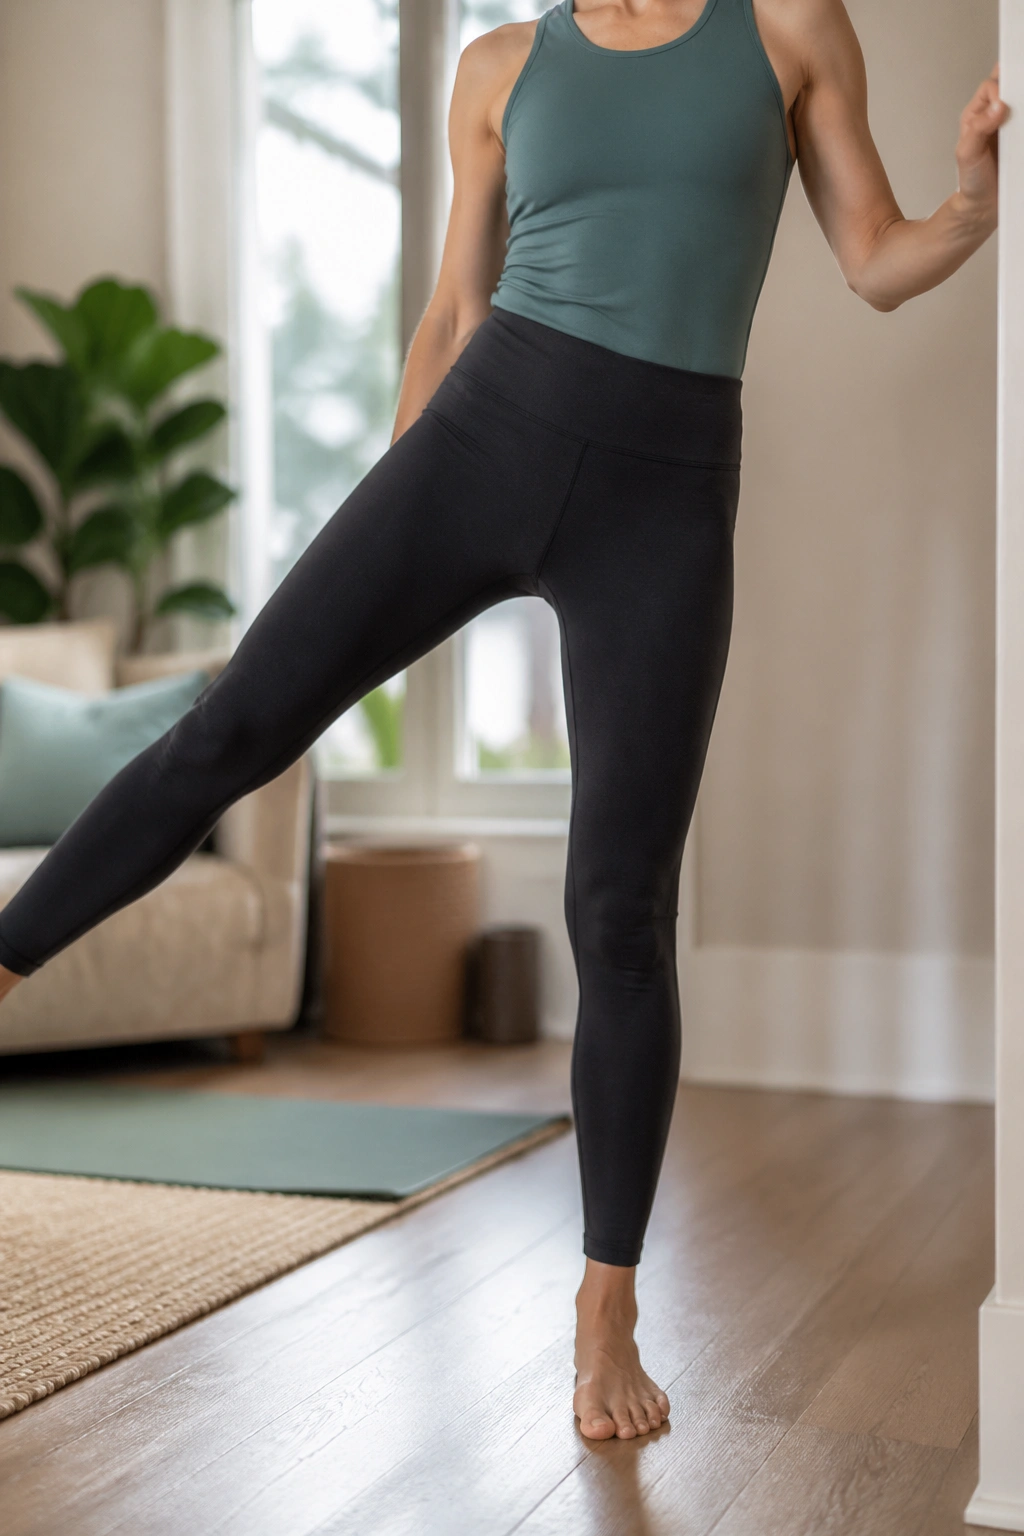
Picture the moment when you step sideways to avoid a puddle, a dog toy, or a kid’s backpack. That tiny side step demands more hip control than most people realize. This move trains it.
Stand tall beside a wall or sturdy chair and hold it with one hand. Shift your weight into the standing leg, then slide the free leg out to the side and back in without leaning your trunk over the standing hip. The toes face forward. The standing knee stays softly bent, not locked.
The goal is not to fling the leg high. The goal is to keep the pelvis level while the hip does the work. Side-stepping control matters for knees because a lot of knee irritation shows up when the body has to manage weight in the frontal plane—stepping off curbs, getting out of a car, moving around furniture.
A few quick markers:
- Keep the moving foot light.
- Watch the standing kneecap; it should point over the second or third toe.
- Reach out only as far as you can stay tall.
- Try 8 to 10 reps per side.
If balance is a headache, stand closer to the wall and use two fingers rather than a full death grip.
17. Supported Calf Raise with a Slow Lower
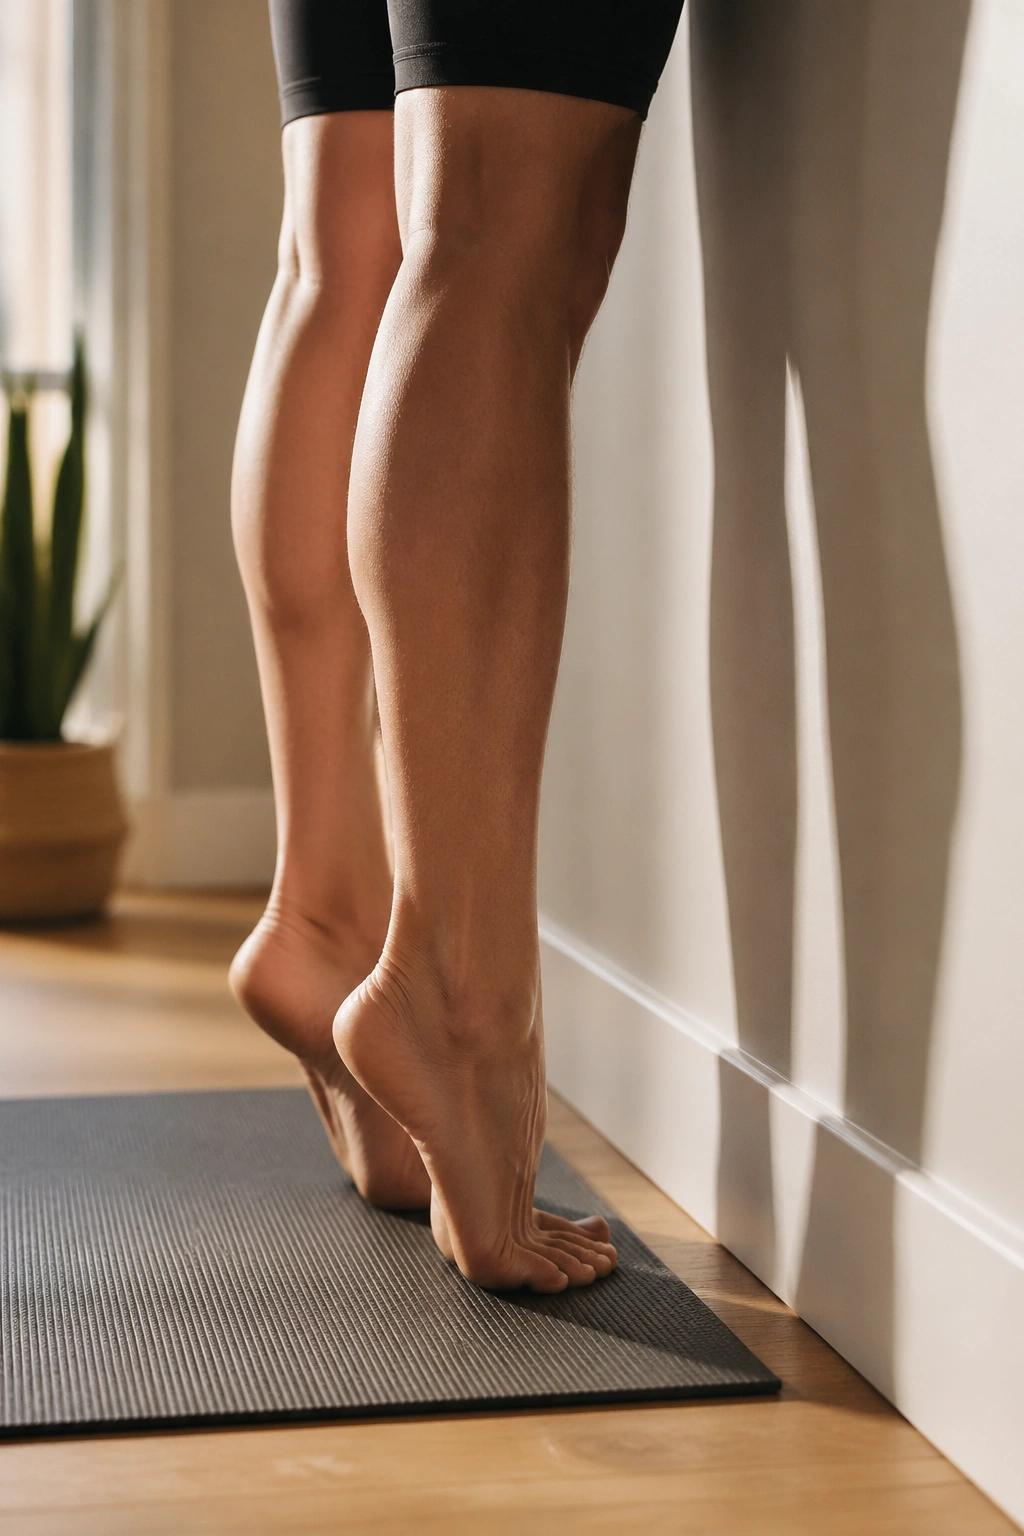
I do not hear enough people talk about calves in knee conversations. They should come up more often.
A stronger calf helps with shock absorption during walking and stair use, and the ankle’s ability to bend well changes what the knee has to do above it. Hold a wall or counter, stand with feet parallel, rise onto the balls of the feet for a count of 2, then lower for a count of 3. That slow lowering is where a lot of the value sits.
This feels humble. It is not. If your calves are weak or your ankles are stiff, the knee often takes on extra motion and load. I see it all the time in people who complain that their knees hurt after long walks but feel fine in seated exercise.
Start with 10 to 15 reps. If the base of the big toe lifts, lower the height and spread the pressure across all the toes. If your balance feels shaky, do the move facing the wall with both hands resting on it. Once that gets easy, try a small towel or yoga block between the ankles to keep the heels tracking straight.
18. Supine Wall Footwork in Parallel
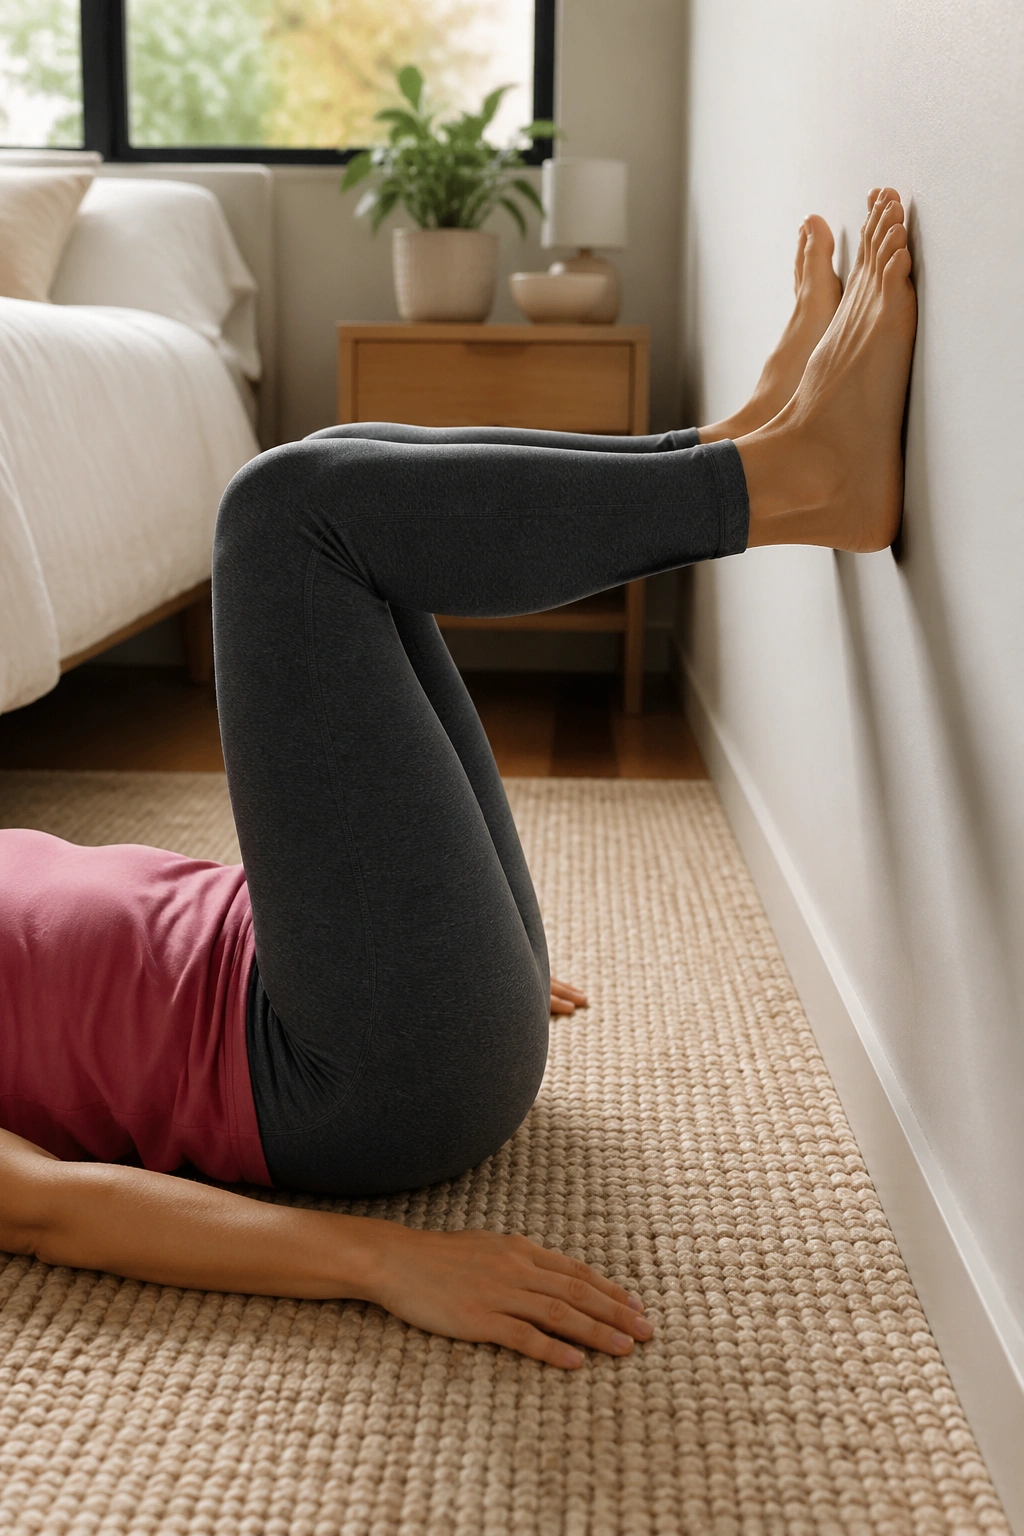
Unlike a squat, wall footwork lets you train a bend-and-straighten pattern while lying on your back, which cuts down body-weight load and gives the knee a calmer environment.
Lie on your back with both feet on a wall, knees and hips bent to about 90 degrees. Feet are hip-width apart and parallel. Press into the wall to slide your body a little away or to extend the knees a short distance, then bend back in with control. Think of it as a Pilates footwork pattern borrowed from the reformer and stripped down to the floor.
This move is a strong fit for people who need to rebuild trust in knee flexion but are not ready for repeated sit-to-stands or squats. The closed-chain contact of the wall gives clear feedback through the whole foot, and you can tune the range with small changes in distance.
A few ways to make it friendlier:
- Work in a partial range, maybe 20 to 40 degrees of motion at first.
- Keep the knees lined up with the middle toes.
- Exhale as you press, inhale as you return.
- Do 8 to 12 reps.
If the front of the knee feels pinchy, bring the feet a touch higher on the wall or shorten the bend. No need to chase depth.
Final Thoughts
Knees like options. They also like calm, repeatable input more than dramatic workouts that leave the joint puffy later in the day. If you take one thing from this list, let it be this: your knee does better when the hips, trunk, feet, and breath all start pulling their weight.
I would start with four moves, not all eighteen. A good first mix is pelvic clock, heel slides, glute bridge, and clamshells. Run that for a week or two. If your knee feels the same or better the next morning, add one standing move and one balance or cross-body move.
And do not get fooled by the quiet ones. Some of the smallest Pilates drills have the biggest payoff because they teach your body how to stop leaking force in all the places that leave the knee exposed. That kind of progress is not flashy. It is the kind you feel when stairs stop feeling personal.
