



The wall is arguably the most undervalued piece of equipment in any Pilates studio. It provides immediate, unyielding feedback that a floor mat simply cannot offer. When you press your spine, legs, or palms against a solid vertical surface, you are not just exercising; you are using the wall as a biofeedback tool to correct your alignment in real-time. If your ribcage pops, the wall lets you know instantly. If your hips tilt unevenly, the wall reveals the asymmetry.
Starting a dedicated practice does not require heavy weights or expensive machines. This twenty-one-day sequence focuses on leveraging the wall to deepen your connection to your core, improve your posture, and build functional strength. Each day builds on the last, moving from fundamental stabilization to more complex, compound movements. Treat the wall as a partner. It is there to catch you, to challenge you, and to tell you exactly where your body is in space.
1. Wall-Supported Breathing and Core Activation
The foundation of every movement starts with the breath. Many people rush into exercises, but without proper diaphragm engagement, you are likely just holding your breath and tensing your neck. Lean your back against the wall, feet about six inches away. Place your hands on your ribcage. As you inhale through your nose, feel your ribs expand into your palms, like an accordion opening.
Exhale through pursed lips, knitting your ribs together and pulling your belly button back toward the wall. The goal is to imprint your entire spine—from the tailbone to the shoulder blades—against the vertical surface. If you feel a gap behind your lower back, soften your knees slightly to tilt your pelvis. This is your baseline. Without this level of core control, the subsequent movements lose their efficacy.
Focusing on the Deep Transverse Abdominis
The transverse abdominis is your body’s natural corset. When you focus on that sharp exhalation, you are activating these deep fibers. Keep the shoulders pressed back, opening the chest. If your shoulders roll forward, you are cheating the pose. Stay here for five minutes, focusing entirely on the rhythmic expansion and contraction of your core.
2. Pelvic Tilts and Lower Back Release
Lower back pain often stems from an exaggerated curve in the lumbar spine. This exercise specifically targets the release of tension in that area. Begin standing with your feet hip-width apart, heels about four inches from the baseboard. Press your entire spine into the wall, beginning with the tailbone.
Inhale to prepare, then exhale to tuck your pelvis under. Imagine you are trying to imprint your lower back into the wall by drawing your hip bones toward your lower ribs. Your glutes will engage, but do not clench them excessively. Hold for three seconds, then return to a neutral spine while maintaining contact.
Why This Matters for Your Alignment
Repeating this movement serves as a recalibration for your pelvis. Most of us walk around with an anterior pelvic tilt—a swayback posture. By systematically forcing your spine to meet the wall, you are training your muscles to hold a more neutral, supportive position throughout the day. Perform twenty repetitions, moving slowly and resisting the urge to snap the hips back to the start.
3. The Wall-Supported Glute Bridge
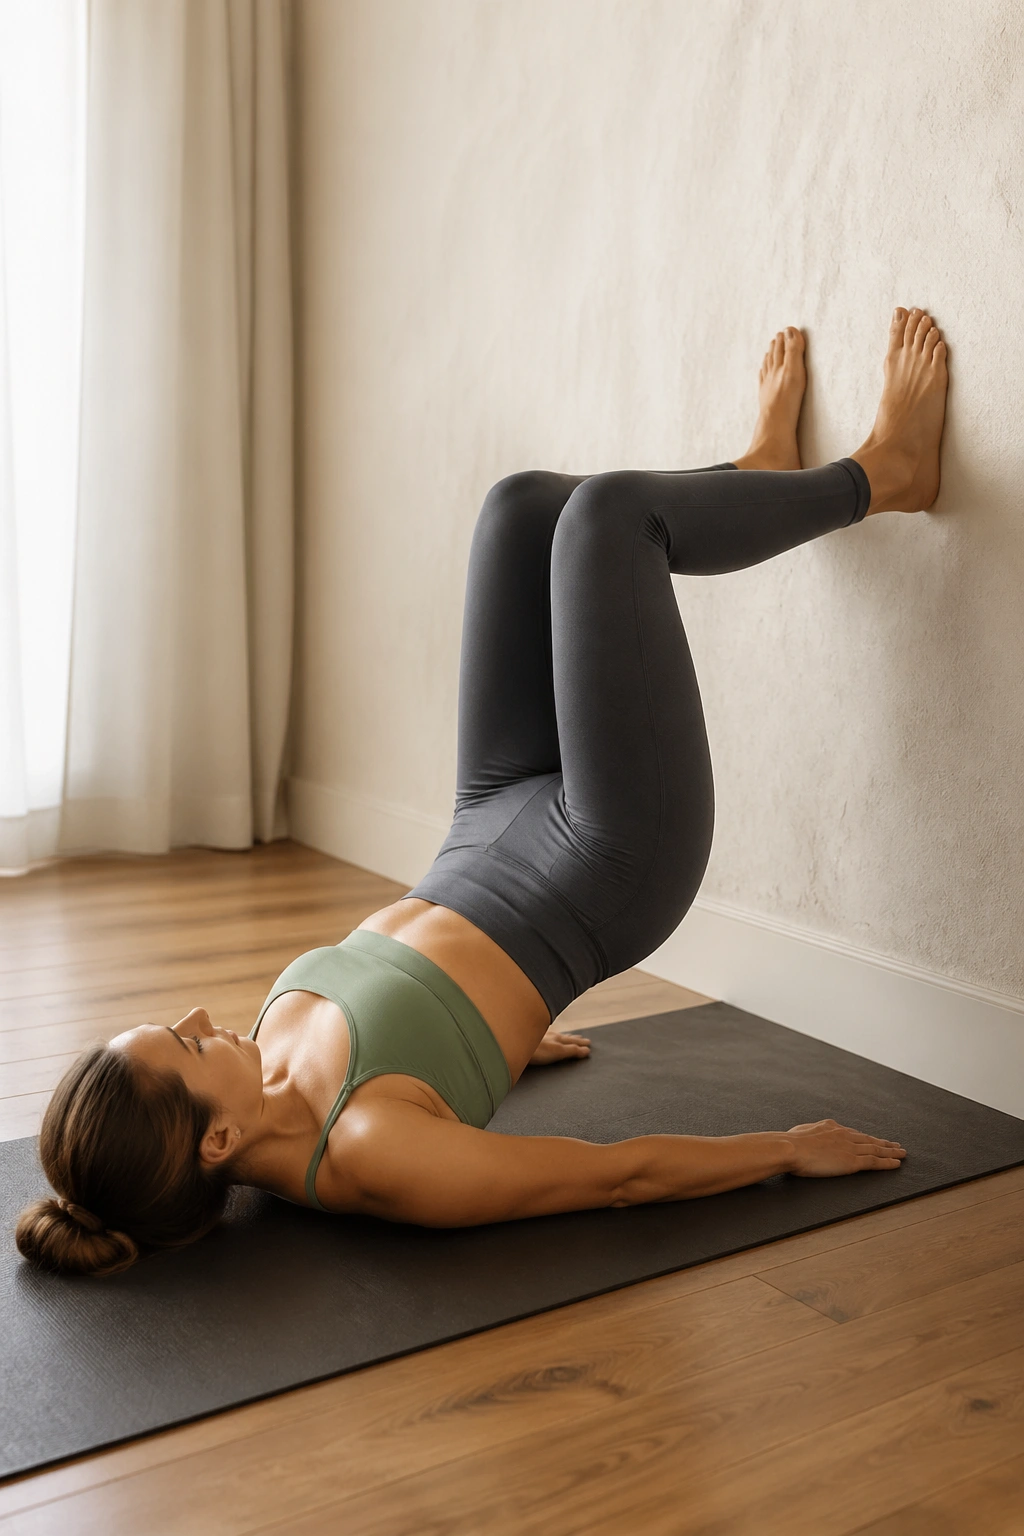
Traditional floor bridges are effective, but adding the wall forces you to focus on knee alignment and foot placement. Lie on your back, feet flat against the wall with knees bent at a ninety-degree angle. Your shins should be parallel to the floor. Engage your core, and on an exhale, press your feet firmly into the wall to lift your hips toward the ceiling.
Ensure your weight is distributed evenly between your heels and the balls of your feet. As you rise, your back should remain in a straight line from knees to shoulders. The wall provides stability, allowing you to isolate the glutes without worrying about sliding or losing balance.
Avoiding Common Errors
Do not let your knees splay outward. Keep them hip-width apart, as if you are holding a block between them. If your hamstrings cramp, walk your feet slightly higher up the wall. This takes the pressure off the back of the legs and forces the glutes to do the heavy lifting. Squeeze at the top for a two-second hold before lowering back down with control.
4. Leg Circles for Hip Mobility
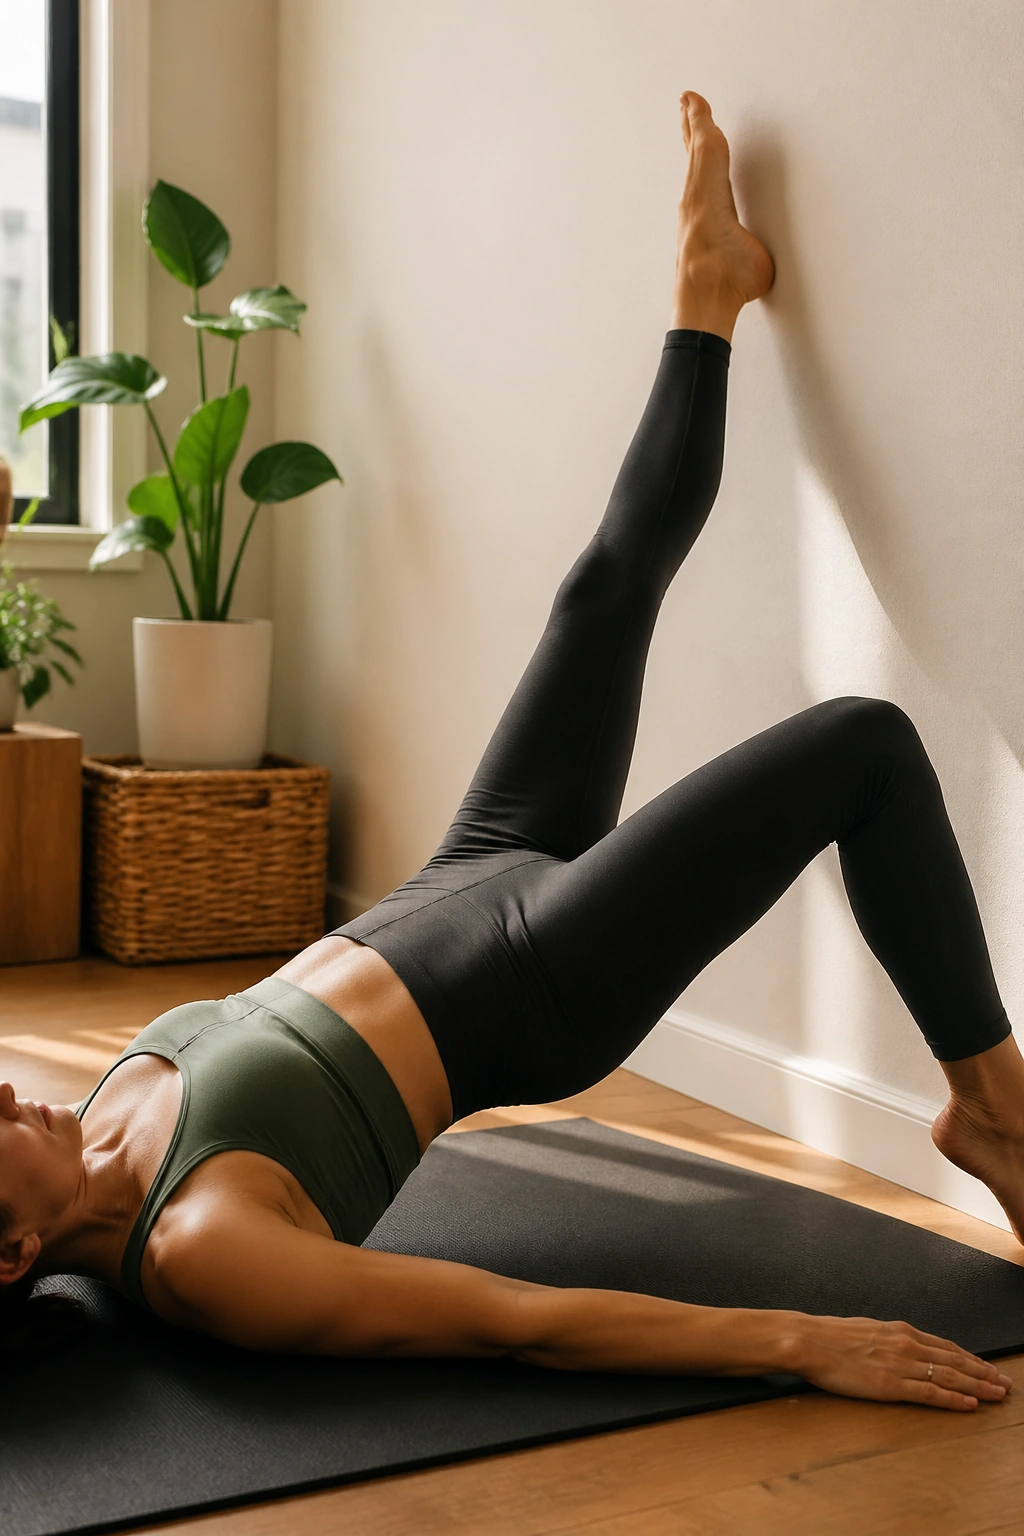
Hip stiffness is a common byproduct of long hours spent sitting. Wall-supported leg circles provide the necessary resistance to safely open the hip joint. Lie on your back, extending one leg straight up against the wall, while the other leg remains on the floor or is bent for stability.
Take the leg that is against the wall and slowly circle it. Imagine your heel is tracing the outline of a dinner plate. Keep your pelvis completely glued to the floor. If your hips start to rock or wiggle, shrink the size of your circle. The wall acts as a guide for height, but the movement should come from the hip socket, not the lower back.
The Importance of Stability
Control is the name of the game here. You might be tempted to swing the leg around using momentum, but that bypasses the stabilizing muscles you are trying to train. Move slowly. Perform ten circles in a clockwise direction, then switch to counter-clockwise. You should feel the deep muscles around the hip joint firing to keep the torso still.
5. Wall-Press Chest and Tricep Toner
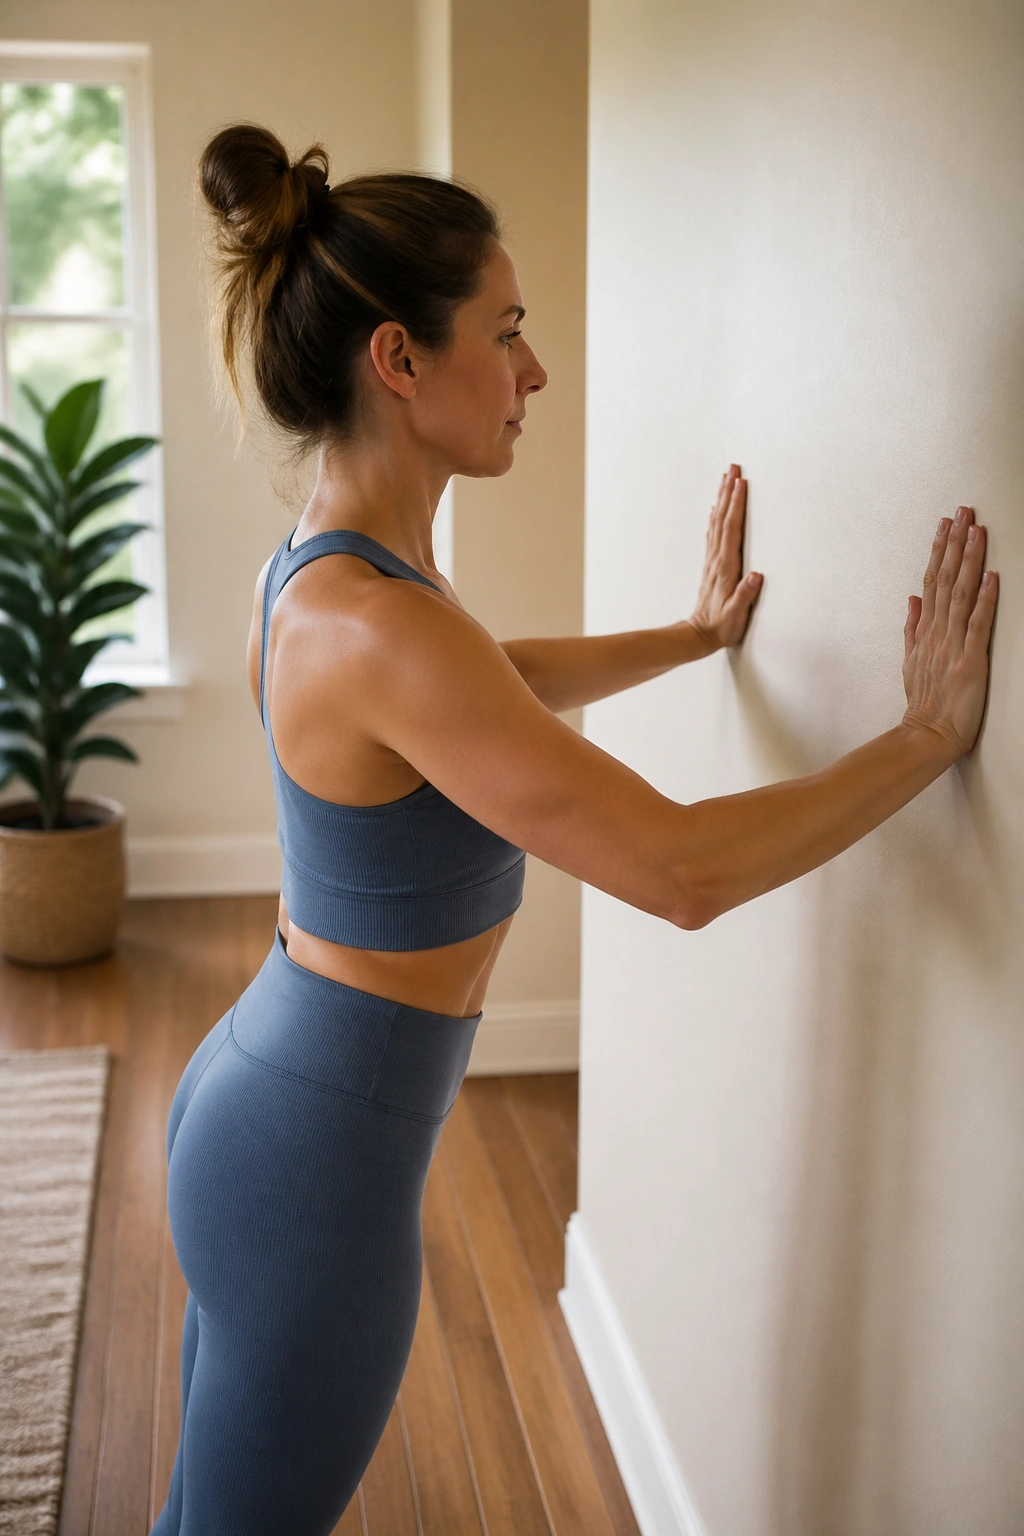
This is not a traditional push-up. It is a focus on scapular stability and pectoral engagement. Stand facing the wall, about an arm’s length away. Place your palms flat against the wall at shoulder height. Inhale as you bend your elbows, lowering your chest toward the wall.
Keep your elbows tucked in close to your ribs—do not let them flare out to the sides. Flare-outs put unnecessary strain on the shoulder joints. As you push away from the wall, exhale and focus on pushing your shoulder blades away from each other. This is called protraction, and it is a key movement for a healthy, stable shoulder girdle.
Maximizing the Resistance
If the move feels too easy, step your feet further back from the wall. This increases the angle and forces your core to work harder to prevent your lower back from arching. Perform three sets of twelve repetitions, keeping your neck long and your gaze fixed at eye level throughout the entire movement.
6. Inner Thigh Squeezes with Resistance
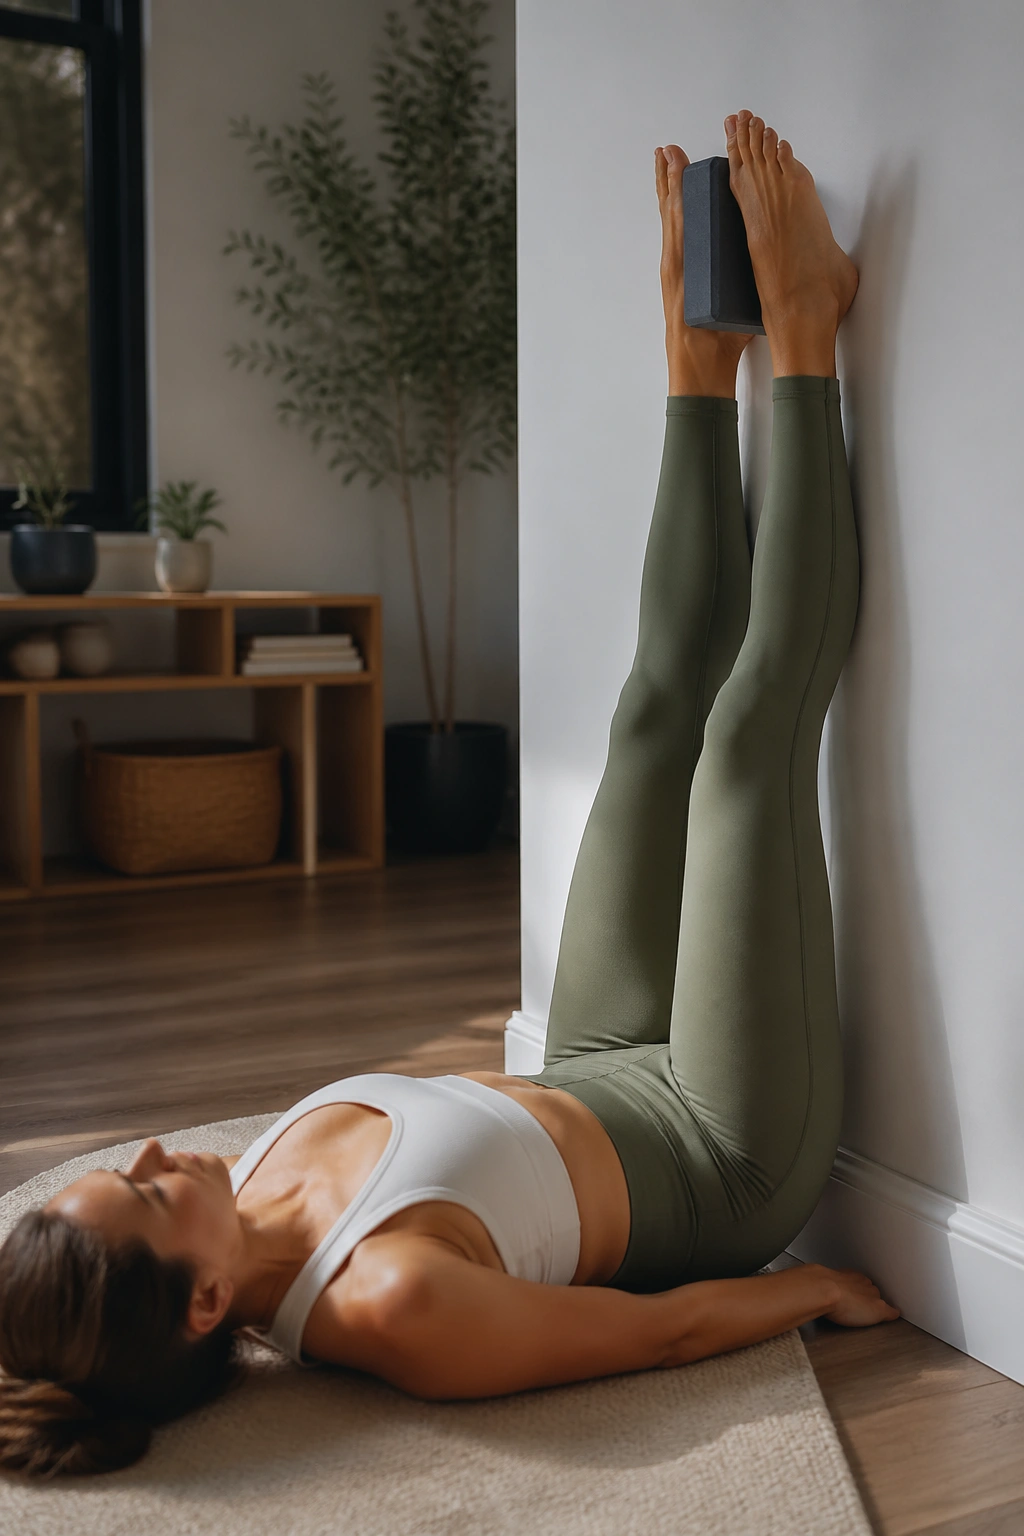
The adductors, or inner thighs, are often neglected in standard workouts. For this move, you need a small prop, like a cushion or a yoga block. Lie on your back, legs extended up the wall. Place the block between your inner ankles.
Squeeze the block as hard as you can. You will feel your inner thighs engage immediately. While maintaining that squeeze, lower your legs down a few inches, then return to the starting position. The wall keeps your legs steady, so you can focus entirely on the isometric tension of the squeeze.
Why Isometric Tension Works
Isometric exercises—holding a muscle under tension without changing its length—are excellent for building muscle density. Because you aren’t moving the joint through a massive range of motion, you can safely apply more force. Keep your lower back imprinted against the mat. If your back lifts, your legs are too low. Adjust your angle until you can maintain a flat spine.
7. Wall Sit with Isometric Holds
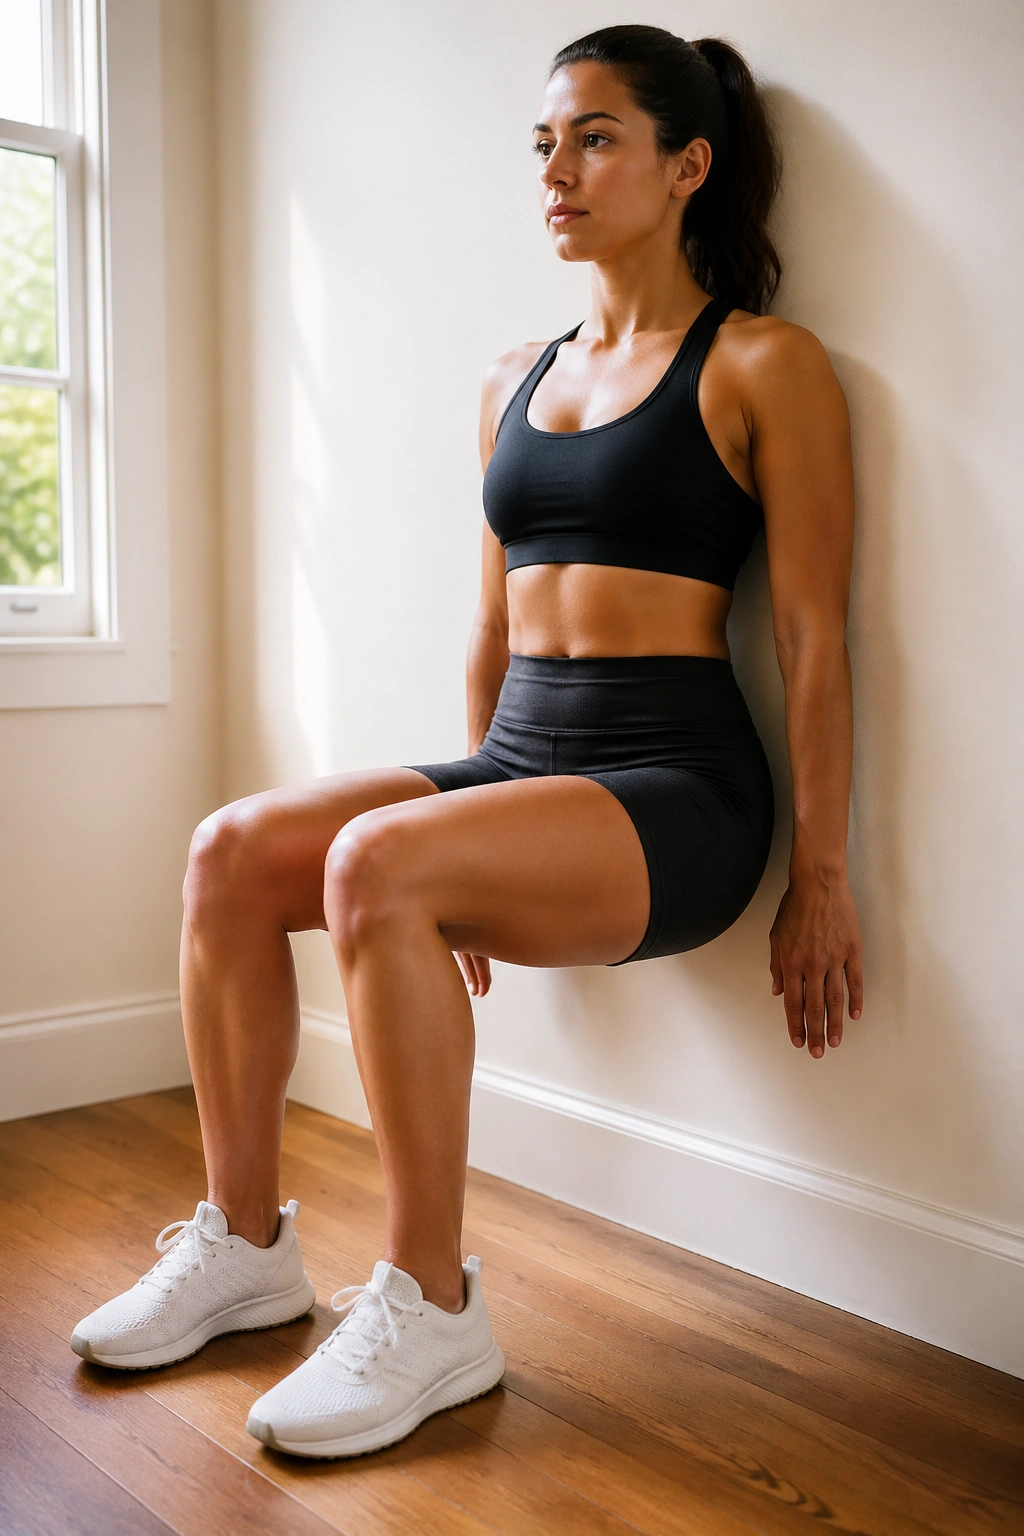
The classic wall sit is a staple for a reason. It is brutal on the quads, but it also demands incredible core stability. Stand with your back against the wall and slide down until your knees are at a ninety-degree angle. Your heels should be planted firmly on the floor.
Push your entire spine, including the head, into the wall. Try to eliminate any space between your lumbar spine and the surface. You will feel your quadriceps start to burn within thirty seconds. Embrace the sensation. This is the fatigue point where the muscle actually starts to change.
Timing and Endurance
Start with a forty-five-second hold. If you find your legs shaking, that is normal. Focus on your breathing. Inhale deeply, and on the exhale, try to “zip up” your core muscles even tighter. Do not rest your hands on your knees, as this shifts the focus away from your legs and core. Keep your arms relaxed by your sides or extended forward for a balance challenge.
8. Standing Roll-Downs against the Surface
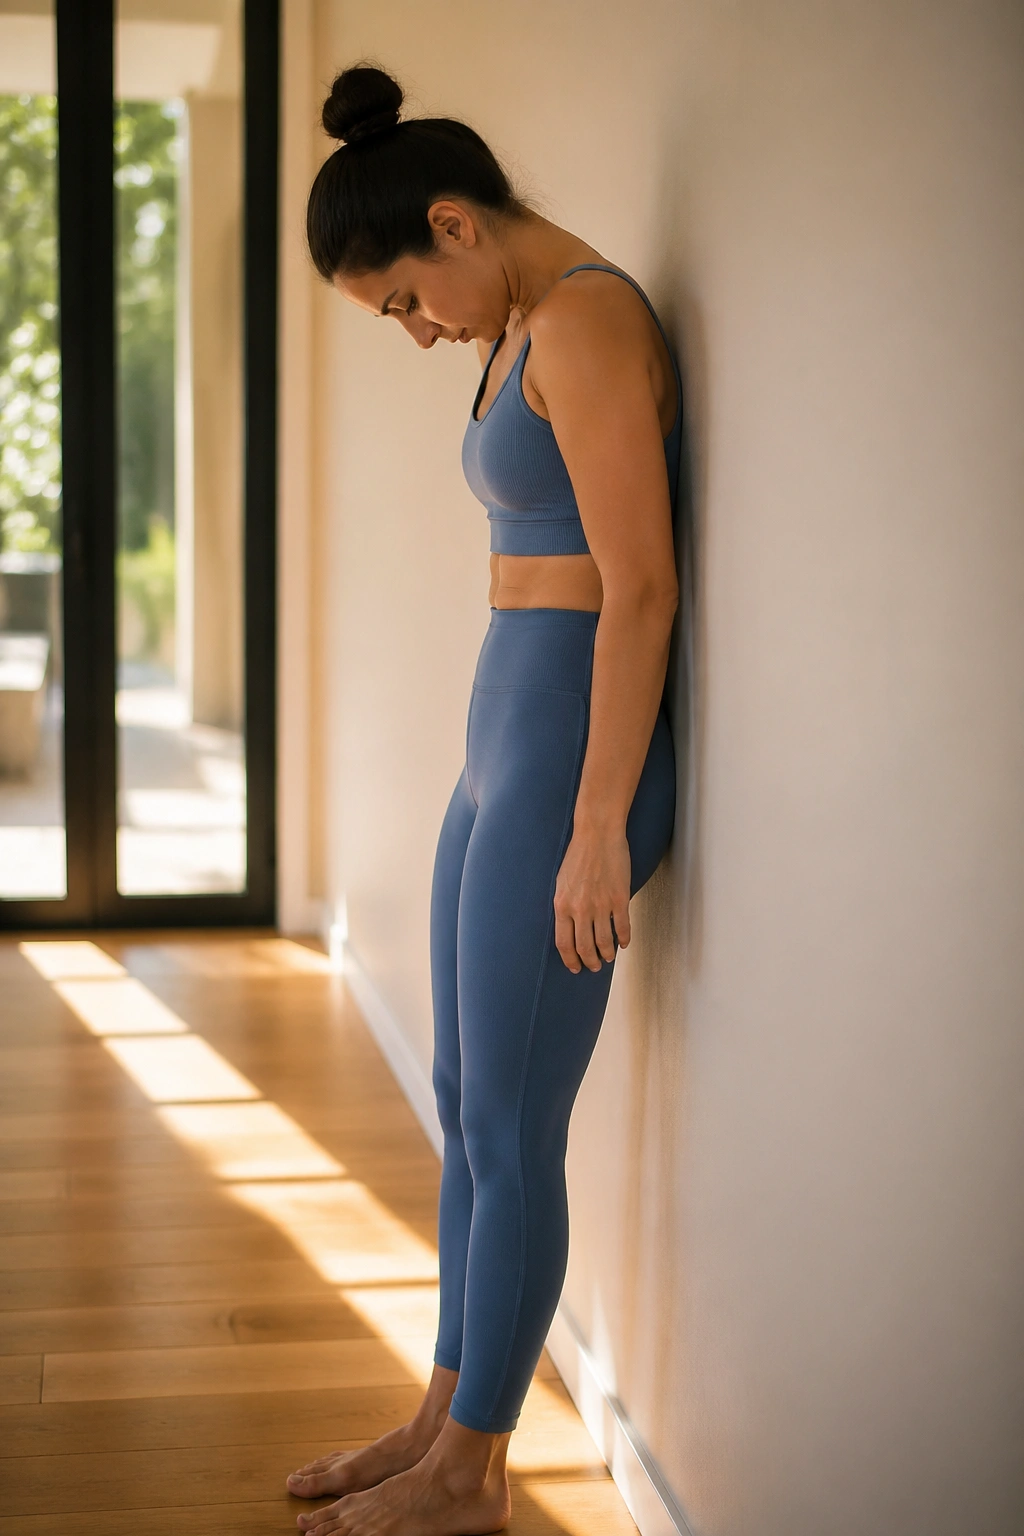
This exercise is all about spinal articulation. Stand with your back against the wall, feet a few inches away. Inhale as you lengthen your spine, feeling the top of your head reaching for the ceiling.
As you exhale, slowly drop your chin to your chest and begin to peel your spine away from the wall, one vertebra at a time. The wall is your guide; try to keep the contact for as long as possible before the curve of your spine forces a separation. Hang heavy at the bottom, letting your arms dangle. Inhale again, and slowly restack your spine, feeling each bone find its place against the wall until you are standing tall again.
Why Articulation Matters
When we move as a stiff unit, we put stress on our discs. Learning to move the spine segment by segment keeps the back supple and healthy. Do not rush the descent. The slower you move, the more you have to engage your core muscles to control the descent against gravity.
9. Wall-Supported Teasers
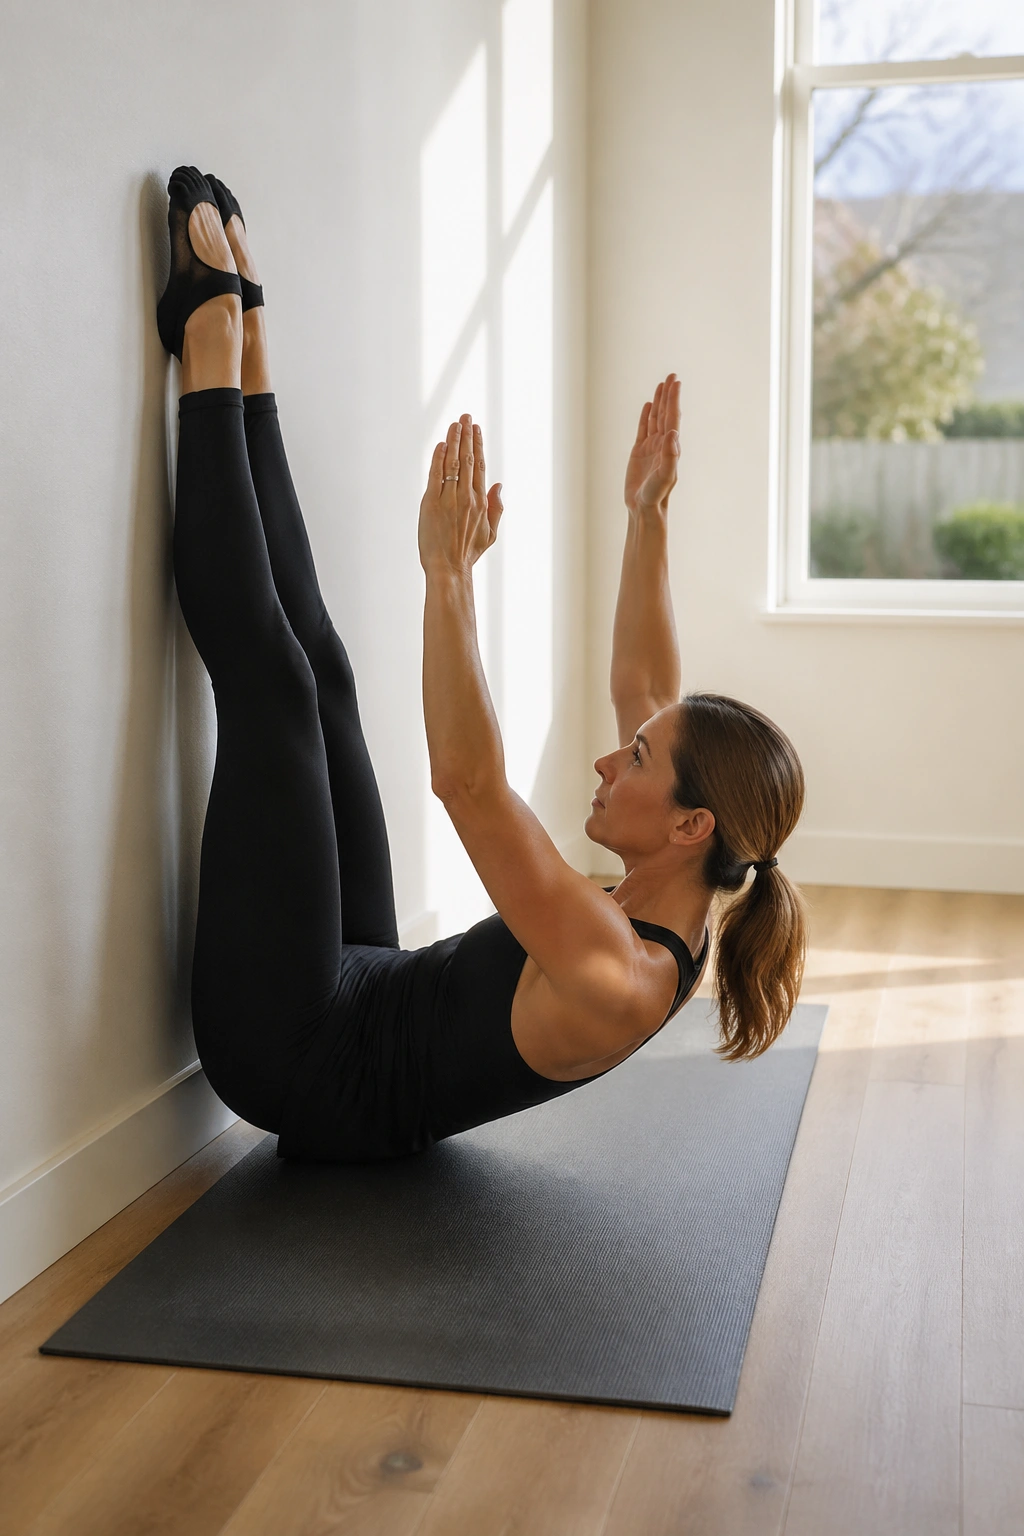
The teaser is a classic Pilates move that is notoriously difficult. The wall makes it accessible. Lie on your back with your legs extended up the wall. Reach your arms overhead. Inhale to prepare, and as you exhale, peel your upper body off the floor, reaching your fingers toward your toes.
The wall gives you a target for your legs, keeping them locked in place so you can focus on the crunching motion of the upper body. Your goal is to create a “V” shape. If you cannot reach your toes, reach for your shins. The wall ensures your legs do not drift toward your chest, which keeps the focus entirely on your rectus abdominis.
Troubleshooting the Crunch
If your neck hurts, stop and reset. You are likely pulling from your neck instead of your abdominals. Imagine a string pulling your breastbone toward your thighs. Keep the ribcage knitted shut. If you feel a “popping” sensation in your stomach, that is the abdominal wall losing containment. Stop, reset, and focus on the exhale to keep the core flat.
10. The Side-Lying Leg Lift Sequence
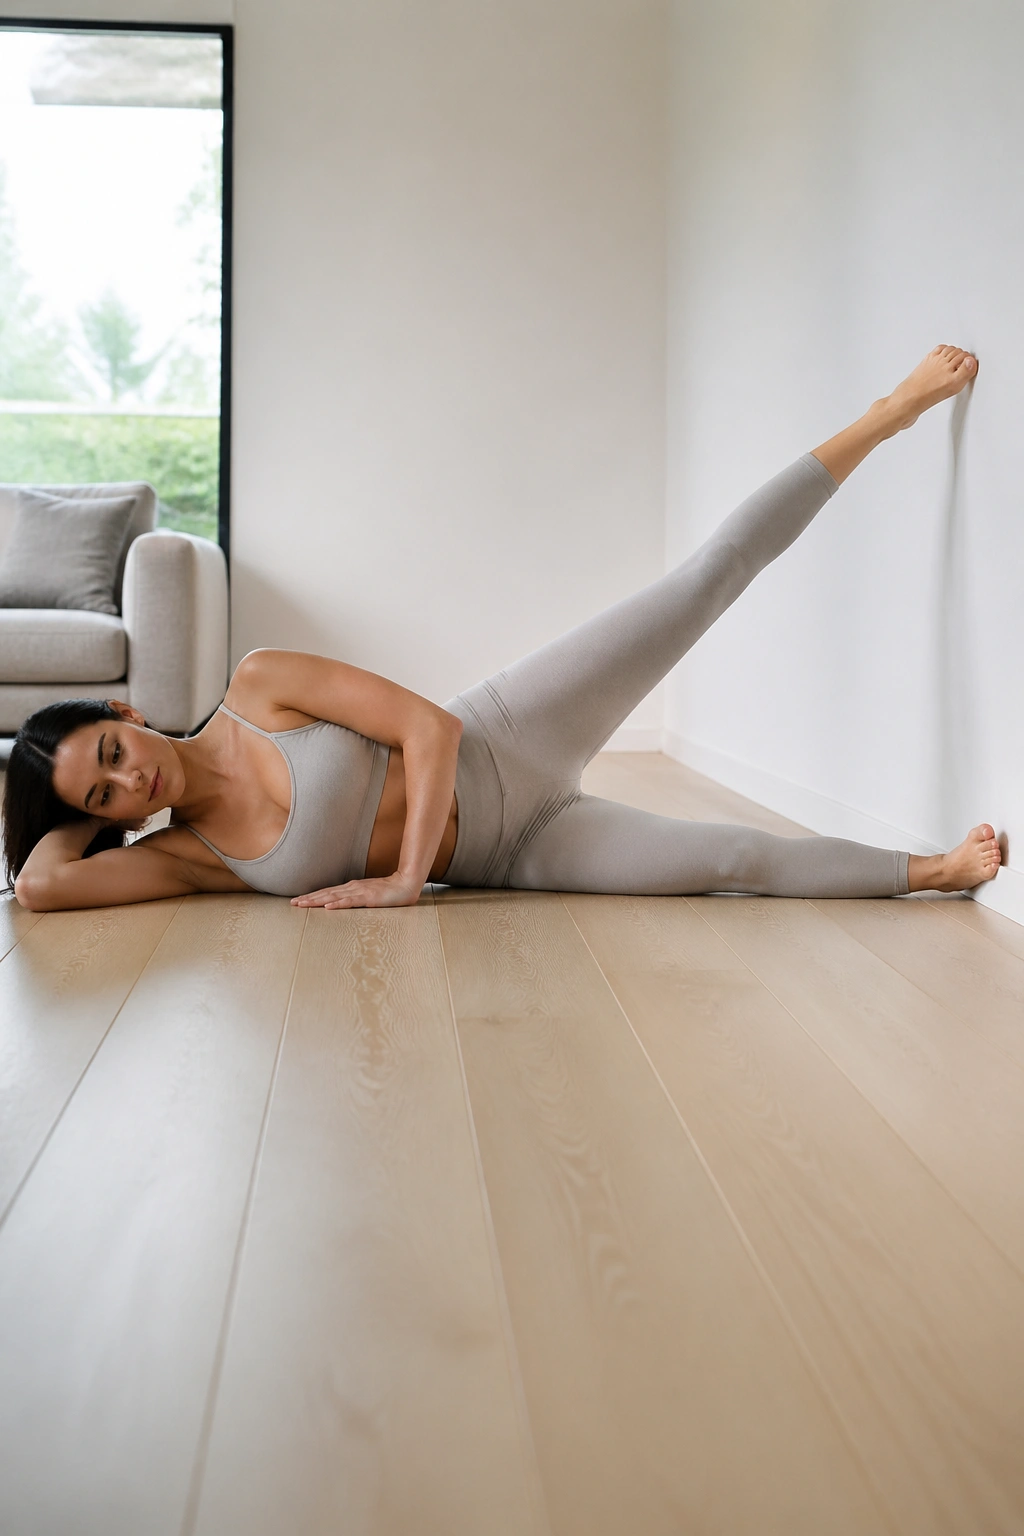
Side-lying exercises are fantastic for the gluteus medius, the muscle responsible for pelvic stability. Lie on your side with your back pressed against the wall. Extend both legs straight, slightly in front of your hips.
The wall acts as a tracking system. As you lift your top leg, keep your heel and the back of your calf in contact with the wall. Lift the leg up, then slowly lower it down, resisting gravity. Because the wall is there, you cannot cheat by rocking your hips forward or backward. You have to use your deep hip stabilizers to control the movement.
Developing Hip Stability
Perform fifteen lifts per side. You will feel a deep burn in the side of the hip. This burn is exactly what you want. It indicates that you are isolating the stabilizing muscles of the hip, which will help with everything from walking to balancing. If you feel the burn in your lower back, you are lifting your leg too high. Lower the range of motion.
11. Wall-Assisted Swan Dive
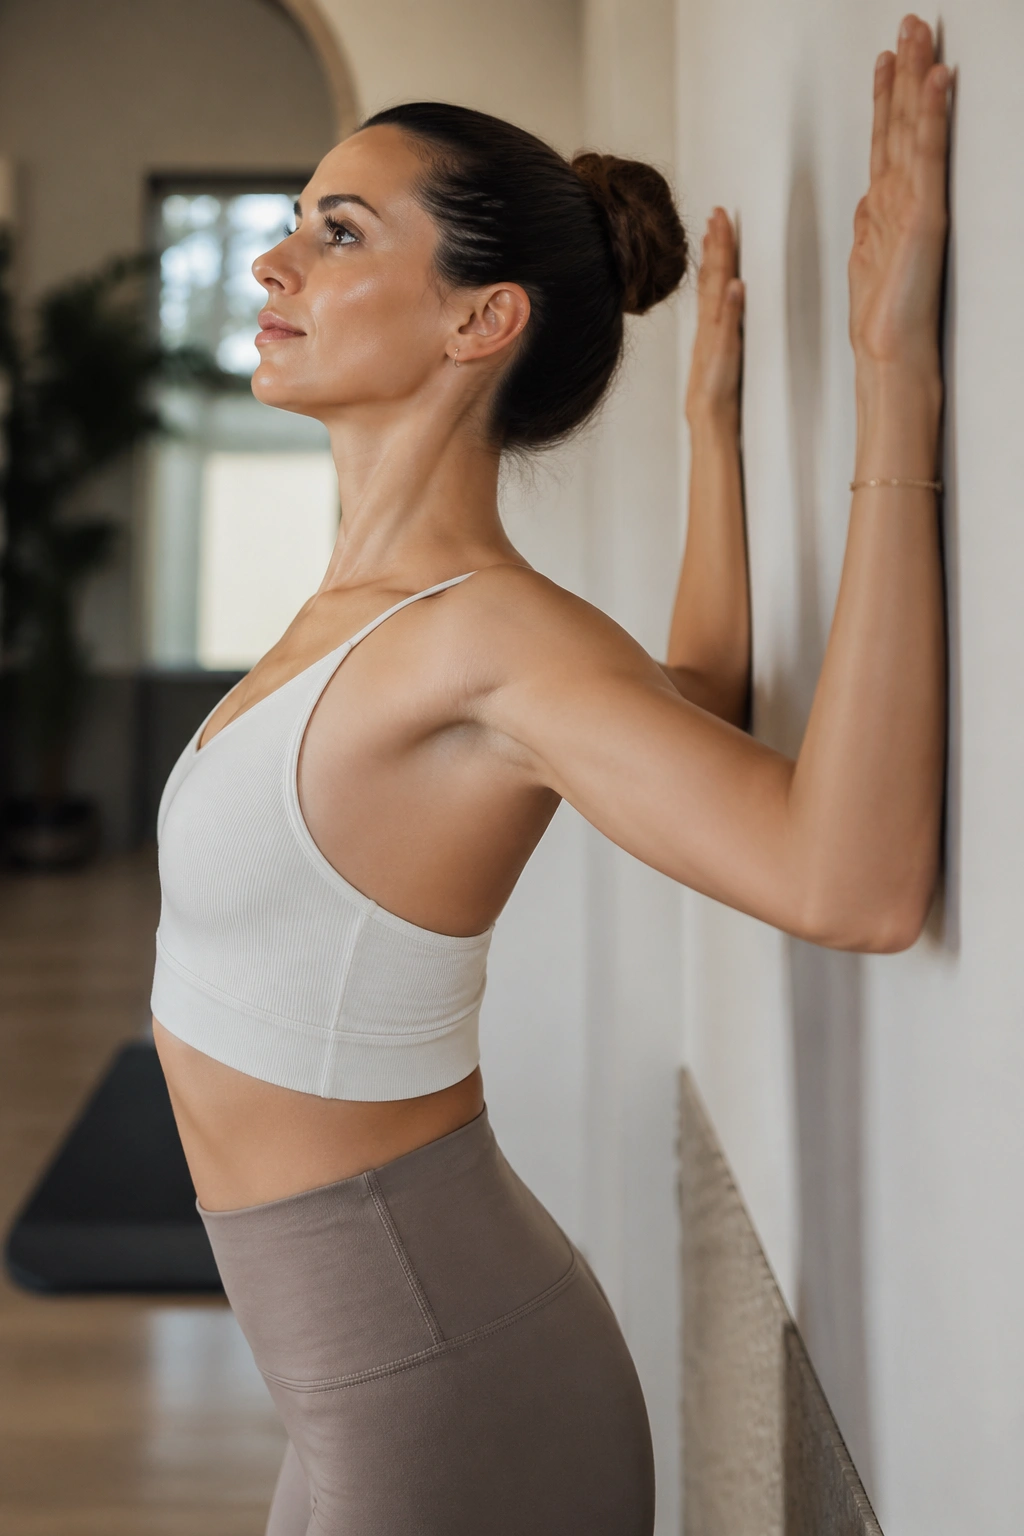
Extension is the opposite of the forward-bending motions we do all day. Stand facing the wall, about a foot away. Place your forearms against the wall, elbows at shoulder height. This is your starting position.
Inhale and press your forearms into the wall, lifting your chest and gliding your shoulder blades down your back. Think about lengthening your spine rather than just bending backward. Keep your core tight to protect your lower back. The wall helps you maintain an upright posture while encouraging thoracic extension.
The Importance of Thoracic Mobility
Most of us are tight in our upper back. This movement helps open up the ribcage and improve lung capacity. Do not crunch into your lower back. Focus on the feeling of opening the chest. If you feel pinching in your lumbar spine, reduce the range of motion or engage your glutes more strongly to support the pelvis.
12. Scissors and Flutter Kicks
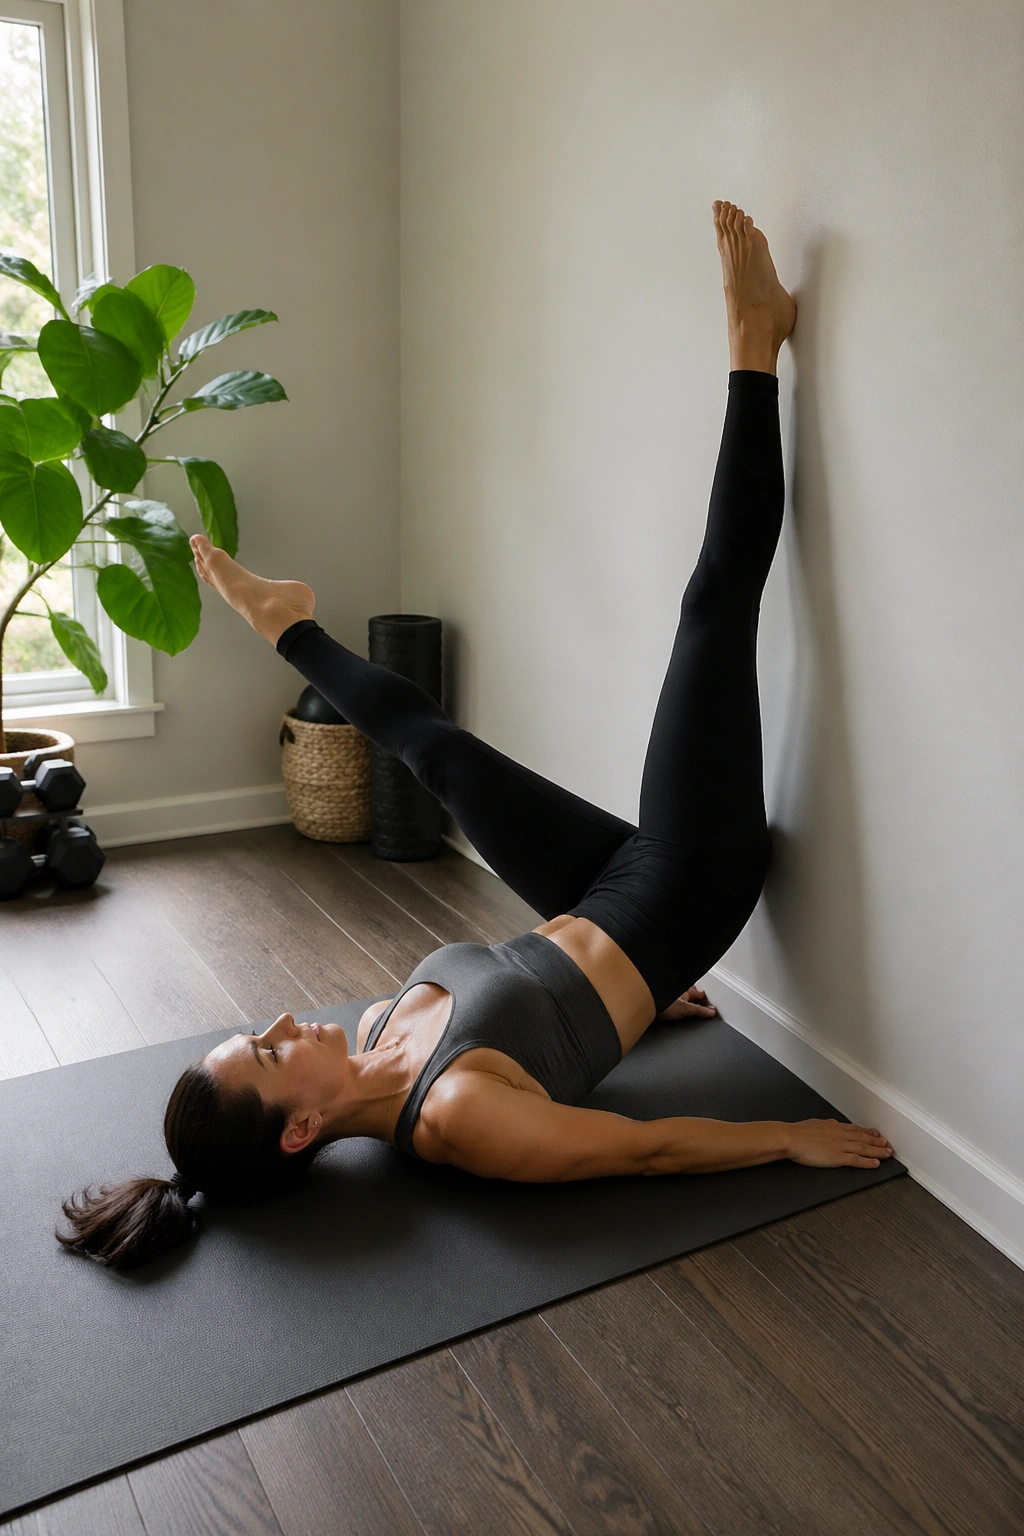
This is a cardio-intensive Pilates move that also torches the lower abs. Lie on your back, hips close to the wall, legs extended straight up. Take your right leg and lower it slightly away from the wall while the left leg stays anchored to the surface.
Switch legs in a scissoring motion. As one leg moves away, the other stays perfectly vertical against the wall. The wall provides the sensory cue to keep one leg at ninety degrees, ensuring your hips remain square. If your hips start to twist, you are moving too fast. Slow down and prioritize the precision of the movement.
Coordination and Control
The challenge here is to keep the upper body relaxed while the lower body works. Keep your head on the floor, gaze fixed on your legs. Do not let your shoulders creep toward your ears. Focus on the deep “scoop” of the belly button toward the spine on every single switch.
13. Wall Push-ups for Upper Body Strength
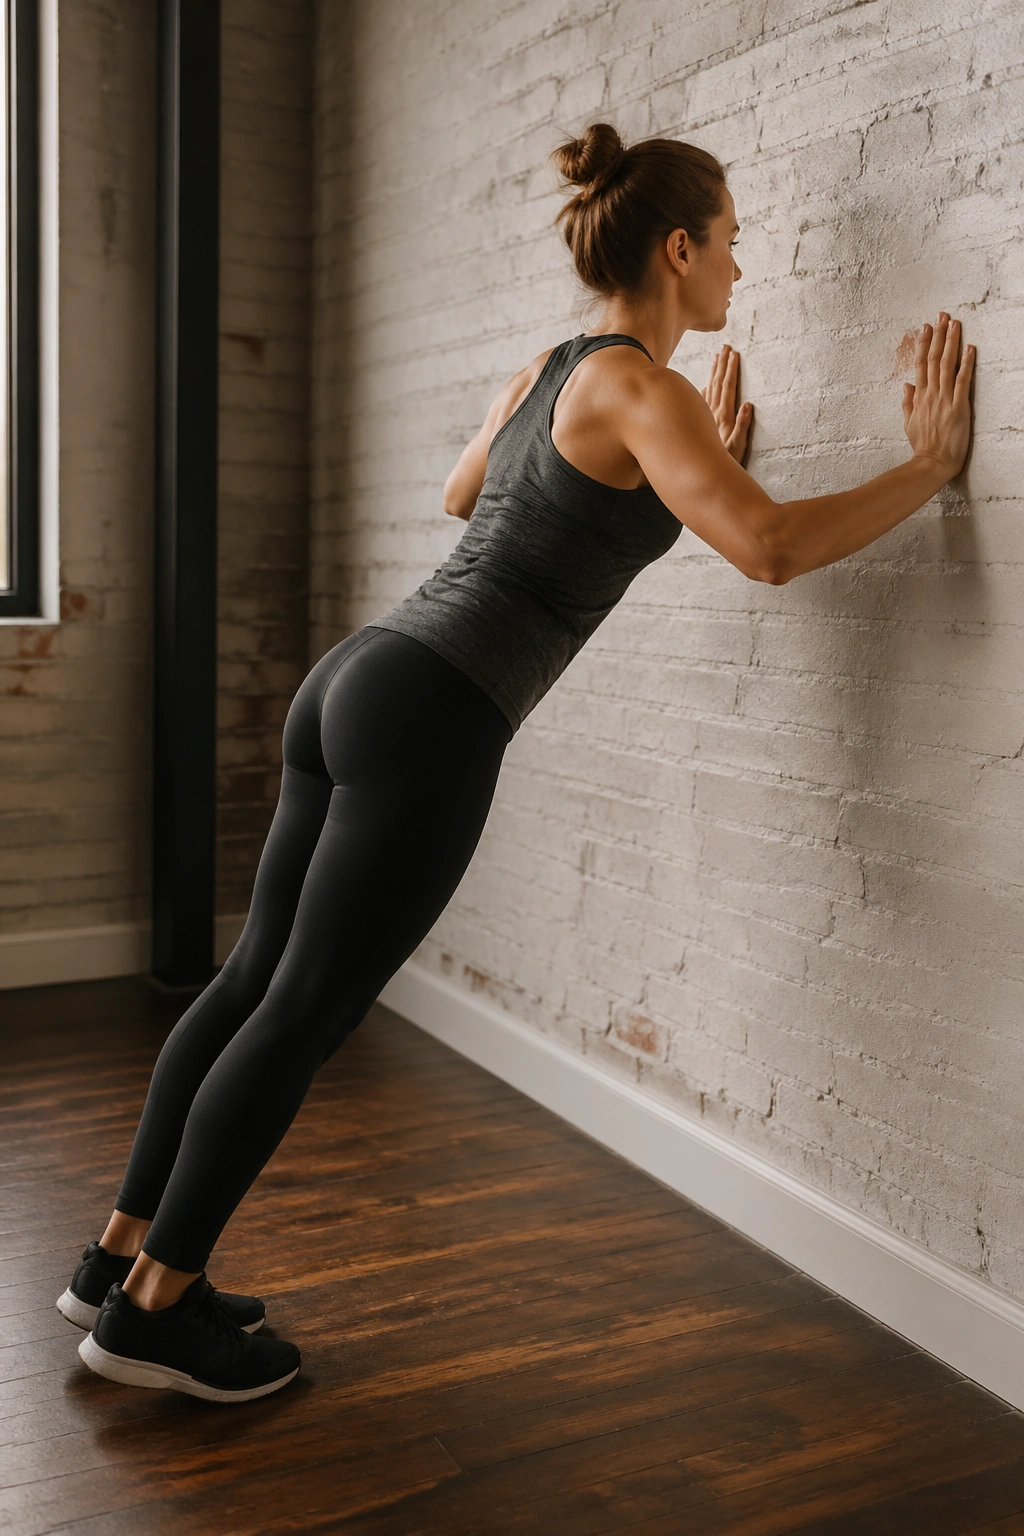
We touched on this earlier, but today, we increase the intensity. Move your feet further back from the wall so you are at a sharper angle. Place your hands slightly wider than shoulder-width.
Perform ten controlled push-ups. When you press away, ensure your elbows do not lock out—keep a micro-bend to maintain tension on the triceps. The wall provides a stable surface to work against, but you can also use your hands to “grip” the wall, which helps recruit the muscles in your forearms and chest more effectively.
Why Width Matters
A wider hand placement puts more emphasis on the outer chest, while a narrower placement focuses on the triceps. Experiment with both to see where you feel the most activation. Always keep your core engaged. If your hips sag toward the wall, you are no longer in a plank; you are just leaning. Tighten your glutes to stay in a straight line.
14. Hamstring Stretches and Lengthening
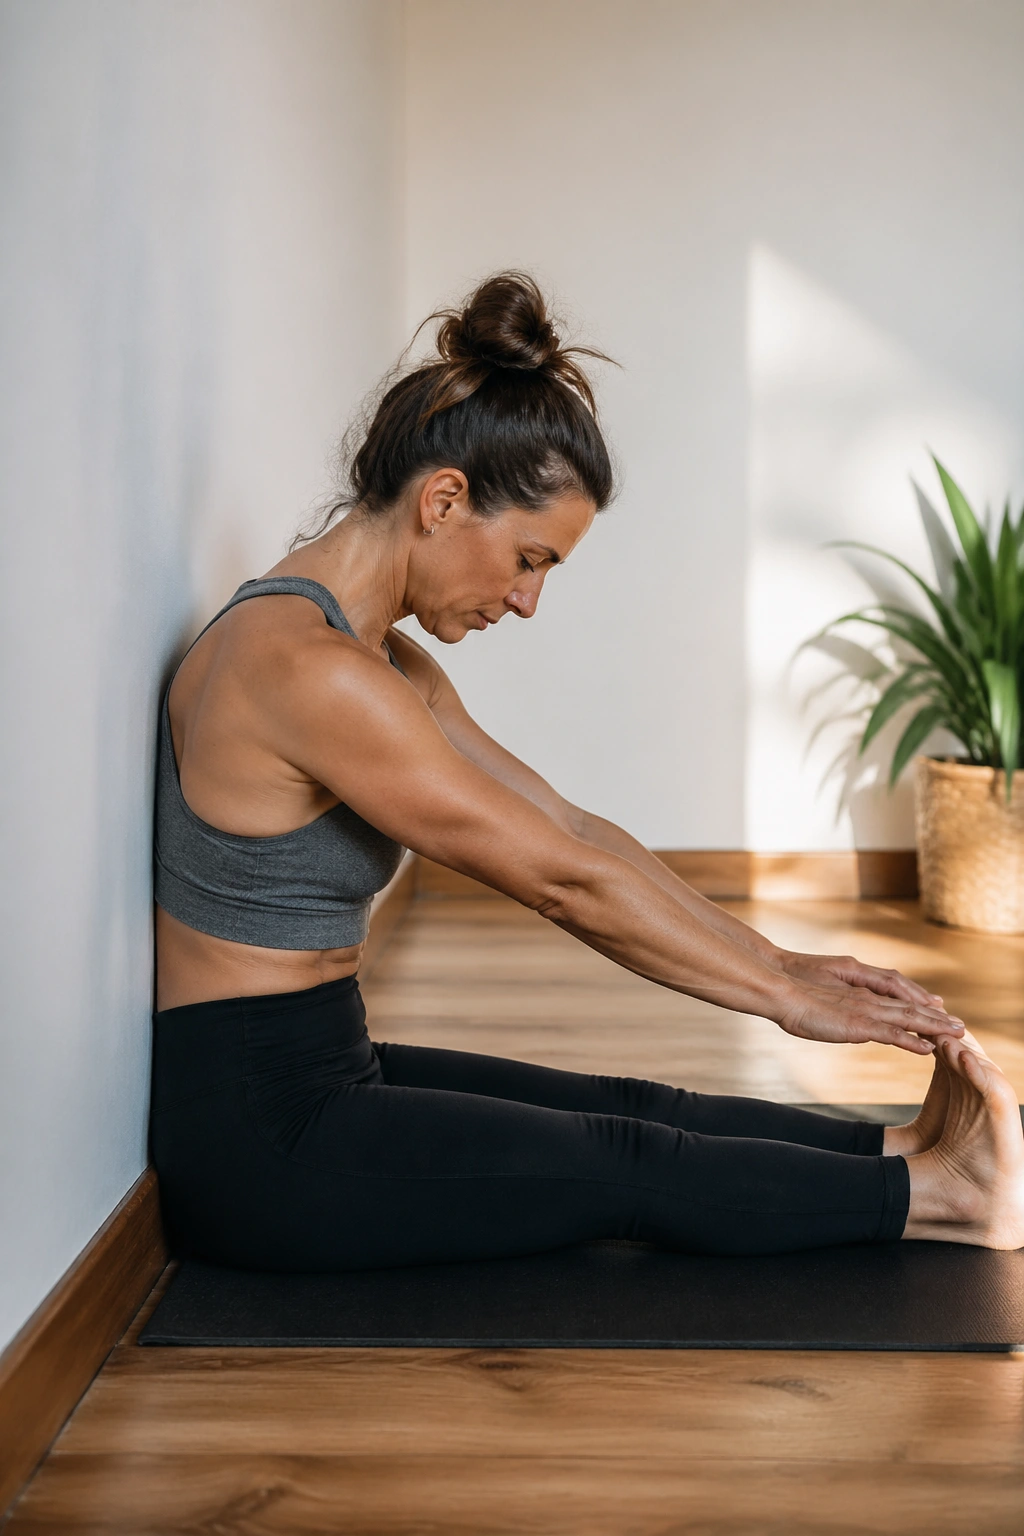
Recovery is just as important as the workout. Hamstrings that are too tight pull on the pelvis, creating that anterior tilt we are trying to avoid. Sit with your back against the wall, legs extended straight in front of you.
Try to sit up tall, feeling your sit bones digging into the floor. Flex your feet toward your face. You will feel a deep stretch in the back of your legs. If you can, hinge forward slightly from the hips, keeping your back flat against the imaginary wall behind you. Do not round your spine to reach further. The goal is to lengthen the muscle, not to reach the toes.
The Role of Stretching in Pilates
Stretching should be active. Engage your quadriceps to help release the hamstrings. By keeping the quads active, you signal the nervous system to let the hamstrings relax. Hold this position for at least two minutes, focusing on deep, slow breaths that expand the ribcage.
15. The Wall-Supported Plank Challenge
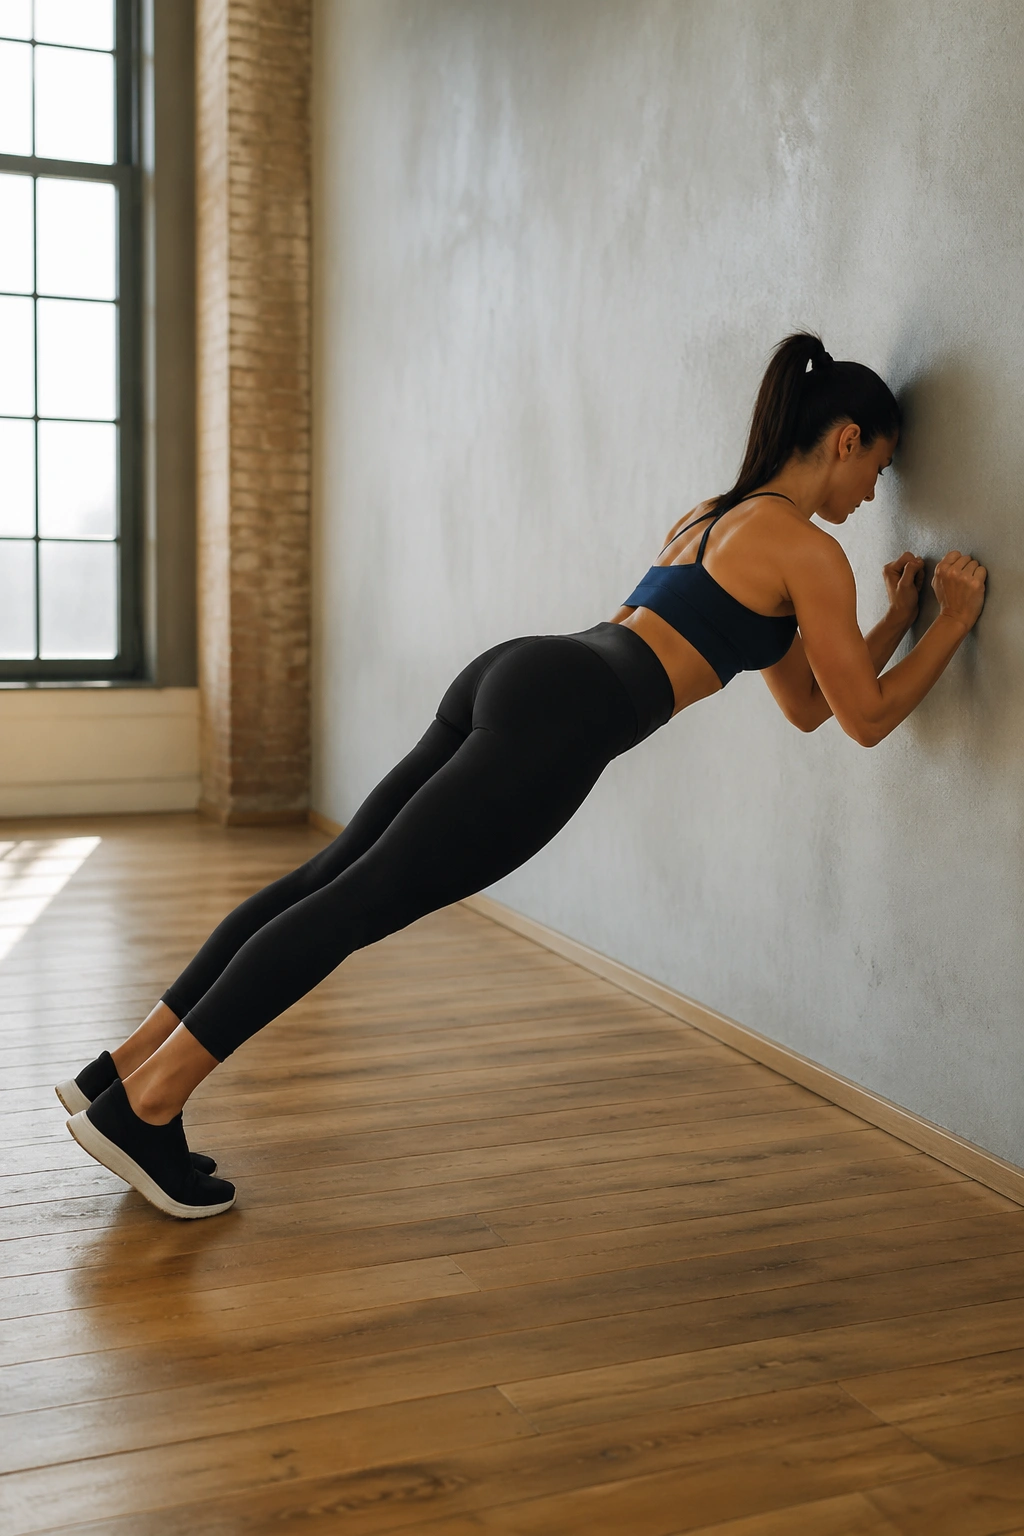
Planks are the ultimate test of core endurance. To do this against the wall, stand facing the wall and place your forearms on it. Walk your feet back until your body forms a straight diagonal line.
The challenge is to hold this for one minute without your lower back arching. Press your forearms into the wall to push your shoulder blades apart. This activates the serratus anterior, a muscle often overlooked that is vital for shoulder stability. Squeeze your glutes and thighs. Everything should be engaged.
Tracking Progress
If you collapse at thirty seconds, don’t worry. This is an endurance exercise. Each day, try to add five seconds. The wall removes the gravity load of a floor plank, but the requirement for spinal neutrality remains exactly the same. Keep your neck in line with your spine; do not let your head hang down.
16. Oblique Twists and Rotational Core
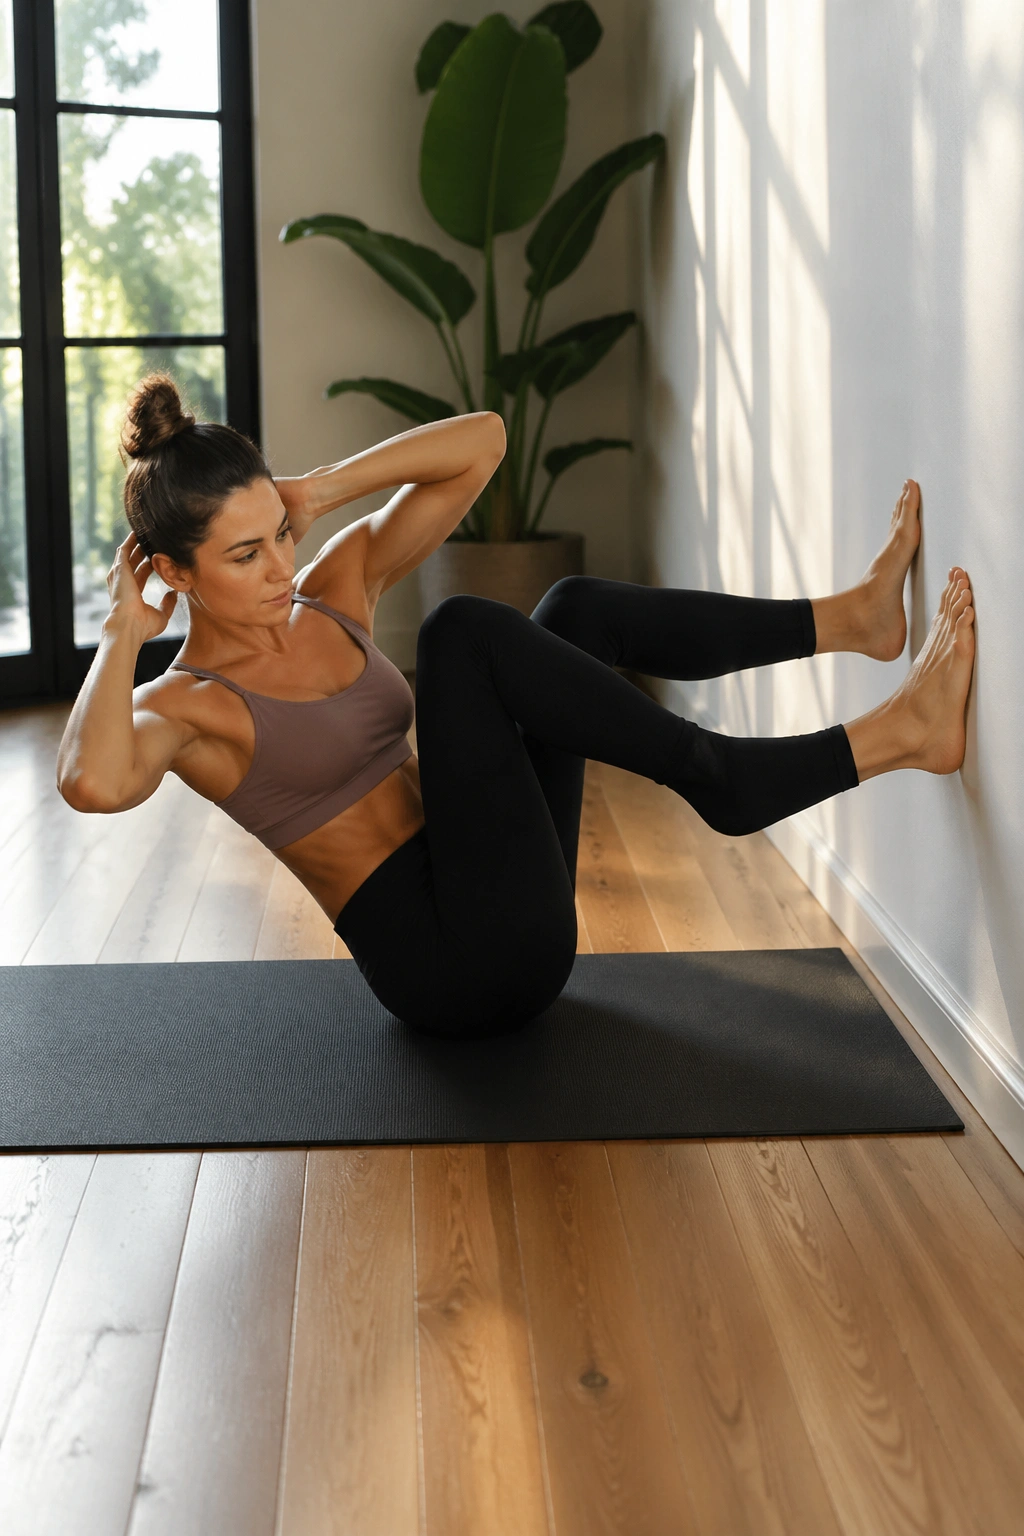
Rotational strength is essential for spinal health. Lie on your back, knees bent, feet flat against the wall. Bring your hands behind your head, elbows wide.
Inhale to prepare, then exhale and lift your head and shoulders, twisting to bring your right elbow toward your left knee. Keep your feet pressed firmly into the wall throughout the entire twist. The wall stabilizes your lower body, which forces your obliques to initiate the rotation. If your legs move, you aren’t doing the exercise—you’re just rocking your body.
The Twist Mechanics
Think about lifting your ribcage up and over, rather than just crunching forward. The twist should come from the thoracic spine, not the neck. Perform ten twists on each side. Keep your movements fluid and controlled. Never sacrifice form for speed.
17. Wall Squats with Calf Raises
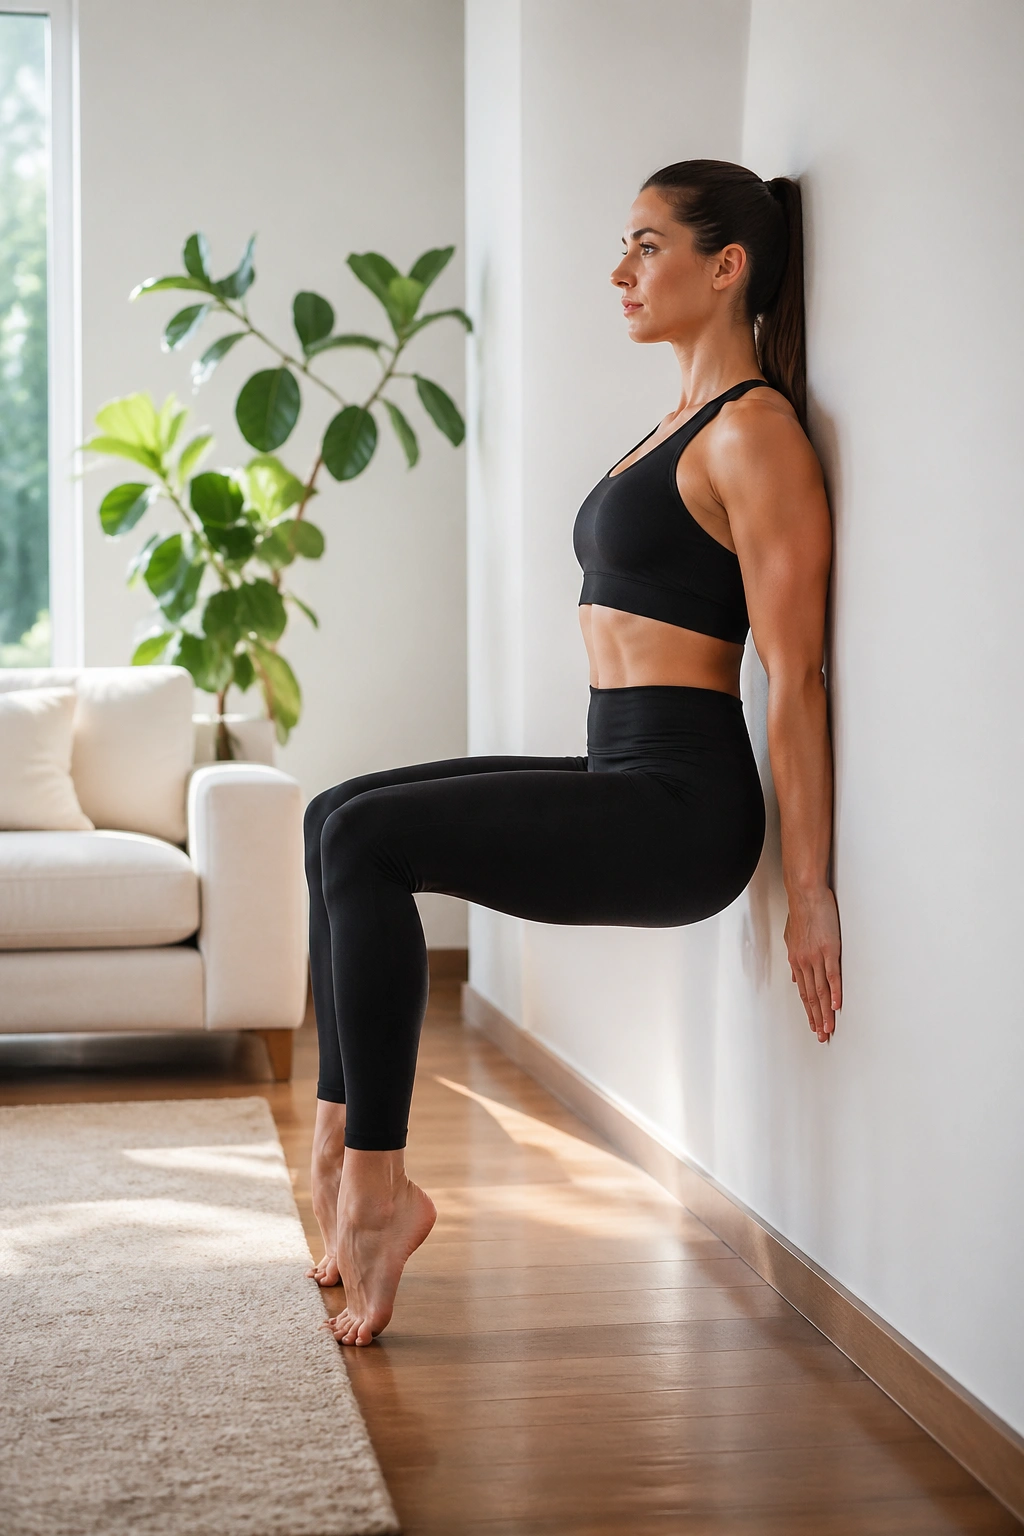
This is a compound movement that combines lower body strength with balance. Perform a wall sit, but as you hold the squat, lift your heels off the floor. This forces your calves to work while your quads are under tension.
It is a multitasking move that increases the intensity significantly. Lower your heels, then lift again. Keep your spine glued to the wall. If you find yourself sliding down the wall, engage your glutes more forcefully.
Building Ankle Stability
Calf raises on a stable surface like the floor are easy. Doing them while the quads are working hard adds a layer of complexity that strengthens the ankles and feet. This is excellent for anyone who wants to improve their balance or athletic performance. Perform three sets of fifteen raises while maintaining the wall sit.
18. Supported Bird-Dog Exercises
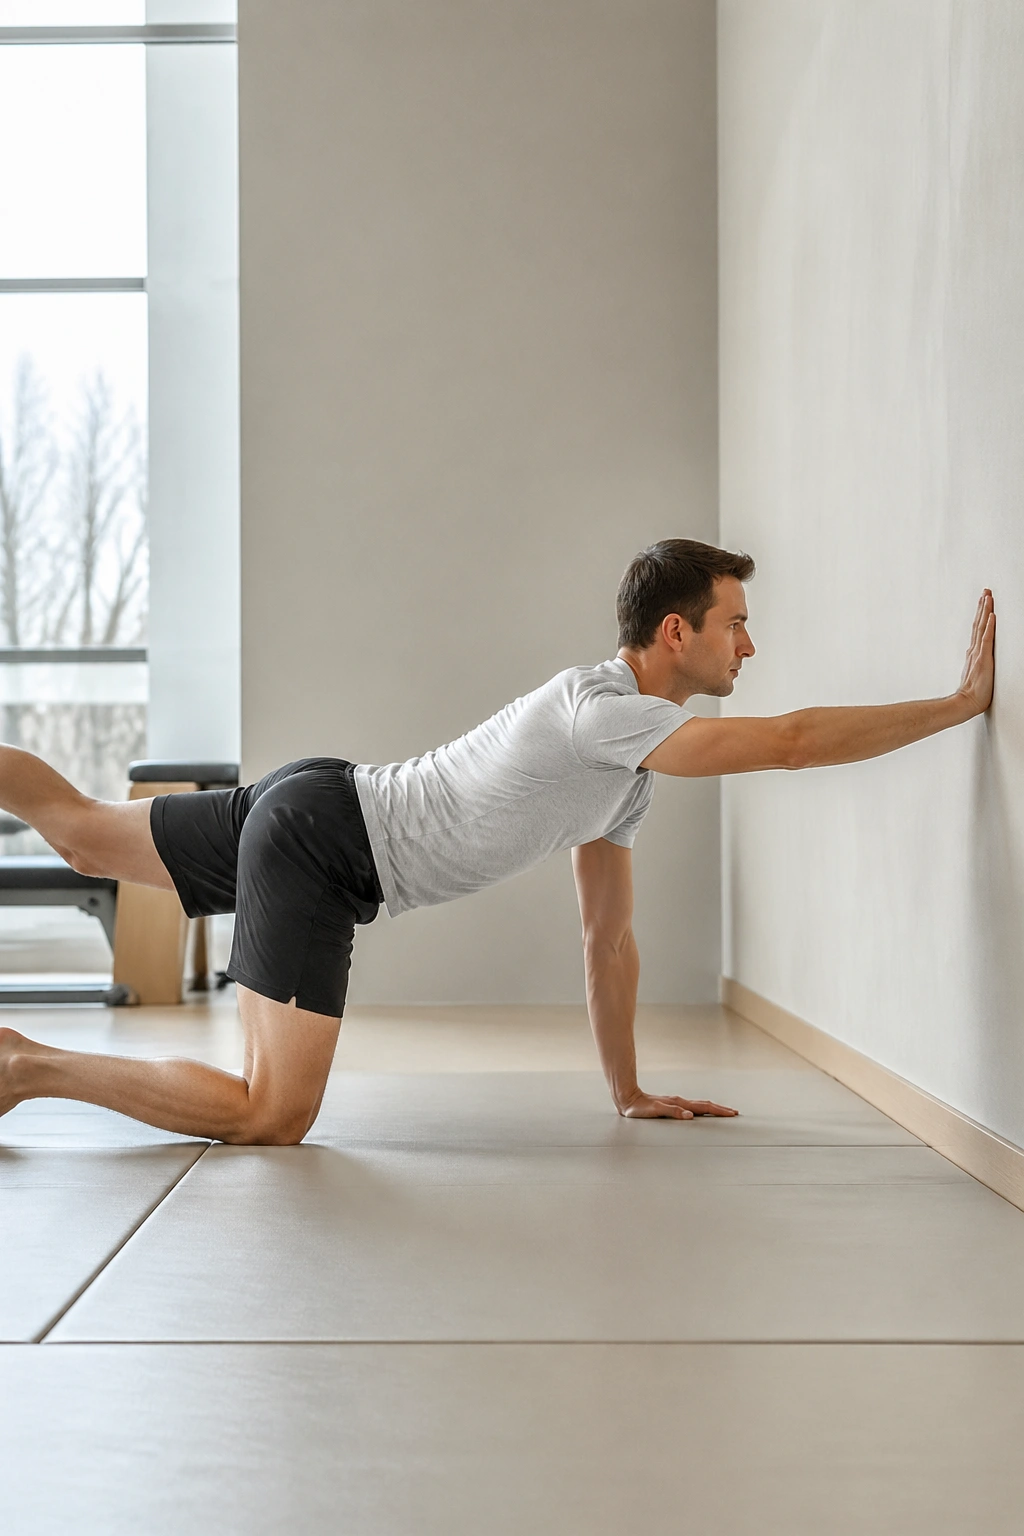
The bird-dog is the gold standard for spine stability. To adapt this for the wall, get on your hands and knees facing the wall, a few inches away. Reach one arm up to touch the wall while simultaneously extending the opposite leg back.
The wall gives you a tactile goal. You aren’t just reaching into empty space; you are actively pressing your hand against a solid surface. This resistance helps you find your center of gravity. Keep your hips square to the floor. Imagine a glass of water on your lower back—don’t spill a drop.
The Mind-Body Connection
This move demands focus. Because the wall is there to guide your hand, you can really pay attention to the stabilizing muscles in your core. If your lower back arches, you’ve gone too far. Focus on reaching long rather than high. Long, straight lines are the hallmark of good Pilates form.
19. Back Extension and Spine Alignment
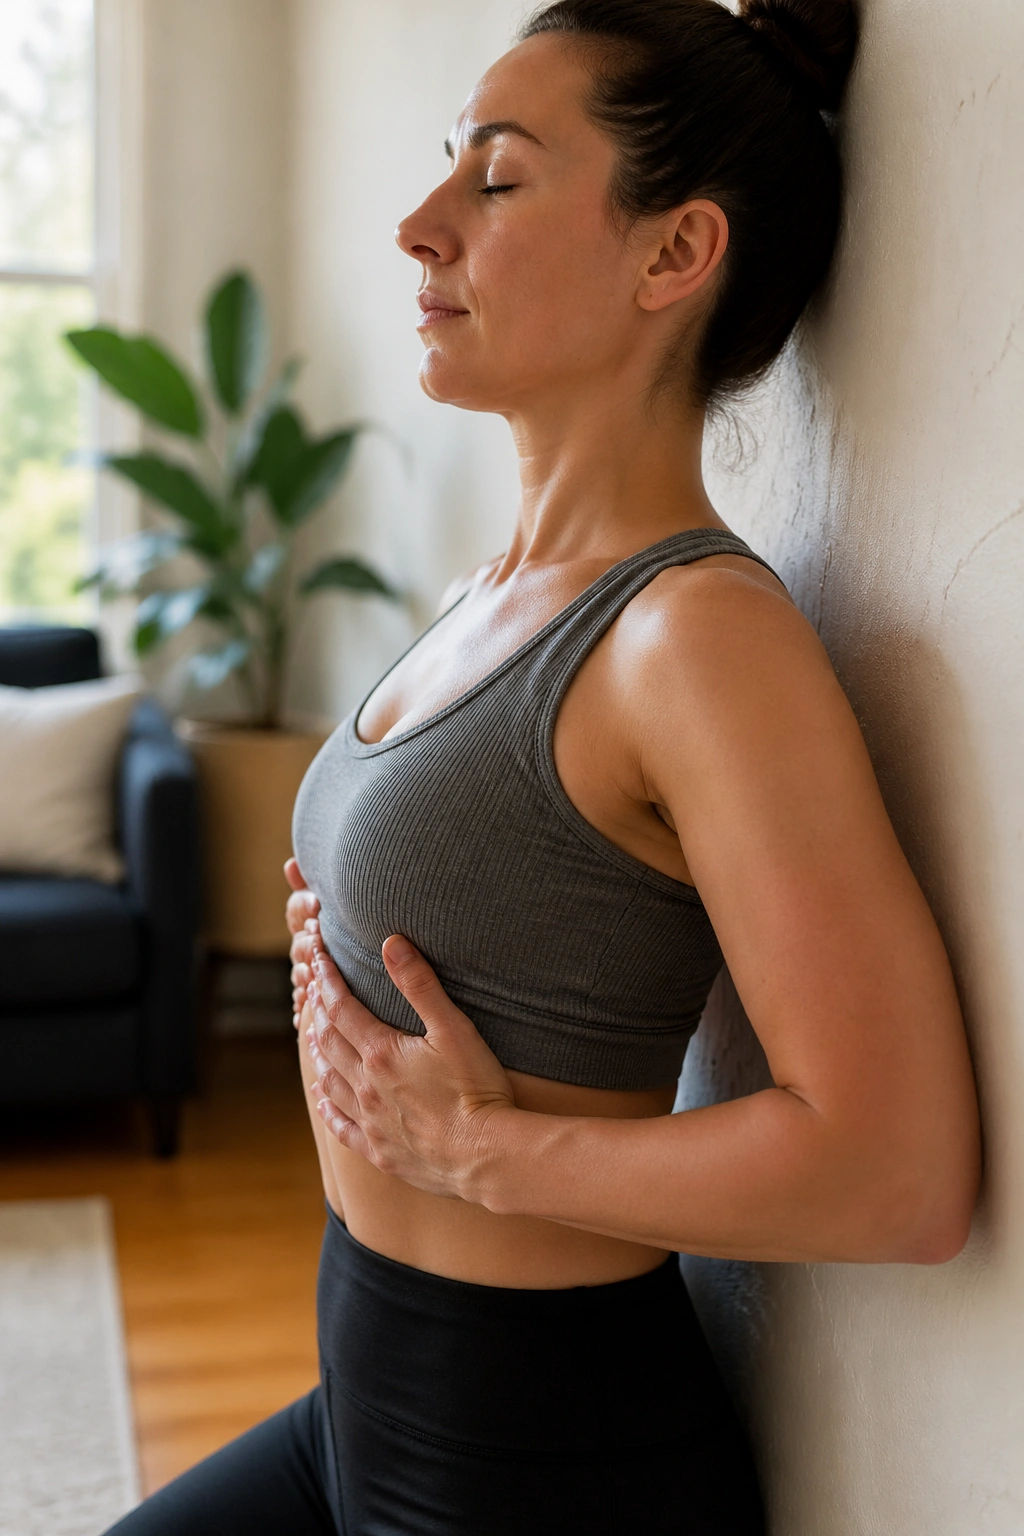
This is a subtle but powerful movement for posture. Stand with your back against the wall, feet forward. Bend your elbows and place your forearms against the wall, palms facing out.
Slide your arms up the wall and back down. Try to keep your wrists, elbows, and shoulders in contact with the wall the entire time. This is much harder than it looks. You will likely feel your shoulders wanting to pop off the wall. Fight that urge. This movement corrects rounded shoulders and strengthens the muscles between your shoulder blades.
Correcting Rounded Shoulders
Many of us have tight chests and weak upper backs. This move reverses that. Imagine you are ironing your back against the wall. The tension you feel is the muscles waking up. Perform ten slow repetitions, focusing on the quality of the contact rather than the speed.
20. The Full-Body Wall Flow
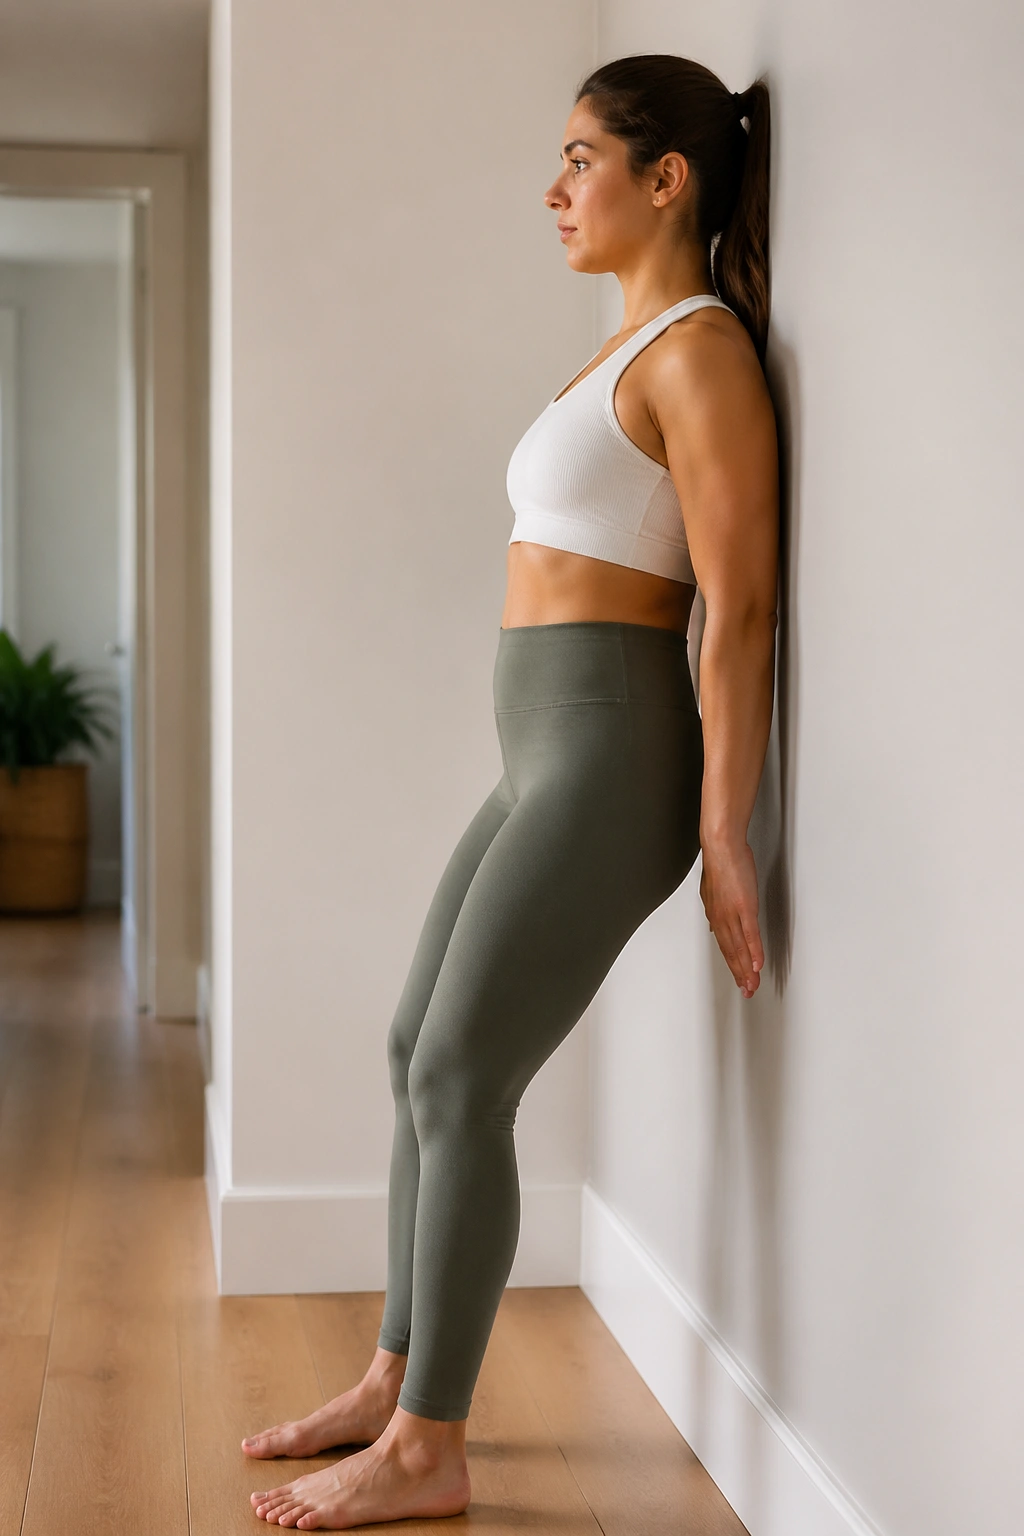
Today, we combine everything you have learned. String together five of your favorite moves from the last nineteen days into one continuous flow. For example: start with wall squats, move into push-ups, transition to glute bridges, perform leg circles, and finish with the oblique twists.
The key to a flow is transition. Don’t just stop and start. Use the wall to help you pivot or slide from one position to the next. This builds coordination and endurance. Because you have established the foundations in the previous days, today is about testing your stamina.
Keeping the Intensity
You should be breathing hard by the end of this flow. That is okay. Pilates is not about being passive; it is about controlled effort. Keep your core tight through the transitions. If you lose your form, slow down and reset. The quality of the movement is always more important than the number of repetitions.
21. Mindful Integration and Stability
On your final day, return to the movement you started with: the wall-supported breathing. Notice how different your body feels compared to the first day. Your spine should feel more aligned, your core more responsive, and your awareness of your own posture significantly heightened.
The wall is not just a tool for these twenty-one days; it is a tool for life. Whenever you feel your posture slipping, find a wall, stand against it, and realign your spine. This simple act is a form of maintenance. It resets your body and reminds you of what “neutral” actually feels like.
Carrying the Practice Forward
You have finished the sequence, but the practice doesn’t stop here. You can pick and choose your favorite movements to add to your daily routine. The beauty of wall Pilates is its simplicity. It requires nothing but a vertical surface and your own focus. Take this awareness of your core and your alignment into your daily life, and you will notice the difference in how you move, sit, and stand every single day.
Wrapping Up
Building a sustainable fitness routine often comes down to accessibility. When you remove the barriers—the commute to the gym, the need for bulky equipment, the setup time—you are left with only the movement itself. Using the wall as your anchor creates a level of physical discipline that is hard to replicate with free-standing exercises alone. The wall provides the honesty that a mirror sometimes lacks; it forces you to face the reality of your alignment, your imbalances, and your true level of control.
As you look back on these three weeks, recognize that the small, incremental changes you made are the most meaningful. It is rarely the singular, massive effort that creates change, but rather the consistent, daily application of focus. Whether you continue with this exact routine or begin to integrate these movements into other training, remember the core principles: maintain a neutral spine, breathe deeply into the ribcage, and prioritize controlled precision over sheer repetition. You now have a toolset that will serve you well indefinitely, regardless of where you are or what equipment you have access to.
