



Most home workouts fail for one boring reason: you cannot tell where your body is in space. Your ribs pop forward, your shoulders creep up, your pelvis tips, and you end up repeating sloppy reps that feel busy but do not feel right. Wall Pilates fixes that fast because the wall gives you instant feedback. If the back of your ribs leaves the wall, you know. If your neck is jammed, you feel it. If one hip is doing more than the other, the wall rats you out.
That is why I keep coming back to wall Pilates when people want a plan they can actually stick with. A blank wall, a mat, and 15 to 25 minutes can take you a long way. And unlike flashy routines that race through 20 moves before you have found your breath, this style rewards slow control, clean lines, and the kind of small corrections that make your core, glutes, and posture work harder.
There is another reason this format works: the wall cuts down on guesswork. In clinics and Pilates studios, teachers have used walls for years to teach neutral spine, shoulder placement, and pelvic control. That makes wall work useful for beginners, but it is not only beginner material. Done well, a feet-on-wall bridge or a wall-supported teaser will humble plenty of strong people.
One warning before you start: do not confuse discomfort with progress. A shaking core? Fine. A hip flexor cramp? Common. Sharp pain in your neck, low back, knee, or wrist? Stop and change the move. This plan builds from easy alignment drills to tougher strength and balance work, so the first few days may feel almost too calm. Stay with it. Those early reps are where the payoff starts.
Set Up Your Wall Pilates Space at Home
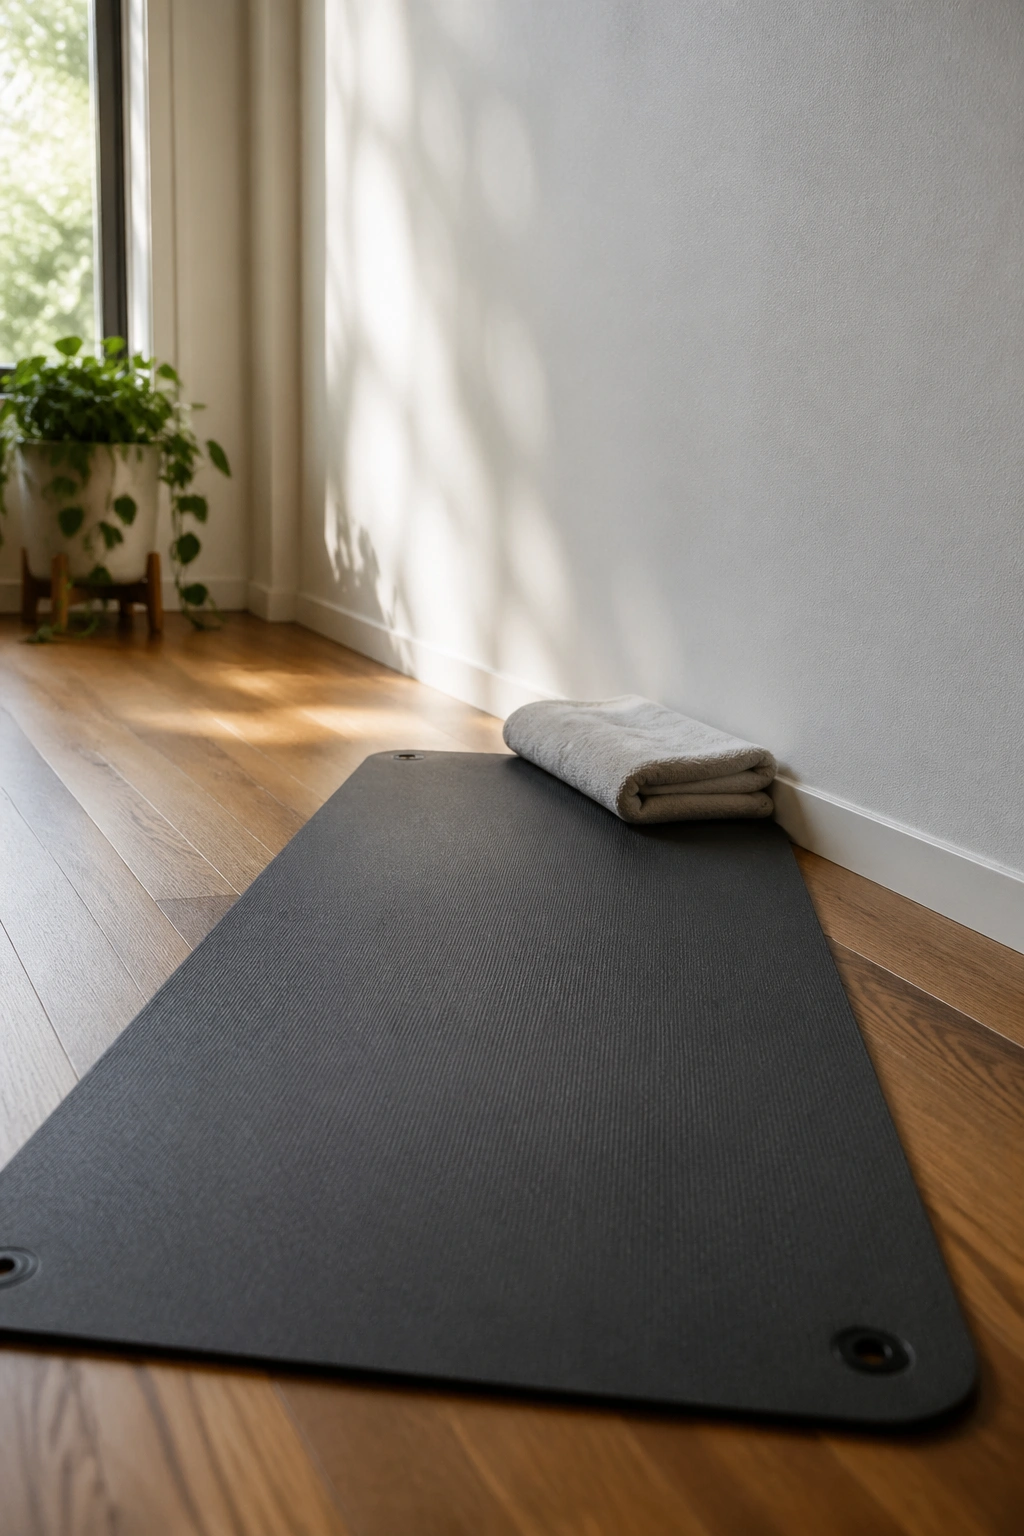
You do not need a mini gym. You need one clear wall, about the width of your outstretched arms, and enough floor space for a mat. Hardwood is fine if your mat grips well. Slippery socks on a slick floor are not fine. Bare feet or grippy socks work better for most people.
A folded towel earns its keep here. Tuck it under your head in supine work if your chin lifts toward the ceiling, or place it under your knees when side-lying positions feel bony. If you have sensitive wrists, keep a yoga wedge or rolled towel nearby for the incline plank and push-up days.
Use this quick setup checklist:
- Wall: flat, dry, and free of frames, shelves, or low baseboard heaters
- Floor: mat that will not slide when you press your feet into the wall
- Shoes: skip them unless you need extra arch support
- Clothing: fitted enough that you can feel hip and rib position
- Timer: set it so you are not grabbing your phone every 40 seconds
Good lighting helps more than people think. You will catch crooked shoulders and a rotated pelvis faster when you can actually see your alignment.
Wall Pilates Form Rules That Matter More Than Reps
If you only remember three things, make them these.
Keep your ribs quiet
A lot of people try to look “tall” by flaring the ribs and arching the low back. In Pilates, that usually steals work from your core and dumps it into your spine. Think of your front ribs as soft, not collapsed, and let the back of your rib cage widen when you inhale.
Move on the exhale when the effort spikes
Exhale during the hard part of the move. Roll down on the exhale. Lift the bridge on the exhale. Pull the knee in on the exhale. That breath pattern helps the deep abdominals switch on without you bracing like you are about to get punched.
Use pressure, not force
Pressing into the wall should feel deliberate, not violent. A bridge with your feet on the wall works because of steady pressure through the whole foot, not because you slam your heels into drywall and hope for the best.
One more thing—actually, this one matters more than people admit. Slow reps beat extra reps. If you can do 15 rushed movements or 6 clean ones, take the 6.
How to Follow the 30 Day Wall Pilates Plan
This plan works best when you treat each move as the featured drill for the day, not the only thing you do. Spend 5 minutes warming up, then do the featured move for the listed sets and reps, then repeat 2 to 4 earlier moves you already know. That gives you enough practice without turning the session into a marathon.
A clean session can fit inside 20 minutes:
- Warm-up: 5 minutes of easy marching, arm circles, cat-cow, or breathing on the floor
- Featured move: 2 to 3 sets using the reps or hold time listed below
- Review block: 2 to 4 earlier moves, 1 set each
- Finish: 1 minute of relaxed breathing or a gentle spine stretch
The progression is built in. Days 1 through 10 teach alignment and lower-body connection. Days 11 through 17 lean into deep core control. Days 18 through 24 wake up the side body and rotational strength. Days 25 through 30 tie it all together with upper body, balance, and full-body work.
Miss a day? Pick up where you left off. Do not cram three sessions into one evening because your calendar got messy.
1. Wall Roll Down
Start with your back against the wall, heels about 6 to 8 inches forward, knees soft. Let the back of your head, ribs, and pelvis touch the wall. On an exhale, nod your chin, then peel away one segment at a time until your hands hang near your shins or ankles.
This move looks mild. It is not. You are teaching your spine to articulate instead of dropping in one lump, which is what most people do when they “touch their toes.” Pause at the bottom for one breath, then stack back up from tailbone to head.
Quick cues
- Do 5 slow reps
- Keep a tiny bend in your knees
- Stop if you feel pinching in the low back
- Think “peel” on the way down and “stack” on the way up
Best use: Day 1 and then as a warm-up on any stiff day.
2. Standing Wall Imprint
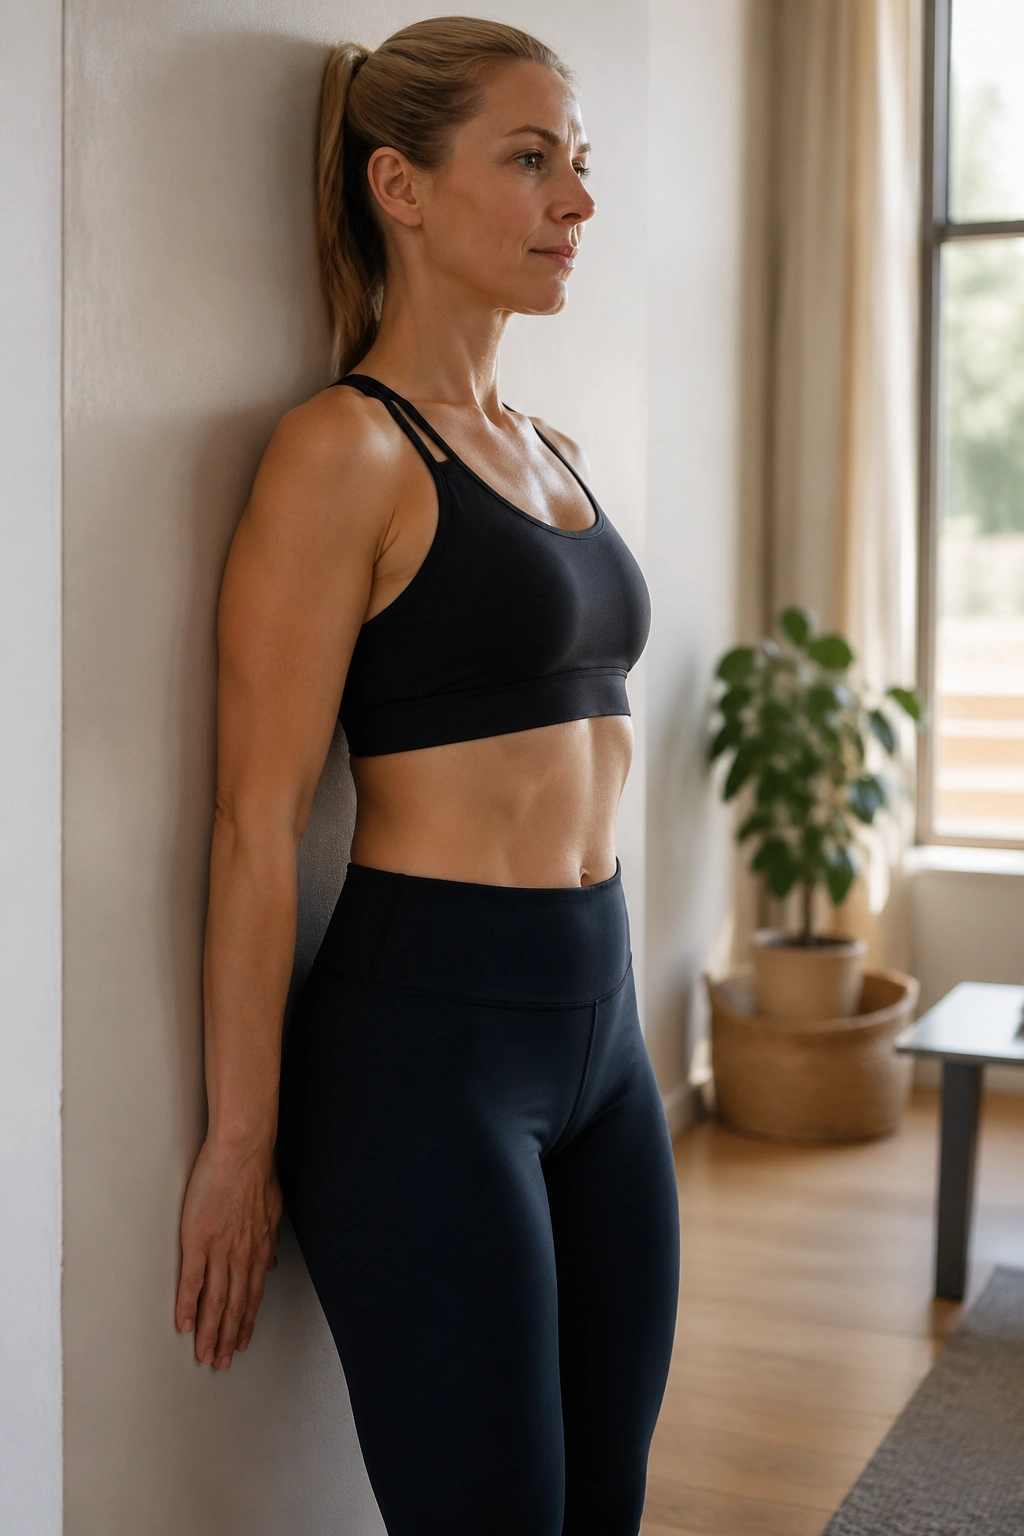
If your low back always arches away from the wall, this is the reset move I would not skip. Stand with your back against the wall, feet 8 to 10 inches forward, knees bent a touch. Exhale and gently tip your pelvis so your low back presses into the wall. Inhale and return to neutral without exaggerating the arch.
You are not trying to mash your spine flat for dear life. Think small, controlled pelvic motion—the kind that teaches your abs and glutes to cooperate. Done right, you will feel the lower belly turn on and the front of the hips stop gripping.
Do 8 to 10 reps. If your hamstrings cramp, walk the feet an inch farther forward and ease off the squeeze.
3. Wall Arm Slide
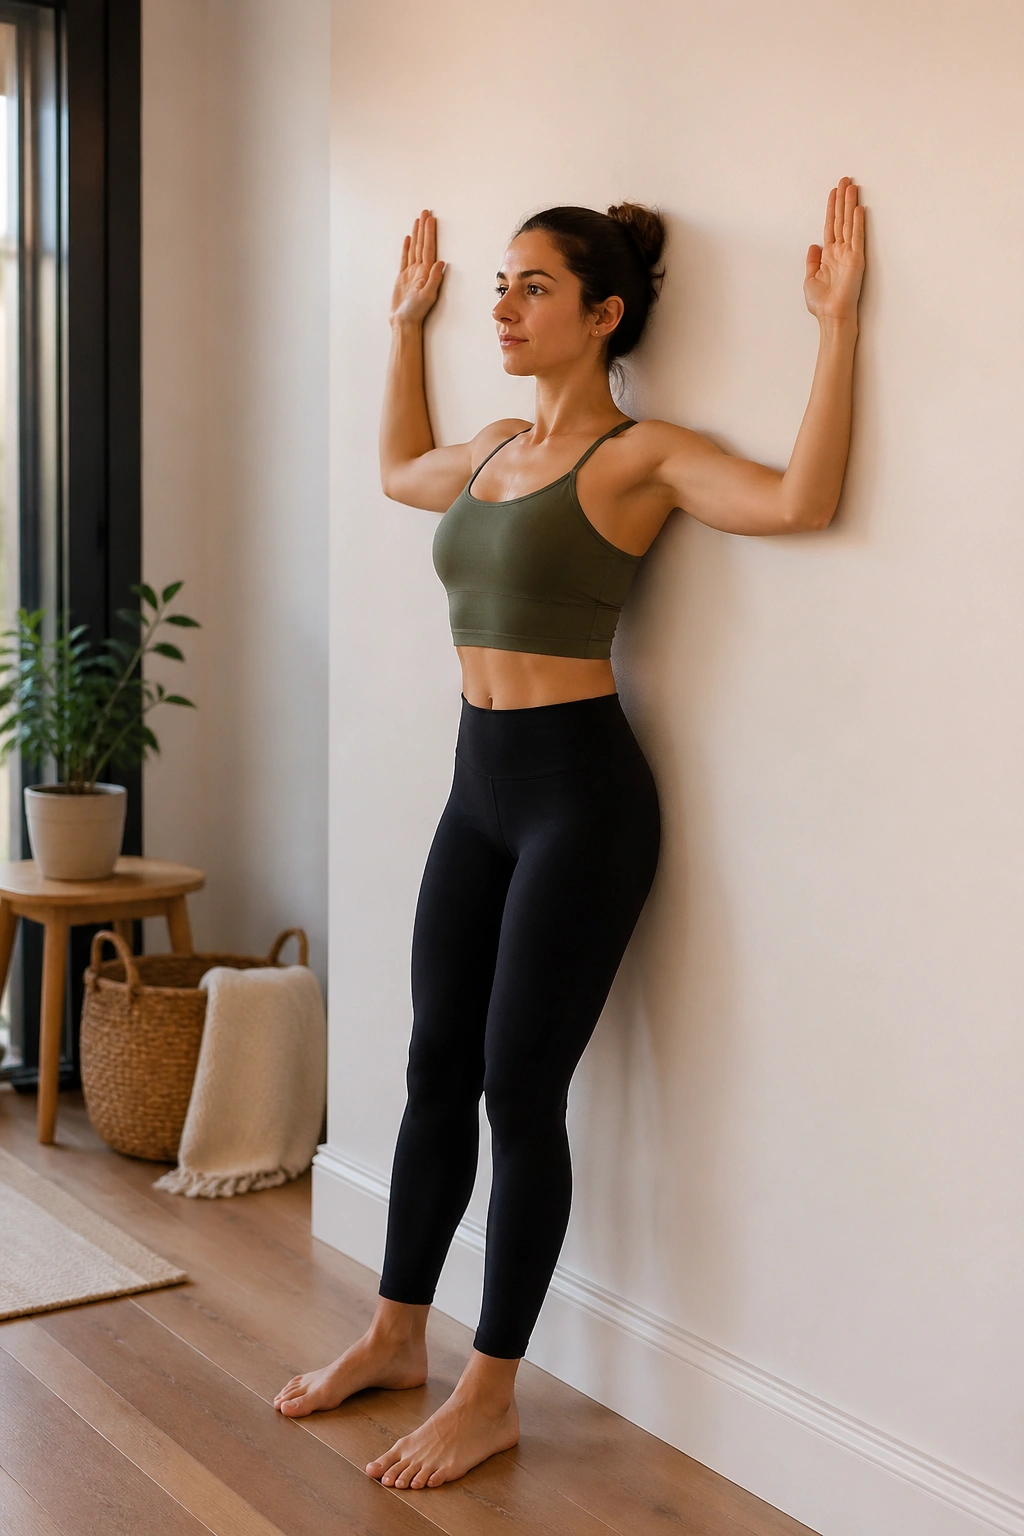
Posture work gets ignored until your neck starts barking at you. Stand with your back to the wall and bring your arms into a goalpost shape: elbows bent at 90 degrees, backs of the hands near the wall if that is comfortable. Slide the arms upward as far as you can without your ribs lifting or your low back arching.
A clean wall arm slide tells you a lot. Tight lats, stiff pecs, weak lower traps—they all show up here. Range matters less than keeping the ribs down and the neck long. If your wrists or elbows lose contact, that is fine. Keep the movement honest.
What to feel
- Upper back muscles working
- Front ribs staying quiet
- No shrugging toward the ears
Shoot for 6 to 8 slow reps. If this one feels humbling, good. That means it is doing its job.
4. Wall Calf Raise and Reach
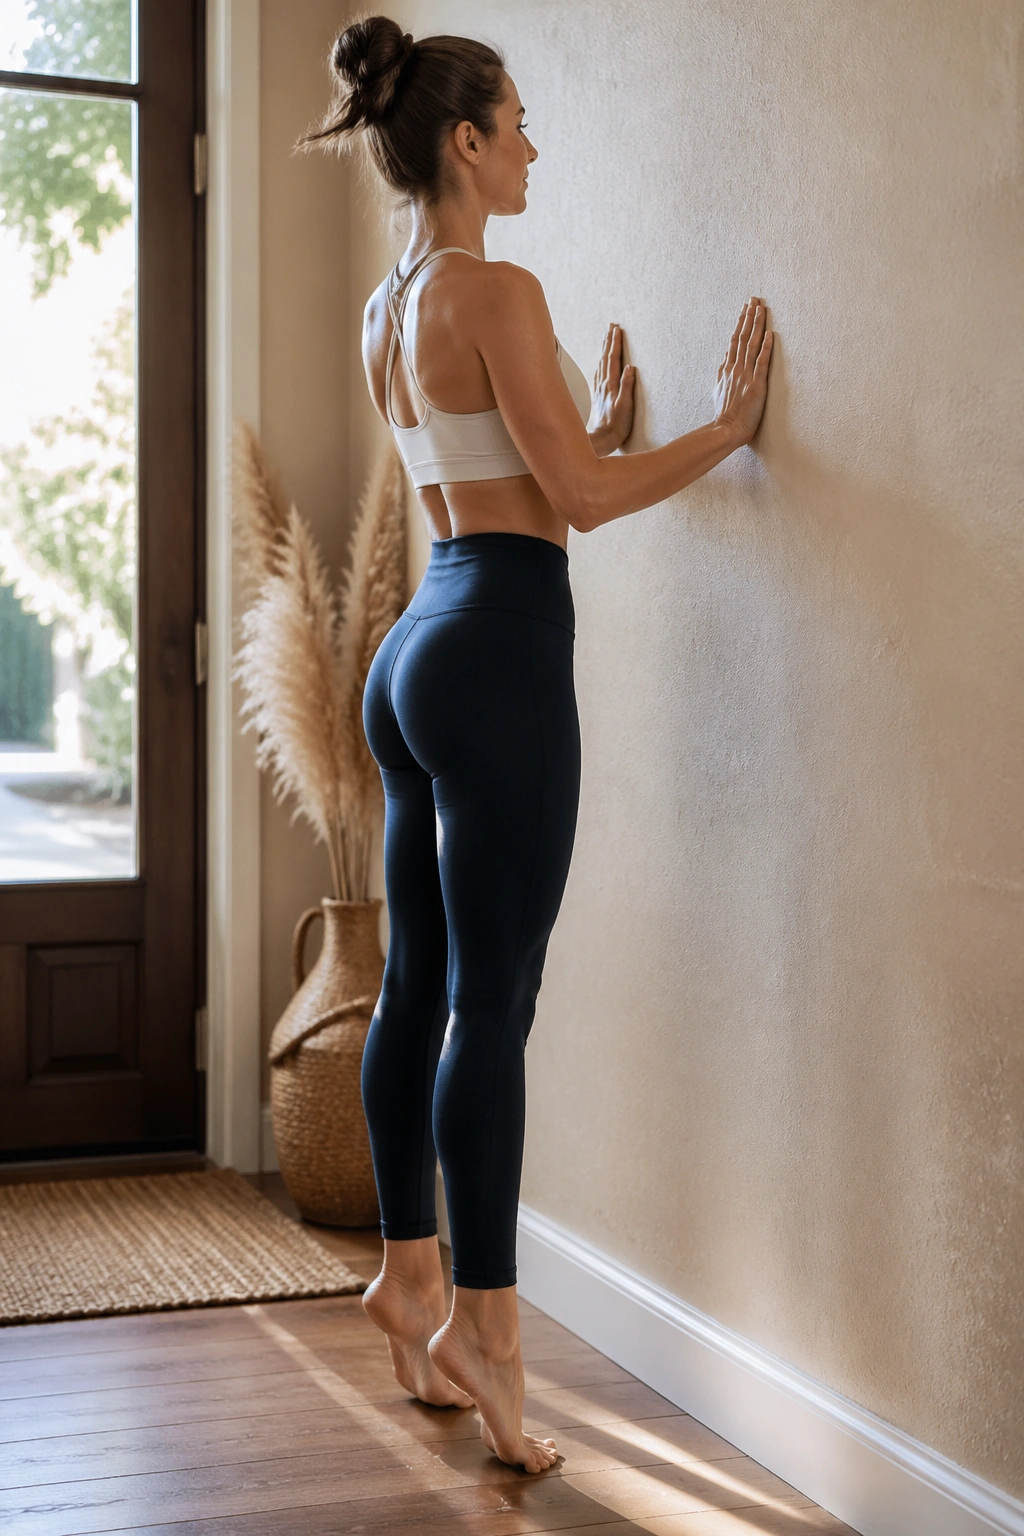
Face the wall and place your fingertips on it for balance. Feet should sit hip-width apart, with weight spread across the big toe mound, little toe mound, and heel. Rise onto the balls of your feet, pause for 2 seconds, then lower with control.
Then add the Pilates piece: as you rise, reach the crown of your head up and lift through the lower belly so the move does not turn into a lazy ankle bounce. Strong feet and calves make balance work cleaner, and they help your squats and bridges feel steadier later in the plan.
Do 10 to 12 reps. If you wobble, narrow your hand pressure into the wall instead of grabbing it. Tiny pressure. That is enough.
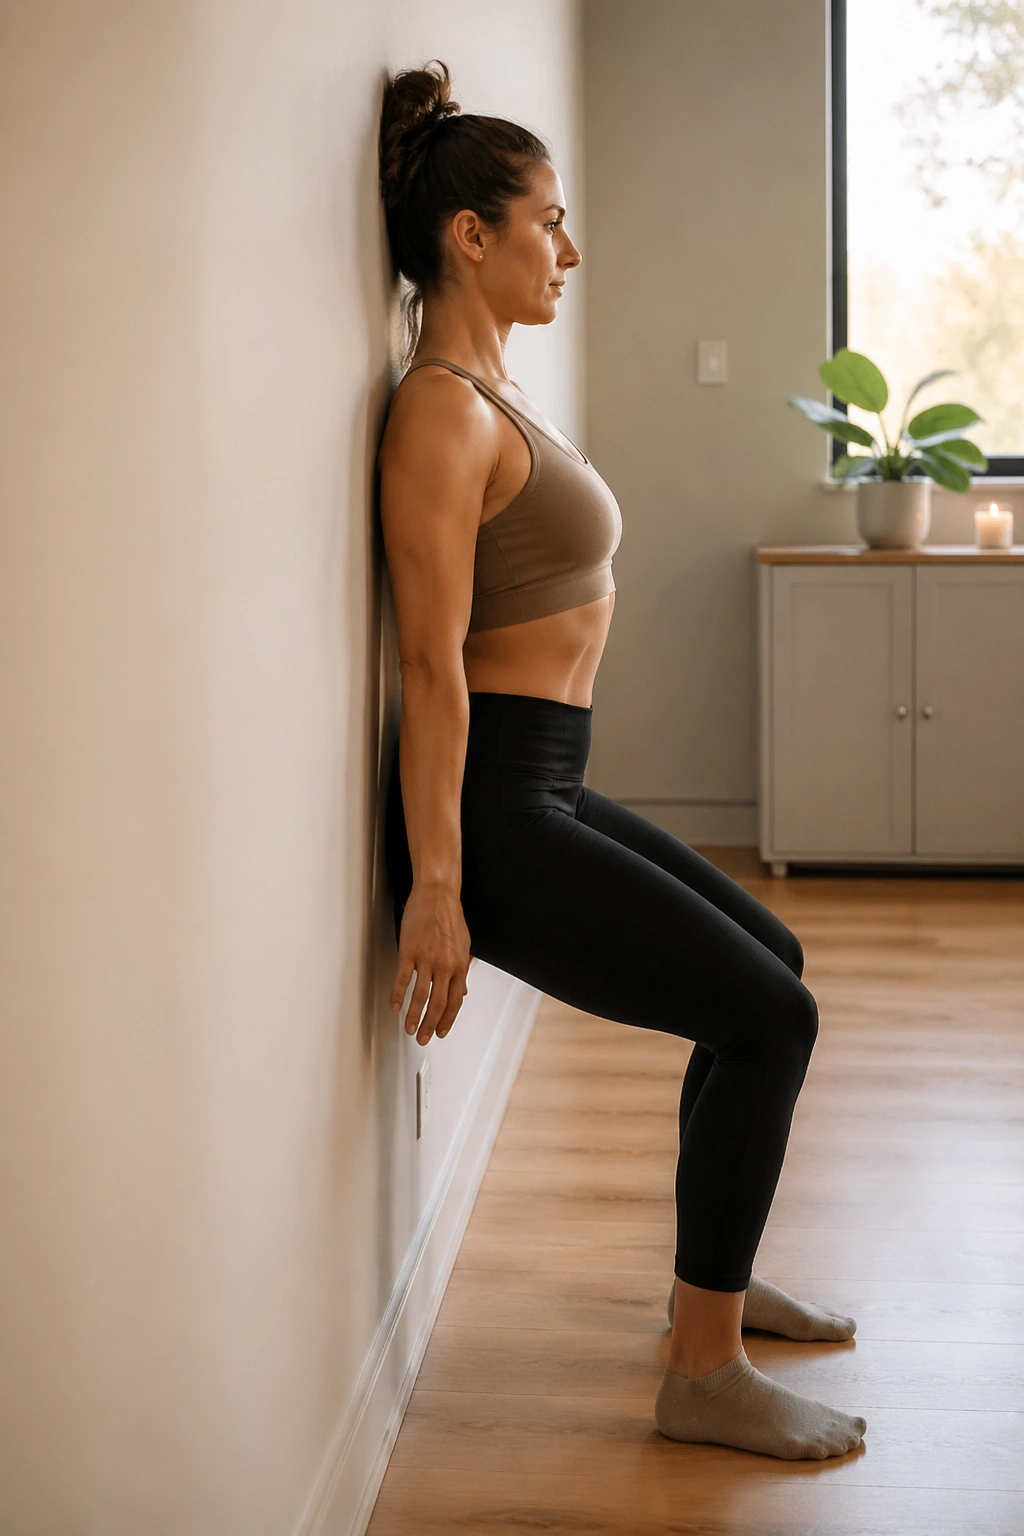
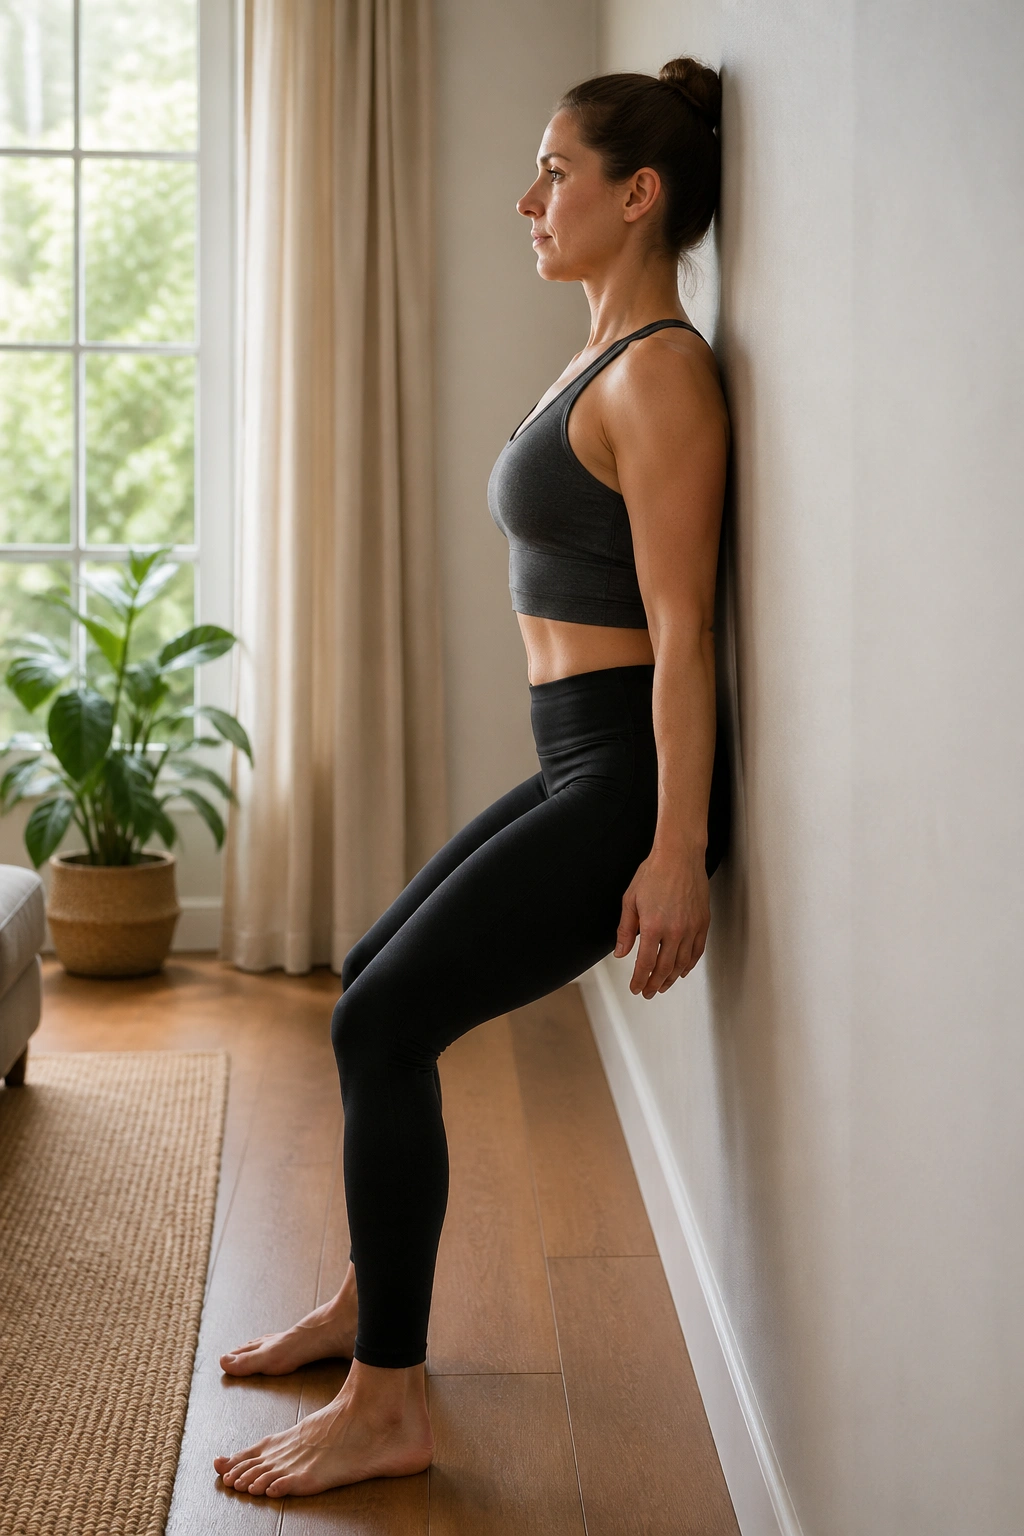
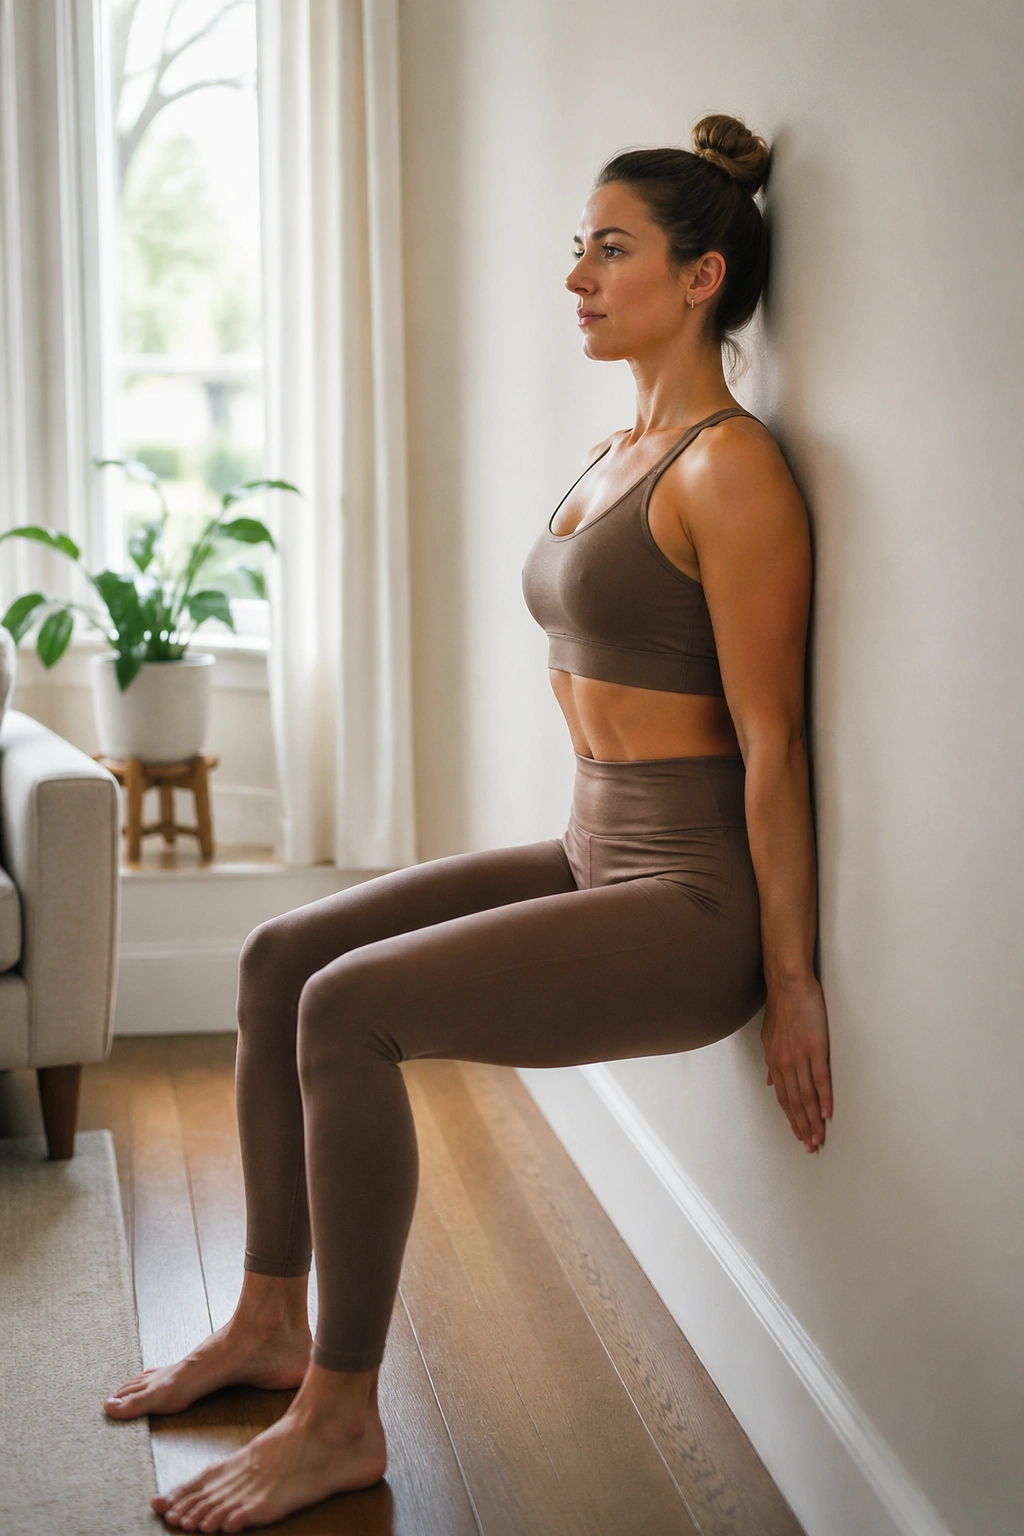
5. Wall Half Squat Hold
Stand with your back to the wall and walk your feet forward until you can slide down into a partial squat. You do not need a deep 90-degree wall sit on day 5. A knee bend of 45 to 60 degrees is plenty if you can keep your knees tracking over the second and third toes.
Here is the part people miss: pull your lower ribs back into the wall and keep the back of your head light on the wall too. That turns a leg burn drill into a full-body alignment hold. Your quads will light up, yes, but so will your glutes and trunk.
Hold for 20 to 30 seconds, rest, then repeat 2 more times. If knee pressure feels sharp, come higher. If you only feel your thighs and nothing else, tuck your pelvis less and grow taller through the spine.
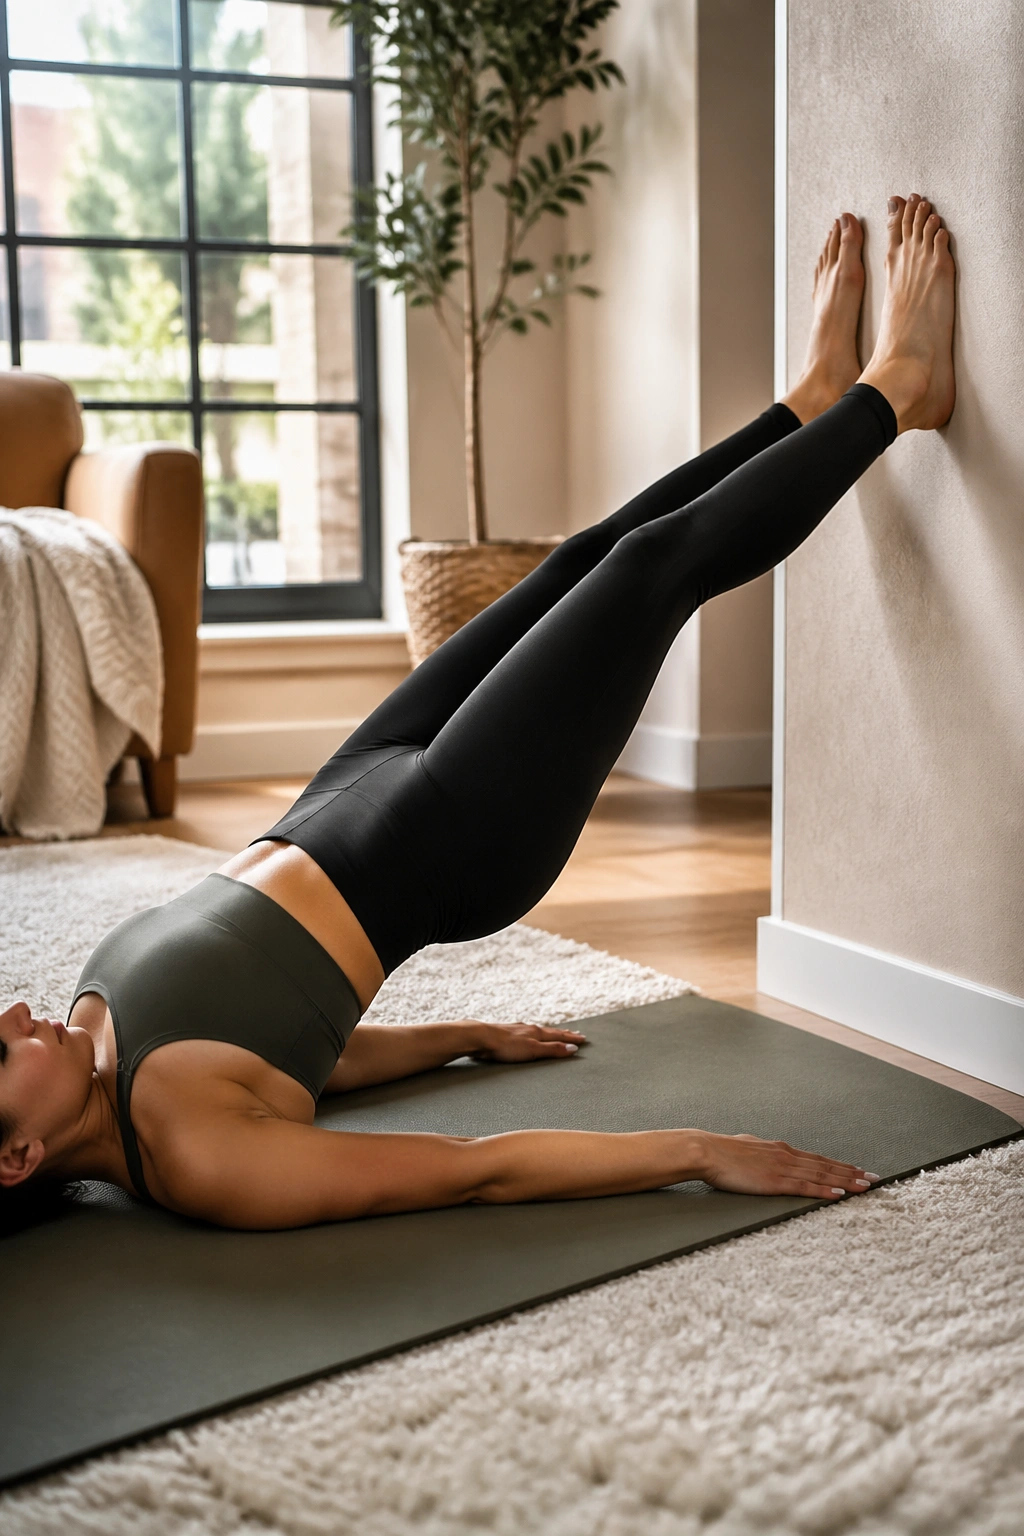
6. Bridge With Feet on the Wall
Lie on your back with knees bent and feet flat on the wall so your shins are close to parallel with the floor. Arms rest by your sides. Exhale, press through your feet, and peel your pelvis off the mat into a bridge. Inhale at the top. Lower one vertebra at a time.
This version is sneaky. With the feet elevated, hamstrings and glutes have to organize without as much help from momentum, and the wall gives you a clean reference for even pressure through both feet. If one foot pushes harder, you will know fast.
How to get the most from it
Use 8 reps with a 2-second hold at the top. Press through the whole foot, not only the heels. If your ribs pop up, lower your hips a bit sooner.
Neck should stay easy. If you feel pressure there, place a folded towel under your head.
7. Bridge Heel Slide
Start in the same position as the previous move. Lift into your bridge and hold. From there, slide one heel a few inches up the wall, then back down, keeping the pelvis as level as you can. Switch sides.
This is where the backside of your legs starts making demands. The goal is not a giant slide. The goal is a quiet pelvis while one leg moves. Think of balancing a glass of water on your lower belly and keeping it from spilling.
Do 5 to 6 slides per side. If your hips wobble side to side, make the motion smaller. Smaller is smarter here.
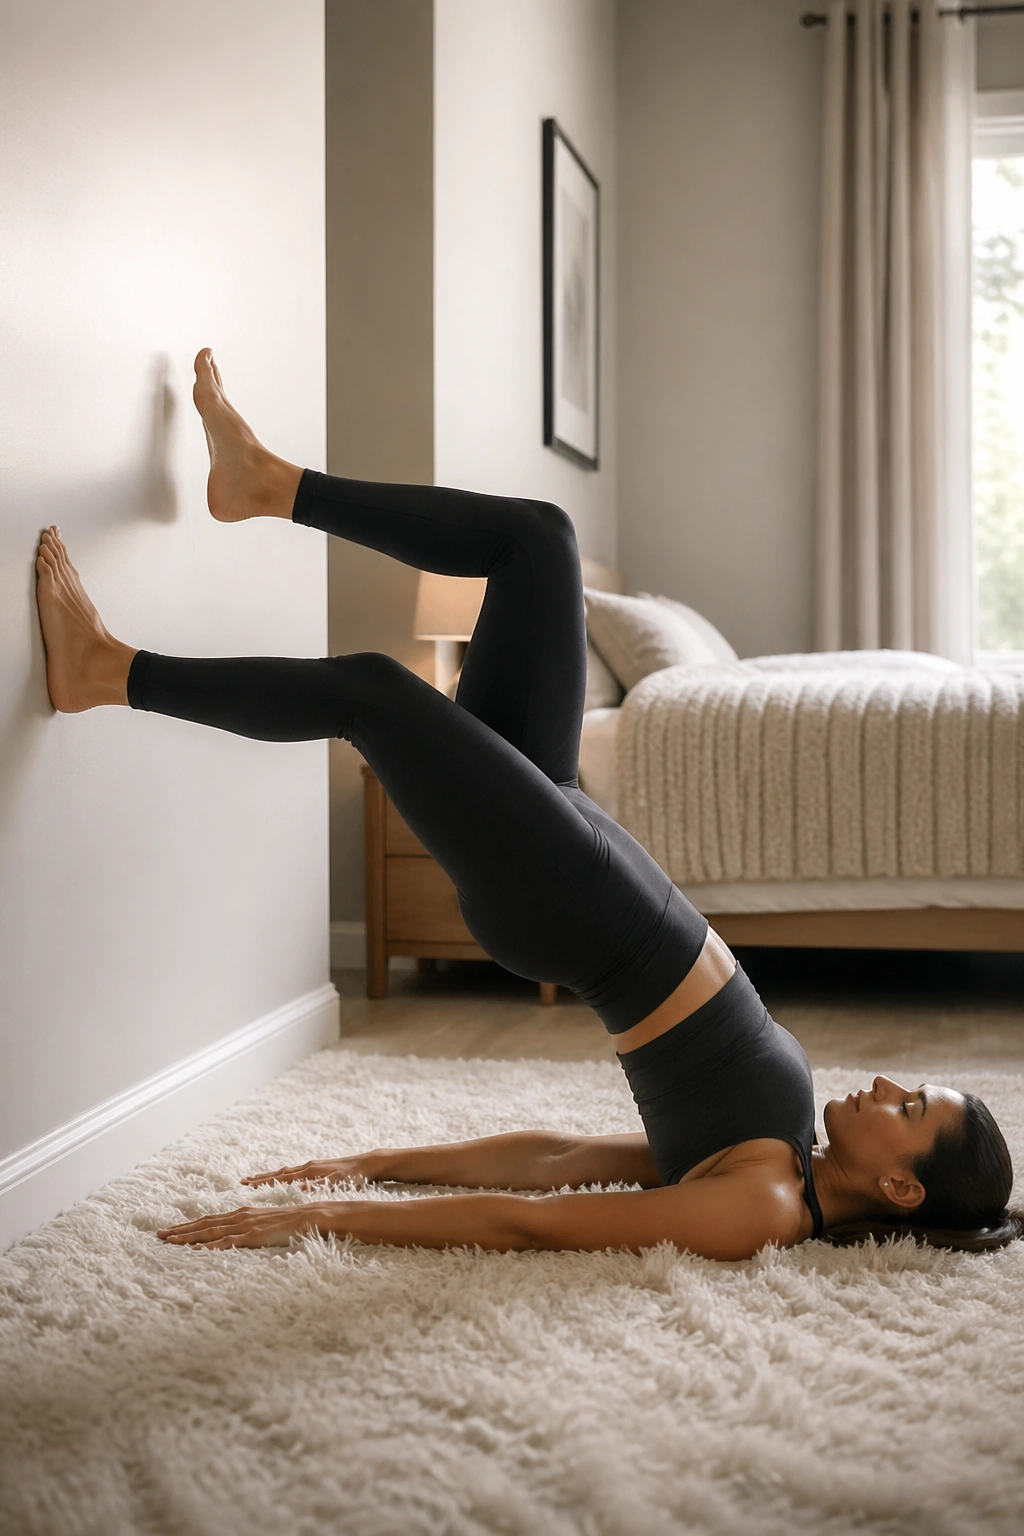
8. Wall March Bridge
Hold your bridge with both feet on the wall. Shift a touch of weight into one leg and peel the other foot one inch off the wall, then place it back down. Alternate sides.
A lot of people rush this and end up twisting through the waist. Do not. The move works because you resist rotation. Your standing glute should feel like it is gripping the floor through the wall, if that makes sense. Odd image, useful result.
Try 4 to 6 marches per side. If the hamstrings seize up, reset, lower your hips, and try again with a softer lift.
9. Wall Adductor Bridge Squeeze
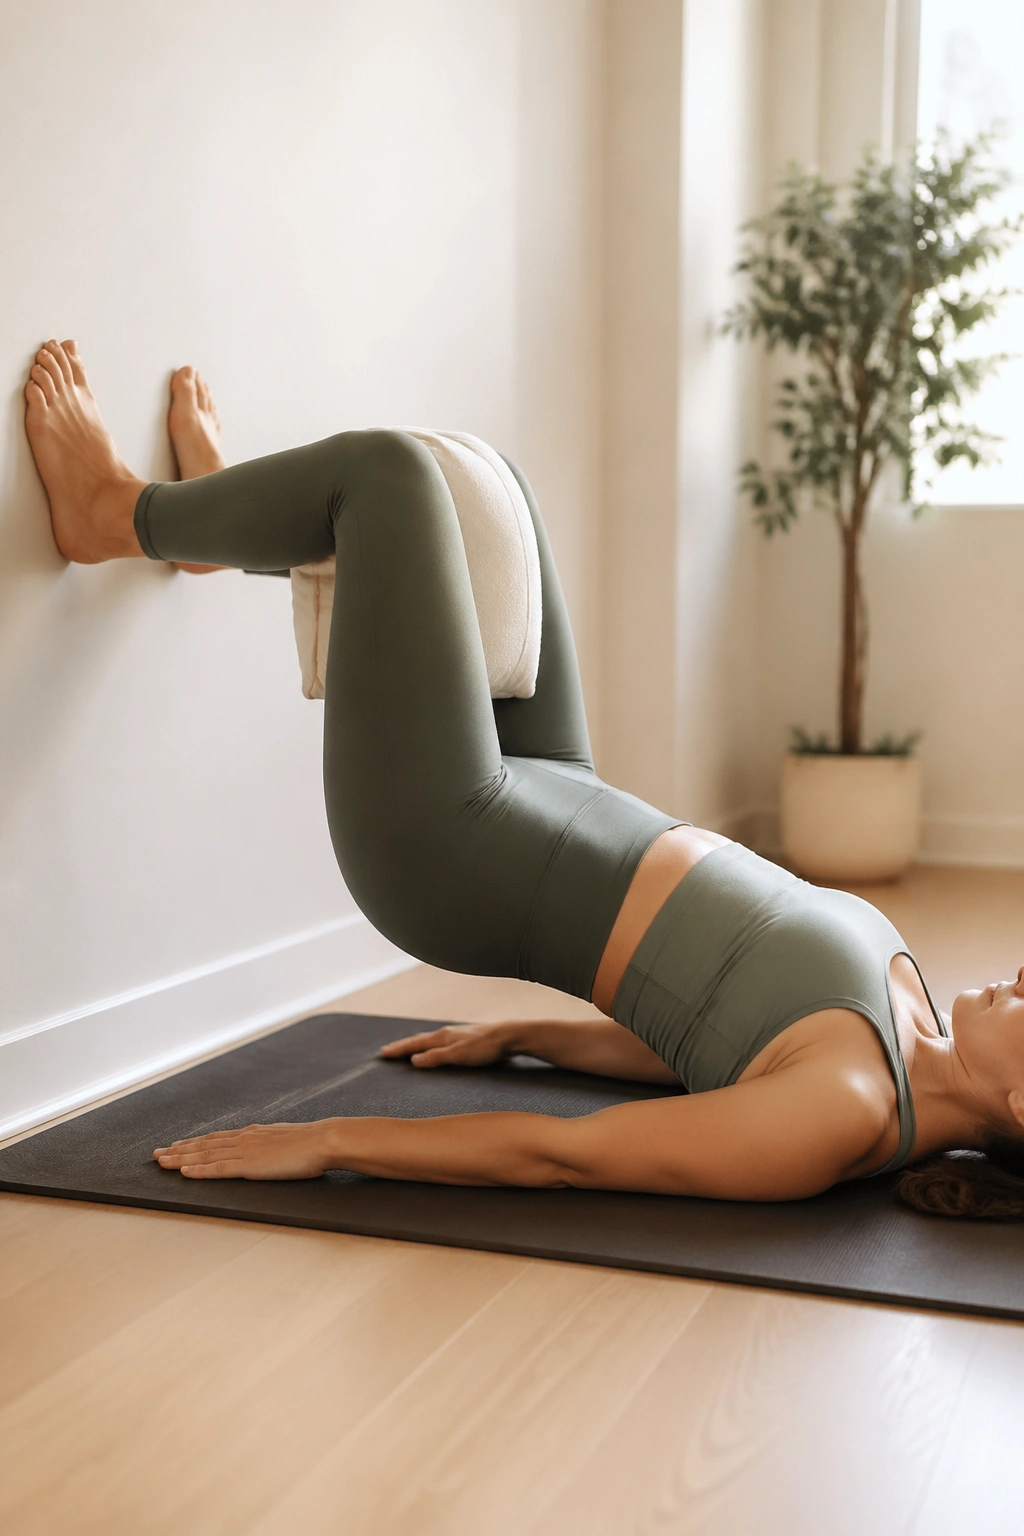
Place a folded pillow or yoga block between your knees, feet still on the wall. Lift into bridge and squeeze the prop gently as you hold for 3 seconds, then lower.
This one often surprises people. The inner thighs are not only “leg muscles.” In Pilates, they help connect the pelvic floor, deep abdominals, and glutes. When the squeeze is light and steady—not frantic—you get a more centered bridge with less splaying through the ribs and knees.
Quick setup notes
- Keep knees in line with hips
- Squeeze at about 30 percent effort, not maximum force
- Do 8 reps with a 3-second hold
If you feel your quads taking over, move your feet a little higher on the wall and reduce the height of the bridge.
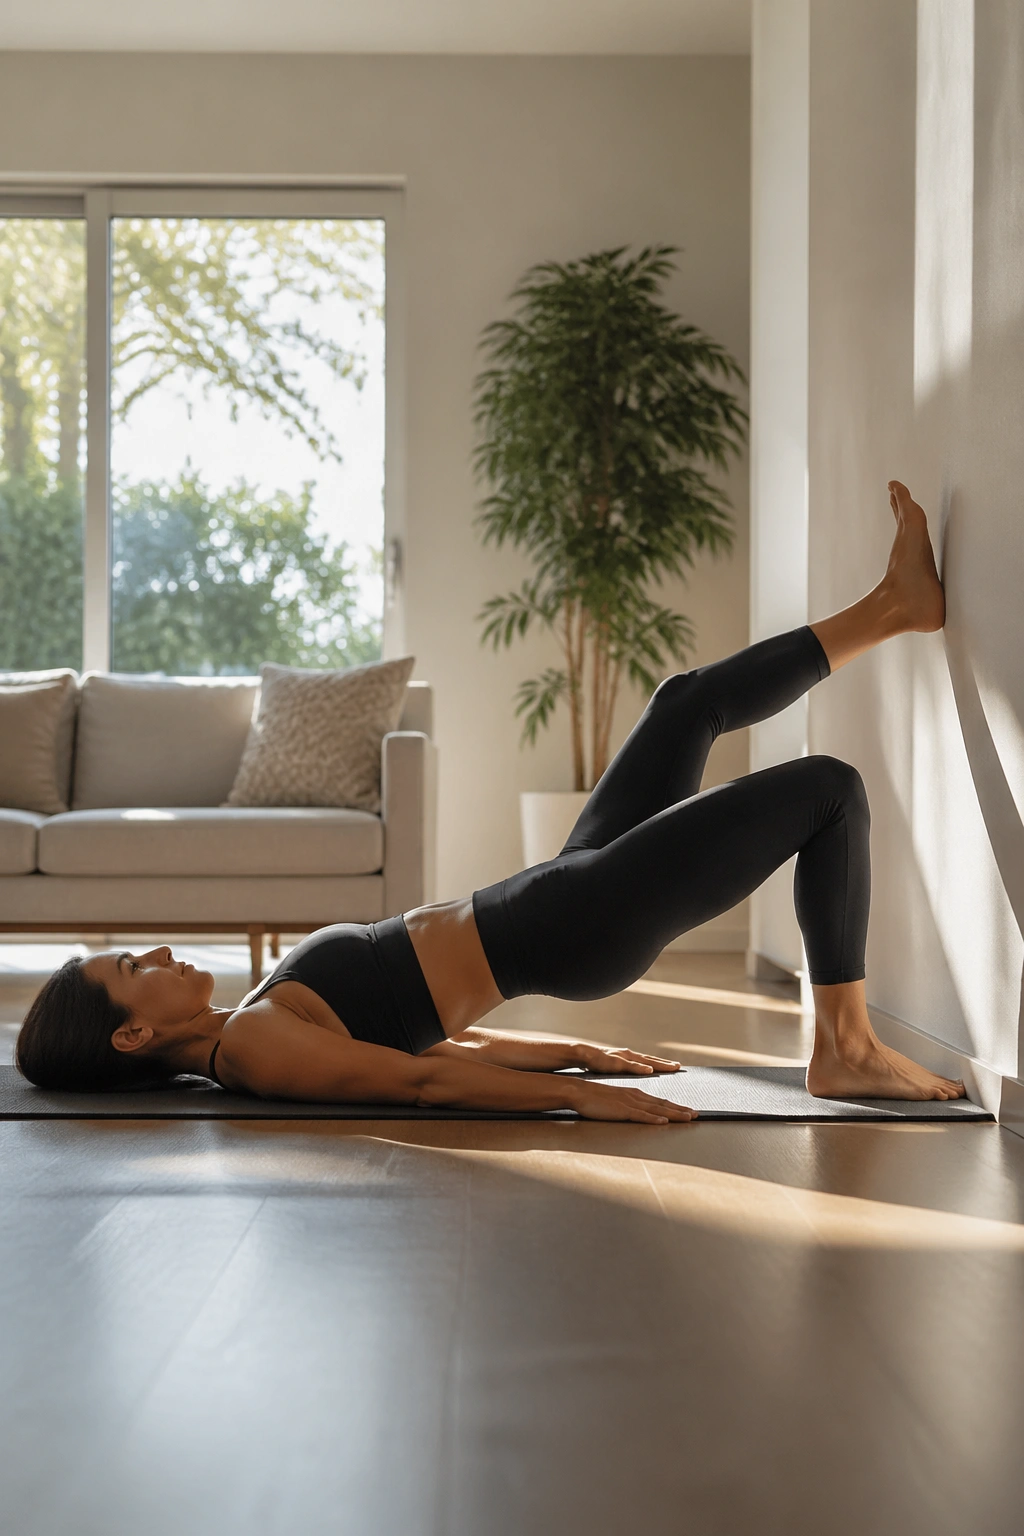
10. Single-Leg Bridge Press
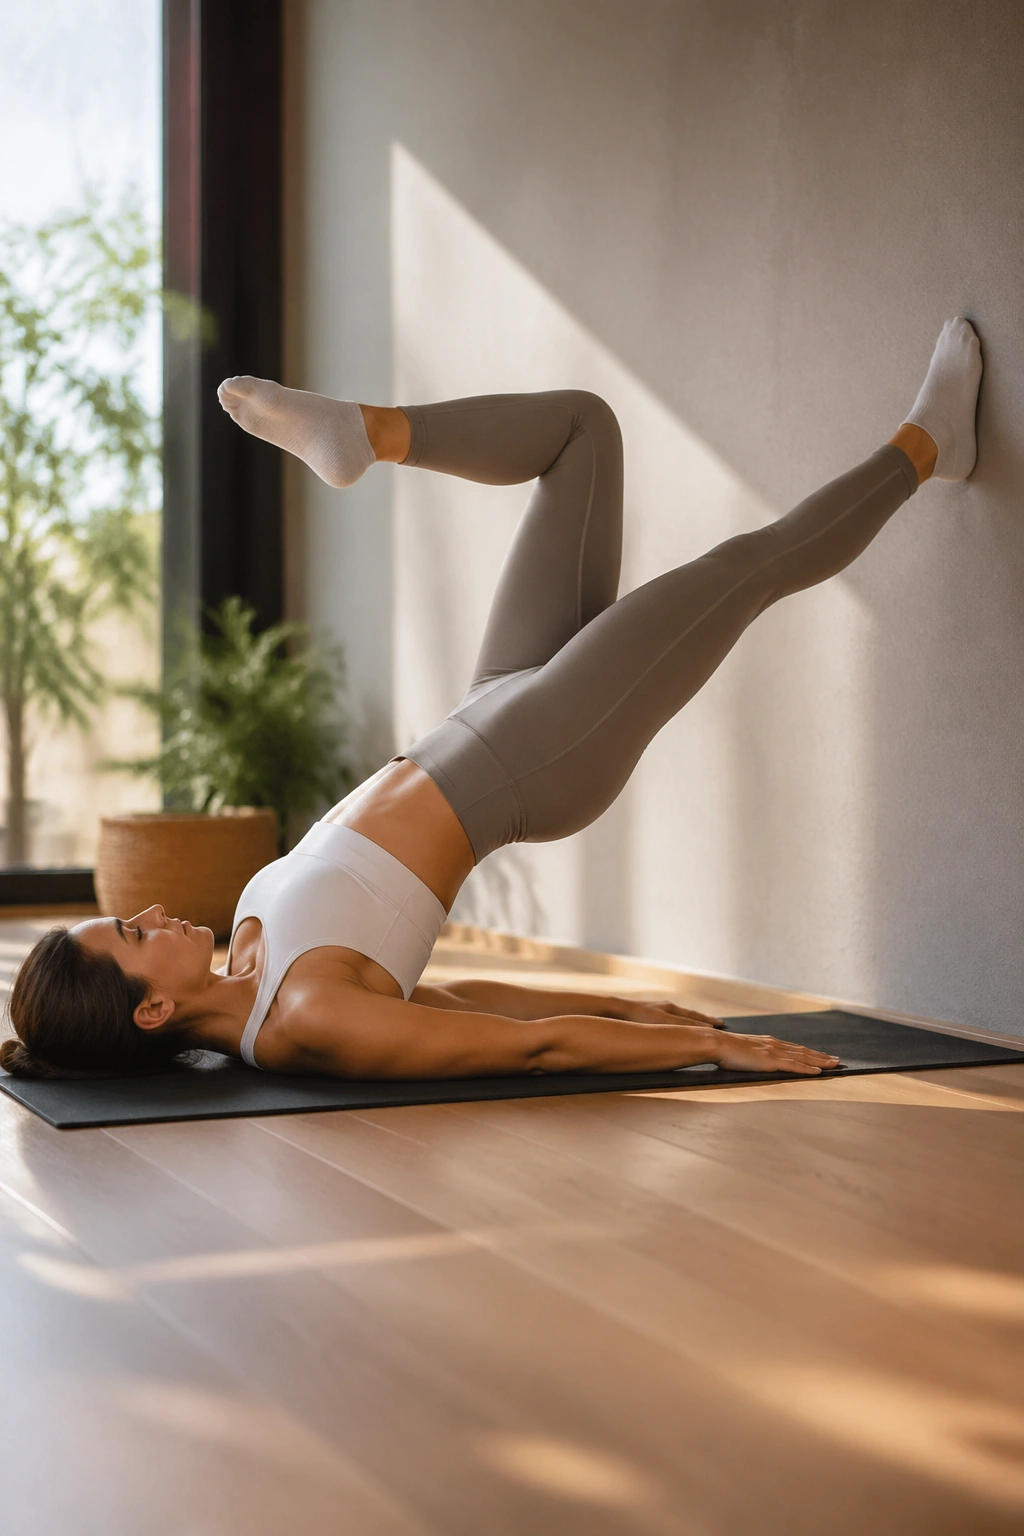
Put one foot on the wall and bring the other leg to tabletop. Exhale and lift into bridge from the standing leg, hold for a breath, then lower. Finish all reps on one side before switching.
Unlike a regular single-leg bridge done on the floor, the wall gives you feedback about foot pressure and knee alignment. That makes this variation more controlled and, for many people, safer. You should feel glute first, hamstring second, low back last. If the low back is first in line, reset.
Work with 6 to 8 reps per side. Start low. A small bridge that stays square is better than a high bridge that twists.
11. Wall Toe Taps
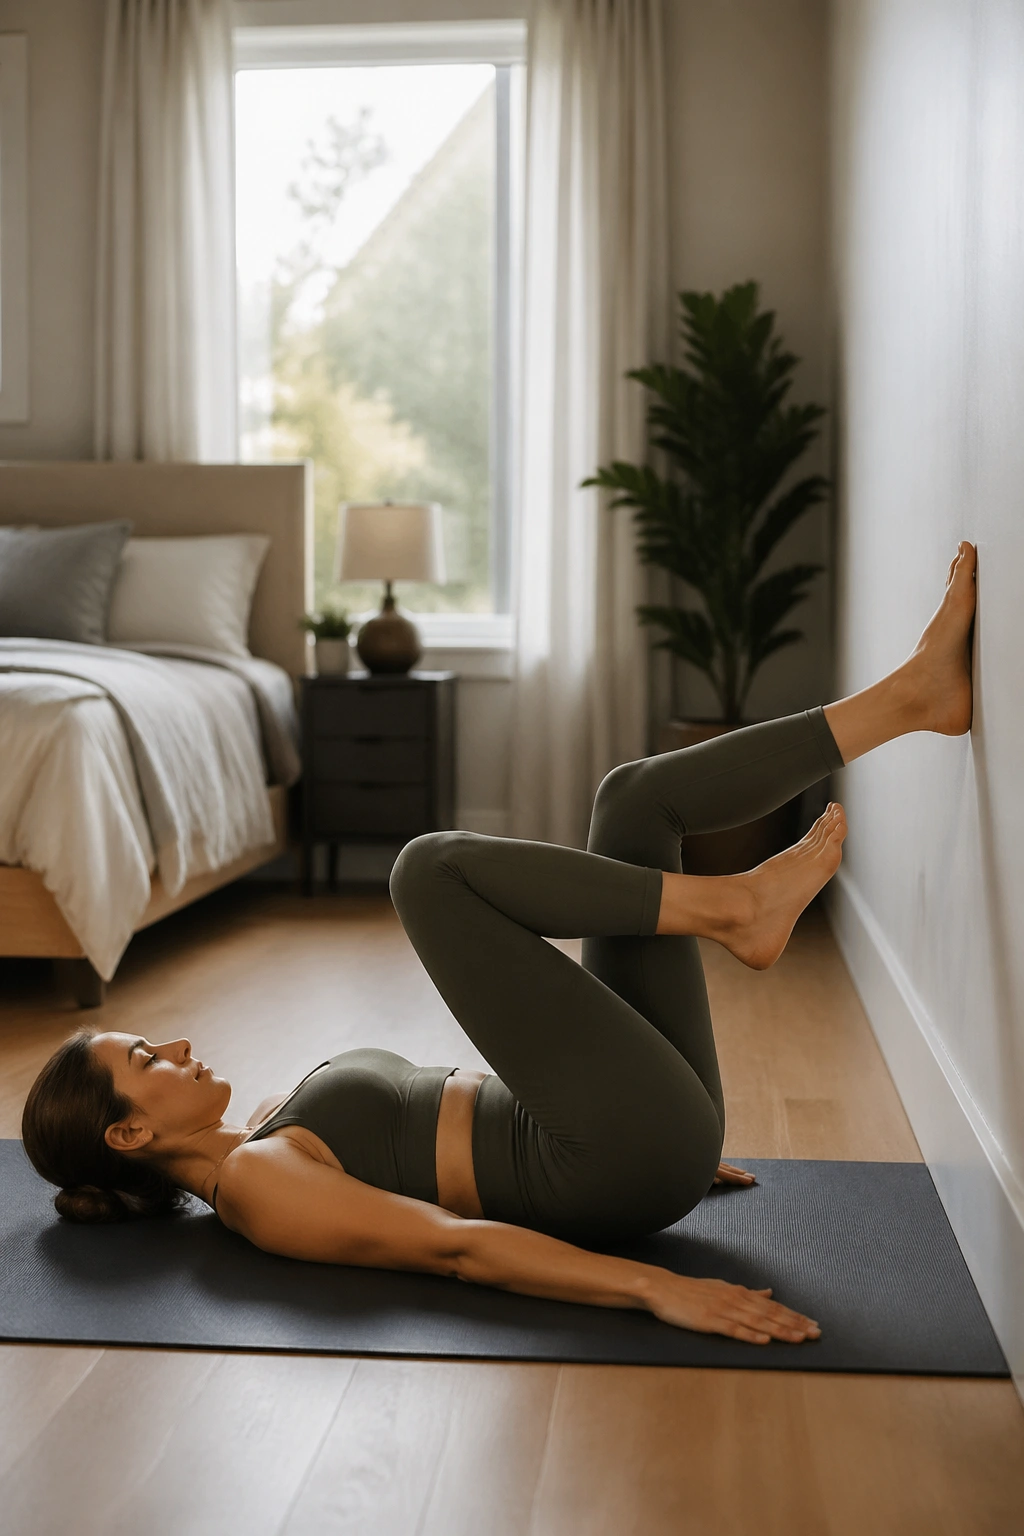
Lie on your back close enough to the wall that both feet can rest on it with hips and knees bent to roughly 90 degrees. Exhale and peel one foot off the wall, tapping the toes toward the mat, then bring it back. Alternate sides.
This is one of my favorite core drills for beginners because the wall helps you find tabletop without guessing. The trick is to keep the pelvis heavy and the rib cage calm while the leg moves. If your back arches off the floor each time the leg lowers, shorten the range.
Why it works
You are training lower-ab control against the weight of one moving leg. That sounds modest. It is not modest when done slowly.
Try 6 to 10 taps per side.
12. Dead Bug Wall Press
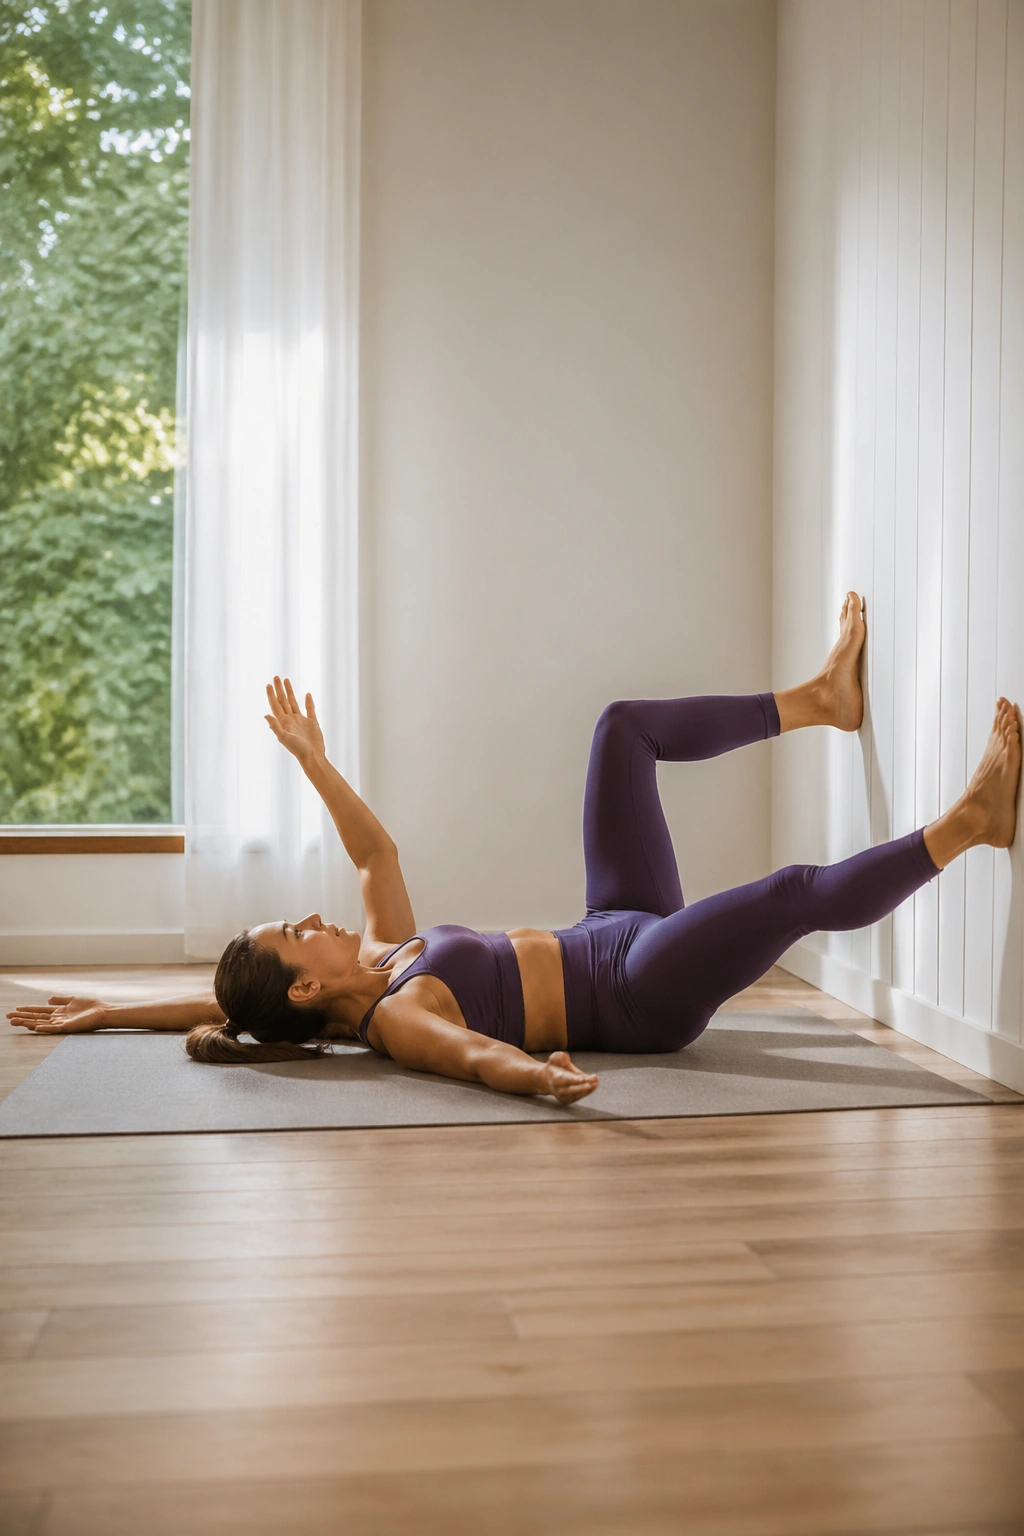
Here the wall becomes your training partner. Lie on your back with knees and hips at 90 degrees, feet flat on the wall. Press your right foot into the wall while your left arm reaches overhead and your left leg extends out at a diagonal. Return and switch sides.
Cross-body work like this is gold for trunk stability. Pressing the planted foot into the wall gives your core something to organize around, which helps stop the low back from arching when the opposite leg reaches long.
Do 6 reps per side. Move on an exhale during the reach. If your neck tenses, keep your head down and make the leg extension shorter.
13. Wall Hundred Hold
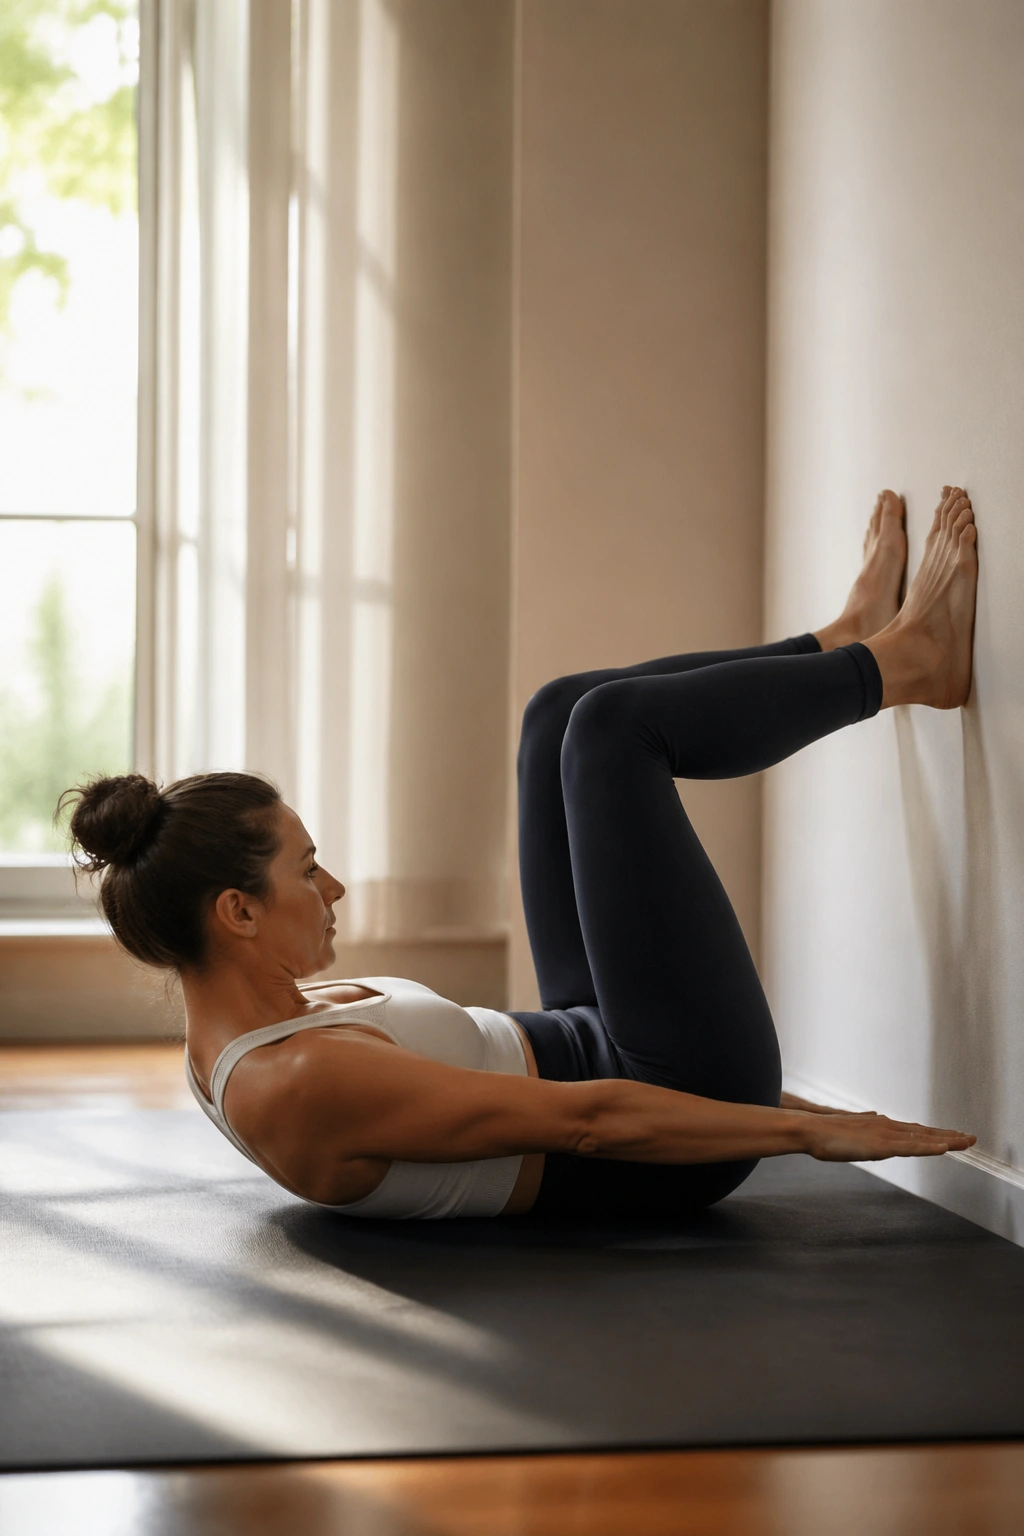
Classic Pilates, with a kinder setup. Lie on your back with feet lightly planted on the wall, knees bent. Curl head and shoulders up, reach the arms long by your sides, and pump them in small pulses while breathing in for 5 counts and out for 5 counts.
You do not need to hit the full 100 pumps on the first pass. Start with 50. The point is sustained abdominal work without yanking on the neck. Keeping the feet on the wall gives you a bit of support so you can focus on the curl and the breath.
If your neck gets tired before your abs do, lower your head for 2 breaths, then come back up. That is not quitting. That is smart pacing.
14. Knee Fold Wall Press
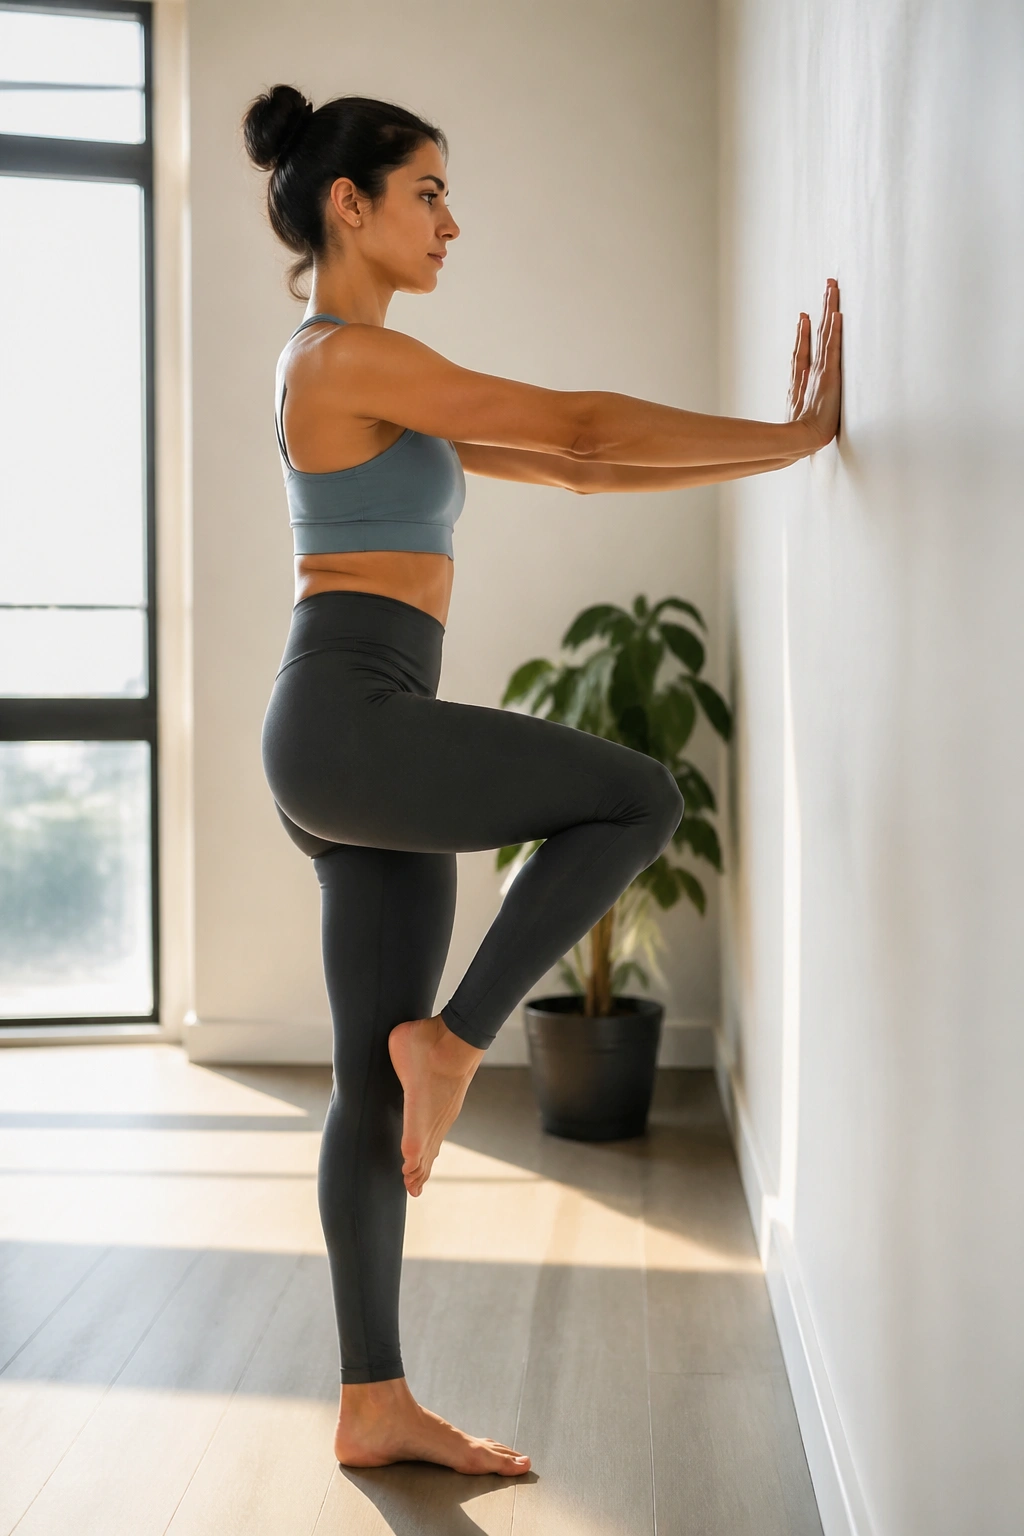
Stand facing the wall with both palms on it at chest height. Shift into one foot and lift the other knee to hip height without leaning your torso back or hiking the standing hip. Pause, lower, repeat, then switch sides.
This move looks almost too basic until you see how much people sway. Standing core control is where mat gains start paying rent in real life—stairs, walking, getting up from a chair, carrying groceries. The wall gives you light support without doing the work for you.
Practice it this way
- 8 knee folds per side
- Slow lift, 2-second pause, slower lower
- Standing knee stays soft, not locked
If balance is easy, reduce the hand pressure until only fingertips touch.
15. Single-Leg Stretch Press
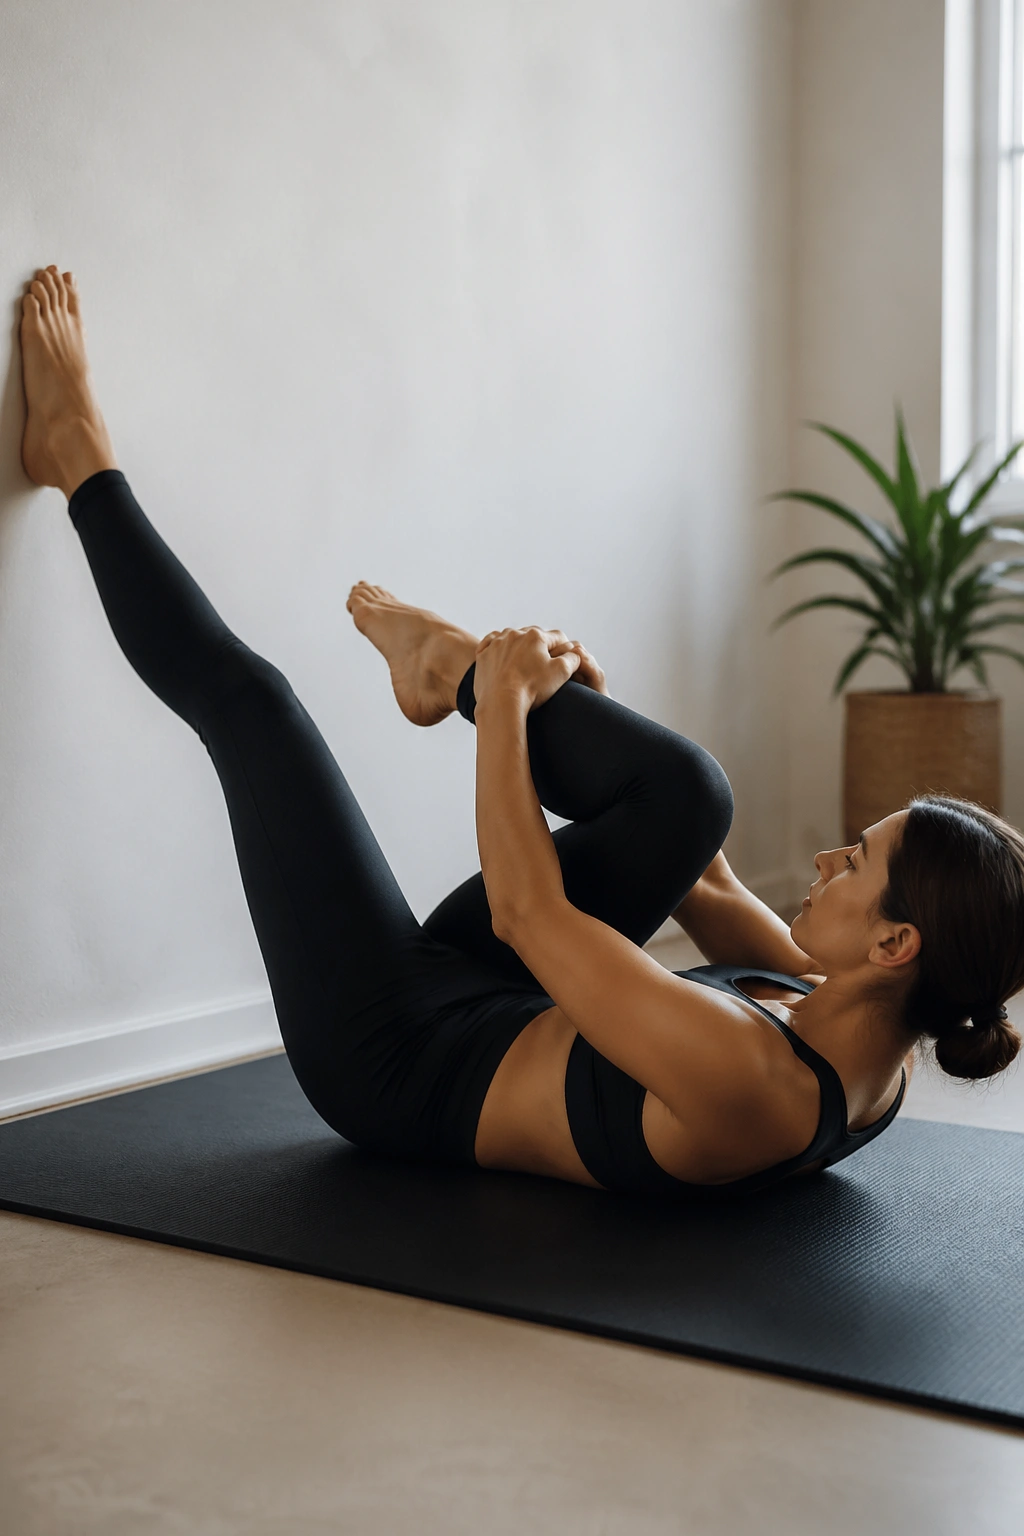
Lie on your back with one foot pressed into the wall and the other knee hugged toward your chest. Curl the head and shoulders up if your neck allows, then switch: the bent leg reaches to the wall as the other knee folds in.
The wall keeps the reaching leg honest. Instead of waving around in space, it has a clear target and a firm end point. That makes the abs work harder than the move looks, especially when you press through the whole foot each time it lands.
Aim for 6 to 8 switches per side. Move slowly enough that you could stop halfway if asked. If you cannot stop, you are using momentum.
16. Crisscross Press
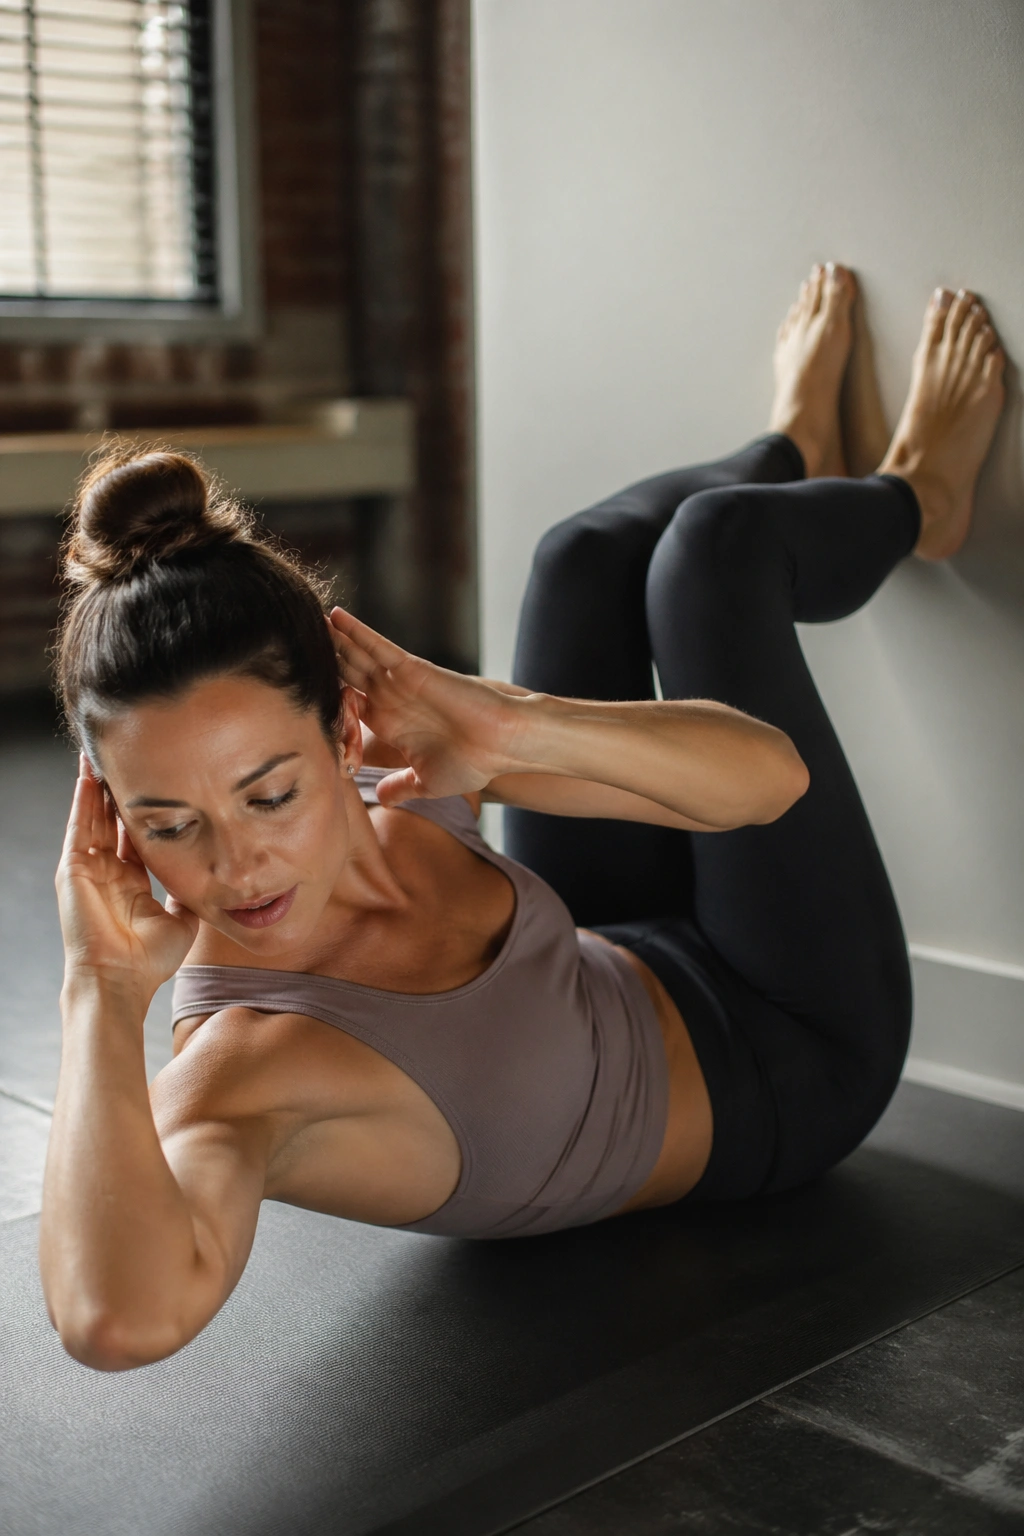
Set up like the previous move, but this time place both feet on the wall to start. Curl up, hands lightly behind the head. Lift one foot off the wall and rotate your rib cage toward the bent knee. Return to center, switch sides.
Most people over-pull the neck and under-rotate the ribs. Think elbow wide, breastbone turning, opposite foot pressing into the wall for support. Rotation should come from the trunk, not from yanking your head sideways.
Go for 5 to 6 reps per side. Fewer, cleaner reps beat a fast bicycle-style frenzy every time.
17. Wall Roll-Up Assist
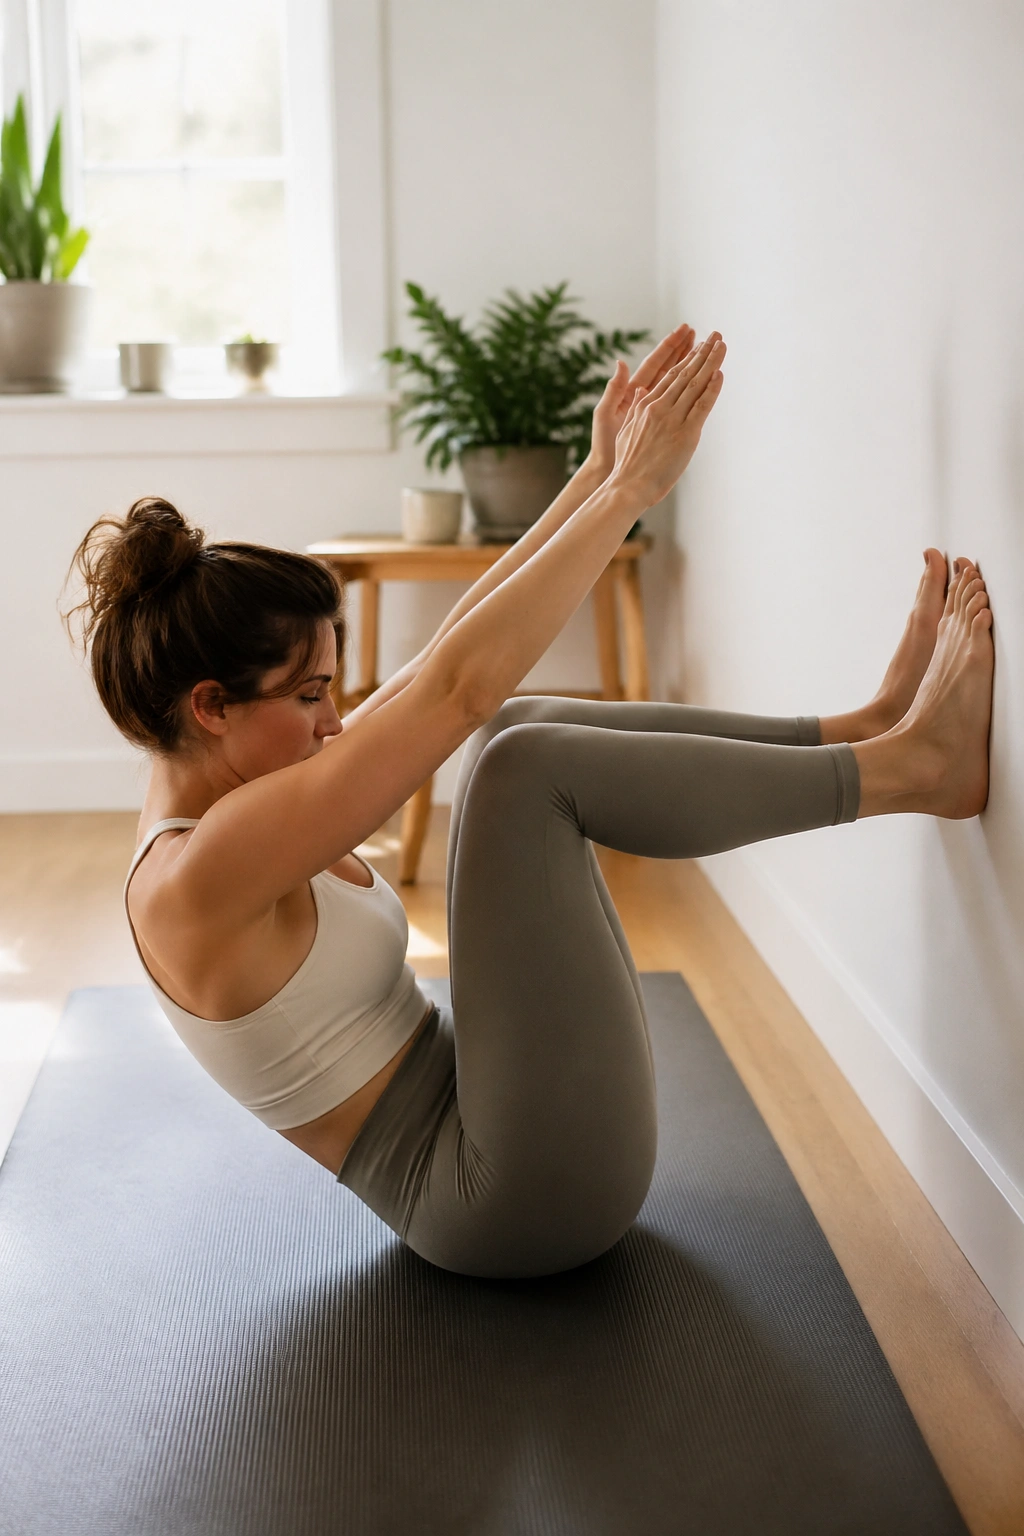
Scoot close to the wall and lie on your back with knees bent, feet planted on the wall. Reach the arms overhead. Exhale and use gentle foot pressure into the wall to help peel your head, ribs, and spine up into a seated fold. Inhale. Roll back down with control.
This is a smart bridge between ab curls and a full roll-up. If standard roll-ups feel impossible—or they yank on your hip flexors—the wall gives you just enough leverage to learn the shape without cheating wildly.
A couple of form checks
Keep the feet heavy on the wall, but do not shove. Think of them as anchors. Do 5 slow reps.
When rolling down, aim to lower the pelvis last. That descending control is half the exercise.
18. Side-Lying Wall Leg Lift
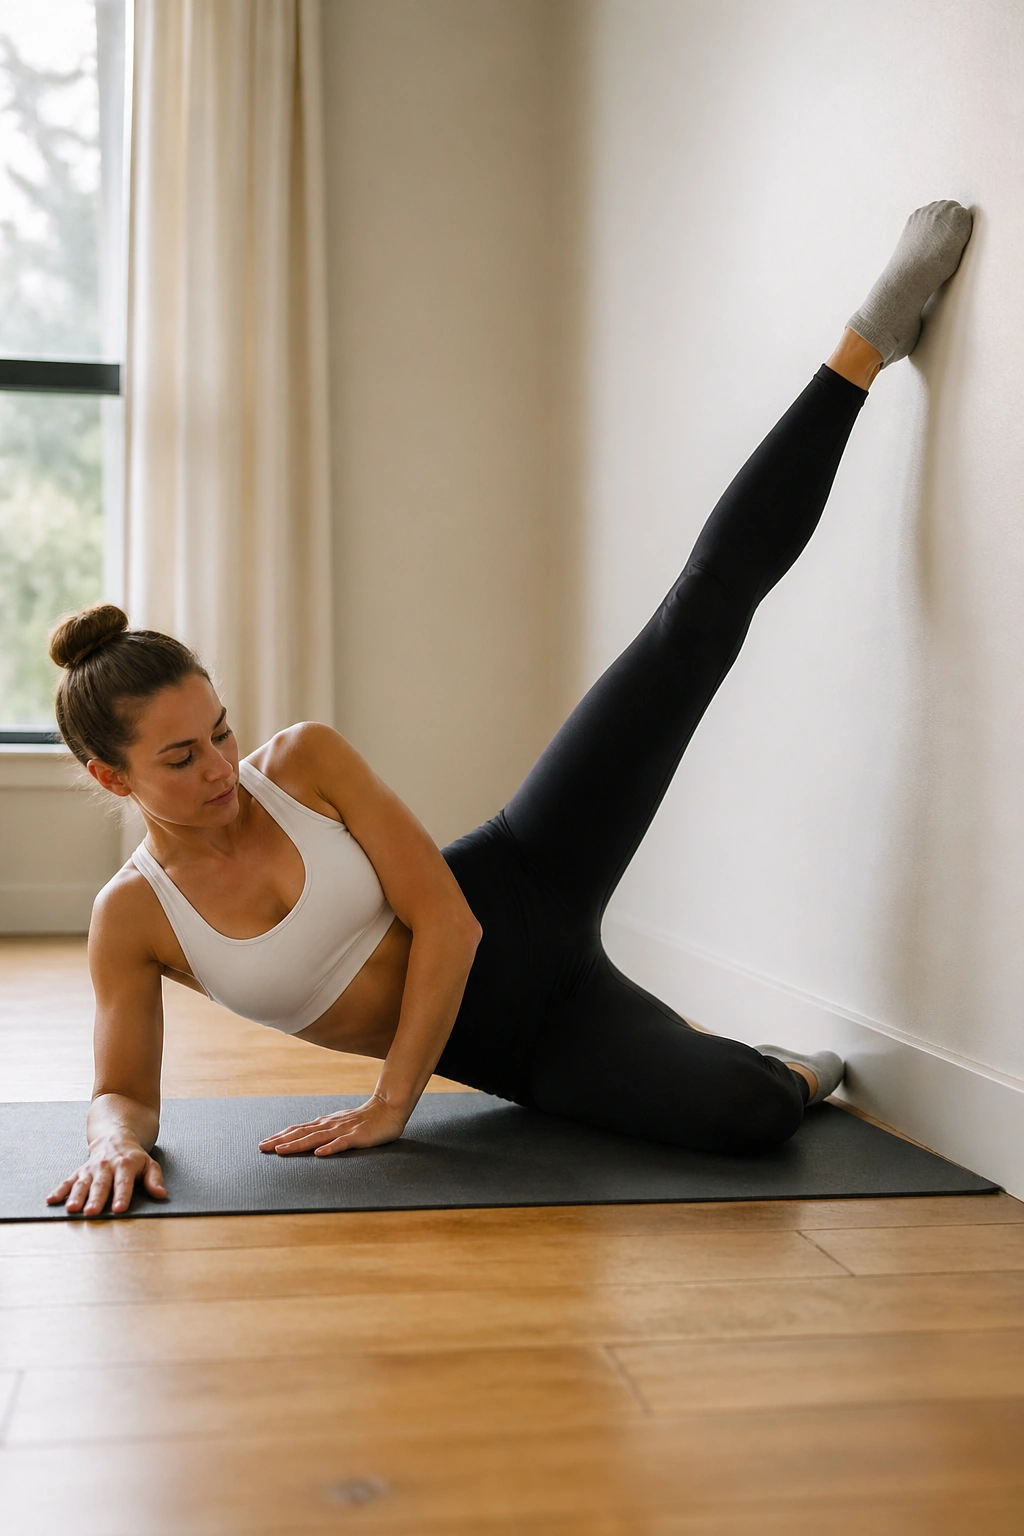
Lie on your side with your back body near the wall, bottom knee bent if you need support, top leg long. Keep the heel, calf, and glute of the top leg lightly touching the wall as you lift and lower it.
This setup is ruthless in a good way. The wall stops the leg from drifting forward and turning the move into a hip-flexor swing. You are training clean outer-hip work, which most of us need more than we need another hundred squats.
Do 10 lifts per side, then hold the leg up for 10 seconds on the last rep. If the waist collapses into the mat, prop your head or bend the bottom knee more.
19. Inner-Thigh Press at the Wall
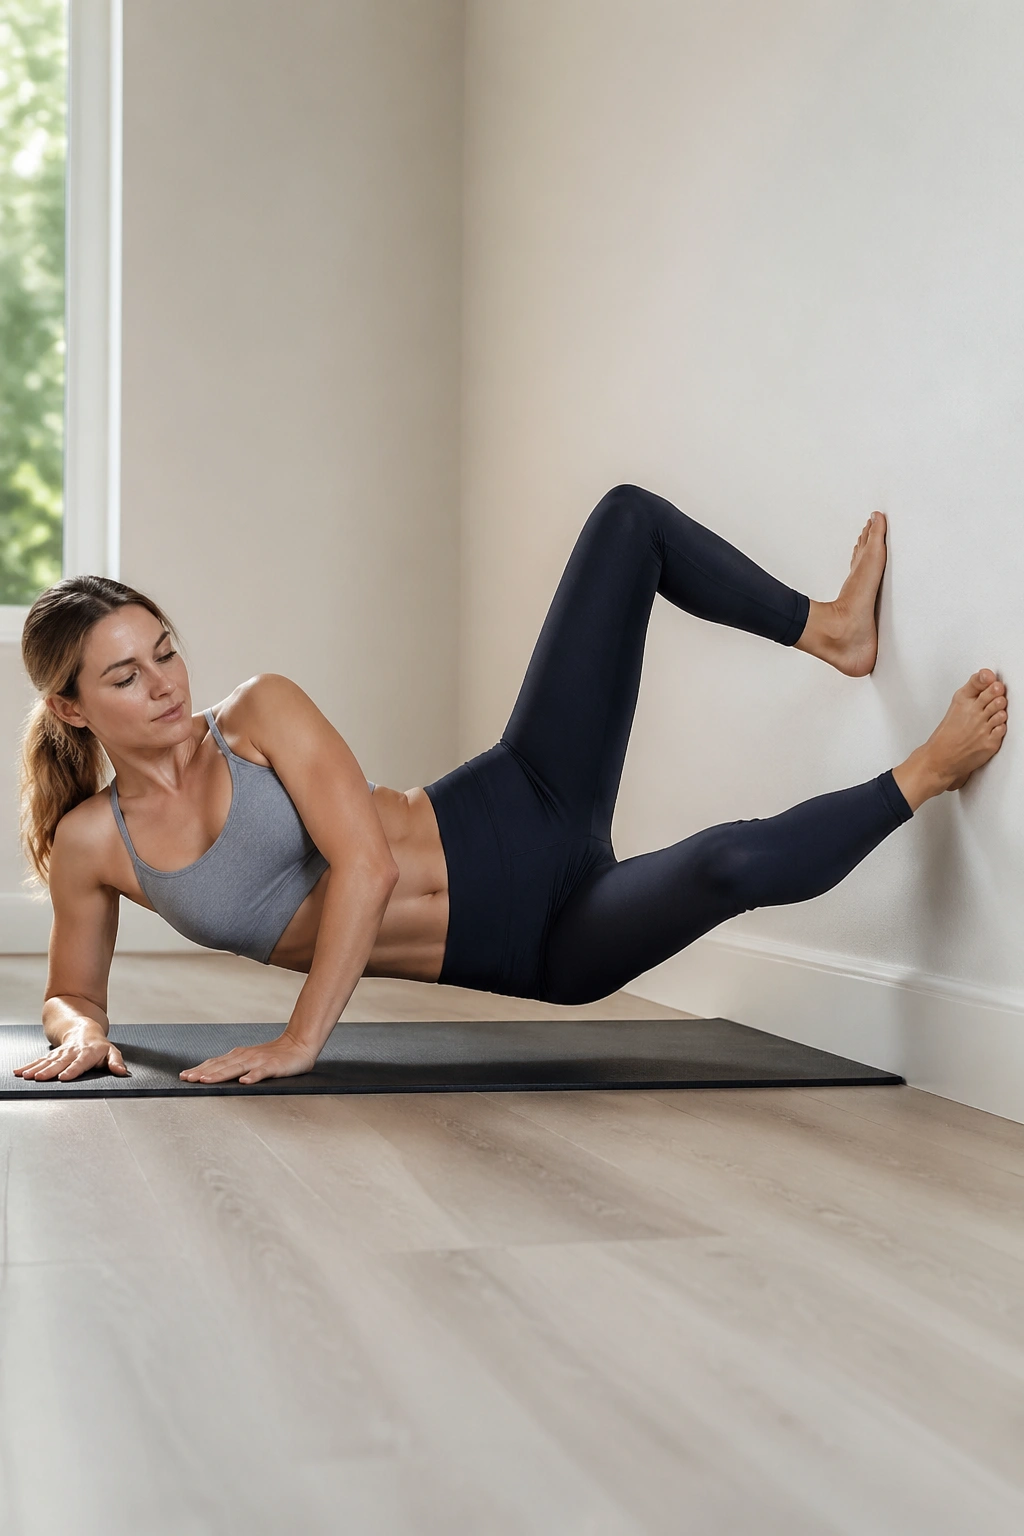
Stay side-lying, but face the wall this time. Place your top foot flat on the wall with the knee bent. Extend the bottom leg long and lift it up toward the wall, then lower with control.
The bottom leg is the worker here. You should feel the inner thigh of the long leg, not a vague effort in the front of the hip. Keep the pelvis stacked and resist rolling backward.
A good starting point is 10 to 12 reps per side. Small range is fine. Inner-thigh work is one of those places where ego ruins the party fast.
20. Wall Clamshell
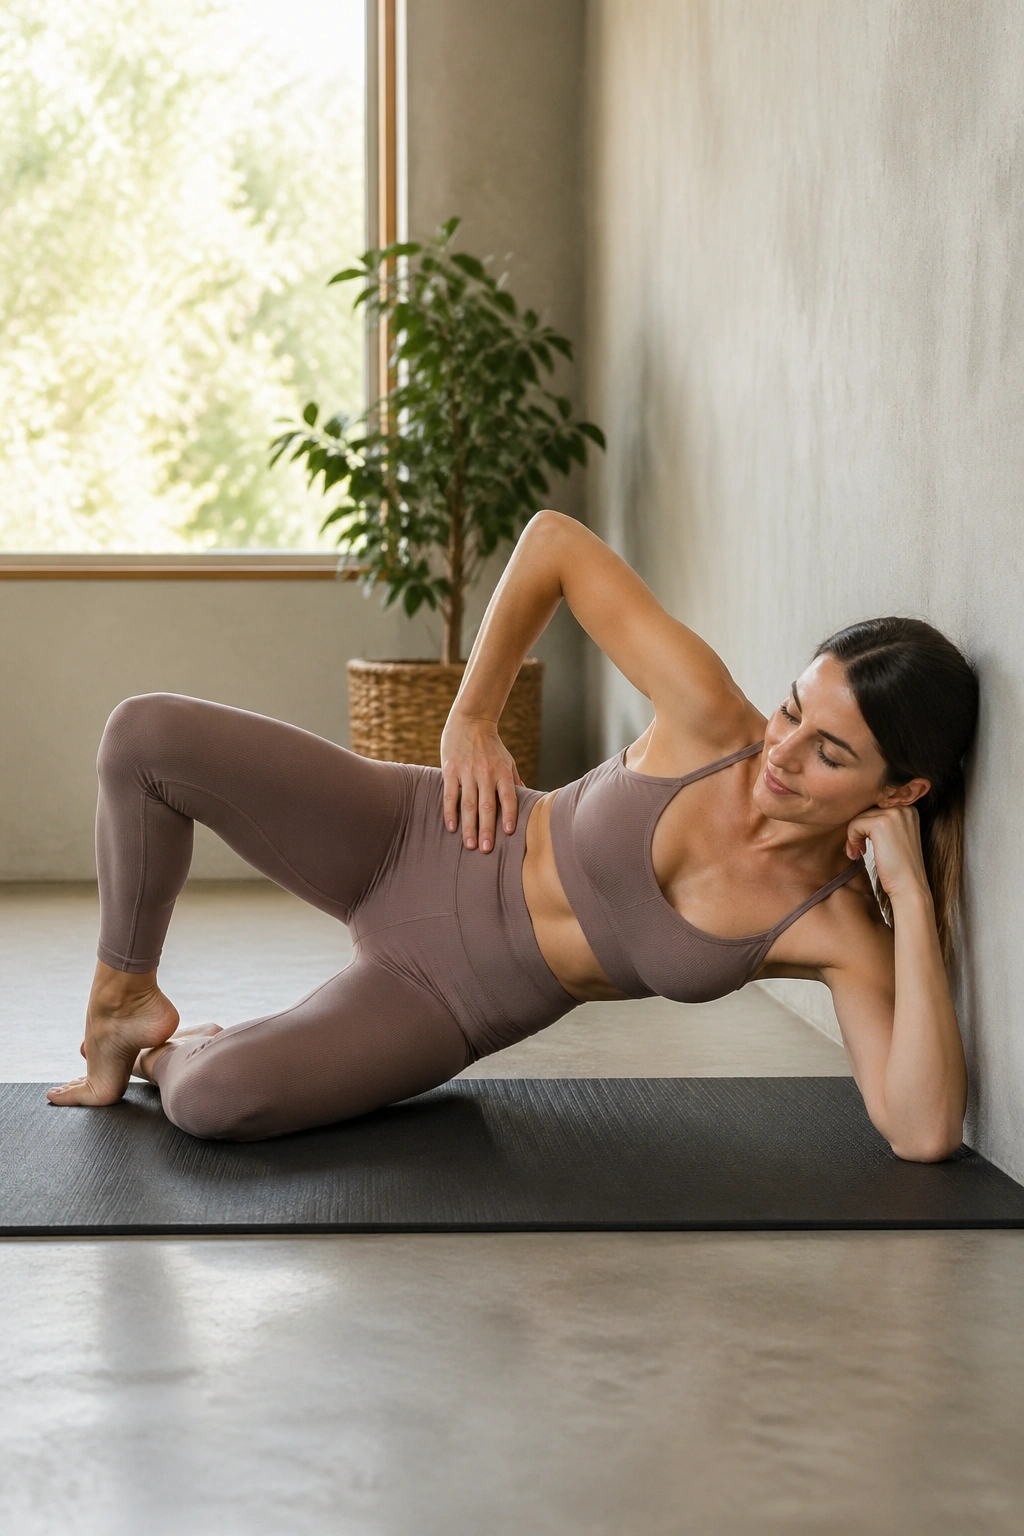
Lie on your side with knees bent and hips stacked, back close to the wall. Keep your heels together and your feet lightly touching the wall if that position works for you. Open the top knee without letting the pelvis roll back, then close.
If your glute medius is asleep, this move will wake it up. If your lower back usually takes over in standing work, that wake-up call matters. The wall gives you a simple reference: keep the back of the top hip from rolling away.
Good rep range
Try 12 slow reps per side, with a 2-second pause at the top.
No giant opening needed.
No rocking.
The burn arrives quickly. That is normal.
21. Side Kick Front and Back at the Wall
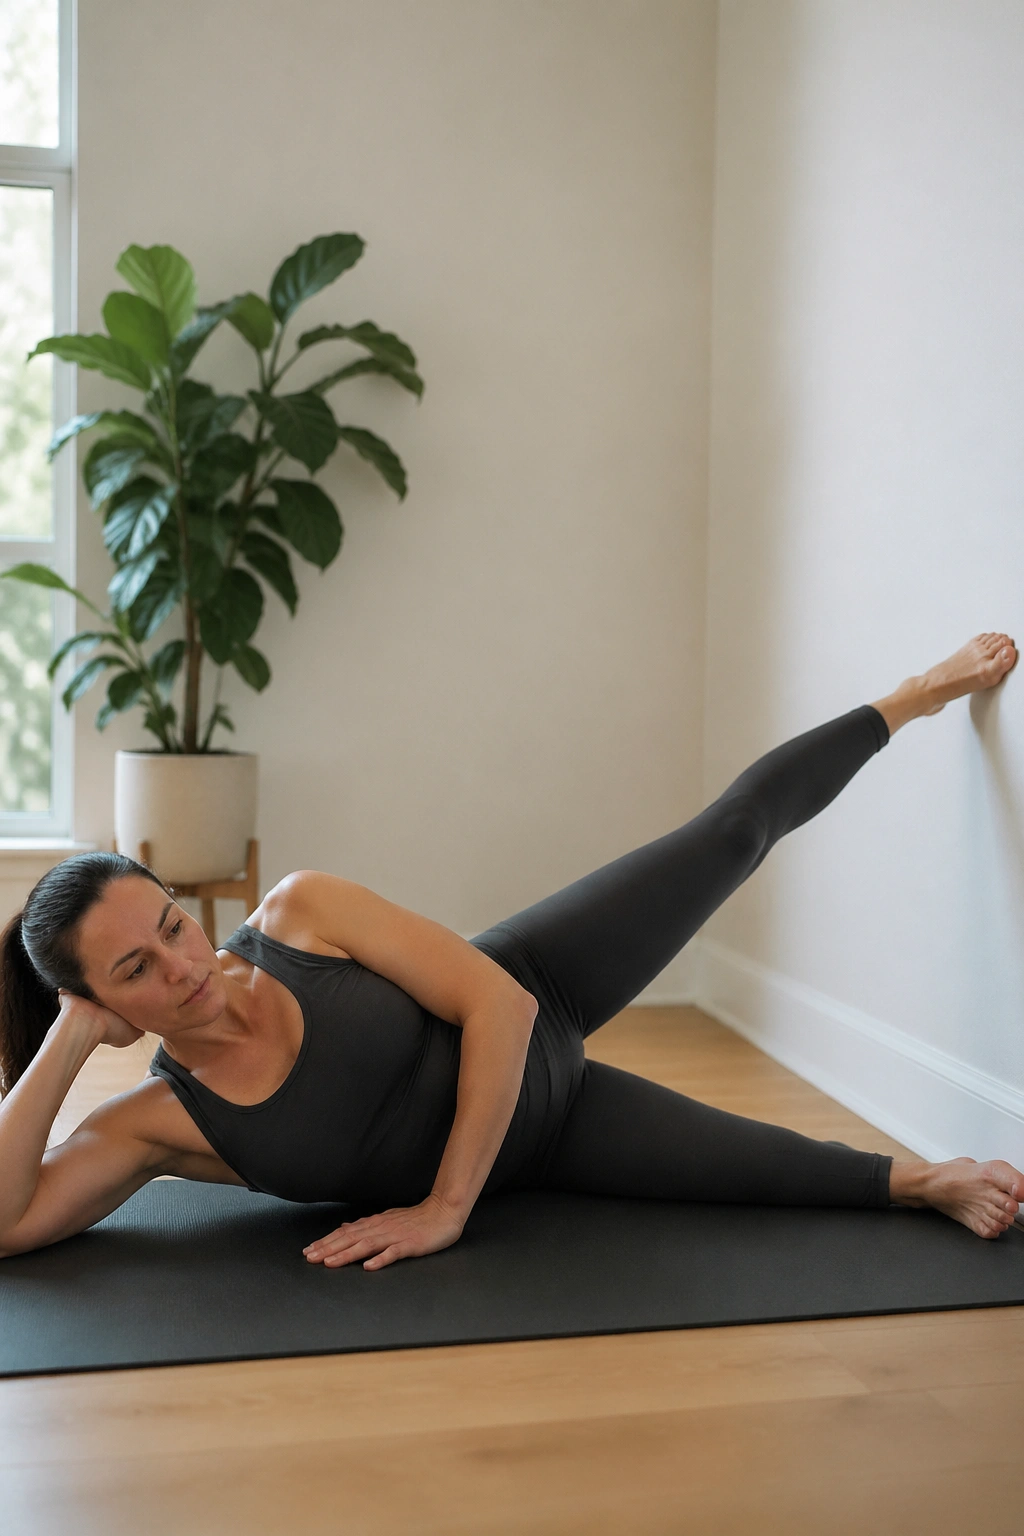
Go back to the side-lying setup with your back near the wall and the top leg lifted to hip height. Kick the top leg forward with a flexed foot, then sweep it behind you with a pointed foot, all while keeping the trunk long and the waist lifted.
Pilates side kicks can turn messy fast. The wall cuts down on that by showing you when your ribs or pelvis twist. Your leg gets to move; your torso does not. That separation is the whole point.
Do 8 front-back swings per side. Keep the back swing modest. If you fling the leg behind you, the low back will join the party.
22. Mermaid Side Bend at the Wall
Sit sideways a foot or so from the wall, legs folded in whatever seated position feels kind to your hips. Place the hand nearest the wall on a yoga block or the floor. Reach the far arm overhead and side bend toward the wall, using it as a visual line for length.
This is not a collapse into the waist. Think of lifting up and over, making a long arc from outer hip to fingertips. The stretch should spread through the side ribs and lat, not jam the shoulder.
Take 4 to 5 slow side bends each way, breathing into the open side of the rib cage. If seated positions irritate your knees, do this kneeling on a pad or in a chair beside the wall.
23. Standing Side Bend Reach
Stand with one side facing the wall, inside hand resting on it for balance. Step the outside foot a little wider, reach the outside arm overhead, and arc away from the wall while keeping both hips heavy.
This one looks graceful. It is also sneaky side-body strength if you return upright without leaning on the hand. Use the wall for orientation, not support, and you will feel the obliques and lateral hip working together.
Do 6 to 8 reps per side. Pause at the top of each return to check that your ribs are stacked over your pelvis.
24. Standing Leg Circle at the Wall
Face the wall sideways and place one hand on it. Lift the outside leg a few inches off the floor and draw small circles from the hip socket. Five in one direction, five in the other.
Small circles. Small. The move is useful because it challenges pelvic stability while the hip moves freely. Once the circles get big, the torso starts helping and the value drops. Think saucer, not hula hoop.
If standing balance is your weak spot, keep the toe of the moving leg brushing the floor in a half-circle pattern first. Then progress to hovering.
25. Wall Plank
Place your hands on the wall at shoulder height and walk your feet back until your body forms a long straight line from head to heels. Press the floor away through your heels and the wall away through your palms, then hold.
Do not underestimate incline planks. If you keep the ribs knit, glutes gently on, and shoulder blades broad, this is full-body work. The higher the hands, the easier it is. The farther your feet are back, the harder it gets.
Hold target
- 20 to 40 seconds
- Eyes on the spot where wall meets floor
- No sagging through the low back
If your wrists complain, make fists against the wall or use forearms instead.
26. Wall Push-Up Plus
From your wall plank, bend your elbows and lower your chest toward the wall in one line. Press back to straight arms. Then add a small extra push at the top by spreading the shoulder blades apart without shrugging.
That last inch—the “plus”—is what many people miss. It trains serratus anterior, which helps your shoulder blades move well and keeps pressing work from turning into neck work. Do 8 to 12 reps with a slow lower and a firmer press away.
This is one of those unglamorous moves that pays off everywhere: posture, overhead reach, floor push-ups, even carrying bags without your shoulders crawling toward your ears.
27. Wall Plank Knee Drive
Set up in your wall plank. Lift one knee toward your chest without rounding the entire spine, then place it down and switch. If you want more oblique work, drive the knee slightly toward the opposite elbow.
Control matters more than speed. A frantic knee drive turns into cardio and throws the pelvis around. A slow, strong drive teaches the abs to brace while the hip flexes, which is useful in walking, climbing, and running.
Try 8 drives per side. If your shoulders fatigue first, step closer to the wall and reduce the angle.
28. Wall Assisted Lunge
Stand facing away from the wall with one hand lightly touching it behind you or beside you for balance. Step one foot forward into a split stance and lower into a controlled lunge, then rise.
Some people need the wall here for confidence. Some need it because without that fingertip support they wobble and dump the load into the front knee. Both are fine. The goal is vertical drop, steady front foot pressure, and a long back leg, not a dramatic depth contest.
Do 8 reps per side. Keep the front shin close to vertical and the torso tall. If the back knee feels cranky, shorten the range and place a folded towel under it if you are hovering close to the floor.
29. Wall Split Squat Pulse
Take the same split stance, but stay in the lower half of the movement and pulse up and down 1 to 2 inches for 12 to 15 reps. A fingertip on the wall is enough.
This is where patience gets tested. The pulse is tiny. The shake is not. By shrinking the range, you keep tension parked in the legs and glutes instead of bouncing through joints. The trunk should stay stacked, not pitched forward.
Do one round per side, rest, then repeat if you still have clean form. If the front thigh lights up almost at once, welcome to the club.
30. Wall Teaser Press
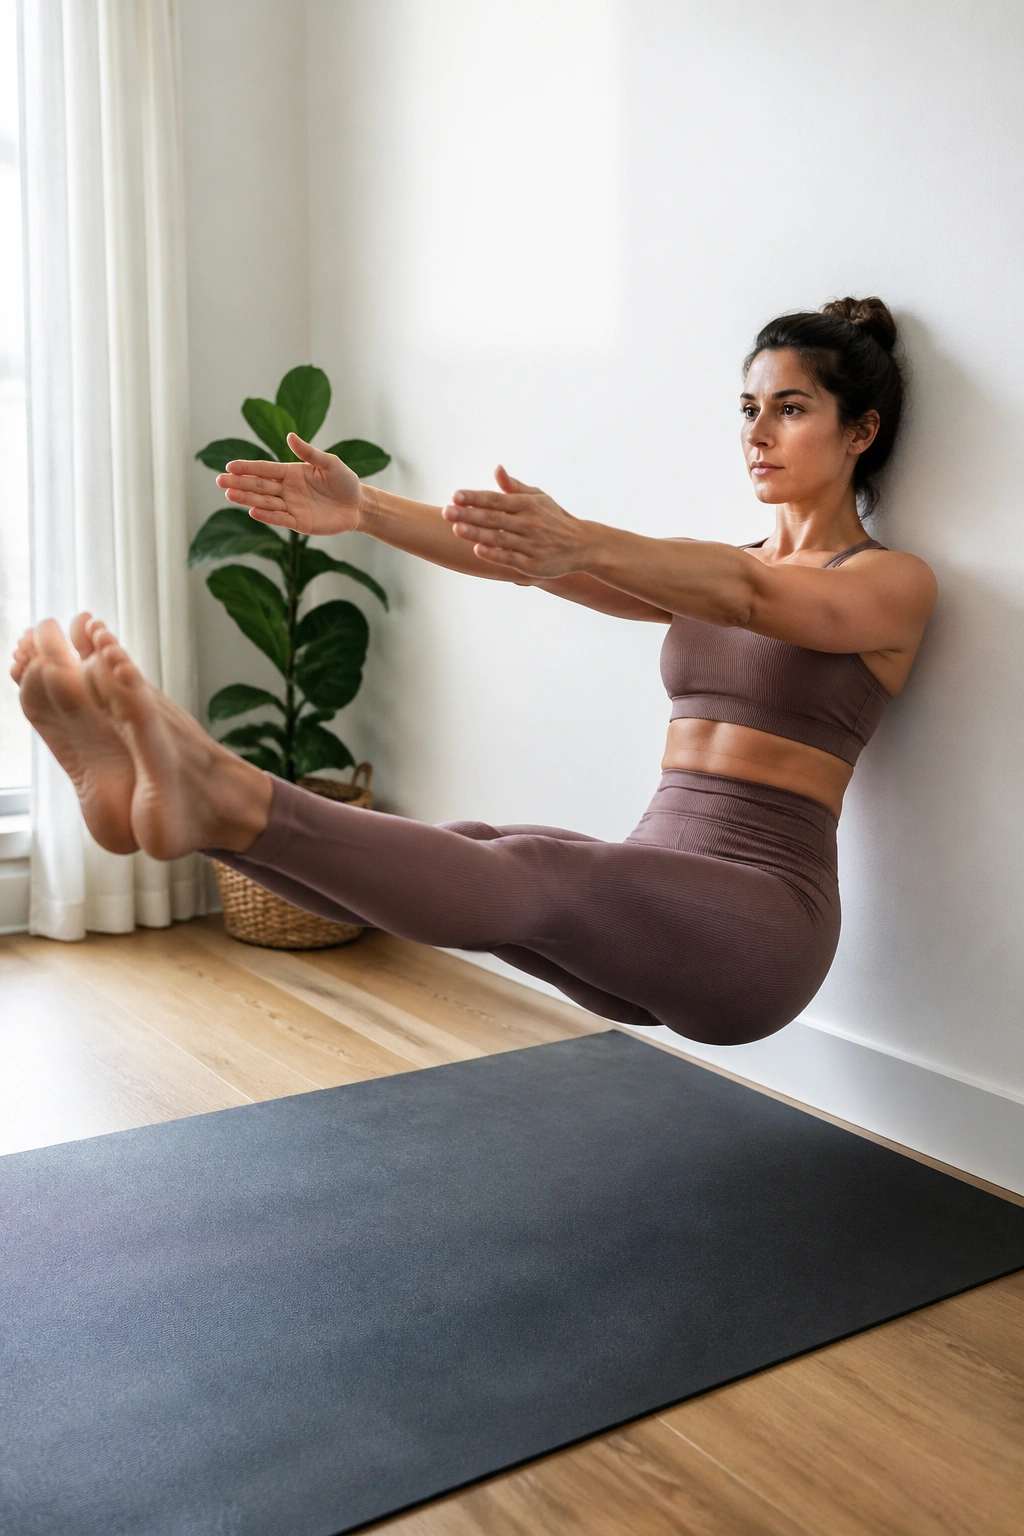
Lie on your back with knees bent and feet on the wall. Reach your arms overhead. Exhale, curl up through the head and chest, and peel into a V-sit shape as you press the feet lightly into the wall for help. Hold for 2 breaths, then roll down slowly.
This is the grand finale because it asks for spinal articulation, lower-ab control, breath, and focus all at once. It does not need to look dramatic. Even a half-teaser with a strong curl and a steady lower body counts.
How to finish the plan
Do 4 to 6 reps.
Pause at the top without gripping your neck.
Lower slower than you lifted.
If you can only reach the low curl shape and roll back down, that is still solid work. Keep it clean.
Keep the Wall Pilates Habit Going After Day 30
Once you finish the 30 days, do not toss the plan aside and go hunting for a louder routine. Repeat it, but change the dosage. Add a second set where you used to do one. Extend holds by 10 seconds. Slow the lowering phase to 4 counts. Small changes keep the work honest.
You can also build mini circuits from the list depending on what your body needs that day. A tight-back morning might call for wall roll downs, wall arm slides, mermaid side bends, and toe taps. A strength day might lean on bridges, split squat pulses, wall push-up plus, and the wall plank knee drive.
And if I had to be blunt, here it is: consistency beats novelty in Pilates. Fancy moves are fun for about five minutes. Clean reps done four times a week change how you stand, breathe, and move through the day.
Final Thoughts
The wall is not a gimmick. It is feedback. That is why these wall Pilates moves work so well in a home setting where no instructor is beside you nudging your ribs down or leveling your hips.
Start with precision, not ambition. A 15-minute session with calm breath and sharp alignment will do more for your body than 40 rushed minutes spent chasing a burn you cannot control.
By day 30, you should feel stronger in places that matter—deep abs, glutes, upper back, feet, side body. You may also notice something less flashy and more useful: standing taller without forcing it, moving with less wobble, and knowing when a rep is clean before anyone else has to tell you.
