



Lower back pain has a way of turning ordinary movements into negotiations. Getting out of the car, rolling over in bed, reaching for a sock—none of it looks hard until your back decides otherwise. That’s why Pilates exercises for lower back pain relief keep coming up in physical therapy offices, mat classes, and home programs: the right ones teach your body how to move with less gripping, less fear, and far better support.
I wish more people heard this early: an achy low back does not always need harder stretching. Sometimes it needs your ribs to move again, your hips to do their share, and your deep trunk muscles to stop arriving late to the job. A tiny pelvic tilt done with control can calm a cranky back faster than the dramatic toe-touch people keep chasing.
Clinical guidelines for ongoing nonspecific low back pain have long leaned toward movement over bed rest, and systematic reviews of Pilates programs have reported better pain scores and day-to-day function than minimal care alone. The gains are not mystical. They usually come from better trunk control, stronger hips, less stiffness through the thoracic spine, and a nervous system that stops treating every bend like a threat.
One catch, though. Back pain is not one condition with one fix. If your symptoms shoot down the leg, include numbness, wake you with severe night pain, or follow a fall or other injury, you need proper medical input before you start collecting exercises. For the broad, frustrating middle ground—stiff, achy, movement-sensitive lower backs—these drills are where I’d start.
How Pilates exercises for lower back pain relief should feel
A helpful back session should feel almost underwhelming at first.
That is not a joke. The best early-session moves often look small, even a little dull, because your first job is to reduce guarding, not to “work the core” until your abs shake. If a movement turns your breathing shallow or makes you brace your jaw, you’ve probably gone too hard.
Use a short pain scale while you practice. Zero to 3 out of 10 discomfort is usually a reasonable lane for home exercise; a brief increase can be acceptable if it eases right away and does not spread farther down the leg. A move that jumps to a 5, lingers for hours, or makes you feel less steady later is giving you useful feedback—shrink the range, slow it down, or skip it.
A few rules help keep things sane:
- Breathe out on the effort. Exhaling tends to calm rib flare and helps the deep abdominal wall join in without a hard brace.
- Start with 5 to 8 slow reps or 3 to 5 breaths per side, not 20 rushed ones.
- Keep the range small until the movement feels clean and repeatable.
- Watch the after-effect. If your back settles to baseline within an hour or by the next morning, the dose was probably fine.
- Use props without guilt. A folded towel under the head, a pillow between the knees, or a yoga block under the hand can turn an irritating drill into a useful one.
Boring is good here. Boring means your back is no longer in an argument with the rest of your body.
1. Lateral Rib Breathing in Crook Lying
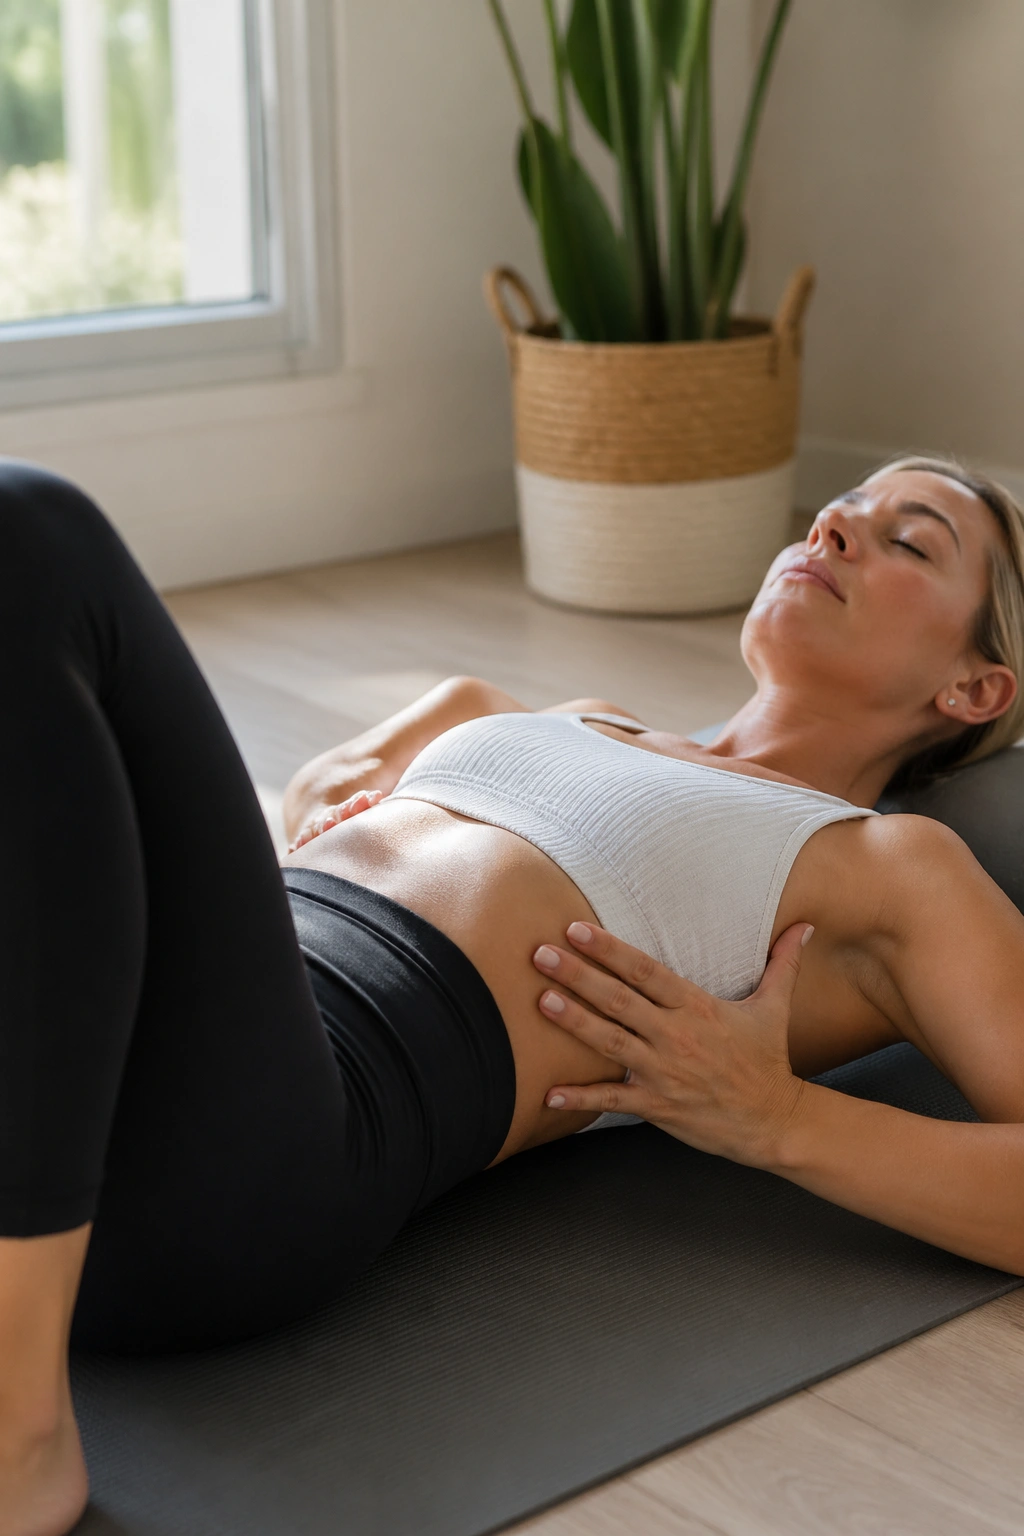
If your lower back is bracing before you even start, begin here. Lie on your back with your knees bent, feet flat, and hands wrapped around the lower ribs. This position—often called crook lying—takes some load off the spine and lets you feel what your rib cage is doing.
Breathe in through your nose for about 4 seconds, aiming the breath into the sides and back of your ribs instead of puffing your chest upward. Then exhale slowly for 5 to 6 seconds, letting the ribs narrow while your lower belly gently firms, like zipping up snug jeans without sucking in. Your low back can stay neutral; do not mash it into the floor.
A lot of people with back pain are not weak first. They’re over-braced first. Lateral breathing helps peel off that constant tension so the rest of the workout has a chance.
Quick setup cues
- Keep your feet about hip-width apart.
- Place your heels roughly 10 to 12 inches from your sit bones.
- Put a thin pillow under your head if your chin tips toward the ceiling.
- Take 5 to 8 breaths, resting if your neck starts to help too much.
Small tip: picture your back ribs widening into the mat on the inhale. That image works better than “take a big breath” for most people.
2. Pelvic Tilt and Release
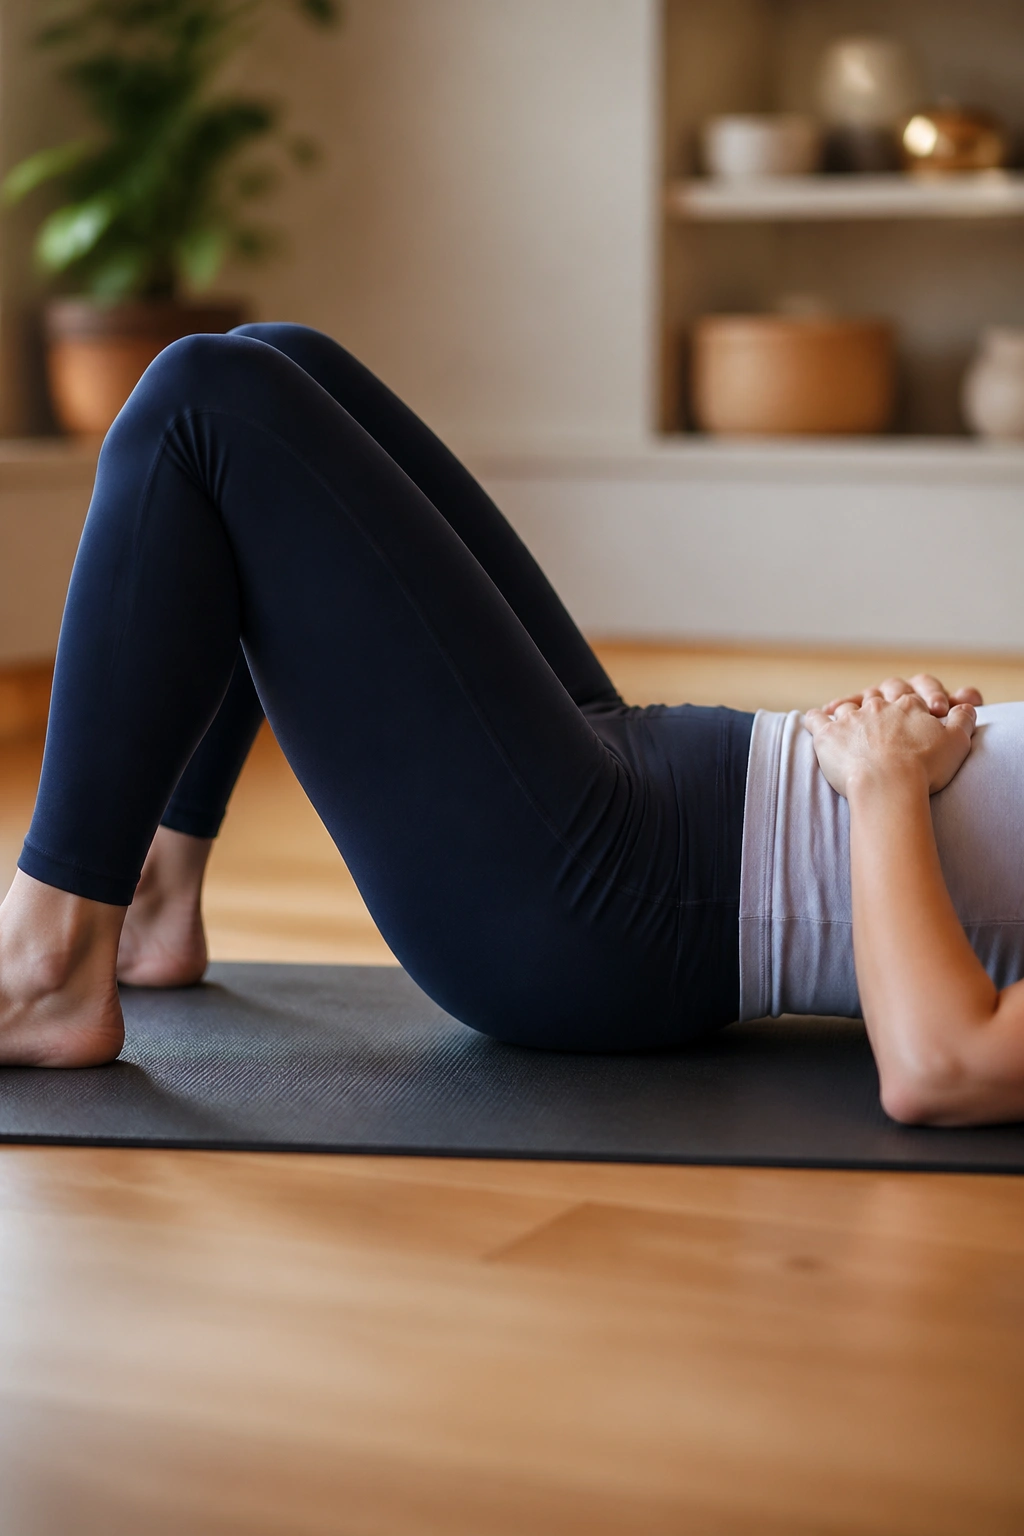
Can a movement of two inches change how your back feels? Yes—and this is one of the cleanest examples.
Start on your back with knees bent and feet planted. On the exhale, gently tilt your pelvis so your pubic bone tips a little toward your ribs and your lower back gets lighter against the floor. On the inhale, roll back the other way until you return to neutral or a slight natural arch. The motion is tiny. If your glutes clench hard or your ribs pop up, you’re turning a useful drill into a wrestling match.
Why this helps
A pelvic tilt gives you awareness of the lumbopelvic zone—the area where your lumbar spine, pelvis, and deep abdominal wall coordinate. When that region feels stiff or disconnected, your back often takes more motion than it wants during daily tasks. Tilting and releasing teaches your body that the area can move without danger.
It also gives you a fast read on your symptoms. If a gentle posterior tilt feels soothing, flexion may be friendly for your back. If it feels sharp or sends pain down the leg, you’ve learned something just as important: do not force more of it.
Dose it this way
Try 8 to 10 slow reps, matching each tilt to an exhale and each release to an inhale. Pause for one full breath in neutral after every third rep. That pause matters; otherwise people drift into nonstop flattening and call it control.
3. Pelvic Clock
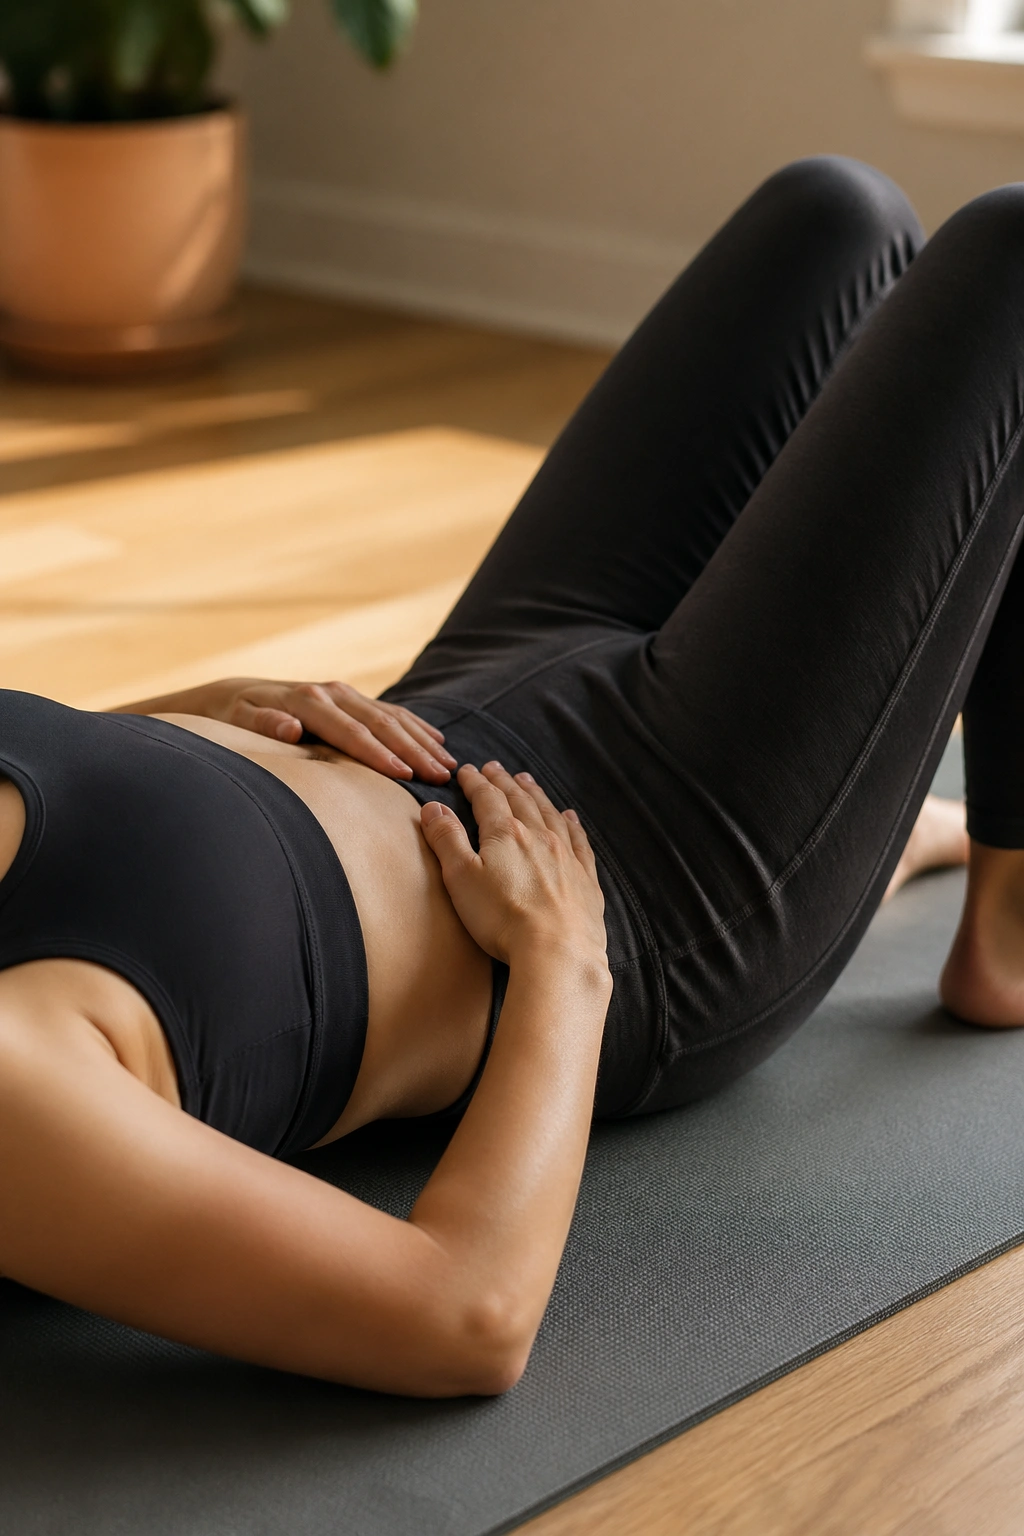
Picture your pelvis as a clock face. Twelve o’clock points toward your navel, 6 o’clock toward your pubic bone, and 3 and 9 sit at your hip bones. Once that image clicks, this exercise becomes one of the smartest little mobility drills in mat Pilates.
From your back with knees bent, rock your pelvis toward 12, then 6, then side to side between 3 and 9. After that, connect the dots into a slow circle—clockwise for 3 to 5 rounds, then counterclockwise. Keep the motion smooth, as if you are drawing the circle with a heavy marker, not scratching at the paper.
Finding the points on the clock
The trick is to move from the pelvis without turning it into a leg exercise. Your feet stay grounded. Your thighs stay quiet. Your ribs do not jump in and try to do the whole thing for you. If one side feels bumpier, smaller, or strangely absent, welcome to the club. That asymmetry is common.
Where people get lost
They rush. Or they make the circles huge. Or they grip the butt so hard the clock stops being a clock and becomes a plank. A small, clear circle is worth far more than a dramatic one. This drill is not about effort. It is about map-making.
Use it for 1 to 2 minutes as a warm-up before anything more demanding.
4. Marching Knee Folds
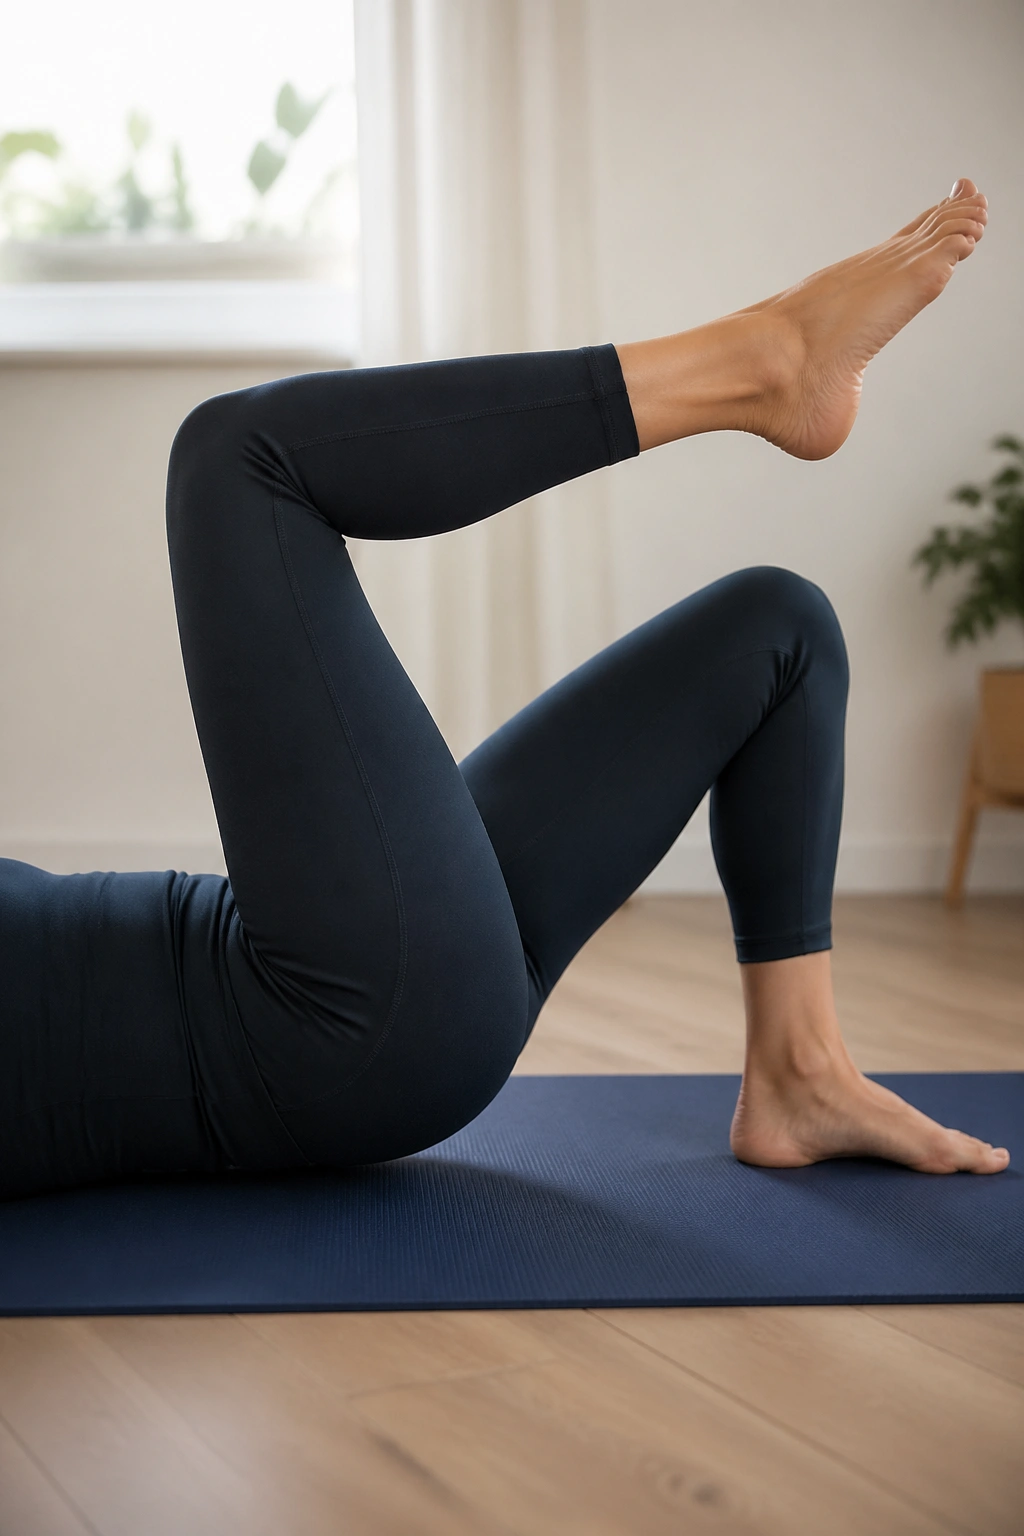
Rushing straight to crunches is one of the less useful habits in back care. Marching knee folds do a better job early on because they challenge pelvic stability without asking your spine to flex hard against gravity.
Lie on your back in neutral, knees bent, feet flat. Exhale and float one foot off the floor until the hip and knee both reach about 90 degrees—Pilates folks call this tabletop. Inhale to place the foot back down with control. Alternate sides.
The goal is not to lift high. The goal is to keep the pelvis from rocking like a canoe.
- Do 6 to 8 reps per side.
- Keep your fingertips on the front hip bones if you want feedback.
- If the pelvis shifts, only unweight the foot for a second instead of fully lifting it.
- Lower slowly. The lowering phase tells you more than the lift.
One clean rep beats six sloppy ones. Every time.
5. Bent-Knee Fallout
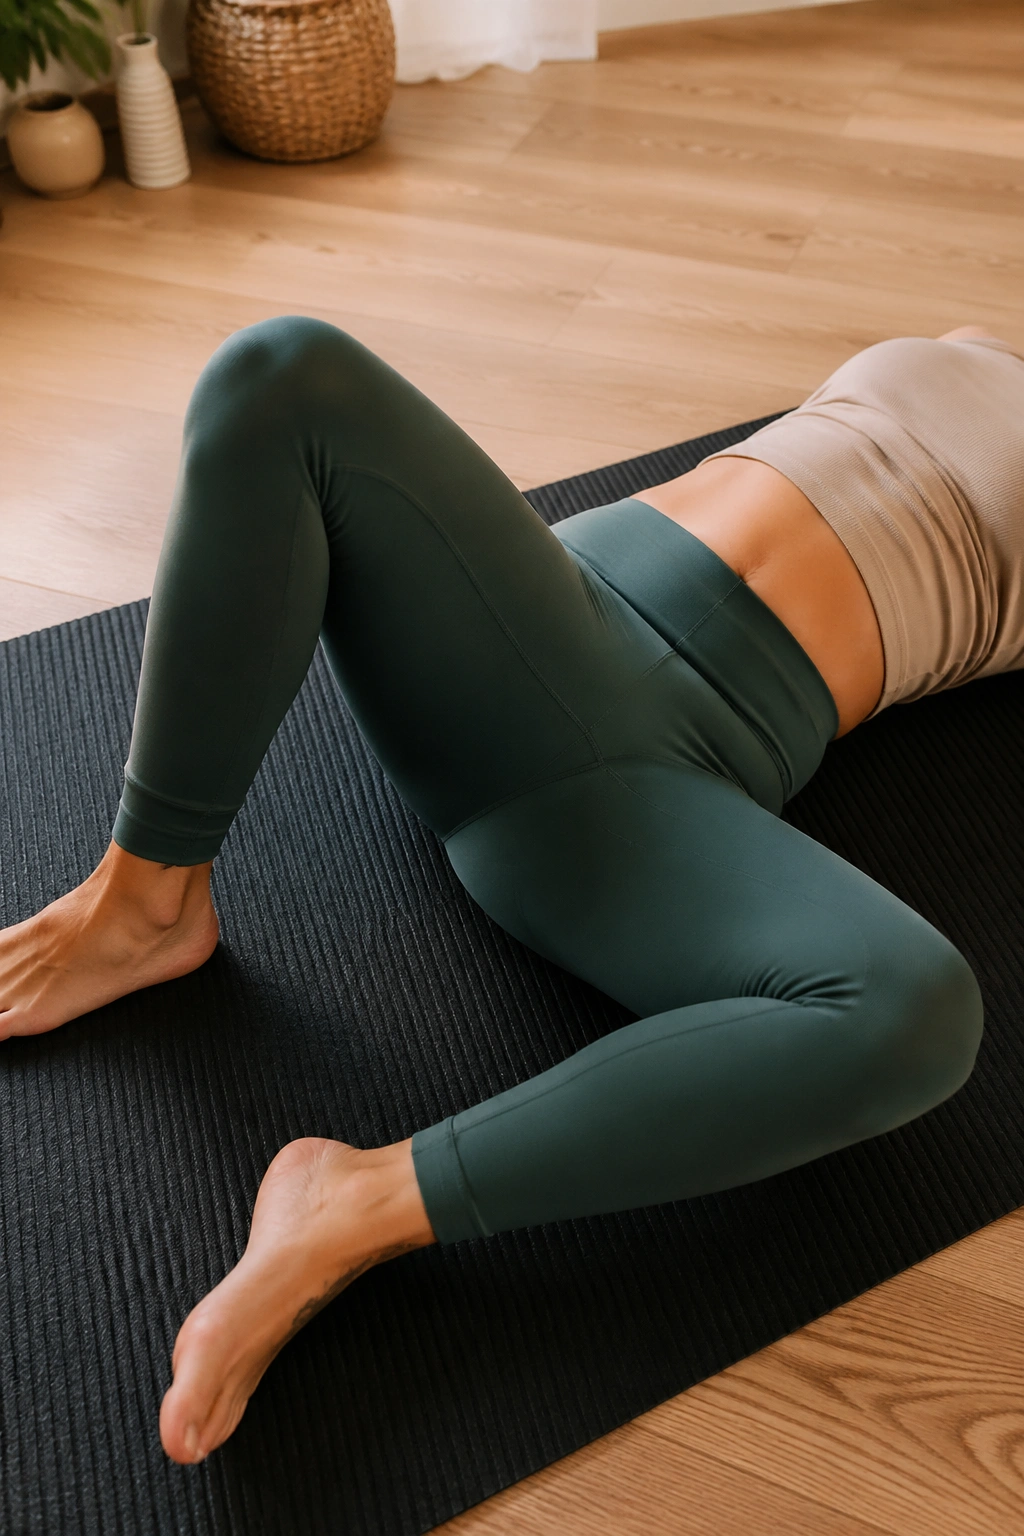
If your low back grabs the instant one leg moves sideways, this exercise exposes it fast. It also gives you a clean way to fix it.
Stay on your back with knees bent and feet flat. Let one knee open out to the side like a gate while the other leg stays still. Go only as far as the pelvis can stay level. Then bring the knee back to center without letting the rib cage shove upward.
What looks like a hip drill is really a hip-and-core conversation. The moving leg is asking for rotational freedom at the hip while the trunk resists being pulled around. When that balance is missing, your lumbar spine often volunteers for the job—and complains later.
Keep the range small at first. Three inches might be enough. If you can open the knee wider only by rolling your pelvis, you’re not ready for the wider range yet.
I like 6 to 8 reps per side, paired with a long exhale on the opening phase. If it helps, rest one hand on your lower belly and one on the front of the pelvis. Your mission is to keep both as quiet as possible. Calm. Measured. No drama.
6. Toe Taps from Tabletop
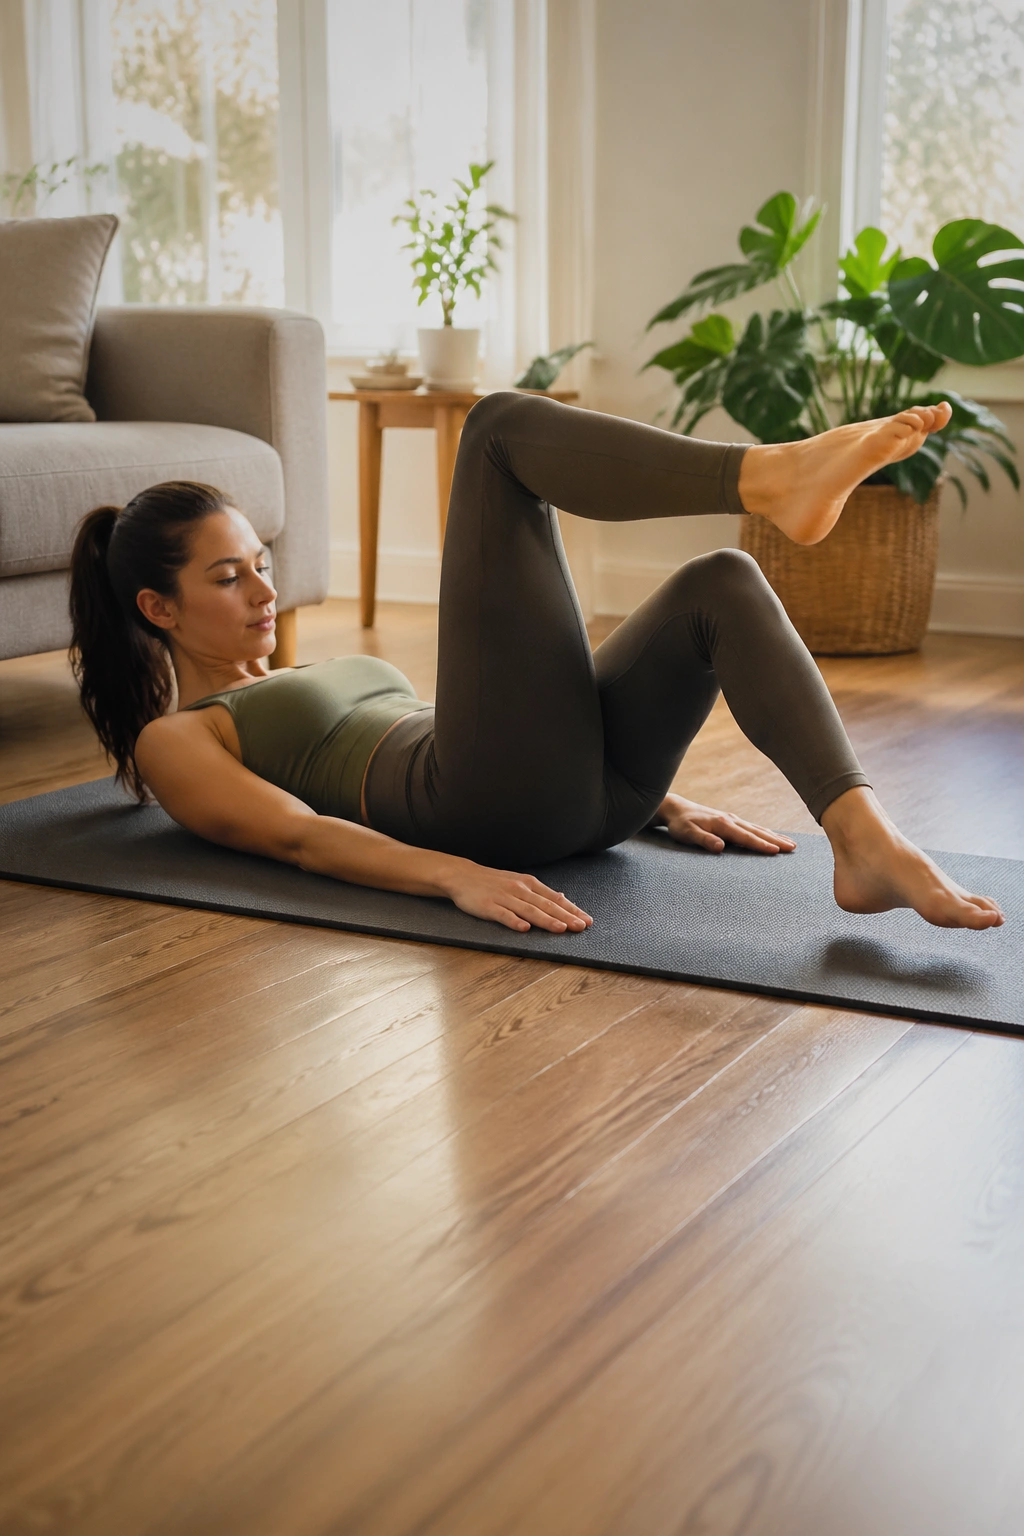
Unlike marching knee folds, toe taps ask your trunk to hold steady while the leg travels farther, which makes them a smart next step once the easier drills feel steady.
Set both legs in tabletop. On the exhale, lower one foot toward the floor and lightly tap the toes down—or stop an inch above the mat if the tap pulls your back into an arch. Inhale to return the leg to tabletop, then switch sides. Your ribs stay heavy, your neck soft, and your abdomen gently engaged rather than sucked inward.
This one tells the truth fast. If your belly domes, your pelvis tips, or your breath vanishes halfway down, the drill is ahead of you. Back up to marching knee folds for another week or two, or keep one foot on the floor while the other taps. There is no prize for choosing the harder version too early.
Who gets the most from it
Toe taps are useful for people whose back pain shows up during leg-dominant tasks—walking uphill, getting in and out of bed, climbing stairs—because the exercise teaches the trunk to stay organized while the hips move.
Start with 4 to 6 taps per side. Slow is the whole point.
7. Supine Spine Twist with Knees Bent
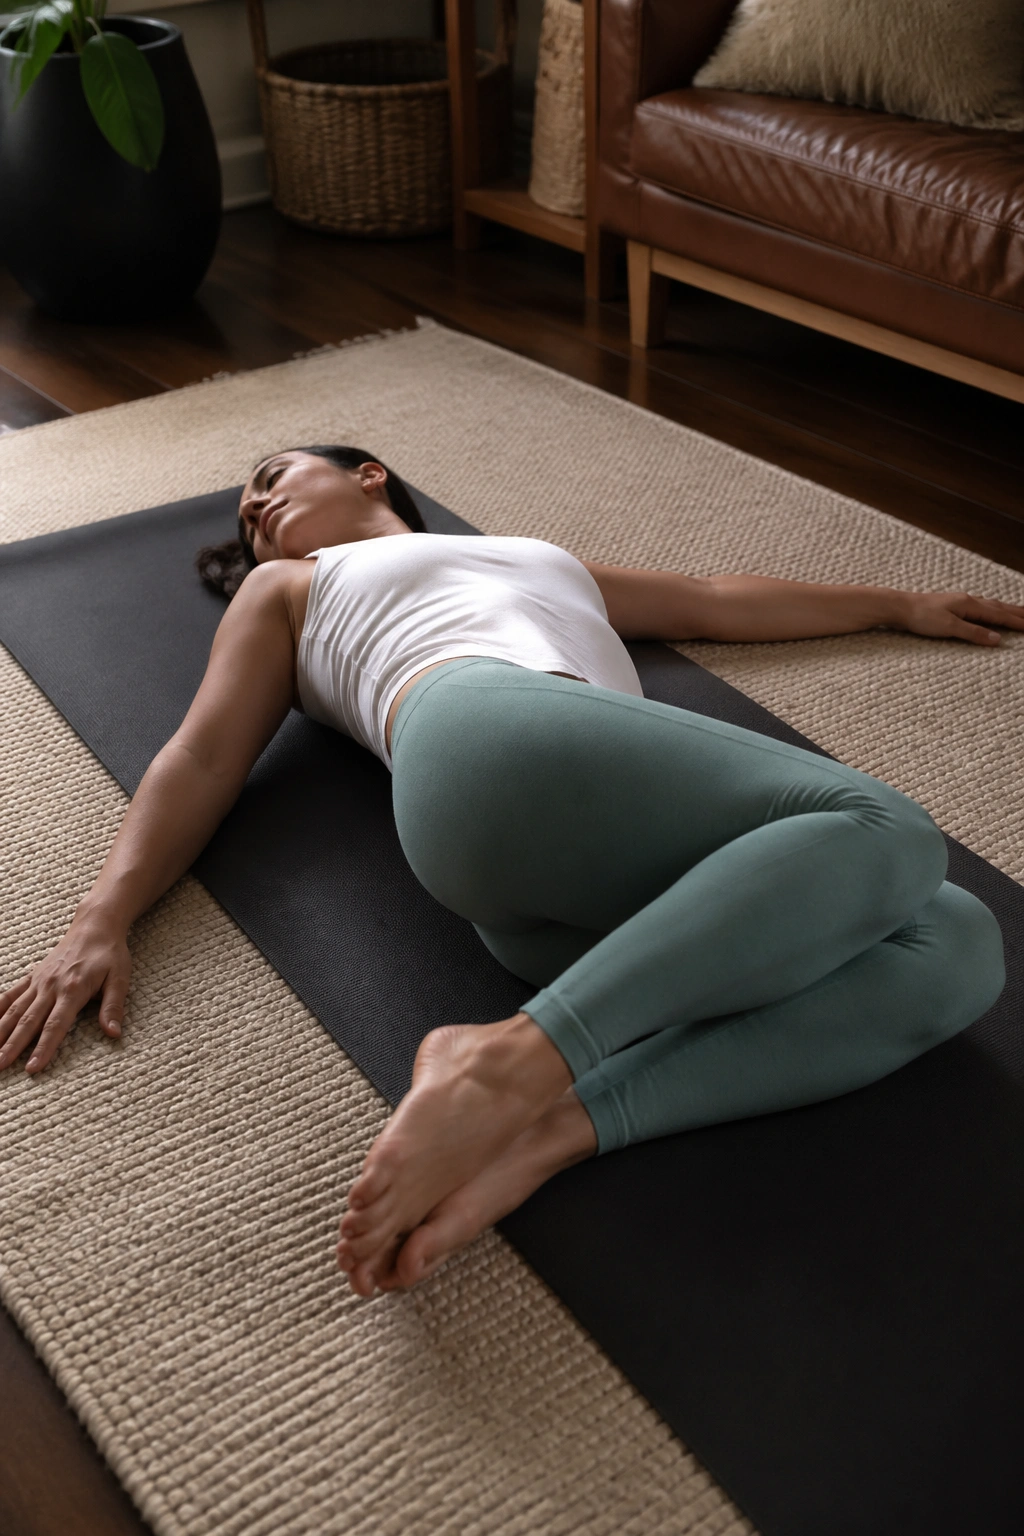
This is the move people tend to overdo on day one. A gentle spinal twist can feel good for stiffness, but the win comes from control and breath, not from dropping both knees to the floor and hoping for the best.
Lie on your back, arms out wide or in a soft T, knees bent and together. Let the knees drift a short distance to one side as you exhale. Inhale to return to center, then repeat to the other side. Keep both shoulders heavy. Think “easy sway,” not “aggressive twist.”
Keep the range small
If your knees travel farther than your rib cage can manage, the lumbar spine takes too much rotation. Put a pillow, yoga block, or folded blanket beside the thighs so the legs have a stopping point. That one tweak often changes the whole feel of the exercise.
Here are the cues I use most:
- Move the knees only as far as both shoulders can stay down.
- Exhale as the legs travel.
- Keep the knees stacked, not drifting apart.
- Try 5 to 6 reps per side.
When it’s right, the twist should feel like a wringing out of stiffness through the waist and mid-back—not a tugging, electric feeling in the low back.
8. Cat Stretch on All Fours
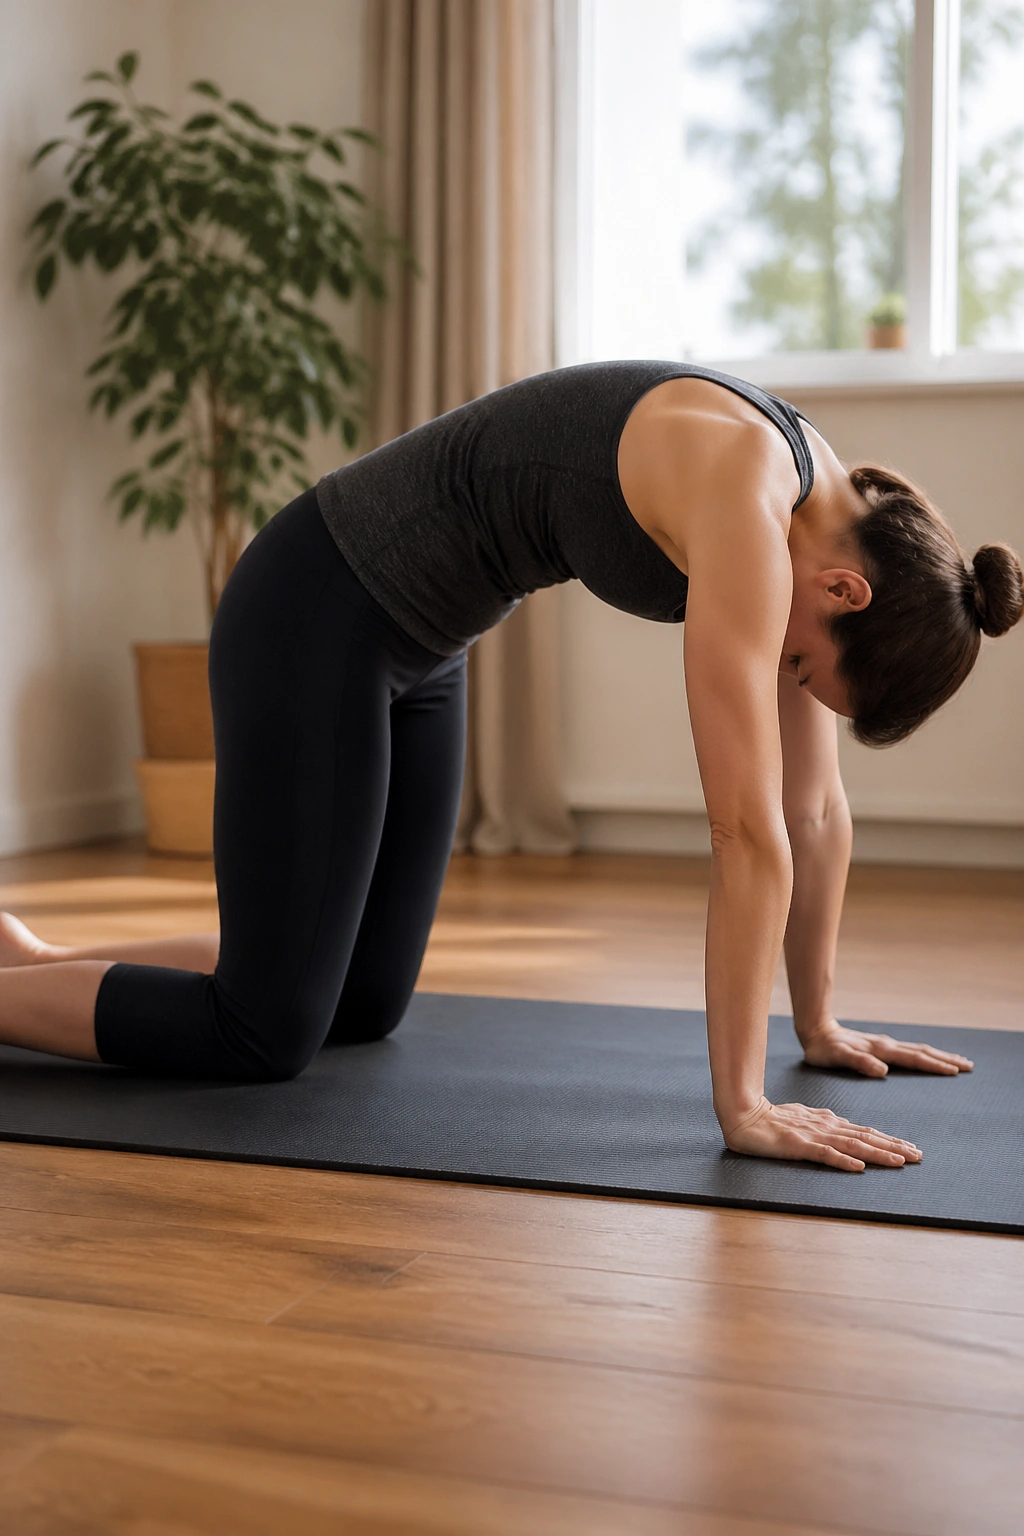
Four points of contact. That’s all you need.
Come onto hands and knees with wrists under shoulders and knees under hips. Exhale and round from the tailbone upward, letting the pelvis tuck first, then the waist, then the upper back, and finally the head. Inhale and return to neutral or a slight comfortable arch. Move one spinal segment at a time if you can. That part takes patience.
Cat stretch helps because it restores spinal articulation—the ability of the joints along the spine to share motion instead of dumping it into one stiff, irritated spot. It also gives you a clean reset after sitting, driving, or any day when your back feels compressed and stale.
Do not throw yourself between extremes. A cat stretch done with speed turns into momentum, and momentum hides the spots that need attention. If your wrists ache, make fists, hold dumbbells as handles, or rest on forearms. If flexion bothers your symptoms, stay near neutral and focus on the inhale-exhale rhythm instead.
Six slow cycles are enough to tell whether your back likes it.
9. Quadruped Rock Back
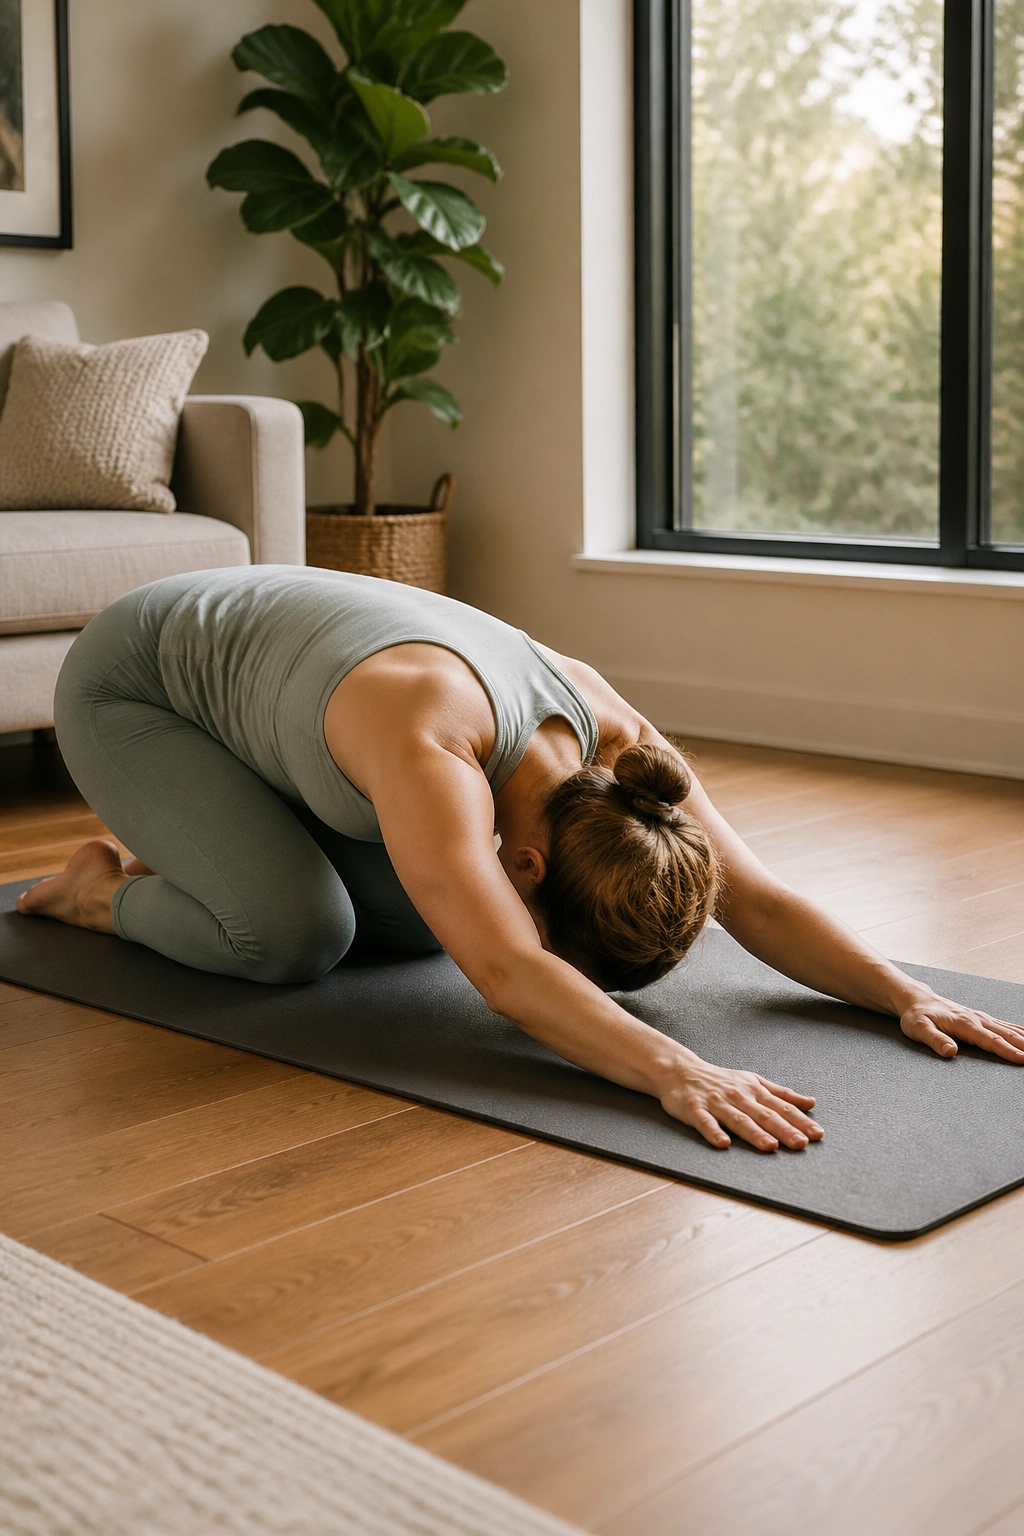
Ten slow rock-backs can do more for a stiff morning back than another hour of half-hearted stretching.
Start on all fours in a long neutral spine. Without rounding hard or sagging, shift your hips back toward your heels as far as comfortable, then glide forward to the starting position. The movement should feel like your thighs folding into your hip sockets while your spine stays quiet. That distinction matters.
A lot of low backs hate sitting because the hips stop contributing. Quadruped rock back re-teaches hip flexion without the load of standing, and it often gives the lumbar spine a break from doing too much bending. It is one of my favorite drills for people who feel “stuck” when they first stand up.
If your knees feel compressed, place a folded blanket behind them or shorten the range. If your belly or chest gets in the way, widen the knees a little. If your back rounds halfway through and that rounding feels fine, keep it small and comfortable; you do not need textbook geometry here.
Try 8 to 10 rocks, each one synced to a slow inhale back and exhale forward—or the other way if that feels better. Your body will tell you.
10. Open Book Thoracic Rotation
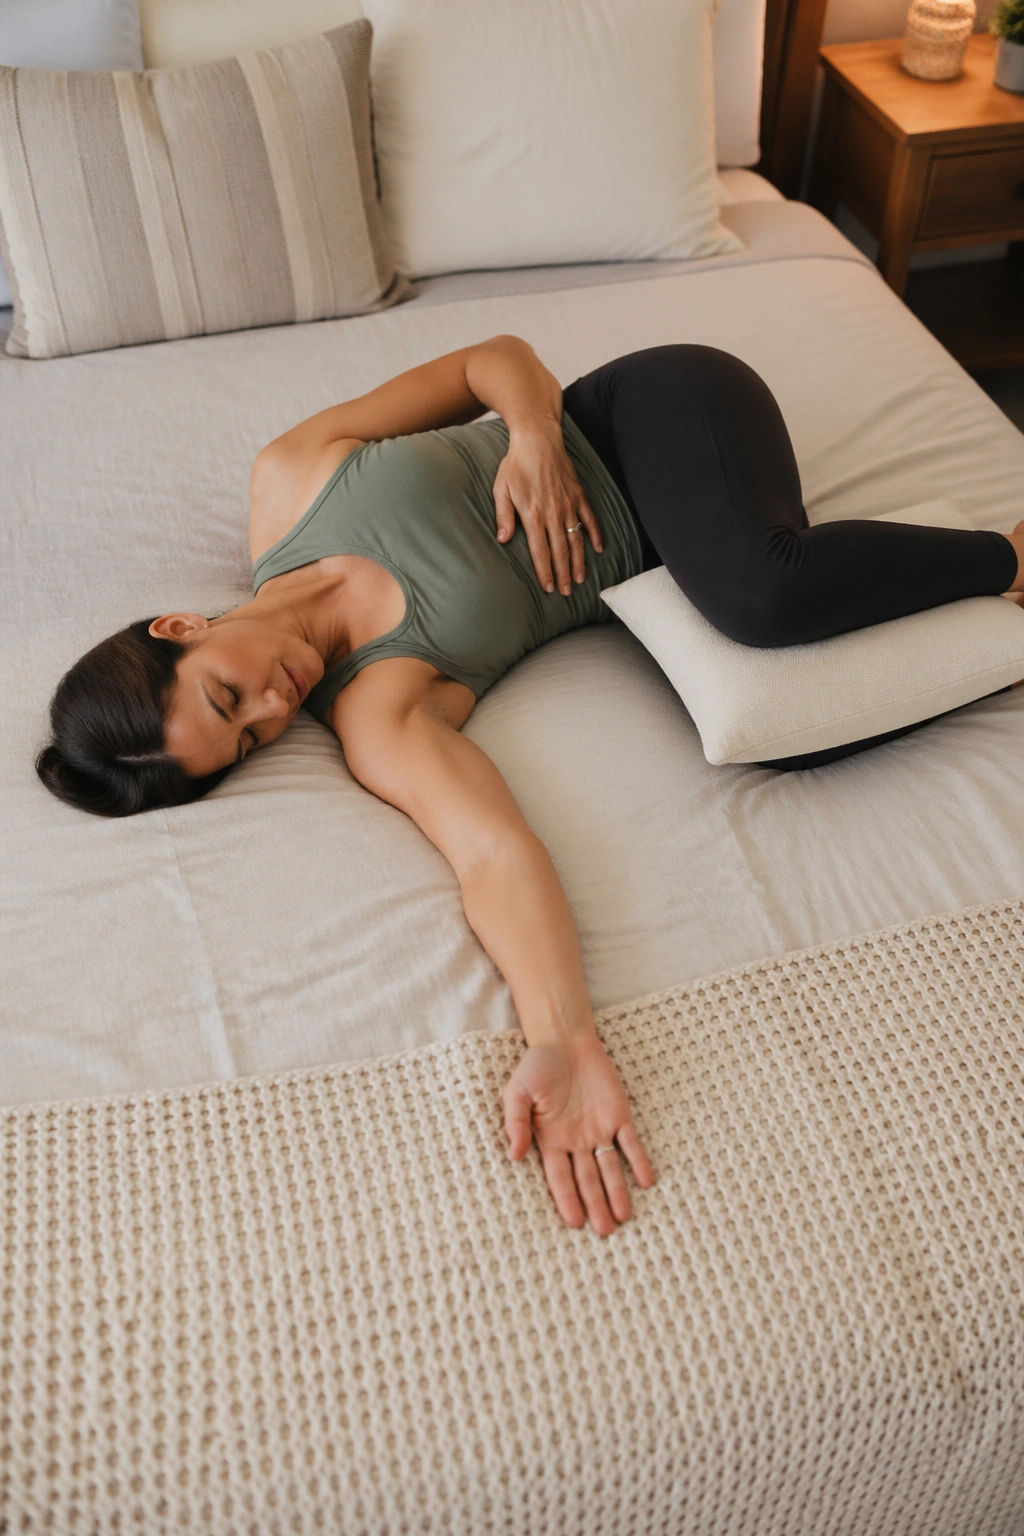
I keep coming back to this one because so many “low back” problems are partly mid-back stiffness in disguise.
Lie on your side with hips and knees bent to about 90 degrees. Rest your head on a pillow so your neck is level. Stack both arms straight out in front of you, palms together. Then sweep the top arm across your chest and out behind you, allowing the rib cage to rotate while the knees stay stacked. Follow the hand with your eyes.
This is less about stretching the shoulder and more about teaching rotation to happen higher up the chain. When the thoracic spine moves better, the lower back often stops trying to steal extra twist during reaching, rolling, and getting out of the car.
A few details make it work:
- Put a pillow or yoga block between the knees if they want to slide.
- Exhale on the opening phase.
- Stop where the ribs can rotate without the pelvis rolling backward.
- Take 5 slow reps per side, holding the open position for one breath.
The stretch should land around the chest, ribs, and upper waist. If all you feel is the front of the shoulder, change the arm angle.
11. Bird Dog Prep
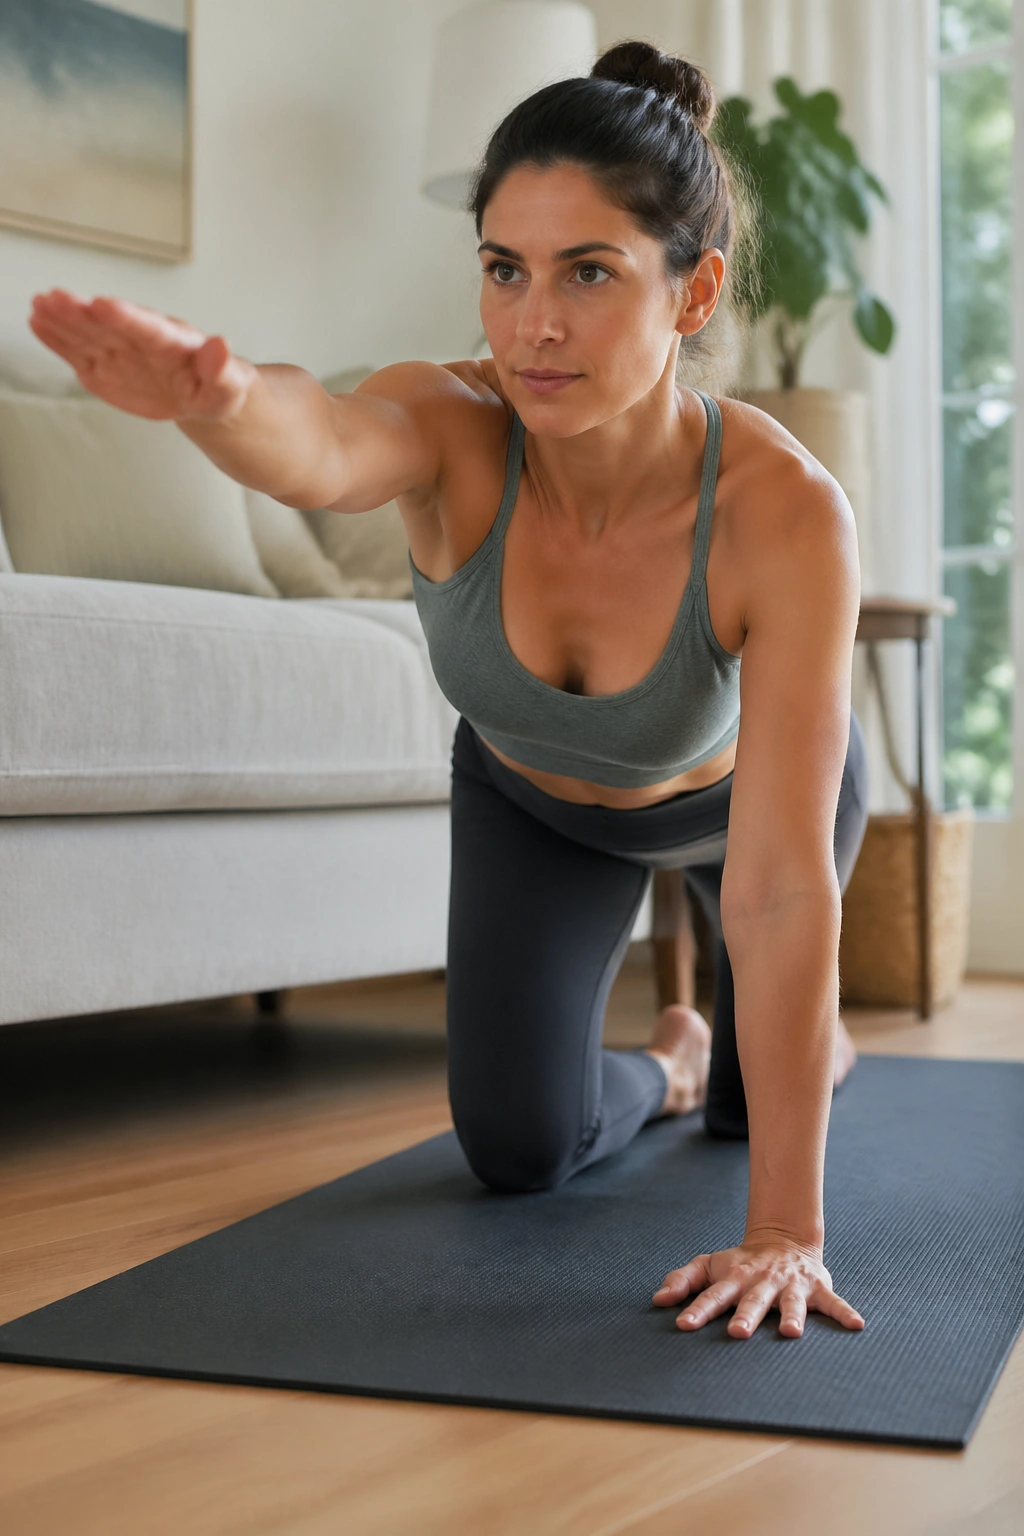
If bird dog makes you wobble across the mat, that is useful information. Anti-rotation control is often the missing piece in backs that feel okay lying down but complain during walking, carrying, and standing on one leg.
Set up on hands and knees. Before you lift anything, press the floor away lightly and make the back of your neck long. Then try the easiest version first: reach one arm forward to shoulder height without letting your ribs twist or your weight dump into one hand. Return, then switch. After that, slide one leg straight back with the toes still on the floor. Only when both versions feel clean do you try the classic opposite arm-and-leg reach.
Start smaller than your ego wants
A lot of people need the arm-only or leg-slide version first, and there is no shame in that. If the pelvis tilts, the belly sags, or your back pinches, the full expression is too big for the day.
A good progression
- Level 1: arm reach, 4 to 6 reps per side
- Level 2: leg slide with toes grazing the floor, 4 to 6 reps
- Level 3: opposite arm and leg reach, holding 2 to 3 seconds
A dowel along the spine can help. If it rolls off, your body just gave you honest feedback.
12. Swimming Prep
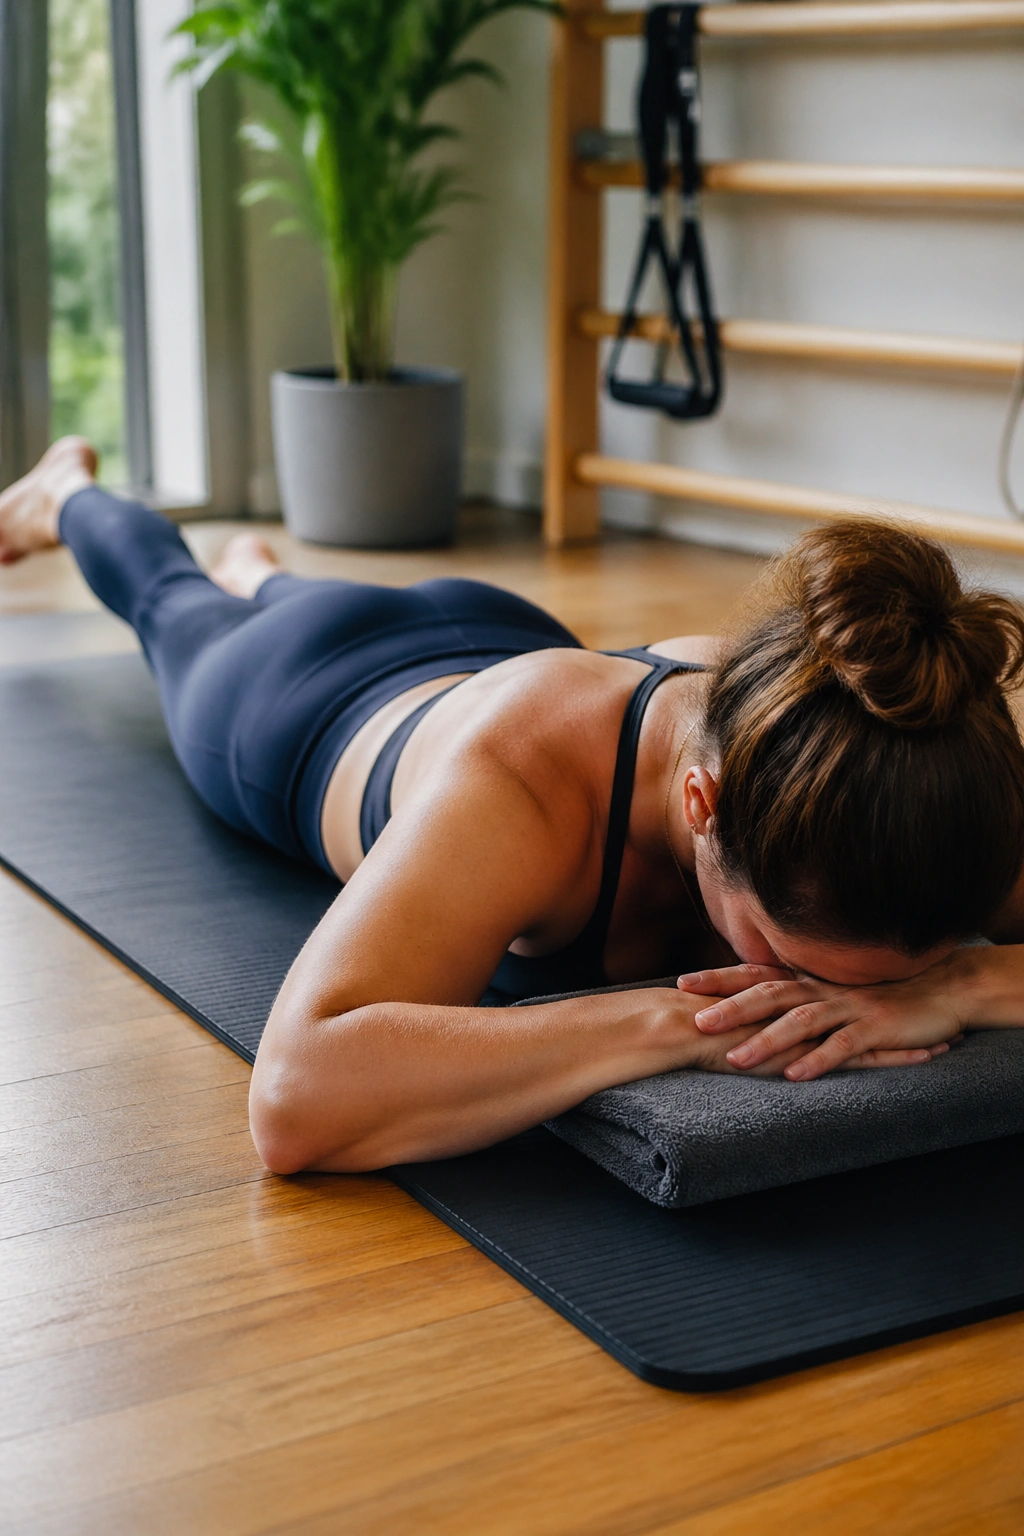
Lie on your stomach and you learn fast which muscles like to take over.
In swimming prep, rest your forehead on folded hands or a small towel, legs long behind you. Gently draw the lower belly away from the mat, then float one leg an inch off the floor without cranking your lower back. Lower it. Repeat on the other side. Later, you can add the opposite arm reaching forward or lift both lightly in an alternating pattern.
This is a clean way to strengthen the posterior chain—glutes, spinal extensors, upper back—without the big range of a full superman-style lift. That matters, because a lot of desk-bound backs are less “tight” than they are under-enduring. They do not have the stamina to hold you upright, so everything starts hanging on joints and passive tissues.
Keep the lift tiny. One inch is enough. If you feel hamstring cramping, bend the knee a touch before straightening again. If extension makes your symptoms worse, skip this and stay with bridge work or side-lying drills. Try 5 to 8 lifts per side.
13. Shoulder Bridge
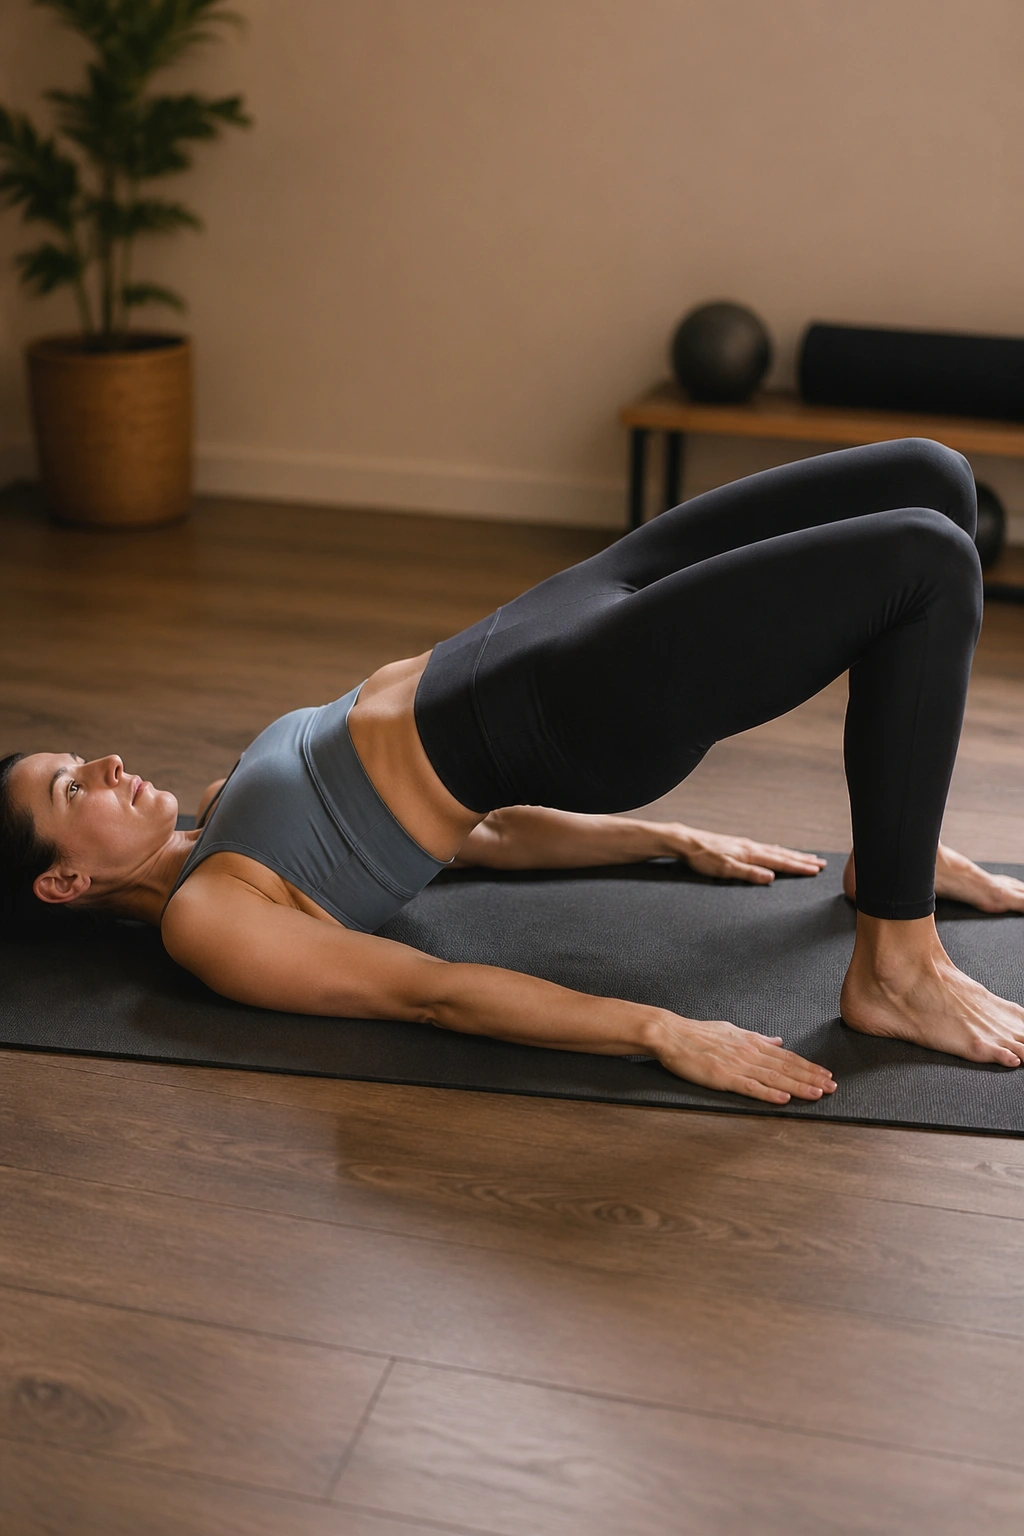
Your glutes should light up before your lower back does.
Lie on your back with knees bent and feet hip-width apart. Press through the heels and exhale to lift the pelvis into a bridge, either by peeling the spine up one section at a time or by lifting in one piece while keeping the ribs quiet. Pause for one breath at the top, then lower slowly.
Bridge is one of the best-known Pilates exercises for back pain, and for good reason. It trains hip extension, wakes up the glutes and hamstrings, and gives your trunk practice staying organized while force travels through the lower body. When the hips do their share, the lumbar spine often feels less overworked during standing and walking.
Check these three things:
- Your heels should sit about 8 to 10 inches from your sit bones.
- At the top, think “long through the knees” rather than “higher, higher, higher.”
- Lower over 3 to 4 seconds.
Aim for 6 to 8 reps. If you feel cramping in the hamstrings, move the feet a little farther away or reduce the height.
14. Bridge March
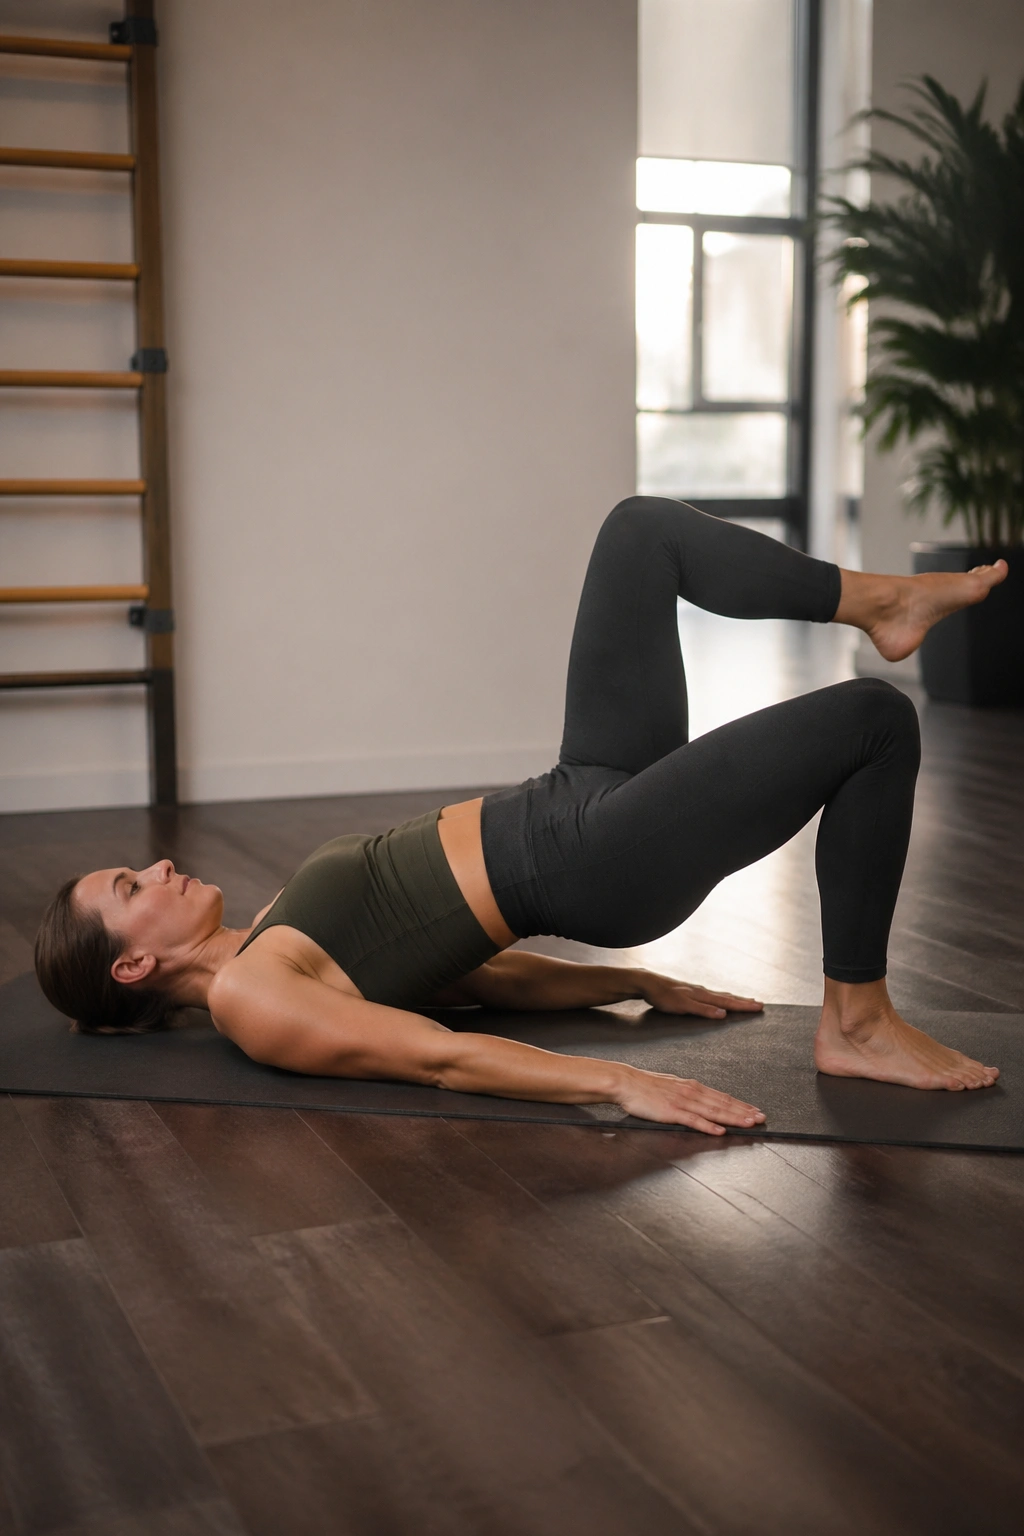
Marching in a bridge is not a beginner move, even though it looks harmless. Once you lift one foot, the pelvis wants to drop, twist, or both—and that is exactly why this drill is so useful once regular bridge feels easy.
Lift into a low bridge first. Then, without changing the height of the pelvis, float one foot a few inches off the floor. Set it down and switch sides. If that is too much, start with heel lifts instead: raise one heel while keeping the toes down, then alternate. That smaller version still teaches weight shift and anti-rotation.
A safer entry point
Keep the bridge lower than you think. People often fail this move because they chase a big glamorous bridge and then have nowhere to stabilize from. A modest lift gives the glutes room to work without the back having to grip.
Reps that make sense
Try 4 to 6 marches per side or 6 to 8 alternating heel lifts. If your pelvis tips or your lower back grabs, return to standard bridge for another round. There’s no downside to that. Strong basics beat flashy progressions.
15. Sphinx Breathing
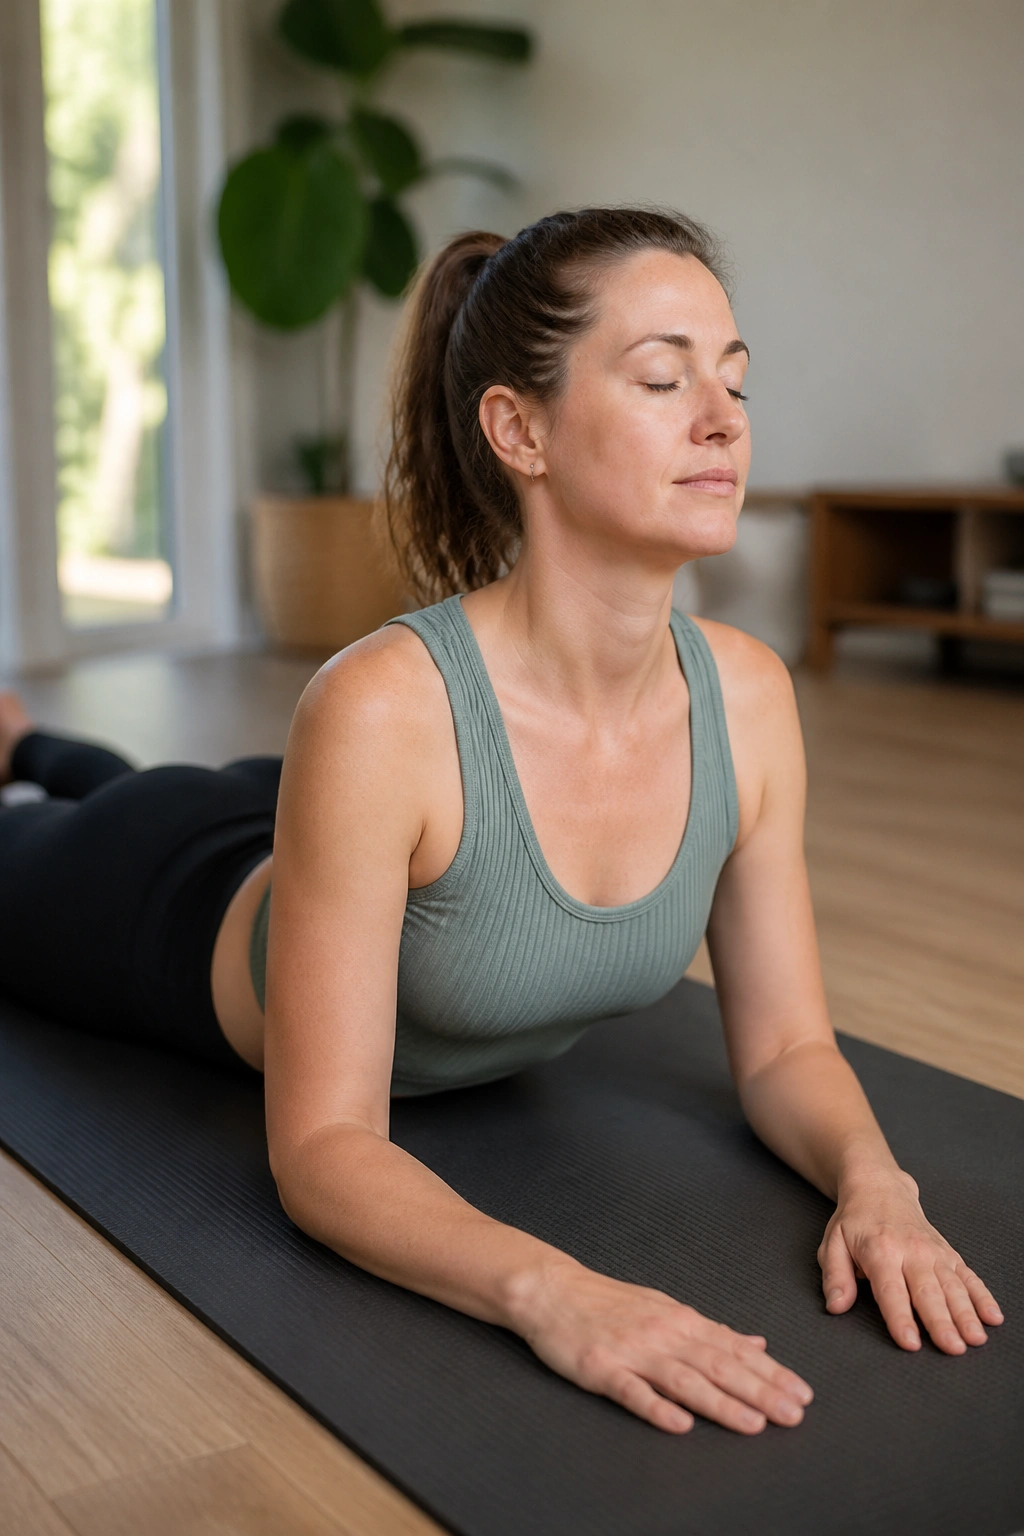
What if extension feels good instead of threatening? For some backs—especially the ones that hate prolonged sitting and feel better after walking—sphinx can be a relief.
Lie on your stomach and prop yourself on your forearms, elbows a little in front of the shoulders. Let the chest broaden, keep the glutes soft, and take 4 to 6 slow breaths. You are not trying to jam into a deep backbend. You are letting the front of the body open while the lumbar spine experiences a mild, supported extension.
This one is often useful for people whose symptoms worsen with repeated bending forward. They stand up from a chair, take a few steps, and feel a little better—that pattern often responds well to gentle extension-biased work. On the other hand, if leaning backward pinches, compresses, or ramps up your symptoms, skip sphinx for now.
A folded towel under the ribs can make it kinder. So can widening the elbows. Let your breath do the work.
16. Swan Prep
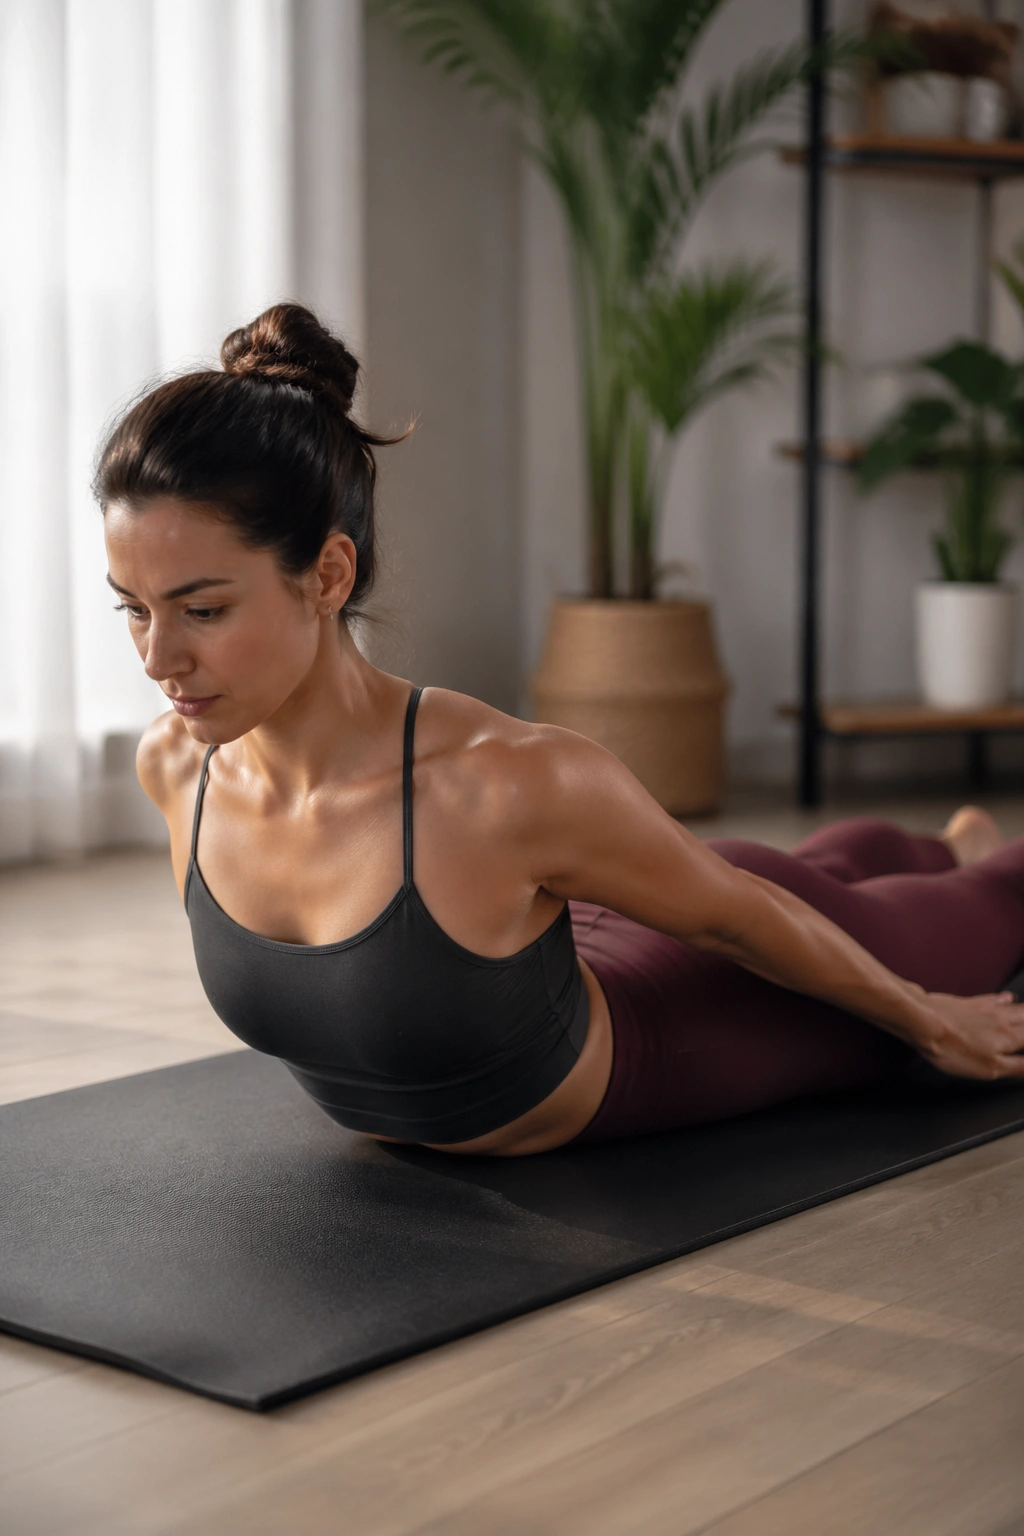
Swan prep is where posture work stops being decorative and starts being useful.
Lie prone with your hands beside the lower ribs or keep the forearms down if that feels better. On an inhale, lengthen the crown of the head forward and lift the head and upper chest a few inches. On the exhale, lower with control. The lift is led by the upper back, not by jamming the neck upward. Your pubic bone and lower ribs stay grounded.
This drill builds spinal extensor endurance, which matters more than people realize. If your upper back stays folded all day, the lower back often ends up overextending to help you see straight ahead. Swan prep spreads that load more evenly up the chain.
A few cues make or break it:
- Keep your gaze slightly down, not straight ahead.
- Think longer, not just higher.
- Stop before the low back feels pinchy.
- Try 5 to 6 reps, each one slow enough to own.
If extension aggravates your symptoms, leave this one out. A back-friendly program is not a loyalty test.
17. Side-Lying Clamshell
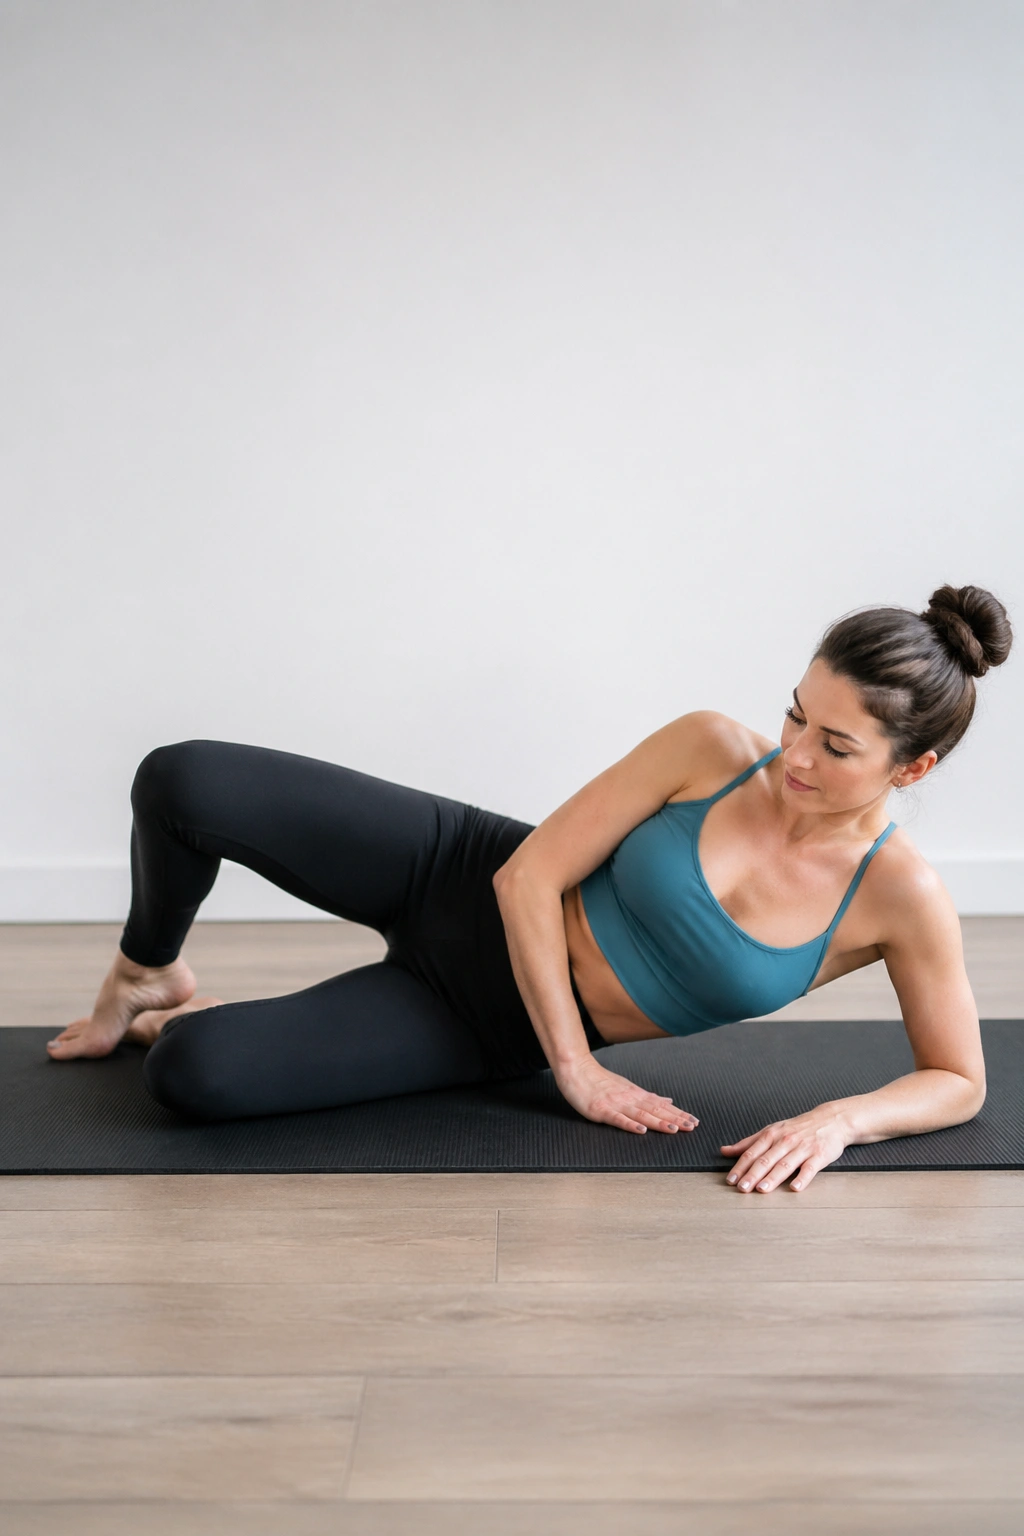
Side-lying work looks almost sleepy until your outer hip starts shaking. Then you understand why it keeps showing up in good rehab programs.
Lie on your side with hips stacked, knees bent, and heels in line with your sit bones or a bit farther forward. Keep the feet together and open the top knee without rolling the pelvis backward. The range may be small. Small is fine. Put your top hand on your hip bone and make sure it stays quiet.
Clamshell strengthens the glute medius and deep hip rotators, which help control the pelvis when you walk, climb stairs, and stand on one leg to put on pants. When those muscles are late or weak, the low back often picks up the slack.
Try this setup:
- Knees bent about 90 degrees
- 8 to 12 reps per side
- One-second pause at the top
- Slow lower on a full exhale
If you feel it in the front of the hip instead of the outer hip and butt, bring the heels slightly farther from your body and reduce the height of the lift.
18. Side-Lying Leg Lift
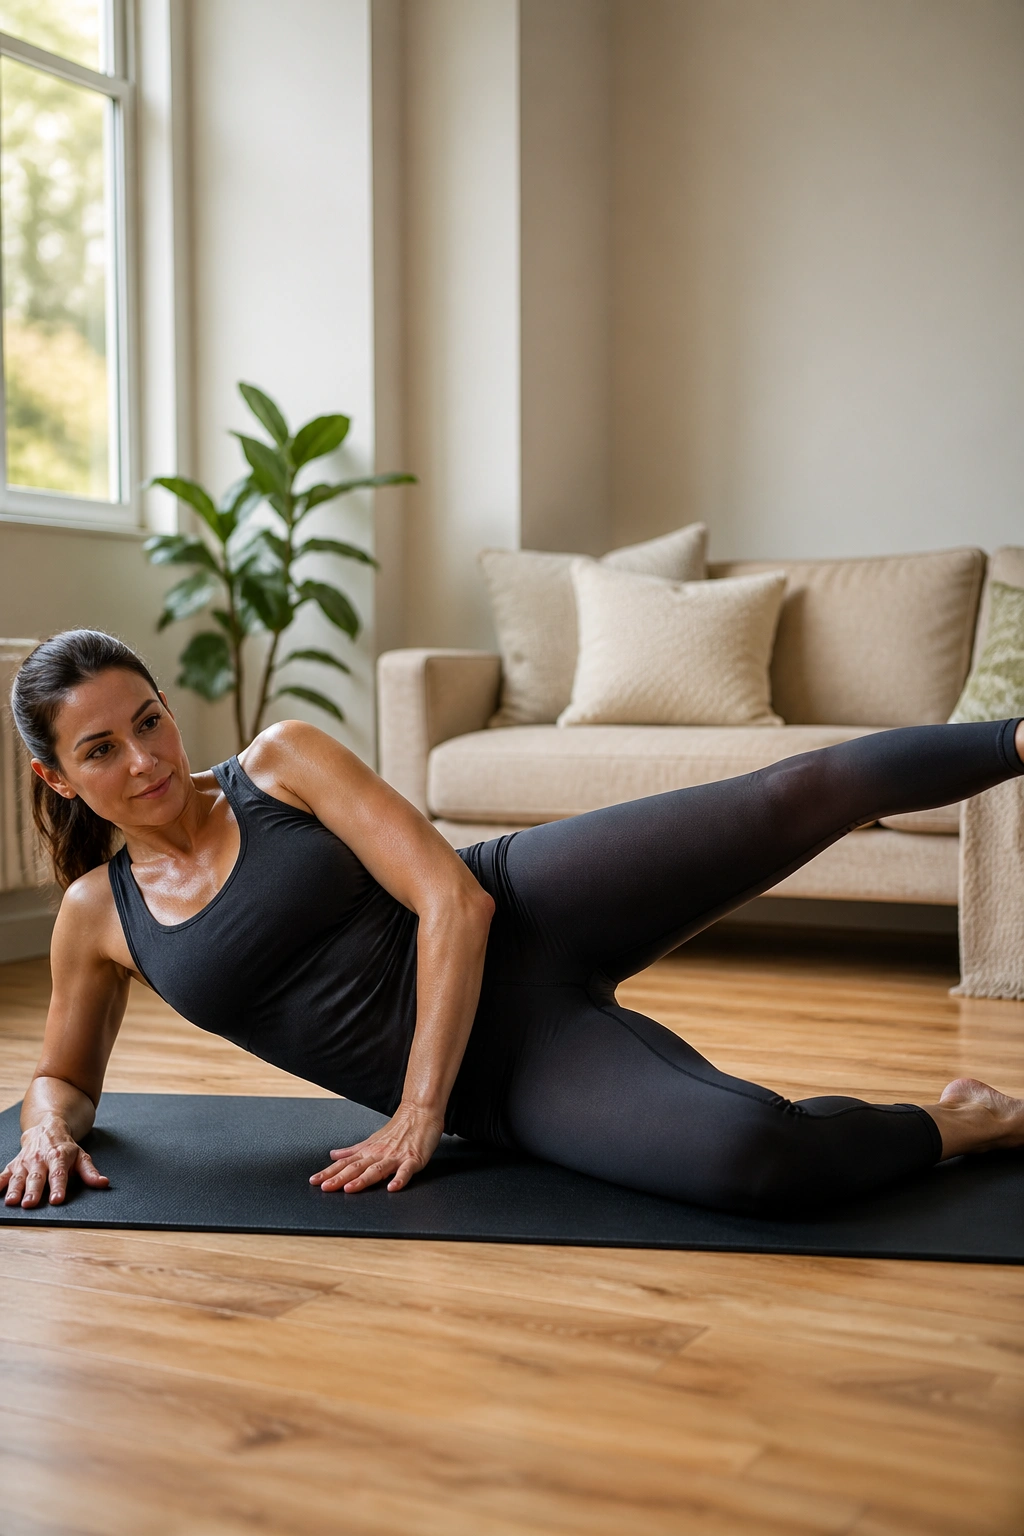
Unlike clamshells, a straight-leg lift gives you a longer lever and more side-body demand. You’ll feel that difference fast.
Set up on your side with the bottom knee bent for support or both legs straight if you’re stronger. Reach the top leg long and slide it slightly behind the body line before lifting it 8 to 12 inches. Lower slowly. Keep the toes facing forward or turned slightly down, which helps keep the work in the side hip instead of the front.
This exercise is money for people whose backs ache during standing and walking. Why? Because the side hip acts like a pelvic seatbelt. If it can’t hold the pelvis level, the low back often sways, hikes, or twists a little on every step. Multiply that by a few thousand steps and the back starts complaining.
Do 8 to 10 reps per side. If your waist collapses into the mat, put a folded towel under it or prop yourself on the forearm. You want length through the whole side of the body, not a crunch.
19. Mermaid Side Bend
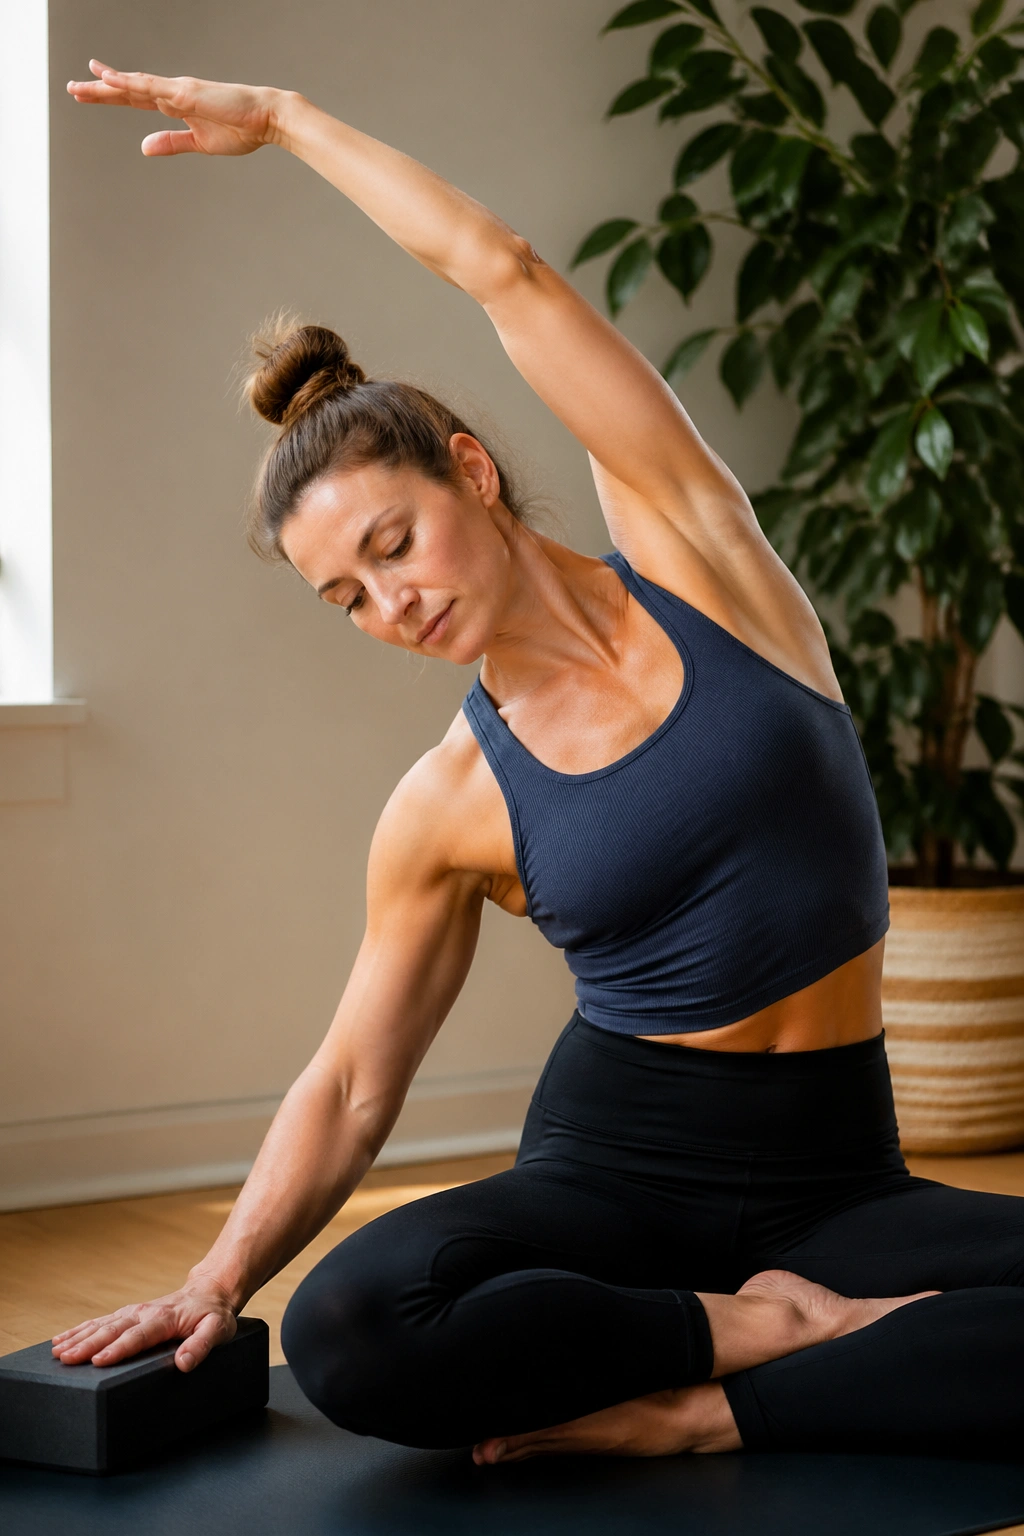
A tight waist and stiff rib cage can make the low back do side-bending it was never built to own by itself. Mermaid fixes that in a calm, civilized way.
Sit with the legs folded in a comfortable cross-legged or side-sit position. One hand rests on the floor or a yoga block beside you. Reach the other arm overhead and arc into a side bend, aiming the stretch up and over rather than collapsing down. Breathe into the open side ribs for 3 to 5 breaths, then switch.
Make it comfortable
If sitting on the floor feels like punishment, sit on a folded blanket, yoga block, or the edge of a chair. A chair mermaid works well, by the way—one hand on the seat, the other arm reaching overhead.
Where the stretch should land
You should feel this through the lat, obliques, side ribs, and waist, maybe into the hip. You should not feel a sharp pinch in the low back. If you do, shorten the arc and think about lifting up before you lean.
This is a lovely finisher after bridge work or any session that has made your trunk work hard.
20. Wall Roll Down
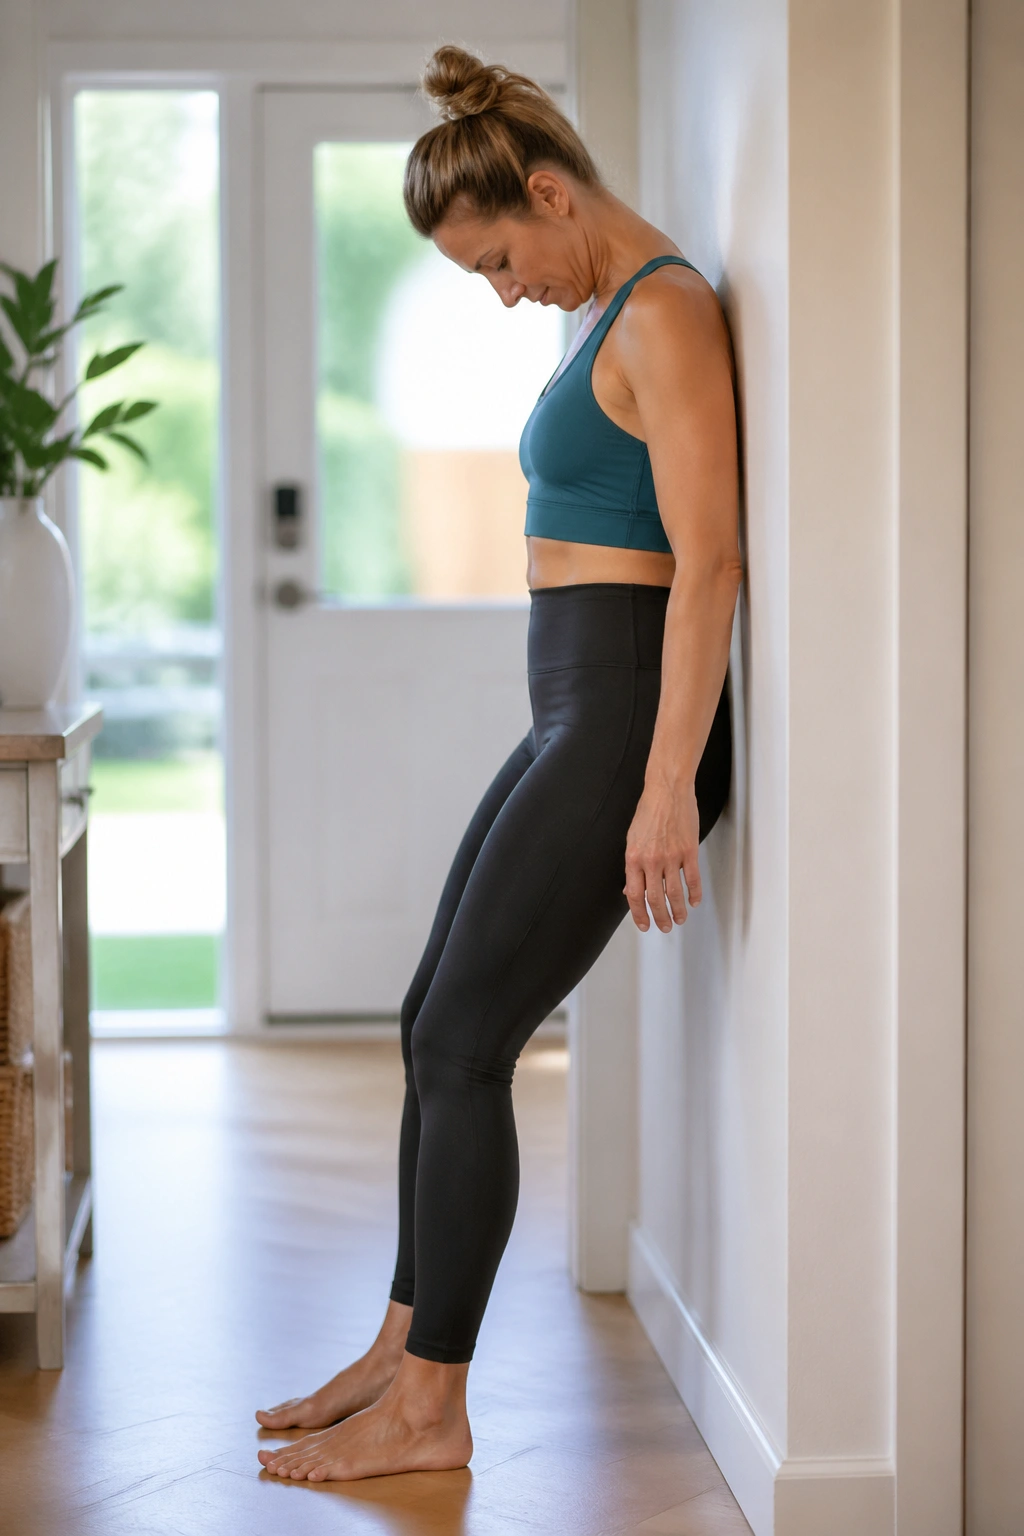
When standing up from your desk feels rusty, a wall roll-down can reset the whole back line—if your body likes forward bending.
Stand with your back a few inches from a wall or lightly touching it, knees soft, feet about hip-width apart. Nod the chin, then peel down through the upper back, mid-back, and waist, stopping at the first sign of pulling or symptom spread. Hang for one breath if that feels good, then bend the knees a touch more and stack back up from the bottom to the top.
This is less about reaching your toes and more about segmental awareness. The wall gives feedback about where you lose contact first, which can be eye-opening. Some people discover they hinge only from one sore spot. Others realize they’ve been locking the knees and asking the hamstrings to do all the work.
Use these checkpoints:
- Keep the weight in the middle of the feet, not in the heels.
- Exhale as you roll down.
- Limit yourself to 3 to 5 reps.
- Skip it if forward bending sends pain down the leg or leaves you worse afterward.
When it’s right, the movement feels like your spine is taking attendance one segment at a time.
Build a short Pilates routine for lower back pain relief
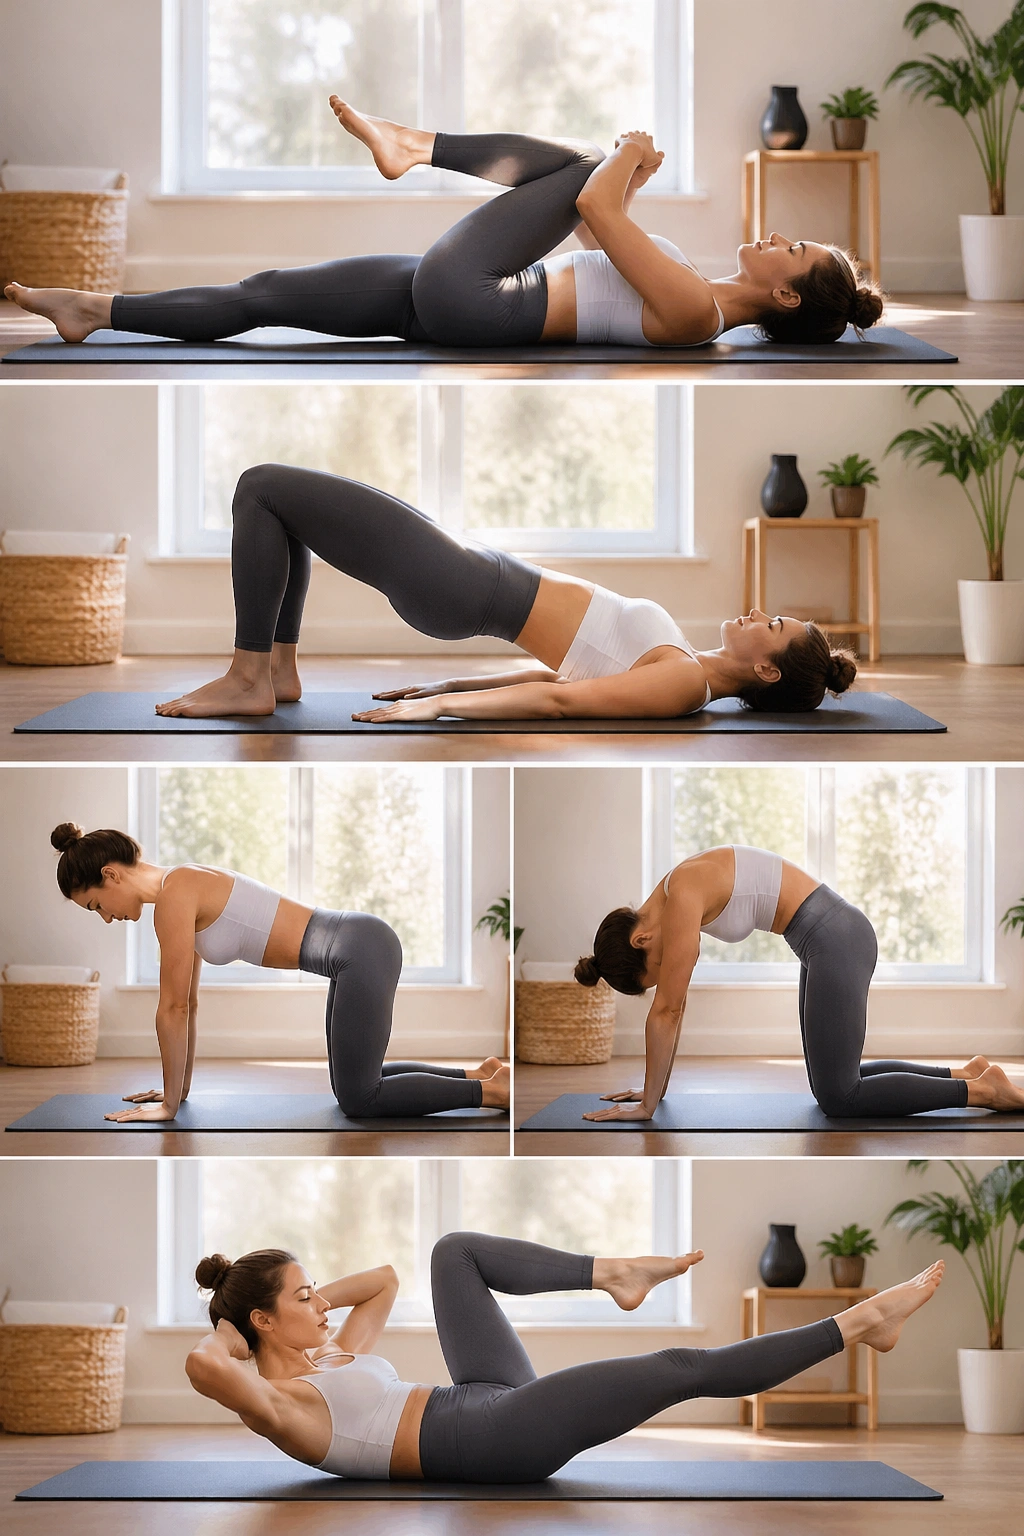
Do not do all 20 in one session. You’ll learn less and your back will get noisier.
Pick 4 to 6 exercises that match your pain pattern and do them well. If you want a starting point, these mini-routines work nicely:
Morning stiffness reset
- 1. Lateral Rib Breathing — 5 breaths
- 2. Pelvic Tilt and Release — 8 reps
- 7. Supine Spine Twist — 5 reps per side
- 8. Cat Stretch — 6 reps
- 9. Quadruped Rock Back — 8 reps
- 19. Mermaid Side Bend — 3 breaths per side
This one suits the back that feels old before breakfast but warms up once you move.
Desk-ache stability session
- 1. Lateral Rib Breathing — 5 breaths
- 4. Marching Knee Folds — 6 reps per side
- 6. Toe Taps — 4 reps per side
- 13. Shoulder Bridge — 6 reps
- 17. Side-Lying Clamshell — 10 reps per side
- 18. Side-Lying Leg Lift — 8 reps per side
This sequence gives the hips and trunk more of the work they often stop doing after long stretches of sitting.
Flexion-sensitive back option
- 1. Lateral Rib Breathing — 5 breaths
- 9. Quadruped Rock Back — tiny range, 6 reps
- 13. Shoulder Bridge — 6 reps
- 15. Sphinx Breathing — 4 breaths
- 16. Swan Prep — 5 reps
- 17. Side-Lying Clamshell — 8 reps per side
If bending forward tends to stir things up, lean toward extension-tolerant work like this and leave the wall roll-down for later—maybe much later.
A decent home session can be 10 to 15 minutes. More is not the goal. A calmer back is.
Signs your back needs a clinician, not another stretch
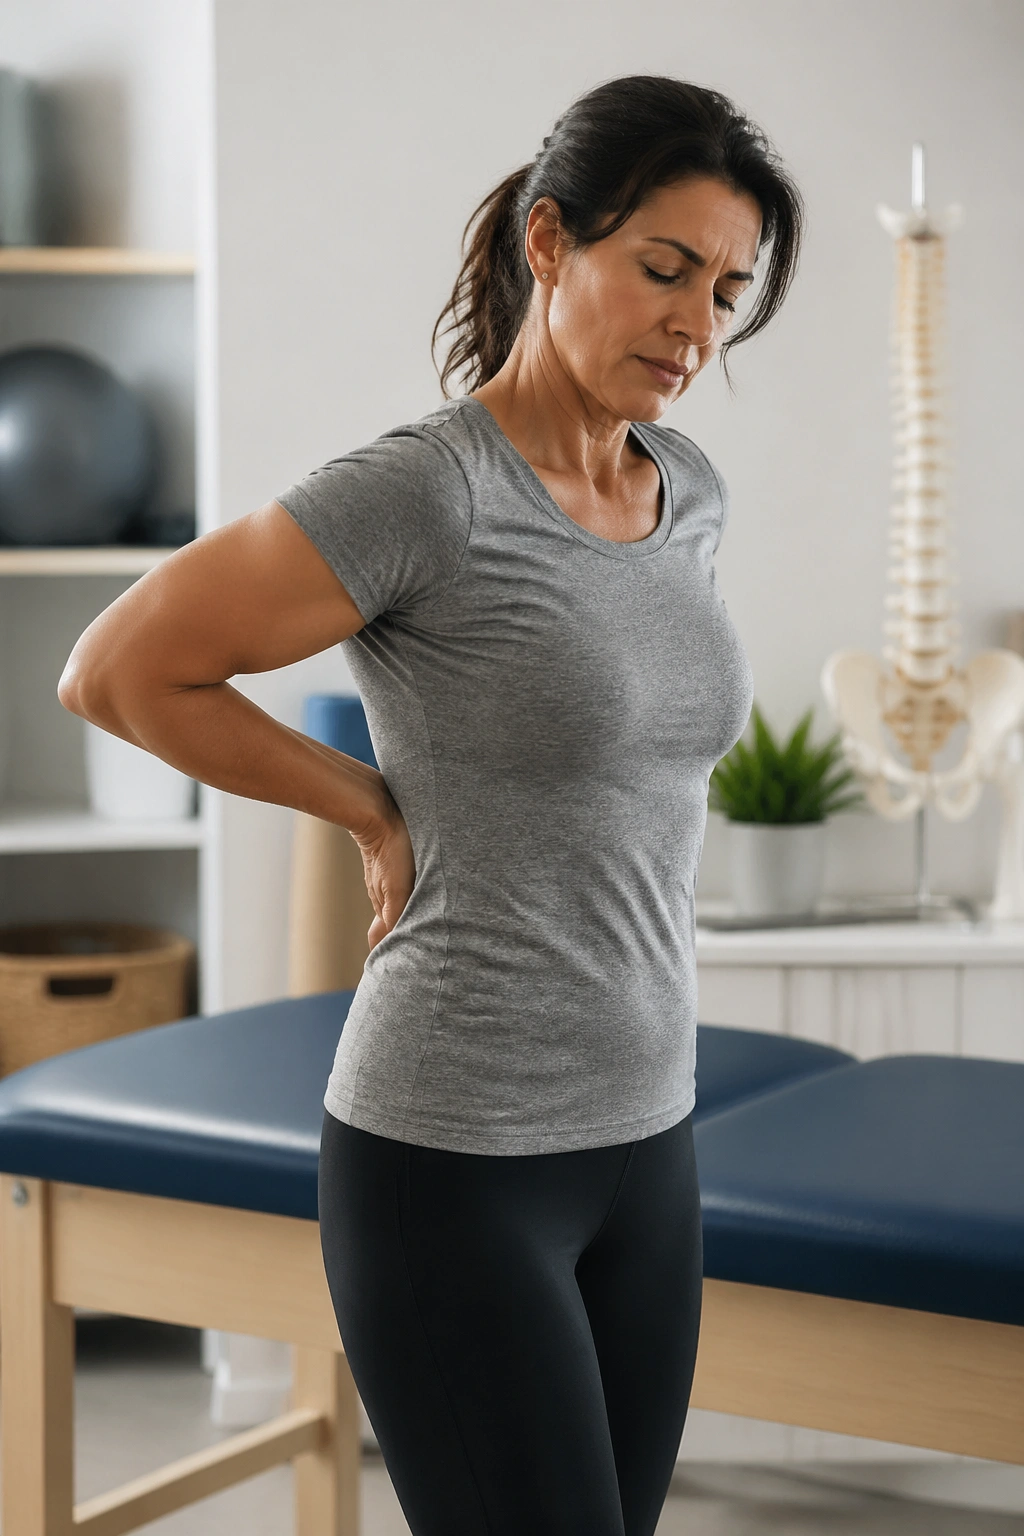
Here’s the blunt version: some symptoms should push you toward a doctor, physical therapist, or other qualified clinician before you keep experimenting.
Watch for these red flags:
- Pain after a fall, crash, or other trauma
- Progressive numbness, tingling, or weakness in one or both legs
- Changes in bladder or bowel control
- Numbness in the saddle area—the inner thighs, buttocks, or groin
- Fever, unexplained weight loss, or a history of cancer along with back pain
- Severe night pain that doesn’t settle with position changes
- Pain shooting below the knee that keeps worsening with exercise
- Symptoms that are not easing after 2 to 4 weeks of well-dosed movement and activity changes
Even without red flags, get help if you keep guessing and getting nowhere. That’s not failure. It’s just a sign you need a sharper lens on what your back is reacting to—flexion, extension, load, rotation, nerve tension, sleep, stress, or some mix of all five.
Final Thoughts
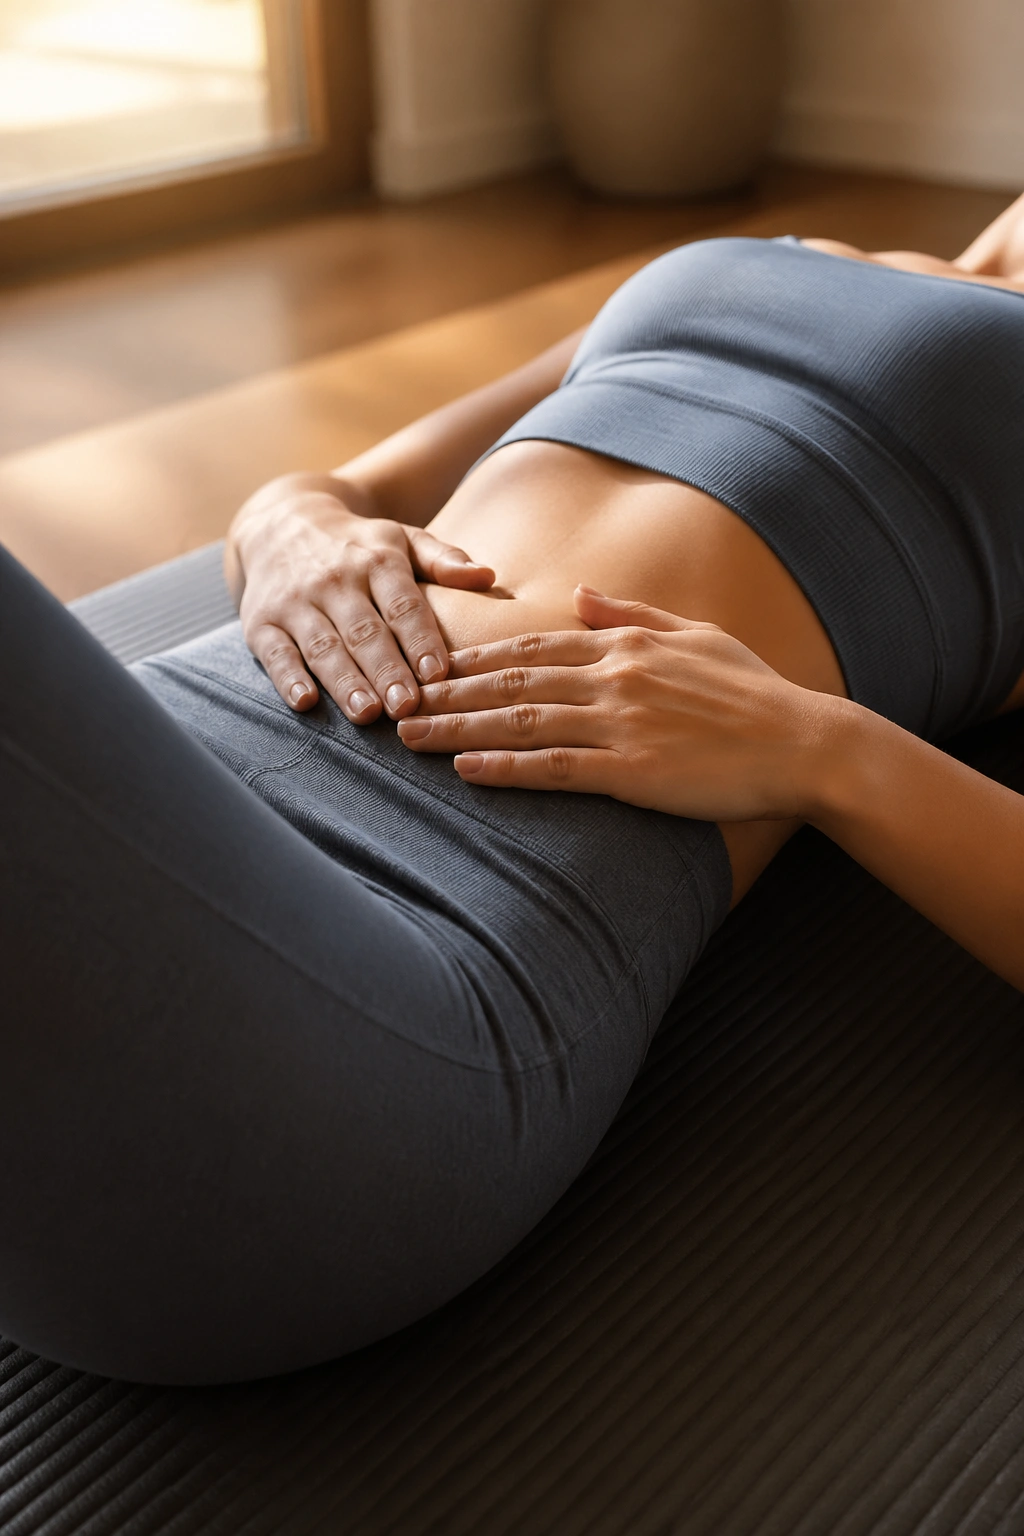
The best Pilates for back pain rarely looks flashy. It looks like better breathing, cleaner pelvic control, stronger hips, and smaller ranges done with more honesty. That is why it works.
You do not need all 20 exercises. You need the right 5 or 6, done often enough that your nervous system stops treating movement like bad news. Start with the drills that calm symptoms, then earn your way into the ones that build endurance and strength.
If I had to leave you with one practical rule, it would be this: keep a short list of your three most reliable relief moves and use them before your back gets loud, not after. That habit changes more than people expect.
