



A good Pilates session at home can look almost too calm to count. Yet ten slow minutes on a mat can make your midsection shake more than a rushed circuit ever will, and Pilates exercises for beginners at home work best when the movement is small, exact, and a little stubborn.
That’s the part people miss. They expect sweat, speed, and big ranges of motion, then wonder why their neck starts yanking, their lower back arches, or their hips take over the whole job. Pilates asks for the opposite: control, breath, and a clear line through the spine. Tiny movements matter.
No fancy gear. A mat, a folded towel, and a wall will carry most of the load here. A chair helps for balance, and a pillow under the head can make floor work feel far less awkward. Good form beats ambitious reps every time.
If you’re new to this, start with the quieter exercises first. The body usually tells the truth early — in the ribs, in the neck, in the lower back — and the best beginner routine listens before it pushes.
1. Standing Roll-Down
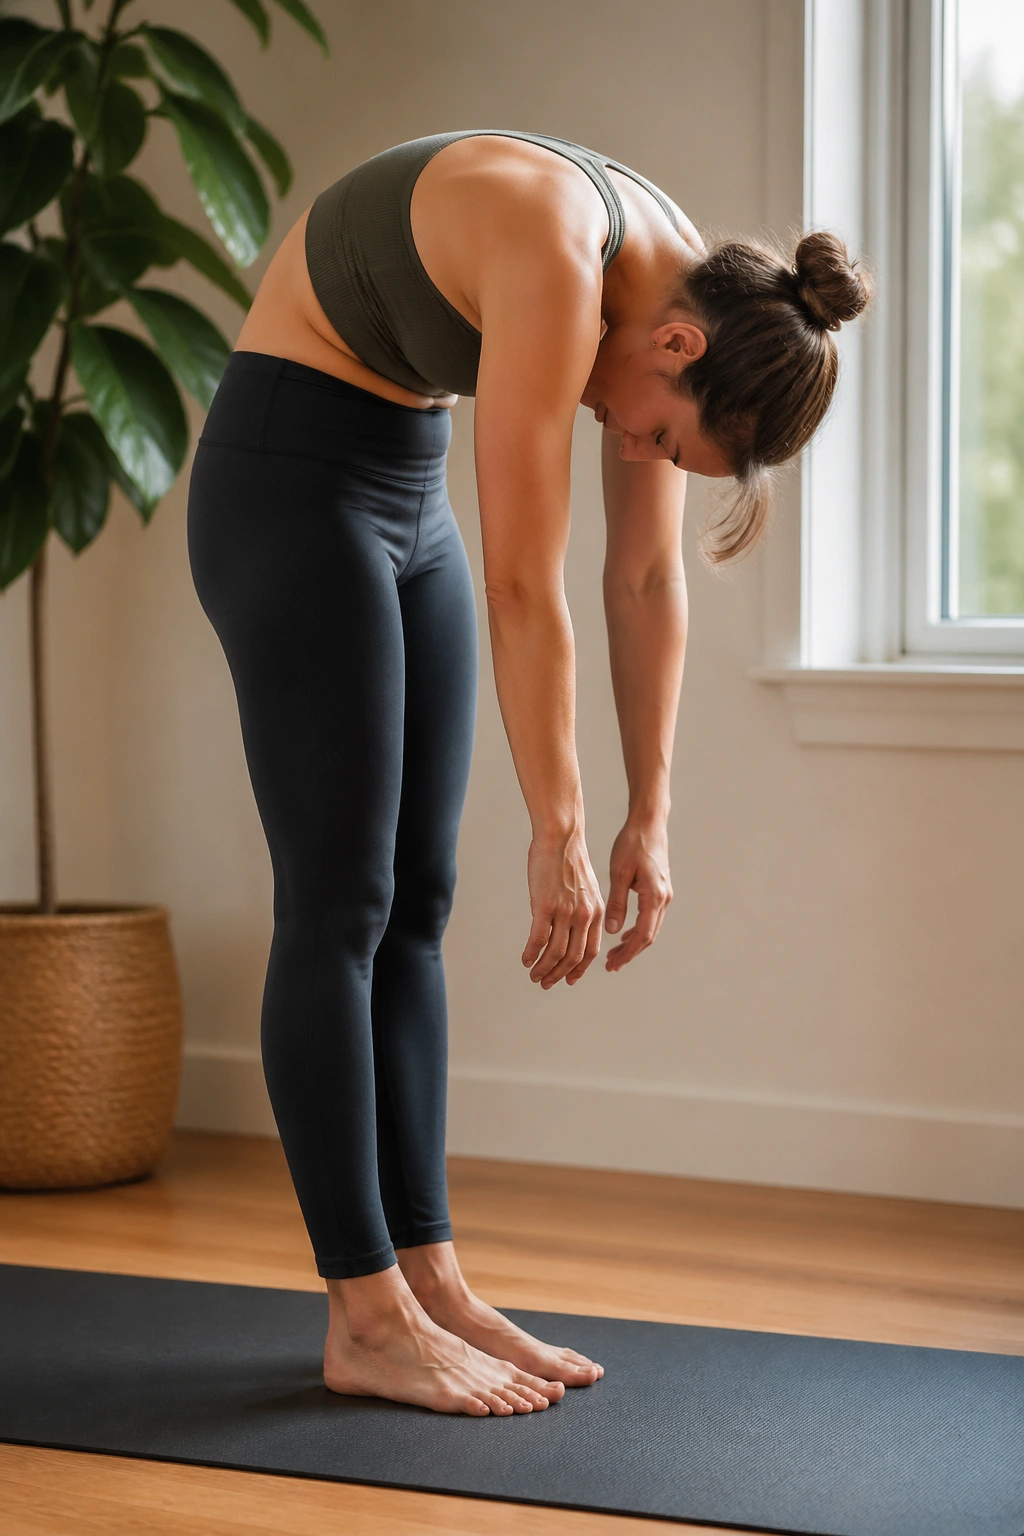
The standing roll-down is one of those exercises that looks almost too simple until you try it with honest control. You stand tall, then peel the spine forward one little segment at a time, and that slow unfurling teaches your back to move without panic.
Why it belongs at the start
This is a clean way to wake up the back line of the body without getting down on the floor right away. It also gives you a fast read on how your hamstrings, calves, and lower back are feeling that day. Tight? Fine. The move still works.
- Stand with your feet hip-width apart and your weight centered over the whole foot.
- Soften your knees a little; locked knees make the movement stiff.
- Exhale, tuck the chin slightly, and let the head lead the spine downward.
- Stop anywhere that feels like a good stretch — you do not need to touch the floor.
- Inhale to pause, then exhale and roll back up slowly, stacking the spine one piece at a time.
Tip: If you feel dizzy, keep the range small and move slower. A half roll-down is still a real one.
2. Pelvic Curl Bridge
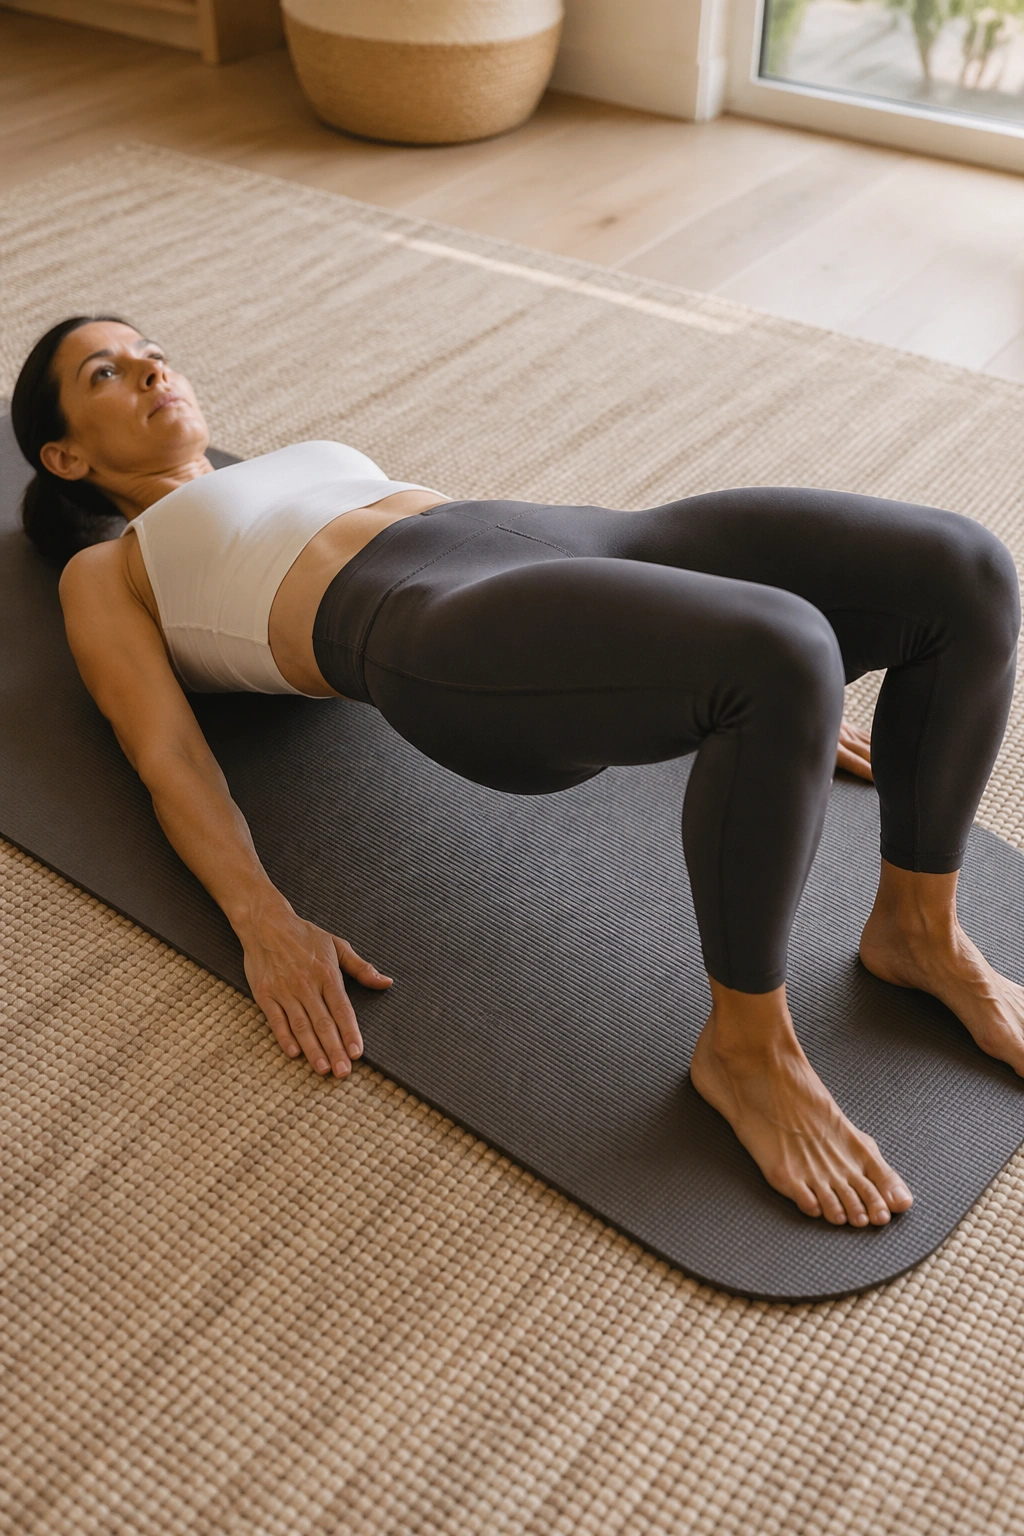
If you want a beginner move that teaches your glutes, hamstrings, and abs to stop arguing, this is it. The pelvic curl bridge is the kind of floor exercise that looks neat on paper and then lights up your whole back side in practice.
Lie on your back with your feet flat, knees bent, and heels close enough that you can brush them with your fingertips. As you exhale, tip the pelvis and lift the tailbone first, then peel the spine off the mat one vertebra at a time until you reach a small, steady bridge.
Lower in the same order. Slow. No dropping.
The common mistake is rushing to the top by squeezing the glutes first and flaring the ribs. That turns the move into a back bend with a fancy name. Keep your ribs heavy, press evenly through both feet, and think about lengthening your knees away from your hips as you lift. Six to eight controlled reps are enough for a beginner round.
3. Chest Lift
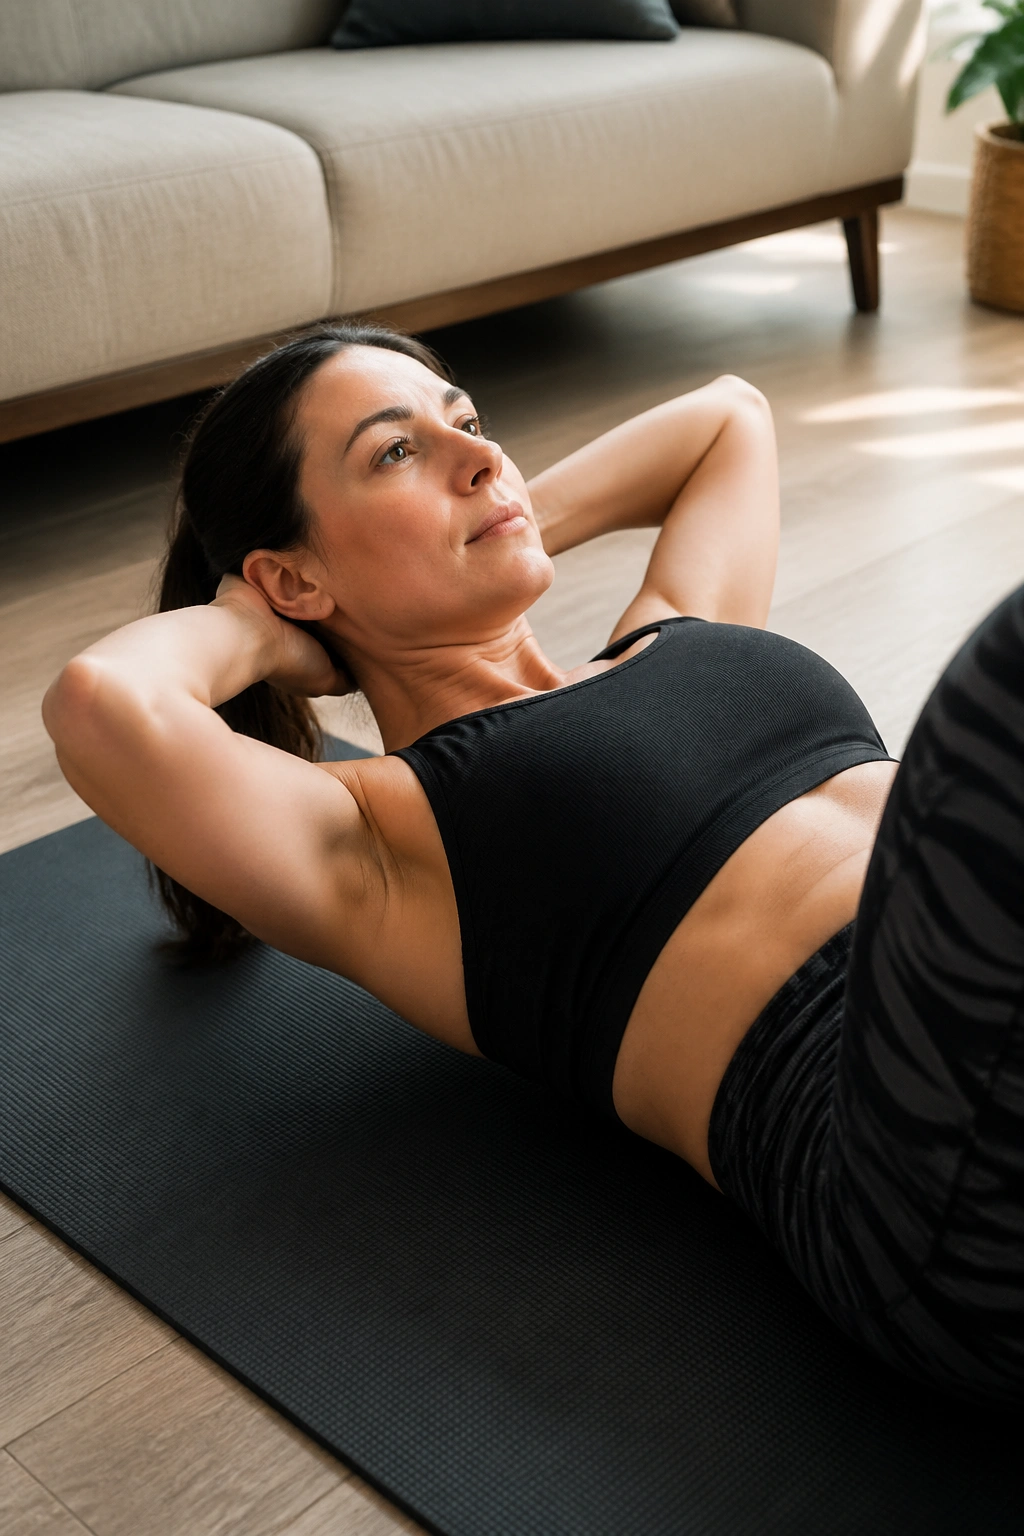
Can a tiny crunch actually be useful? Absolutely — when it’s done like a Pilates chest lift and not like a fast sit-up.
Lie on your back with your knees bent and feet on the mat. Place your hands behind your head with the elbows softly open, not yanked wide. Exhale and lift the shoulder blades just an inch or two, enough to feel the front ribs narrow and the upper belly pull in. The head comes with the chest, but not the other way around.
How to keep your neck happy
Keep your eyes on your thighs instead of staring at the ceiling. That small change tends to stop the neck from taking over. If your neck tightens anyway, place one hand behind the head and keep the other arm long by your side for support.
Lower with control, inhale, and repeat for 5 to 8 reps. Small is the point here. If you’re crunching hard enough to shake the whole room, you’ve probably gone too far.
4. Toe Taps
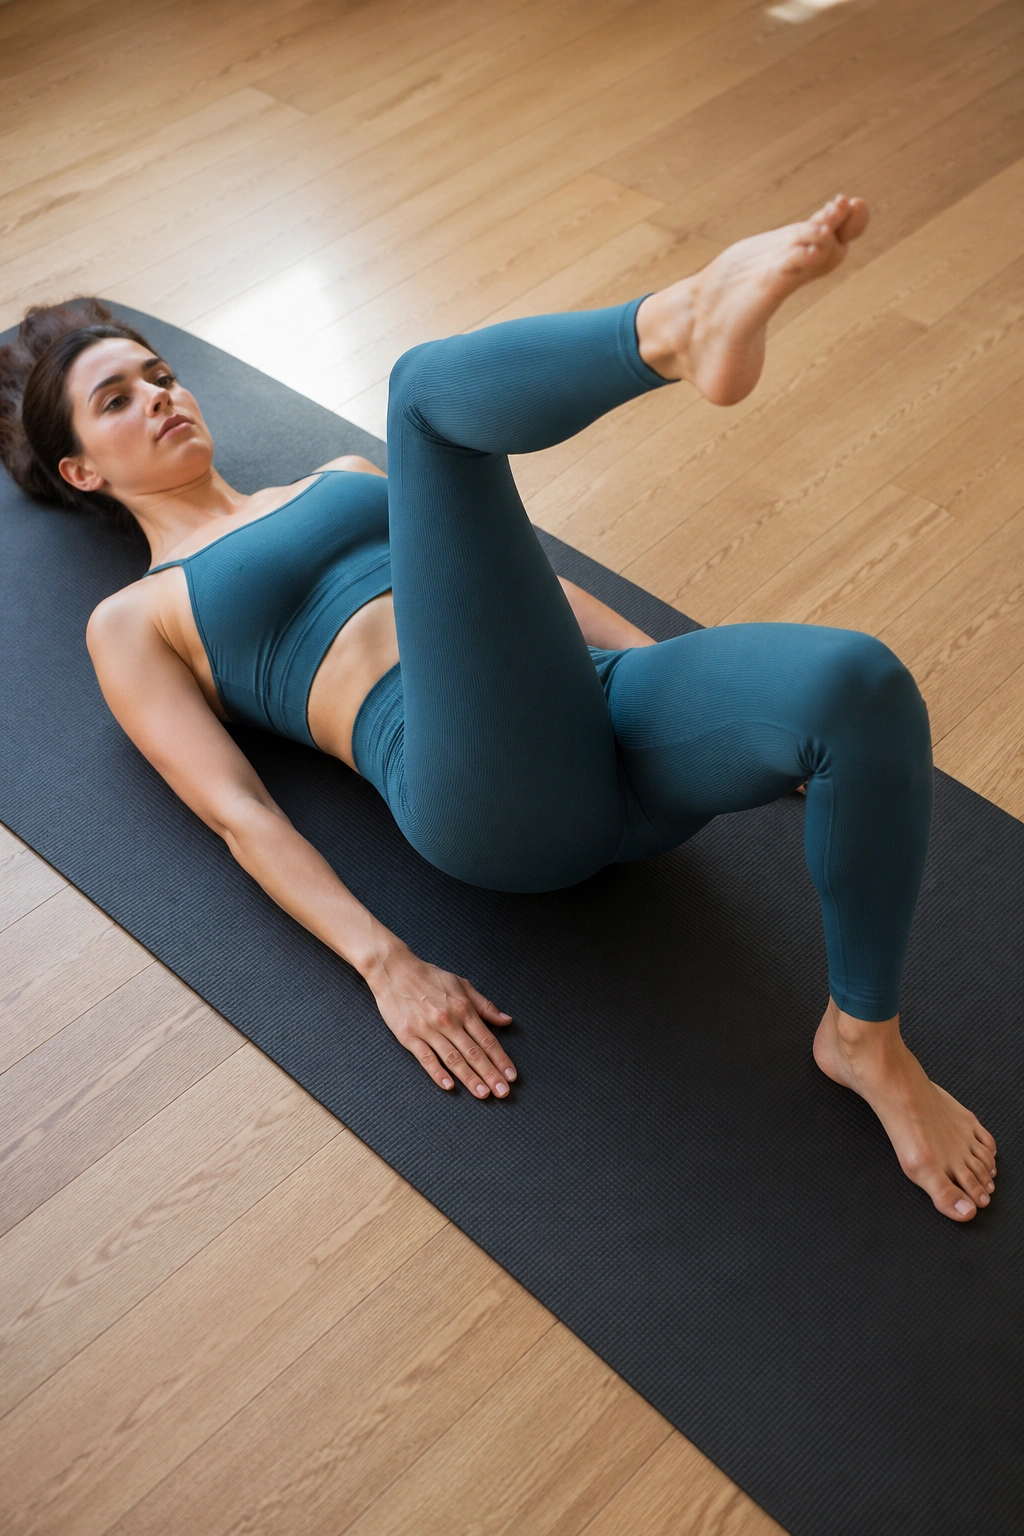
Toe taps are the kind of exercise that feels almost boring for the first few reps and then starts exposing every bit of compensation you didn’t know you had. That’s why they’re useful.
Start on your back with both knees lifted to tabletop, shins parallel to the floor. Keep the ribs settled and the pelvis steady as you lower one toe to the mat, then bring it back to tabletop and switch sides. The lower back should stay quiet. If it arches, the legs are going too low.
A lot of people try to win this move by making it bigger. Don’t. Smaller taps are often harder because they force the deep core to do the work instead of letting momentum take over.
- Keep your hands on your ribs if that helps you feel the breath.
- Tap only as low as you can without losing the back connection.
- Exhale on the tap, inhale on the return.
- If tabletop feels shaky, one foot stays down and you alternate legs from there.
5. The Hundred Prep
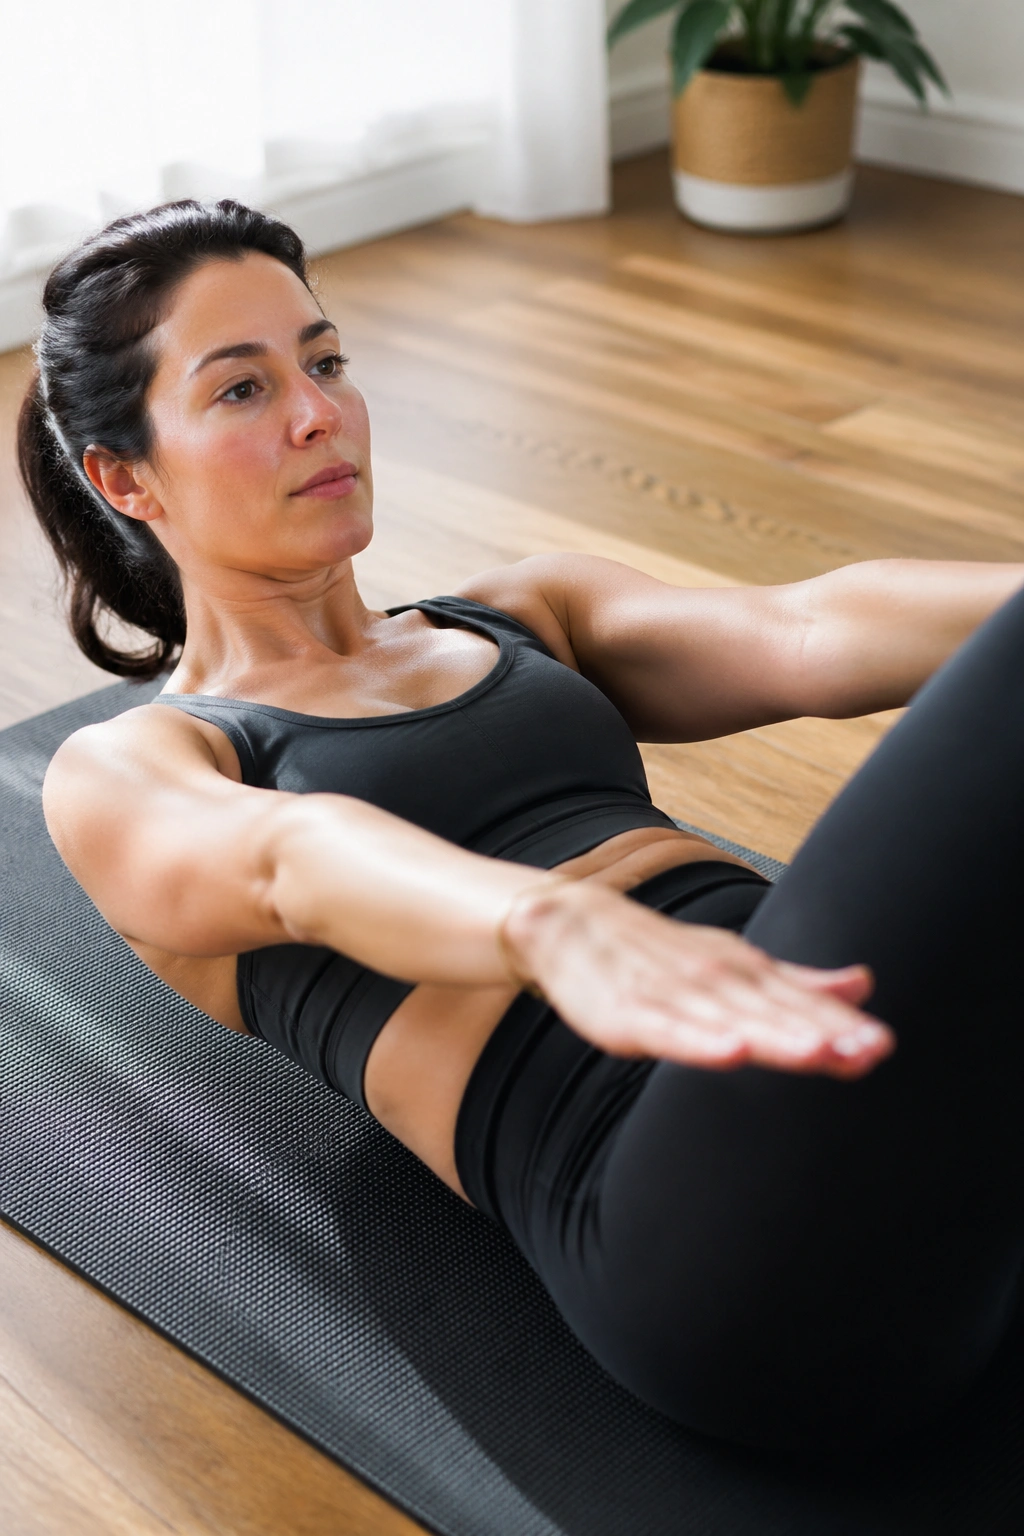
The full Hundred gets talked about a lot, but the beginner version is where the real learning happens. The goal isn’t to suffer through a long arm pump; it’s to keep the torso calm while the breath and arms move together.
Lie on your back, lift your knees to tabletop, and curl the head and shoulders up only if your neck feels fine. Arms reach long by your sides and pump a few inches up and down. Breathe in for five counts, out for five counts, keeping the chest broad and the belly flat rather than braced hard.
One-sentence truth: if the shoulders are creeping toward your ears, the range is too big.
You can keep your feet down for the first few rounds. That’s not cheating. It’s smart. Do 3 to 5 breath cycles, rest, then repeat once more if you still feel steady. The exercise should leave you warmer, not wrecked.
6. Tabletop March
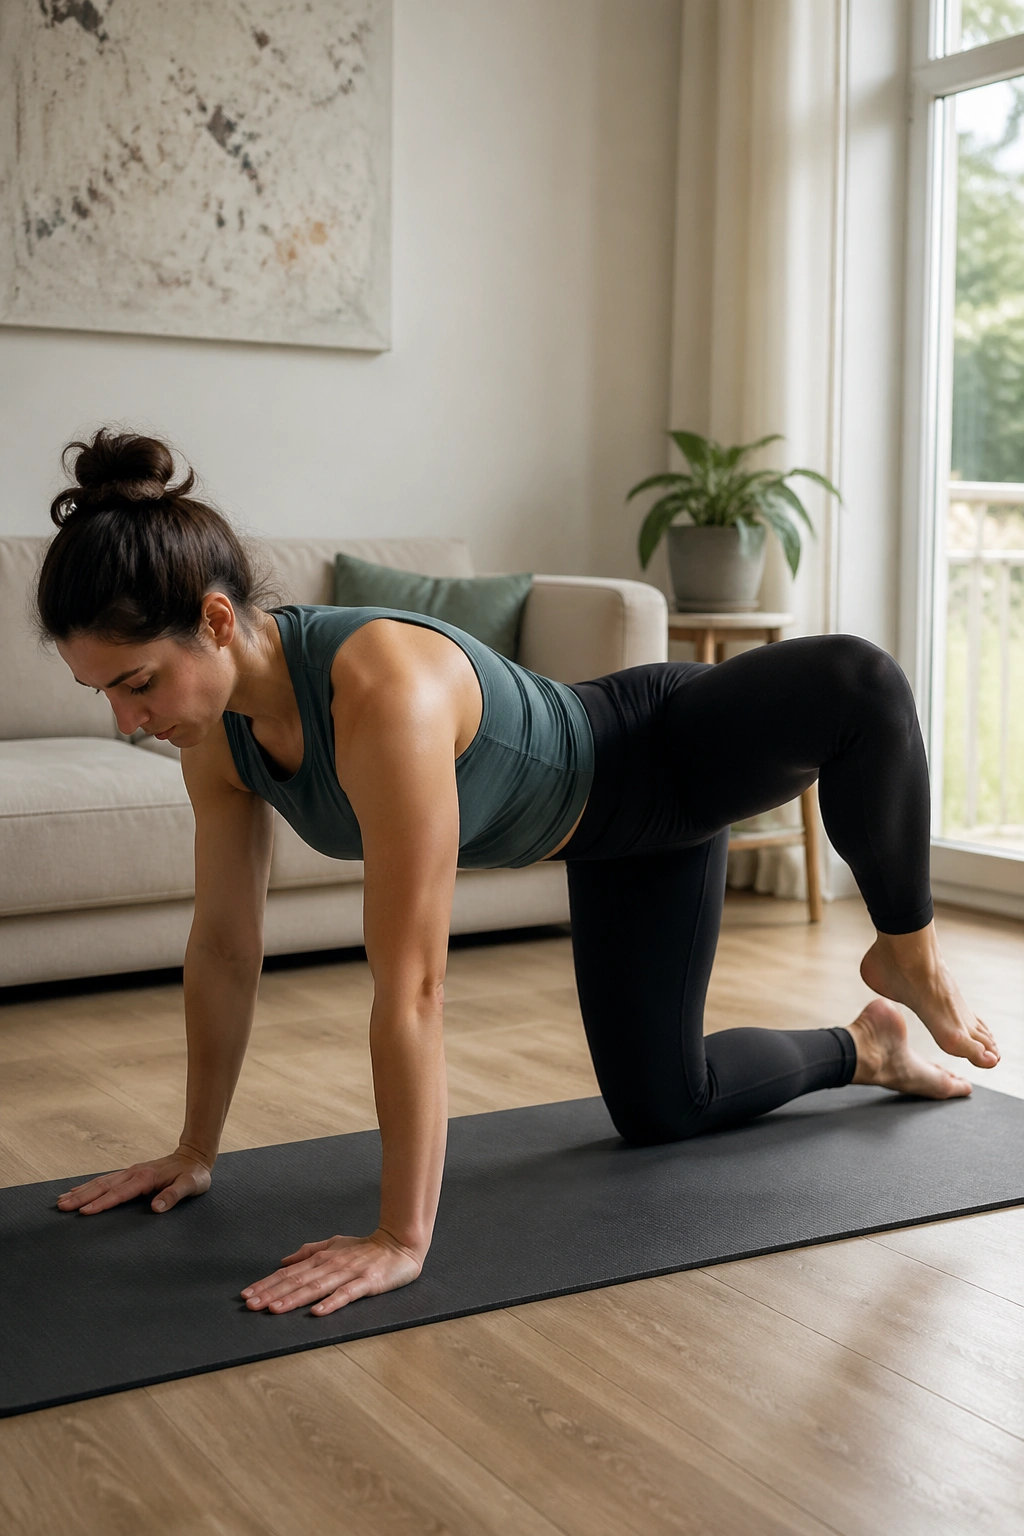
Tabletop march is cleaner than toe taps when your pelvis likes to wander. The movement is smaller, and that smallness is the point.
Unlike toe taps, which ask one leg to reach toward the floor, the tabletop march keeps both knees folded and asks for a controlled lift and lower. One foot floats a few inches higher, returns, then the other side takes a turn. Because the range is short, you get more control and less chance of the lower back arching.
This one suits people who can hold tabletop but lose form the second the leg reaches away. Try 8 slow marches per side. Keep the pelvis level enough that a coin on your hips would stay put. That image sounds a little silly, but it works.
If you feel the hip flexors gripping hard, exhale longer on the lift. It usually softens the front of the hip just enough to keep the movement smooth.
7. Cat-Cow
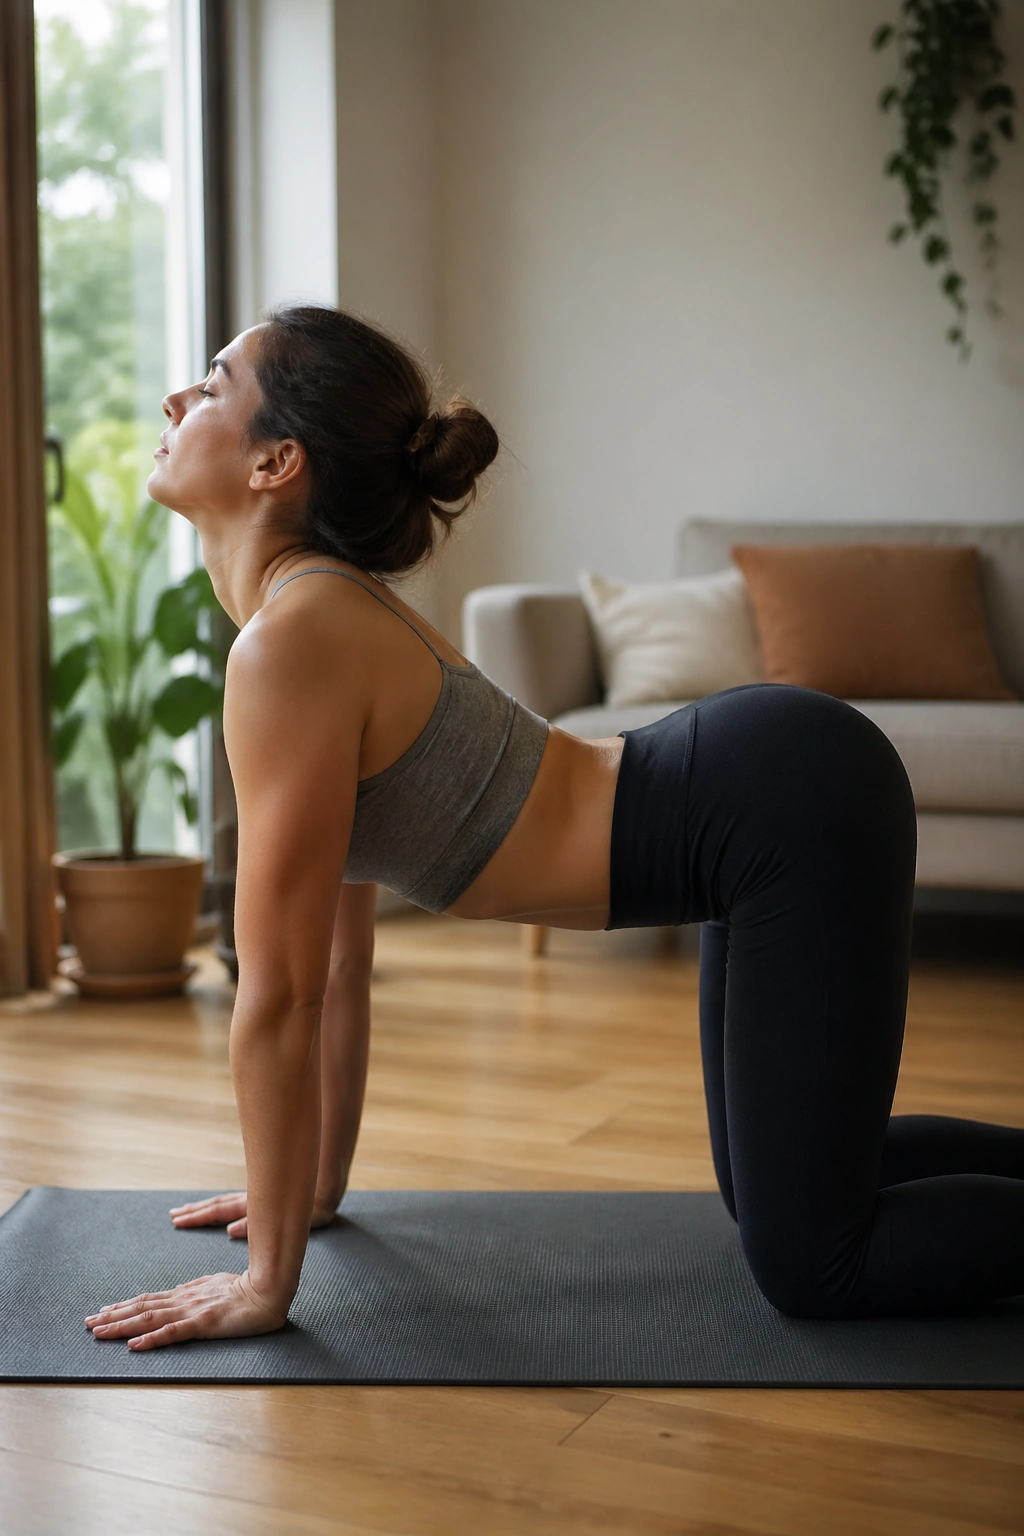
What makes cat-cow worth doing when you have a whole list of Pilates exercises? It gives the spine a chance to move in both directions without load, and that makes everything else feel less sticky.
Come onto hands and knees with your wrists under your shoulders and knees under hips. Inhale as you tip the tailbone up and open the chest, then exhale as you round the spine and gently press the floor away. The movement is not about making the shape huge. It’s about moving one piece of the spine after another.
How to move it well
Keep your elbows soft and your weight spread across the whole hand. If your shoulders collapse, the neck takes over. If your lower back pinches on the arch, shorten the range and make the curve smaller.
Five to six slow rounds are plenty. The breath should feel like it’s guiding the motion, not chasing after it.
8. Bird Dog
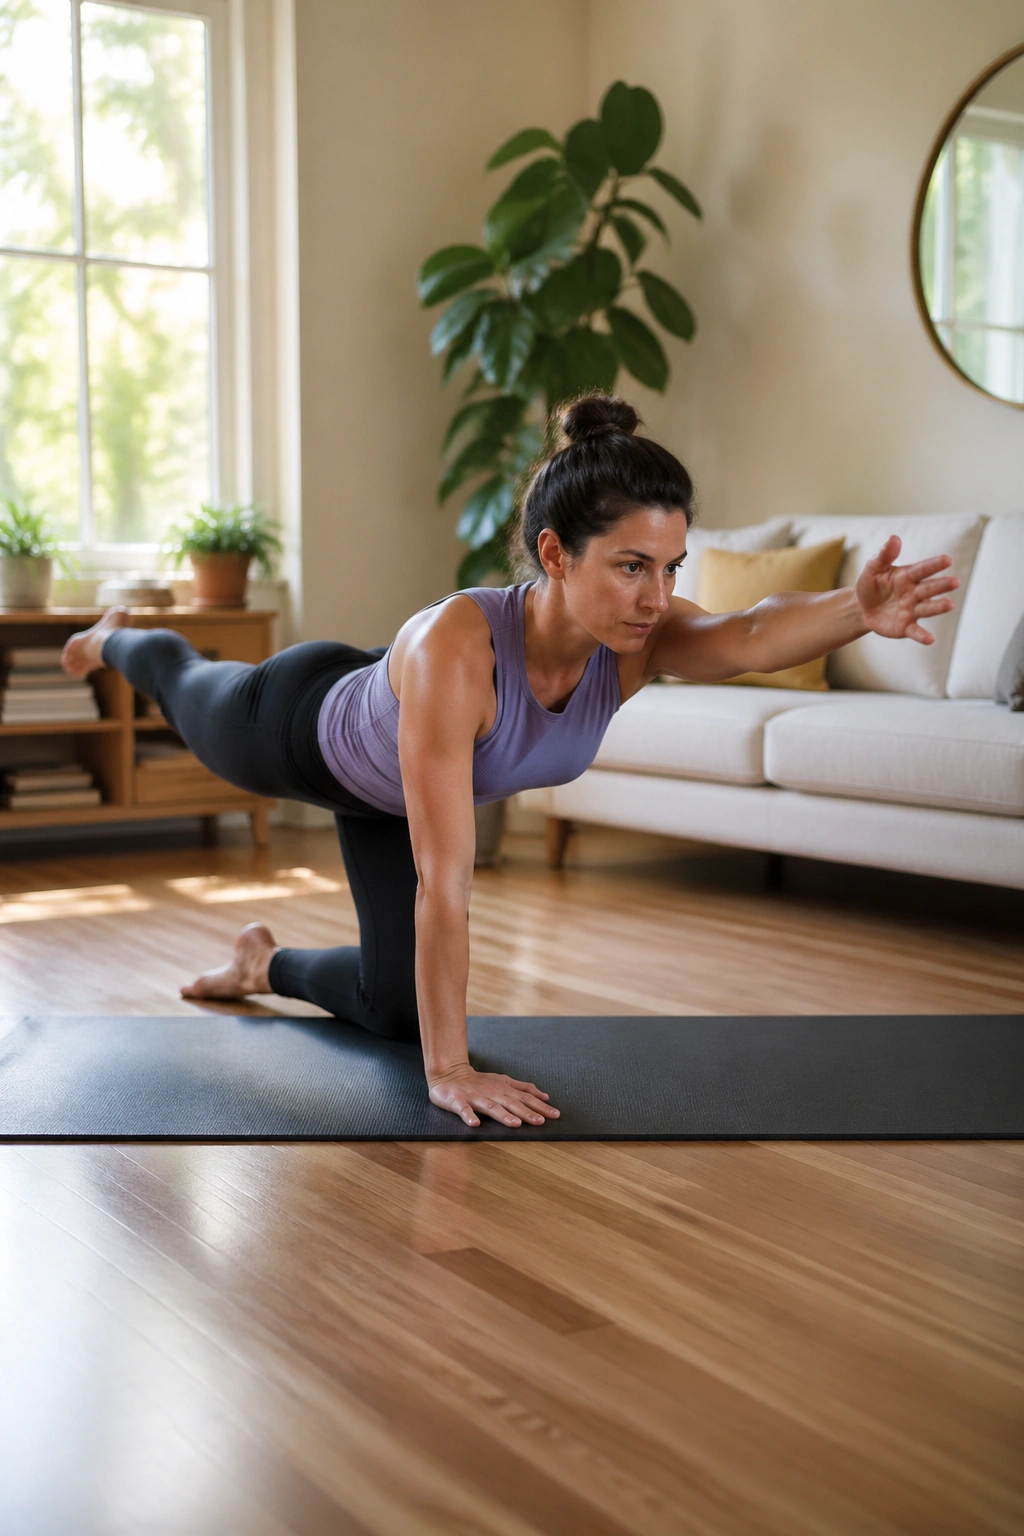
A bird dog sounds simple until your hips start twisting and your arm wants to wave around like it’s helping when it isn’t. Then the exercise becomes interesting.
Begin on hands and knees. Reach the opposite arm and leg long at the same time, keeping both level with the floor or just a touch higher. Hold for one full breath, set down with control, then switch sides. The real work comes from keeping the torso square.
A good bird dog feels long, not high. That distinction matters. A leg that lifts too far usually arches the back and steals the stability the exercise is supposed to build. Reach through the heel, lengthen through the fingertips, and keep the gaze a little ahead of your hands so your neck stays in line.
- Start with just the leg or just the arm if balance feels shaky.
- Pause for 2 breaths at the longest point.
- Keep the belly gently drawn in so the low back doesn’t sag.
- If the wrist complains, come down onto fists or a folded towel.
9. Side-Lying Leg Lifts
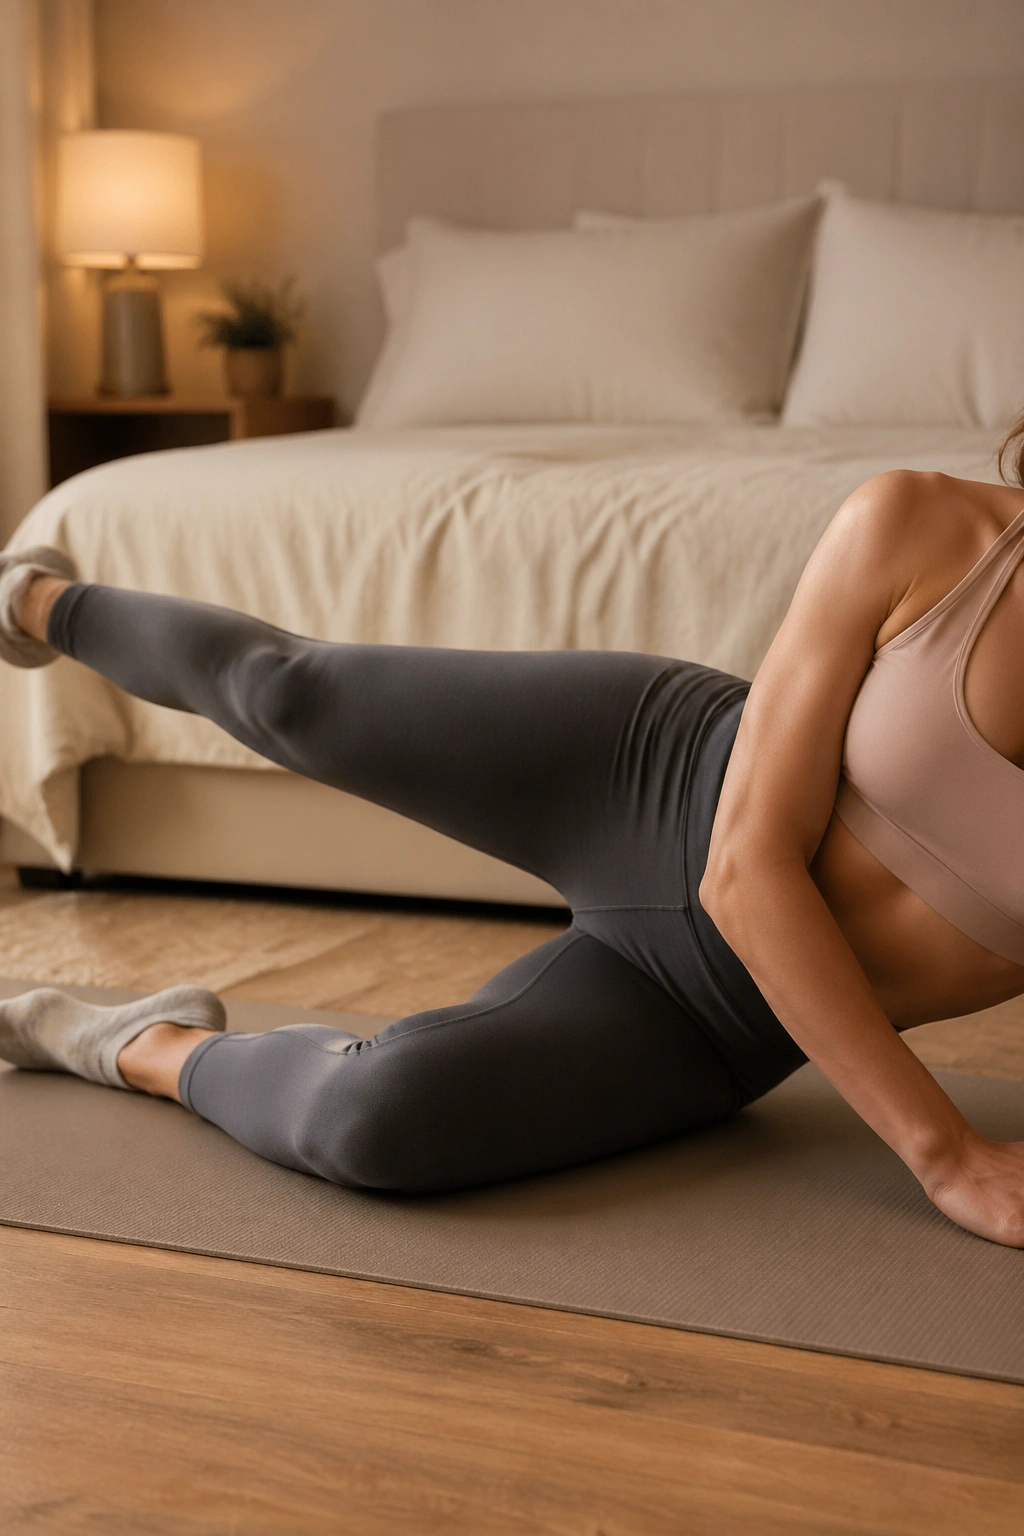
Side-lying leg lifts are one of the best ways to wake up the side hip, and most beginners are surprised by how much they feel it after only a few reps. That side hip muscle matters more than people think; when it gets sleepy, the whole pelvis gets sloppy.
Lie on one side with your legs long and stacked. Rest your head on your lower arm or a pillow. Lift the top leg only as high as you can keep the pelvis steady, then lower it with control. The torso should stay quiet. No rocking. No swinging.
A small lift often works better than a big one because it keeps the tension where you want it — around the outer hip, not the low back. Eight to ten reps per side is a good start. Turn the top toes a touch downward if you feel the front of the hip taking over.
10. Clamshells
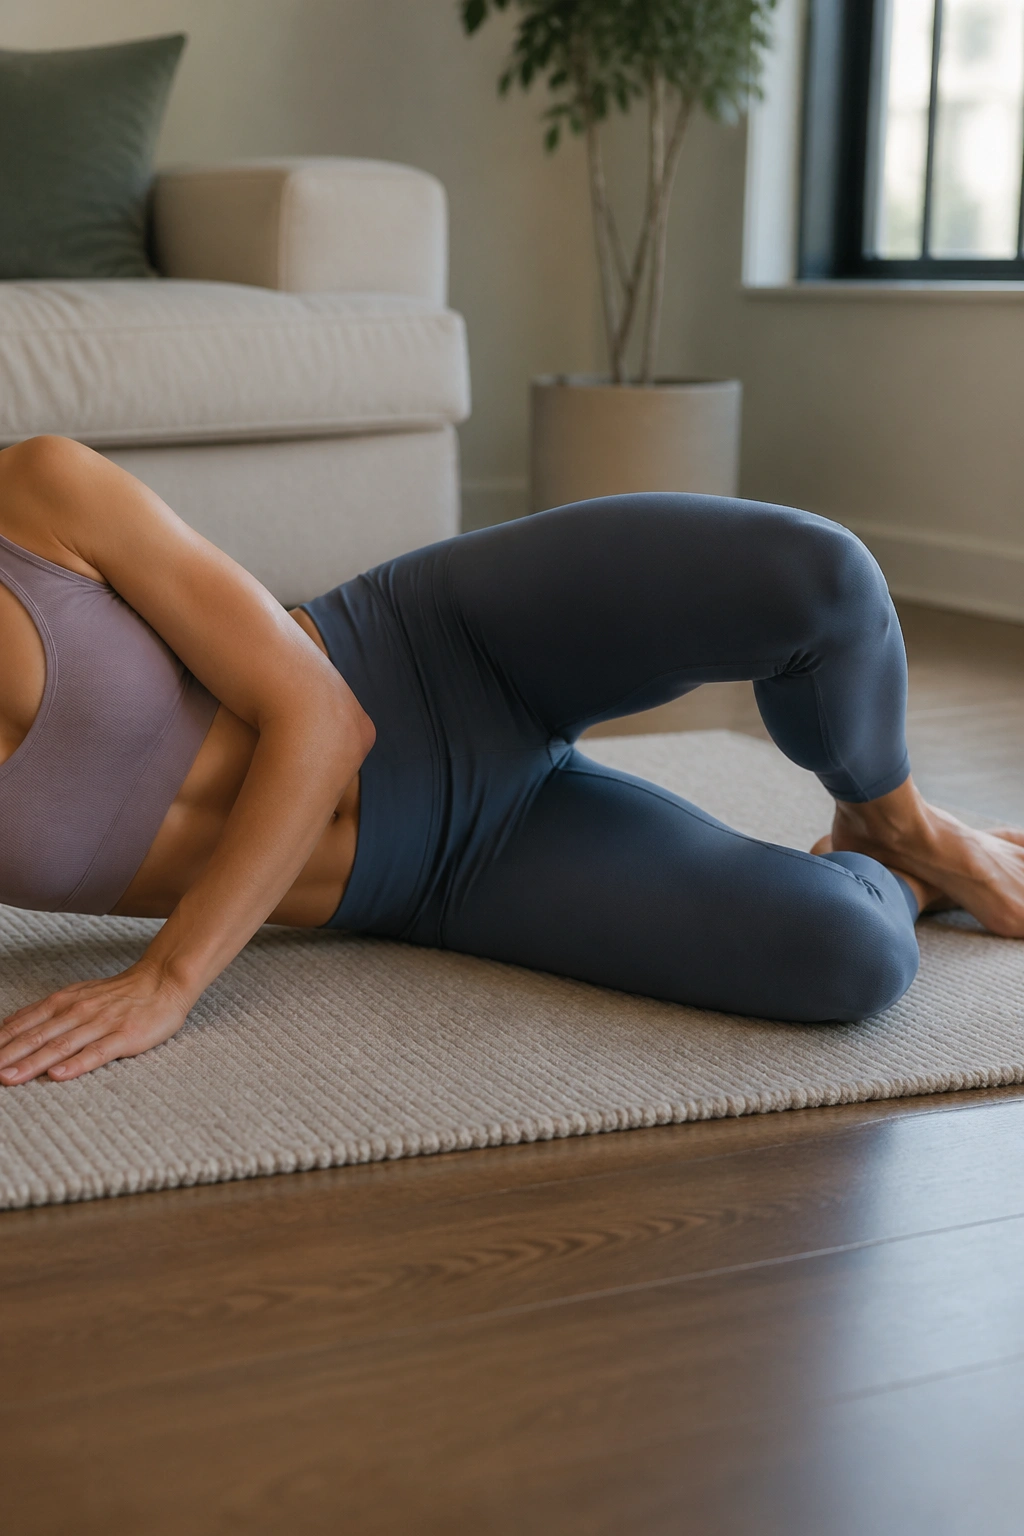
Clamshells are plain, and that’s why they work so well. There’s nowhere to hide in this exercise. If your hips roll back or your feet drift apart, you’ll feel it right away.
Lie on your side with your knees bent and heels lined up. Keep the pelvis stacked, then open the top knee like a shell opening just a few inches. Close it again without slamming the knees together. The feet stay in contact the whole time.
This move is about the deep side glutes, not about making the opening huge. If you open too far, the pelvis usually tips and the lower back starts cheating. Try 10 to 12 reps per side with a 2-second pause at the top. If it feels easy, slow the lowering phase. That usually changes the game fast.
A folded towel under the waist can make the body feel more level, which helps beginners notice when the torso starts to drift.
11. Single Leg Stretch
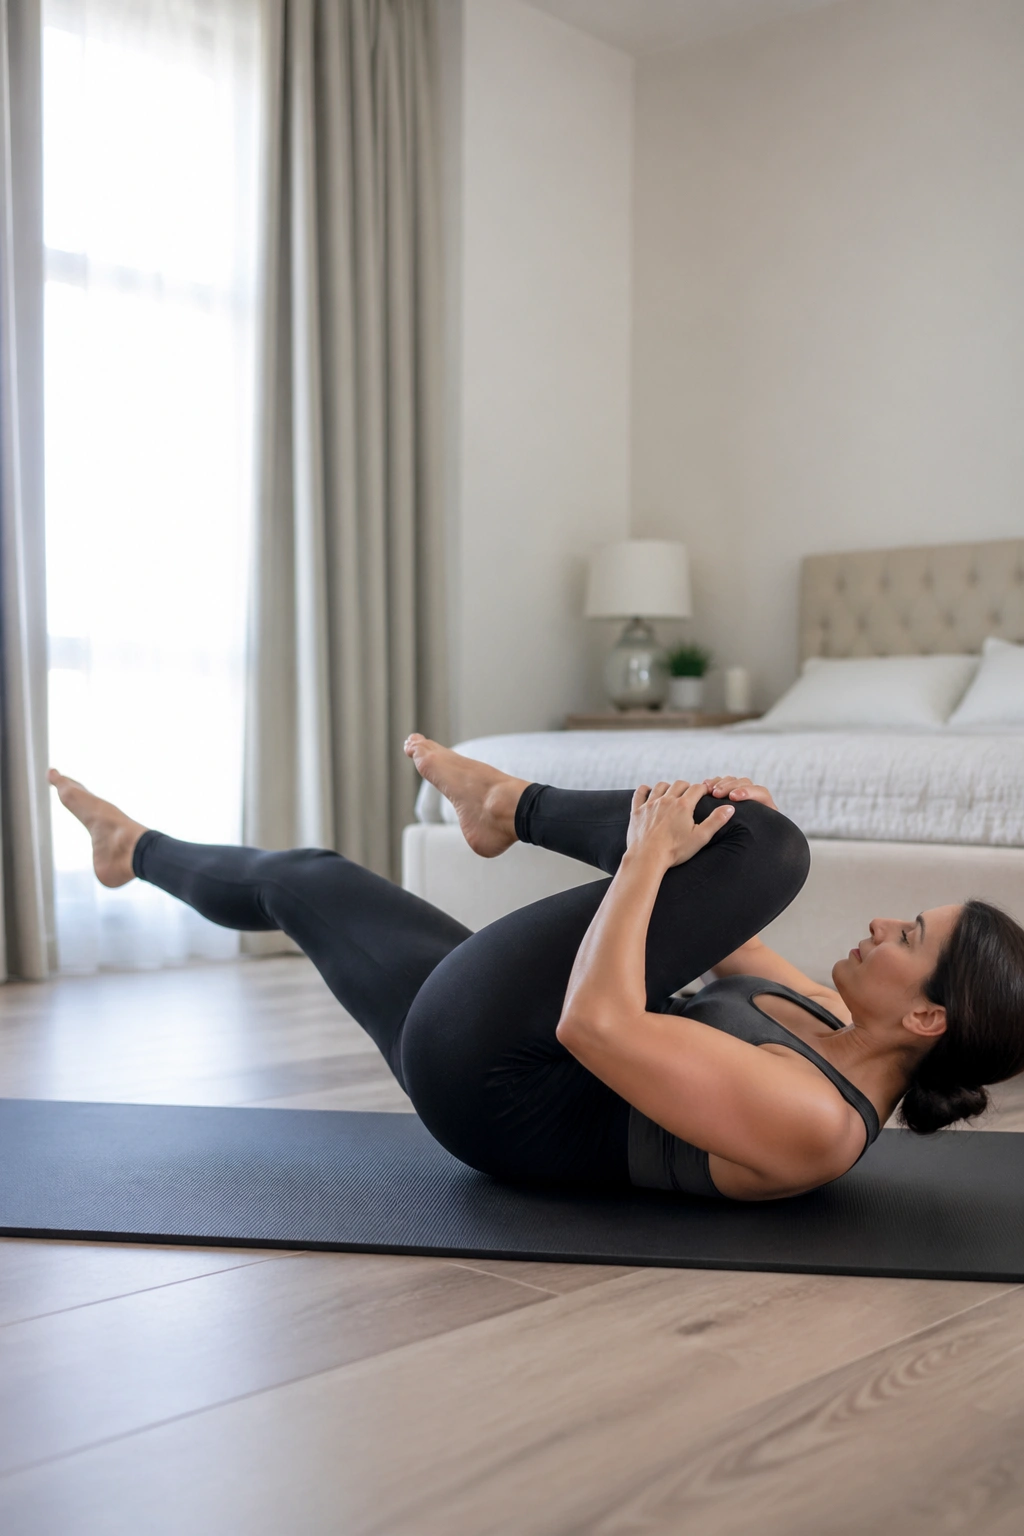
Single leg stretch is where Pilates starts feeling a little more rhythmic. One knee hugs in, the other leg reaches out, and the breath helps keep the whole thing from turning messy.
Lie on your back and draw both knees in. Curl the head and shoulders up only if your neck is comfortable, then extend one leg out long while the opposite knee stays close to the chest. Switch sides on the exhale. The movement should feel controlled and narrow, not like a bicycle race.
How to keep the low back quiet
Keep the reaching leg high if your back arches. That’s the simplest fix, and it works more often than people expect. You can also keep your head down and do the leg switches without lifting the chest at all.
Five to eight switches per side is enough at first. If your shoulders start shrugging, stop early. Better to do fewer clean reps than a long set that turns into neck tension.
12. Double Leg Stretch Prep
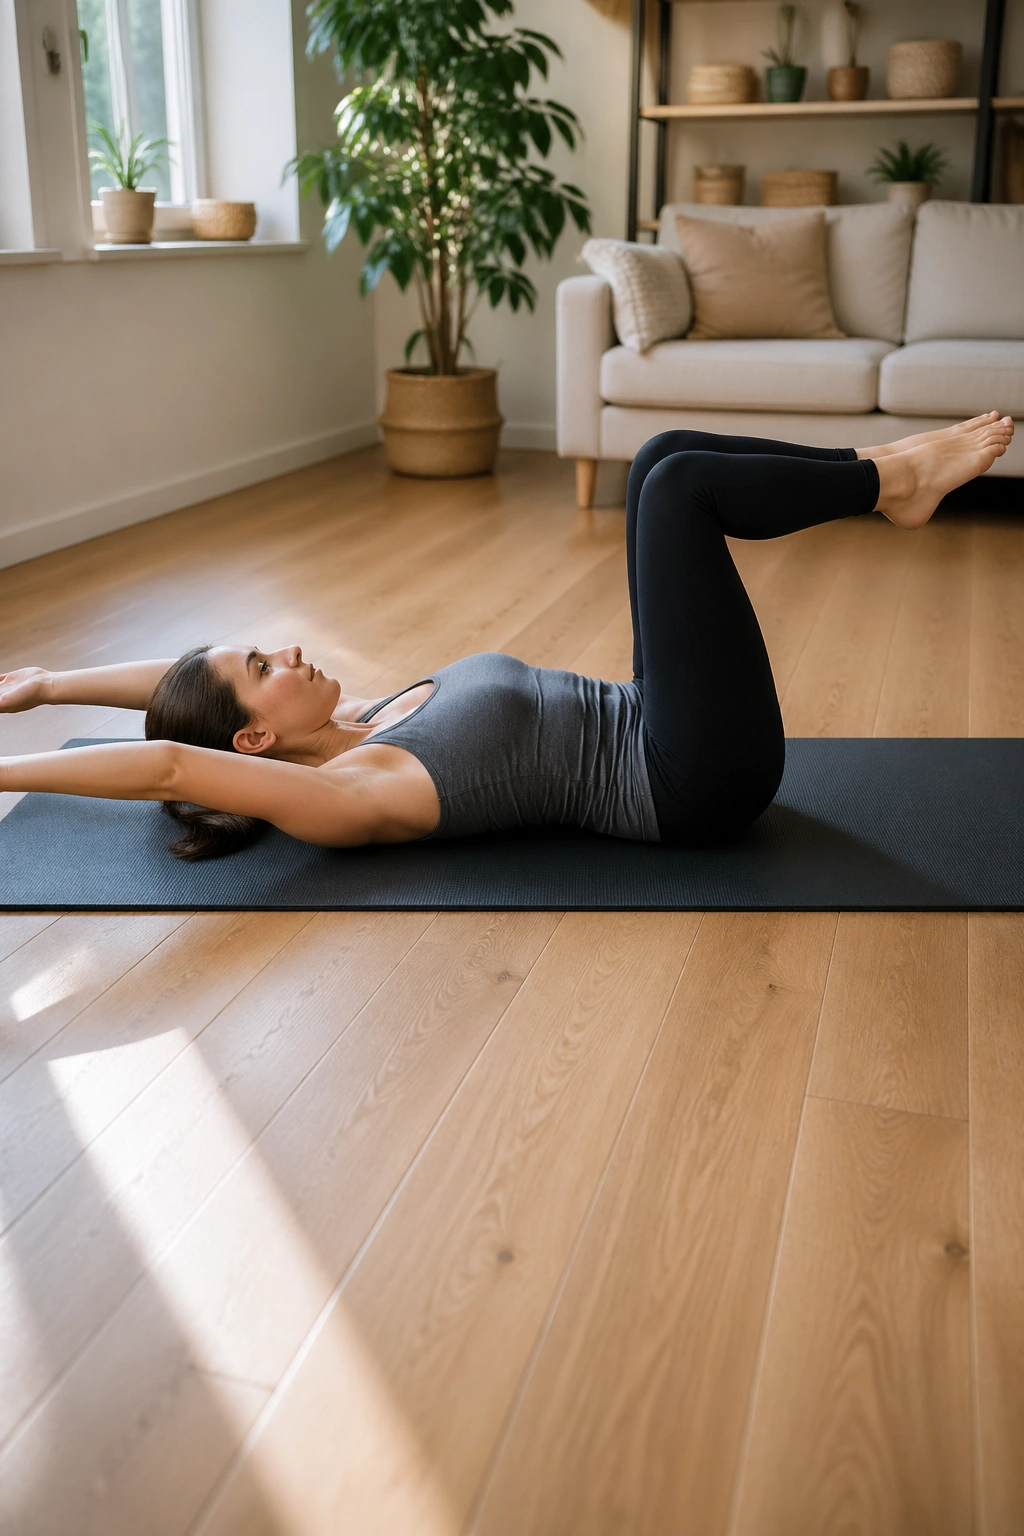
The full double leg stretch can be too much for a new body on a new mat. The prep version keeps the same shape without asking the spine to hold the line under pressure.
Unlike the full version, where both arms and both legs reach away at once, the prep lets you keep the knees bent or the feet a little higher as you extend. Hug the knees in, then reach the arms overhead while the legs move away only as far as the back stays steady. Circle the arms back in and return.
The reason this version matters is simple: it teaches length without losing control. If your ribs pop up or your lower back feels like it’s lifting off the mat, the reach is too wide. Keep the exhale long and make the motion smaller. Six reps is enough to start.
People often skip this and jump straight to the full exercise. That’s a mistake. The prep builds the skill the full move needs.
13. Spine Twist Supine
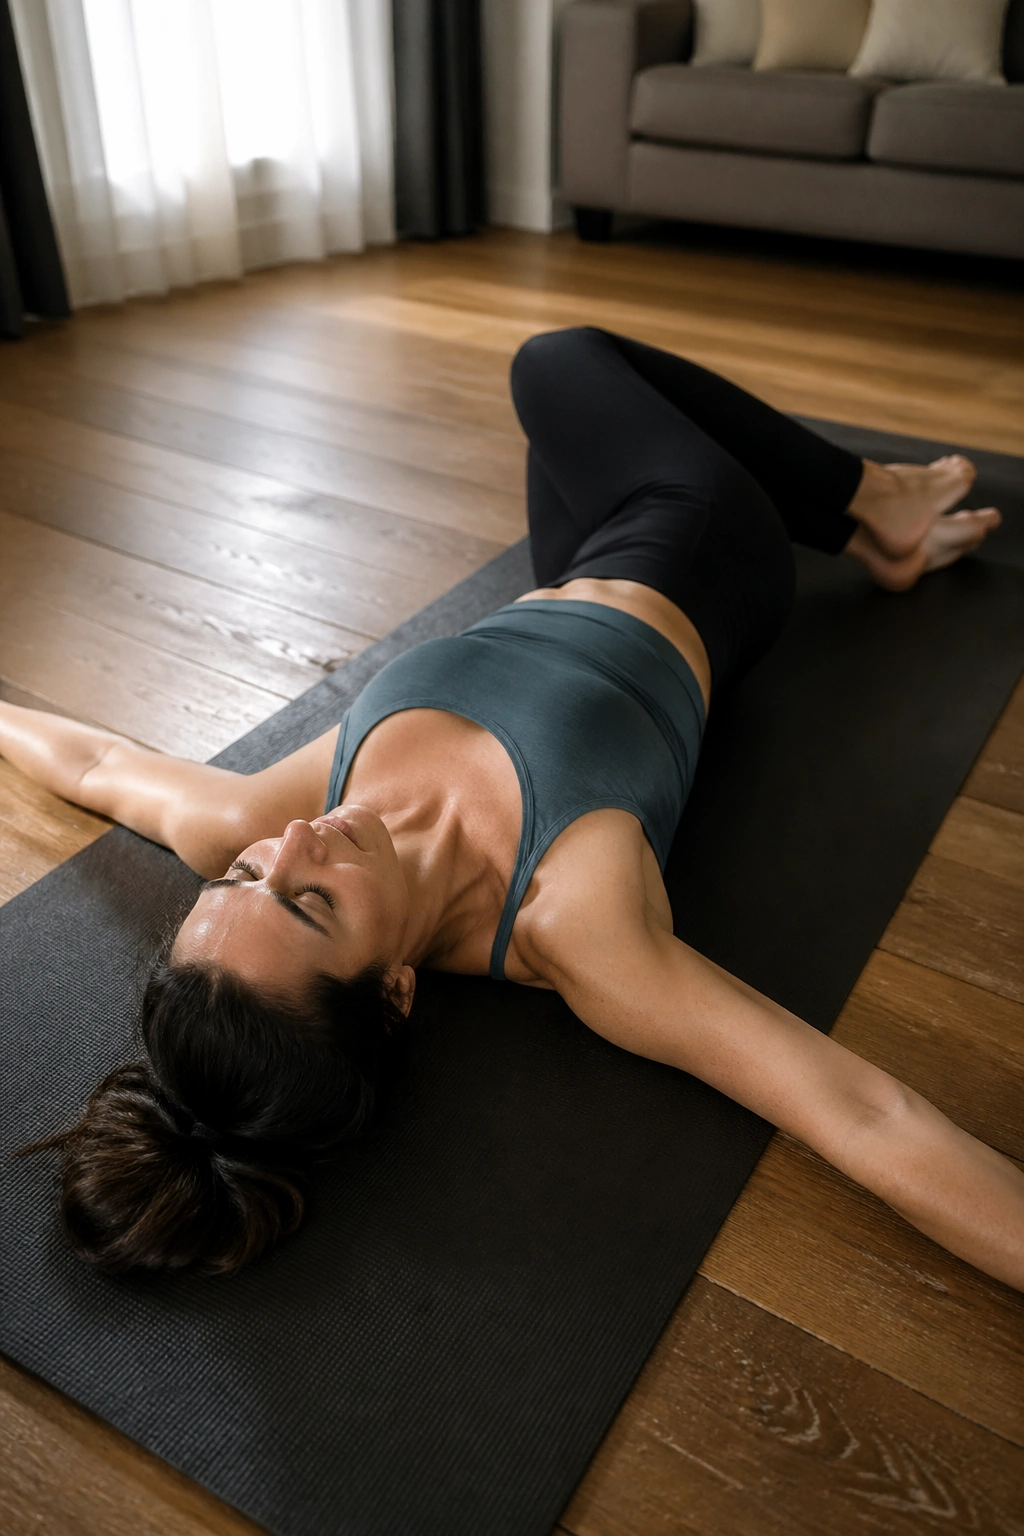
A lot of beginners think rotation means cranking the knees side to side. It doesn’t. Spine twist supine is cleaner than that, and kinder too.
Lie on your back with your knees bent and feet flat, or lift the legs to tabletop if that feels steady. Open the arms out to a T. Exhale and let both knees drop to one side while the shoulders stay heavy. Inhale back to center, then go the other way. The movement should come from the waist and the ribs, not from flinging the knees.
If the knees hit the floor too fast, shorten the range. If the shoulders peel up, keep your knees higher and move slower. Four to six slow turns each way is enough. This one works well after core work because it lets the trunk unwind without going floppy.
- Keep the top shoulder anchored.
- Move on an exhale for better control.
- Place a pillow between the knees if the hips feel tight.
- Stop before the low back tugs.
14. Swimming Prep
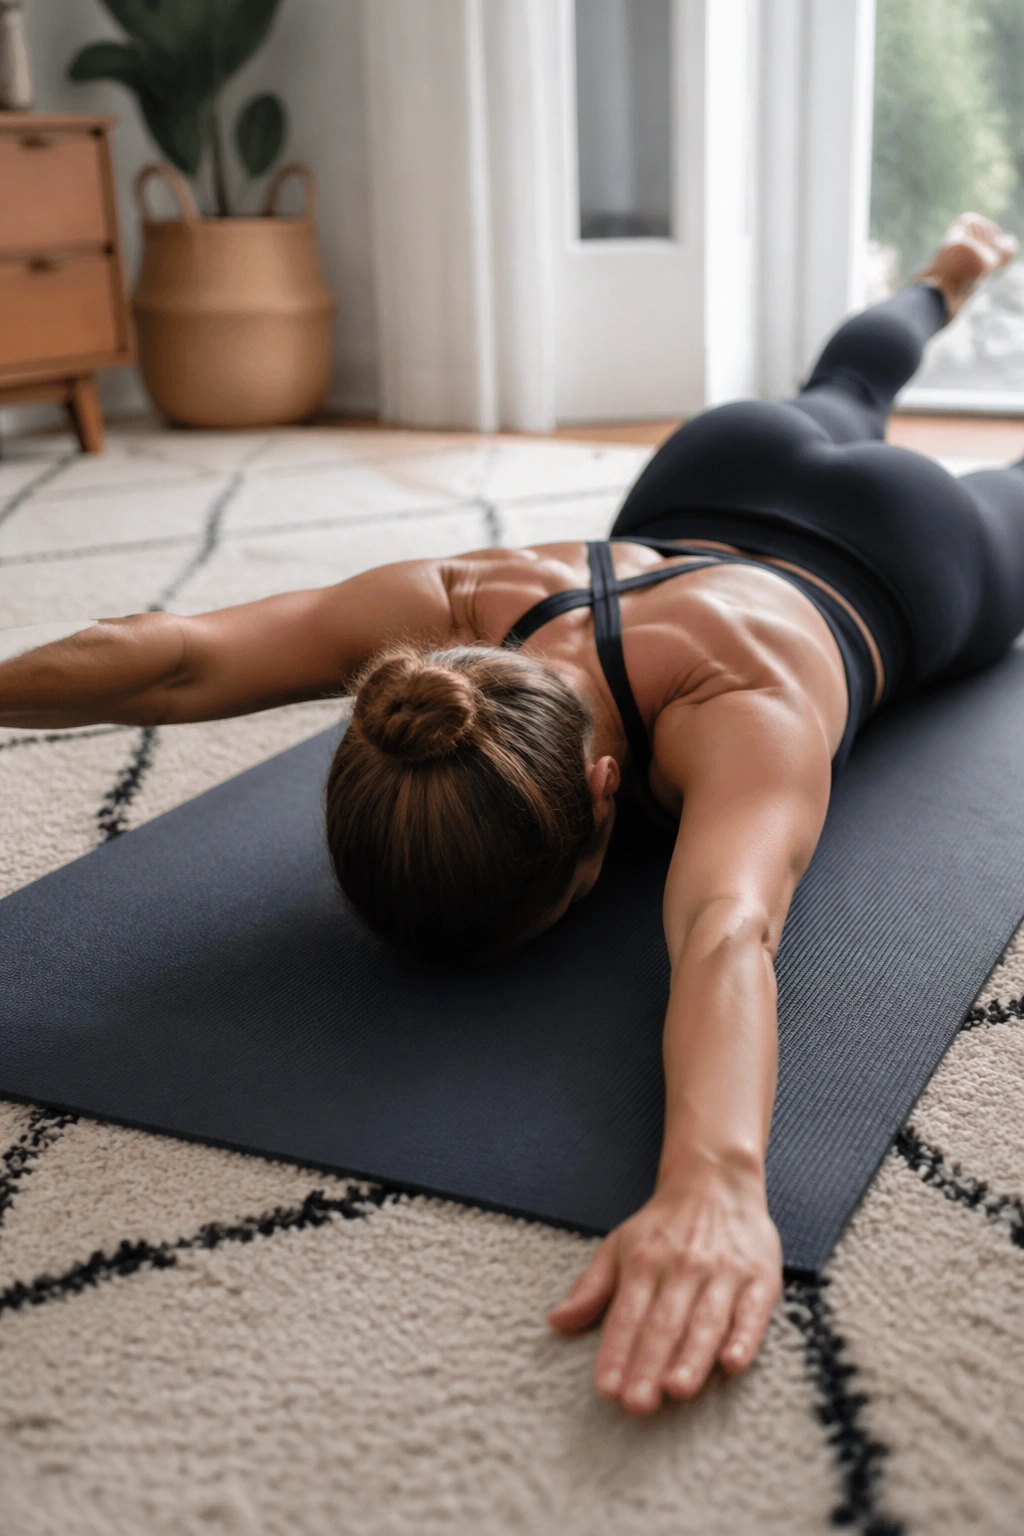
Swimming prep looks modest, but it teaches length through the back body better than a lot of flashier moves. You’re on your stomach, so the challenge is staying long instead of sinking into the mat.
Lie face down with your forehead on the mat or on a folded towel. Reach one arm forward as the opposite leg lifts a few inches, then switch sides. Keep the lift small. The goal is to feel the back of the body engage without jamming the lower back.
One-sentence reminder: height is not the goal here.
The neck should stay long, the lower ribs should stay down, and the glutes should support the lift without clenching hard. Try 6 to 8 alternating reaches. If your low back feels pinched, lower the legs first and keep only the arms moving until the shape feels easier.
15. Side Plank on Knees
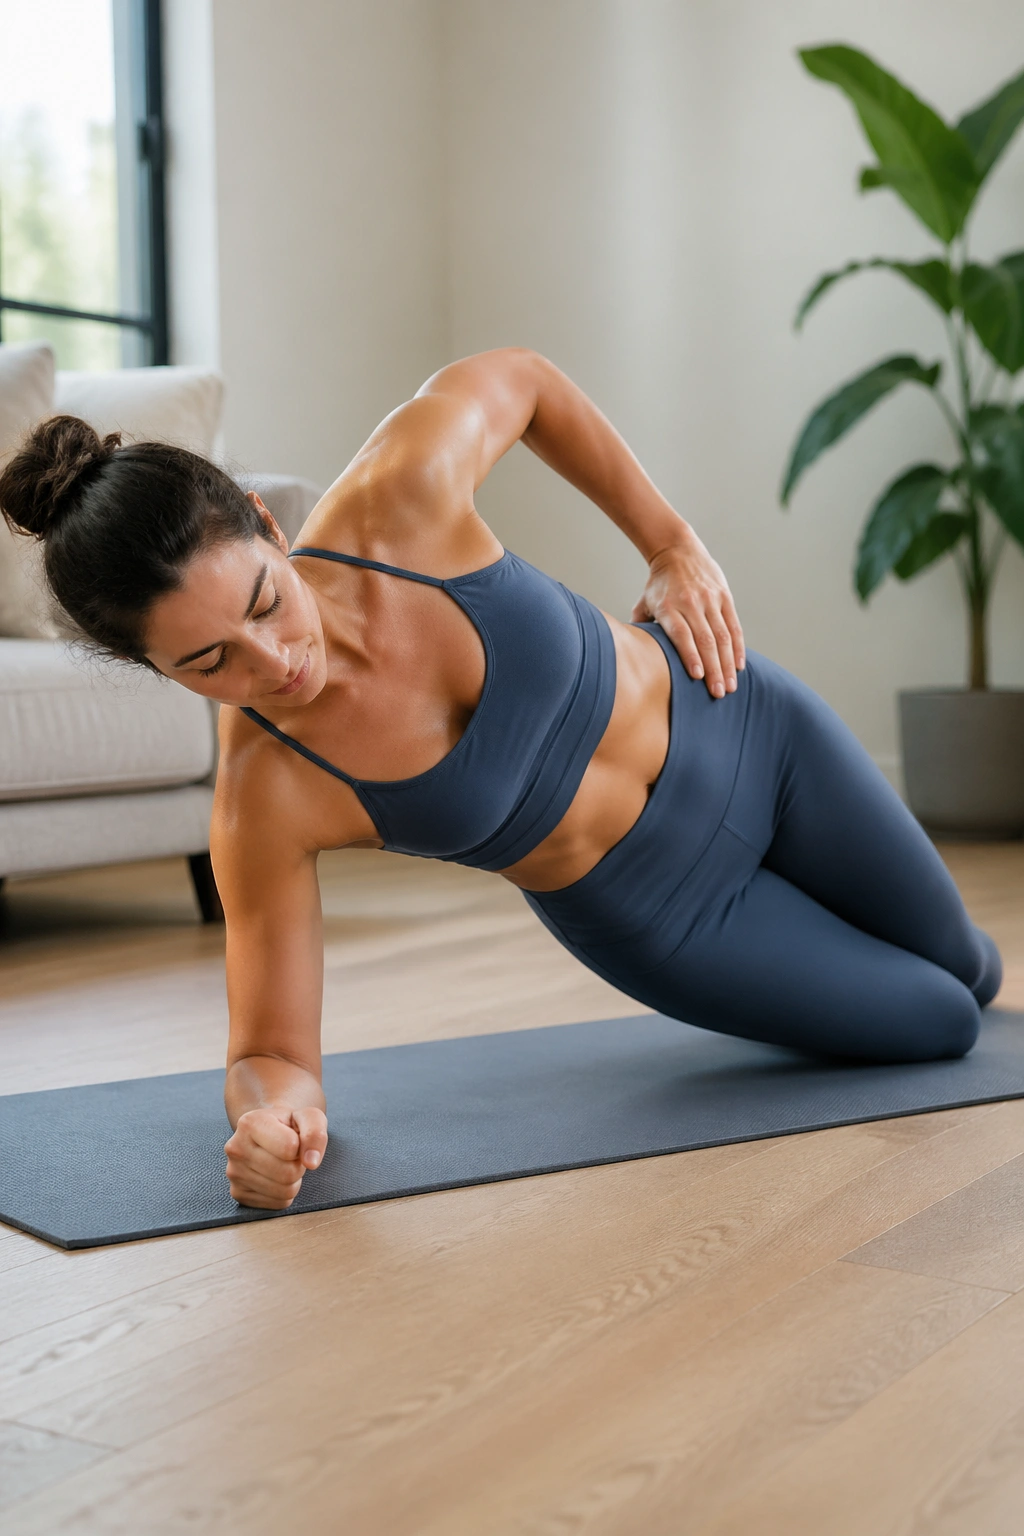
Can you do a side plank if a full one feels brutal? Yes, and the kneeling version is often the smarter place to start.
Set one forearm on the floor with the elbow under the shoulder. Bend both knees and stack the legs, then lift the hips so the body makes a straight line from shoulder to knee. The top hand can rest on the hip or reach to the ceiling. Hold for 10 to 20 seconds, rest, and repeat on the other side.
Set-up that saves the shoulder
Press the floor away through the forearm and keep the neck long. If the shoulder feels jammed, shift the elbow a touch farther from the body and recheck the line. Beginners sometimes let the hips drift backward; bring them slightly forward so the obliques can do their part.
This is a strong move, but it does not need to be dramatic. Two short holds on each side can be enough for a first session.
16. Swan Prep
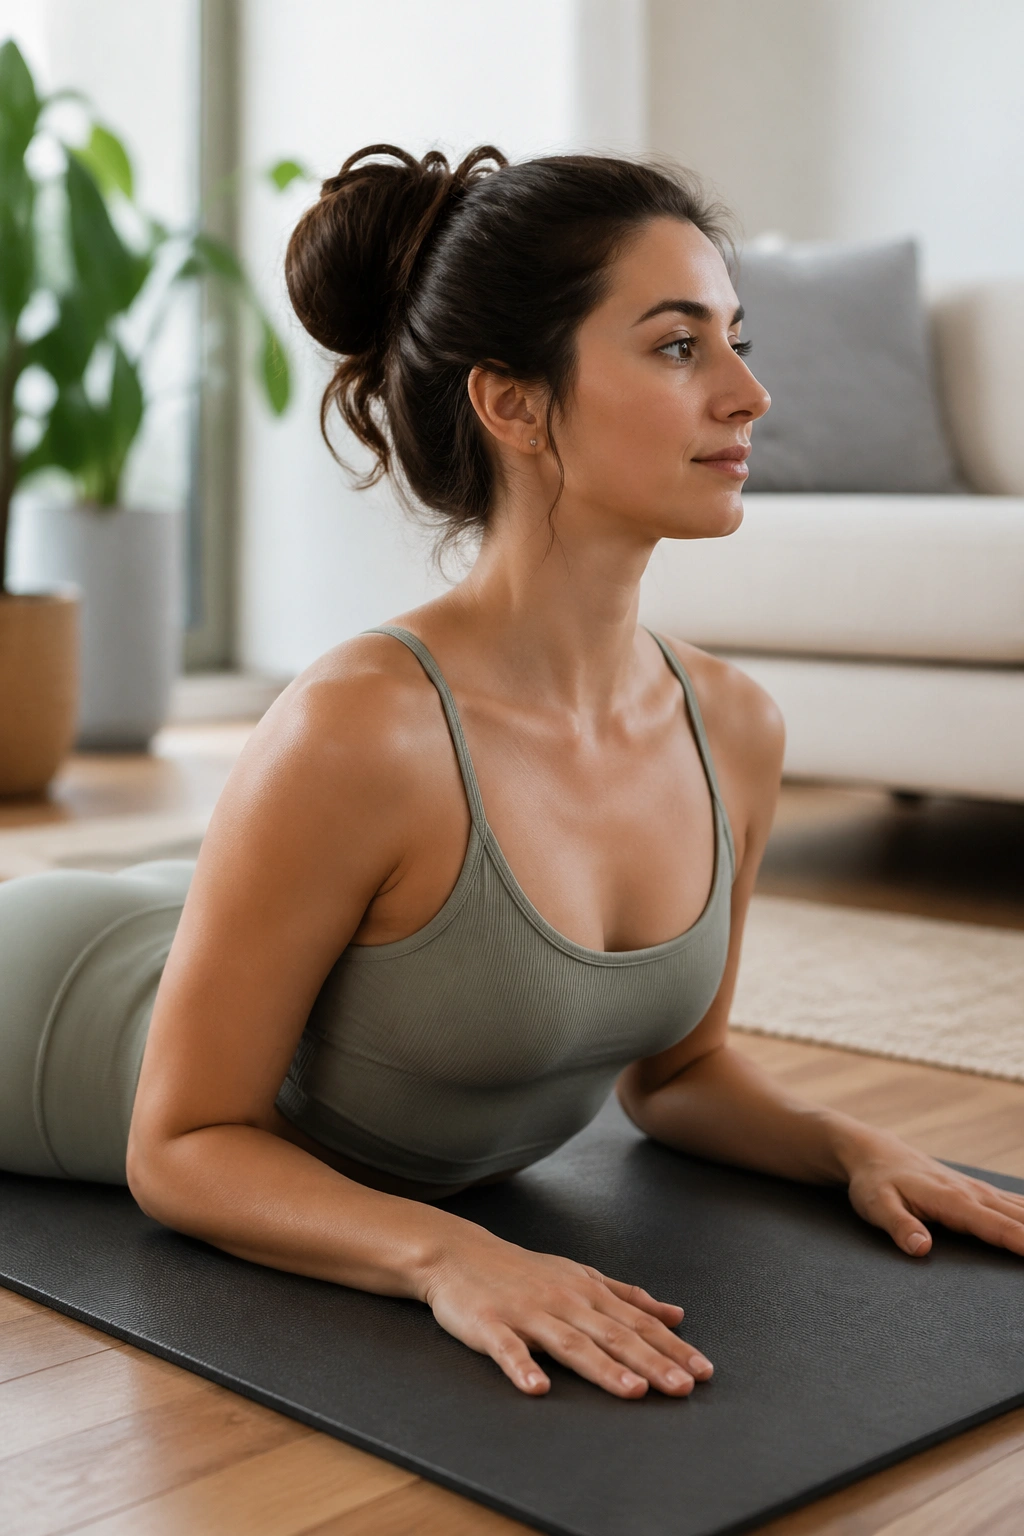
Swan prep is the floor move I like when someone says their posture feels slumped but they can’t tolerate a big backbend. It opens the front of the body without demanding a huge lift.
Lie on your stomach with your hands under your shoulders and elbows tucked close. Press the pelvis and lower ribs into the mat, then gently lift the chest a few inches. The upper back extends, but the neck stays in line and the low back doesn’t dump. Lower with control.
The common mistake is throwing the head up first. Don’t. Lift through the sternum and let the head follow the line of the spine. If the lower back pinches, make the lift smaller and keep the belly lightly supported against the floor. Five slow reps is enough. This is one of those exercises that feels better when it stays modest.
17. Leg Circles
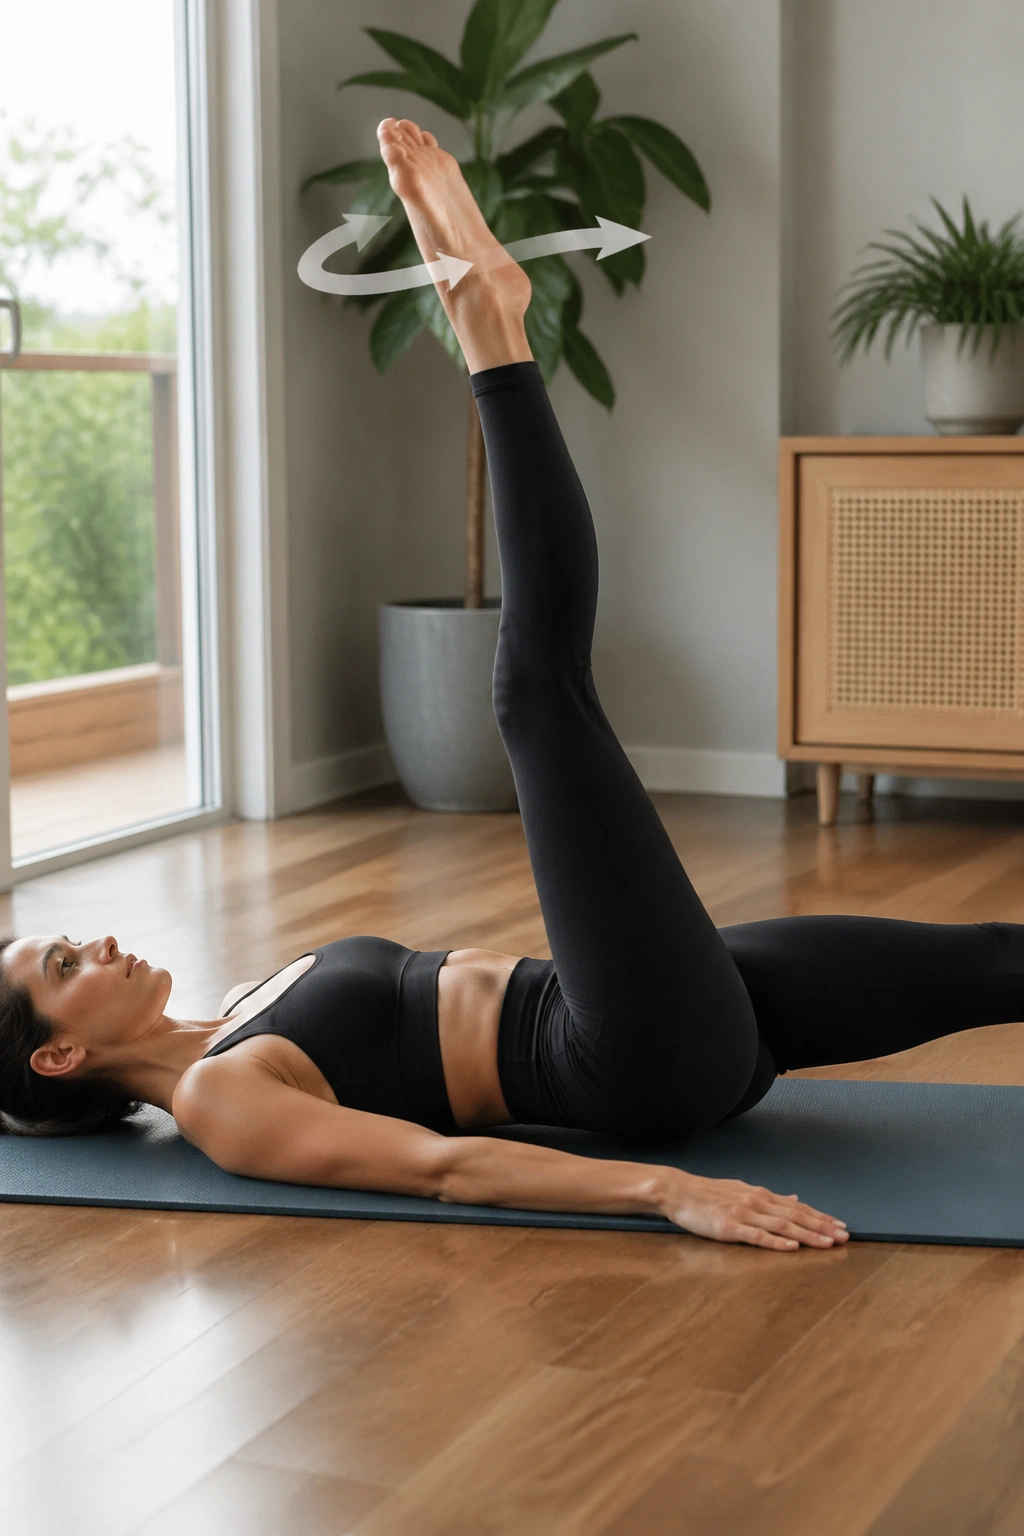
Leg circles look elegant when they’re done well, and messy when they aren’t. The pelvis has to stay still while one leg draws a small circle in the air. That’s the whole trick.
Lie on your back with one leg long on the mat and the other reaching to the ceiling, knee soft if needed. Circle the lifted leg across the body, around, and back to center. Keep the circle small enough that the hips stay level. Then reverse the direction.
A big circle usually drags the pelvis along for the ride. A small circle teaches control instead. Five circles each way per leg is a sensible start. Put one hand on the hip bones if you want a clear check on whether the pelvis is sneaking around.
- Keep the standing leg heavy on the mat.
- Bend the lifted knee slightly if the hamstring pulls.
- Move slower than you think you need to.
- Breathe out on the hardest part of the circle.
18. Wall Plank
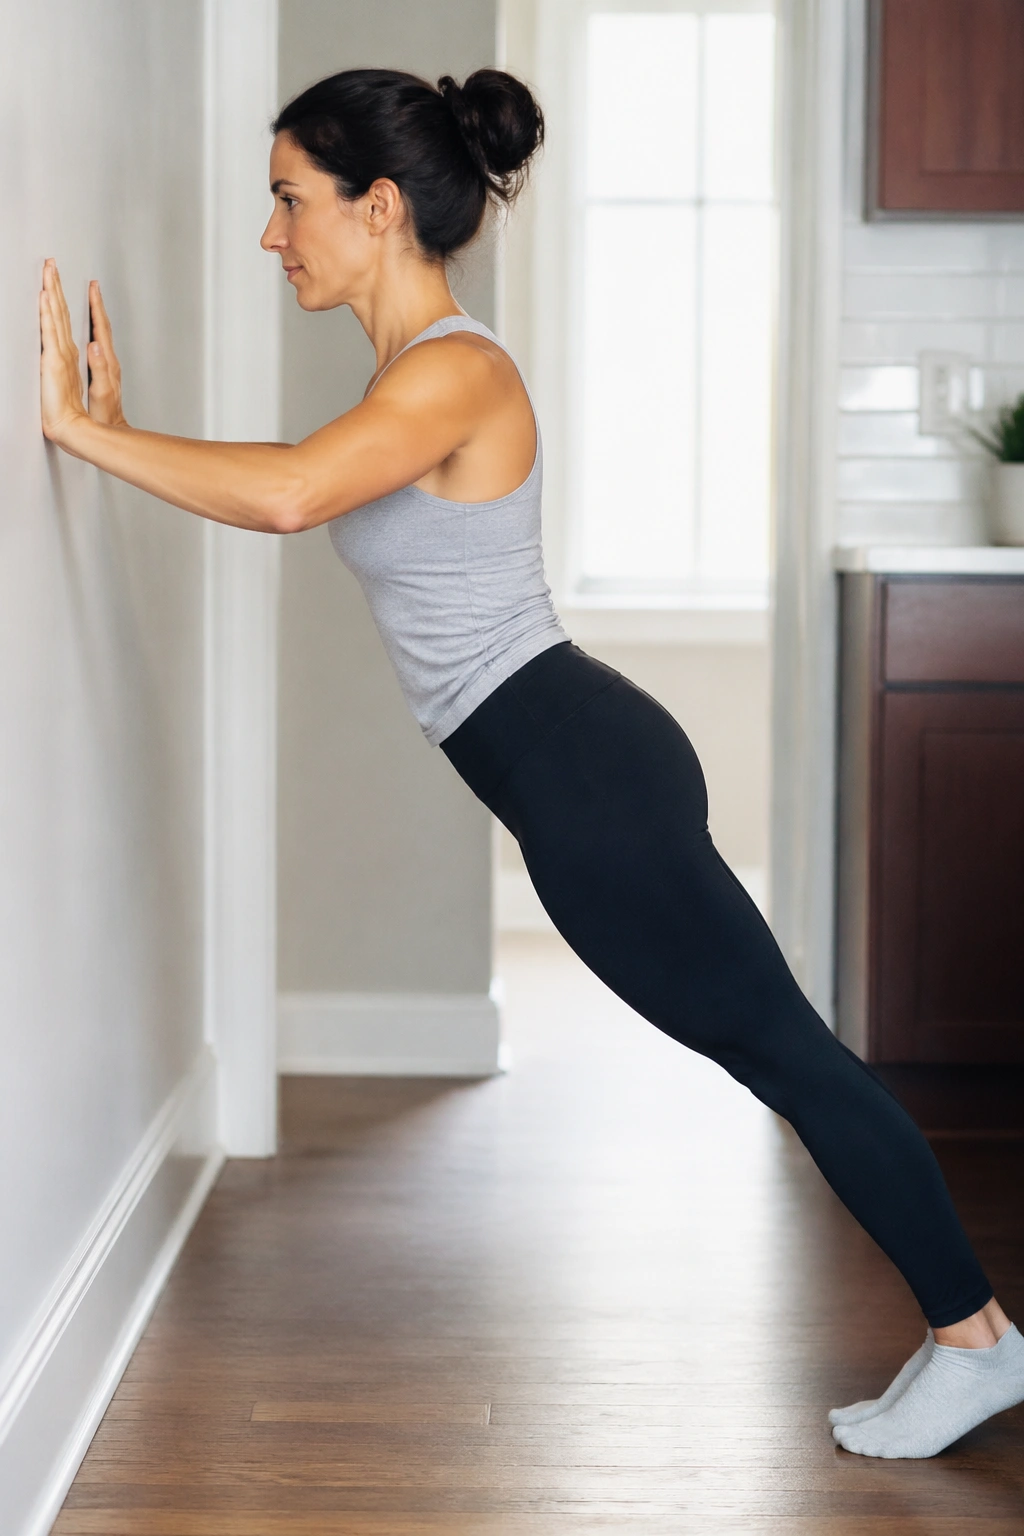
A wall plank is one of the easiest ways to practice plank shape without dumping pressure into the wrists, shoulders, or low back. It also gives beginners a clearer line to work with than a floor plank.
Stand facing a wall and place your hands flat at shoulder height. Walk your feet back until your body makes one straight line from heels to head. Press the wall away, draw the ribs in, and keep the chin slightly tucked. Hold for 20 to 40 seconds.
Compared with a floor plank, this version lets you learn the shoulder position without fighting gravity so hard. That matters. If the back starts sagging, step closer to the wall. If the shoulders creep up, slide them down the back and breathe out longer. Three holds are enough.
This is a good place to build confidence before moving to the mat. No drama. Just clean shape.
19. Saw
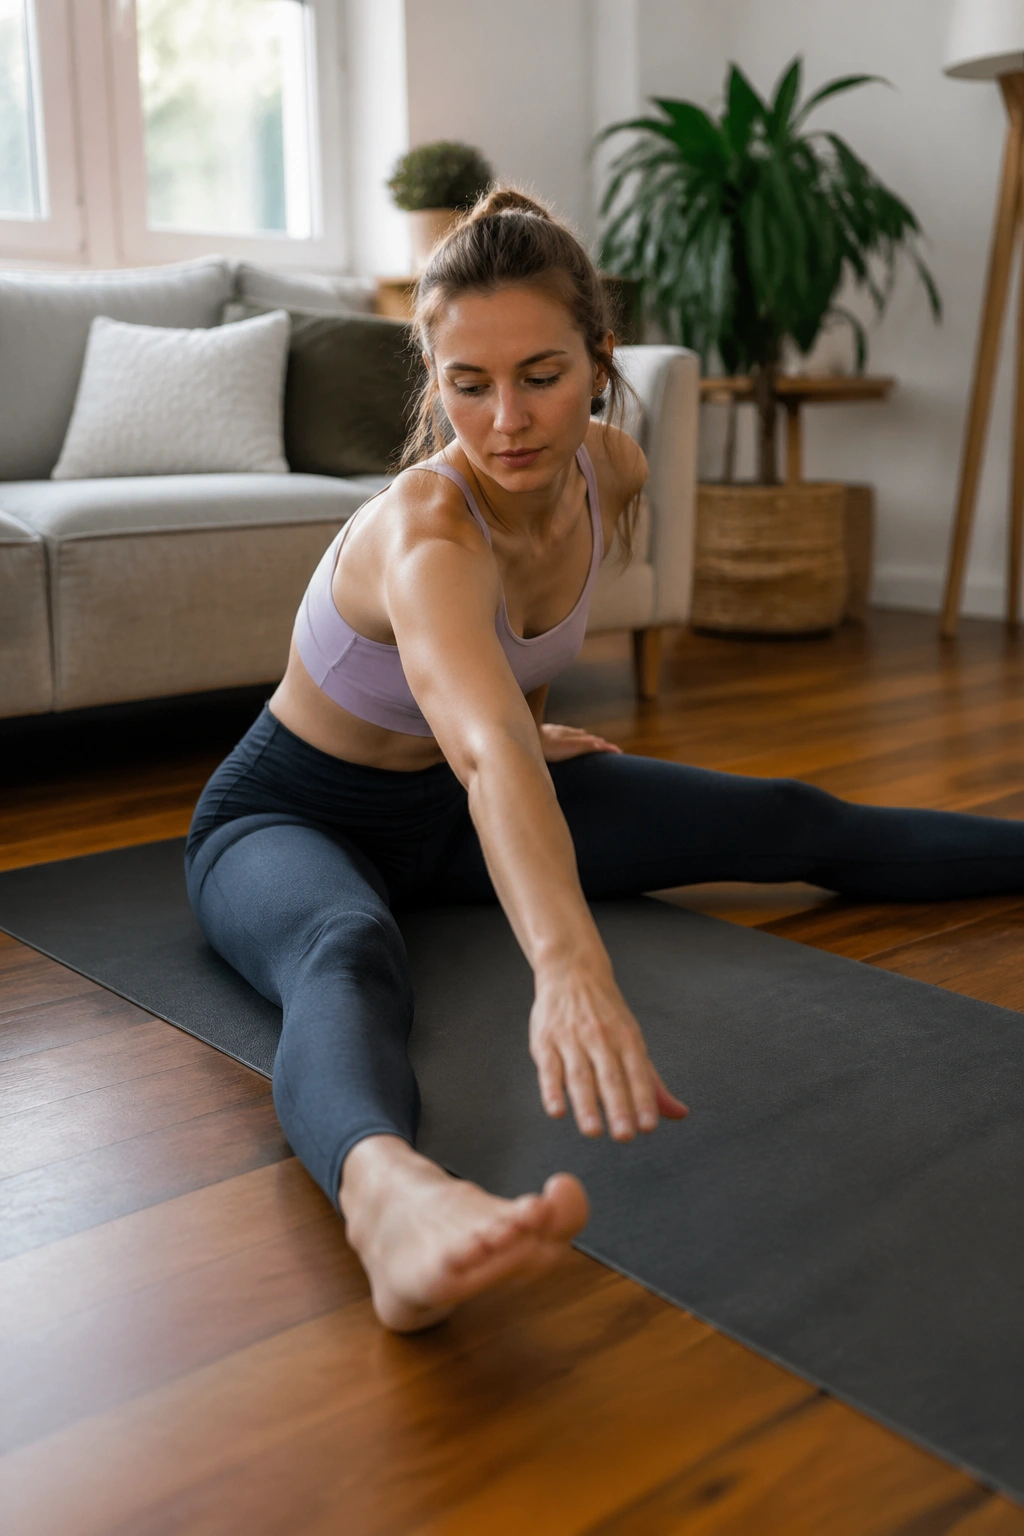
The saw has a funny name for a move that feels so tidy when it works. You sit tall, twist, and reach toward the opposite foot, and the spine gets both rotation and hamstring work in one go.
Sit with your legs wide or just a little apart if wide feels too aggressive. Open the arms out to the sides, twist the trunk, and reach the front hand toward the opposite little toe while the back hand reaches behind you. Inhale to grow taller, exhale to reach farther. Come back up and switch sides.
How to keep it from turning into a shrug
Keep the shoulders down and let the waist do the folding. If the knee bends a lot or the back rounds hard, bring the legs in a little closer. The stretch should feel long through the back of the leg and open through the ribs, not jammed in the neck.
Try 3 rounds per side. Slow is better here. A rushed saw turns into a reach, and the reach misses the point.
20. Mermaid Stretch
Mermaid is the kind of finish that leaves you feeling taller without asking for much from the joints. After all the core work and spine control, a side bend can feel like somebody opened a window.
Sit with your legs folded to one side and stack yourself upright on the sitting bones. One hand anchors lightly on the floor, the other arm floats up and over in a smooth arc. Keep both seat bones as grounded as you can, breathe into the side ribs, and let the top arm reach long instead of collapsing forward.
If your lower back feels cranky, keep the bend small and focus on length rather than depth. Hold each side for 2 or 3 slow breaths. It’s a calm move, but it has real value because it gives the trunk a chance to lengthen after all that stabilizing work.
A simple home Pilates routine usually feels better when it ends here — or somewhere close to here — because the body gets one last chance to open up before you stand and walk away.
