



You do not need dumbbells, bands, or a polished home gym to get a workout that leaves your legs shaky and your breathing honest. A beginner can build real fitness with floor space, a wall, and a timer. The trick is choosing movements that are simple enough to repeat, but not so easy that you drift through them.
Most people make home workouts harder than they need to be. They jump straight to burpees, then wonder why their knees, wrists, and motivation complain. Better to start with no equipment workouts for beginners at home that teach you how to squat, brace, push, hinge, and recover without feeling like punishment.
A good beginner session should feel clear. You should know where your feet go, what your ribs are doing, and when to breathe out. If a move makes you wobble, that is fine. If it makes you wince, that is not.
Start with the easiest one and keep the rest for later. Simple wins at first, and they stack fast.
1. Marching Intervals That Wake Up the Whole Body
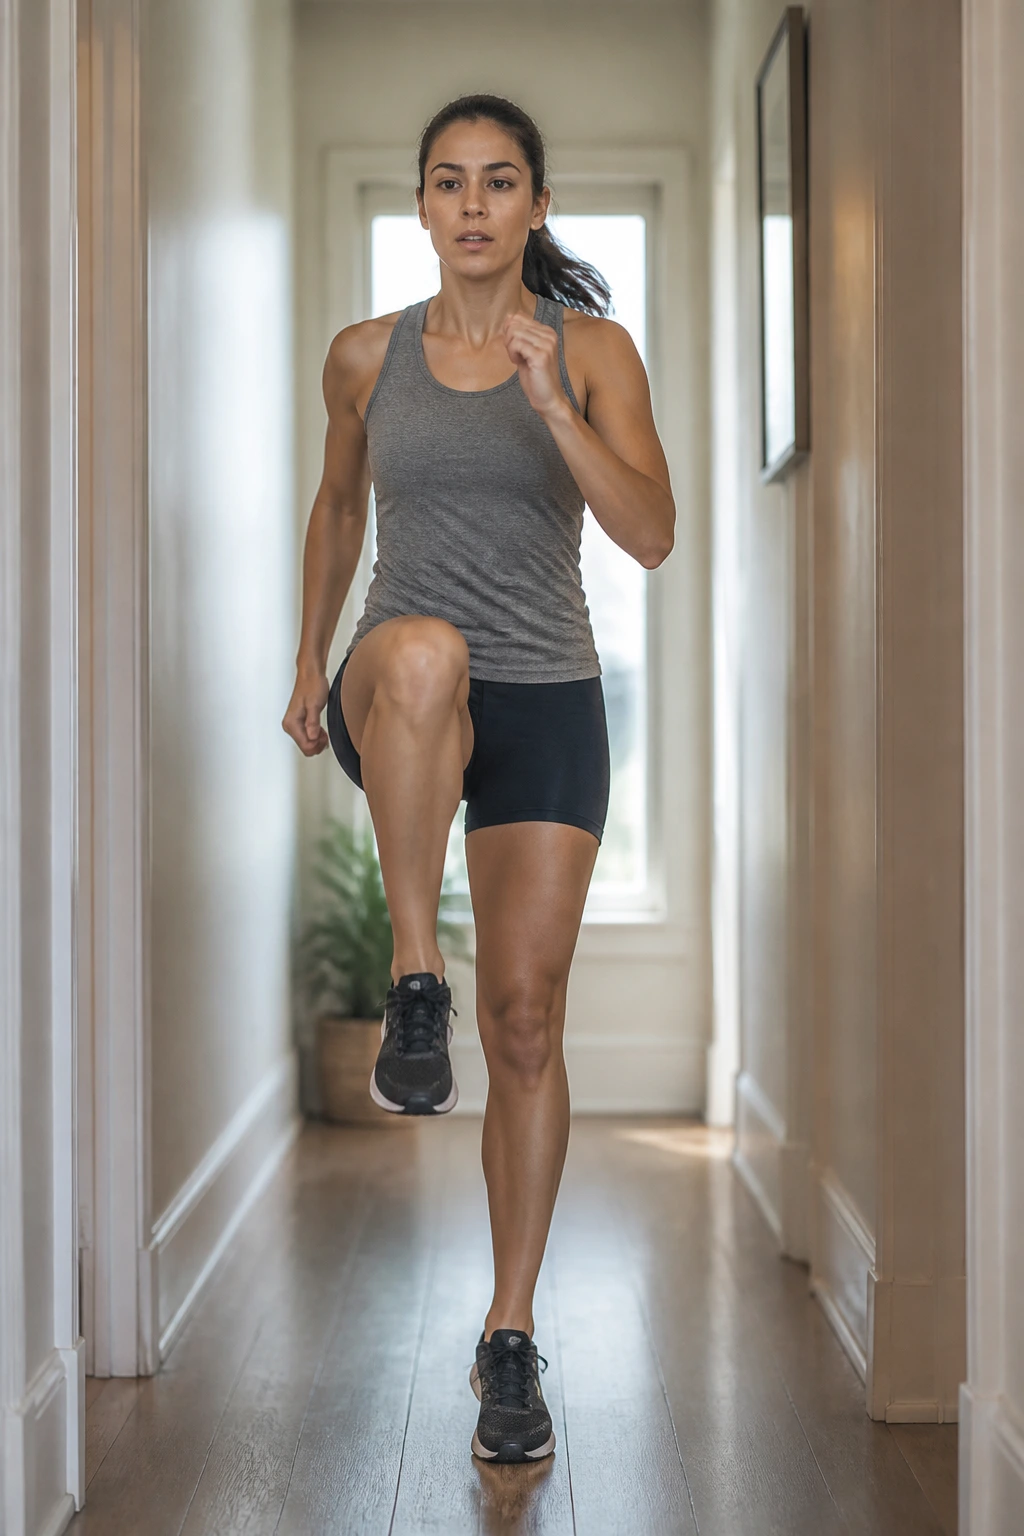
Marching sounds tame. It isn’t, once you keep the knees honest and the arms moving like they mean it. I like this one as a first-minute workout because it gets blood moving without asking your joints to negotiate a jump.
Why it works
Marching raises your heart rate, but it also teaches rhythm. You are not flailing around. You are pressing one foot down, lifting the other knee, and keeping your chest tall while your arms swing in a controlled way.
Try 30 seconds of marching, 15 seconds of easy steps, and repeat for 6 to 10 rounds. If that feels too mild, lift the knees a little higher or add a sharper arm drive. If it feels too hot, keep the steps smaller and breathe through your nose for the first two rounds.
- Keep your feet light, not noisy.
- Pull your ribs down so you do not lean back.
- Swing opposite arm and leg together.
- Stay in place or march forward and back in a small hallway.
Best cue: move like you are waking up, not sprinting to catch a bus.
2. Wall Push-Ups That Build Early Upper-Body Strength
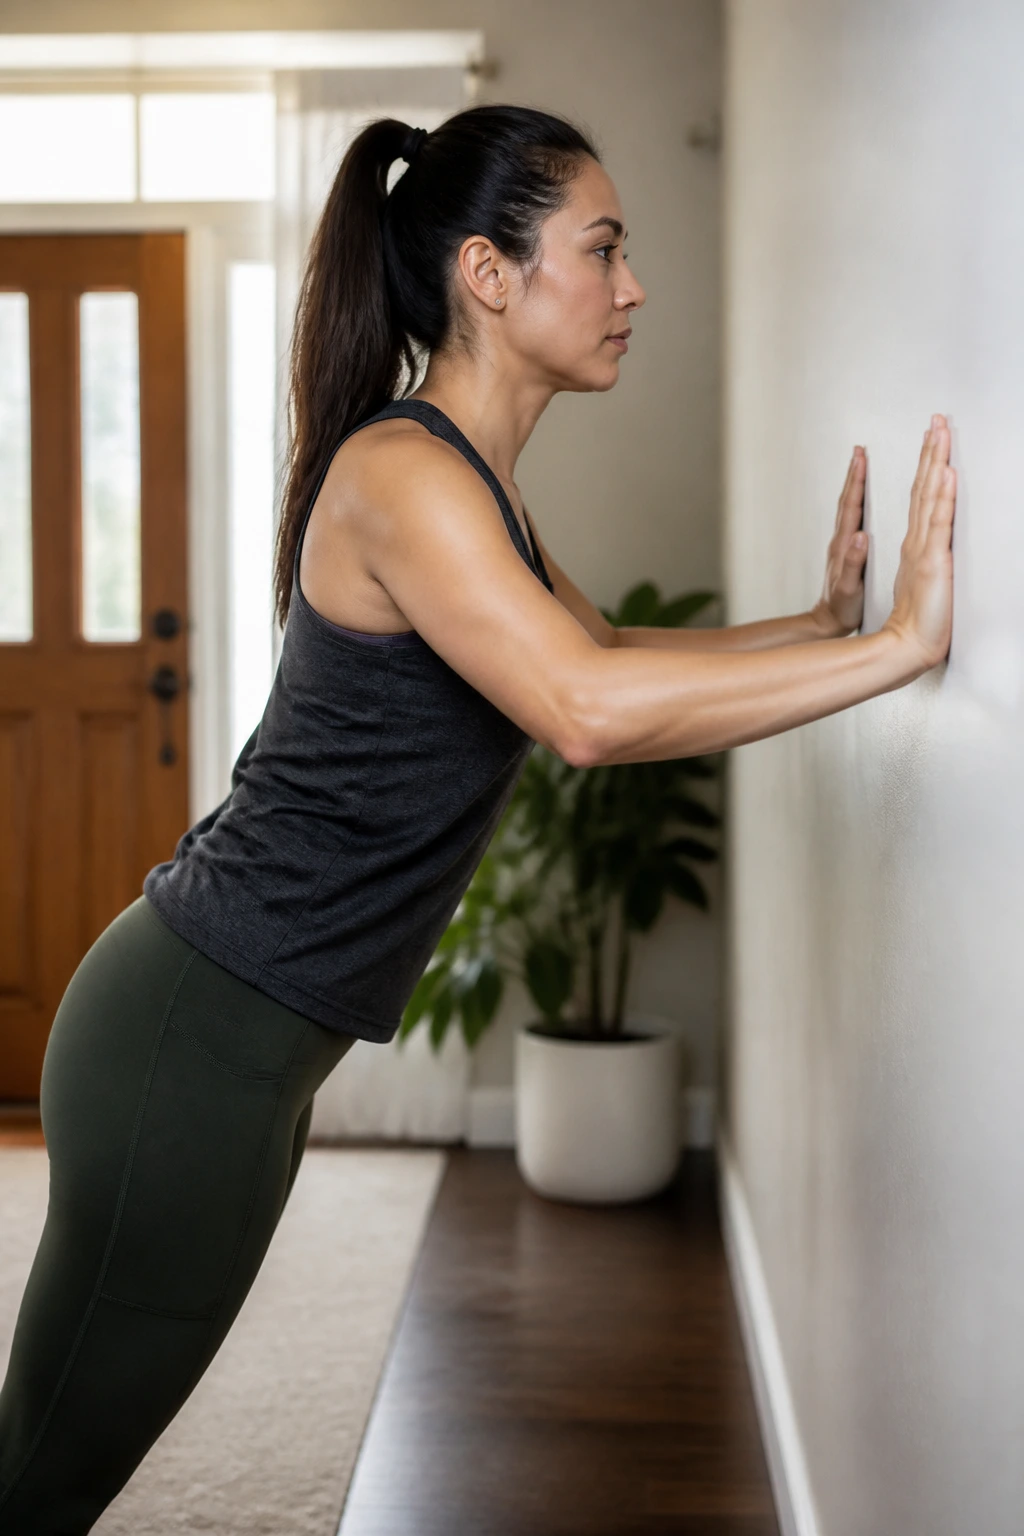
Can wall push-ups actually build strength? Yes — if you treat them like a real exercise, not a warm-up you rush through. The wall gives you enough support to learn the push pattern without dumping all your weight into your wrists and shoulders.
Stand an arm’s length from a wall, place your hands at chest height, and walk your feet back until your body forms a straight line. Lower your chest toward the wall for 8 to 12 slow reps, then press away hard enough that you feel your triceps and chest switch on. Keep your elbows about 30 to 45 degrees from your sides. Wide elbows get sloppy fast.
A beginner can do 2 to 4 rounds, resting 30 to 45 seconds between sets. If that feels too easy, move your feet a few inches farther from the wall. If your lower back arches, step closer. That tiny adjustment changes everything.
Simple. Useful. No drama.
3. Slow Squats That Teach Control
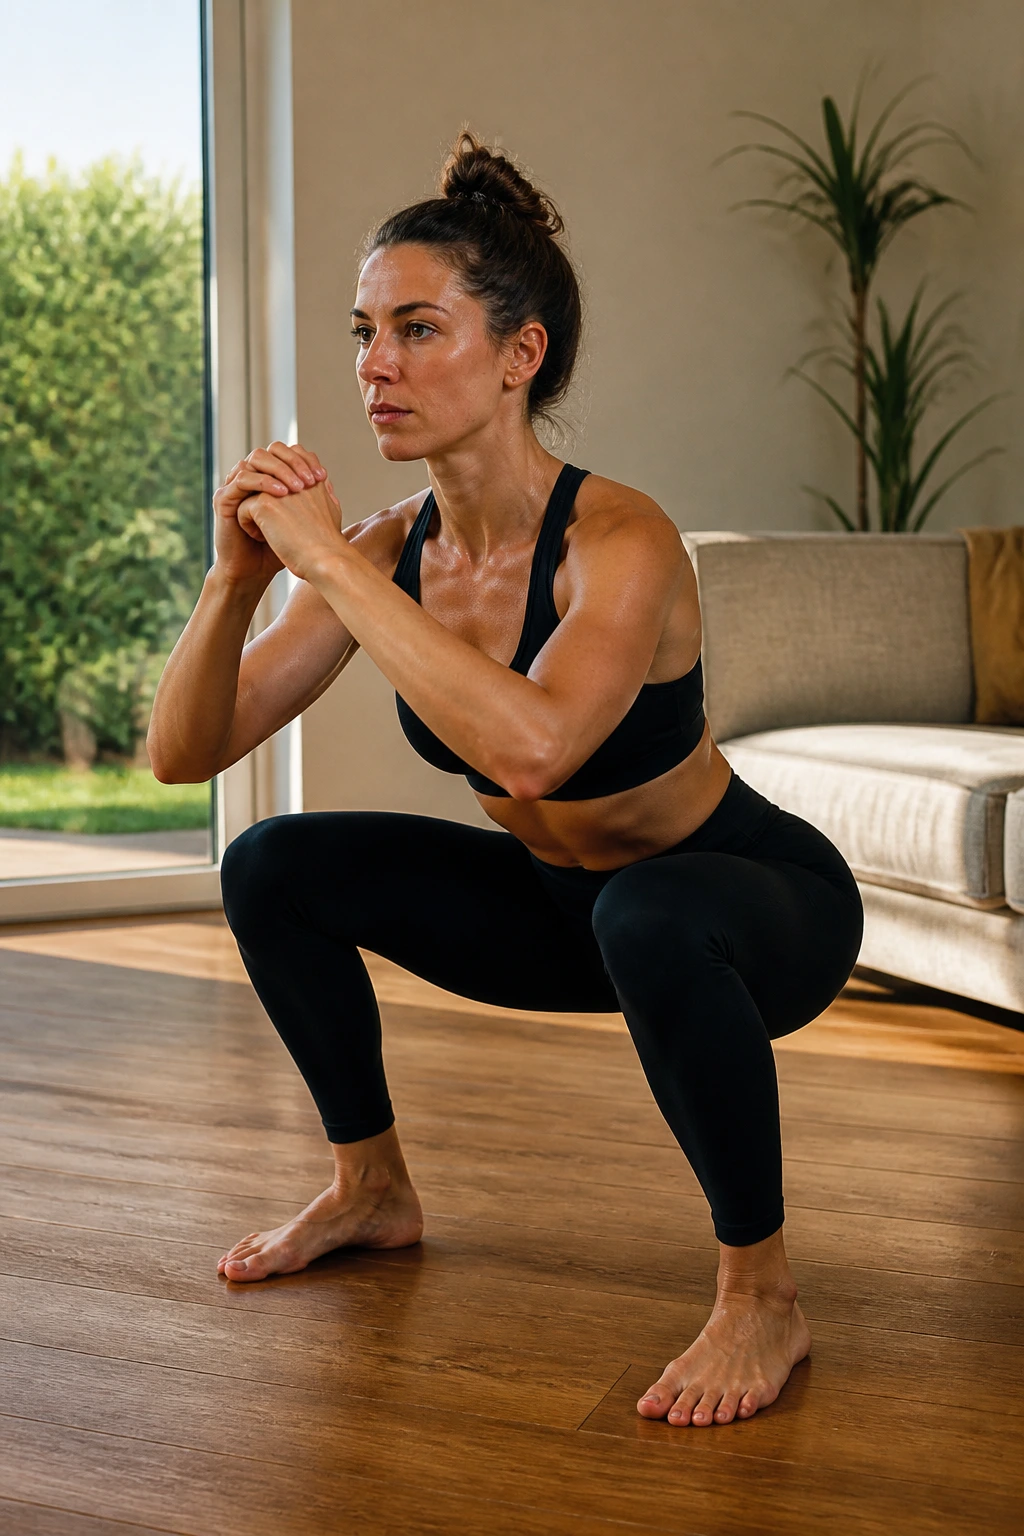
If a squat makes your knees cave or your heels pop up, slow it down and use tempo. That one change turns a sloppy rep into a lesson your legs can actually use. Tempo squats are a beginner’s best friend because they make you notice what your hips, ankles, and feet are doing.
What to do
Use a 3-second lower, 1-second pause, and strong stand-up. Do 5 to 8 reps for 3 rounds. Keep your feet about hip-width apart, toes turned out just a little, and press your whole foot into the floor. The pause at the bottom is where the work gets honest.
What to feel
- Pressure through the heels and the big toe.
- Hips moving back before knees bend deeply.
- Chest staying open instead of collapsing forward.
- Legs doing the work, not the low back.
If you want a gentler version, squat halfway down and own that range first. Depth comes later. Control comes first.
4. Glute Bridges That Light Up the Back of the Body
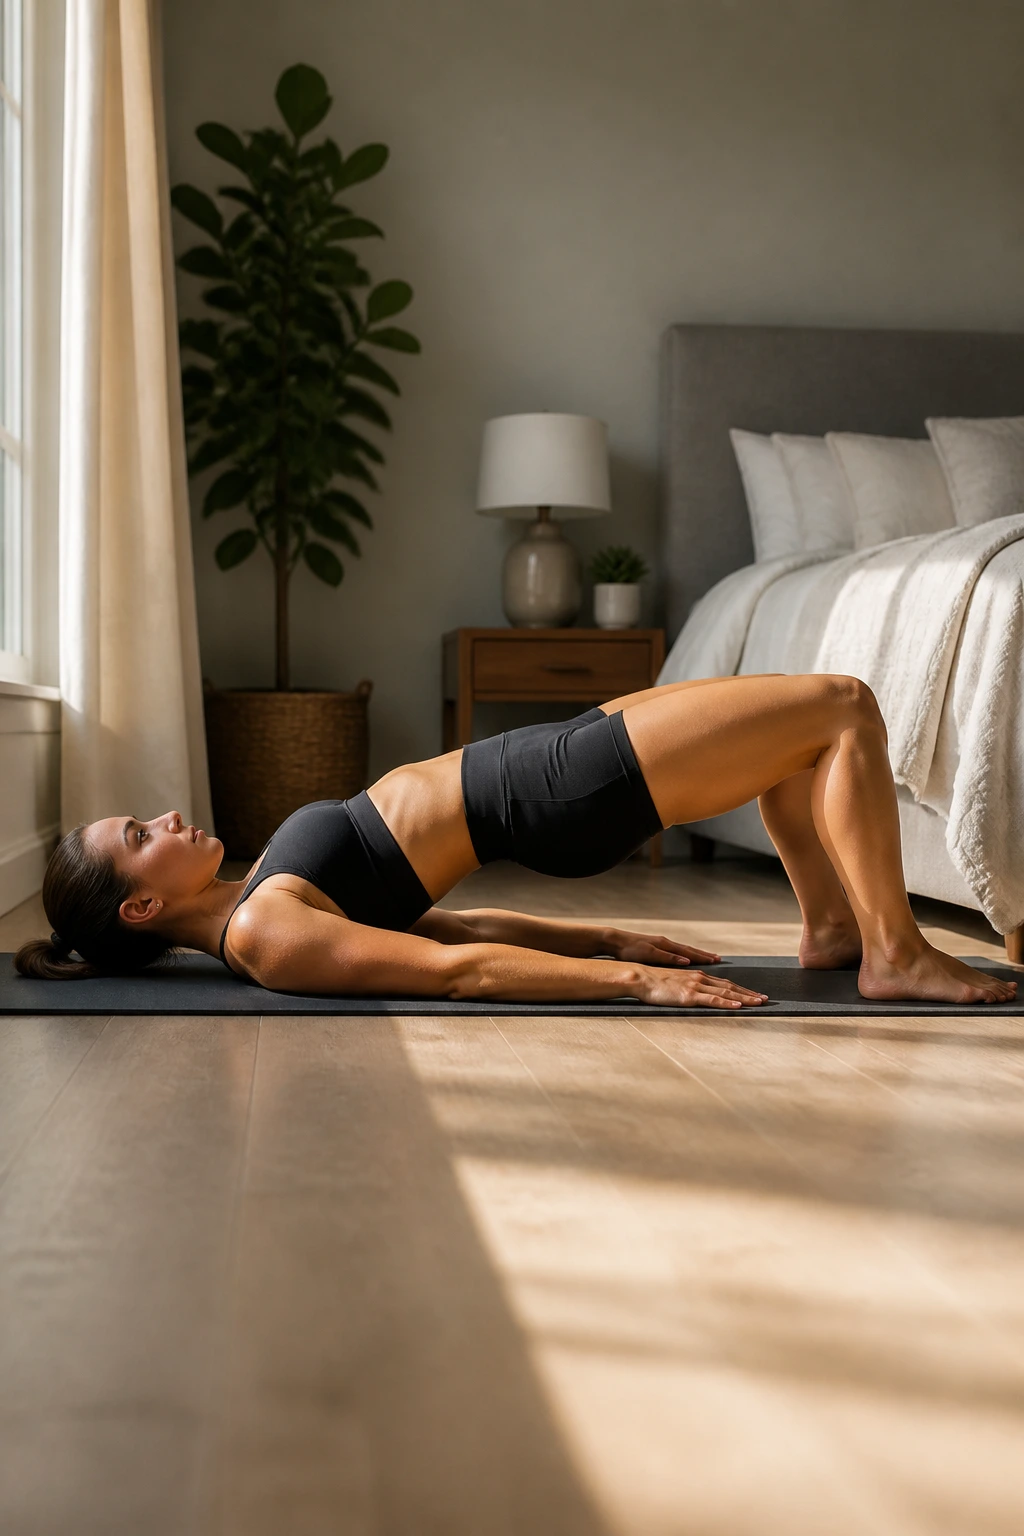
The floor feels honest here. No momentum. No sneaking. Just your glutes, your hamstrings, and a little bit of patience while you drive your hips up and hold them there.
Lie on your back, knees bent, feet flat about a foot from your hips. Press through your heels, squeeze your glutes, and lift until your body forms a straight line from shoulders to knees. Do 10 controlled bridges, then hold the top for 10 seconds, then finish with 10 small pulses. That sequence is sneaky-hard for a beginner.
Keep your ribs down so you do not turn it into a backbend. If your hamstrings cramp, move your feet a little farther away from your hips and reduce the height of the lift. You want the glutes to do the heavy lifting here, not the back of your thighs taking over.
One round feels pleasant. Three rounds feels like work.
5. Dead Bugs That Flatten the Lower Back
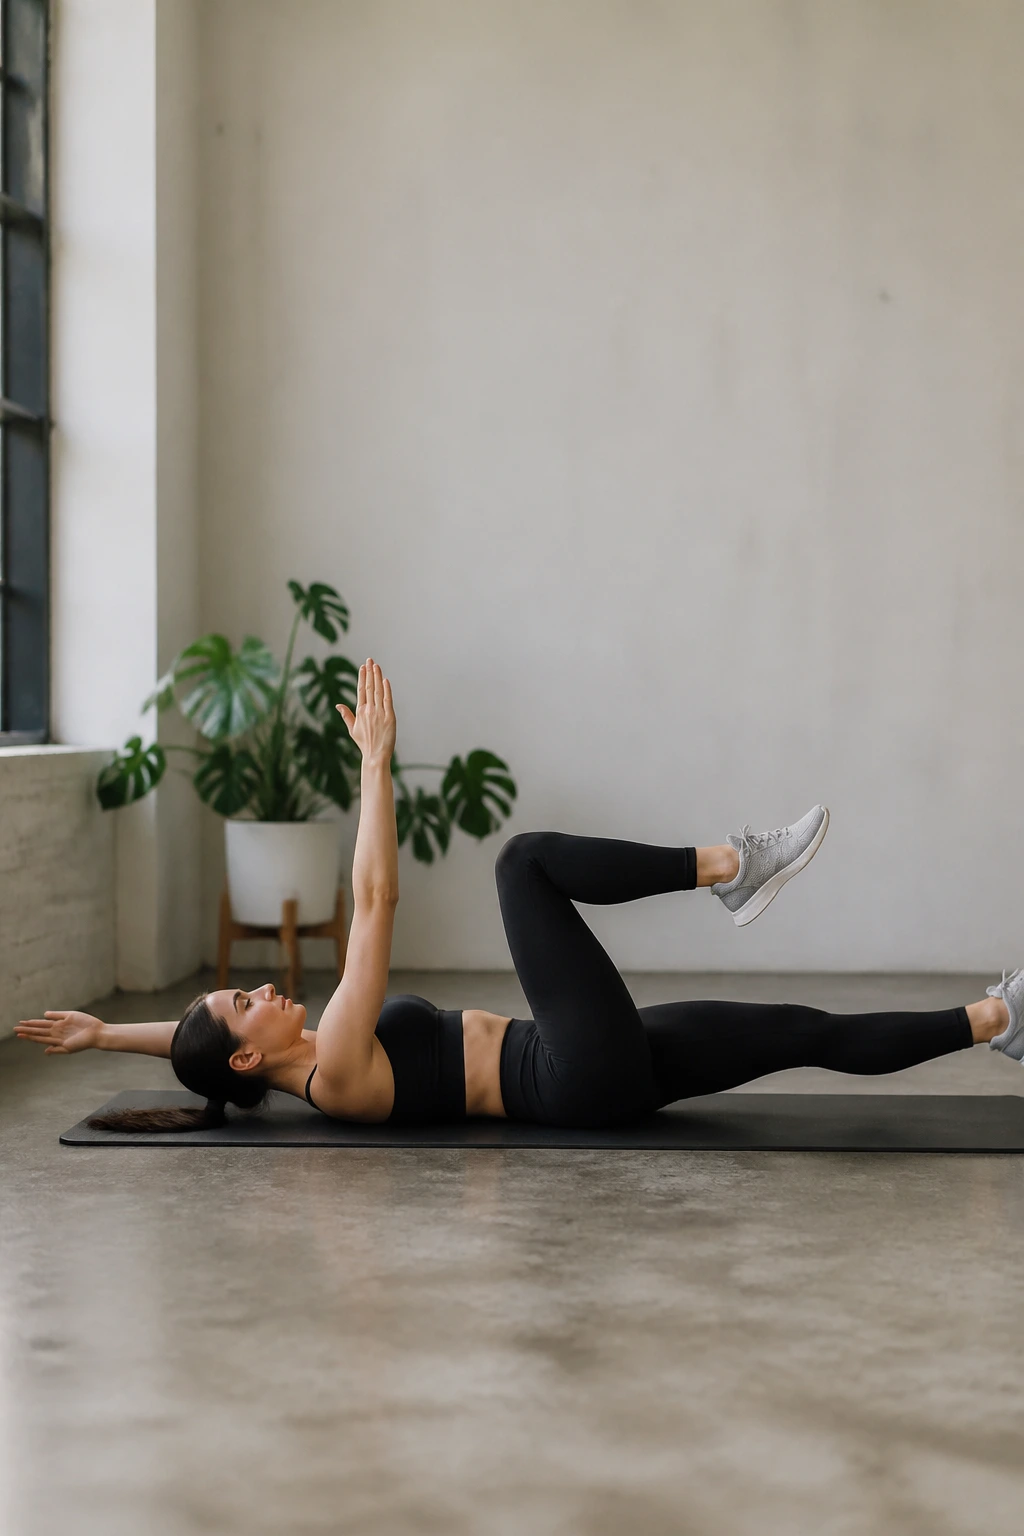
Why does the dead bug show up in so many beginner plans? Because it teaches you to brace without asking for a perfect plank or a long hold on your hands. It is a floor exercise with a small range and a big payoff.
Lie on your back with your arms reaching toward the ceiling and your hips and knees bent at 90 degrees. Press your lower back gently into the floor, then lower the opposite arm and leg at the same time. Come back to center and switch sides. Do 6 slow reps per side for 3 rounds.
How to scale it
If your lower back pops up, shorten the leg reach. If your shoulders feel tense, keep the arms bent instead of locked straight. If coordination is the problem — and it often is — move slower than you think you need to.
- Exhale as the arm and leg extend.
- Keep the ribcage quiet.
- Stop the leg before the back arches.
- Rest 20 to 30 seconds between rounds.
The whole move should feel controlled. If it starts to look like a bicycle crash, slow it down.
6. Reverse Lunges That Train Balance
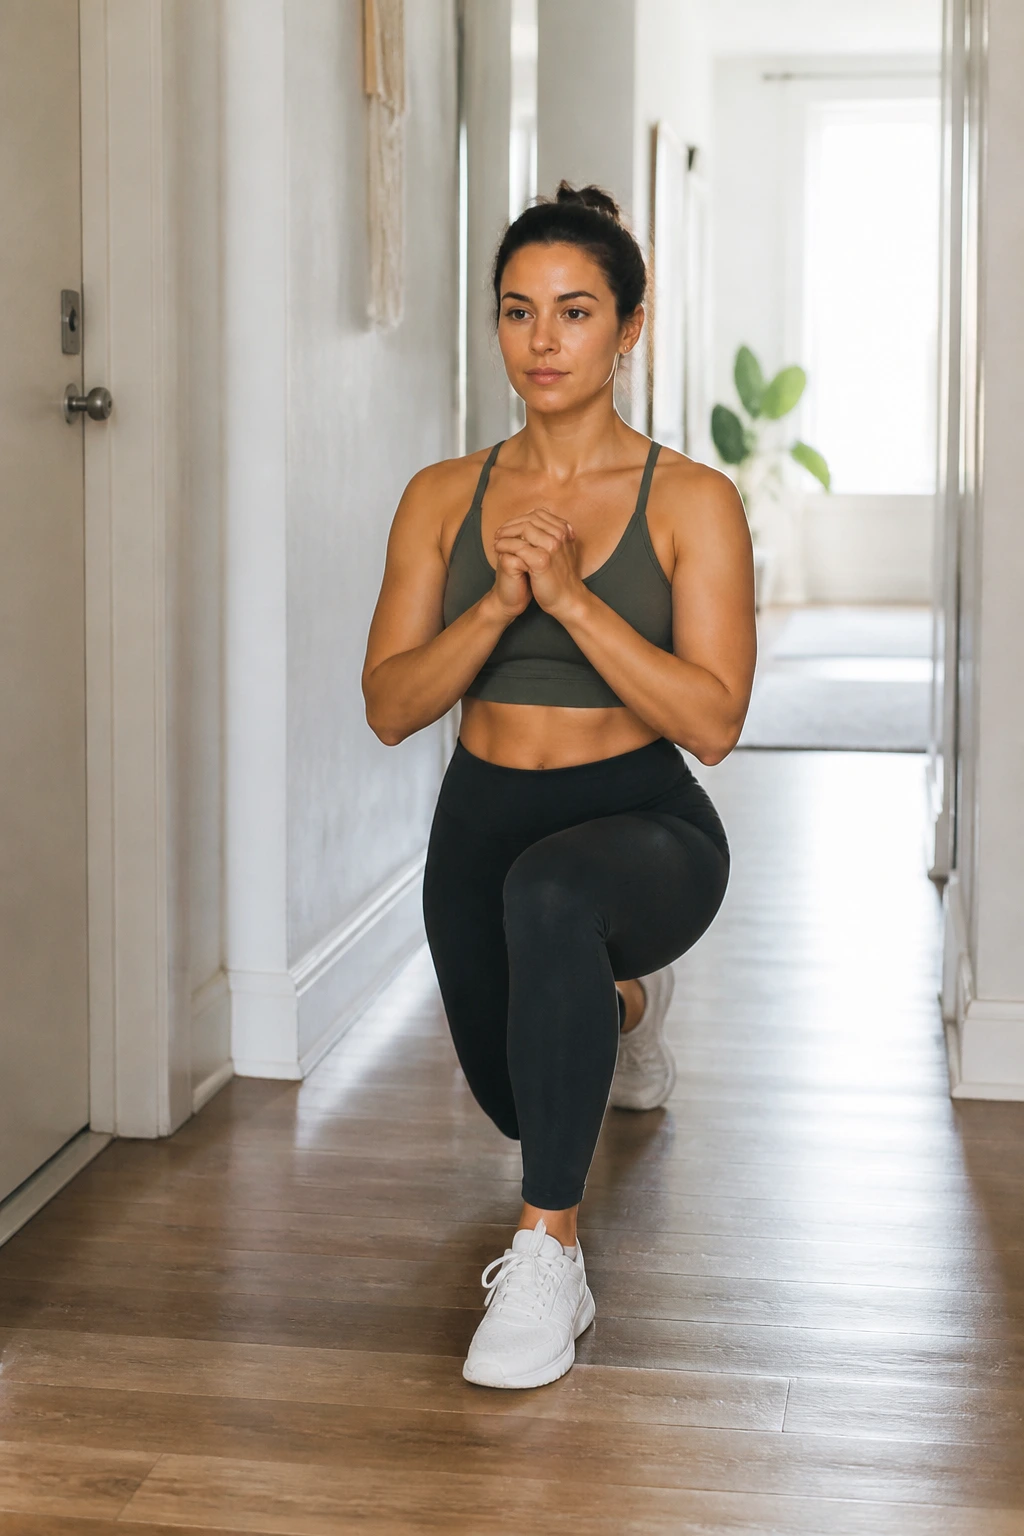
Reverse lunges are kinder than forward lunges, and that matters when your balance is still a little shaky. Stepping back gives you more room to find your footing, and the front leg does most of the work without the same jolt to the knee.
Stand tall, step one foot straight back about 18 to 24 inches, and lower until both knees bend. Keep your front heel down and your chest stacked over your hips. Push through the front foot to stand back up. Do 6 reps per side for 2 to 4 rounds.
The move gets easier when you keep the step narrow and the torso tall. It gets messy when you wobble side to side or rush the descent. I prefer reverse lunges for beginners because they teach control before speed. Forward lunges have their place. This is not that place.
If your balance is rough, hover your back toes lightly on the floor at the bottom. You still get the pattern.
7. Low-Impact Jumping Jacks That Raise Heart Rate
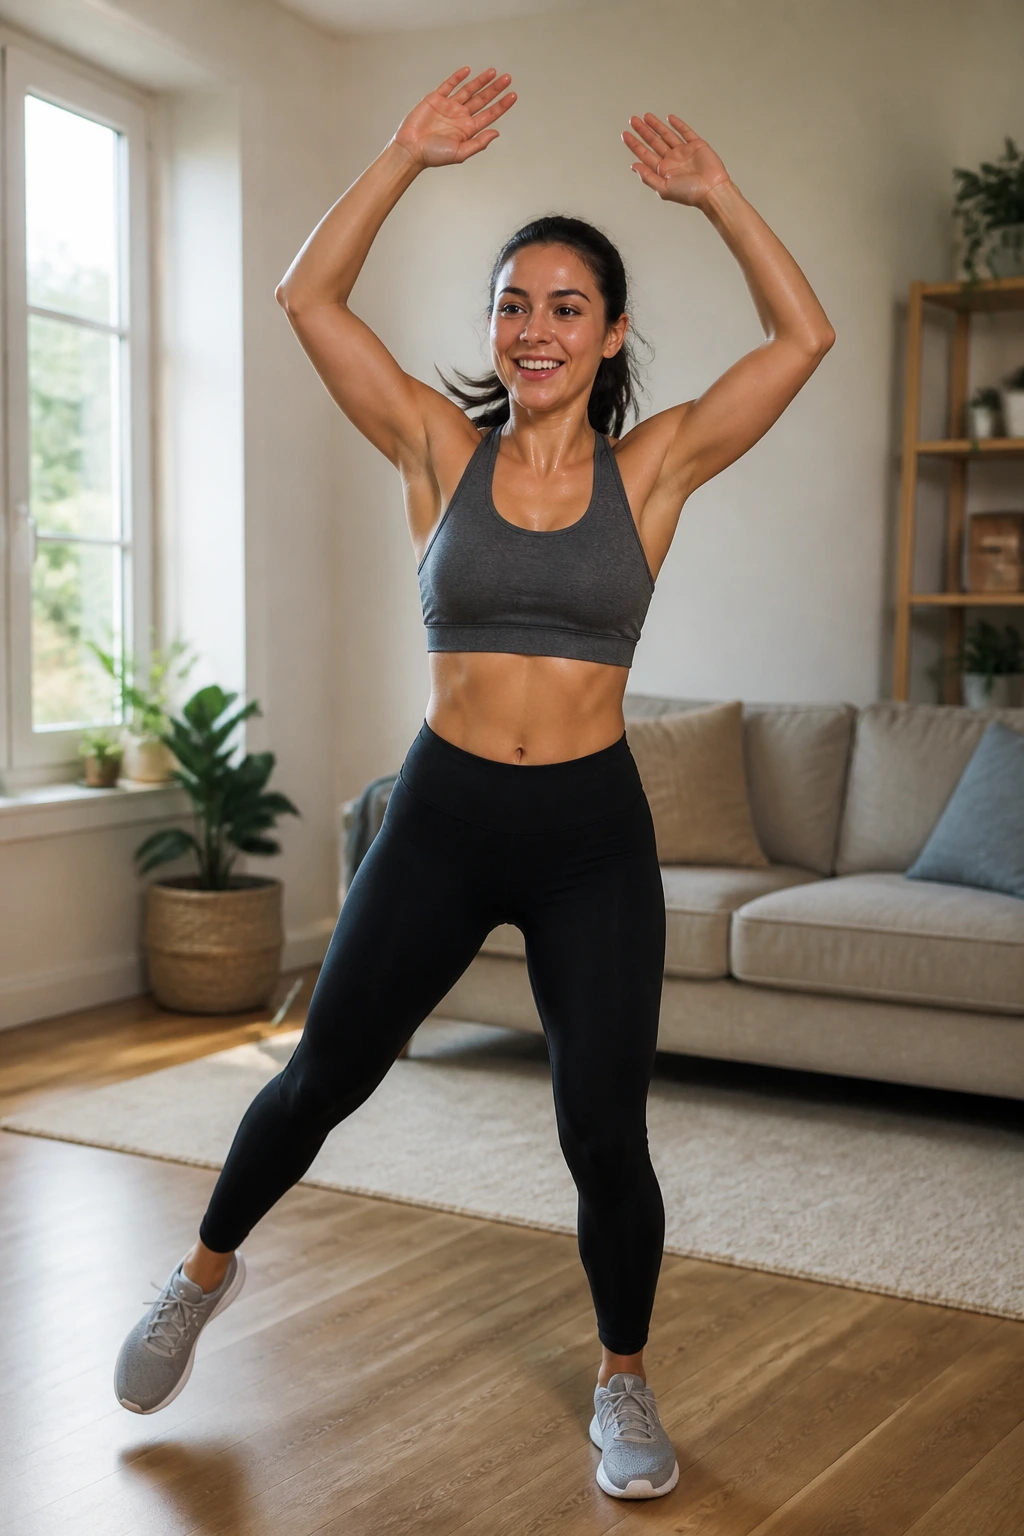
This is the workout that gets your pulse up without punishing your joints. Skip the jump, keep the rhythm, and you still get a real cardio hit.
Open one foot to the side while your arms sweep overhead, then step back to center and switch. That’s the low-impact jack. Do 30 seconds on, 30 seconds off, for 8 rounds, or keep going for 4 minutes straight if you want a steadier pace. The arms matter here. Lazy arms make the exercise feel half-finished.
Quick facts
- Great when your knees dislike jumping.
- Easy to pair with squats or push-ups.
- Good space needed: about one arm’s span on each side.
- Best done on a floor that does not slide.
If your shoulders tire before your legs do, keep the arms at shoulder height instead of overhead. That small cutback can save the set. And yes, it still counts.
8. Plank Shoulder Taps That Test a Quiet Core
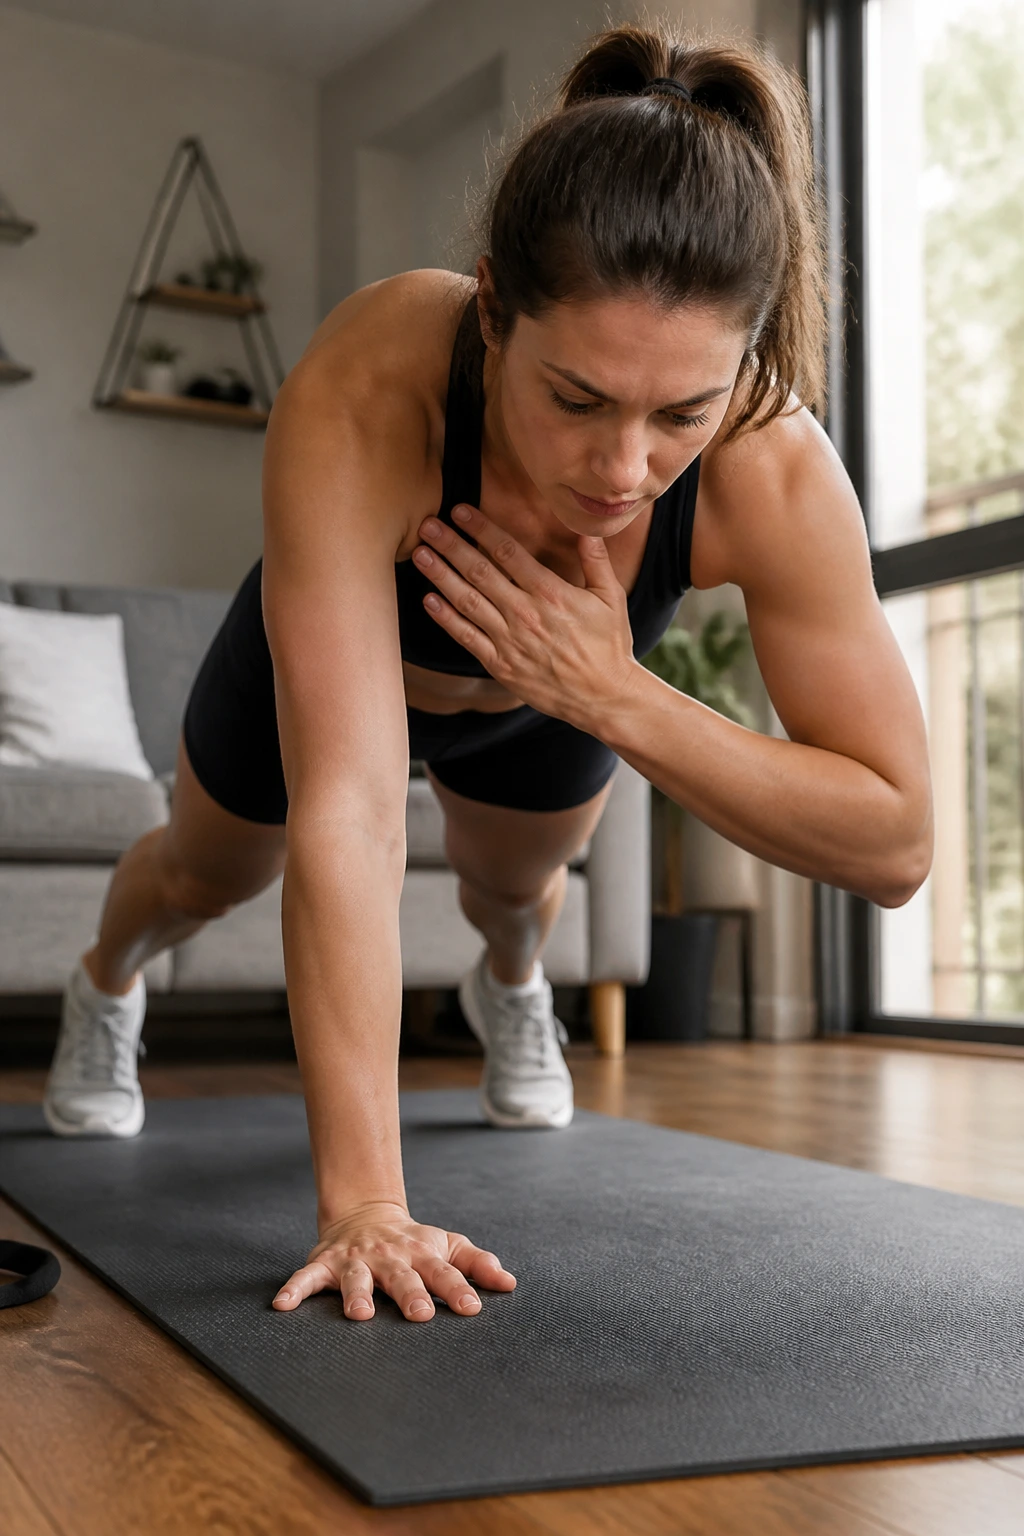
A plank with shoulder taps is not just a core move. It is a test of whether you can keep your hips from wobbling while your arms move, which is exactly the kind of control beginners need. Plain planks are fine. This version asks for more.
Start in a high plank with your feet a little wider than hip-width. Tap your right shoulder with your left hand, then switch sides. Go slow enough that your hips stay level. Aim for 10 taps per side for 3 rounds.
The temptation is to rush. Don’t. A slower tap gives your abs time to brace and your shoulders time to work without the whole body twisting like a doorknob. If your wrists complain, shift a bit more weight into your fingertips and spread the fingers wide.
A solid version looks boring from the outside. Good. That means it is working.
9. Bird Dogs That Build Stability
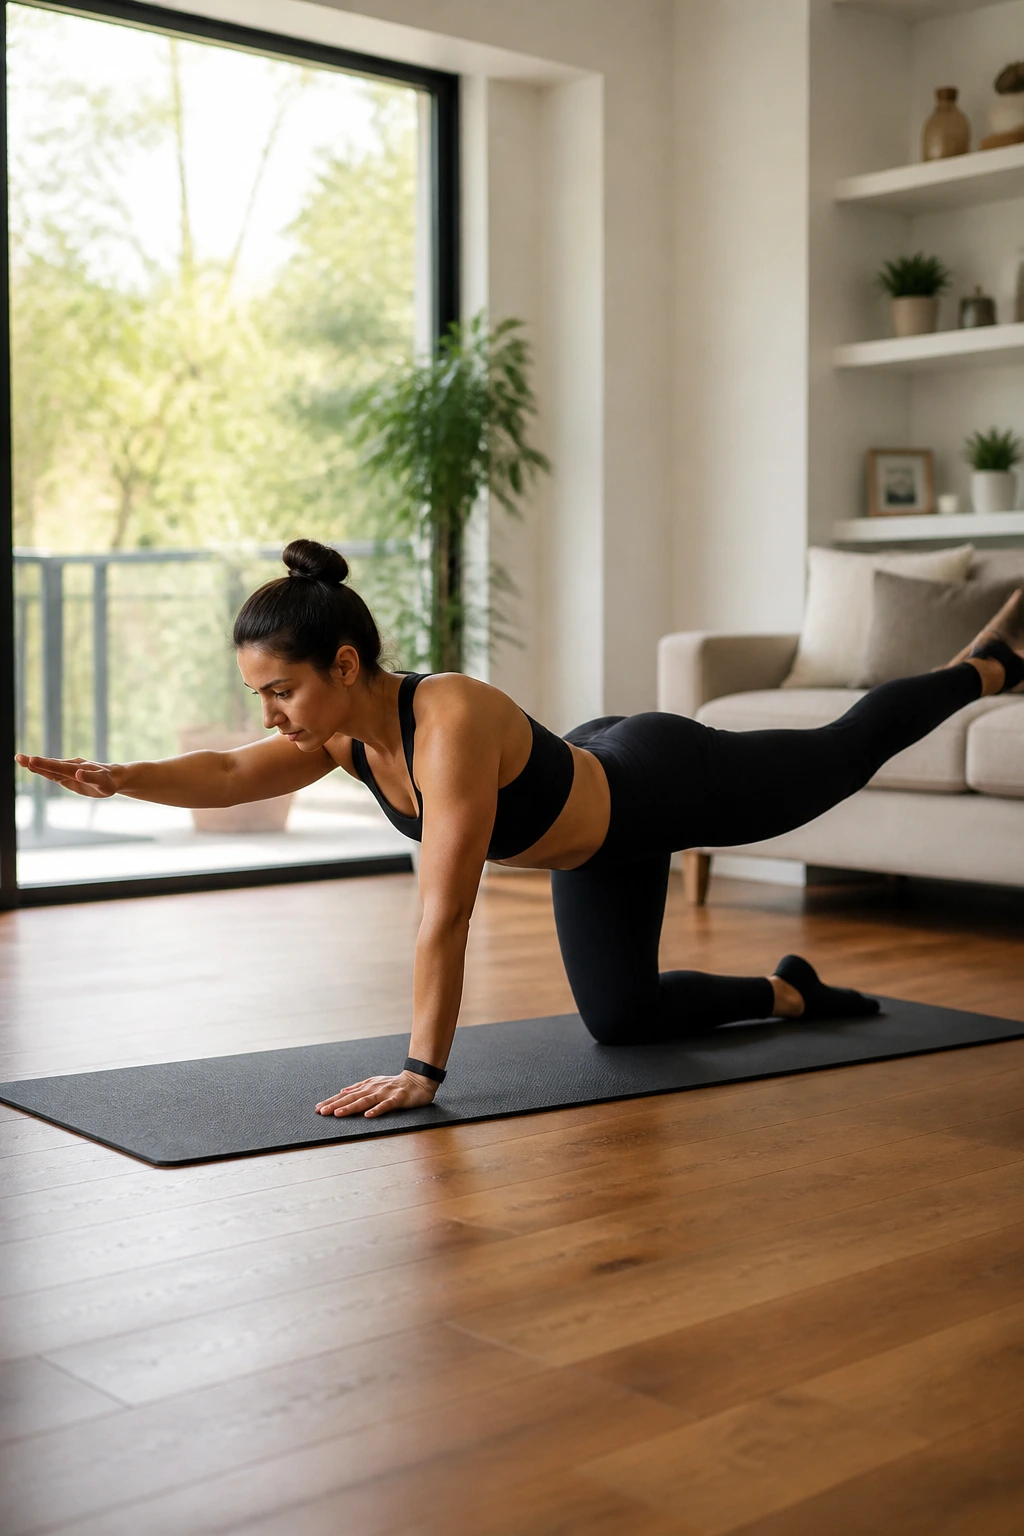
Picture being on all fours and lifting one arm and the opposite leg without tipping. That is bird dog training in its plainest form, and it teaches balance better than most people expect. The move looks gentle. It is not lazy.
Hands under shoulders, knees under hips. Reach your right arm forward and your left leg back, keeping both long and level. Hold for 2 to 3 seconds, then return to the floor and switch sides. Do 5 slow reps per side for 3 rounds.
A few details matter a lot:
- Keep the hips square to the floor.
- Reach long, not high.
- Keep your neck in line with your spine.
- Move with control, not speed.
If you want more challenge, hold each rep for 5 seconds. If you want less, leave the toes of the back leg lightly on the floor. That still teaches the pattern, and sometimes that is enough for the day.
10. Mountain Climbers Done as a Walk, Not a Sprint
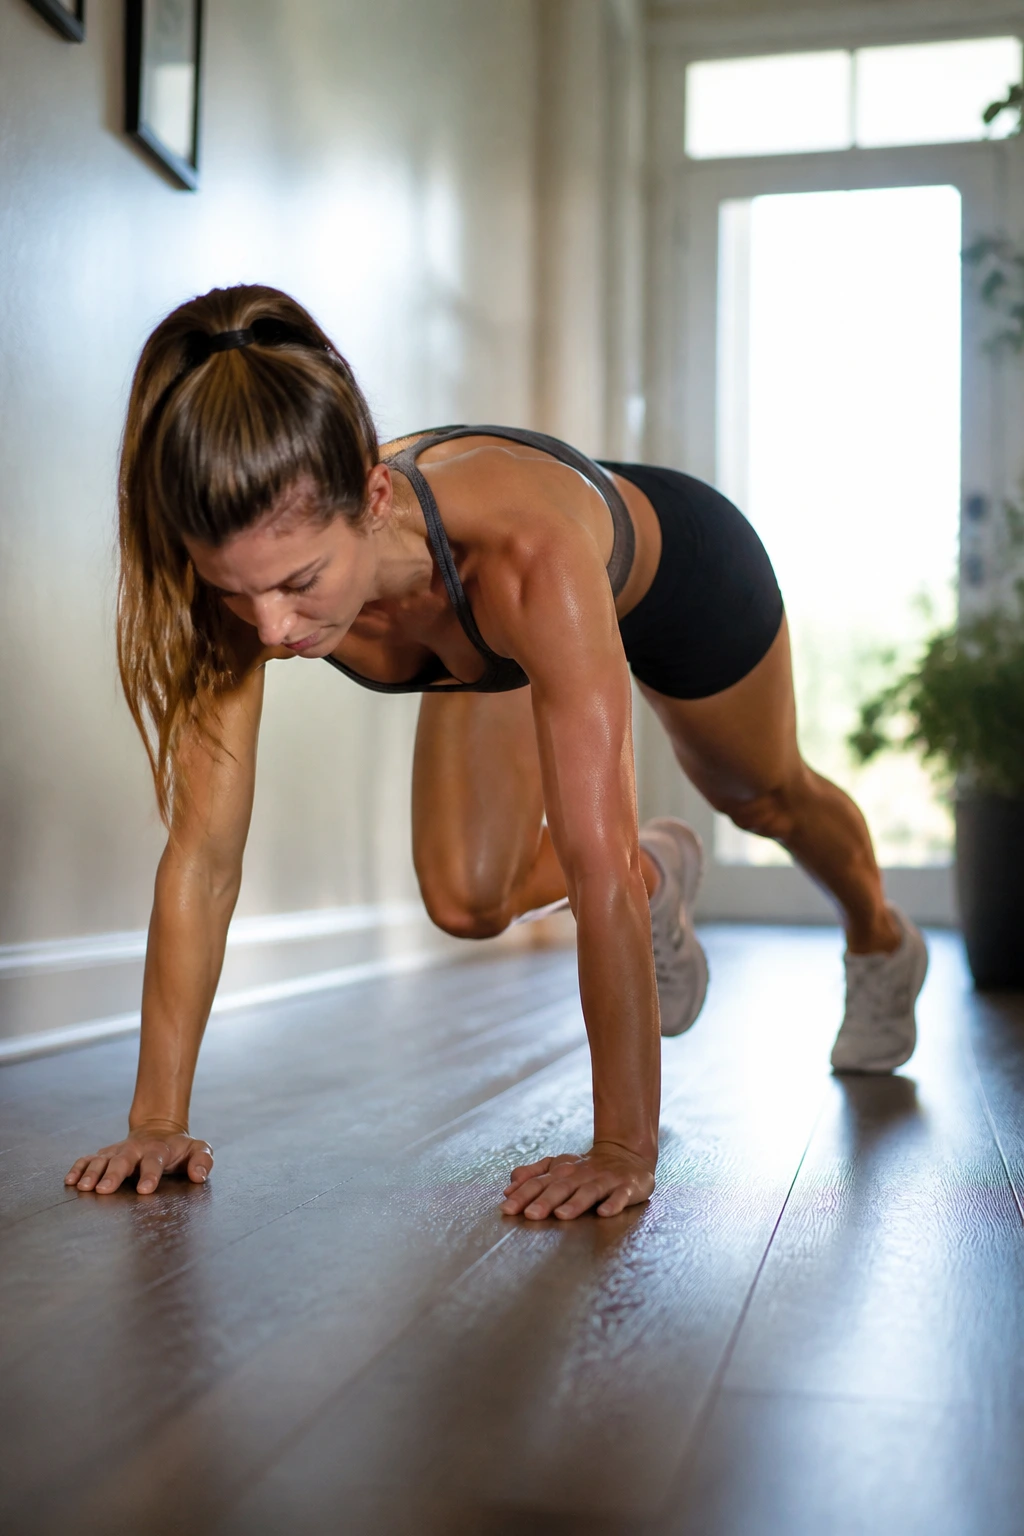
How do you make mountain climbers beginner-friendly? Slow them all the way down. The point is not to race your feet. The point is to keep your trunk steady while your knees move.
Start in a high plank. Step one knee toward your chest, put it back, then switch sides in a deliberate walking pattern. Do 20 total knee drives per side or work for 30 seconds, then rest for 20 to 30 seconds. Keep your hands under your shoulders and your hips low enough that you do not look like a tent.
How to use it
Use mountain climbers as a cardio burst between strength moves. They fit well after squats or push-ups because the heart rate is already up. If your shoulders fatigue, shorten the set and keep the core tight.
The sneaky part is the stillness. Fast climbers can turn into noisy leg swings. Slow climbers teach control, and control tends to hold up better when the workout gets harder.
11. Side-Lying Leg Lifts for Hips That Work Hard
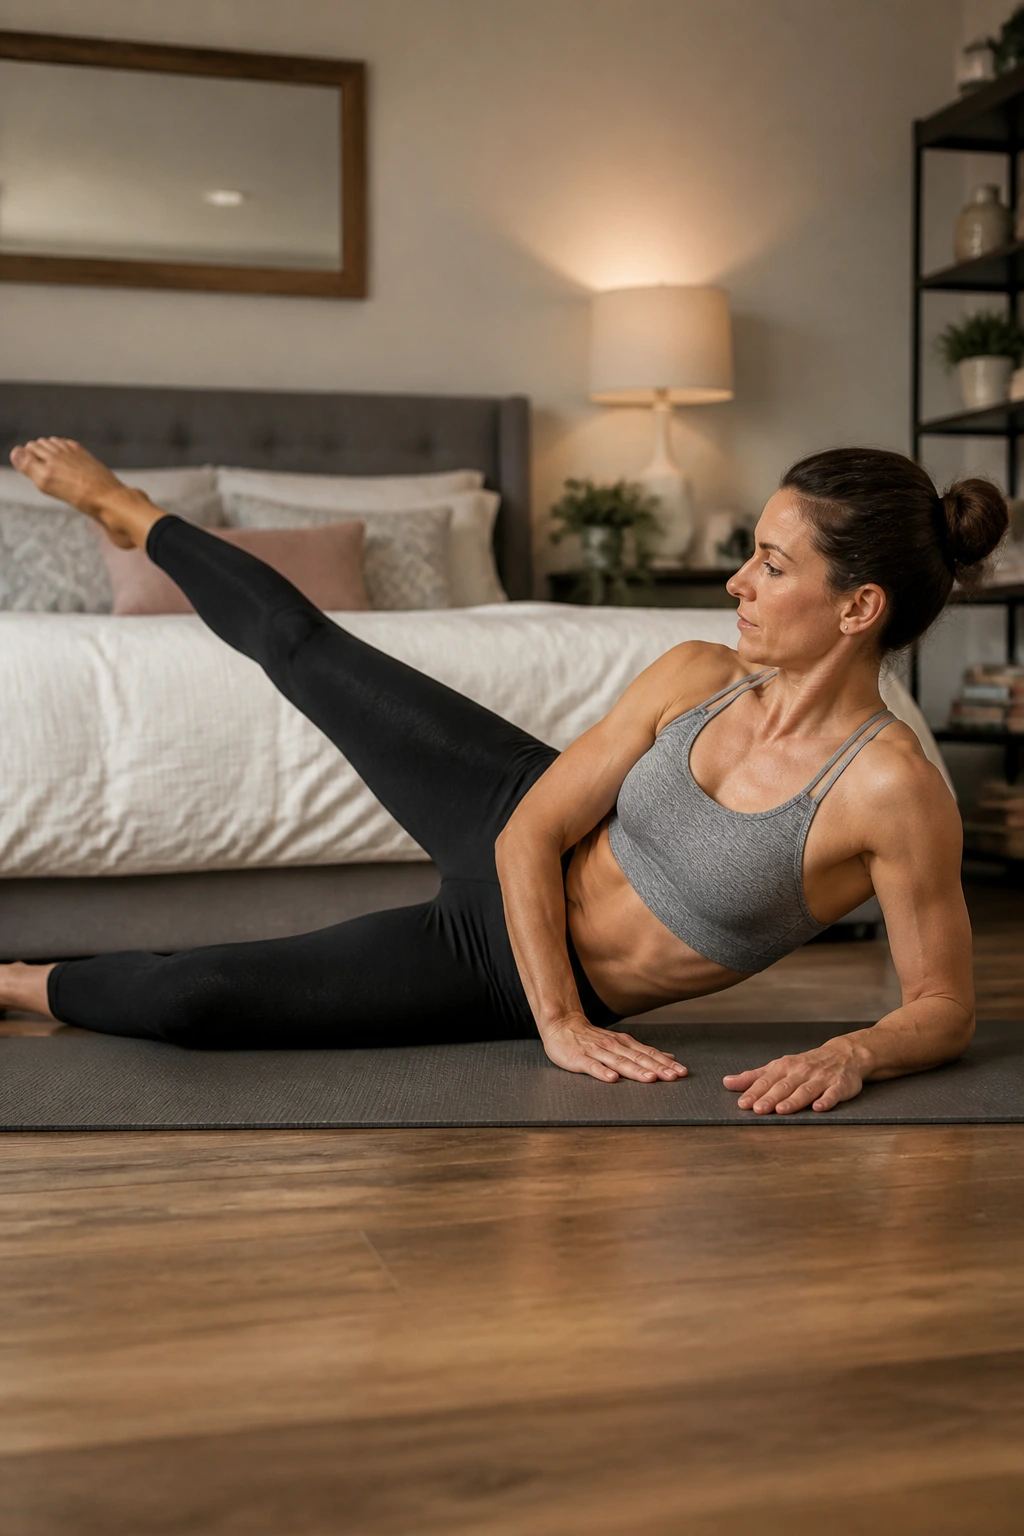
Lie on your side and you find out fast whether your hip is awake or not. Side-lying leg lifts are one of those moves that look tiny and feel sharper than expected when you do them well.
Stack your hips, bend the bottom leg slightly, and lift the top leg 12 times, then add 12 small circles and finish with 12 short pulses. Do that on each side for 2 to 3 rounds. The top foot should point mostly forward, maybe a little down, so the side of the hip does the work instead of letting the front of the thigh take over.
Keep the lift small. A giant swing usually means the torso is rolling backward. A clean three-inch lift tells the truth better. You may feel a burn on the outer hip before anything else. That is normal.
This is a quiet workout. Quiet does not mean easy.
12. Bear Crawls for a Full-Body Wake-Up
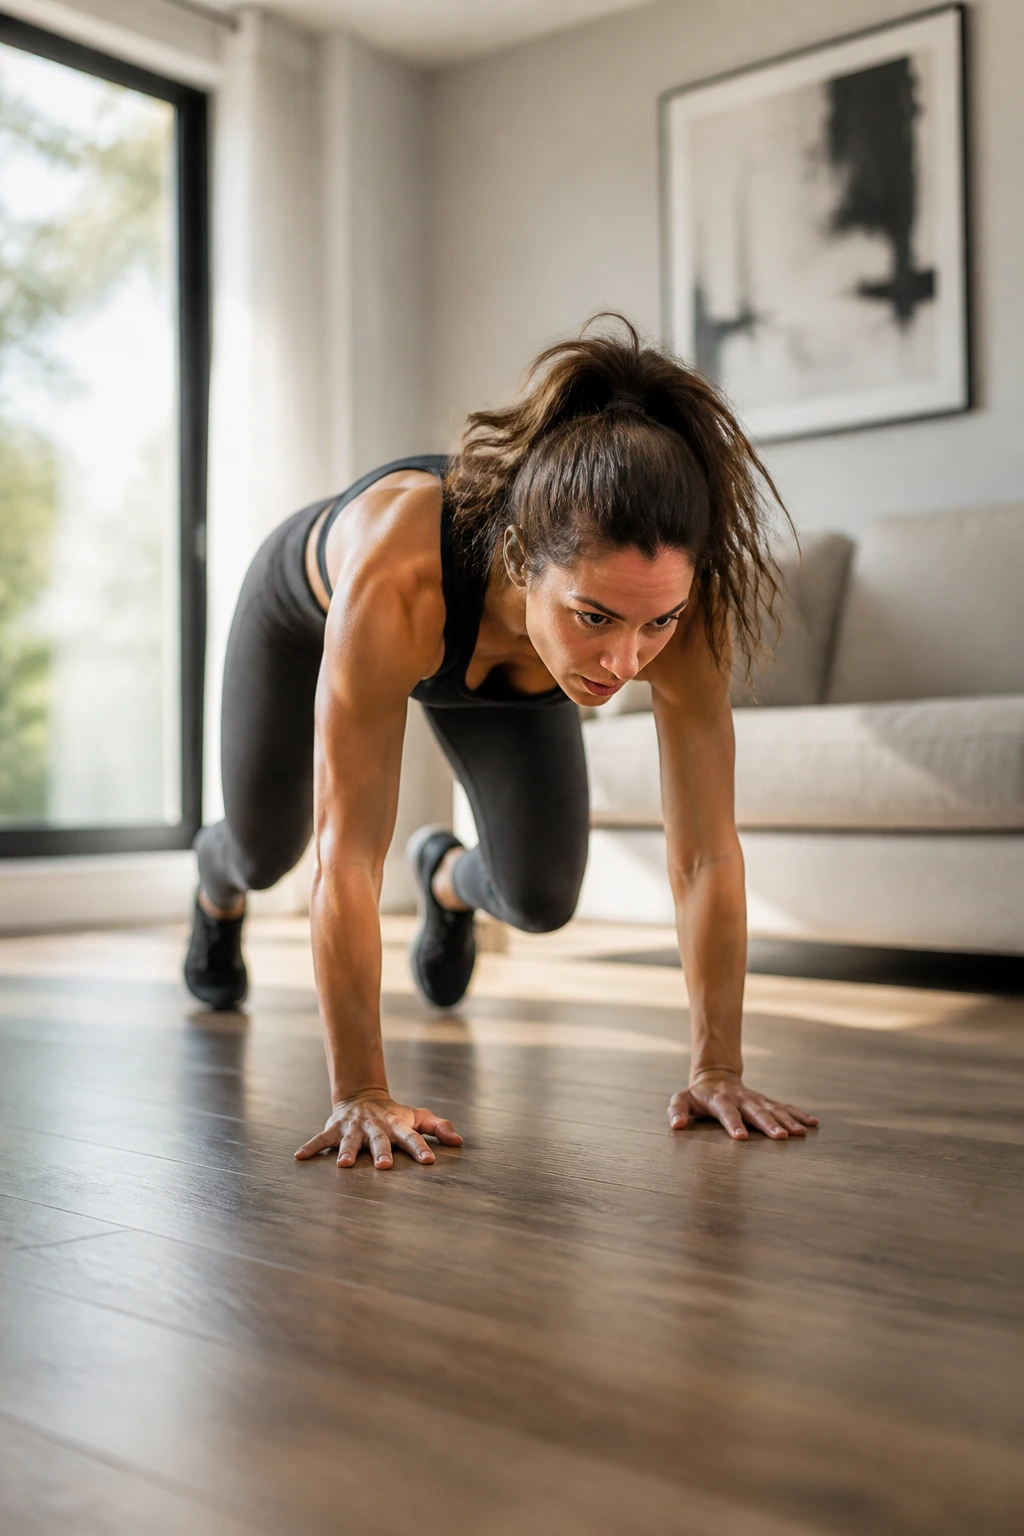
Bear crawls look playful. They are not. They make your shoulders, abs, hips, and feet all work at once, which is why they show up in so many honest bodyweight plans.
Start on hands and knees, then lift your knees 1 to 2 inches off the floor. Hold that position for 10 seconds, then take 4 slow steps forward and 4 back. Rest, then repeat for 3 rounds. Keep your back flat and your steps short. Big steps turn the move into a mess.
Unlike a plank, a bear crawl adds movement. Unlike a squat, it asks your shoulders to support more of your body weight. That makes it a solid bridge between floor work and fuller-body exercise.
If you have sensitive wrists, shorten the hold and spend more time on the marching steps. If the room is tiny, crawl in place. That still counts, and it still gets your heart rate up.
13. Hip Hinge Routines for the Back of the Legs
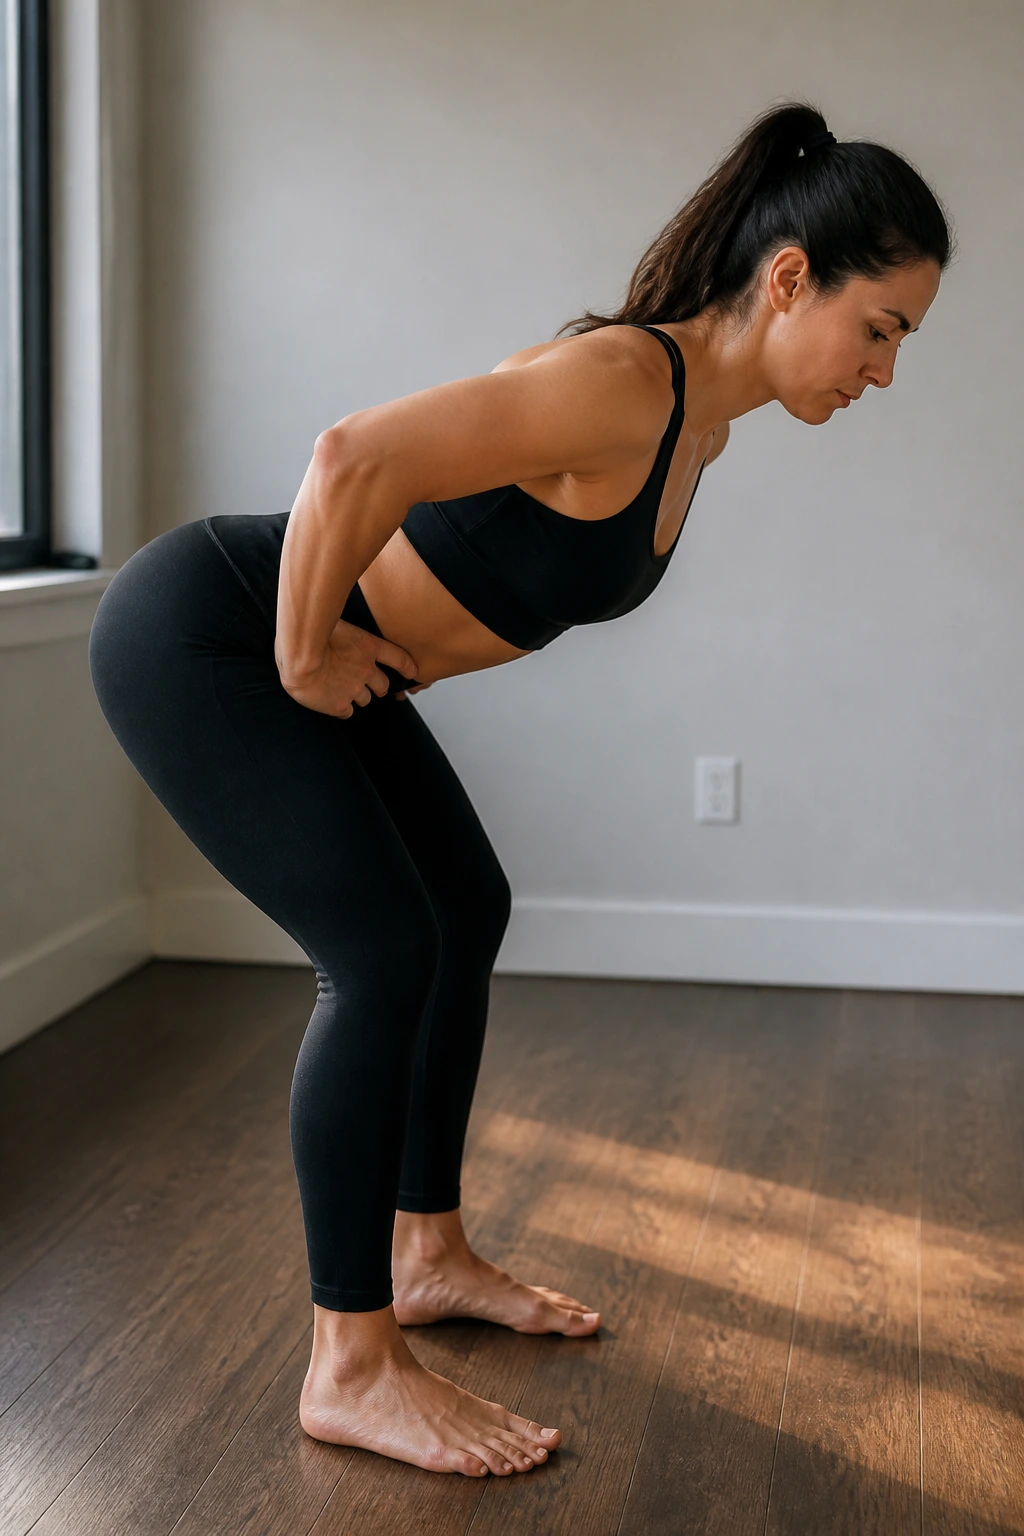
A hip hinge is the move most beginners skip, and then their squats feel clumsy and their hamstrings never get a clear job. This one matters. It teaches you to fold at the hips without collapsing the spine.
What to do
Stand with soft knees, place your hands on your hips, and push your hips back while your chest tips forward. Stop when your torso is roughly at a 45-degree angle, then squeeze your glutes and stand tall again. Do 12 reps for 3 rounds. If that feels easy, slow the lowering phase to 3 seconds.
What to watch for
- The back stays long, not rounded.
- Knees stay slightly bent.
- Weight stays over the middle of the foot.
- The neck follows the spine, not the ceiling.
A mirror helps, but a wall works too. Stand a few inches from it and send your hips back until they touch the wall first. That tiny drill cleans up the pattern fast.
14. Skater Steps That Open the Hips
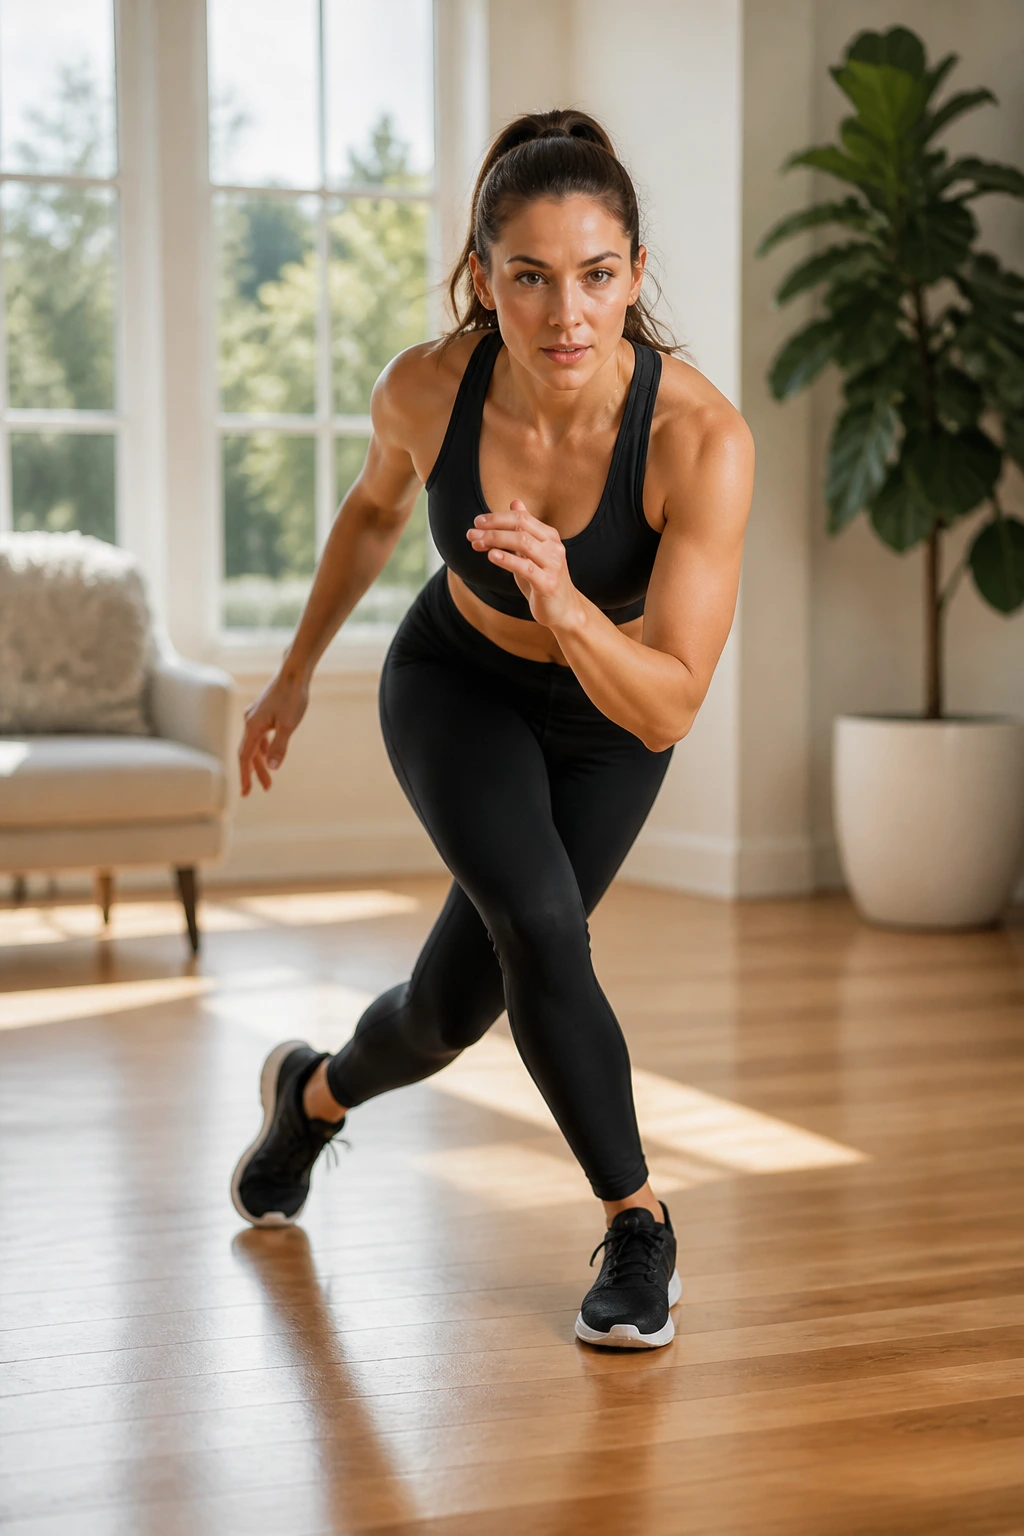
Skater steps raise your heart rate without the loud, bouncy feel of jumping. They also wake up the side-to-side muscles most beginners ignore until they trip on a curb or twist awkwardly getting out of a car.
Shift your weight to one side, step the other leg behind you, and tap the floor lightly. Then move the other way. Do 20 total steps for 3 to 5 rounds, keeping your knees soft and your chest slightly forward. You can swing the arms across the body to help with rhythm.
What makes this one good is the lateral work. Walking and squatting are straight-line habits. Skater steps remind your hips and ankles that there is more than one direction to care about.
Stay smooth. No need to throw yourself across the room. A controlled side step with a small reach is enough to make the legs notice.
15. Kneeling Side Planks for Obliques and Shoulders
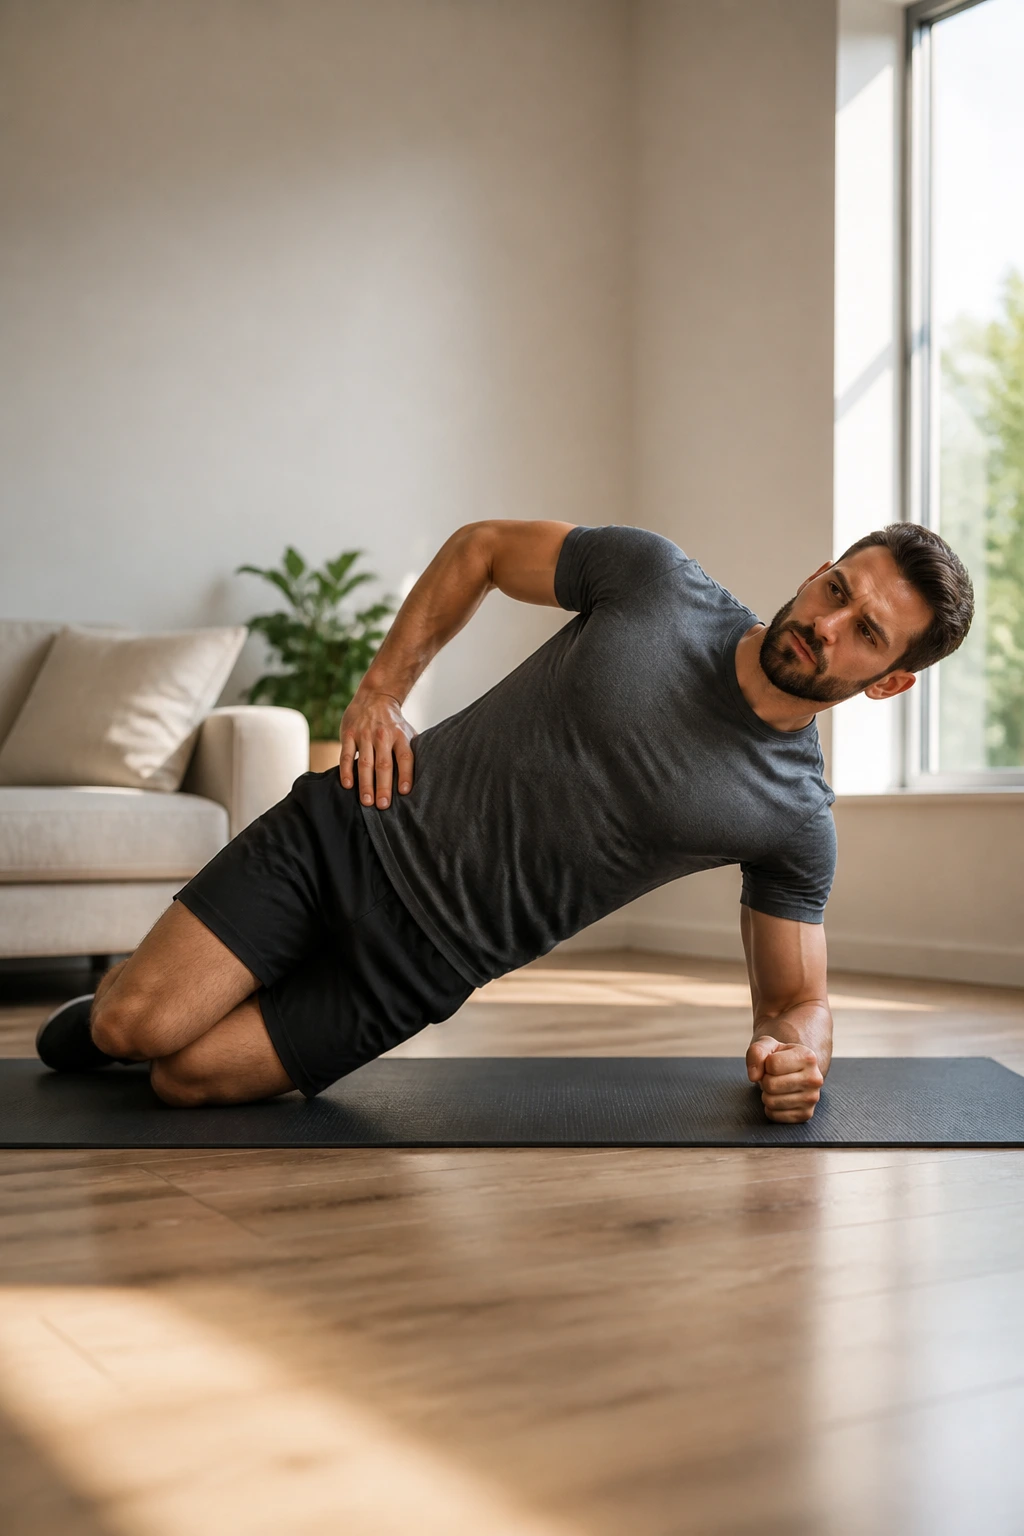
If side planks make you want to quit after six seconds, start on your knees. That is not a compromise. It is a smart way to learn the shape before your bodyweight gets in the way.
Set your elbow under your shoulder, bend your knees, and lift your hips so your body forms a straight line from shoulder to knee. Hold for 15 to 20 seconds per side, rest, then repeat for 3 rounds. Keep your top shoulder from rolling forward. The torso should look stacked, not twisted.
A few details help a lot
- Press the floor away with the forearm.
- Keep the hip from sagging.
- Breathe behind the brace.
- Stop the set before your shoulder starts creeping toward your ear.
This move looks small on paper. In practice, the obliques, shoulder, and glute on the bottom side all have work to do. Good. Beginners need exercises that teach tension without forcing chaos.
16. Superman Holds for the Back Side
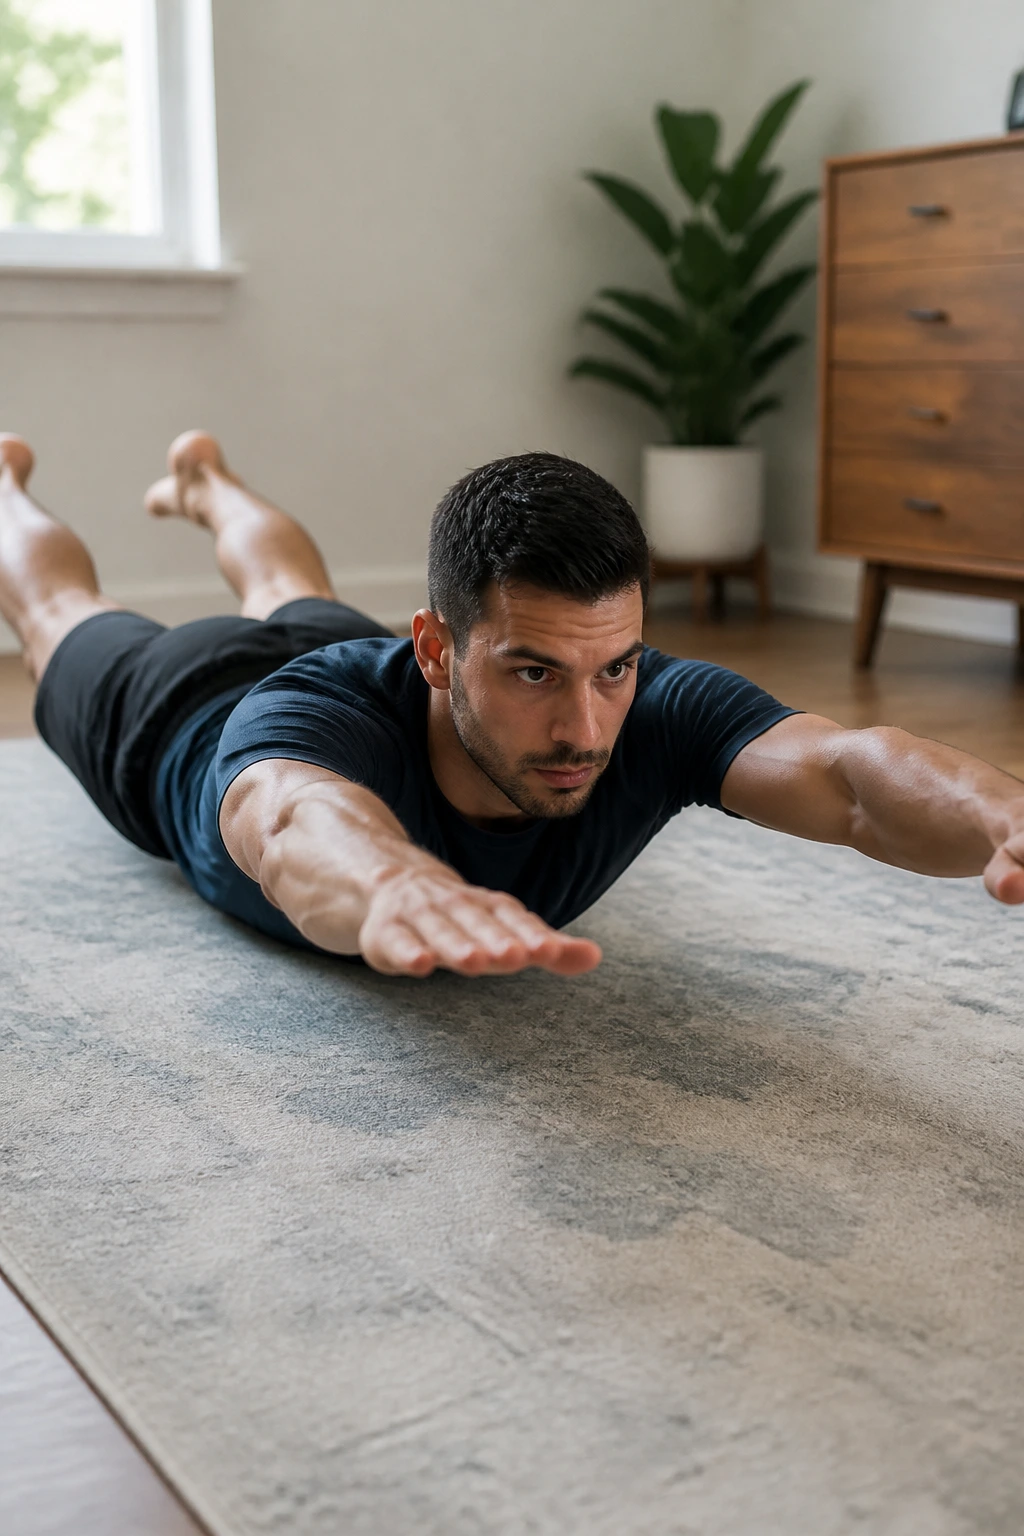
Can a superman actually help a beginner? Yes, if the lift stays small. The big mistake is trying to throw the chest and legs sky-high, which usually turns the neck into the boss of the movement.
Lie face down with your arms reaching forward or bent by your sides. Lift your chest and legs a few inches off the floor, hold for 2 seconds, then lower with control. Do 8 reps for 3 rounds. The move should feel like a gentle back extension, not a full-body heave.
What to avoid
Do not crank your chin up. Keep the eyes a foot or two ahead of you on the floor. Do not squeeze so hard that your lower back pinches. A short lift is enough. A small lift, held cleanly, beats a big ugly one every time.
If the floor feels hard on your hips, place a folded towel under them. That tiny comfort change can make the whole set more usable.
17. Side-to-Side Squat Shifts for Inner Thighs
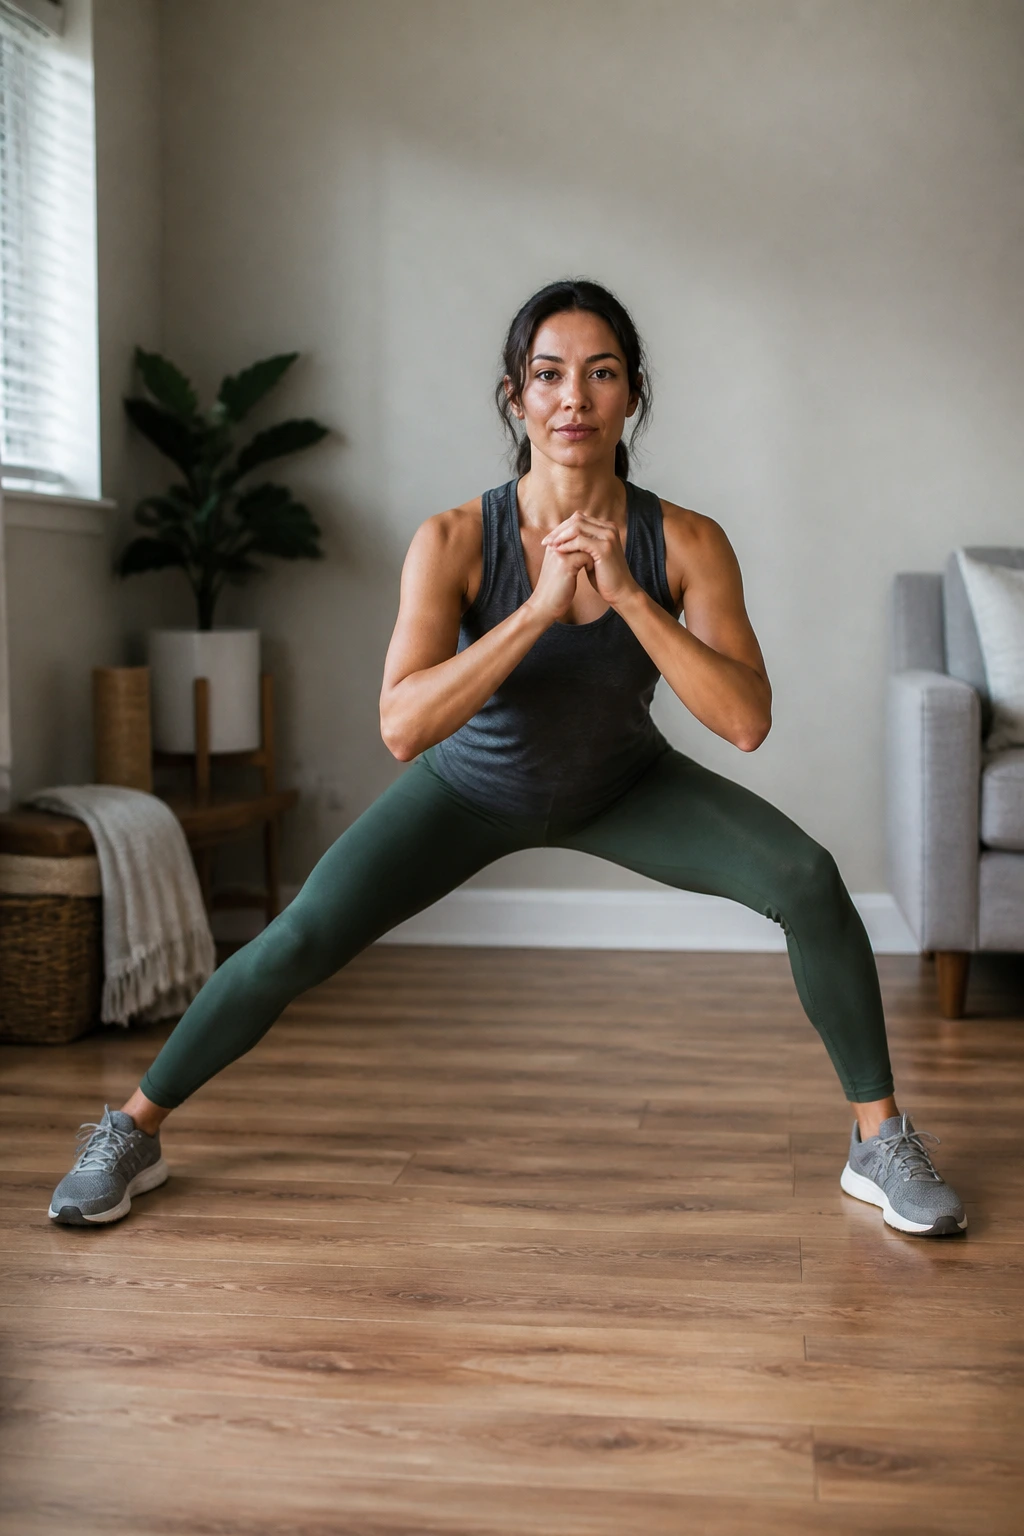
Stand with your feet wider than shoulders and sink side to side, and the inner thighs wake up fast. This is not a flashy exercise. It is a useful one, especially for beginners who feel stiff when they move sideways.
Shift your weight into one leg, bend that knee, and keep the other leg straighter as you move to the other side. Do 8 shifts per side for 3 rounds. Keep your toes mostly forward and your hips back, almost like you are trying to sit into one hip and then the other.
The range can be small. It should be, at first. A deep side squat is a later step. Right now, you want the muscles around the hips to learn how to accept weight and then give it back.
This one pairs well with skater steps or marching. One teaches control. The other gives you a little speed. Together, they feel balanced without being fancy.
18. Shadow Boxing Rounds for Cardio and Coordination
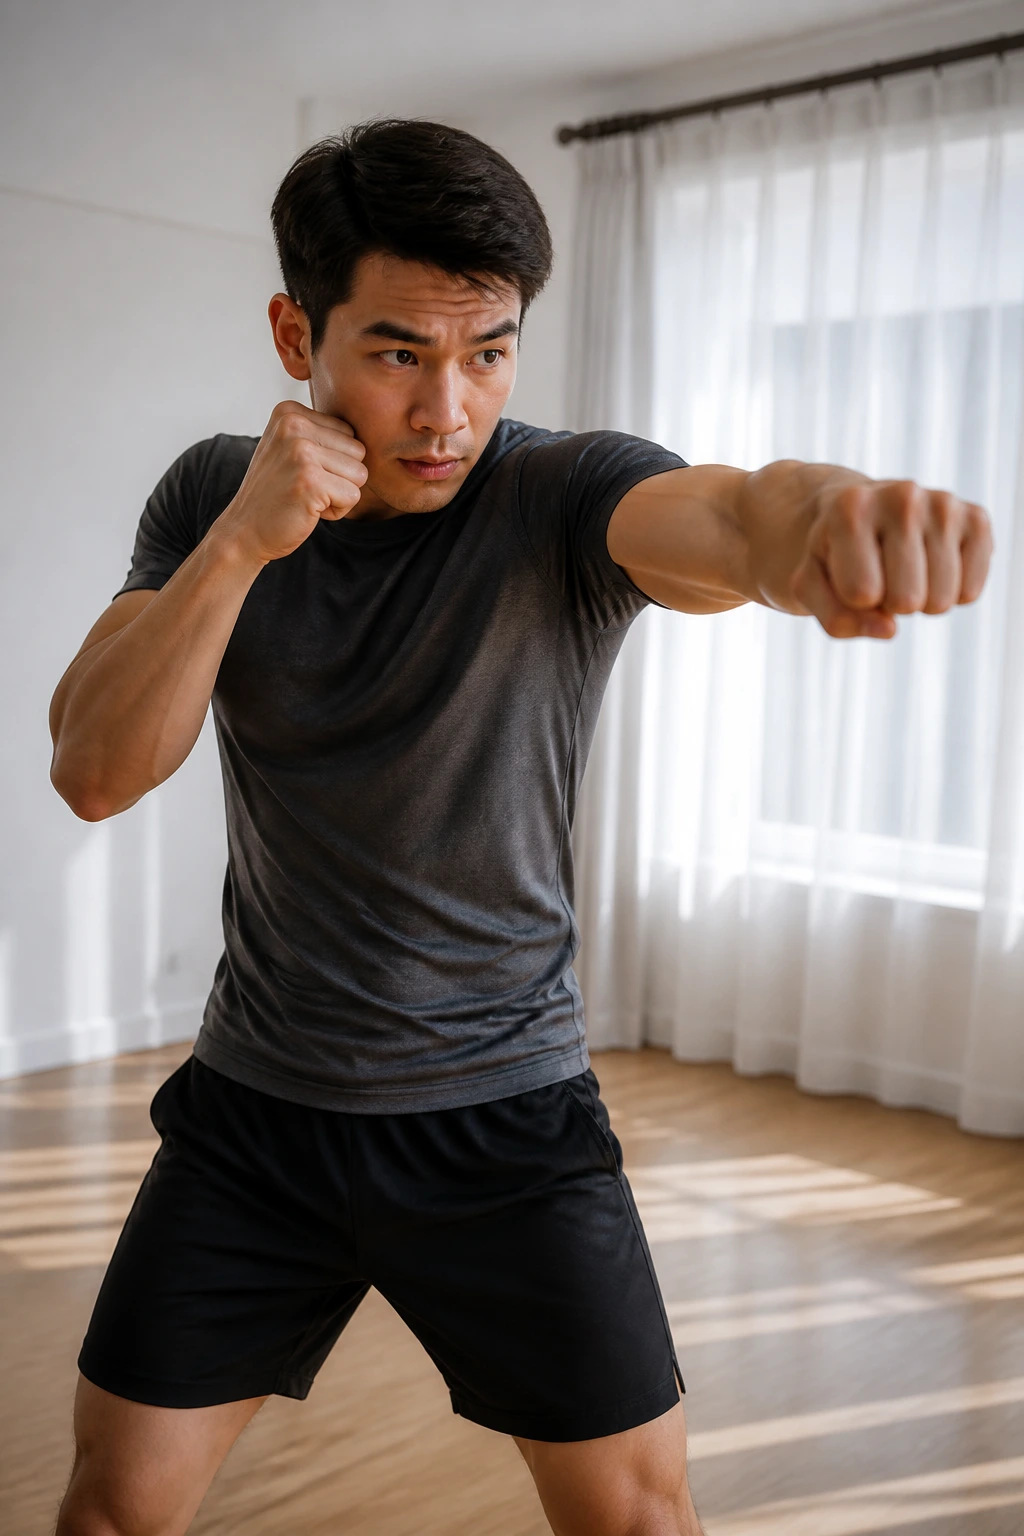
Shadow boxing is closer to cardio than people think, and it beats jogging for anyone who hates pounding steps. It is also one of the better no equipment workouts for beginners at home because you can scale it from gentle to surprisingly hard in one minute.
Stand with your hands up near your cheeks. Throw a jab, then a cross, then add a hook if you want, while your feet take tiny steps and your hips turn with the punches. Work for 1 minute, rest for 30 seconds, and repeat for 6 rounds. Keep the punches snappy but not locked out.
A simple combo works fine: jab-jab-cross. If coordination gets messy, stay with two punches and focus on the feet. The real work is in the rhythm, not in making it look like a boxing match.
You should finish this one breathing harder, not nursing sore shoulders. If the shoulders burn too soon, keep the punches lower and the stance wider.
19. A 10-Minute Full-Body EMOM
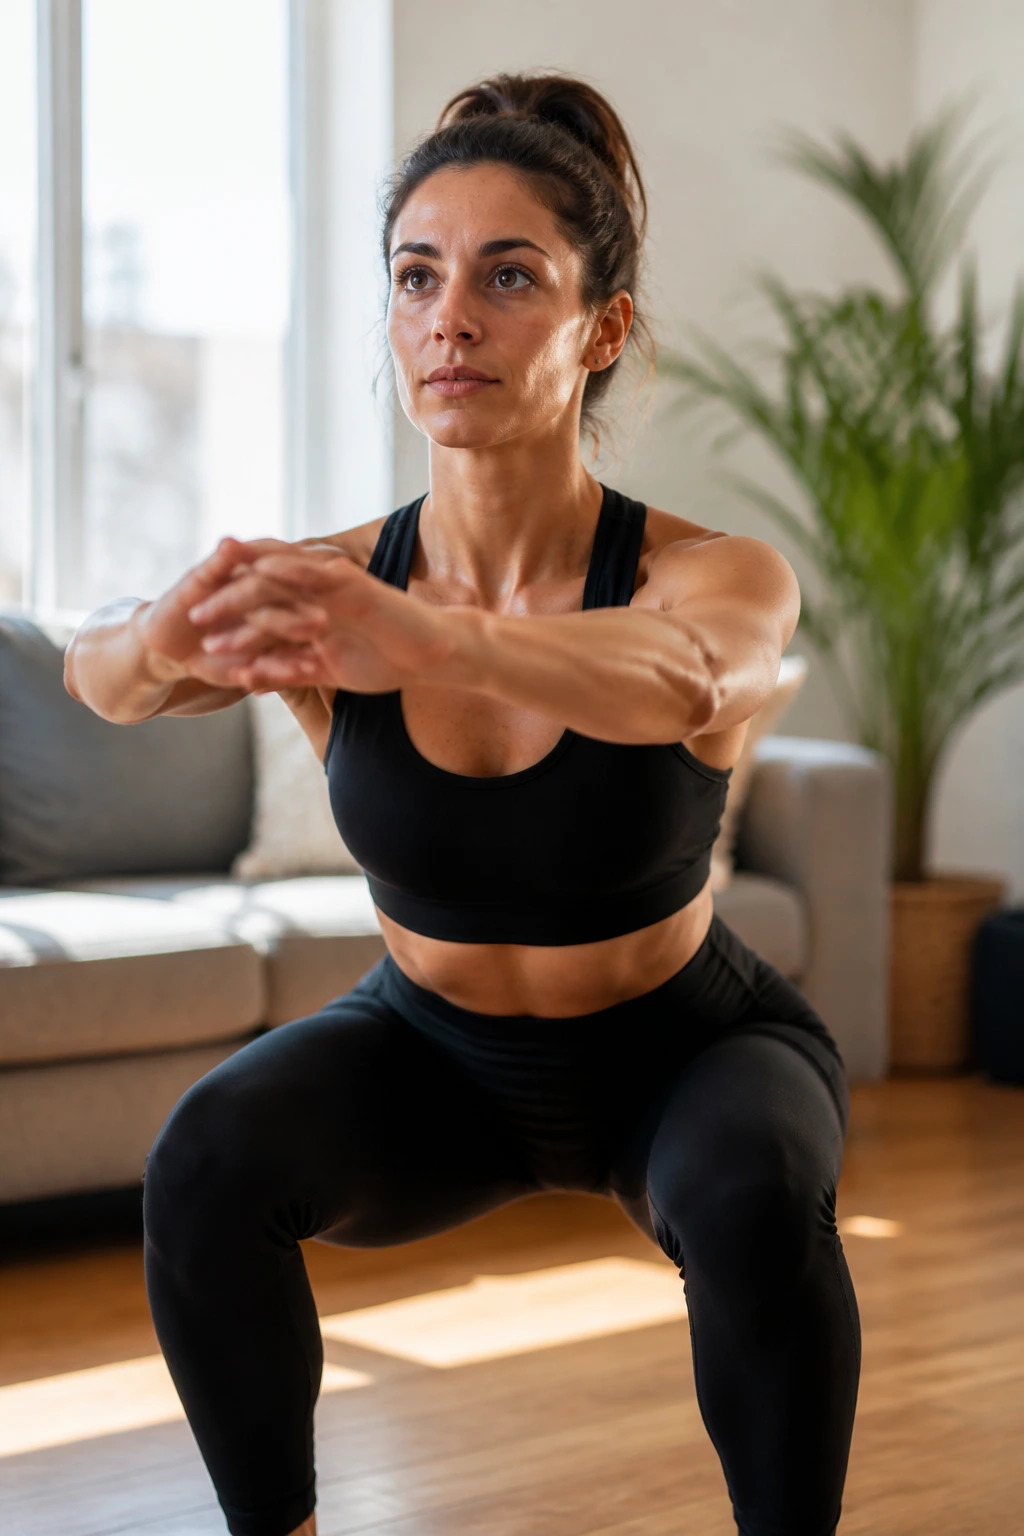
An EMOM sounds fancy until you write it out: every minute on the minute, you do the work and use the leftover time to breathe. This is a clean beginner format because the clock keeps you honest and the breaks arrive without you having to negotiate with yourself.
Minute-by-minute plan
- Minute 1: 8 air squats
- Minute 2: 6 wall push-ups
- Minute 3: 20 marching steps per side
- Minute 4: 10 glute bridges
- Minute 5: 20-second plank hold
- Repeat minutes 1 through 5 one more time
You want each set to take about 20 to 35 seconds. That leaves a small rest window before the next minute starts. If a set spills past 40 seconds, cut the reps by 2 or 3. If you finish with a lot of time left, add a rep or two next round.
How to keep it useful
Pick one hard move, one medium move, one cardio move, one floor move, and one brace move. That mix keeps the workout from turning into a single muscle complaint. It also makes the whole thing feel less repetitive, which matters more than people admit.
20. A Recovery Flow to End Without a Crash
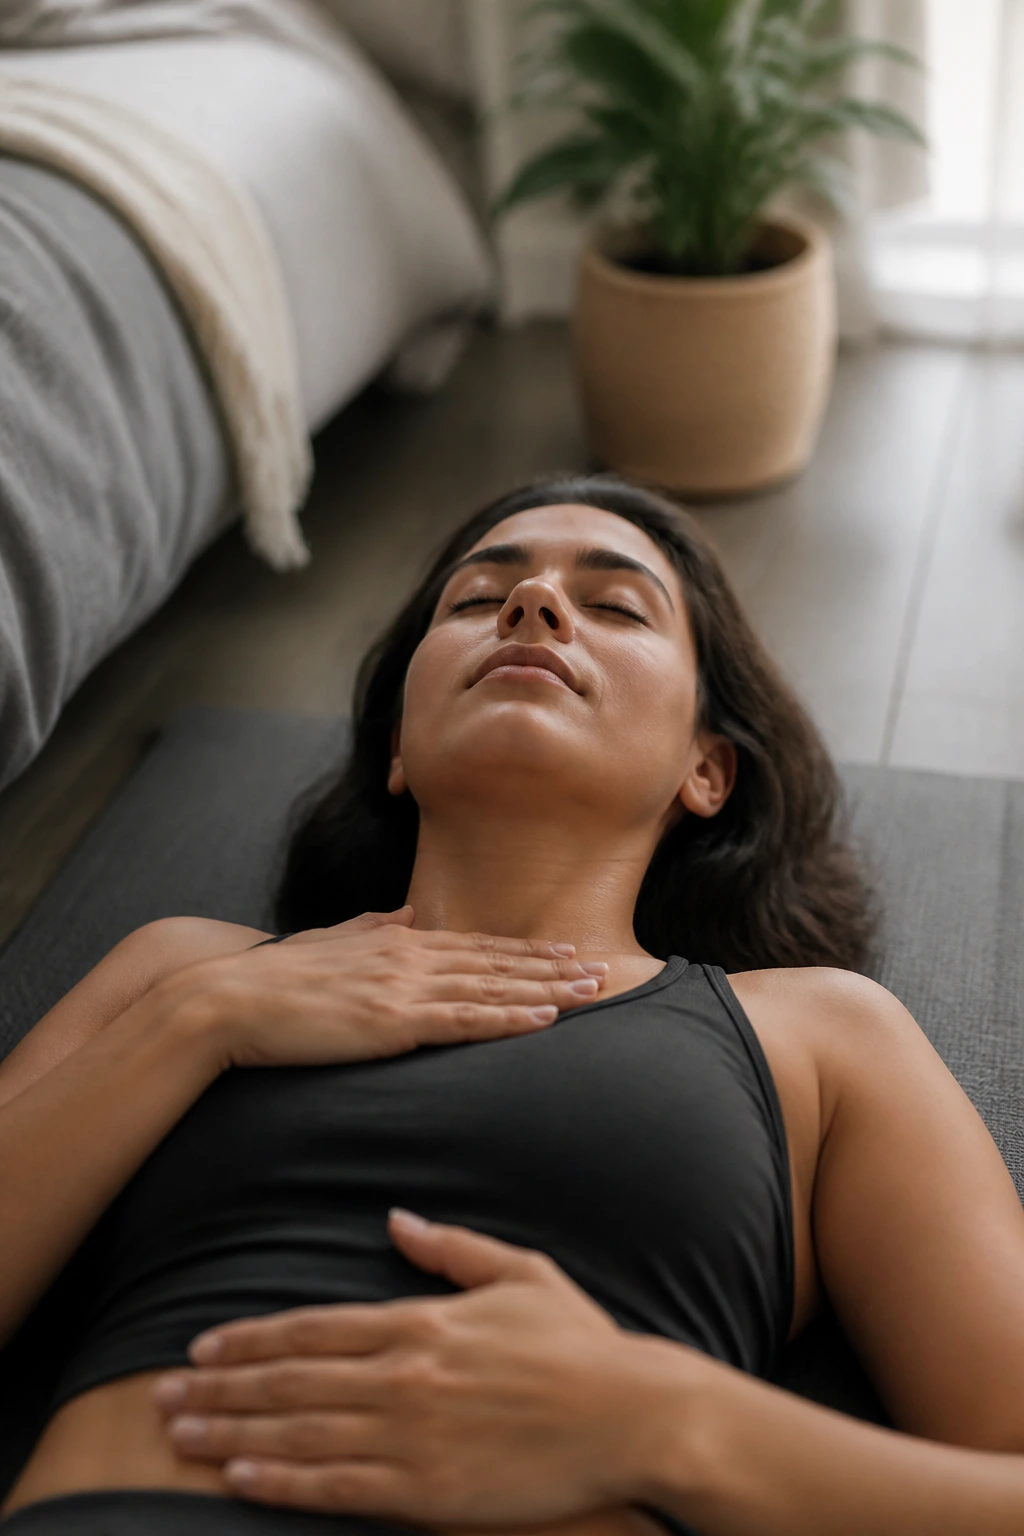
What should you do after the last hard rep? Stop on purpose, not by collapsing. A short recovery flow keeps your body from locking up and gives the beginner plan a cleaner finish.
Start with 30 seconds of slow breathing on your back, one hand on your chest and one on your belly. Then move into a child’s pose stretch for 30 seconds, a half-kneeling hip flexor stretch for 20 seconds per side, and a standing forward fold with soft knees for 20 seconds. Finish with a gentle chest opener on the floor or against a wall.
Why this matters
A beginner who skips the cool-down often wakes up stiffer than expected. Not dramatic. Just annoying. A few calm minutes lower the sharp edge of the workout and make it easier to repeat the session later in the week.
If you are short on time, keep only the breathing, hip flexor stretch, and forward fold. That is enough to shift gears.
Finish Smart
Pick three of these and repeat them for a week before you start collecting more. That sounds almost too plain, which is exactly why it works. Beginners usually do better with fewer choices and more repetition.
A sensible mix is one cardio move, one lower-body move, and one floor-based core drill. Marching, squats, and dead bugs make a clean trio. If your wrists dislike floor work, lean more on standing moves and glute bridges. If your knees are grumpy, keep the lunges shallow and the marching low-impact.
The best home workout is the one you can finish with decent form and enough energy to come back tomorrow or the day after. Not crushed. Not bored. Just worked.
