



If crunches make your lower back bark, stop pretending that is the price of a strong midsection. No crunch core workouts for bad backs work better when they teach the torso to brace, breathe, and resist movement instead of folding over it.
The core is supposed to stabilize the spine, not bully it.
Some backs hate flexion. Some hate extension. A few hate anything that looks like exercise, which is why a calmer starting point matters more than fancy equipment or a hard floor and a grim face.
If pain shoots into a leg, numbness shows up, or a movement gets sharper instead of warmer, stop and get checked. That is not the moment to “push through.” It’s the moment to change the plan.
What you want here is a mix of floor drills, anti-rotation work, side support, and loaded carries. Pick a few, do them with clean reps, and leave the ego out of it. The best core work for a cranky back usually looks boring. Good. Boring is often exactly what the spine likes.
1. 90/90 Breathing With a Gentle Brace
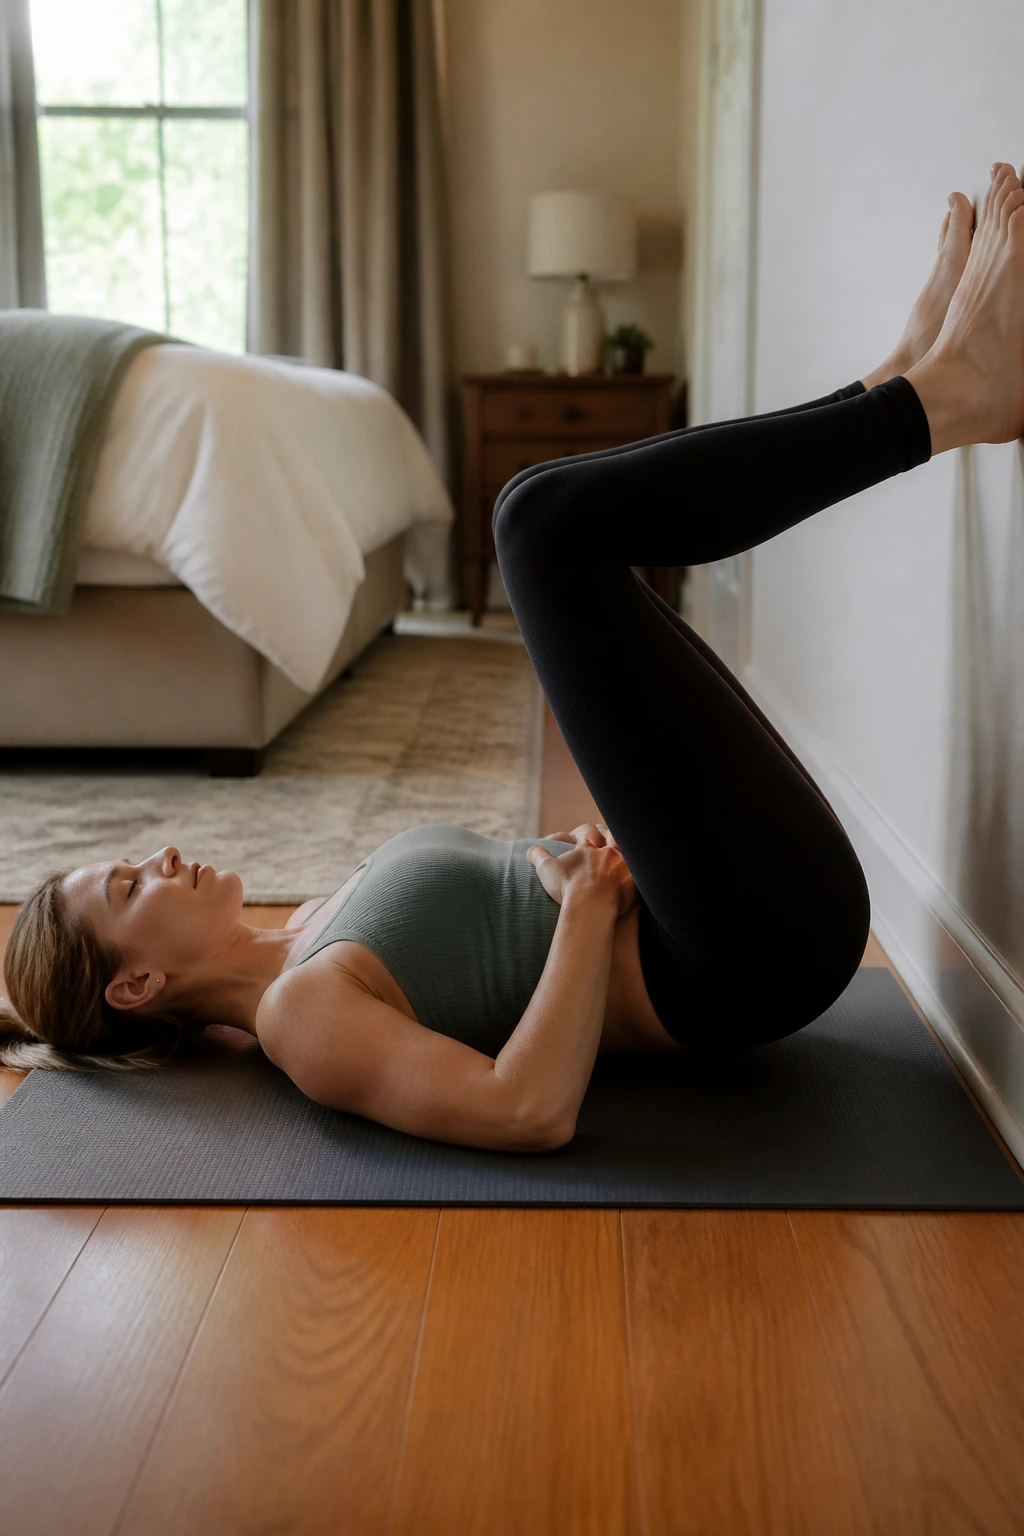
This is where a lot of back-friendly core work should start, even if it doesn’t feel like a workout at all. Lie on your back with your feet on a wall or a sturdy chair so your hips and knees sit at about 90 degrees. That position helps your ribs settle over your pelvis instead of flaring up and making your lower back do extra work.
Breathe in through your nose, then exhale slowly through your mouth like you’re fogging a mirror. At the end of the exhale, gently tighten your midsection — not a hard clench, more like turning a dimmer switch to about 20 or 30 percent.
Do not arch your low back to “get a deeper breath.” If your back wants to pop up off the floor, move your feet a little closer or rest your calves on a chair instead.
Four to six breaths count as one round. Do two or three rounds before the rest of your session, or use it as a reset on days when your back feels extra twitchy. It’s not flashy. It works anyway.
2. Dead Bug Heel Taps
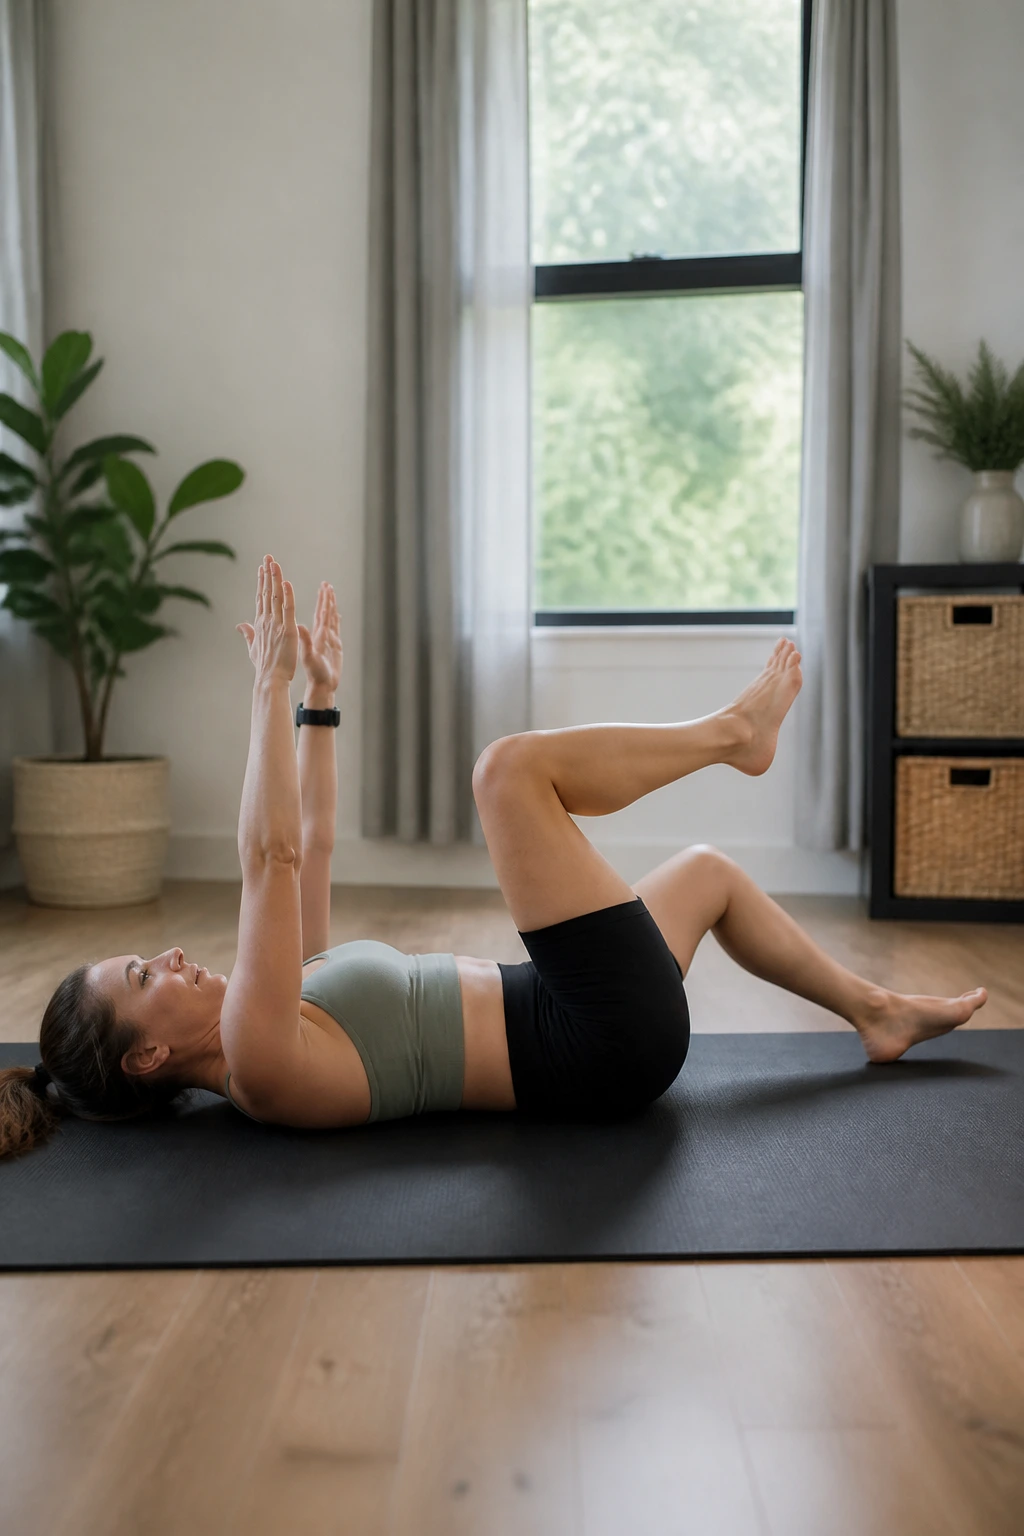
Why does this one show up in so many spine-friendly plans? Because it teaches your trunk to hold steady while your legs move, and that’s the real job most backs need help with.
How to Set It Up
Lie on your back with your knees bent over your hips and your arms reaching straight toward the ceiling. Keep your ribs heavy, then lower one heel toward the floor in a slow tap while the other leg stays quiet. Return to the start and switch sides.
Keep the movement small at first. If your low back starts to arch or you feel your ribs pop up, shorten the range and slow down. The floor is your feedback tool. The second your back loses contact or your stomach starts to dome, the set is getting sloppy.
- Aim for 6 to 10 taps per side.
- Move with a 2-second lower and 2-second return.
- Rest 30 to 45 seconds between sets.
A clean dead bug should feel like work in the front of your torso, not a tug-of-war in your lower back. That’s the line to protect.
3. Dead Bug Band Press
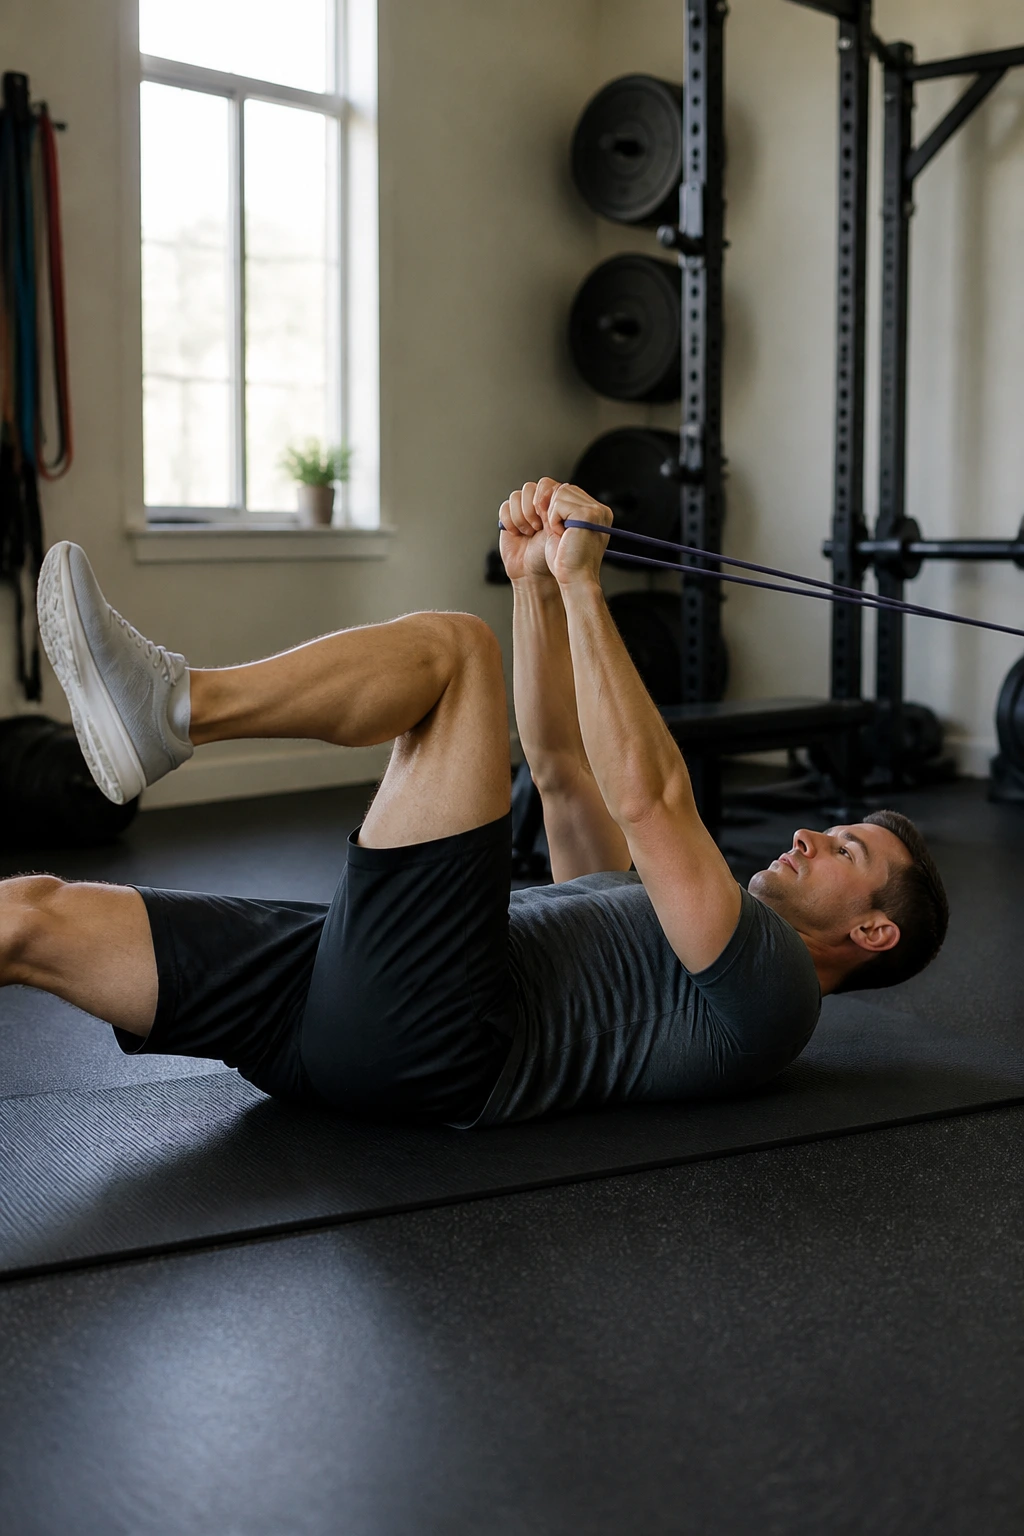
Adding a light band changes the whole game without adding spine motion, which is why this version can be sneaky-hard. Anchor a band behind you or hold a small loop band in both hands, then press it away from your chest while your legs alternate in a dead-bug pattern.
The band wants to pull your arms back. Your midsection has to stop that from turning into rib flare or back arching. That little fight is the point.
If you don’t have a band, press your hands together hard at chest level and hold that tension while you move the legs. Same idea. Less hardware.
What you’re chasing is calm resistance. The abs should feel awake, but your low back should not feel like it is bracing for impact. Two or three sets of 5 to 8 reps per side is plenty.
A lot of people rush this and turn it into a strange bicycle move. Don’t. Slow wins here.
4. Bird Dog
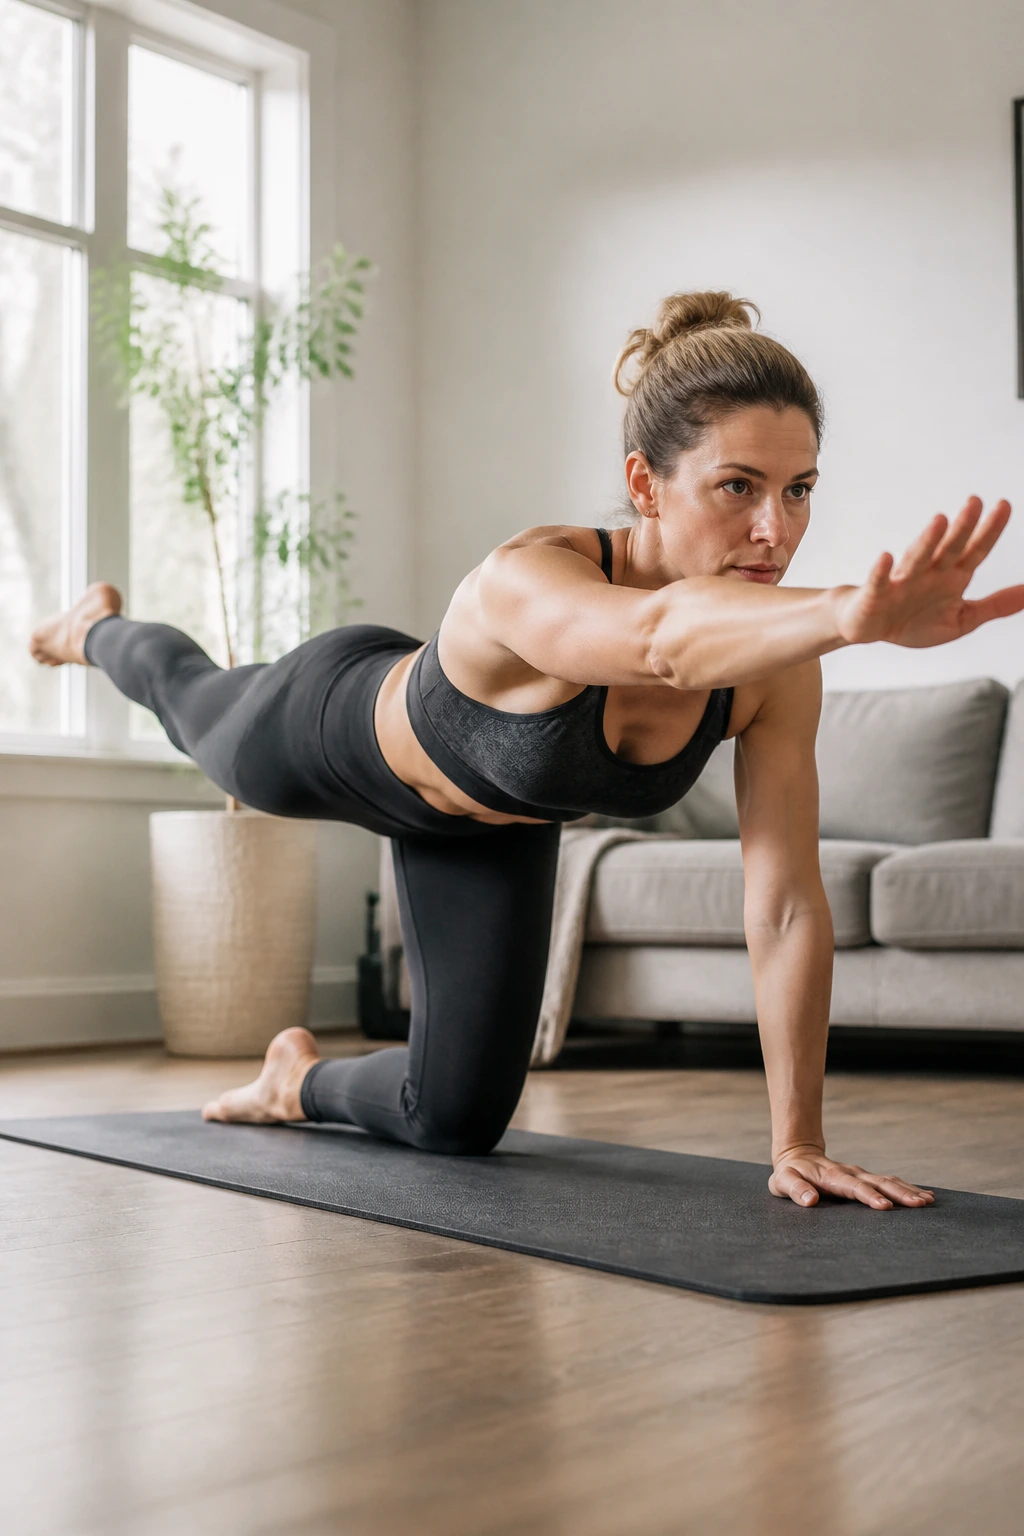
The bird dog earns its place because it teaches coordination without asking the spine to curl or twist. Start on hands and knees with your hands under your shoulders and your knees under your hips. Reach one arm forward and the opposite leg back, then pause before returning to center.
That pause matters. A flailing bird dog is just a balance drill with a good name.
Keep your hips square to the floor and imagine balancing a glass of water across your low back. You don’t need to lift the leg high; you need to keep the pelvis from swinging open.
What to Watch For
- Reach long, not high.
- Keep the neck in line with the spine.
- Hold for 2 to 5 seconds at the top.
- Do 5 to 8 reps per side.
If your wrists hate the floor, put your hands on a bench or couch. If your back feels pinchy when the leg goes back, shorten the reach. That small correction usually cleans the whole movement up.
5. Bird Dog Row
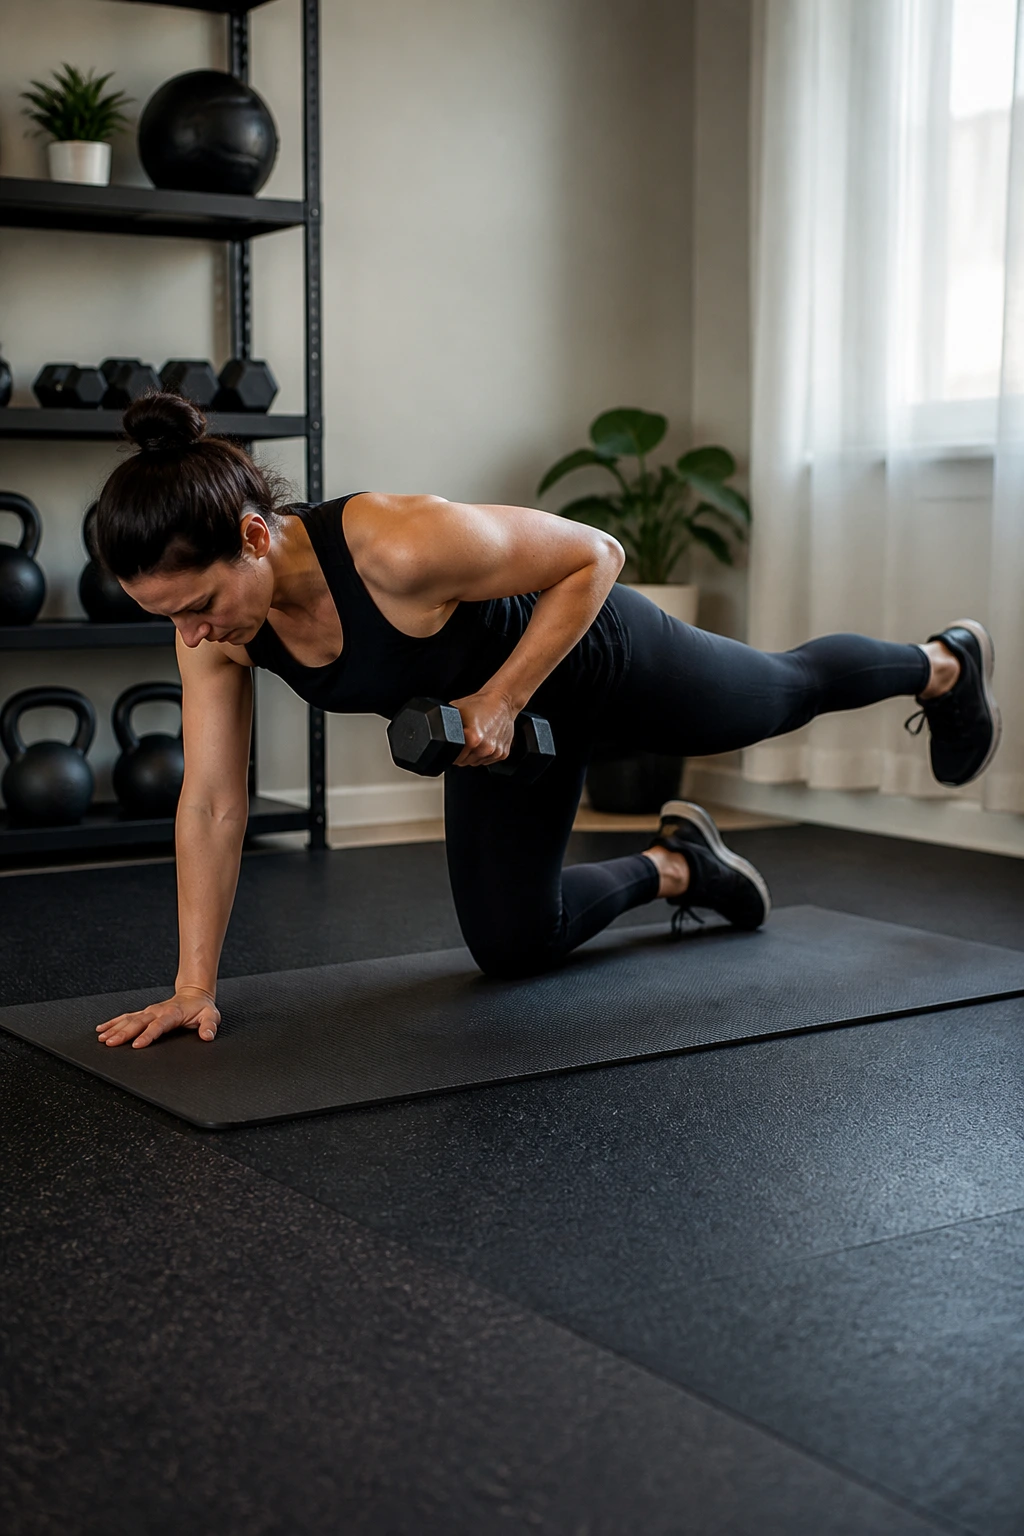
This is the bird dog’s stronger cousin. Set up the same way, but place a light dumbbell or a band handle in one hand and row it while the opposite leg stays long behind you. The row adds anti-rotation demand, which means your torso has to fight the urge to twist when one side does the work.
That makes it useful for people who need core control to carry over into real life — lifting a bag, pulling a door, hauling groceries, all the ordinary stuff backs complain about later.
Keep the weight light enough that your ribs stay quiet. If the row makes your shoulders hike or your hips swing, the load is too much. Control beats load here. Every time.
Try 5 to 6 rows per side, with a full reset between reps. It should feel tidy and deliberate, not like a fight with your own balance.
6. McGill Curl-Up
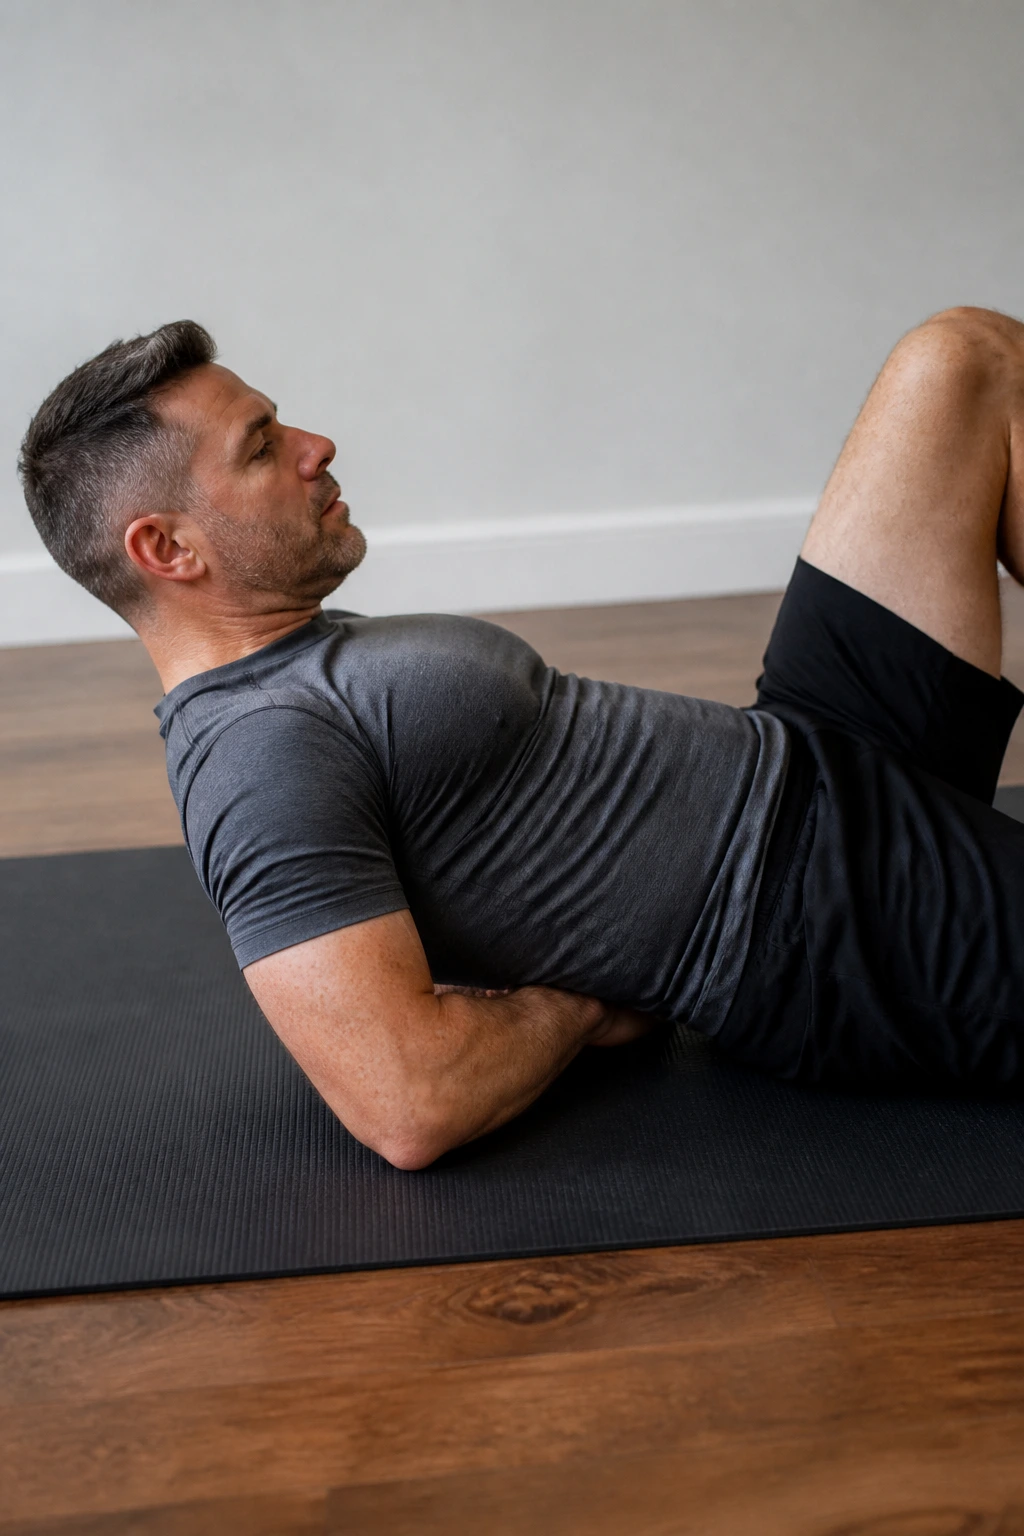
Not a crunch. Not even close.
The McGill curl-up is one of those exercises people misunderstand because it looks like a tiny version of the thing their back hates. Lie on your back with one knee bent and the other leg straight. Slide your hands under the natural curve of your lower back, then lift your head and shoulders just a little while keeping the spine quiet.
The lift is small on purpose. You’re not rounding hard; you’re bracing and creating tension without flooding the lumbar spine with motion.
How to Set It Up
- Brace before you move.
- Lift 1 to 2 inches, not 1 to 2 feet.
- Hold 5 to 10 seconds.
- Lower slowly and repeat 5 to 8 times per side.
If your neck takes over, tuck the chin a touch less and think about lifting from the chest. If your lower back feels compressed, reduce the lift even more. Tiny wins here are still wins.
This is one of the best choices when a person wants “ab work” without the usual aftertaste in the low back.
7. Side Plank From the Knees
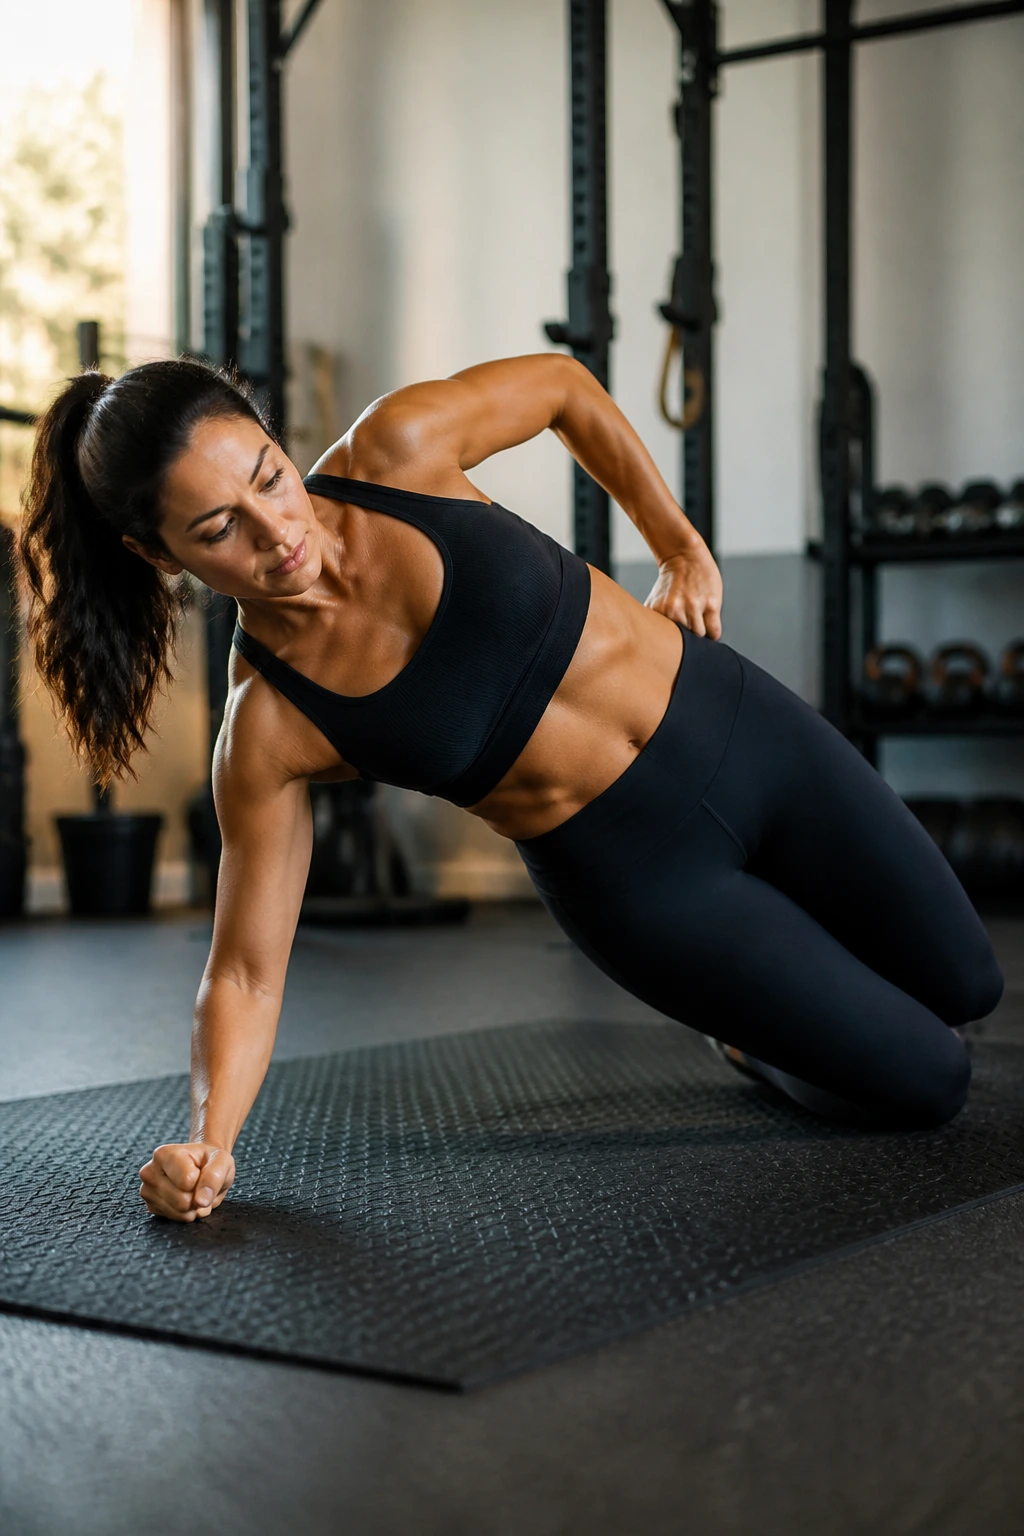
Side planks look harmless until the bottom side of your torso starts shaking. Then they get honest. Lie on one side, prop yourself on your forearm, bend your knees, and lift your hips so your body makes a straight line from shoulder to knee.
Keep the elbow under the shoulder. Push the floor away with the forearm. That little shove helps the ribcage stay lifted instead of collapsing toward the floor.
You should feel the side of your waist and the glute on the lower side doing real work. If the low back is taking over, bring the knees a little closer or shorten the hold.
Ten to 20 seconds per side is a good start. Three rounds usually tells you enough. If you can hold a clean position for 30 seconds without twisting, you’re ready to progress or add a second set.
8. Full Side Plank
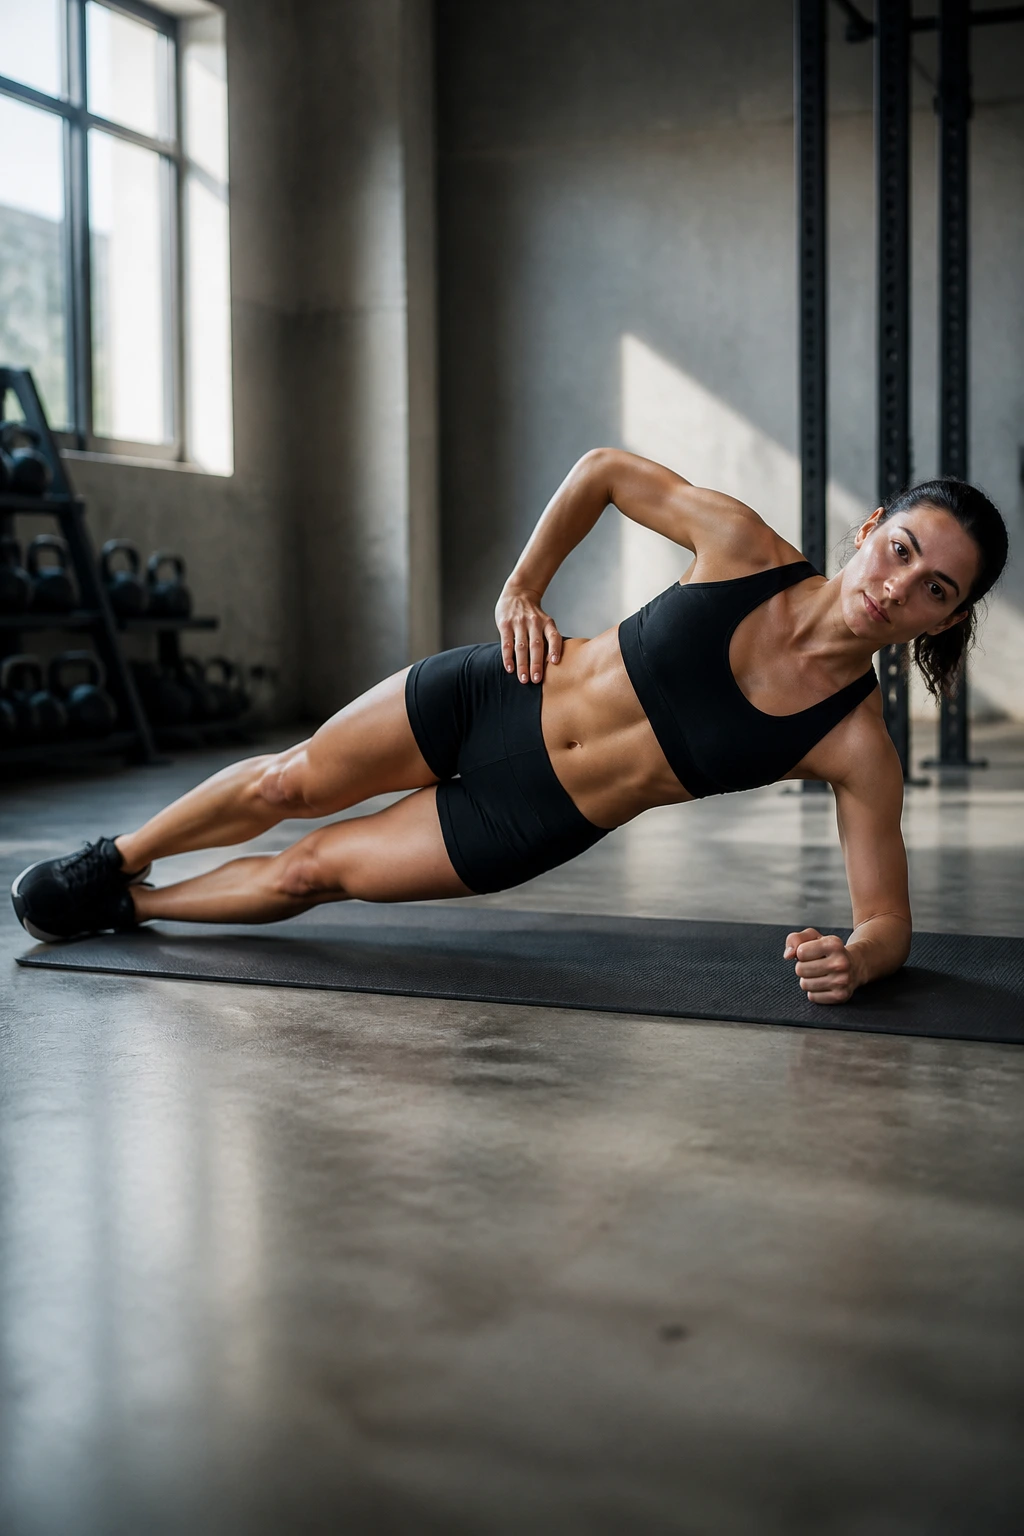
If the knee version feels crisp and controlled, the straight-leg side plank gives you a bigger challenge without turning into a flexion exercise. Stack your feet or stagger them slightly for more balance, then lift your hips until your body forms a long line from head to heel.
The trick is not to chase the longest hold. Long holds with sagging hips are a waste of time. I’d take a clean 15-second hold over a wobbly minute almost every time.
Keep your neck long and your top shoulder away from your ear. Some people like to put the top hand on the hip; others reach the arm to the ceiling. Use the version that keeps your torso quiet.
Start with 10 to 20 seconds per side, two or three rounds. If the shoulder protests, go back to the knees and earn your way up. No prize is given for skipping the progression.
9. Glute Bridge
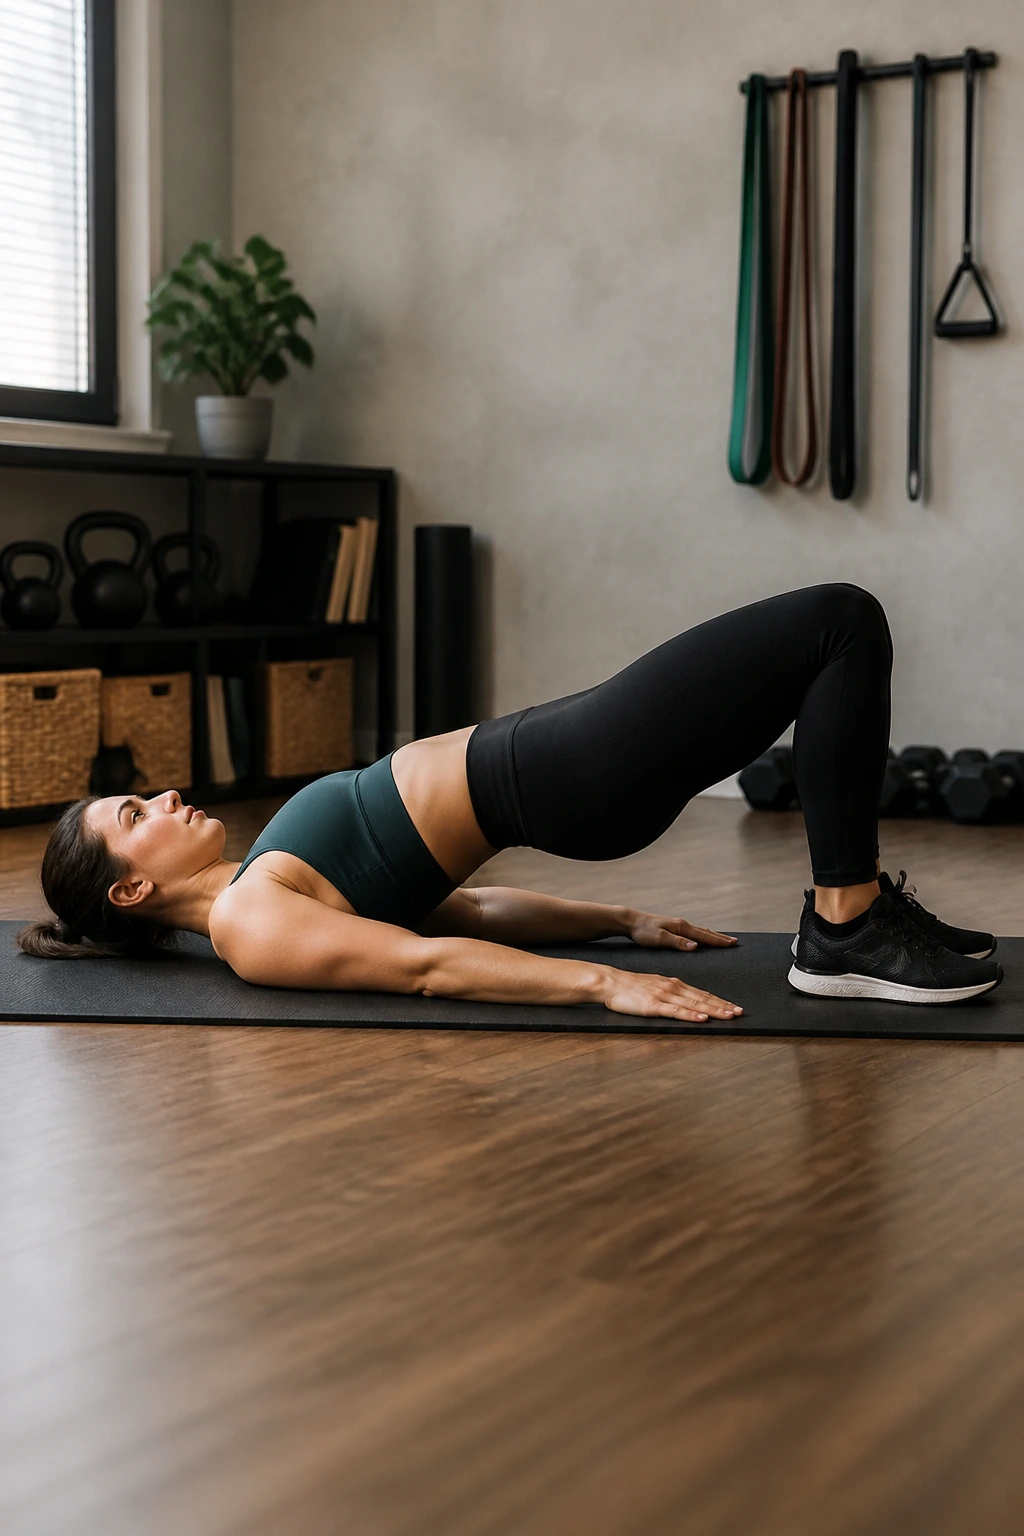
A weak or sleepy glute can make the lower back do work it never signed up for, which is why bridges show up so often in back-friendly plans. Lie on your back with your feet flat and close enough that your fingertips can graze your heels. Drive through the heels, squeeze the glutes, and lift the hips until your body makes a gentle slope from shoulders to knees.
Stop before the ribs flare up or the lower back arches hard. The top position should feel like the glutes own the lift.
What to Feel
- Pressure in the heels.
- Tension in the glutes.
- Quiet abs.
- No pinching in the low back.
Two or three sets of 8 to 12 reps works well. Pause for a full second at the top. If your hamstrings cramp, slide your feet a little closer to your hips and try again.
That little foot adjustment solves the problem more often than people expect.
10. Marching Glute Bridge
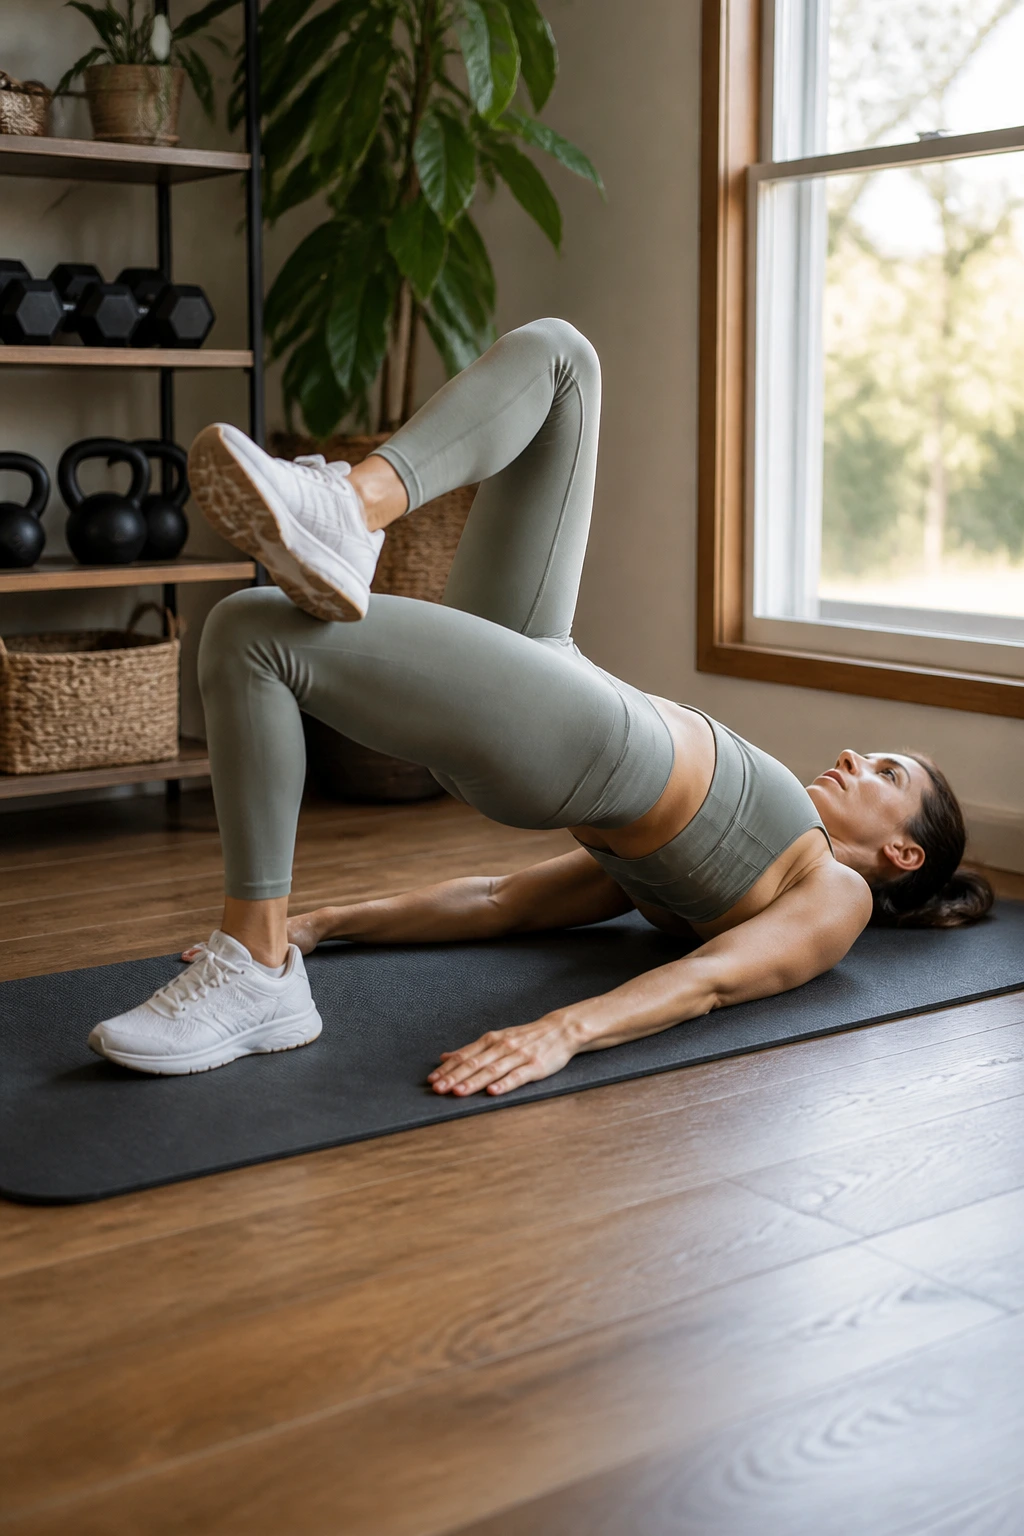
A bridge gets honest when one foot leaves the floor. Lift into the top of a glute bridge, then slowly raise one knee a few inches without letting the pelvis drop or twist. Set that foot down, switch sides, and keep the hips level the whole time.
This one exposes sloppy control fast. Good. Better to find out on the floor than while carrying a laundry basket up stairs.
The range should stay small. If the hips rock side to side, shorten the lift or go back to basic bridges for a week. The goal is a still pelvis, not a higher knee.
Six to eight marches per side is enough to start. Keep the breath steady and the ribs down. A lot of people forget the breathing piece and then wonder why their back feels tense by the third set.
11. Pallof Press
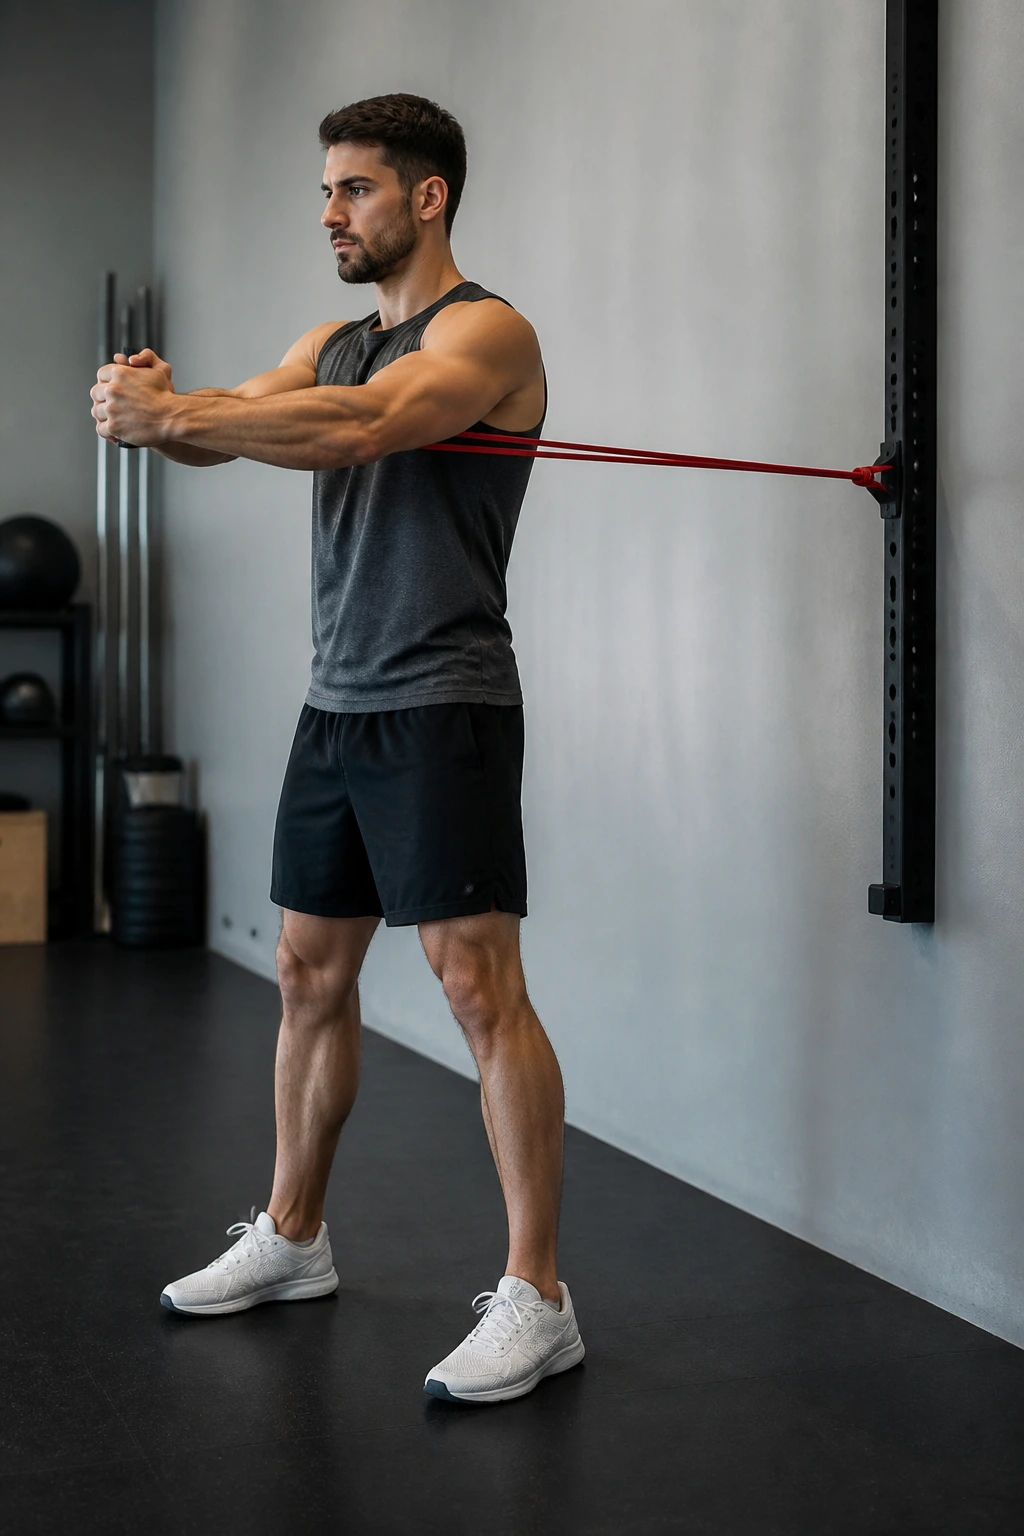
If your back hates twisting, the Pallof press is worth its weight in gold. Stand sideways to a cable or band anchored at chest height. Bring the handle to your sternum, press it straight out in front of you, and resist the pull that wants to rotate your torso.
It looks simple. It is not.
The whole point is that your trunk learns to stay square while an outside force tries to turn you. That shows up in real life every time you reach, lift, or carry something slightly off-center.
How to Use It
- Press slowly.
- Pause for 1 to 2 seconds with arms extended.
- Return under control.
- Do 8 to 12 reps per side.
If your hips drift or your shoulders turn, widen your stance a little. If that still feels shaky, drop the resistance. The band should challenge you, not yank your posture apart.
12. Half-Kneeling Pallof Hold
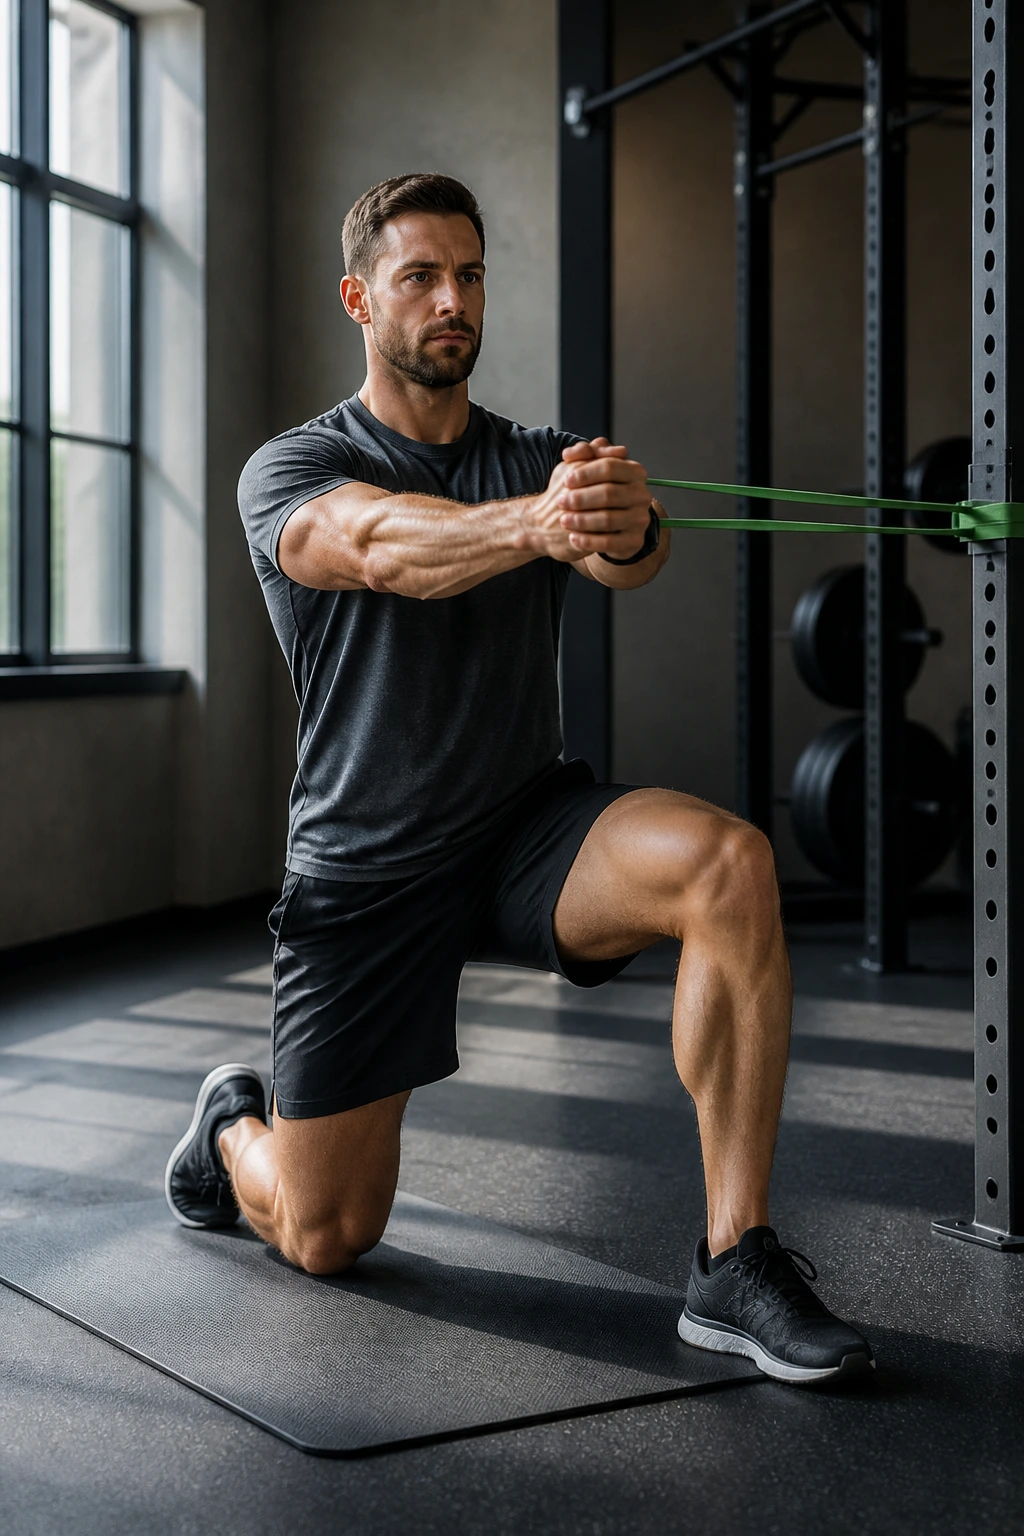
Half-kneeling changes the game by adding a little hip control to the anti-rotation work. Put one knee on the floor, the other foot forward, and hold the band or cable at chest height while you press out and freeze.
The kneeling side glute has to stay awake. Your ribs need to stay stacked. Your torso cannot cheat by leaning back or twisting away from the pull.
This version is especially nice for people who stand all day, because it teaches the body to stay tall without locking everything rigid. There’s a difference between strong and stiff. You want strong.
Hold for 10 to 20 seconds per side, or press and pause for 5 to 8 slow reps. If your low back pinches, reduce the load and make sure you’re not arching to “get tall.” Tall is fine. Flared ribs are not.
13. Suitcase Carry
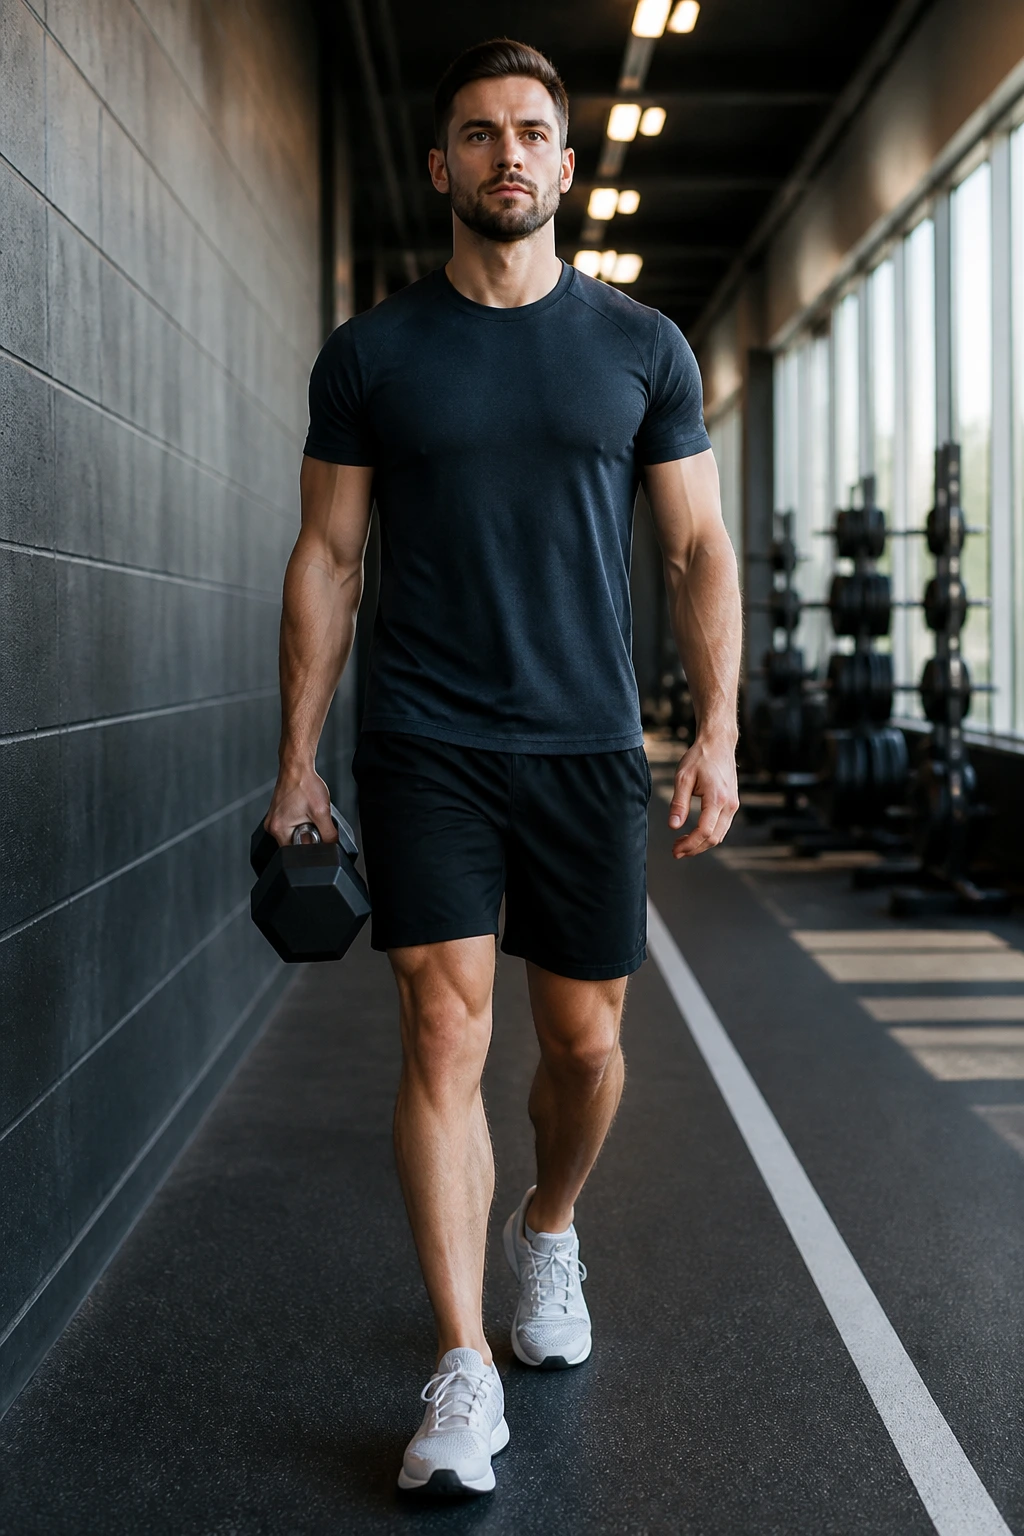
Carry one heavy object on one side and walk. That’s the whole trick, and it works because your trunk has to stop you from tipping toward the weight. It is one of the cleanest ways to train the core without a single crunch.
Hold a dumbbell or kettlebell in one hand, stand tall, and walk slowly for 20 to 40 yards. Don’t lean away from the weight. Don’t let the opposite shoulder hike up and become a panic point. Just stay long through the spine and quiet through the ribs.
A suitcase carry should feel like a test of posture, grip, and patience all at once. If you’re waddling, the load is too heavy.
Use the heaviest weight you can hold without bending sideways. Do two or three trips per side. Rest as needed. That’s enough to make the trunk work hard without turning the session into a circus.
14. Farmer Carry
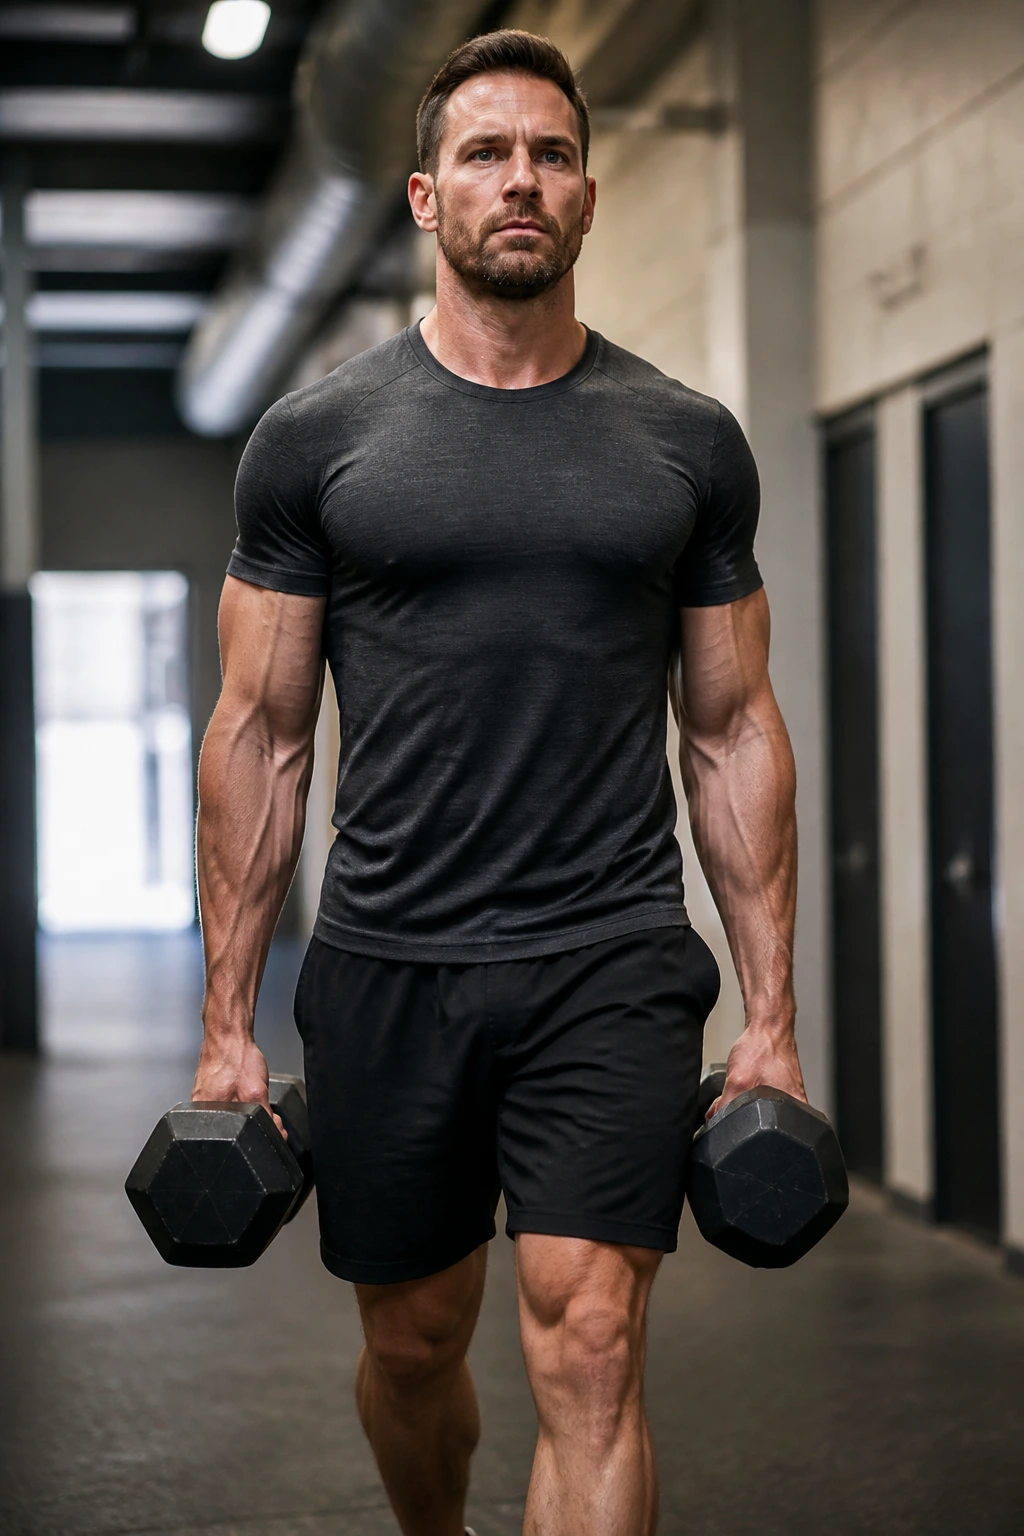
Farmer carries use two weights, one in each hand, and they ask for a different kind of control. Instead of fighting side bend, you’re fighting the urge to slouch, flare, or rush. Walk with a tall chest, soft knees, and a steady pace.
This is where a lot of people discover how fast their posture falls apart under fatigue. Fine. That information is useful. Better to learn it with two kettlebells in your hands than under a barbell you can’t control.
A Simple Rule
If the weights make you shrug, lighten the load. If they make you lean forward, shorten the distance. If your lower back tightens by the turn of the hallway, stop the set there.
Thirty to 60 yards is plenty. Two or three rounds works well. The grip usually gives out before the abs do, and that’s not a problem — it just means you found a useful load.
15. Front Plank With Hands Elevated
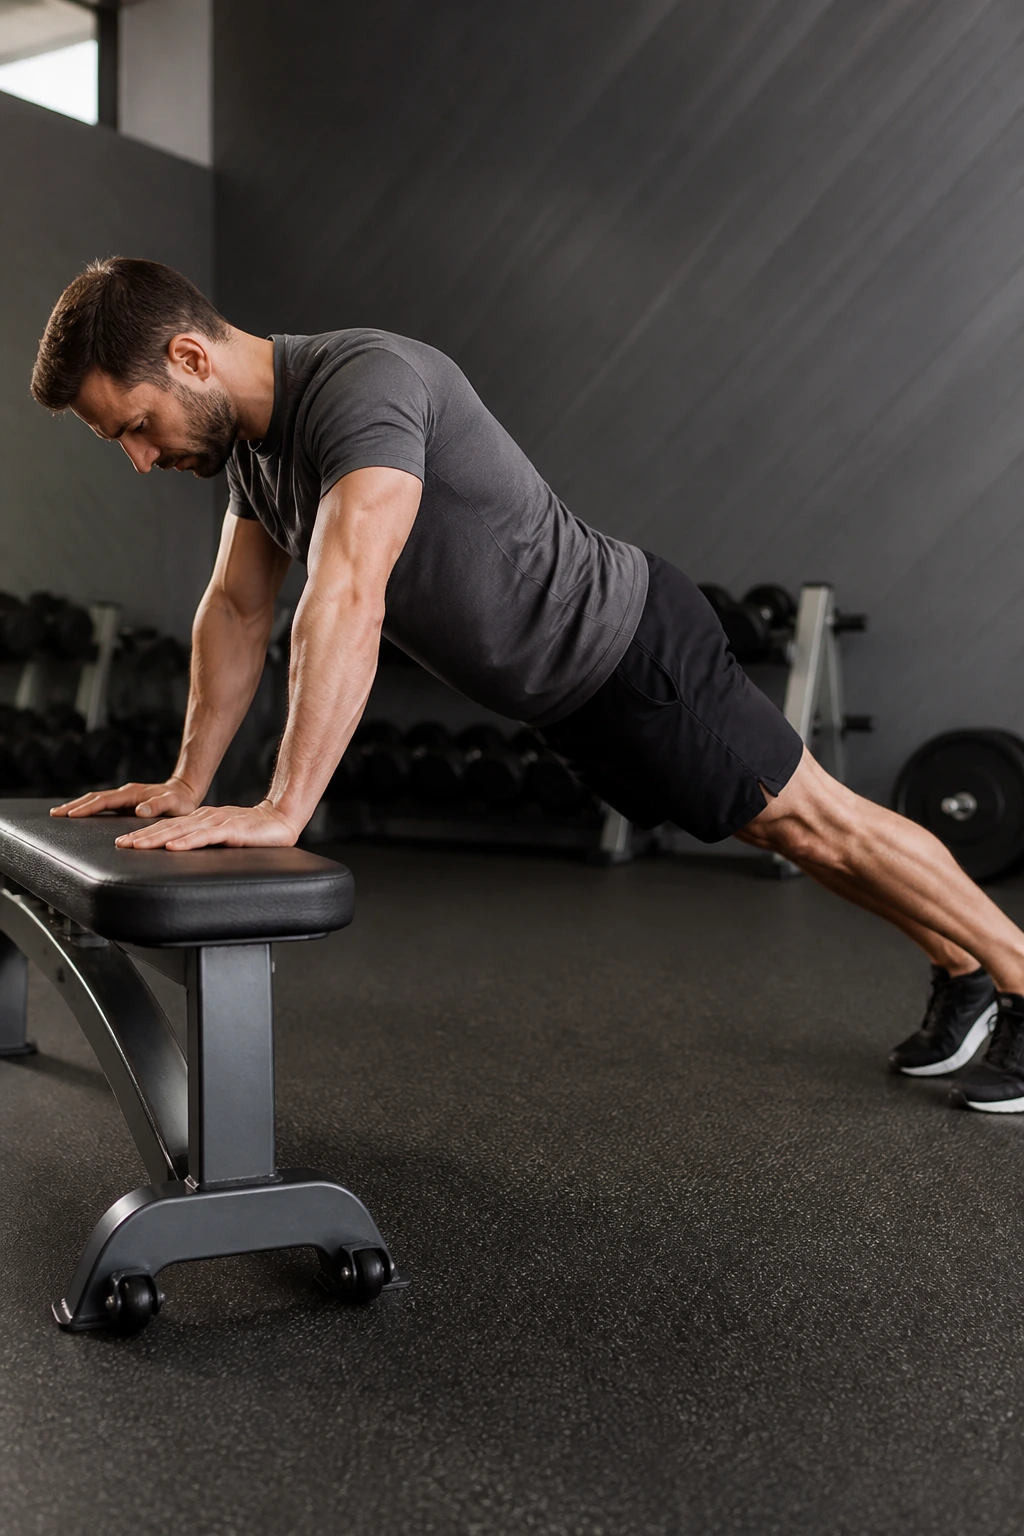
Why start on a bench or wall instead of dropping straight to the floor? Because a supported plank lets you keep better shape while the core learns how to hold. Put your hands on a bench, box, or sturdy couch, walk your feet back, and make one straight line from head to heels.
Keep the glutes on and the ribs tucked gently down. Don’t let your lower back sag like a hammock. That’s the version that makes back pain people swear off planks forever, which is a shame because the drill itself isn’t the problem.
Ten to 30 seconds is enough for most people at first. Short and clean beats long and sloppy. If you can breathe through the hold without shaking apart, you picked the right height.
Lower the surface only when the current version feels easy and controlled. That’s the smart progression, not suffering.
16. Plank Shoulder Taps
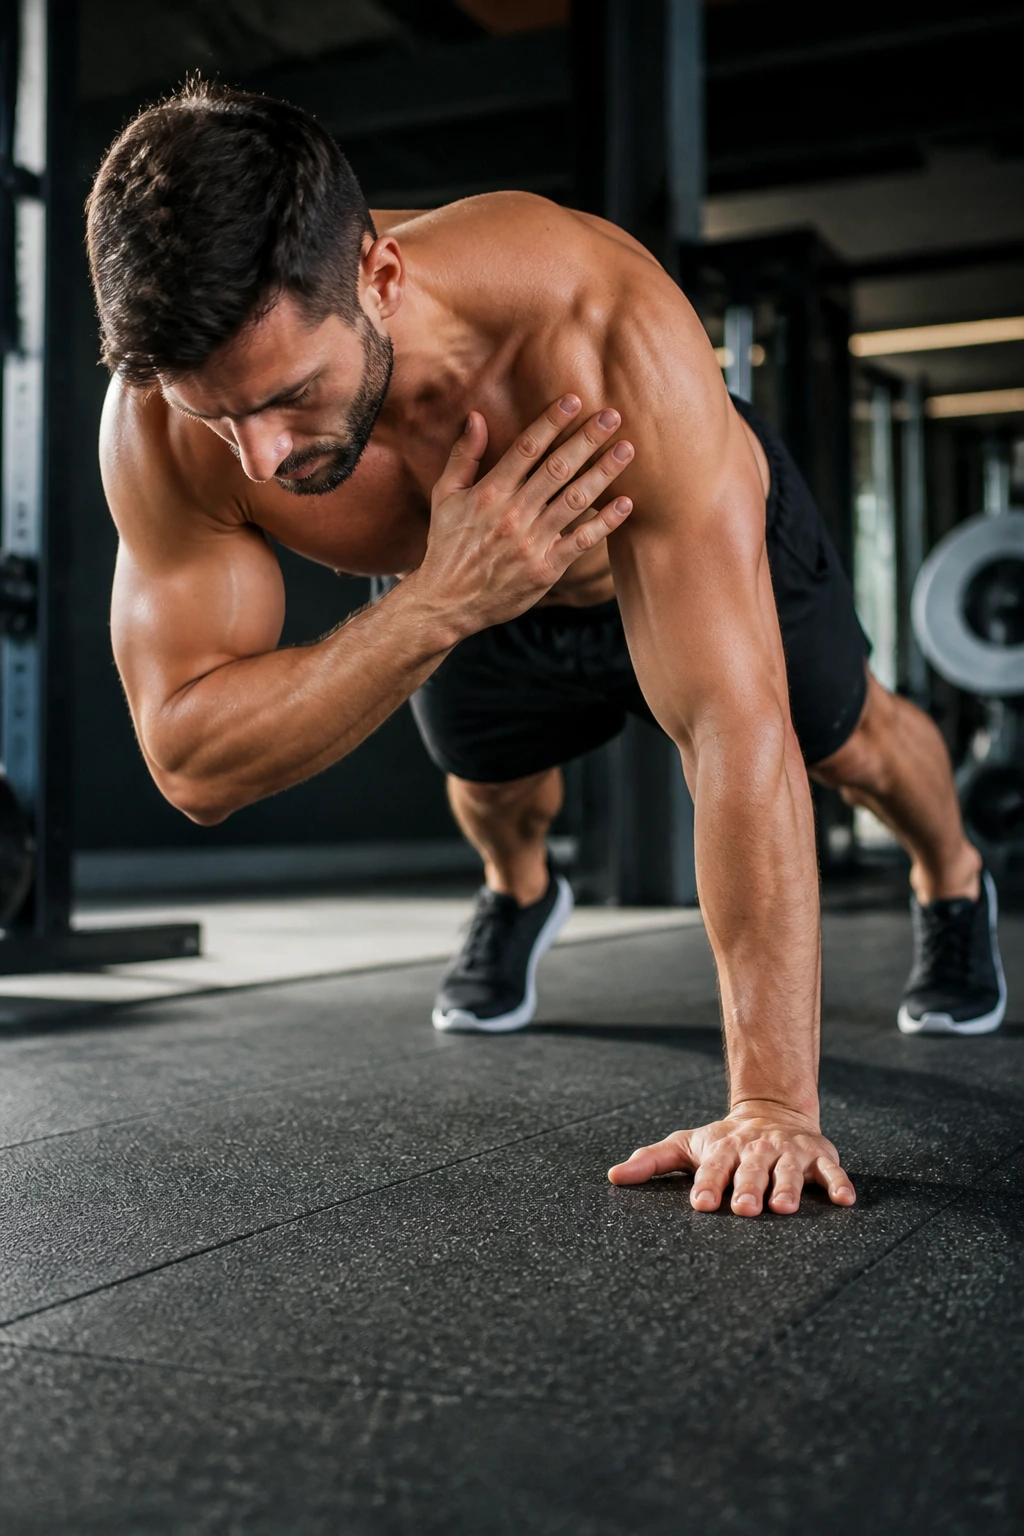
A plank that includes shoulder taps is a plain old anti-rotation test wearing a different outfit. Start in a high plank, preferably with hands elevated if your back appreciates that, then tap one shoulder with the opposite hand while the hips stay as still as possible.
Feet wider than hip width make this much more manageable. Close your feet and the whole body starts to wobble. That wobble is the point of the challenge, but it shouldn’t turn into a full-body twist.
What Makes It Hard
- One arm leaves the floor.
- The opposite side has to stabilize.
- The pelvis wants to swing.
- The trunk has to say no.
Go slow. Six to 10 taps per side is enough. If the low back starts to sag or your hips bounce like a metronome, switch back to a static elevated plank and earn the right to tap again later.
17. Wall Plank
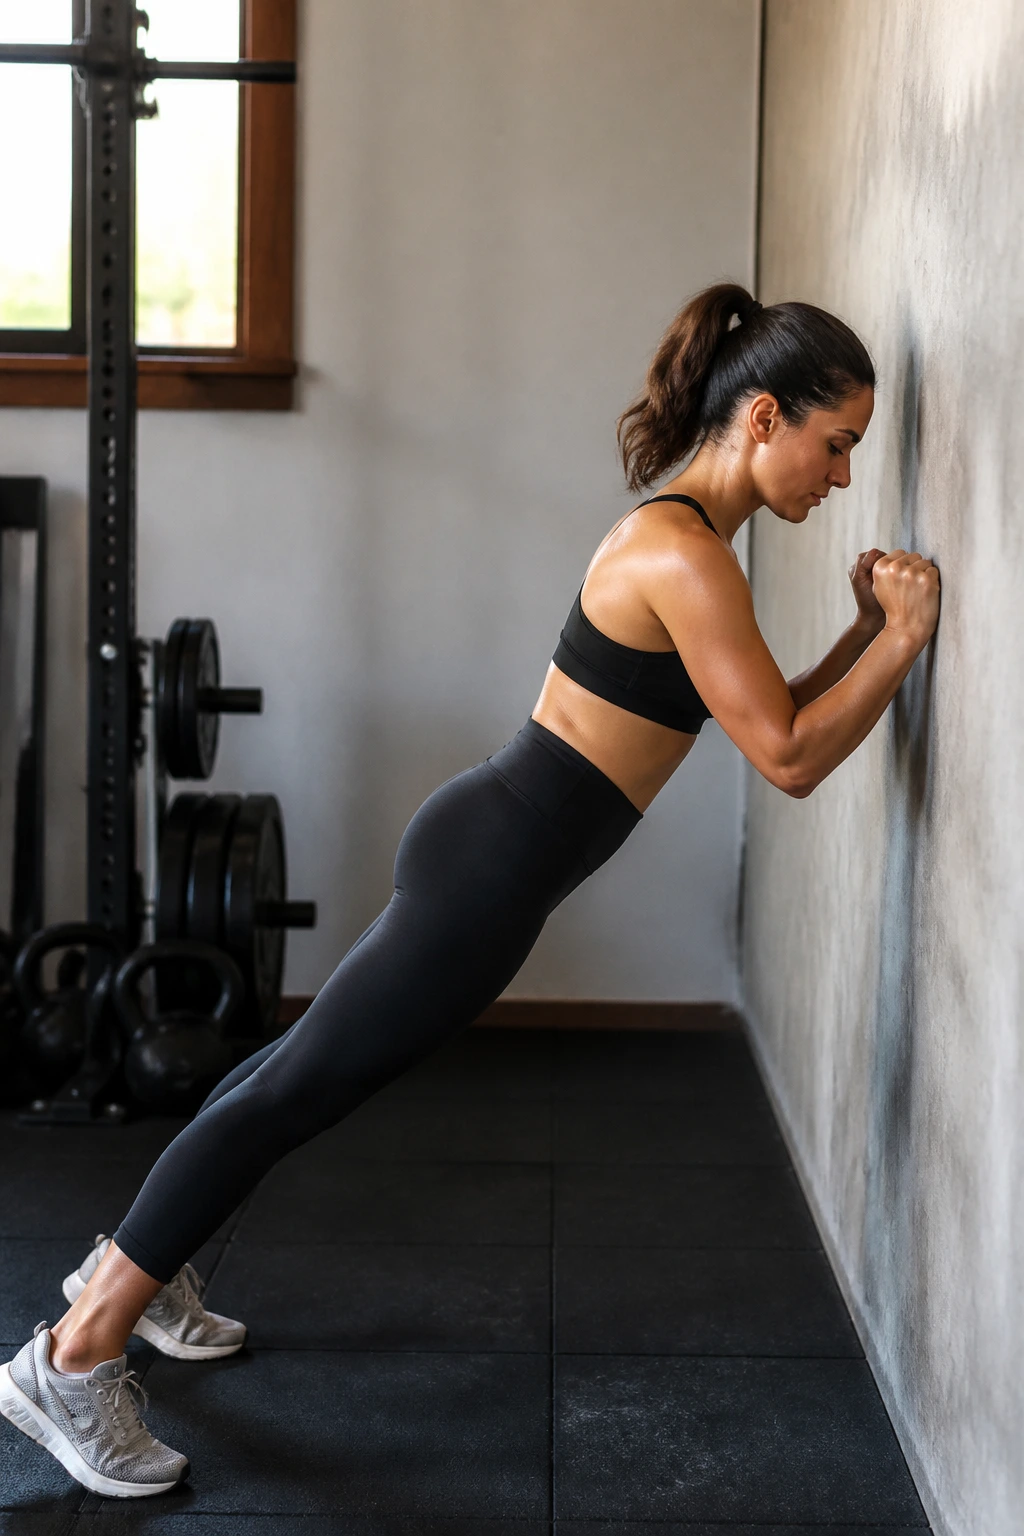
A wall plank is the least glamorous version here, and I mean that as a compliment. Stand facing a wall, place your forearms or hands against it, and walk your feet back until your body makes a firm diagonal line. Brace lightly, squeeze the glutes, and hold.
It looks almost too easy until you do it with proper tension. Then your whole torso starts to light up in a quiet way that floor planks sometimes miss.
Who Should Use It
- Anyone coming back from a flare-up.
- People who hate getting down on the floor.
- Beginners who need a clean starting point.
- Lifters who want a low-fatigue warm-up drill.
Hold for 20 to 40 seconds and breathe the whole time. If you feel pressure in the lower back, step a little closer to the wall and reduce the angle. That small change can turn a useless strain into a good warm-up.
18. Heel Slides
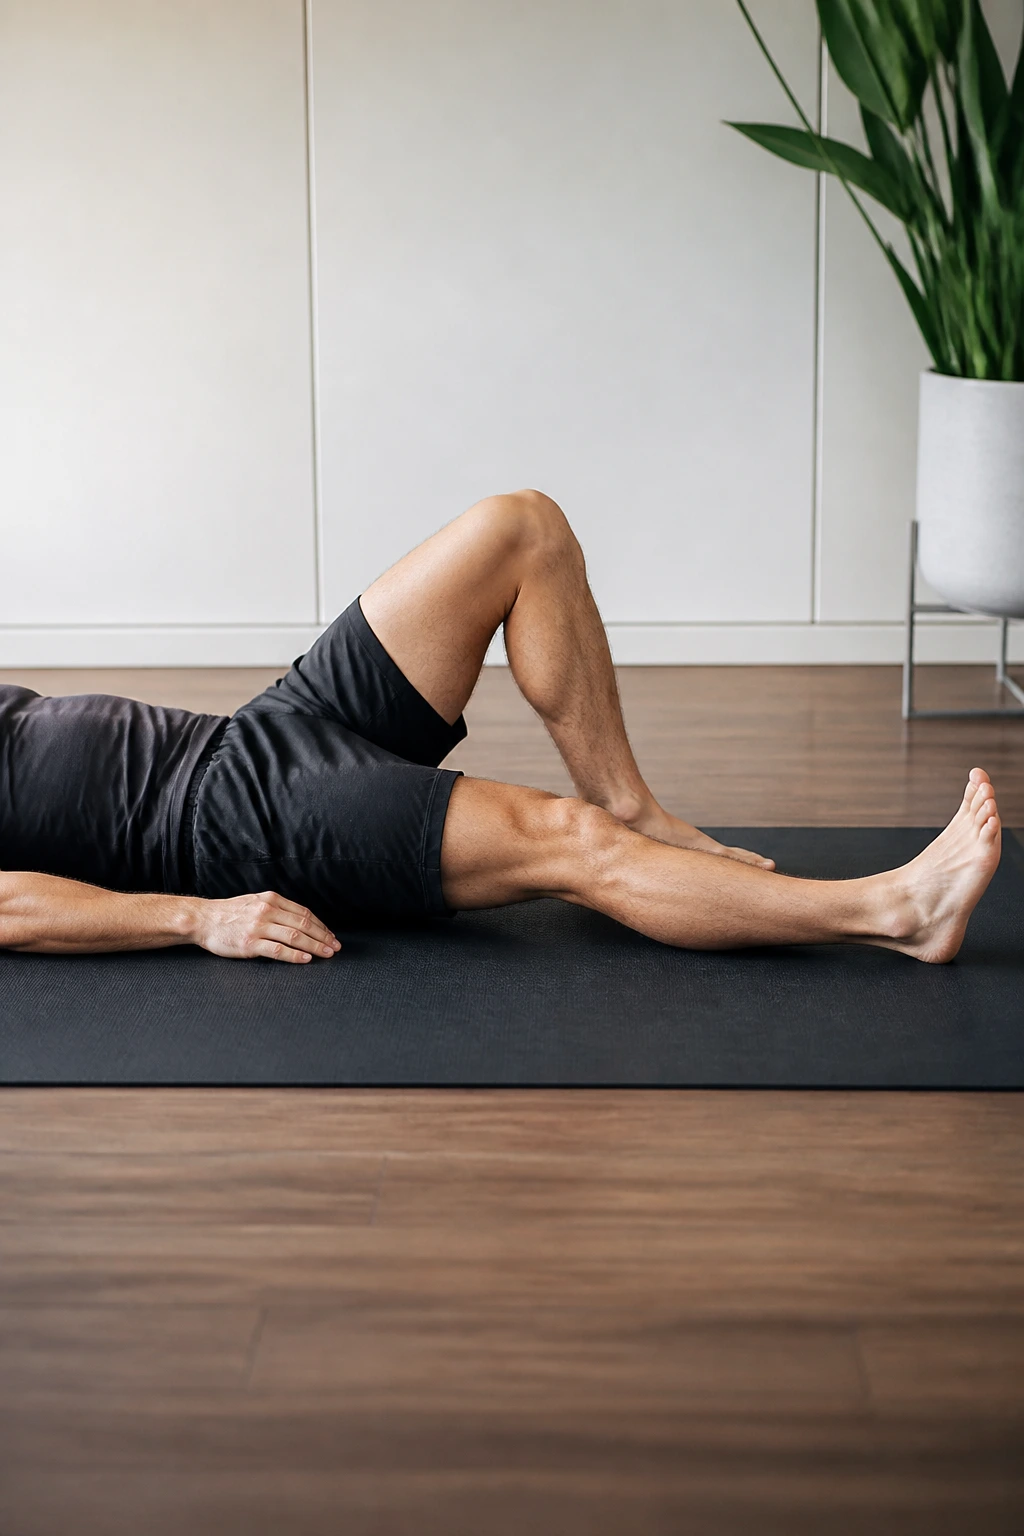
Heel slides are one of those drills people dismiss because they look too gentle. Then they try them slowly and realize their core has been slacking off.
Lie on your back with one knee bent and the other foot flat. Slide one heel away from you along the floor until the leg almost straightens, then pull it back in without letting the pelvis rock or the ribs pop up. Switch sides.
The slide should be smooth, not dramatic. If your back arches, cut the range in half. If your hip flexors start to grip hard, slow the return and keep the exhale long.
This one is great on days when your back feels touchy but you still want to train something. Six to 10 slides per side is enough. The small range is not a weakness. It’s the whole point.
19. Standing Band March
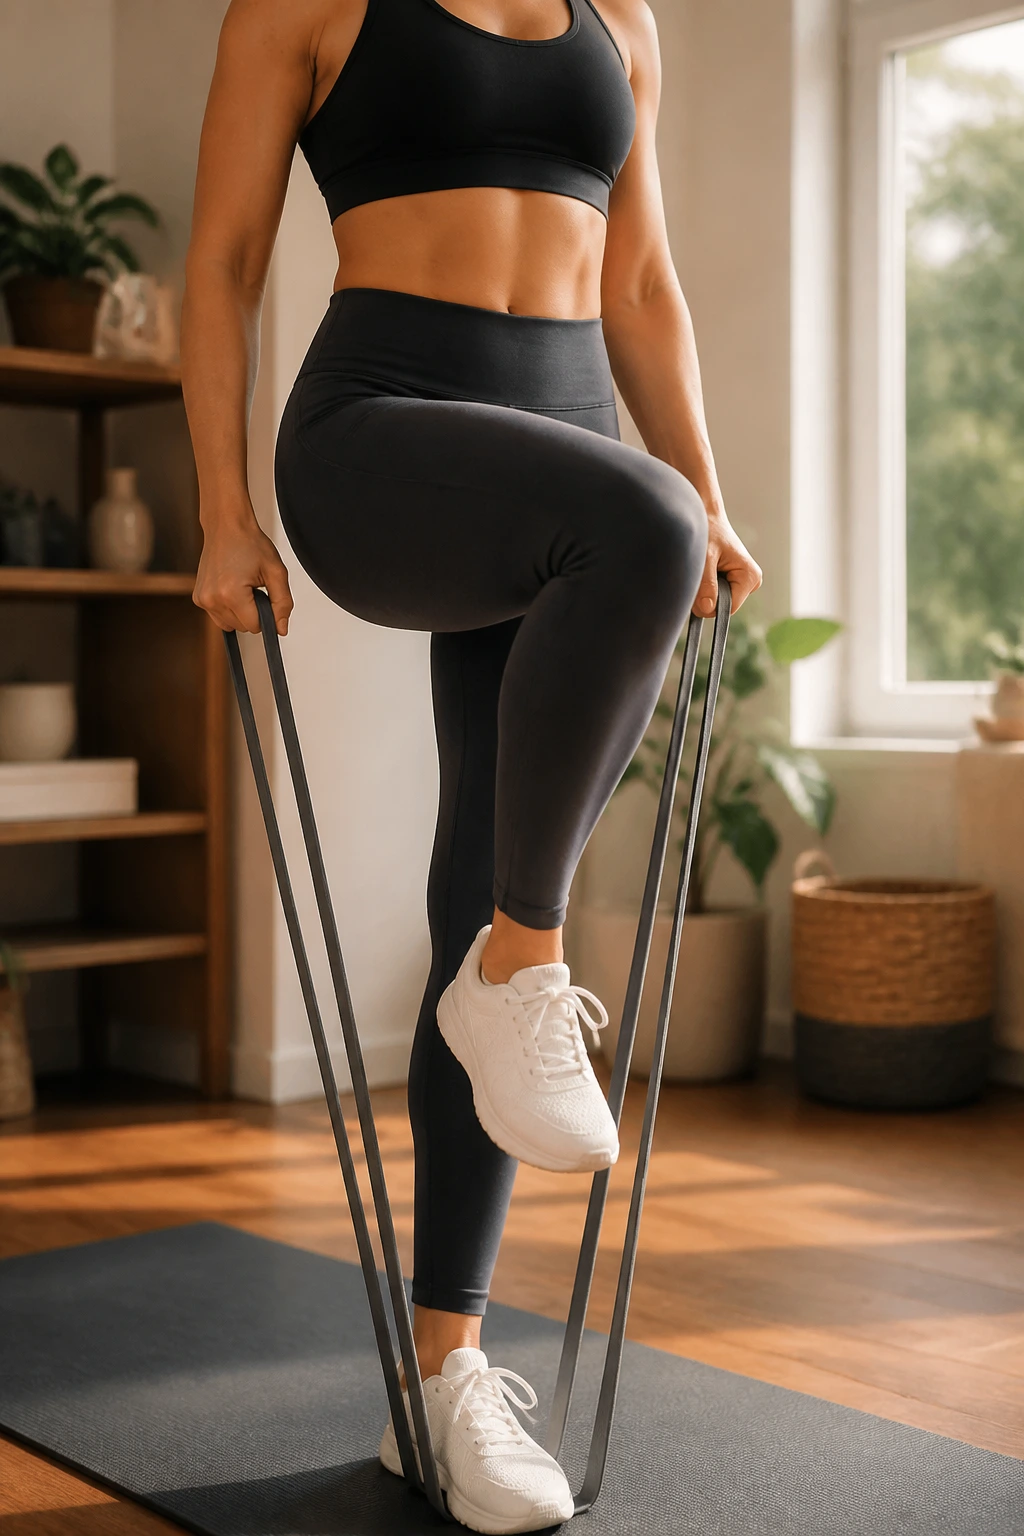
Standing drills matter because life happens standing up. Attach a light band around your feet or hold a band in your hands for gentle tension, then march one knee up at a time while staying tall through the torso.
Think of the exercise as a balance test with a brace requirement. Each time one foot leaves the floor, the trunk has to keep the ribs stacked and the pelvis from tipping or leaning back.
Keep These Cues in Mind
- Lift the knee only as high as you can stay steady.
- Keep the exhale smooth.
- Stand tall, not stiff.
- Move slowly enough that the torso stays quiet.
Twenty to 30 total steps is a clean target. If your low back arches or the movement starts to feel jerky, reduce the band tension and shorten the march. A smaller march done well beats a bigger one done badly.
20. Bear Hover Hold
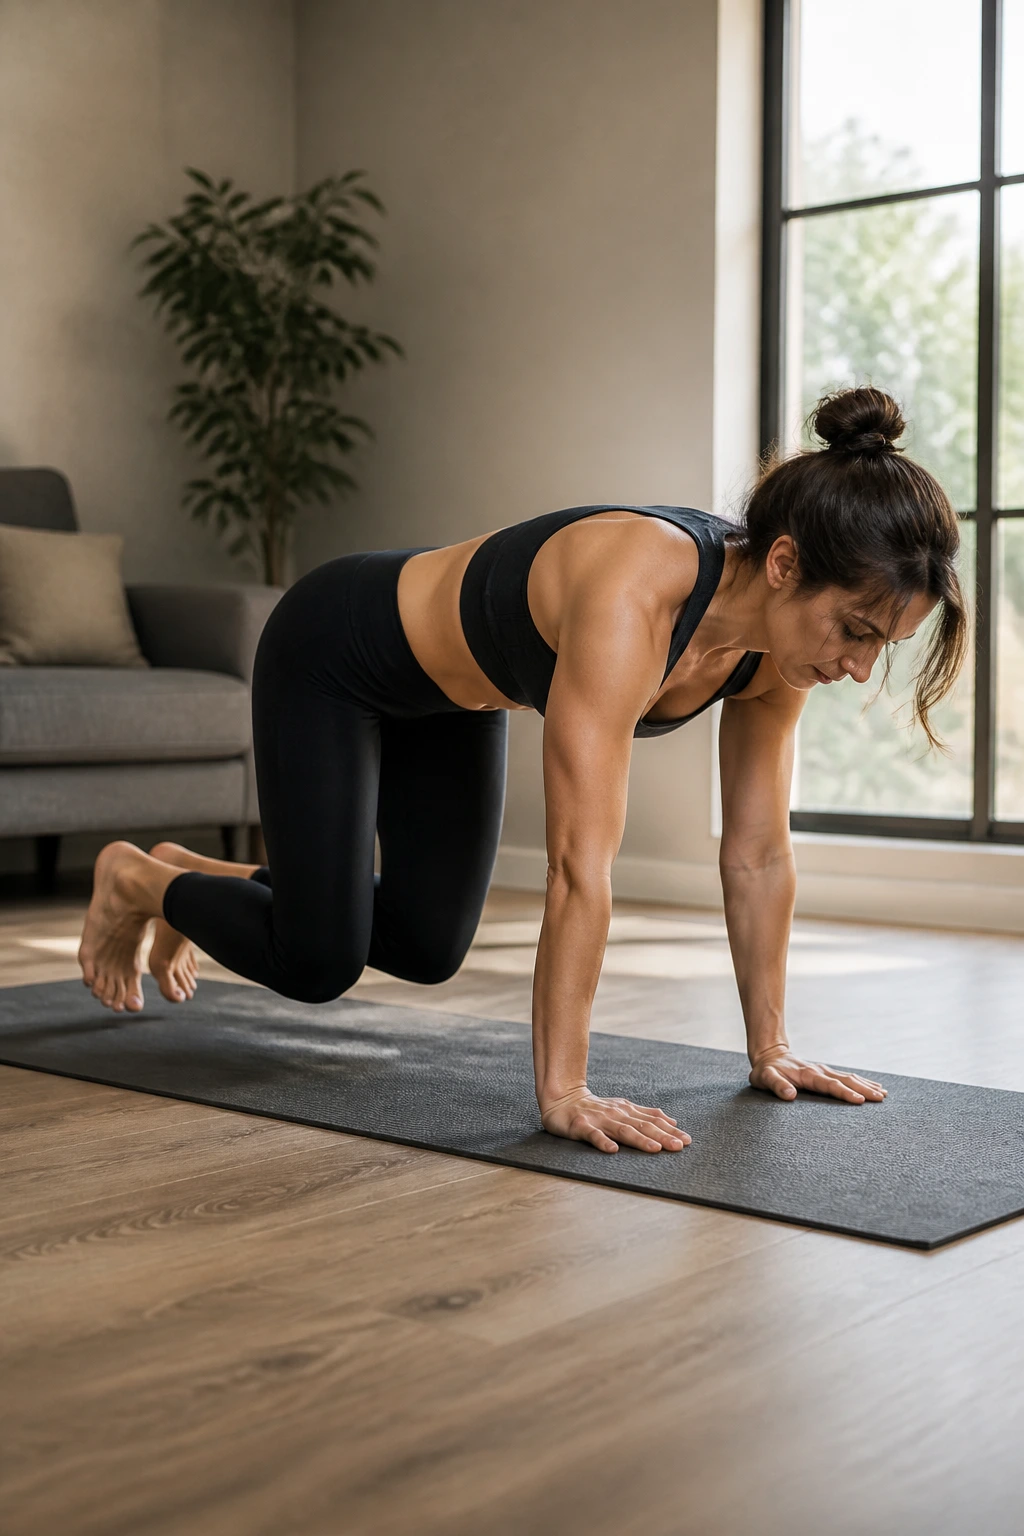
This is the most advanced move on the list, and it should stay that way until the rest feel solid. Start on hands and knees, tuck your toes, then hover the knees about 1 to 2 inches off the floor while keeping your back flat and your breath under control.
The bear hover is brutal in a sneaky way because the knees want to drift, the ribs want to flare, and the hips want to pike. Hold those lines together and you’ve got a serious trunk challenge without any crunching at all.
If that position pinches your back, skip it for now. No apology needed. Use the wall plank, side plank, or dead bug instead and come back later.
Five to 15 seconds per hold is enough for a start. Two or three rounds will tell you whether the movement belongs in your routine. If the answer is yes, keep it short and crisp. Long, sloppy bear hovers belong in the trash.
Pick four of these, not ten. Run them for a couple of weeks before deciding they “work,” because back-friendly training usually pays off in steadiness first and dramatic burn second.
If a drill leaves you tighter afterward, swap it out. The goal is a trunk that feels organized when you stand up, walk, reach, or carry something awkward — not a midsection that looks heroic for ten seconds and complains for the rest of the day.
