



No crunch ab workouts are the first thing I reach for when crunches start making a lower back grumpy. That is not a moral stance. It’s just common sense.
A cranky back usually dislikes repeated spinal bending, fast twisting, and anything that turns the hip flexors into the main event. What tends to feel better is core work that keeps the ribs stacked over the pelvis and asks the trunk to resist movement instead of creating more of it.
That means dead bugs, planks, carries, presses into bands, and a few crawling drills that look almost too simple to matter. They do matter. Quietly. And often more than the flashy stuff that leaves your abs sore but your back annoyed.
If pain shoots down a leg, changes when you cough, or keeps hanging around after you stop training, that’s not a cue to “push through.” Get it looked at. For everything else, start with the quieter work below and build from there.
1. Dead Bug Presses for No-Crunch Core Work
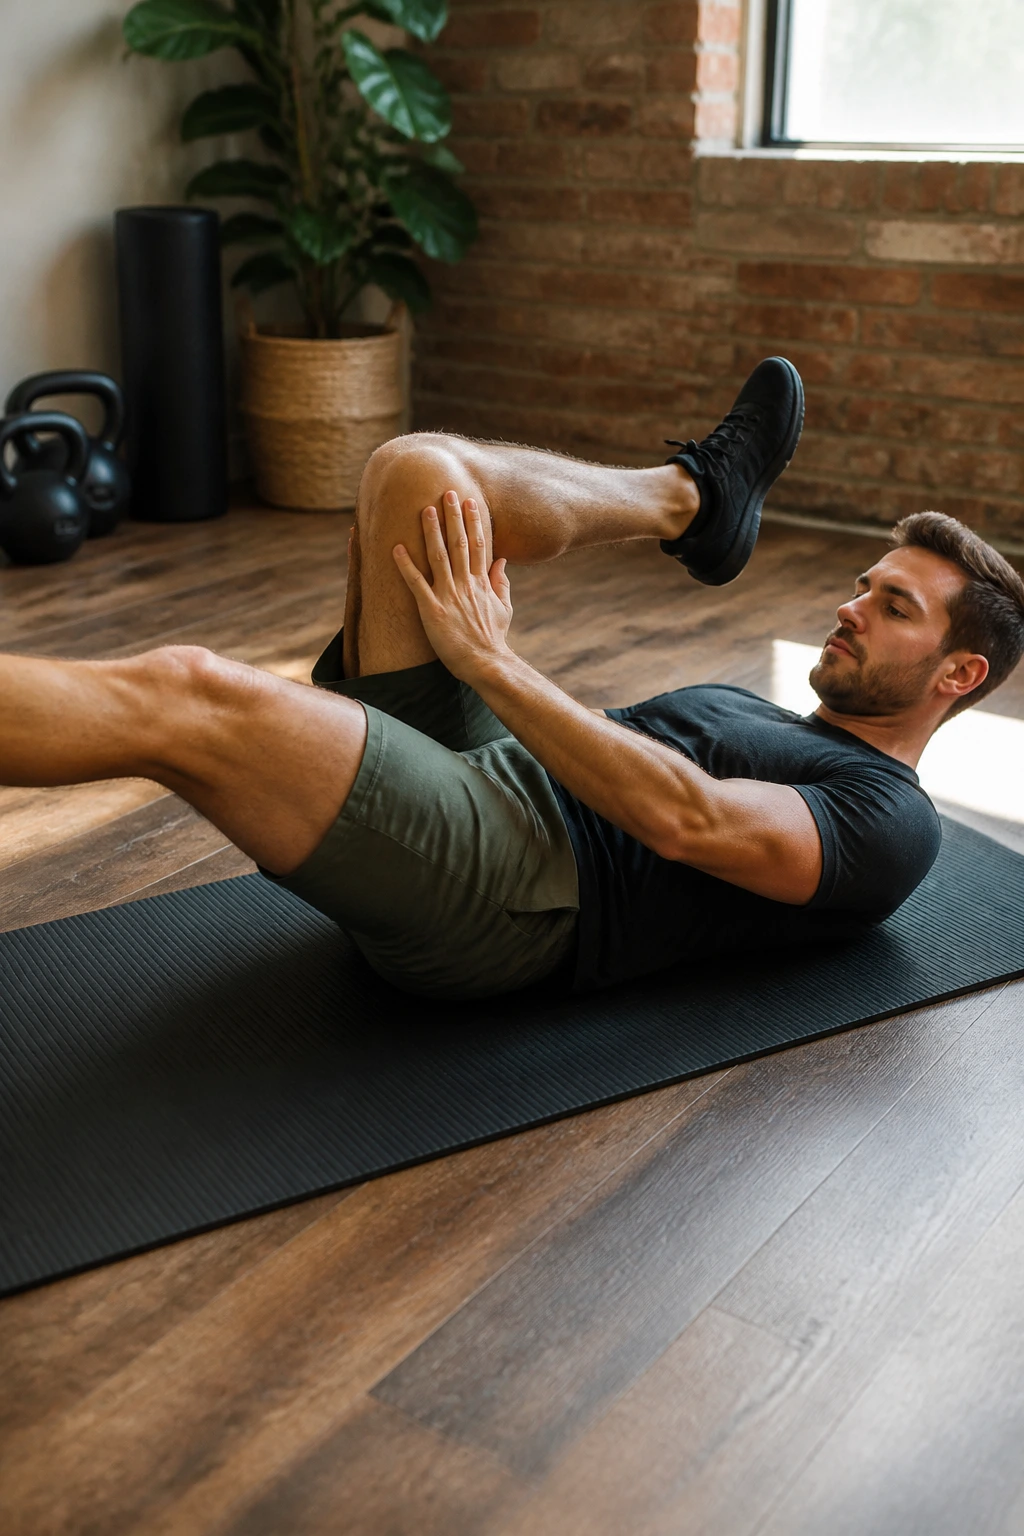
If crunches make your lower back complain, dead bug presses are where I’d start. They look gentle, which is part of the appeal, but the good version of this drill is sneaky-hard.
Lie on your back with your knees bent at 90 degrees and your shins parallel to the floor. Press both hands into the fronts of your thighs, then slowly extend one leg while keeping your low back heavy against the floor. The real job is not moving fast. It’s keeping your trunk from arching when the limb moves away.
Best cue: exhale before the leg goes out. That little breath drop usually does more than forcing your abs to “tighten.”
- Try 5 to 8 slow reps per side.
- Stop the moment your ribs flare or your back lifts.
- If the floor feels too hard, place a towel under your sacrum for comfort, not support.
Small move. Big honesty.
2. Bird Dog Reaches
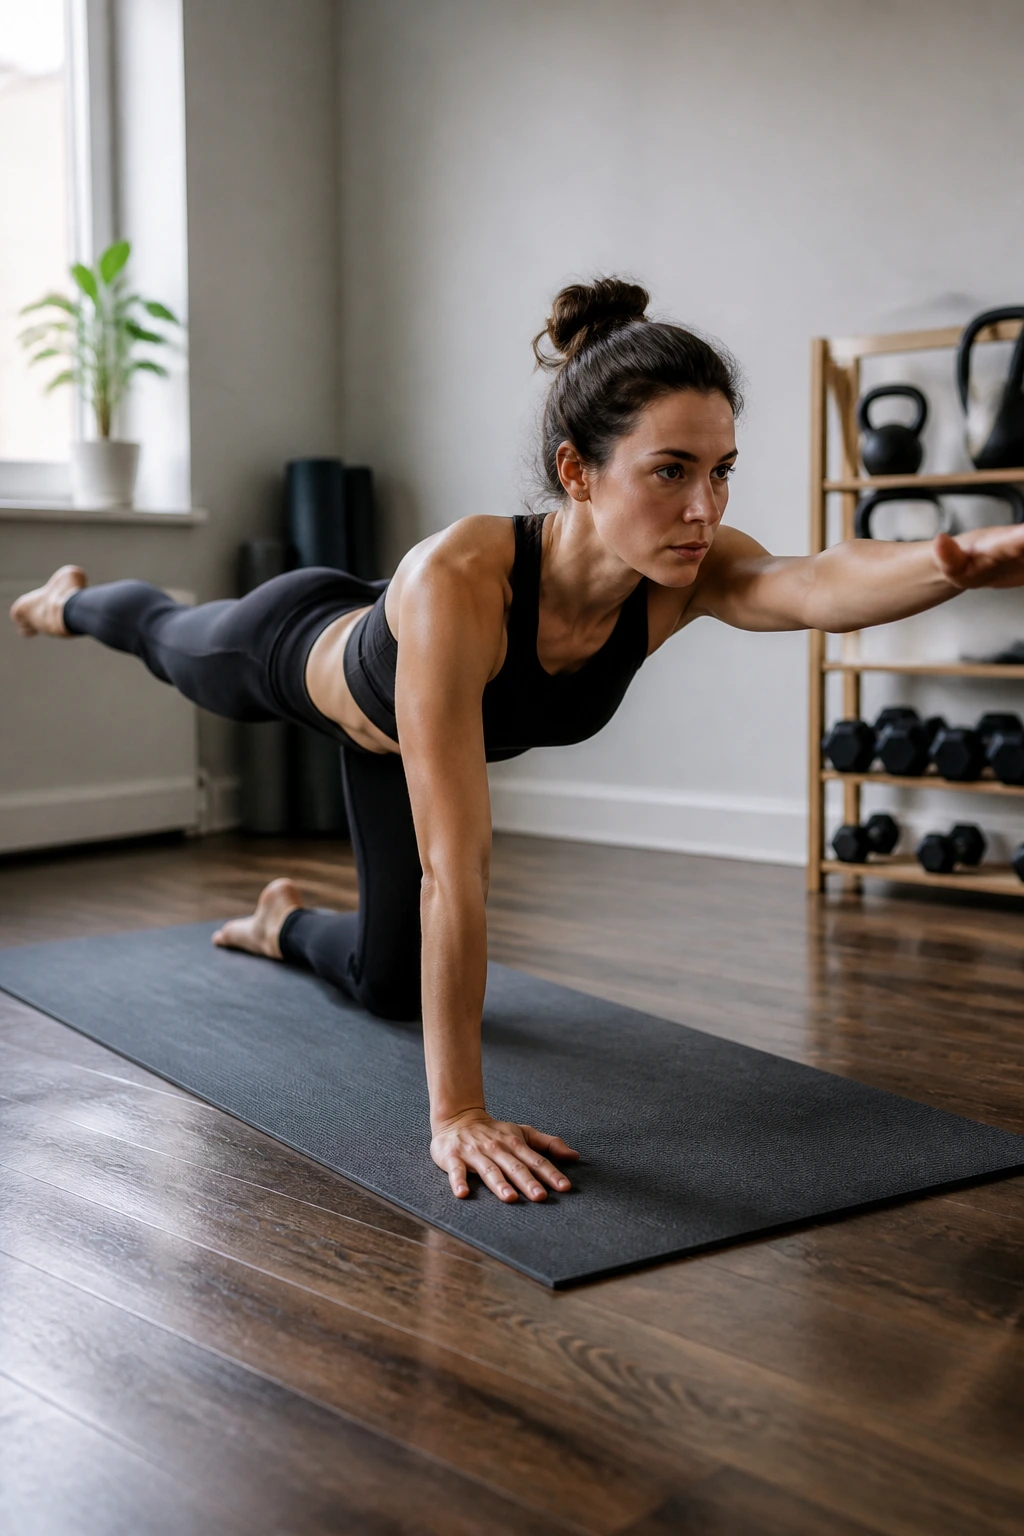
Why does a move this plain show up in so many back-friendly routines? Because it teaches the body to stop wobbling when one arm and one leg move in opposite directions.
Start on hands and knees with your hands under your shoulders and knees under your hips. Reach your right arm forward and left leg back without letting your pelvis spin open. Hold for a beat, return with control, then switch sides. The goal is a long line from fingertips to heel, not a high kick that turns your back into a hinge.
What to watch for
- Keep the reaching leg in line with your torso.
- Don’t let your lower ribs sag toward the floor.
- Pause for 2 seconds at full reach if the movement feels too easy.
- If your shoulders don’t love full reaches, do the leg only for a set or two.
A clean bird dog should feel steady, almost calm. If it feels like a balance contest, slow down. That is the point.
3. Forearm Plank
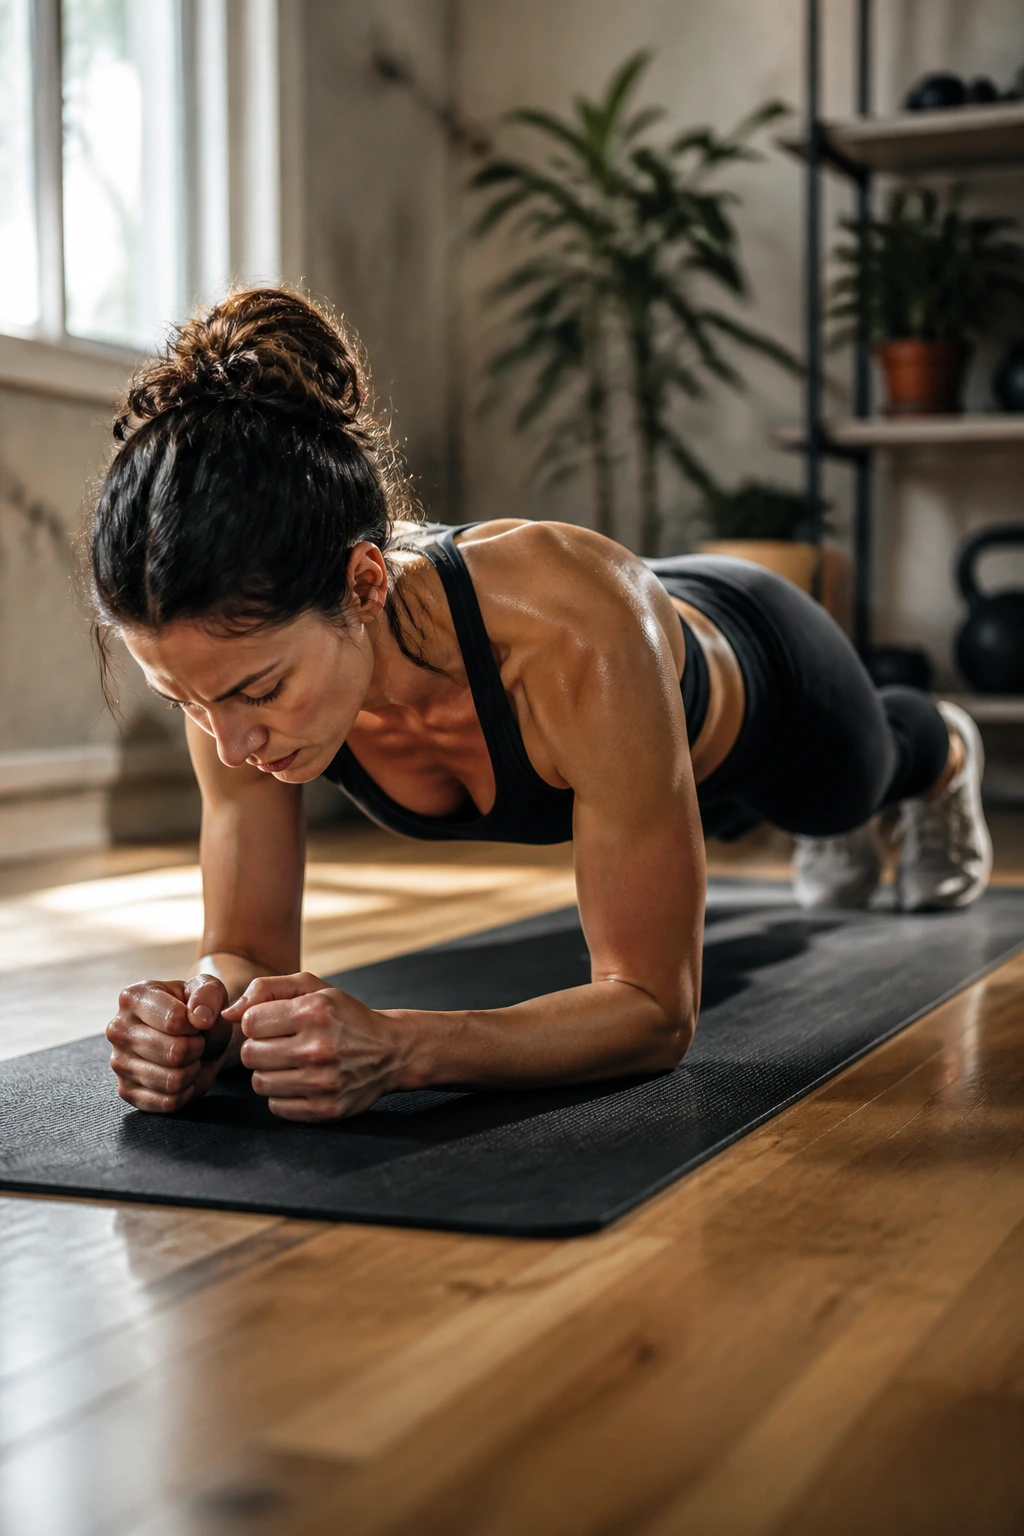
A clean plank beats a long, sloppy hold every time. I’ll take 20 honest seconds over a minute of sagging hips and shrugged shoulders.
Set your forearms on the floor with elbows under shoulders and your toes tucked. Squeeze your glutes, draw your ribs down, and think about making your body one solid plank from head to heels. The back should stay flat, not jammed into an arch. If you can breathe in short, quiet breaths without losing shape, you’re doing it right.
One good rep of this is worth more than a pile of shaky holds.
A lot of people make planks harder by accident. They hold their breath, dump their hips, and let the neck crane forward. Don’t do that. Short sets, good shape, and a clear stop point are the whole game here.
4. Side Plank
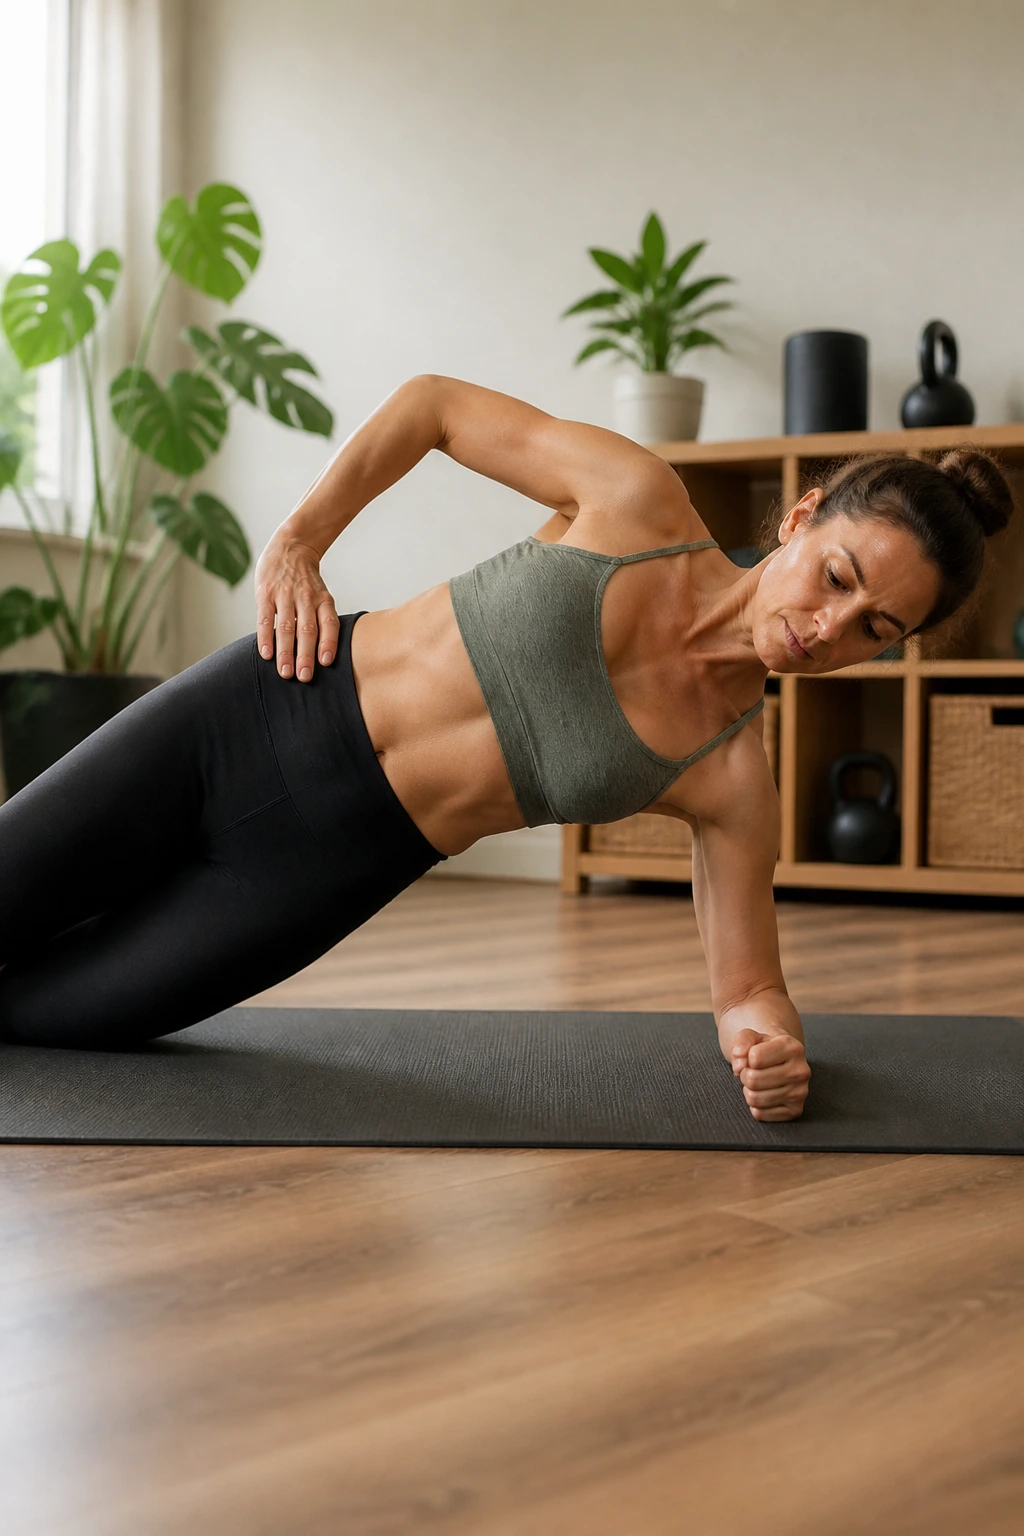
Front planks get the credit. Side planks do a lot of the actual work for a back that hates bending sideways.
Lie on your side, prop up on one forearm, and lift your hips so your body makes a straight line. If the full version feels too spicy, drop the bottom knee to the floor and keep the top leg long. Your top shoulder should stay stacked right over the bottom one. No collapsing. No shrugging. No leaning into the floor like you’re trying to hide from it.
A short side plank hold hits the obliques and the deep side stabilizers without asking your spine to curl. That’s the win. Start with 10 to 15 seconds per side and add time only when your shape stays clean.
If one side feels much weaker, that’s useful information, not a problem to panic over.
5. Pallof Press for No-Crunch Abs
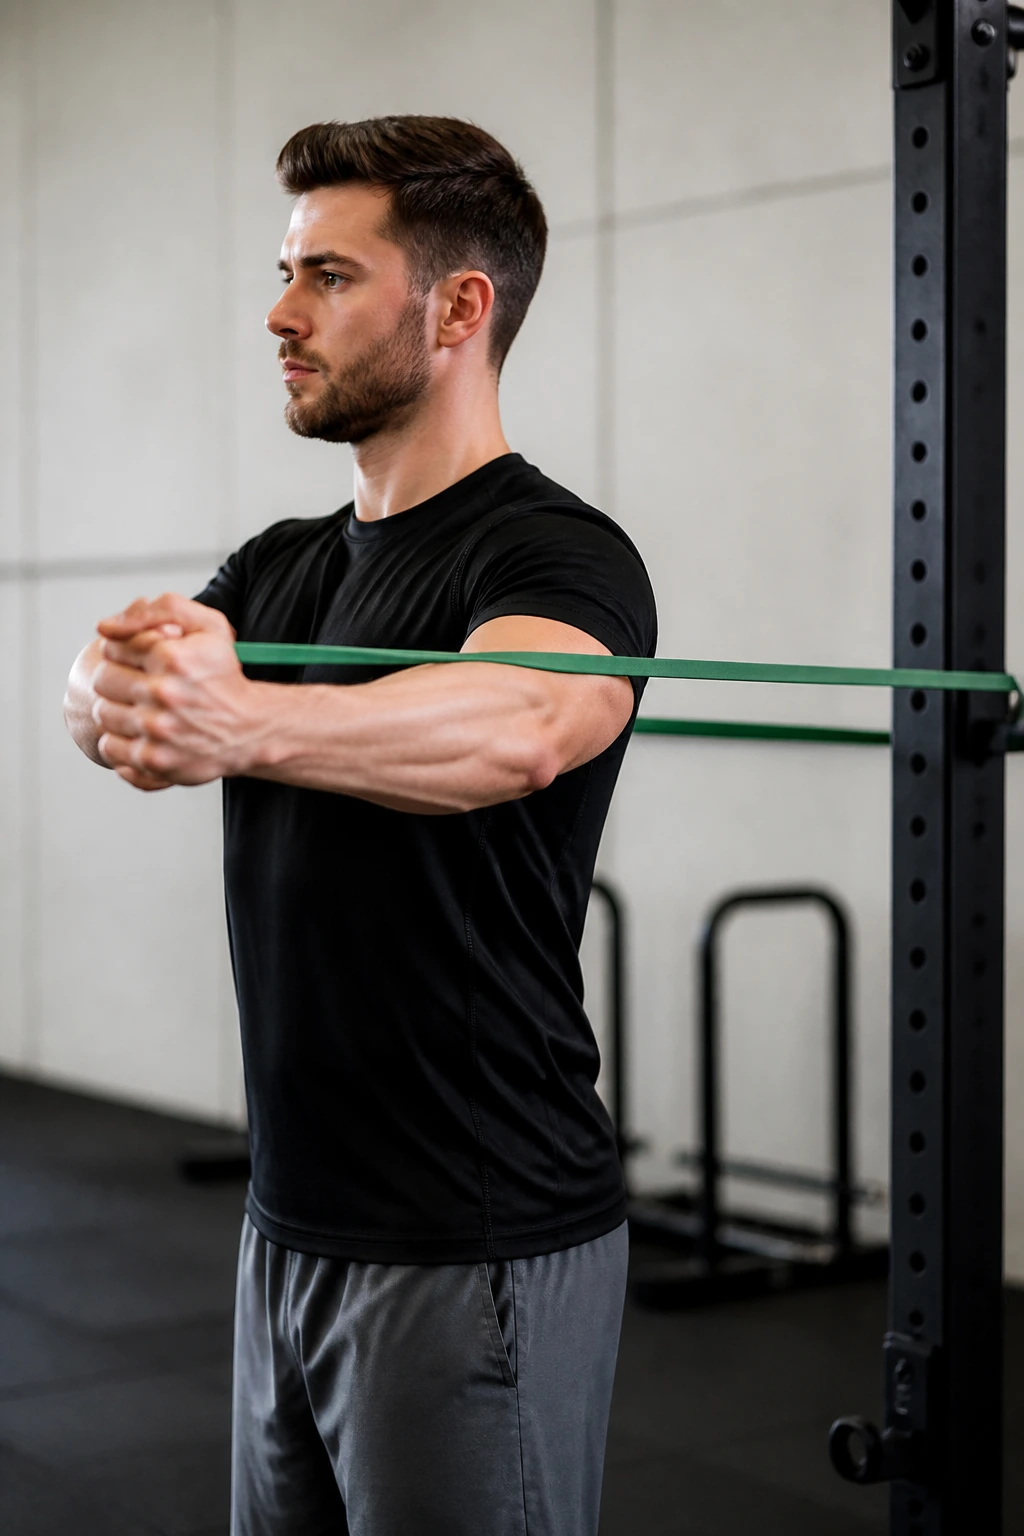
The Pallof press is core training with the volume turned down. It looks almost boring, which is exactly why people underestimate it.
Anchor a band or cable at chest height and stand sideways to it. Hold the handle at your chest, step away until you feel steady tension, then press your hands straight out in front of you and pause before bringing them back. Your torso should stay square. The cable wants to twist you. Your job is to not let it.
Set it up like this
- Use a band, cable, or pulley at sternum height.
- Stand tall with knees soft, not locked.
- Press out slowly and hold for 1 to 2 seconds.
- If standing feels easy, switch to a half-kneeling stance.
This one is especially nice for backs that hate twisting. The movement trains anti-rotation without a lot of spinal motion, and that usually makes it friendlier than a bunch of sit-up variations.
6. Suitcase Carry
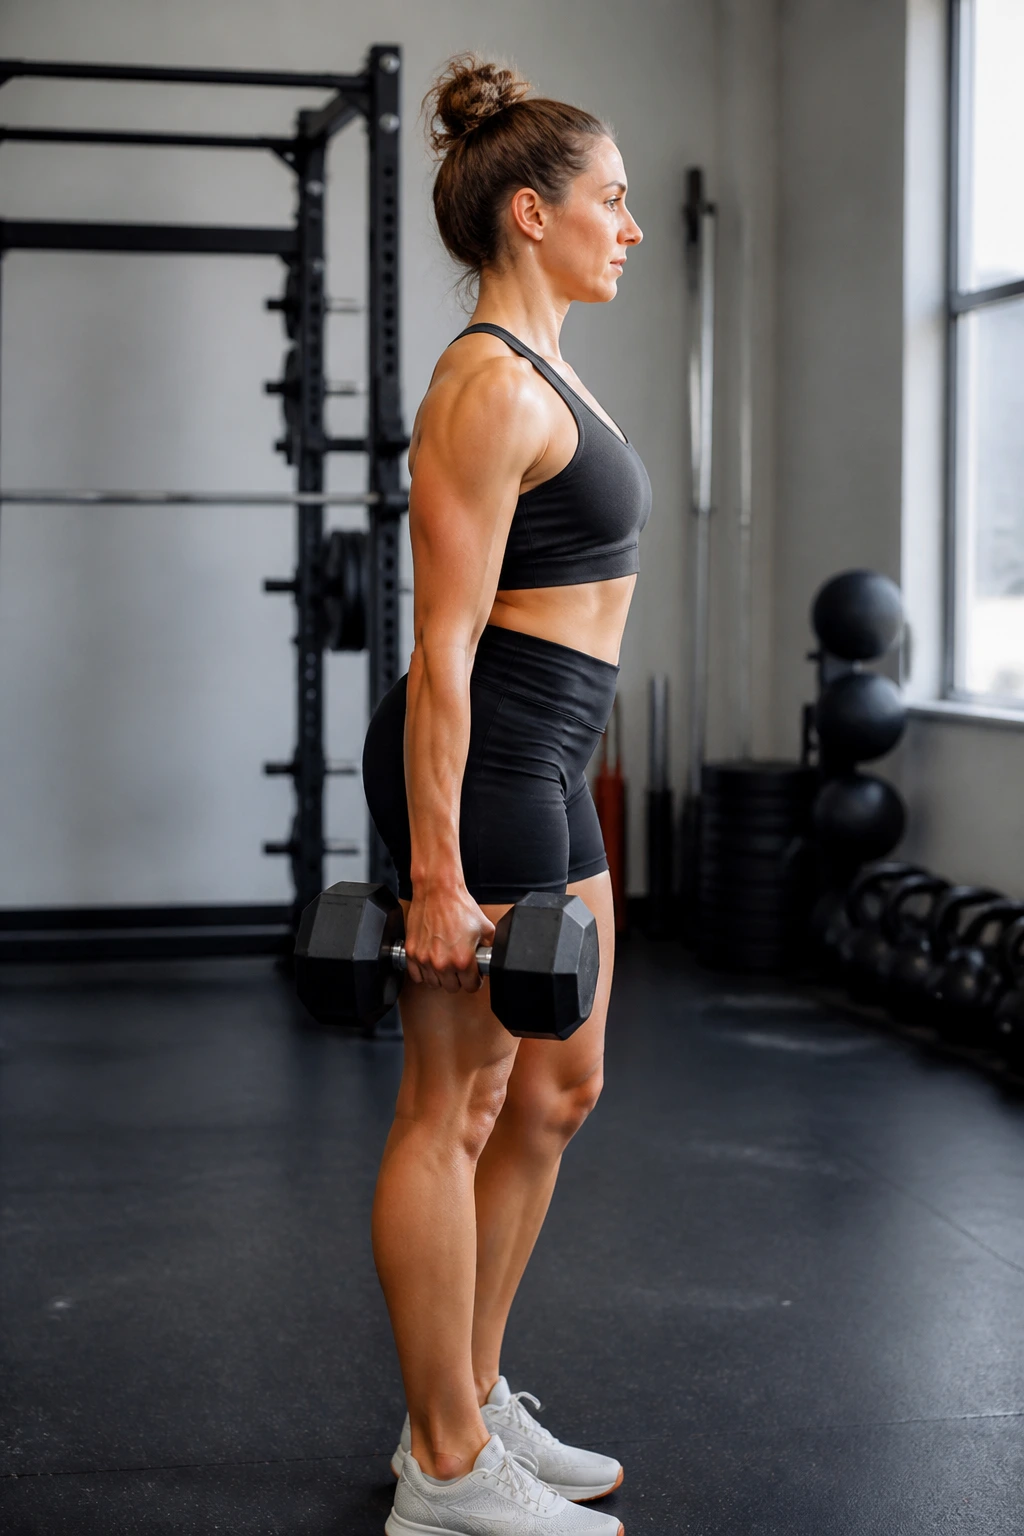
Carry one heavy thing on one side and your trunk suddenly has a job. A real one.
Pick up a dumbbell or kettlebell in one hand and walk with your torso tall, ribs stacked, and shoulders level. The weight will try to pull you toward it. Don’t lean away dramatically. Don’t sway. Just walk like a person who knows where the ceiling is. Thirty seconds of this can light up your side body faster than people expect.
If your grip fails before your abs do, the load is too heavy. That’s the usual mistake. A suitcase carry should feel heavy, yes, but not like a fight to avoid being yanked sideways.
Try 20 to 40 yards per side, or 20 to 30 seconds if space is tight. Slow steps help. So does looking straight ahead instead of checking your feet every two seconds.
7. Glute Bridge March
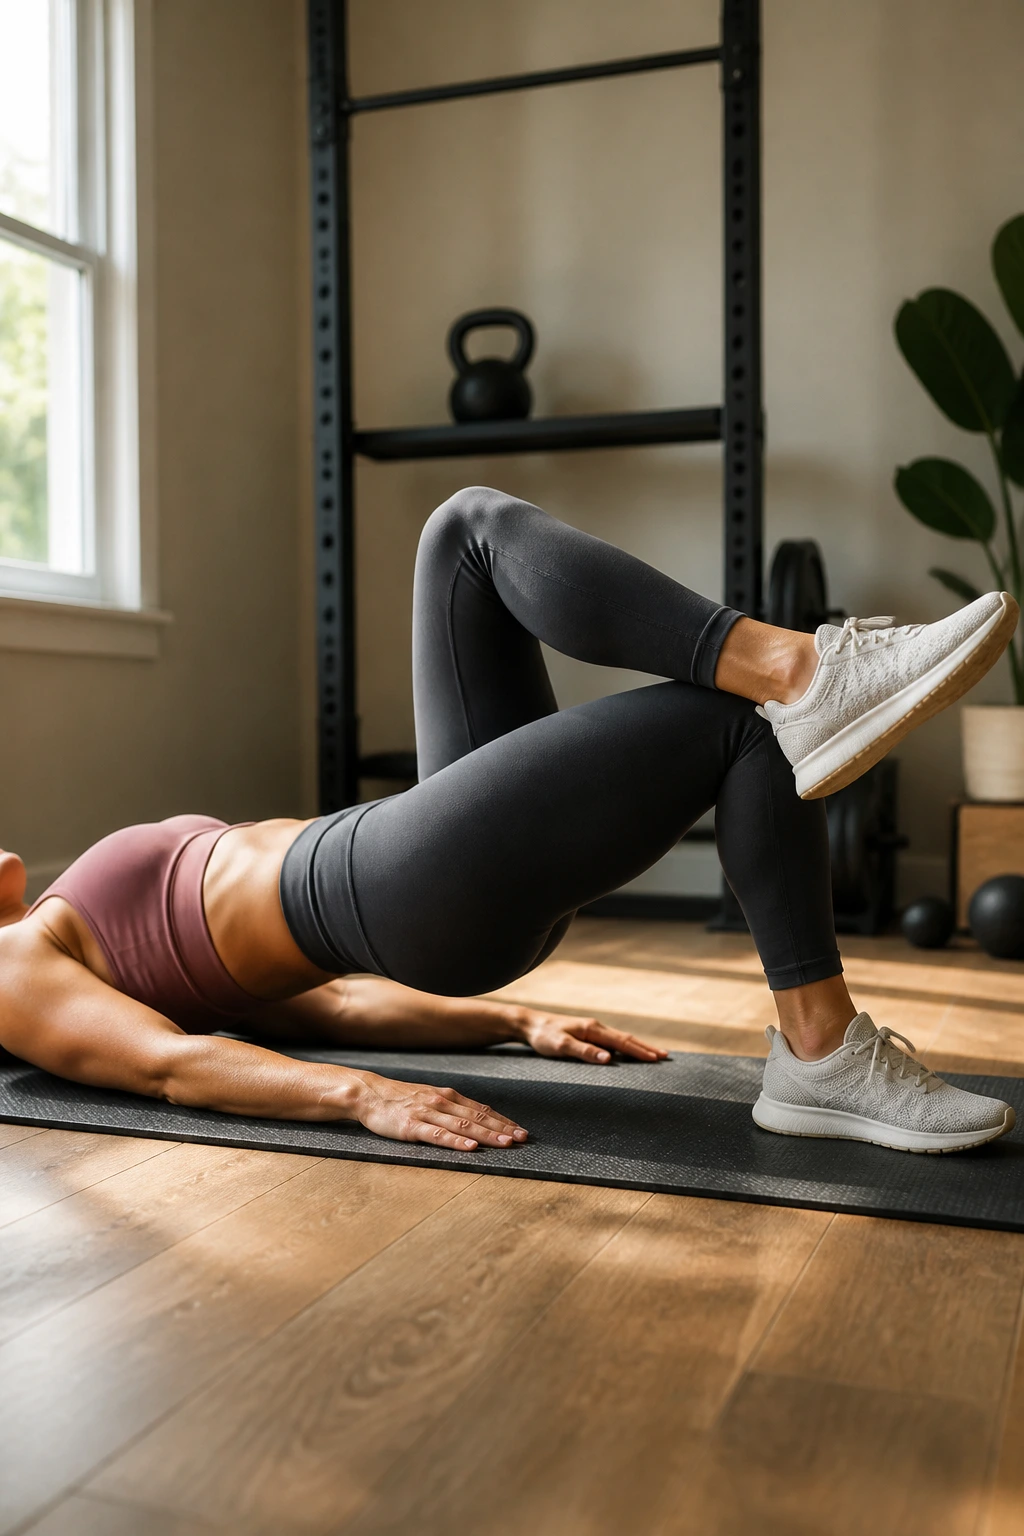
Your hamstrings should feel long and active here, not knotted and crampy.
Lie on your back with your feet flat and knees bent. Lift your hips into a bridge, then slowly raise one foot a few inches off the floor without letting the pelvis drop or twist. Set it down, switch sides, and keep the bridge height steady. The abs are working, but the glutes are doing a lot of the heavy lifting too, which is good news for a back that hates overhelping from the wrong muscles.
If your low back starts to take over, lower the bridge a bit. If your hamstrings clamp up, move your feet a touch farther away from your hips. Tiny adjustments matter more than people think.
A smooth march is the goal. Not a big one.
8. Bear Plank Hover
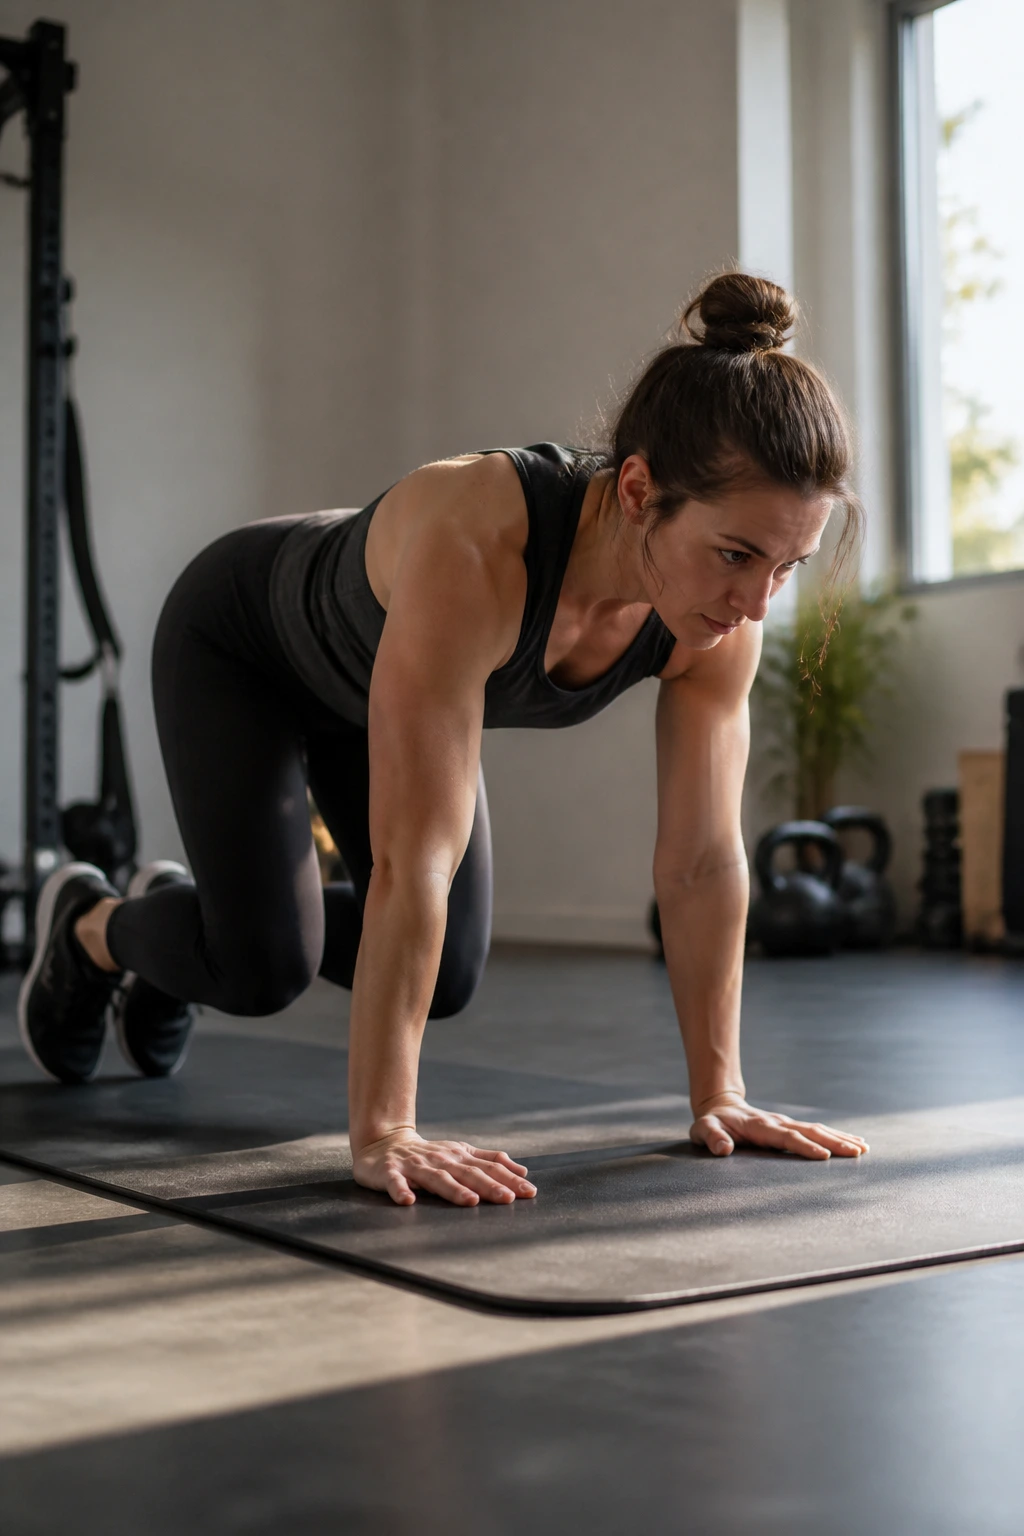
The tiniest holds are often the nastiest. The bear plank hover is a perfect example.
Start on hands and knees, then lift your knees one inch off the floor while keeping your back flat and your neck long. Your knees stay under your hips, your hands under your shoulders, and your breath stays slow. It looks tiny. It is not tiny.
Easiest way to use it
- Hover for 5 to 10 seconds.
- Rest fully between holds.
- Keep the knees low; don’t turn it into a frog jump.
- If your wrists hate floor pressure, use dumbbells as handles or skip it.
This is a good pick when you want a harder core drill without a bunch of movement. If you can keep the hover steady while breathing, your trunk is doing real work. If your hips rock or your shoulders shake wildly, shorten the set and tighten the shape.
9. Bird Dog Row
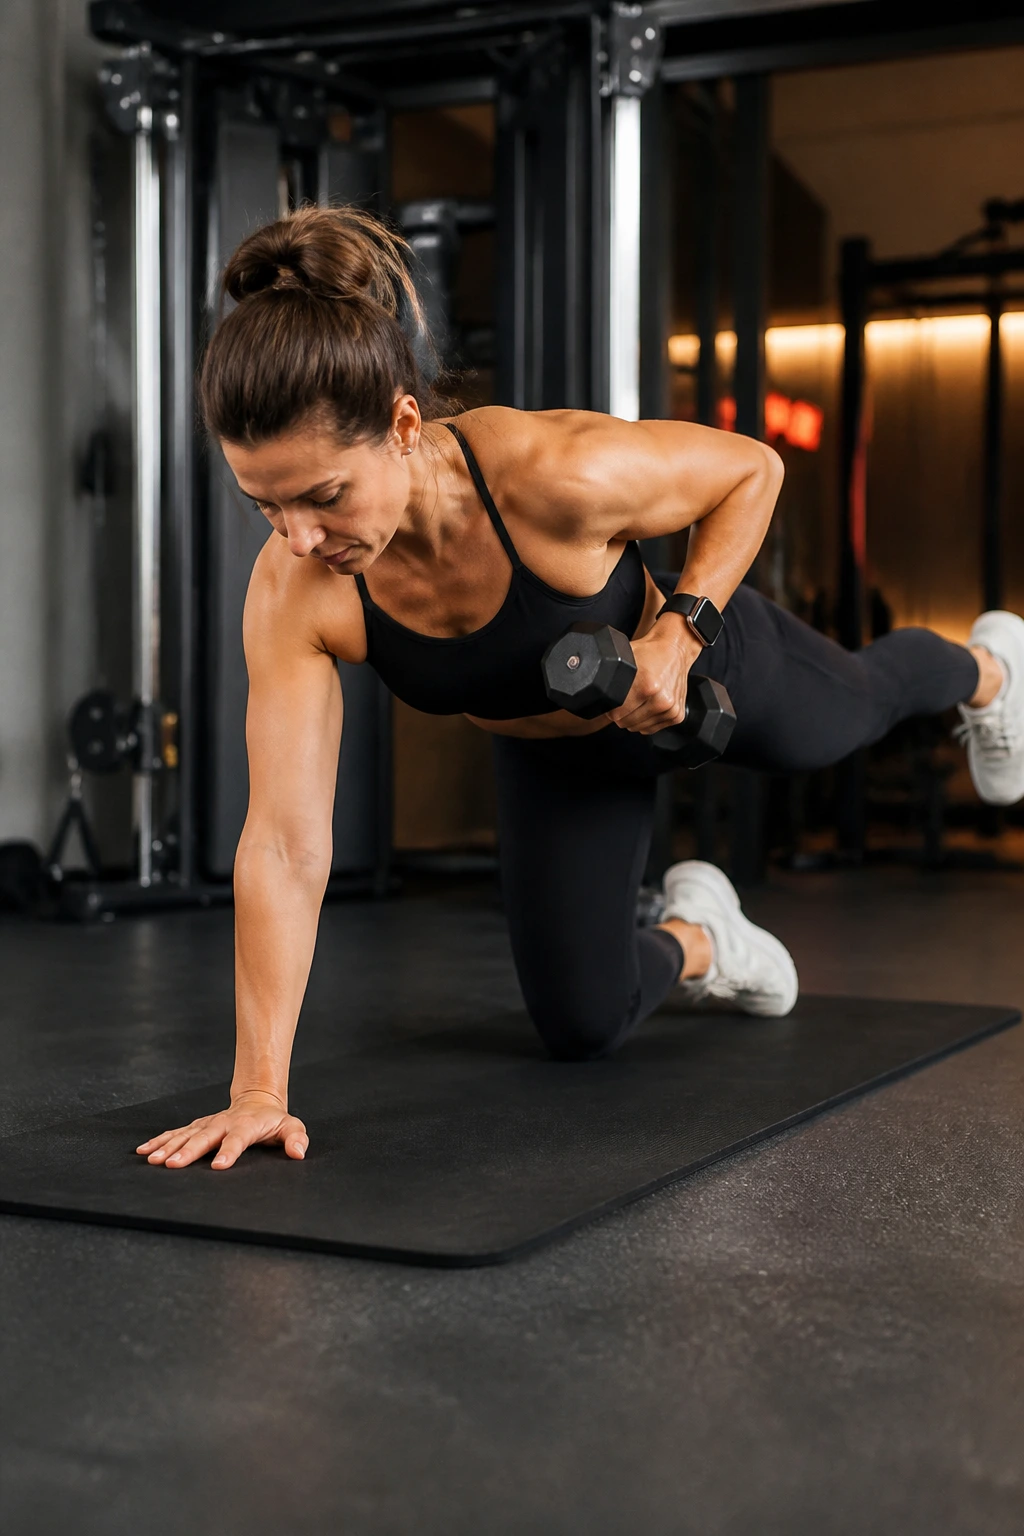
Once a plain bird dog feels too easy, add a row and the whole thing changes.
From a hands-and-knees position, hold a light dumbbell in one hand. Extend the opposite leg back, then row the weight toward your ribs without letting your torso twist open. The row should feel smooth, not jerky. If the weight pulls you off balance, it’s too heavy. Simple as that.
This version is excellent for teaching the back to resist movement while the upper body works. That’s the part most people miss. They think core training always needs more bending. Sometimes the best thing is learning to keep everything still when one side wants to cheat.
A light dumbbell is enough here. I’d rather see 6 clean reps per side than 12 messy ones.
10. Half-Kneeling Cable Chop
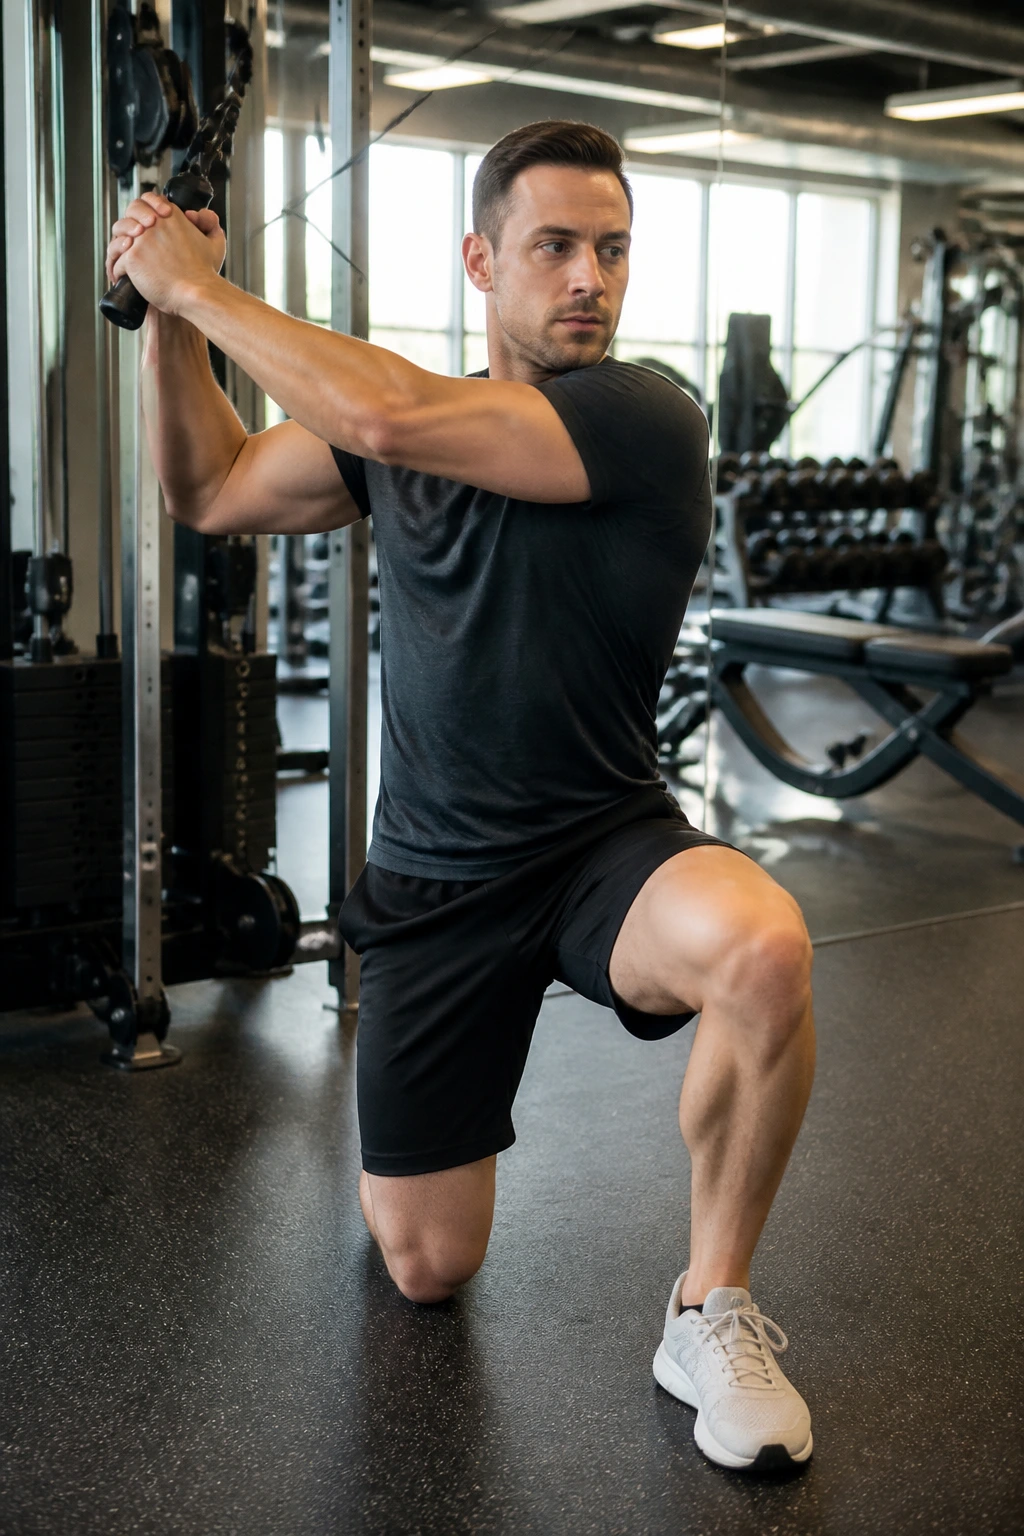
This is not a speed move.
Set a cable or band high and kneel on one knee, with the inside knee down and the outside foot planted. Pull the handle diagonally across your body in a controlled line, then return slowly. Your torso should stay tall. The hips shouldn’t lurch, and the back shouldn’t crank into a twist to “help” the arms finish the rep.
Half-kneeling gives you a lot of feedback. If you sway, you feel it right away. If you rush, the motion gets sloppy fast.
Use 8 to 12 reps per side and keep the path smooth. Think controlled diagonal, not woodchopper drama. The cleaner the line, the better the abs and obliques have to work.
11. Half-Kneeling Cable Lift
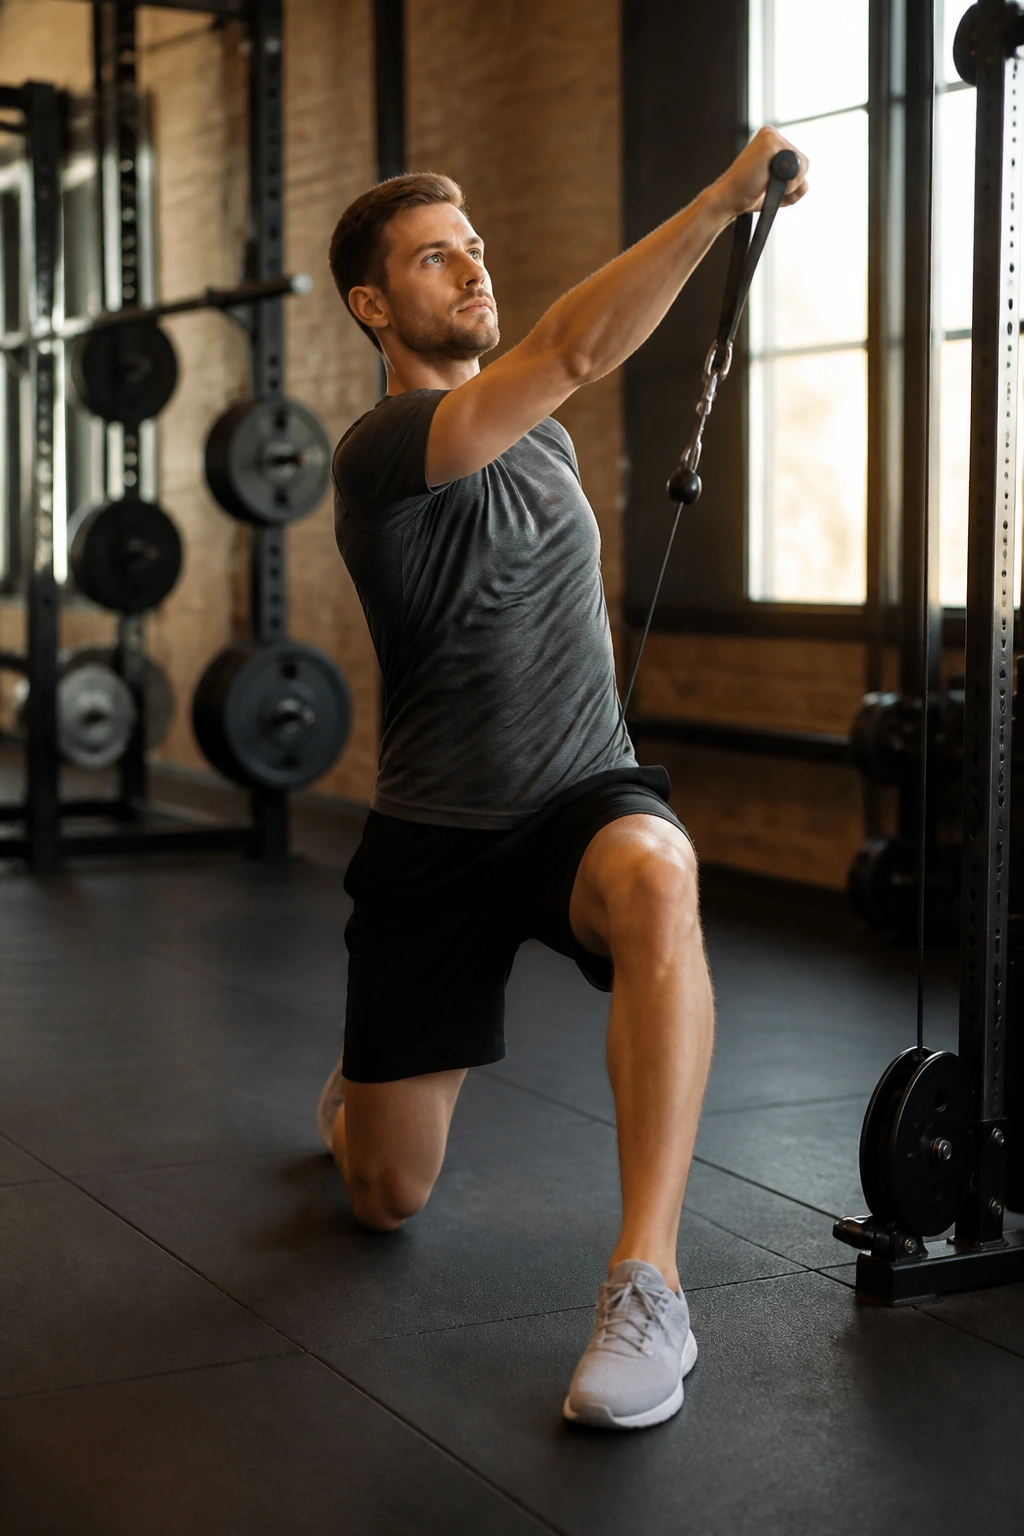
The upward diagonal gets ignored, which is a shame.
Set the cable or band low, then kneel in the same half-kneeling stance and pull the handle up and across your body. The lift asks the obliques, shoulder blade muscles, and deep trunk stabilizers to work together without a lot of spine motion. It’s a nice cousin to the chop, but it hits the pattern from a different angle.
I like this one for people who need rotation control without flinging the torso around. The half-kneel keeps the pelvis honest. The arm does the moving. The trunk keeps the shape.
If your shoulder starts shrugging toward your ear, lower the load. If your back twists to finish the lift, shorten the range. A smaller movement done cleanly is a better exercise than a bigger one done badly.
12. Dead Bug with Band Pulldown
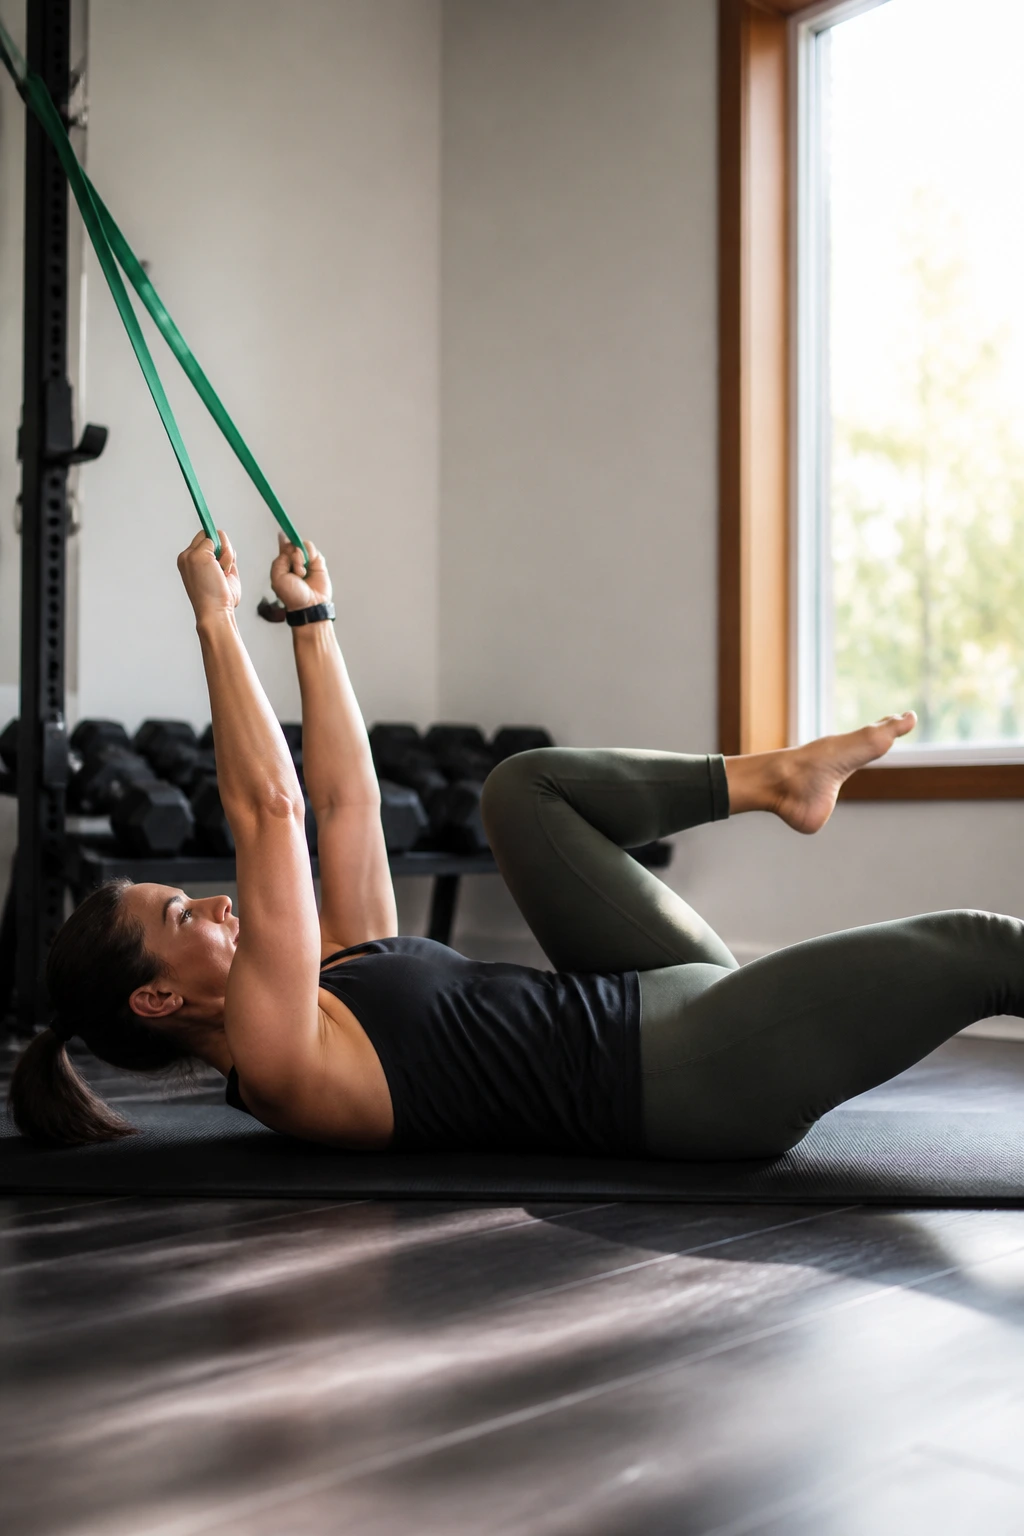
Lats on. Ribs down.
Anchor a band overhead and hold both ends with straight arms while lying on your back in a dead bug position. Pull the band down and keep some tension on it as you alternate leg movements. That overhead pull links the upper back and core in a way that feels very different from ordinary floor work.
The cue that saves the rep
Exhale before the leg moves. If you wait until your back arches, you’re already behind.
- Keep the elbows soft, not locked into a painful angle.
- Make the leg reach smaller if your low back lifts.
- Use a light band first; heavy tension turns this into a shoulder exercise fast.
- Aim for 4 to 6 controlled reps per side.
This is one of my favorite ways to make a dead bug feel less like a rehab drill and more like real training.
13. Stability Ball Rollout
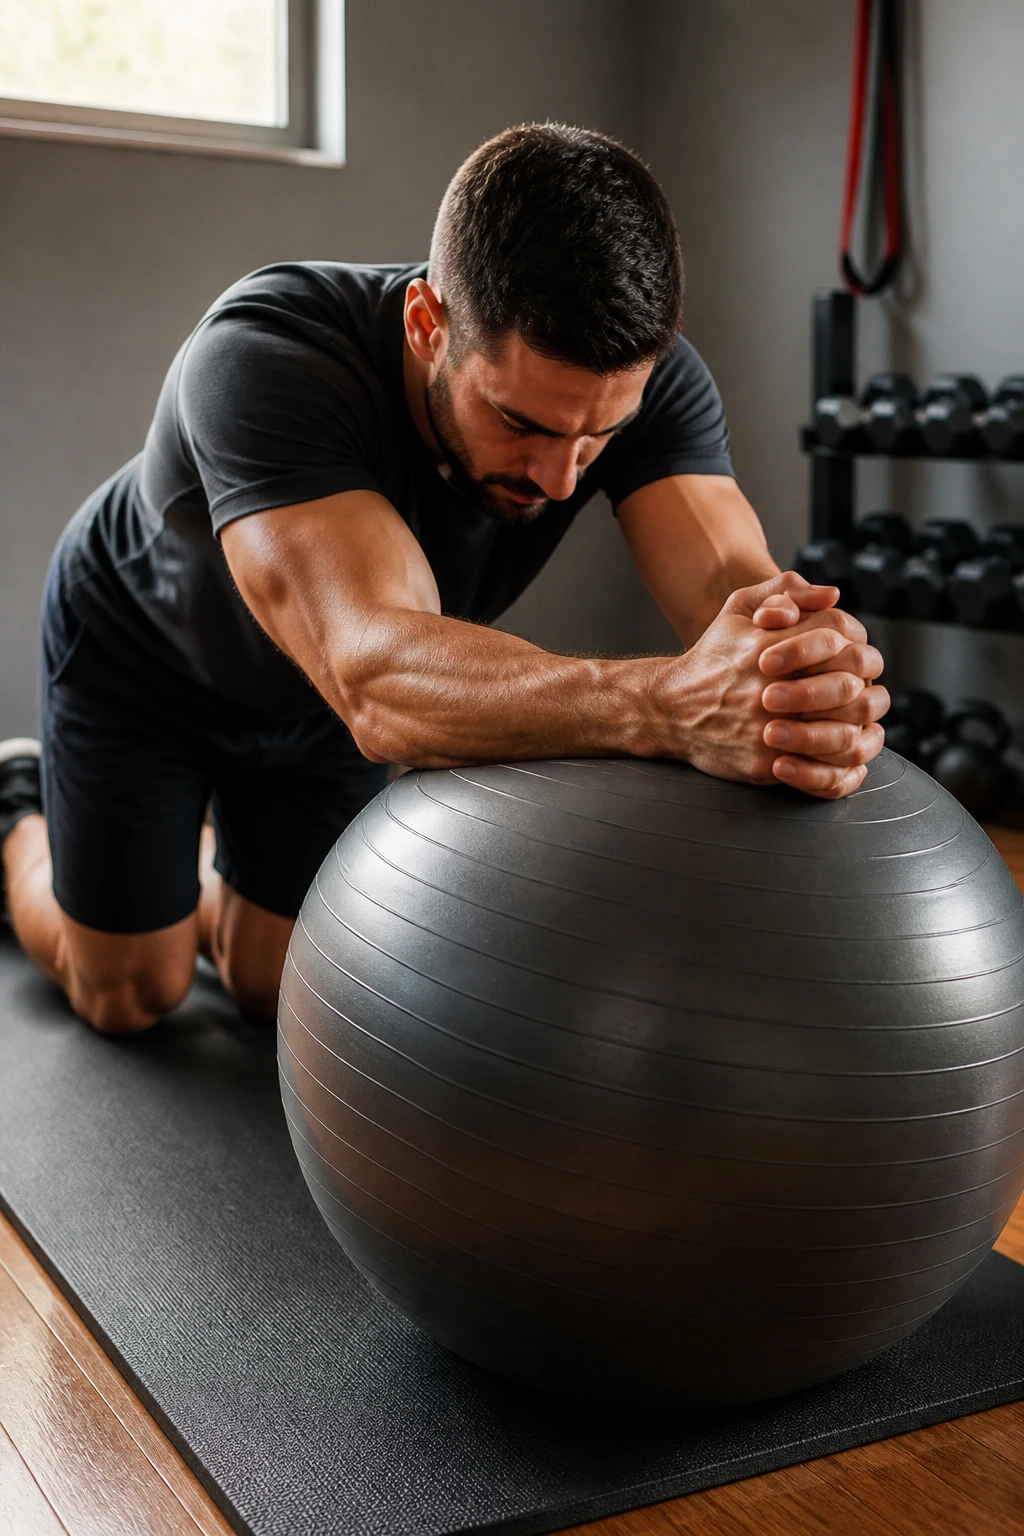
Can rollouts work for cranky backs? Yes — but only if you keep the range modest and the spine under control.
Kneel on the floor with your forearms on a stability ball. Roll it forward a few inches, stop before your low back starts to dip, then pull it back in with your abs. The movement should feel like your whole front body is lengthening under control, not like you’re dumping into the floor and hoping for the best.
Start small. Tiny rolls count.
If a full rollout makes your back feel pinchy, shorten the range or put the ball against a wall so it cannot run away from you. That tiny change makes the drill much friendlier. I would also skip this one if extension is a known trigger for you. No hero points here.
14. Reverse Plank
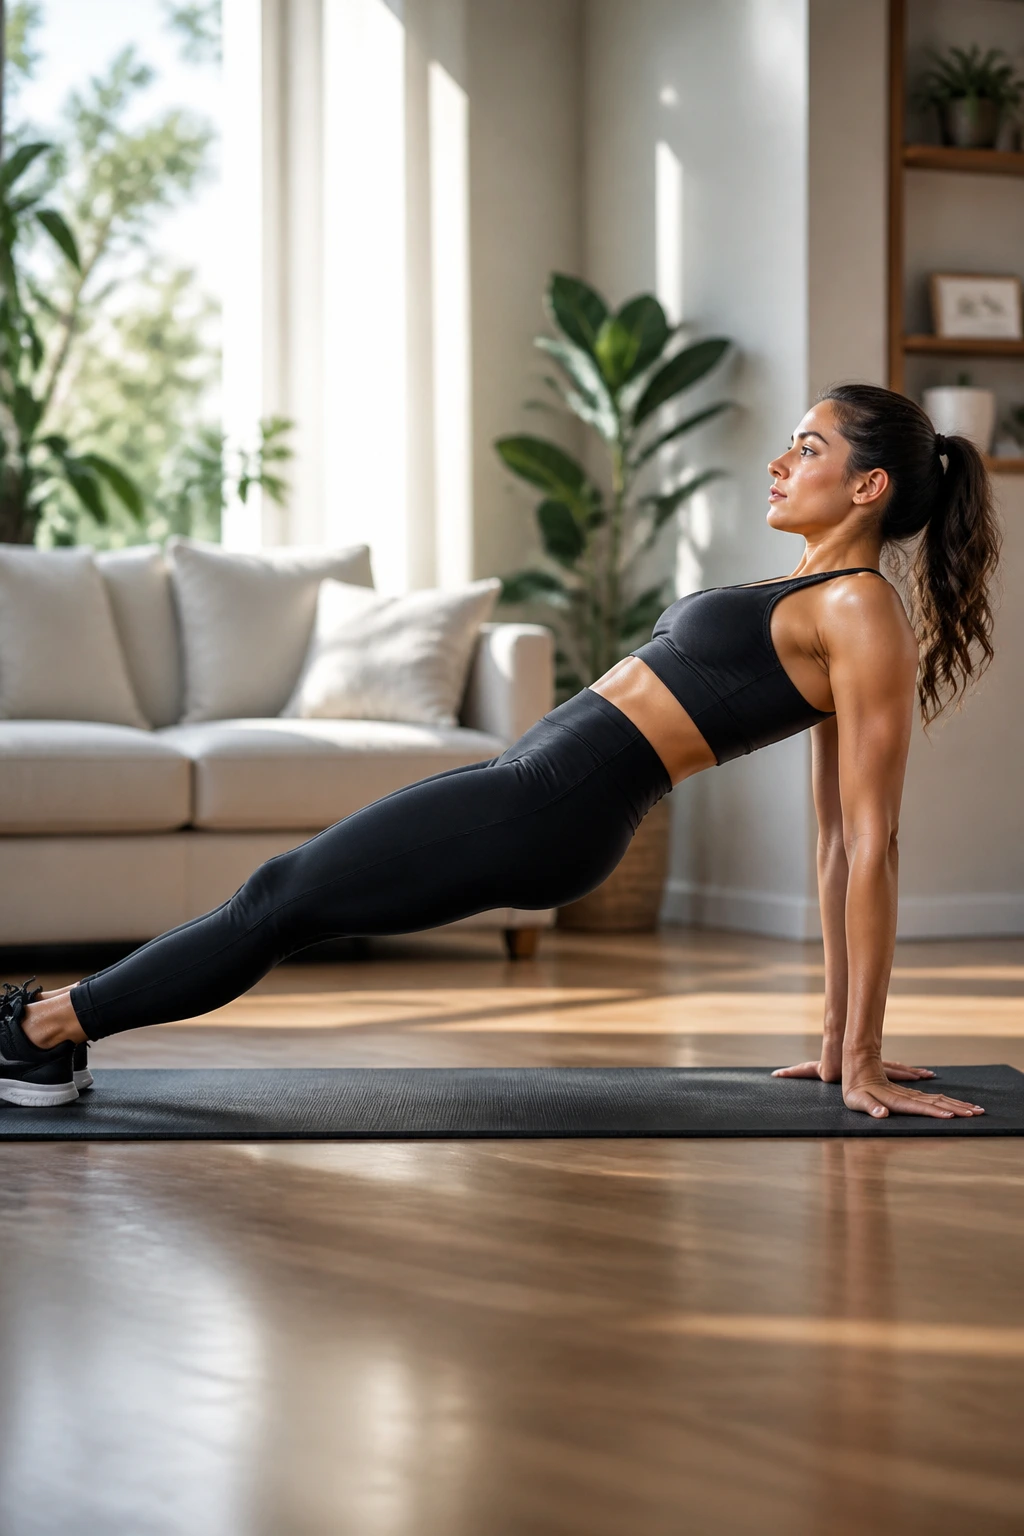
If your hips spend all day folded at a desk, reverse plank feels like a reset.
Sit with your legs straight out in front of you and place your hands on the floor behind your hips. Press through your palms, lift your hips, and squeeze your glutes so your body makes a long line from shoulders to heels. You should feel your backside wake up — glutes, hamstrings, upper back — while the front of your trunk works to keep everything steady.
It’s a weirdly satisfying hold when it fits your body. And if it doesn’t, you’ll know fast. Tight shoulders can make the setup awkward, so bend the knees a little if needed.
Hold for 10 to 20 seconds at first. Keep breathing. If the hips sag, stop and reset instead of chasing a longer timer.
15. Quadruped Hover
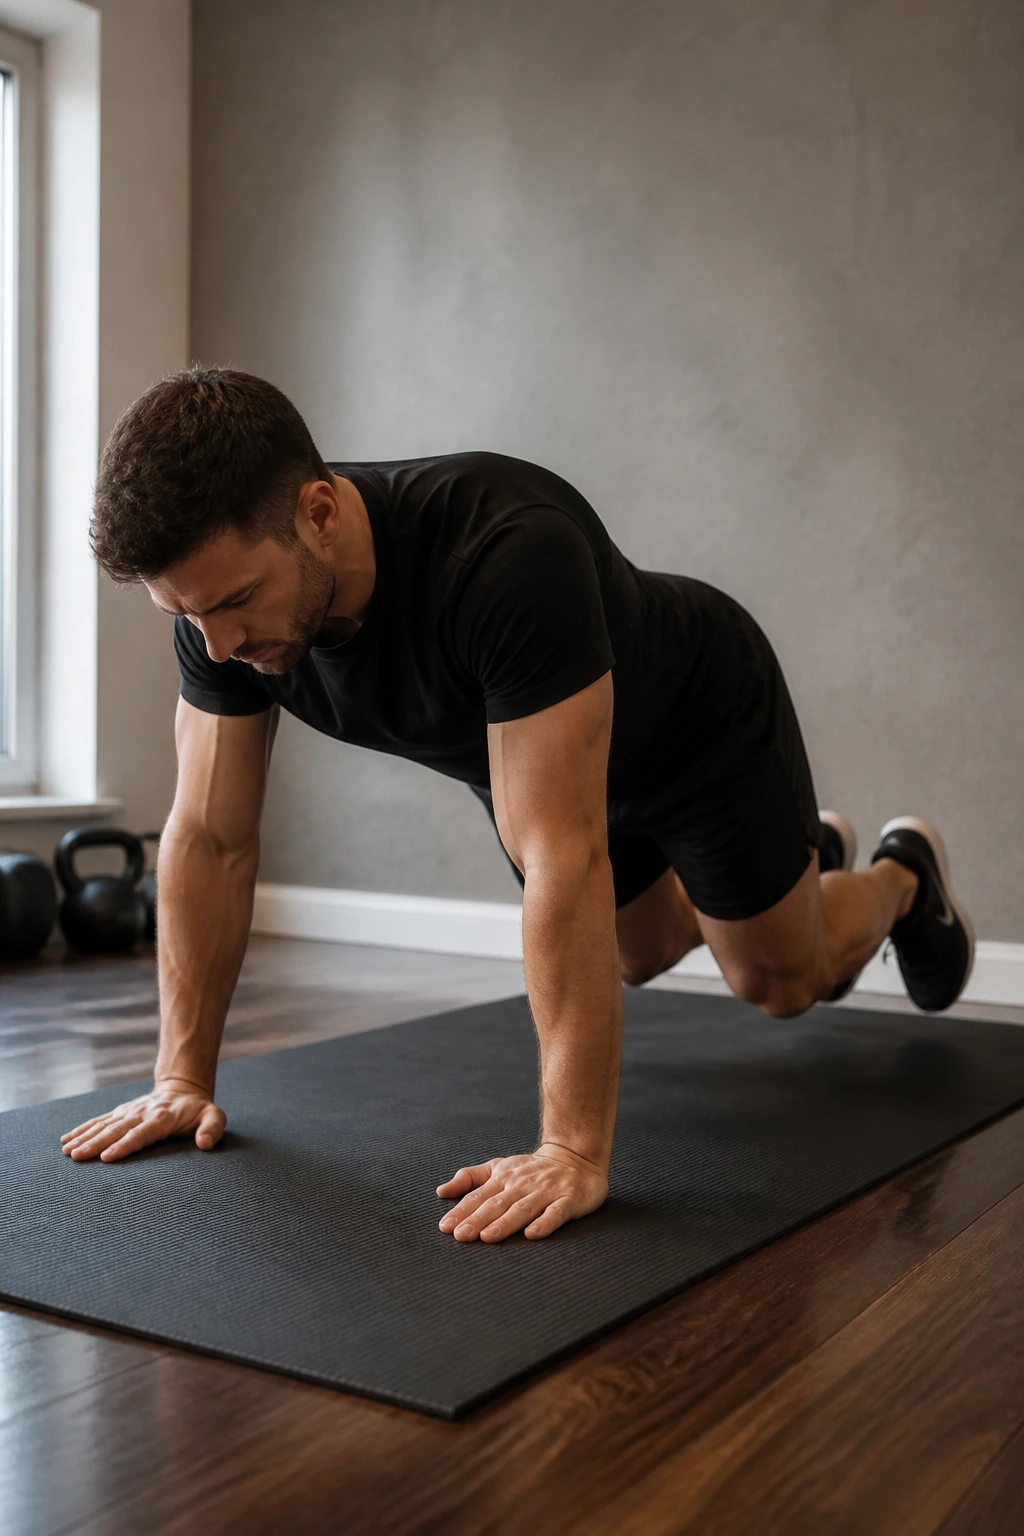
Tiny movement, real demand.
Start on hands and knees, brace gently, then hover your knees just off the floor. The difference between this and a bear plank is small on paper, but it changes how the weight spreads through your shoulders and trunk. Your core has to hold shape while your body floats just enough to make cheating harder.
A good hover feels almost boring for the first two seconds, then your abs wake up with a vengeance. That’s the part I like. No swinging. No momentum. Just controlled tension.
Use short holds at first — 5 to 8 seconds is plenty. If your wrists hate the position, place your hands on push-up handles or dumbbells. If your back arches, lower the knees, breathe out, and try again.
16. Standing Band March
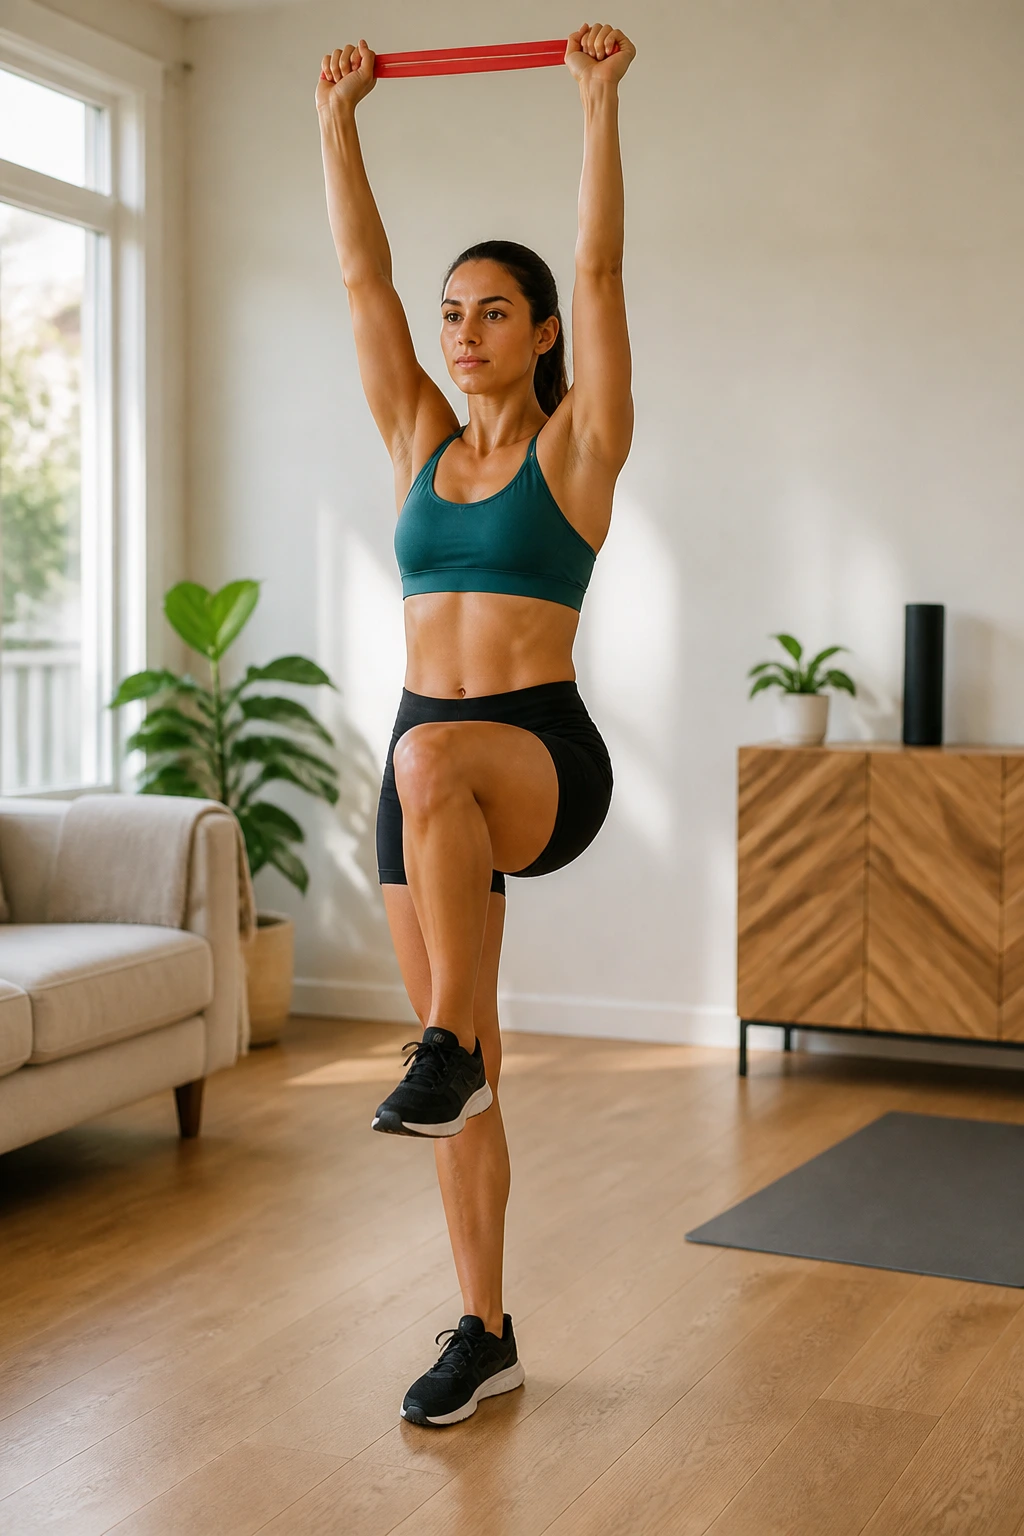
Standing core work is underrated because it looks too calm.
Loop a band around your hands or hold a light load overhead, then march in place without letting your rib cage flare or your torso sway. Each knee drive asks the trunk to stay organized while the legs move. That’s useful. A lot of daily life happens on your feet, not on a mat.
This is a nice option when floor work bugs your back or your hips. It also teaches a cleaner stack from head to heel, which carries over to walking, lifting groceries, and not wobbling when you reach for something on a shelf.
A few clean cues
- Keep the standing foot rooted.
- Lift the knee only as high as you can keep your posture.
- Exhale on each march.
- Use 20 to 30 total marches as a starter set.
17. Farmer’s Carry
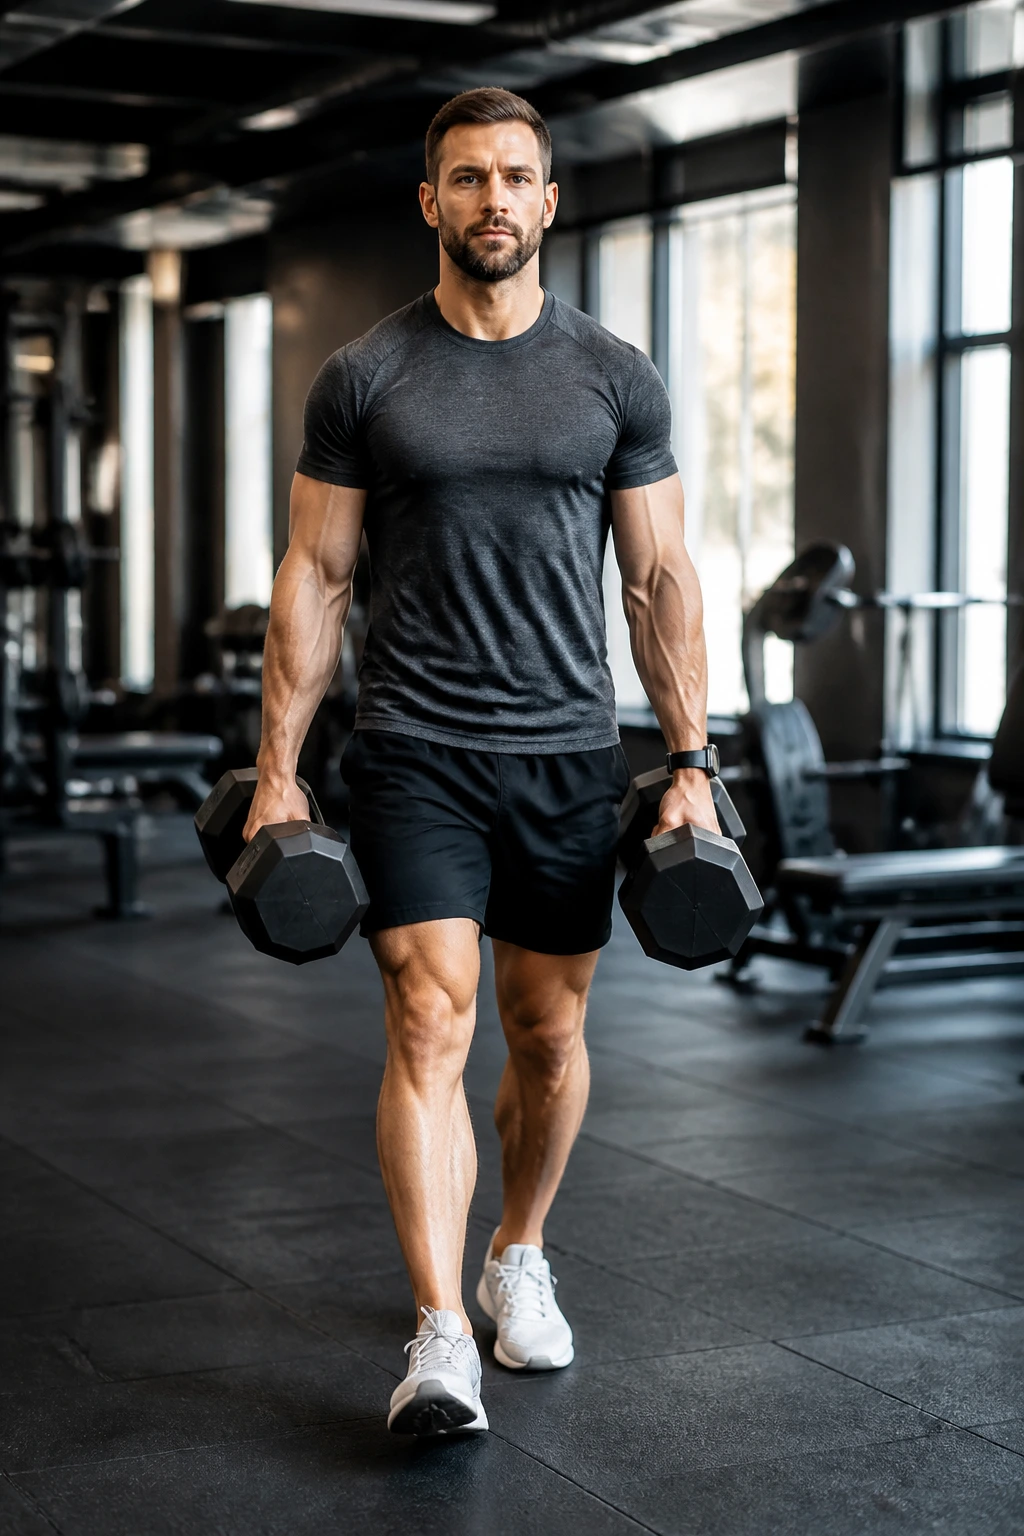
Unlike the suitcase carry, this loads both sides at once, so the challenge comes from walking cleanly while the weights try to drag your shoulders down.
Grab two dumbbells or kettlebells, stand tall, and walk with short, controlled steps. Your ribs should stay stacked over your pelvis. Your shoulders shouldn’t creep up by your ears. The trunk works hard here, but the movement itself is simple, which is part of the charm.
I like farmer’s carries for people who want core work that feels practical instead of gymnasty. It hits grip, posture, and midline tension without a single crunch. If you have room, walk for 20 to 40 yards. If not, march in place for 30 seconds and keep the same shape.
Too much weight turns this into a shrugging contest. Keep it honest.
18. Stir-the-Pot
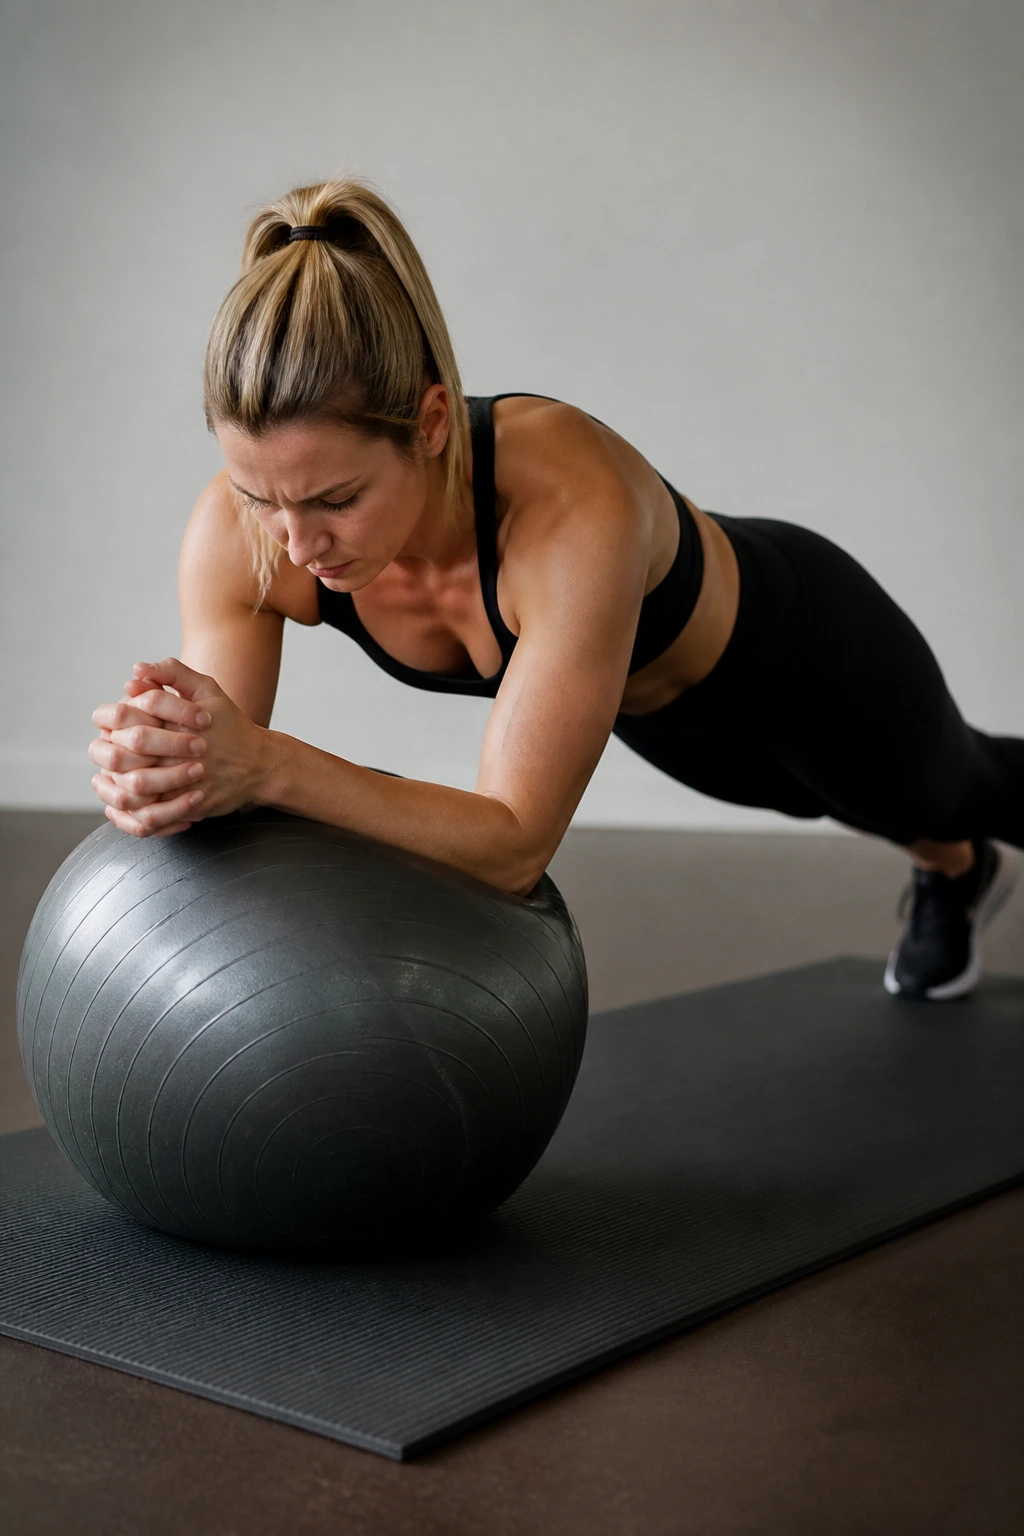
Looks like a party trick. Feels like a core audit.
Set your forearms on a stability ball and come into a plank position. Make tiny circles with your arms — small enough that your hips do not swing around like a pendulum. The ball wants to move. Your job is to stop the rest of the body from chasing it.
What to watch for
- Circle size should stay small, about the size of a cereal bowl.
- Keep the glutes tight so the low back does not sag.
- Stop if your shoulders shrug up hard.
- Start with 3 to 5 circles each direction.
This one can get spicy fast, so I’d treat it like a quality drill, not a volume drill. If your back gets cranky during bigger planks, a smaller range here usually works better than trying to force through it.
19. Wall Press Dead Bug
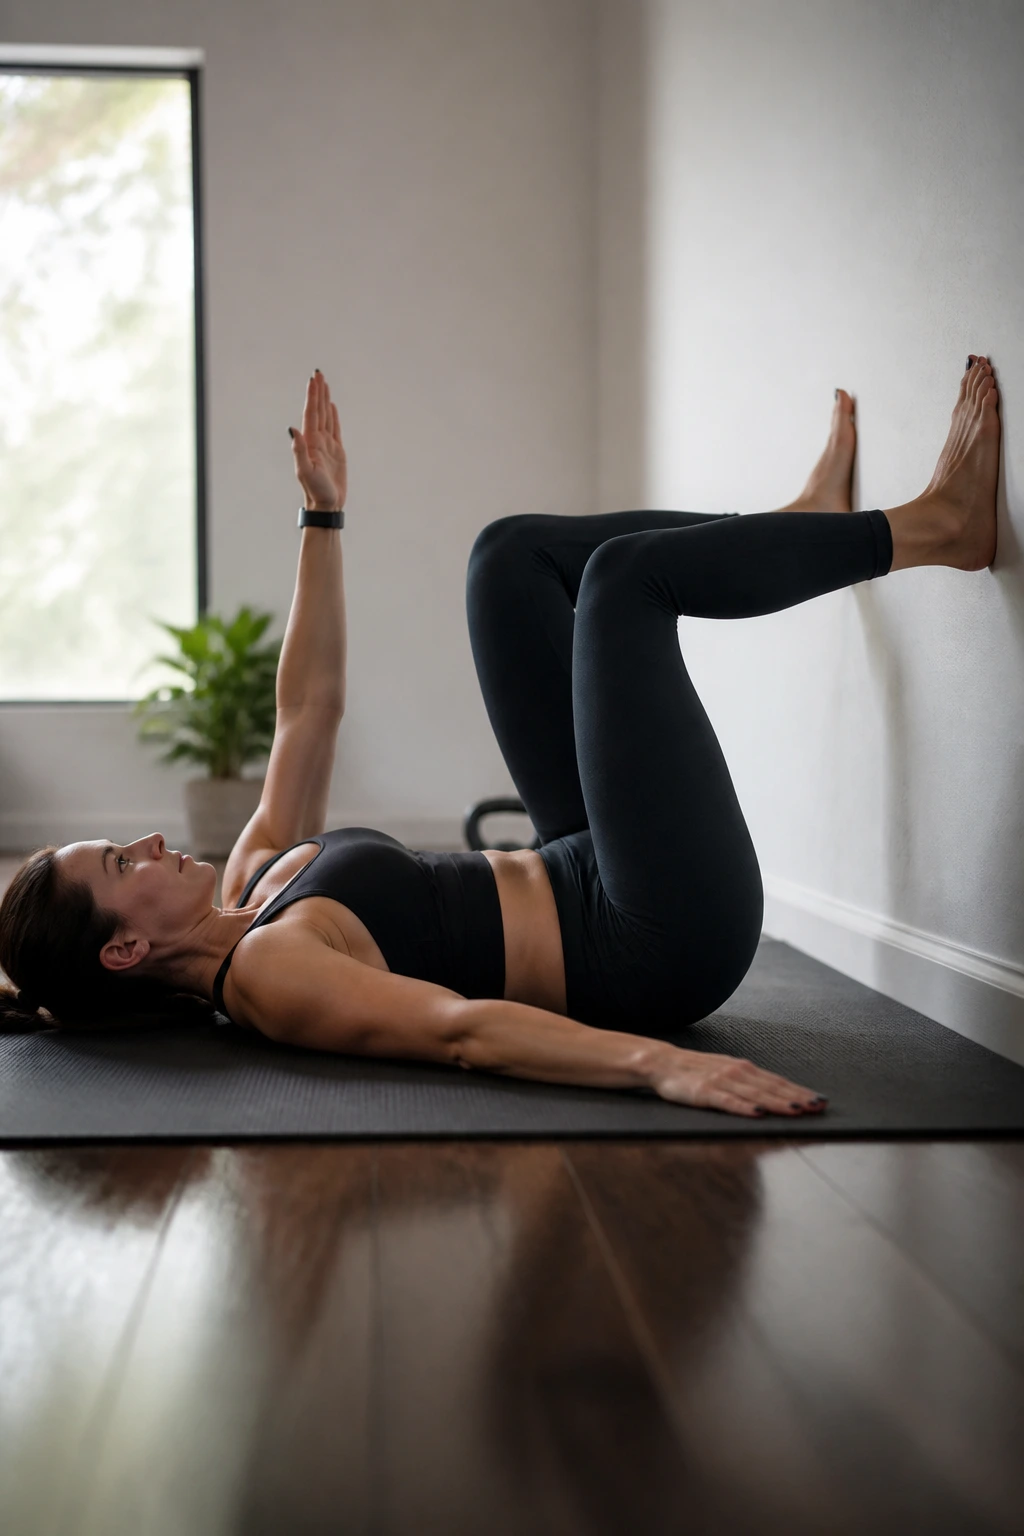
A wall can save a dead bug session.
Lie on your back with your feet flat against a wall and your knees and hips bent about 90 degrees. Press your heels into the wall and keep that pressure while you alternate arm and leg movements. The wall gives you feedback right away. If you lose your brace, the shape changes fast.
That makes this a nice regression for days when the floor version feels off. It is also useful for people who struggle to feel their abs working in dead bugs, because the wall gives them something obvious to push against.
Keep the pressure steady and the breaths short. If your back arches, bring the moving leg in a little closer and slow down. Boring, yes. Useful, absolutely.
20. McGill Curl-Up for No-Crunch Back Relief
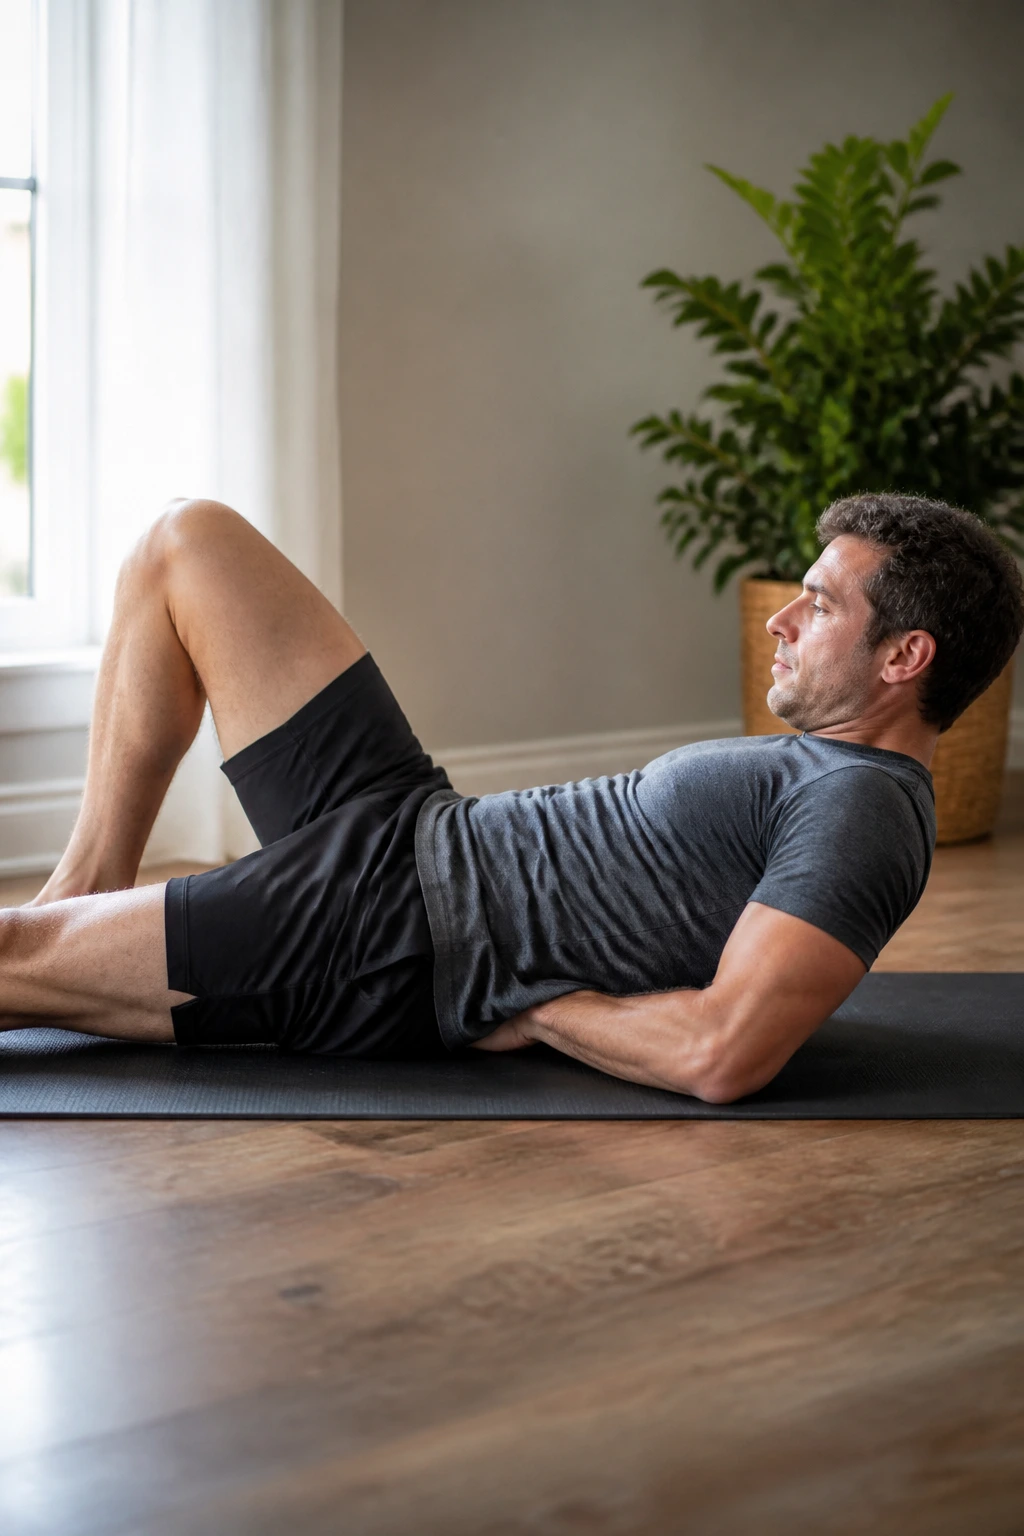
This one sits in a strange middle ground.
Lie on your back with one knee bent and the other leg straight. Slide your hands under the natural curve of your low back, then lift your head and shoulders only an inch or two off the floor while bracing lightly. Hold for a few seconds, lower, and repeat. It is not a crunch. The range is tiny on purpose.
I like this movement for people who want a little flexion without going all the way into a sit-up or crunch. It teaches tension without yanking the spine through a big arc. If it starts to feel like a real abdominal curl, you’ve gone too far.
Use 5-second holds for a handful of reps. And if flexion itself is a trigger, skip it. There are plenty of other options in this list.
Final Thoughts
The best no crunch ab workouts for bad backs usually look quieter than people expect. Dead bugs, side planks, carries, Pallof presses, and crawling holds win because they teach the trunk to hold shape instead of folding over and over.
If I had to keep only three for a simple routine, I’d pick one floor drill, one standing drill, and one carry. That mix covers a lot of ground without making your back feel like it spent the day in a wrestling match.
And if a move sends pain in a bad direction — sharper pain, leg symptoms, next-day flare-ups — drop it. A solid core should make your body easier to live in, not give you a new reason to groan when you stand up from a chair.
