



Bad lower back days have a way of turning leg day into a negotiation. The squat rack isn’t the problem here; the way the torso braces, the depth you choose, and the speed you move often matter more than the exercise name.
A lot of people quit on leg training after one cranky hinge or one deep lunge that lit up the lumbar area, which is a shame because the legs can still be trained hard without loading the spine. Lower back friendly leg workouts at home are usually less about fancy moves and more about tidy, boring control: a steady exhale, a stable pelvis, and a range of motion that your hips can own without your low back chiming in.
What usually helps is not exotic. It is controlled reps, a chair, a wall, a floor, and a willingness to stop one rep before your lower back starts doing the work your hips should be doing. The details make an exercise feel friendly instead of sketchy.
Start on the floor. The first move I come back to most often is the plain glute bridge, and there’s a reason it shows up so early here.
1. Glute Bridge
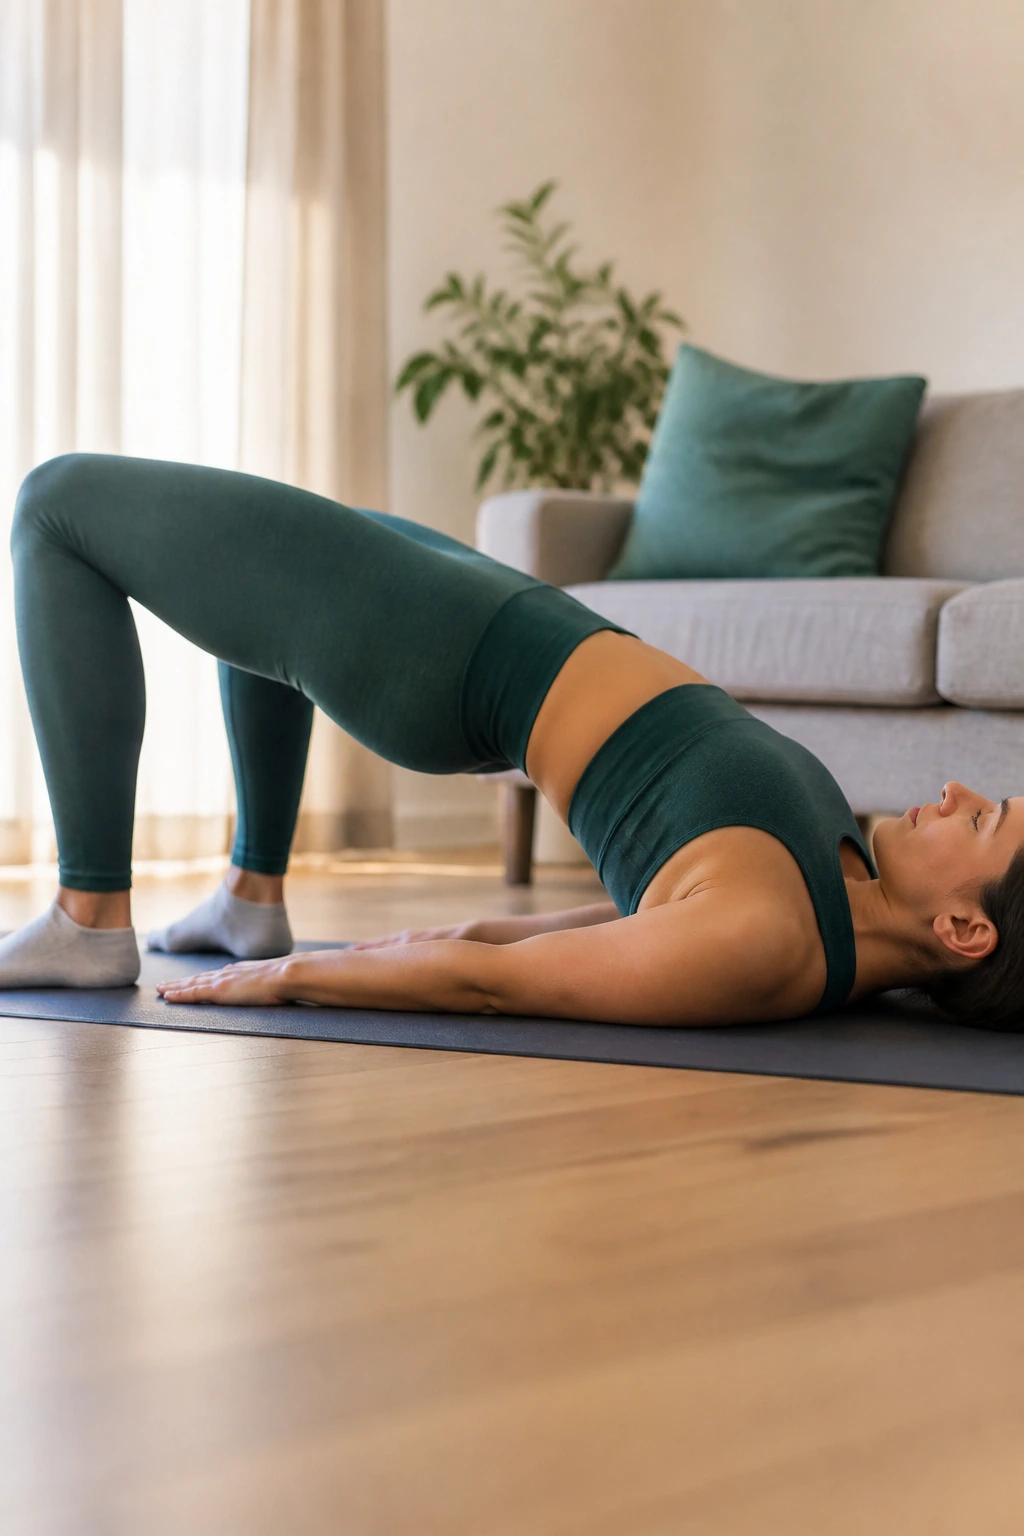
The glute bridge is the quiet hero here. No jumping, no fancy setup, no heavy load pressing down through the spine. Just your feet, your hips, and the floor telling you whether you’re actually using your glutes or sneaking the work into your lower back.
Why It Spares the Low Back
Lie down with your knees bent and your feet flat, then tuck your pelvis slightly before you lift. That tiny tilt matters more than people think. It keeps the ribs from flaring and stops the lumbar spine from turning the rep into a back bend.
If you do it well, you should feel the glutes and hamstrings working first, with your lower back staying heavy and calm on the floor. That’s the goal. Not a huge arch. Not a dramatic hip snap.
- Place your feet about hip-width apart.
- Keep your heels roughly 12 to 18 inches from your sit bones.
- Lift until your body makes a straight line from shoulders to knees.
- Hold the top for 2 seconds before lowering.
Tip: If you feel this mostly in your back, shorten the range and squeeze your glutes before each rep. The bridge gets much better when the pelvis stays tucked and the ribs stay quiet.
2. Glute Bridge March
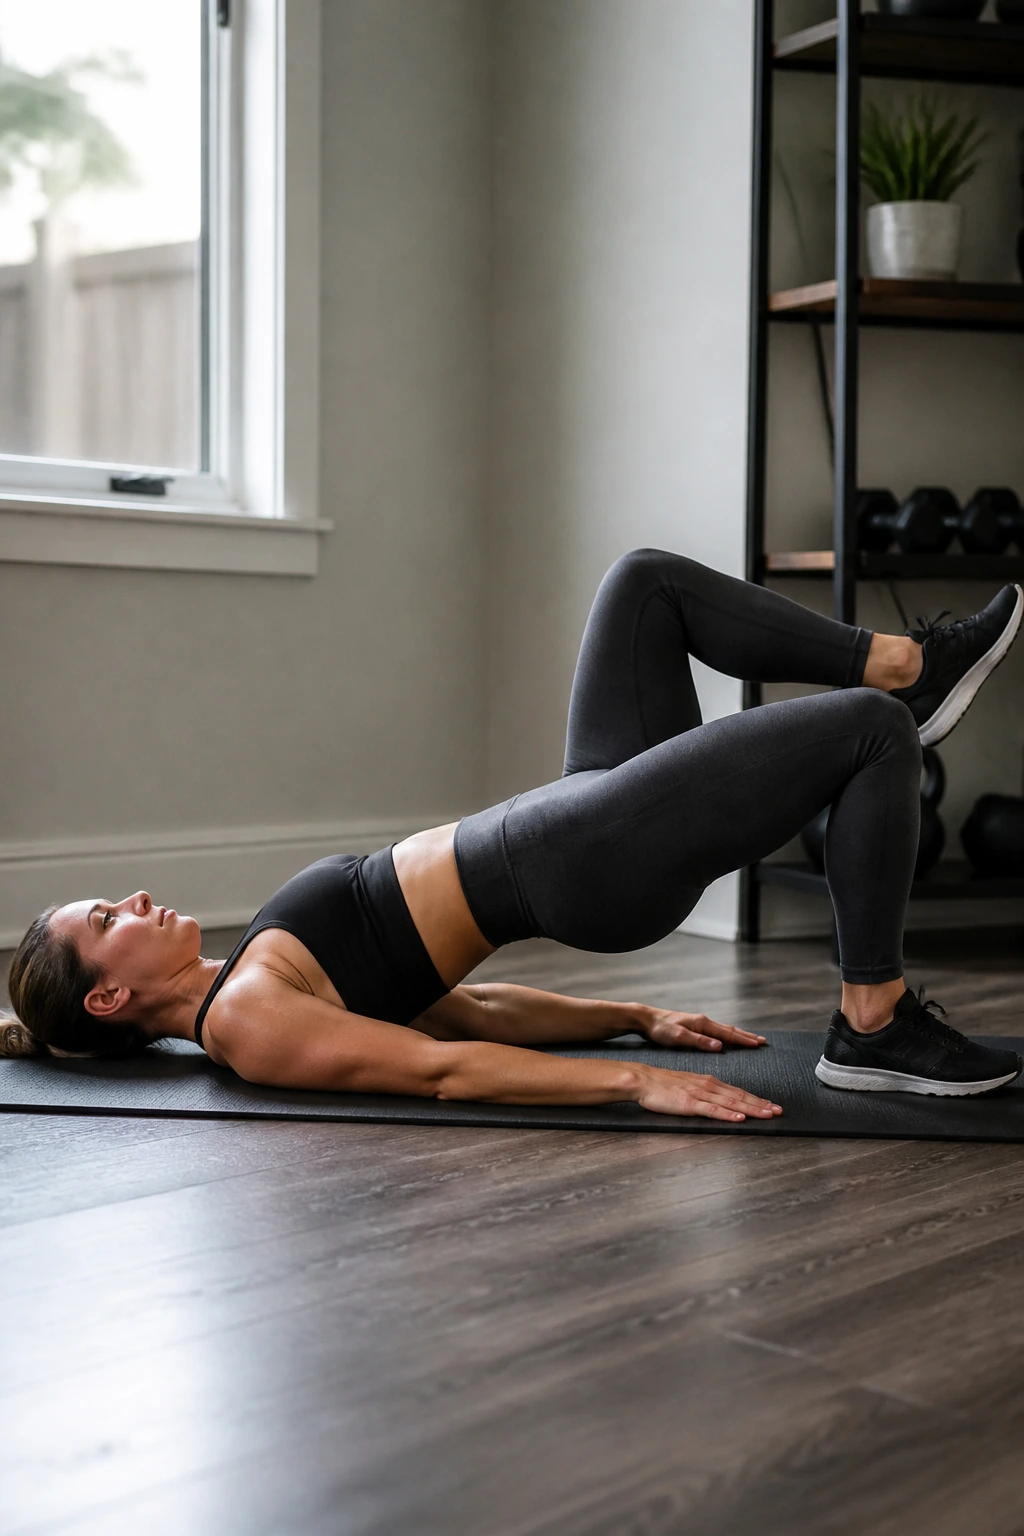
Harder than it looks. That’s the short version, and it catches people off guard because the movement barely leaves the floor.
A bridge march asks one leg to leave the ground without letting the pelvis wobble. That small test is gold for anyone whose low back gets cranky when the hips shift side to side. Your core has to resist rotation, and your glutes have to hold the bridge shape while one hip flexes.
The cue I like most is to imagine a tray of water resting across your pelvis. If one side tips, you’re moving too fast. If your ribs pop up, you’re losing the brace. Slow it down until each march feels almost deliberate.
How to Use It
- Start with a normal bridge and hold the top.
- Lift one foot just 1 to 2 inches off the floor.
- Pause for a beat, set it down, then switch sides.
- Aim for 6 to 10 marches per side.
If your hips sag, drop back to the standard bridge. No shame there. The march is a progress move, not a badge.
3. Chair Box Squat for Lower Back Friendly Leg Strength
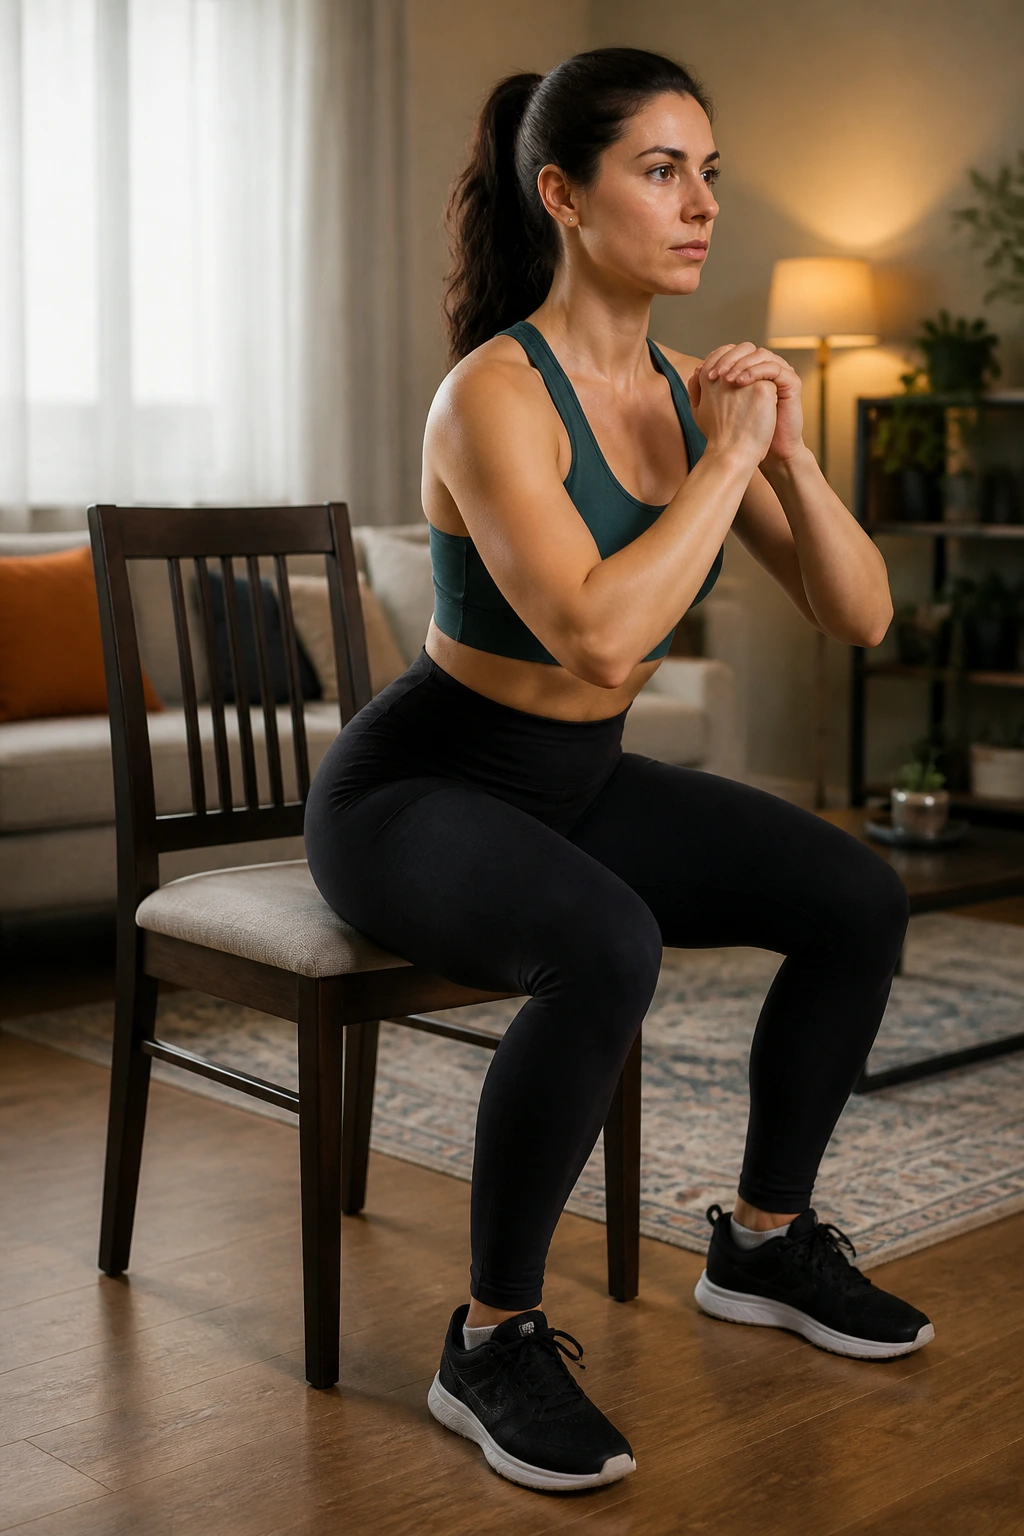
Why does a chair make squats feel friendlier on the back? Because it gives you a target, and targets stop squats from turning into guesswork. A chair box squat keeps the pattern simple: sit back, touch, stand. That little pause removes the urge to dive too deep and curl the pelvis under.
Set the Chair, Then Sit Back
Use a sturdy chair, bench, or couch edge that doesn’t slide. Stand with feet about shoulder-width apart and toes turned out just a little. Reach the hips back as if you’re closing a car door with your backside, then tap the chair lightly before standing again.
The tap matters. Don’t flop down. A soft touch keeps the legs under tension and saves your low back from the sloppy bottom position that often shows up in bodyweight squats.
- Choose a seat height near knee level if you’re new to squatting.
- Cross your arms or hold your hands in front of your chest.
- Keep your chest tall, but not puffed up.
- Stand by pushing the floor away, not by yanking with your shoulders.
Watch for this: If your lower back rounds at the bottom, use a higher chair or cut the depth. A cleaner half squat beats a messy deep one every time.
4. Wall Sit
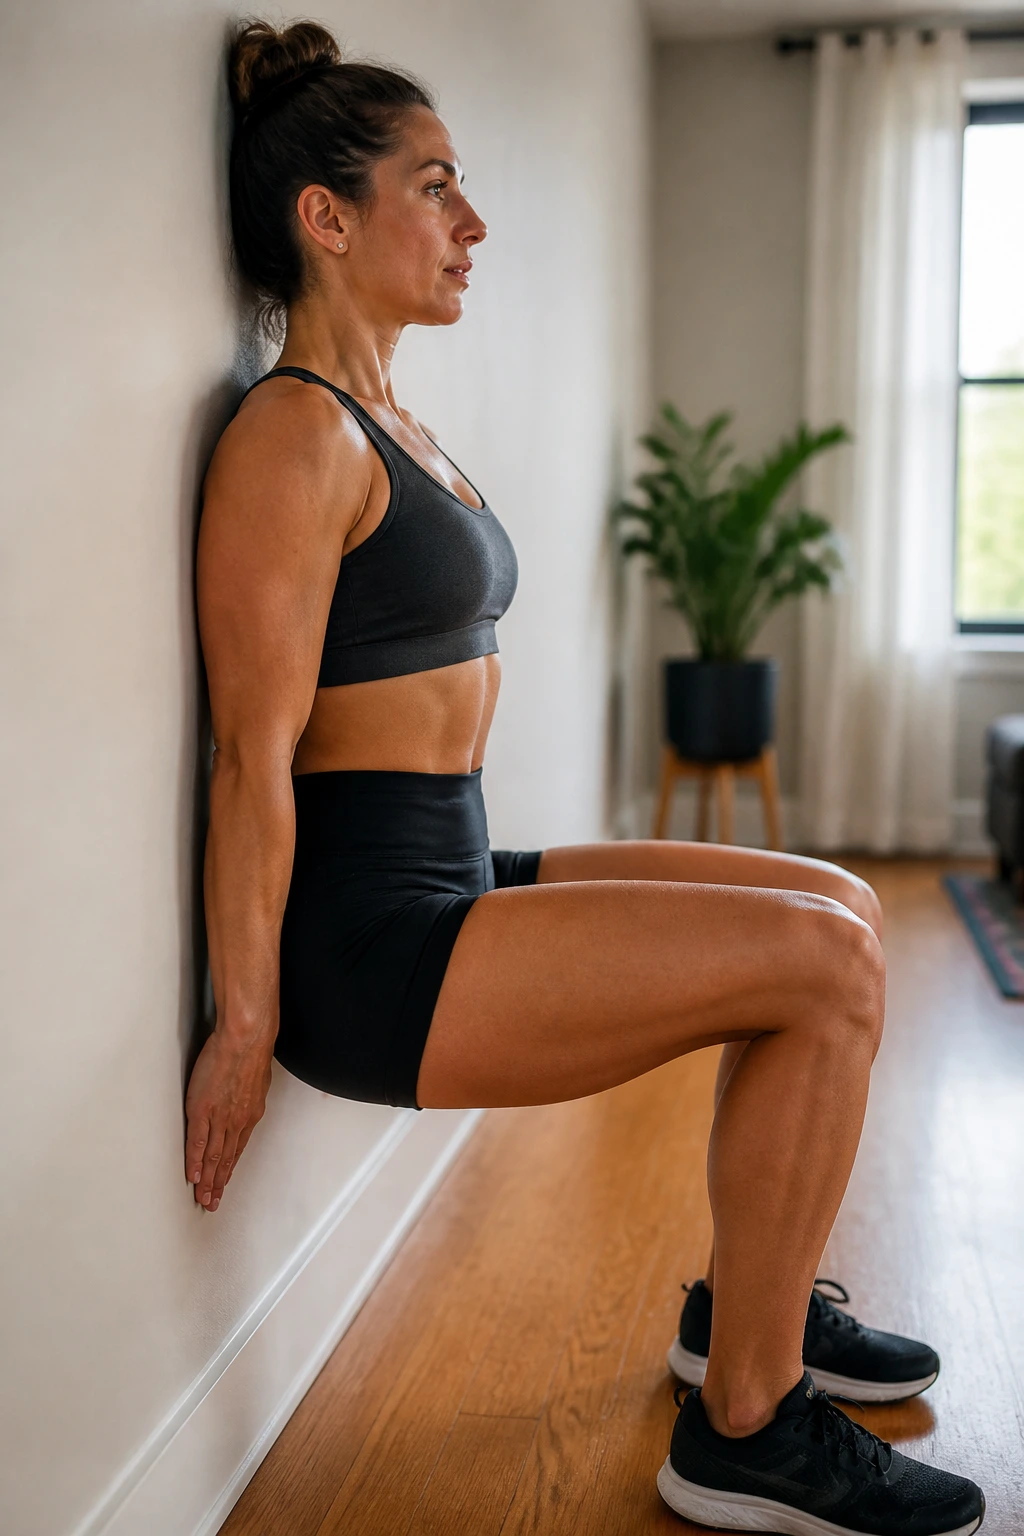
If standing squats make your back grumble, the wall sit is the blunt instrument. It’s not flashy. It just asks your quads to hold hard while your spine gets to stay put.
A wall sit is an isometric hold, which means the muscles work without a lot of motion. That can be a gift when your lower back hates repeated bending or lifting. The wall gives you structure, and the floor gives you a stable base.
The sweet spot is usually around 90 degrees at the knees, but you do not have to force that angle. If that depth feels rough on your knees or hips, stand a little taller. A wall sit that you can breathe through is worth more than a lower one that makes you brace like you’re defusing something.
- Walk your feet 16 to 24 inches away from the wall.
- Press your whole back into the wall, including the low ribs.
- Hold for 20 to 45 seconds.
- Breathe through the burn instead of holding your breath.
One solid set can wake up your thighs fast. Three sets can ruin your excuse-making.
5. Reverse Lunge
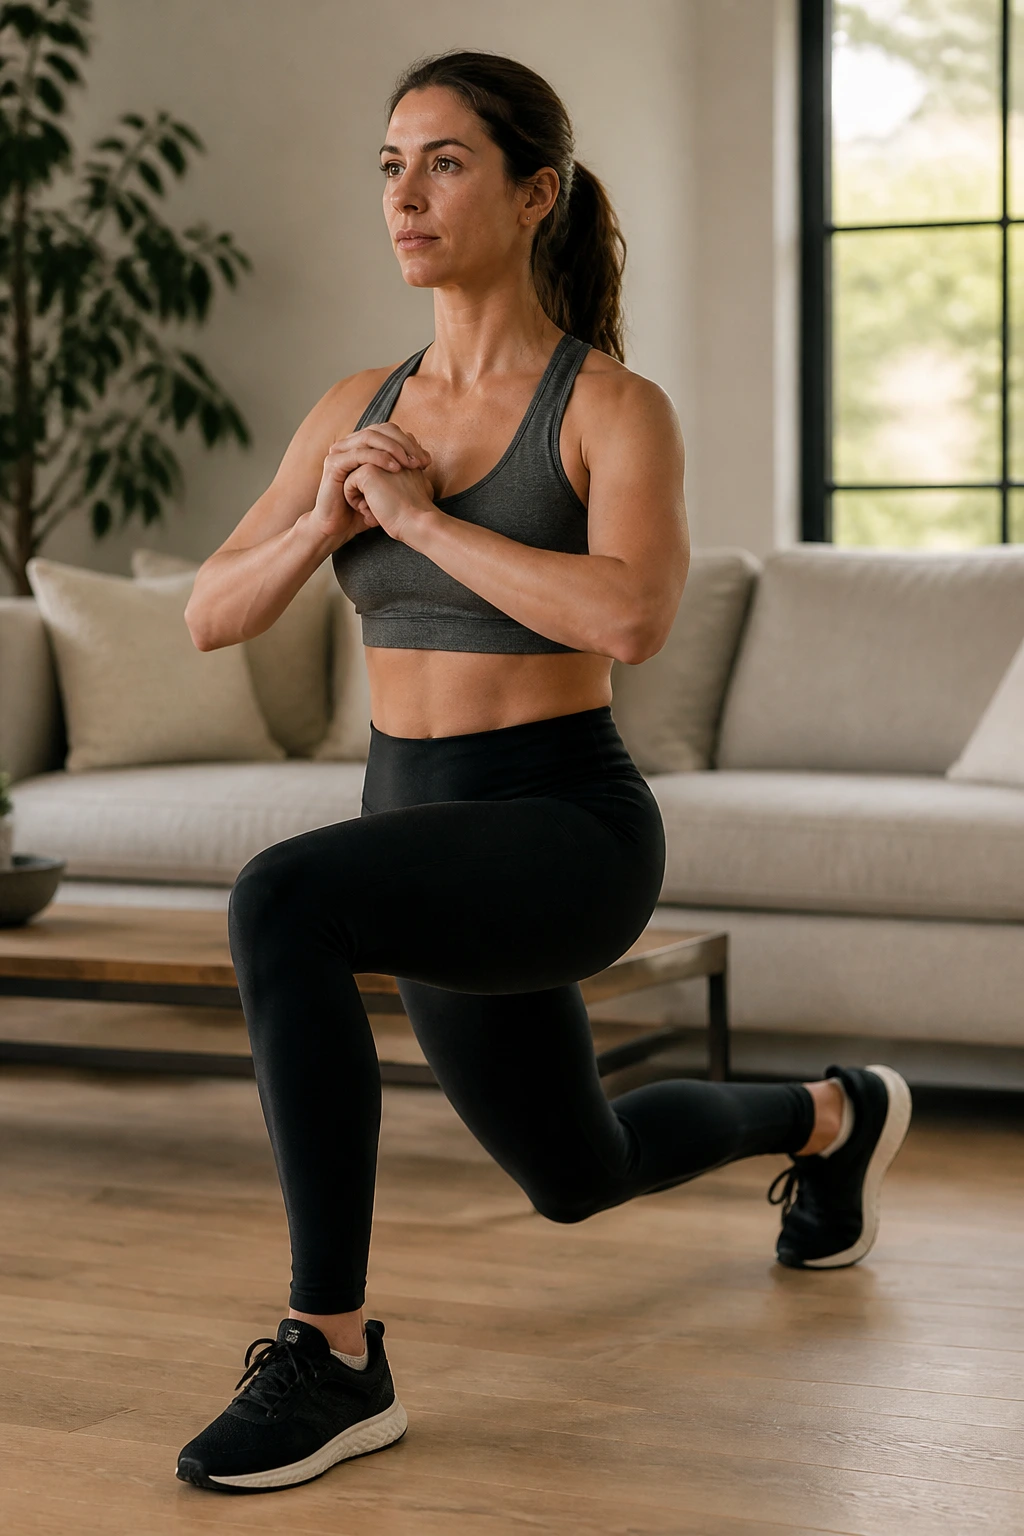
A reverse lunge is often kinder to the back than a forward lunge because you control the step away from the floor instead of catching your whole body moving forward. That small difference changes the feel a lot. The descent is smoother, the balance demand is lower, and the torso usually stays calmer.
Step back softly, not far. A giant step can make your pelvis tilt and your back arch. A shorter step lets the front foot stay rooted while the back knee lowers toward the floor in a clean line.
The front heel should stay down, and the front shin should stay fairly upright. You want the front leg to do the real work, not the lower back trying to stabilize a wobbly torso. Hold a wall or countertop if you need it. That is smart, not cheating.
Do 6 to 10 reps per side and move slowly enough to feel the front glute load up as you stand. If the movement feels harsh, cut the depth by a few inches and keep the torso tall. The exercise still counts.
6. Split Squat
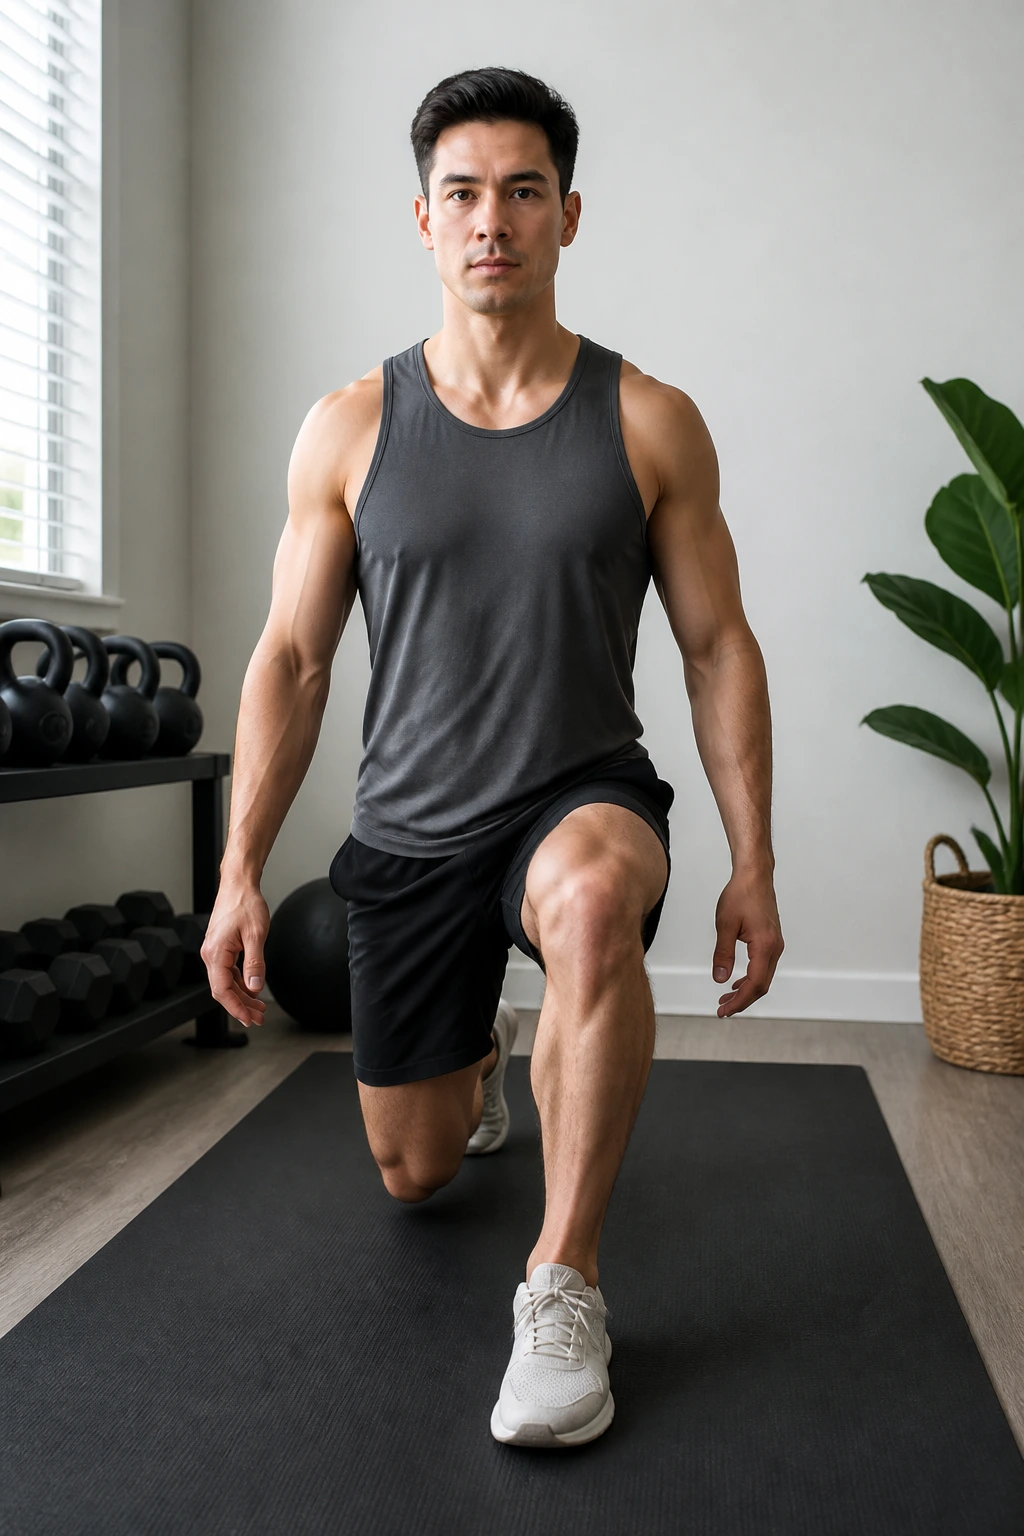
Unlike the reverse lunge, the split squat doesn’t ask you to move through space. Your feet stay planted. That sounds small, but fixed stance work is often easier to control when your low back is fussy and balance feels off.
The split squat is a good choice when you want a leg exercise that makes the quads burn without turning into a coordination test. You set up once, then lower straight down and stand straight up. The movement is tidy, and tidy tends to be friendlier to the spine.
A small mistake here changes everything: if your stance is too short, the front knee shoots forward and the back leg gets cramped. If it’s too long, you may feel the stretch in the hip flexor or lose your brace. Find the middle ground where you can lower under control and still keep your ribcage stacked over your pelvis.
Best use: slow strength work at home, especially when you want one leg to work hard while the other leg stays mostly out of the way.
7. Step-Up on a Sturdy Step
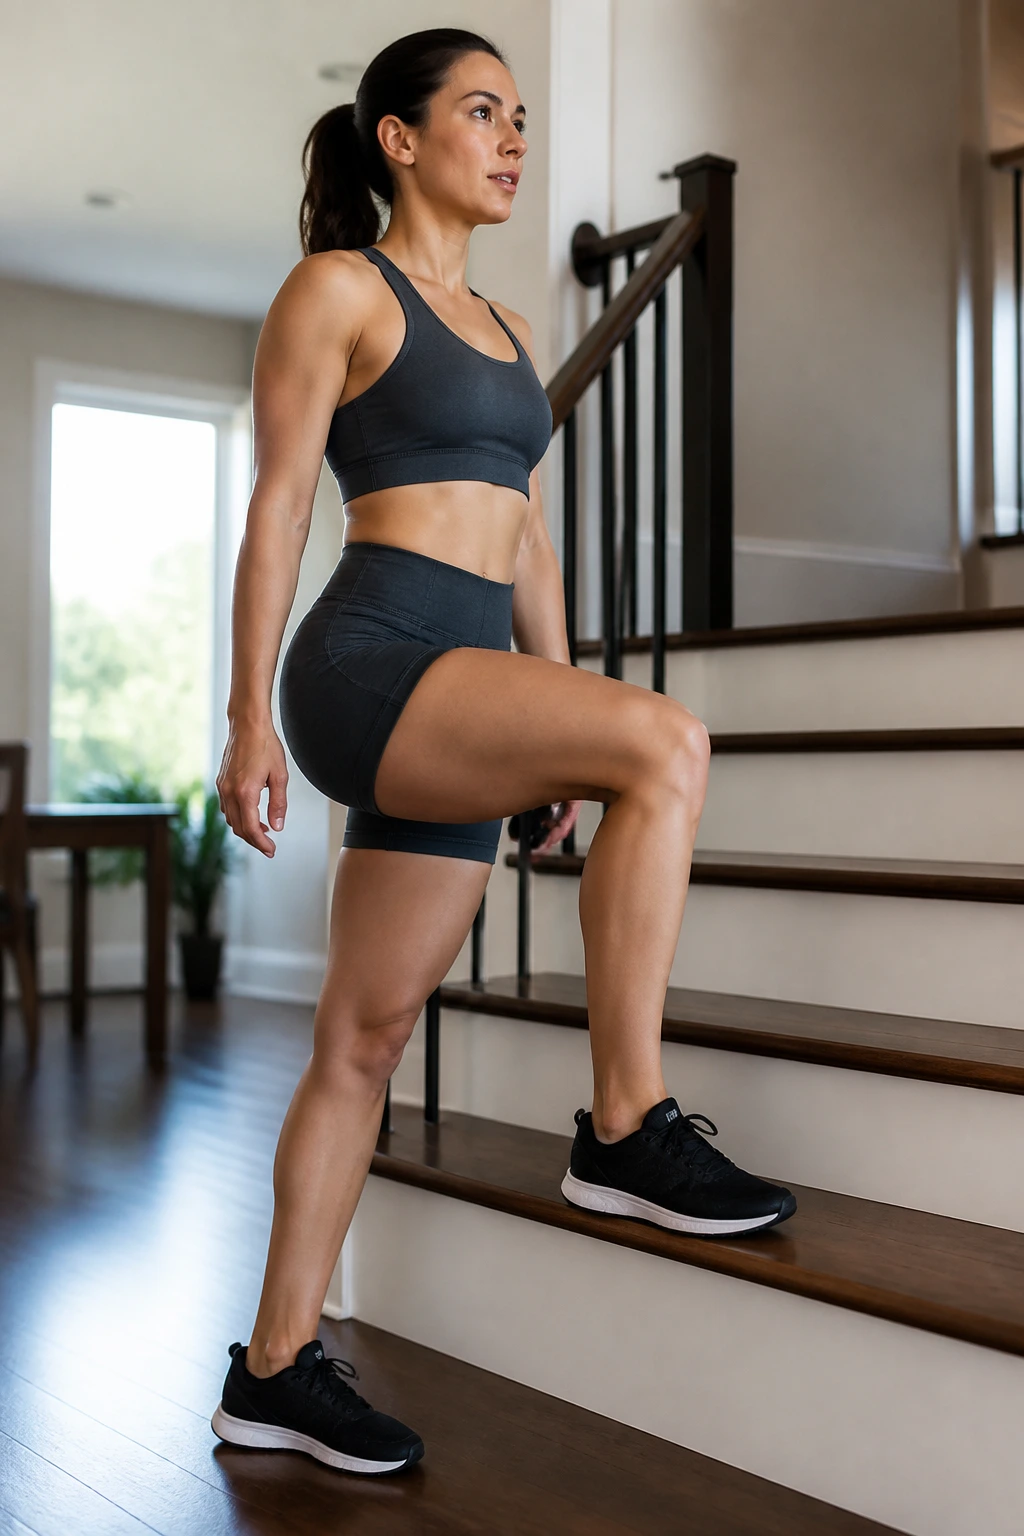
A staircase can do more for a home leg session than most people give it credit for. Step-ups train the quads, glutes, and balance system at the same time, but they do it with a pretty friendly spine position if you keep the movement controlled.
How to Keep It Clean
Use the bottom stair or a low, stable step first. Higher is not better here. A step that is too tall usually turns into a hip hike and a back wiggle, which is exactly what we are trying to avoid.
Put the whole foot on the step. Not half of it. Drive through the heel and midfoot of the working leg, then stand tall without pushing off too much from the trailing leg. The trailing foot should help only a little.
- Choose a step around 6 to 12 inches high to start.
- Keep your chest stacked over your hips.
- Lower with control for 2 to 3 seconds.
- Use the wall or a railing if balance is shaky.
Good sign: You feel the standing leg working hard, but your low back stays quiet. That’s the one to keep.
8. Supported Bulgarian Split Squat for Lower Back Friendly Strength
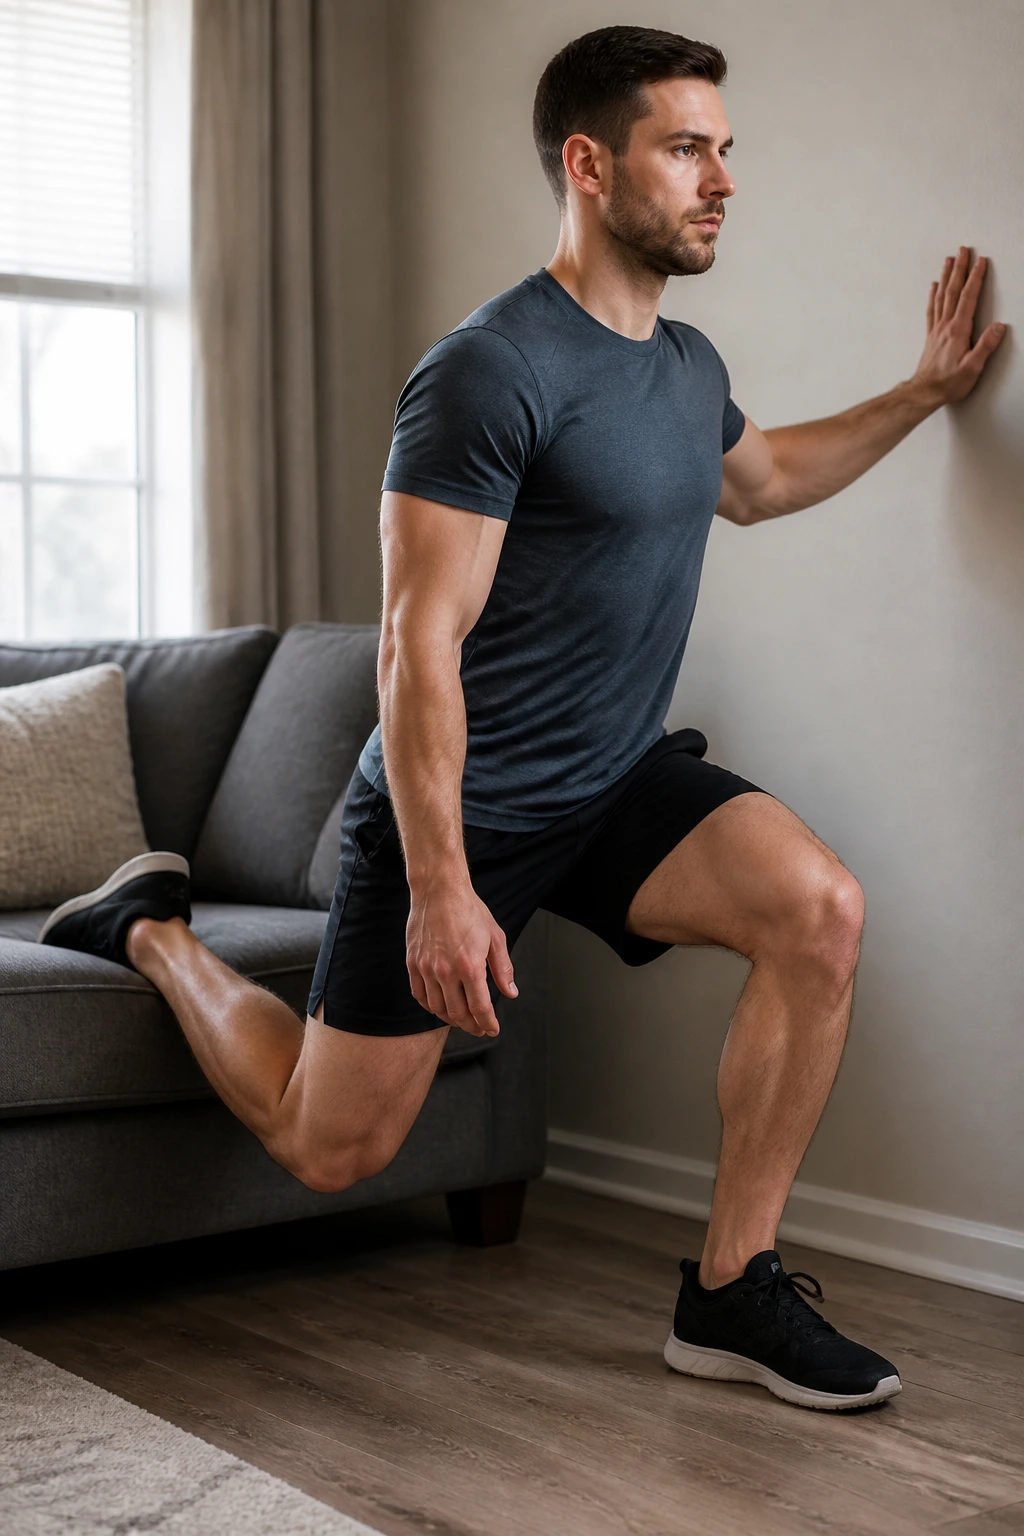
This one looks intense, and yes, it can be intense. But with a wall, chair, or couch for support, it becomes far more manageable than people expect. The support takes some of the balance demand away, which lets your legs do the job without your lower back tightening up to keep you upright.
The key is not to chase a huge range on day one. Put the rear foot on a low couch or chair, keep one hand lightly on a wall, and lower only as far as you can stay stacked. If your front heel comes up or your torso starts leaning like a folding chair, you’ve gone too far.
The front foot usually needs to sit a little farther forward than people think. Too close and you’ll jam the knee. Too far and you’ll feel like you’re doing a balance stunt instead of a leg exercise.
This move is best for people who already tolerate split squats but want more challenge without loading the spine with weight. Keep the reps slow, keep the torso quiet, and don’t turn it into a depth contest.
9. Sumo Squat
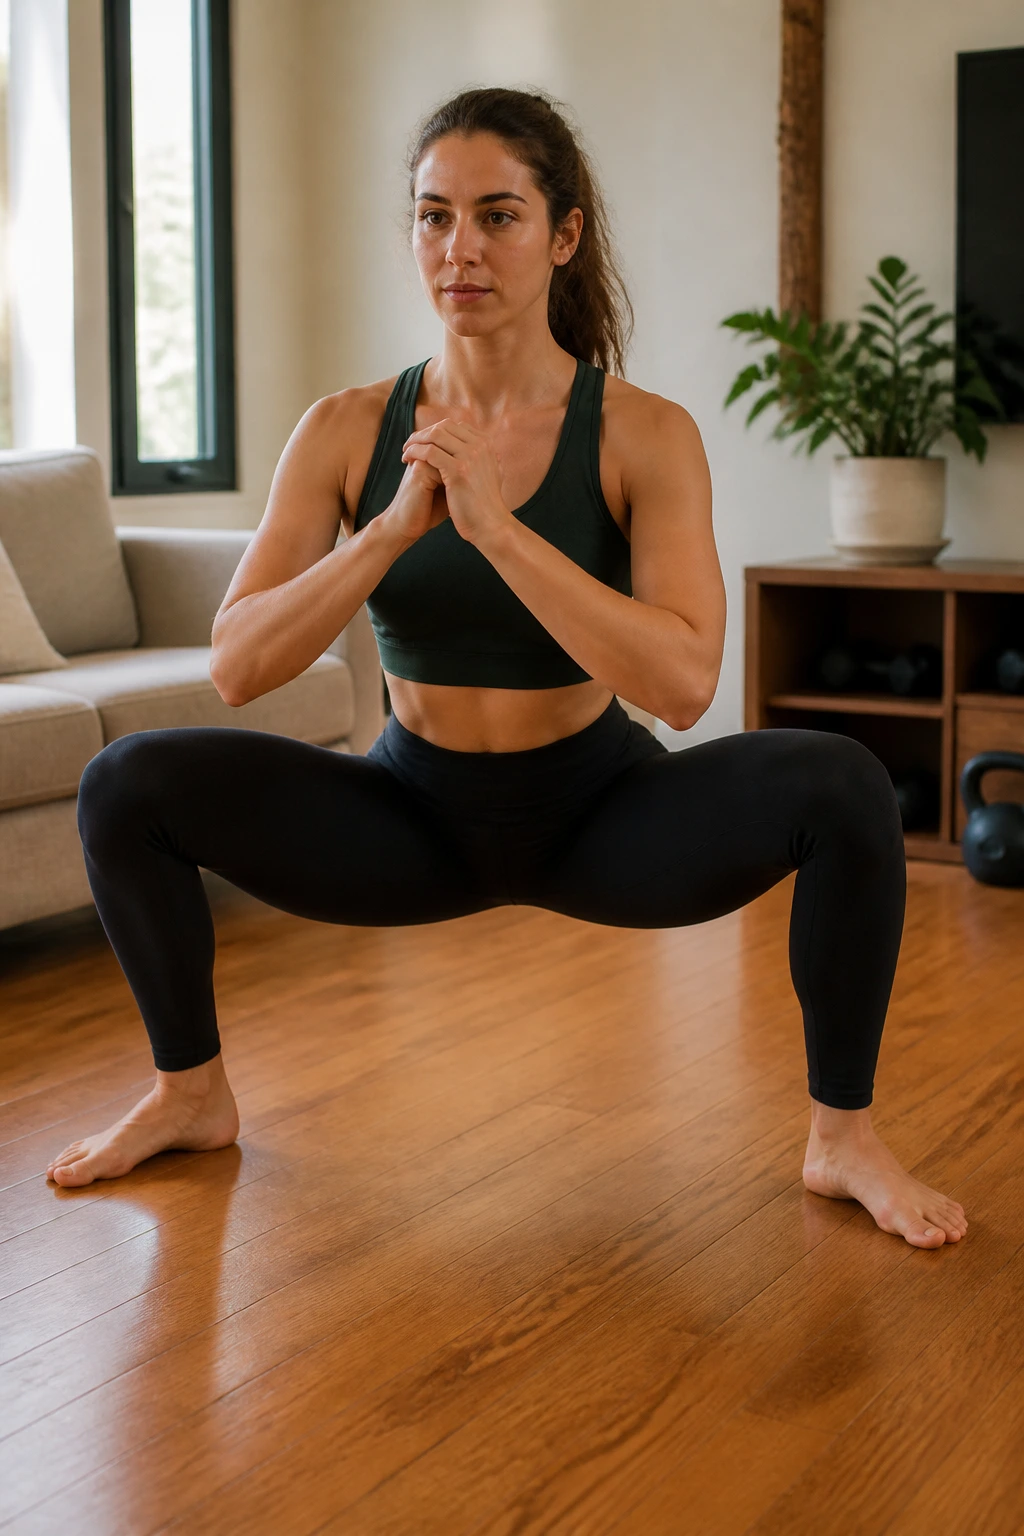
Does a wider stance help? For many people, yes. A sumo squat can feel easier on the back because it lets the torso stay more upright while the hips sit between the knees instead of folding so far forward.
What Makes It Different
Stand with your feet wider than shoulder-width and turn the toes out about 20 to 30 degrees. From there, sit down between your heels rather than reaching the chest toward the floor. The inner thighs and glutes will notice this fast, and the lower back often gets a break from the more upright torso.
The trick is to stop before your pelvis tucks under. Once that tuck starts, the low back starts picking up the slack. If the bottom feels cramped, raise the depth a bit and use a smaller squat. You do not need to go low to make this useful.
How to Use It
Do 8 to 12 controlled reps, then pause for a beat at the bottom of each one. A tiny pause kills the bounce and makes the legs work harder without needing more speed or load.
Best for: readers who want a squat pattern that feels steadier, more grounded, and less demanding on the low back than a narrow, deep squat.
10. Sit-to-Stand
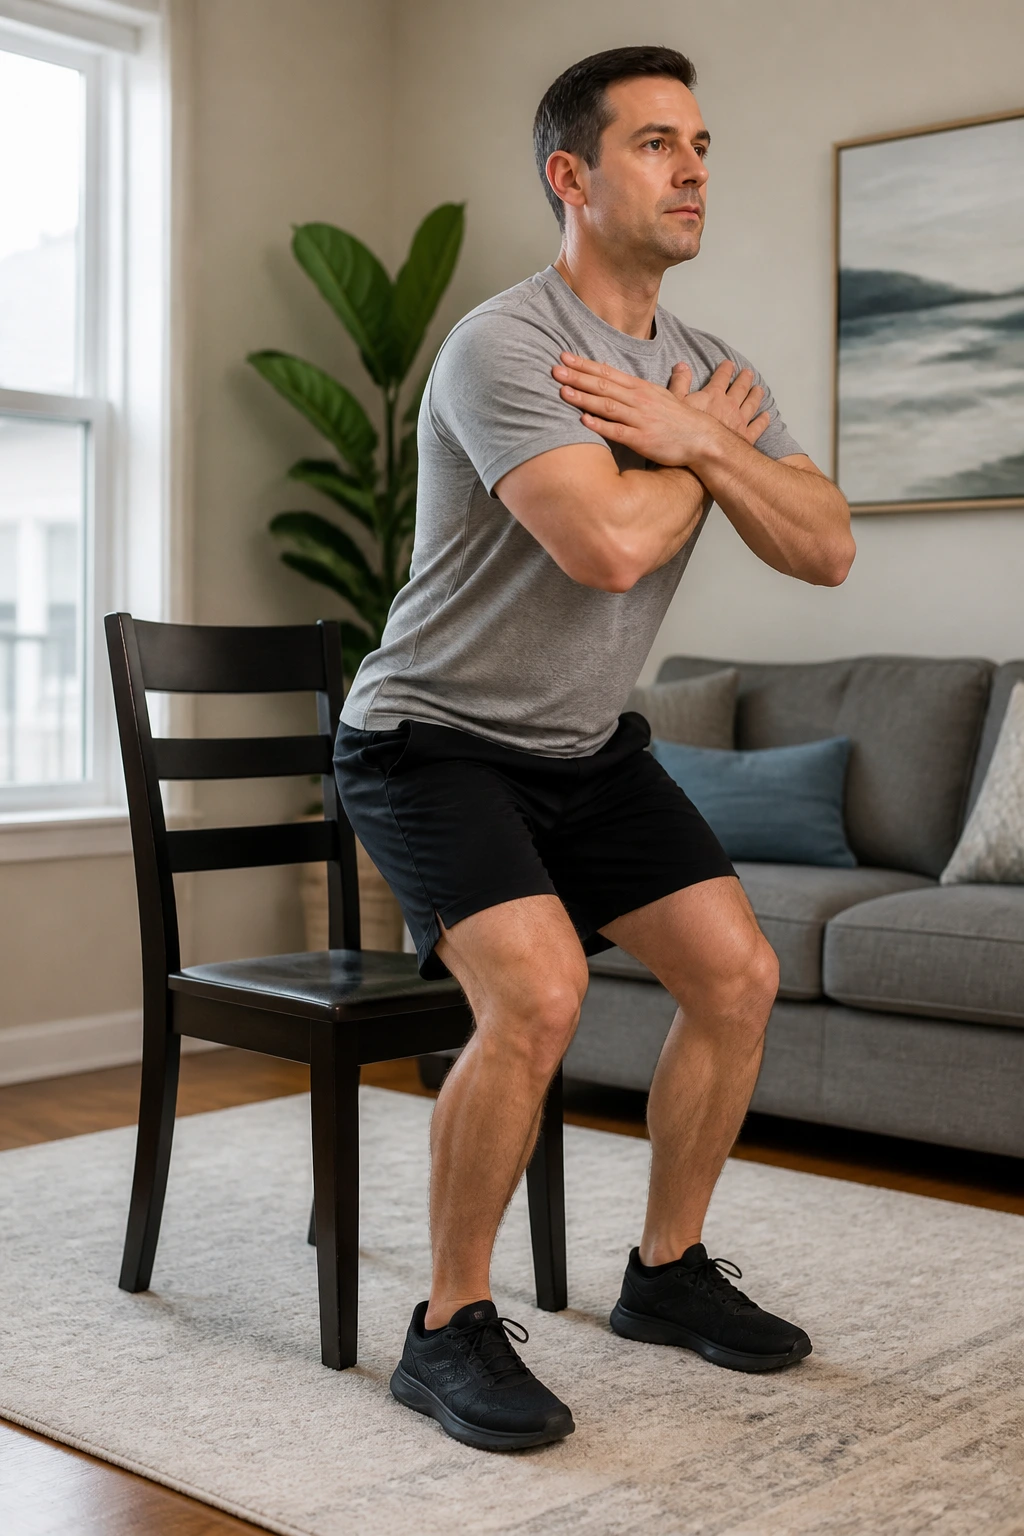
The boring chair drill is often the one people should have kept all along. Sit-to-stand work looks plain, but it teaches one of the most useful leg patterns you can own: getting up from a seat without dumping effort into the back.
A firm chair gives you a consistent depth and a clear finish. Lower under control, lightly touch the seat, then stand up by driving through the feet. That lowering phase is where the money is. If you fall into the chair, the quads never really get a chance to work.
Use your arms only if you need them. Seriously. If you can cross your arms over your chest, do it. If you can’t yet, put your hands on your thighs and still focus on a smooth stand.
- Pick a chair that doesn’t rock.
- Keep your feet flat and about hip-width apart.
- Lower for 3 seconds if you want more work.
- Stand without rocking forward onto your toes.
The beauty of this move is how easy it is to scale. A cushion makes it easier. A lower chair makes it harder. Same pattern, different challenge.
11. Side-Lying Leg Raise
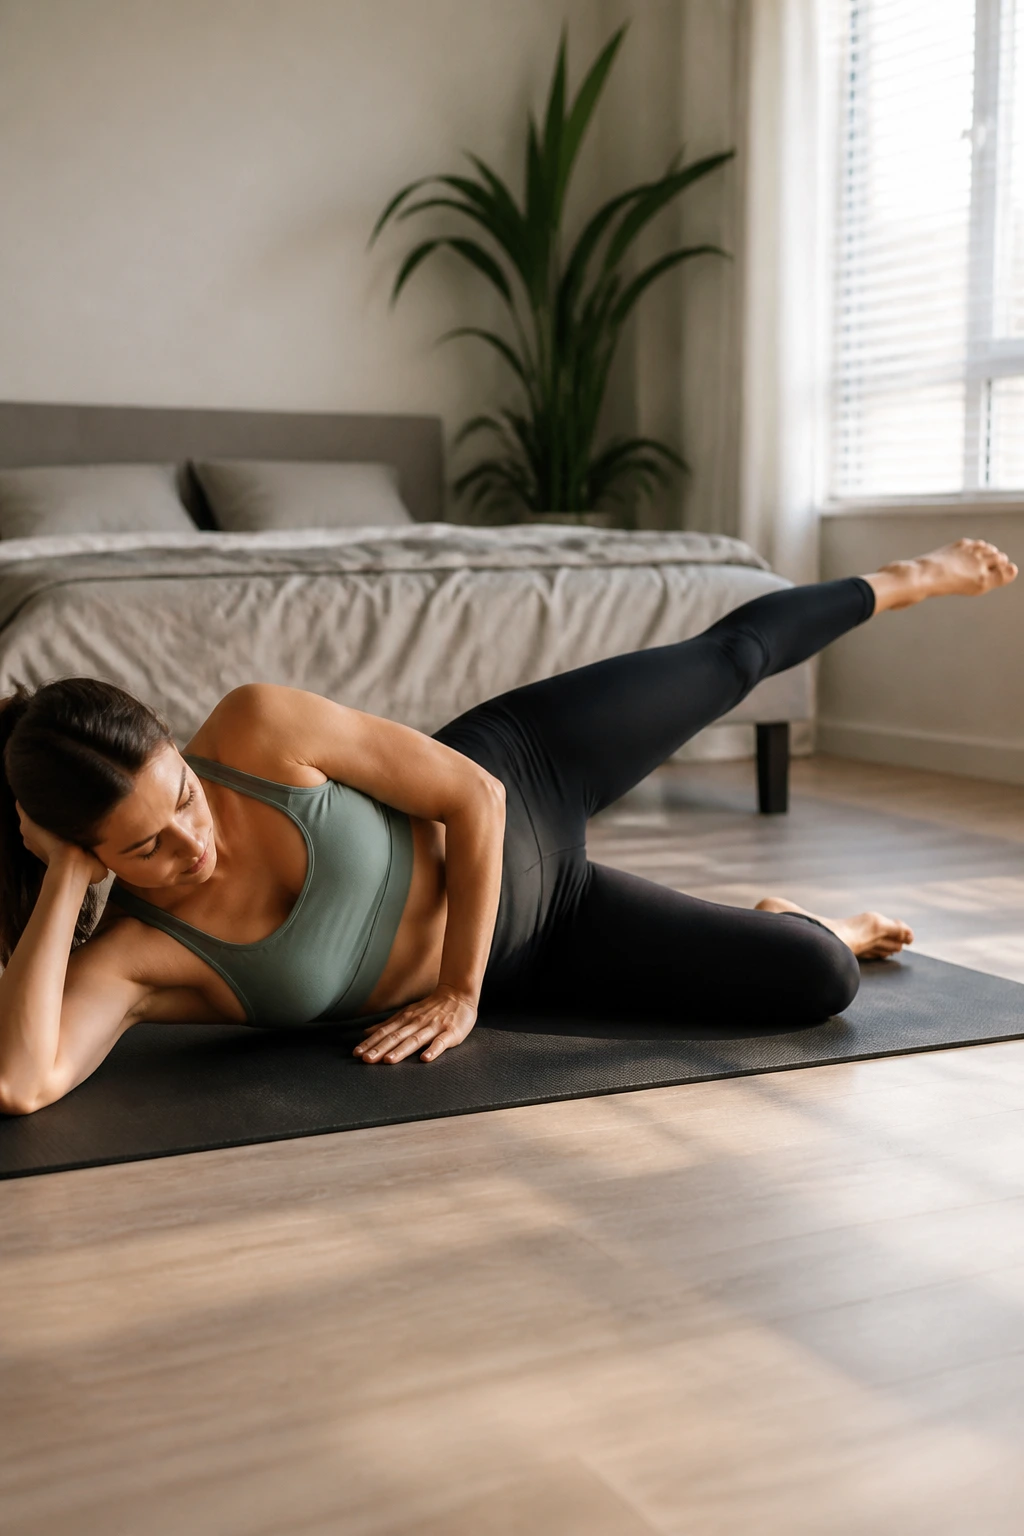
The side-lying leg raise is a good reminder that the outer hip matters more than people think. When the glute med does its job, the pelvis stays steadier in squats, lunges, and step-ups. When it doesn’t, the low back often gets recruited to hold things together.
Lie on your side with your bottom knee bent and your top leg straight. Stack the hips, then lift the top leg only 8 to 12 inches. That’s usually enough. If you swing the leg higher than that, the hip flexor and lower back start stealing the show.
Keep the toes turned slightly down. That tiny adjustment helps the outer hip light up instead of the front of the thigh. You should feel the side of the buttock working, not a giant pull in the low back or a pinch in the front of the hip.
A slow lower matters here. If the leg drops like a stone, the movement gets sloppy fast. Two sets of 12 to 20 reps can be enough to make your standing work feel cleaner later.
12. Clamshell
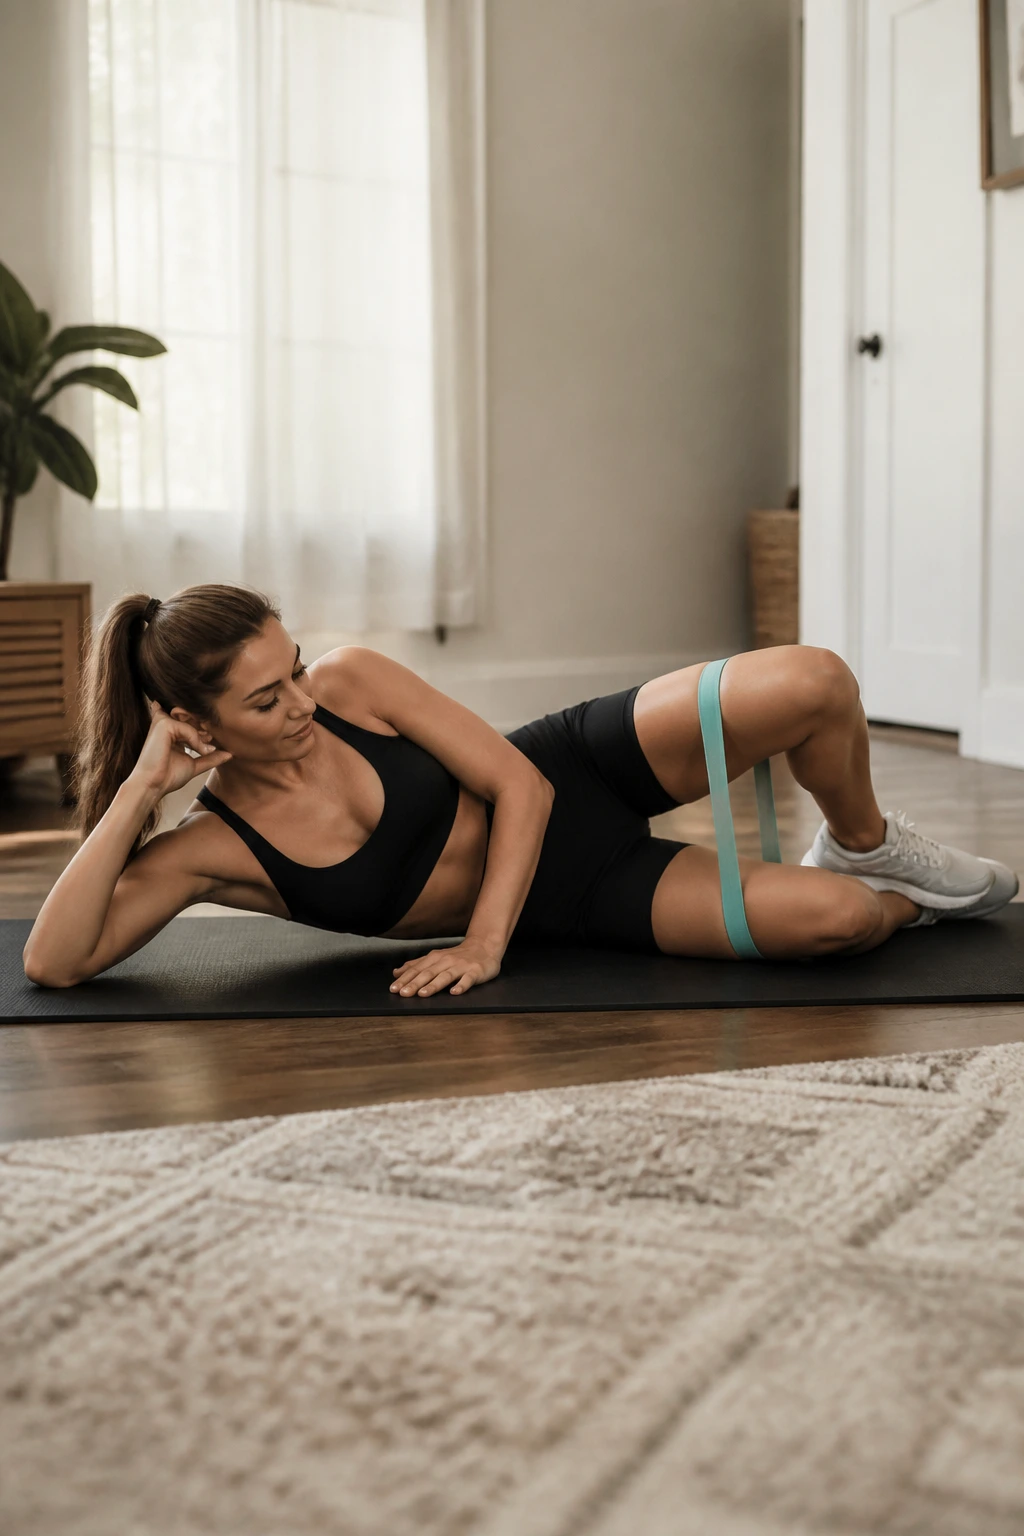
Small move, big payoff. The clamshell looks almost too easy until you notice how quickly the outer hip starts to complain, especially if your knees tend to cave inward during squats or split squats.
Who Tends to Love It
People who feel their knees wobble inward, or whose hips feel unstable on one side, usually get a lot from this drill. It targets the glute med in a way that is gentle on the lower back and easy to do on a living room floor.
Lie on your side with your knees bent, feet together, and hips stacked. Open the top knee without rolling the pelvis backward. That last part matters. If your top hip rolls behind you, the range gets fake fast and the glute doesn’t work as hard.
- Keep the feet touching from start to finish.
- Open the knee only as far as you can keep the pelvis still.
- Try 15 slow reps per side.
- Add a mini band above the knees when bodyweight starts feeling easy.
Best cue: Think “rotate from the hip, not from the waist.” It keeps the motion honest.
13. Donkey Kick
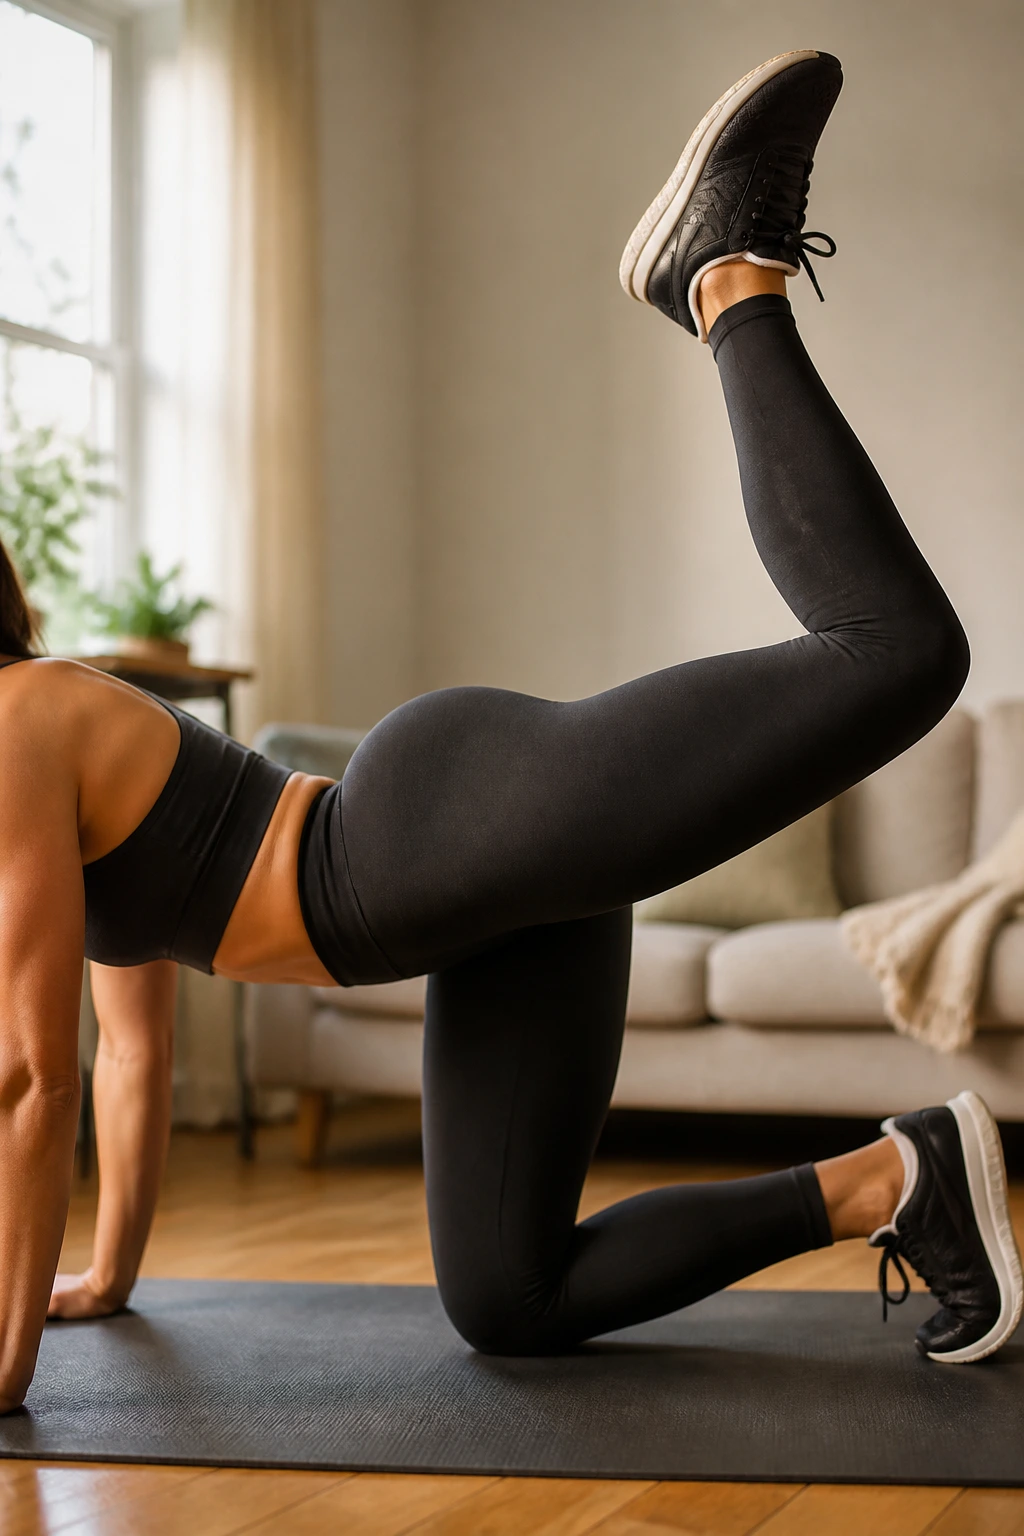
A donkey kick goes wrong the moment the lower back decides to swing the leg for you. That’s the common trap. The fix is not to kick higher; it is to kick smaller and brace harder.
Start on all fours with your hands under your shoulders and knees under your hips. Exhale, tighten the belly gently, then lift one bent leg until the heel points toward the ceiling. The motion should feel like the glute is doing a short, controlled press, not like your spine is tossing the leg up.
Clean Cues
- Keep the ribs from flaring.
- Stop the lift when the pelvis wants to twist.
- Move the leg in a slow arc, not a snap.
- Aim for 8 to 15 reps per side.
If you feel pinching in the lower back, lower the range by half. The glute still gets a job. It just won’t look dramatic on video, which is fine. Video is not the point.
A little pause at the top helps more than extra speed ever will.
14. Fire Hydrant
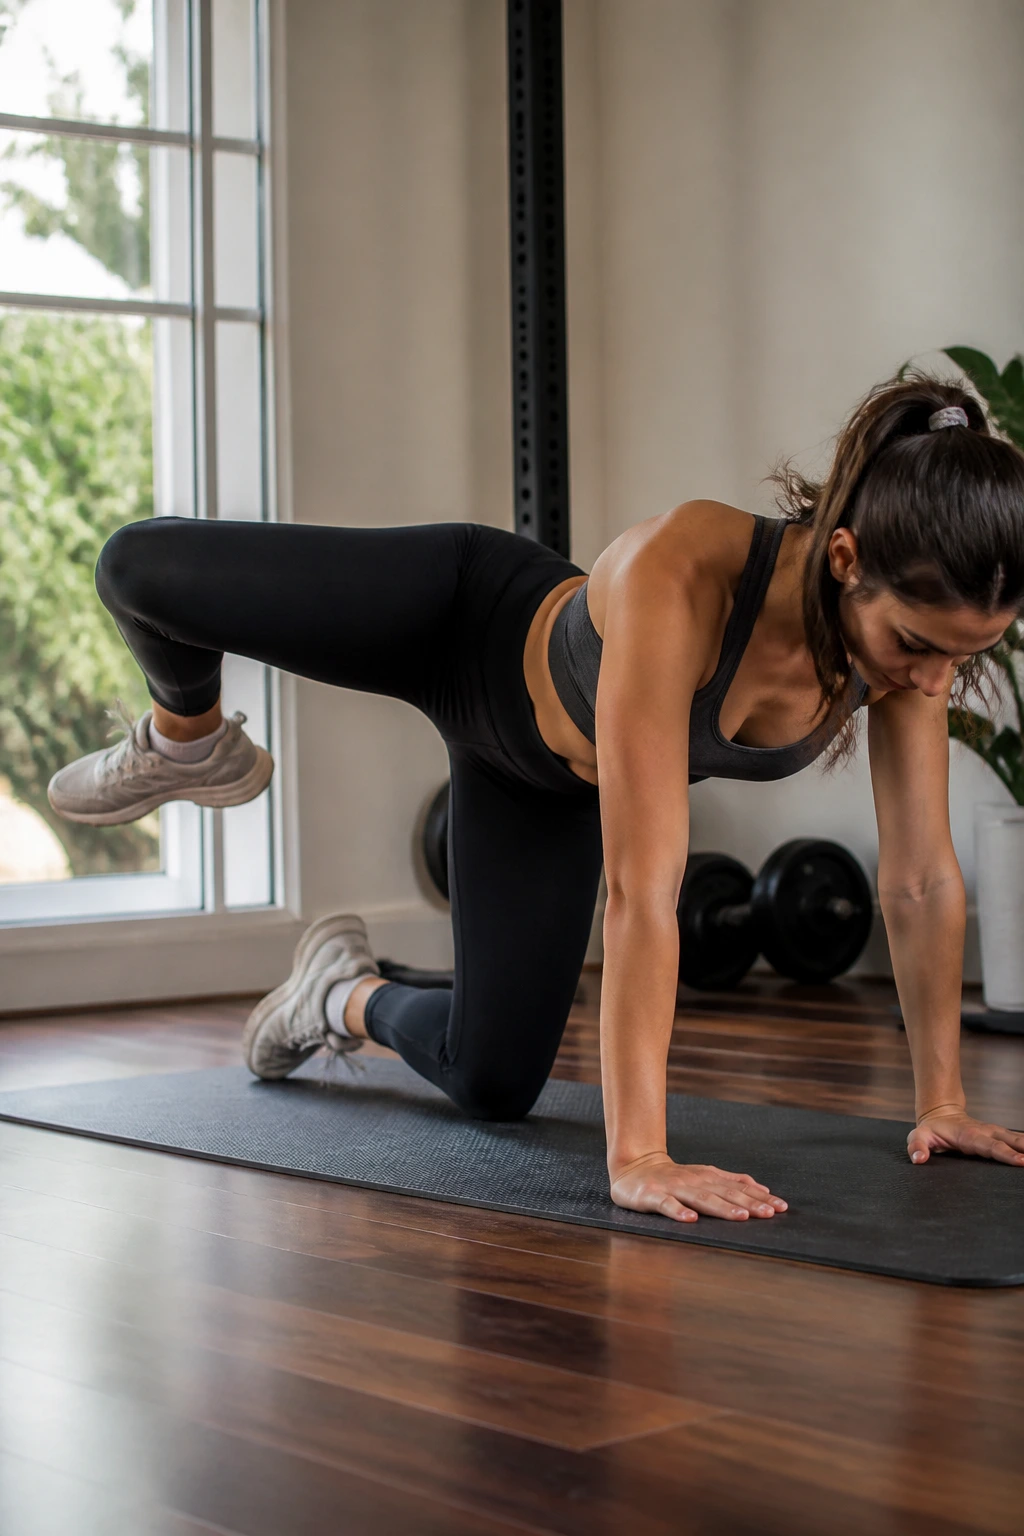
It looks tiny, and that is the point. The fire hydrant is one of those moves that gets brushed off because the range is so small, but if you keep the pelvis steady, the side glute has to work hard.
On hands and knees, lift one knee out to the side while keeping the torso still. That’s the whole drill, and it is enough. The goal is not to twist open like a gate. The goal is to move the hip joint while the spine stays quiet.
If your wrists get tired, drop to forearms. If your shoulders feel jammed, widen the hands. Tiny setup changes can make this feel much better, and there is no prize for suffering through a bad position.
Do 10 to 15 reps per side, pausing for a second at the top. You should feel the outer hip light up first, not the lower back. If the back kicks in, make the lift smaller. Really small is fine.
This is a good one for days when you want glute work without standing, stepping, or loading your joints much at all.
15. Single-Leg Glute Bridge
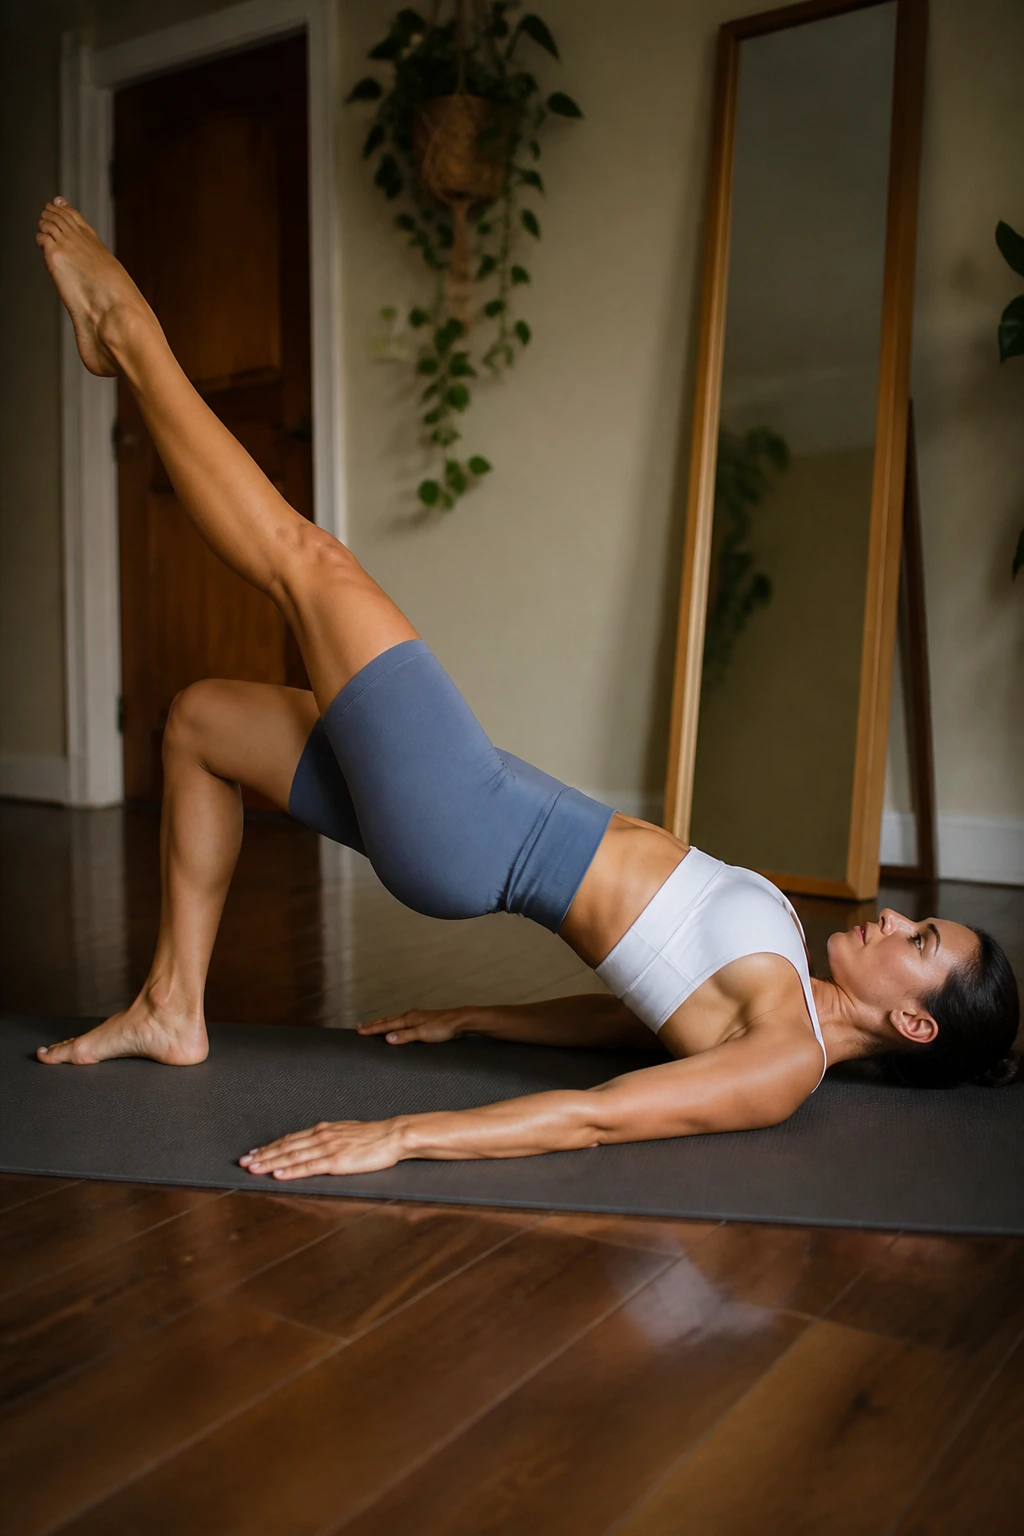
Can you make a bridge hard without adding weight? Absolutely. Remove one leg, and the same floor move suddenly asks the working side to do much more of the job.
The single-leg glute bridge is useful because it keeps the spine relatively calm while increasing the demand on the glutes and hamstrings. But the move only works if the pelvis stays level. If one hip drops or twists, the lower back usually starts sneaking in to save the rep.
How to Keep the Pelvis Square
Start in a regular bridge position. Lift one foot off the floor, bend the knee, and keep the thighs lined up. Then press through the planted heel and raise the hips slowly.
- Start with 6 to 10 reps per side.
- Keep the lifted thigh close to the other knee.
- Do not let the lifted side of the pelvis dip.
- If hamstrings cramp, move the planted foot a little farther away.
The first few reps can feel awkward. That’s normal. Once the pelvis settles, the exercise feels much cleaner, and your glute will probably tell you it means business.
16. Hamstring Heel Dig Bridge
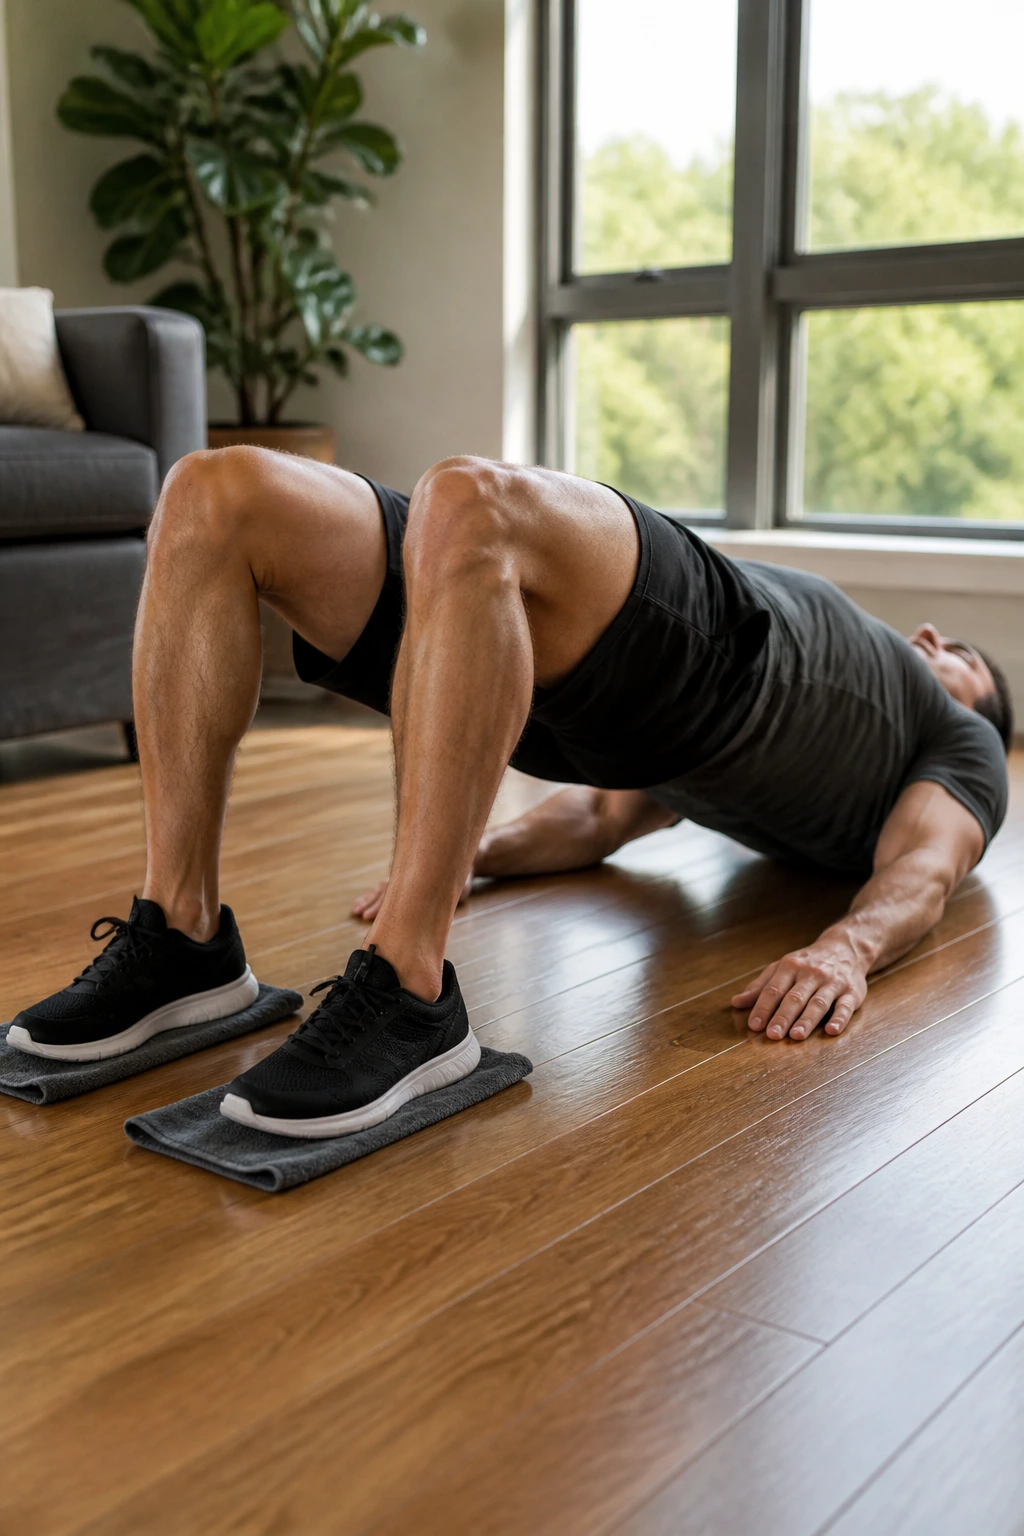
If you’ve got a smooth floor, a towel, and a little patience, this move is worth trying. It turns a bridge into a sliding hamstring curl, which means the legs keep working while the lower back stays out of the spotlight.
Lie on your back with both heels on a towel or sliders. Lift your hips into a bridge, then slowly dig the heels in and pull them toward your body. The hamstrings will fire fast. The slide is short at first. That’s normal. Two or three controlled reps can feel stranger than they look.
What to Watch For
- Use a floor that lets the towel slide: wood, laminate, or tile.
- Keep the hips lifted the whole time.
- Move slowly enough that the towel doesn’t bunch up.
- Stop if the low back starts sagging.
If the floor is too sticky, the towel will fight you and the movement turns ugly. A pair of socks on a smooth surface can work too. Small fix. Big difference.
This one is sneaky. It looks like a bridge, but your hamstrings know better within seconds.
17. Lateral Band Walk
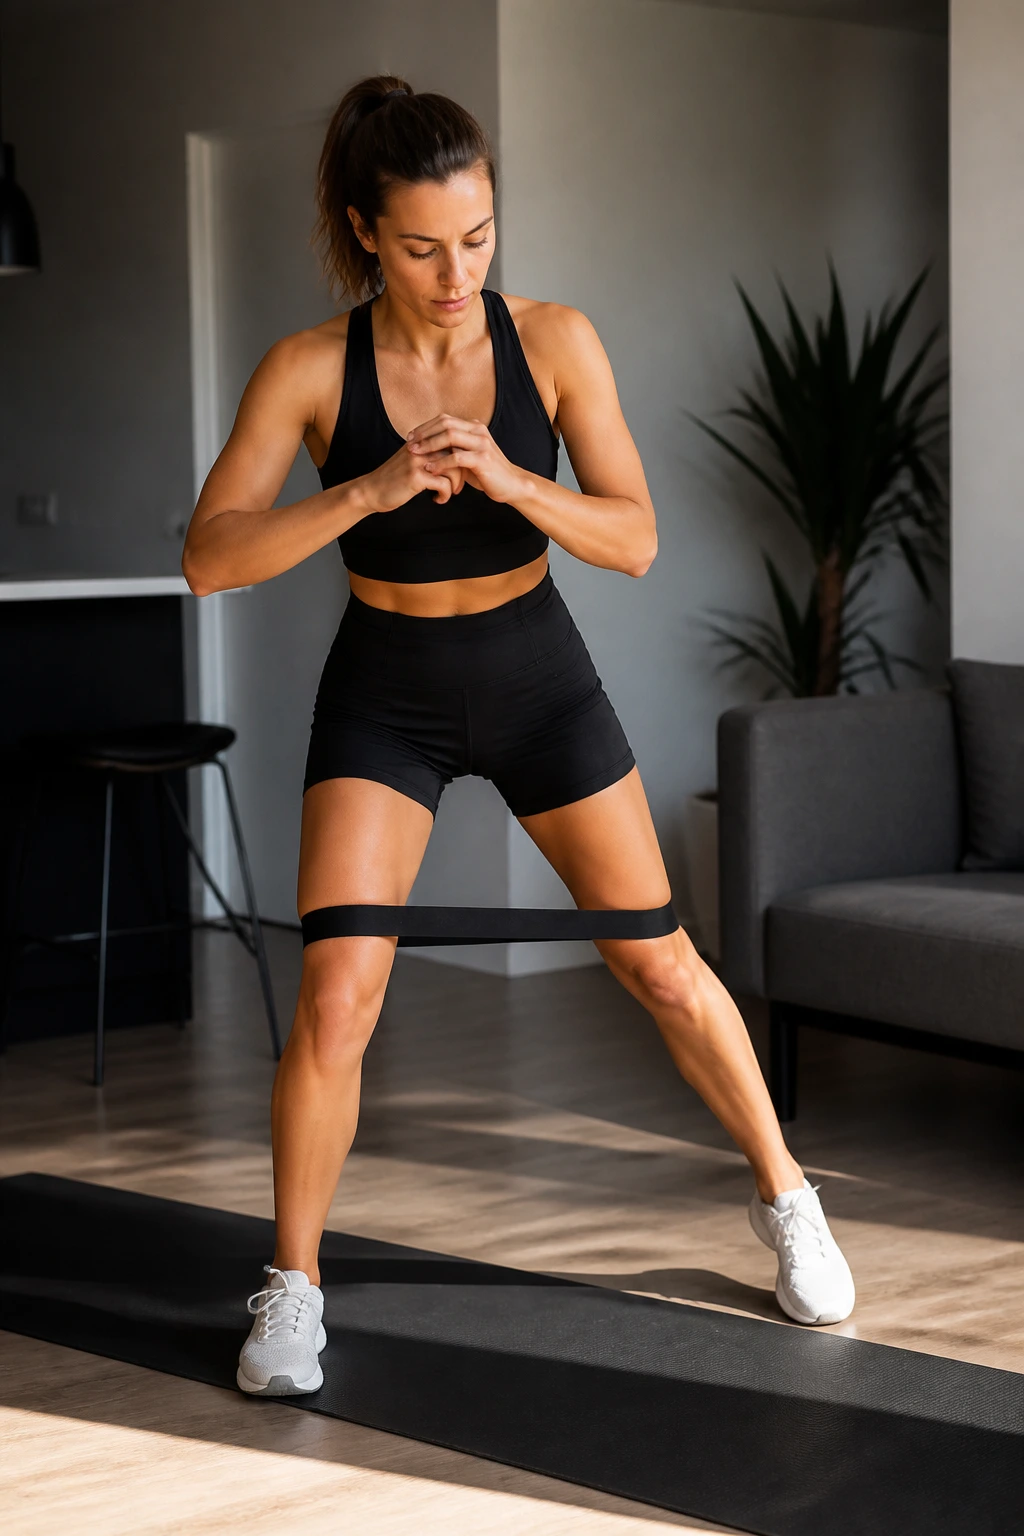
The lateral band walk does not look glamorous, and that’s part of its charm. Side steps with a band can clean up hip stability in a way that shows up later in squats, lunges, and step-ups, especially when the knees like to drift inward.
Keep the knees soft, the chest quiet, and the steps controlled. If you rush, the band turns into a sloppy tug-of-war. The hips should stay level while you step side to side, not bob up and down like you’re sidestepping puddles.
A mini band above the knees is easier than one around the ankles. Around the ankles is harder. Use that on purpose, not by accident. If you do not own a band, a shallow side-step squat works, though the band gives clearer feedback.
Take 6 to 10 steps one way, then return. The outside of the hips should work, and the low back should stay boring. Boring is good here. Boring means the pelvis is holding steady.
18. Standing Hip Abduction Hold
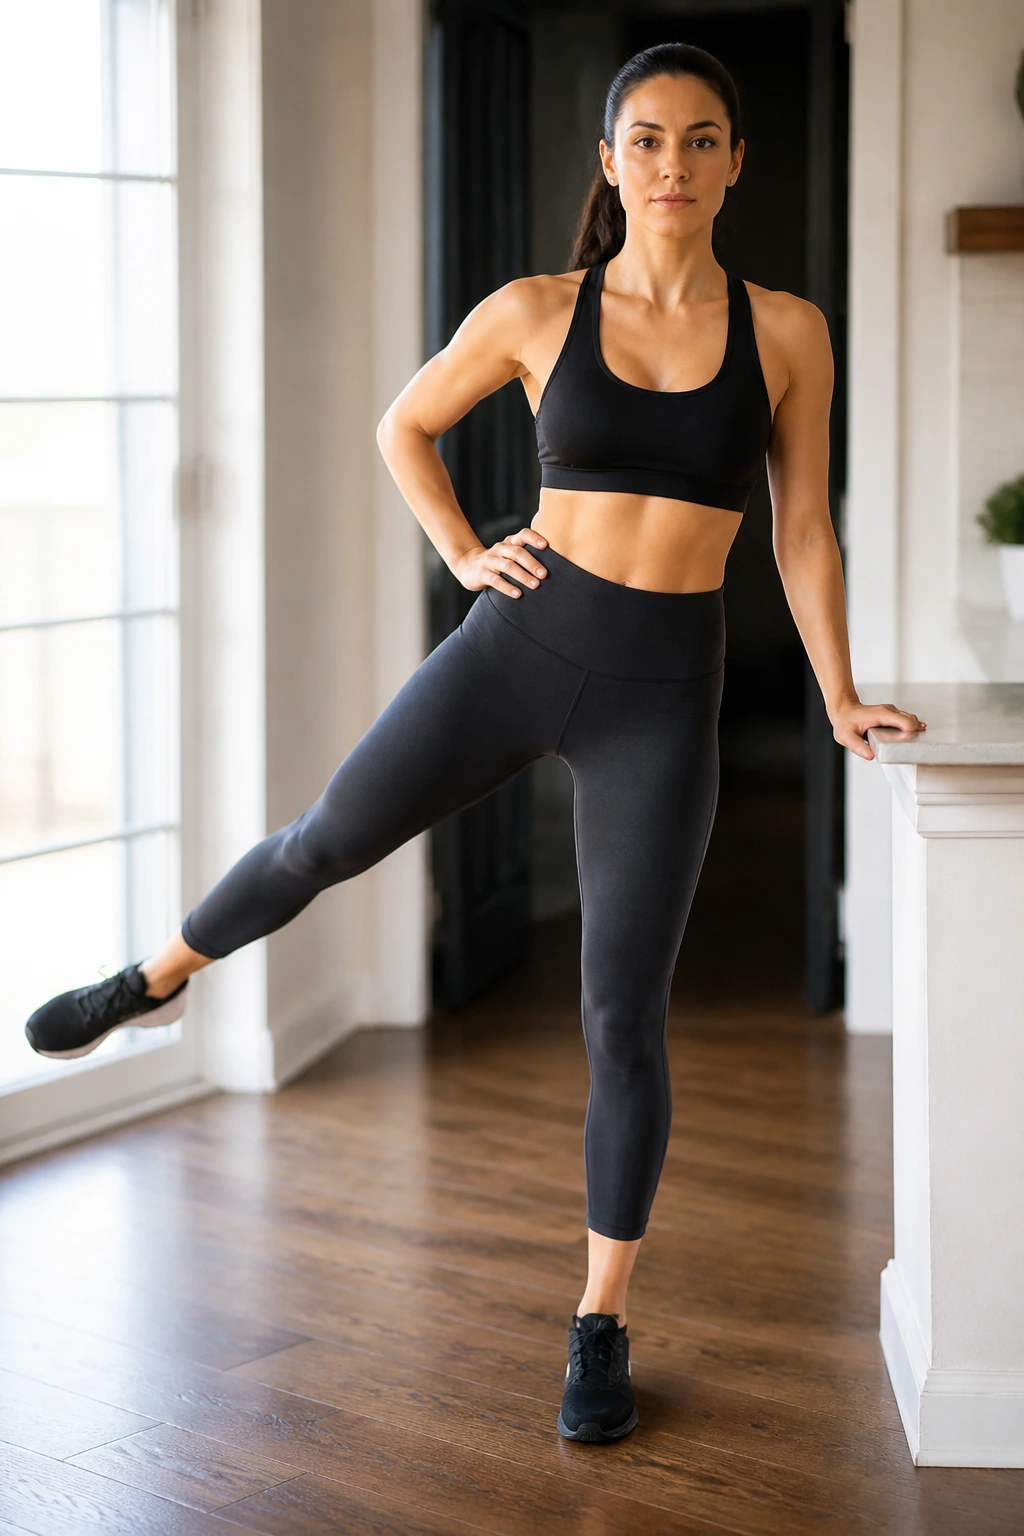
This is the move people skip and then wonder why their hips feel shaky. Standing hip abduction is small, but it hits the outer hip without asking your spine to flex, extend, or twist much.
Hold onto a countertop, wall, or the back of a chair. Shift your weight onto one leg, then lift the other leg straight out to the side about 6 to 10 inches. Pause for 2 seconds, lower slowly, and repeat. No swing. No hike. No leaning away from the lifted leg.
The lift should come from the hip, not from tipping your torso. If you catch yourself leaning, bring the leg down and make the motion smaller. A short, strict hold does more for this drill than a big sloppy lift ever will.
This one is especially good if floor work bothers your wrists or knees. It also works well between harder sets as a reset for the glutes. A few clean reps can change how the next squat or lunge feels.
19. Calf Raise With Slow Lowering
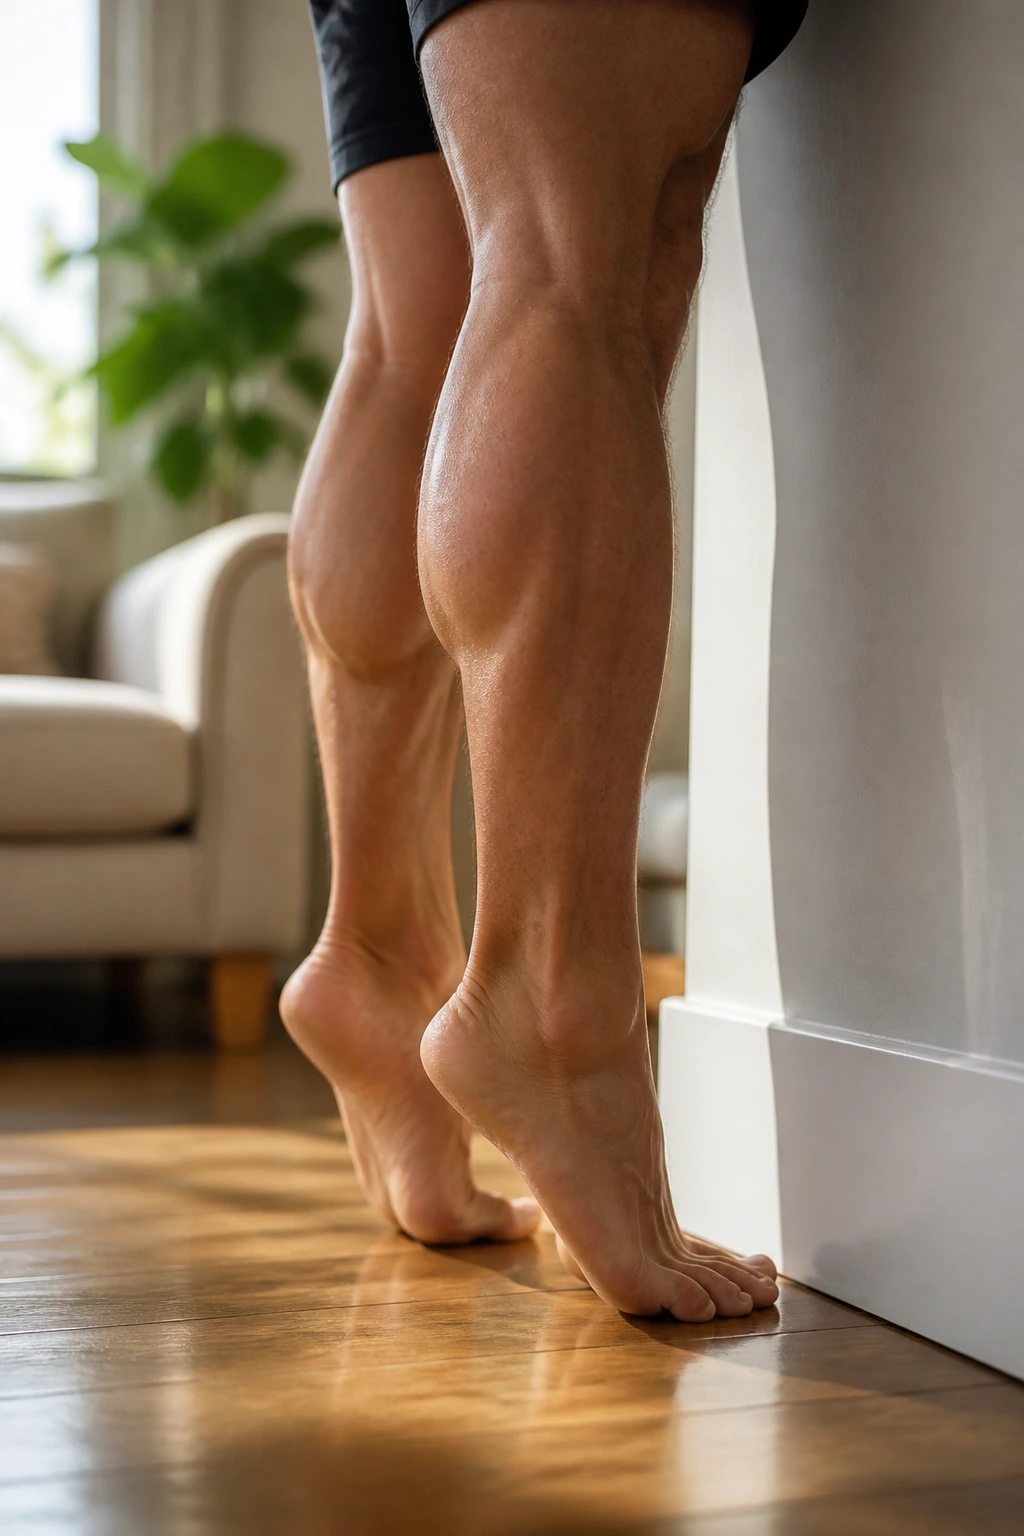
People forget calves because calf work looks too simple to matter. Then an ankle feels stiff, a squat gets wobbly, and suddenly the tiny muscles down by the heel seem a lot more important.
Why Calves Matter for Your Back-Friendly Leg Work
Strong calves help with ankle control, and stable ankles help the knees and hips line up better. That does not fix everything, but it removes one common reason leg work feels clunky. When your ankle gives out early, your lower back often ends up compensating.
Stand tall with your feet hip-width apart and rise onto the balls of your feet. Pause at the top for a second, then lower for 3 to 4 seconds. That slow drop is the part most people rush through. It matters.
- Start with 15 to 20 reps.
- Hold onto a wall if balance is off.
- Try one leg at a time once two legs feel easy.
- Use a stair step if you want a deeper range.
Best cue: Think of the heel lowering like a controlled elevator, not a drop.
Simple. Effective. Annoying in the best way.
20. Wall Sit March
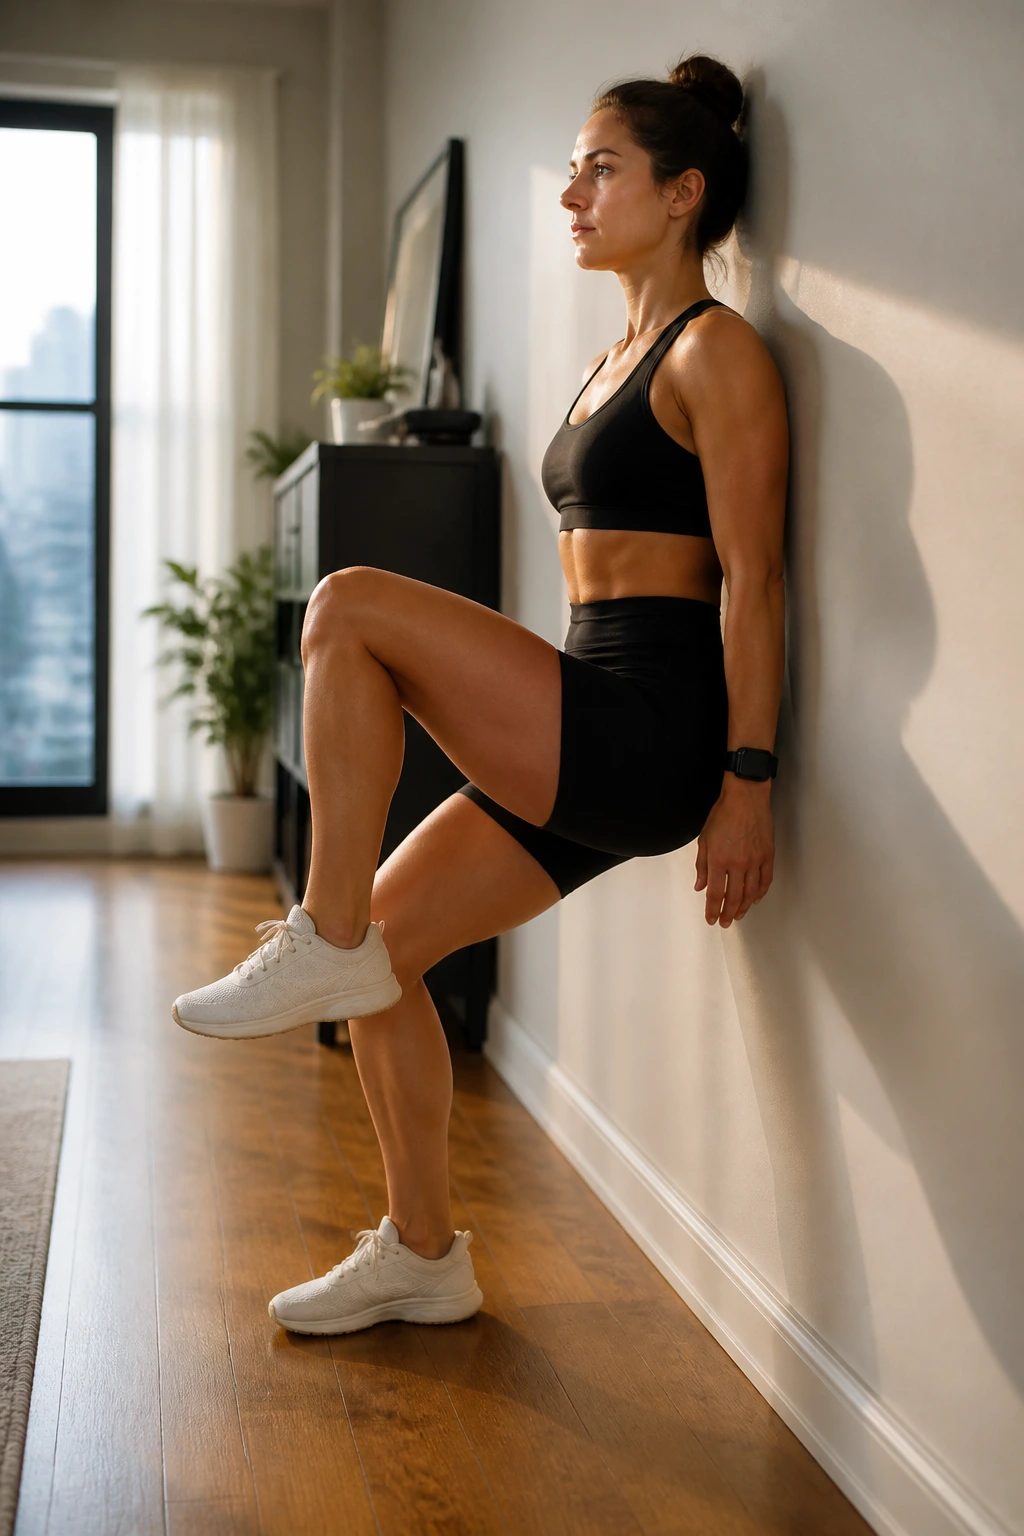
This is the finisher I like when the quads need a wake-up and the lower back has already done enough for the day. A wall sit march keeps the legs under tension while adding just enough movement to make the set feel alive.
Set up in a wall sit with your knees bent around 60 to 90 degrees, depending on what feels manageable. From there, lift one foot a few inches off the floor, set it down, then lift the other. The torso stays glued to the wall. The pelvis stays level. The legs do the work while the spine stays out of the drama.
How to Keep It Honest
- Keep the press through the heels and midfoot.
- Lift each foot only 1 to 2 inches.
- Move slowly enough that the wall does not become a crutch.
- Start with 10 marches per side.
If your low back starts arching away from the wall, stand a little taller and shorten the hold. That usually fixes it fast. The beauty of this move is that it finishes a home leg session without needing much space, gear, or setup. Just a wall, some grit, and legs that will complain in the right places.
