



Most people turn hip day into a squat marathon. That’s a mistake if what you really want is stronger glutes, steadier knees, and hips that don’t feel cranky after a long day of sitting.
The smartest hip workouts for women at home usually look almost boring at first glance. A bridge on the floor. A side-lying lift. A split squat done with patience. Nothing flashy. Everything targeted.
That’s the part people miss. Your hips are not one tiny muscle with one job. They’re a whole support system — glute max for power, glute medius for side-to-side control, smaller deep muscles for stability, and all of them get touchy when you sit too much and train too randomly.
A mat, a loop band, a sturdy chair, and a little floor space are enough to do real work here. Start where you can feel the back pocket, the outer hip, and the side glute doing their share. The first move is usually the one people skip, and that’s exactly why it matters.
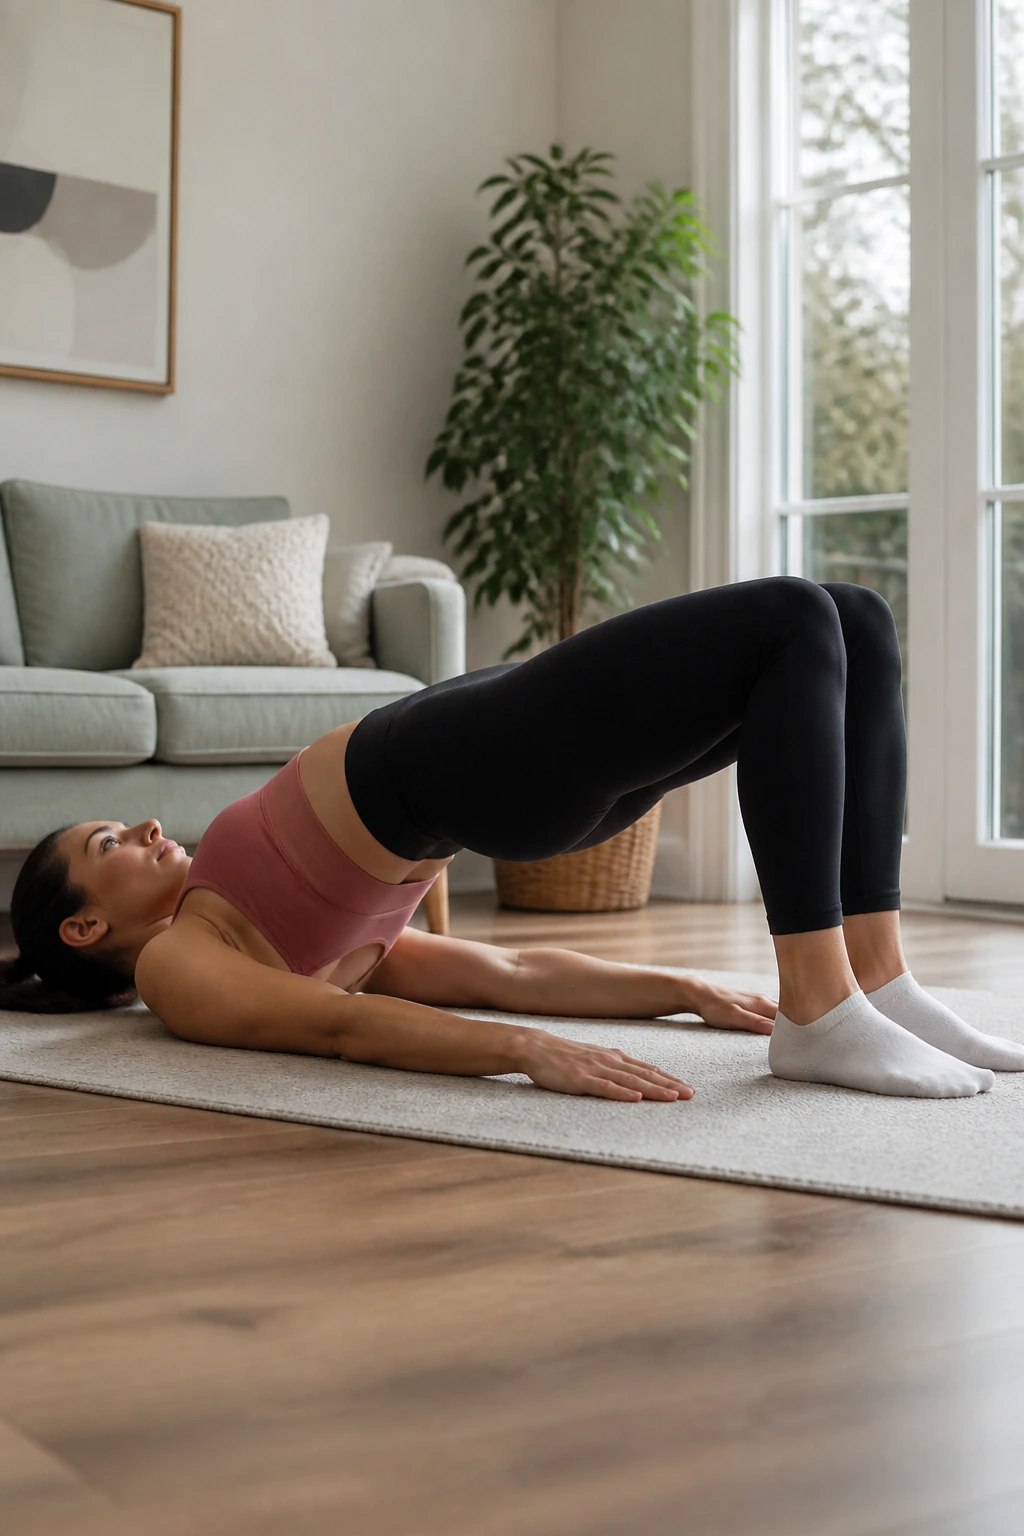
1. Glute Bridges for Hip Workouts at Home
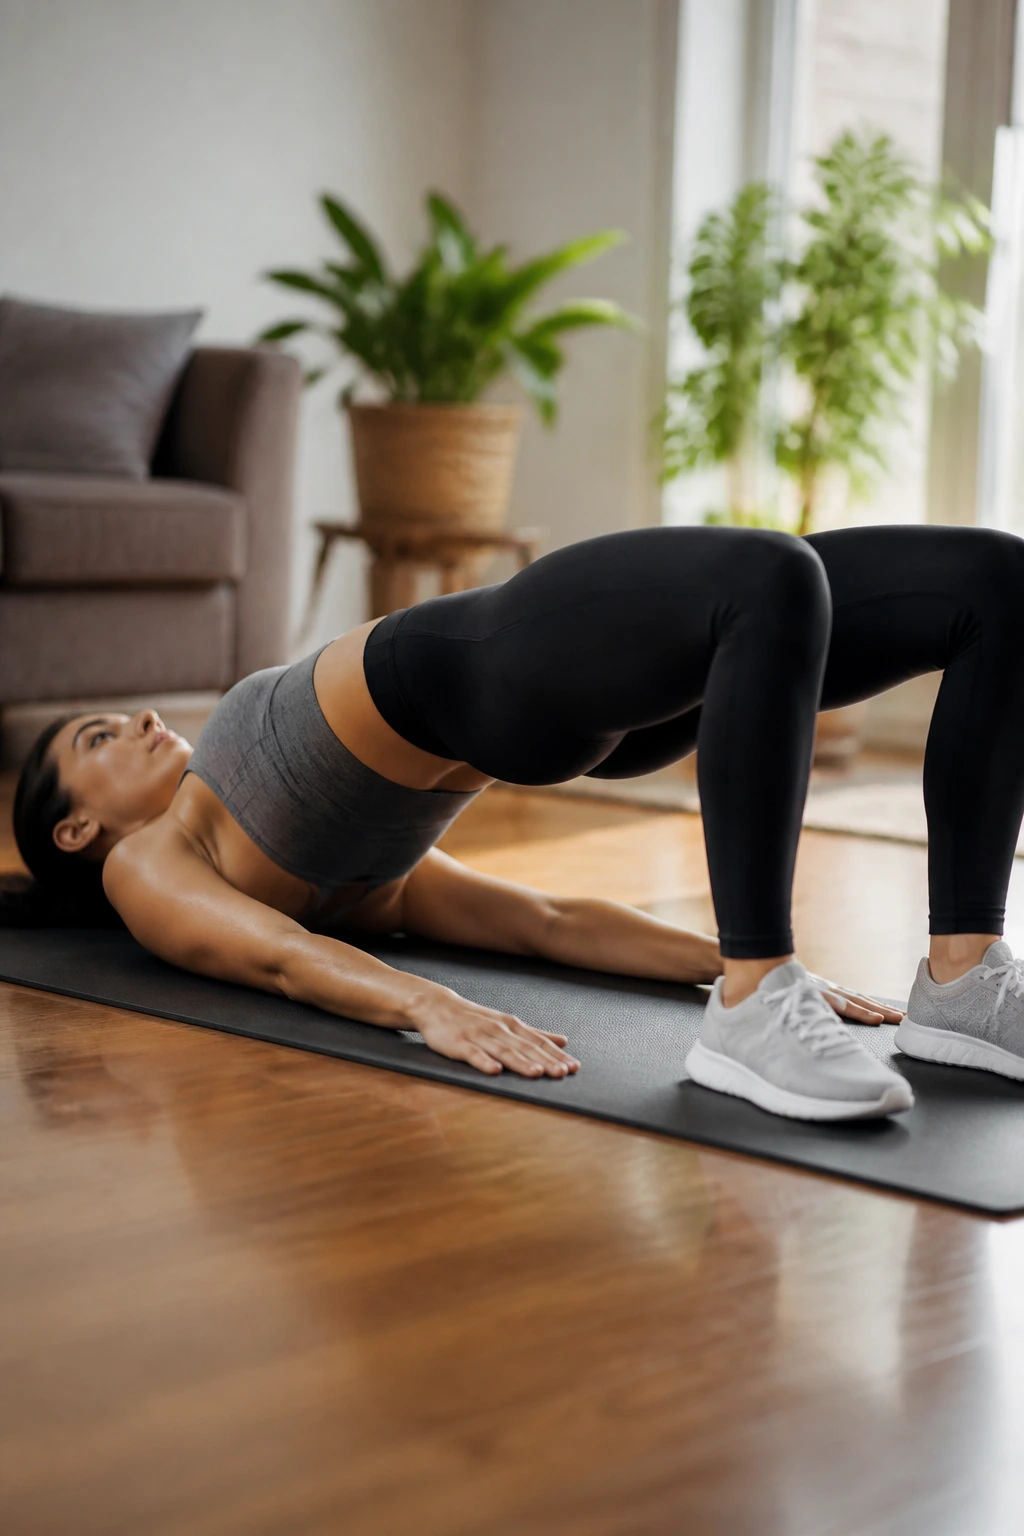
The basic glute bridge earns its place because it teaches your body how to extend the hip without turning every rep into a lower-back arch. Lie on your back, plant your feet, and drive through your heels until your hips rise. Simple setup. Serious payoff.
Why It Works
The bridge gives you floor feedback, which is handy when you’re still learning what a real glute contraction feels like. If your ribs flare or your back takes over, the mat tells on you fast. That’s a good thing.
Keep your feet about hip-width apart, knees bent, and chin slightly tucked. The top position should feel like your glutes are doing the lifting, not your spine. Pause for 2 seconds at the top and think about tucking your tailbone a little as you lower.
- Do 2 to 4 sets of 12 to 20 reps.
- Use a mini band above the knees if you want more outer-hip work.
- Press through the whole foot, not only the toes.
- Stop a rep early if your back starts doing the job.
Best cue: squeeze the glutes before you lift, not after.
2. Single-Leg Glute Bridges
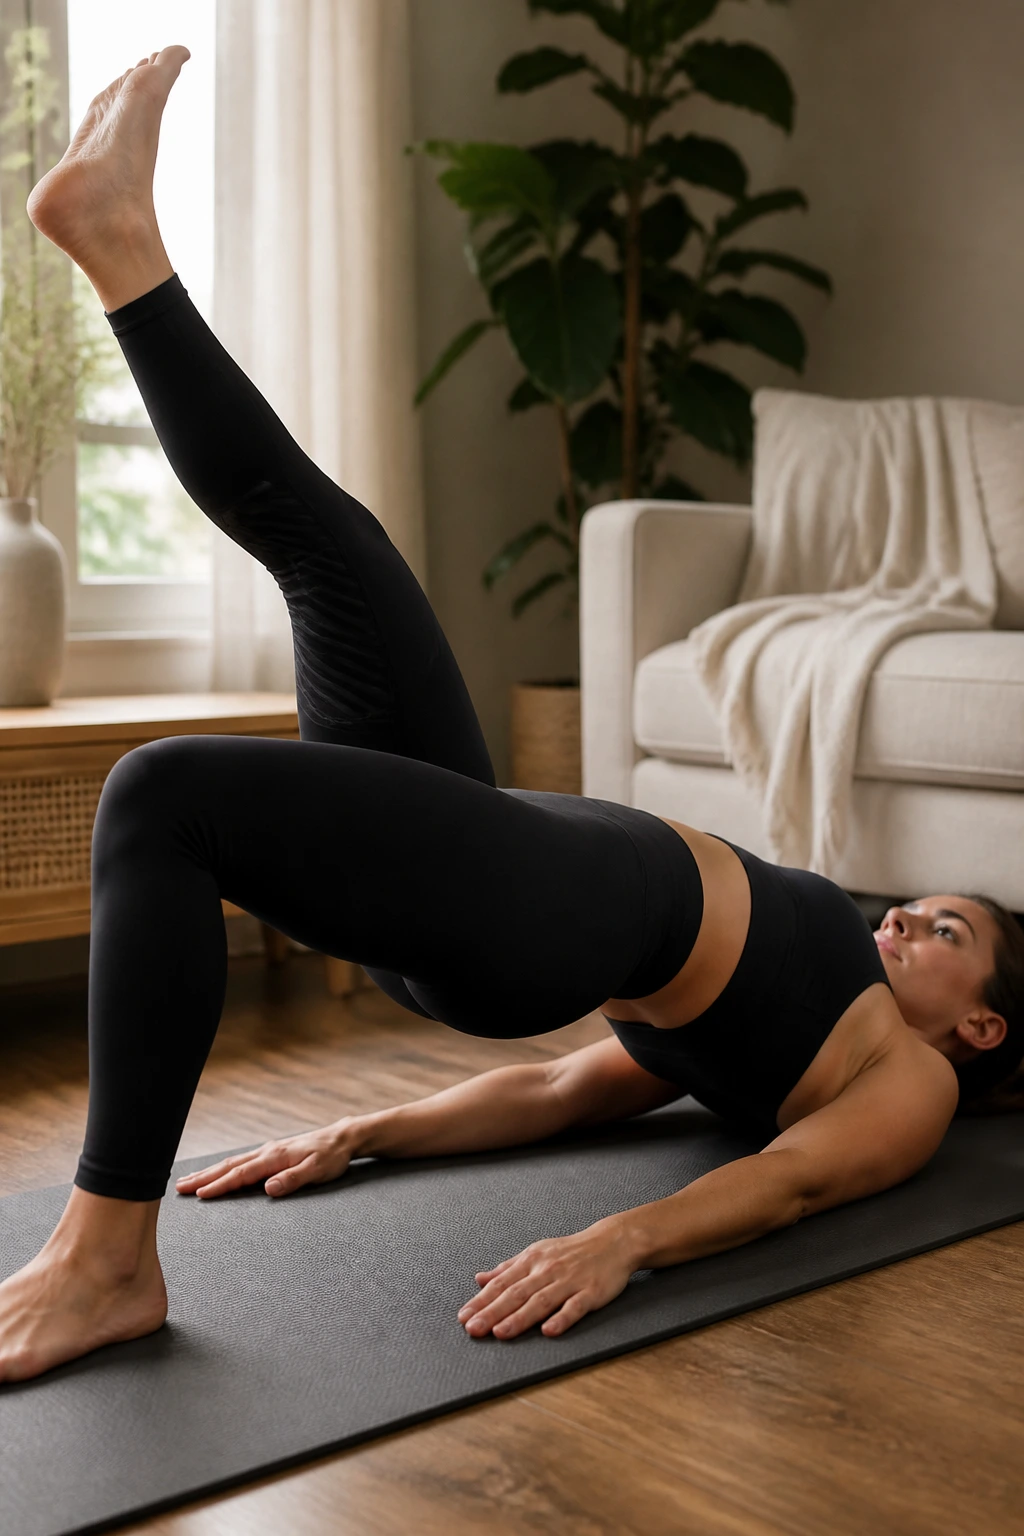
If a two-legged bridge feels too easy, the single-leg version will expose every weak link fast. It’s one of those moves that looks tiny until you try it with honest form. Then it gets loud.
Lift one leg, keep both hips level, and push through the planted heel. The instinct is to twist or hike one hip higher than the other. Don’t let that happen. The goal is clean force, not a wobbly science experiment.
Take your time lowering. That slow descent matters more than the flashy part at the top. A lot of people chase height here, but a smaller range with a stable pelvis works better than a huge bridge that turns sideways halfway up.
A solid dose is 8 to 12 reps per side for 2 to 3 sets. If that feels like too much, keep the lifted knee bent instead of straightening the leg. That tiny change usually makes the move more manageable without turning it into a different exercise.
3. Frog Pumps
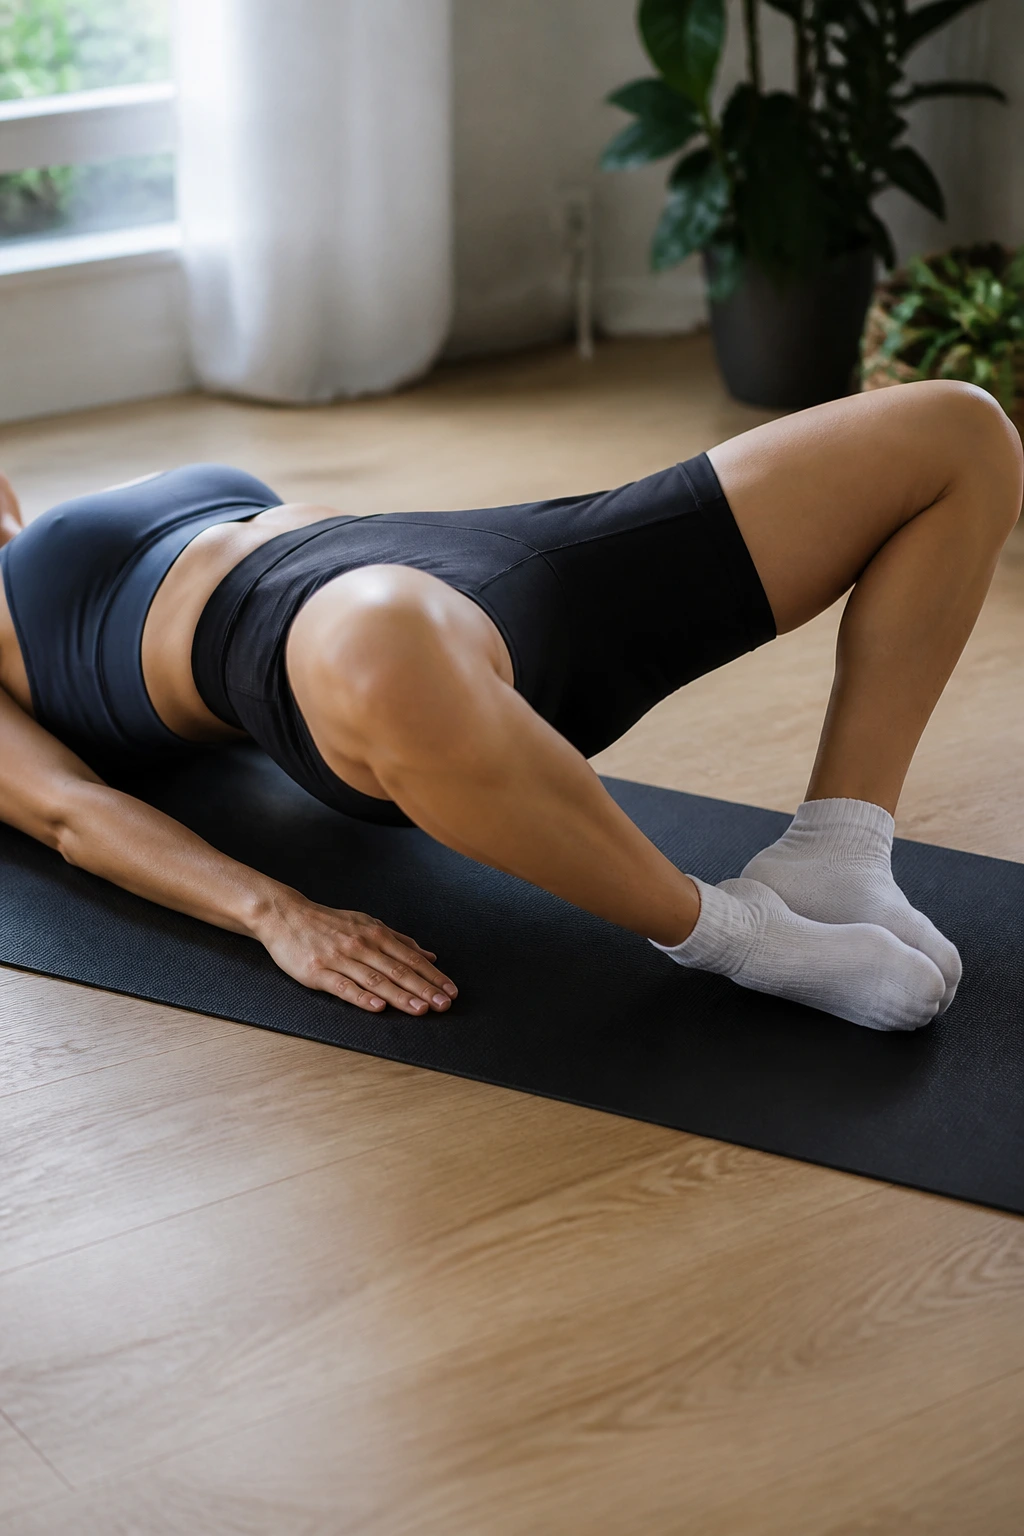
Why do frog pumps burn so fast? Because they shorten the range and keep the glutes under tension almost the entire time. Your knees stay open, the soles of your feet touch, and the hips barely leave the floor before they go right back down.
That smaller motion is the point. People often think a big lift is the answer, but frog pumps are built for high-rep burn work, not a dramatic rise. The glutes stay loaded while the lower back gets a break.
How to Do Them Well
Set your feet together and let your knees fall out like a diamond shape. Keep your lower back relaxed and lift only until you feel the glutes tighten hard at the top. Twenty to 40 reps is a good range if you want this move to finish a session with a proper burn.
Use them after bridges, squats, or lunges. They pair well with short rests — about 20 to 30 seconds — because the whole point is to flood the area with work, not to chase heavy load. A mini band above the knees makes them even uglier in a good way.
4. Clamshells
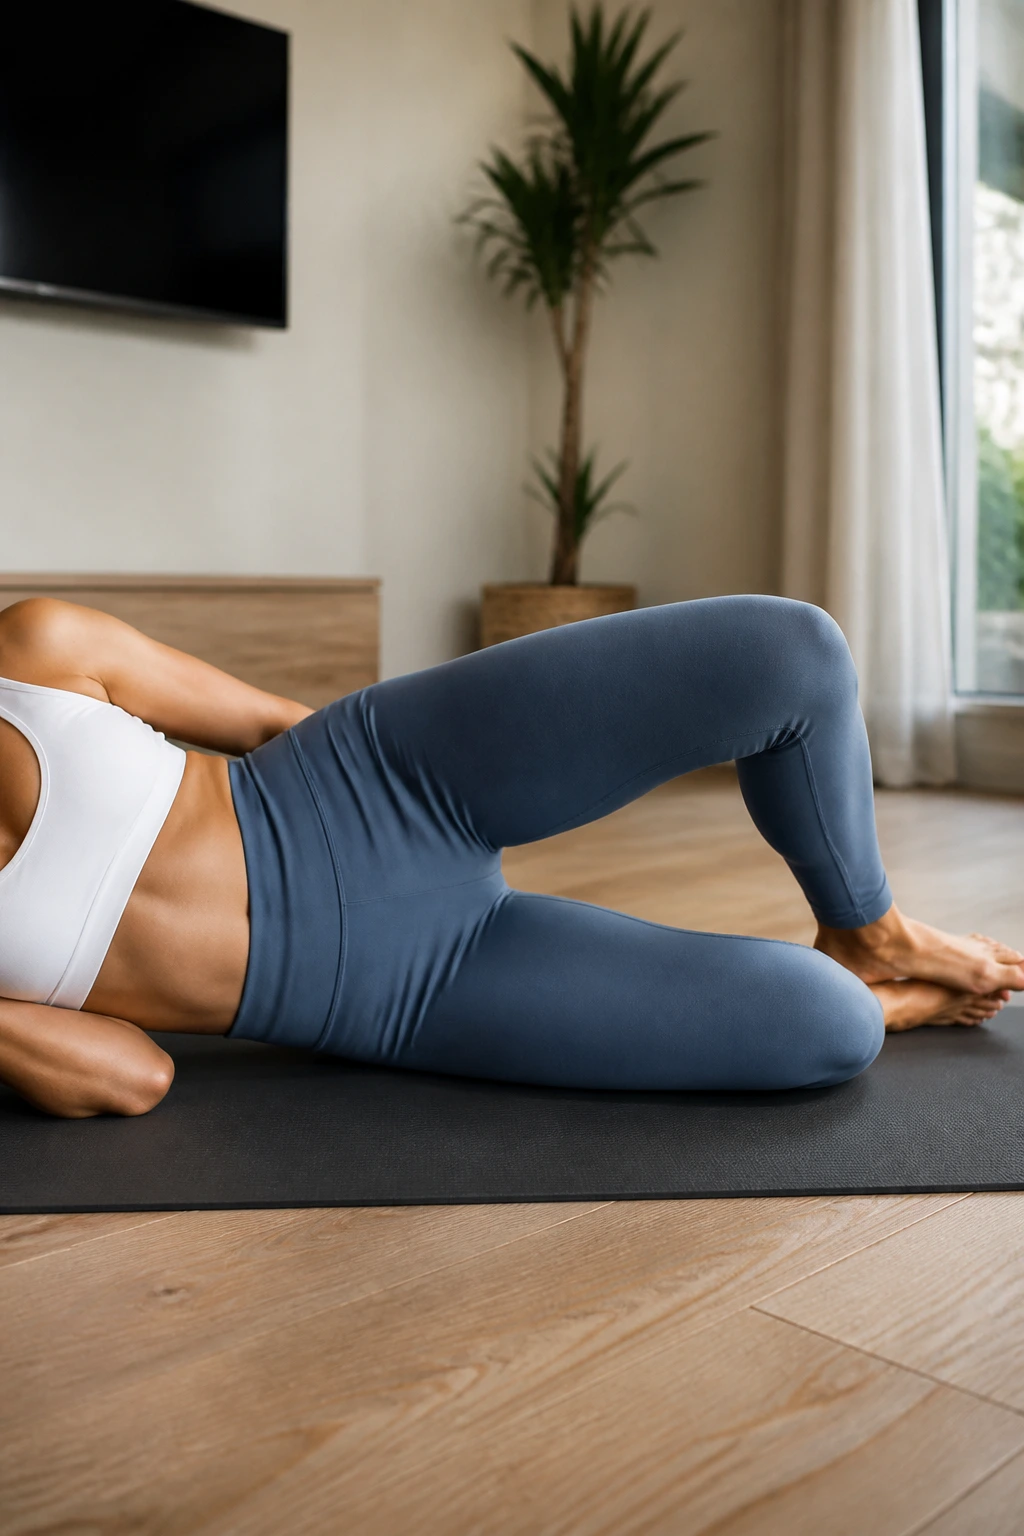
A lot of outer-hip trouble shows up during everyday stuff first. Standing on one leg. Walking upstairs. Getting out of the car. Clamshells are the quiet little move that wakes up the muscles that keep all of that steadier.
Lie on your side, bend your knees, and keep your heels together while you open the top knee. The lower back should stay quiet. The pelvis should stay stacked. If you roll backward to get more range, you’re cheating the exact muscles you came here to train.
The magic is in the slow opening and even slower return. A band above the knees adds resistance, but the real win is precision. Do 15 to 25 reps per side and keep the movement small enough that your hips don’t rock.
- Hold the top for 1 second.
- Keep your feet glued together.
- Stop when the outer hip starts to shake.
- Use a folded towel under your head so your neck stays relaxed.
5. Fire Hydrants
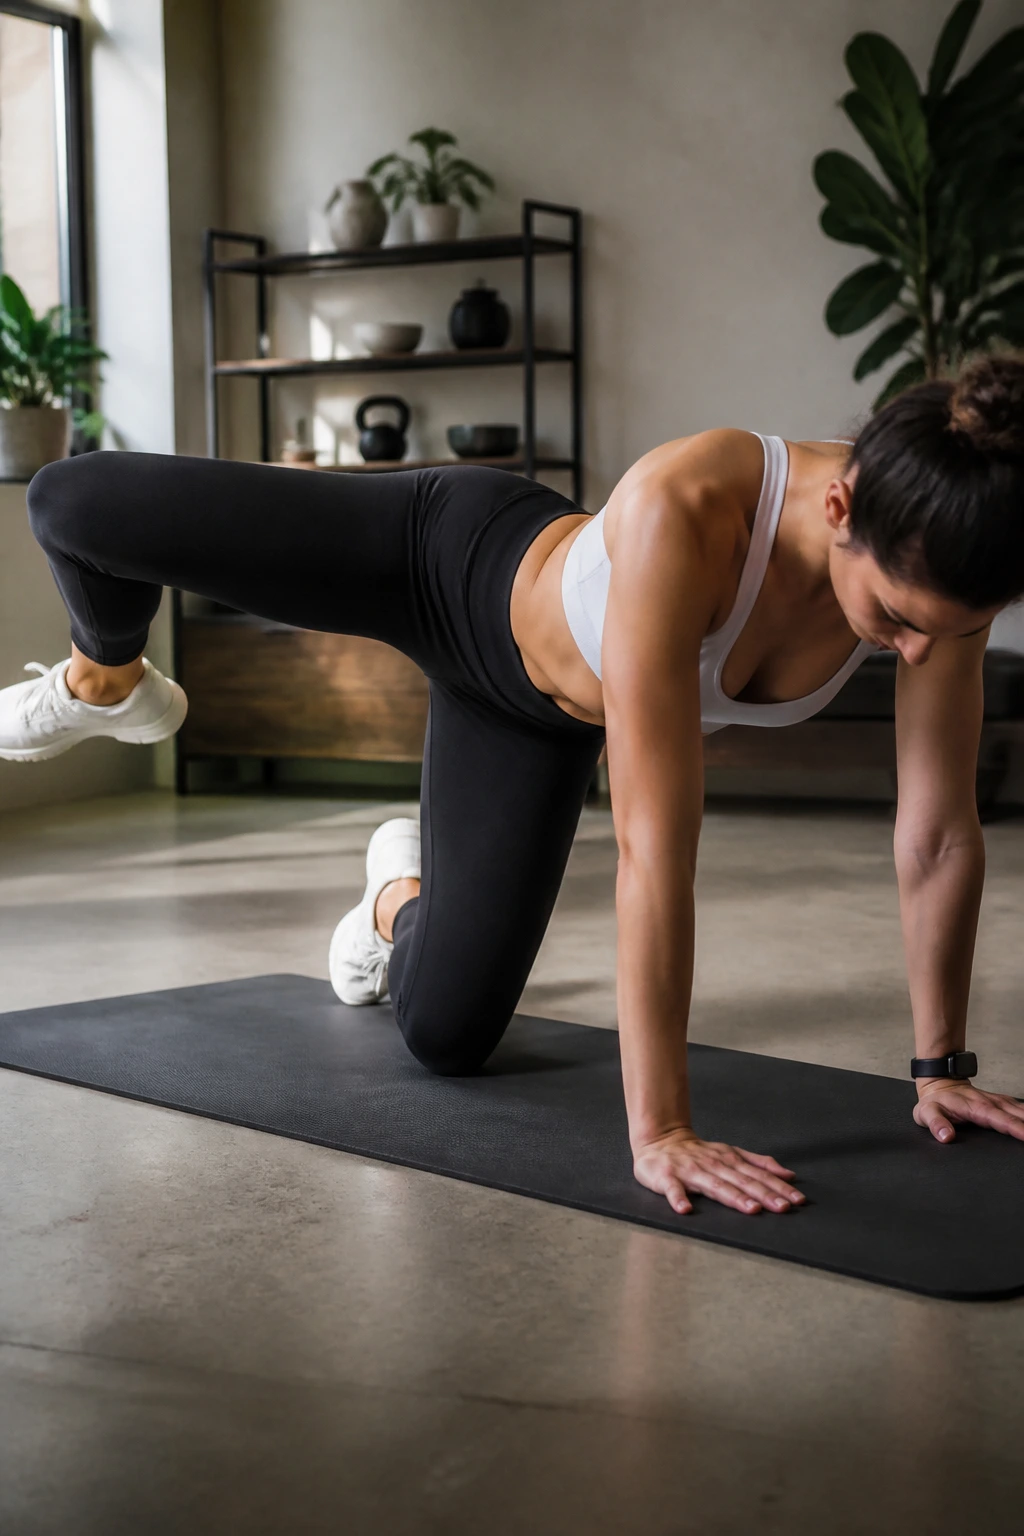
Fire hydrants are one of those moves that look almost playful until the side of your hip starts talking back. Hands and knees, one knee lifts out to the side, and the work lands squarely in the outer glute.
What makes them useful is the angle. You’re taking the leg away from the body while the torso stays mostly still, which is exactly where a lot of people are weak. The temptation is to swing the leg high. Don’t. Higher is not better here if it comes with a twisting torso and a crooked lower back.
Keep the knee bent at roughly 90 degrees and lift until your pelvis starts to want to tip. That’s the ceiling. Ten to 15 controlled reps per side is plenty if you do them cleanly. If you want more work, add a 10-second hold on the last rep.
The simplest cue is this: imagine balancing a glass of water on your lower back. If it spills, the rep got messy.
6. Donkey Kicks
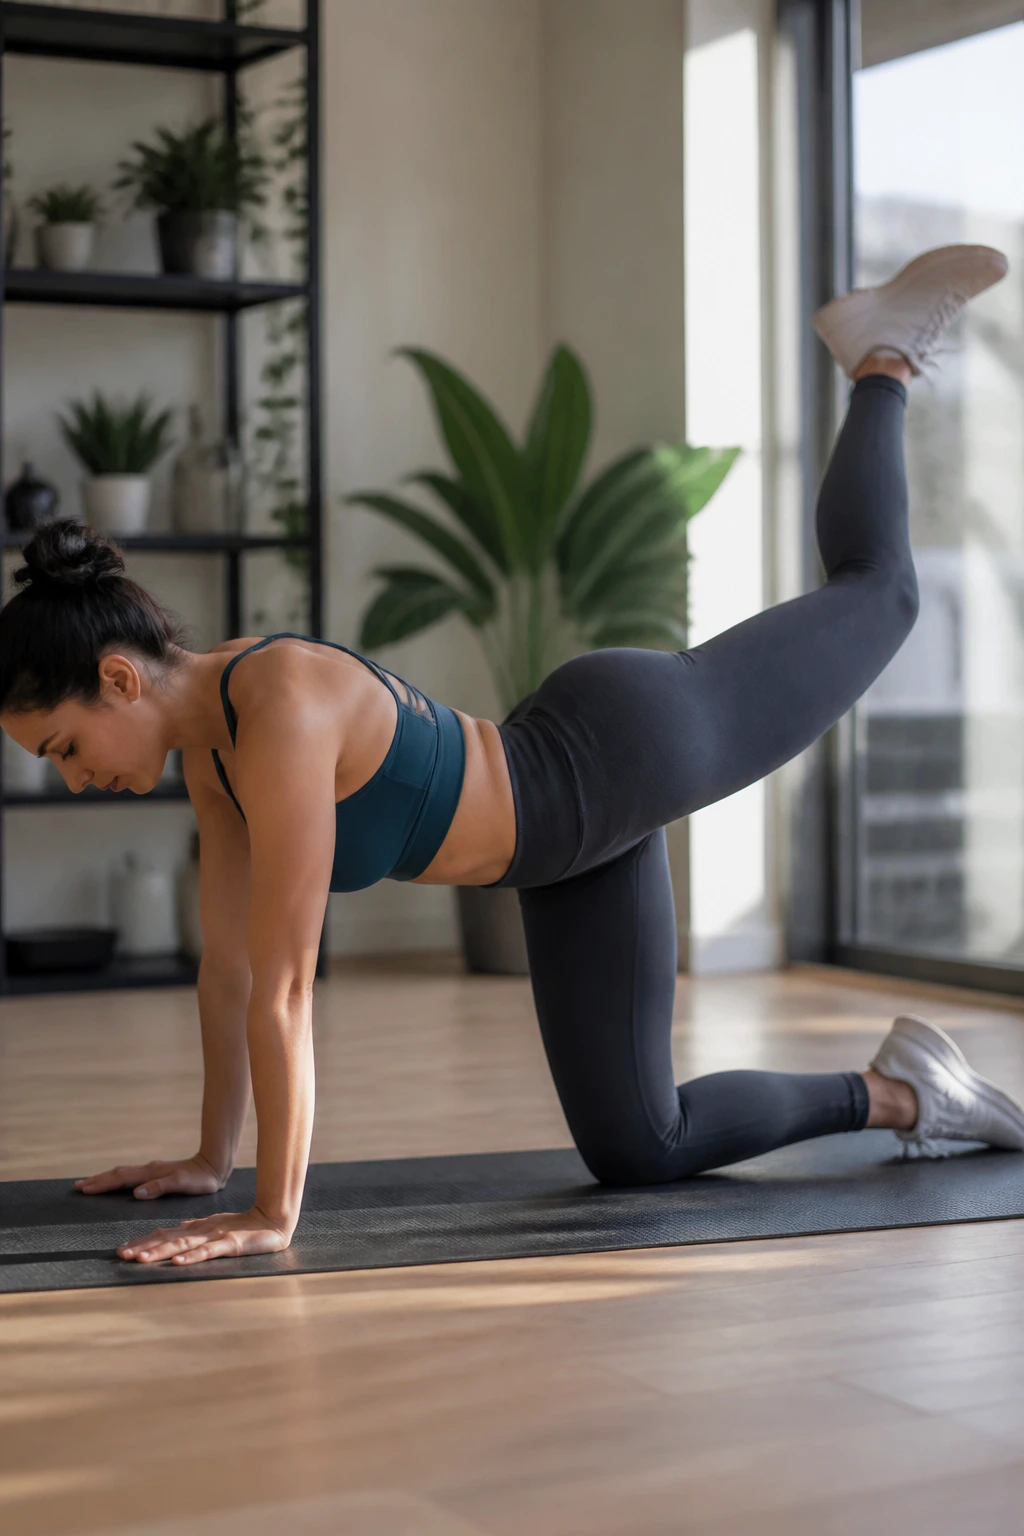
Unlike fire hydrants, donkey kicks bias the back of the hip more than the side of it. That makes them a strong pick when you want to feel the glute max working without needing a lot of equipment or space.
Start on hands and knees. Keep one knee bent and push the sole of the foot toward the ceiling, but do not crank your lower back upward to fake extra height. The best reps feel like the thigh is moving from the hip socket, not like the spine is folding in half.
A small range is enough. Seriously. If the lift gets so high that your ribs pop forward, the glutes are losing the fight. Aim for 12 to 20 reps per side, and use a slow 2-second squeeze at the top if bodyweight gets too easy.
Want to make them harder at home? Slip a loop band around the thighs or place a dumbbell behind the knee only if you can keep the motion clean. If the setup gets fussy, skip the load and slow the tempo instead.
7. Side-Lying Leg Raises
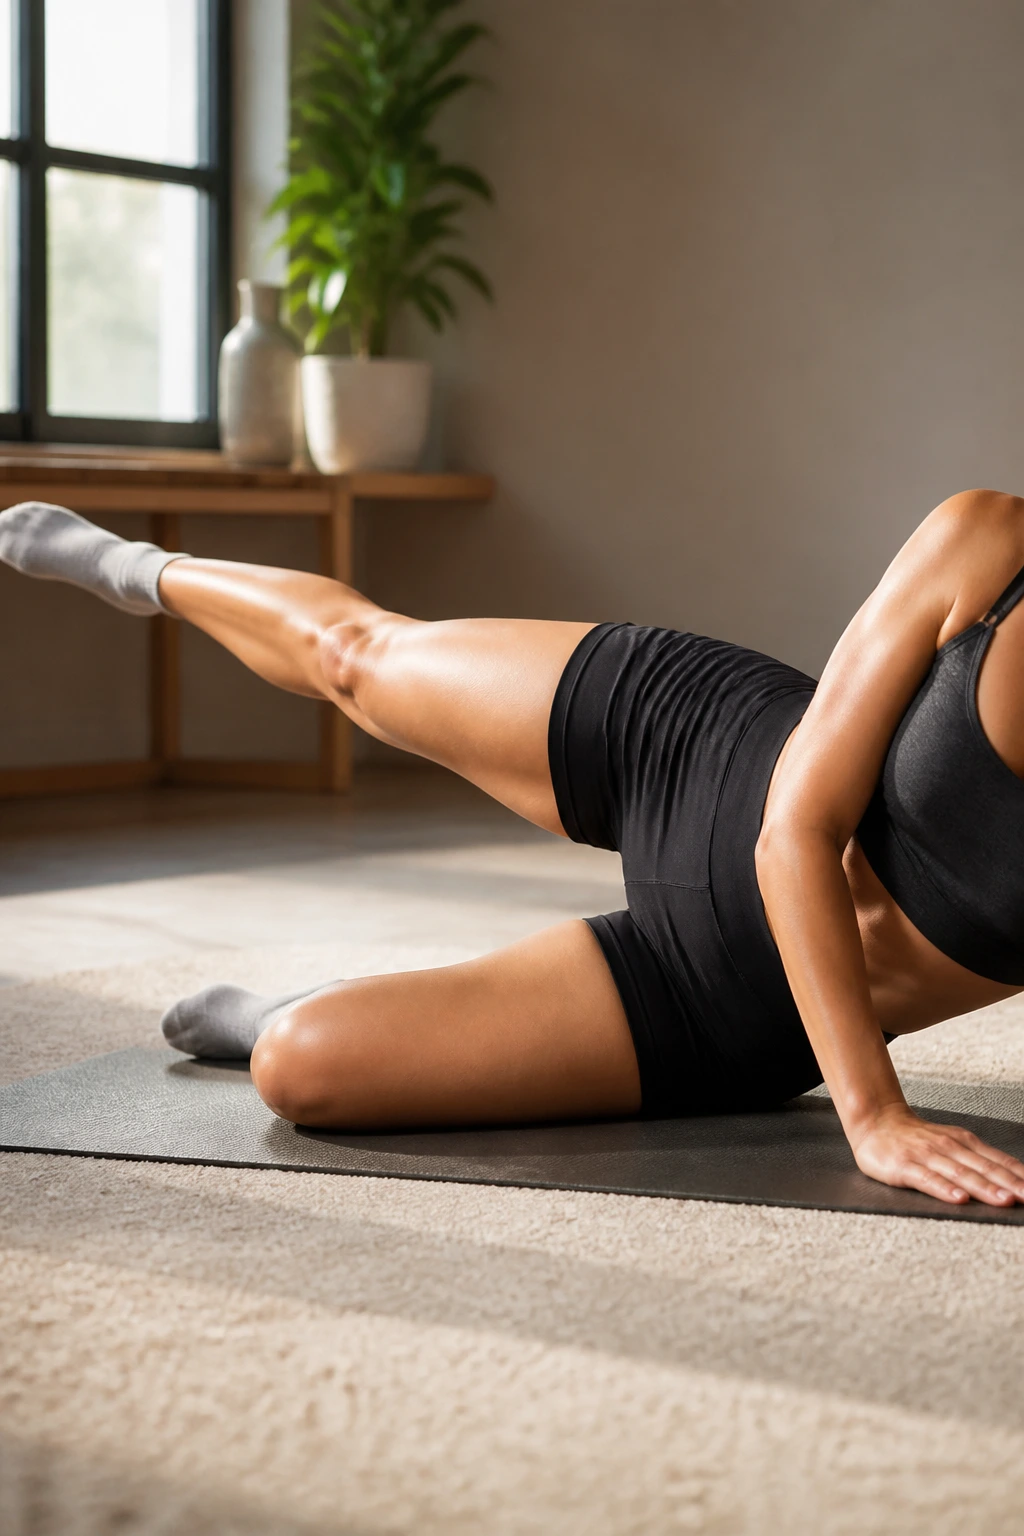
Can a side-lying leg raise do much? Yes — if you stop rushing it. This move looks almost too small to matter, then you do it with honest form and feel the outer hip light up in a way you didn’t expect.
Lie on one side with the bottom leg bent for support and the top leg long. Turn the top toe slightly down so the front of the hip doesn’t take over. Lift from the side of the hip, not from the waist. That’s the whole game.
A slow lowering phase helps more than people think. Try 15 to 20 reps per side with a 3-second lower on each rep. If you swing the leg up and down quickly, the wrong muscles start helping and the movement gets sloppy.
What to Watch For
- Don’t lean backward.
- Don’t point the toe hard toward the ceiling.
- Don’t lift so high that your hip folds forward.
- Keep the lower waist long, not scrunched.
A light ankle weight can help later, but bodyweight done slowly is plenty for most people.
8. Lateral Band Walks for Hip Workouts at Home
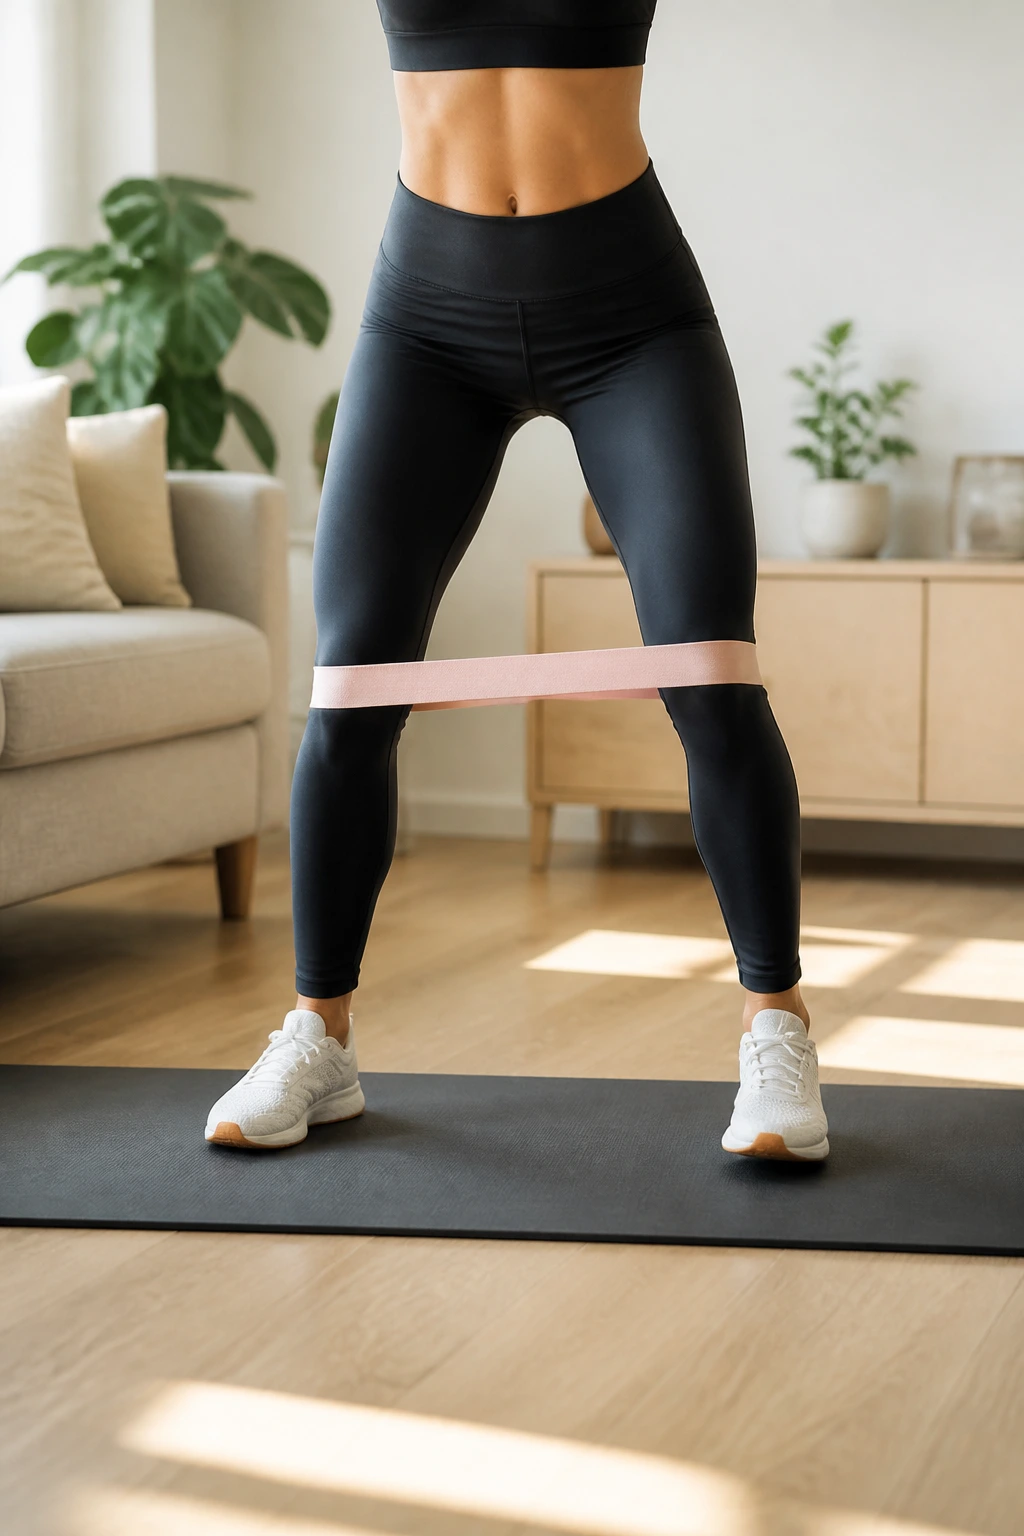
Lateral band walks are one of the cleanest ways to train the glute medius at home. That’s the muscle that helps your pelvis stay level when you walk, squat, step, and change direction. Weak there? You usually feel it.
Place a mini band above your knees or around your ankles, bend your knees slightly, and take small side steps without letting your feet drag together. The steps should be deliberate. The knees should keep pressing out against the band. The torso should stay quiet.
This is not a speed drill. If you race through it, the band wins and your hips do less. Take 8 to 12 steps each way for 2 to 4 rounds. Rest 30 to 45 seconds, then do it again.
How to Get More From It
- Use the band above the knees for a friendlier version.
- Move it to the ankles when the easier setup stops challenging you.
- Keep your toes pointing mostly forward.
- Stay low enough that your glutes work, but not so low that your thighs burn out first.
If you only have time for one outer-hip drill, this is a very good one.
9. Curtsy Lunges
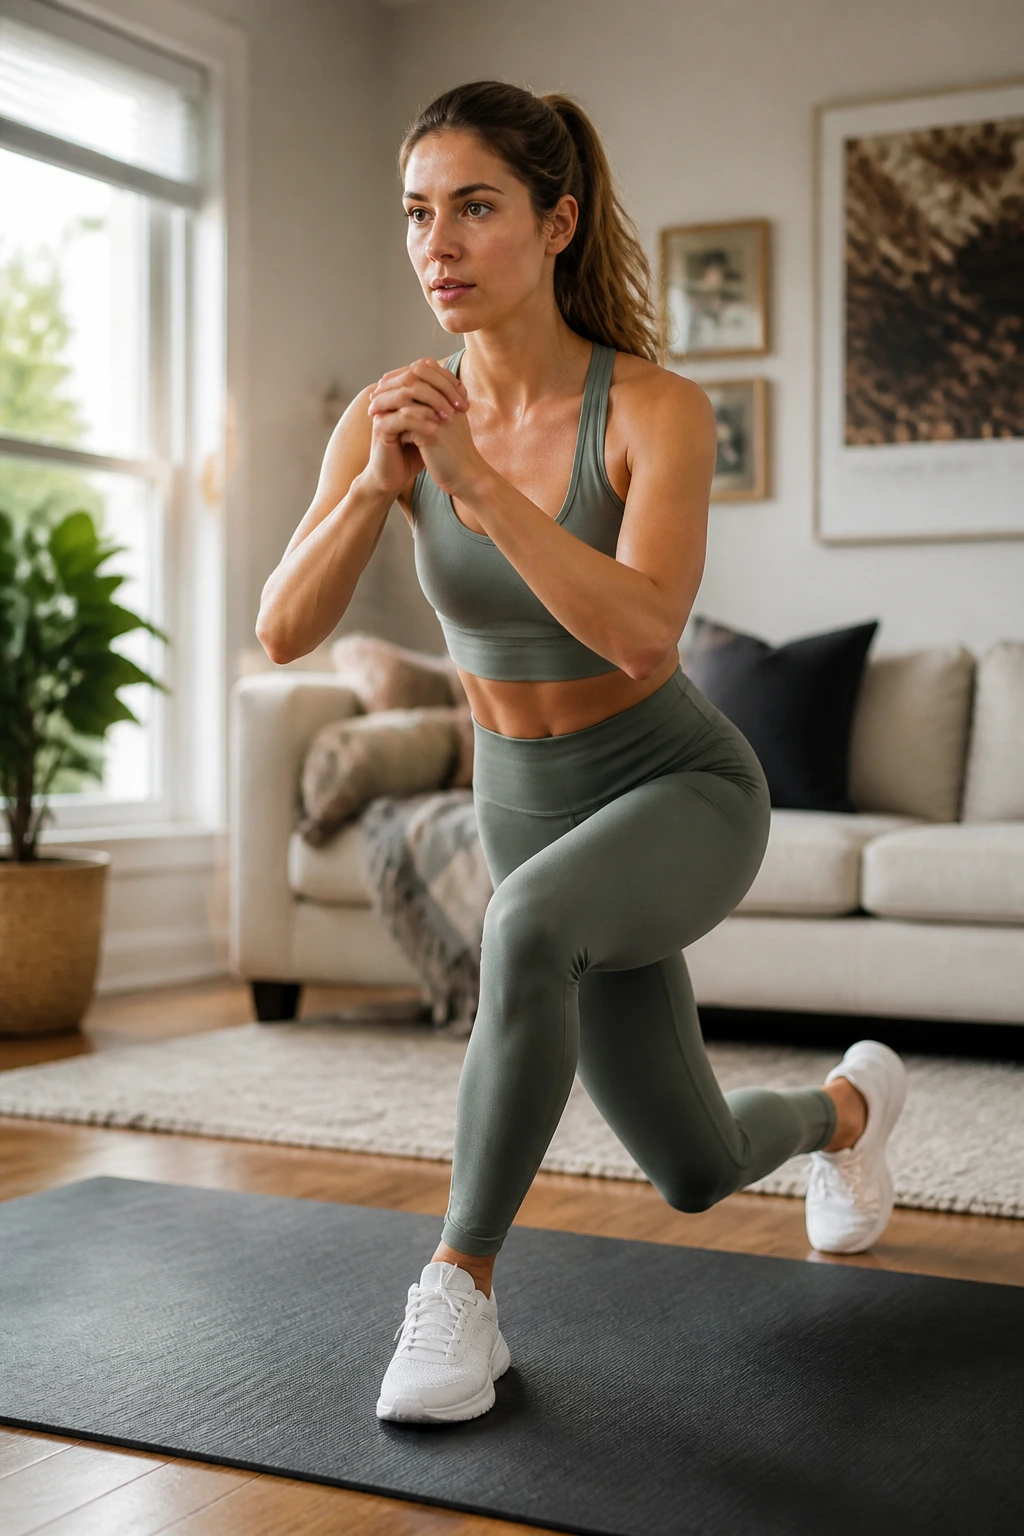
Curtsy lunges bring the side hip into the picture in a way straight-back lunges don’t. The cross-behind step changes the demand, and you’ll feel it in the glutes, the outer thigh, and the stabilizers around the standing leg.
Step one leg diagonally behind the other and lower with control. The front knee should track over the toes, not cave inward. A lot of people make the mistake of crossing too far behind, which turns the rep into a balance circus. Keep the step modest.
Your torso can lean slightly forward, and that’s fine. It often helps the glutes work harder and keeps the movement from feeling like a quad-only lunge. Try 8 to 12 reps per side for 2 to 3 sets.
If your knees don’t love this pattern, skip the depth and shorten the step. Or swap it for reverse lunges. No exercise is sacred if your joints hate it.
10. Sumo Squats
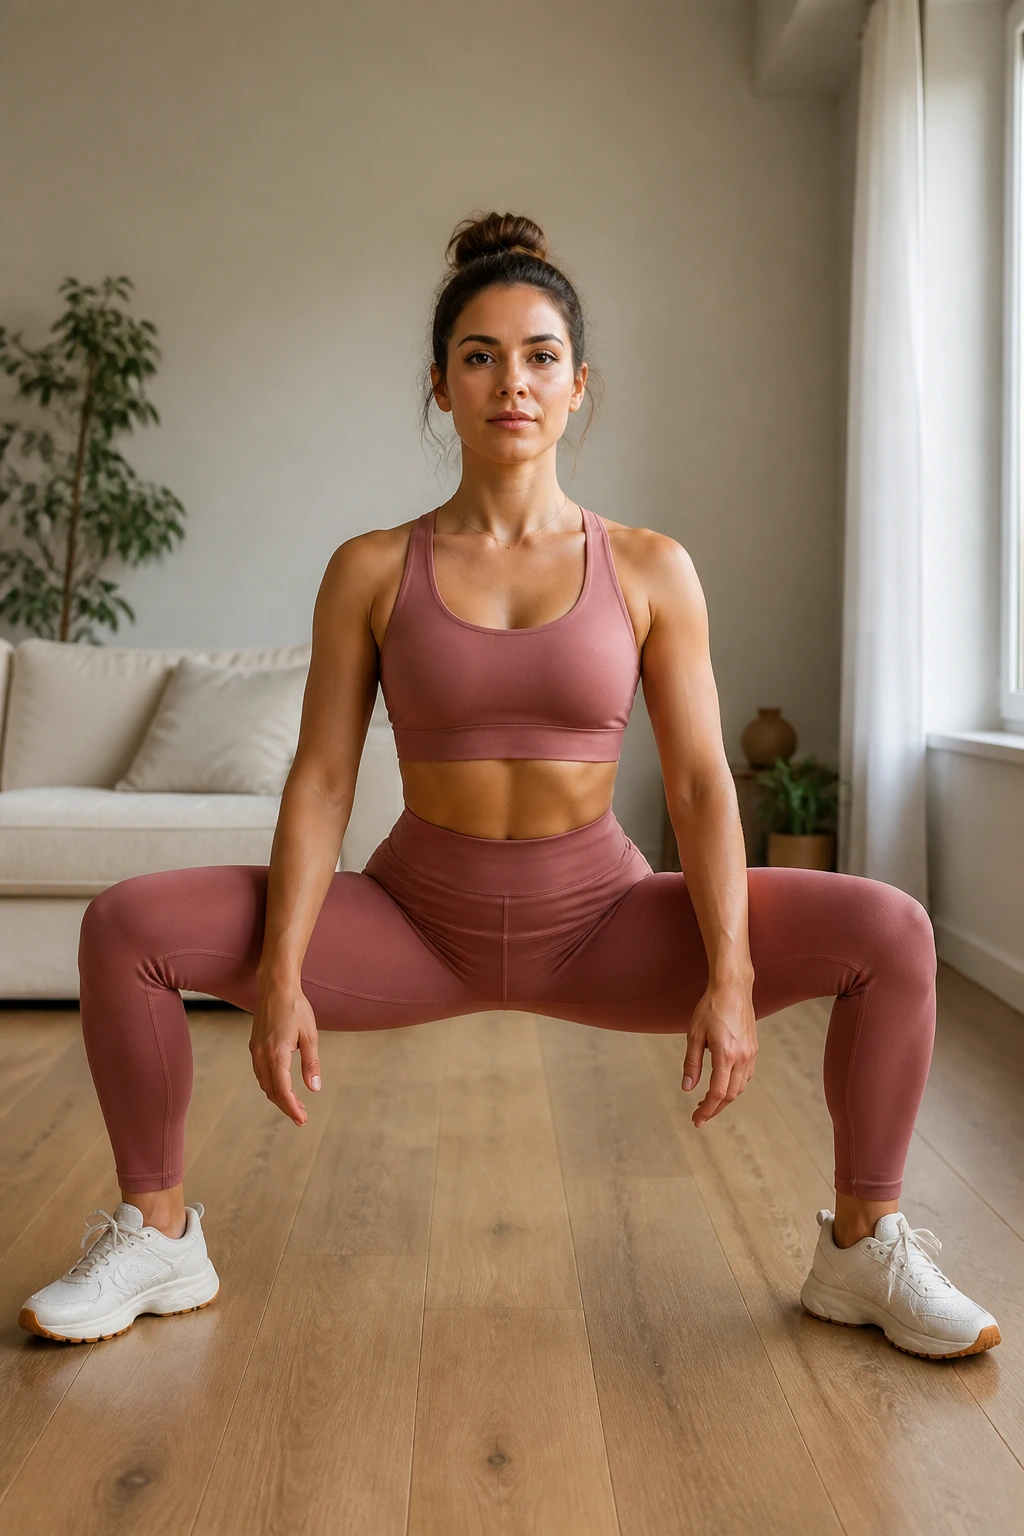
A wide stance changes the feel of a squat fast. The inner thighs get more work, the glutes stay involved, and the hips have to sit between the feet instead of straight down in a narrow track.
Set your feet wider than shoulder-width and turn the toes out a little, maybe 15 to 30 degrees. Keep the chest up, brace lightly through the middle, and sit down until your thighs are near parallel or as low as your mobility allows. Then stand by pressing the floor apart.
This move is simple, but people mess it up by dumping weight into the toes or letting the knees collapse inward. Neither helps. Think about pushing the knees in line with the toes and keeping the whole foot planted. Ten to 15 reps works well, and a pause at the bottom makes the glutes work harder without extra equipment.
Hold a dumbbell, kettlebell, or backpack if bodyweight gets stale. A backpack loaded with books can be awkward, but it does the job.
11. Couch Hip Thrusts
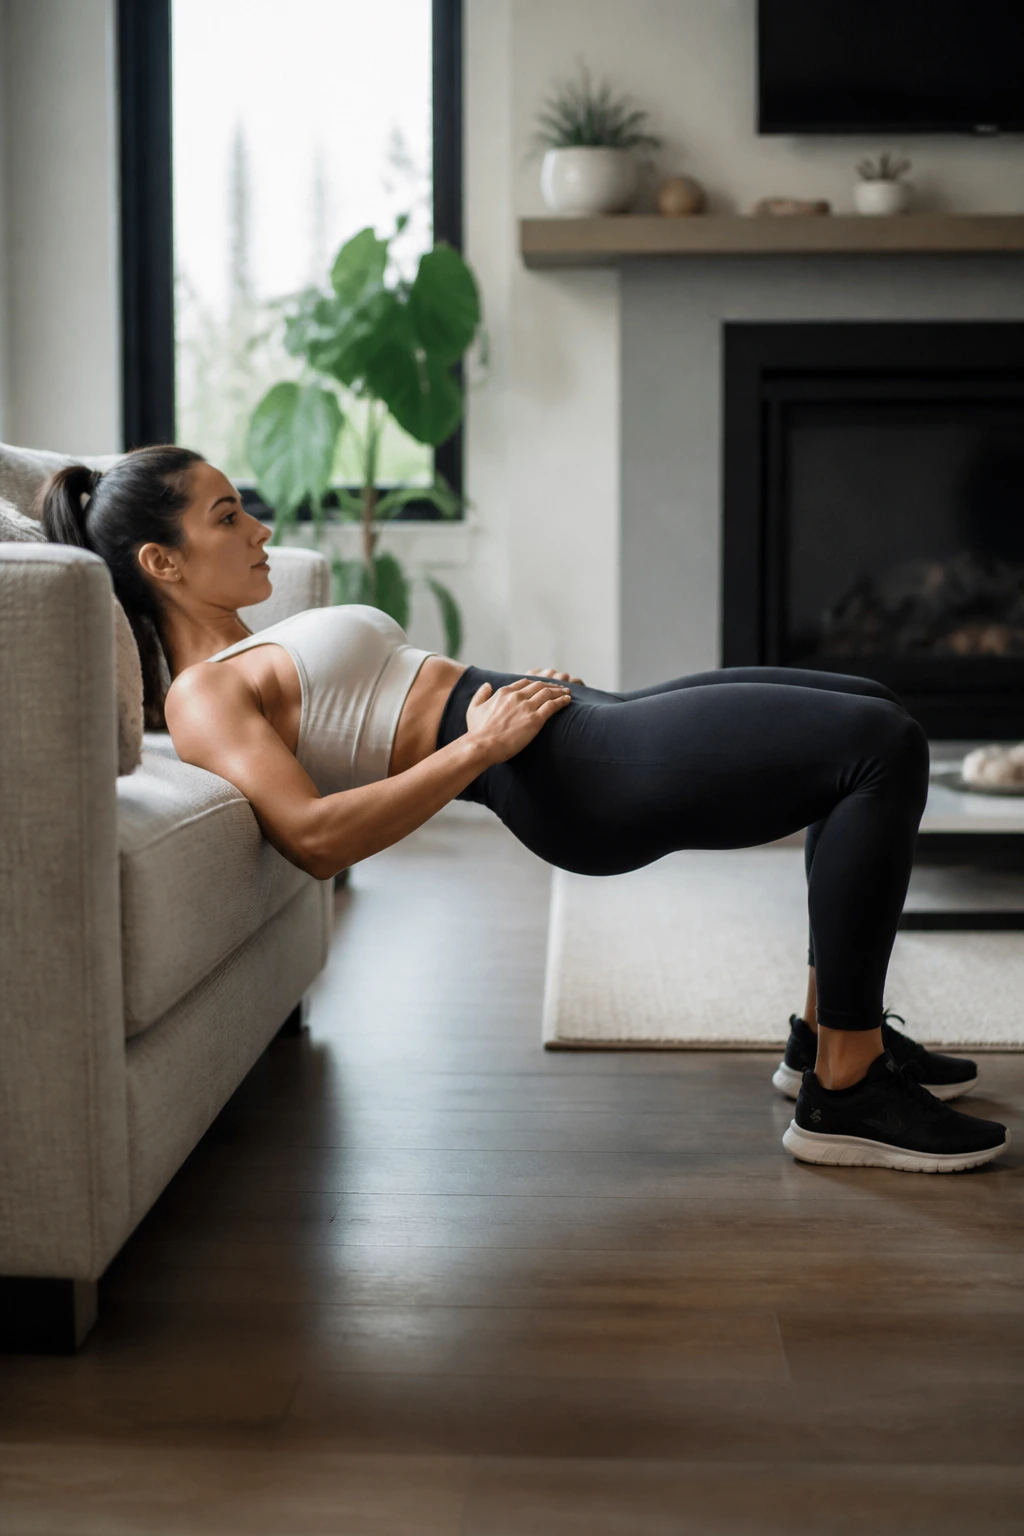
A couch edge changes everything. Hip thrusts done with the upper back on a sturdy sofa or bench let you move through a bigger range than a floor bridge, and that extra range is why the exercise hits so hard.
Set your shoulder blades on the edge, plant your feet, and tuck the chin so your ribs do not flare. Drive the hips up until the torso and thighs make a strong line, then squeeze the glutes hard at the top. The top position should feel powerful, not loose.
Two to four sets of 8 to 15 reps is a good place to start. Add a backpack, dumbbell, or a heavy bag across the hips when bodyweight feels easy. A folded towel under the weight helps if the load digs into you.
A lot of people overarch the lower back here. That usually means the glutes checked out early. Keep the ribs down, keep the chin tucked, and think “hips up” rather than “back bend.”
12. Bulgarian Split Squats
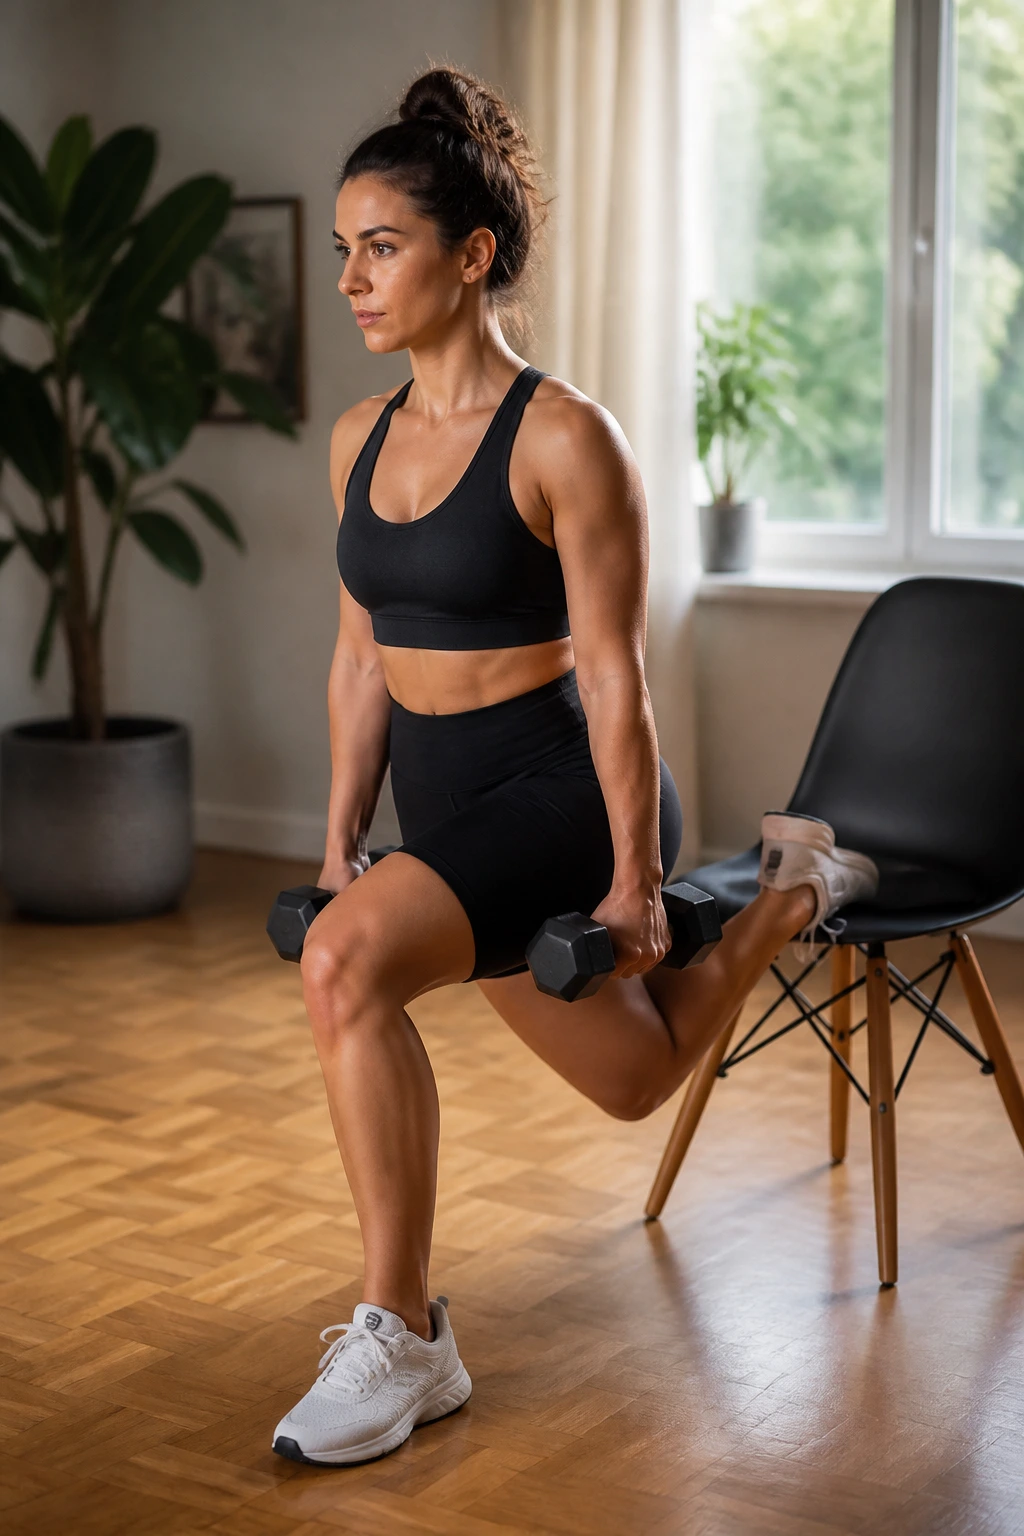
This one looks fussy, then it quietly becomes one of the hardest glute builders you can do at home. One foot stays on the floor, the back foot rests on a chair or couch, and the front leg does nearly all the work.
Take a small step forward so the front shin can stay roughly vertical at the bottom. Lean the torso slightly forward, lower under control, and press through the front heel to stand. If the front foot feels unstable, shift it a little farther out. Tiny stance changes matter here.
Form Checkpoints
- Front knee tracks over the middle toes.
- Back leg is support, not the star.
- Hips stay square.
- The bottom position feels deep, but not jammed.
Six to 10 reps per side is enough for most people, especially if you hold a pair of dumbbells or a loaded backpack. This is not a move to rush. The slow eccentric — the lowering part — is where a lot of the work happens.
13. Step-Ups
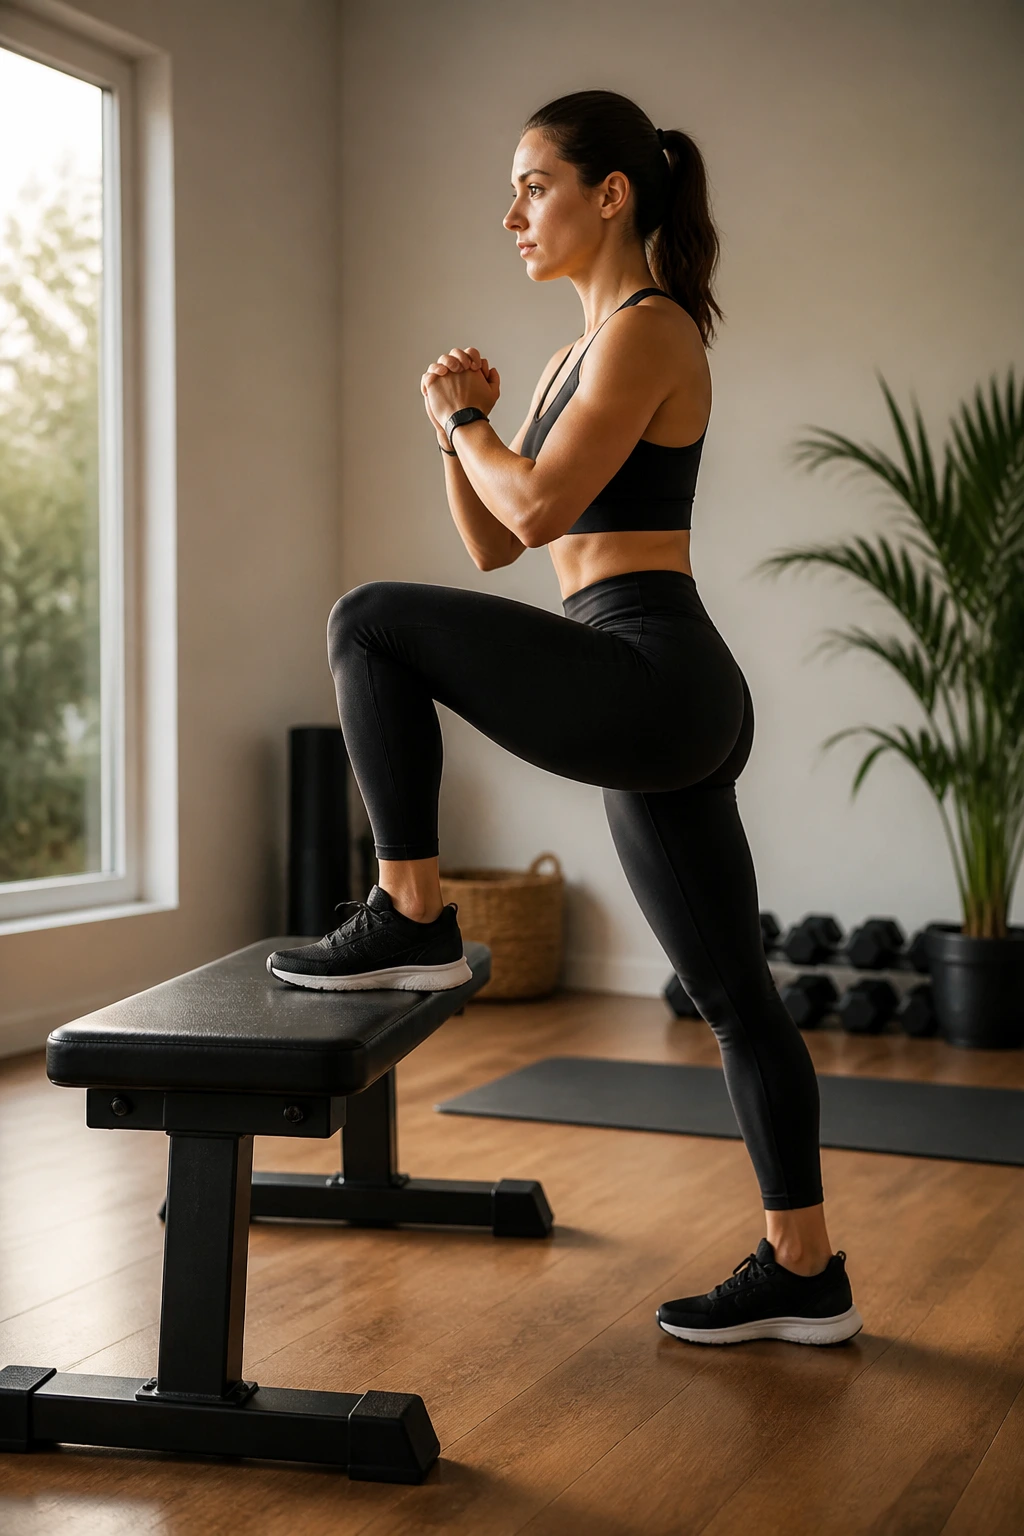
A sturdy step, a low bench, or even a solid stair can turn into a strong hip move fast. Step-ups train the glutes in a way that feels close to real life, which is probably why they show up in so many good home plans.
Choose a surface that lets your working thigh stay roughly parallel to the floor or a little lower. Higher is not automatically better. Plant the whole foot, lean slightly forward, and drive through the heel to stand. Resist the urge to push off the back leg too much.
The lowering phase matters more than people expect. Lowering under control teaches the hip to stabilize, not just fire once and disappear. Do 8 to 12 reps per side for 2 to 4 sets.
If balance is a problem, hold a wall lightly with one hand. If the move feels too easy, add a backpack or hold a dumbbell in each hand. Clean reps beat ugly heavy reps every time.
14. Romanian Deadlifts with Dumbbells or a Backpack
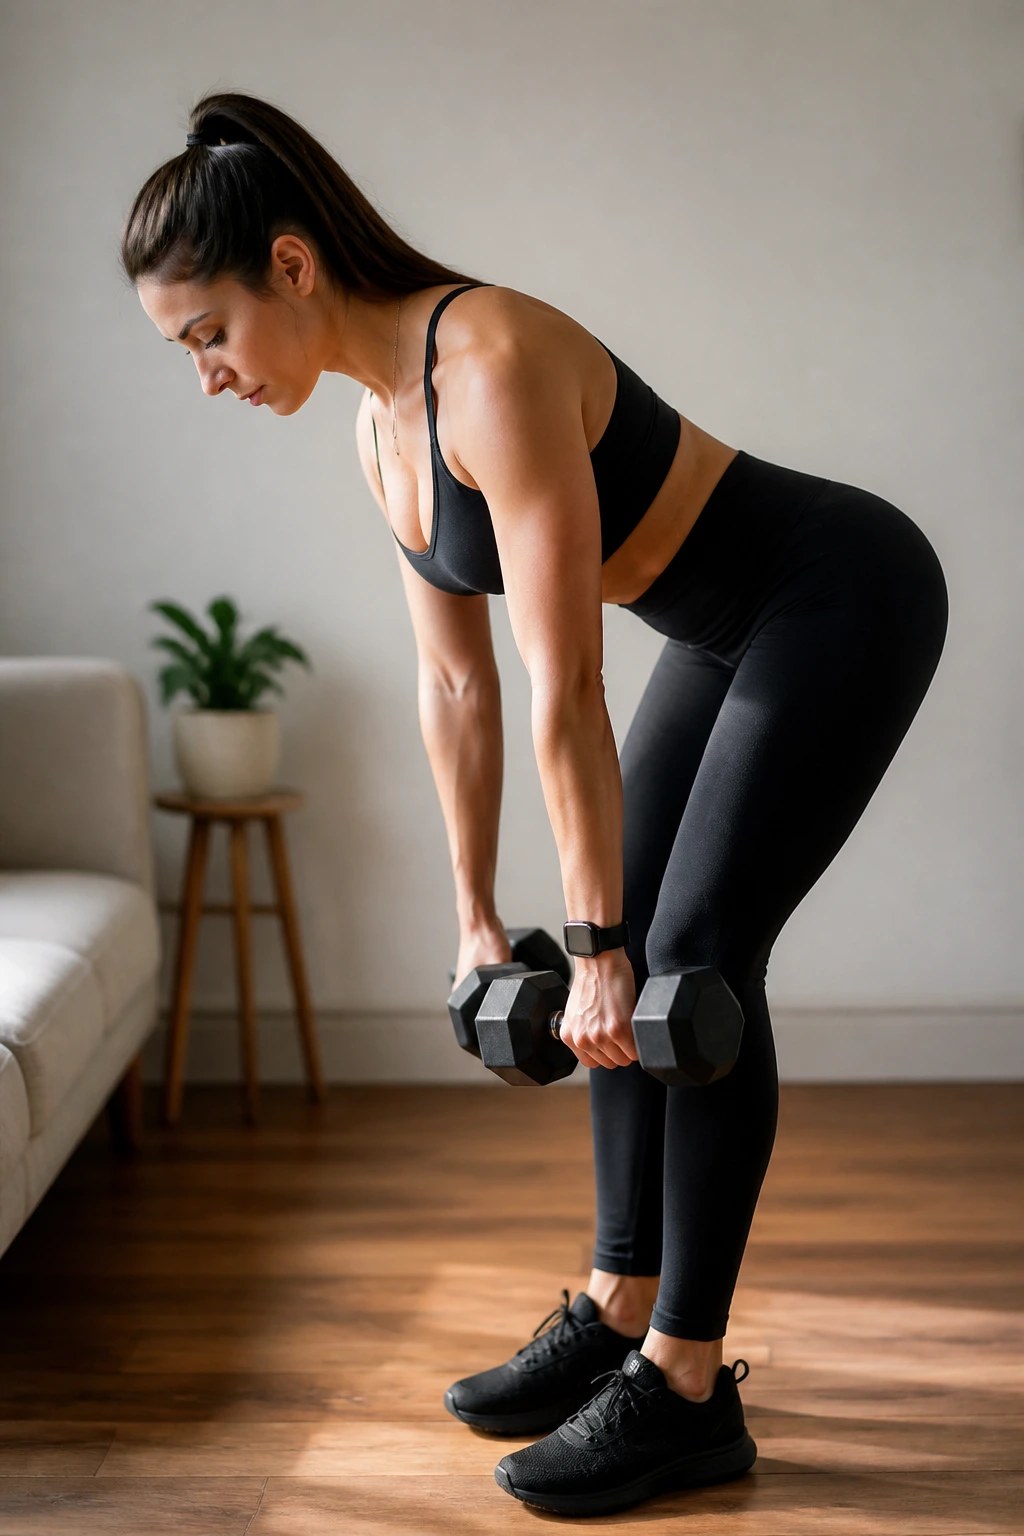
If you only do knee-bending moves, your hips miss half the job. Romanian deadlifts, or RDLs, teach the hinge pattern — the one where the hips move back while the spine stays long.
Stand tall with a pair of dumbbells, water jugs, or a loaded backpack held close to the body. Soft knees. Push the hips back. Let the weights slide down the thighs until you feel a deep stretch in the hamstrings, then drive the hips forward to stand.
This is not a squat. If the knees bend too much, the hinge gets lost. If the back rounds, the load is too low or the range is too deep. Eight to 12 controlled reps is enough for most home sessions, and the last few inches on the way up should feel like the glutes finishing the job.
A mirror helps here. So does slowing down. If the movement still feels fuzzy, practice the hip push-back without weight first. That boring version is often the one that fixes everything.
15. Reverse Lunges
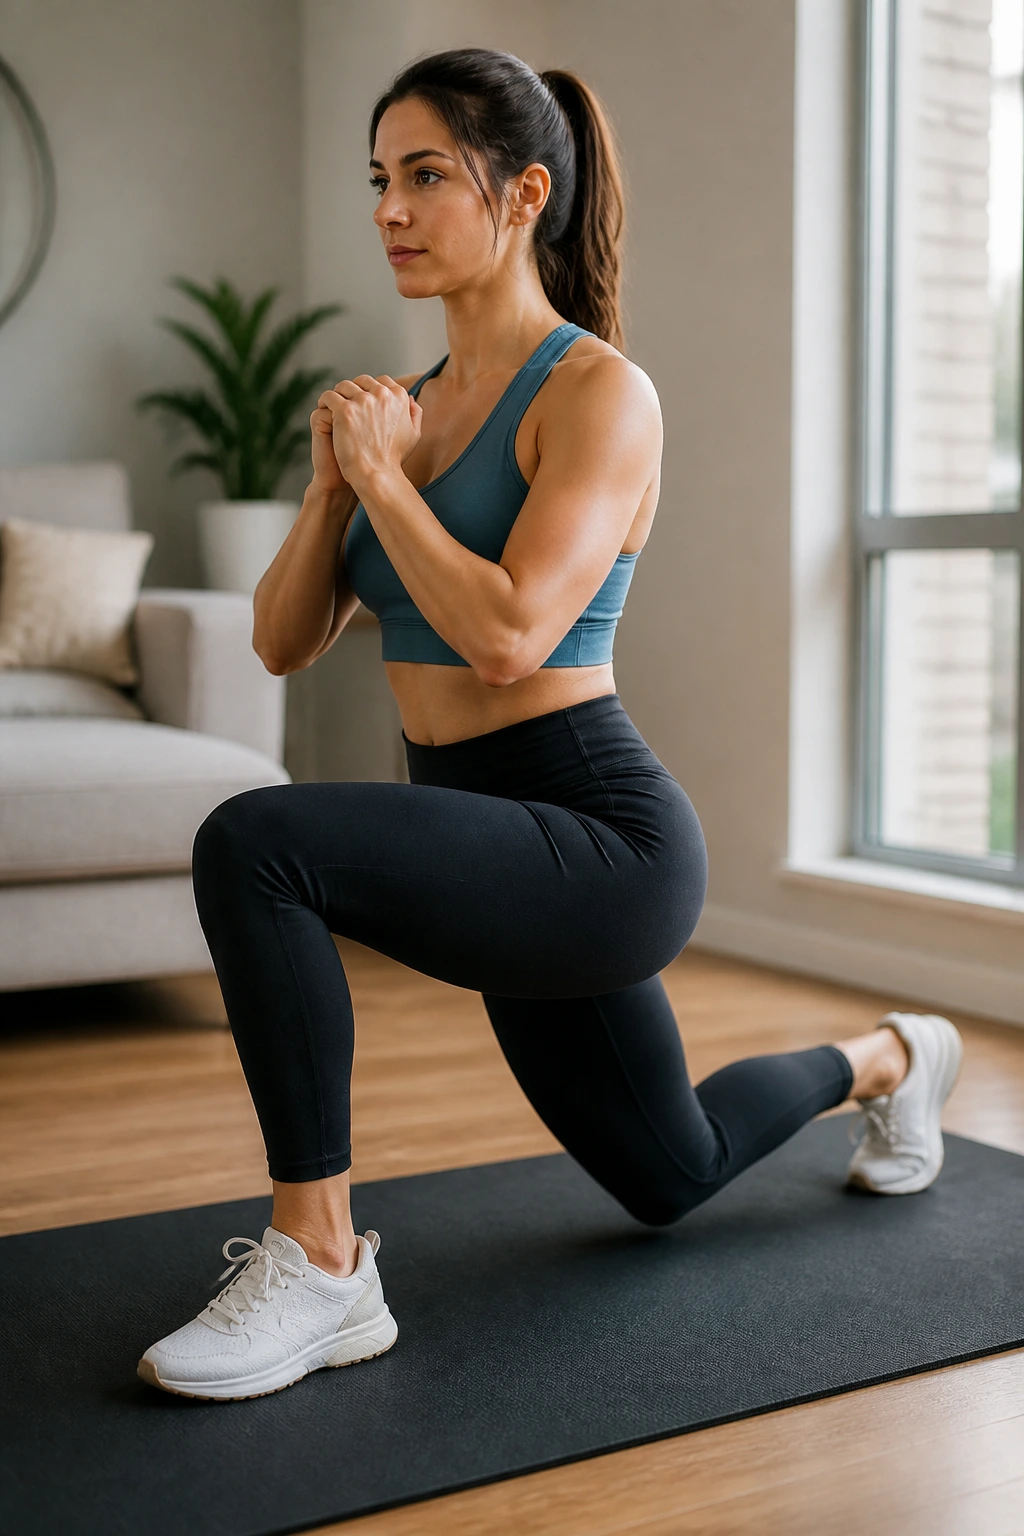
Why do reverse lunges feel friendlier than forward lunges for a lot of people? Because stepping back usually gives you more control and less knee drama. The front leg stays planted, and the glutes get a clean shot at helping.
Step one foot straight back, drop into the lunge, and keep the front heel grounded. A slight forward torso lean is fine. It often makes the glutes work harder and keeps the motion from becoming a quad-only grind. Stand by pressing through the front foot, not by flinging the back leg forward.
Eight to 10 reps per side is a solid starting point. If you want more burn, add a pause at the bottom for one count. If you want more challenge, hold dumbbells or a backpack. If your balance is shaky, keep the movement slow and stay near a wall.
This is one of the most useful all-around hip and leg moves on the list. It trains strength, control, and balance in one shot.
16. Skater Hops
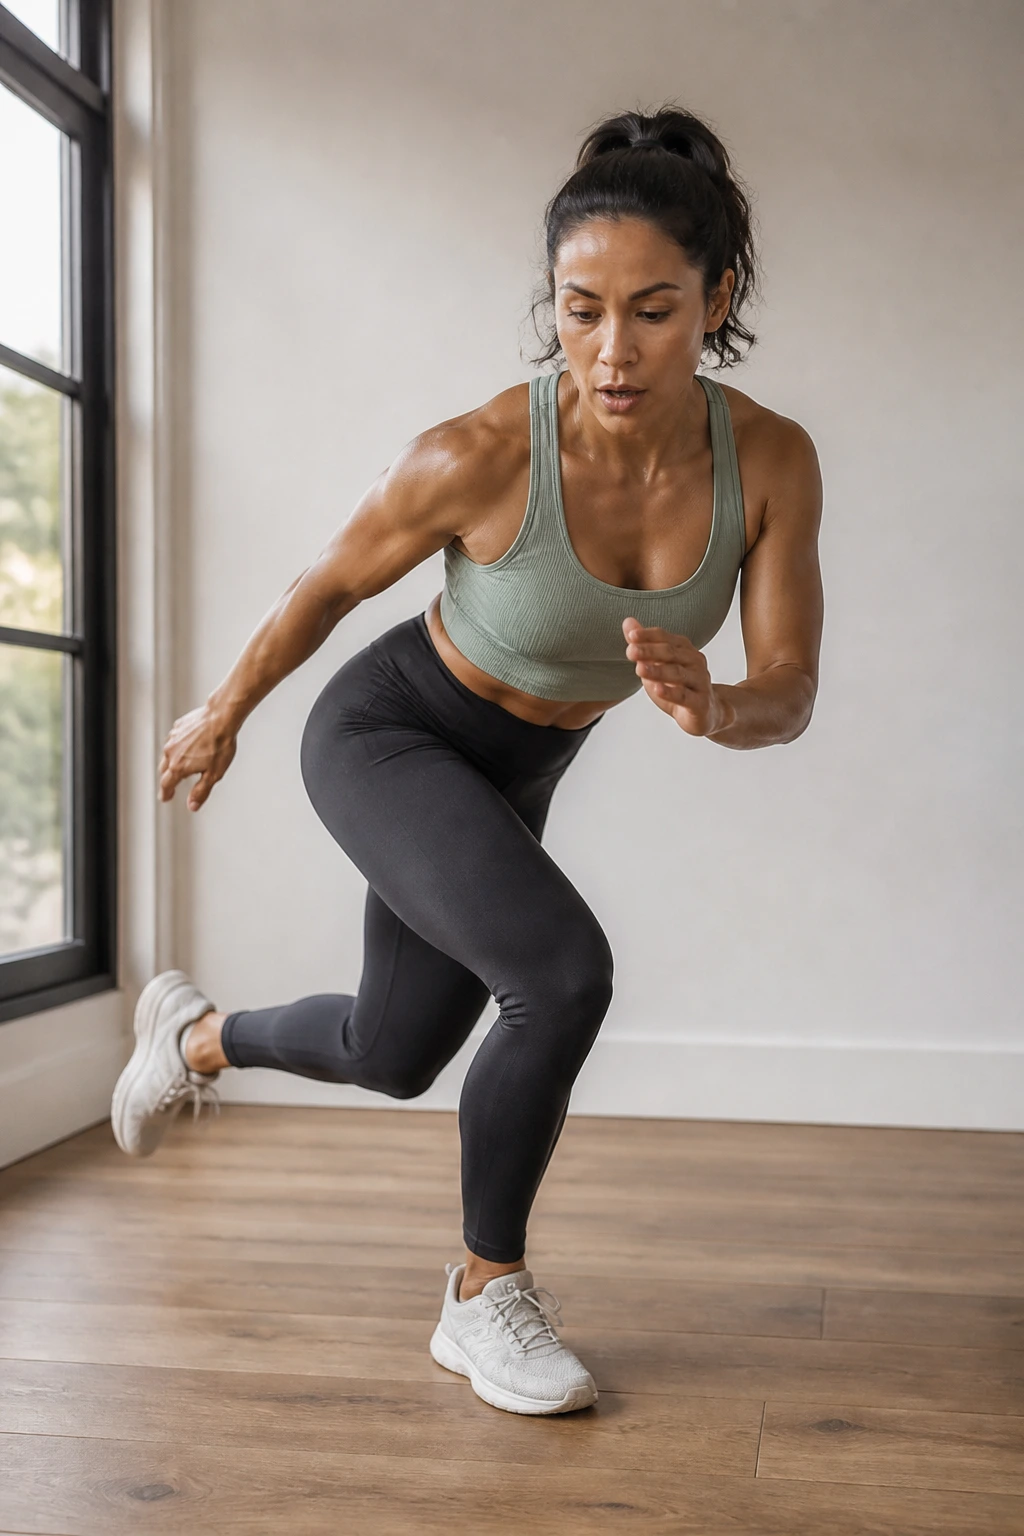
Some days strength alone is not enough. The hips also need side-to-side power, and skater hops give you that in a way a plain squat never will.
Start with a small hop or step to one side, land softly on that leg, and swing the other leg behind you like a speed skater. The standing hip has to absorb force, which is exactly what makes the move useful. Keep the knee soft. Keep the foot quiet on landing.
If jumping feels like too much, do skater steps instead. Same side-to-side shape. Less impact. That version still wakes up the outer hips without pounding the joints. Work for 20 to 30 seconds for 3 to 5 rounds, resting long enough to keep your form neat.
A good skater hop should feel springy, not sloppy. If the landing gets noisy, shorten the jump. If the knees cave inward, slow down and think about pushing the floor away.
17. Standing Band Kickbacks
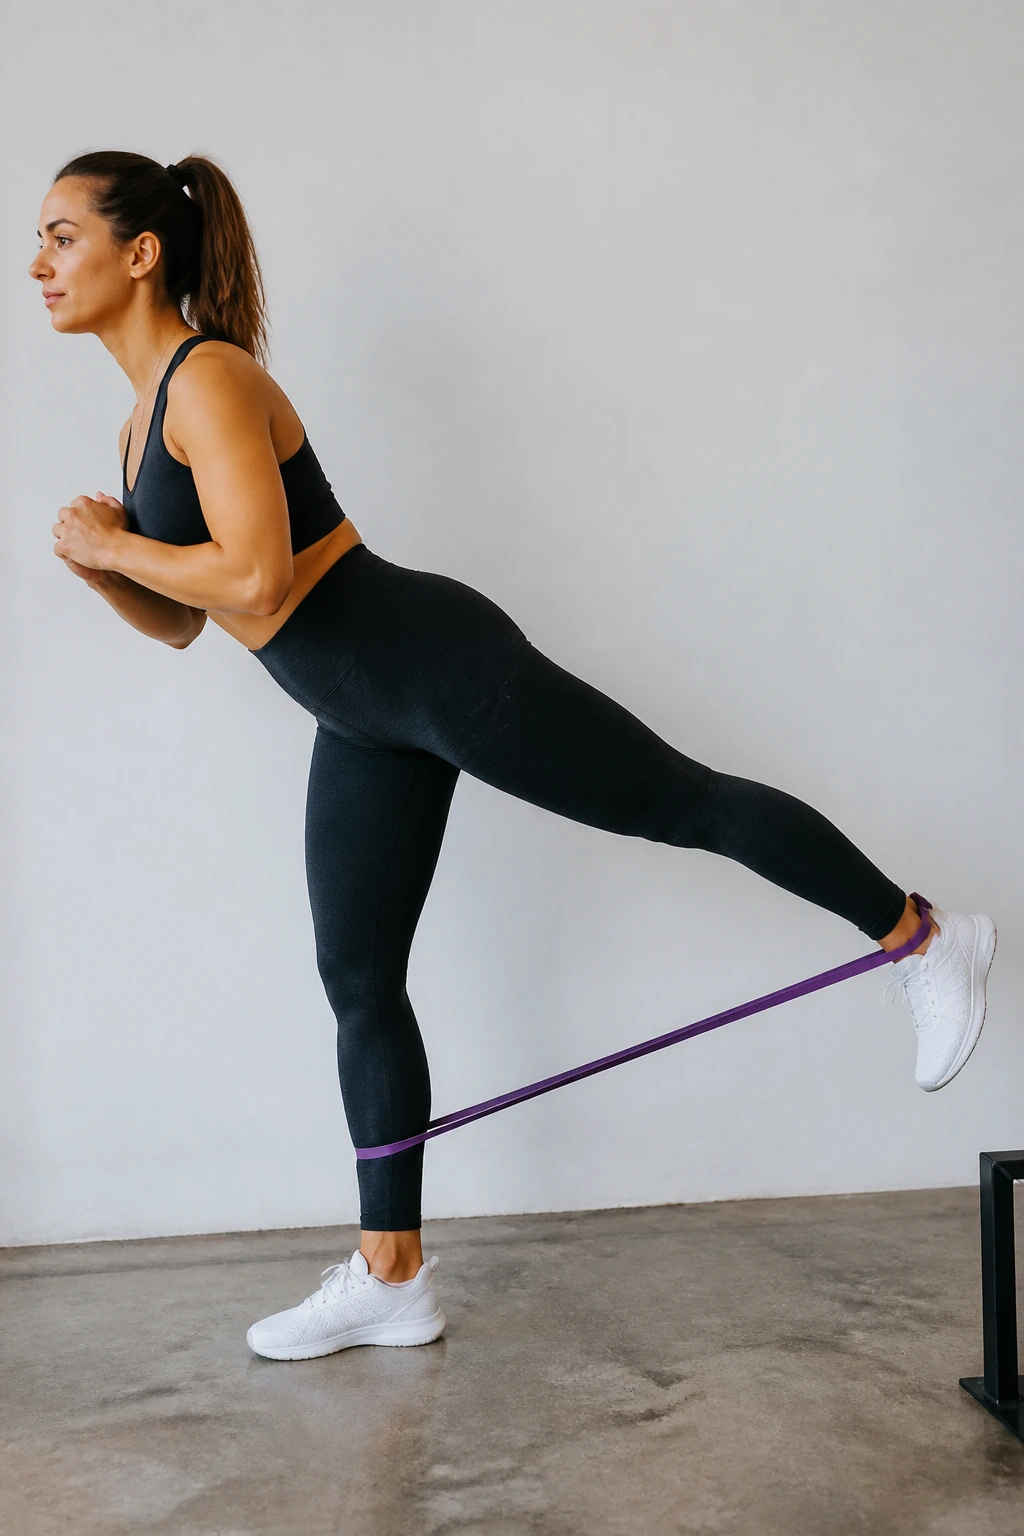
Not everyone wants to spend a whole session on the floor. Standing band kickbacks are useful for those days, and they also teach you to stabilize on one leg while the other leg works behind you.
Loop a band around one ankle and anchor it low, or use a long resistance band tied to something solid. Hold onto a chair with one hand, keep the torso tall, and kick the working leg straight back without arching the lower back. The motion should come from the hip, not from a swing.
You’ll know you’re doing it right when the glute on the moving side does the work and your ribs stay stacked over your pelvis. Ten to 15 reps per side is a good start, with a 1-second squeeze at the end of each kick.
If you want a little more outer-hip work, angle the leg slightly out as it travels back. That tiny change can make the move feel a lot more complete.
18. Quadruped Hip Circles
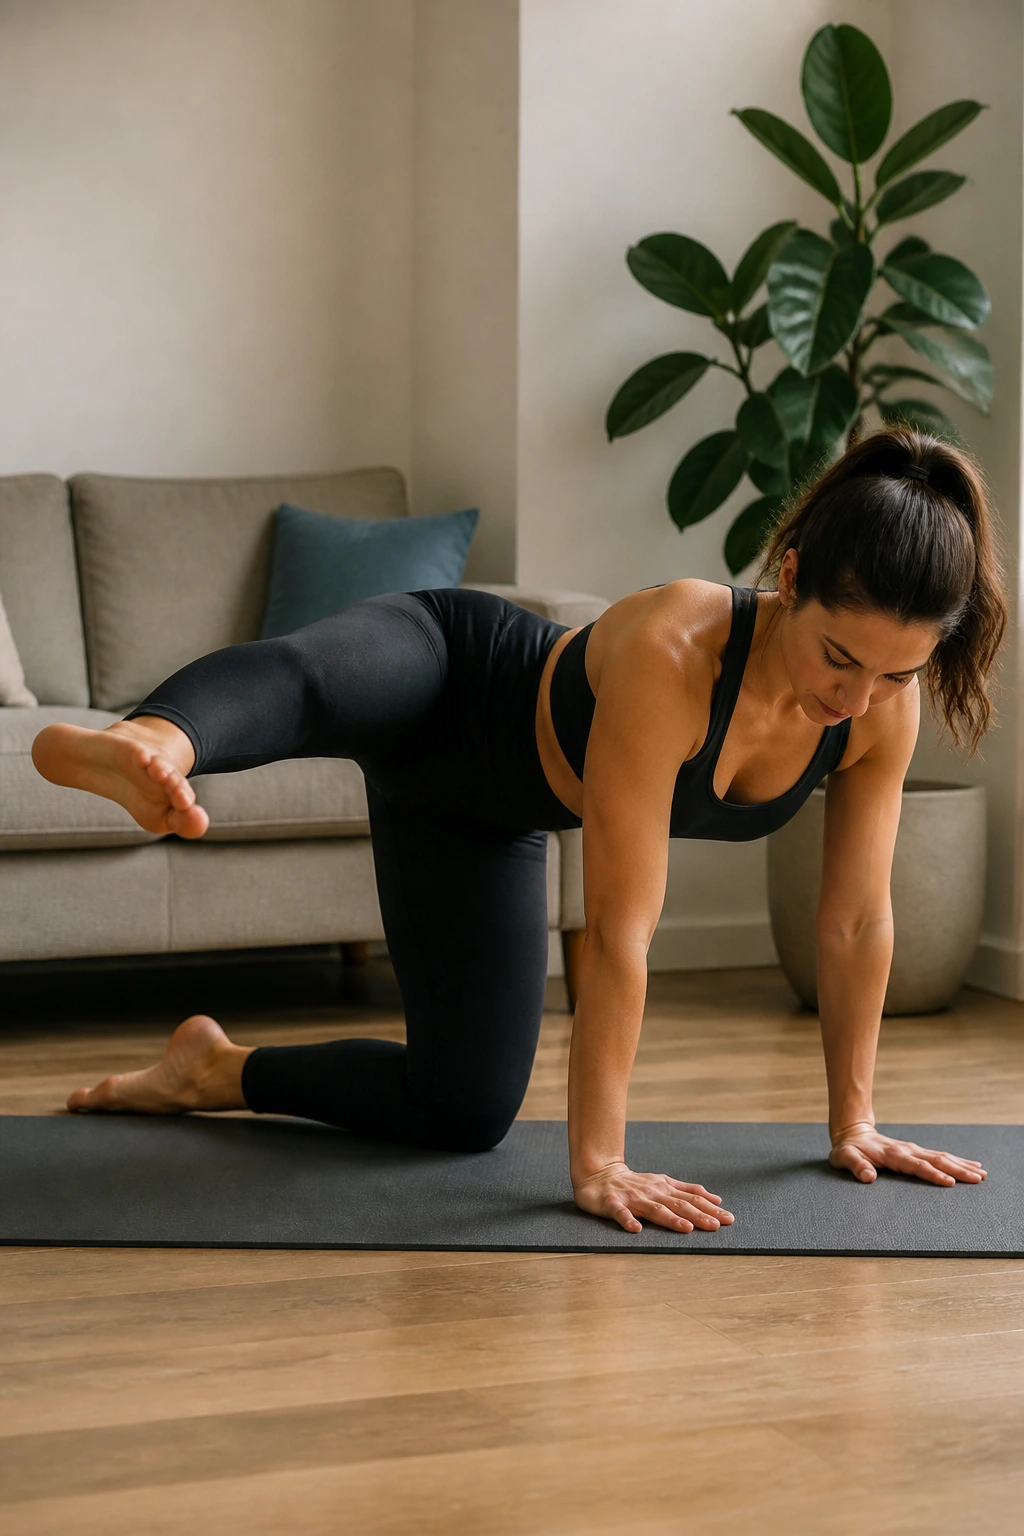
Hip circles look almost too gentle to count. Then you do them slowly and realize they ask for control that most people do not have.
Set up on hands and knees, bend one knee to 90 degrees, and trace a small circle with that knee as if you were drawing on the wall behind you. Keep the pelvis as still as possible. The circle should come from the hip joint, not from a wild twist through the torso.
This is a good drill on days when the hips feel stiff or when you want to sneak mobility work into a strength session. Six to eight circles in each direction per side is enough to start. More is not automatically better if the motion gets sloppy.
The trick is to move slowly enough that you can feel where the joint gets tight. That awareness is the point. Not speed. Not sweat. Just control.
19. Wall Sit with Band Abductions
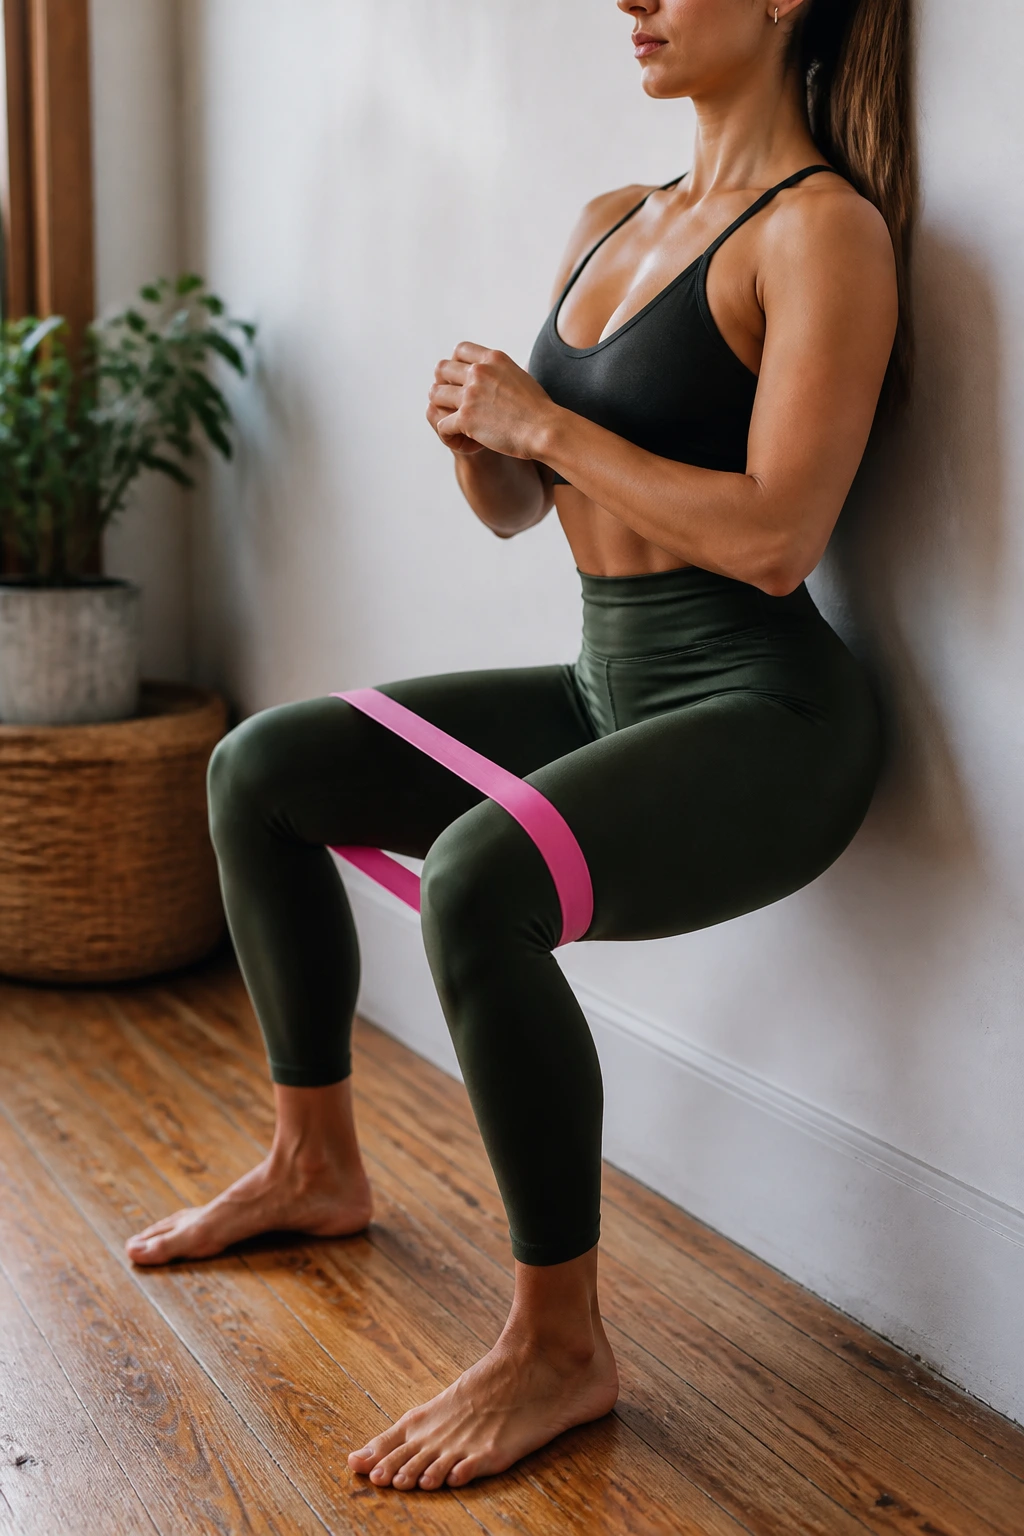
A wall sit already lights up the thighs. Add a band above the knees and press the knees outward, and the outer hips have to stay active while the legs hold that deep, boring burn.
Slide down the wall until your knees sit around a right angle or a little higher if that’s all you can manage. Keep your back flat against the wall and your feet far enough forward that the knees don’t drift past the toes too much. Then press the knees out against the band in short pulses or one steady hold.
This works well as a finisher because it combines an isometric hold with abduction. That means the muscles stay under tension instead of relaxing between reps. Hold for 20 to 45 seconds, or do 15 to 25 small presses before standing up.
Your thighs will complain. Fine. But the lower back should not. If it does, move your feet farther out and sit a touch higher. A cleaner wall sit beats a deeper ugly one every time.
20. A 20-Minute Hip Workouts at Home Circuit
If you want a simple weekly plan, this is the easiest way to put the whole list to work. Pick 4 moves, set a timer, and keep the session moving. No overthinking. No six-page spreadsheet.
Here’s a clean home circuit that balances the front, back, and side of the hips:
- Glute bridges — 40 seconds
- Lateral band walks — 30 seconds each direction
- Reverse lunges — 8 reps per side
- Frog pumps — 25 reps
- Wall sit with band abductions — 30 seconds
Rest 45 to 60 seconds after the full round, then repeat for 3 rounds. If you’re short on time, do 2 rounds. If you’ve got more in the tank, add one more round and keep the form tidy.
The nice thing about a circuit like this is that it hits the glutes from different angles without trashing your joints. You get hinge work, squat work, side-hip work, and a little endurance. That’s enough for a real home session, and it’s easy to repeat two or three times a week without getting bored. Keep the weights light at first, keep the reps honest, and let the hips do their actual job.
