



Joint pain changes the rules fast. One week you can handle a normal dumbbell session, and the next week your knees, elbows, or shoulders complain about every little thing. That is exactly where workouts with bands for people with joint pain earn their place: the resistance climbs gradually, the setup is simple, and you can keep the movement range small without turning the whole thing into a rehab lecture.
I like bands for this reason. They let you train hard enough to matter, but not so hard that your joints feel like they paid the bill. Mini bands, long loop bands, and tube bands with handles all have a role here, and a cheap door anchor opens up even more options. The band color is less important than the tension you can control for clean reps. Too many people chase heavier bands and end up turning every rep into a shrug, a grimace, and a half-rep.
Sharp pain, swelling, catching, numbness, or a joint that feels unstable is a stop sign. So is pain that gets worse rep by rep instead of settling once you warm up. Keep the motion smooth, breathe out on the effort, and use a range that feels boring in the joint but honest in the muscle. That’s the sweet spot. Not flashy. Useful.
Pick a band you can handle for 8 to 15 controlled reps, then see what your body says tomorrow. That little test tells you more than ego ever will.
1. Seated Band Row for a Calm Upper Back
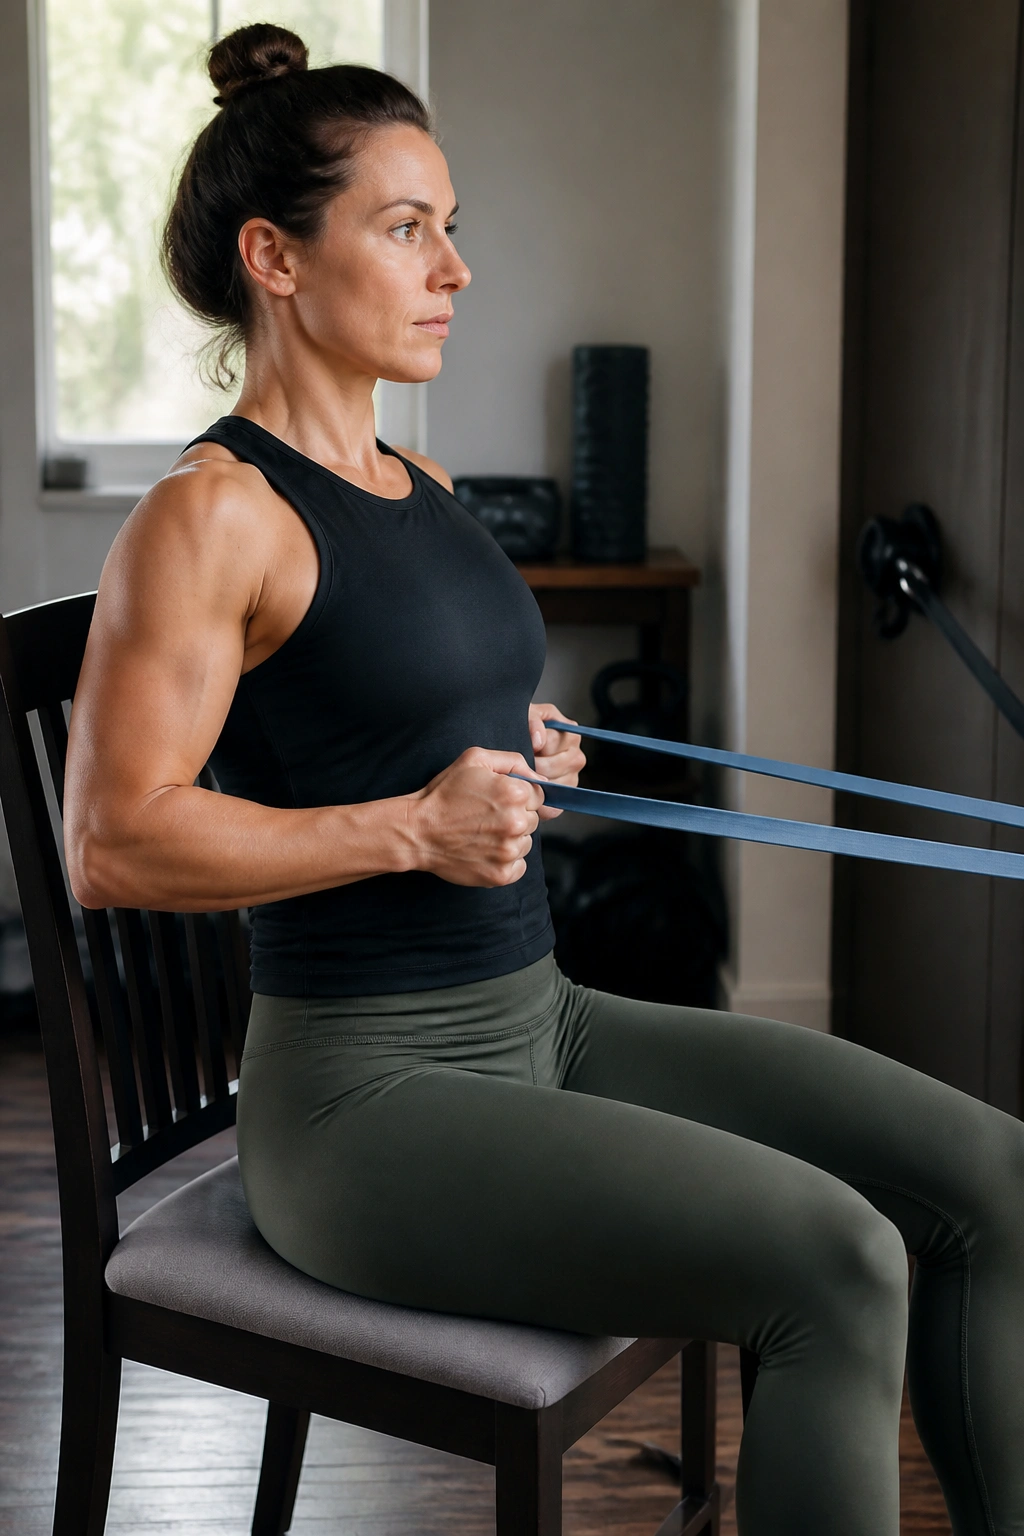
A seated row is the move I reach for when shoulders feel rusty. It asks your back to pull, not yank, and that matters when the elbows or wrists get fussy.
Sit tall on a sturdy chair or bench with a long band looped around a fixed point at chest height. Keep your feet flat, ribs down, and neck long. Pull the handles or ends toward your lower ribs, pause for a full second, then let the band slide back slowly for 2 to 3 seconds. The return is where the work gets sneaky.
Why It Helps So Much
The row keeps your elbows close to your sides, which usually feels friendlier than wide pulling. It also lets you load the mid-back without asking the shoulders to move through a big painful arc.
Good cues:
- 2 to 3 sets of 8 to 12 reps
- Chest tall, but not arched
- Elbows skim past the rib cage
- Stop when the shoulder blades meet, not when the band hits your body
One small thing: if your neck tightens up, the band is too heavy or you’re pulling too high.
2. Wall Chest Press for Gentle Pushing
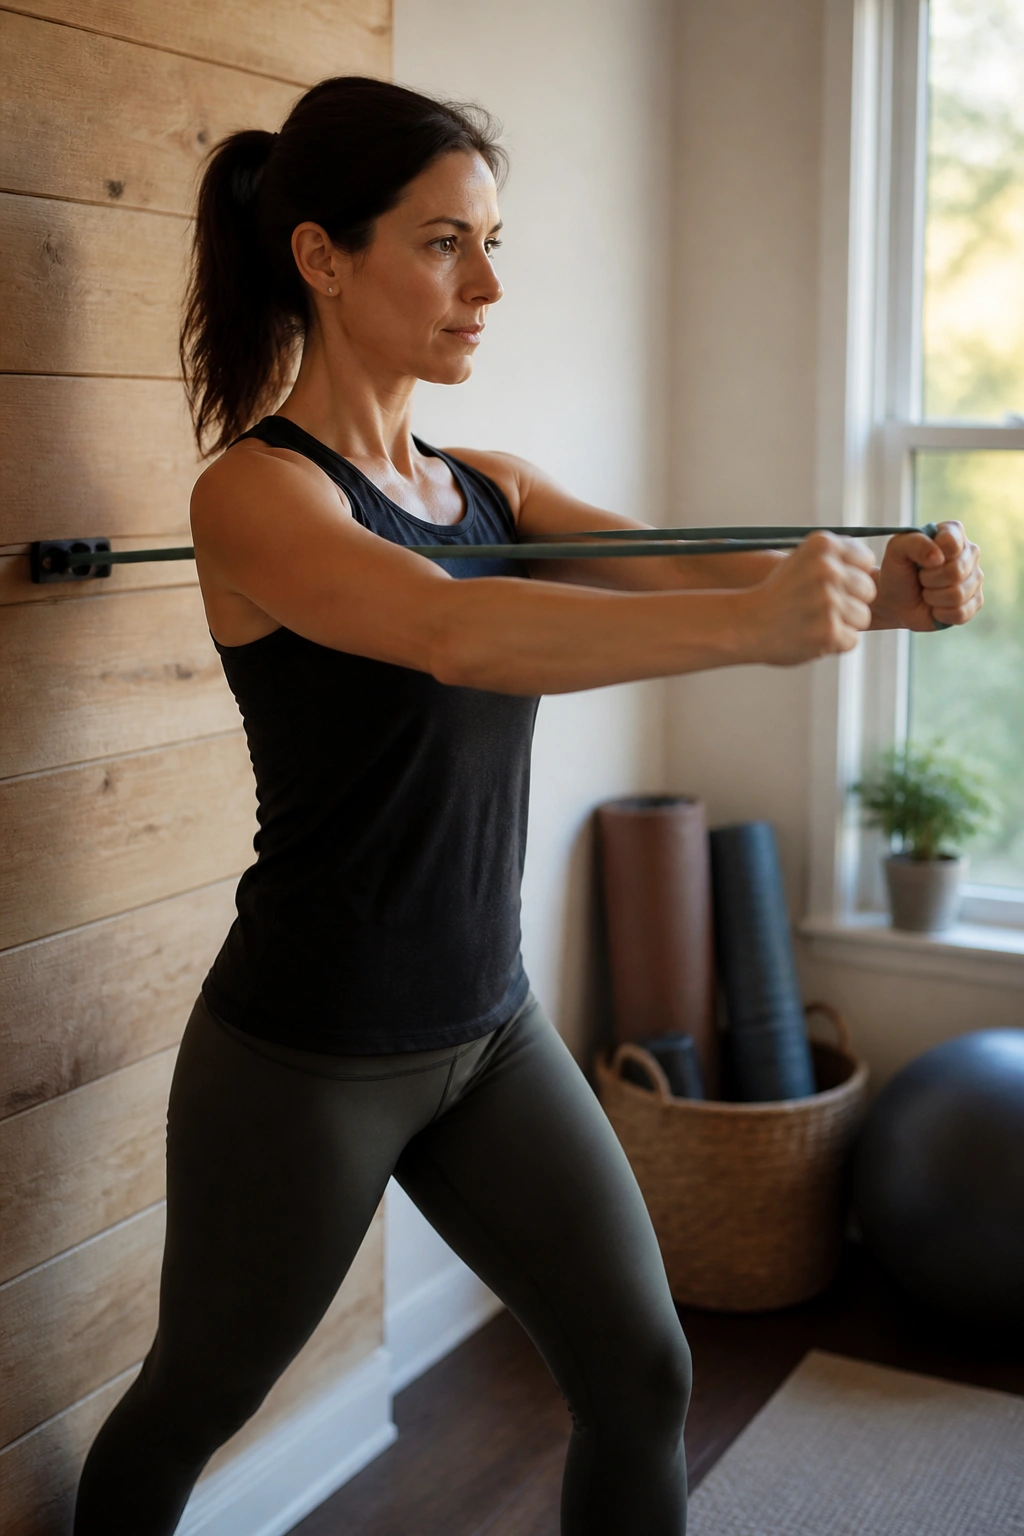
Why does a press on the wall often feel better than a floor push-up? Because the angle is kinder. You still train the chest and triceps, but the load is lighter and the wrists can stay neutral instead of taking the whole job.
Stand facing away from a wall or sturdy anchor with the band behind you at chest height. Take a split stance so you do not wobble. Press forward until your arms are straight but not locked, then come back with control. Keep your shoulders down. Keep your ribs from flaring. That last part matters more than people think.
How to Keep Shoulders Quiet
A lot of sore shoulders hate deep pressing because the upper arm drifts too far back. The wall press avoids that trap.
- 2 to 3 sets of 8 to 10 reps
- Elbows about 30 to 45 degrees from the torso
- Wrists straight, not bent back
- Exhale as you press
A narrow stance helps, too. Less sway means less irritation.
3. Band Pull-Apart for Stiff Desk Shoulders
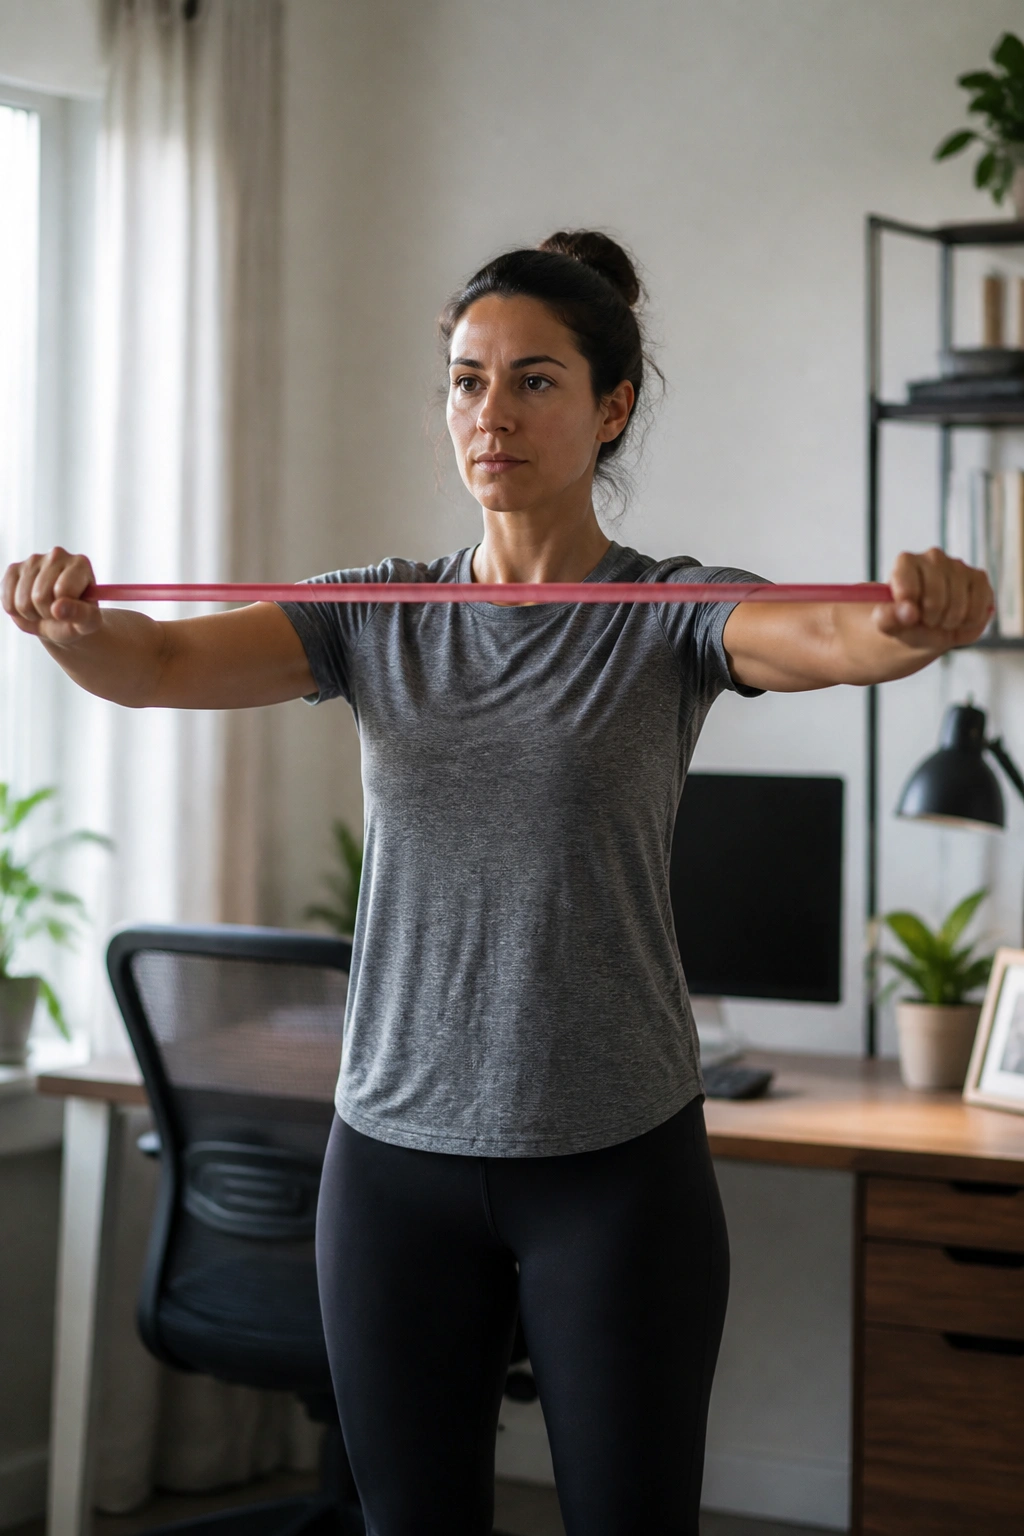
A desk-stiff upper back loves this one. The movement looks tiny, but your rear shoulders and shoulder blades get a clean job without a bunch of joint drama.
Hold a light band at shoulder height with straight arms, then pull it apart until your hands are wider than your shoulders. Pause for a beat. Return slowly until the band has slack again. That’s it. No big swing. No snapping the band back together. If the move turns into a shrug, you’ve gone too heavy or too fast.
Small Details That Matter
This drill works best when the motion comes from the shoulder blades, not the lower back. Your ribs should stay quiet. Your neck should stay long.
- 2 sets of 12 to 20 reps
- Light band only
- Palms down for a stricter pull, palms up if your shoulders like that better
- Keep the motion in front of your chest, not behind it
Tip: if your wrists ache, switch to a band with soft handles.
4. Neutral-Grip Biceps Curl for Elbows That Hate Supination
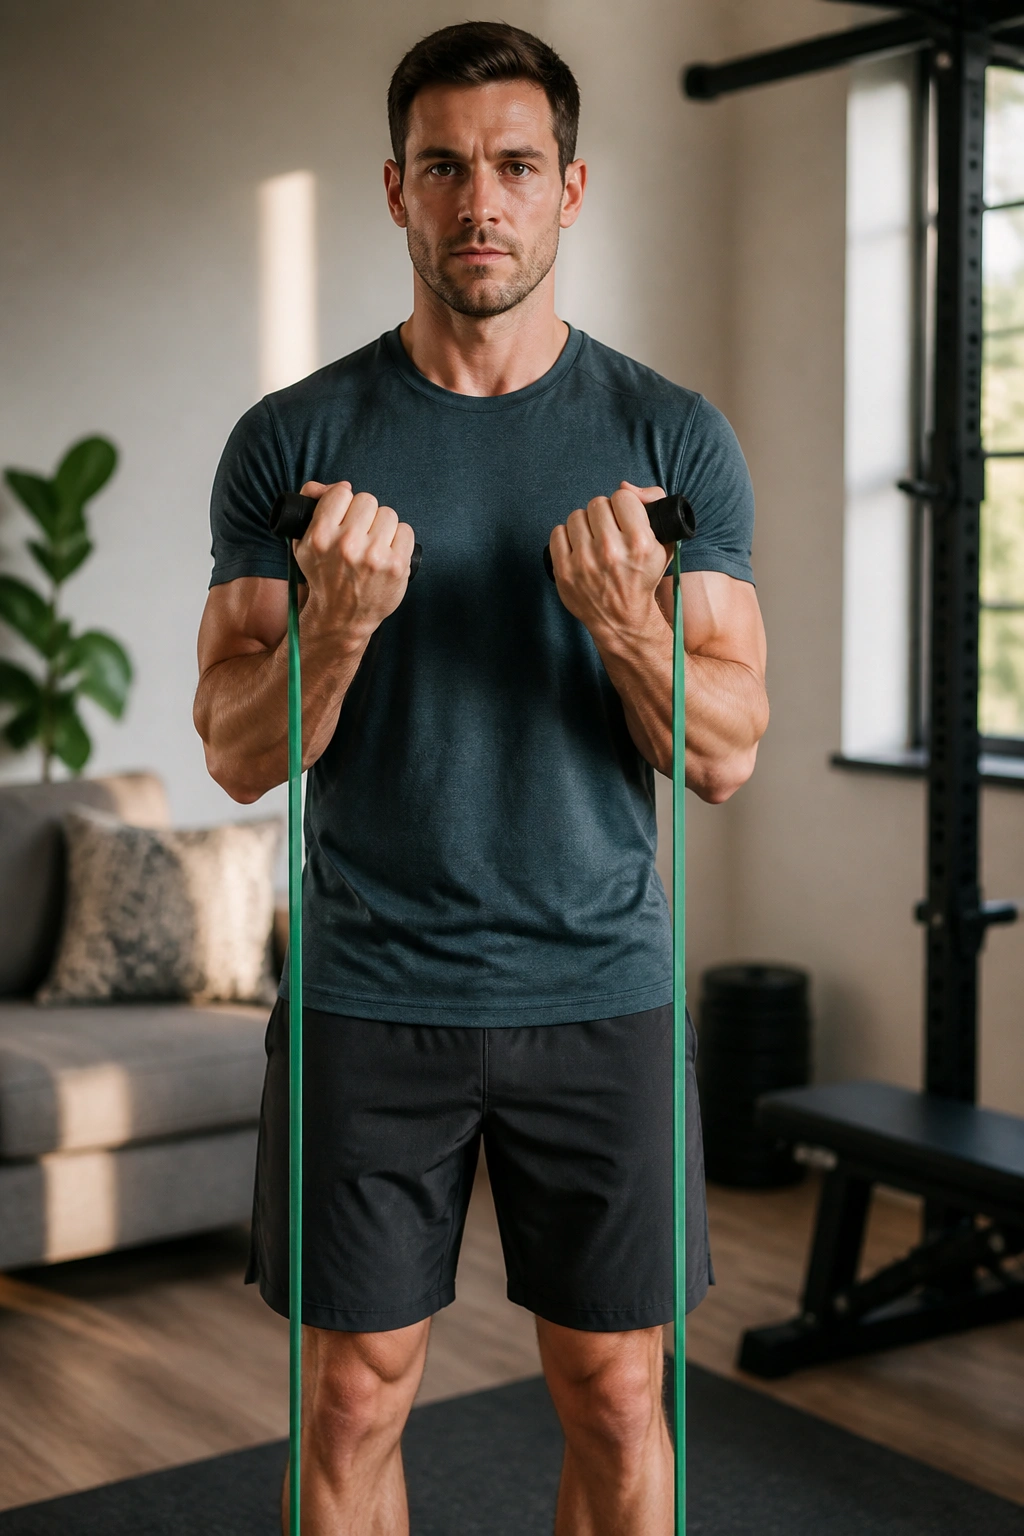
The neutral-grip curl gets more useful than people think. Palms facing each other, or close to it, usually takes some pressure off cranky elbows compared with a hard palms-up curl.
Stand on the middle of the band or use a tube band with handles. Keep your elbows close to your sides and curl until your hands reach about mid-chest. Lower for 3 seconds. That slower return matters more than loading up the band. Heavy curls with ugly form are a fast way to annoy the elbow tendons.
I’d start with 2 sets of 10 to 12. If that feels too easy, add a third set before you add tension. That keeps the movement clean. It also saves you from turning the exercise into a shoulder shrug, which happens all the time.
One good rule: if your wrist starts bending backward, stop there. That’s your body telling you the band is enough.
5. Triceps Pressdown Without the Elbow Sting
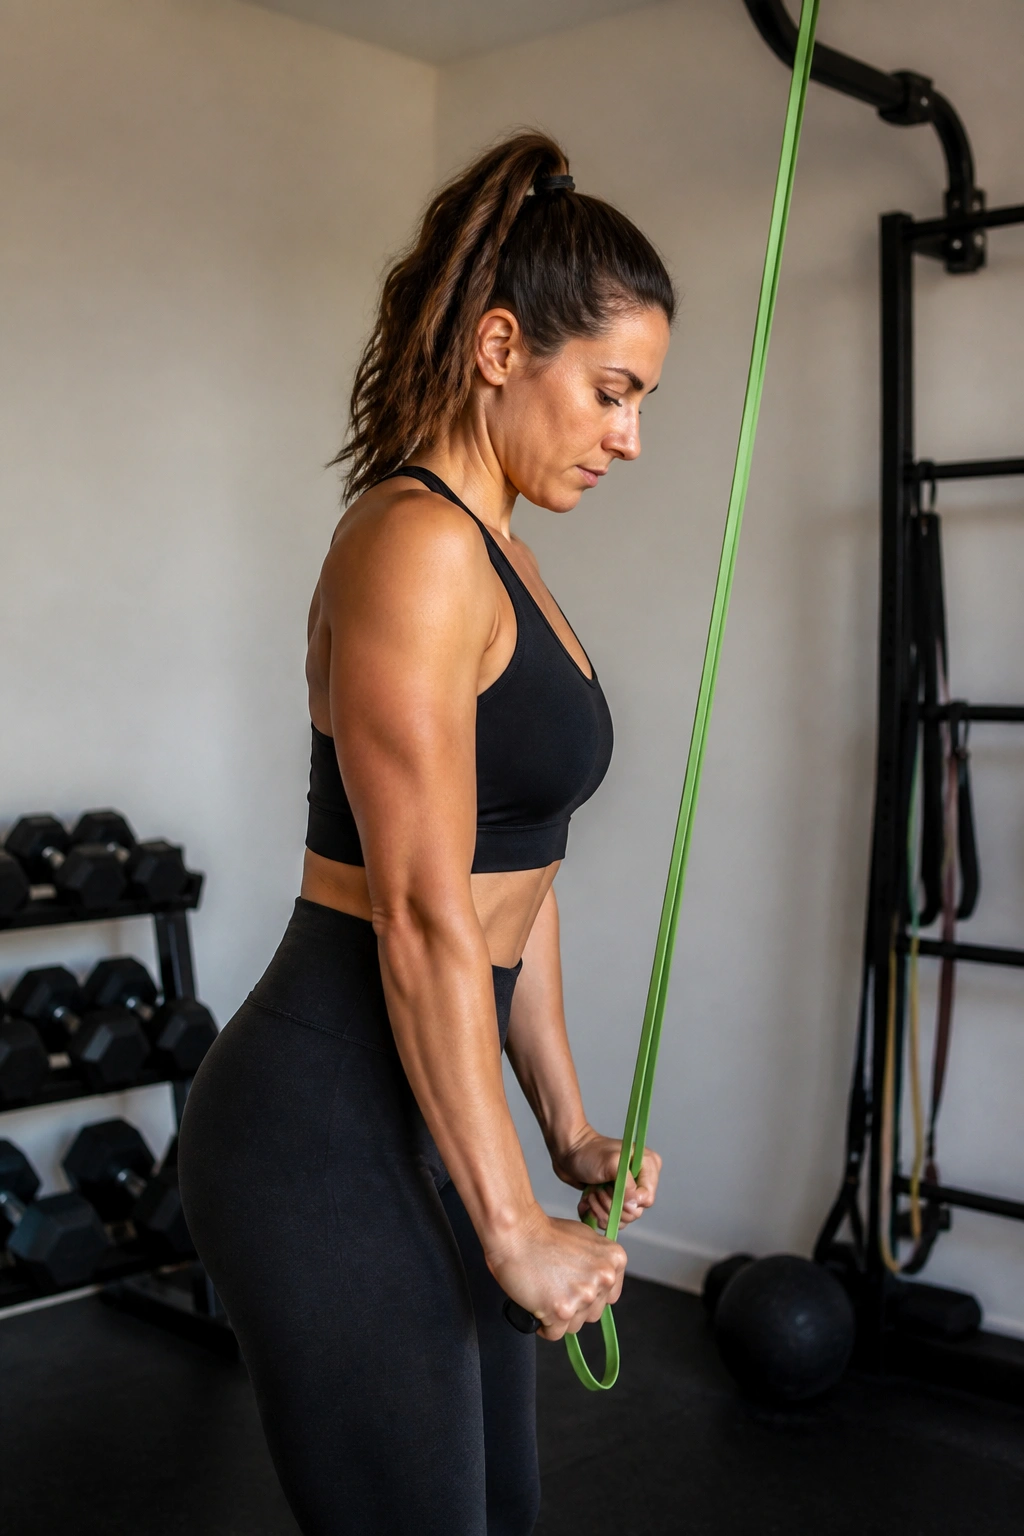
Triceps work usually gets blamed for sore elbows, but the pressdown can be surprisingly kind when it’s done right. The trick is keeping the upper arms still and letting the forearms do the work.
Anchor a long band overhead. Hold the ends or handles with elbows tucked near your ribs, then press down until the arms are straight. Do not slam into lockout. A soft finish is better. Bring the hands back up until the elbows are bent about 90 degrees, and keep the shoulders from creeping up toward your ears.
Your stance should feel boring. Slight bend in the knees. Ribs stacked. Neck relaxed.
The best version of this move uses a band light enough that you can control the last inch on the way up. That part is where bad reps show themselves. If the elbows drift forward, the band is too strong or the anchor is too high.
6. Mini-Band Glute Bridge for Hips and Knees
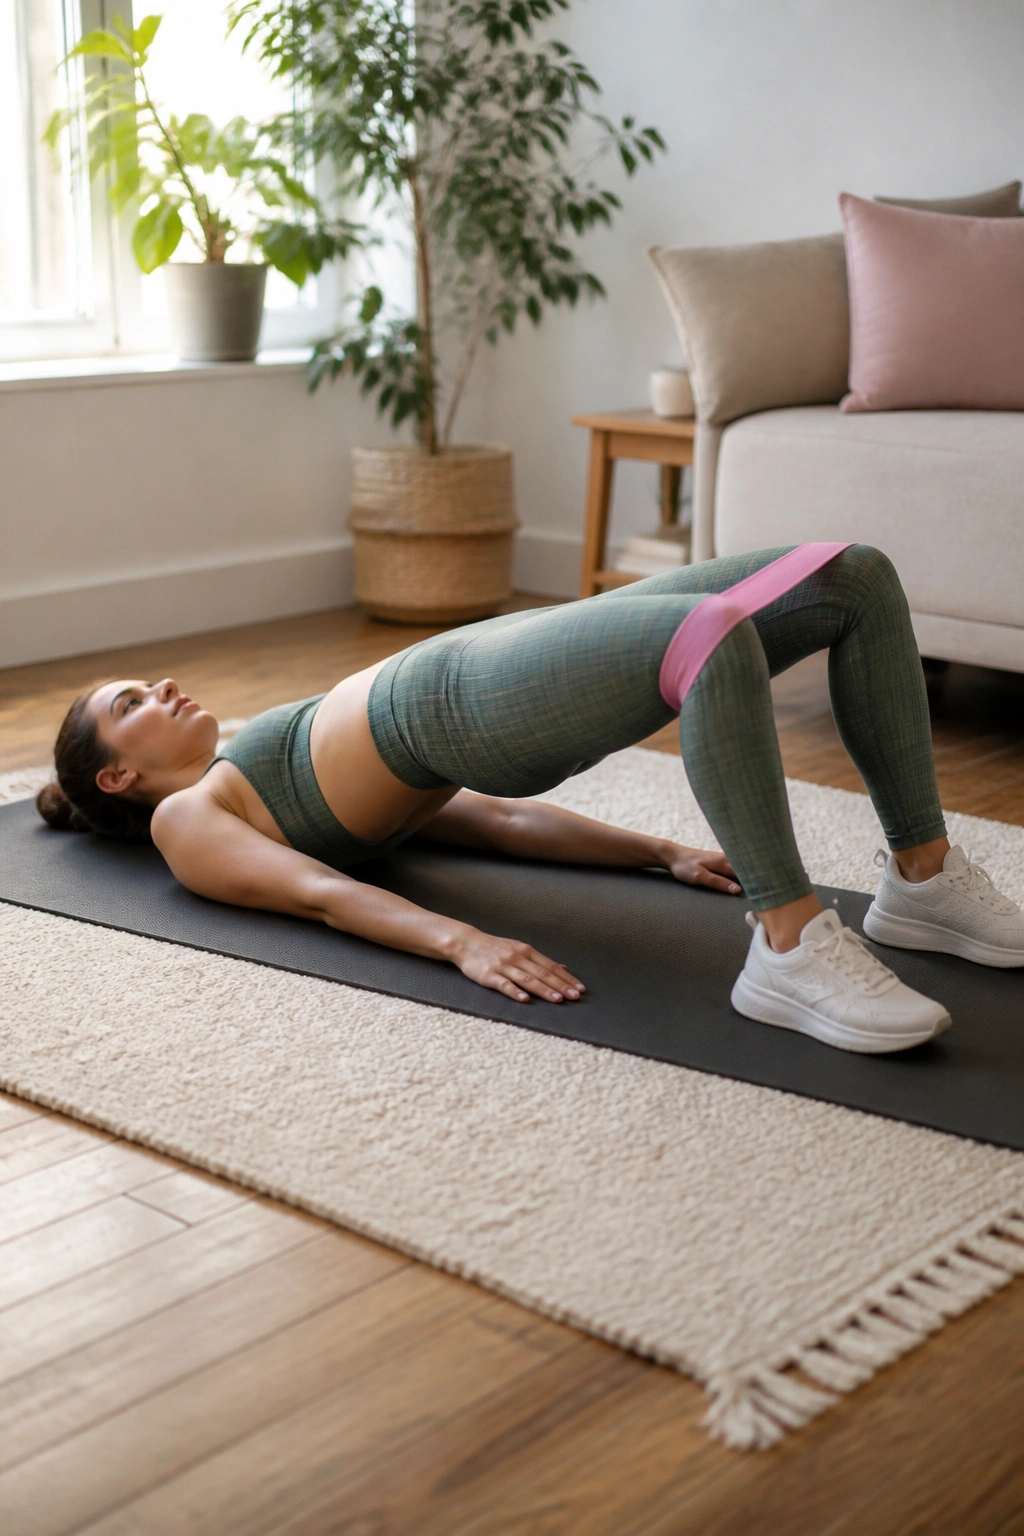
A band around the knees can make a bridge feel oddly polite. It gives the hips something to press into while the back stays supported on the floor, which is a nice setup when weight-bearing leg work feels rough.
Lie on your back, feet flat, knees bent, and loop a mini band just above the knees. Press the knees gently out into the band, then lift the hips until your body makes a straight line from shoulders to knees. Hold for a second, squeeze the glutes, and lower with control. The movement should feel like the backside is doing the work, not the lower back.
What You Should Feel
If the hamstrings take over completely, move your feet a little closer to your hips. If the knees cave in, press out harder into the band.
- 2 to 3 sets of 10 to 15 reps
- Feet hip-width apart
- Press through the heels
- Keep the chin slightly tucked
Good sign: the glutes feel warm before the lower back does.
7. Side-Stepping Band Walk for Quiet Hips
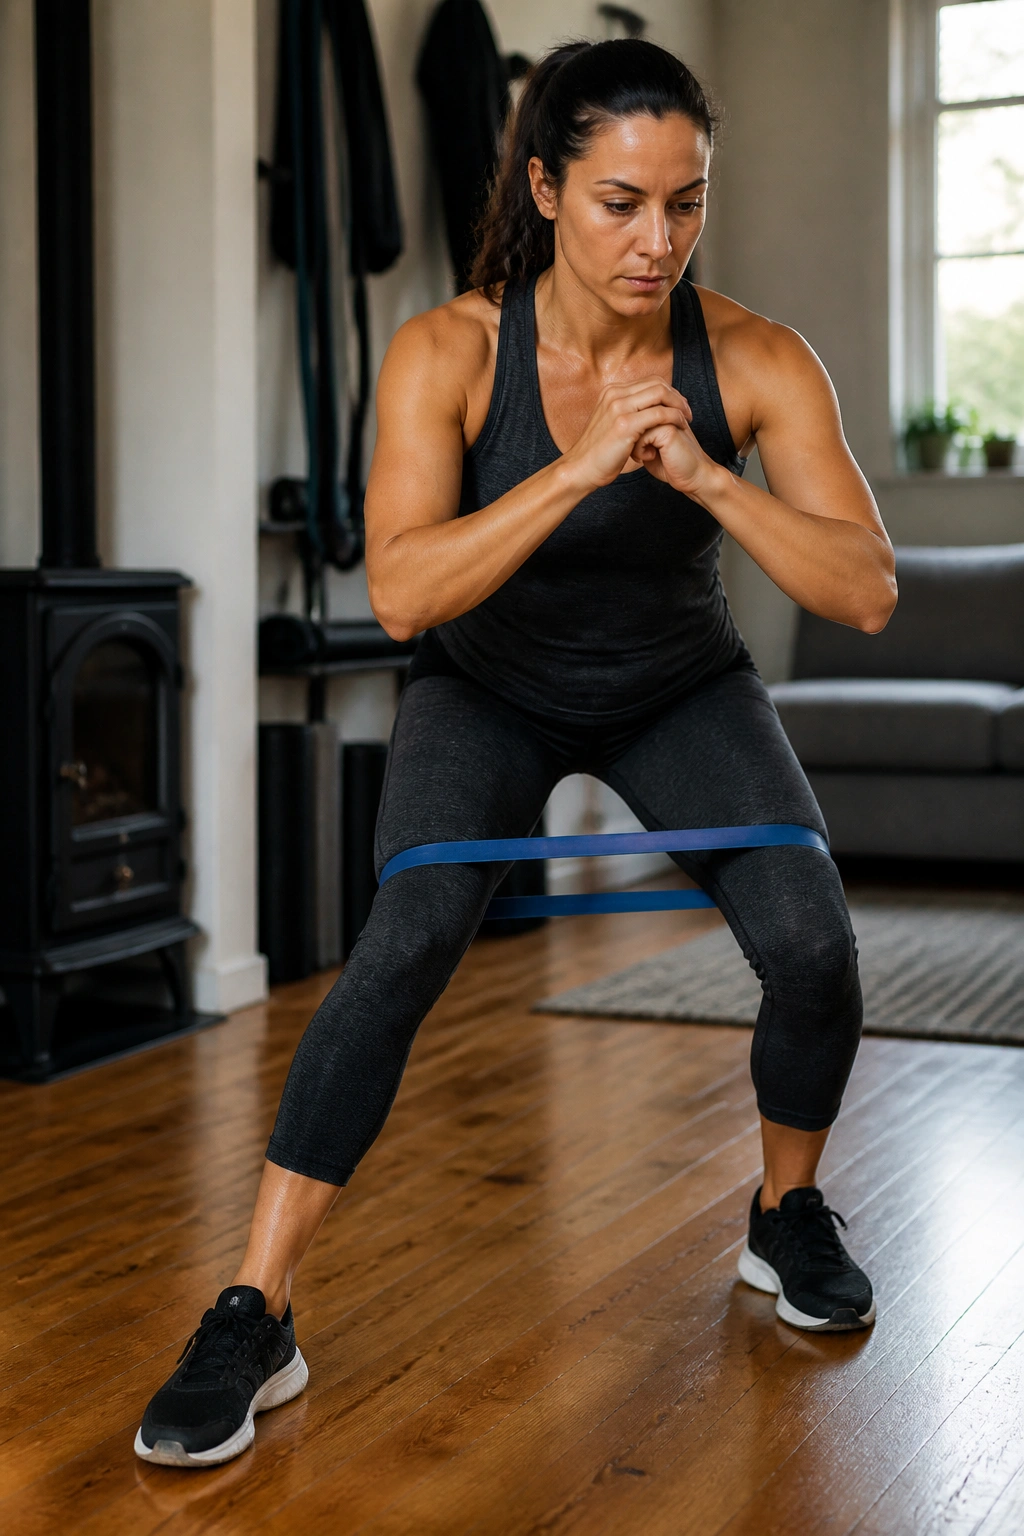
Why does this tiny side-step burn so fast? Because the hip muscles that hold your pelvis steady are doing a real job, and they usually get undertrained.
Place a mini band above the knees or around the ankles if your hips tolerate it. Sit back slightly into a shallow quarter-squat, then take 8 to 12 slow steps to one side. Follow with the same number back. Keep the toes pointing forward or only slightly out. If the knees cave inward, widen your stance a touch and slow down.
This move is one of my favorite options for people whose knees ache during walking or stair work. The load is small, but the hips still have to steer the legs. That can matter a lot.
Do 2 to 3 rounds. Rest 30 to 45 seconds. If your feet slap the floor or you start leaning like a tired shopping cart, the band is too tight.
8. Clamshell for Deep Hip Support
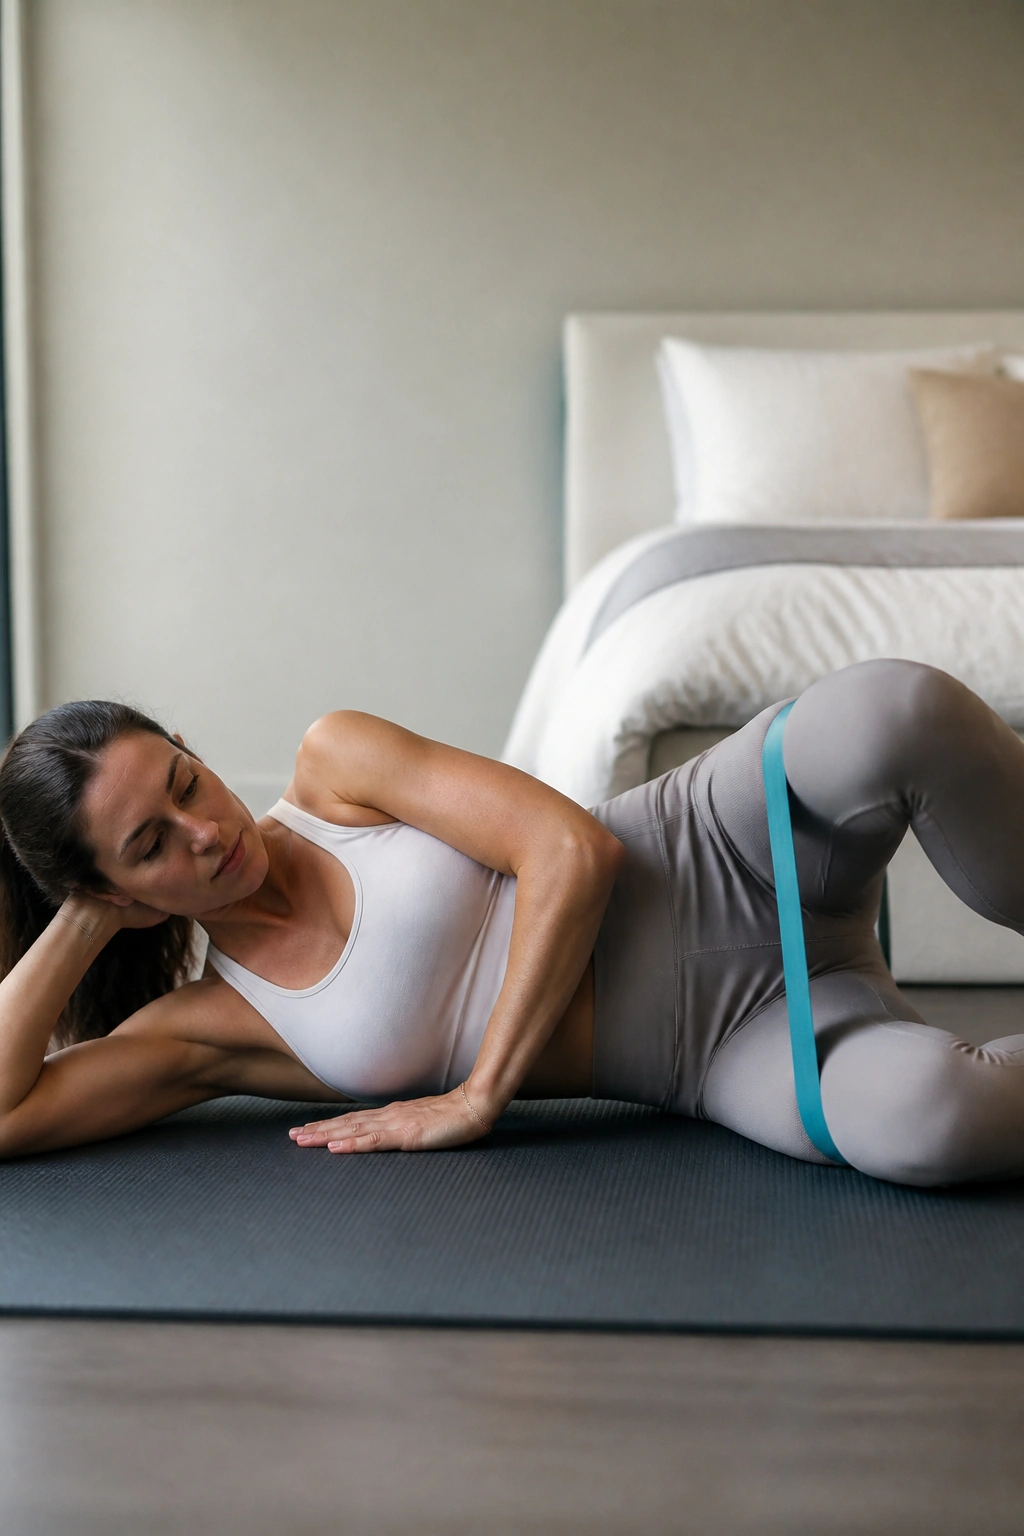
The clamshell looks too small to matter. Then you do 15 controlled reps, and suddenly the side of the hip wakes up in a big way.
Lie on your side with hips and knees bent, heels stacked, and a mini band above the knees. Keep your feet together while you open the top knee like a clam shell. The pelvis stays still. That part is the whole point. If your top hip rolls backward, you’ve lost the target.
I like this one for people whose knees complain during stairs or standing too long. Stronger side hips often mean the knee tracks better, plain and simple. Not magic. Mechanics.
A Clean Rep Looks Like This
- Feet stay touching
- Hips stay stacked
- Open only as far as you can without rolling back
- 2 to 3 sets of 12 to 15 reps each side
Short range is fine here. Bigger is not better.
9. Standing Hip Abduction for Days When the Floor Feels Annoying
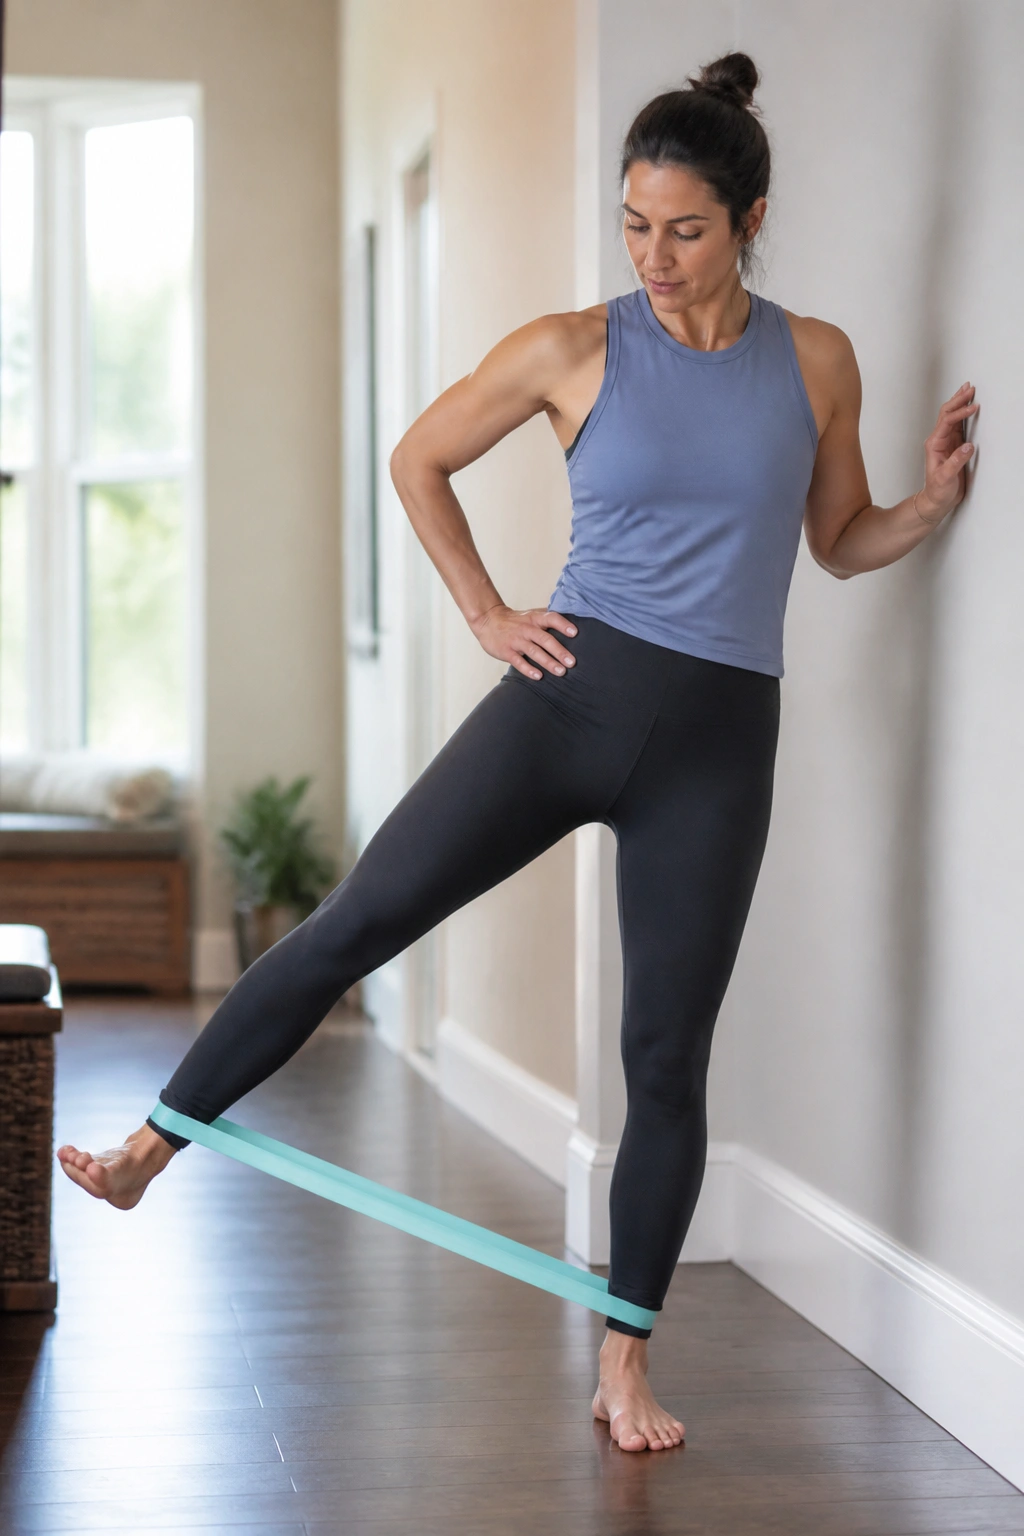
Standing hip abduction saves you from the floor. That sounds minor, but for anyone with stiff knees, sore wrists, or a back that dislikes getting down and up, it’s a relief.
Anchor a light band low or loop a mini band around both ankles. Stand tall, hold onto a wall or chair, and move one leg out to the side without leaning your torso. Come back slowly. The working leg should feel the outer hip turning on, while the standing leg stays quiet and steady.
This is one of those exercises that can be done almost anywhere. Kitchen counter. Hallway. Beside the couch. A little balance challenge is built in, which is useful if you’re trying to keep the ankles and hips honest.
Two sets of 10 to 12 each side is a clean start. If the body sways, shorten the range and slow the tempo down.
10. Chair Sit-to-Stand With a Band Around the Knees
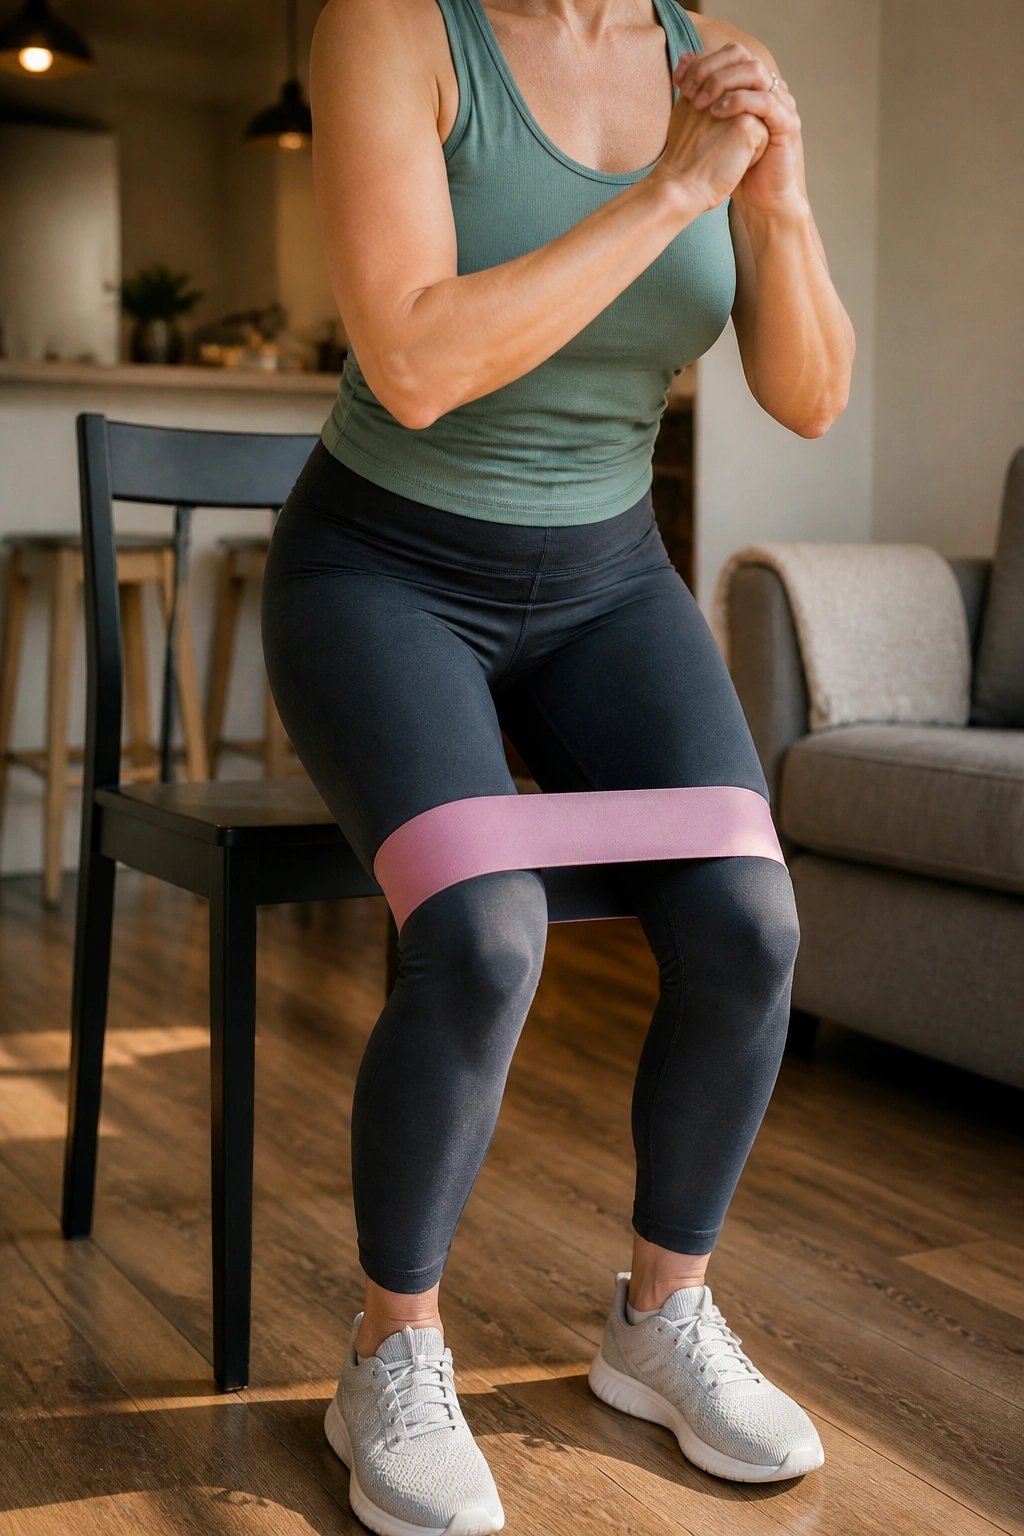
A chair, a light band, and five slow stands can tell you a lot about your knees. If the knees cave inward during the rise, the band gives you feedback right away.
Loop a mini band just above the knees, sit on a firm chair, and place your feet under your knees. Lean forward slightly from the hips, press the knees gently out, and stand up. Sit back down with control. The descent matters. Rushing the sit is how people turn a decent drill into a sloppy one.
Make the Chair Do the Work
A higher chair is easier on sore knees. A lower chair makes the quads and glutes work harder. Start high, then lower the seat only if the motion feels smooth.
- 2 to 4 sets of 6 to 10 reps
- Drive through the middle of the foot
- Keep the chest proud, not flared
- Stop if the knees pinch during the bend
This is one of the best leg exercises for joint-friendly strength because it trains a real daily movement pattern.
11. Anchored Hamstring Curl for the Back of the Thighs
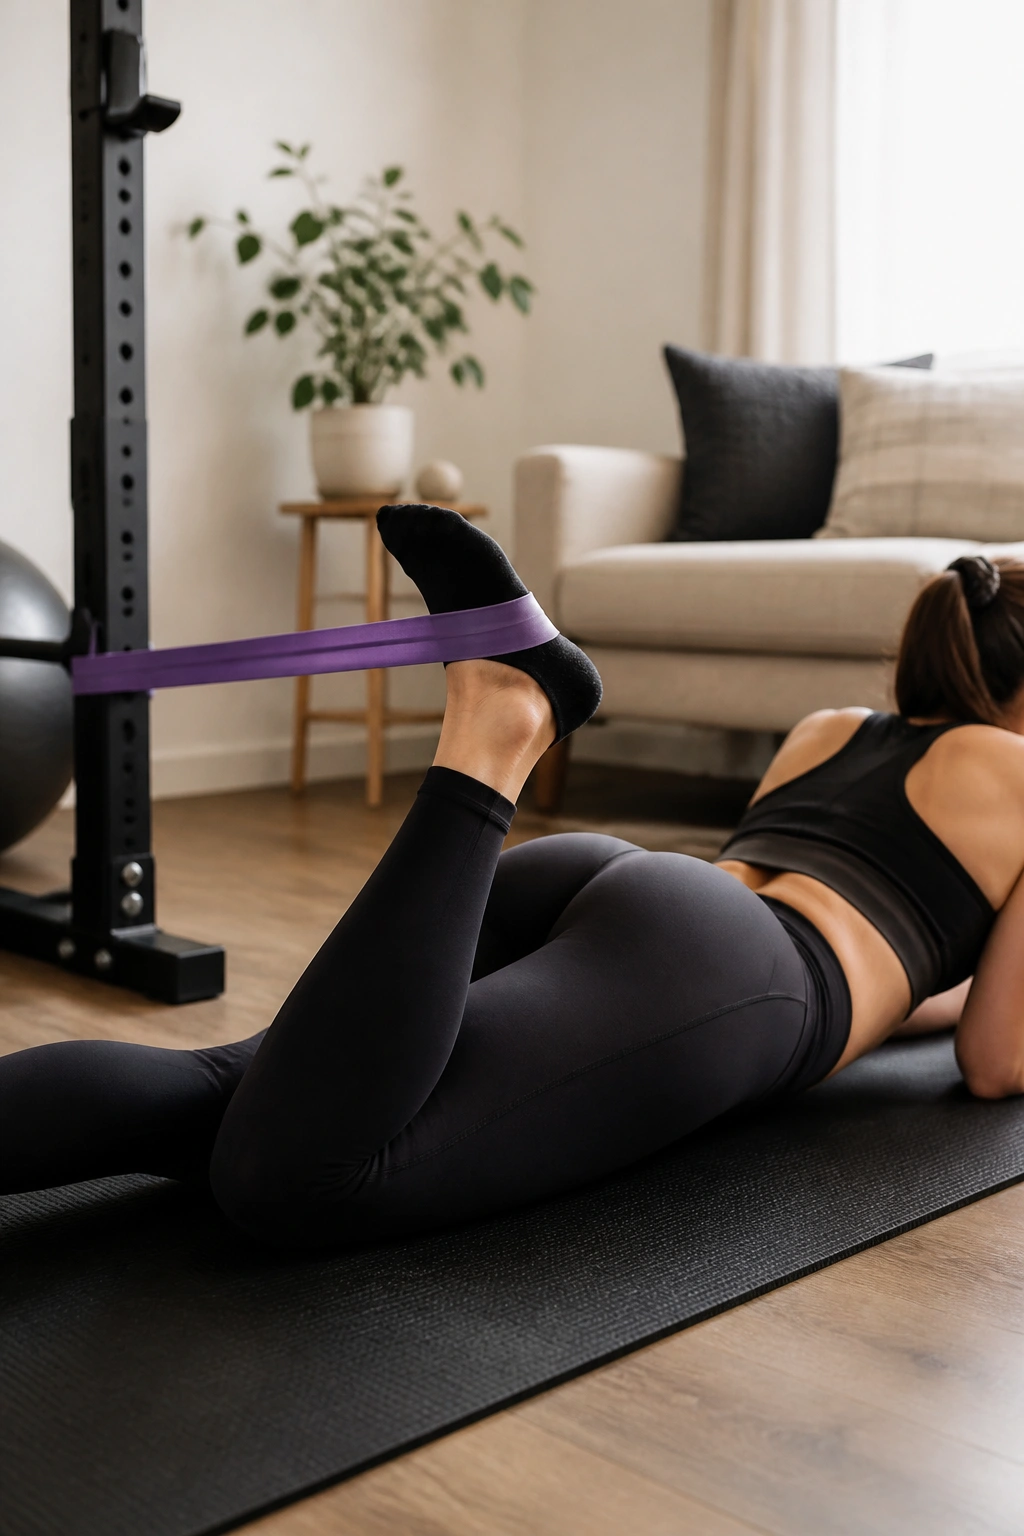
Hamstring curls with bands feel plain at first. Then you realize how much they help stabilize the knee and support walking, climbing, and standing up from low chairs.
Anchor a band low behind you, loop it around one ankle, and bend the knee to pull the heel toward the back of the thigh. Return slowly. You can do this standing, lying face down, or even seated with the band anchored in front and pulled backward depending on what your body likes.
The key is to keep the thigh still. If the whole leg swings around, the band is too strong or your stance is too loose. I prefer a range where the hamstring contracts without the knee feeling jammed.
Try 2 to 3 sets of 10 to 15 reps each side. If the standing version feels wobbly, hold a counter or chair with one hand. Stability first. Flash later, if ever.
12. Terminal Knee Extension for Quieter Knees
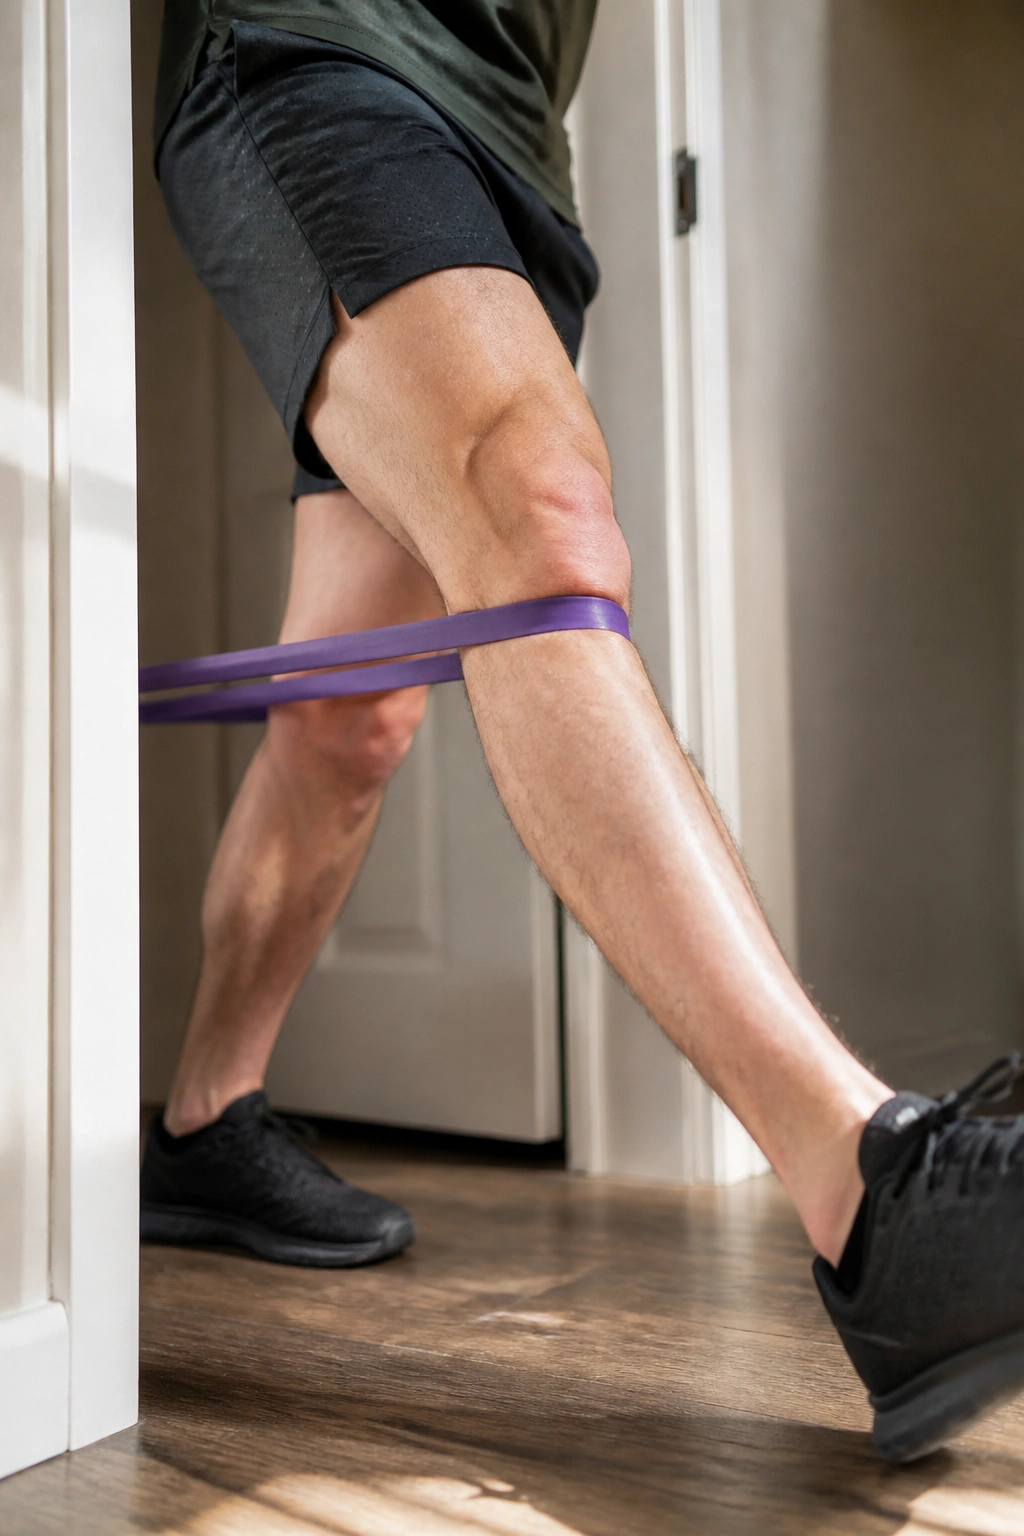
Can a knee exercise be friendly? Yes — when it trains the last part of the straightening motion instead of forcing a deep bend.
Anchor a band behind the knee at a low point, step into it, and bend the knee slightly. Then straighten the leg by squeezing the quad and pressing the knee back into a full, tall finish. Keep the motion small and controlled. The band should feel like resistance, not a tug-of-war.
Why It Works
Terminal knee extension, or TKE, is a useful middle ground. It builds quad strength without asking the knee to flex deeply, which helps some sore knees tolerate the work better.
- 2 to 3 sets of 10 to 12 reps each side
- Pause for 1 second in the straight position
- Keep the foot planted
- Do not snap the knee into lockout
If the front of the knee complains, shorten the range immediately. No drama. Just adjust.
13. Seated Leg Extension for Controlled Quad Work
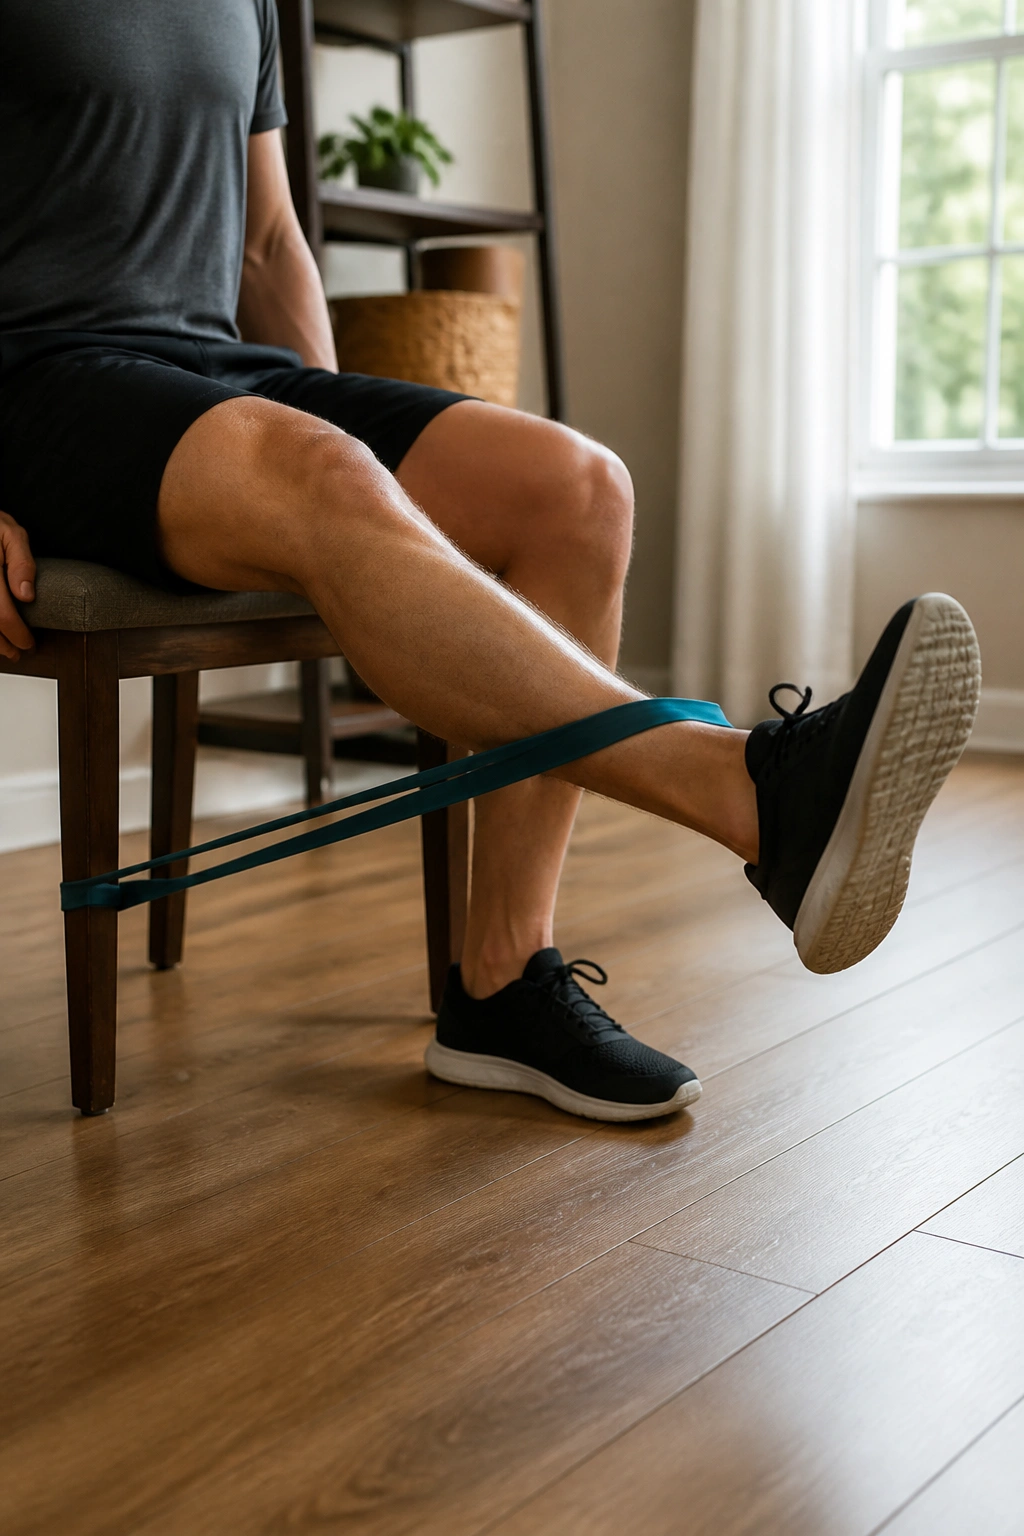
A leg extension can be a bad idea, or a very useful one. The difference is how much range you use and how hard you push into the band.
Sit on a chair with a band anchored behind you and looped around one ankle. Straighten the knee until the lower leg lines up with the thigh, then return slowly. The movement should be smooth, with no kicking. If the front of the knee grumbles, stop a little before full extension and keep the band lighter.
This one is good for days when standing work feels rough but you still want the quads to do their share. It also gives you a clear side-to-side check. If one knee shakes more than the other, that is useful information.
I’d start with 2 sets of 8 to 12 each leg. Keep the ankle relaxed and the thigh still. If you feel the hip hiking up, sit back a bit more in the chair.
14. Pallof Press for a Spine That Wants Less Drama
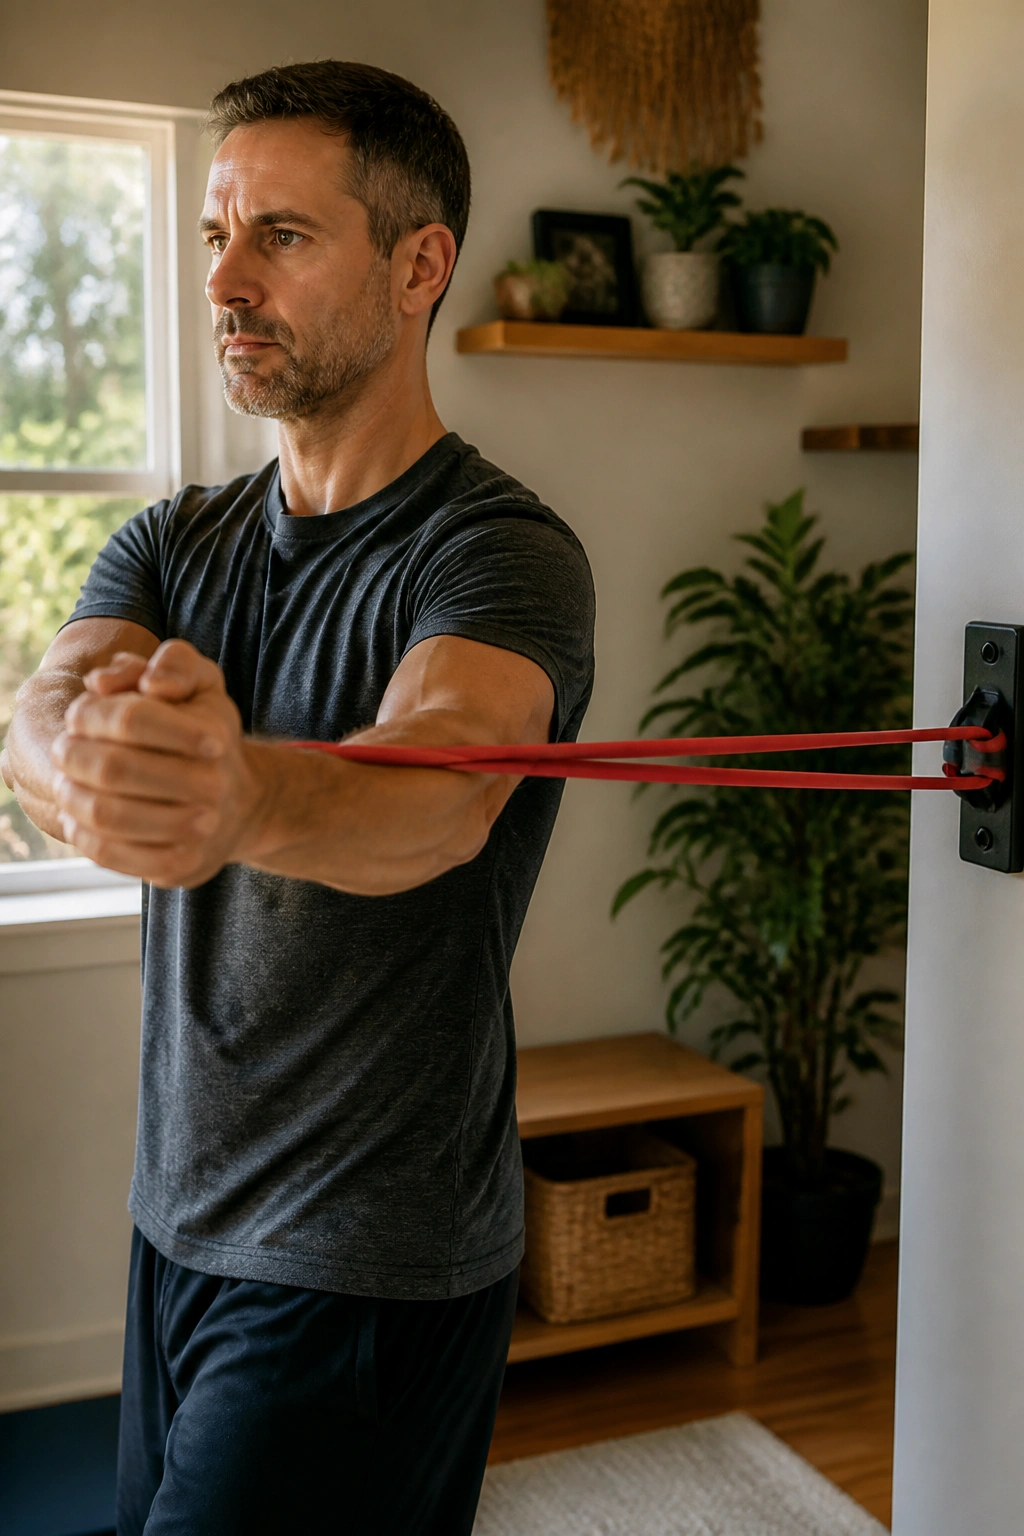
A Pallof press is one of the rare core moves that leaves the spine out of the drama. The band tries to twist you, and your job is to not let it.
Anchor the band at chest height from the side. Stand or kneel sideways to the anchor, hold the band at your chest, then press it straight out in front of you without letting your torso rotate. Bring it back in. Slow is better than hard here.
Why the Joints Like It
There’s no crunching, no fast twisting, and no need to brace so hard that your shoulders climb into your ears. It trains the trunk to resist movement, which is useful for everyday lifting and walking.
- 2 to 3 sets of 8 to 10 reps per side
- Hold each press for 1 to 2 seconds
- Keep the ribs stacked over the pelvis
- Kneel if standing feels unstable
A light band is enough. If you have to lean to win, the setup is wrong.
15. Dead Bug Band Pulldown for Core Control Without Neck Strain
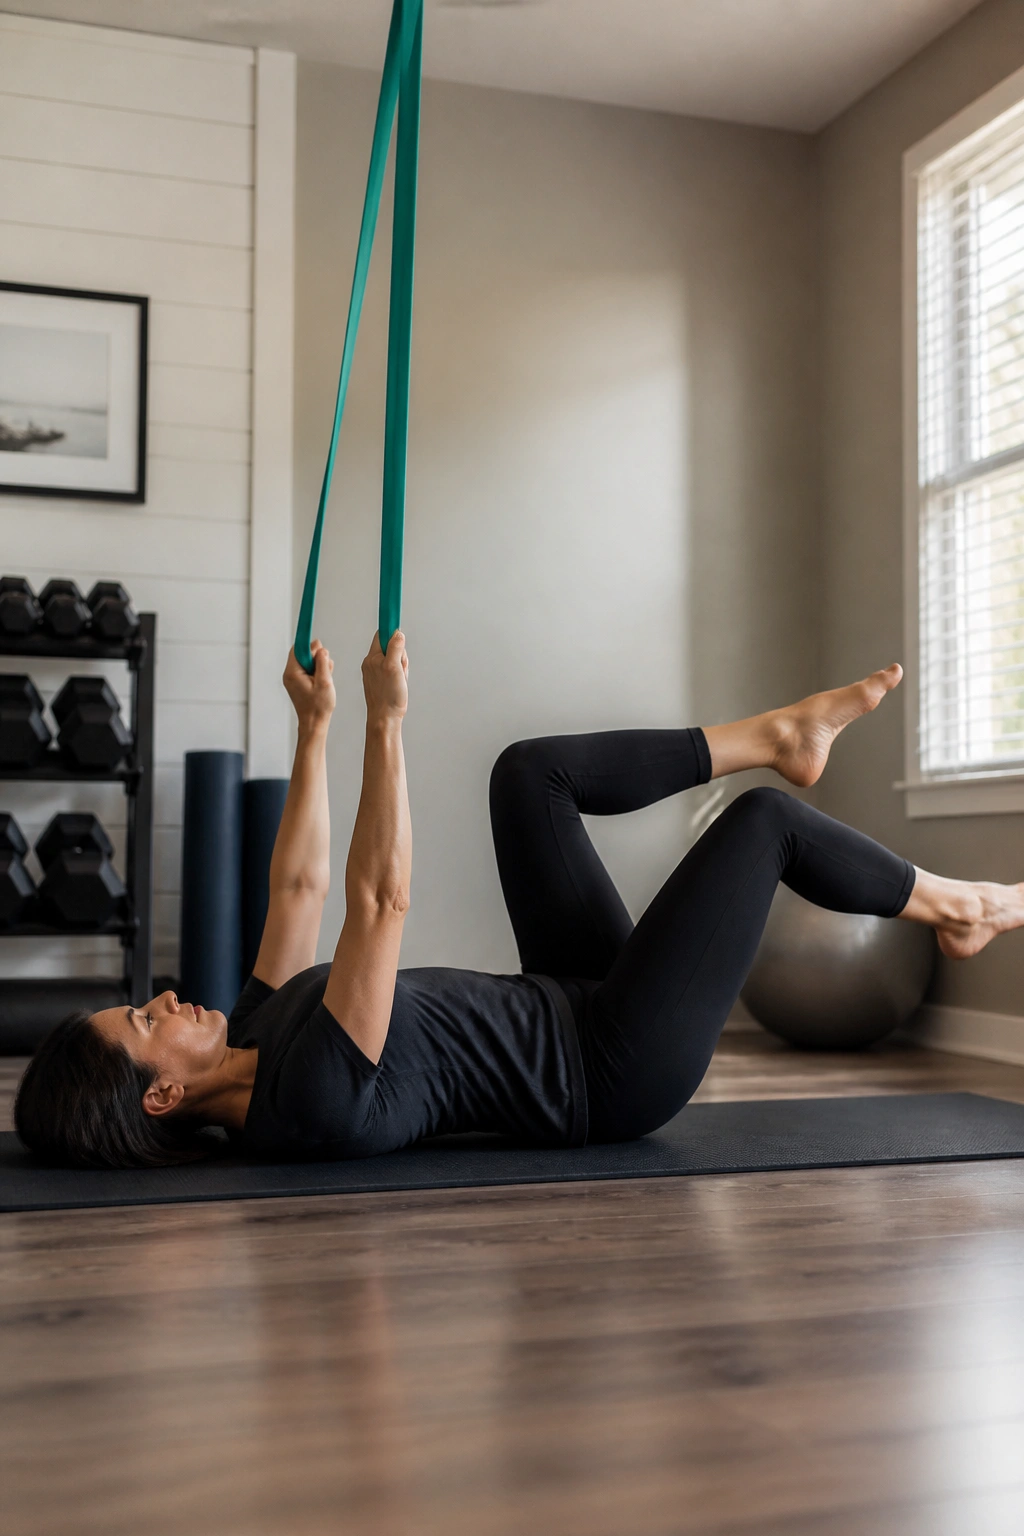
If crunches make your neck complain, this floor drill is a better trade. You get core work and shoulder engagement without folding the spine over and over.
Anchor a long band overhead, lie on your back, and hold the band with straight arms. Lift your knees into tabletop, then slowly lower one leg at a time while keeping the band pulled down toward your hips. The rib cage should stay quiet. The lower back should not arch off the floor. That’s the part that tells you the core is doing its job.
I like this move for people who feel core work in the neck or hip flexors more than the stomach. It’s calmer. Also cleaner.
Try 2 sets of 6 to 8 reps per side, moving slower than you think you need to. If the band pulls your shoulders forward, use less tension or shorten the arm position a little.
16. Face Pull to External Rotation for Shoulder Space
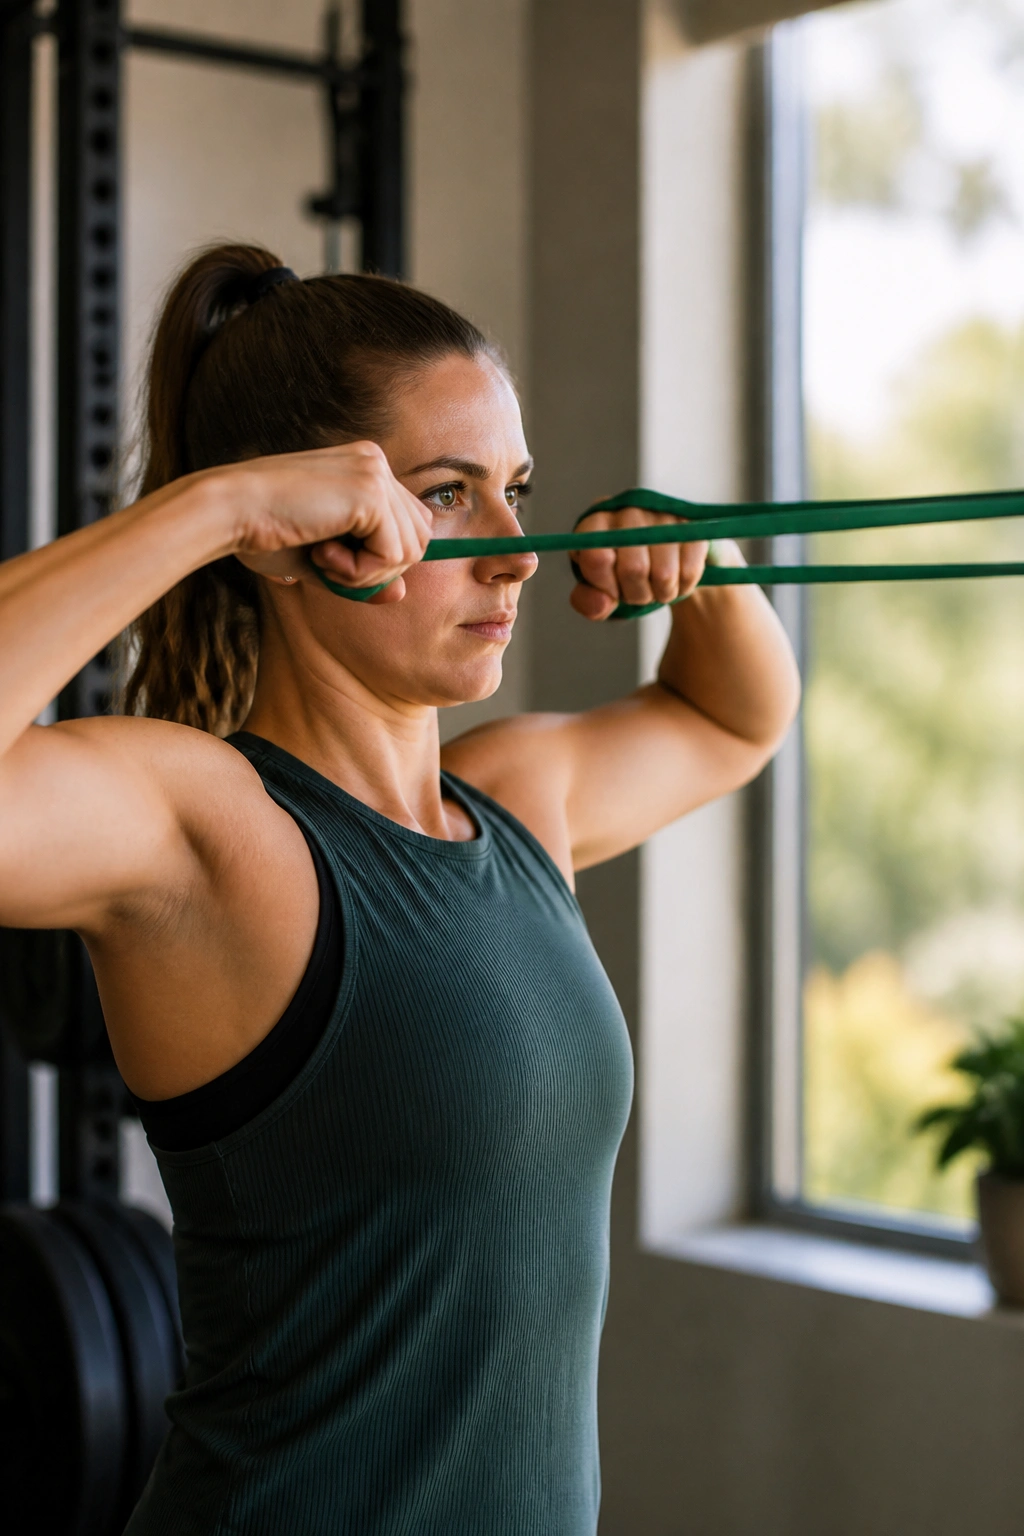
Shoulder external rotation is boring in the best way. Add a face pull first, and the whole thing becomes a strong upper-back drill that still respects cranky shoulders.
Anchor the band at face height. Pull toward the nose or upper cheeks with elbows high but not flared, then rotate the hands back so the knuckles point behind you a little. Return slowly. The motion is small, and that’s fine. Do not turn it into a rear-delt fling.
The goal is control around the shoulder blade, not a hero rep. If you feel pinching in the front of the shoulder, lower the anchor a bit and cut the range.
- 2 to 3 sets of 10 to 12 reps
- Light to medium band
- Neck relaxed
- Elbows slightly below shoulder height if needed
This one often feels better than overhead pressing when the shoulders are grumpy.
17. Shoulder External Rotation at the Side for Rotator Cuff Care
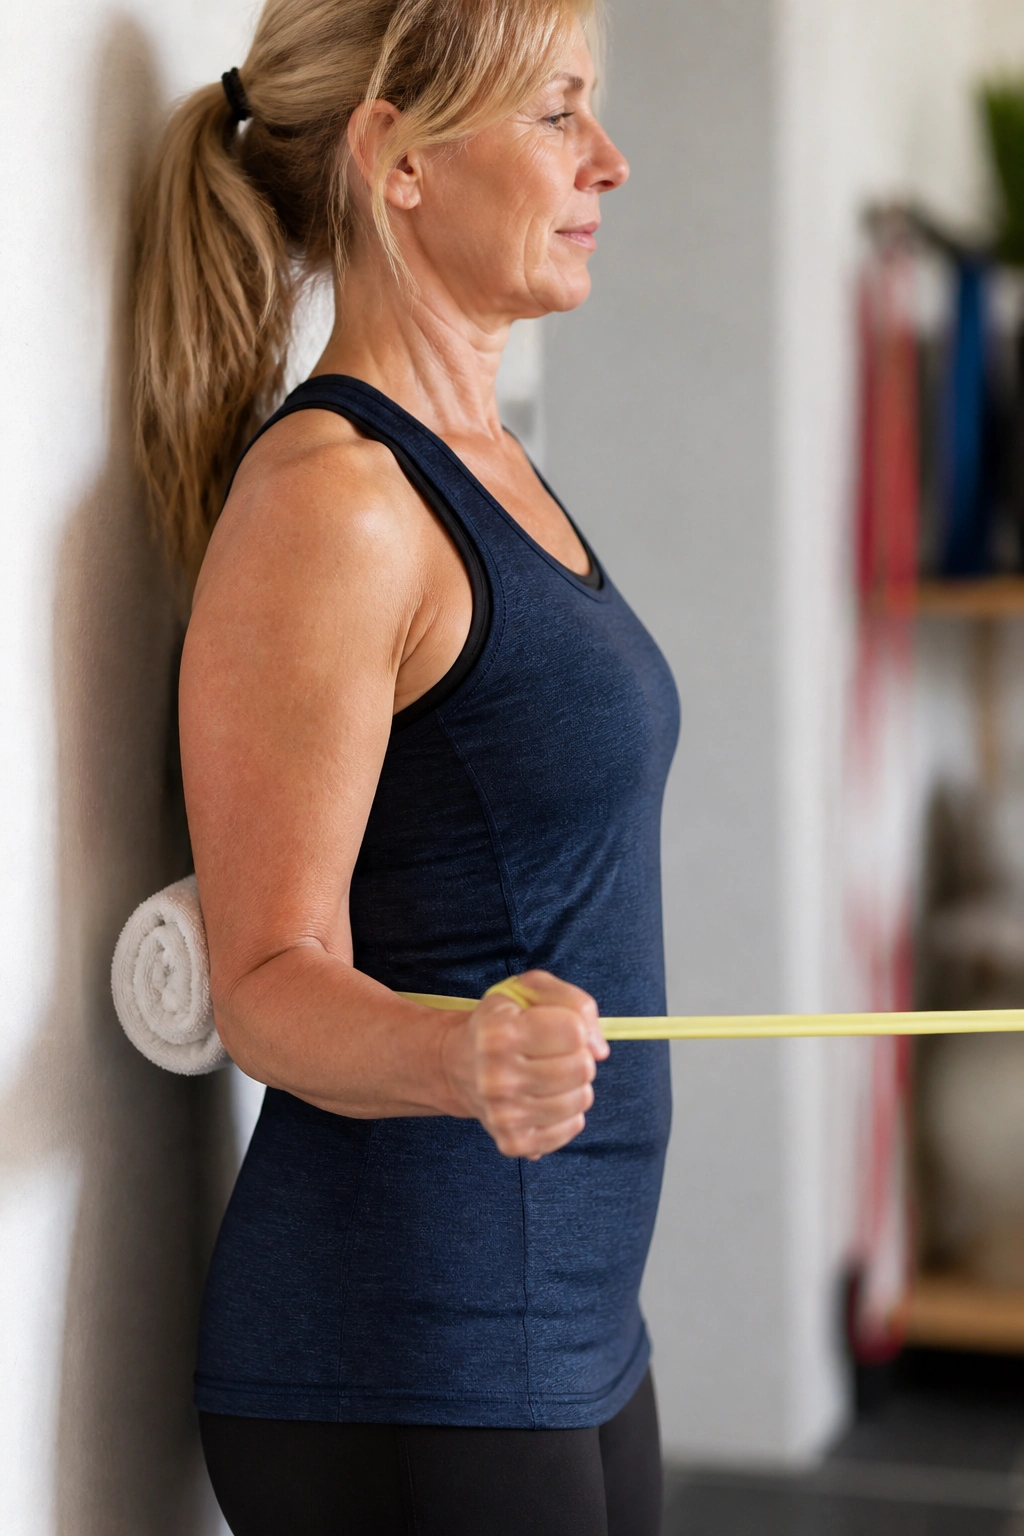
The wall slide only looks like a rehab drill. Same story here: humble setup, useful result. Keep the upper arm tucked close to the ribs, bend the elbow to 90 degrees, and rotate the forearm outward against a very light band.
You can stand with the elbow pinned to your side by a small towel roll, or sit if standing makes you sway. The movement should be tiny. If the elbow drifts away from the body, the shoulder starts cheating, and the joint pays for it later.
What to Watch For
- Keep the shoulder blade down
- Use a band so light that the wrist doesn’t shake
- Stop before the forearm jams outward
- 2 sets of 12 to 15 reps per side
This is a shoulder health move, not a strength contest. Keep that straight and it does its job well.
18. Scapular Wall Slide With Band
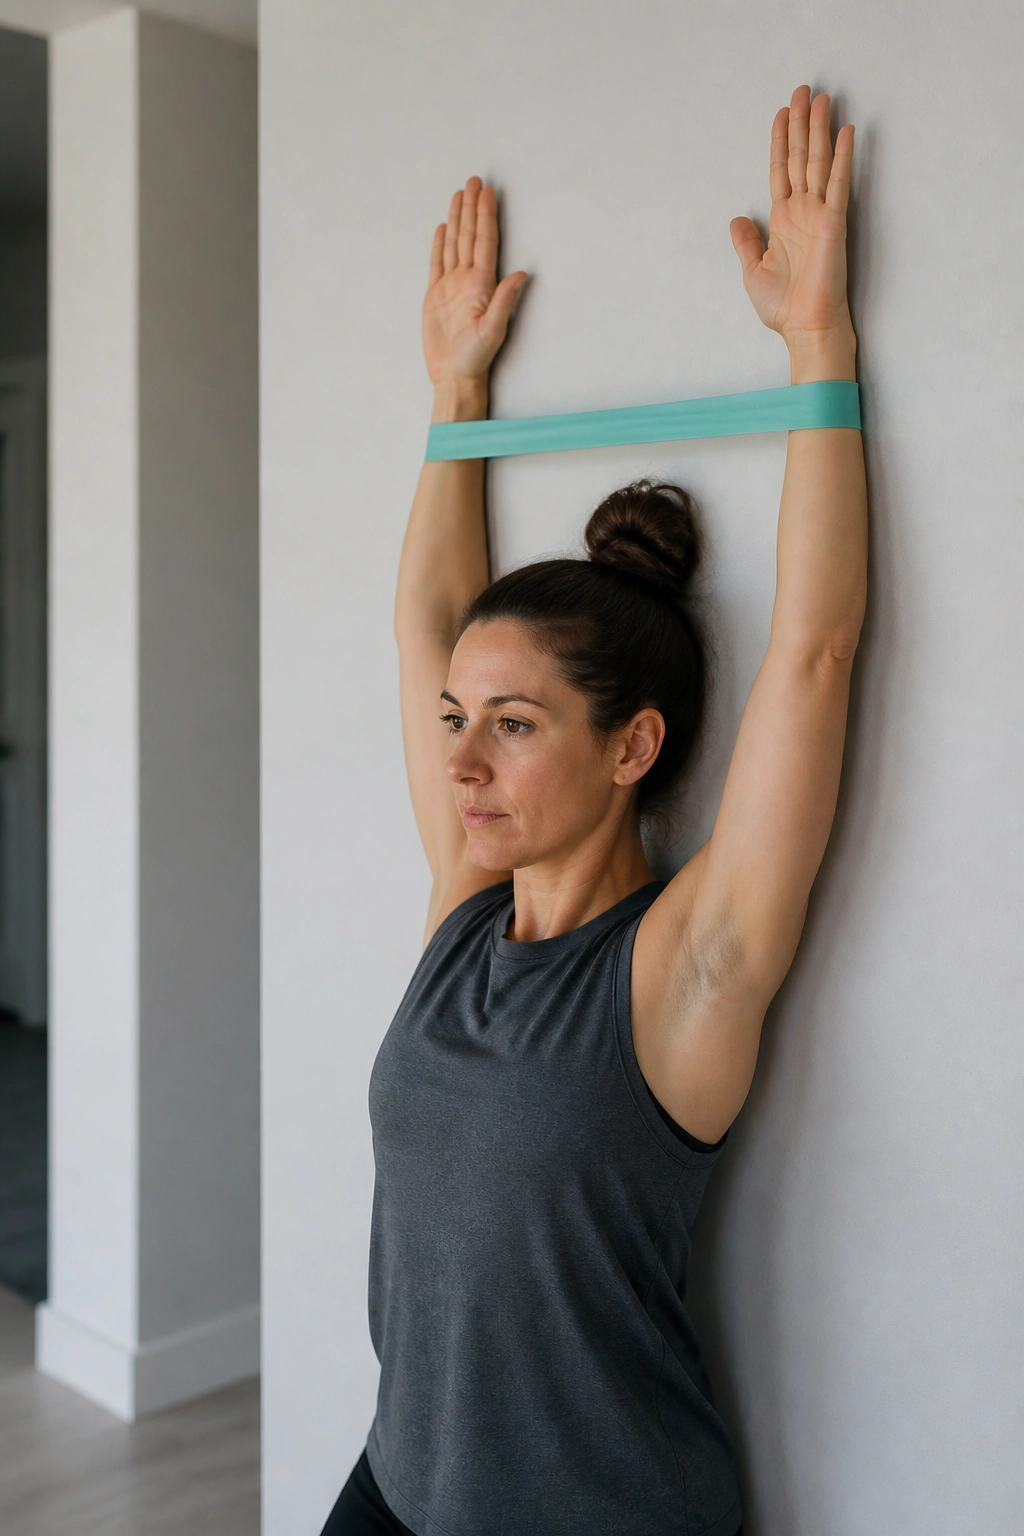
Most people skip the ankles. A lot of people also skip the shoulder blade. Then they wonder why overhead reaching feels clunky. The wall slide helps clean up that pattern without loading the joints much.
Loop a mini band around the wrists or forearms, press the arms lightly into the wall, and slide them upward while keeping the lower ribs from flaring. The forearms move up, the shoulder blades rotate, and the neck stays relaxed. If the lower back arches hard, the slide is too high or the band is too strong.
What to Watch For
- Keep light pressure into the wall
- Slide only as high as you can without rib flare
- Breathe out near the top
- 2 to 3 sets of 8 to 10 slow reps
This one feels small. It isn’t. Smooth shoulder blade motion matters more than most people think.
19. Standing Calf Raise and Ankle Flex for Better Foot Support
A split squat sounds like trouble to a lot of sore knees, but the fix is not always to avoid the lower body. Sometimes the ankles are part of the problem, and a simple calf-and-ankle band drill helps more than another fancy move.
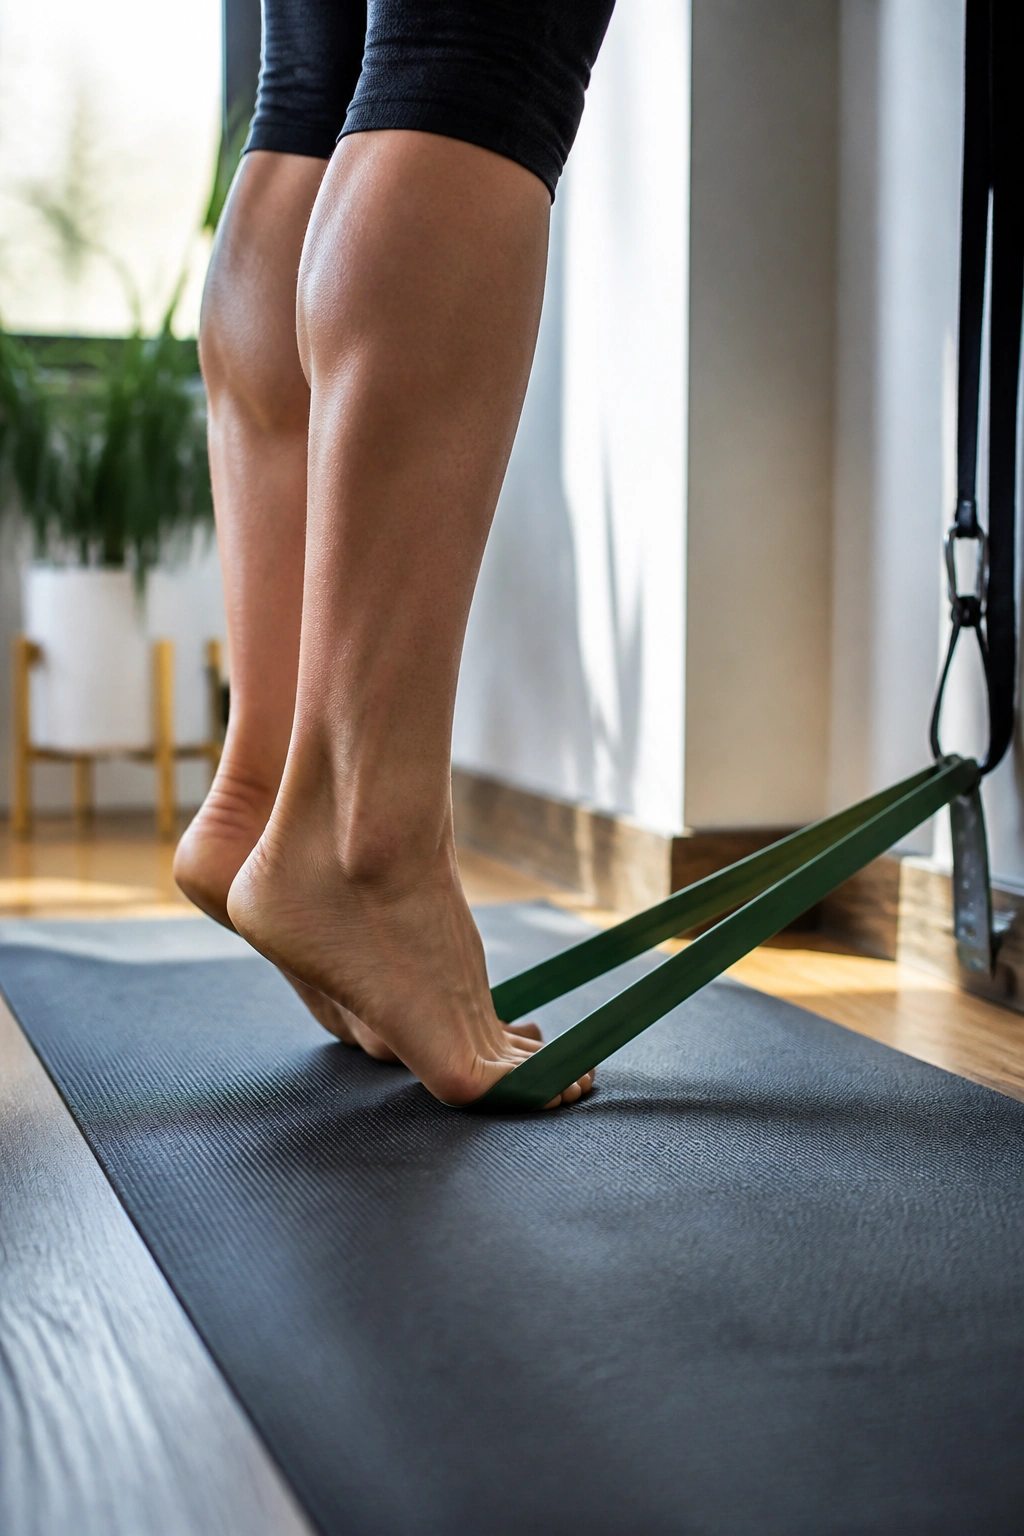
Sit or stand with a band looped over the front of the foot and anchored in front of you. Point the toes away against the band, then pull them back toward you. If you prefer a standing version, do calf raises with a mini band around the forefoot or ankle to keep the foot honest. Small movements count here. The goal is smoother ankle motion, not a burn contest.
This is a useful add-on for people whose knees feel stiff on stairs. Better ankle bend often means the knee does not have to steal the whole job.
- 2 sets of 12 to 15 reps
- Slow up, slower down
- Keep the heel tracking straight
- Do both feet if balance is shaky
20. Band March With Tall Posture
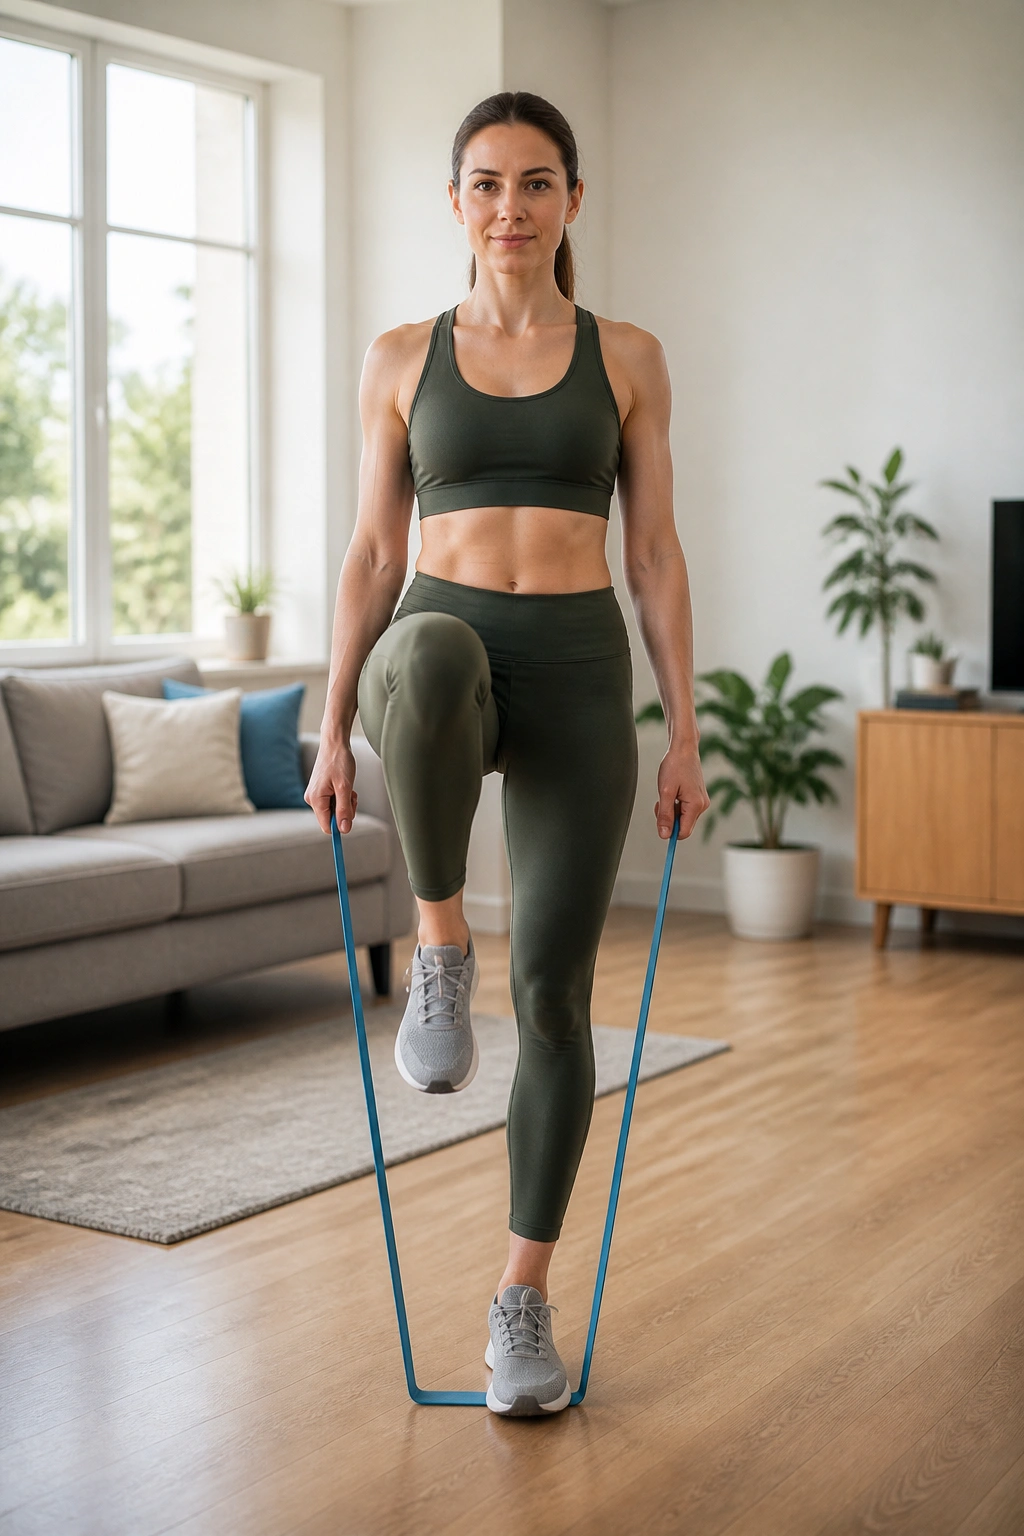
Marching in place sounds almost too simple. That is exactly why it’s useful. You train balance, hip flexion, trunk control, and a little bit of heart rate without pounding the joints.
Loop a light band around both feet or anchor one end low and hold it for resistance while you march. Stand tall, lift one knee to a comfortable height, set it down, then switch sides. Keep the arms relaxed and the ribs stacked. If you want more challenge, add a 2-second hold at the top of each knee lift. If the standing leg wobbles, slow down before you add more tension.
This is the move I like at the end of a session because it feels like a reset instead of a test. Your body gets moving, the joints stay calm, and the posture work carries over into walking and stairs.
If you only have 10 minutes, pair this with the seated row and the glute bridge. That trio covers a lot without stirring up a sore knee, elbow, or shoulder. And that’s the real win here: enough training to feel better, not so much that you dread the next day.
