



If you have ever spent an hour standing at a kitchen counter only to realize your lower back feels like it’s being pulled toward the floor, you know exactly how vital your hips are. Most of us treat our hips as nothing more than a hinge—a passive connector between the torso and the legs. But when that hinge gets stiff, weak, or misaligned, the consequences ripple upward into your spine and downward into your knees and ankles. It is rarely the hips themselves that scream in agony; usually, the pain manifests somewhere else, leaving you to chase symptoms that won’t go away.
The key to fixing this isn’t necessarily stretching until you can do the splits. In fact, most people who struggle with “tight” hips are actually dealing with weakness. When the muscles around your hip joint—the glutes, the deep rotators, and the adductors—are not strong enough to do their job, the body compensates. It locks up. It gets tight as a protective mechanism. The solution is to retrain that stability through movement that builds strength and endurance, not just flexibility.
You do not need a gym membership or a rack of heavy barbells to reclaim your mobility. You need consistency and the right mechanics. The twenty movements outlined below are designed to wake up the muscles that have likely been dormant from hours of sitting, restoring the balance required for pain-free movement.
1. Clamshells
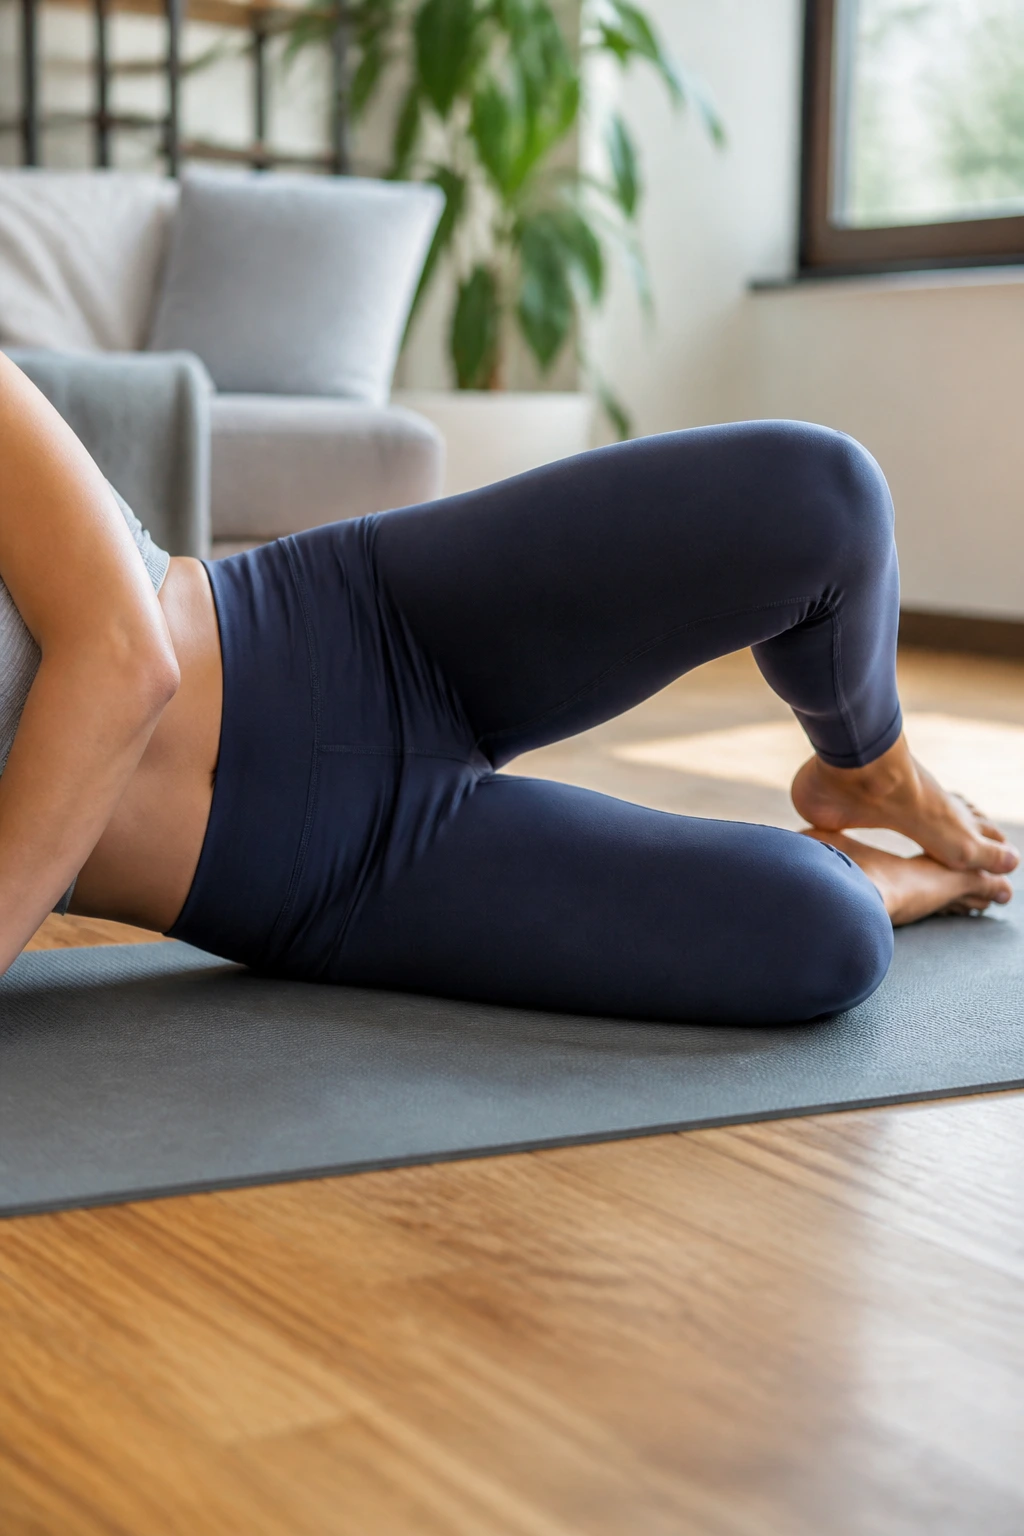
This is the gold standard for targeting the glute medius, the muscle responsible for keeping your pelvis stable when you walk or run. If you skip this because it feels too simple, you are missing out on the primary fix for knee caving and lower back strain.
Getting the Setup Right
Lie on your side with your legs stacked, knees bent at a 45-degree angle. The trick here is alignment. Your feet, hips, and shoulders should be stacked in a perfectly straight line—don’t let your top hip roll backward, or you’ll shift the work into your lower back.
The Execution
Keep your feet touching while you lift your top knee as high as you can without rotating your pelvis. Imagine there is a wall behind your back that you cannot touch. It should feel like a concentrated burn in the meaty part of your upper-outer glute. If you feel it in your TFL—the muscle at the very front of your hip—you are likely rolling too far forward. Adjust your angle and slow the movement down.
Pro tip: Add a small resistance band just above your knees if you want to dial up the intensity, but master the bodyweight version first to ensure your form is pristine.
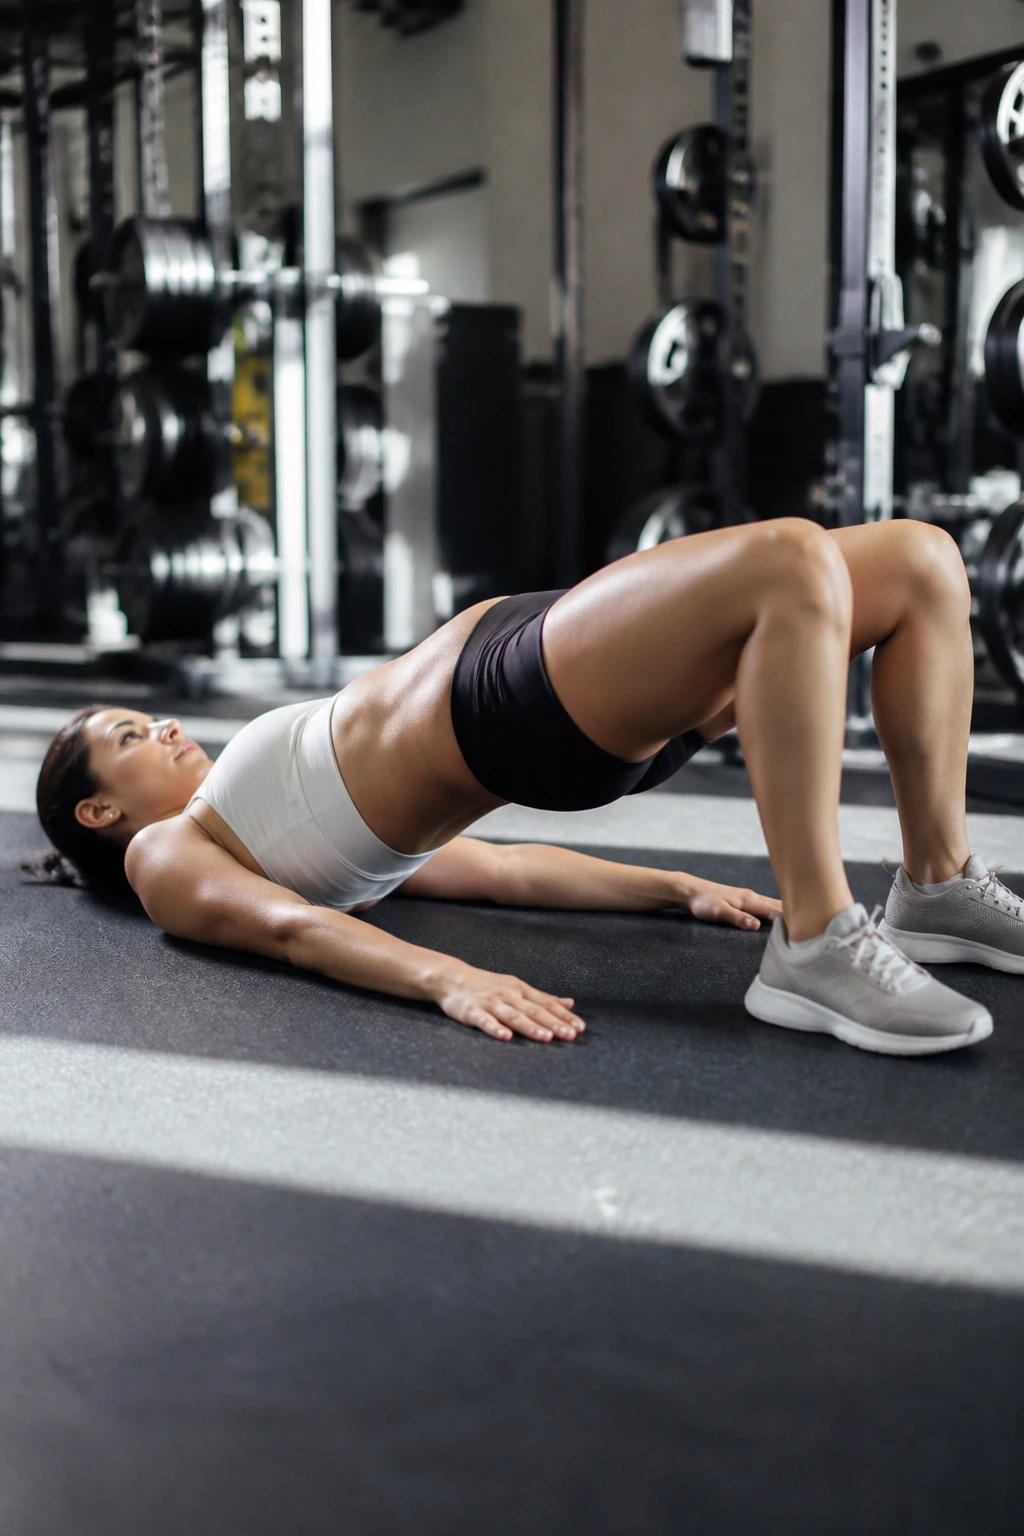
2. Glute Bridges
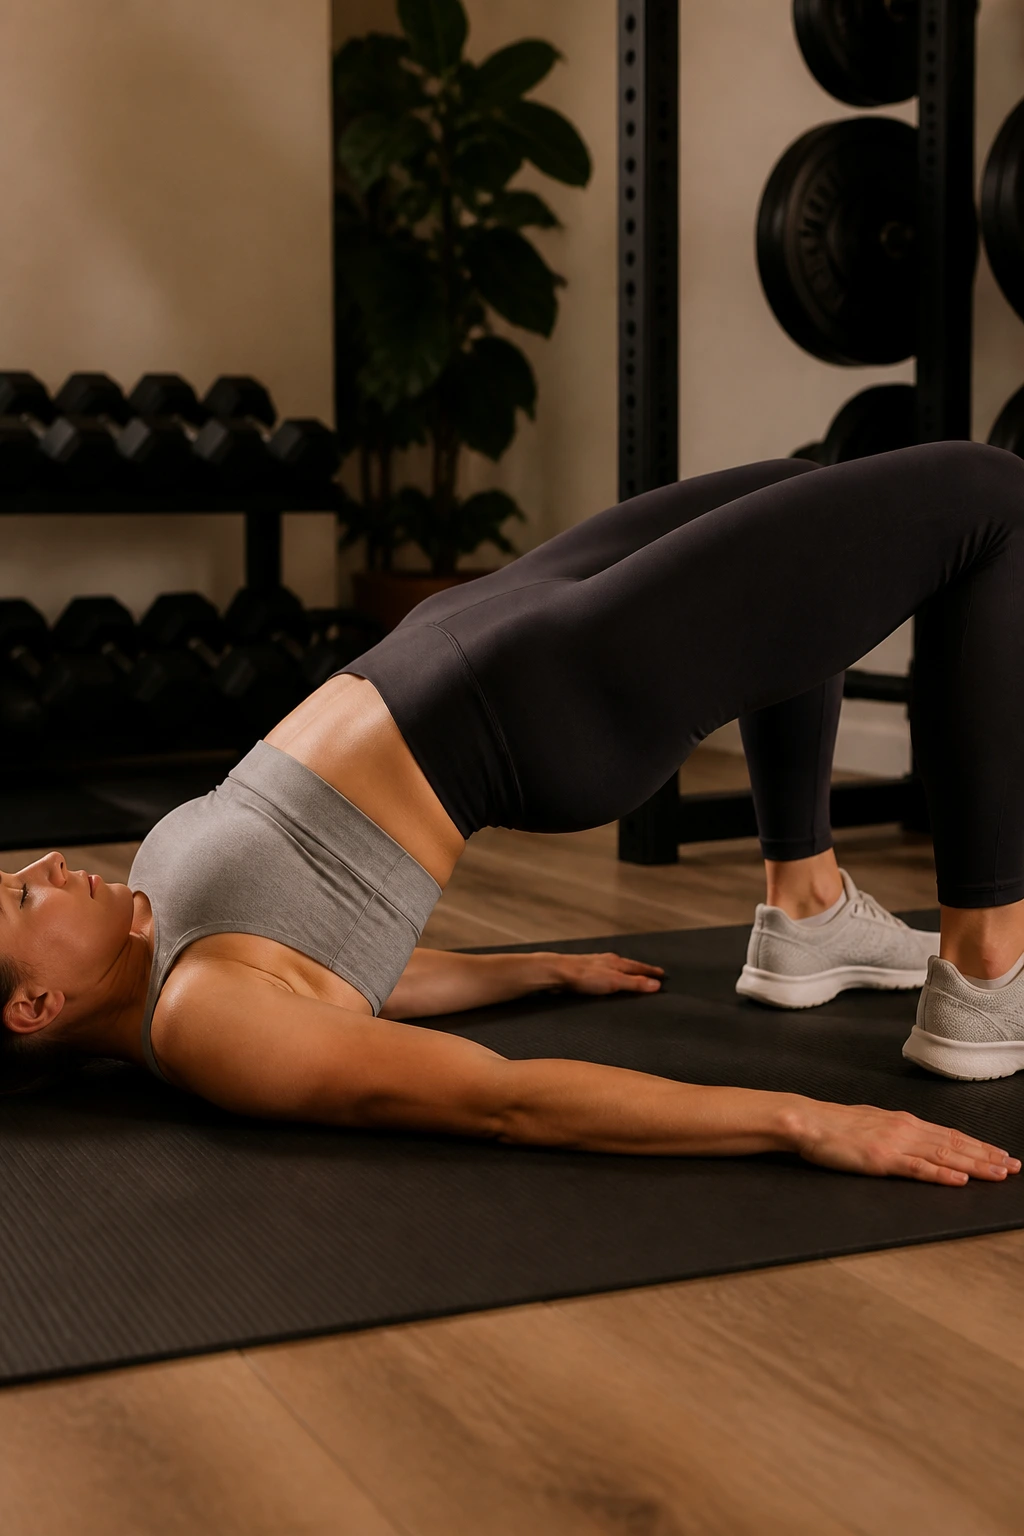
Most people perform these with their lower back, not their glutes. A proper bridge is a masterclass in separating hip extension from lumbar movement. This exercise should make your hamstrings and glutes fire in unison, creating a solid base for your spine.
Why It Works
By lying on your back, you remove the need for balance, which allows you to focus entirely on the contraction. Drive through your heels, not your toes. As you lift your hips toward the ceiling, tuck your pelvis slightly to keep your ribs down.
Key Details
- Keep your chin tucked to avoid straining your neck.
- Squeeze your glutes at the very top for two full seconds.
- Lower yourself down with control; do not just drop your hips to the floor.
Warning: If you feel this in your hamstrings more than your glutes, move your feet closer to your glutes. If you feel it in your lower back, you are likely overextending your spine rather than driving with your hips.
3. Lateral Band Walks
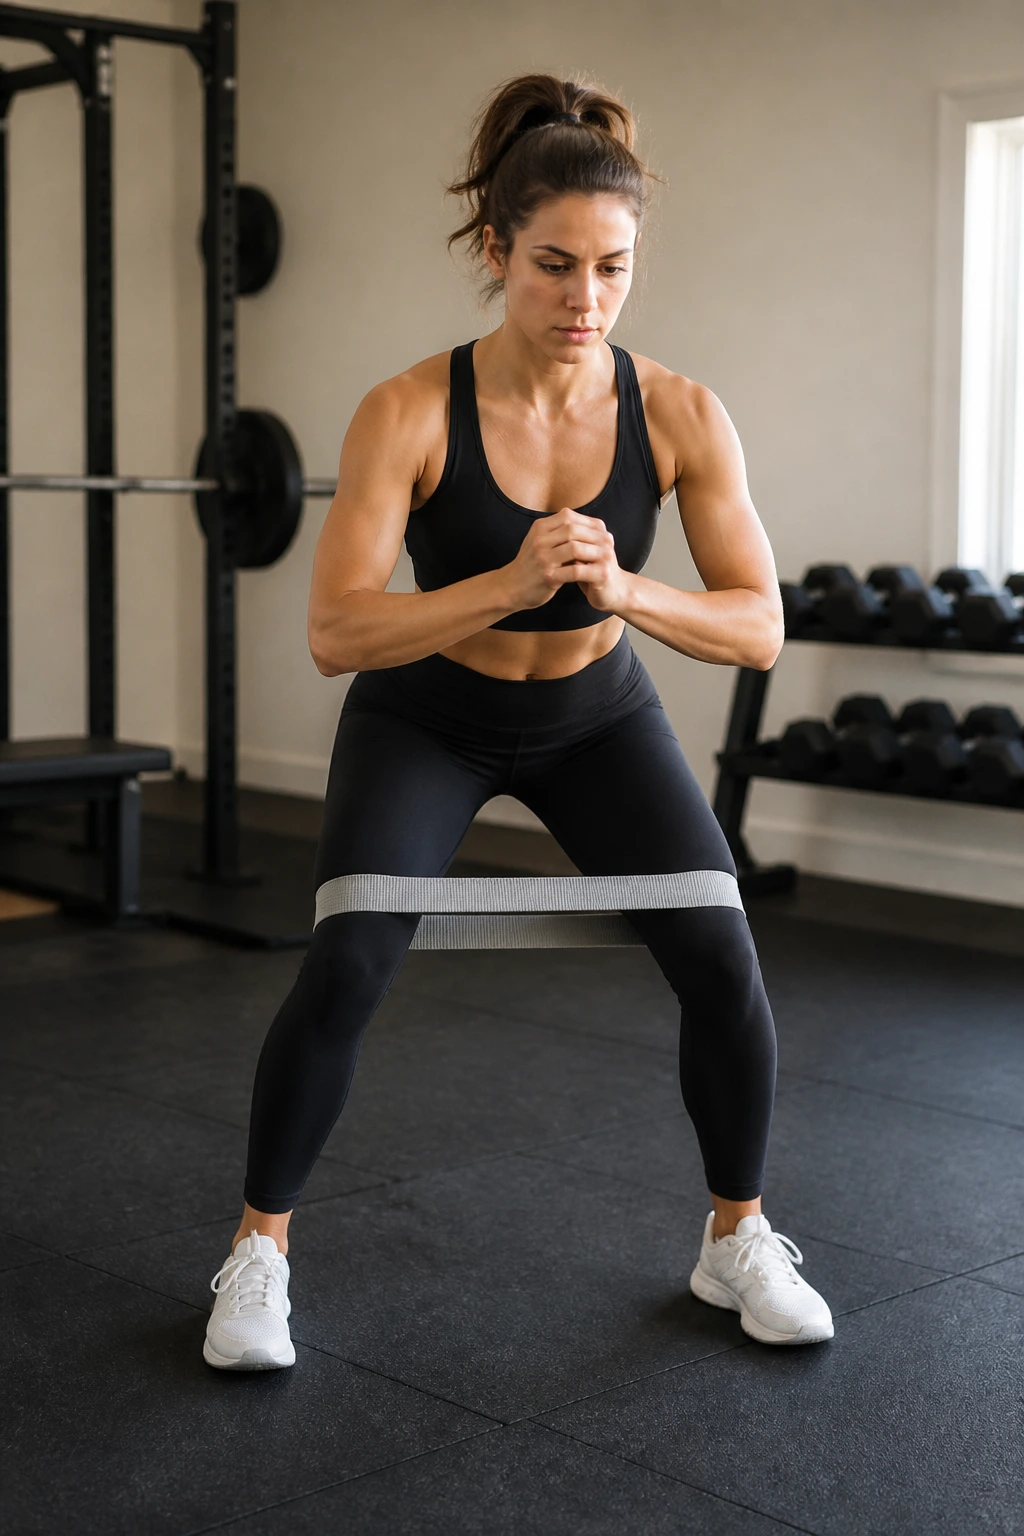
This movement is deceptively difficult. It forces your hips to work in the frontal plane, a direction we rarely move in during daily life. When you walk sideways against resistance, you are training the exact muscles that prevent your knees from collapsing inward during squats or lunges.
How to Perform
Place a resistance band around your ankles or just above your knees. Assume a quarter-squat position—keep your chest up and your weight balanced. Take a step to the side, then bring your other foot in to meet it, maintaining tension on the band the entire time.
Why This Matters
If you let the band snap your feet together, you lose the benefit. Control the eccentric phase—the return—every single time. Do not drag your feet; pick them up and place them down with intent. Ten steps in each direction should be enough to make your outer glutes scream.
4. Single-Leg Romanian Deadlifts
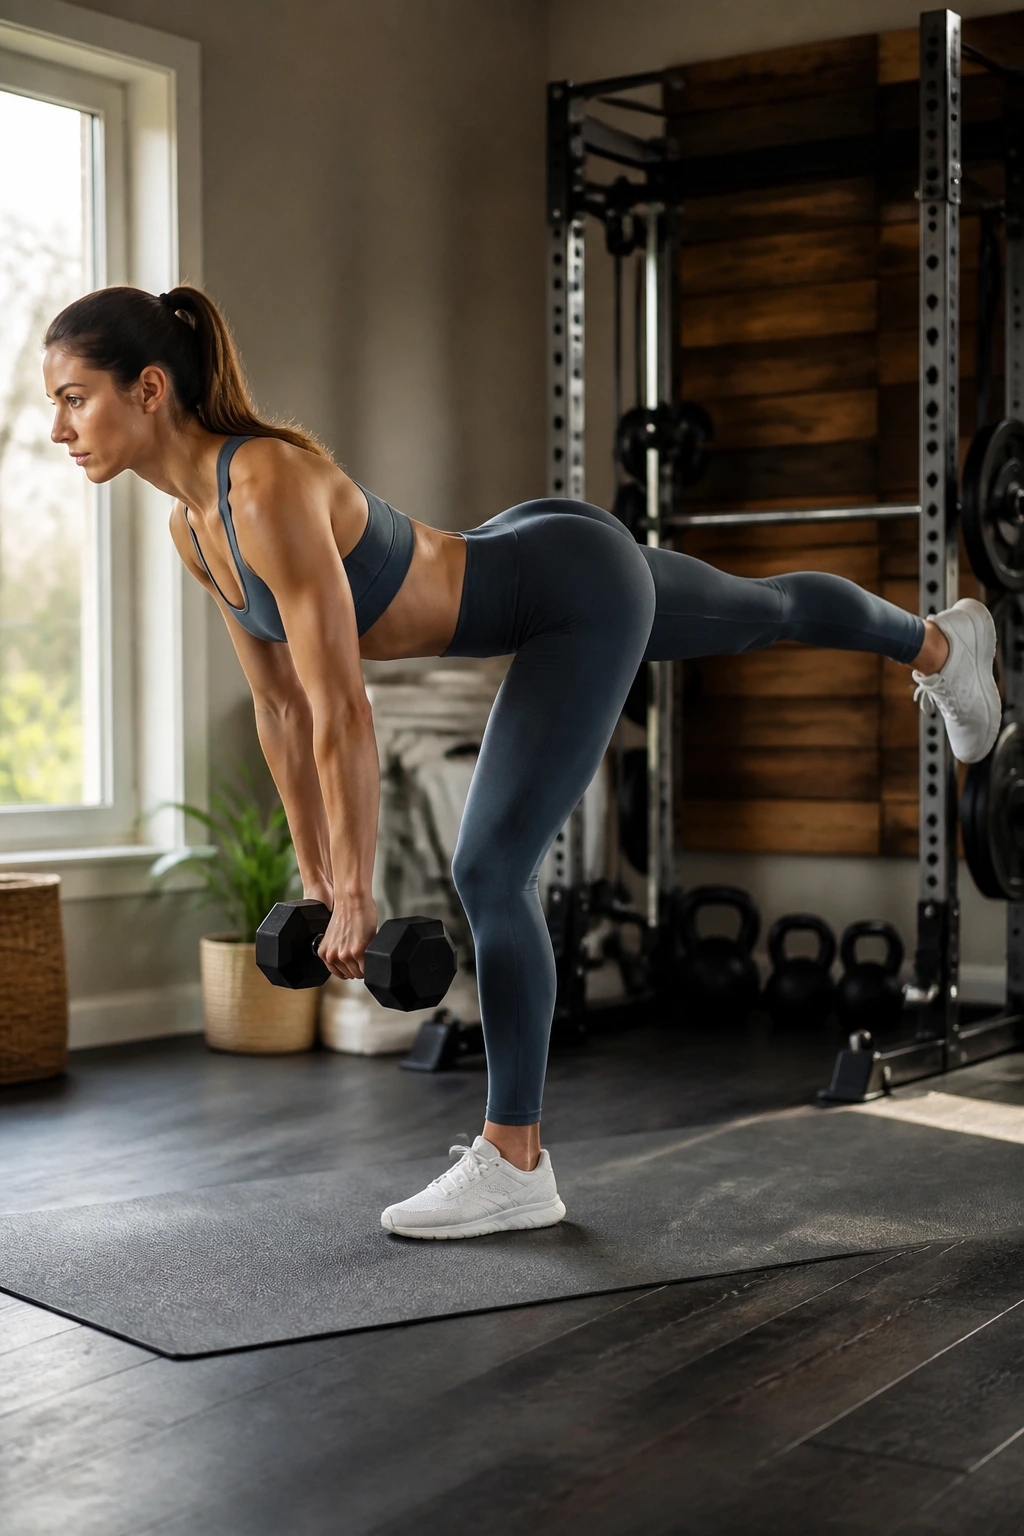
This is arguably the king of hip stability exercises because it demands coordination, balance, and unilateral strength all at once. You are training your hip to act as the primary stabilizer while your torso remains neutral.
The Mechanics
Stand on your right leg with a slight bend in the knee. Hinge at your hips, sending your left leg straight back behind you as you lean your torso forward. Keep your back flat—imagine you are balancing a broomstick along your spine.
Avoiding Common Errors
Don’t reach for the floor. The goal is to reach your back leg as far away from you as possible. If you reach for the floor, you will round your back and defeat the purpose. Your goal is to feel a deep stretch in the hamstring and glute of your standing leg.
5. Bird-Dogs
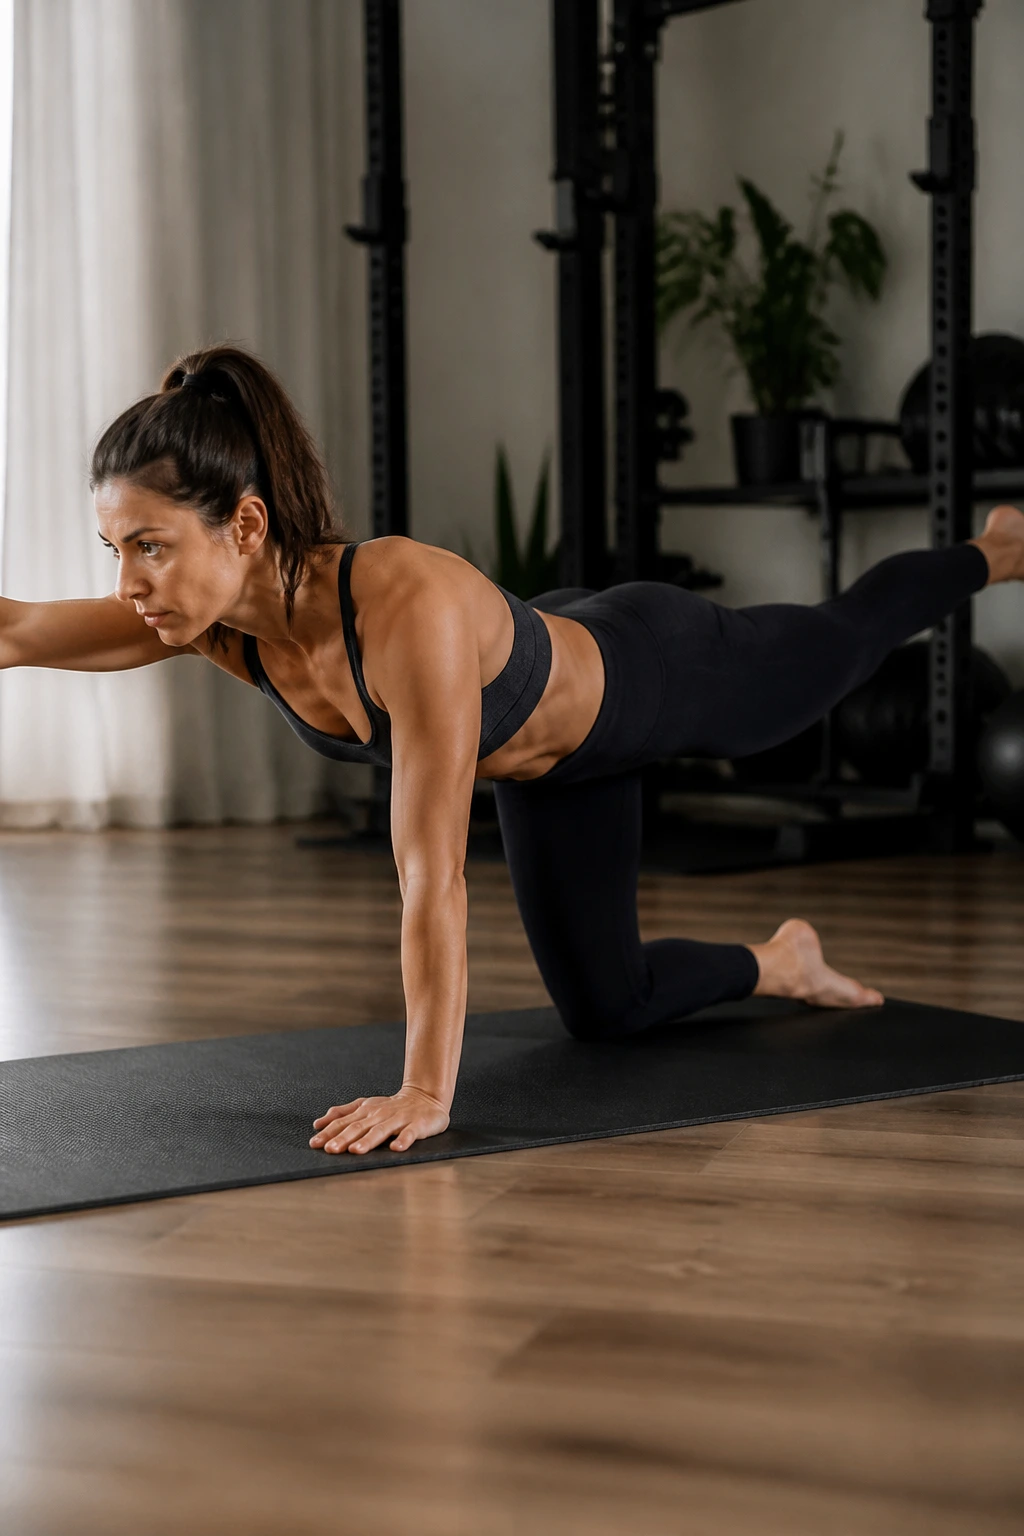
Often dismissed as a beginner core move, the Bird-Dog is actually an incredible tool for hip and spinal alignment. It forces you to control the pelvis while moving your limbs in opposite directions.
The Setup
Start on all fours with your hands directly under your shoulders and your knees under your hips. Keep your back flat. Extend your right arm forward and your left leg backward simultaneously.
Finding Stability
The secret is to not let your hips shift. Most people allow their pelvis to tilt or rotate as they extend their limbs. Keep a glass of water on your lower back—don’t let it spill. If you are struggling, move slower. Much slower.
6. Fire Hydrants
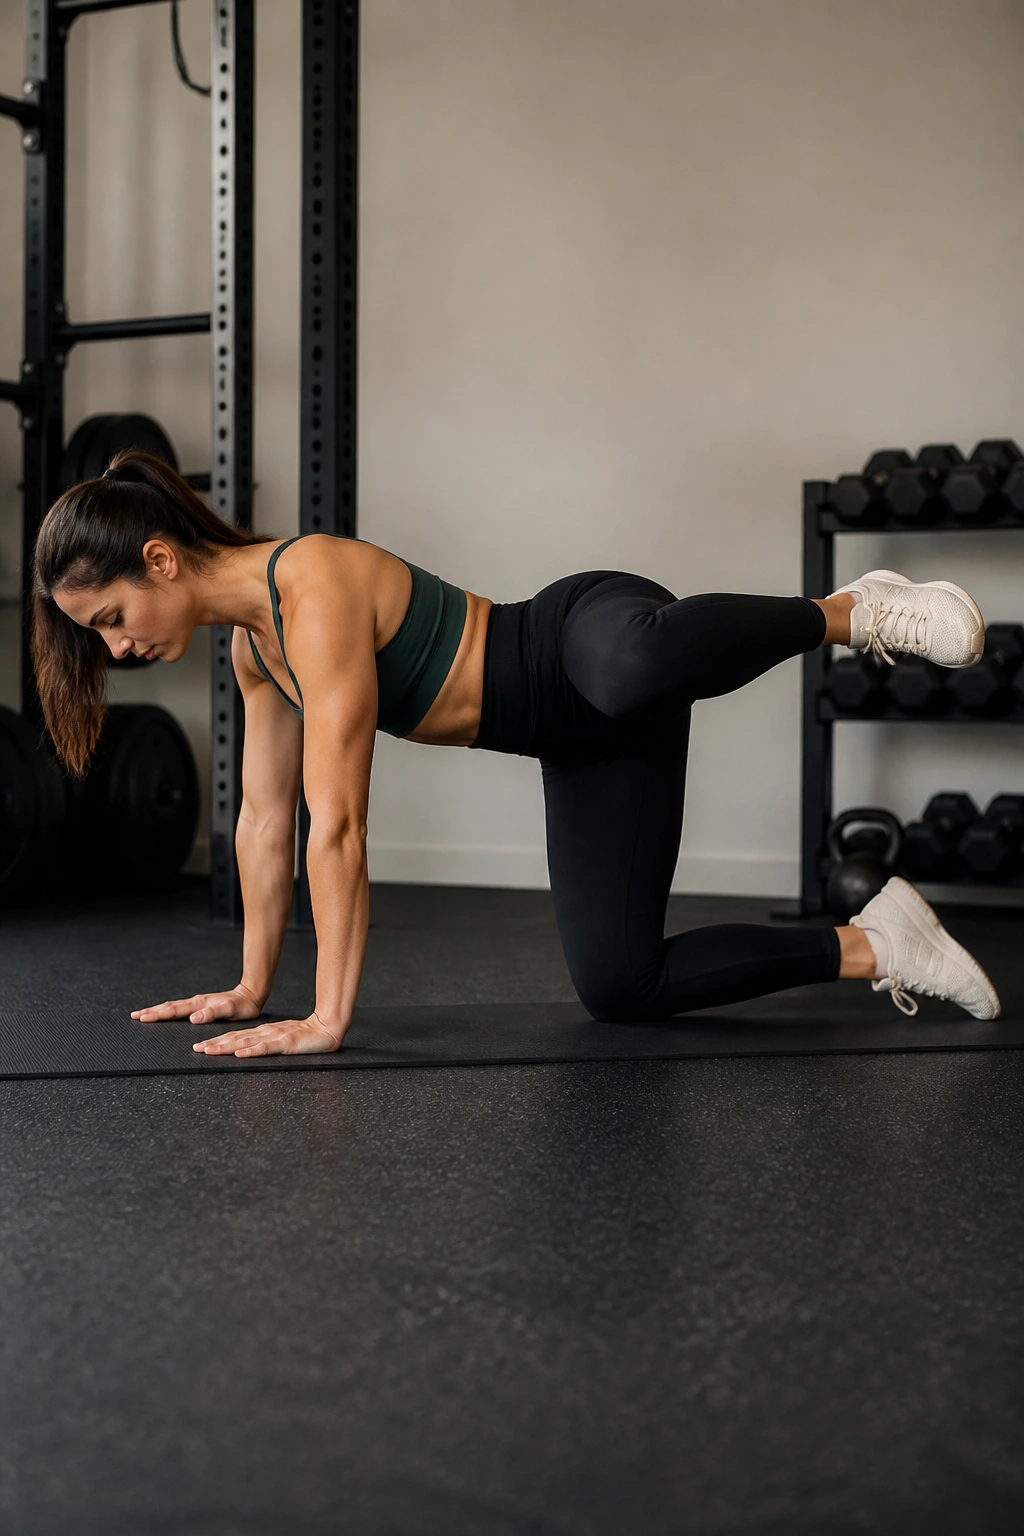
This move is all about internal and external hip rotation. It creates space in the hip joint and builds strength in the deep stabilizers that are rarely touched by traditional lifting.
The Technique
On all fours, keep your knee bent at 90 degrees and lift your leg out to the side, like a dog at a fire hydrant. Keep your torso rock-solid. If your whole body leans to the side as you lift your leg, you’re cheating yourself out of the rotation work.
Why Use It
This is a fantastic warm-up move to wake up the hips before heavier compound lifts. It signals to your nervous system that it’s time to move the hip joint through its full range of motion.
7. Reverse Lunges
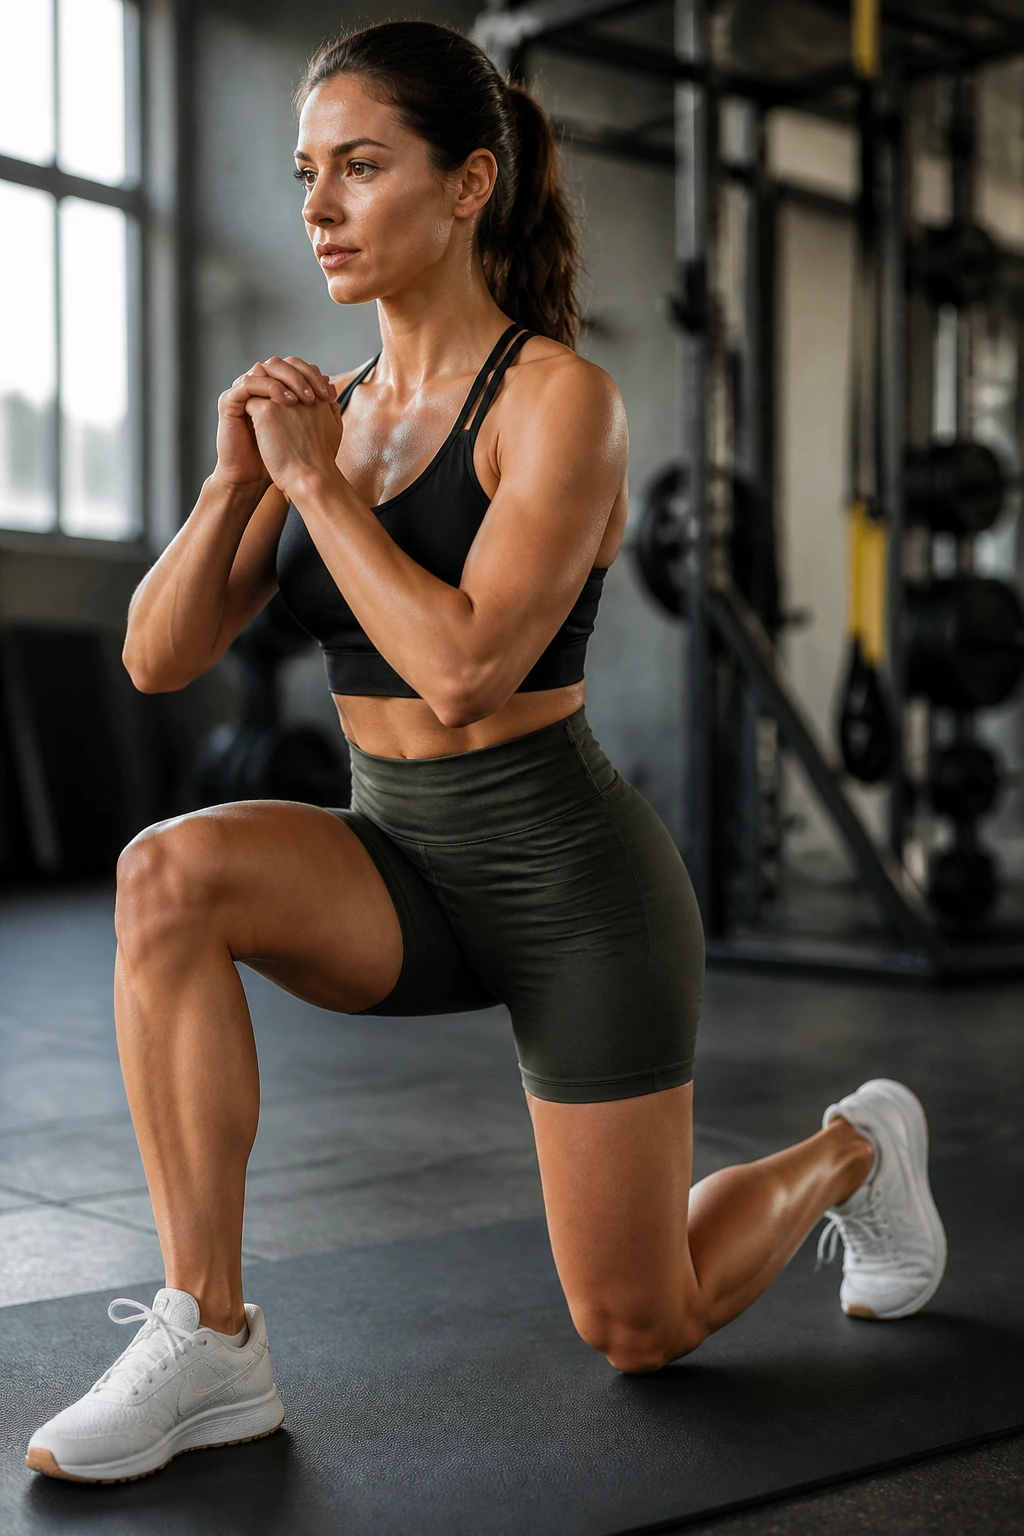
Unlike forward lunges, which put significant pressure on the knee joint, reverse lunges are much kinder to the patella and demand greater stability from the hip. You are shifting your center of gravity backward, which forces the glutes to do the heavy lifting.
Execution
Step backward with one foot, dropping your back knee toward the floor. Keep your front shin vertical—don’t let your knee track past your toes. Keep your weight centered on the front leg; the back leg is merely for balance.
Building Control
Drive back up to the starting position using only your front leg. If you find yourself pushing off your back toe, you are relying too much on your calves and not enough on the glute of your front leg. Reset and focus on that front heel.
8. Side-Lying Hip Abduction
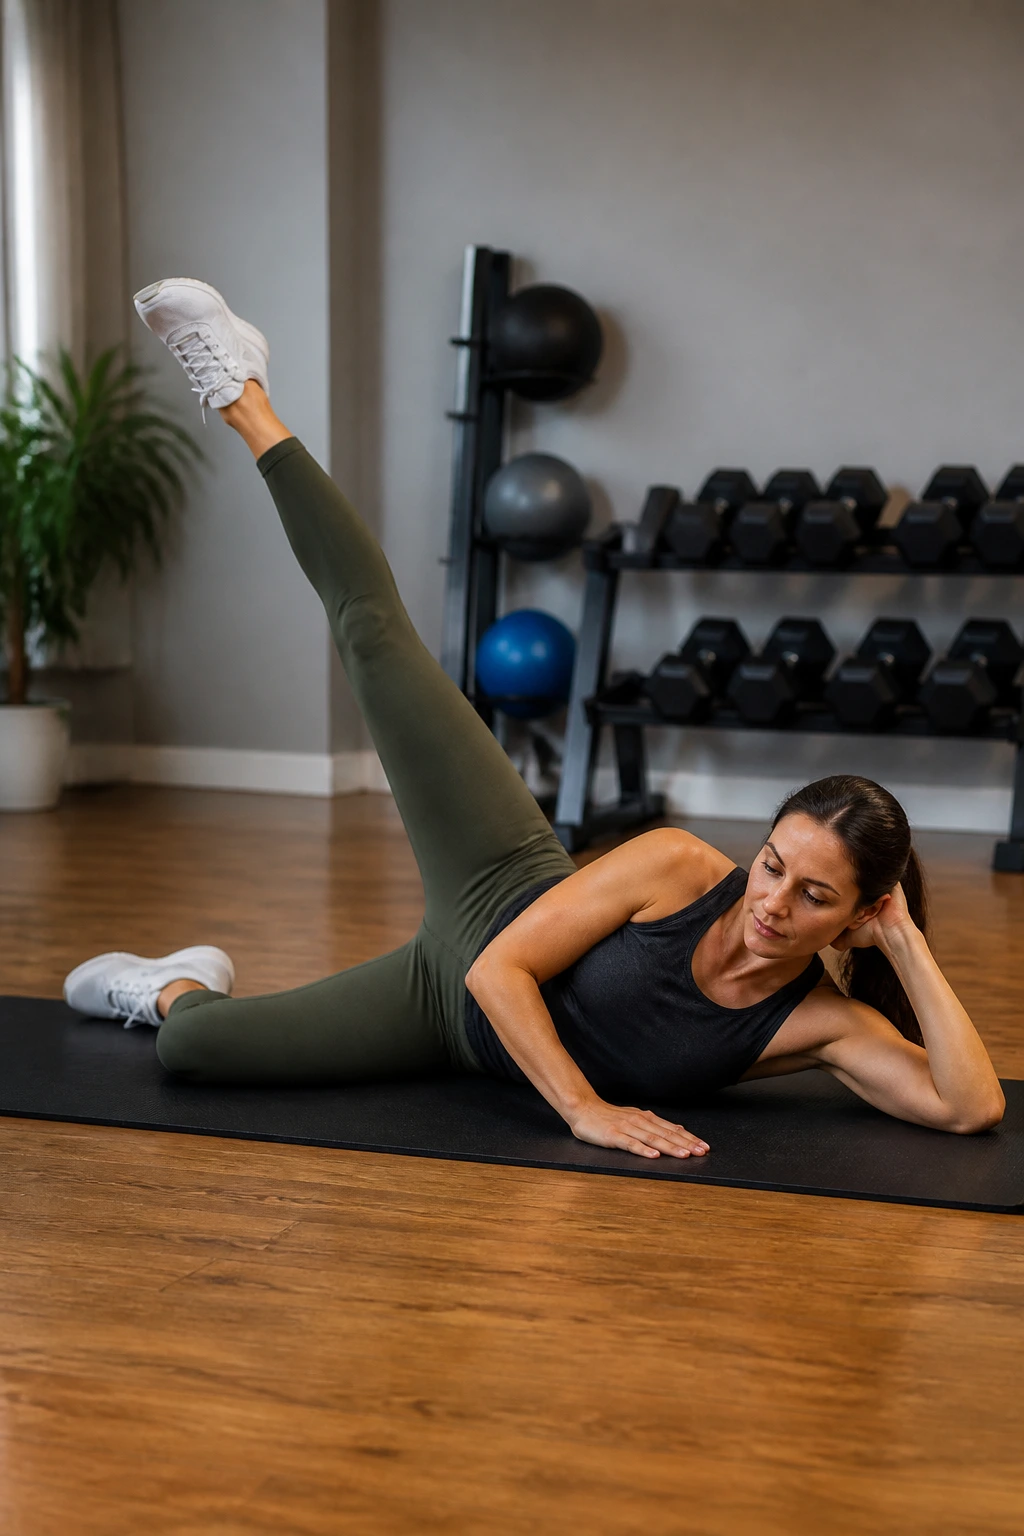
This is isolation work at its finest. If you find one hip is significantly weaker than the other—a very common issue for runners and those who sit for long periods—this is where you fix the imbalance.
How to Execute
Lie on your side with the bottom leg bent for stability. Keep the top leg straight and lift it toward the ceiling. Lead with your heel, not your toe. If you turn your toe toward the ceiling, you engage your hip flexors; if you keep your toe pointed forward or slightly down, you target the glute medius.
The Burn
This exercise is high-rep territory. Aim for sets of 15 to 20 reps. You want to fatigue the muscle. Keep the movement smooth; no jerky swings. The slower you go, the more effective this becomes.
9. Bulgarian Split Squats
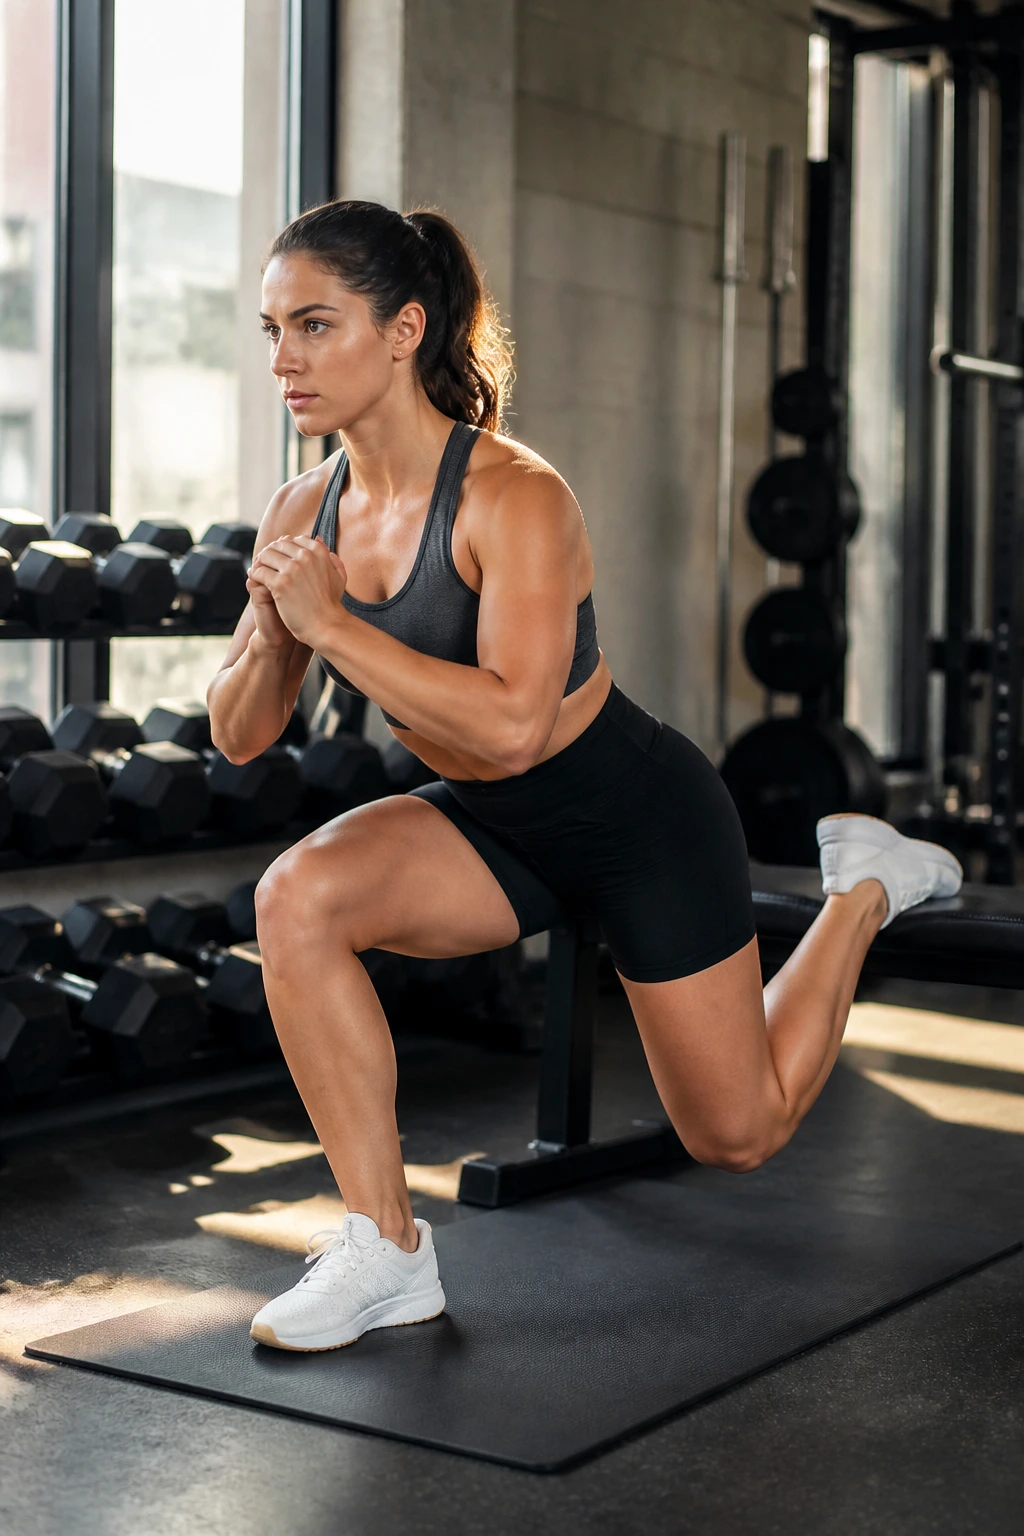
Love them or hate them, these are non-negotiable for anyone serious about hip health. By elevating the rear foot, you place the lead leg in a position where the glute must work overtime to stabilize and extend the hip.
Setup and Form
Place your back foot on a bench or chair. Step your front foot out far enough that your knee stays behind your toes when you descend. Drop your back knee straight down—don’t drift forward.
Making It Work
Lean your torso forward slightly to target the glutes even more. If you stay completely upright, you put more emphasis on the quads. Both variations are useful, but for hip strength, a slight forward lean is often superior.
10. Cossack Squats
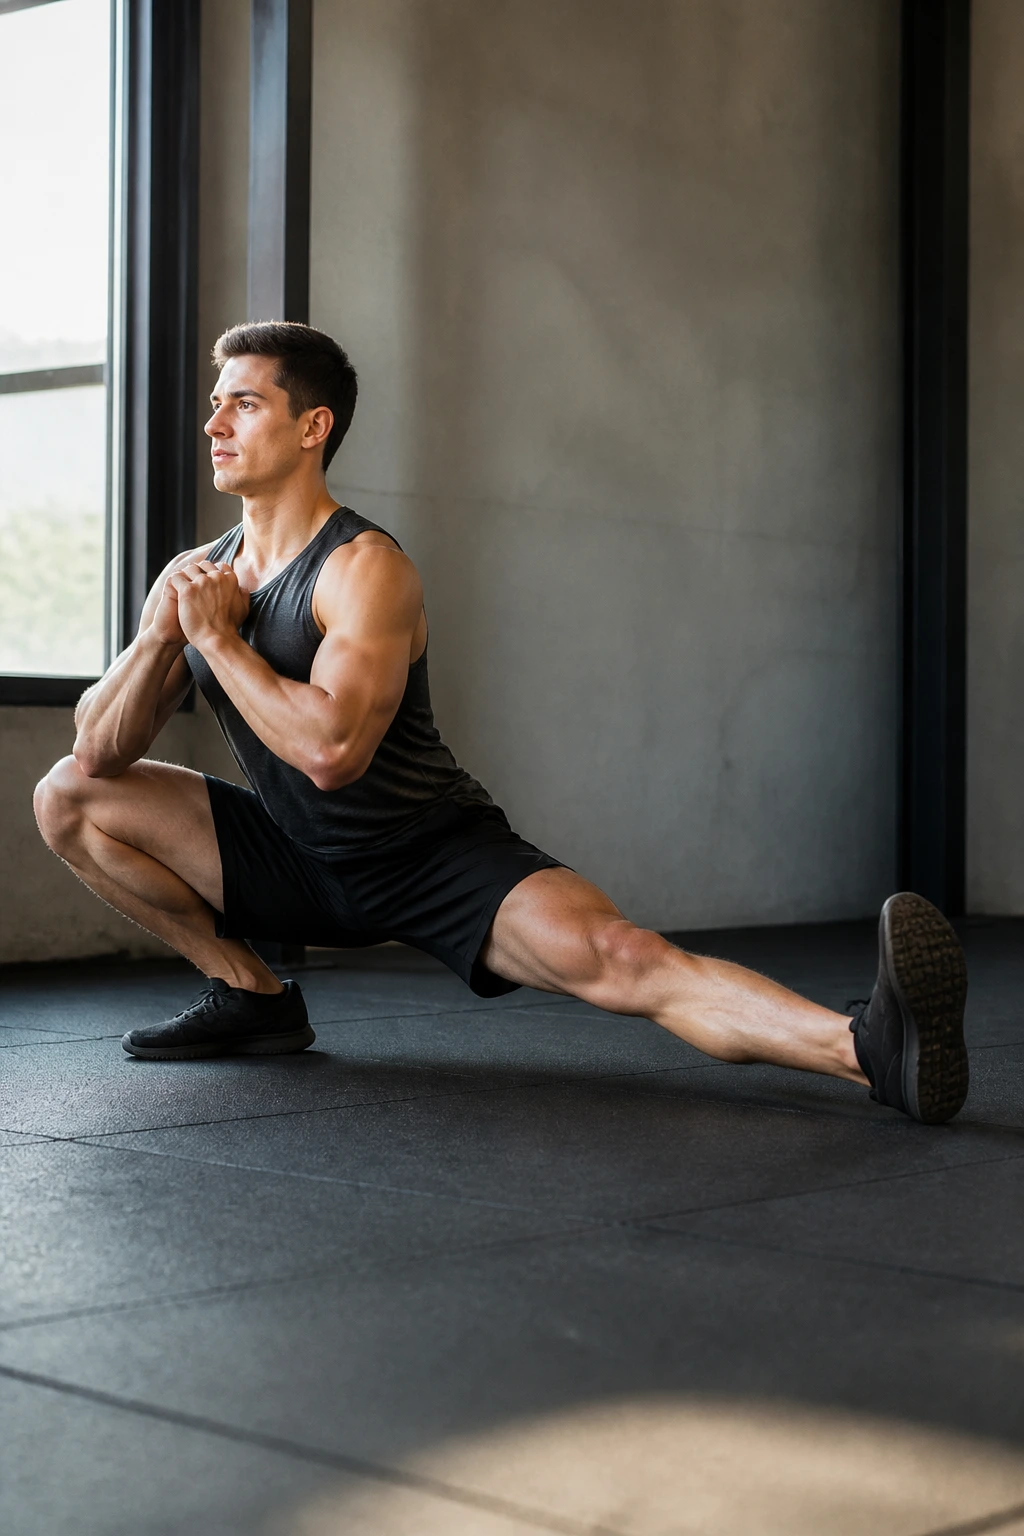
This movement adds a layer of lateral (side-to-side) mobility and strength that most gym routines completely ignore. It forces you to move your hips through a deep, awkward range of motion that builds resiliency in the adductors and hips.
The Movement
Start with a very wide stance. Shift your weight to one side, squatting down as deep as you can while keeping the other leg perfectly straight. Keep your chest up—don’t fold over at the waist.
Why They Are Tough
The straight leg’s toes should point toward the ceiling. You will feel this intensely in your groin and the inner hip. It is a challenging move, so start with a shallow range of motion and work your way deeper over time.
11. Step-Ups
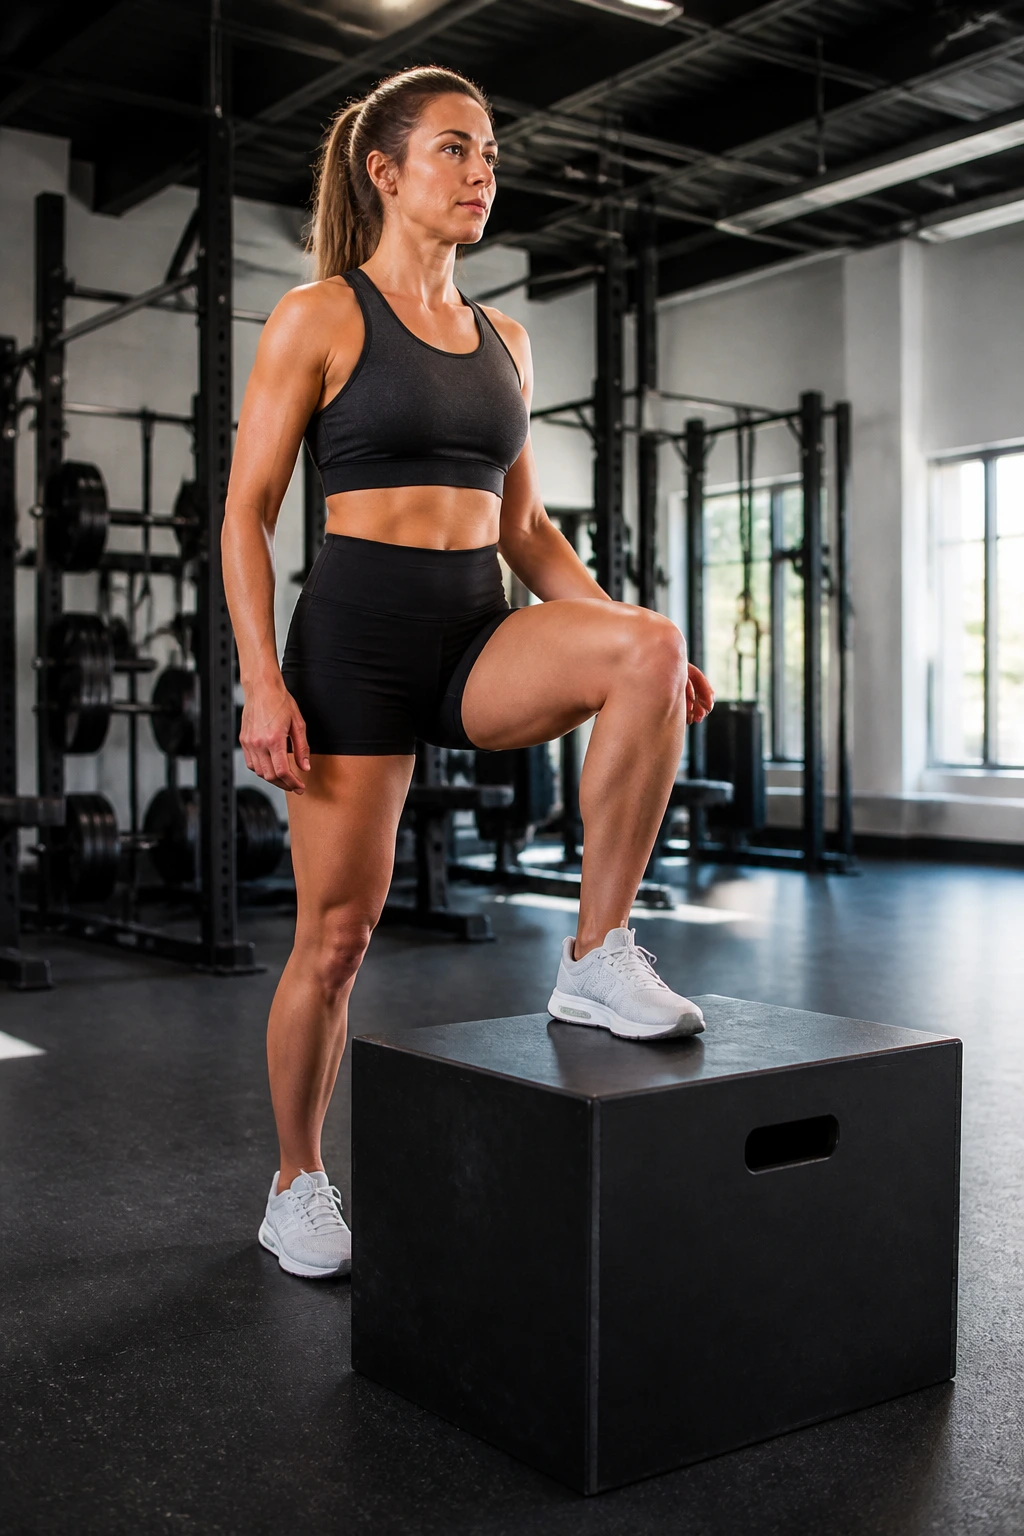
The step-up is the ultimate functional test of hip strength. It mimics climbing stairs or navigating uneven terrain. When you step up, you are forcing your hip to stabilize the entire weight of your body while generating force.
Important Cues
Use a box or bench that is knee-height or lower. If the box is too high, you will naturally rock your body to get momentum. Do not use momentum. Step up, drive through the heel, and ensure your hips are fully extended at the top.
The Downward Phase
The most important part of the step-up is the descent. Lower yourself back to the floor as slowly as possible. This eccentric control is where the real strengthening happens for your knees and hips.
12. Glute Medius Kickbacks
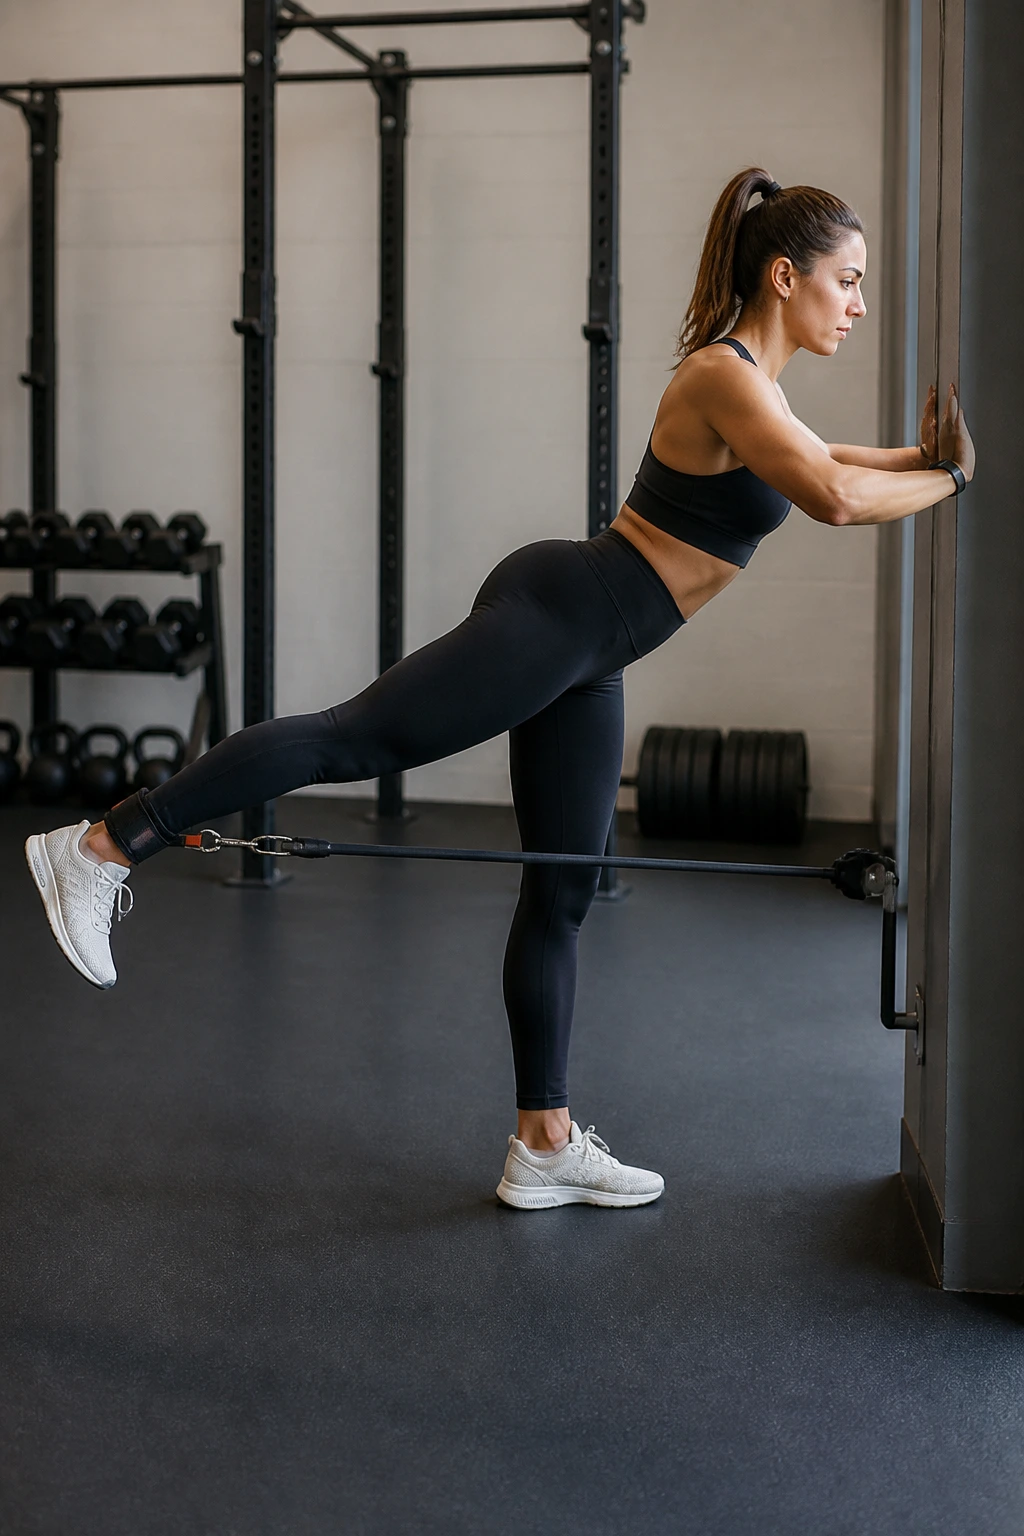
This targets the often-neglected rear portion of the glute, which is essential for pelvic stability. You can do this with a cable machine, a resistance band, or just bodyweight.
How to do It
Stand tall and hold onto something for balance. Extend one leg backward, squeezing your glute as you reach the peak of the movement. Keep your leg straight. Avoid arching your lower back to get your leg higher.
Focus
The range of motion is actually quite small. If your back arches, you have gone too far. Stop at the point of contraction. You should feel a deep, localized squeeze in the glute, not a pinch in your lumbar spine.
13. Sumo Squats
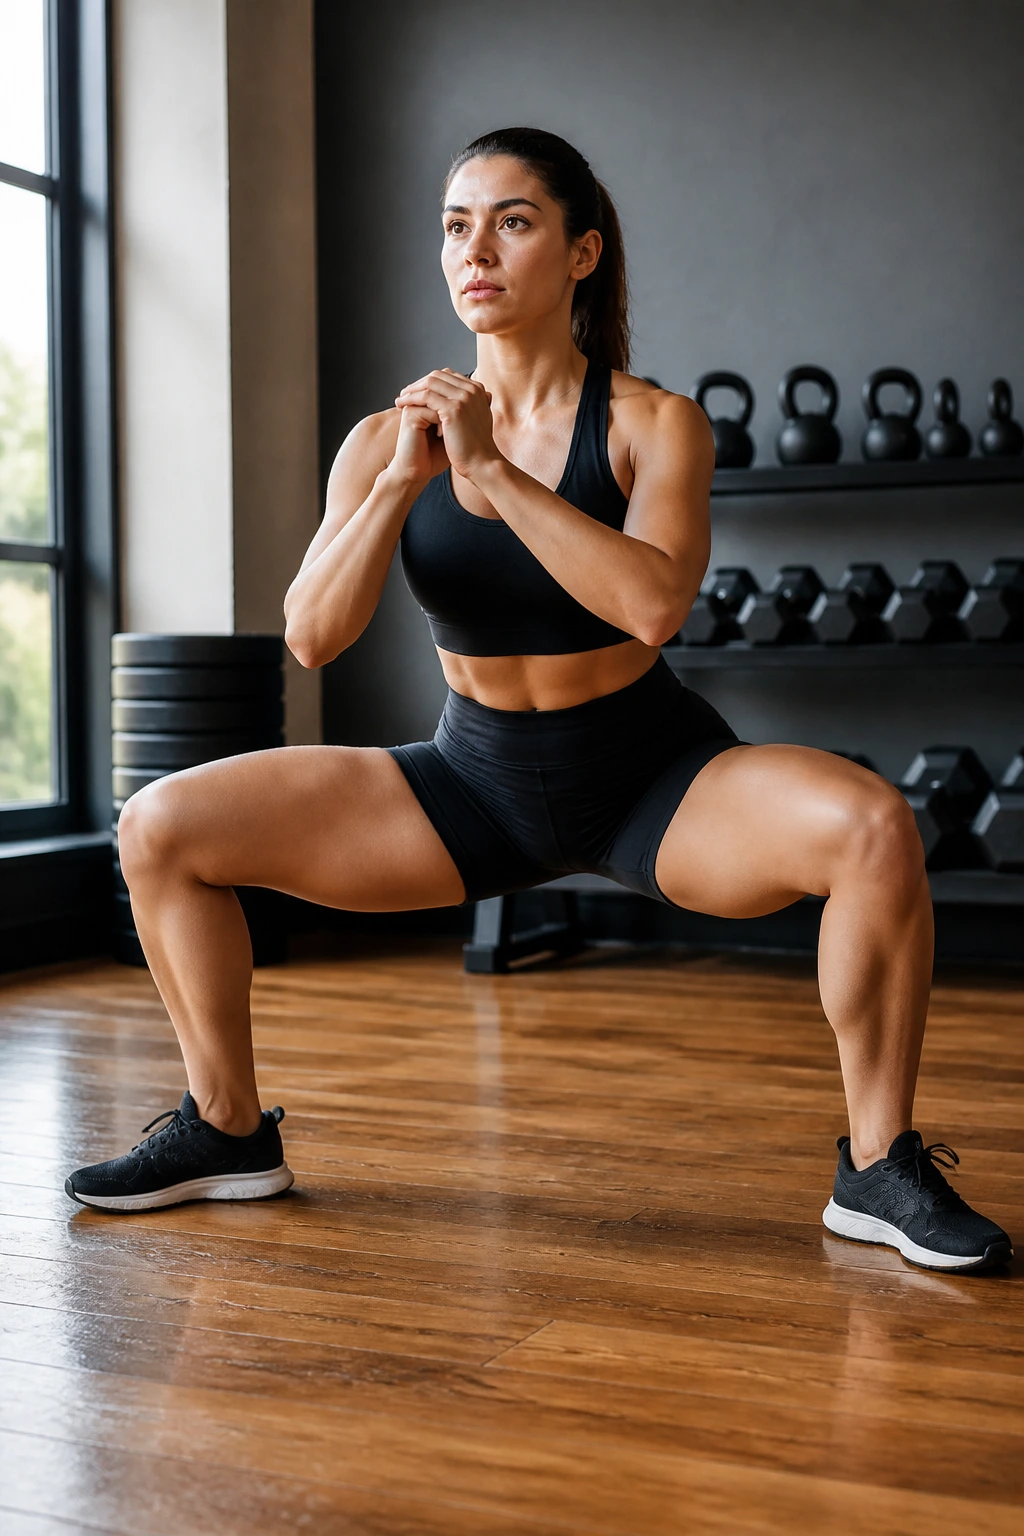
By taking a wide stance and pointing your toes outward, you force your hips into external rotation and place more load on the inner thighs and glutes. This is a great way to build strength in the adductors.
Positioning
Stand with your feet wider than shoulder-width, toes turned out about 45 degrees. Drop your hips straight down, keeping your knees tracking over your toes. If your knees cave in, you need to bring your stance in slightly or focus on your glute strength.
Depth
Go as deep as your hip mobility allows while keeping your spine neutral. If you feel like your pelvis is tucking under at the bottom (often called “butt wink”), shorten your range of motion.
14. Copenhagen Planks
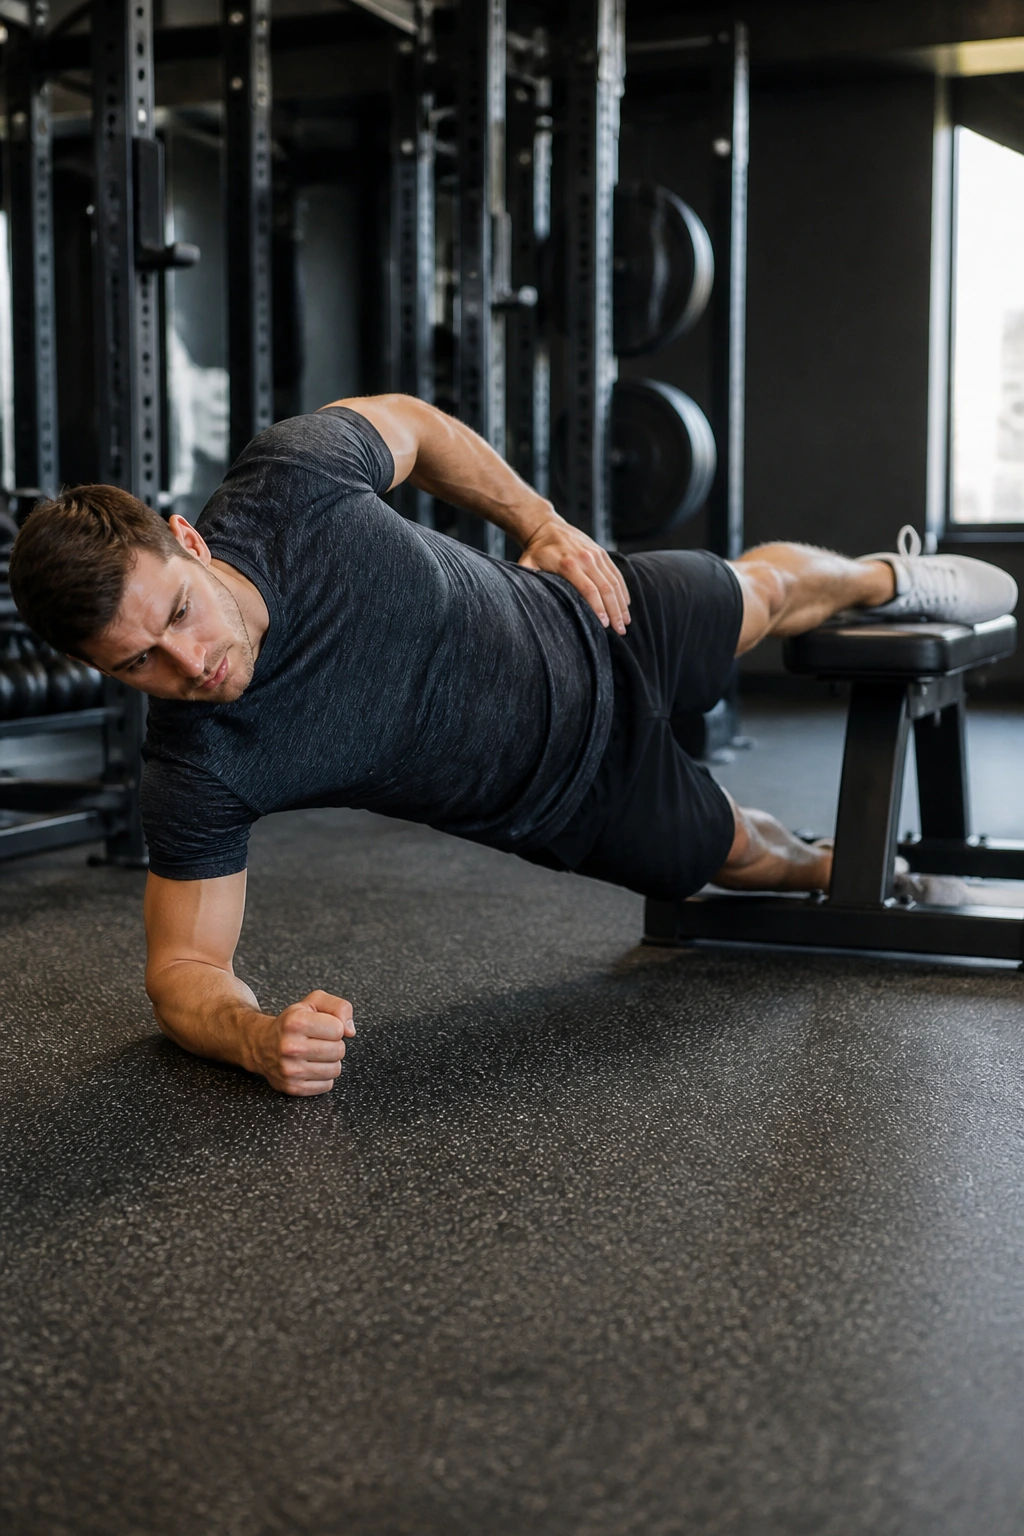
This exercise is usually reserved for advanced athletes, but it is the premier move for adductor strength. The adductors are the muscles on the inside of the thigh; they are crucial for pelvic stability but almost always ignored.
The Setup
Lie on your side next to a bench. Place your top foot on the bench and lift your body up into a side plank, with the bottom leg hanging or tucked behind the bench.
Why It’s Effective
Your inner thigh is fighting gravity to keep your body in a straight line. If you can’t hold this, you can start by putting your bottom knee on the bench, but aim to move to the full version eventually.
15. Curtsy Lunges
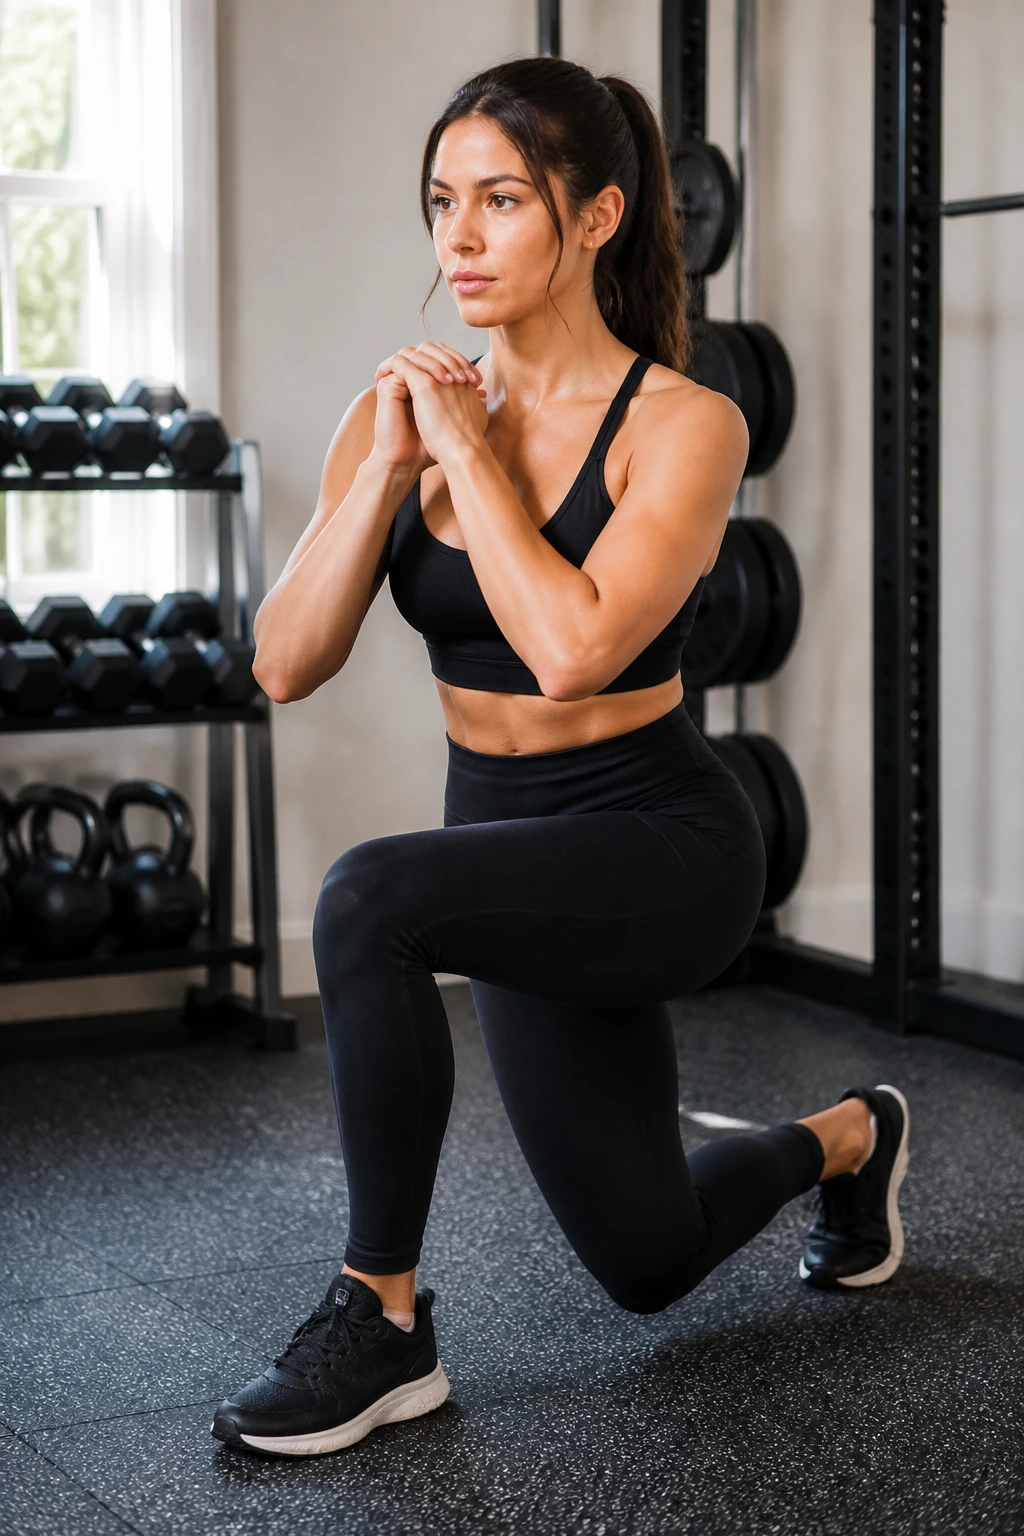
This movement introduces a diagonal component that works the hip from an angle that standard squats and lunges miss. It forces the glute medius and minimus to work harder to stabilize the femur.
Execution
Step one foot behind and across the other, as if you are performing a curtsy. Keep your front foot planted firmly. Lower your back knee until it’s close to the floor.
The Benefit
You will notice this hits the side of the glute—the “shelf”—very quickly. It’s an awkward movement, so start with no weight until you master the balance.
16. Goblet Squats
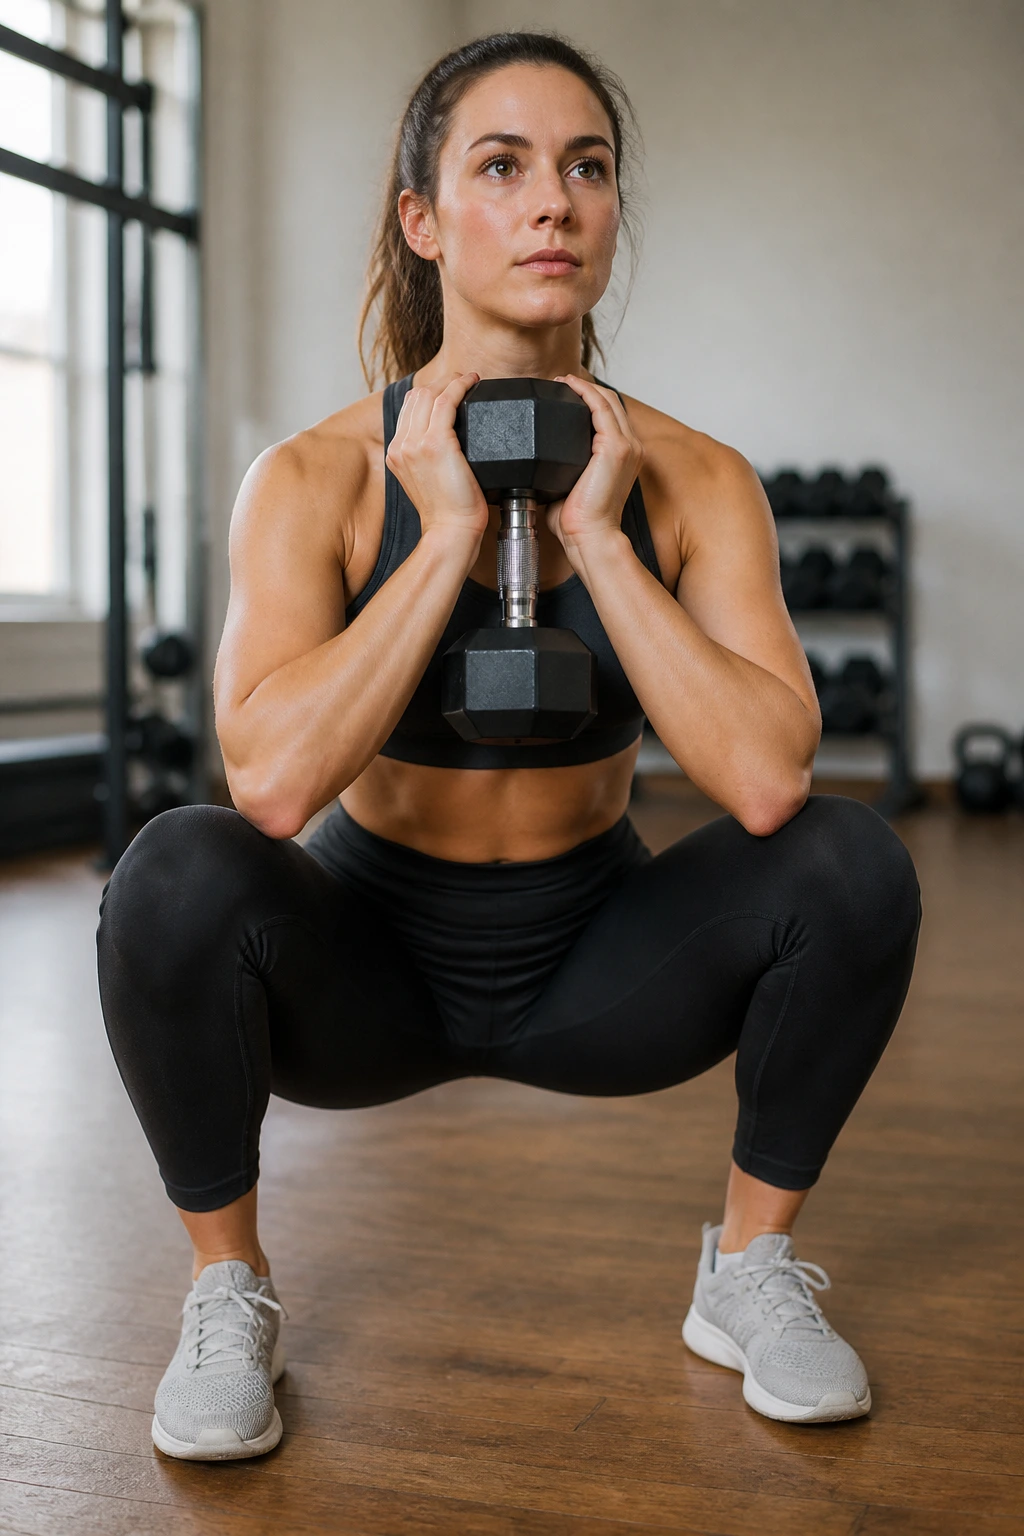
The goblet squat is the best teaching tool for a proper squat pattern. By holding a weight against your chest, you create a counterbalance that helps you keep your torso upright, allowing your hips to sink deeper into the movement.
The Secret Sauce
Don’t just squat; pull yourself down. Use your hip flexors and core to actively lower yourself between your legs. When you hit the bottom, your elbows should be inside your knees. Use your elbows to gently push your knees outward, which helps open up the hips.
Consistency
This isn’t about maximum weight. It’s about achieving perfect depth and hip mechanics. Even if you use a light dumbbell or kettlebell, the focus remains on the squat pattern itself.
17. Hip Thrusts
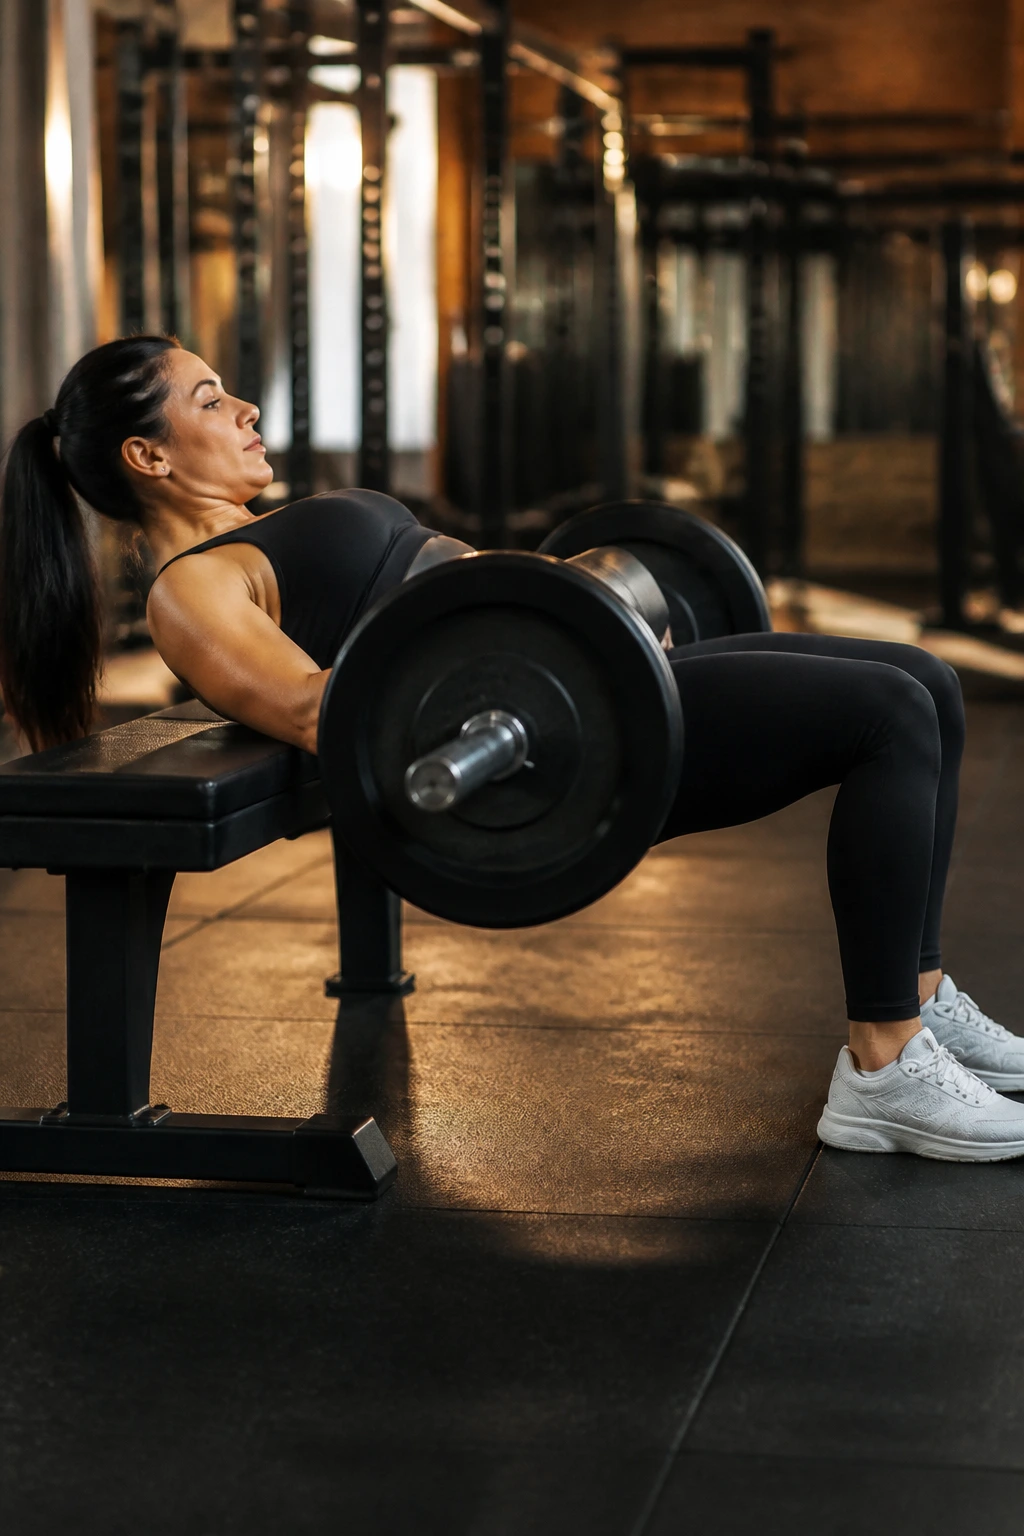
If you want to build raw strength in the posterior chain—your glutes, hamstrings, and lower back—there is no better exercise. It is the ultimate “booty builder,” but more importantly, it is the ultimate “hip stabilizer.”
The Setup
Sit on the floor with your upper back against a bench. Place a barbell or dumbbell across your hips. Drive your hips upward, squeezing your glutes as hard as possible at the top.
Crucial Details
Your shins should be vertical at the top of the movement. If your feet are too far out, you’ll feel it in your hamstrings. If they are too close, you’ll feel it in your quads. Find that sweet spot where the glutes are the main drivers.
18. Donkey Kicks
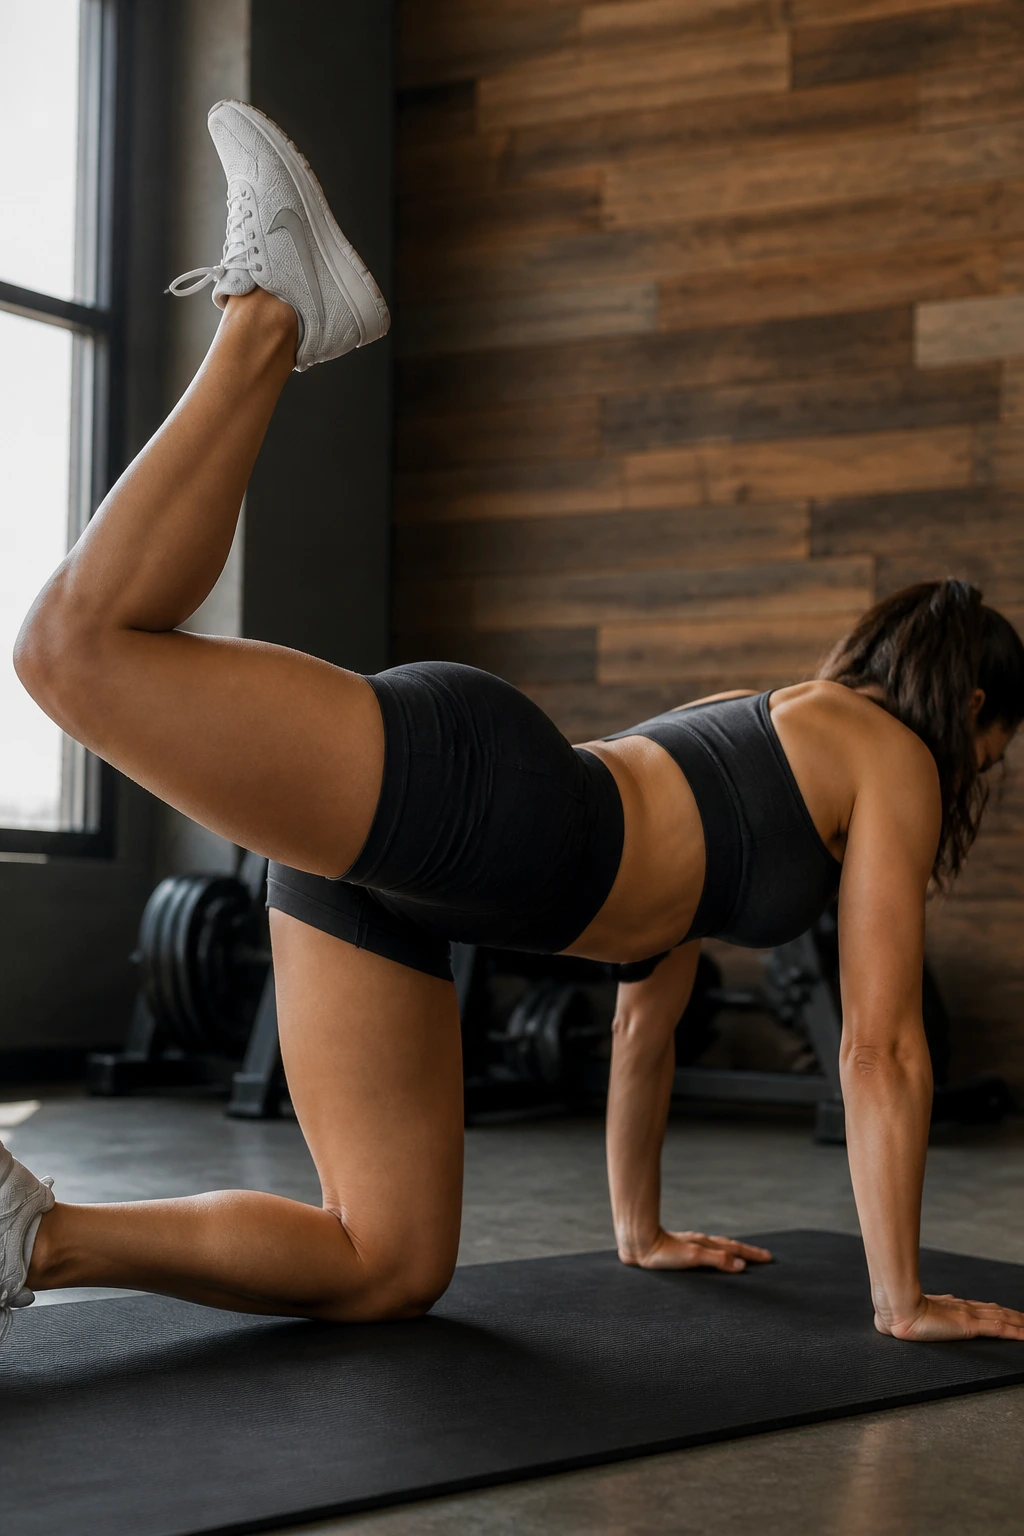
This is a classic for a reason. It is excellent for isolating the glute maximus, the largest muscle in the body, which is responsible for hip extension.
The Move
On all fours, keep your knee bent at 90 degrees and kick your foot toward the ceiling. Imagine you are trying to push the ceiling away with your heel. Keep your pelvis locked in place—don’t let your back sway.
Variations
You can do this with pulses—small, rapid movements at the top of the range—to really fatigue the muscle. This is a high-volume movement; don’t be afraid to perform 20 or 30 reps per set.
19. Single-Leg Squat to Bench
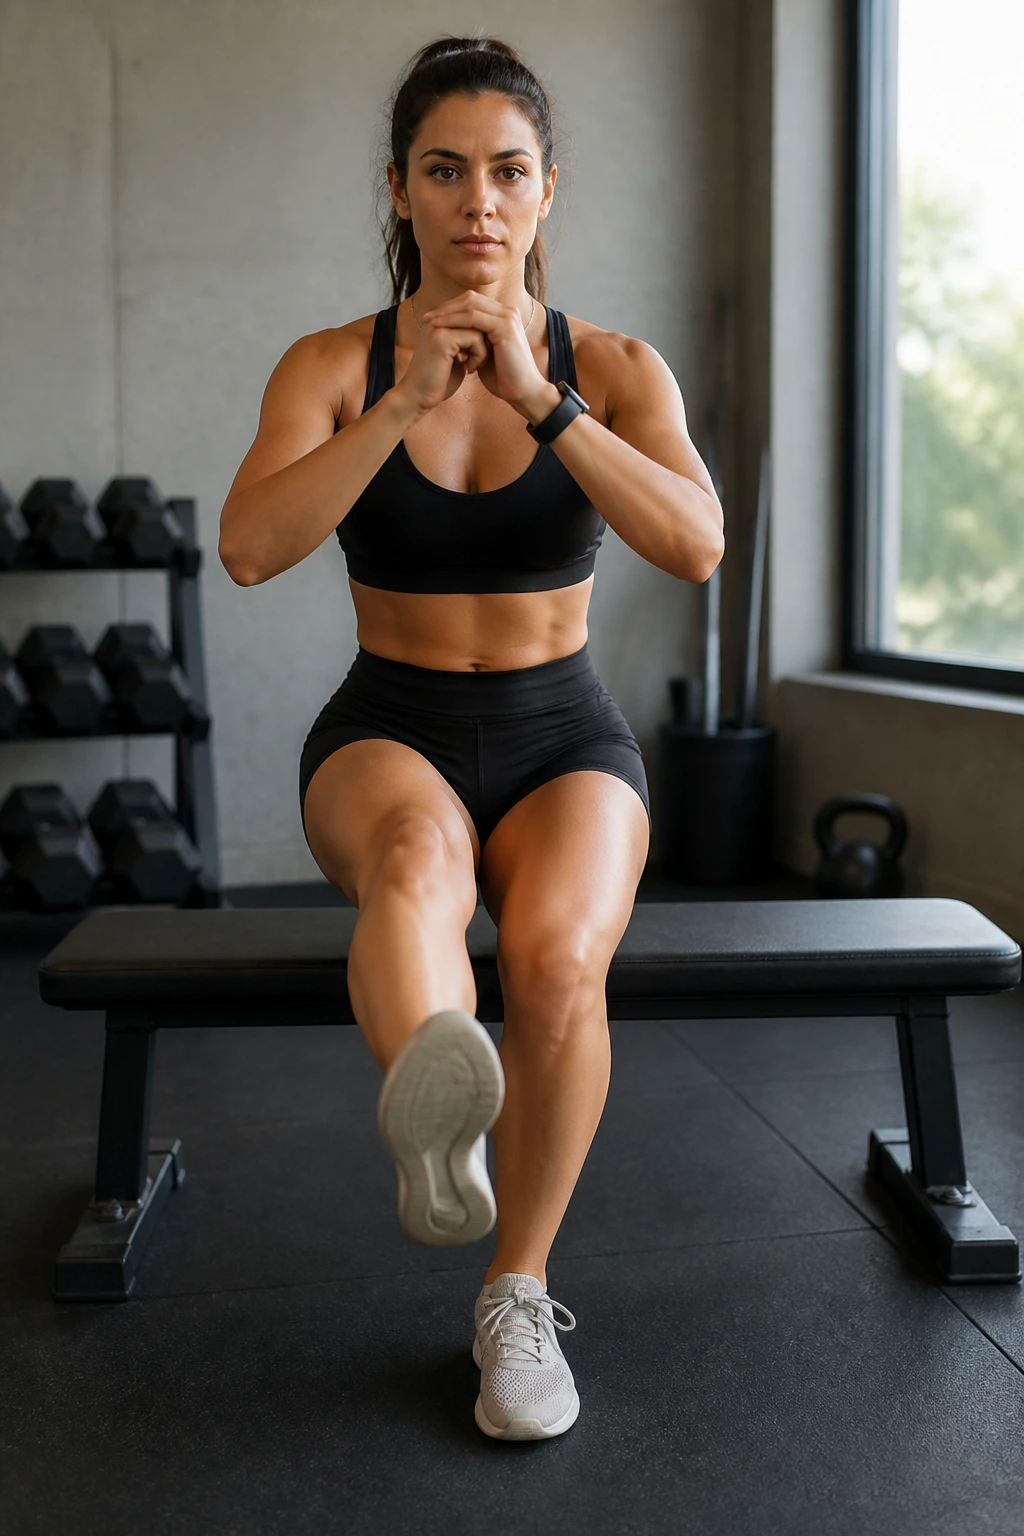
This is the ultimate test of hip control. If you have any weakness in your hips, this movement will expose it immediately. It’s not about how low you go; it’s about keeping your knee aligned and your pelvis stable.
The Goal
Stand in front of a bench or chair. Lift one leg off the ground and sit back onto the bench, then stand back up. If you find yourself falling onto the bench or using your arms to swing, slow it down.
Scaling
If you can’t get up, just practice the descent. Lower yourself as slowly as you can. The eccentric phase is where your body learns how to control the movement, which is the precursor to performing the full rep.
20. Paloff Press
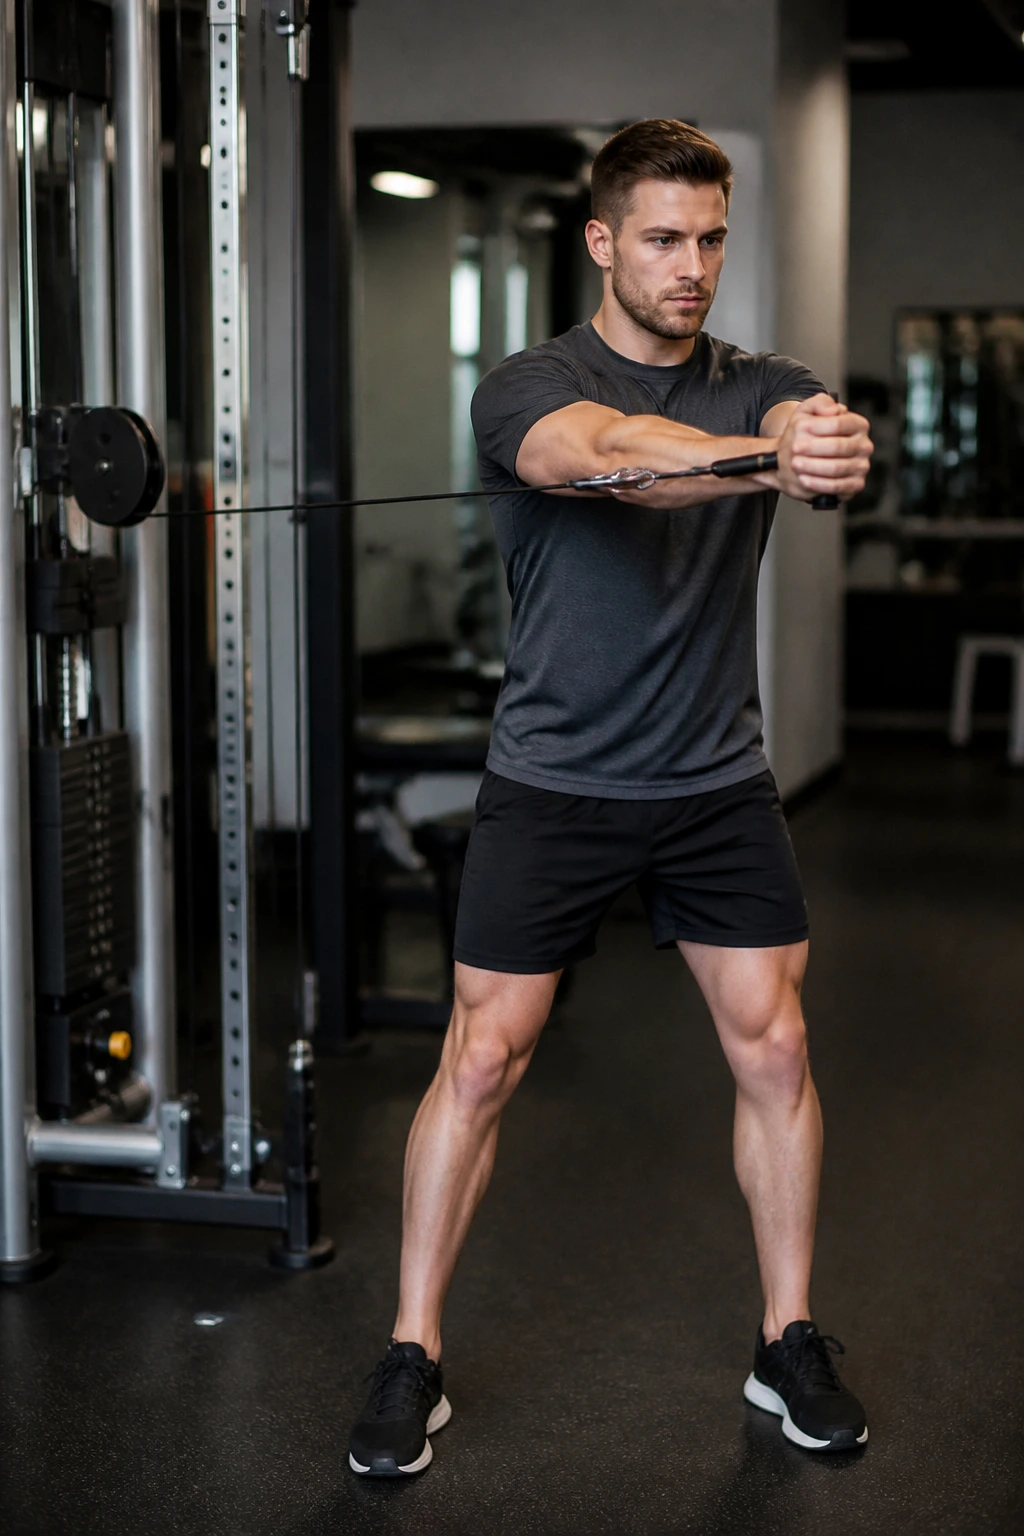
While this looks like a core exercise, it is actually an anti-rotation movement that requires your hips to lock the pelvis in place while your torso moves. It creates a bridge between your core and your hips.
Execution
Stand perpendicular to a cable machine or a resistance band anchored at chest height. Hold the handle with both hands at your chest. Press your hands straight out and hold for three seconds.
The Challenge
The resistance is trying to rotate your body toward the anchor point. Your hips must fight to keep your pelvis square forward. It teaches you how to stabilize the hips against external forces, which is essential for everything from walking to lifting heavy objects.
Understanding the Difference Between Tight and Weak

One of the most common mistakes people make is trying to stretch their way out of hip pain. We are told that sitting makes our hips “tight,” so we lunge and stretch and hold poses until we are blue in the face. Yet, the pain remains. Why? Because the body rarely feels “tight” for no reason.
Often, a muscle feels tight because it is overstretched or overworked, acting as a constant stabilizer because other muscles aren’t doing their job. If your glute medius is weak, your TFL (the muscle on the front/side of your hip) will seize up to compensate. Stretching that TFL might feel good for ten seconds, but you are stretching a muscle that is already strained from doing too much work.
The fix is almost always strength. By strengthening the glutes, you take the pressure off the secondary stabilizers. You allow the overactive muscles to finally relax. You aren’t stretching the tightness away; you are eliminating the need for the tightness.
How to Program These Exercises
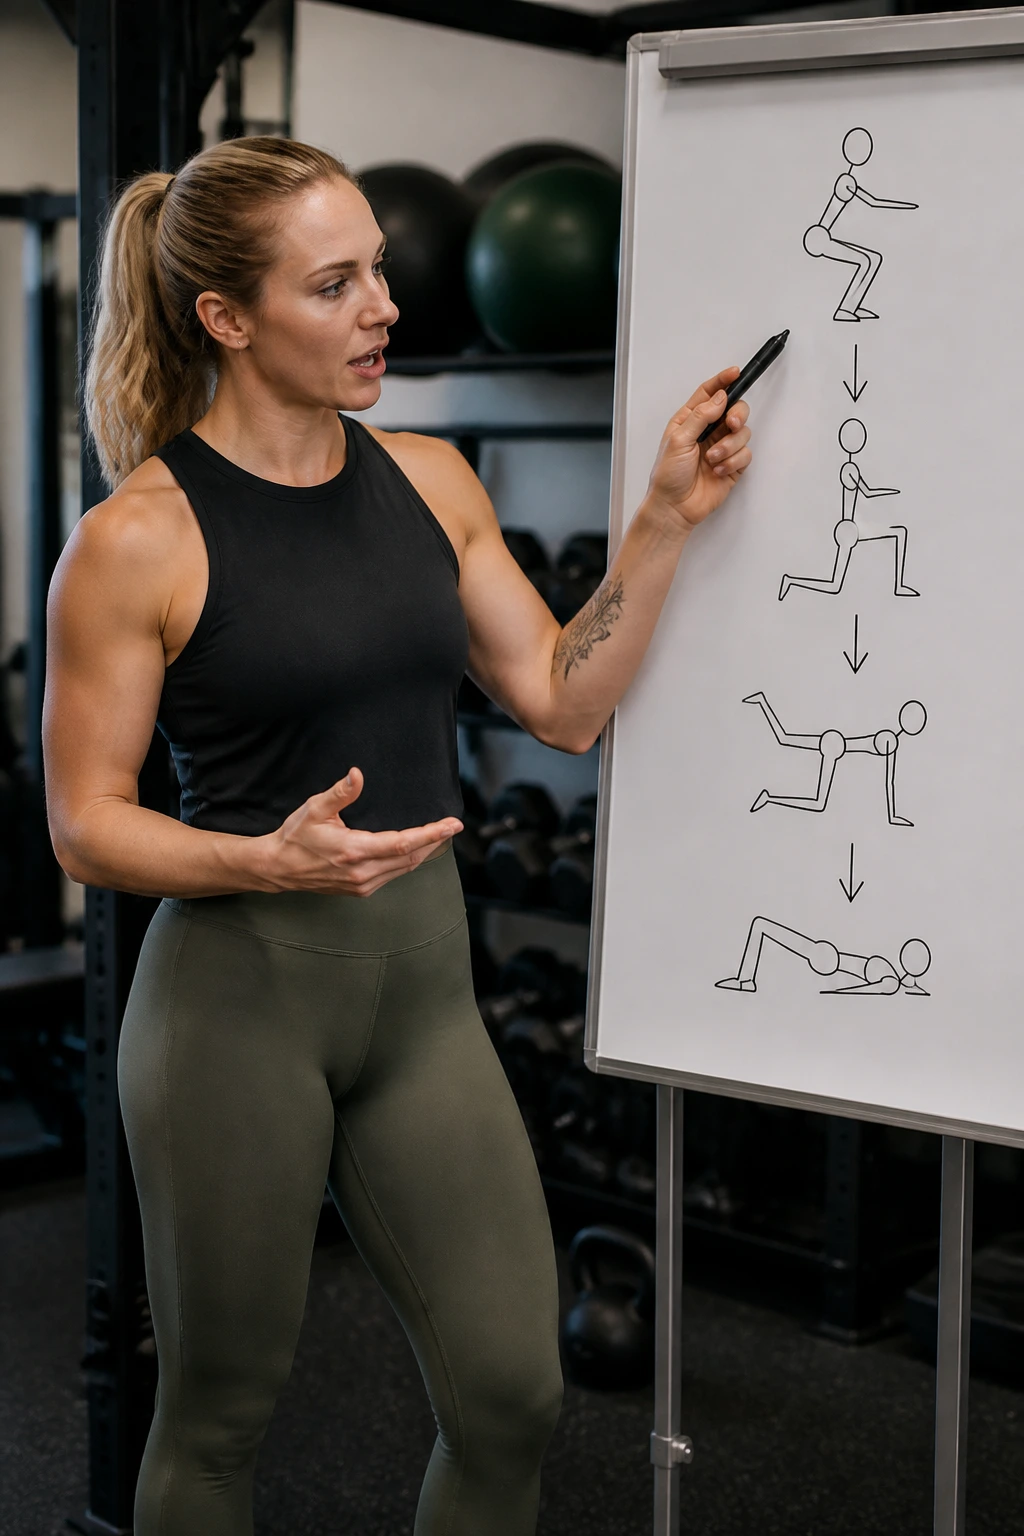
You do not need to do all twenty of these every single day. That is a recipe for burnout and inflammation. Instead, think of these as a library of movements you can pull from to build a routine that fits your needs.
For most people, a simple routine of 3-4 exercises performed 3 times a week is plenty to see results. Pick one hinge movement (like the Deadlift), one squat movement (like the Goblet Squat or Bulgarian Split Squat), and one isolation movement (like the Clamshell or Glute Bridge).
Start with 3 sets of 10-12 reps. If you find an exercise easy, increase the difficulty by slowing down the tempo—3 seconds on the way down, 1 second hold, 1 second up. Control is the most underrated aspect of training. If you can’t do it slowly, you aren’t strong at it yet.
Common Mistakes That Sabotage Progress
The biggest trap people fall into is rushing. It is tempting to fly through these movements to get the workout over with, but you are wasting your time if you do. Your brain needs to learn how to fire these muscles, and that requires focus and speed control.
Another common issue is “pelvic tilt.” When doing exercises like the bridge or the deadlift, people often arch their lower back to achieve the position. This puts all the stress on your lumbar discs instead of your hips. Always think about keeping your ribs tucked and your core braced.
Lastly, do not ignore the “warm-up” aspect. If you have been sitting at a desk for eight hours, jumping straight into a heavy Bulgarian Split Squat is a bad idea. Spend five minutes doing some bodyweight hip circles, light band work, or cat-cow stretches. Your hips need to be lubricated and signaled before they are asked to produce force.
When to Consult a Professional
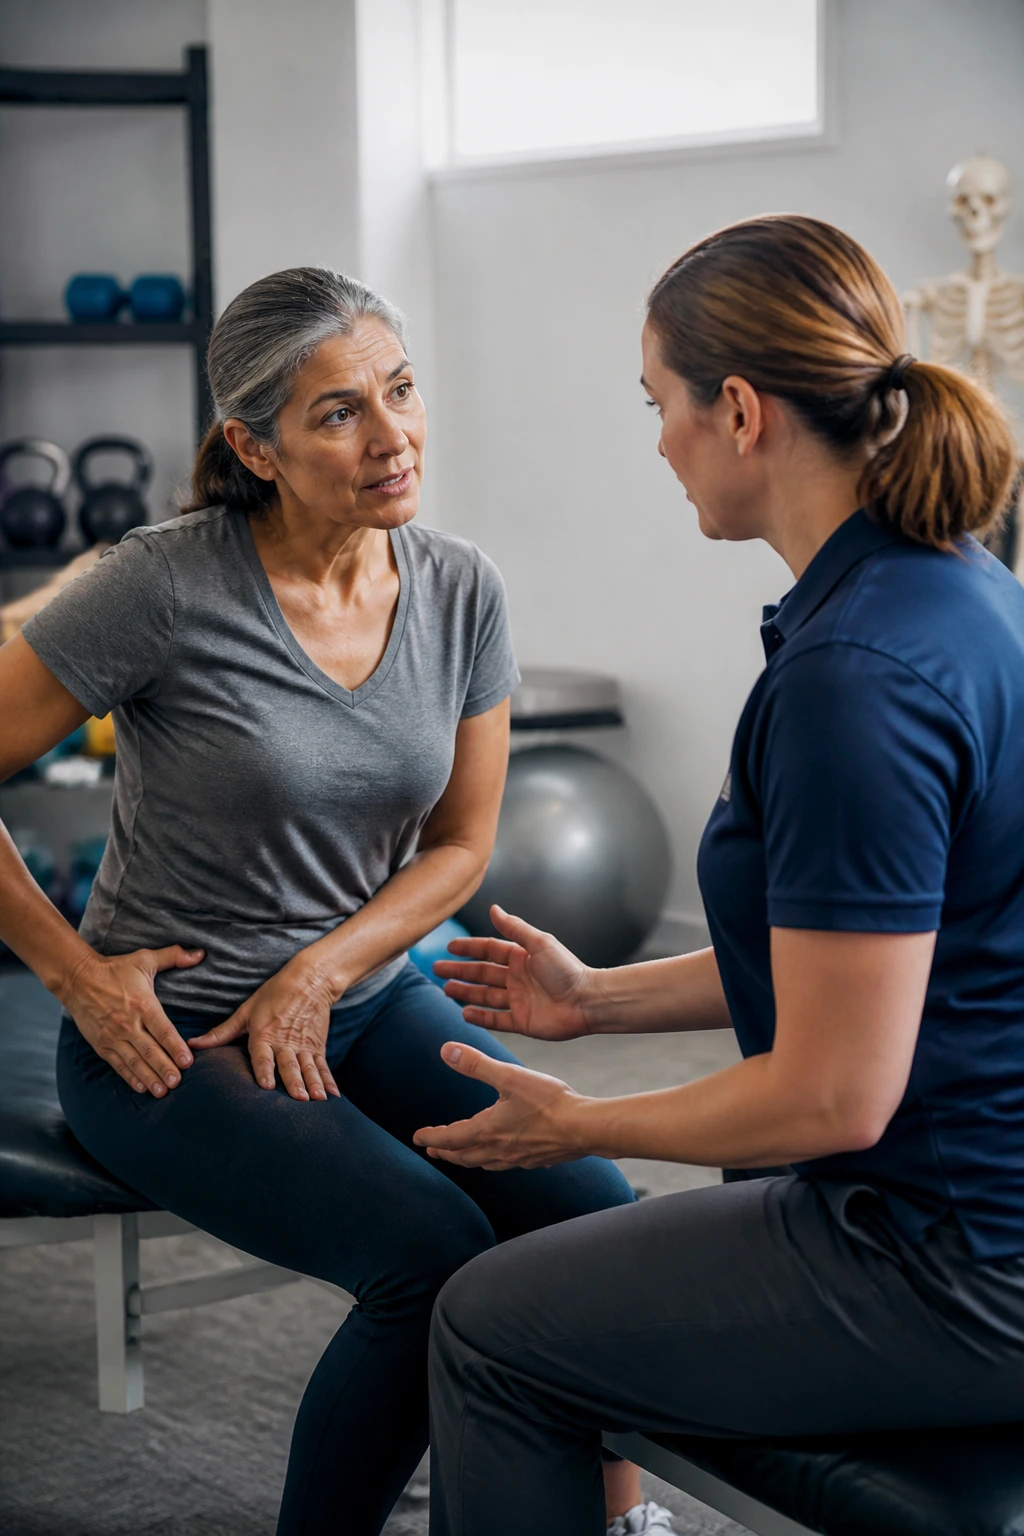
These exercises are designed to build stability and endurance in healthy hips. However, they are not a replacement for medical care. If you are experiencing sharp, shooting pain, numbness, tingling, or pain that radiates down your leg, stop immediately.
Those are signs of potential nerve involvement or structural issues that cannot be fixed with exercise alone. There is a big difference between the dull, tired ache of a muscle that has been worked hard and the sharp, hot pain of an injury. Trust your body. If something feels genuinely wrong, get it checked out by a physical therapist or a doctor before you continue.
Final Thoughts
Building stable, pain-free hips is not a sprint. You are undoing years of sitting patterns and movement compensations. It takes time for the body to trust that it can move freely again.
Consistency is the secret sauce here. You don’t need to be perfect every day, but you do need to keep showing up. Some days your hips will feel stiff, and other days they will feel open. Listen to that feedback, adjust your intensity, but keep moving. Your hips are the engine of your body—treat them with the patience and work they deserve.
