



Most people do not notice their hips until something goes wrong. You might be sitting at a desk for eight hours, feeling that creeping tightness in the front of your thighs. Or perhaps you stand up to walk across the room and catch a sharp, nagging pinch in your lower back. Often, the culprit is not your spine or your knees, but a set of chronically weak or neglected muscles surrounding the hip joint. We tend to focus heavily on the “mirror muscles”—the chest, the biceps, the quads—while ignoring the powerhouses that actually facilitate movement.
The hips are the bridge between your upper and lower body. When they are strong, they act as a stable base, allowing you to walk, run, and lift without compensating with your lumbar spine or your ankles. When they are weak, the entire kinetic chain suffers. You start seeing “knee cave” during squats, you feel lower back fatigue after standing for short periods, or you notice that your balance is surprisingly shaky when you try to stand on one leg. This is not just about aesthetics; it is about longevity and pain-free movement.
Strengthening the hips requires more than just heavy squats. It demands a mix of stability work, isolation, and functional movement. Whether you are a total beginner who struggles to stand on one leg or an experienced lifter trying to push past a plateau, the following movements will challenge the gluteus medius, minimus, and maximus, as well as the deep rotators and hip flexors. Do not rush these movements. If you want results, treat each repetition as a lesson in control.
1. Glute Bridges
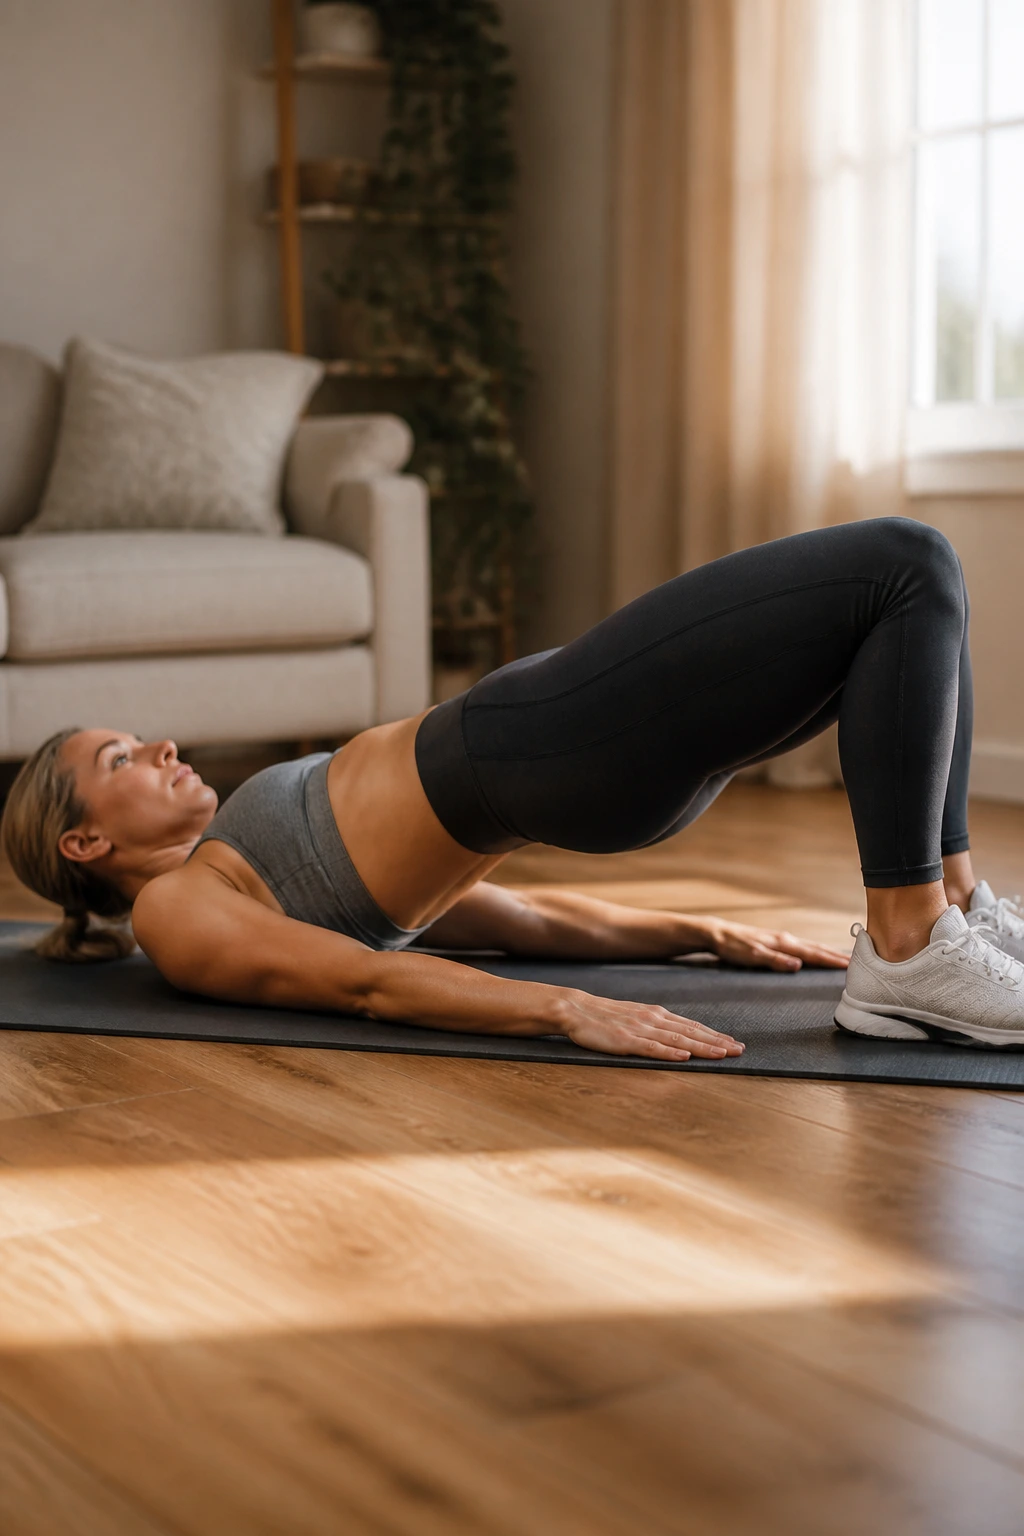
The humble glute bridge is the foundational movement for hip health. It teaches you how to initiate movement from the glutes rather than the lower back. Start by lying flat on your back with your knees bent and feet flat on the floor, about hip-width apart. From here, press through your heels to lift your pelvis toward the ceiling. The goal is a straight line from your shoulders to your knees at the top of the movement.
The Mind-Muscle Connection
Many people perform this exercise as a mindless rhythmic pumping. That is a mistake. Focus entirely on the squeeze. At the peak of the bridge, hold for a count of three. Imagine you are trying to crack a walnut between your glutes. If you feel this more in your hamstrings, shift your feet slightly further away from your body. If you feel it in your lower back, tuck your ribcage down to ensure your spine stays neutral.
Common Pitfalls
- Hyperextending the back: Stop the lift when your glutes are fully engaged; do not arch your lumbar spine.
- Foot placement: Placing feet too close to your glutes often over-recruits the quads.
- Lack of tension: You should be engaging your core throughout the entire motion.
2. Clamshells
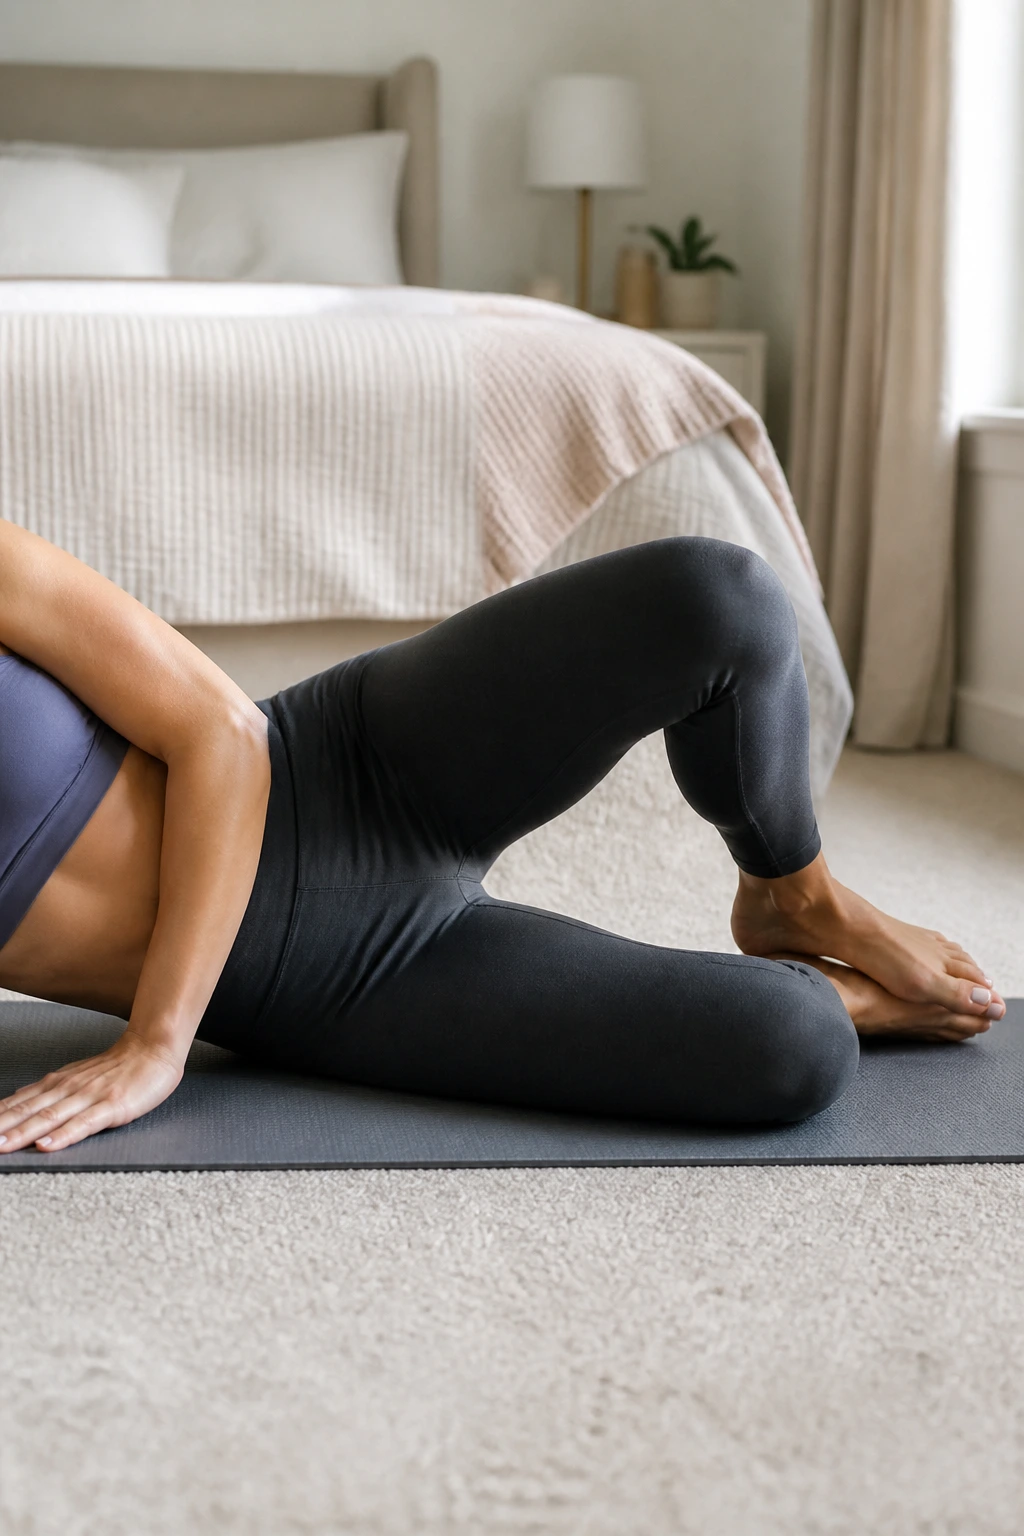
This is the gold standard for targeting the gluteus medius, the muscle responsible for stabilizing your pelvis when you walk or run. Lie on your side with your legs stacked, knees bent at a 45-degree angle. Keeping your feet touching, rotate your top knee upward like an open book. The secret here is to keep your feet glued together; if your feet start drifting apart, you have lost the isolation.
Why This Matters for Stability
Your glute medius is notoriously lazy. If you have any history of IT band syndrome or knee pain, you likely have a weak glute medius. This exercise forces that muscle to fire without the assistance of the larger, dominant muscles in the thigh. If you find this too easy, wrap a resistance band around your legs just above your knees. The added resistance makes the final few repetitions significantly more demanding.
Execution Tips
- Keep the hips stacked: Do not let your top hip roll backward as you open the knee.
- Controlled tempo: The lowering phase should take just as long as the opening phase. Do not just drop your leg back down.
3. Bird-Dogs
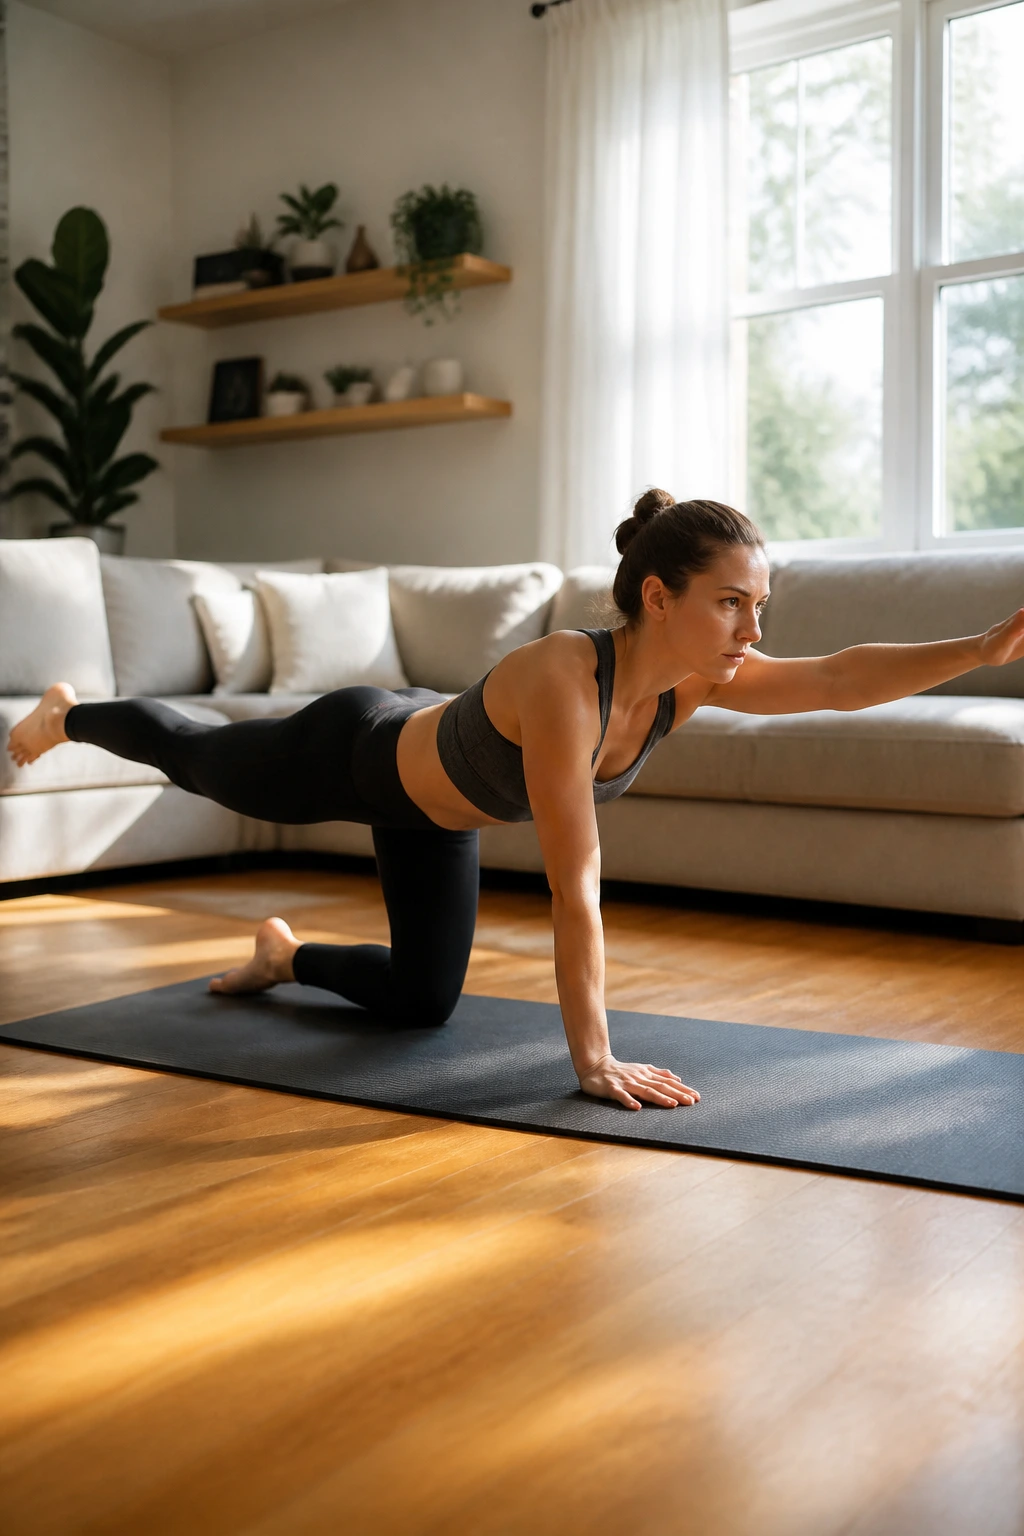
Bird-dogs are an exercise in coordination and core stability. Get on your hands and knees in a tabletop position. Simultaneously extend your right arm forward and your left leg backward. The goal is to keep your torso perfectly still—if you are wobbling like a jelly, you are doing it too fast.
Engaging the Hip Stabilizers
This move forces the hip of the planted leg to stabilize your entire body. It is an anti-rotational exercise. If you notice your hips swaying from side to side as you lift your limbs, your core and hip stabilizers are not yet fully engaged. Slow down. Think about drawing your belly button into your spine and creating a rigid bridge with your body.
Progressive Difficulty
Once you master the basic version, try holding the extension for ten seconds before switching. If that becomes simple, try performing the movement with your eyes closed to challenge your proprioception. This exercise is incredible for preventing lower back pain because it teaches your hips to stabilize while your limbs are moving.
4. Side-Lying Leg Raises
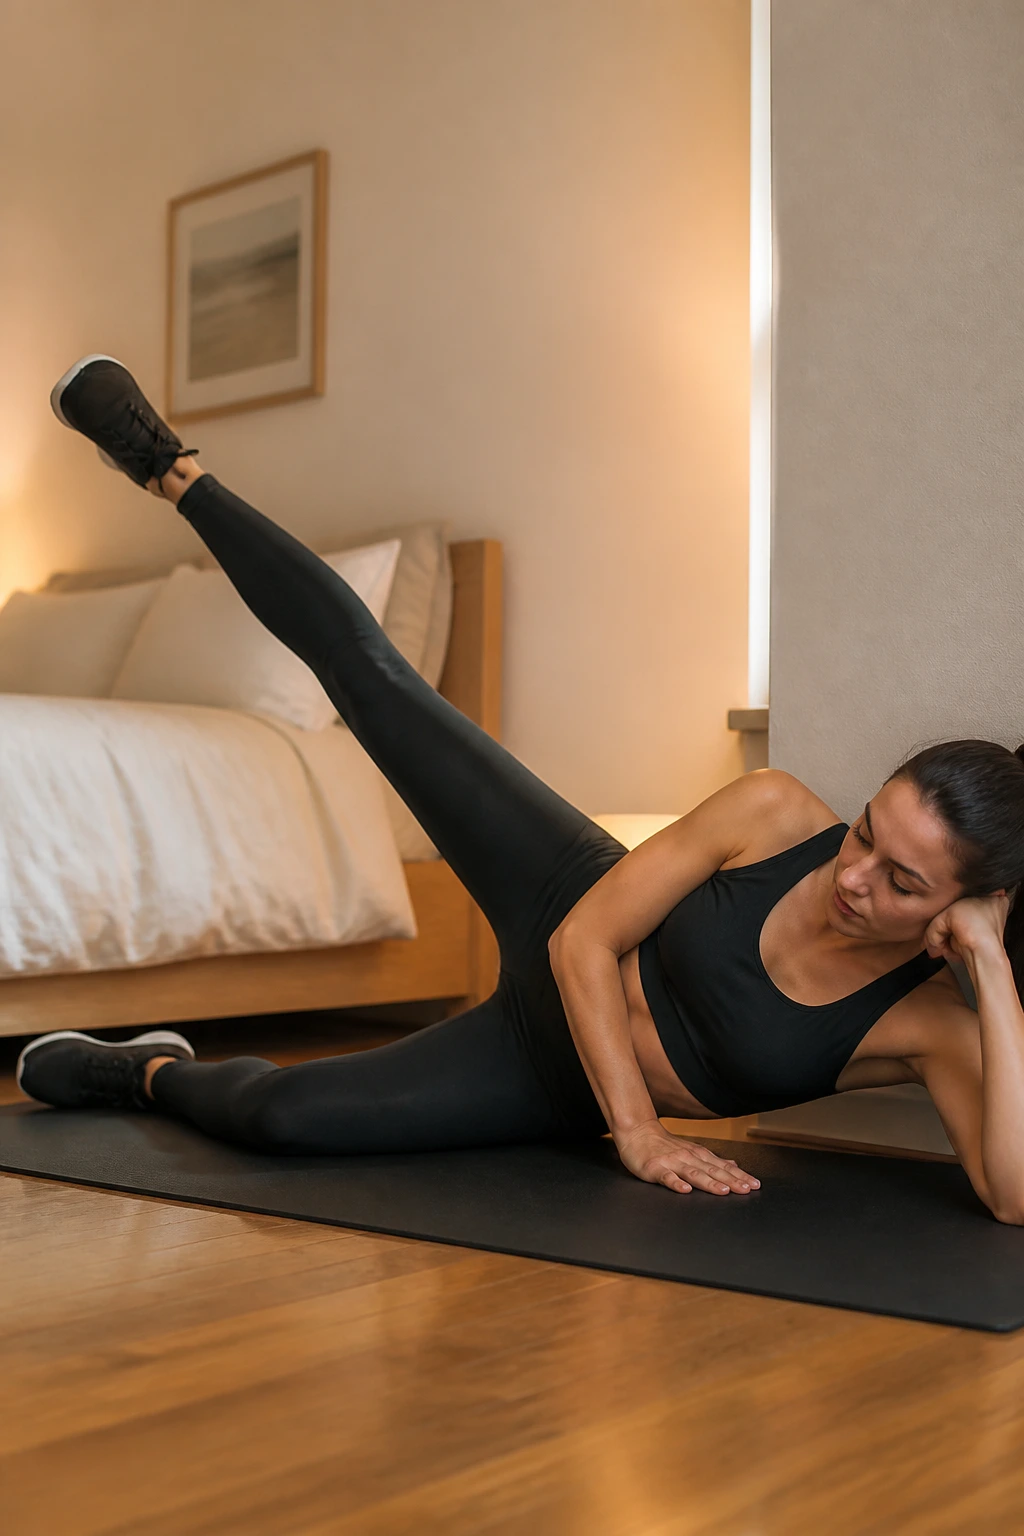
While clamshells focus on rotation, side-lying leg raises focus on abduction. Lie on your side with your legs straight. Lift your top leg toward the ceiling while keeping your toe pointed slightly downward. By internally rotating the hip slightly (pointing the toe down), you target the glute medius and minimus more effectively.
The “Don’t Rock” Rule
The biggest mistake people make here is letting their torso rock forward or backward. You should feel like your hips are sandwiched between two panes of glass. If you need to, lean your back against a wall to prevent your hips from rotating. You will likely feel a significant burn in the side of your hip within ten to fifteen reps. That burning sensation is exactly what you are looking for.
Why You Should Do This
If you run or hike, these are essential. They build the lateral hip strength required to keep your pelvis level with every single step. A level pelvis means less torque on your knees and less strain on your lower back.
5. Monster Walks
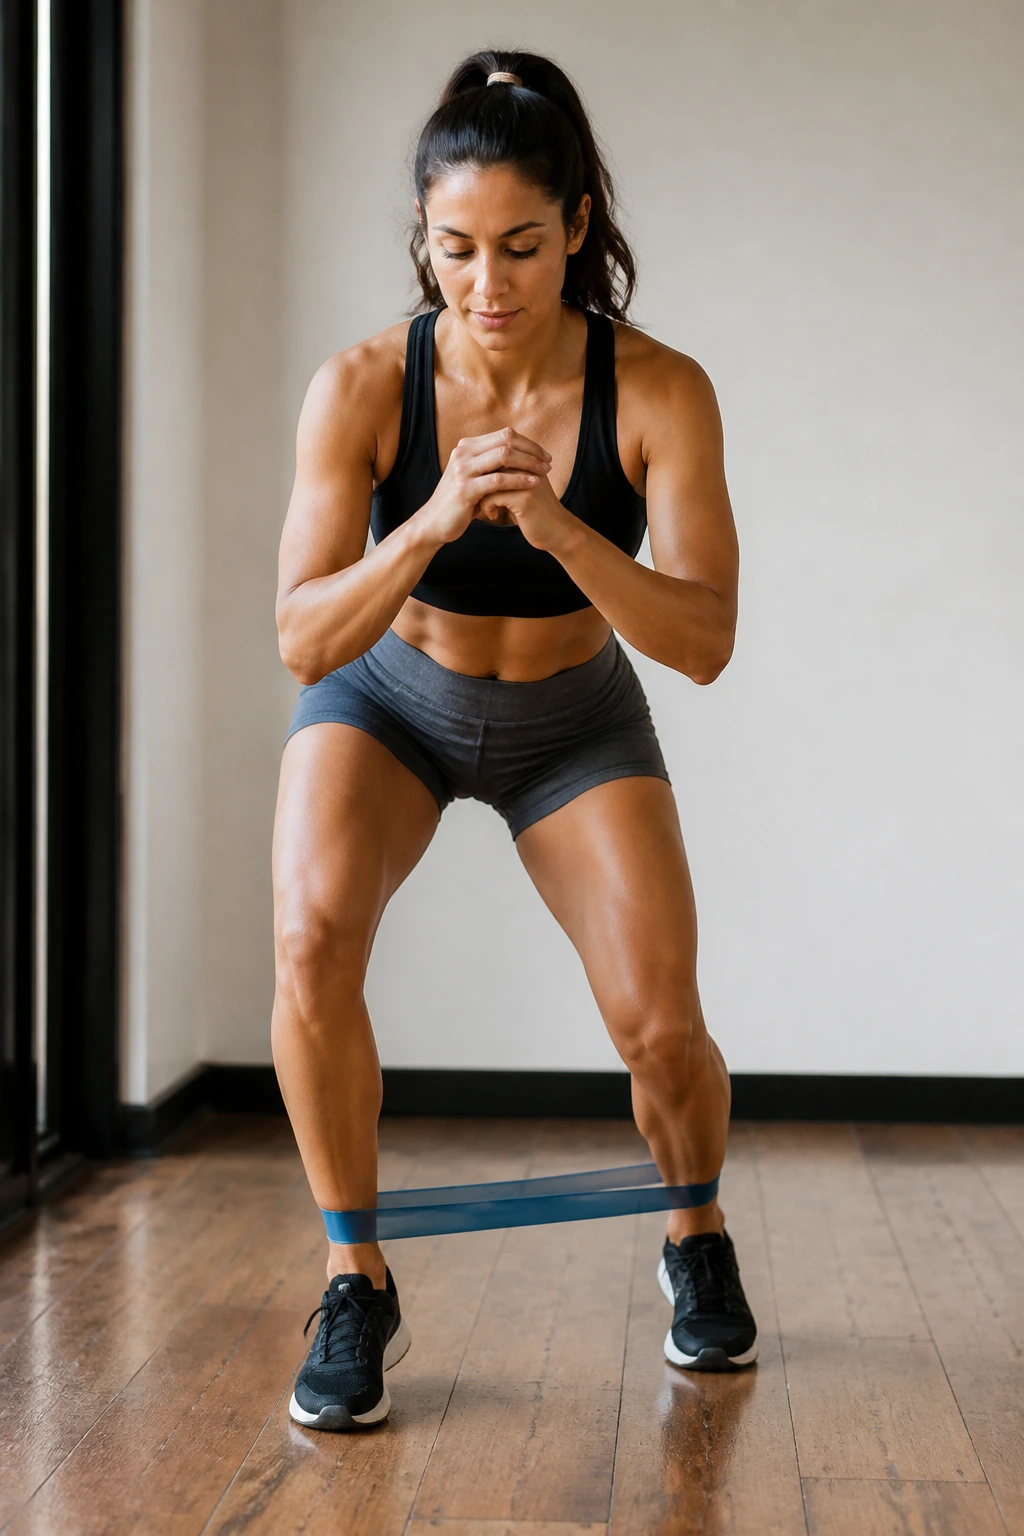
This exercise requires a mini-resistance band. Place the band either around your ankles or just above your knees. Stand with your feet shoulder-width apart, knees slightly bent, and drop into a shallow squat. Now, step diagonally forward and out, maintaining tension on the band the entire time.
Why It’s Different
Most gym movements occur in the sagittal plane—moving forward and backward. Monster walks move you in the frontal and transverse planes, which is where your hips truly learn to stabilize. You are forcing the glutes to fight against the resistance of the band while maintaining a squat position. It is exhausting and highly effective for developing functional hip strength.
Key Technique
- Keep the tension: Never let your knees cave inward. If the band pulls your knees together, you need to push them out harder.
- Stay low: The higher you stand, the less work your hips do. Sink into that quarter-squat and stay there.
6. Fire Hydrants
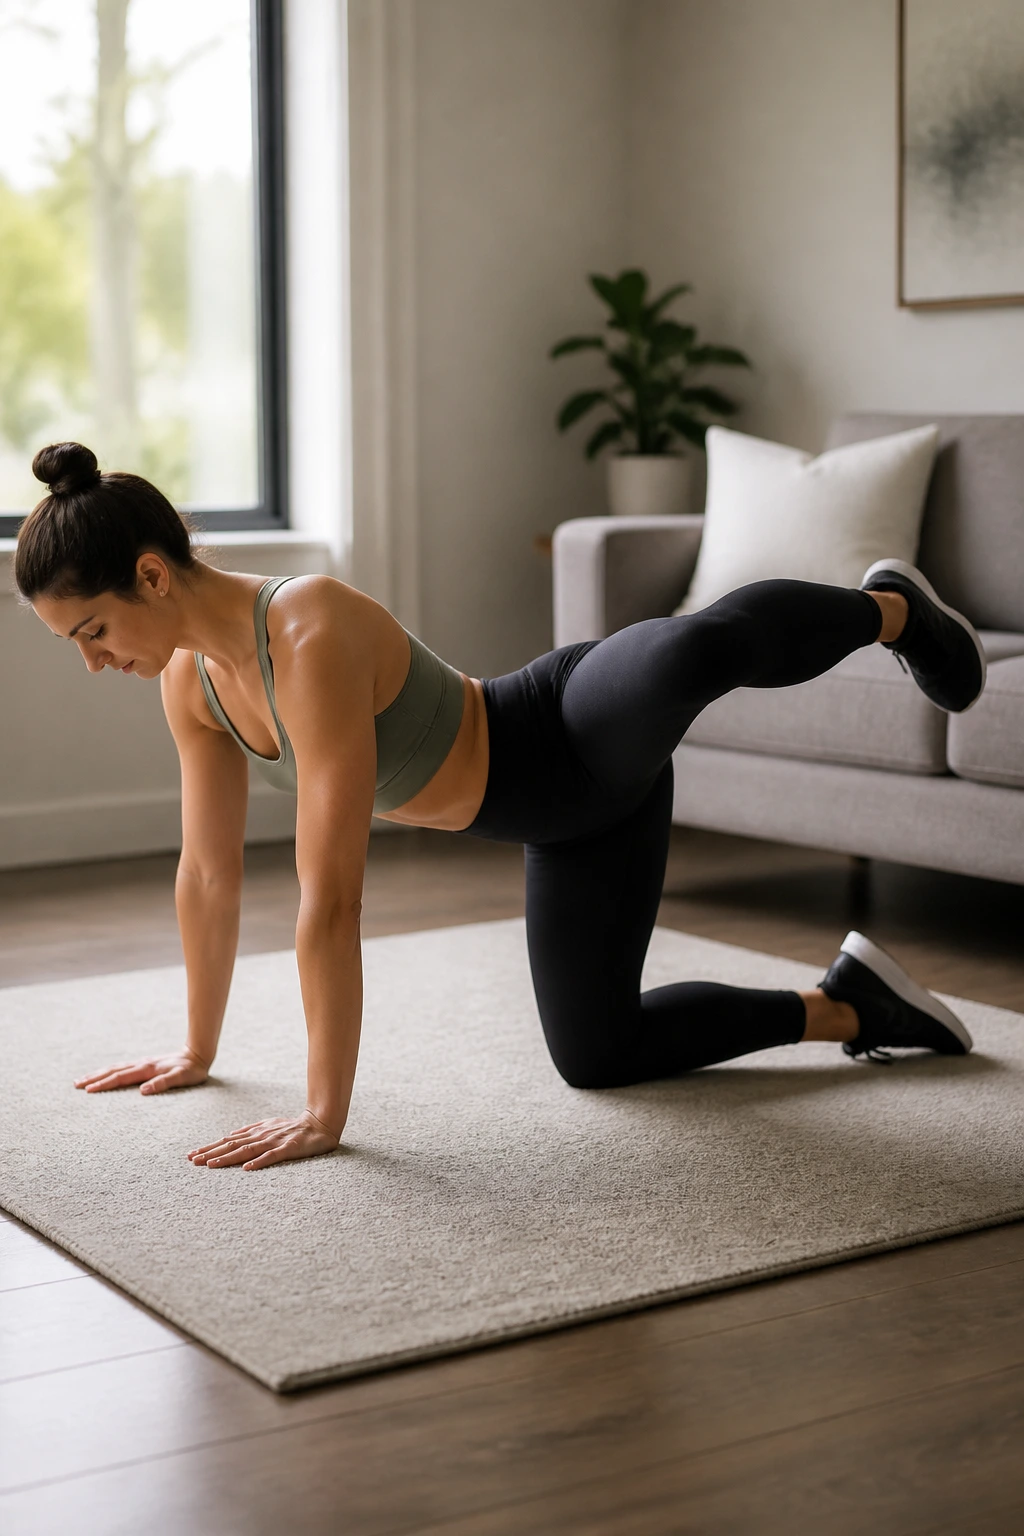
Start in a tabletop position, just like you would for a bird-dog. Keeping your knee bent at a 90-degree angle, lift your right leg out to the side until your thigh is parallel to the floor. It is called a fire hydrant for obvious reasons. This movement isolates the gluteus medius and requires significant core engagement to prevent your spine from compensating.
Focusing on the Hinge
You are not trying to rotate your entire trunk to get the leg higher. You are strictly lifting from the hip joint. If you only get your leg up two inches before your torso starts to twist, that is fine. Focus on the internal effort of the glute pulling the leg up. Over time, that range of motion will improve.
The Value of Isolation
This movement is excellent for “waking up” the glutes before a heavy leg day. Use it as part of your warm-up to ensure your glutes are firing before you get under a barbell.
7. Weighted Sumo Squats
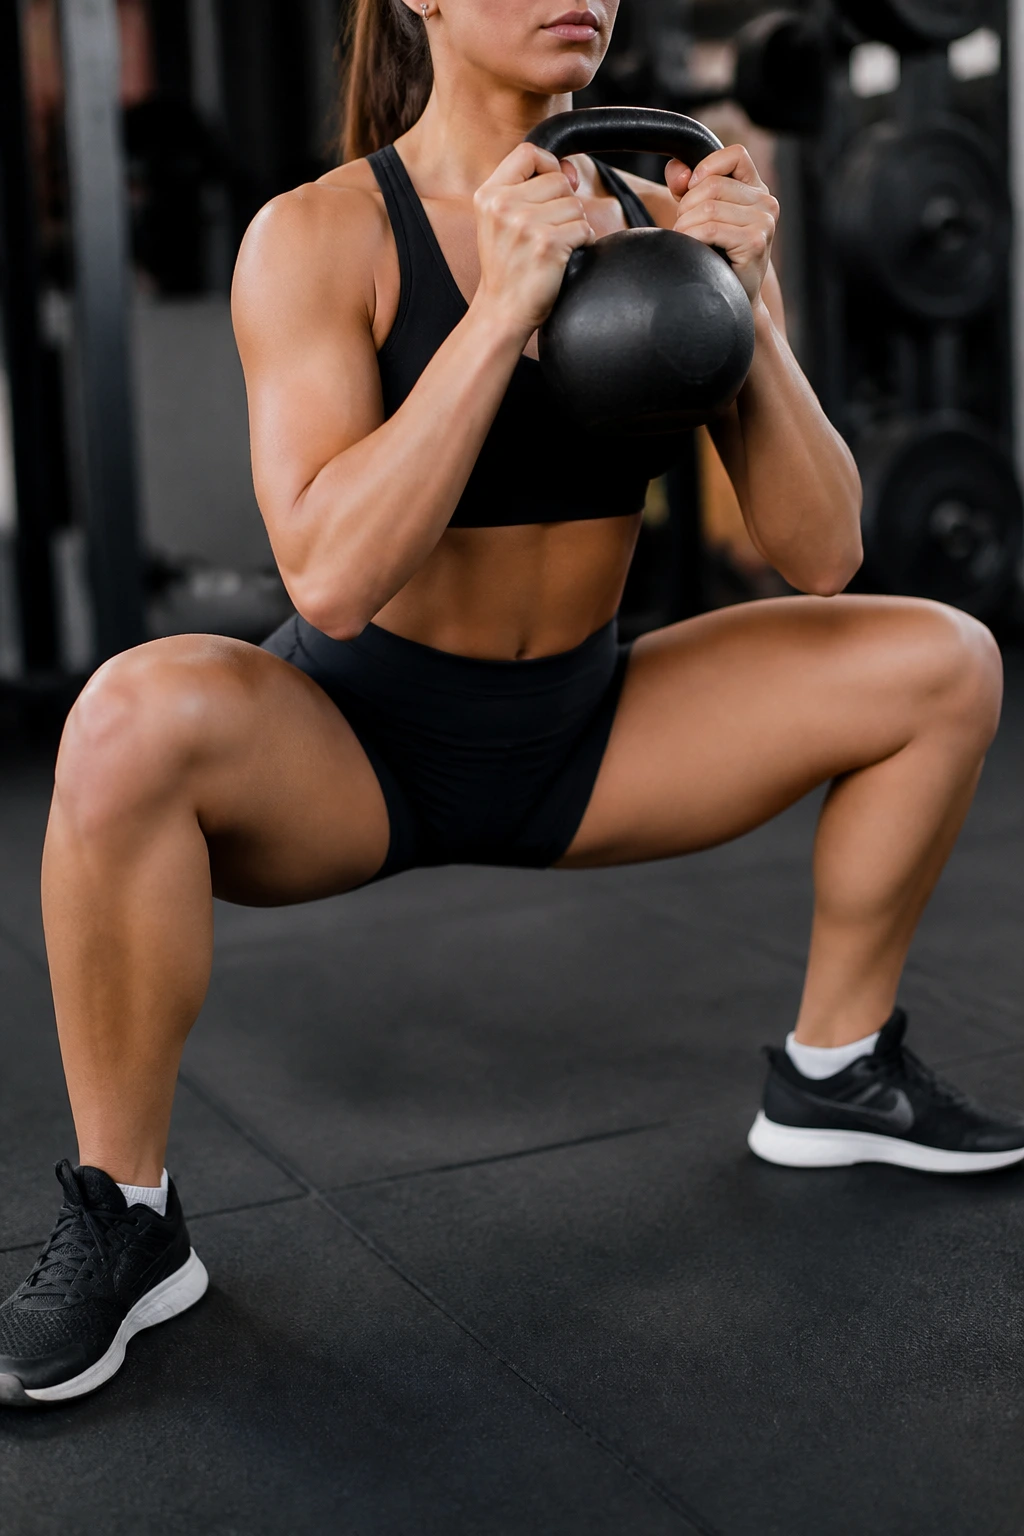
The wide stance of the sumo squat shifts the focus from the quads to the inner thighs (adductors) and the glutes. Stand with your feet wider than shoulder-width, toes turned outward. Hold a kettlebell or dumbbell in front of you. As you squat, ensure your knees track directly over your toes.
The Adductor Connection
Many people suffer from weak hips because their adductors—the muscles on the inside of the thigh—are underactive. By widening your stance, you force these muscles to work harder. The sumo stance also allows for a more upright torso, which reduces the shear force on your lower back compared to a narrow-stance back squat.
Practical Tips
- Go deep: Because your feet are wider, you have more clearance to drop your hips.
- Drive the knees out: If your knees buckle inward, you lose all the engagement in your hips. Think about “tearing the floor apart” with your feet as you stand up.
8. Lateral Lunges
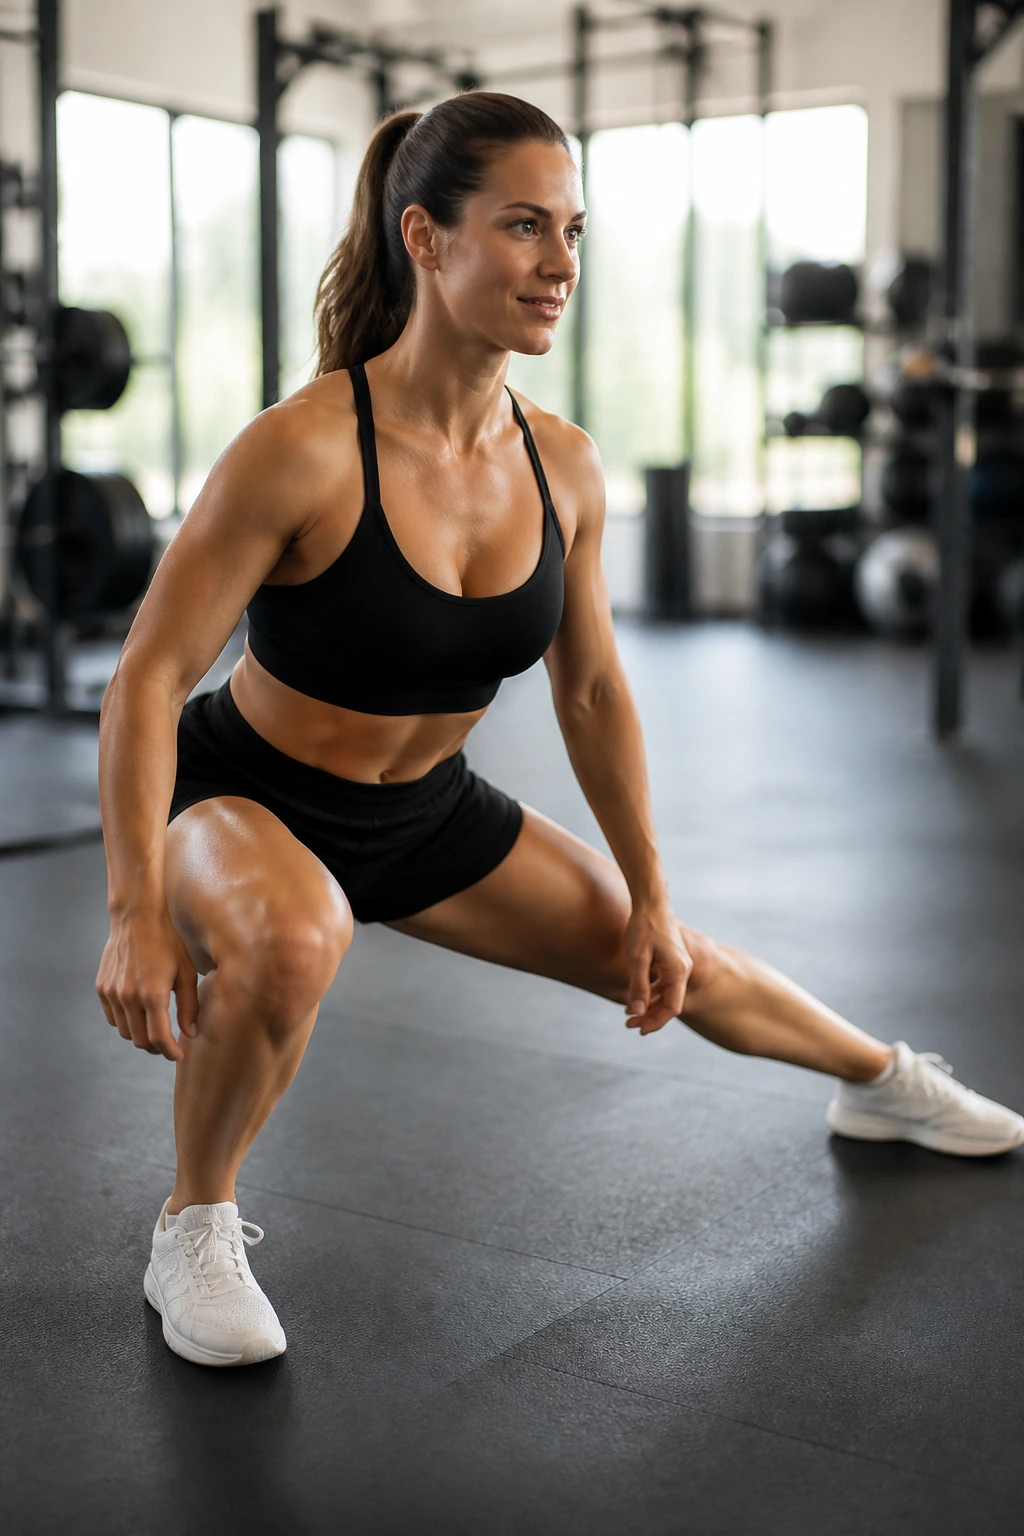
Lateral lunges are a test of hip mobility and strength. Step out wide to the side, keeping one leg straight and bending the other knee into a squat. Push your hips back as if you are trying to sit in a chair behind you.
Why Frontal Plane Work Is Necessary
Most people exclusively train by moving forward and backward. Lateral lunges demand that your hips handle loads in the side-to-side plane. This is vital for athletes and anyone who wants to prevent injury, as most real-world injuries occur when we move in directions we aren’t conditioned for. If your hip mobility is tight, you will feel this immediately in your groin.
Adjusting for Mobility
If you cannot get low in a lateral lunge without your heel coming off the floor, you need to shorten your stance. It is better to have a shallower lunge with good form than a deep lunge where your knee is caving and your heel is floating.
9. Bulgarian Split Squats
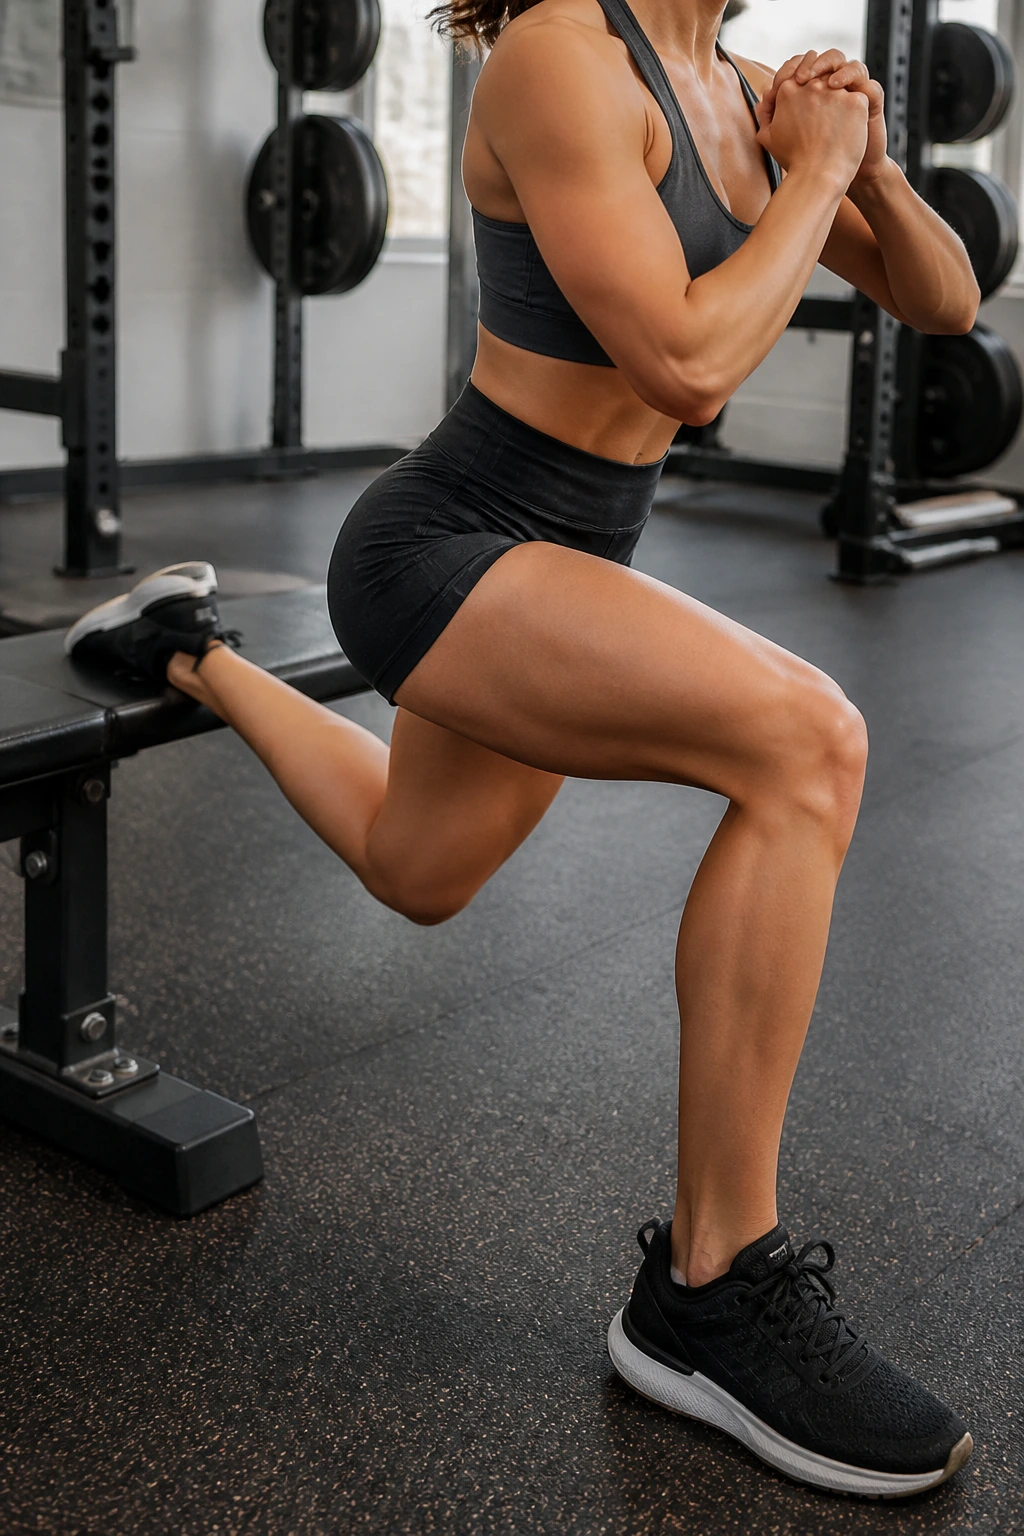
Love them or hate them, there is no denying their efficacy. Place one foot on a bench or chair behind you and lunge with the other. This movement forces you to balance on one leg while the rear hip is held in extension. It is essentially a brutal, concentrated form of single-leg training.
The Hip Flexor Stretch
The magic of the Bulgarian split squat is twofold: it strengthens the working leg and stretches the hip flexor of the back leg. If you are sitting for most of your day, your hip flexors are likely tight and shortened. This movement forces them to lengthen under load.
How to Survive Them
- Torso angle: Lean forward slightly to place more emphasis on the glute. Stay upright to target the quads.
- Foot position: Experiment with how far forward your front foot is. A closer foot hits the quads more; a further foot hits the glutes more.
10. Cossack Squats
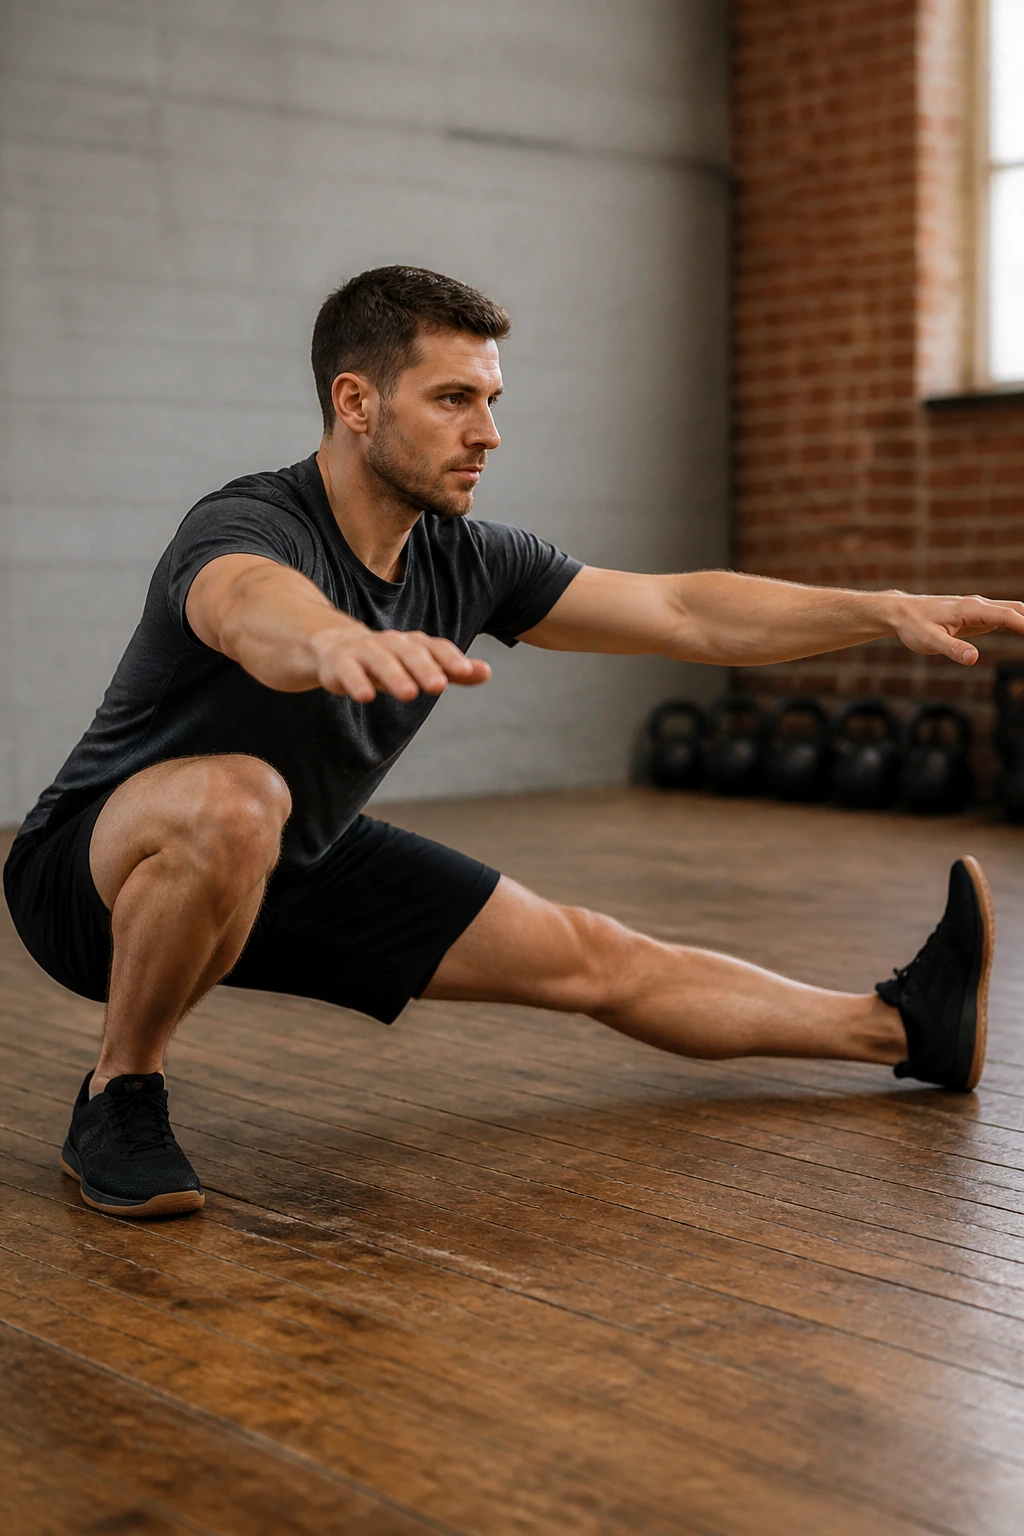
Cossack squats are similar to lateral lunges, but they are performed as a deeper, more fluid movement. From a wide stance, shift your weight entirely to one leg, squatting down as low as possible while keeping the other leg straight and the foot flexed toward the ceiling.
The Mobility Requirement
This is an advanced move. It requires not just hip strength, but ankle and hip mobility. If you are struggling, use a support like a TRX strap or a sturdy pole to balance yourself as you descend. Over time, you will find you need less assistance.
Why They Work
They teach you how to create tension throughout the entire hip joint. You are essentially loading the hip through its full range of motion. For anyone interested in martial arts, running, or heavy lifting, this is a top-tier mobility and strength builder.
11. Hip Thrusts
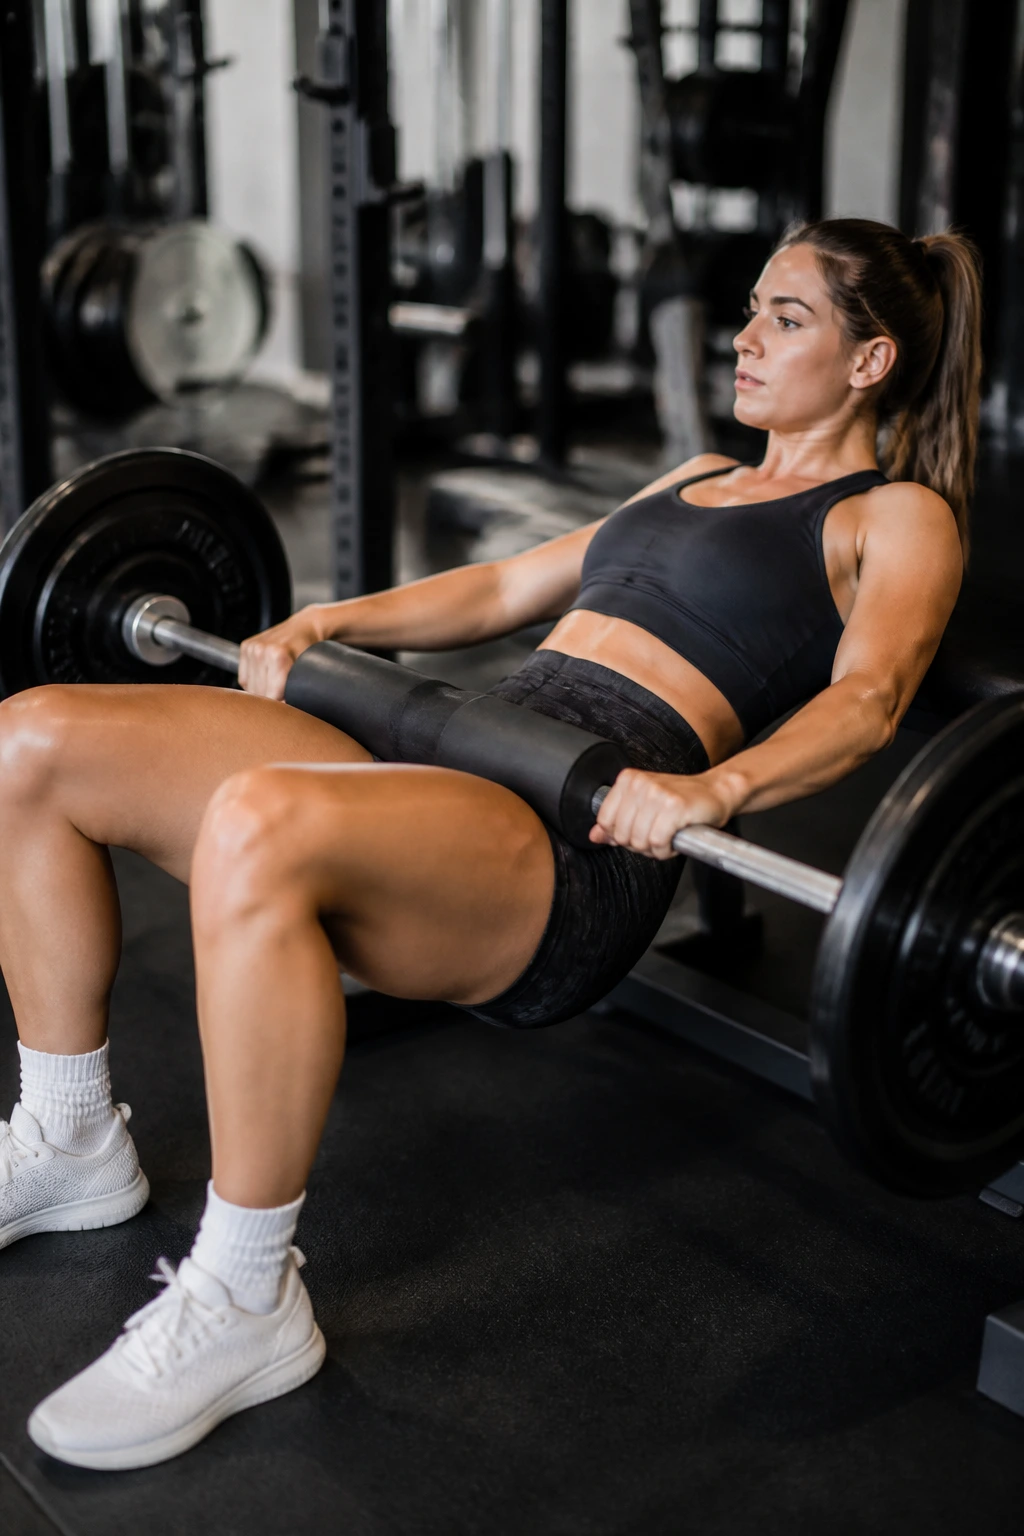
If you want to build strong glutes, the hip thrust is king. Sit on the floor with your shoulder blades against a bench. Place a barbell or dumbbell across your hips. Drive your hips upward, squeezing your glutes at the top. This movement places the glutes in the most shortened position under the maximum load.
Setting Up Correctly
Do not slide the bench. If you are using a barbell, put a pad on the bar so you don’t bruise your hip bones. Your chin should be tucked, and your eyes should look forward throughout the movement. If you look up at the ceiling, you will hyperextend your neck and back.
The Loading Factor
Because you are not balancing a weight like in a squat, you can load the hip thrust much heavier. This is where you can safely push your strength limits to trigger hypertrophy in the gluteal muscles.
12. Kettlebell Swings
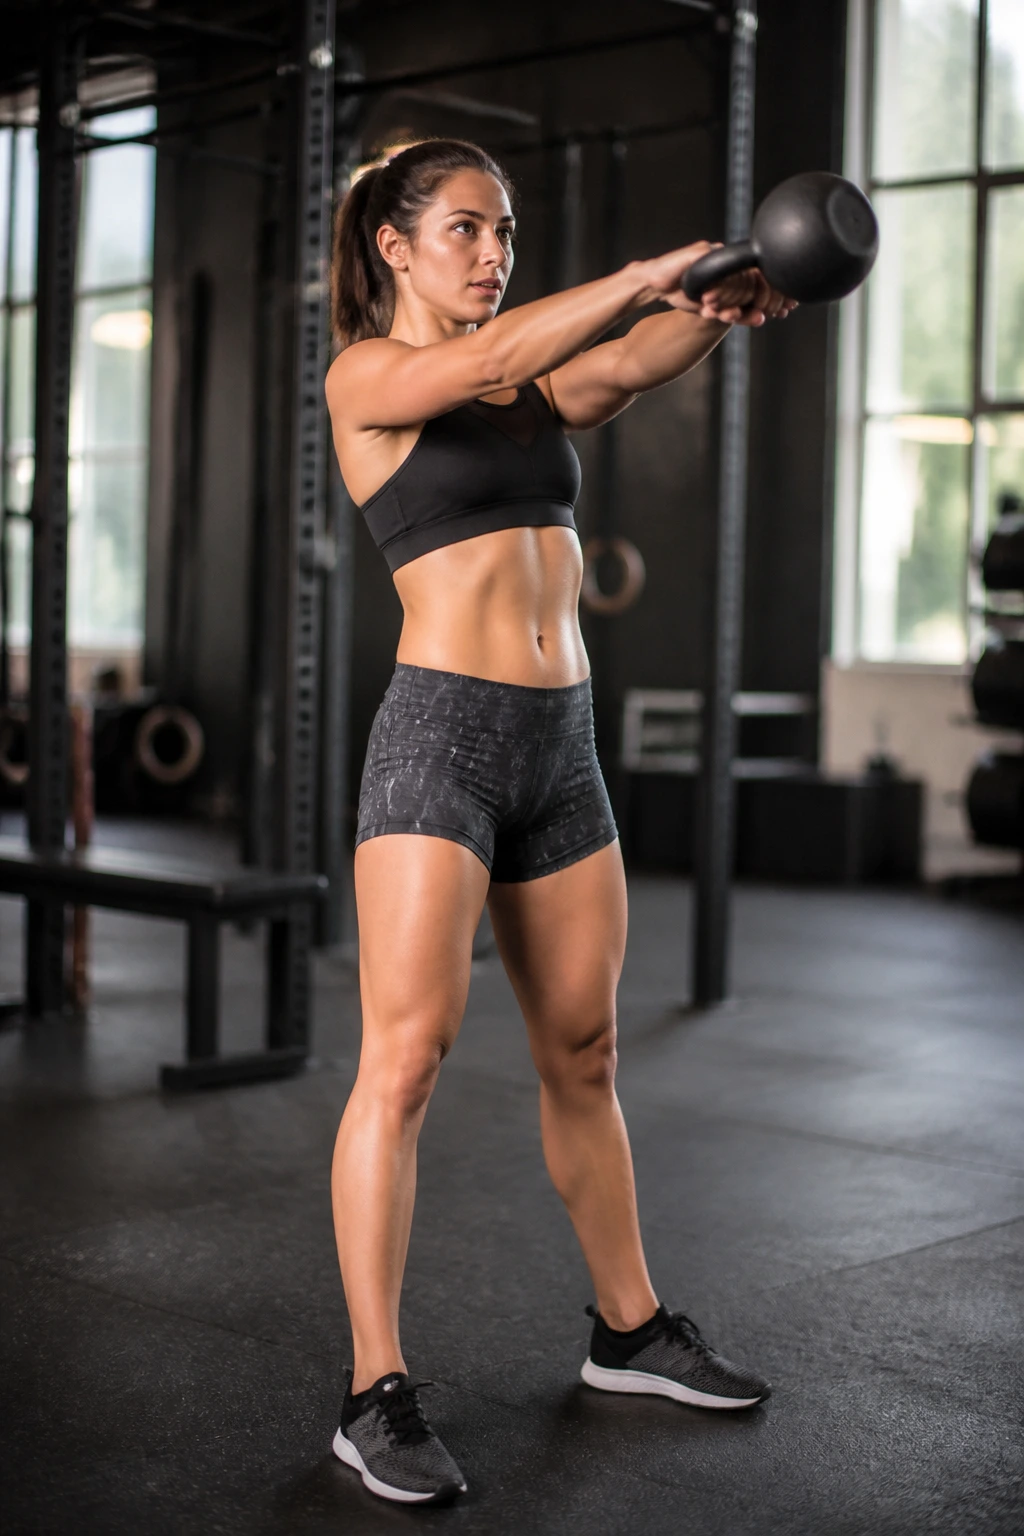
The kettlebell swing is a dynamic hip hinge. It is not a squat; it is a snap. You are hinging your hips back and snapping them forward to propel the kettlebell up. The force is generated by the glutes and hamstrings, not the arms.
The Power Hinge
The hinge is the most important part. If you bend your knees too much, you turn it into a squat. If you round your back, you risk injury. The movement should be quick and explosive. Think of your arms as mere ropes holding the bell; your hips are the engine.
Safety First
- Back health: Keep your spine neutral. If your lower back starts to round, stop.
- The hike: Start the swing by “hiking” the bell back between your legs like a center in football. This builds the necessary tension to explode forward.
13. Single-Leg RDL (Romanian Deadlift)
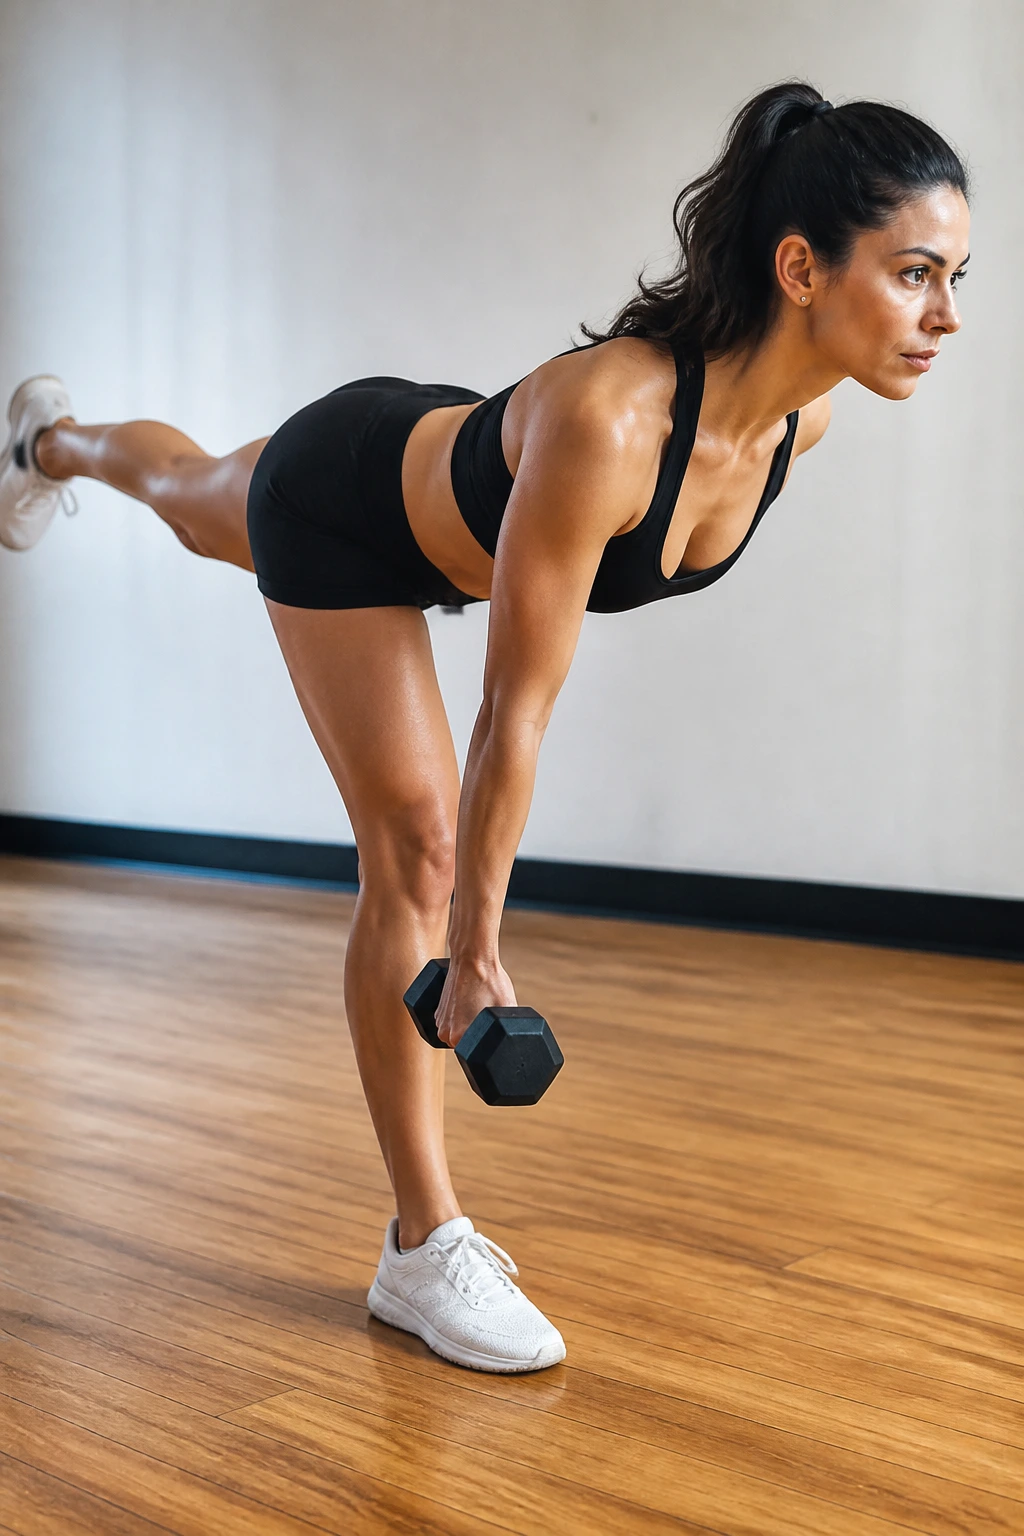
Standing on one leg, hinge at the hips while extending your other leg straight back behind you. Lower your torso until it is parallel to the floor, then return to the starting position. This is the ultimate test of stability and posterior chain strength.
The Balance Struggle
You will wobble. This is normal. The wobbling is actually where the strengthening happens, as your body is forced to recruit every tiny stabilizing muscle in the hip and ankle. If you find it impossible to balance, lightly tap your toe to the ground for support, but try to keep the weight on the working leg.
Precision Matters
Do not reach for the floor with your hands. Reach for the back wall with your heel. The hinge is a hip movement, not a touch-your-toes movement. If you keep your hips square to the ground, you will feel an incredible stretch in the hamstring and glute.
14. Step-Ups
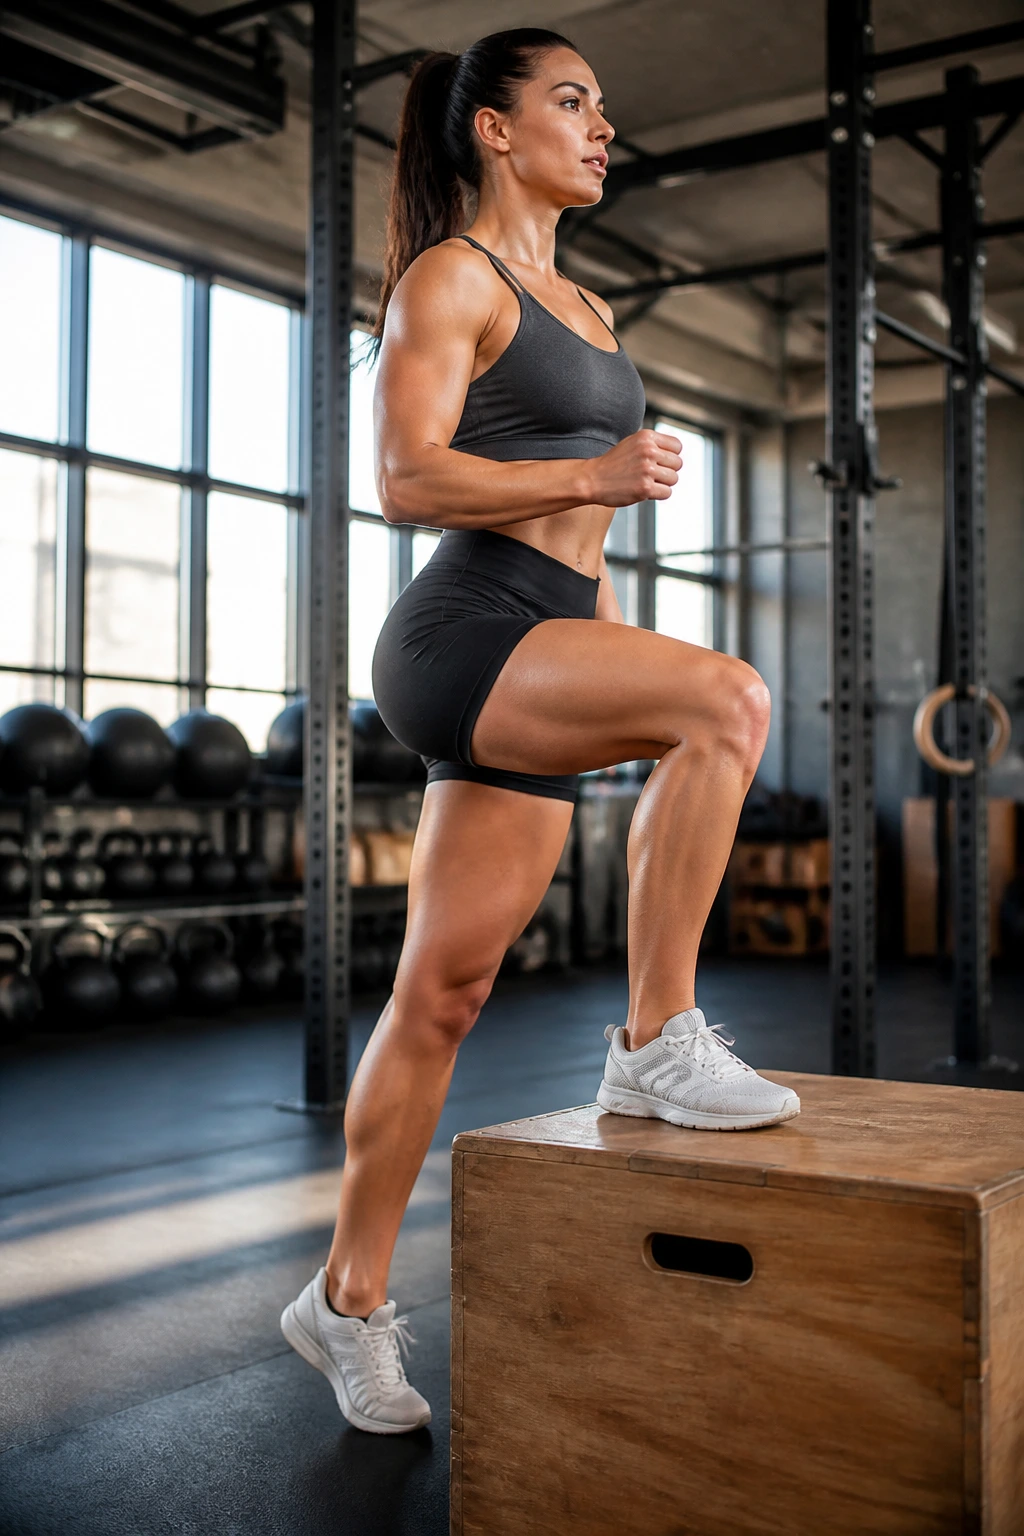
Step-ups are the most functional movement on this list. You do them every time you walk up stairs. The key is to perform them with control. Step up onto a box, drive through the heel, and stand tall. Then, lower yourself back down slowly.
The Negative Phase
Most people bounce off the bottom foot to get up. Do not do that. Keep the trailing foot completely inactive. The descent is actually more important than the ascent; lowering yourself slowly with control eccentric movement builds immense strength in the hip stabilizers.
Height Matters
If your box is too high, your knee will be in an awkward position, which can lead to strain. Your knee should be at roughly 90 degrees or slightly less at the start of the movement. If you are struggling with form, lower the height of the platform.
15. Glute Medius Kickbacks
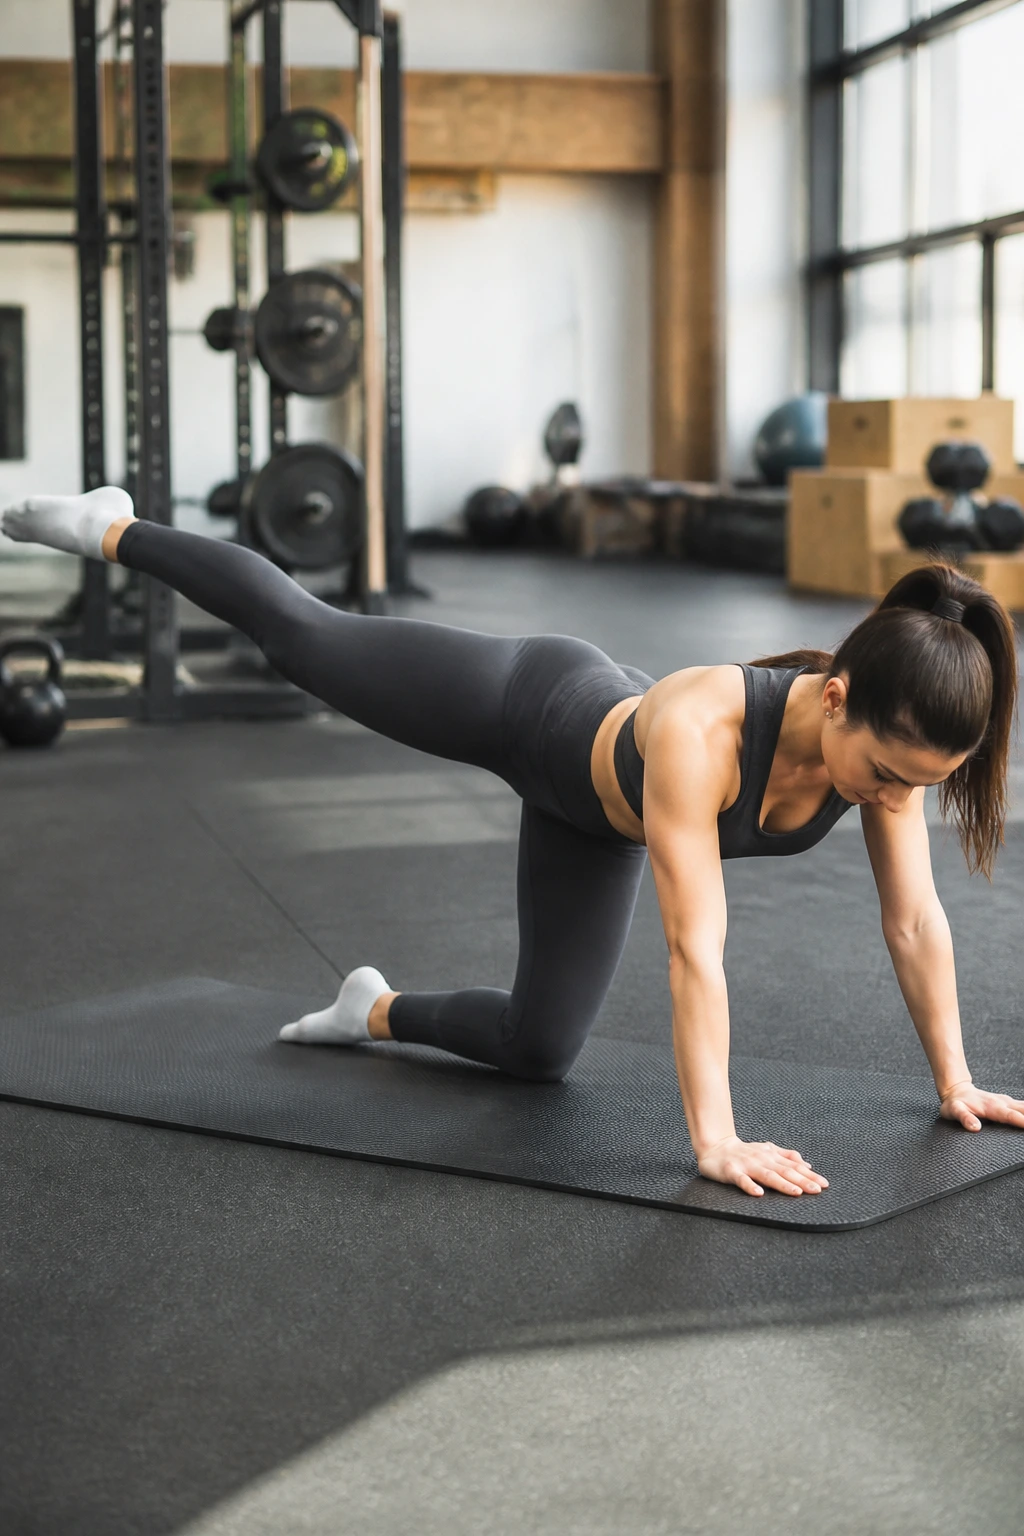
This is a variation of the kickback that targets the glute medius and minimus by adding an angle. Get into a tabletop position. Instead of kicking straight back, kick your leg out at a 45-degree angle.
Why the Angle Matters
Kicking straight back primarily engages the glute maximus. By kicking at an angle, you force the side-stabilizers to engage. It is a subtle difference, but if you want to eliminate the “hip dip” appearance or improve pelvic stability, this subtle adjustment is vital.
Sustained Tension
Do not just kick and drop. Hold the peak of the kick for a second. If you use an ankle weight or a cable machine, you will find this movement becomes significantly more challenging. It is a fantastic finisher for a lower-body workout.
16. Donkey Kicks
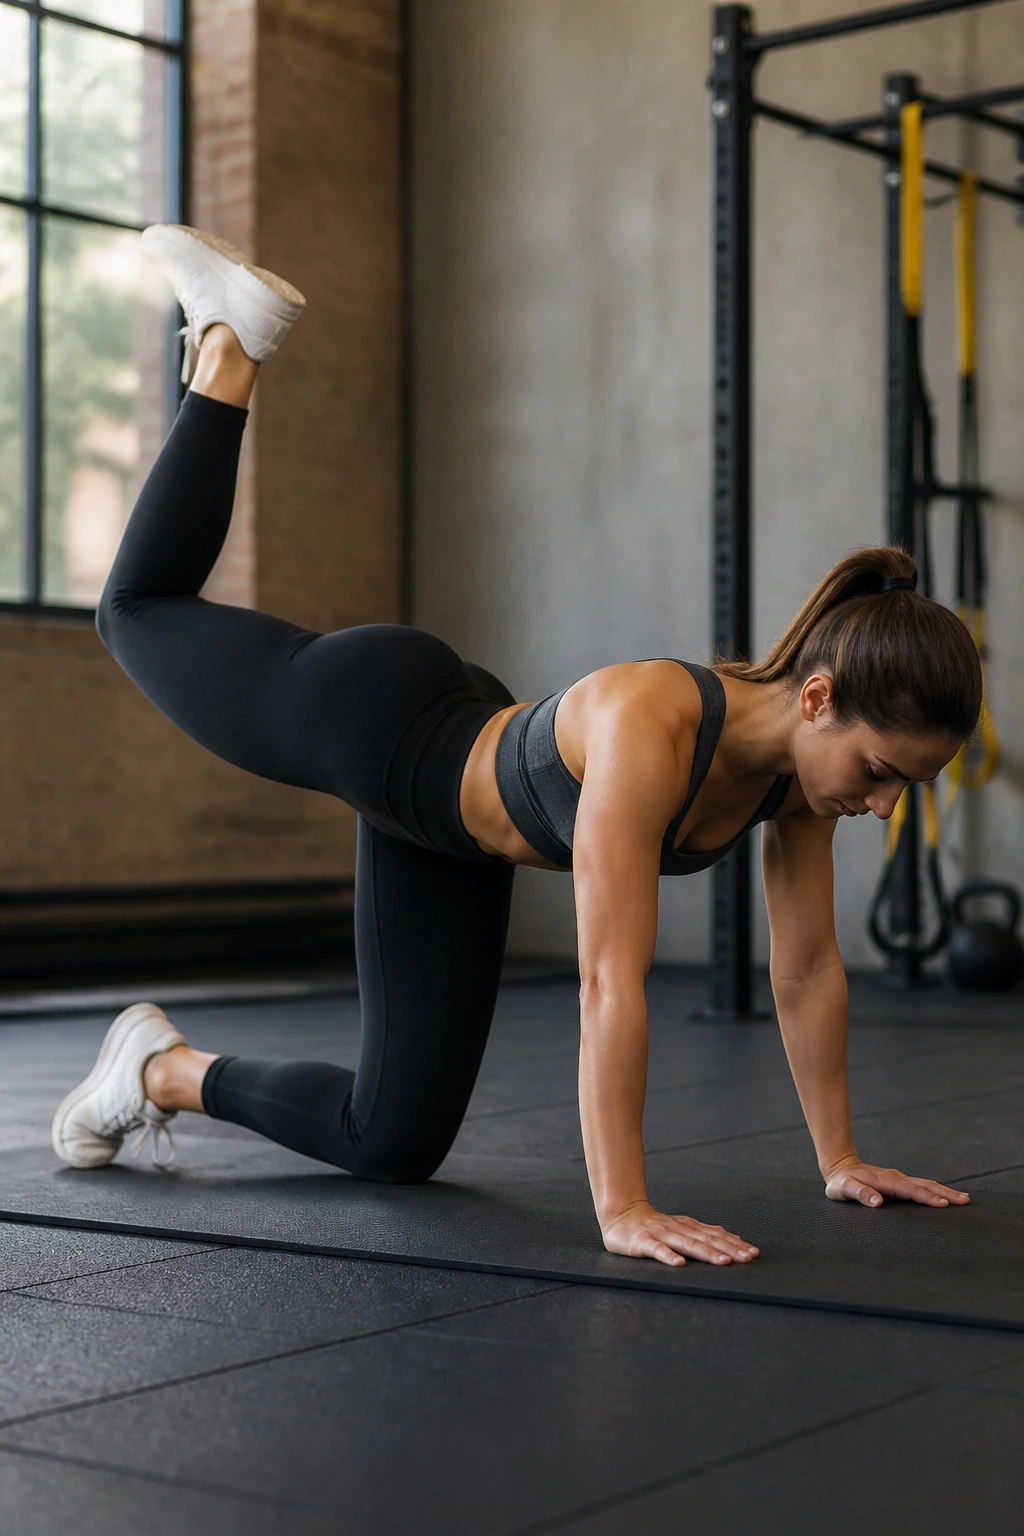
Similar to the kickback, but keeping the knee bent at 90 degrees. Start on all fours, and drive the sole of your foot toward the ceiling. Keep your back flat. The goal is to squeeze the glute as hard as possible at the top.
Avoiding the Back Arch
The most common mistake is arching the lower back to get the leg higher. This provides zero benefit to the glute and puts all the pressure on your spine. Keep your core tight. Imagine you are balancing a glass of water on your lower back. If you arch, the water spills.
Volume Training
Donkey kicks are best done for higher repetitions. They are an isolation exercise. Aim for 15 to 20 reps per side. The burn should be concentrated entirely in the gluteal muscle belly.
17. Banded Hip Abduction
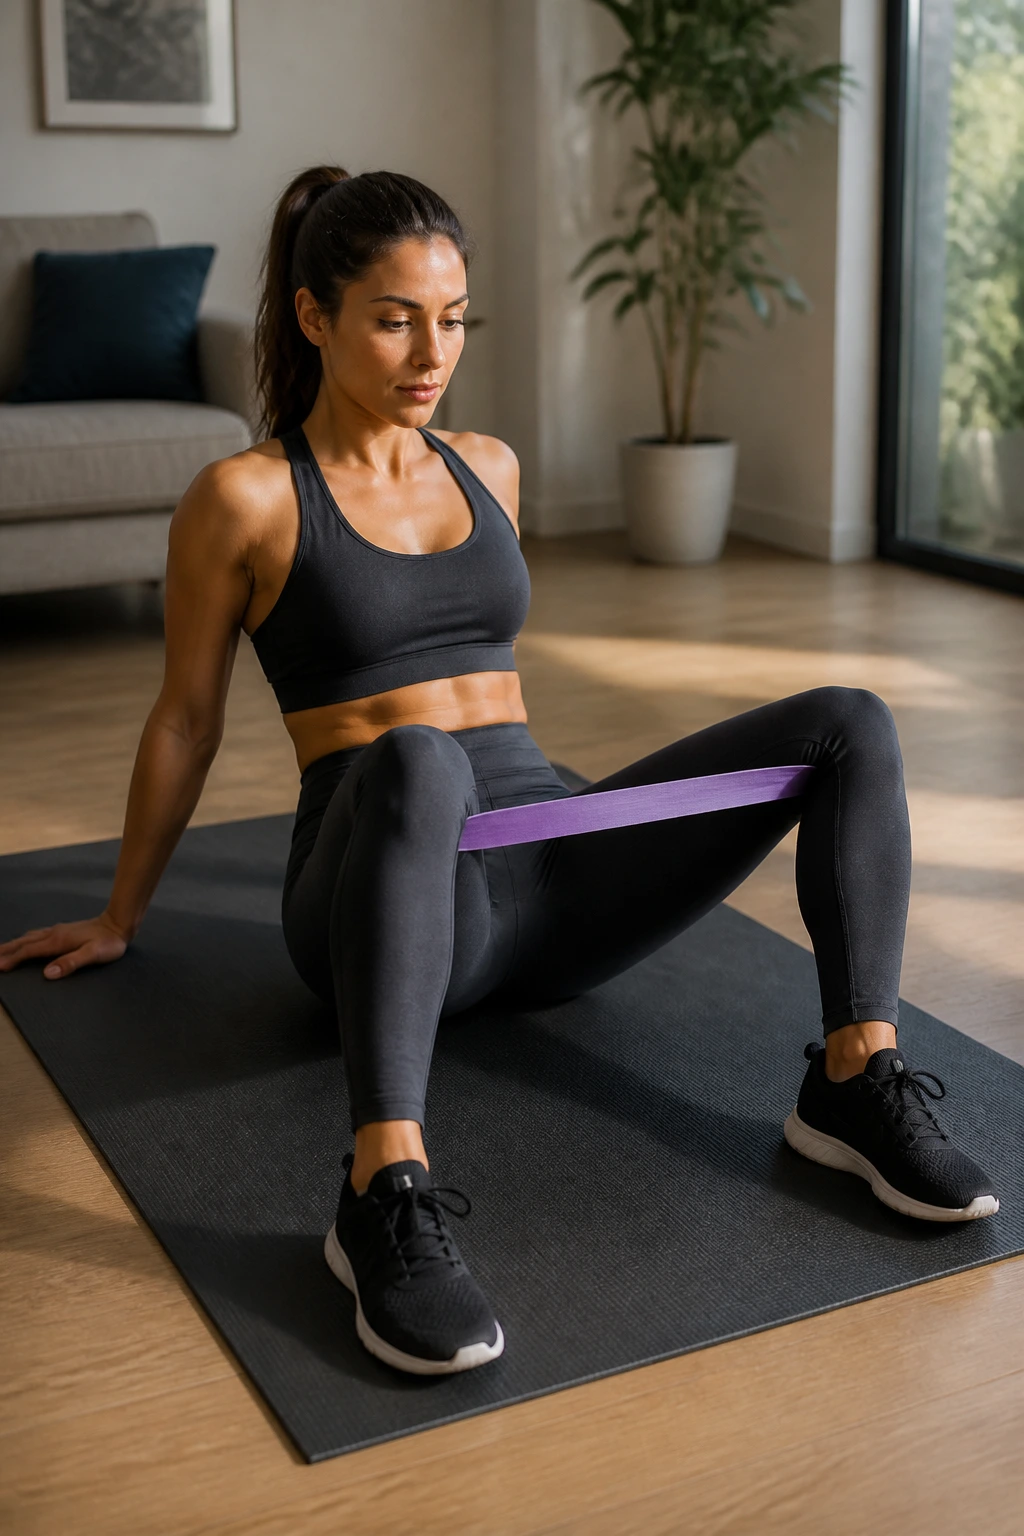
Sit on the floor with a resistance band around your knees. Lean back slightly, using your hands for support behind you. With your feet flat on the floor, push your knees outward against the band, hold for a second, and then release.
The “Burnout” Exercise
This is an excellent way to finish a leg session. The range of motion is small, but the constant tension is brutal. By the end of two minutes, your hips will be on fire. It is one of the few exercises where you can really push for time-under-tension without needing much equipment.
Variations
You can do this seated in a chair as well, which is great for people who have limited floor space or struggle with getting on and off the ground. The principles remain the same: push out, hold, control the release.
18. Seated Hip Abduction (Machine or Band)
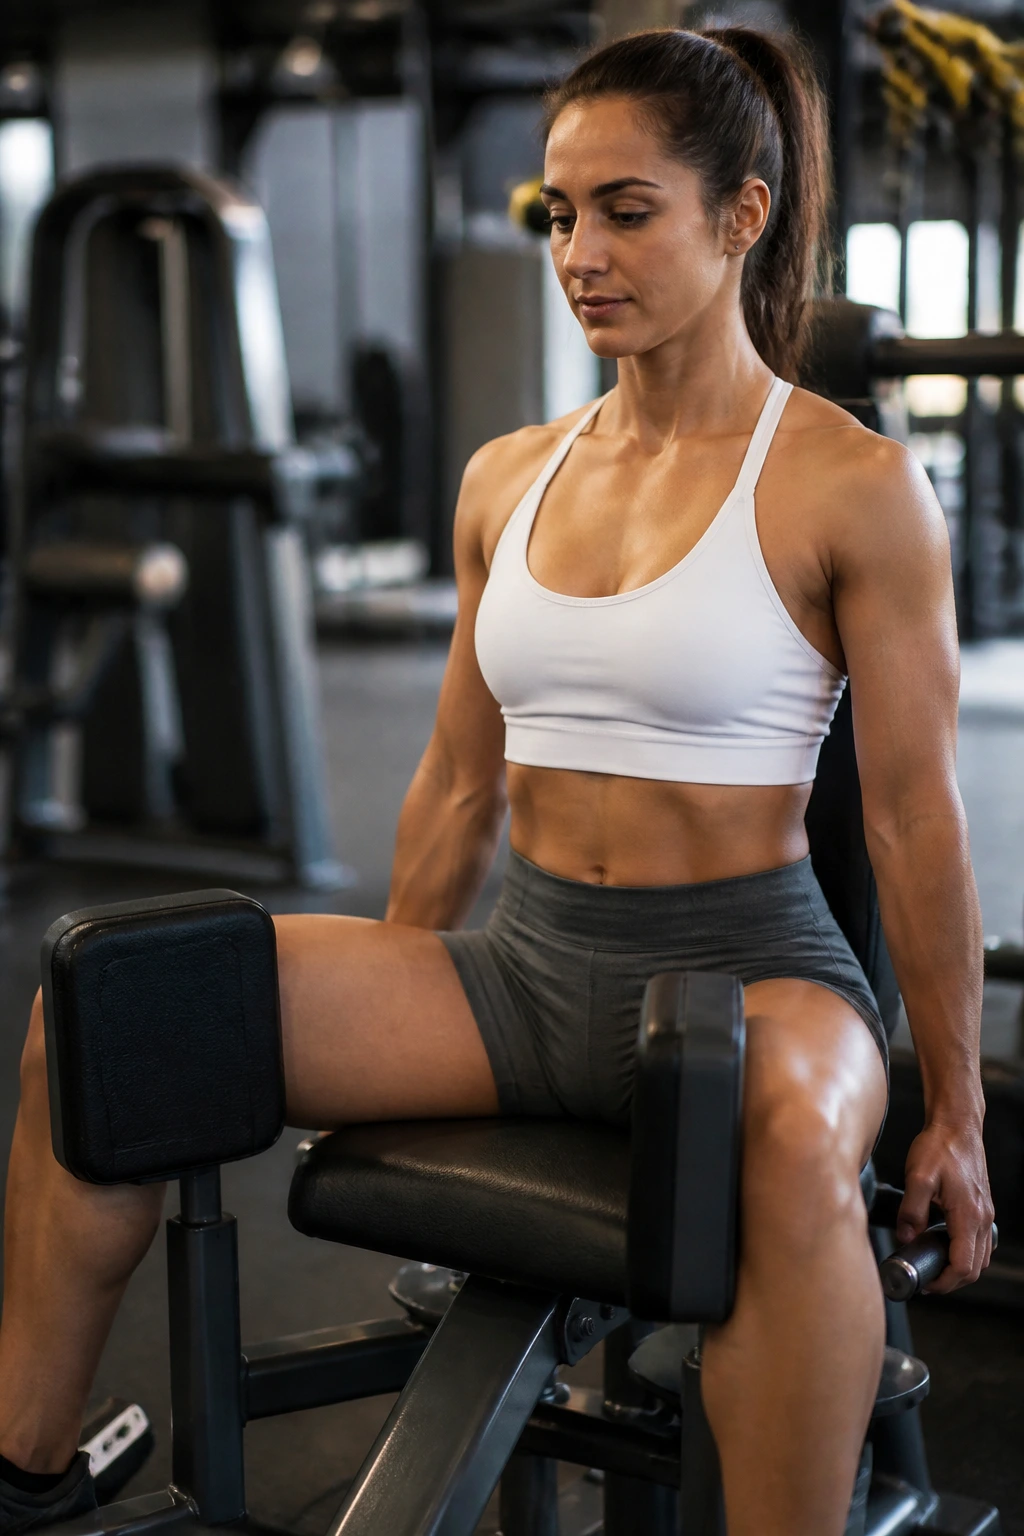
If your gym has a seated abduction machine, use it. If not, you can replicate this by sitting on a bench with a band around your knees. This exercise allows you to sit back and completely remove the core and lower back from the equation, isolating the outer hips.
The Mindset
Because you are supported by the machine or the bench, you can really focus on the contraction. Drive your knees out as wide as possible. Pause at the wide point. This is not about how much weight you can move; it is about how much you can squeeze.
Why This Made the List
It is the most efficient way to isolate the outer hip. After you have done all the compound movements like squats and deadlifts, your stabilizer muscles might be tired but not fully exhausted. This move ensures you wring out every last bit of potential from those glute medius and minimus fibers.
The Path to Stronger Hips
Strengthening your hips is not about performing the most complicated or flashy movements. It is about consistency and respecting the mechanics of the joint. You have eighteen distinct ways to attack this area, ranging from gentle, stability-focused work like the bird-dog to heavy-hitting compound movements like the hip thrust. You do not need to do all eighteen in a single workout. In fact, you should not.
Choose three or four of these exercises to integrate into your existing routine. Pick one compound movement (like a squat or thrust), one isolation movement (like a clamshell or kickback), and one stability movement (like a bird-dog or single-leg balance). Rotate these through your sessions. If you are currently feeling pain, start with the lowest-impact movements—the floor-based exercises—and master your form before adding weight or complexity.
The hips are the foundation of your movement. Treat them with care, train them with intent, and they will support you for a lifetime. Listen to your body as you try these. If a movement causes sharp pain, stop immediately and try a different variation. Strengthening should feel like work, but it should never feel like injury. Be patient with your progress, and you will eventually build the hip strength that creates a stable, powerful, and pain-free body.
