



Hard yoga poses to build strength do one thing better than almost any machine or dumbbell: they expose weak links fast. Crow tells you what your wrists and core are doing. Handstand exposes lazy shoulders. A deep backbend shows whether your glutes and upper back actually help, or whether they sit there taking up space.
A lot of people think yoga strength means “looking stable.” It doesn’t. It means pressing the floor, stacking joints, controlling breath, and staying clean while your muscles shake a little. That shaking is part of the deal. So is the awkwardness.
Warm up first. Wrists, shoulders, hips, and hamstrings all need a few minutes before you ask them to carry body weight or fold into strange shapes. A wall is useful. Blocks are useful. A strap is useful. None of that makes the practice weaker.
These 20 poses move from compact arm balances to inversions, backbends, and standing shapes that ask for balance, patience, and real body control. Start where you can stay organized, not where you can fake it. The difference matters.
1. Crow Pose for Wrist and Core Strength
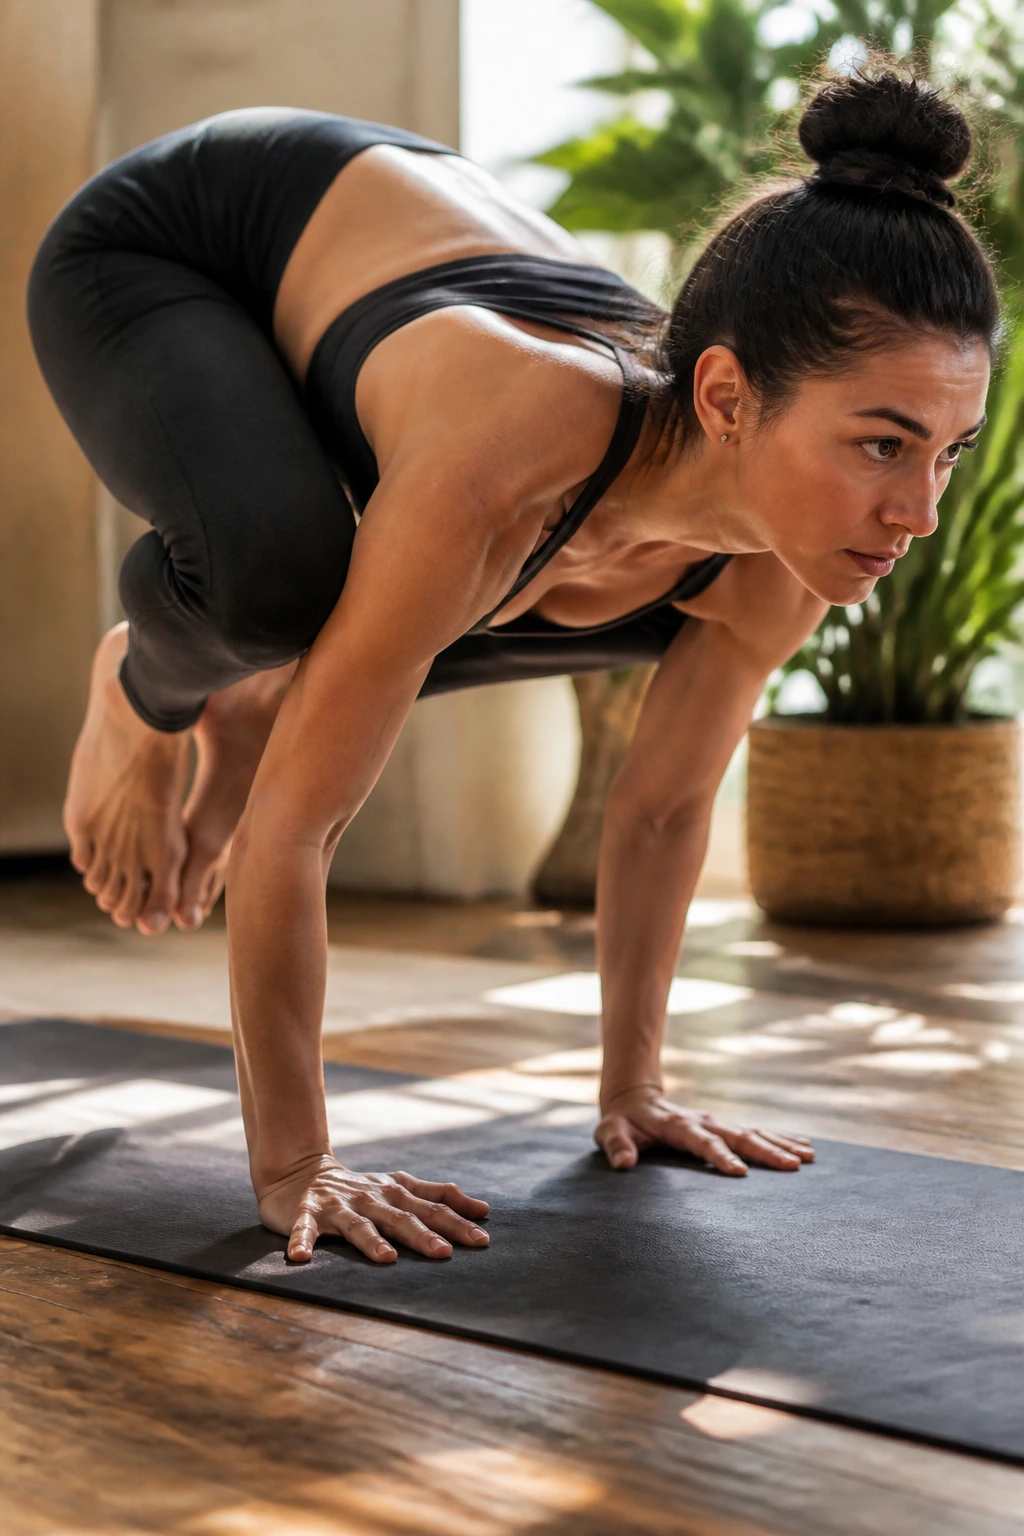
Crow is the pose that teaches you the floor is not passive. Your hands are not decoration here; they’re the whole base, and every finger has a job. When crow is done well, you feel it in the wrists, the deep belly, and the upper back all at once.
What It Loads
The key players are wrist flexors, serratus anterior, and the lower belly. That’s a fancy way of saying the pose wants you to press down, round a little, and keep the knees tucked high on the upper arms.
- Spread the fingers wide and grip the mat with the fingertips.
- Lean forward until the toes get light.
- Hug the knees into the upper arms, not the other way around.
- Keep the gaze a few inches ahead of the hands.
Tiny tip: if your elbows drift out wide, the whole shape gets mushy. Hug them in.
Stay patient. Crow rewards the person who can hold tension without panic.
2. Side Crow Pose for Twist Power and Balance
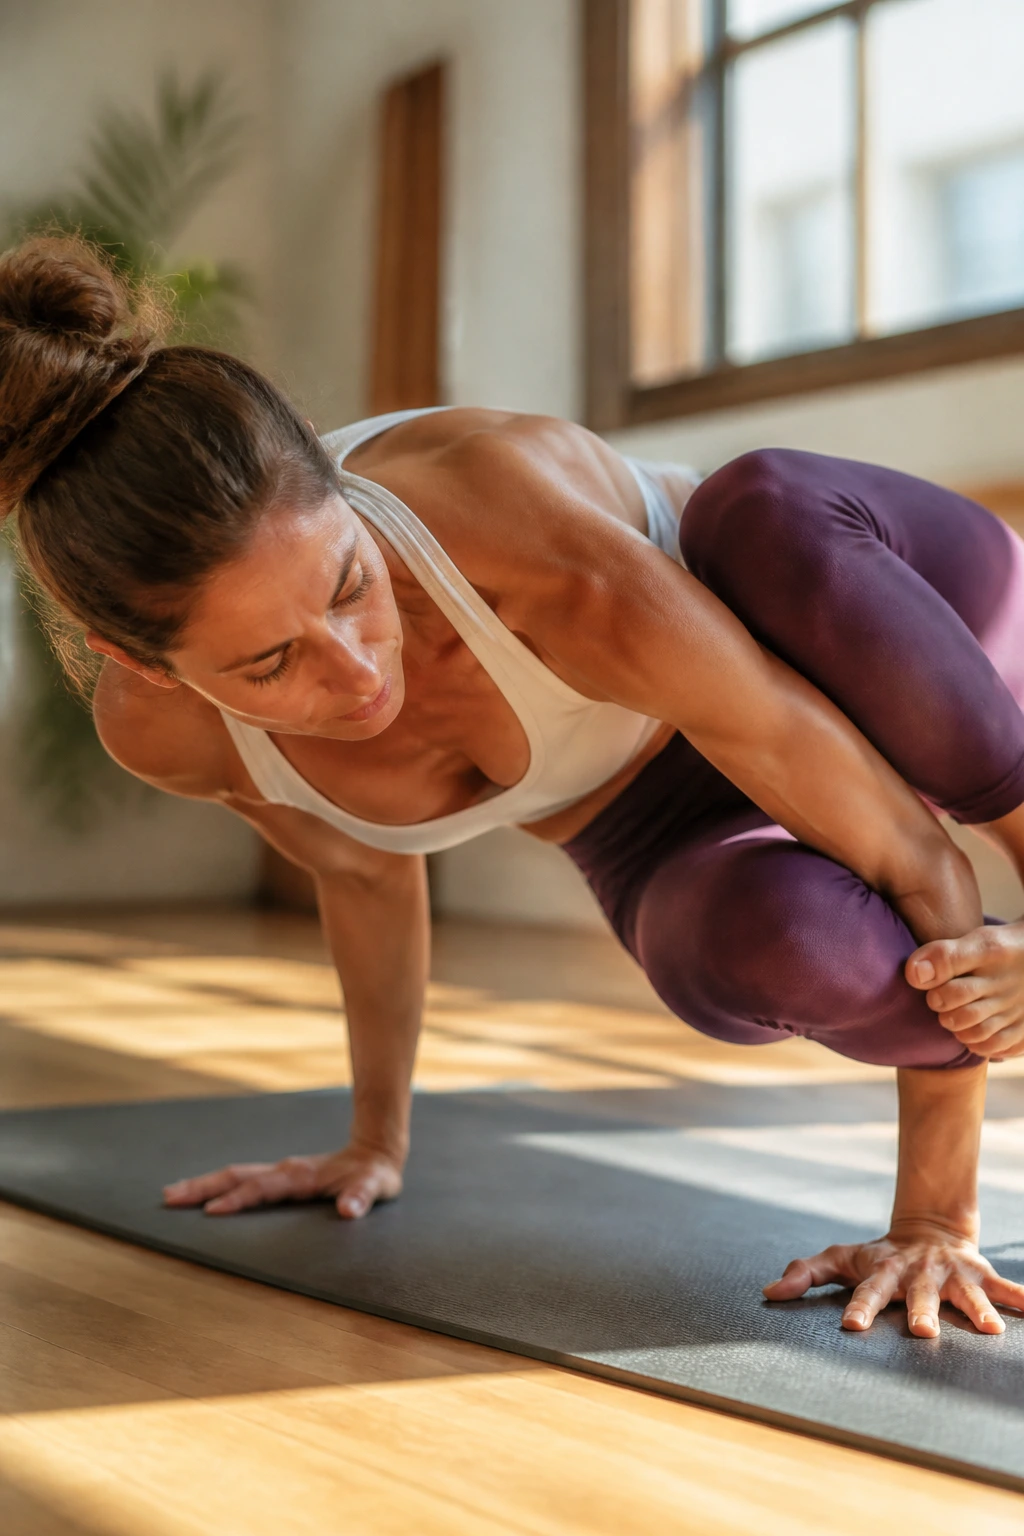
Side crow is what happens when a twist stops being decorative and starts earning its keep. One hip stacks over the other, the torso rotates, and the arms become a shelf that has to stay alive the whole time. It is a mean little pose.
The strength shows up in the obliques, shoulders, triceps, and the inner thighs. You also need enough control in the wrists to keep the weight from dumping into the base hand, because if that hand collapses, the whole twist collapses with it.
I like side crow because it exposes honesty quickly. If the twist comes from flinging the chest around, you get nowhere. If it comes from the ribs and the belly, the lift has a shot.
One sentence matters here: twist before you lift. The pose works better when you turn from the waist and keep the knees compact against the arm shelf. That’s where the power lives.
3. Firefly Pose for Hamstrings and Straight-Arm Strength
Why does firefly feel so unfair? Because it asks for two things at once: deep forward folding and strong arm support. Most people try to force the legs straight too early, and the pose shuts down immediately.
The real work is in the hamstrings, hip flexors, and straight-arm press. Your hands plant on the floor, your shoulders slide under the legs, and the belly has to stay braced so the feet can float instead of scraping the mat like they’re late for a train.
How to Approach It
- Start with bent knees and a deep, active fold.
- Keep the shoulders forward of the wrists.
- Press the floor hard enough that the elbows stay straight.
- Extend one leg at a time only if the lift stays calm.
If the legs stay bent, that’s fine. Seriously. A bent-knee firefly with clean shape teaches more than a straight-legged flop.
4. Eight-Angle Pose for Obliques and Arm Balance
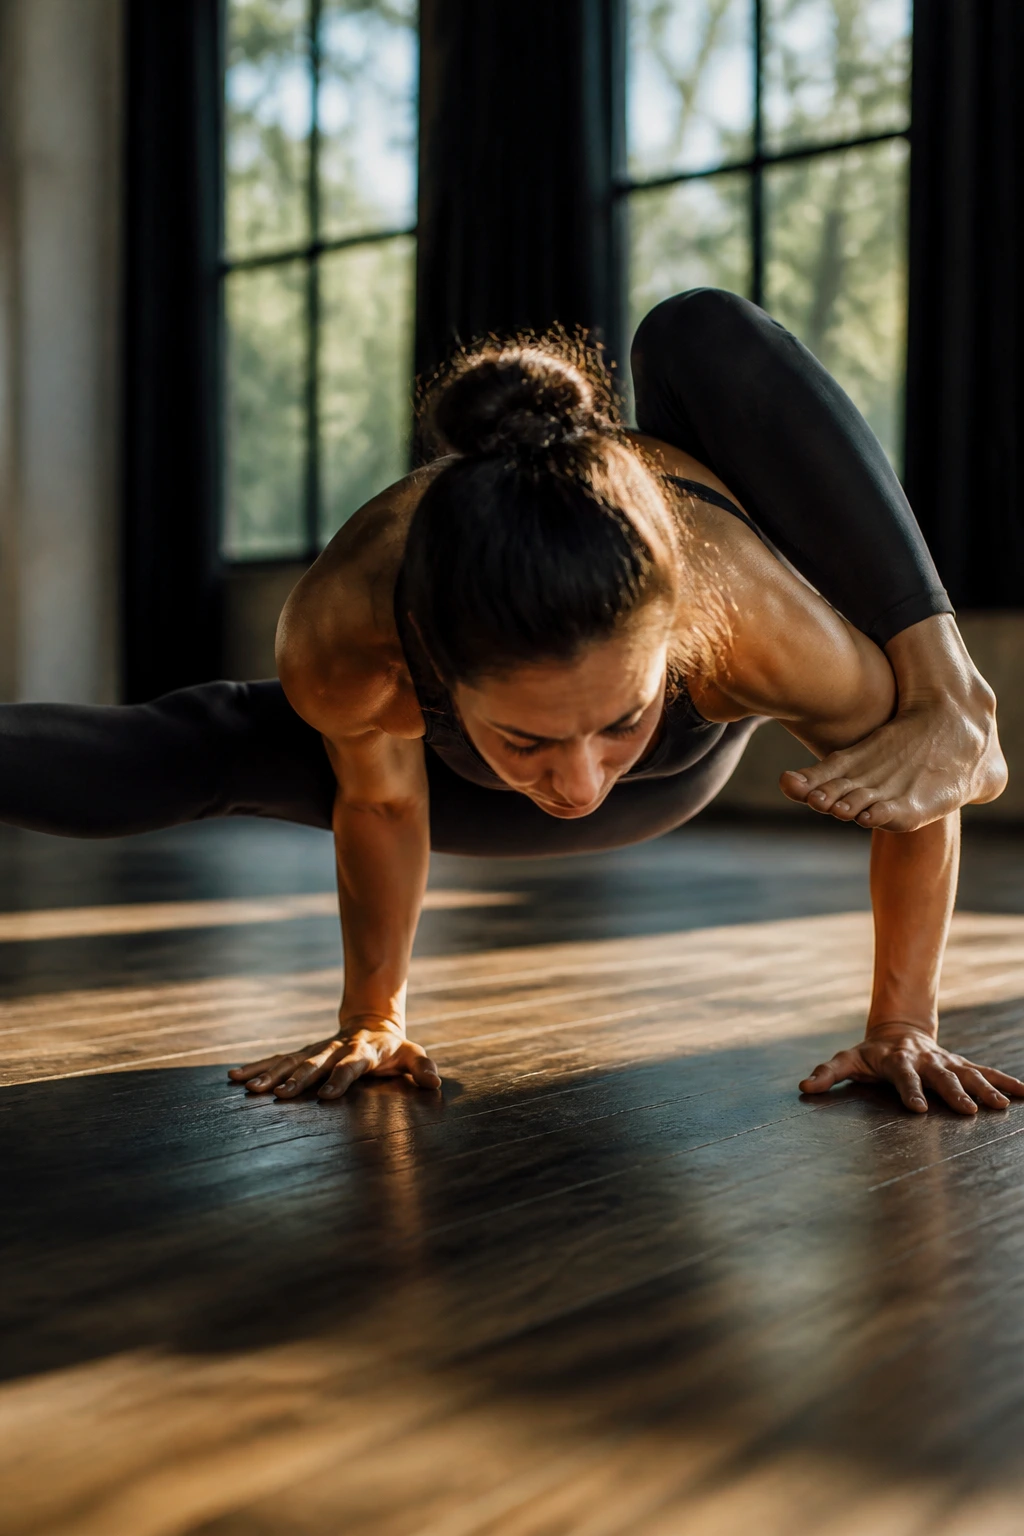
The first time eight-angle clicks, it usually feels less like a pose and more like a hinge that suddenly remembers how to fly. One leg hooks over the upper arm, the torso twists, and the other leg extends out like a lever that wants to drag you sideways.
What makes it strong is the way it loads the obliques, triceps, and deep hip rotators. You’re not just balancing; you’re compressing the body into a small, controlled package and then keeping it there while one leg reaches long. That’s harder than it looks.
- Hook the shoulder deep under the thigh.
- Keep the top leg active, not floppy.
- Press the floor away through both hands.
- Let the gaze stay soft; staring at the floor can make you tip forward.
The shape is tiny. The effort is not.
5. Peacock Pose for Forearm Pressure and Deep Core Control
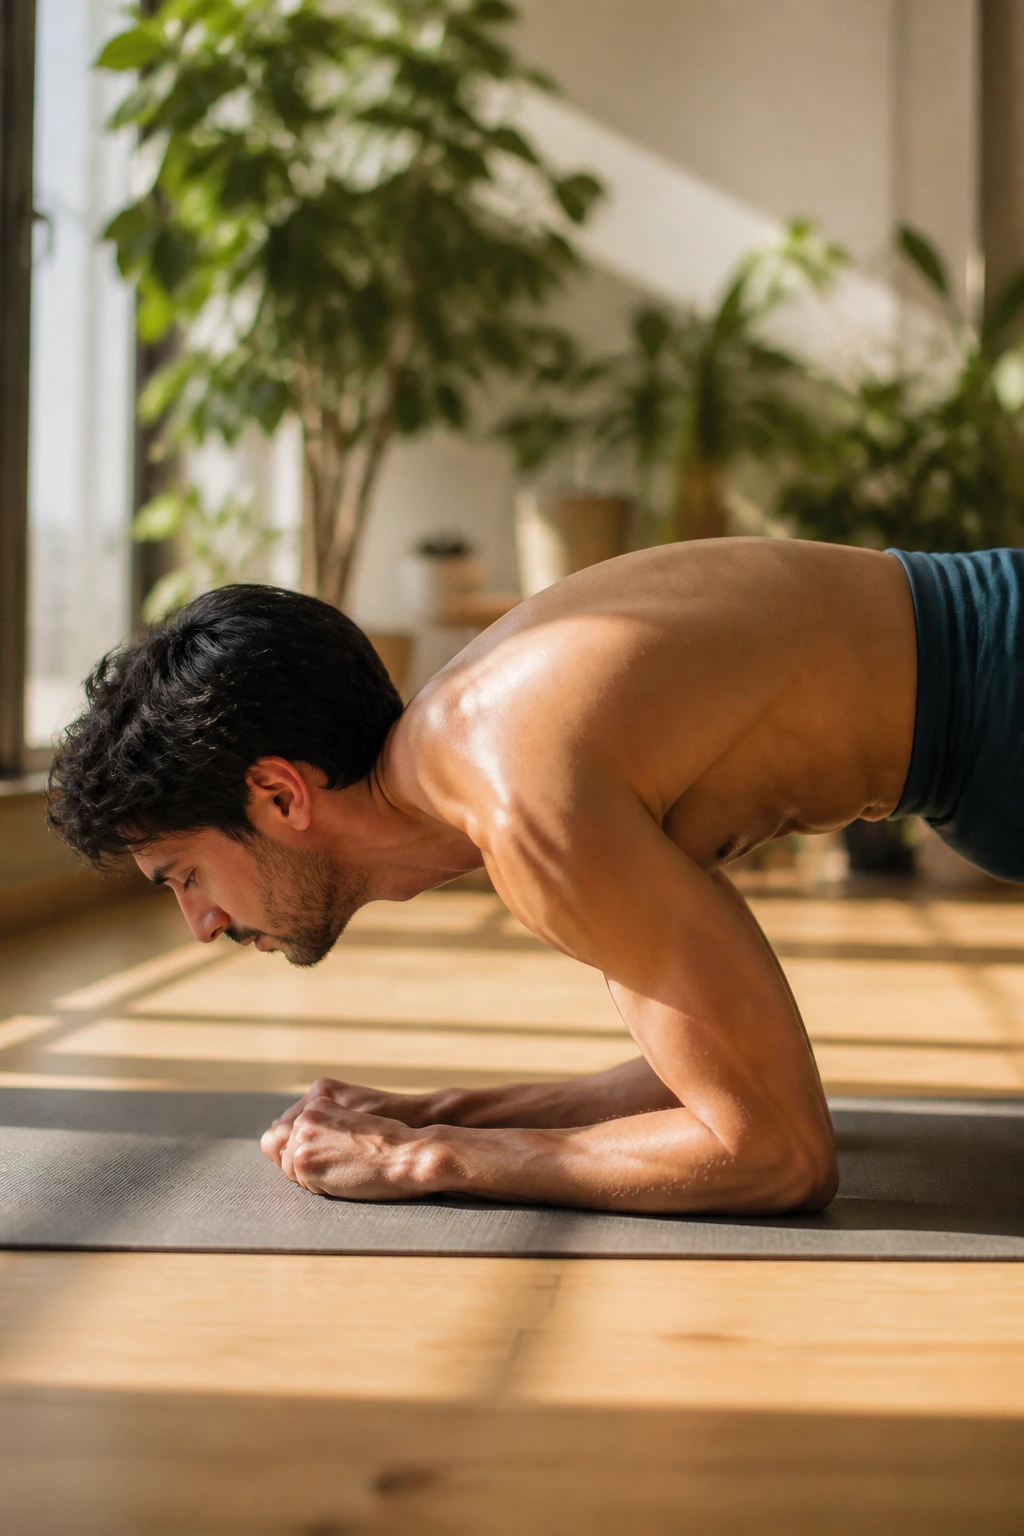
Peacock looks almost strange until you feel what it asks from the body. The palms turn toward the feet, the elbows press into the belly, and the whole front of the torso has to brace like a guarded door. There’s no hiding in this pose. None.
The strength work is intense in the wrists, forearms, front core, and shoulder girdle. You need enough pressure through the hands to keep the elbows anchored, plus enough abdominal tone to stop the pelvis from sagging. If the belly softens, the pose drops fast.
One of the odd things about peacock is how quiet it feels when it works. There’s not much movement, yet the body is fighting hard the entire time. The effort is mostly internal—pressing, resisting, holding the shape together without making it dramatic.
If the wrists are sensitive, stop there. Don’t bully this pose. It’s useful, but it’s not worth a cranky elbow for three days.
6. Dolphin Pose for Shoulder Strength Without the Wrist Load
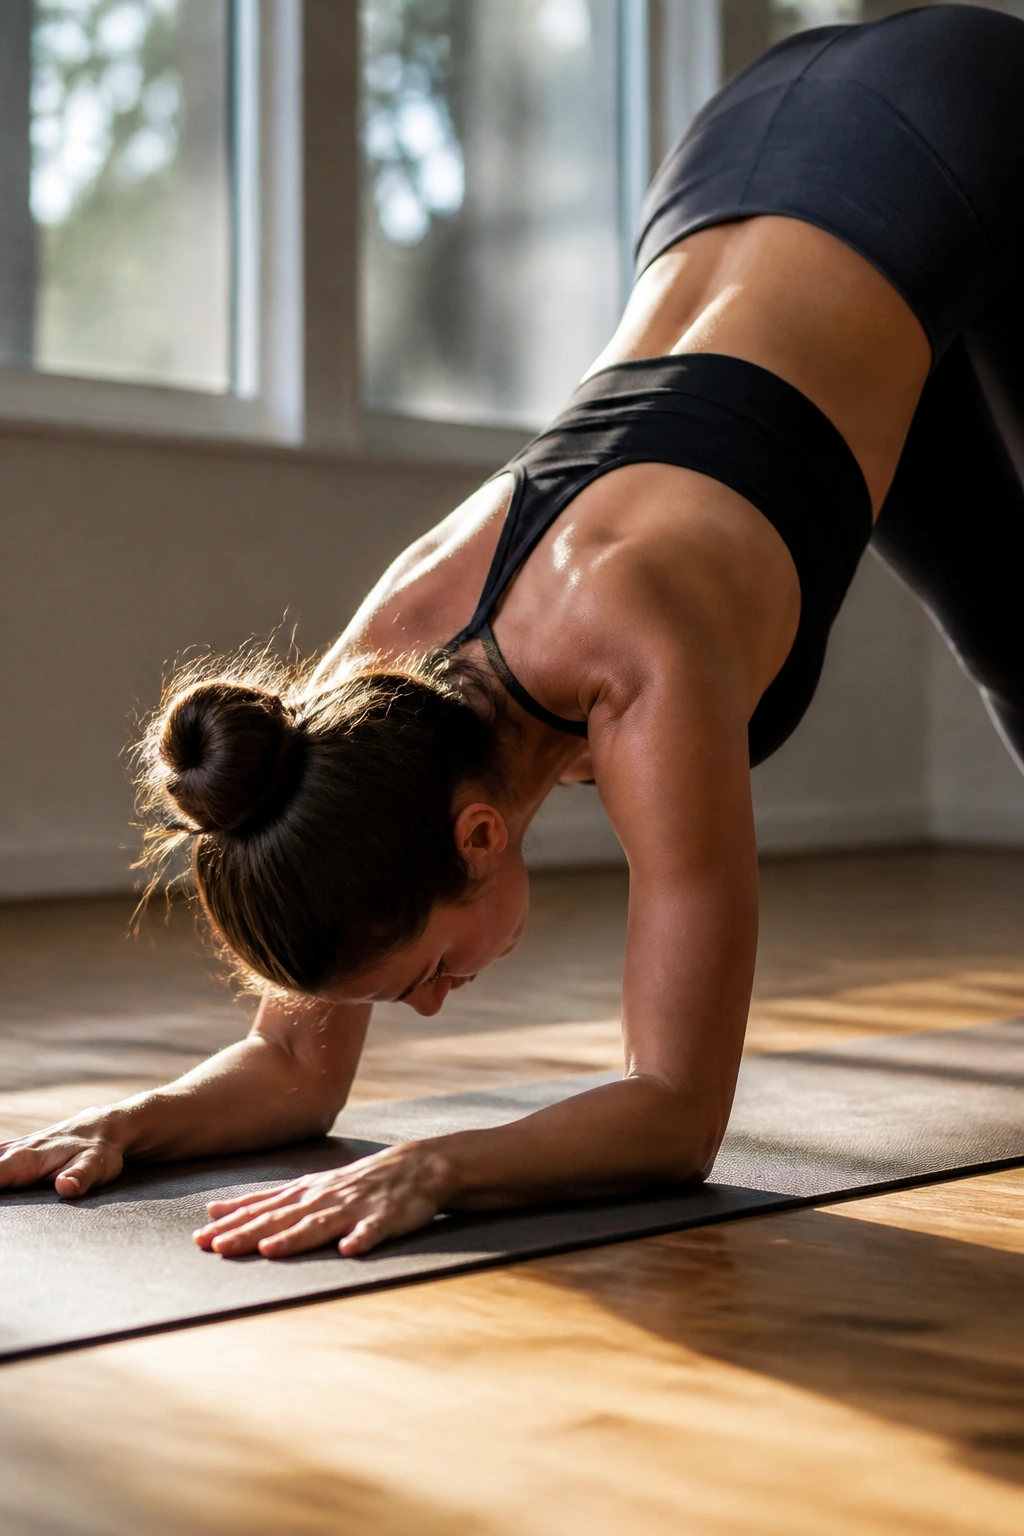
Dolphin is handstand with the volume turned down. It still burns. It still asks for control. But the forearms on the floor give you a cleaner way to train shoulder strength without stacking quite so much pressure into the wrists.
The real job is in the serratus, upper back, and core. You want the shoulders to move away from the ears while the ribs stay tucked in. That’s where the strength comes from. Not from hanging there and hoping for the best.
If you’re building toward inversions, dolphin is one of the smartest places to spend time. Hold it for 5 slow breaths, rest, then repeat. Two or three rounds will light up the shoulders faster than people expect.
Why It Works
You’re learning to push the floor away while staying compact. That combination matters in handstand, forearm stand, and even harder backbends. No wasted motion.
7. Wall Handstand for Vertical Shoulder Power
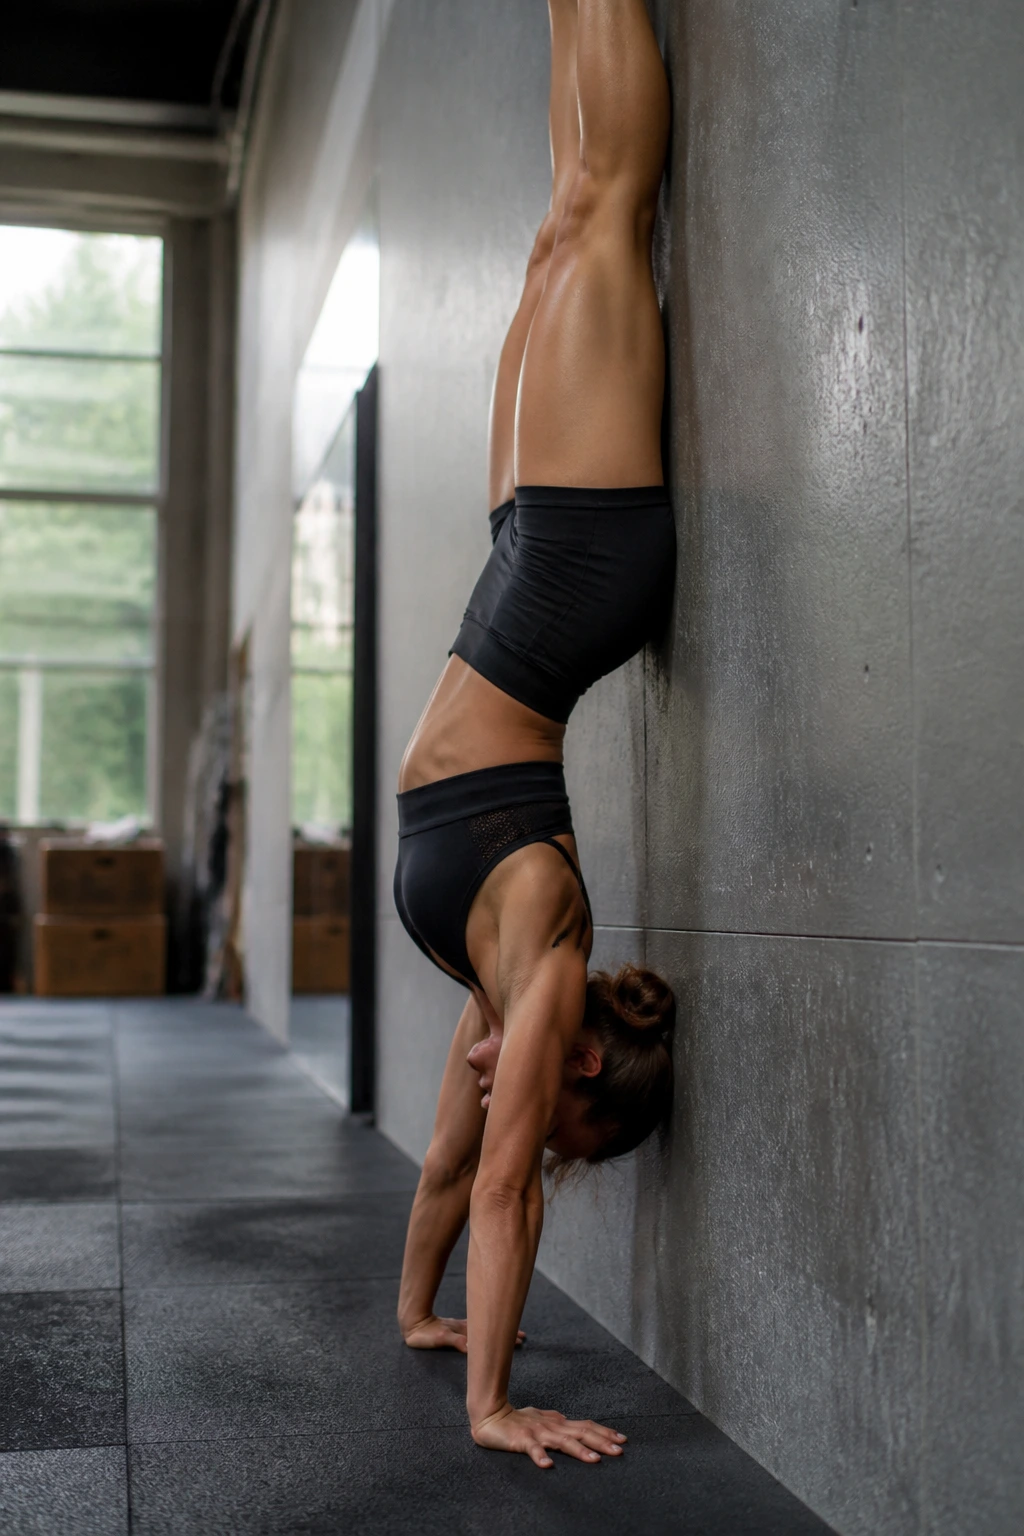
Wall handstand is not about kicking wildly. It’s about pressing. The wall is only there so you can organize the shape long enough to feel what vertical stacking actually means.
Wall Drills That Help
- Chest-to-wall holds: face the wall, walk the feet up, and keep the ribs from flaring.
- Toe pulls: lightly peel one foot off the wall, then place it back before the line gets messy.
- Shoulder shrugs: push the floor away so the shoulders stay active, not collapsed.
The muscles doing the heavy lifting are the deltoids, upper back, triceps, and core. A handstand that’s all legs and no shoulder pressure falls apart fast. A handstand that presses tall begins to feel strangely calm, even if your heart is hammering.
Do not chase the shape before the line. The line is the whole point.
8. Scorpion Forearm Stand for Backline Strength
Scorpion is not a fancy backbend. It’s a strength test with a bendy headline. The pose wants shoulder stability first, then spinal control, then enough hip opening to let the feet arc without turning the low back into a hinge.
The work lands in the upper back, glutes, shoulders, and hip flexors. If the ribs balloon and the belly drops, the back takes over too much and the shape gets wobbly. A good scorpion still feels supported. A sloppy one feels like a near miss.
I’m blunt about this one: don’t rush it. If your forearm stand is shaky, scorpion will not magically fix it. It will expose the shaky parts faster.
Depth is the side effect. Control is the practice.
9. Tripod Headstand for Shoulder Stability and Core Bracing
Why does tripod headstand feel easier and harder at the same time? Easier because the base feels obvious. Harder because the moment your core gets lazy, the legs swing and the neck notices.
How to Use It
Tripod asks for steady hands, a light head, and a very active belly. The hands should bear real weight, not decorative weight. If the neck feels jammed, you’ve gone too far into the head and not far enough into the shoulders.
- Set the hands shoulder-width apart.
- Place the crown of the head lightly on the mat.
- Tuck the knees before sending the legs up.
- Keep the elbows from splaying.
Tripod is useful for people who want to train inversion strength without jumping straight into a full handstand. It teaches bracing, line, and patience in a compact package. If your neck is cranky, skip it. That’s not drama; that’s common sense.
10. Wheel Pose for Glutes, Hamstrings, and Backbody Power
A clean wheel looks dramatic because the work is hidden. What you see is the arch. What you feel is the posterior chain firing from ankles to shoulders.
The pose loads the glutes, hamstrings, spinal extensors, and triceps. If the knees splay out and the lower back takes over, wheel turns into a pinchy mess. The better version is built on active feet, active thighs, and enough shoulder openness to keep the chest broad.
- Press through the big toe mounds and inner heels.
- Keep the knees tracking forward, not out wide.
- Squeeze the glutes enough to support the low back.
- Push the floor away through the hands until the arms feel alive.
One sentence, because it matters: the low back should not do the whole job.
11. Bow Pose for Posterior-Chain Strength and Breath Control
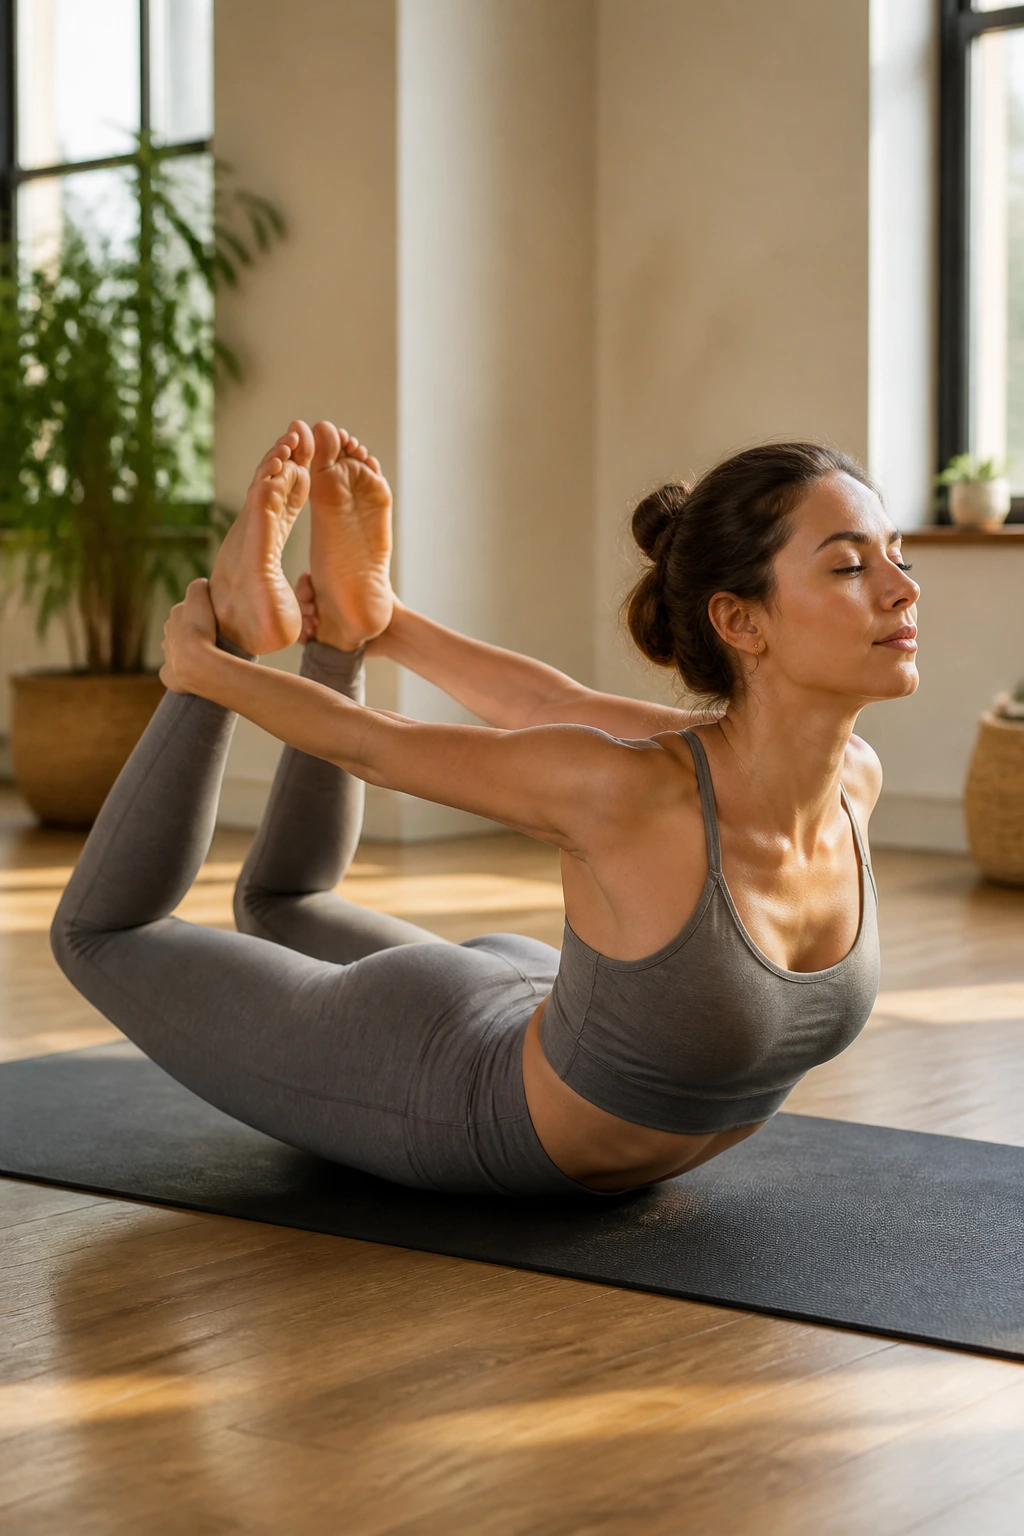
Bow is honest about the front of the thighs. They work hard here, and there’s no pretending otherwise. When you catch the ankles and lift, the quads, glutes, and upper back all have to wake up at the same time.
The shape can feel like a stretch at first, but the real training comes from active lifting. If the feet just get yanked upward, the chest collapses and the low back gets cranky. If the legs press back into the hands and the chest reaches forward and up, the pose starts to feel like controlled work.
It also teaches breath under load. That’s not a small thing. The inhale has to stay smooth even when the thighs are shaking and the ribs feel tight.
Bow is one of those poses that looks graceful only after the hard part is done.
12. Camel Pose for Quads, Glutes, and Upright Backbending
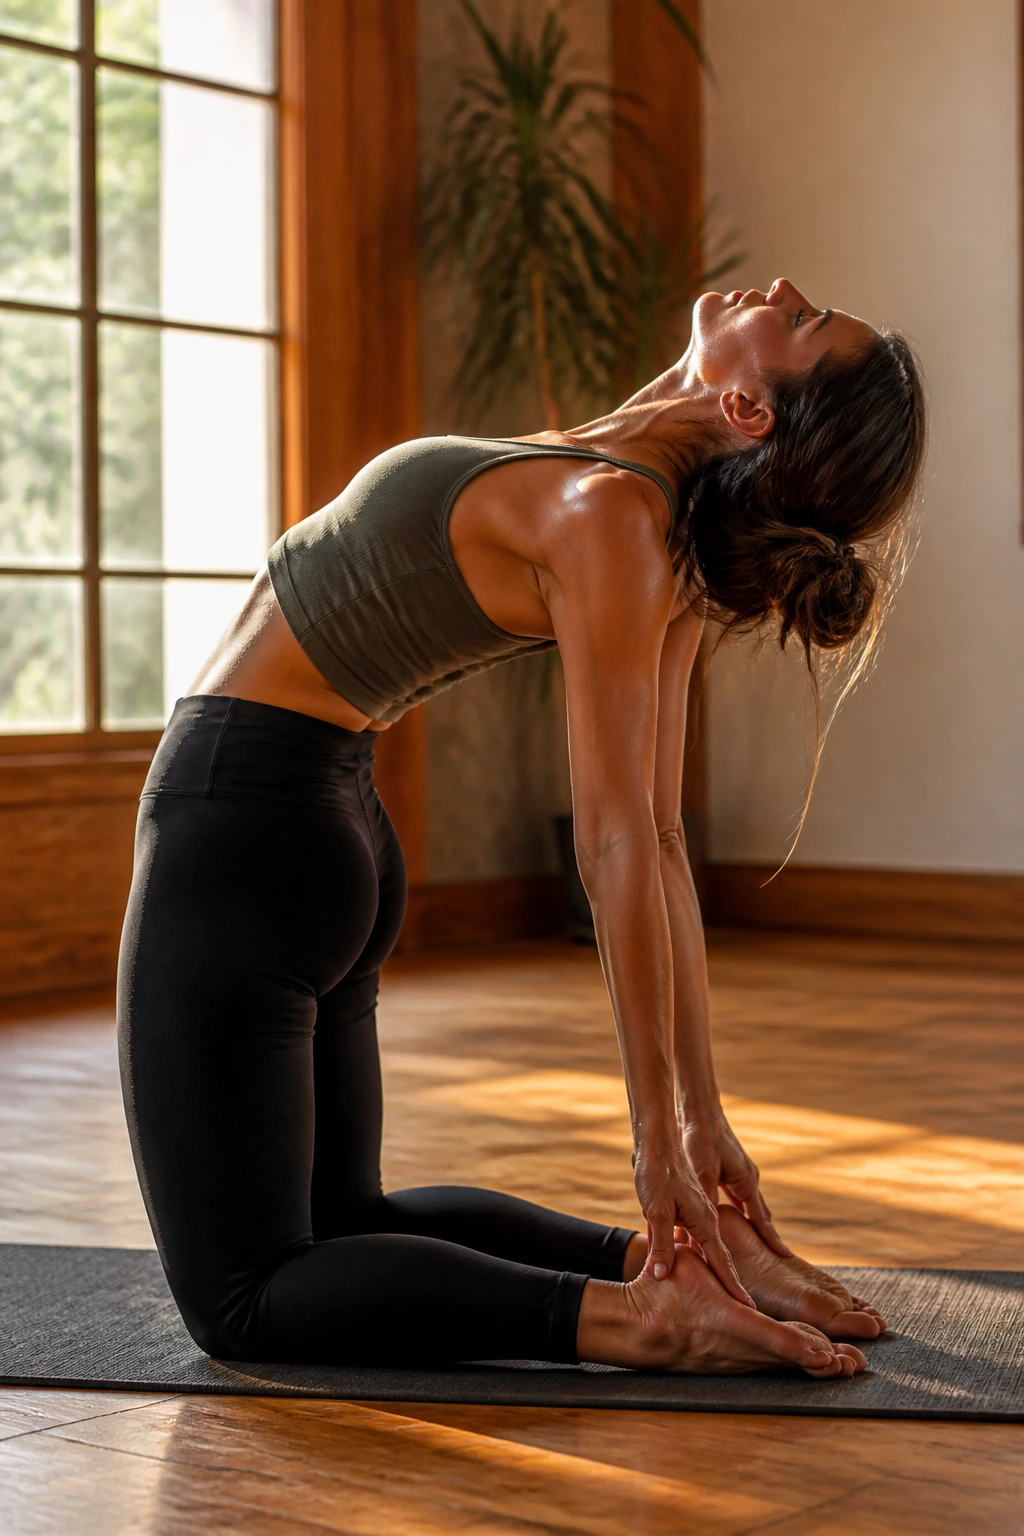
Camel asks less from the wrists and more from the thighs. That makes it a different kind of hard. Instead of pressing from the floor, you’re standing on your knees, anchoring the legs, and letting the chest open without dumping into the spine.
The strength comes from the quads, glutes, and spinal support muscles. The knees need to stay rooted. The hips need to press forward. The hands can stay on the sacrum or reach for the heels, but the backbend should grow from the whole front body, not from tossing the head back and hoping it lands somewhere useful.
I prefer camel when someone needs an upright backbend that still feels athletic. It’s less showy than wheel and often more honest. Start with hands on the lower back. If that feels steady, let the fingertips find the heels or blocks.
The chest should lift. The neck should stay long.
13. King Pigeon Pose for Balance and Hip Flexor Control
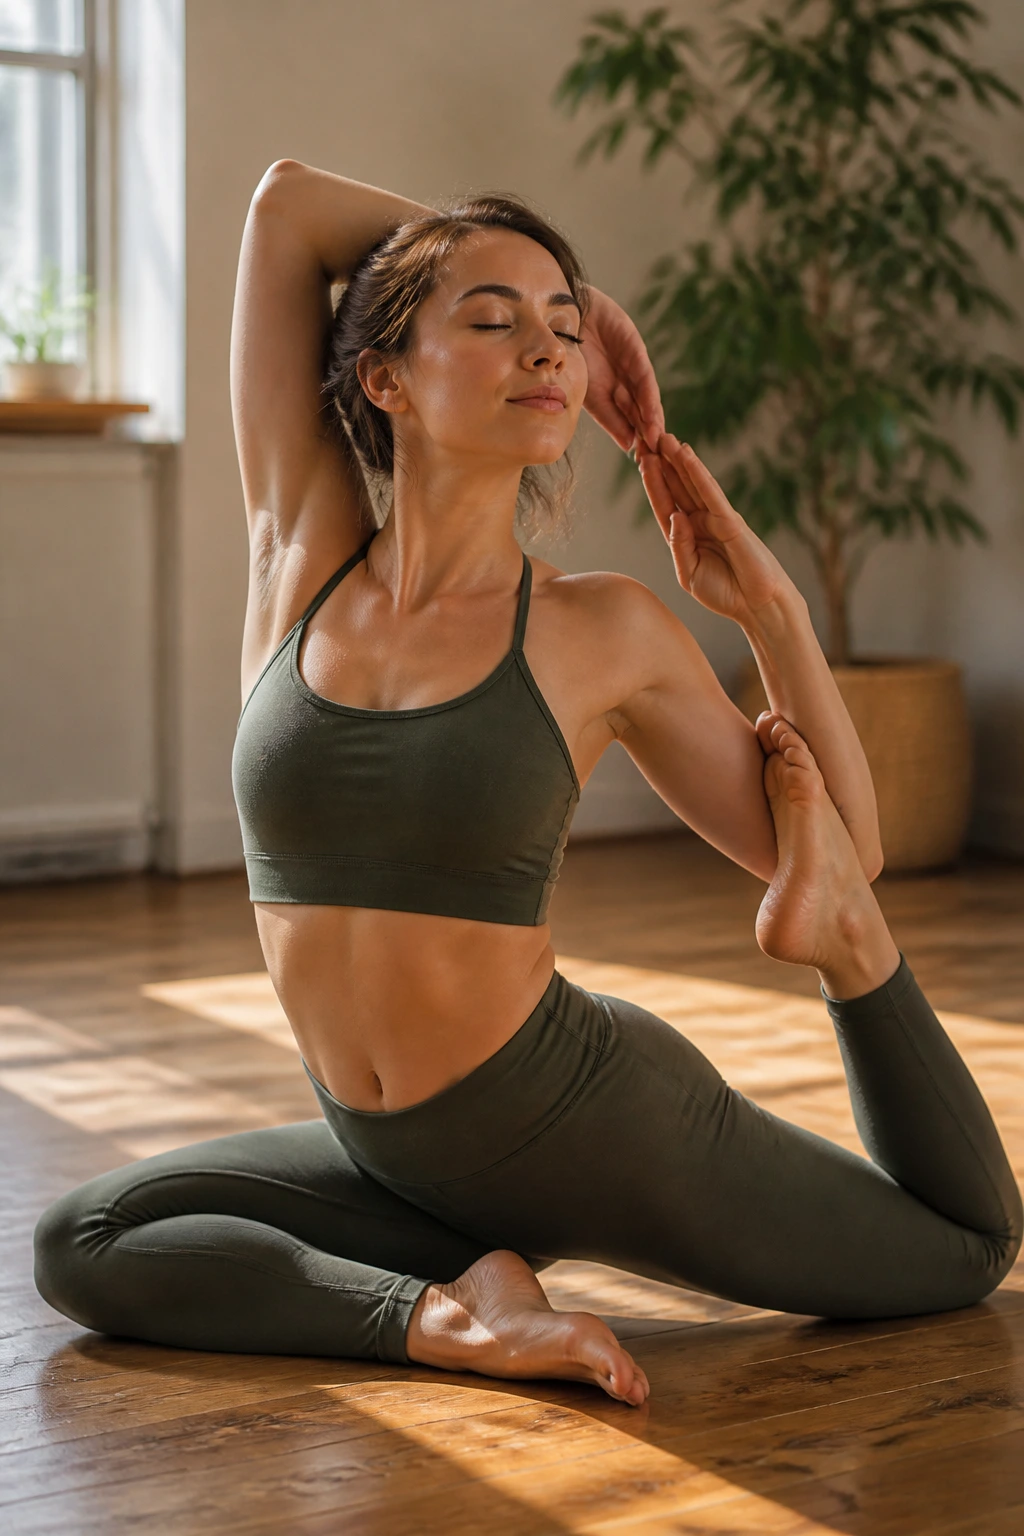
King pigeon looks romantic. It is a ruthless test of balance and hip control. One leg folds under, the other reaches back, and the spine has to stay organized while the upper body opens without falling apart.
The standing support happens in the glutes, outer hip, and core, while the lifted leg demands a lot from the hip flexors and quadriceps. If the back knee is tolerated rather than supported, the pose turns messy fast. A strap around the lifted foot can help keep the shoulders honest.
What to Notice
- Keep the ribs stacked over the hips as long as you can.
- Don’t yank the foot higher just because it’s there.
- Let the lifted knee stay in line with the hip when possible.
- Use the breath to stop the spine from over-arching.
One sentence on purpose: the pose works best when you resist the urge to show off.
14. Bird of Paradise for Standing Leg Strength and Bind Control
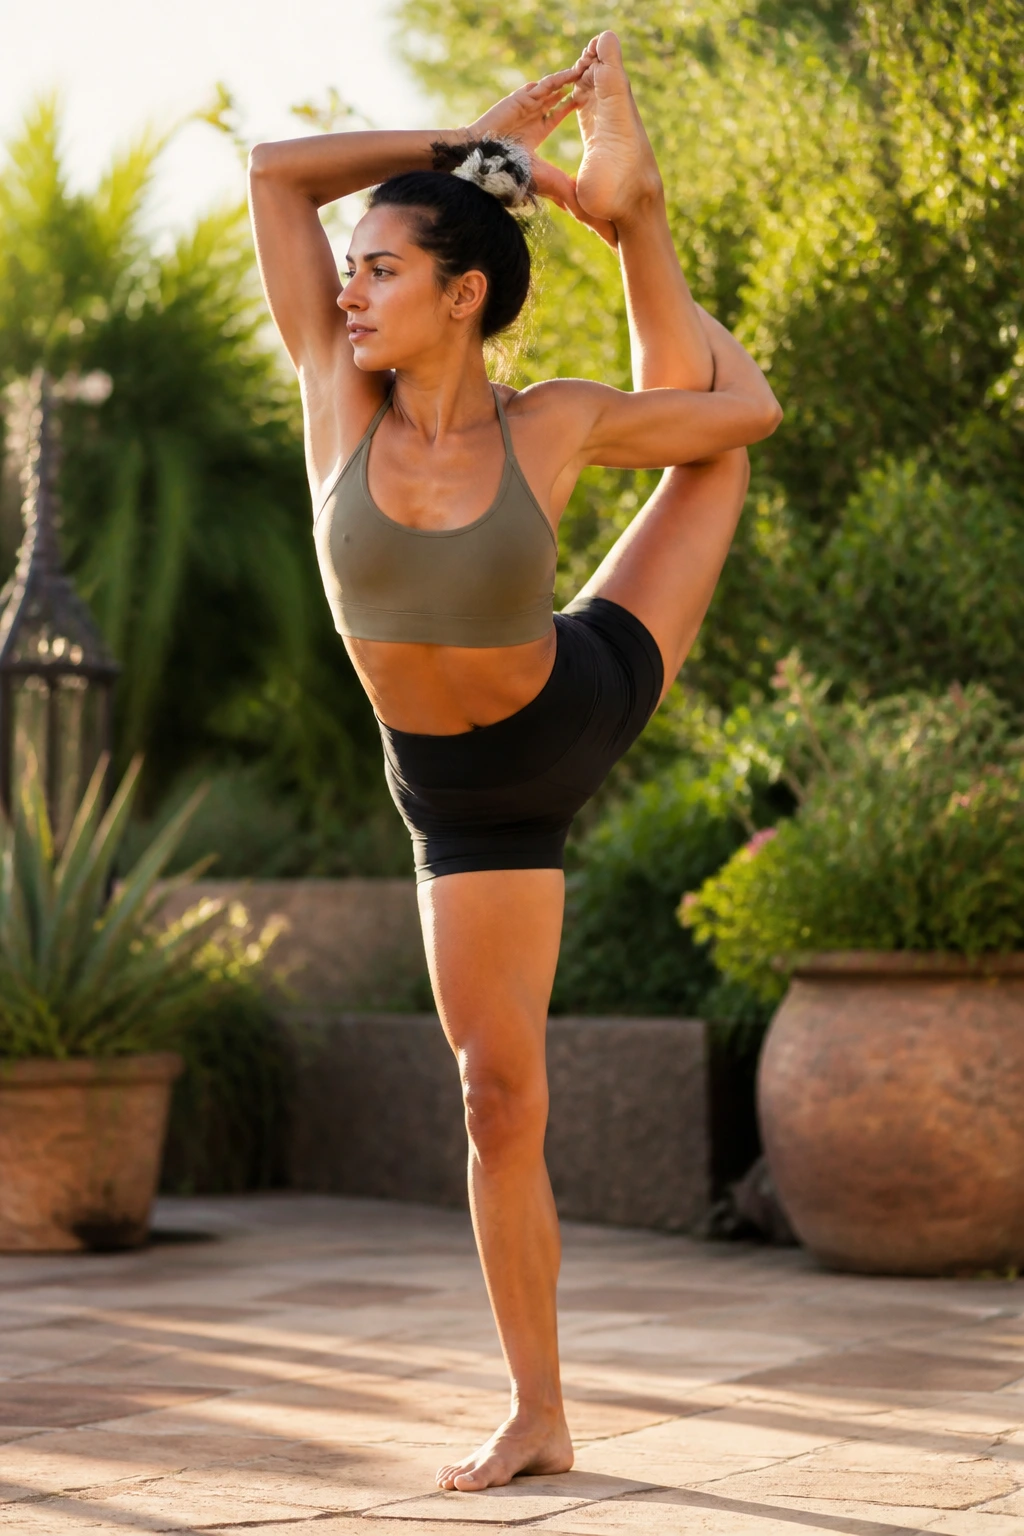
What makes bird of paradise feel so different from a normal bind? The answer is the standing leg. Once you rise up, that leg has to do the job of a column, a spring, and a brake all at once.
The pose blends hip opening, balance, and isometric strength. You come out of a bind, stand tall, then slowly extend the lifted leg without losing the chest. The standing foot stays rooted, the knee stays controlled, and the pelvis tries very hard not to twist away from you.
What to Watch For
- Keep the standing knee soft before you fully straighten it.
- Hold the lifted foot active so the leg doesn’t go dead.
- Lift from the belly, not from a jerk in the shoulders.
- Turn the chest only as far as the standing leg can support.
This pose can get sloppy if you rush the stand. Slow is better. Always.
15. Dancer Pose for One-Leg Balance and Glute Work
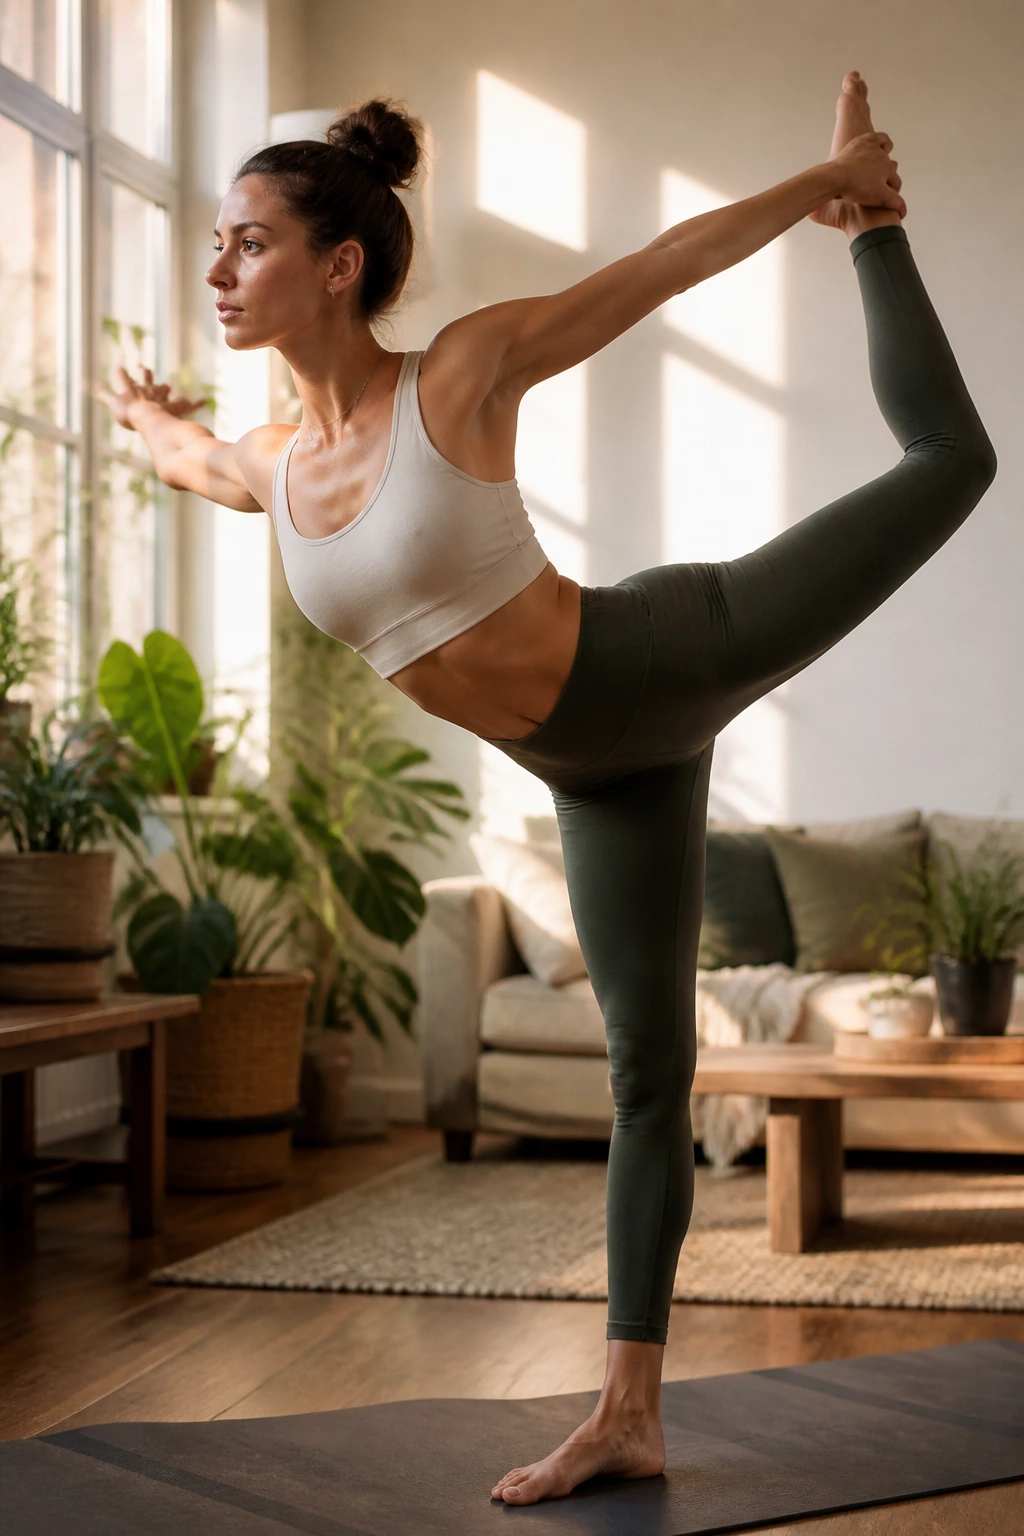
Dancer rewards patience, not drama. The lifted leg reaches back, the torso leans forward, and the standing side does the real labor. If you’ve ever held it for more than a breath, you know the standing foot starts talking back.
The pose trains the glute of the standing leg, the ankle stabilizers, and the back-body chain. The lifted leg also works hard, especially if you keep it active instead of letting it swing like a loose strap. The chest can open, sure, but the useful work is in the rooted leg keeping everything from tipping.
A nice dancer is built, not posed into existence. I like that about it. There’s no shortcut around the standing side.
Use a wall or one hand on a chair if the balance feels too slippery. Clean shape beats wobble every time.
16. Flying Pigeon Pose for Hip Rotation and Core Lift
Flying pigeon is where pigeon pose stops being passive and starts demanding useful work. Instead of hanging out on the floor, you balance over the hands, lift one leg off the ground, and ask the core to keep the torso from folding like a deck chair.
The pose recruits the outer hips, hip rotators, shoulders, and deep abs. The front foot has to stay flexed. The lifted leg has to stay alive. If the chest collapses, the lift disappears, and the whole thing turns into a low, awkward crouch.
It helps to think of it as a controlled transition rather than a stunt. Coming out of a low lunge or a bound shape, you shift forward, brace, then float the back leg. The hips stay as square as they can manage.
If the shoulders shrug, reset. That’s the mistake that steals the shape.
17. Side Plank Pose for Obliques and Shoulder Endurance
Side plank is one of the cheapest strength builders in yoga. Cheap, not easy. One arm, one side of the body, and a long line that demands honesty from the shoulder all the way down to the outer ankle.
The Core Cues
- Stack the wrist under the shoulder.
- Press the floor away so the shoulder does not sink.
- Lift the hips until the waist feels awake.
- Keep the top ribs from drifting open.
The pose lights up the obliques, serratus, glute medius, and the loaded shoulder. If you want more challenge, stack the feet. If the wrist gets cranky, drop to the forearm and keep the same long line.
No fancy trick here. Hold for 3 to 5 breaths, come down, and repeat on the other side. The burn arrives fast, which is part of why the pose works so well.
18. One-Legged Side Plank for Lateral Chain Strength
Why lift the top leg? Because the pose stops being a side plank and becomes a full test of the lateral chain. The outer hip has to work harder, the waist has to resist collapse, and the shoulder gets no mercy.
The line is the whole point. Keep the pelvis stacked, keep the supporting arm active, and let the lifted leg hover only as high as the body can control. If the top hip rolls open, the pose turns into a wobble with good intentions.
How to Keep It Clean
- Lift the top leg from the outer hip, not the low back.
- Keep the supporting elbow or wrist firm and alive.
- Breathe into the side ribs so they don’t cave.
- Lower the leg before form gets sloppy.
You don’t need a huge leg lift. Two or three inches can be plenty if the shape stays honest.
19. Compass Pose for Side Body Length and Hamstring Control
Compass looks graceful because the hard part is quiet. One leg hooks high, the torso rotates, and the other leg straightens out to the side with enough control that the whole shape feels stretched and strong at the same time.
The pose asks for hamstring length, shoulder mobility, and serious oblique control. The straight leg only works if the lifted shoulder stays open and the spine keeps enough lift to avoid collapsing into the twist. That’s a lot to manage in one breath. Maybe more than one breath, if we’re being fair.
Use a strap if the foot can’t reach the hand without the ribs flaring. That’s not a cheat. It keeps the shape useful. I’d rather see a smaller compass with a long spine than a huge leg line built out of strain.
The side body should feel long, not crushed.
20. Koundinyasana II for Full-Body Compression and Twist Strength
Koundinyasana II is the pose that ties a lot of the others together: arm balance, twist, core compression, and a willingness to stay awkward for a while. One leg shoots out to the side, the other stays hooked, and the hands have to act like strong little pillars.
The work is spread across the wrists, shoulders, obliques, hip flexors, and inner thighs. If the belly is soft, the lifted leg drops. If the shoulders cave, the pose feels impossible. If the twist is forced, the whole thing turns into a fight.
Start with the torso low and the legs compact. Shift weight forward only as far as you can keep the elbows bent in a controlled way or straight if your version calls for it. Small adjustments matter here. A half inch can change the whole feel.
If you can hold the shape for three steady breaths, you’re training real strength. That’s enough. More than enough, honestly.
