



Sun salutations look gentle. They aren’t.
A good yoga workout that builds real strength has less to do with flowing prettily and more to do with loading the body in honest ways: long holds, slow lowers, one-legged balance, and enough time under tension for the quads, glutes, core, shoulders, and upper back to wake up. A 30-second chair pose can feel harsher than a sloppy set of squats, and a slow chaturanga can humble people who think yoga is all stretch and breath.
That’s the part a lot of people miss. Yoga strength work is sneaky. It does not always look dramatic, but it asks the muscles to stay switched on while you breathe, stabilize, and keep your shape from falling apart. That combination matters. The body learns control under load, not just flexibility at the end range.
I like this kind of training because it tells the truth fast. If your wrists collapse, if your hips drift, if your standing leg is asleep, you know it. No guessing. No flattering mirror tricks. The 15 workouts below lean into that honesty and keep the focus on real strength, not just a sweaty vibe.
1. Yoga Workouts That Build Real Strength: Sun Salutation Power Flow
Sun salutations are the easiest place to fool yourself. They feel familiar, and that is exactly why they work so well when you slow them down.
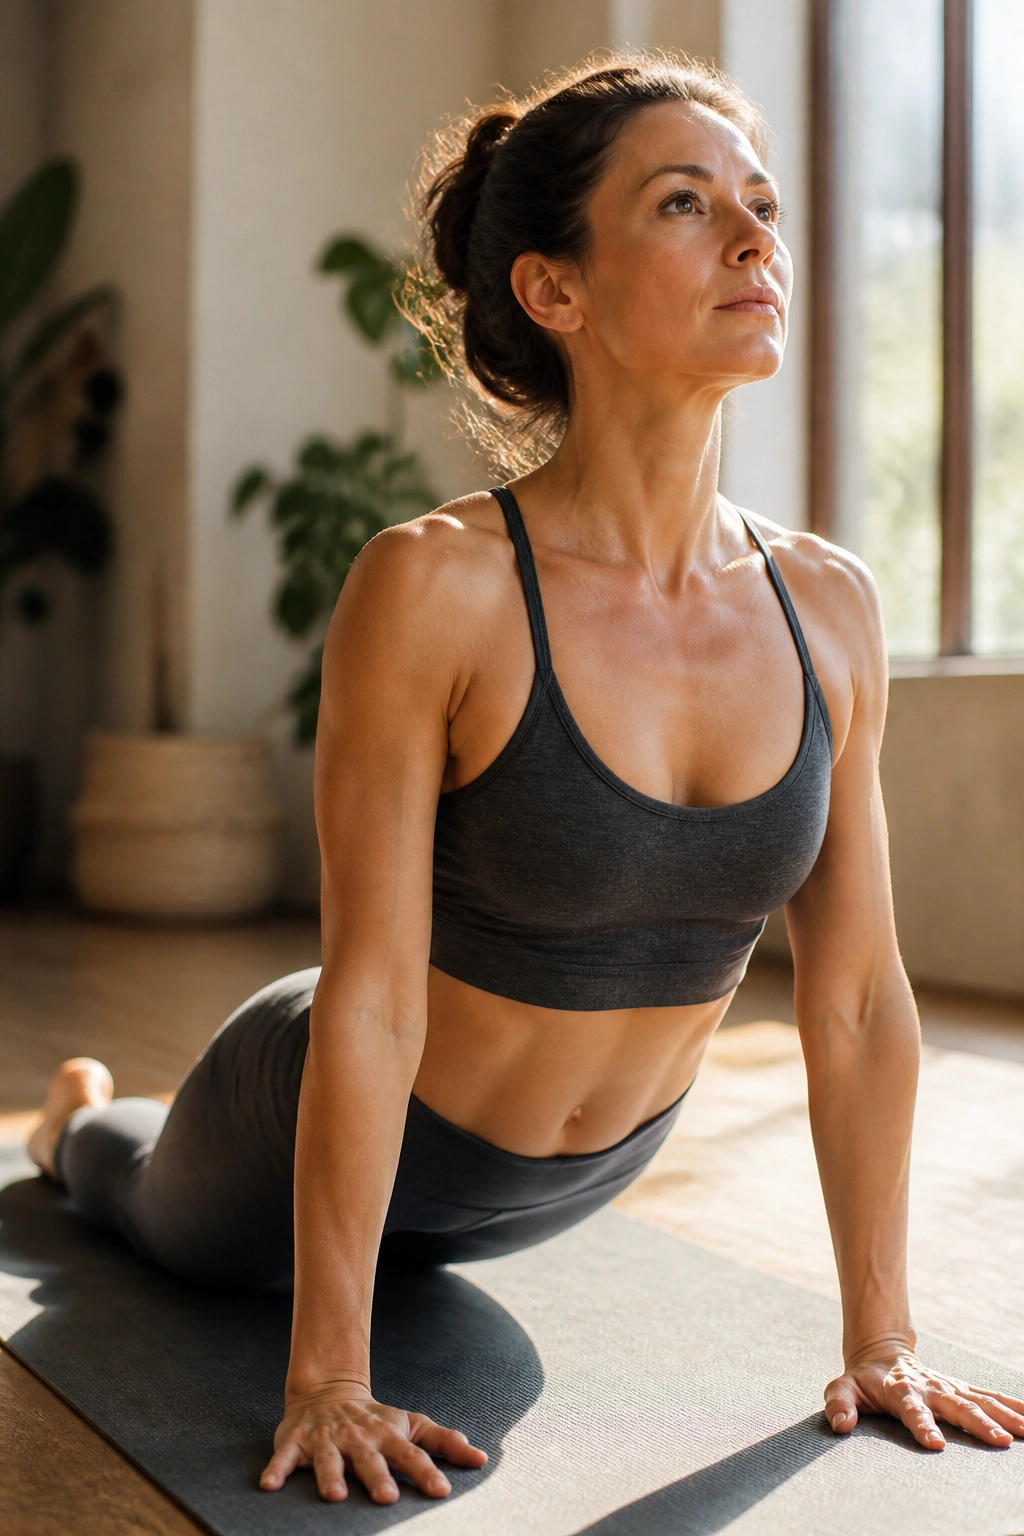
A power-based sun salutation turns a warm-up into a full-body strength set. Move from mountain to fold, step or hop back to plank, lower with control, press into upward-facing dog or cobra, then hold downward dog for three to five breaths before starting again. Do 4 to 8 rounds. The muscles that matter most here are the shoulders, triceps, core, glutes, calves, and the front of the thighs.
How to make it count
- Take 3 seconds on the way down in chaturanga or lower to knees first if your form gets wobbly.
- Hold plank for 2 to 3 breaths before lowering.
- Keep the feet active in downward dog; the heels do not need to touch the floor, but the legs should feel awake.
- Rest 30 to 45 seconds between rounds if your breathing turns ragged and sloppy.
The trick is pace. Fast sun salutations become cardio. Slow ones become strength work. That little difference changes everything, especially in the shoulders and midsection.
If you want a clean rule, use this one: the moment your ribs flare and your hips start dumping forward, you have gone faster than your strength can support.
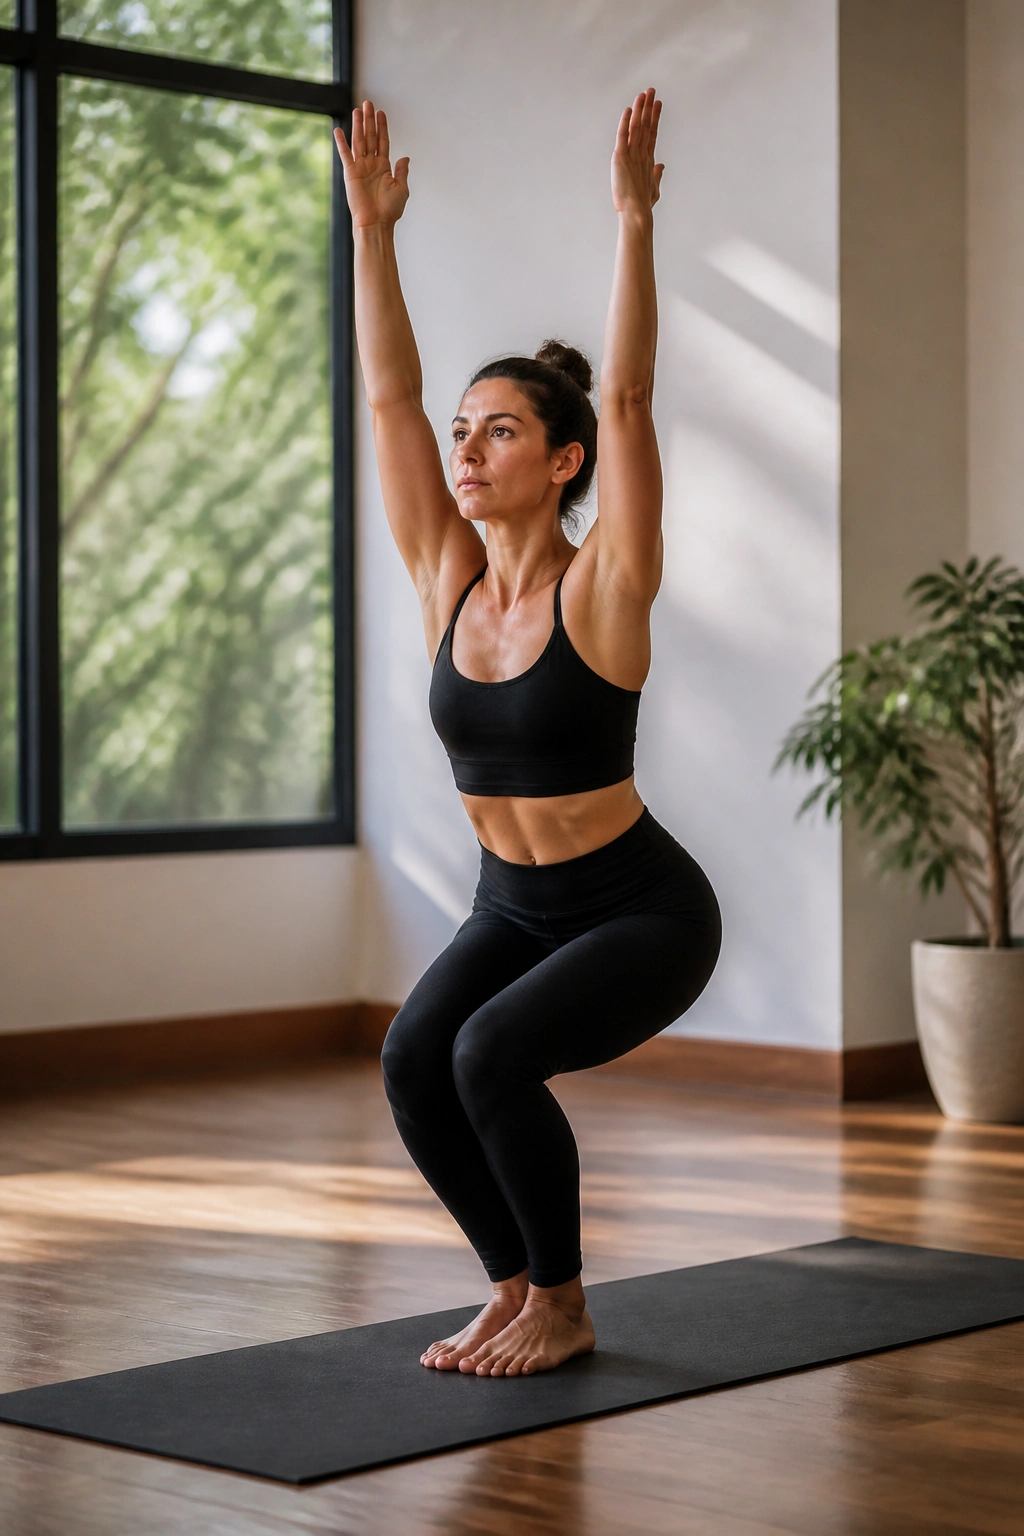
2. Chair Pose Ladders for Quads That Don’t Quit
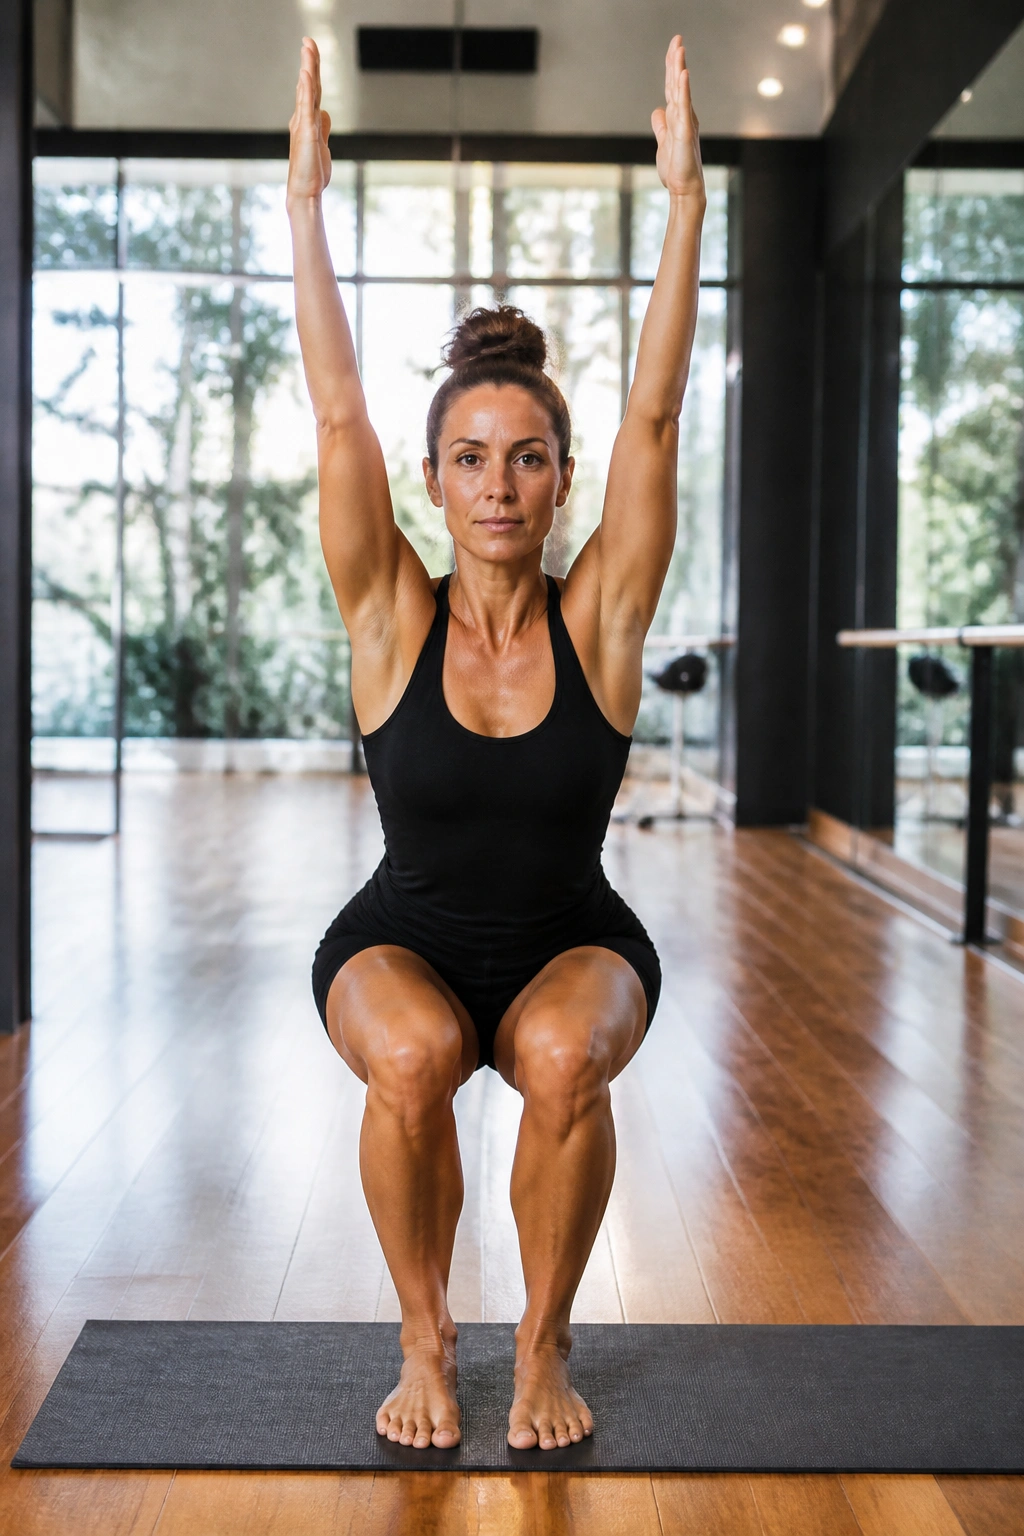
Why does chair pose make people shake so fast? Because it is basically a squat hold with no place to hide.
A chair ladder means you hold the pose, rest, then repeat for longer intervals. Start with 20 seconds, then 30, then 40, then 30 again if you want a descending set. Keep the weight in the heels, lift the toes if your feet tend to roll inward, and let the knees track in line with the second toes. Arms can stay overhead, reach forward, or rest in prayer at the chest if your shoulders are tight.
The ladder
- Round 1: 20-second hold
- Round 2: 30-second hold
- Round 3: 40-second hold
- Round 4: 10 slow pulses or another 20-second hold
The burn shows up in the quads first, then the glutes, then that odd deep spot around the hips that tells you the stabilizers are working too. Keep the chest lifted enough to breathe. Collapse too far forward and the lower back steals the work.
Chair pose gets dismissed because it looks simple. It isn’t. It’s one of the clearest strength tests in yoga, and the payoff is obvious after a few weeks: steadier knees, better standing posture, and less wobble when you move into lunges or single-leg poses.
3. Warrior Stacks That Build Legs, Hips, and Patience
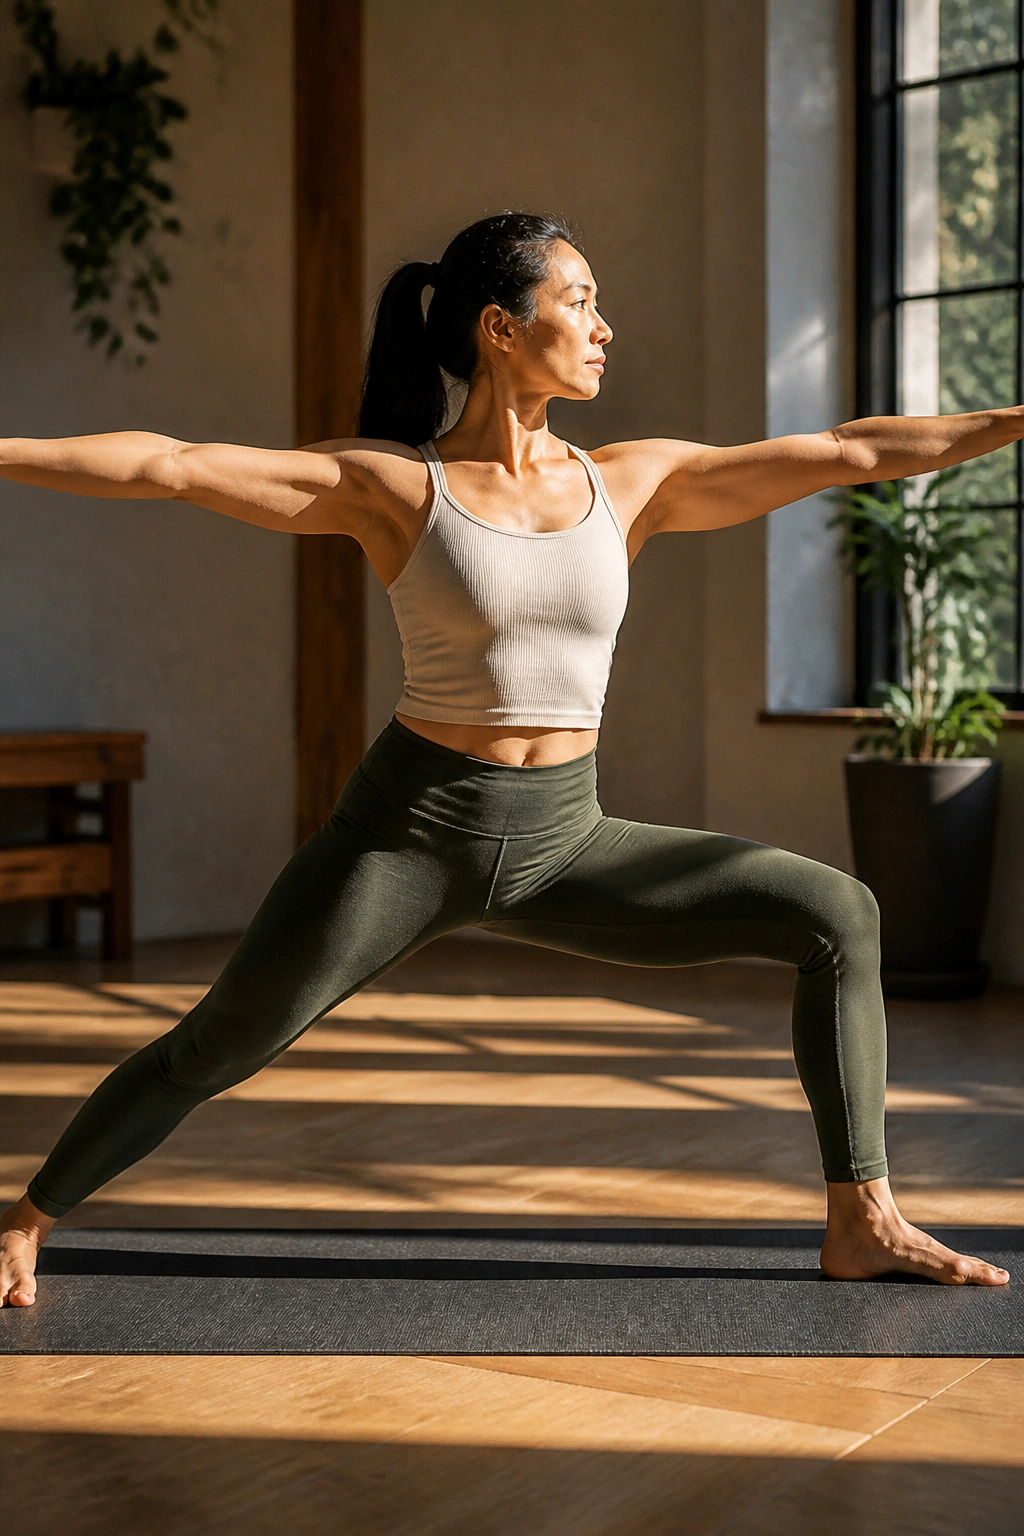
Warrior I, Warrior II, and Warrior III belong in the same conversation because they train different kinds of strength in one family. One opens the hips. One tests the outer leg. One strips away all the spare parts and asks for balance.
Start in Warrior I for three to five breaths, then open to Warrior II and hold another three to five breaths. From there, hinge forward into Warrior III for 10 to 20 seconds if the standing leg can stay steady. The back leg is not decoration. It has to stay active the whole time, with the inner thigh pulling up and the foot pushing back through space.
A lot of people rush the transitions and miss the point. That is a mistake. The real work comes from the pause between shapes, when the thigh starts to burn and the torso wants to wobble.
- Front knee stacked over the ankle or second toe
- Back heel rooted in Warrior I
- Arms long, but not rigid
- Hips level in Warrior III, even if that means lifting the back leg lower
Warrior stacks teach patience under pressure. That sounds vague until you hold them for several breaths and feel your body trying to cut corners. It will. Your job is to notice and correct.
4. Plank to Chaturanga to Up Dog
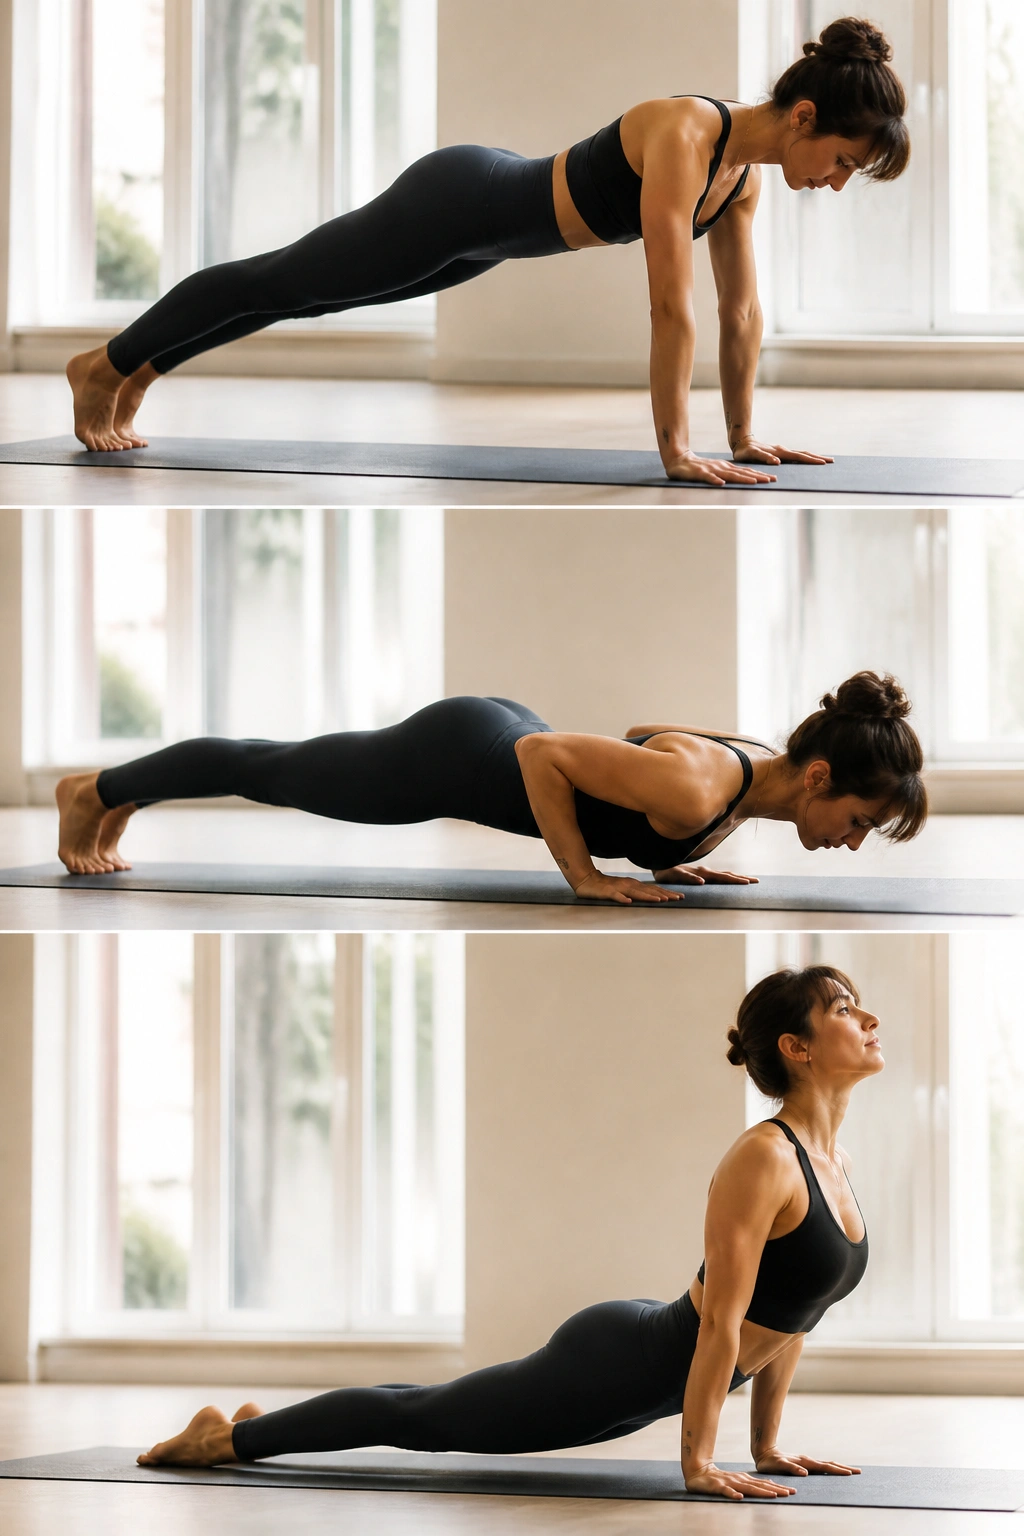
The push-up is not the only upper-body builder in yoga.
A slow plank-to-chaturanga sequence loads the chest, triceps, serratus, and front of the shoulders in a way that feels direct and unforgiving. Start in high plank, lower for a count of three or four, and stop when the elbows hit about 90 degrees. From there, press into upward-facing dog or cobra, then return through plank and hold for one breath before repeating. Five to eight reps is enough when the lowering phase stays strict.
What to watch for
- Elbows hug close to the ribs.
- Shoulders stay away from the ears.
- The chest moves forward as you lower, not straight down like a brick.
- Knees drop to the mat if the lower back starts arching or the shoulders get sloppy.
The hardest part is not the push. It’s the brake. Eccentric lowering builds strength fast because the muscles have to resist gravity instead of just reacting to it. That is why a clean chaturanga burns more than most people expect.
No sagging. No diving.
If you treat it like a race, the shoulders will complain and the low back will pick up the slack. Keep it slow enough that the body has to organize itself on every rep.
5. Crescent Lunge Knee-Drive Intervals for Real Strength
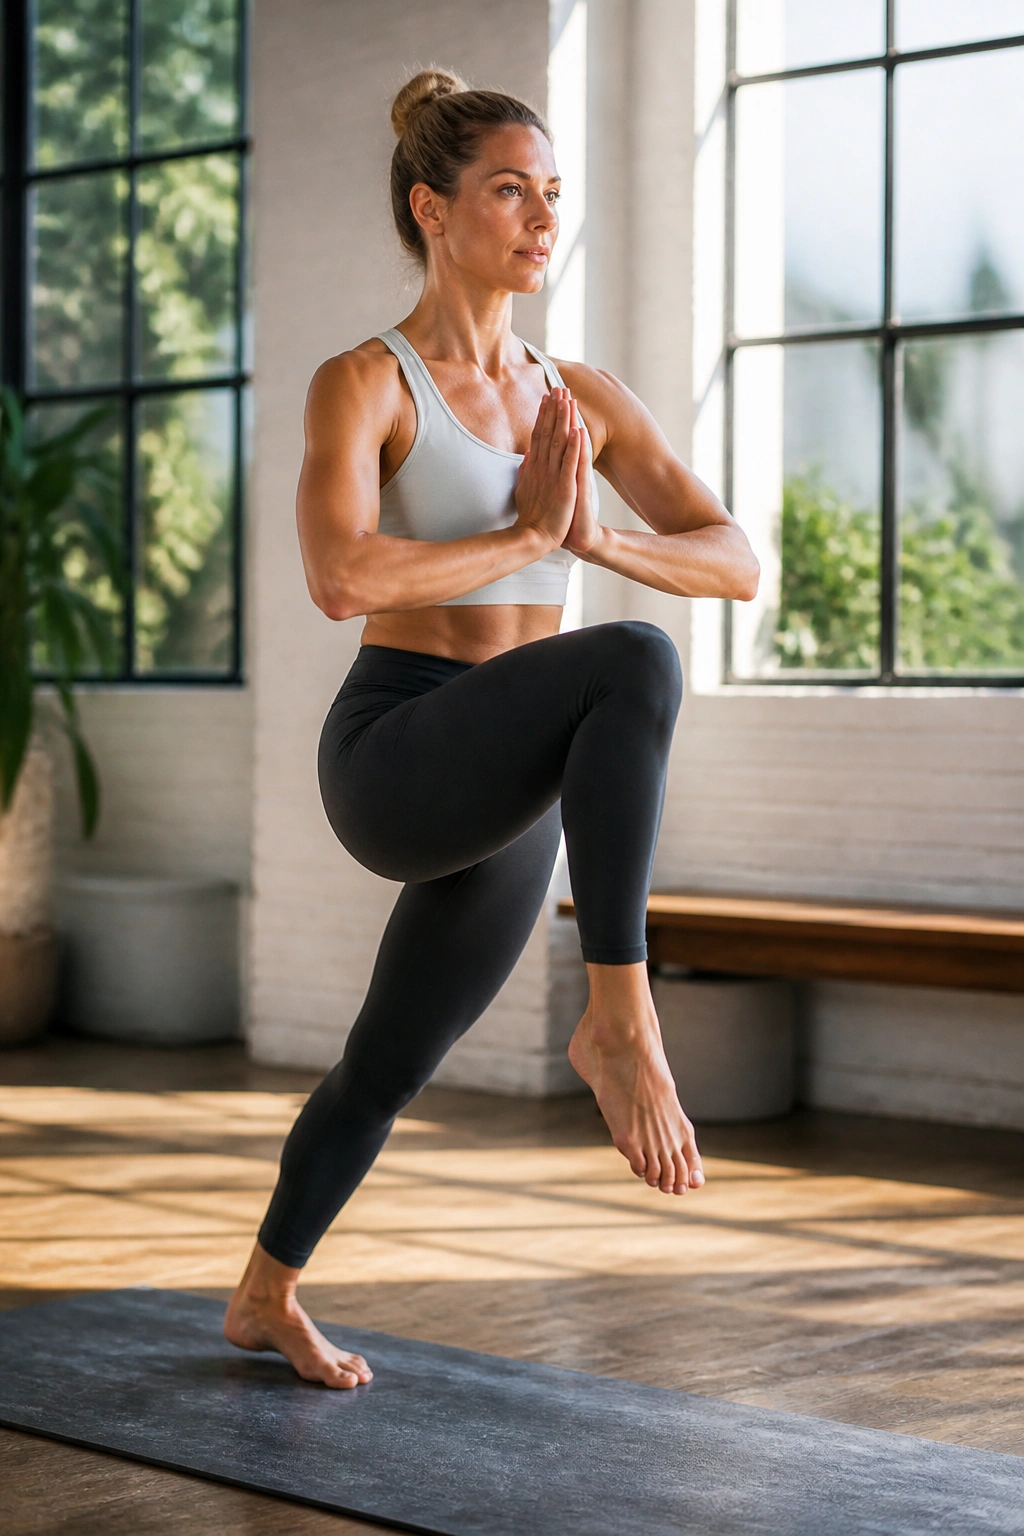
A knee-drive lunge sequence feels almost too simple until the standing leg starts to shake.
Begin in crescent lunge with the back heel lifted and the torso tall. Drive the back knee forward toward the chest, then reach it long again without losing balance. Do 8 to 12 drives on each side, then hold the lunge for 3 to 5 breaths before switching legs. The front leg gets the obvious burn, but the glute on the standing side is doing a lot of quiet work too.
This is one of the best yoga workouts for strength because it mixes stability with movement. You are not just holding a shape. You are controlling the shape while it changes. That’s harder, and it carries over better to walking hills, climbing stairs, and getting up off the floor without using your hands like a crutch.
A few useful cues:
- Keep the front foot rooted through the big toe mound and heel.
- Keep the ribs from thrusting forward.
- If balance is rough, bring the hands to prayer at the chest.
- Add a small twist toward the front knee for extra core work once the basic version feels solid.
The knee drive should feel crisp, not thrown. If your upper body pitches around, slow the tempo and shorten the range. Strength usually lives in the smaller, cleaner version.
6. Side Plank Progressions That Light Up the Waist and Shoulders
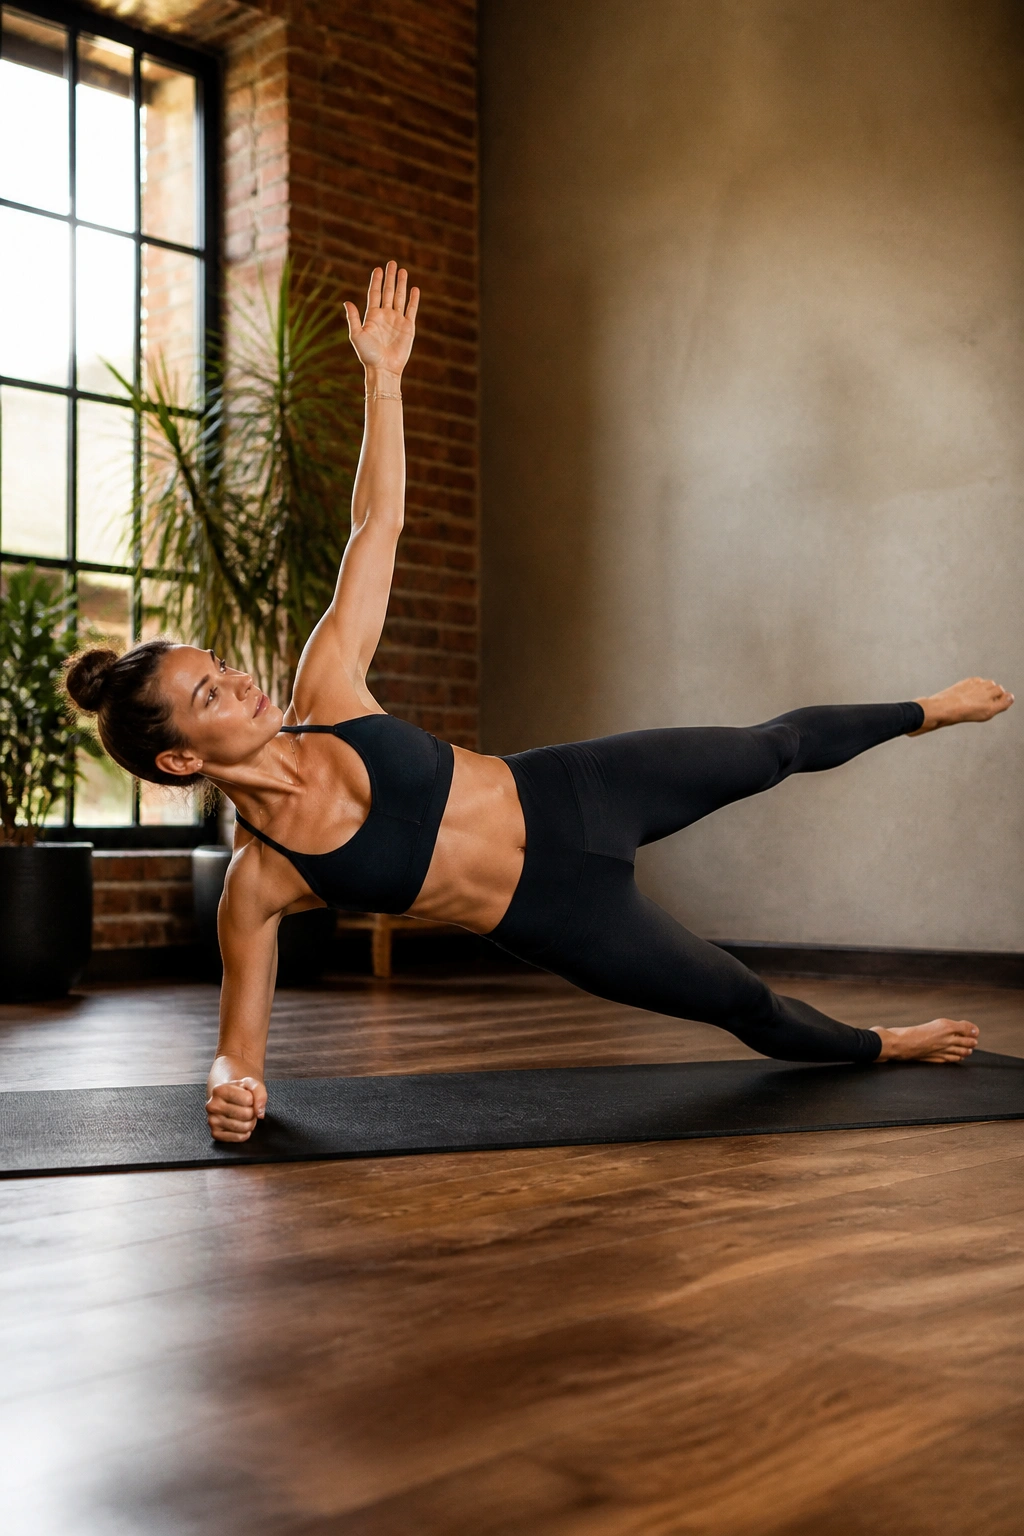
Side plank is one of the cleanest ways to build side-body strength on a mat.
It hits the obliques, yes, but the shoulder of the supporting arm also has to stay stacked and stable while the hip keeps lifting. Start with a knee-down side plank if needed. Hold 15 to 20 seconds, then move to a full side plank for 20 to 30 seconds, and finish with a star version if you want more challenge: top leg lifts, foot stacks, and the whole body stays long.
Simple, harder, hardest
- Knee-down side plank: best for building the shape without collapsing.
- Full side plank: best for core and shoulder strength.
- Star side plank: best if you want the hip stabilizers to burn too.
The mistake is letting the bottom shoulder sink toward the ear or letting the hips roll back. Both shortcuts turn the work into a shrug. Keep the chest open and the bottom ribs pulled in.
My favorite small trick: press the floor away so hard that the supporting shoulder feels broad, not pinched. That one cue changes the whole pose.
Side plank looks static. It isn’t. The body is fighting rotation the entire time.
7. Boat Pose Core Circuits
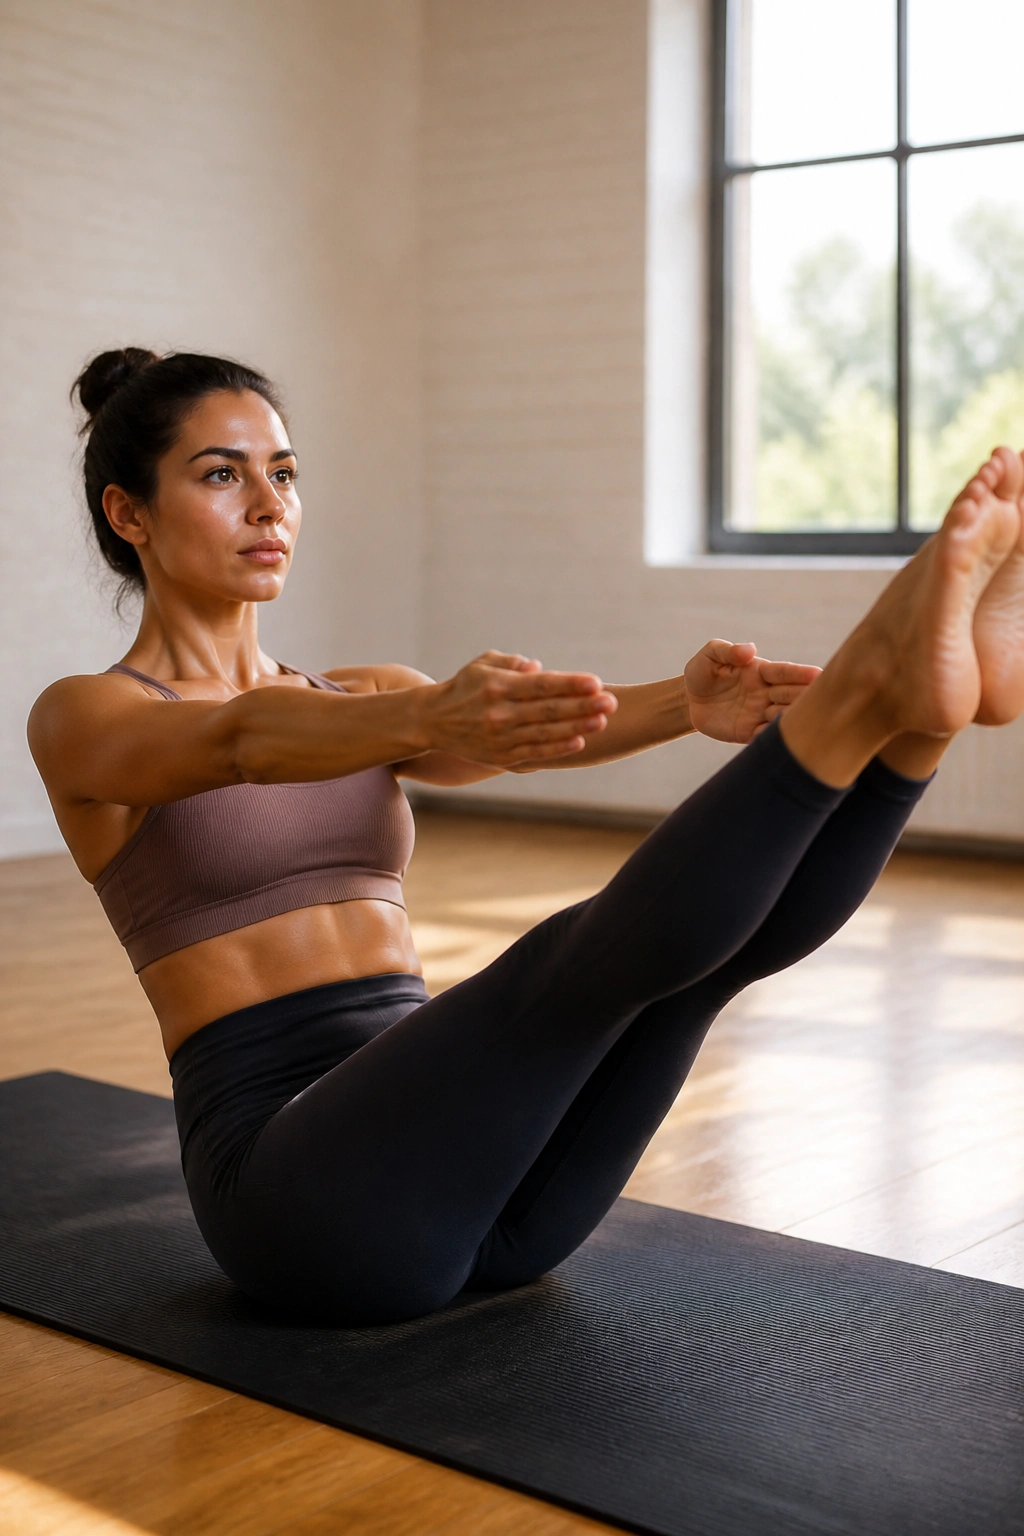
Why does boat pose feel like such a rude little exercise? Because your torso has to stay upright while your hip flexors and abs argue over the job.
A solid boat pose circuit starts with a 20-second hold, then 10 toe taps, then a low-boat hover for 10 seconds, then a return to the original shape. Repeat 3 rounds. If your low back rounds hard or your neck cranes forward, bend the knees more. There is no medal for forcing straighter legs before you can hold the position cleanly.
Boat works best when you treat the spine like a long line instead of a collapsed C. The chest stays open. The shoulders stay down. The breath stays steady enough that you can count the seconds without panic.
Here’s the useful part: boat pose teaches the core to brace while the limbs stay light. That matters in standing balances, arm balances, and even in basic movement like lifting a box or sitting up without rolling sideways.
A few variations keep it interesting:
- Half boat with bent knees
- Boat hold with small arm reaches
- Bicycle-style twists at slow pace
- Low boat hover for 5 to 10 seconds
Don’t rush through it. The point is not to survive boat. The point is to make your center line stronger.
8. Bridge and Single-Leg Bridge Flow
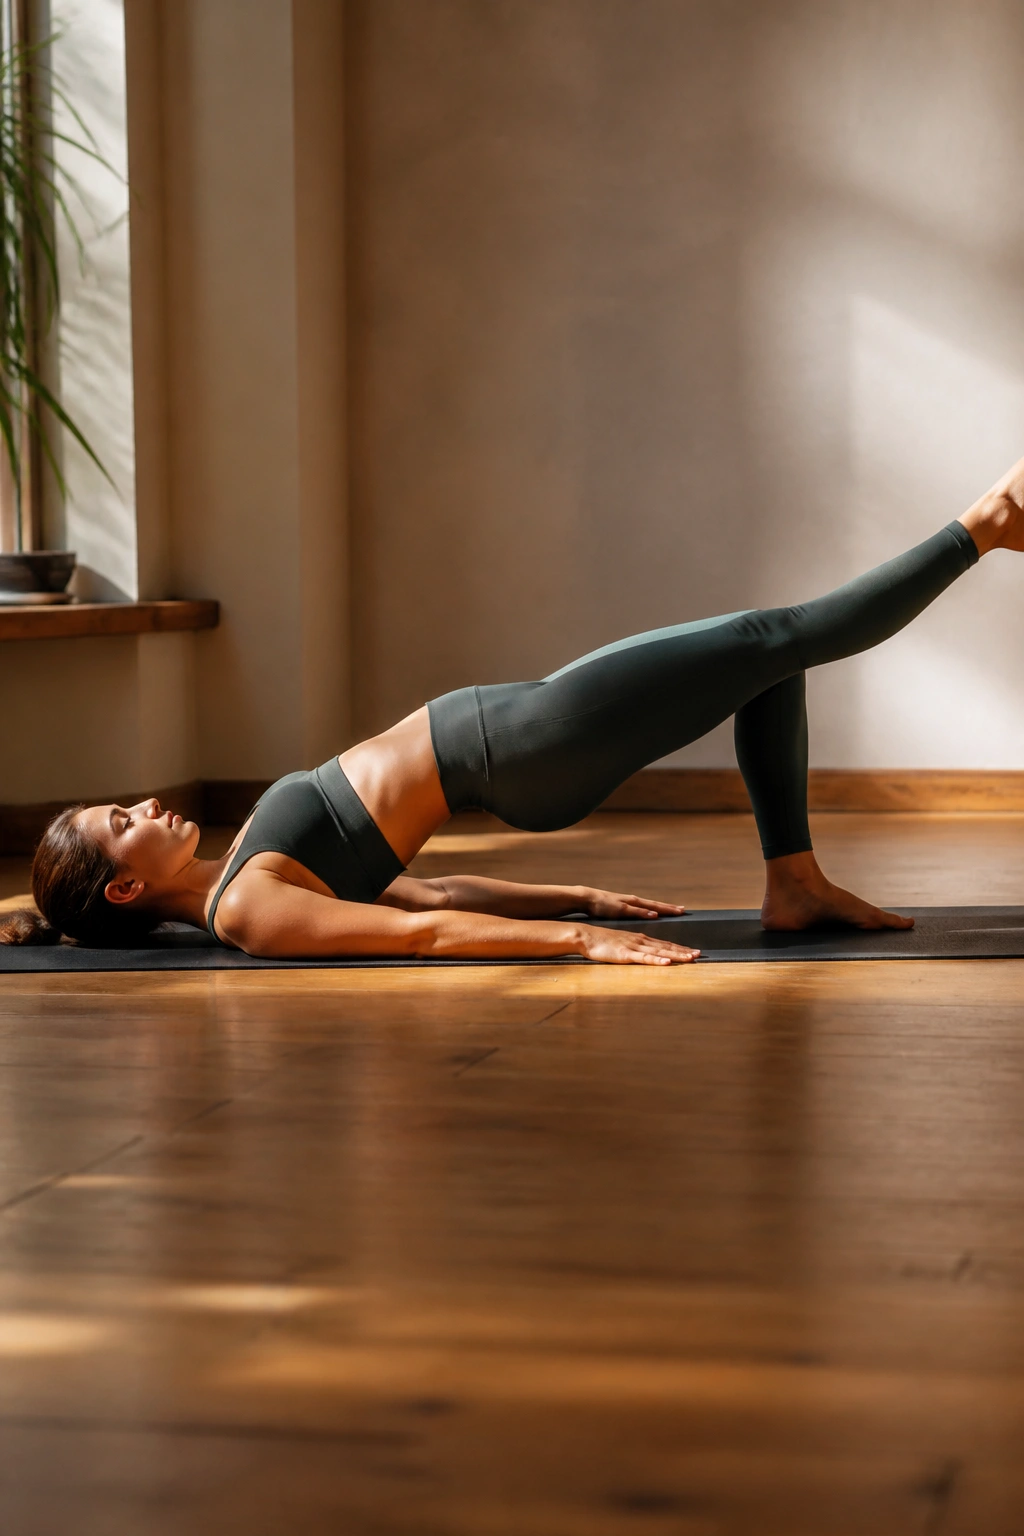
A good bridge pose feels like the floor is pushing back through your heels.
Lie down with the feet hip-width apart, knees bent, and arms long by your sides. Press into the heels, lift the hips, and hold for 5 breaths. Lower with control, then repeat. Once the basic bridge feels steady, try alternating a small march or lifting one leg for a single-leg bridge. That is where the glutes and hamstrings stop being polite.
The strength here comes from the back side of the body. Most people live too much in the front: hip flexors, quads, chest, neck. Bridge flips that around and asks the posterior chain to take charge.
A few cues make a difference:
- Keep the knees from splaying too wide.
- Knit the ribs down so the lower back does not overarch.
- Drive through the whole foot, not just the toes.
- Lift only as high as you can keep the knees and ribs organized.
Single-leg bridge is not about height. It is about not twisting. If the pelvis tips hard, go back to double-leg work and clean it up. That is still strength training. Honestly, it’s the better version of it.
9. Half Moon and Standing Split Balance Flow
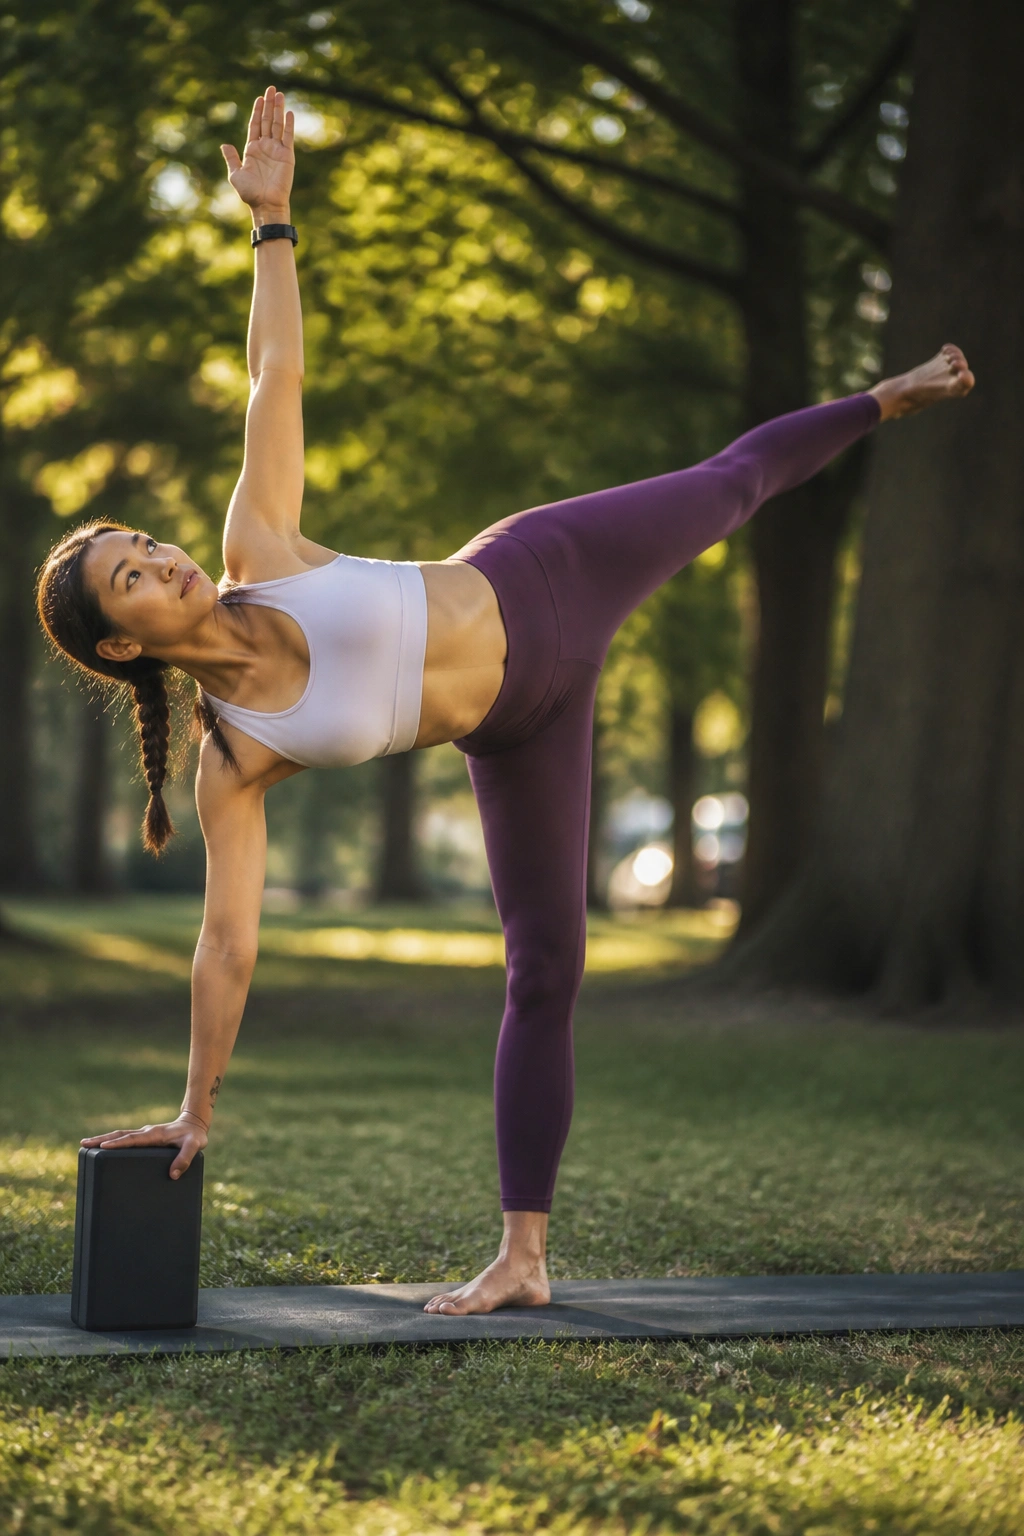
Balance work is not soft. Half moon will tell you that fast.
Start in a standing lunge, tip the torso forward, and place the lower hand on a block or the floor. Open the top hip and stack the lifted leg in half moon. Hold 3 to 5 breaths, then transition into standing split by lowering the torso and lifting the back leg higher. Repeat on both sides. The standing leg, ankle, and outer hip do most of the hard work here.
The whole point is stability under load. The standing hip has to stop the pelvis from wobbling. The foot has to stay active through the big toe mound and heel. The core keeps the trunk from drifting all over the place. It looks graceful when it works, but it feels like a job.
A block under the lower hand is not cheating. It gives you a cleaner line and usually a better hip opening. Chasing the floor too early just makes people twist and topple.
That tiny pause in half moon matters. So does the slow lift into standing split. The slower the transfer, the more the stabilizers have to do. This is the kind of strength that sneaks into the ankles and hips and then shows up everywhere else.
10. Locust and Bow Back-Body Work
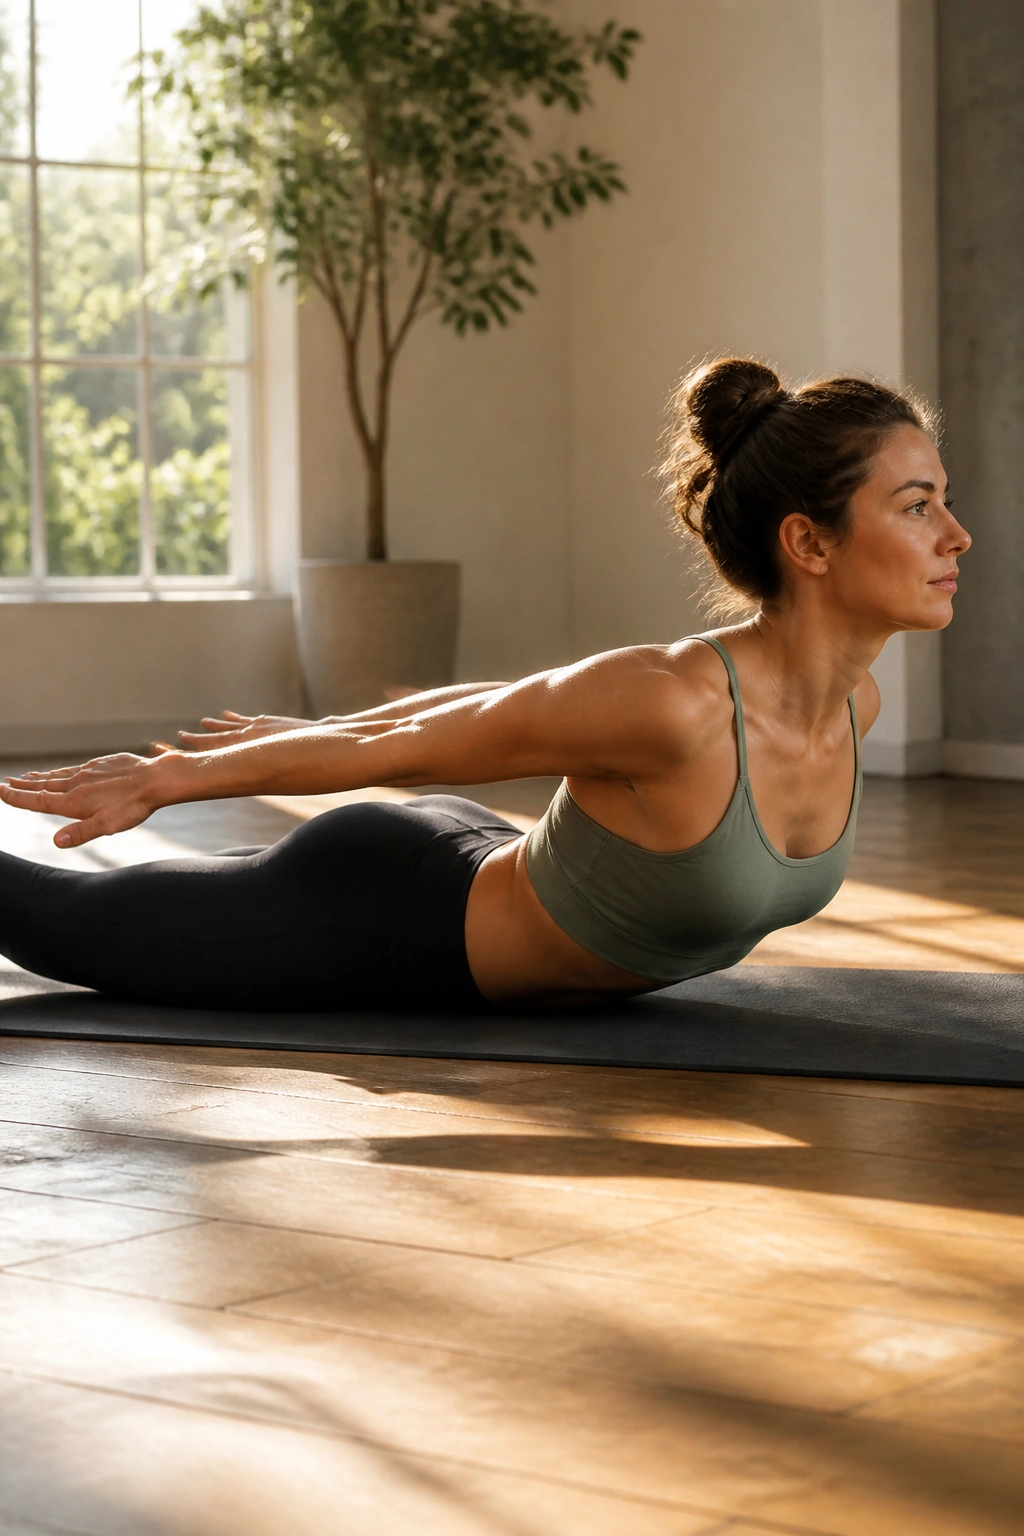
Locust pose looks small. Lie face down, lift the chest two inches, and suddenly the back body has a say.
Start with a low locust: arms by your sides, palms down, legs long, chest lifted just enough to hover. Hold for 15 to 20 seconds. Then rest and repeat with arms reaching back, or lift one leg at a time if the lower back is sensitive. Bow pose can follow if your spine tolerates deeper backbends, but it should never be a fling. It’s a controlled lift.
How to keep your lower back safe
- Lengthen the tailbone toward the heels.
- Reach the crown of the head forward before lifting.
- Keep the neck neutral instead of cranking it back.
- Squeeze the glutes lightly; do not jam them.
The burn should land across the glutes, hamstrings, and muscles alongside the spine. If you feel a sharp pinch in the low back, reduce the lift. More height is not better here.
Back-body work is easy to skip because it looks quiet. That is a mistake. Strong glutes and spinal muscles change posture, help with balance, and make almost every standing pose feel more secure.
11. Dolphin and Forearm Plank Shoulder Sets
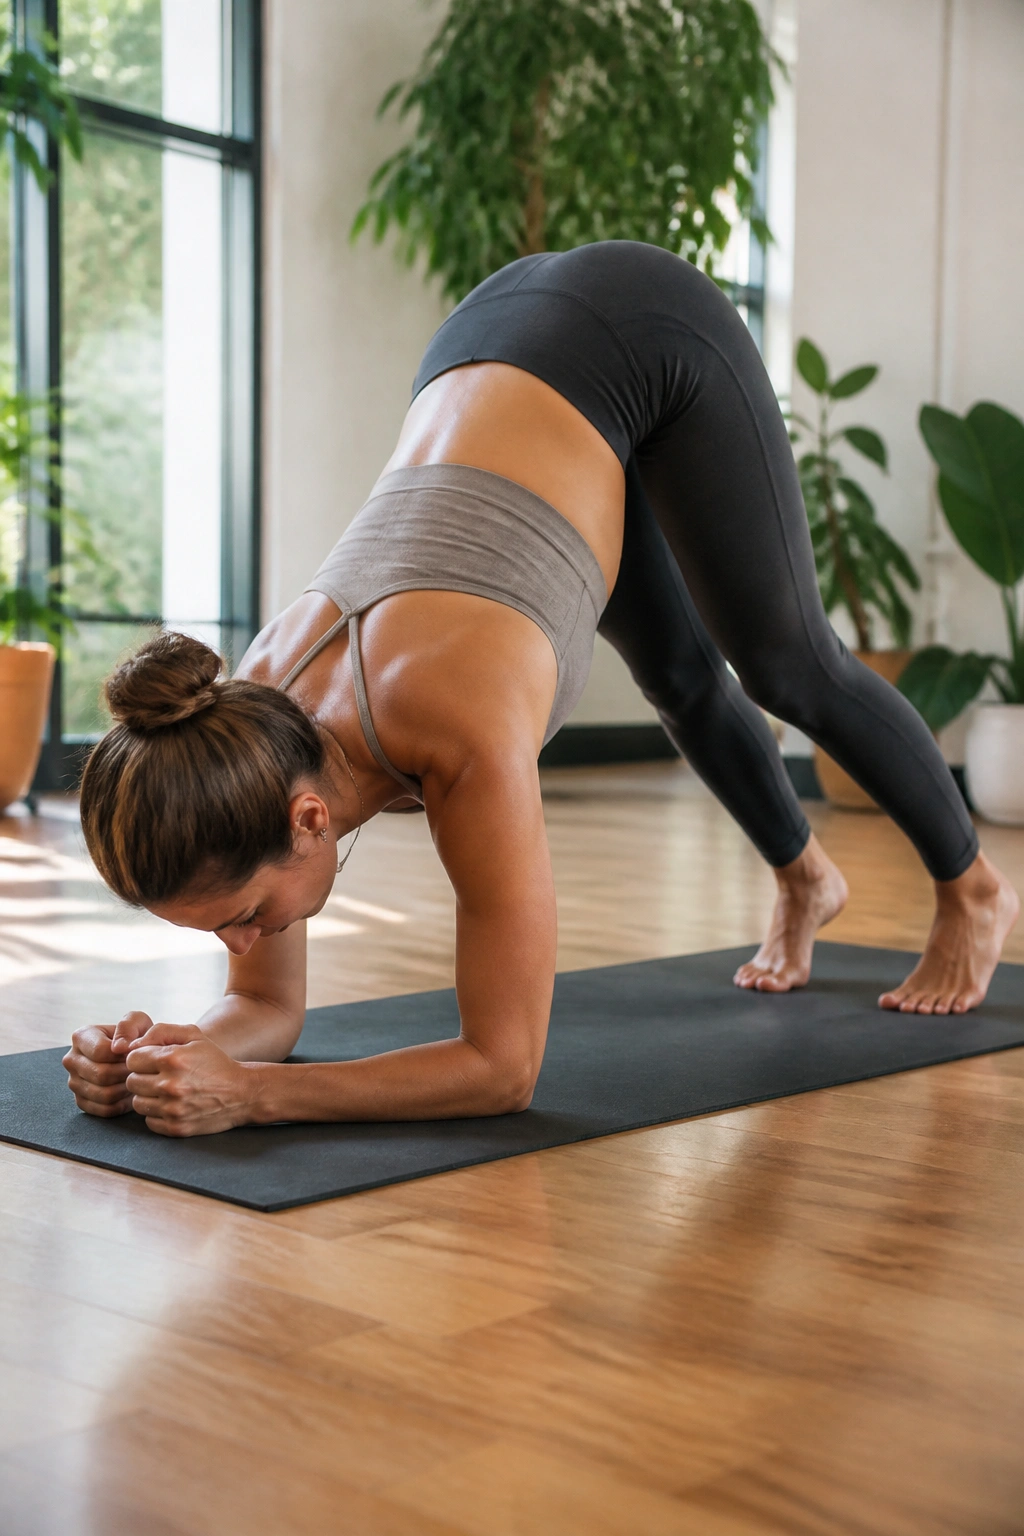
Forearm work is underrated, especially if wrists complain during hand-balancing drills.
Dolphin pose and forearm plank train the shoulders without putting full body weight through the wrists. Start with a 20-second forearm plank, then move into dolphin for 20 to 30 seconds, then return to forearm plank and repeat. The shoulders, upper back, and core have to cooperate, and they have to do it while the breath stays even.
Make dolphin honest
- Forearms parallel, not splayed wide.
- Elbows under shoulders.
- Hips high enough that the pose feels like work, not a nap.
- Heels can stay lifted; do not force them down if the back rounds.
A few shoulder taps in forearm plank make the whole thing harder. So do small dolphin rocks forward and back. Those shifts teach the body to manage load while the center of mass moves, which is exactly what strength is for.
This is also a smart choice if your wrists feel beat up from too much plank, crow prep, or handstand practice. Swap in dolphin and keep the session going. No drama. Still hard.
12. Crow Prep and Arm-Balance Drills
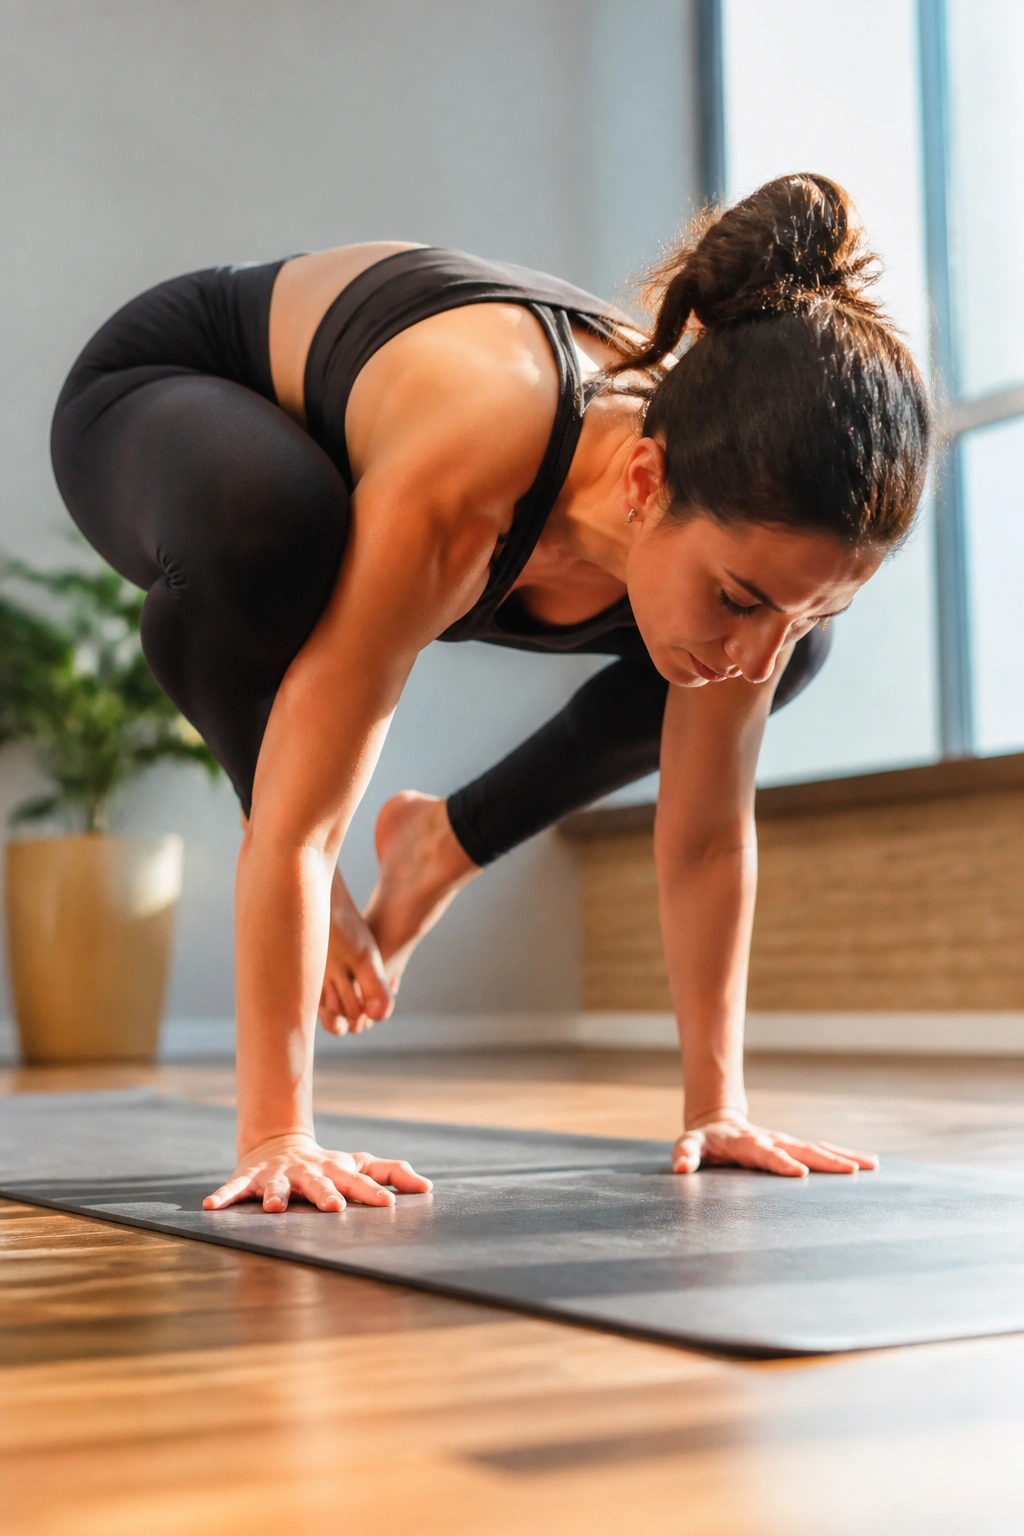
Why practice crow if you can already hold plank? Because crow teaches a different kind of power.
Crow is not a jump. It is a forward shift of body weight, a squeeze of the inner thighs, and a careful handshake between the arms and core. Start with blocks under the feet or hands if the floor feels too far away. Lift one foot at a time, then both toes, then try small rock-backs and rock-forwards without leaving the mat. Ten focused attempts are more useful than thirty wild ones.
What matters most is control in the lean. If the weight never moves forward enough, the feet will stay glued to the floor and the arms never have to work. If the shift goes too far too fast, you face-plant. Crow lives in the middle.
How to practice without face-planting
- Spread the fingers wide and grip the mat.
- Place the knees high on the upper arms, not drifting at the elbows.
- Look a little forward, not straight down.
- Keep the elbows bent just enough to create a shelf.
It’s a strange pose at first. Then it becomes honest. You either own the weight shift or you don’t.
13. Reverse Warrior and Extended Side Angle Holds
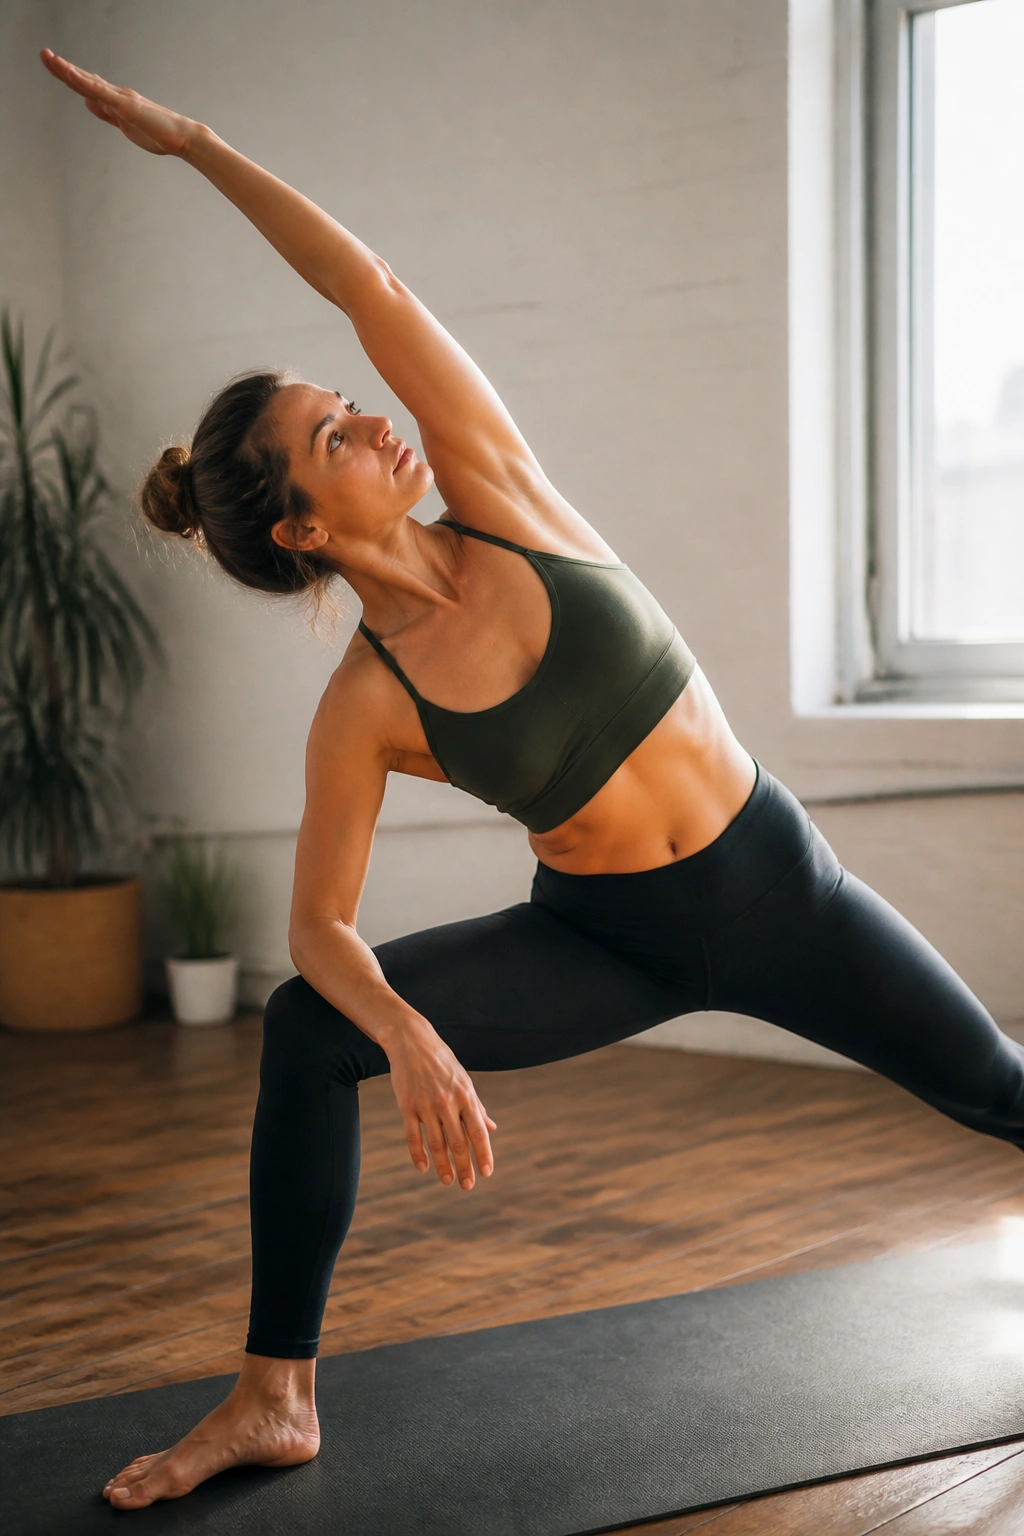
Extended side angle starts with a stretch and ends with a thigh burn if you stay long enough.
Step into Warrior II, then lower the front forearm to the thigh or a block while the top arm reaches overhead. Hold for 5 breaths, then sweep into reverse warrior and hold another 3 to 5 breaths. The front leg, inner thigh, obliques, and side glutes all chip in. It looks smooth. It is not easy.
This pair of shapes does a nice job of building lateral strength, which gets ignored in a lot of workout plans. The side body keeps the torso from folding over. The front leg keeps the pose from collapsing forward. The back leg keeps the base alive.
A small block can save the neck and keep the torso longer. A low stance can save the knees if the hips are tight. There is no prize for suffering in a neat line.
When done well, these holds make standing poses feel sturdier. The torso feels more connected to the legs, and the legs stop feeling like loose furniture under a moving upper body.
14. Wall-Assisted Handstand and Pike Prep
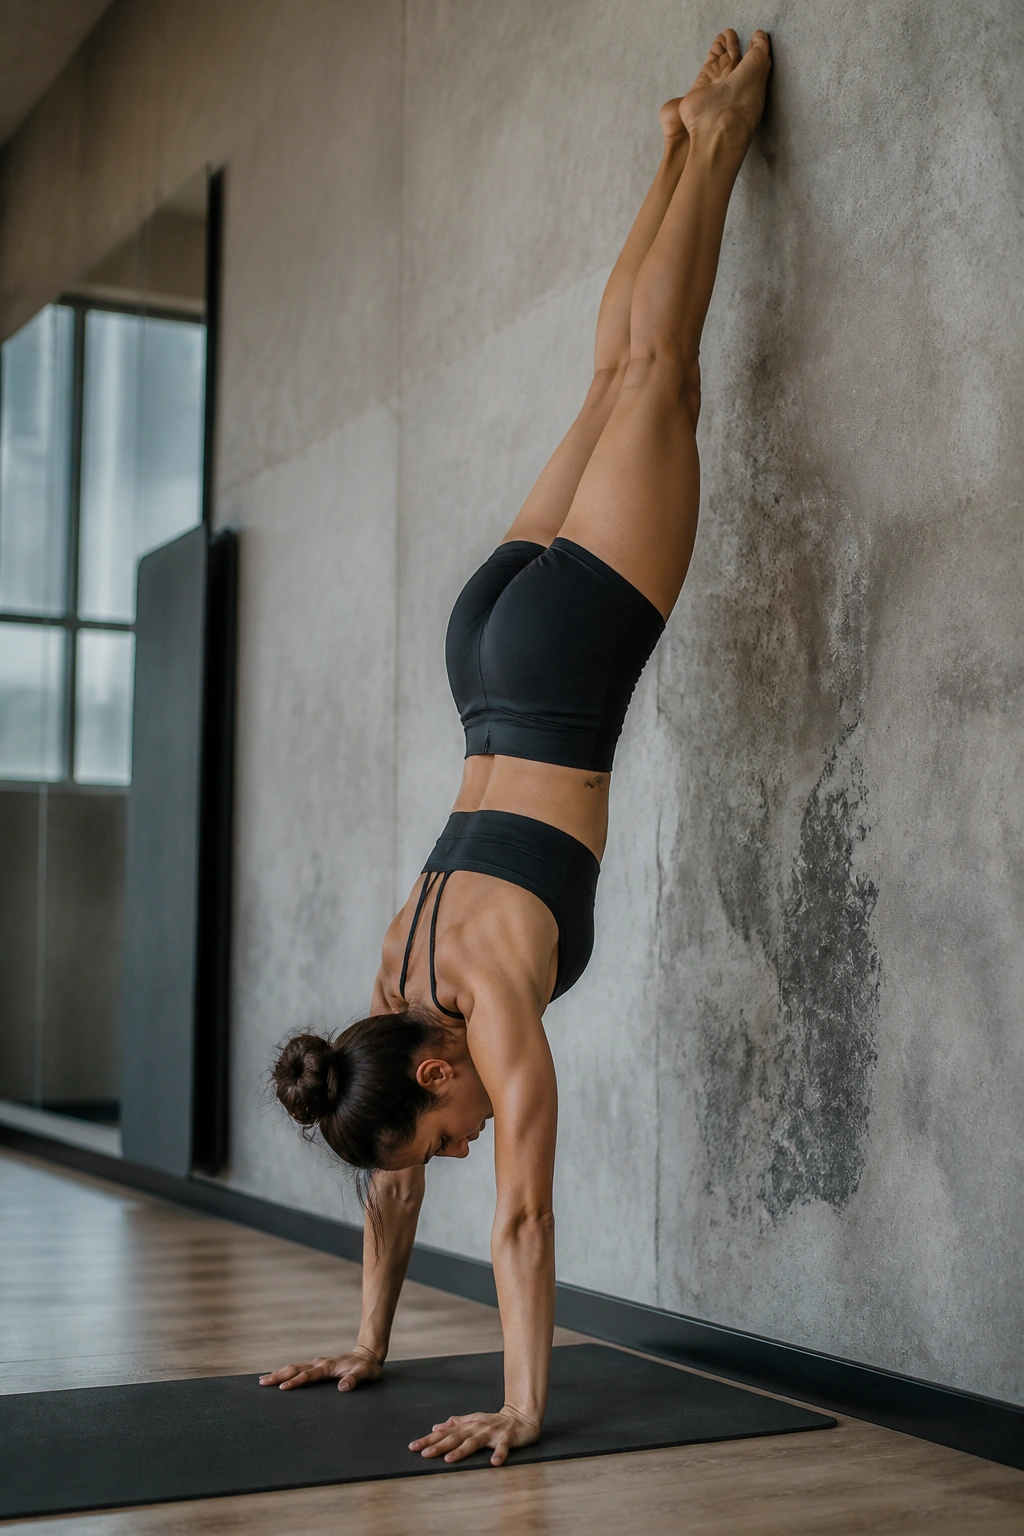
Handstand prep is not about wild kicking.
The useful work is in the setup: wall walks, pike holds, and slow shoulder taps with the feet on a box or a wall. Start with both feet on the floor and hands a short distance from the wall. Walk the feet up only as far as you can keep the ribs tucked and the shoulders active. Hold for 10 to 20 seconds, then walk back down with control.
Wall drills that actually help
- Wall pike hold: feet on a chair or box, hips stacked, 15 to 20 seconds.
- Wall walk: walk hands closer to the wall until shoulders start to load.
- Heel pull drill: lightly unweight one heel at a time while keeping the line steady.
- Shoulder shrugs: press tall through the shoulders without bending the elbows.
The real strength here is in the shoulders, upper back, and deep core. If the ribs flare or the lower back arches hard, the wall is telling you the line is off. Listen to it.
This work pays off even if you never chase a full handstand. Better shoulder strength helps with dolphin, plank, crow, and every overhead reach you do in life.
15. A Full-Body Yoga Workout That Builds Real Strength
A good yoga strength workout does not need fifteen different poses. It needs the right ones, arranged with some sense.
Try this 20-minute circuit when you want one session that hits the whole body: 40 seconds chair pose, 30 seconds plank, 8 crescent lunge knee drives each side, 20 seconds side plank each side, 5 bridge holds with a 3-second squeeze at the top, and 20 seconds boat pose. Rest 30 seconds between rounds and repeat 2 to 3 times. That gives you legs, push strength, core, hips, and a little balance work without turning the mat into a circus.
A simple way to run it
- Round 1: slower pace, clean form
- Round 2: add 5 to 10 seconds to each hold
- Round 3: keep the time the same but shorten the rest
If you want a lower-impact version, keep the knees down in plank and side plank, and use bridge instead of single-leg bridge. If you want it harder, lengthen the chair hold and slow the lower in chaturanga.
This is the kind of session I like most: direct, repeatable, and hard enough to matter. No filler. No fluff. Just a sequence that makes you work and lets you feel exactly where you’re strong, and where you’re still borrowing strength from somewhere else.
Final Thoughts
Real strength on a yoga mat comes from holds, slow transitions, and honest alignment. The flashy stuff gets attention, but the slow, unglamorous work is what changes how your body feels in a squat, a lunge, a push, or a balance.
Pick four or five of these workouts and repeat them for a few weeks. That repetition matters more than chasing novelty. A chair ladder, side plank progression, bridge series, and plank-chaturanga set will tell you a lot about your body very quickly.
If you want a simple test, choose one pose and time it. Add 5 seconds next time if the shape stays clean. When the form breaks, stop there. That is the edge where strength actually gets built.
