



If your glutes only seem to wake up after the last miserable rep, glider work will feel rude in the best possible way. A pair of sliders, paper plates, or even folded towels can turn simple lower-body moves into serious glute training because the sliding leg never gets an easy break.
That’s why glider workouts for stronger glutes work so well. They keep tension on the working leg, ask more from your hip stabilizers, and make it hard to hide sloppy form. If one knee caves, if your pelvis twists, if you lean back and let your lower back steal the job, you feel it almost instantly.
There’s also a nice side effect: these moves are usually friendlier on the joints than jumping, sprinting, or heavy barbell work. Not easier. Just less punishing on impact. Done well, glider training hits the glute max, glute med, hamstrings, and deep hip stabilizers in a way that feels controlled, honest, and a little unforgiving.
Use them on a smooth floor, move slowly, and chase the burn in the right places. The first move sets the tone.
1. Glider Reverse Lunge Reach
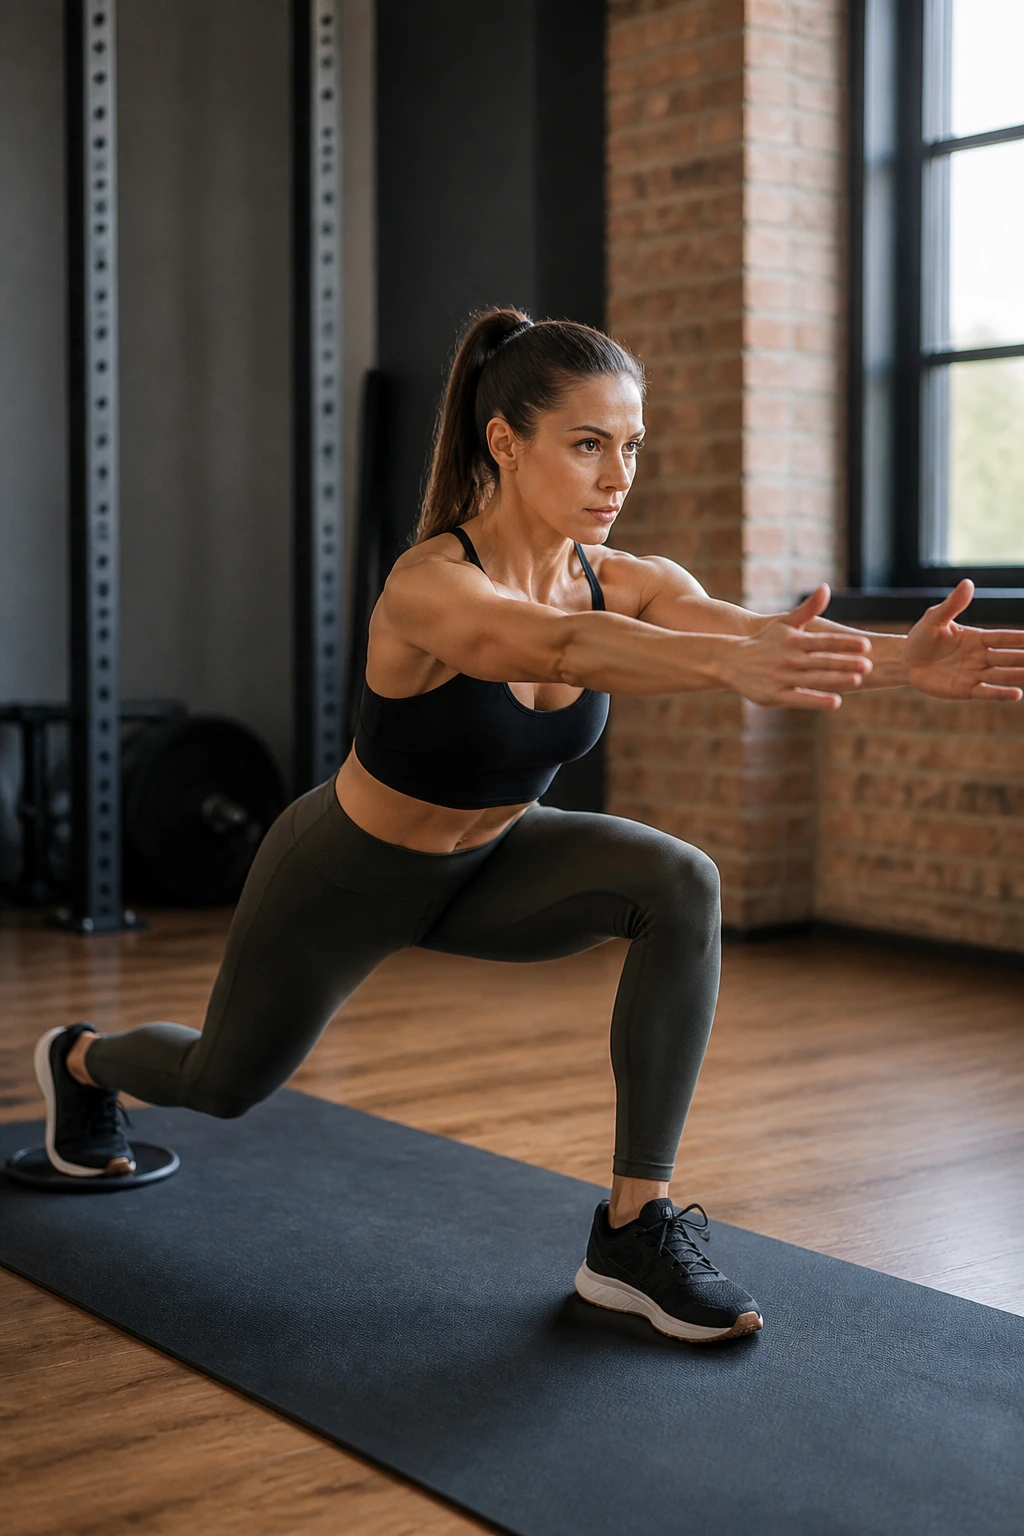
Step back with a slider under the rear foot, and the whole exercise gets more honest fast. The front leg has to support your body while the back leg glides out, which makes the front glute do more work than it does in a regular reverse lunge.
Why It Works
The reverse path already favors the glutes a little. Add the glide, and you keep tension on the working side for longer because the rear foot never gets to stomp down and rest. Keep your front shin close to vertical, press through the heel and midfoot, and let your torso lean forward just a touch.
- Do 3 sets of 8 to 10 reps per side.
- Keep the front knee tracking over the second or third toe.
- Slide back until the front thigh is nearly parallel to the floor.
- Do not push off the back leg on the way up; that turns the move into a cheat rep.
Best cue: think “drop straight down, then stand by squeezing the front glute.”
2. Glider Curtsy Lunge
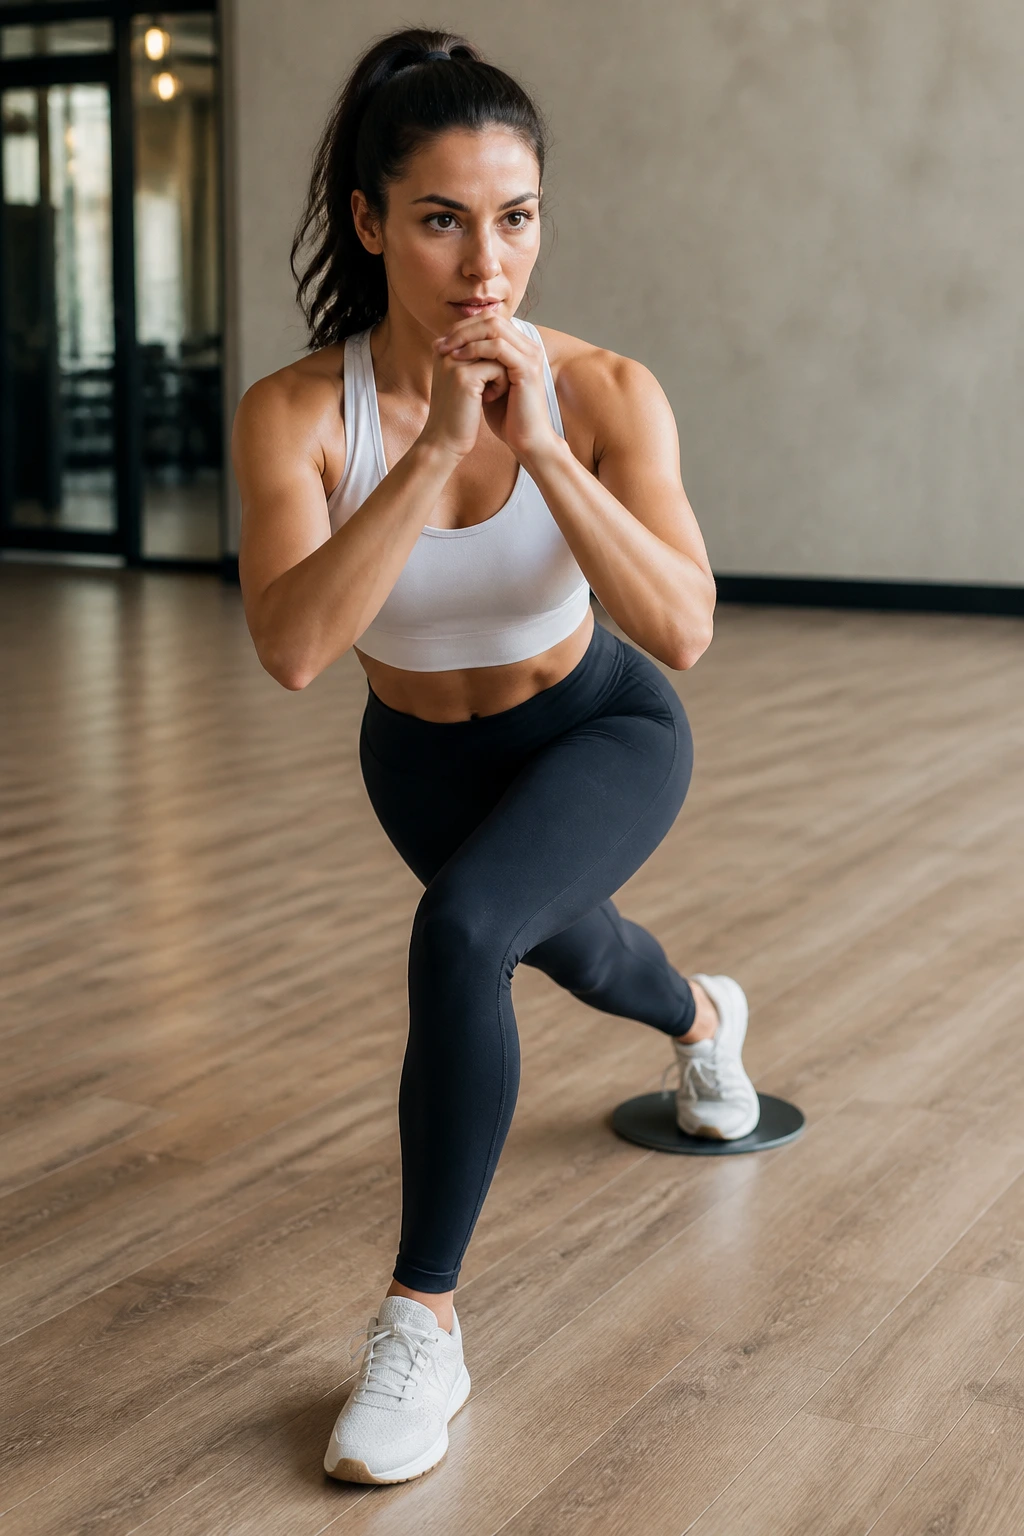
A curtsy lunge with a slide looks small. It isn’t. The diagonal path puts the glute medius — the side-glute muscle that keeps your pelvis steady — on high alert, especially if you keep your hips square instead of twisting to get extra depth.
The back leg crosses behind you, but don’t make it a dance move. Slow the slide, keep your standing foot flat, and resist the urge to collapse into the hip. If the knee of the standing leg caves inward, the whole point gets lost.
This one is excellent if your outer glutes go quiet during squats. It’s also a sneaky test of balance, because the body wants to spin out of the diagonal line. Don’t let it.
A good starting dose is 2 to 3 sets of 8 reps per side. Small steps are enough. You’re not trying to touch the floor with the sliding foot. You’re trying to keep tension on the standing glute until the last rep burns.
3. Sliding Lateral Lunge
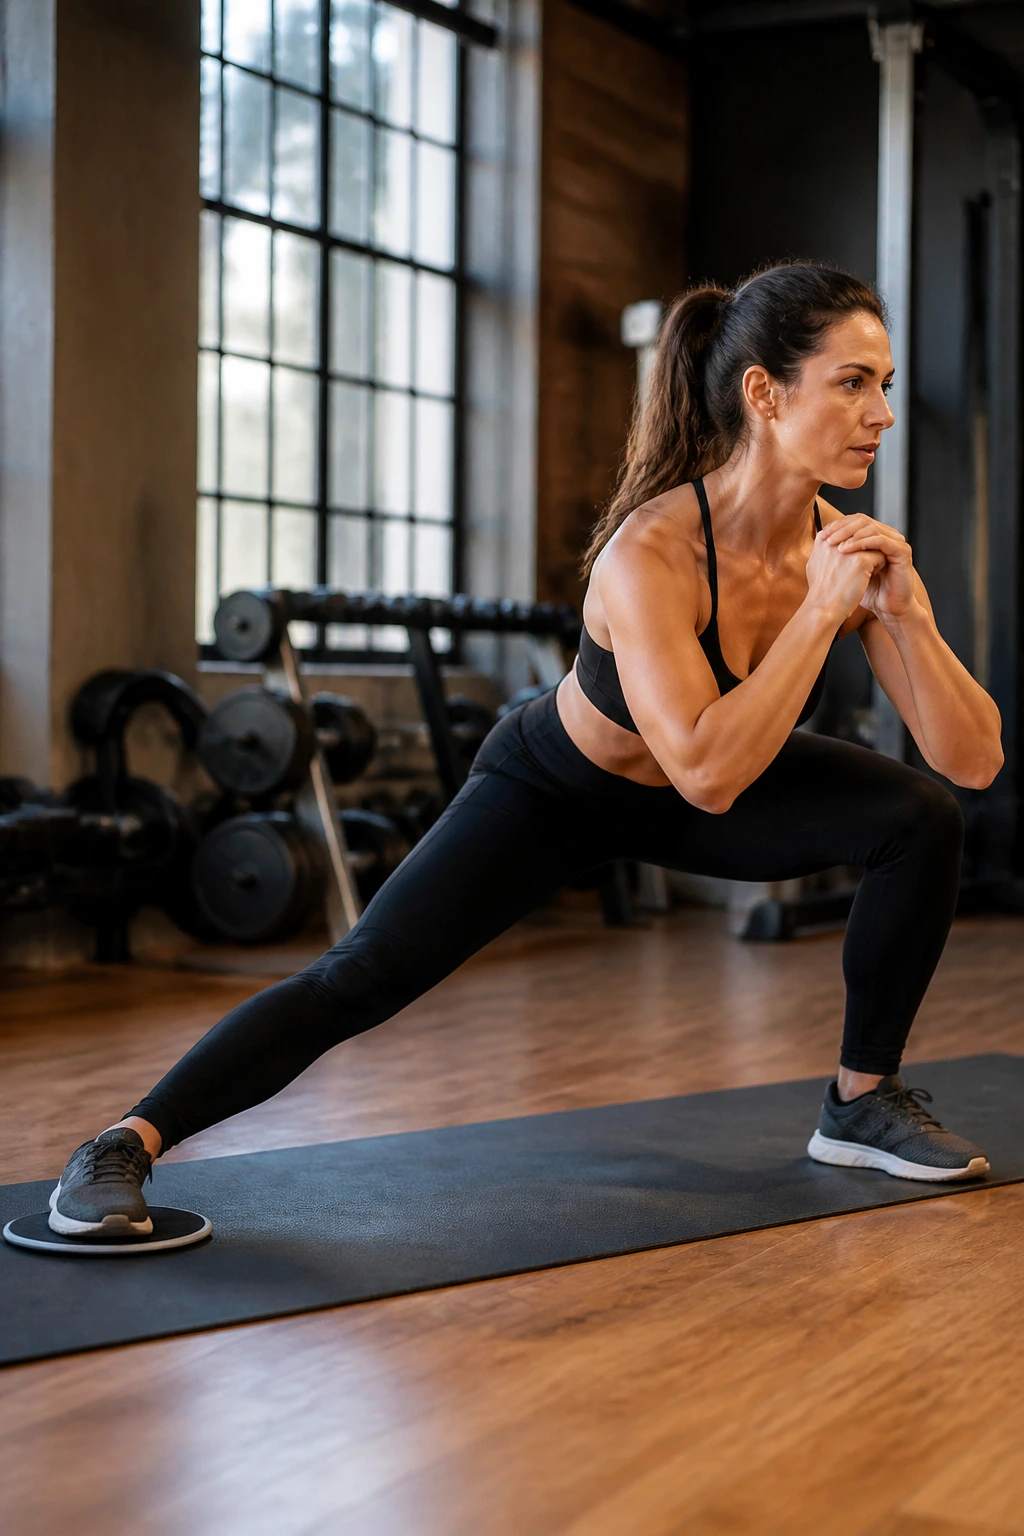
Why does a lateral lunge feel different on a slider? Because the sliding leg has to travel out and back under control, and that long side-to-side path makes the inner thigh and side glute work together instead of taking turns.
What to Watch For
The standing leg does most of the support. The sliding leg should feel like a controlled reach, not a collapse. Keep your chest up, sit the hips back, and keep the non-working foot light on the floor.
- Aim for 3 sets of 6 to 8 reps per side.
- Keep the toes of the sliding foot pointed mostly forward.
- Sit into the hip of the bent leg until you feel the inner thigh lengthen.
- Push the floor away to return, rather than yanking yourself upright.
How to Use It
Pair this with a hinge move like an RDL or glute bridge. That gives you both frontal-plane and straight-ahead work, which matters more than people think. The glutes do not only extend the hip. They also keep you from wobbling side to side, and this drill makes that obvious in a hurry.
4. Single-Leg Glider Glute Bridge
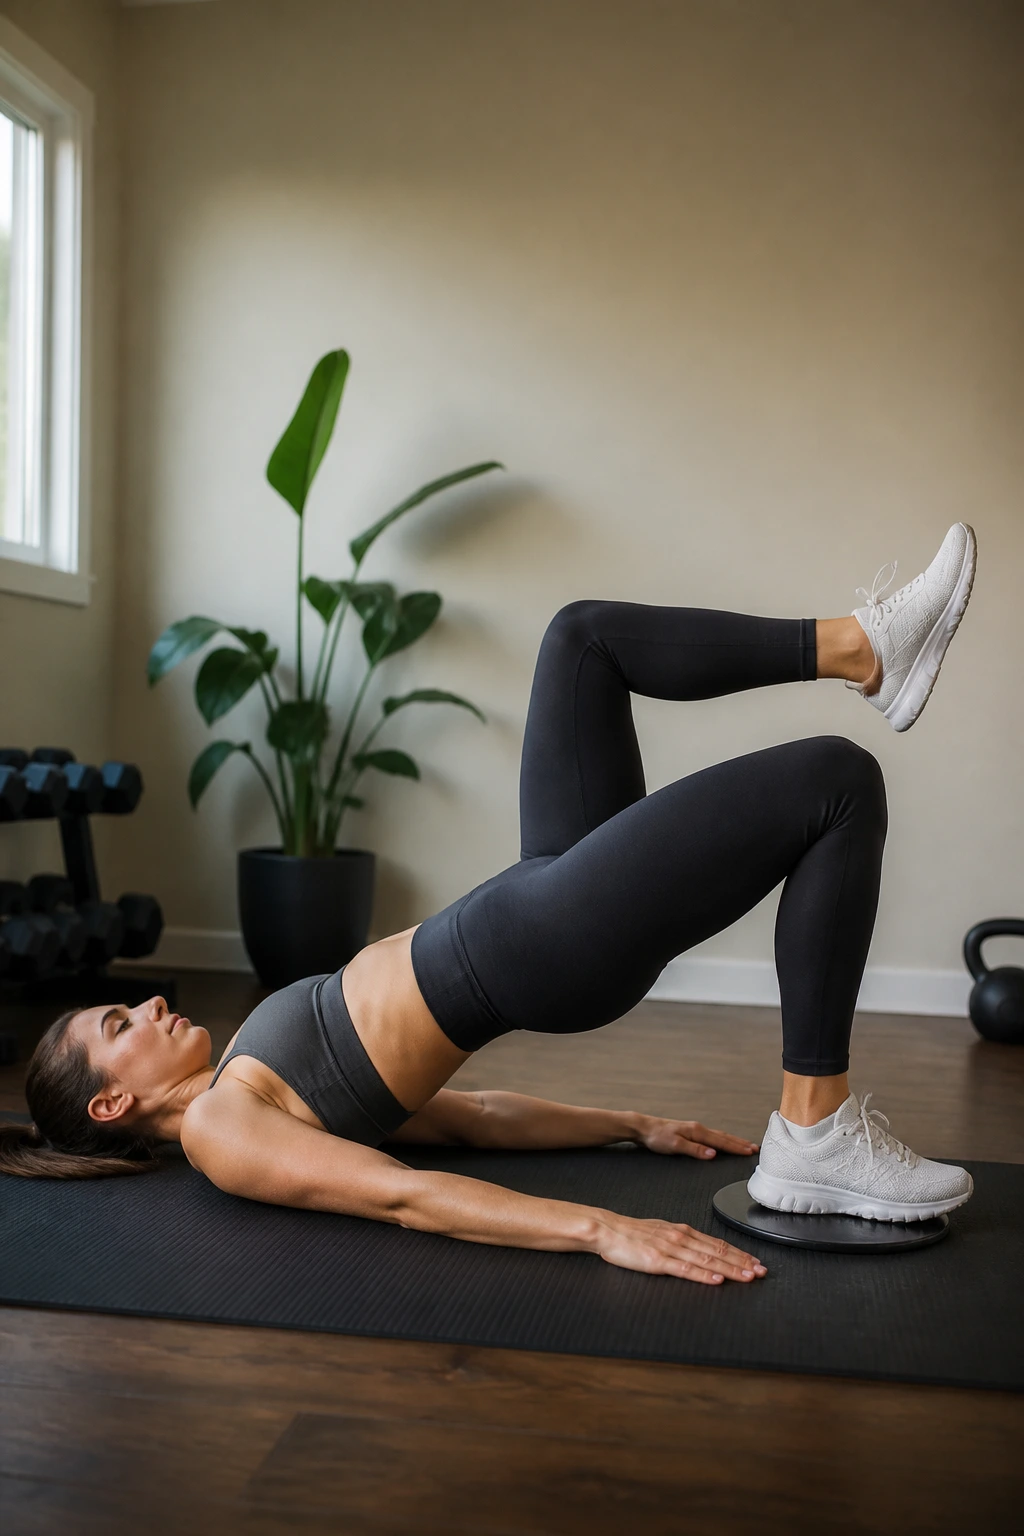
This one looks almost too simple. Put one heel on a slider, keep the other knee bent, and drive the hips up while the sliding leg stays long. The standing side glute has to fight to keep the pelvis level, and that is exactly where a lot of people realize one side is weaker.
Why the Setup Matters
Keep your ribs down and your lower back from arching. If your back takes over, the glutes stop doing the heavy lifting. Press through the heel of the planted foot, then hold the top for a full second before lowering under control.
- Try 3 sets of 10 to 12 reps per side.
- Keep your hips square to the ceiling.
- Lower until your hips barely touch the floor, then go again.
- If hamstrings cramp, bring the heel a little closer to your hips.
One clean rep beats three wobbly ones here. This is not about height. It’s about tension, and the standing glute should feel like it is holding a small bridge together by itself.
5. Glider Hamstring Curl
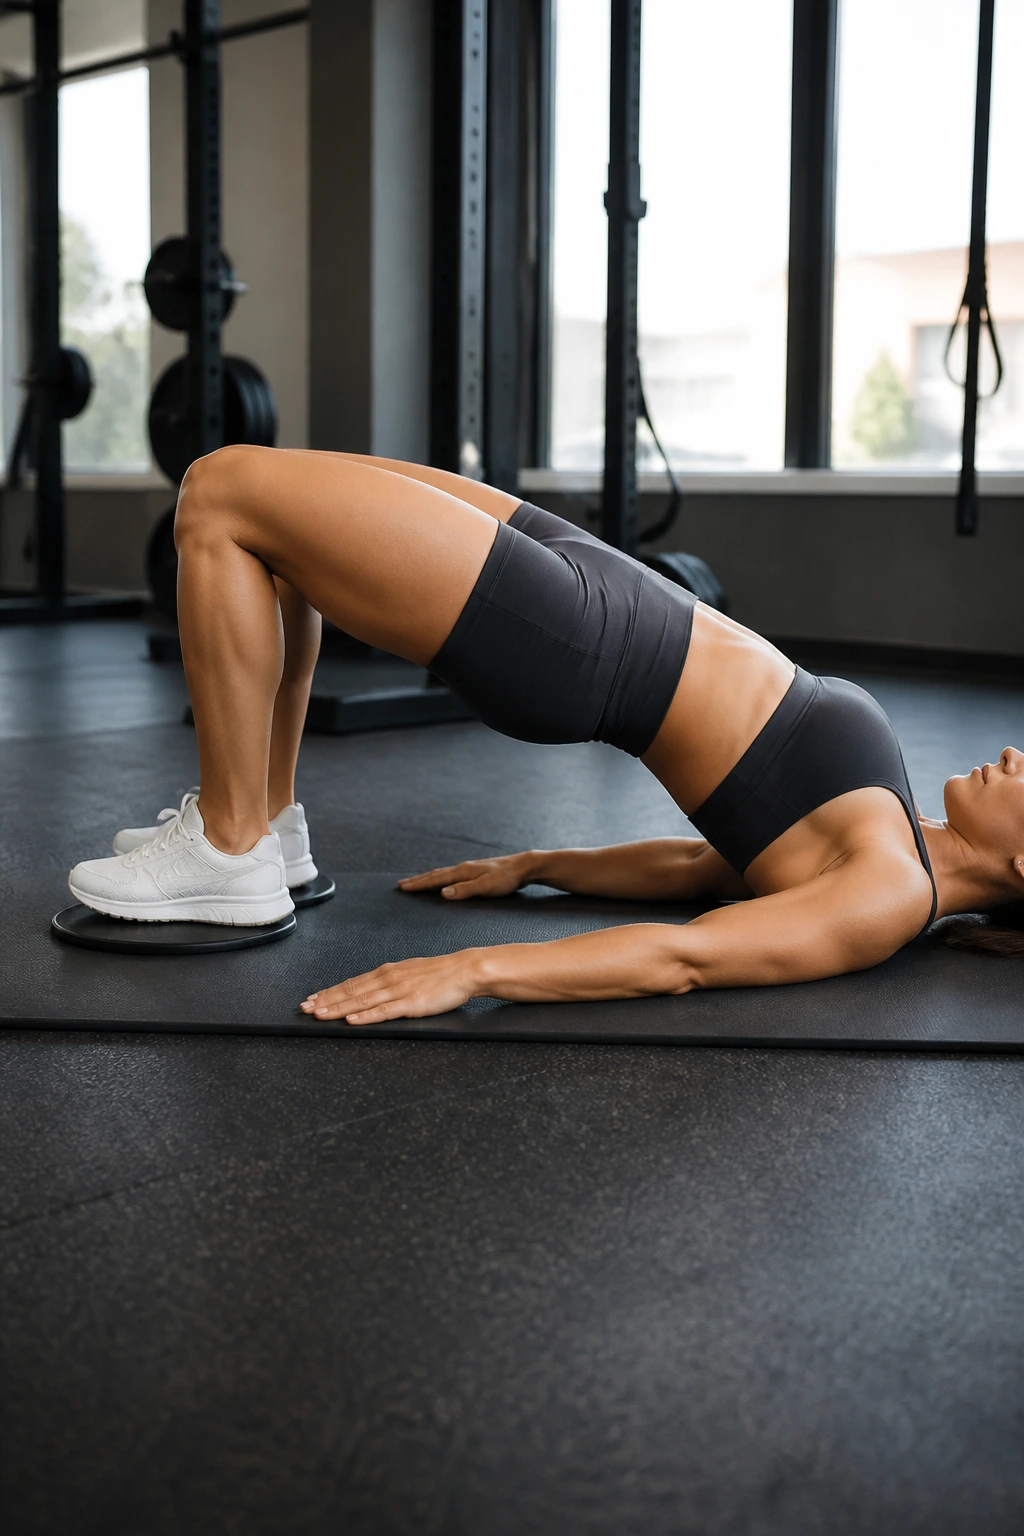
Nope, this is not just a hamstring move. A good slider curl lights up the back of the thighs, yes, but the glutes work hard to keep the hips lifted and the pelvis from sagging like a broken hammock.
Start in a bridge with both heels on the sliders. Pull the heels toward you slowly, then extend them back out without dropping the hips. The hard part is not the pull. It’s keeping the bridge shape while your legs move. That’s where the glutes stay involved the whole time.
Go with 2 to 4 sets of 8 to 12 reps. If you feel a cramp behind the knee, shorten the range and slow the tempo. Better to own a smaller range than to kick through sloppy reps.
I like this one after a lunge or squat pattern because it finishes off the posterior chain without pounding the knees. It’s a quiet exercise. Then suddenly it isn’t.
6. Slider Hip Thrust with Pause
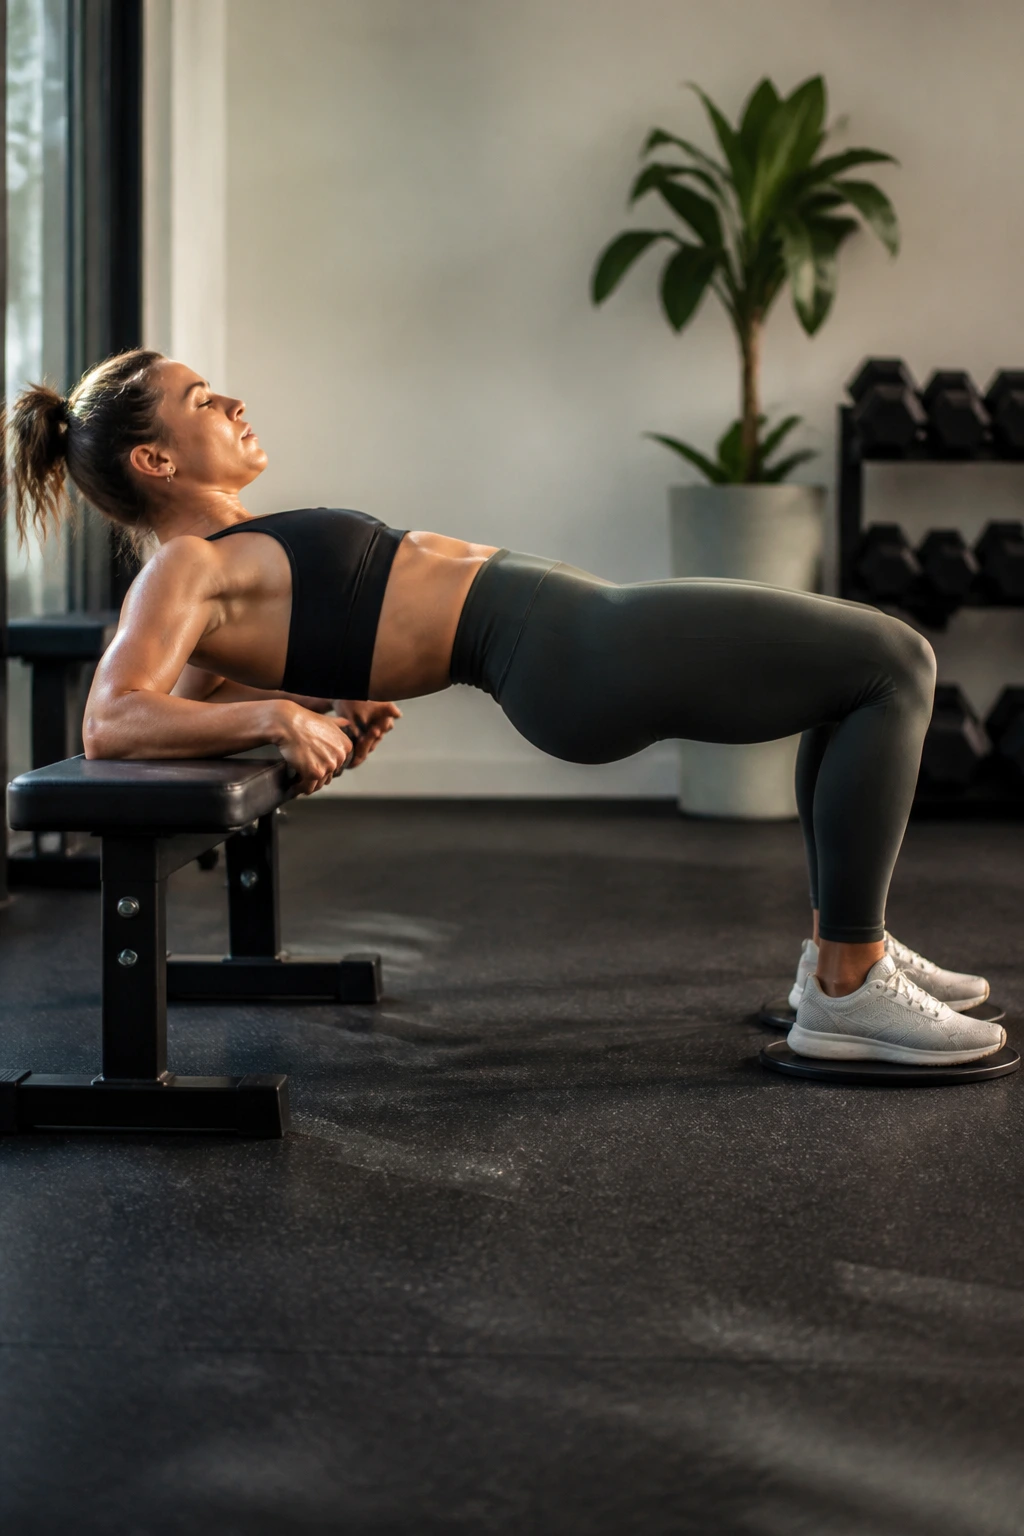
A floor hip thrust already does good things for the glutes. The slider version makes it nastier in a useful way because the heels can drift a little, the hips have to stay locked in, and the top position becomes a real test instead of a quick bounce.
Why It Feels Different
Unlike a regular bridge, this version asks for more control through the whole range. The moving feet make you stay awake, and the pause at the top stops the glutes from hiding behind momentum. Hold for 2 full seconds at peak extension.
Best Way to Run It
Use a couch, bench, or sturdy step behind your upper back. Set your feet on sliders, drive through the heels, and keep your chin tucked so your ribs do not flare.
- Do 3 sets of 8 to 10 reps.
- Pause for 2 seconds at the top of each rep.
- Keep the shins fairly vertical on the way up.
- Stop if your lower back starts doing the lifting.
If you like heavy hip thrusts but want a bodyweight day that still bites, this one is hard to beat. It gives you the squeeze without needing much space.
7. Frog Pump Slide
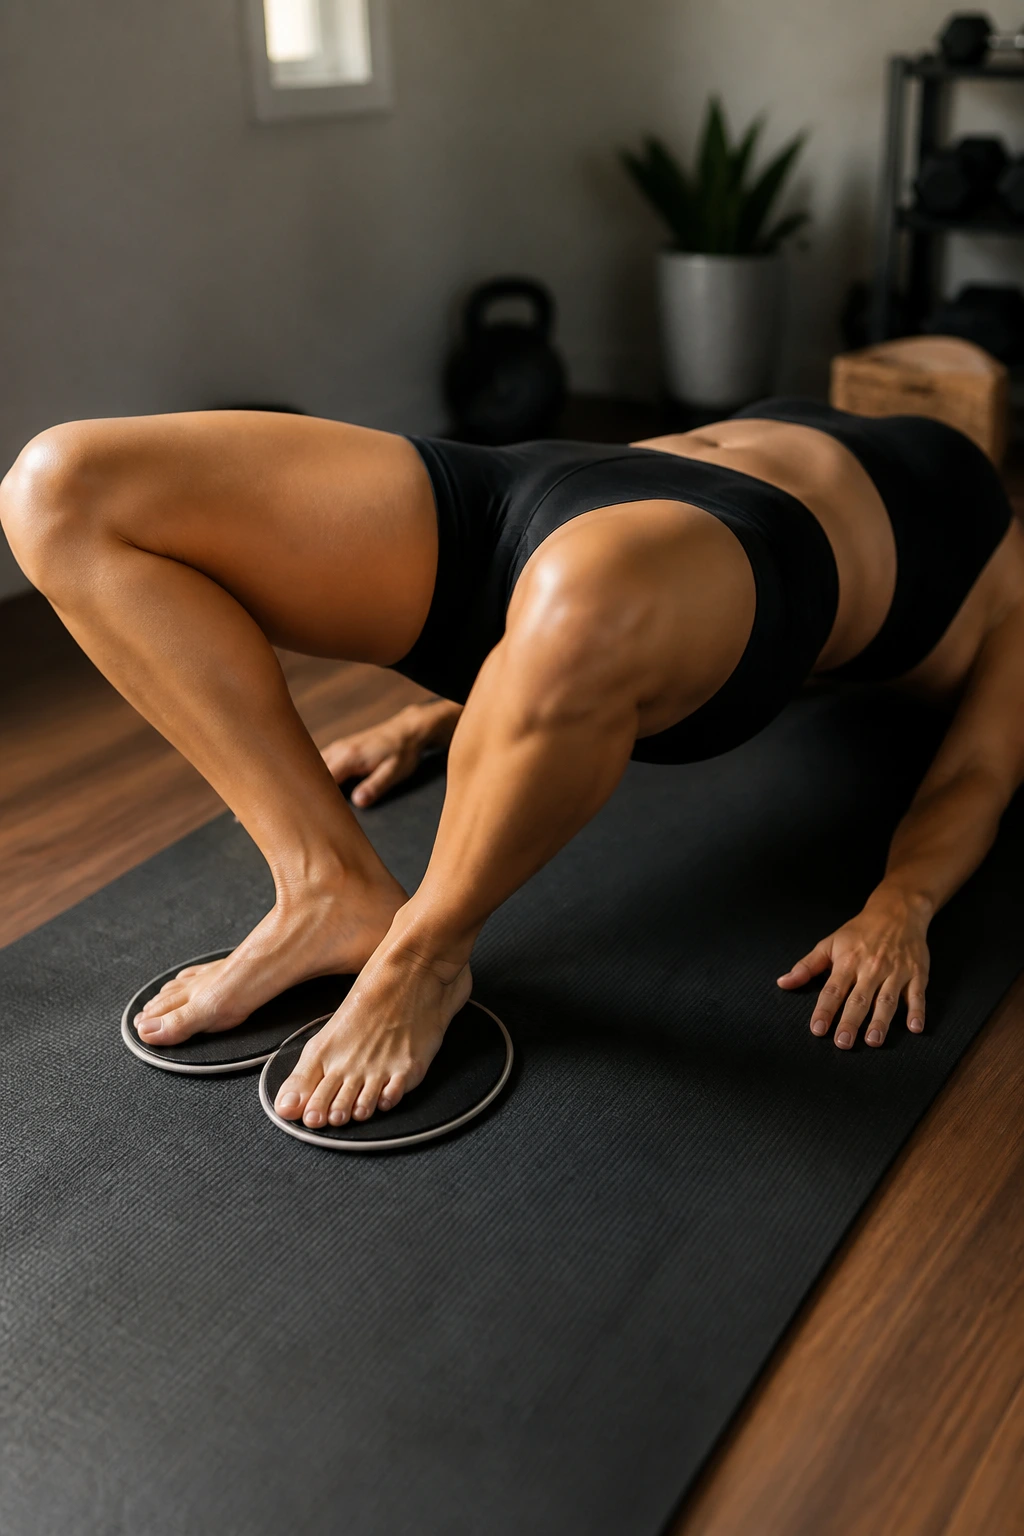
Picture a bridge with your knees open and the soles of your feet touching. Then add sliders. The result is ugly in the best way: a short-range glute movement that keeps constant pressure on the hips and makes the upper glutes and deep hip rotators work harder than you’d expect.
The Small Motion Is the Point
People usually make frog pumps too big. Don’t. The hips only need to rise a few inches. The whole goal is a short, tight contraction with very little rest between reps.
- Set up for 3 rounds of 20 to 30 reps.
- Keep the knees wide but comfortable.
- Hold the top for a one-count squeeze.
- If your neck gets tight, lower the back of your head and soften your jaw.
This is a good finisher after heavier glute work, especially if your regular bridges start to feel stale. It’s not flashy. It’s a pure burn move, and there’s a reason people come back to it.
8. Split Squat with a Sliding Rear Foot
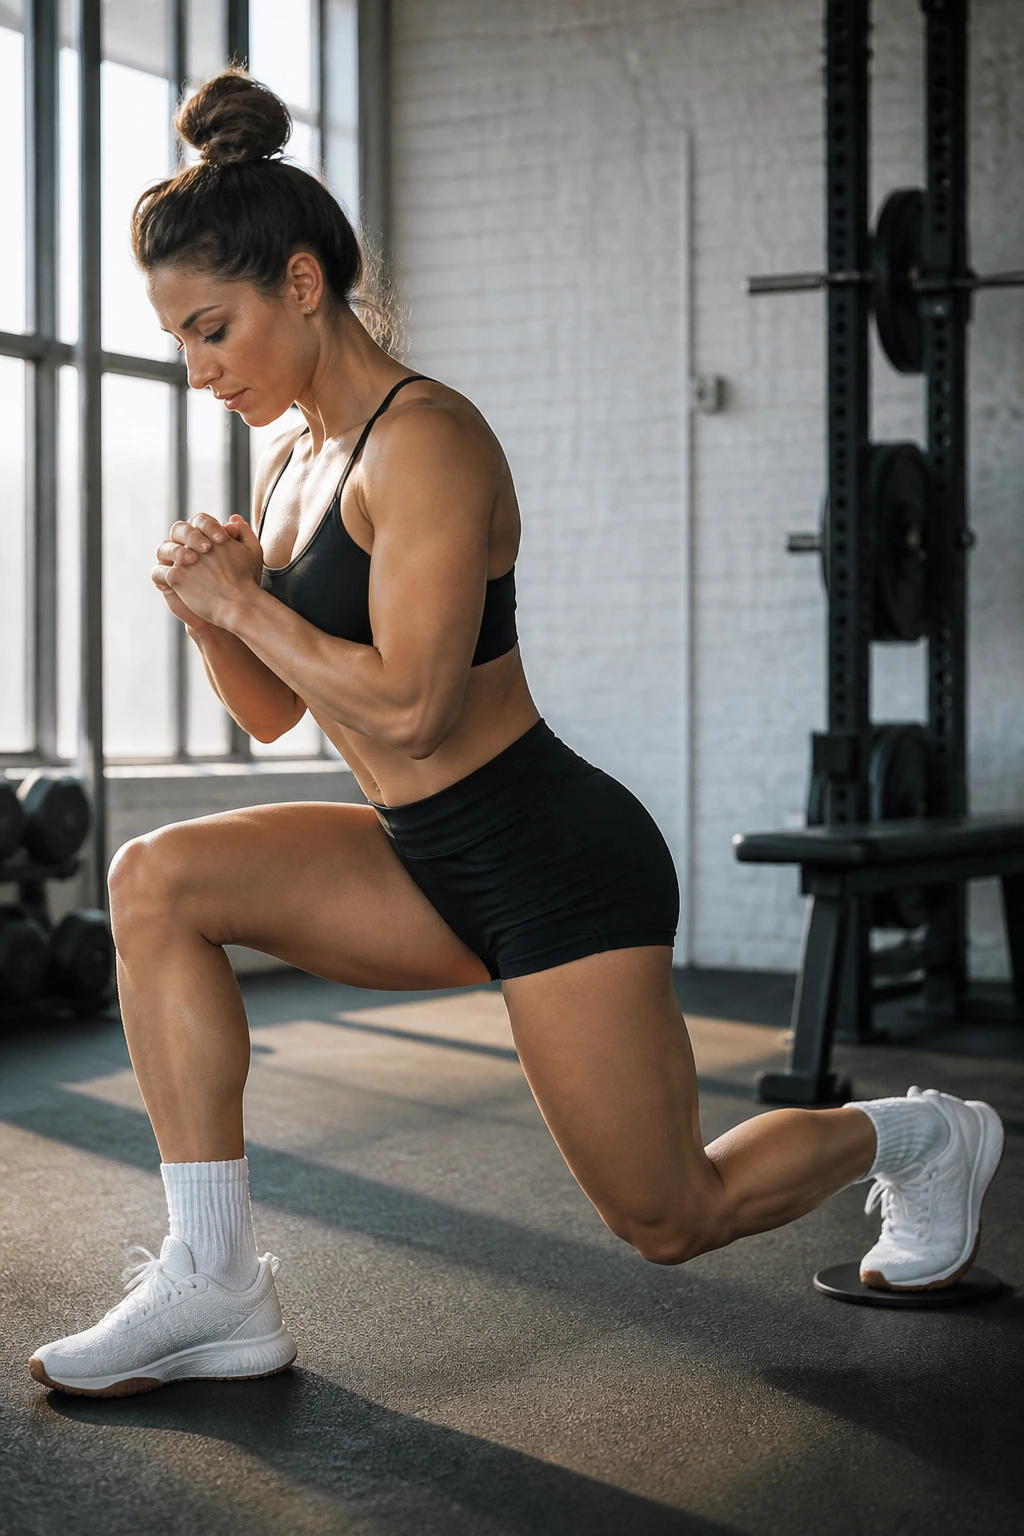
This is one of those exercises that looks polite until you do it. The rear foot slides back while the front leg stays planted, and that front glute gets pulled into a long, loaded position that builds strength without needing a jump or a barbell.
The trick is to keep the torso slightly forward, not upright like a wall. That forward angle helps the glute instead of letting the quad take over. Keep pressure through the whole front foot, not only the toes.
Work in 3 sets of 8 reps per side. Stop the descent when you can still keep the front heel down and the pelvis level. If the back knee crashes onto the floor, you probably went too deep too soon.
This move is a workhorse. Not glamorous. Very useful.
9. Skater Slide
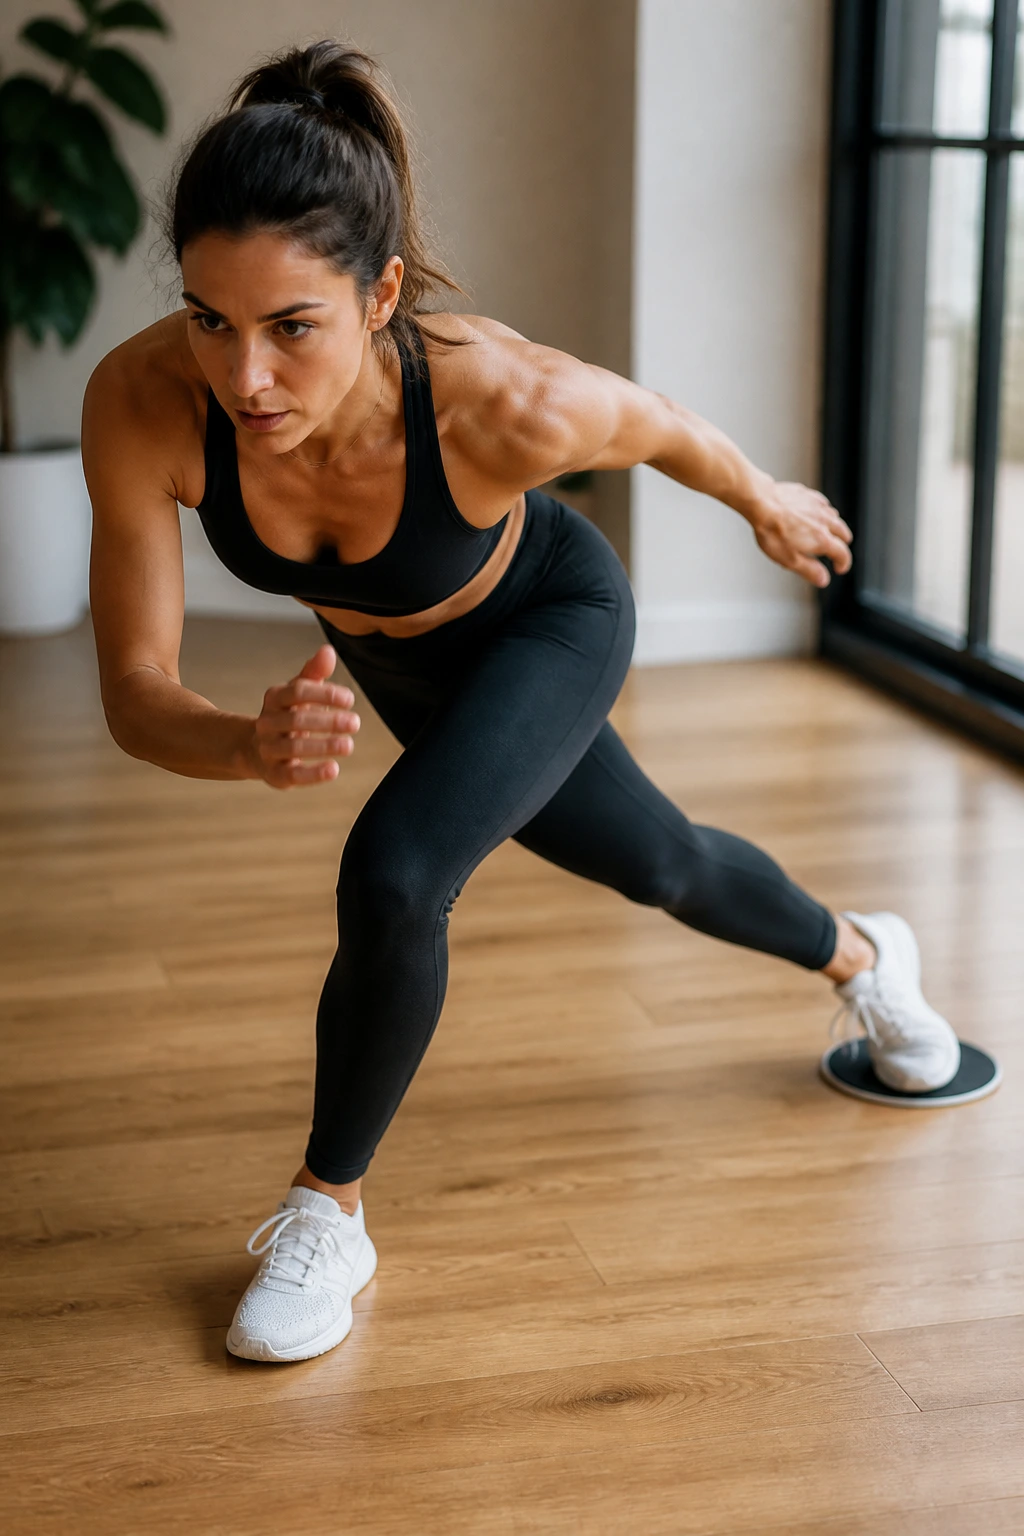
Why do skater-style glider moves feel so different from lunges? Because they combine a lateral push with a balance challenge, which means your glutes have to control side-to-side motion while also driving you back to center.
What Makes It Different
A real skater slide is not a hop. Keep one foot sliding out diagonally behind or to the side while the other leg takes your weight. The standing glute catches the load, and the hip stabilizers fire to stop your torso from tipping.
How to Make It Count
- Use 2 to 3 sets of 10 reps per side.
- Keep the sliding leg light and long.
- Reach the opposite arm forward to help balance.
- Land softly, then return with control.
The appeal here is simple: it feels athletic without being reckless. If your routine has gone heavy on straight-line work, this adds a different stress that the glutes notice fast.
10. Glider Donkey Kick
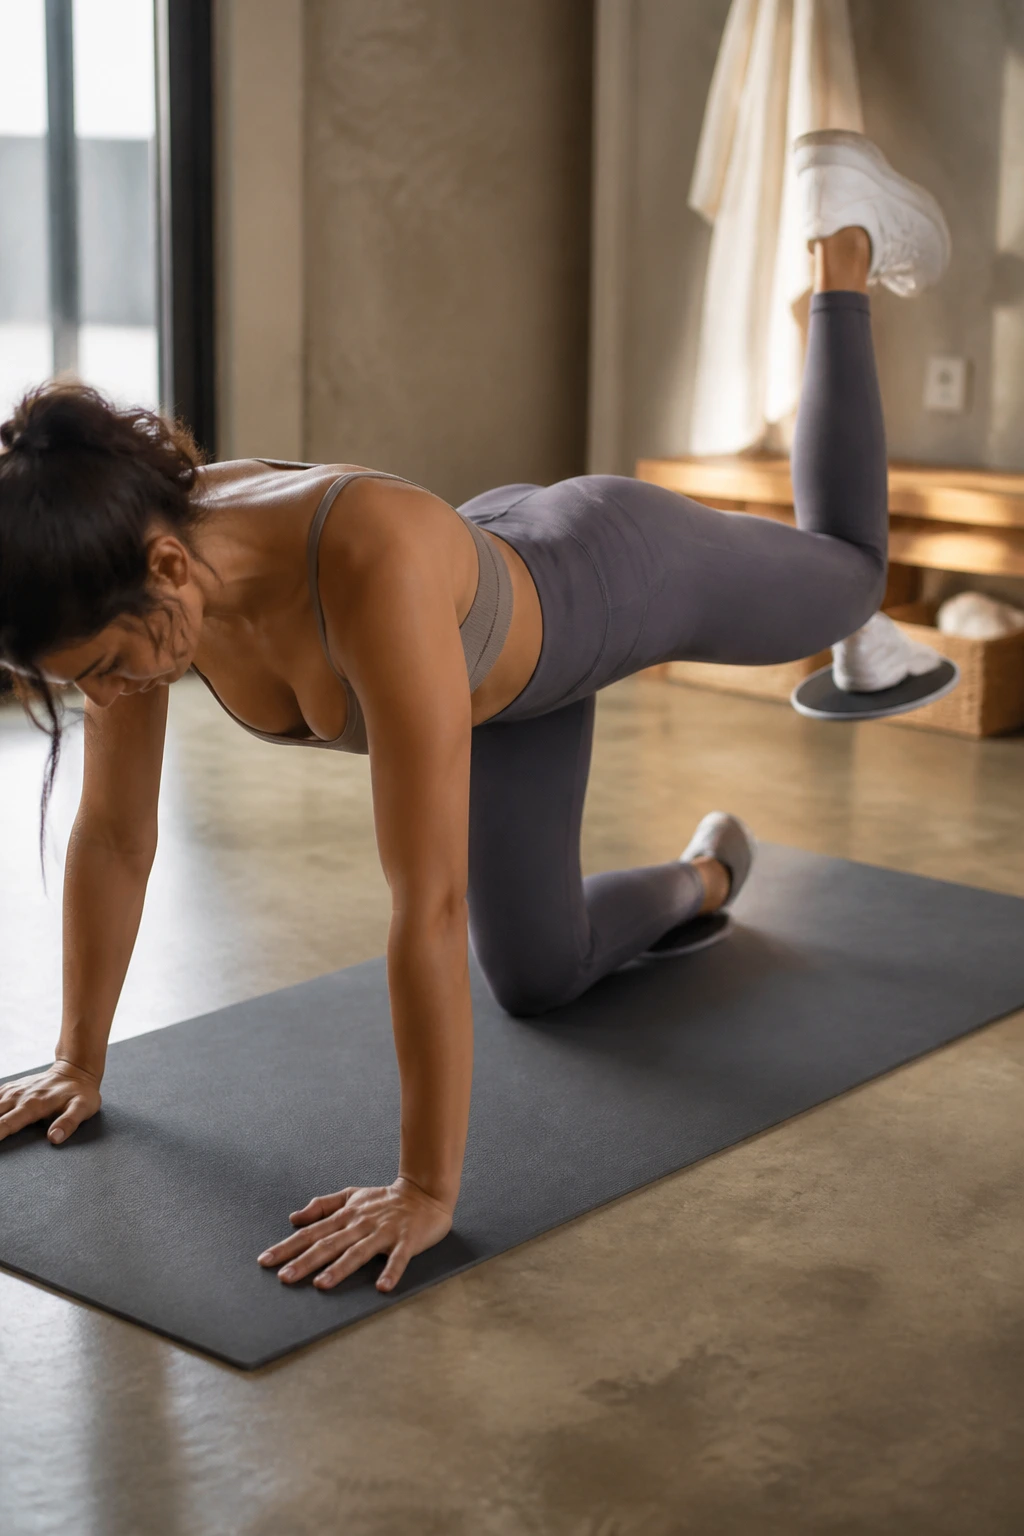
The classic donkey kick gets much better when the working foot is on a slider. The moving leg has to stay engaged the whole time, and the glute that lifts it has to finish the job without arching the lower back to fake it.
What to Watch For
Keep your hands under your shoulders and your knees under your hips. As the sliding leg presses back and up, stop before the low back starts to dip. The movement should come from the hip, not from flinging the spine.
- Do 3 sets of 12 to 15 reps per side.
- Keep the foot flexed.
- Squeeze at the top for 1 second.
- If your back pinches, reduce the height of the kick.
This is one of the best entries if you want to feel the glute max directly. The range is small, but the tension is real, especially if you slow the return.
11. Fire Hydrant Slide
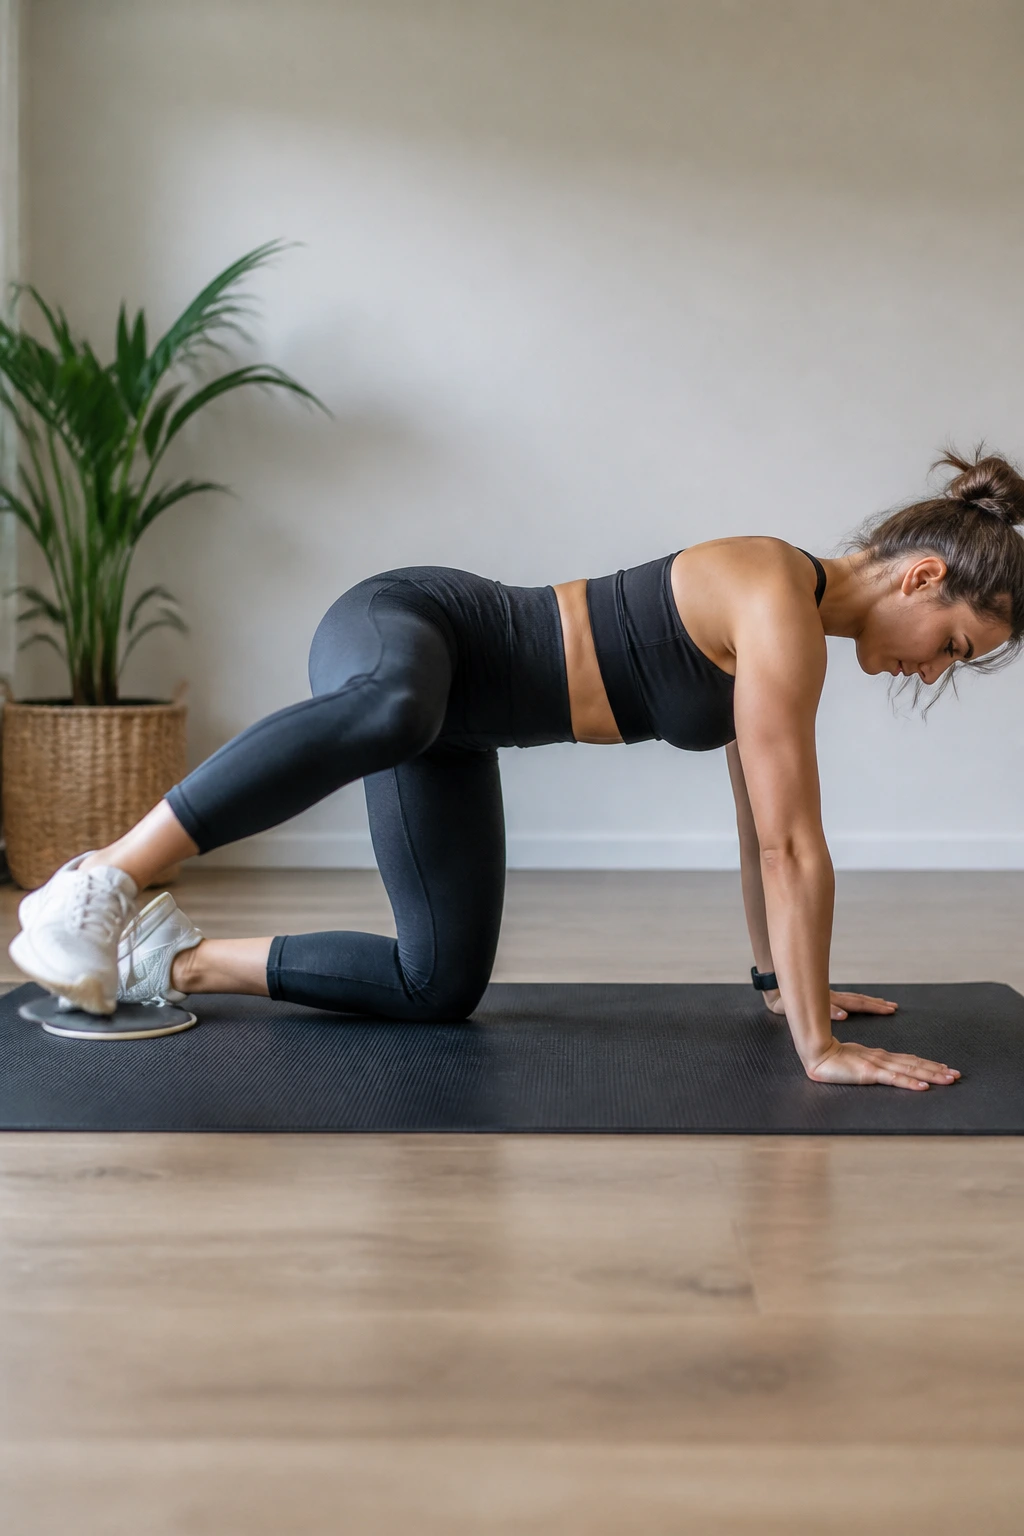
A fire hydrant on sliders looks awkward, and that is part of the charm. The knee slides out to the side while the torso stays stacked, which makes the upper outer glute work to lift and control the leg without a big swing.
Start on all fours. Keep your hips square to the floor and lift one knee out until you feel the side of the hip wake up. Then slide back in slowly. The important part is not how high the knee goes. It’s whether your pelvis stays still.
I like this one as a warm-up before bigger glute drills because it wakes up the side hip fast. Three sets of 10 to 12 controlled reps per side is plenty. If you feel the lower back helping, stop and reset. That usually means the leg is going too high.
Small movement. Big honesty.
12. Plank Knee Tuck on Sliders
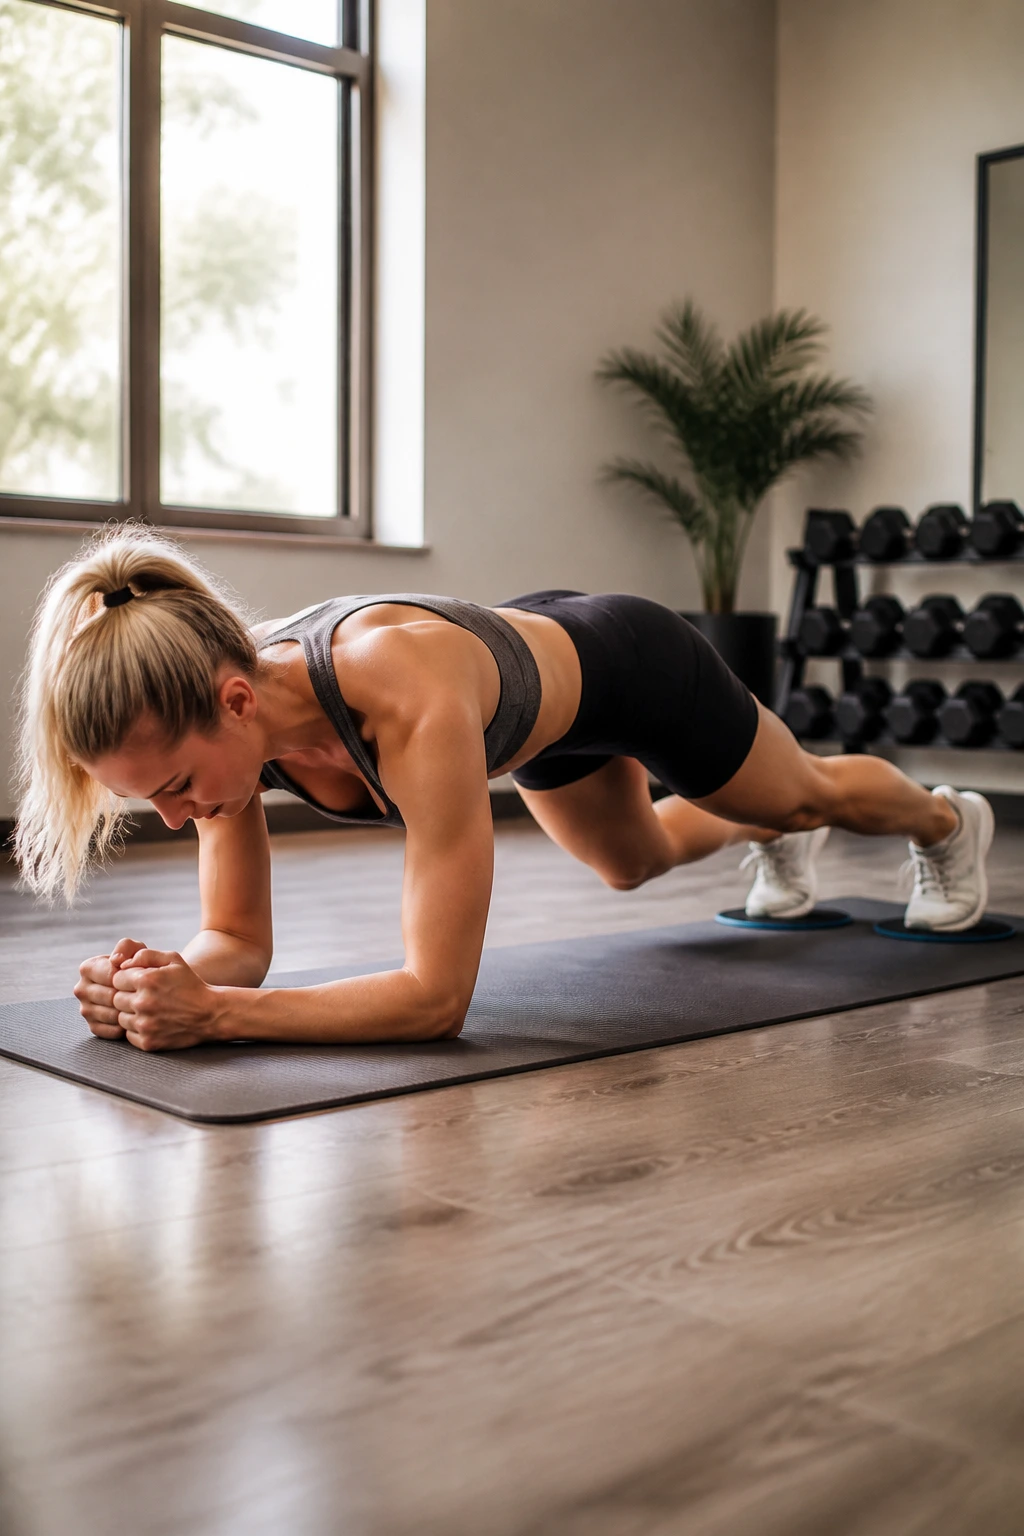
Can a core move help your glutes? Absolutely. A slider plank knee tuck asks the hips to stay steady while the legs move underneath you, and that makes the glutes work as stabilizers instead of only prime movers.
How to Do It Right
Set up in a forearm plank with both feet on sliders. Pull one or both knees toward your chest without letting the hips shoot up. Then extend the legs back out with control. The body should look long and quiet, not like a tent.
- Start with 2 to 3 sets of 6 to 8 tucks if you are new to it.
- Keep the shoulders packed and the neck long.
- Move slowly enough that the hips do not rock side to side.
- If the low back aches, shorten the range immediately.
This is one of the sneakiest glute-and-core combinations on the list. It will not feel glamorous. It will feel effective.
13. Cross-Body Mountain Climber on Sliders
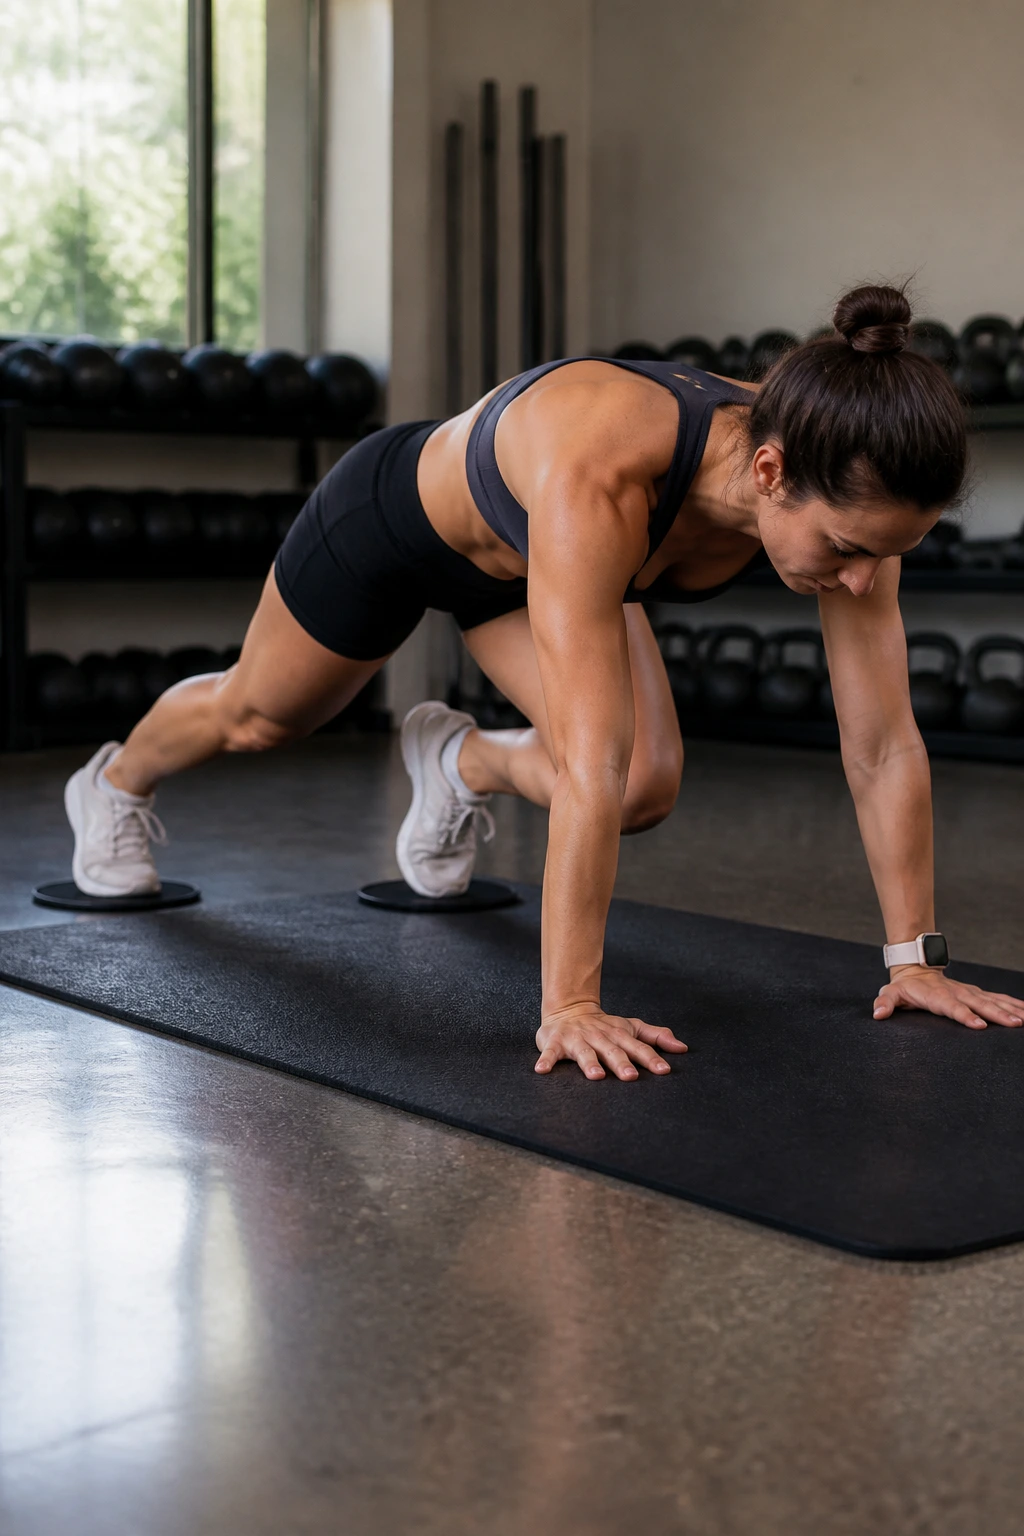
Here’s the version that earns its keep: knees drive toward the opposite elbow, one at a time, with the feet sliding back and forth underneath a strong plank. The diagonal line forces the hips and glutes to stabilize while the abs do their part.
The reason it works is simple. Cross-body motion makes the pelvis want to twist. The glutes have to stop that twist, and they do not get a pass just because the movement is fast. Keep the shoulders over the wrists or elbows, and keep the hips as level as you can.
Try 3 rounds of 20 to 30 seconds. Keep the pace brisk but clean. If your form falls apart, slow down before you speed up again.
This is a conditioning move, yes, but the glutes still matter. Especially if you stay low and resist the urge to pike your hips.
14. Squat Walkout on Sliders
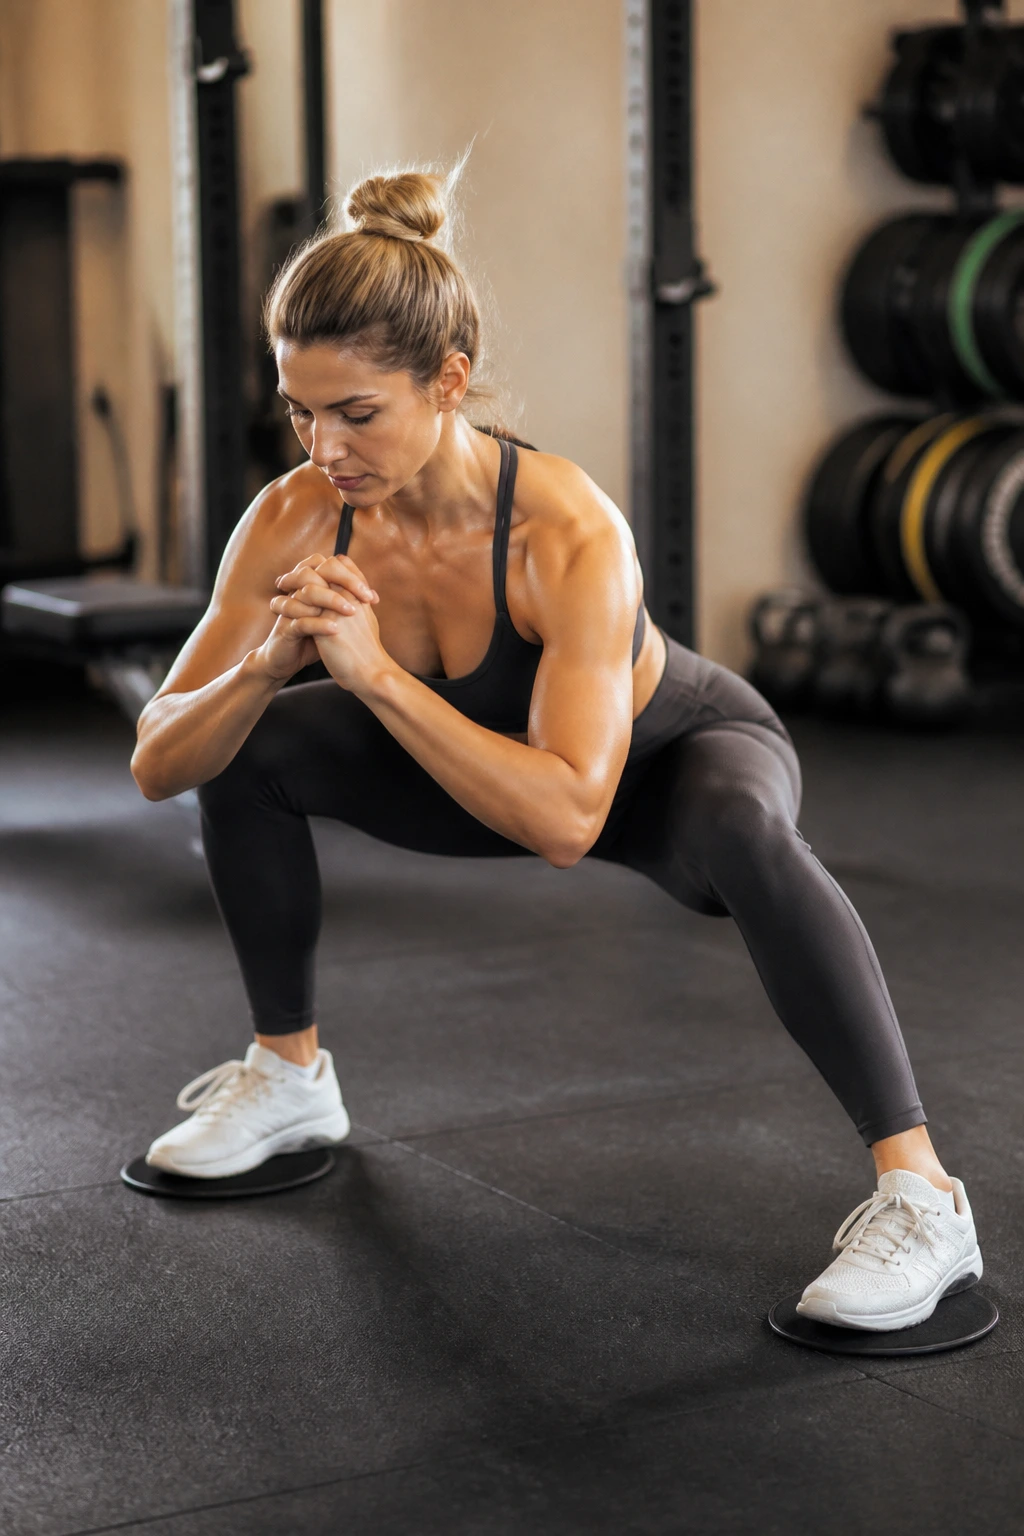
A squat walkout starts with a sit-back squat, then each foot slides out one at a time into a wide stance before returning under the body. That tiny travel makes the glutes work harder than people expect because they have to control the hips through a long, unstable range.
The burn comes from staying low. If you stand up between steps, the exercise turns into a casual shuffle. Don’t do that. Stay in your squat, keep the chest lifted, and move the feet only as far as you can without losing the tension in your hips.
A good target is 2 to 4 walkouts per set, with a pause of 2 seconds in the widest position. If your knees cave in, widen your stance a little and slow the movement down. The glutes like clean lines. They do not care much for sloppy footwork.
15. Single-Leg RDL Slide Reach
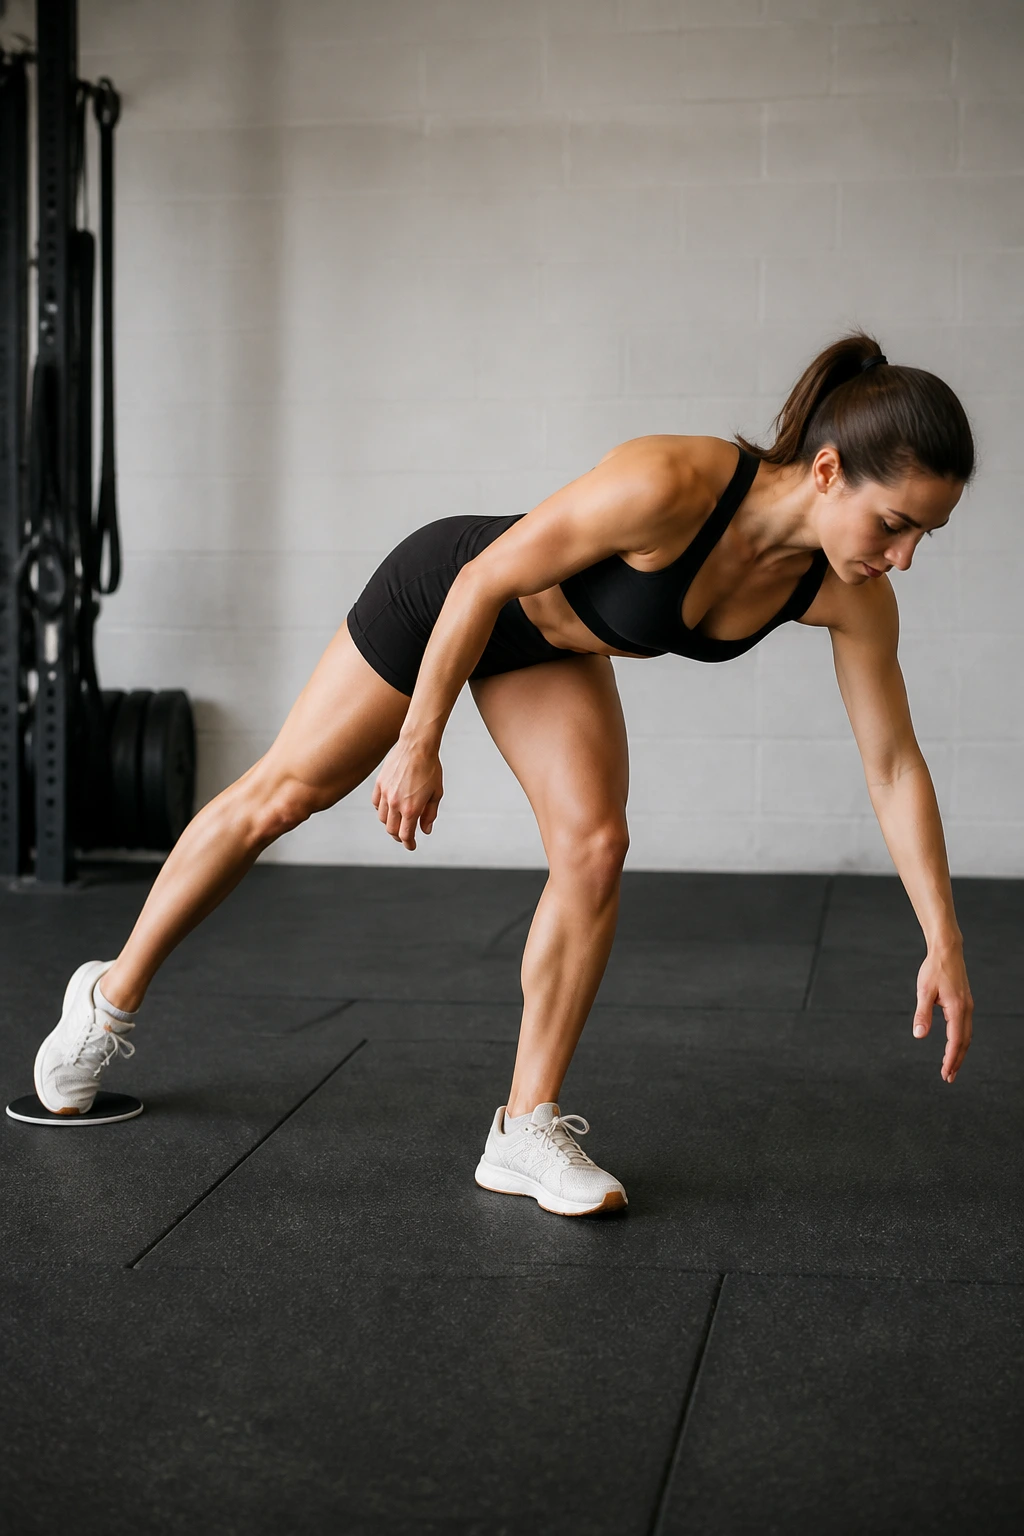
Unlike a standard single-leg RDL, the slider version gives you a little extra challenge at the bottom because the free foot can skim back and reach farther without you losing balance. That means the standing glute and hamstring have to work harder to stop your pelvis from spinning open.
The Mechanics Matter Here
Keep a soft bend in the standing knee, send the hips back, and let the sliding leg trail behind you like a long counterweight. The torso should tip forward as one unit. If you round your back or twist toward the floor, the glute work gets sloppy fast.
Best Use
- Run 3 sets of 6 to 8 reps per side.
- Pause for 1 second at the deepest point.
- Keep the standing heel heavy.
- Use a wall or chair for balance if needed.
This move is a strong pick if you want more single-leg control without adding weight. The balance demand is real, but it’s the kind that teaches your hips to stay organized.
16. Bridge March on Sliders
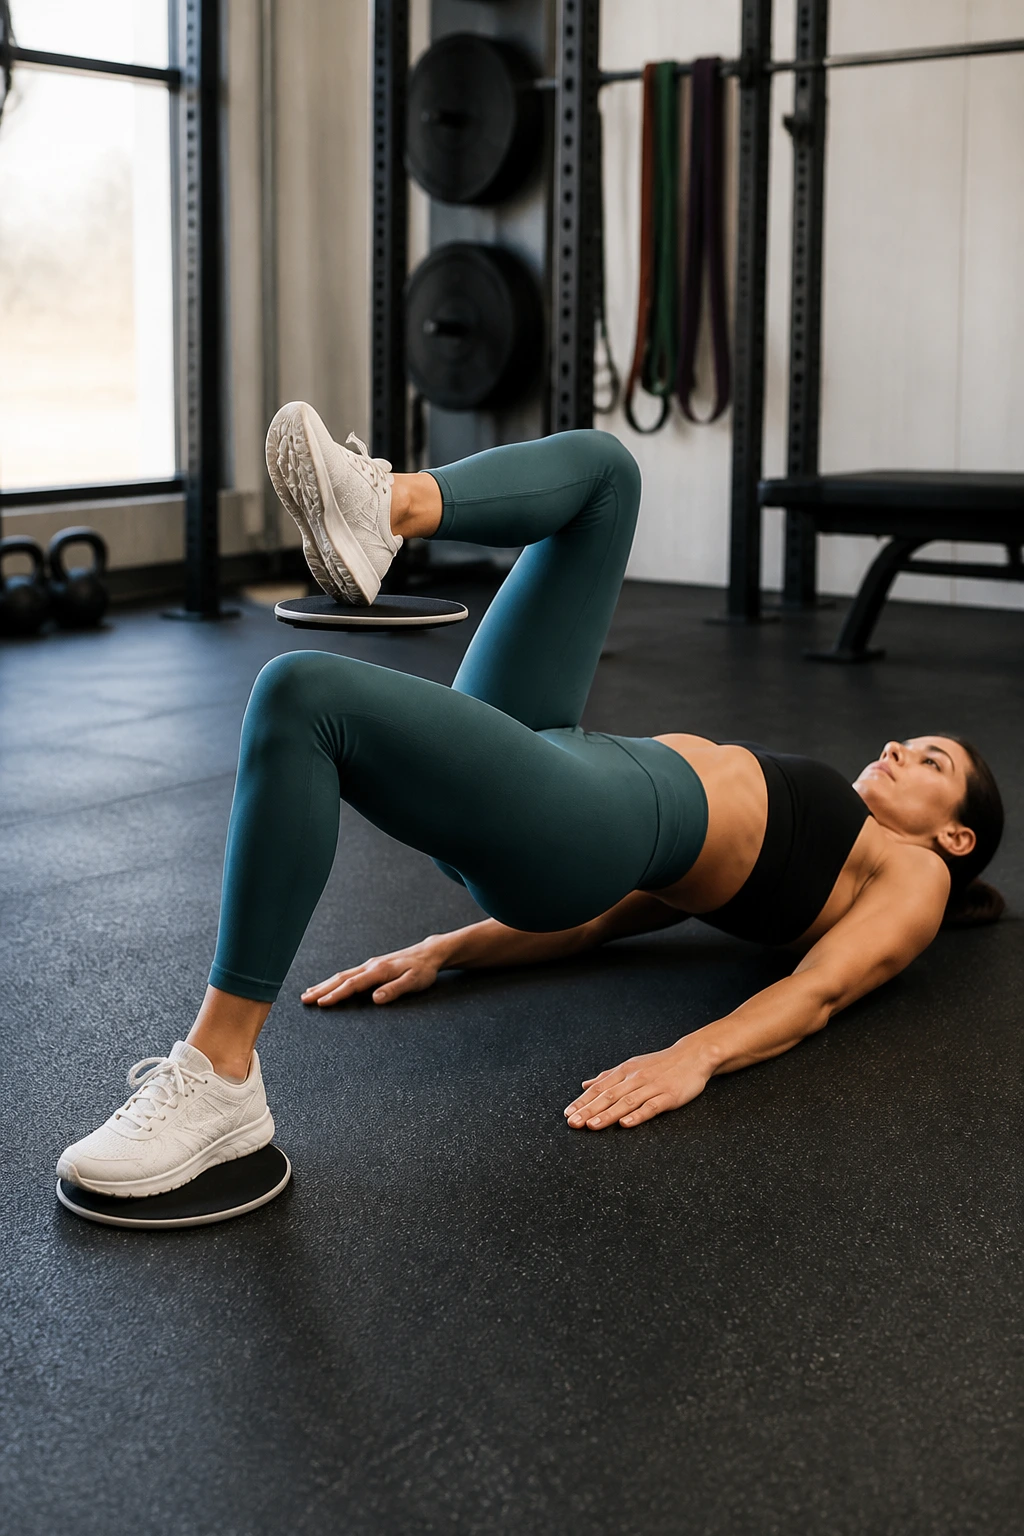
A bridge march is one of those exercises that looks mild until the second or third rep. You hold a glute bridge, then lift one knee at a time while the feet stay on sliders, and suddenly the pelvis has to fight to stay level.
What It Feels Like
At first, the glutes burn from the bridge. Then they burn again because every lifted leg threatens to drop the hips. That little wobble is what makes the drill useful. The marching leg should rise only as high as you can keep the bridge shape intact.
- Do 2 to 3 sets of 10 marches per side.
- Keep the ribs down and the neck relaxed.
- Move slowly enough to avoid rocking.
- If the bridge collapses, lower the hips and restart.
This one is excellent when you want glute endurance instead of max effort. It teaches each side to hold the line while the other side moves. That matters more than people think.
17. Side-Lying Glider Leg Sweep
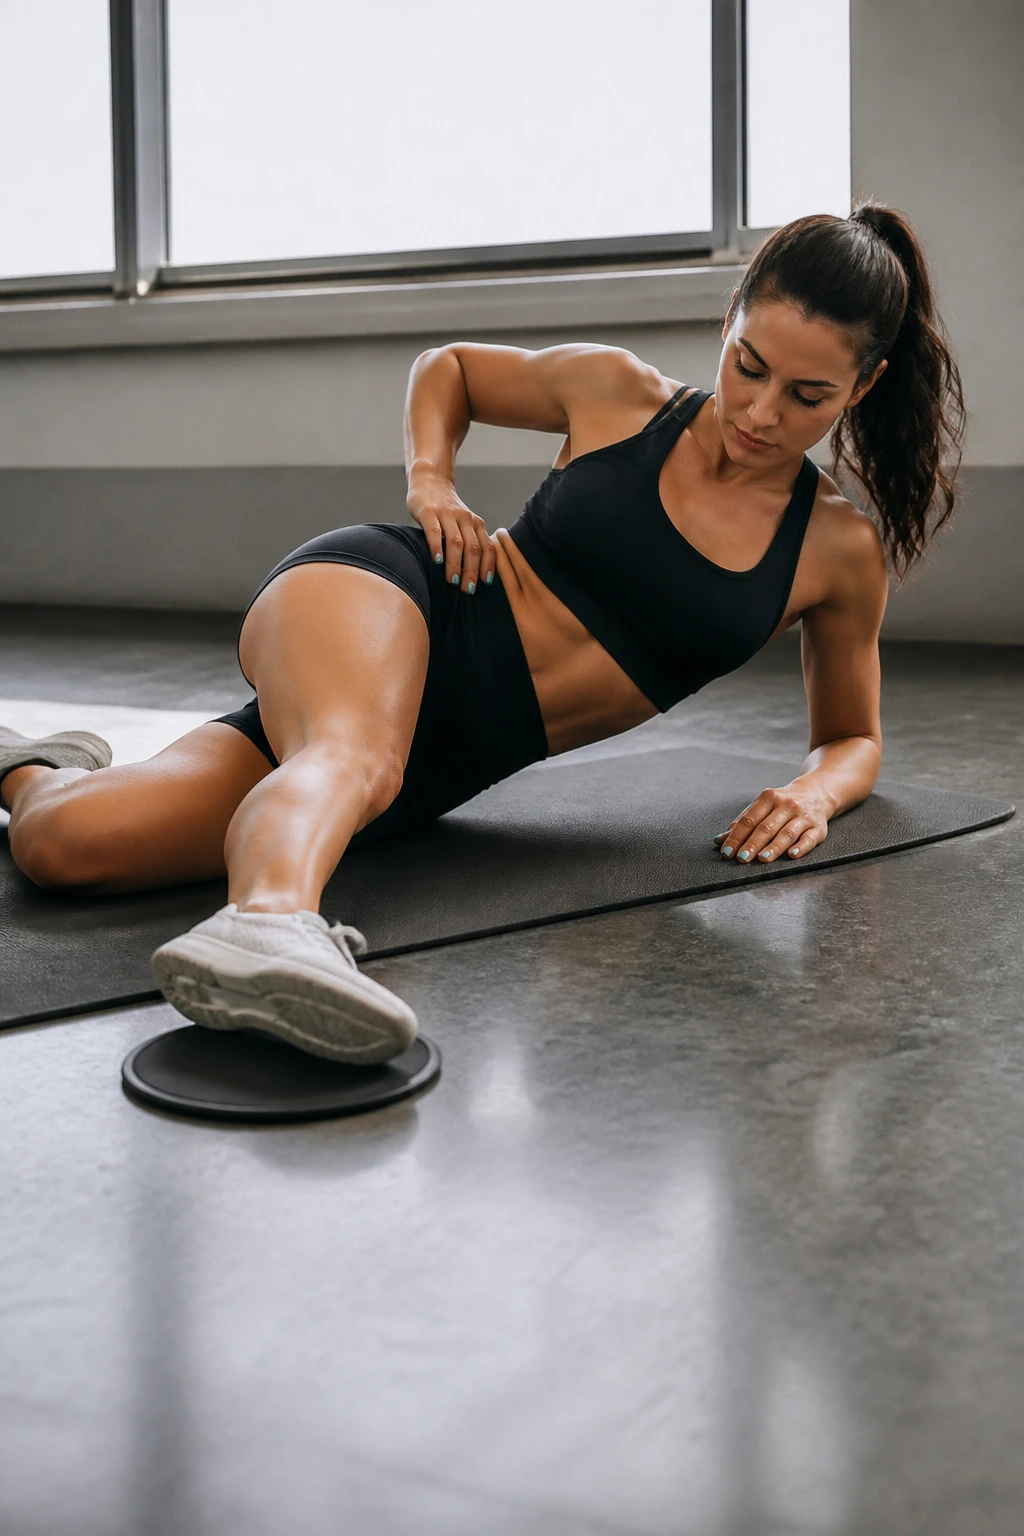
Lie on your side, brace your torso, and let the top leg sweep forward and back on a slider. The glute med and small hip muscles around it have to control the leg while the pelvis stays stacked, which is a fancy way of saying this move lights up the side of the hip.
The temptation is to roll backward. Don’t. Keep the ribs quiet, the waist lifted, and the movement controlled. The sweep should feel smooth, not wild. If the leg swings hard, the glute loses the job and momentum takes over.
Go with 3 sets of 12 slow sweeps per side. The range can be small. That’s fine. If the top hip starts to pinch, reduce the sweep length and keep the foot lighter on the floor.
This is a sleeper exercise. Not exciting at first glance. Then you finish the set and the side of your hip tells the truth.
18. Step-Back to Knee Drive
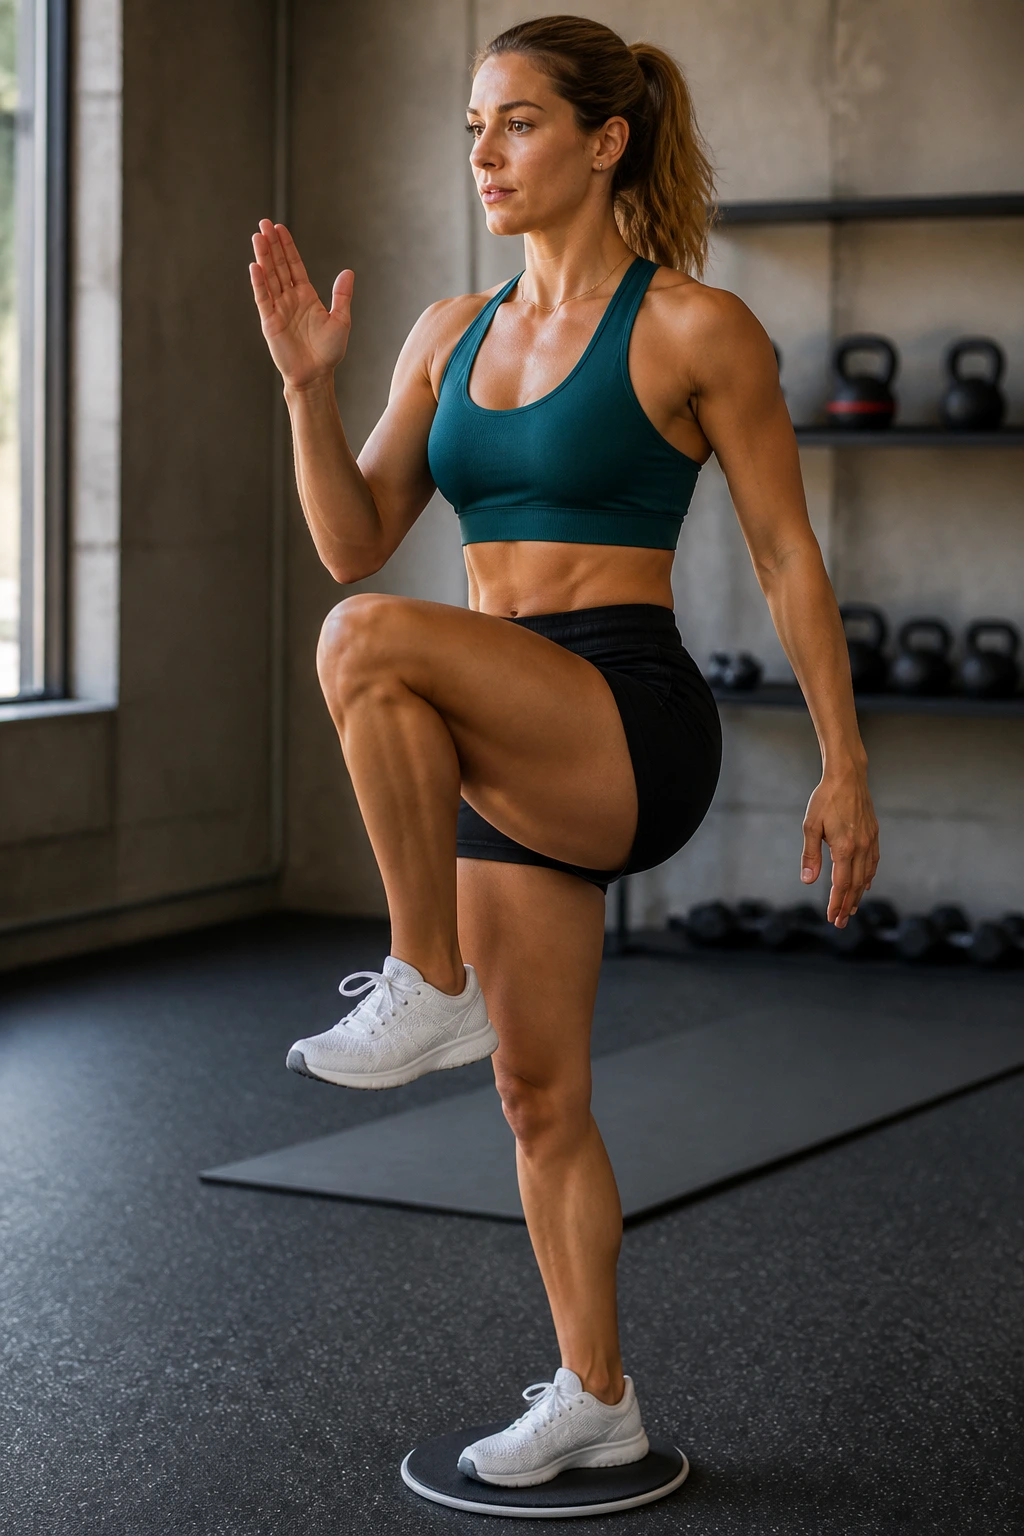
Can a glider lunge feel athletic without pounding your joints? Yes, if you keep the slide controlled and drive the front knee up after the step-back. The glute on the standing leg has to push you out of the bottom position, then help stabilize the knee drive.
How to Build It
Start in a staggered stance with one foot on a slider. Slide back into a reverse lunge, then drive the rear knee up without leaning too far back. Keep the chest tall and the hips square.
What to Avoid
- Do not swing the torso backward.
- Do not bounce out of the bottom.
- Do not let the front knee collapse inward.
- Keep the push smooth on both the descent and the drive.
Use 3 sets of 6 to 8 reps per side. The knee drive adds a bit of power, but the real benefit is the controlled transition from stretch to stand. That’s where glutes get stronger.
19. Front Slider Lunge with Torso Lean
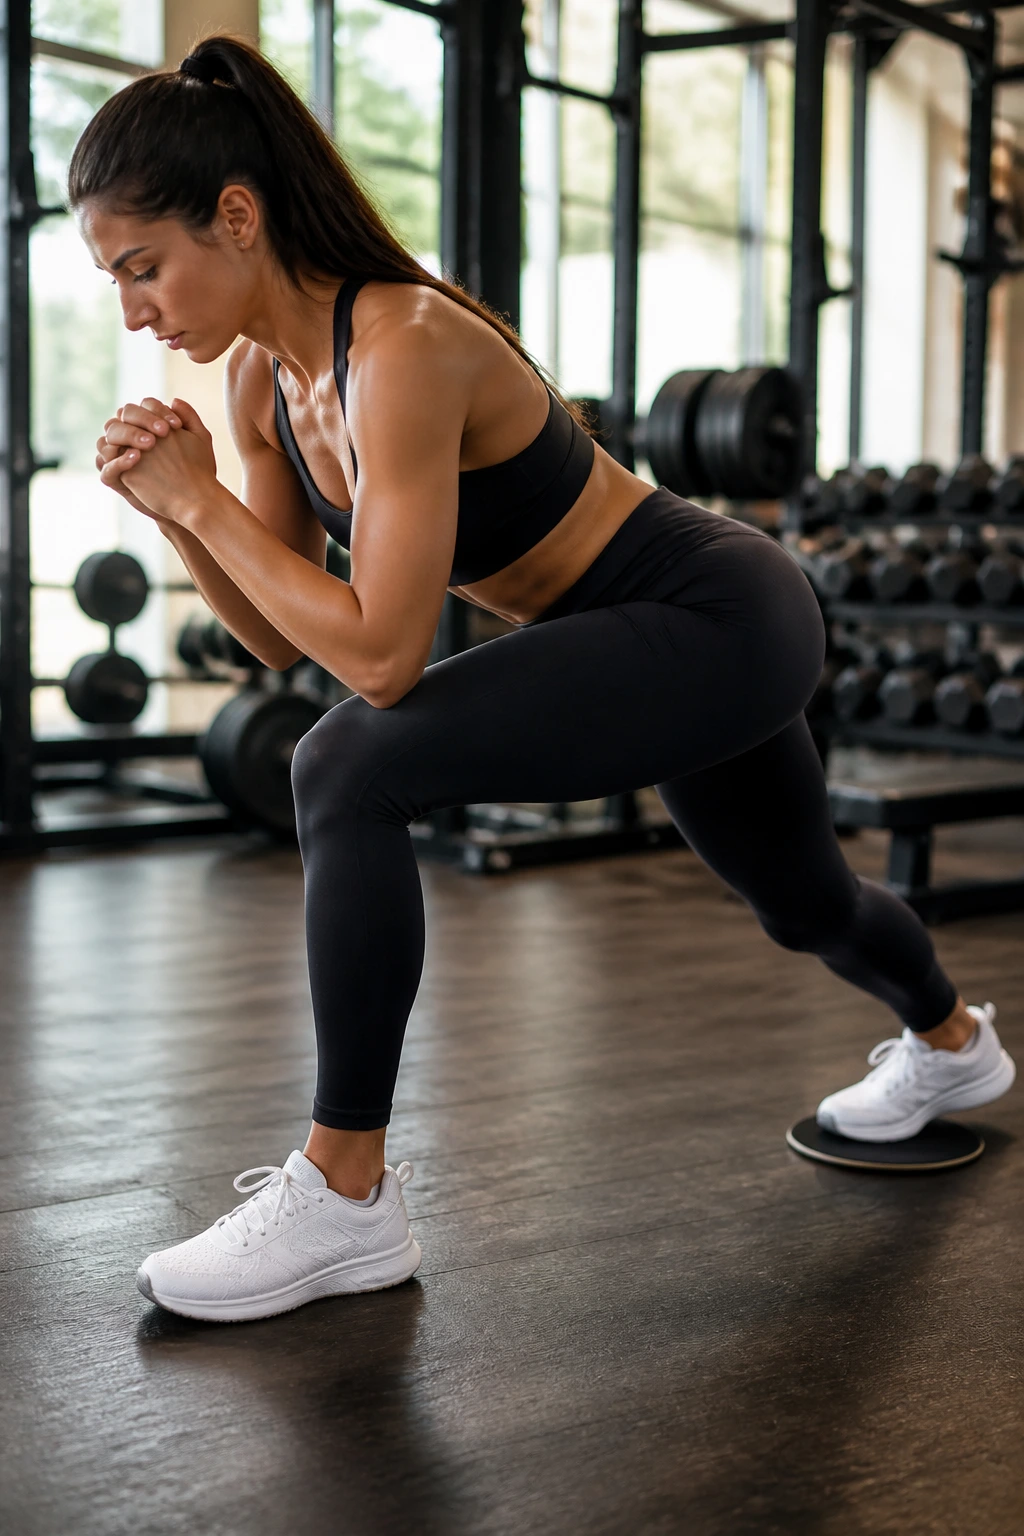
The front slider lunge is a good one when you want a more glute-heavy lunge and a little less quad dominance. The torso leans forward from the hips, the slider leg reaches back, and the front glute has to carry the load through a long, loaded range.
This is the move I’d choose for people who feel lunges mostly in the front of the thigh. That forward lean shifts the work where you want it, as long as you keep the spine long and the chest not collapsed. Think “hinge slightly, then drop.”
- Perform 3 sets of 8 reps per side.
- Keep the front heel glued to the floor.
- Slide back until you feel a clear stretch in the front hip.
- Rise by driving the floor away through the front foot.
It’s a strong middle-ground drill: more glute bias than a regular lunge, but not as balance-heavy as some of the single-leg moves above. Clean and direct.
20. The 10-Minute Glider Glute Ladder
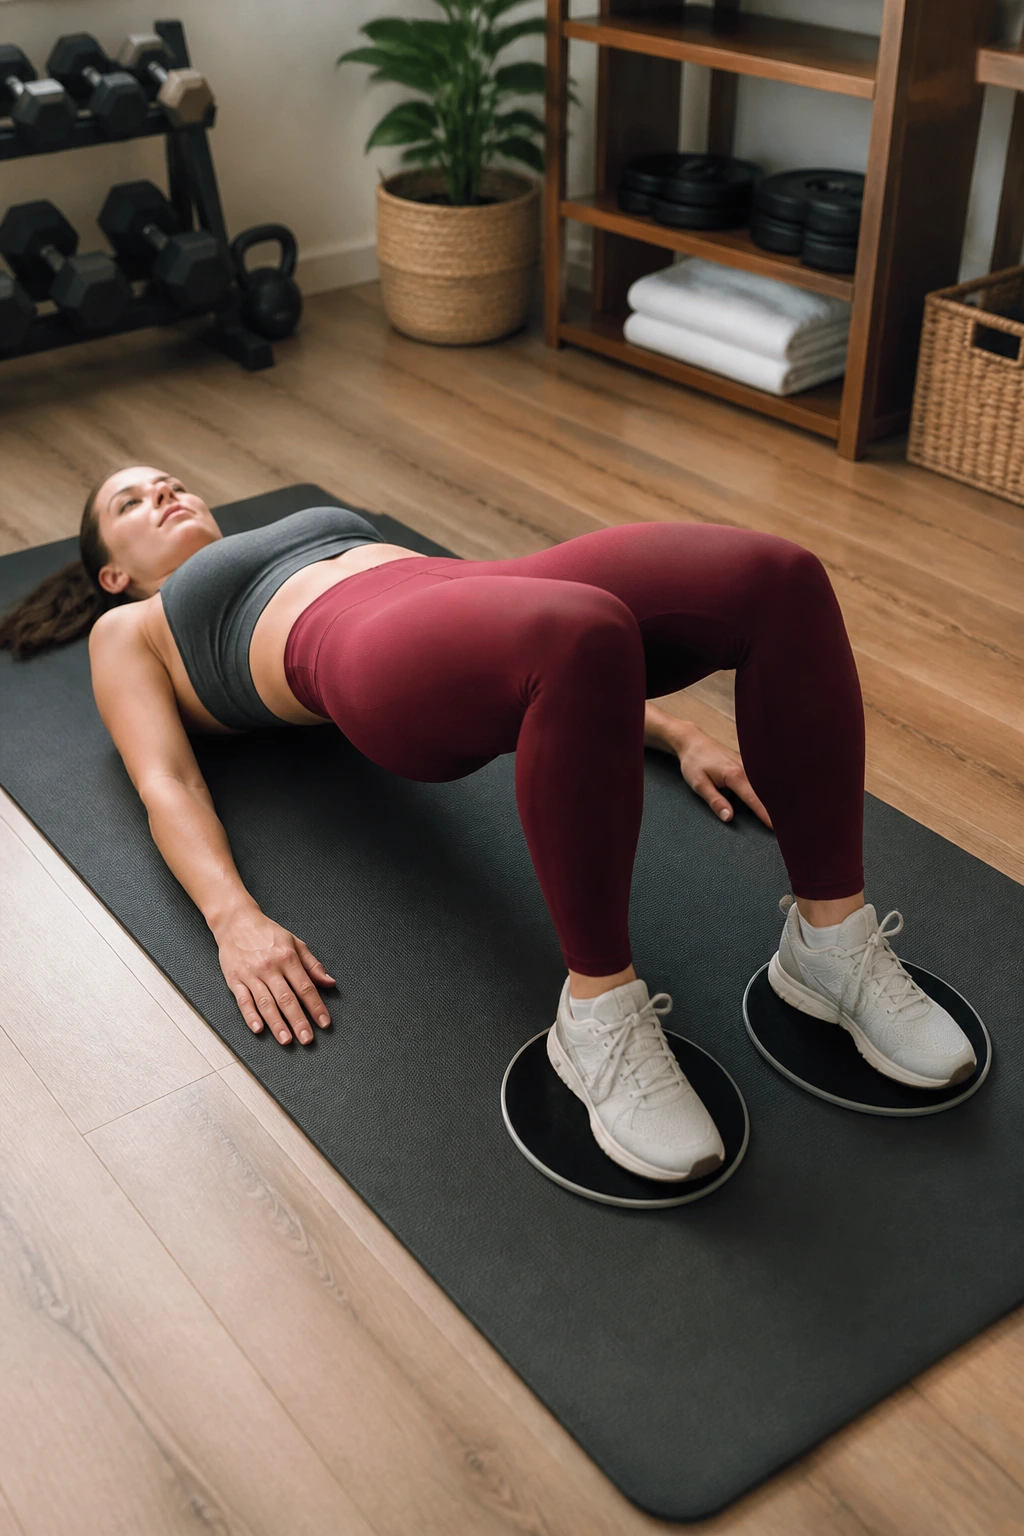
The nicest thing about glider training is that you do not need a huge plan to make it sting. Put four moves together, keep the rests short, and the glutes start complaining in a very useful way. This ladder-style workout is a clean way to finish a lower-body day or fill in a short glute session when time is tight.
The Circuit
- 8 reverse lunge reps per side
- 10 glute bridge reps
- 8 lateral lunge reps per side
- 12 frog pumps
- Rest 45 to 60 seconds, then repeat for 3 rounds
Keep every rep smooth. The first round should feel manageable, the second should feel honest, and the third should make you pay attention to your hip position again. That’s the point. If your lower back starts doing the bridge work, shorten the range. If your knees start wobbling on the lunges, slow the tempo.
This finisher works because it mixes straight-ahead extension, side-to-side control, and constant tension. You get the burn from the bridges, the stability challenge from the lunges, and enough volume to make the session feel complete. No drama. Just solid glute work that builds over time.
A good rule: pick 3 to 5 of these glider workouts and keep them in rotation for a few weeks instead of chasing a brand-new burn every session. The glutes respond well to repetition, clean form, and a little patience. Fancy is optional. Consistent is not.
