



Bodyweight upper body workouts can look polite on paper and still leave your chest, shoulders, triceps, and upper back shaking by the third round. The trick is not hunting for some magical exercise that fixes everything. It’s choosing the right angle, the right tempo, and the right amount of load for the level you’re at.
A lot of people rush straight to floor push-ups, then wonder why their wrists ache or their shoulders feel cranky after a week. That usually means the work started too hard, not that bodyweight training is flawed. A wall, a counter, a floor, and a little patience can take you a long way if you use them well.
I’ve always liked this style of training because it’s honest. There’s nowhere to hide when your core sags, your elbows flare, or your neck cranes forward. Clean reps build strength fast, and sloppy reps have a way of exposing themselves almost immediately.
Start where the form stays neat. Then move up only when the easier version feels almost boring.
1. Wall Push-Up Ladder
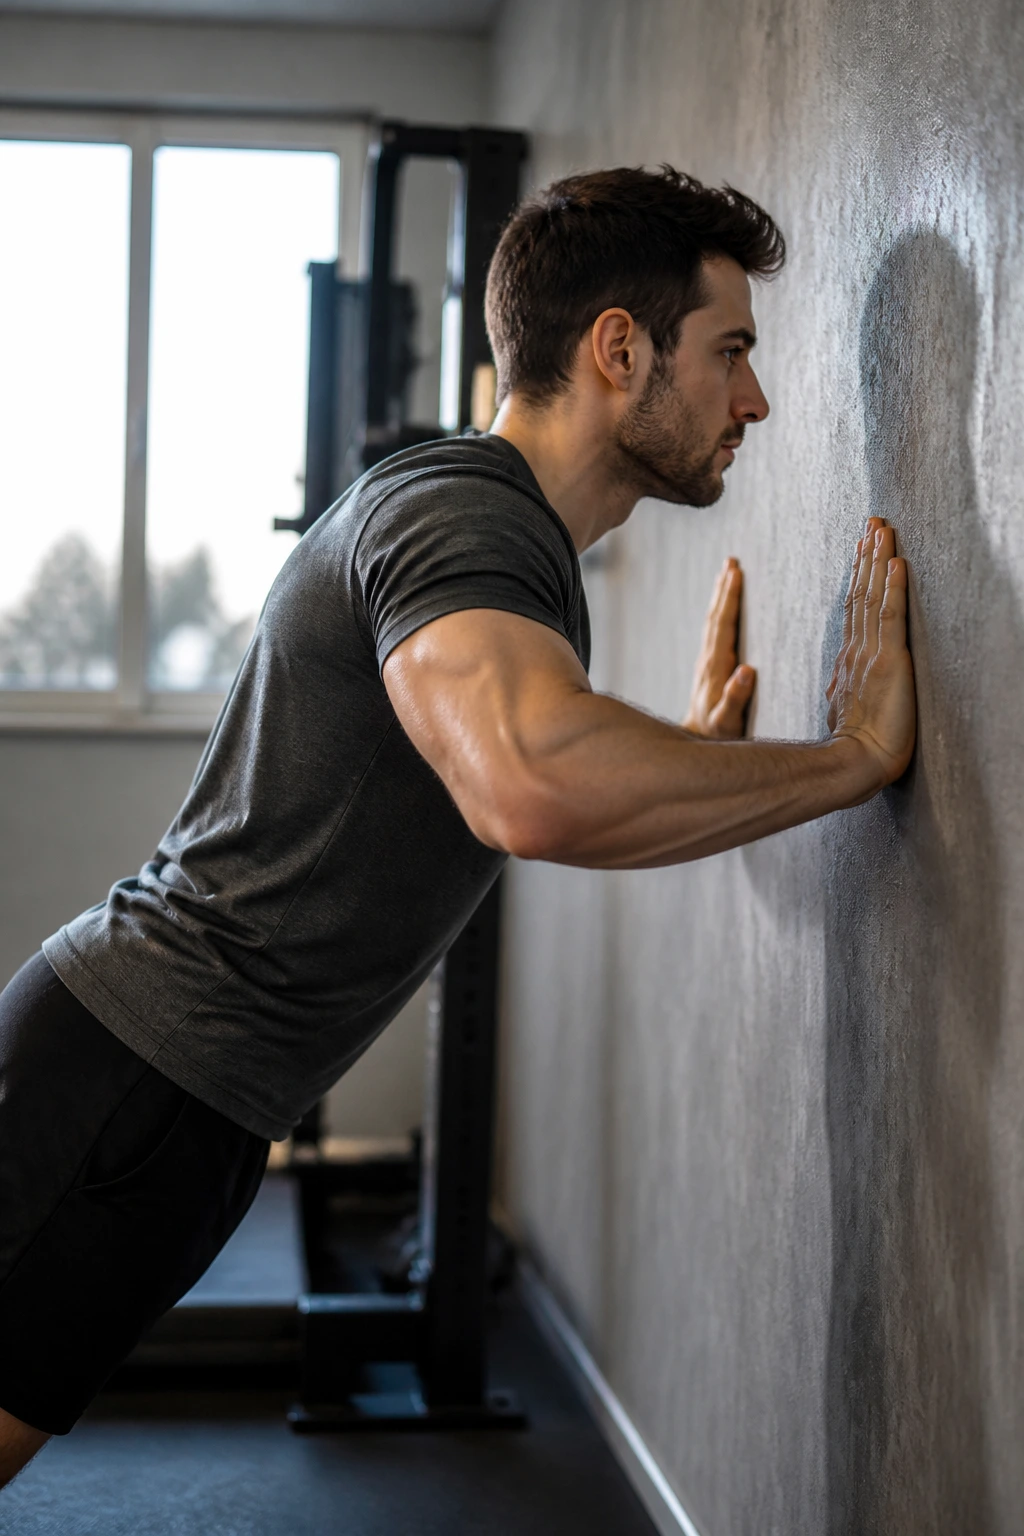
Wall push-ups are not baby push-ups. They’re a clean way to teach your shoulders to stay set, your ribs to stay down, and your chest to work without your whole body collapsing into the movement.
Why It Works
Stand an arm’s length from a wall, place your hands at chest height, and lean in with a straight line from your head to your heels. The farther your feet are from the wall, the harder the rep gets. That one detail changes the whole feel of the exercise.
Use 2 to 4 sets of 12 to 20 reps, resting about 30 to 45 seconds between sets. If you want a little more challenge, slow the lowering phase to 3 seconds and pause for 1 second with your chest close to the wall.
- Hands about shoulder-width apart
- Elbows angle back about 30 to 45 degrees
- Body stays stiff, not slumped
- Chest moves toward the wall, not your face
Tip: If the wall version feels too easy, step your feet back 6 to 12 inches before you jump to a counter or bench.
2. Incline Push-Up Intervals
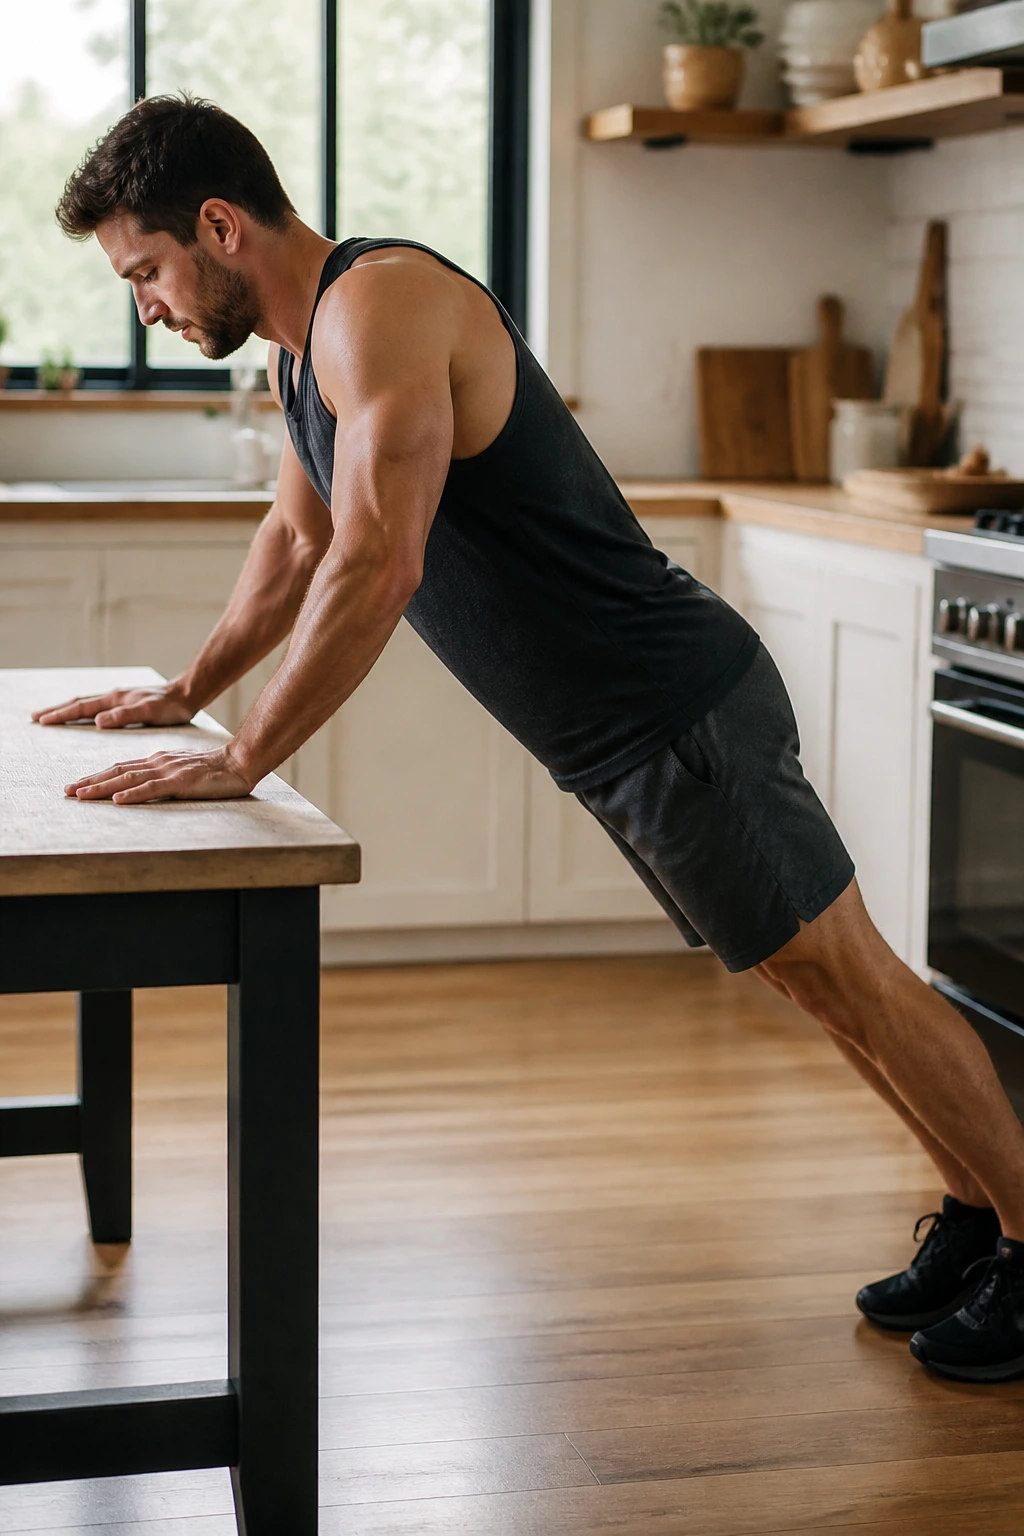
Why use a counter when the floor exists? Because incline push-ups let you train the same pressing pattern with less load on the wrists, elbows, and shoulders.
A kitchen counter, sturdy bench, or low table gives you room to practice a proper line from shoulders to ankles. That makes this one a sweet spot for beginners and for anyone coming back after time away from training. The movement still hits chest and triceps hard, just without the same bite as a floor push-up.
Try 4 rounds of 30 seconds of work, then 30 to 40 seconds of rest. If you prefer reps, aim for 8 to 15 clean reps per set. A lower surface makes the work harder; a higher one makes it easier. That’s the whole scale.
Use this when you want volume without ugly reps. It’s also a nice warm-up before floor work because it gets the pressing muscles warm without frying them.
3. Knee Push-Up Strength Set
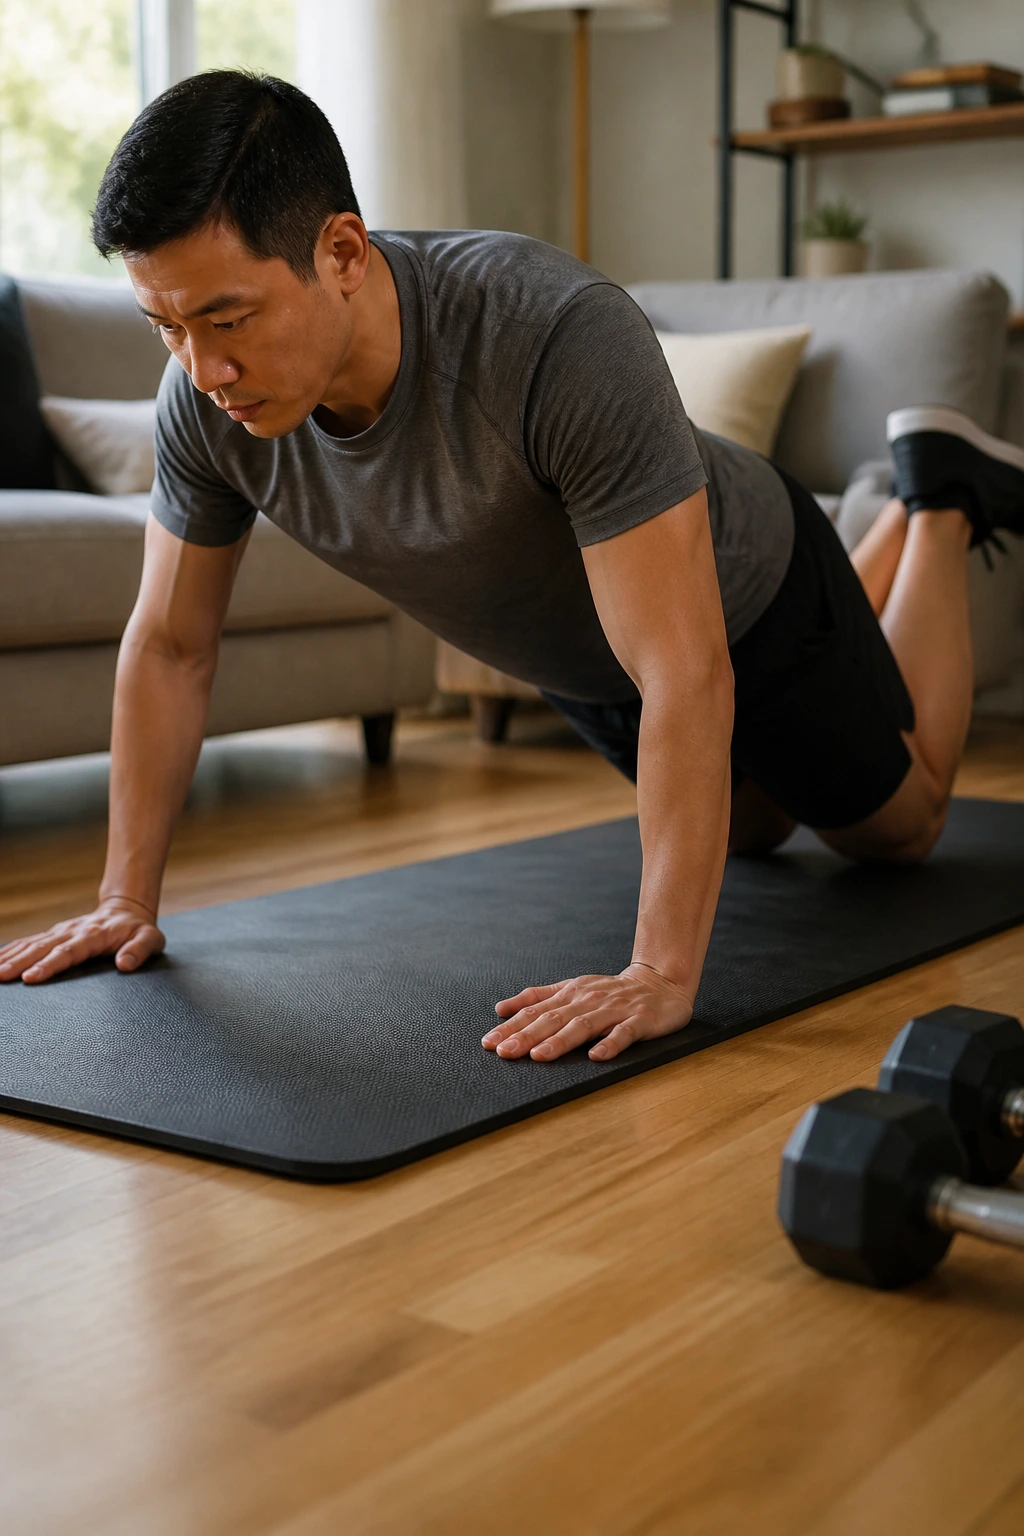
If full push-ups make your hips sag after five reps, knee push-ups are not a failure. They’re a reset.
The important part is the line from your knees to your head. That line should stay straight. People often forget this and treat knee push-ups like a rest break, letting their belly hang and their neck poke forward. That teaches the wrong shape. Keep your glutes lightly tight and your core braced.
Run 3 to 5 sets of 6 to 12 reps, with 45 to 60 seconds between rounds. If 12 is easy, slow the lowering phase or add a pause at the bottom. If 6 is rough, shorten the range a little until the rep stays clean.
Quick checks
- Hands under or slightly outside the shoulders
- Knees on a mat, not jammed into hard floor
- Chest touches close to the floor first
- Head stays in line with the spine
A clean knee push-up usually bridges the gap to your first honest floor push-up faster than people expect.
4. Standard Push-Up Pyramid

A standard push-up is still the king of the list because it tells the truth. No setup tricks. No hiding. Just you, the floor, and how well you can keep tension through the whole body.
I like the pyramid format because it stops people from blowing up their first set. Start with 1 rep, then 2, then 3, building up until the reps start to slow down. Walk back down the ladder the same way. A ladder of 1-2-3-4-5-4-3-2-1 is plenty for most people, especially if you rest 15 to 30 seconds between rungs.
What Makes It Different
Unlike incline or knee work, the floor version asks your core to hold the whole body in one line. That’s where the real training happens. If your chest drops first or your hips shoot up, the movement starts to leak.
Use it when you can already do 8 clean incline reps or 5 steady knee push-ups without cheating. If the floor version turns into a snake crawl, step back a level. That is not a loss. It’s the smart move.
5. Tempo Push-Up Eccentric

A slow lowering phase changes everything. Five seconds down feels boring for the first rep and mean by the third.
Tempo push-ups are where a lot of people finally learn what control feels like. Lower for 4 to 5 seconds, pause for 1 second near the bottom, then press up with normal speed. That slow descent forces your chest, triceps, and front shoulders to do more work instead of letting momentum do the job.
I like 3 sets of 5 to 8 reps here. The rep count stays lower because the time under tension is high. Rest 60 to 90 seconds so you can keep the same pace on every rep.
The most common mistake is rushing the lowering phase and then “finding” the pause by collapsing into the floor. Don’t do that. Stay tight the whole way down. Your chest should hover just above the floor or mat before you press back up.
6. Close-Grip Push-Up Triceps Blaster
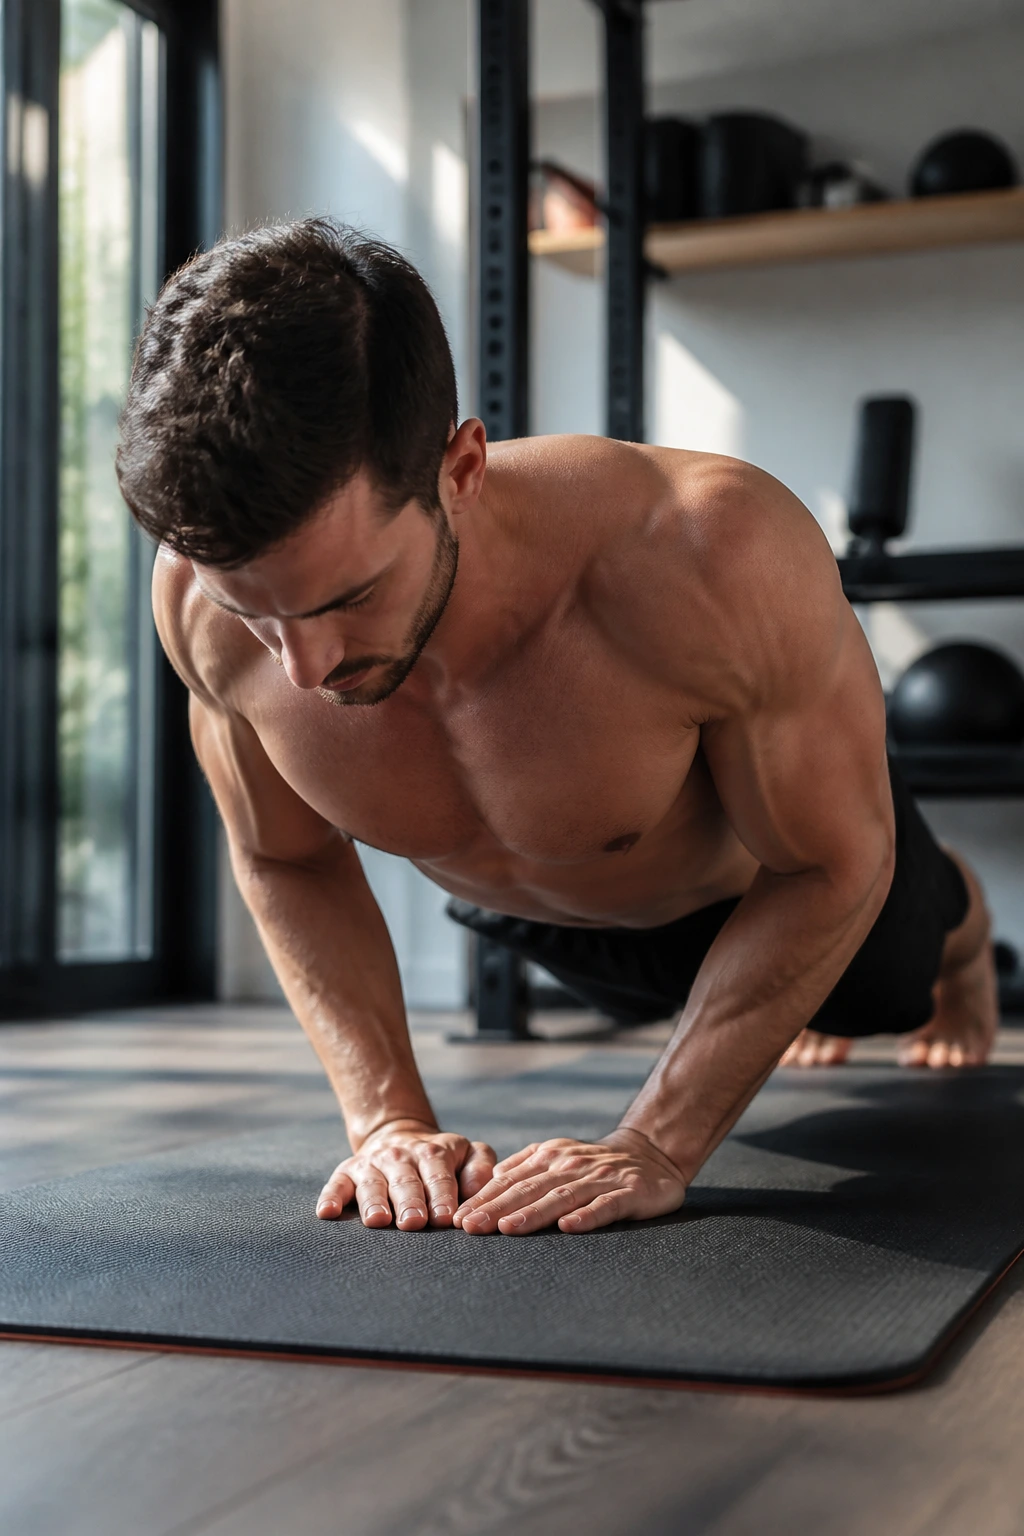
Close-grip push-ups are the triceps workhorse of bodyweight upper body training. They shift more of the load away from the chest and onto the back of the arms, which is exactly why they feel so different by rep six.
What to Watch For
Keep your hands about shoulder-width apart, maybe a touch inside that line. If the hands come too close, the wrists can get cranky and the movement turns awkward fast. Your elbows should travel back, not flare straight out to the sides.
Use 3 to 4 sets of 6 to 12 reps. If you can’t keep your torso steady, drop the rep target and make every rep crisp. Better six clean reps than twelve sloppy ones.
How to Make It Fit
- Use it after standard push-ups
- Keep the neck long
- Stop one rep before the form breaks
- If wrists complain, place your hands on dumbbells or push-up handles
The close-grip version is not glamorous. It’s just useful. And honestly, useful beats flashy every time.
7. Wide Push-Up Chest Emphasis

What does a wider hand position actually do? It changes the stress line so the chest has to help more and the triceps don’t dominate quite as much.
That does not mean flaring your elbows to a hard 90 degrees and grinding through pain. A slightly wider stance is enough. Think hands about 1.5 times shoulder width, not way out in the weeds. Too wide can feel rough on the shoulders, and there’s no prize for making it harder in a sloppy way.
How to Use It
- Do 2 to 4 sets of 8 to 15 reps
- Use it after standard push-ups, not before
- Keep the chest moving between the hands, not the chin diving first
- Stop if the front of the shoulder feels pinchy
This is a nice change-up when the regular push-up starts feeling flat. It gives the chest a different job without requiring any equipment, and that’s why it earns a spot.
8. Plank Shoulder Tap Circuit

A shoulder tap sounds almost too simple until your hips start twisting all over the place. That’s the point where the work shows up.
Get into a strong high plank, feet a bit wider than hip width if needed, then tap one shoulder with the opposite hand and switch sides. The upper body has to fight rotation the whole time. Your chest, shoulders, and obliques all chip in, even though the movement looks small.
I like this as a short circuit: 20 to 40 seconds on, then 20 to 30 seconds off, for 3 to 5 rounds. Slower taps are cleaner than fast slaps. If your hips sway, widen your feet and slow down.
- Hands under shoulders
- Eyes a few inches ahead of your fingers
- Hips level
- Tap, return, switch
This is one of those exercises that seems easy until it isn’t. That little wobble tells you plenty.
9. Scapular Push-Up Reset

Most people think push-ups are all about elbows and chest. They’re not. If your shoulder blades don’t move well, the whole pressing pattern gets clunky.
Scapular push-ups keep your arms straight while you only move the shoulder blades. Sink the chest slightly between the shoulders, then push the floor away until the shoulder blades spread apart. It is a small motion, and that’s exactly why it matters. You’re teaching the upper back to control the shoulders instead of leaving everything stuck in one position.
Use 2 to 3 sets of 10 to 15 reps. Move slowly. At the top, the upper back should feel wide, almost rounded; at the bottom, the chest drops a little while the elbows stay locked.
Bold tip: If you rush this, it turns into a shrug. Don’t shrug. Let the shoulder blades glide.
I love this one before push-up work because it makes the rest of the session feel cleaner.
10. Reverse Plank Hold
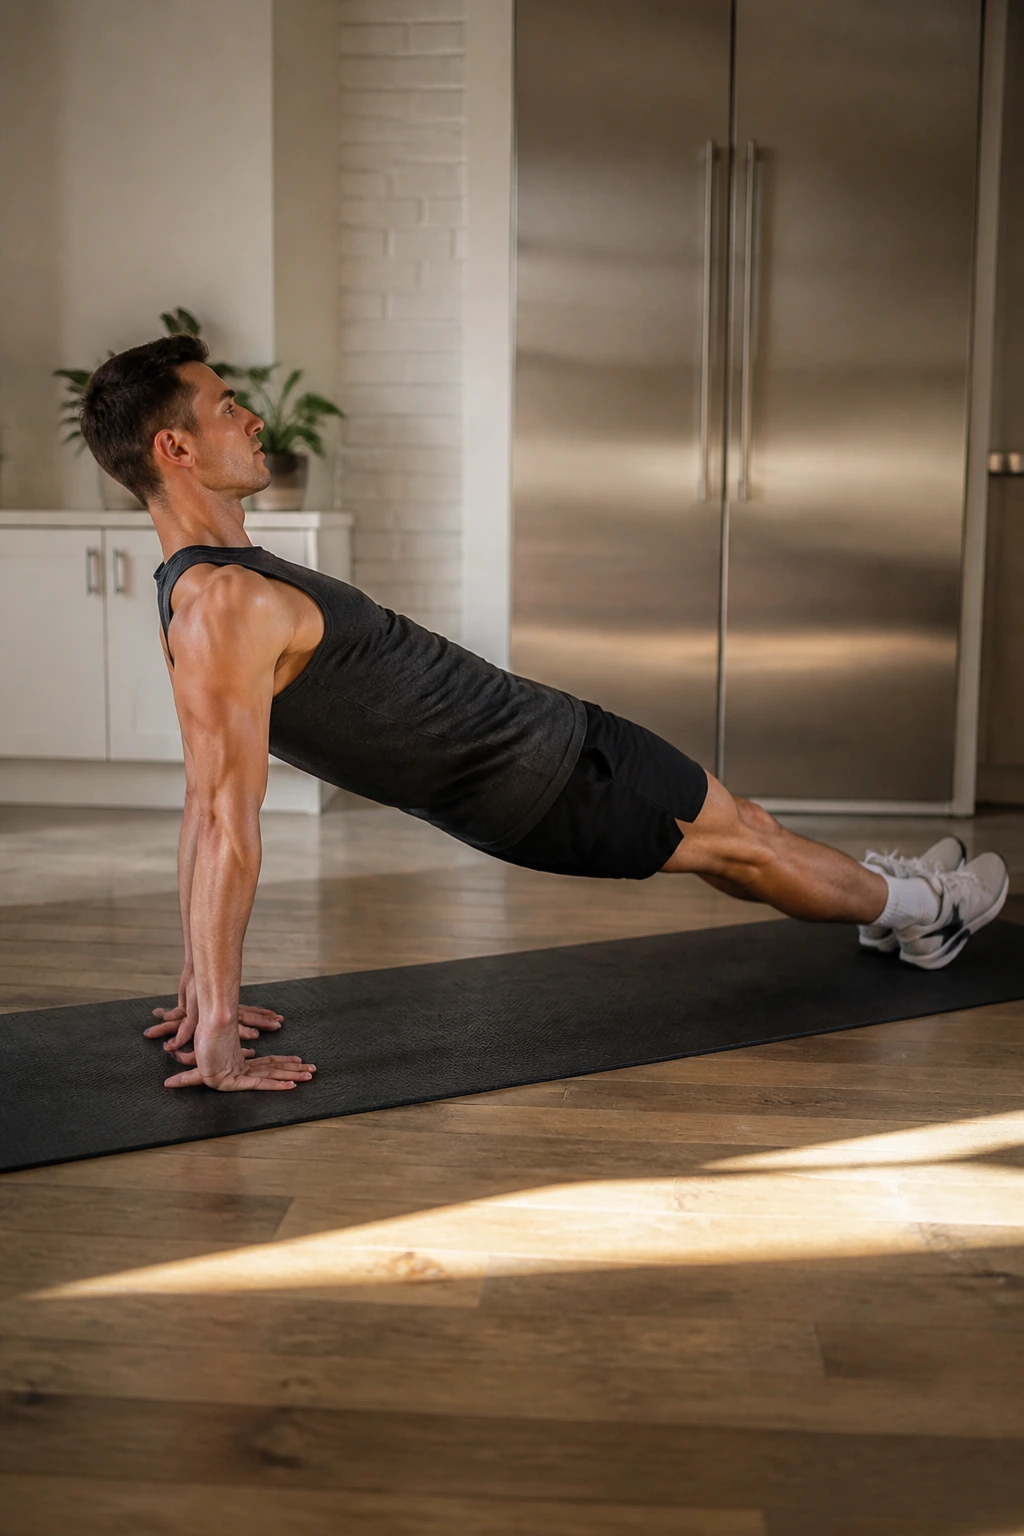
Reverse planks are the neglected cousin of front planks, and that’s a shame. They hit the back of the shoulders, triceps, glutes, and upper back in a way most people never train with bodyweight alone.
The setup is simple: sit on the floor, place your hands behind you, fingers pointed forward or slightly out, then lift your hips until your body forms a long line from shoulders to heels. The chest opens, the back side of the body wakes up, and your shoulders learn to support load in a different direction.
Try 3 holds of 20 to 40 seconds. If your wrists dislike the hand position, turn the fingers out a little or use fists. A bent-knee version is perfectly fine to start with.
This works best after a push-heavy day or paired with push-ups. It balances the front of the body, and that matters more than people think.
11. Pike Push-Up Shoulder Builder
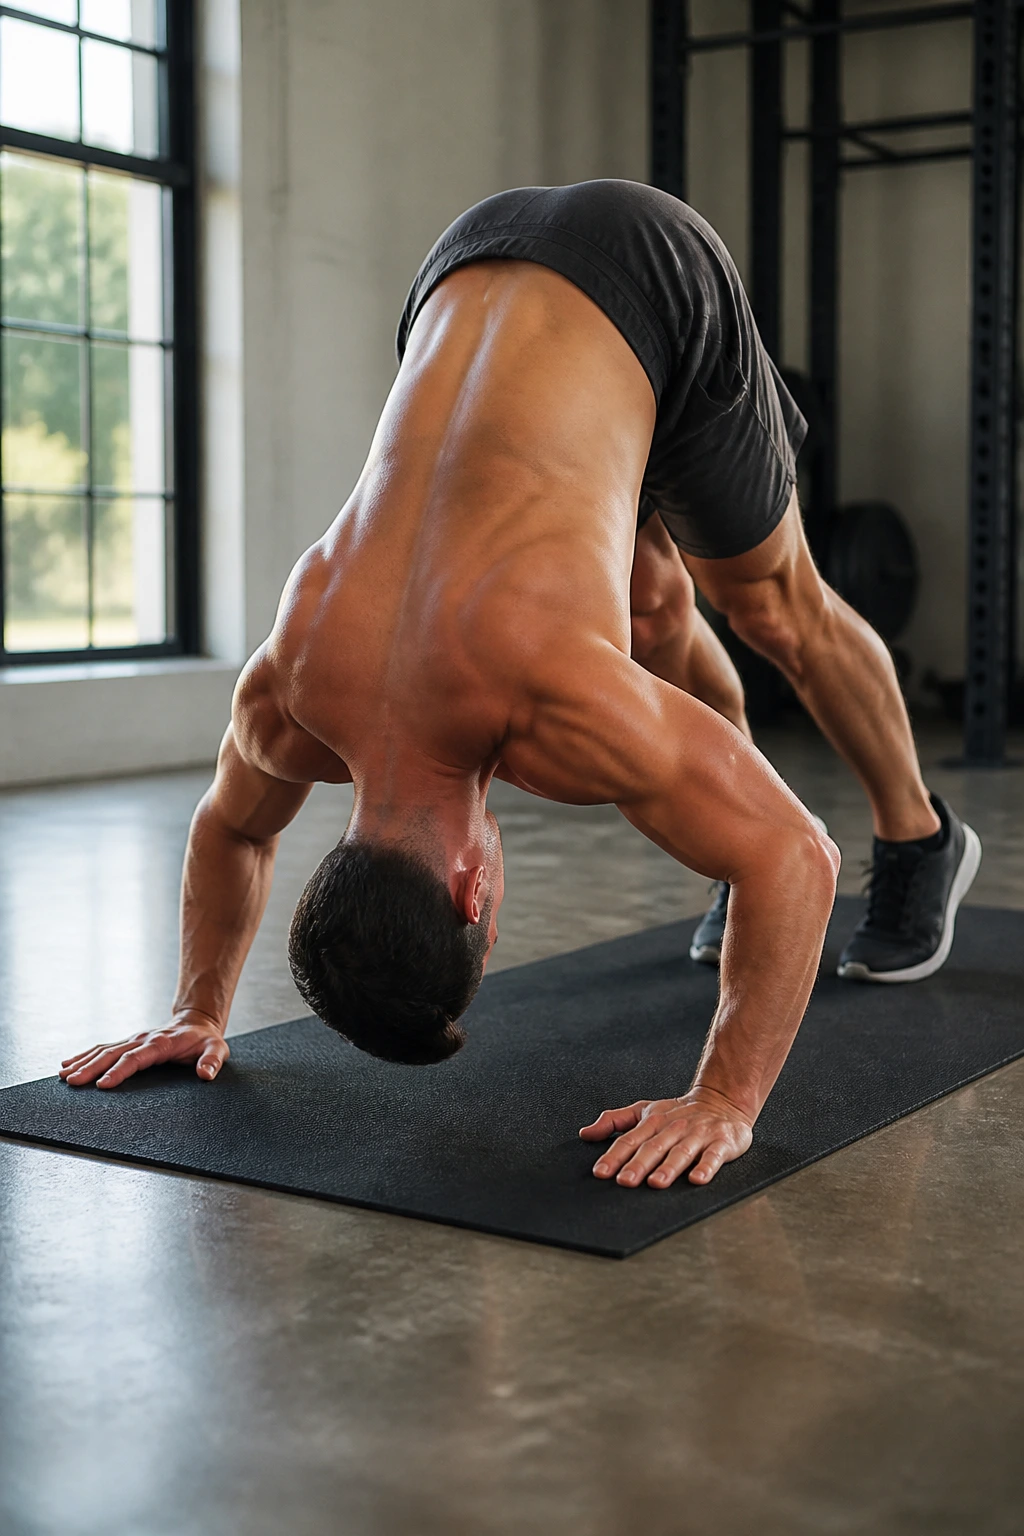
Pike push-ups are where shoulder strength starts to look serious.
Set your hands on the floor, lift your hips high, and make an upside-down V with your body. Then bend the elbows and lower the top of your head toward the floor between your hands. The angle shifts more load onto the shoulders than a standard push-up ever will, which is why this one stings in a good way.
Use 3 to 5 sets of 5 to 10 reps. Keep your feet planted and your heels light. If the move is too tough, shorten the range and work on the bottom half first. If it’s too easy, place your feet on a box or step for a steeper angle.
The biggest mistake is turning it into a sloppy handstand shrug. Keep the head between the hands, not drifting forward, and press the floor away hard at the top.
12. Dive Bomber Push-Up Flow
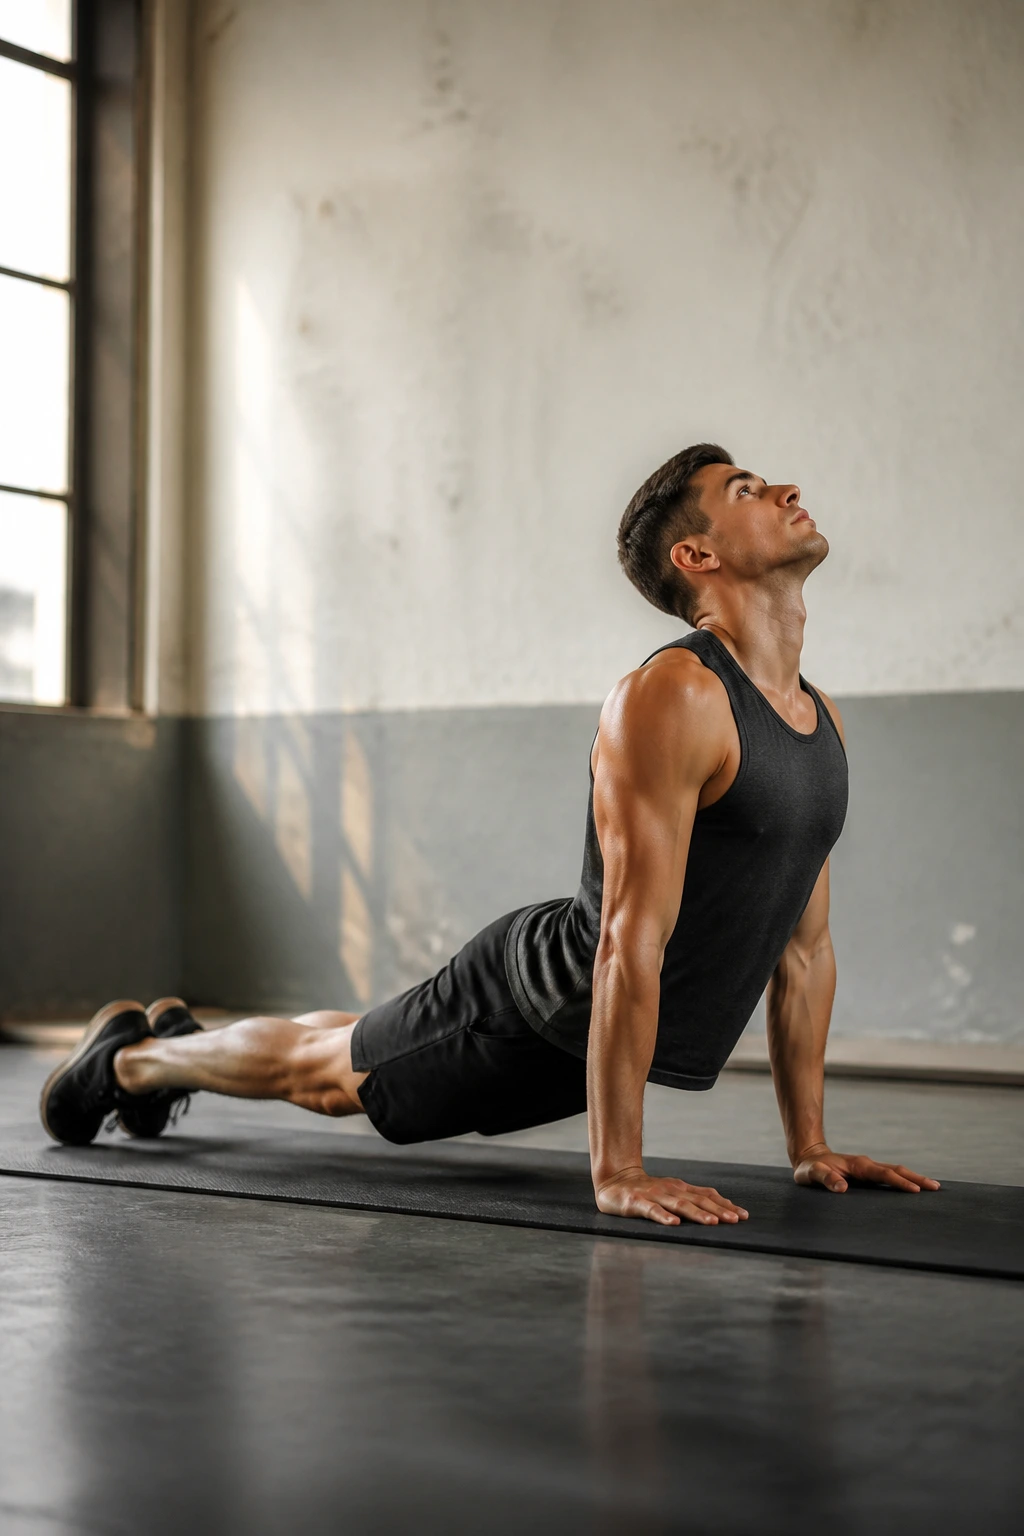
Ever do a push-up that also feels like a shoulder stretch? That’s the dive bomber.
Start in a pike or downward-dog shape, sweep your chest low between your hands, then glide forward into a cobra-like extension before reversing the path. The motion asks for strength, shoulder mobility, and control all at once. It looks fluid when it’s done well. It looks messy when it isn’t.
How It Fits in a Workout
Use 3 sets of 5 to 8 slow reps. Go easy on speed. This is not a race. A smooth rep should feel like a long wave from hips to chest and back again.
If your lower back pinches, reduce how far you dip. If your shoulders feel crowded, shorten the range and keep the elbows softer. A short pause in the front extension helps if you’re still learning the path.
This one lands nicely near the middle of a session, after warm-up work and before heavy pressing fatigue kicks in.
13. Decline Push-Up Strength Ladder

Put your feet on a sturdy step or low box and the whole movement changes. Your shoulders take more of the load, and the upper chest has to pitch in harder than it does on a flat push-up.
That’s why decline push-ups feel a notch harder even when the rep count looks the same. The body angle shifts more weight toward the hands. It also makes sloppy core tension obvious fast. If your midsection caves, you feel it immediately.
Use 3 to 4 sets of 5 to 12 reps, resting 60 to 90 seconds between sets. Start with a small elevation, maybe 6 to 12 inches, and only raise the feet when the rep quality stays sharp. There’s no need to go high just to prove a point.
- Feet on a secure surface
- Hands a touch wider than shoulders
- Ribs down, glutes on
- Lower under control, press hard at the top
If standard push-ups are getting stale, this is a clean next step.
14. Diamond Push-Up Triceps Finisher

Diamond push-ups have a reputation for being brutal, and honestly, they deserve it. The narrow hand position makes the triceps work harder, and that back-of-the-arm burn shows up fast.
The shape matters here. Bring your hands close enough that your thumbs and index fingers form a diamond or a tight triangle under the chest. Then lower with control, keeping the elbows tucked fairly close to the body. If your wrists hate the exact hand shape, shift to a slightly wider close-grip position instead of forcing the diamond.
I like 2 to 4 sets of 4 to 10 reps at the end of a workout. This is not the first thing I’d program for a tired beginner. It’s a finisher, or a small block for someone who already owns the standard push-up.
The rep count can be low and still matter. A few hard clean reps do more for the triceps than a dozen half-reps done in a hurry.
15. Bear Crawl Conditioning Block

Bear crawls look like something kids do in a gym class, which is probably why people underestimate them. They shouldn’t.
From hands and feet on the floor, lift your knees just a few inches off the ground and crawl forward with opposite hand and foot moving together. The shoulders stay busy, the core has to stop the torso from swaying, and the wrists take a steady dose of load. It’s messy in the best way.
Try 4 to 6 rounds of 20 to 40 seconds, with 30 to 45 seconds of rest. Keep the steps small. Big steps tend to jack up the hips and turn the crawl into a weird little race. That misses the point.
What Makes It Different
Unlike a plank, the bear crawl asks you to stabilize while moving. That extra challenge makes it a strong upper-body conditioning drill, especially when you want something that feels athletic instead of stationary.
If your shoulders are already fried from pressing, keep the crawl short and crisp. If you want more work, slow the crawl down until every hand placement feels deliberate.
16. Wall Walk Skill Builder
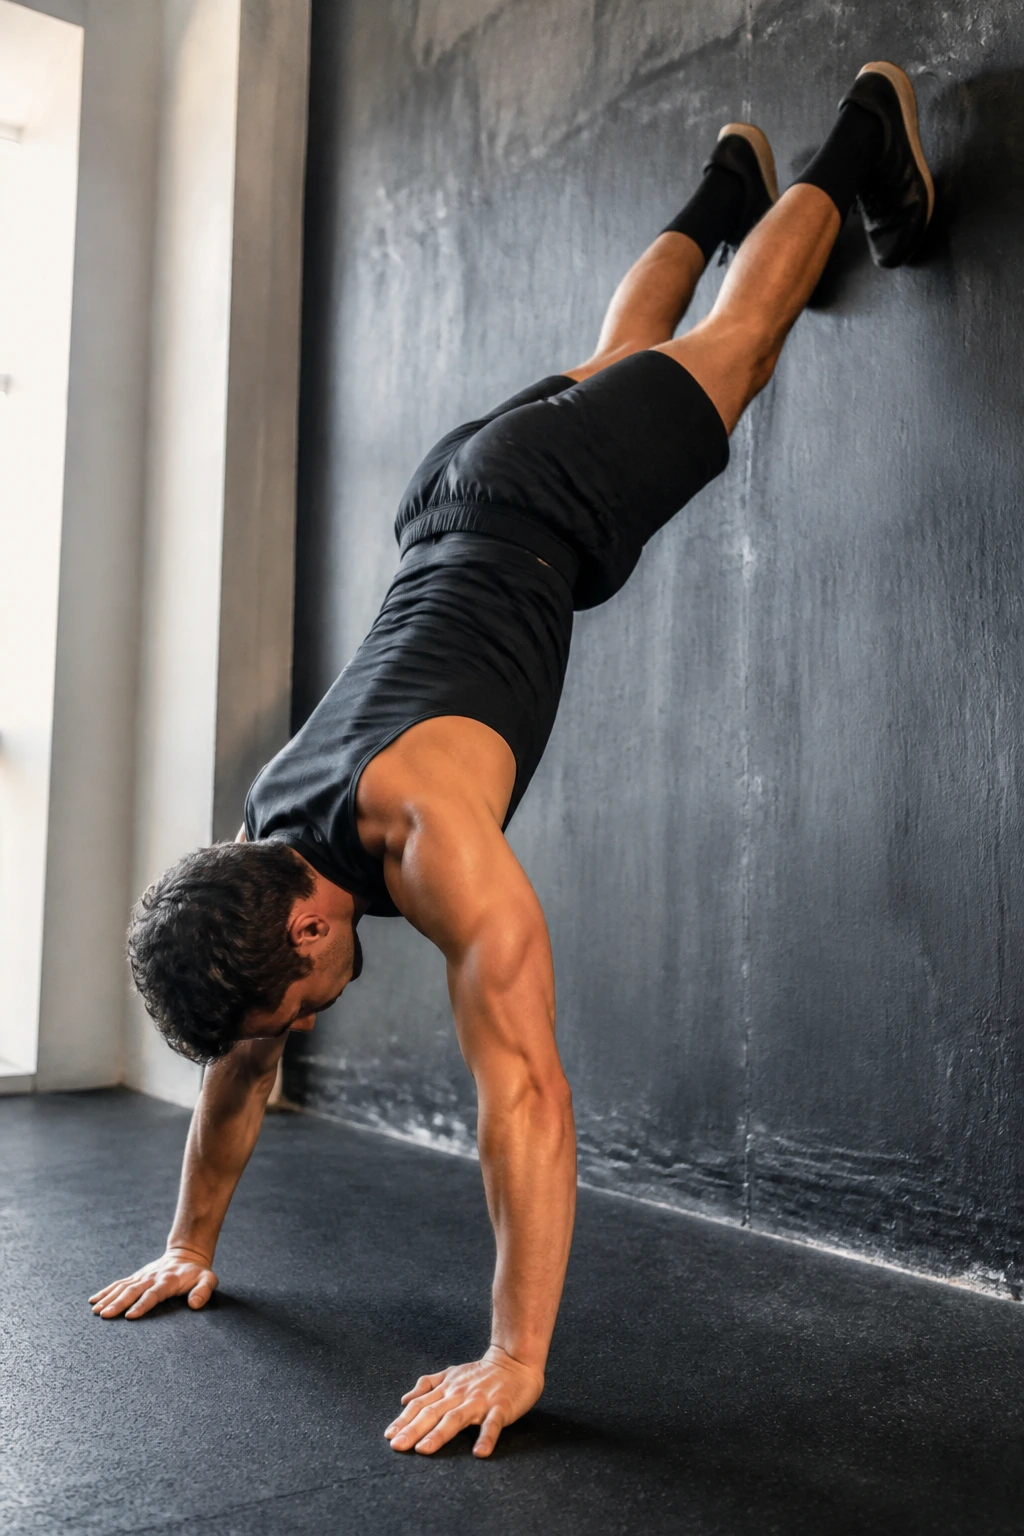
Wall walks expose sloppy core tension fast. They also show whether your shoulders can support your body when the line gets vertical.
Start in a plank with your feet against a wall or near it, then walk your feet up while your hands move closer to the wall. Keep going until you’re close to a handstand position, pause for a moment, and walk back down with control. It sounds simple. It is not simple. That’s why it’s useful.
How to Scale It
- Beginners: walk feet up only halfway and hold for 5 to 10 seconds
- Intermediate: reach a near-vertical hold for 10 to 20 seconds
- Advanced: add a slow walk back down without rushing
Use 3 to 5 reps, resting enough between efforts that the next walk stays smooth. If your ribs flare hard, stop a step earlier and clean up the brace before you go higher. The shape matters more than the height.
This one sits nicely between strength work and handstand practice because it teaches both pressure and control.
17. Handstand Hold Practice
Why hold a handstand before chasing fancy variations? Because the hold teaches the position itself.
A wall-facing handstand is the cleanest version for most people. Kick up gently, keep your hands a few inches from the wall, and press tall through the shoulders so the body feels stacked. The wall is there for balance, not for lounging against. If you slam your heels into it, the line is off.
Use 3 to 5 holds of 15 to 45 seconds, with 60 to 90 seconds of rest. Shorter holds with a better line beat long holds with a broken shape. Every time.
The most useful cue I know is this: push the floor away. That tiny thought changes the whole upper body. The shoulders get active, the neck gets long, and the body feels less like a collapse waiting to happen.
If wall walks are practice, this is the test of whether the practice is sticking.
18. Handstand Shoulder Tap Practice
Handstand shoulder taps are where balance, strength, and nerve all show up together. They also punish impatience.
Once you can hold a steady wall handstand without wobbling like a shopping cart, shift one hand to tap the opposite shoulder and return it to the floor. The move is tiny. That’s the hard part. A big swing ruins the line and makes the drill less useful.
Key Rules
- Start with 2 to 3 sets of 4 to 8 taps per side
- Keep the taps slow and deliberate
- Brace the ribs so the low back doesn’t arch hard
- Stop if the shoulders lose stack or the wrists start to slide
Do not rush this one. A slow, controlled tap builds more usable strength than a dozen frantic attempts. If you need a shorter range, tap the upper arm instead of the shoulder at first.
The payoff is real. Once this feels stable, ordinary pressing drills tend to feel cleaner because the body has learned to manage shifting load overhead.
19. Archer Push-Up Strength Test
Archer push-ups are the point where bodyweight pressing starts to feel lopsided on purpose. One side does the heavy work while the other stays long and mostly straight.
Spread your hands wider than a standard push-up, then bend one elbow and let that side lower while the other arm stays extended. Switch sides each rep or work one side for a small cluster. The goal is not to dive bomb to the floor. The goal is to control the shift from side to side without twisting the torso like a corkscrew.
I’d program 3 to 5 sets of 3 to 6 reps per side. If full archer reps are too much, raise the hands on a sturdy surface or shorten the range. That small adjustment keeps the movement honest without turning it into a grind.
The best part is how it reveals weaknesses. One side always feels smoother at first. That’s normal. Keep the reps even, keep the chest square, and let the asymmetry do the teaching.
20. Upper-Body Density Circuit
Want one session that stitches the whole list together? Use a short density circuit and keep the pace steady instead of chasing a max-effort burnout.
Try this for 10 to 12 minutes:
- 8 incline or standard push-ups
- 6 pike push-ups
- 20 shoulder taps
- 20-second reverse plank
- Rest 30 to 45 seconds, then repeat
Beginners can stay with the incline push-ups and knee pike push-ups. Intermediate lifters can move to standard push-ups and full pikes. Advanced folks can swap in decline push-ups or add a wall walk hold at the end of each round.
The circuit works because it covers the big pieces: horizontal pressing, vertical pressing, anti-rotation, and posterior support. That mix keeps the shoulders happier than hammering one pattern for half an hour straight.
If you only have a short window, this is the one I’d keep on repeat. It’s blunt, efficient, and it covers more ground than a lot of longer workouts that look busier than they are.
