



A good body weight exercise earns its place fast. If it doesn’t teach control, balance, or force in a clean way, it’s just movement for the sake of movement.
That matters because body weight exercises are often the first thing people reach for when they want to get stronger without a gym, a machine, or a pile of gear. The catch is plain enough: form matters more than pride. Ten clean squats beat thirty sloppy ones, and a 15-second plank with a flat back beats a minute of sagging and shaking.
These twenty moves cover the patterns most people need: squat, lunge, hinge, push, brace, rotate, and get up and down from the floor without feeling like you’ve been folded into a suitcase. A true pull usually needs a bar, rings, or a strap, so this list sticks to the no-fuss exercises you can do on a floor, a wall, a chair, or a small patch of open space.
Start with five or six. Do two to four rounds. Rest long enough to keep your shape, not so long that your heart rate drops to zero. And if something pinches instead of working the right muscles, switch to an easier version—there’s no prize for grinding through a bad rep.
1. Bodyweight Squat
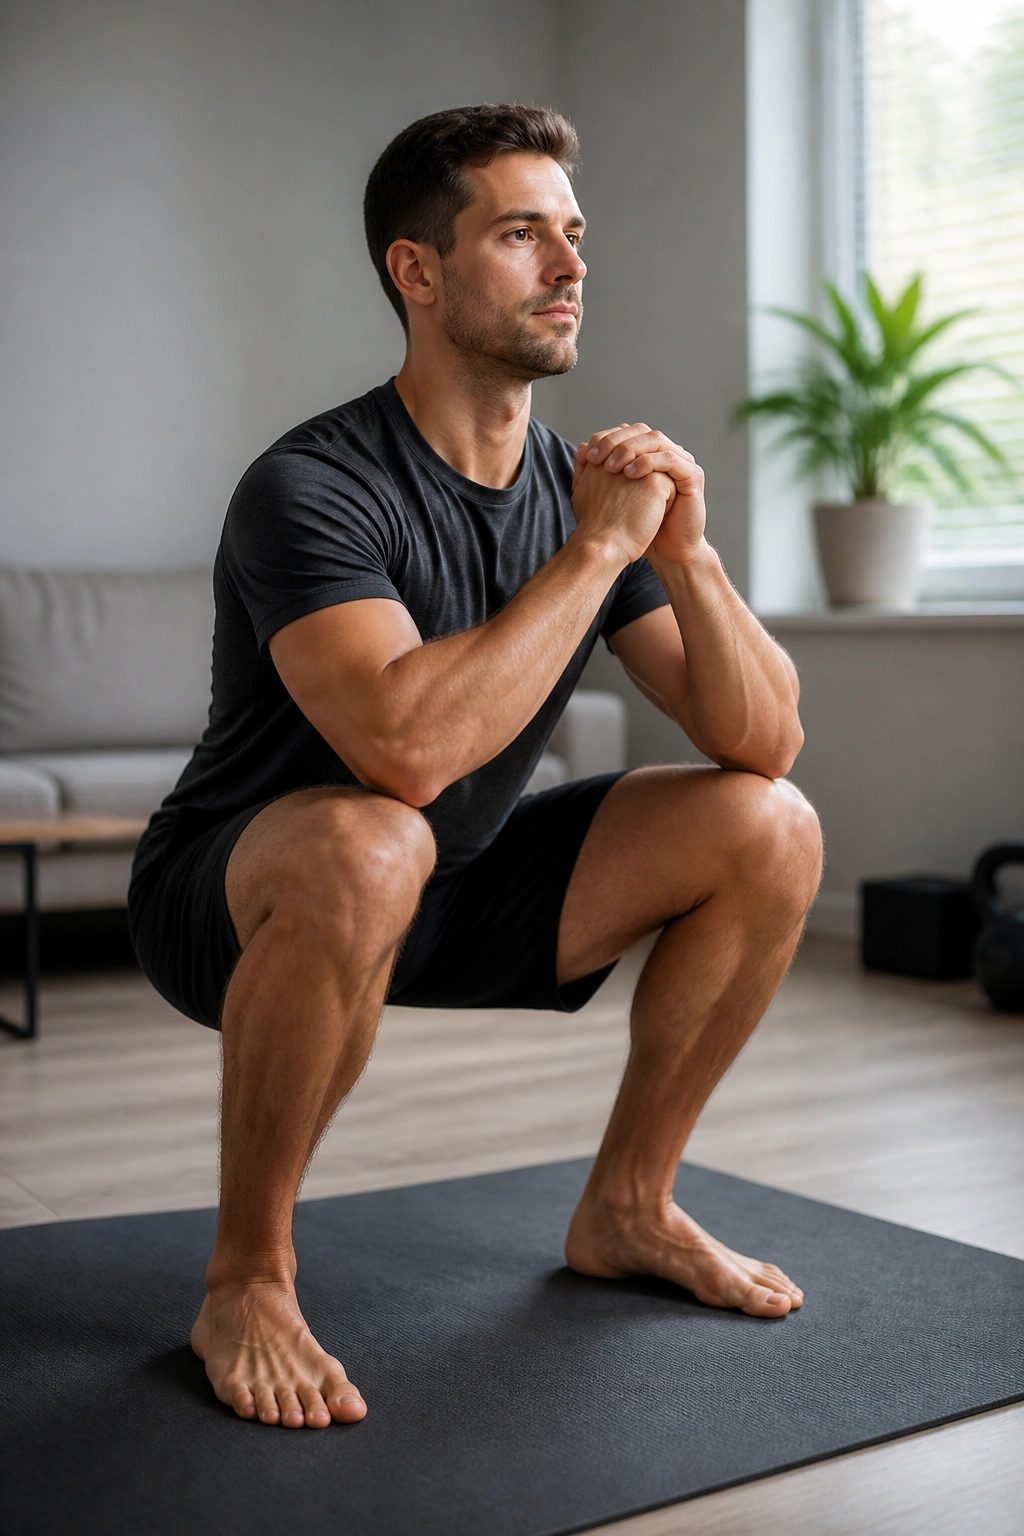
The bodyweight squat is the baseline test. If you can sit down under control and stand back up without your heels peeling off the floor or your knees caving inward, you’ve already got a useful leg pattern.
Set your feet about shoulder-width apart, turn your toes out just a little, and lower your hips between your heels. Not straight back. Not straight down either. Think of sitting into a chair that’s just a few inches behind you, then standing tall without throwing your chest forward.
What to Watch at the Bottom
- Keep both feet fully planted, especially the big toe and heel.
- Let the knees track in the same direction as the toes.
- Stop at the depth you can own without the lower back rounding.
- Keep the chest tall, but don’t puff the ribs way up.
A box or chair helps a lot here. Tap it lightly and stand, or sit all the way down if that’s where your current range lives. No ego reps. Clean squats build better legs than forced ones, and they’re much kinder to the knees and back.
2. Incline Push-Up
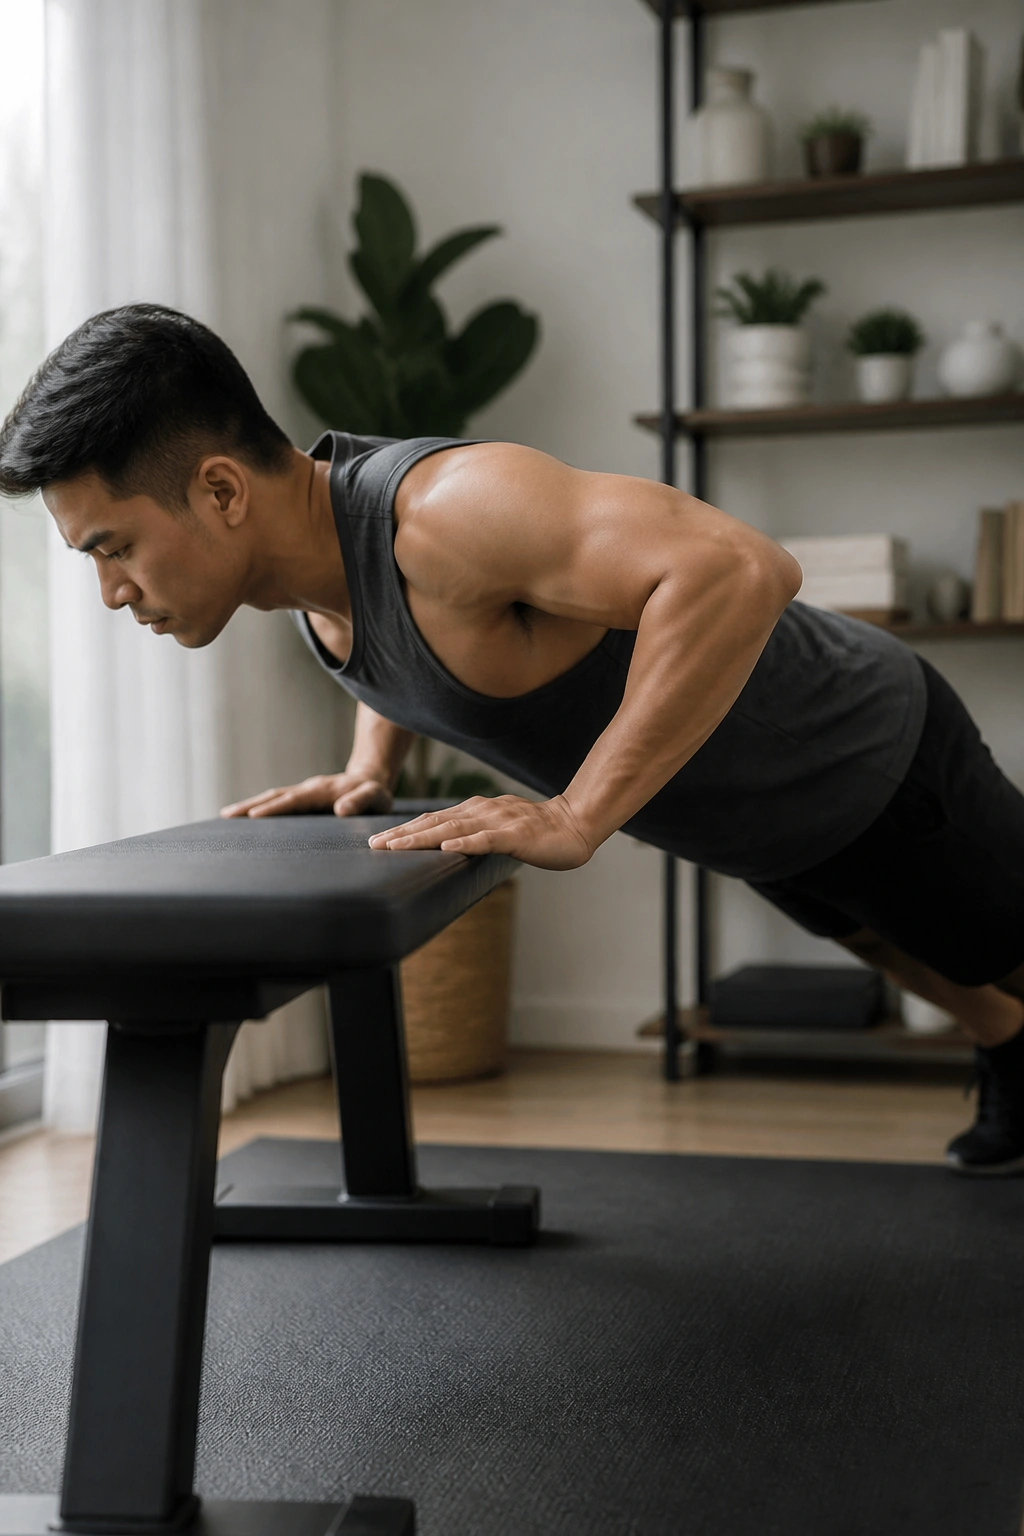
Can’t do a floor push-up yet? Good. Start higher. A wall, countertop, sturdy table, or bench gives you a version that still trains the chest, shoulders, and triceps without turning every rep into a fight.
The main idea is simple: the higher your hands are, the easier the push-up. That means you can choose a level where your body stays straight and your elbows don’t flare out like wings. Lower the incline over time as your strength improves.
A solid incline push-up should feel like a smooth press, not a neck-and-shoulder scramble. Keep your hands a little wider than shoulder-width, brace your midsection, and lower your chest toward the edge of the surface until your elbows bend around 30 to 45 degrees from your sides.
One clean rep is worth more than five ugly ones. If your hips sag, your wrists ache, or your shoulders shrug toward your ears, raise the incline and slow down. That’s not a step backward. It’s the right step.
3. Reverse Lunge
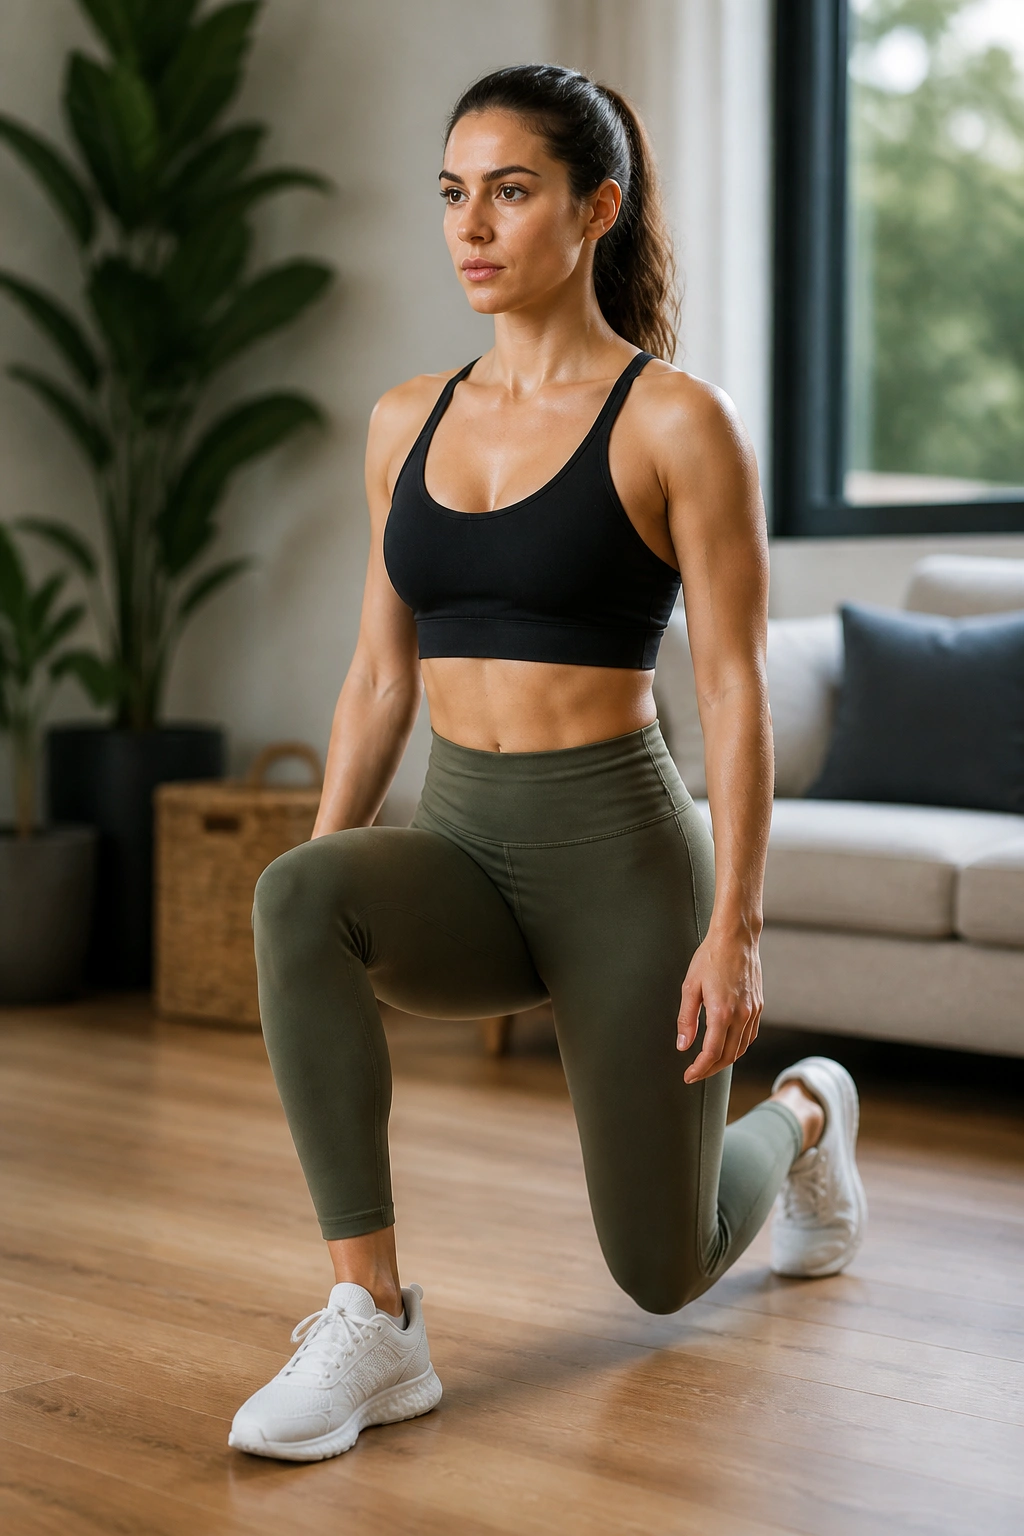
Reverse lunges are often friendlier than forward lunges, especially if your balance is a bit shaky or your knees complain when you step into a split stance. Stepping back keeps the front shin more controlled and gives you a little more room to organize the movement.
Step one foot straight back, drop the back knee toward the floor, and keep most of your weight on the front leg. The front heel stays down. The front knee should point in the same direction as the toes, not drift inward.
Why Stepping Back Helps
- It usually feels steadier than stepping forward.
- It lets you control depth without a hard landing.
- It makes the front leg do most of the work.
- It’s easy to shorten the range if your hips feel tight.
Use a wall or chair with one hand if balance is the problem. That’s fine. A split stance with a light touch for support beats wobbling through every rep. And yes, a shorter step is allowed. In fact, it’s often smarter until the pattern feels smooth.
4. Glute Bridge
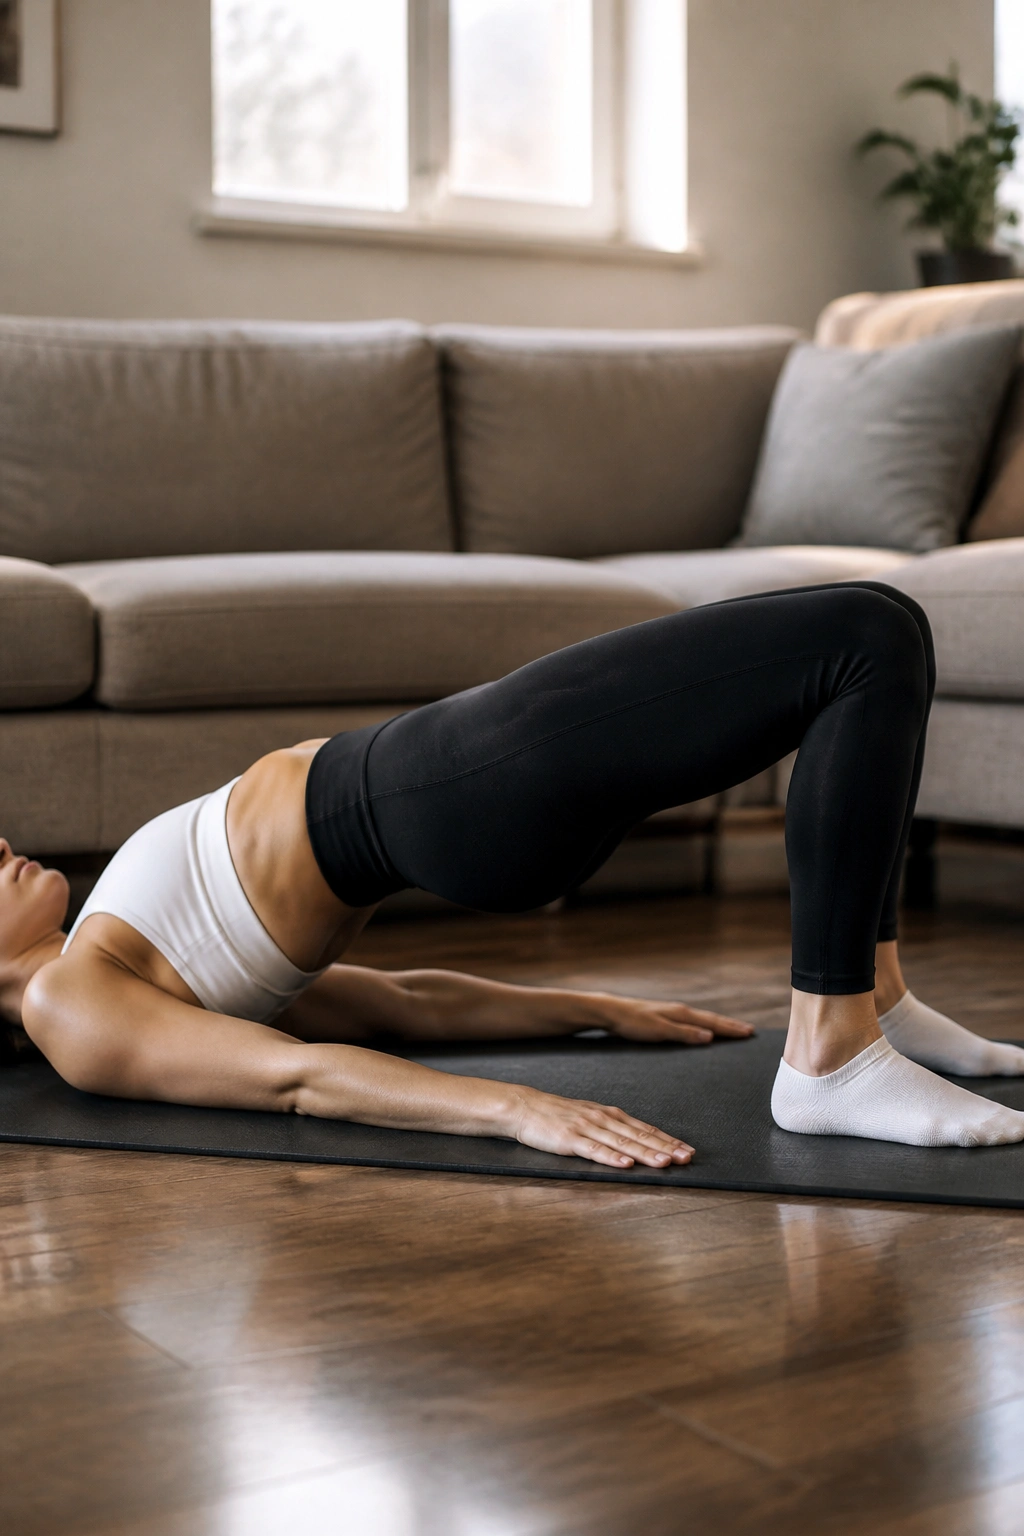
Why do so many people feel bridges in their hamstrings instead of their glutes? Because the feet are too far away, the ribs are flared, or the lower back is taking over and stealing the work.
Lie on your back, bend your knees, and place your feet flat on the floor about hip-width apart. Exhale, tuck the ribs down a bit, and press through the heels to lift the hips until your body makes a long line from shoulders to knees. At the top, squeeze the glutes hard for a second or two.
How to Feel It in Your Glutes
Keep the feet close enough that the shins are near vertical at the top. If the heels are too far away, the hamstrings tend to dominate. If the feet are too close, the movement feels cramped. The middle ground usually works best.
A bridge can be done for 10 to 20 reps, or as a 20 to 30 second hold if you want less motion and more tension. Don’t overarch the back at the top. The lift should come from the hips, not a dramatic spine bend.
5. Forearm Plank
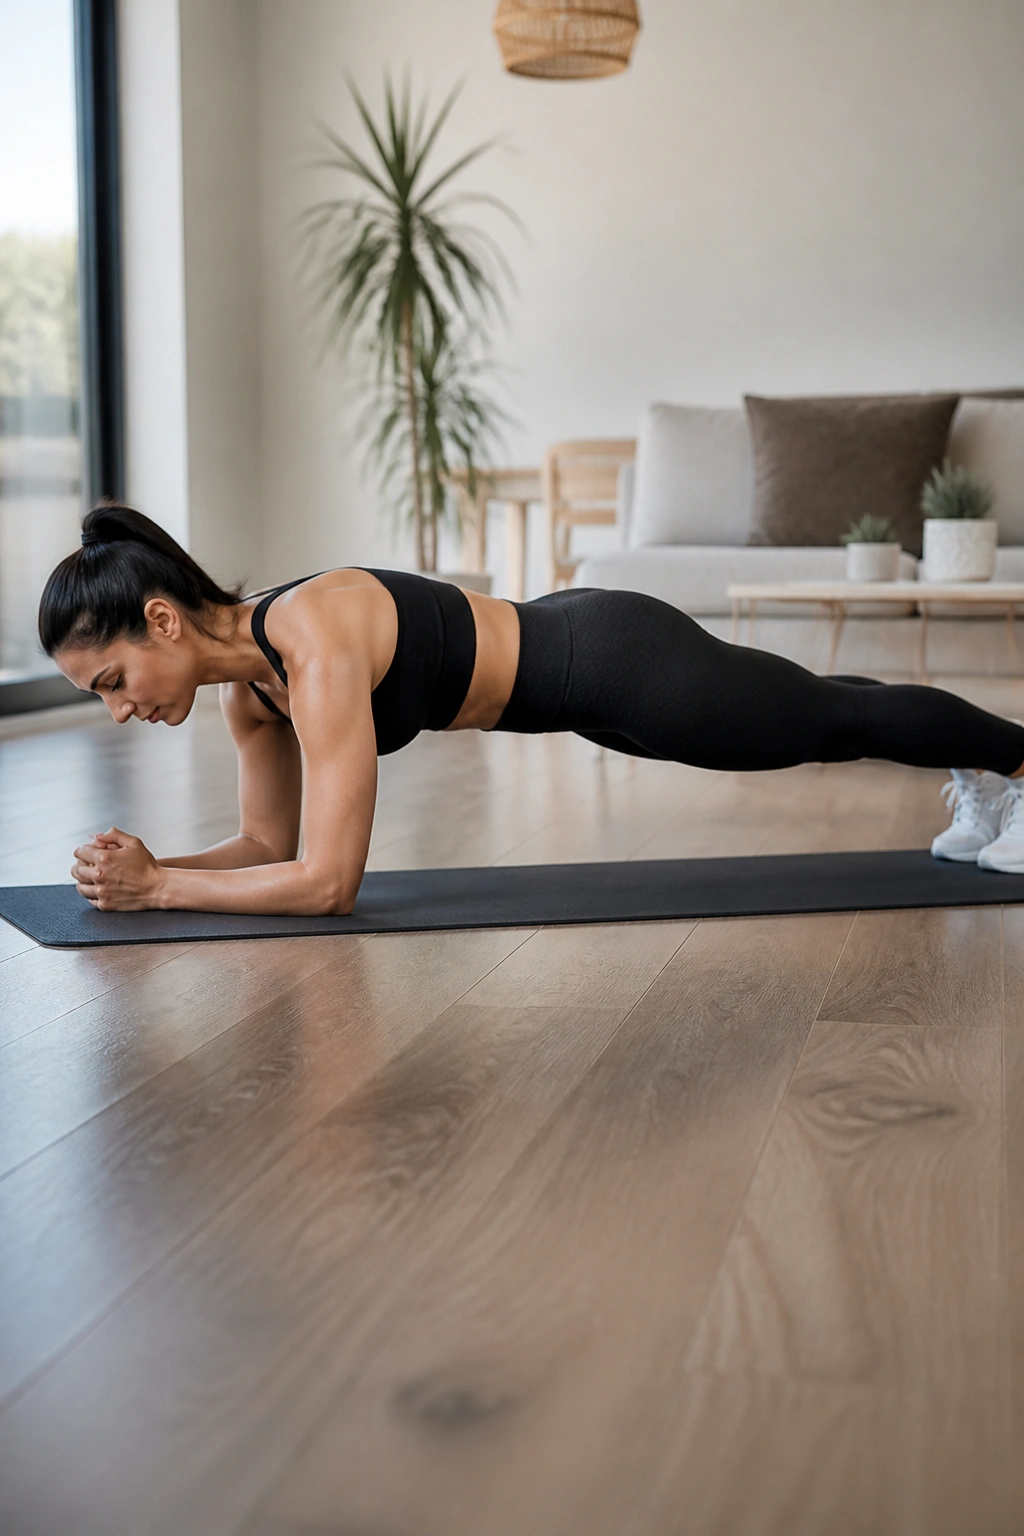
The plank is not a contest to see who can suffer the longest. It’s a test of whether you can keep your body stacked and still breathe like a normal person.
Set your elbows under your shoulders, stretch your legs back, and tighten your glutes just enough to keep your pelvis level. Your body should look like one straight line from head to heels. If your lower back is doing the main job, the plank has already gone off the rails.
Short sets are fine. Honestly, they’re better than long sloppy holds. Ten to 20 seconds of solid position teaches more than a minute of sagging hips and clenched teeth.
Breathe slowly through your nose if you can. That helps keep the ribs from flaring and the neck from turning into a stress knot. If your shoulders shake, that’s normal. If your lower back starts talking back, stop, reset, and do a shorter set.
6. Dead Bug
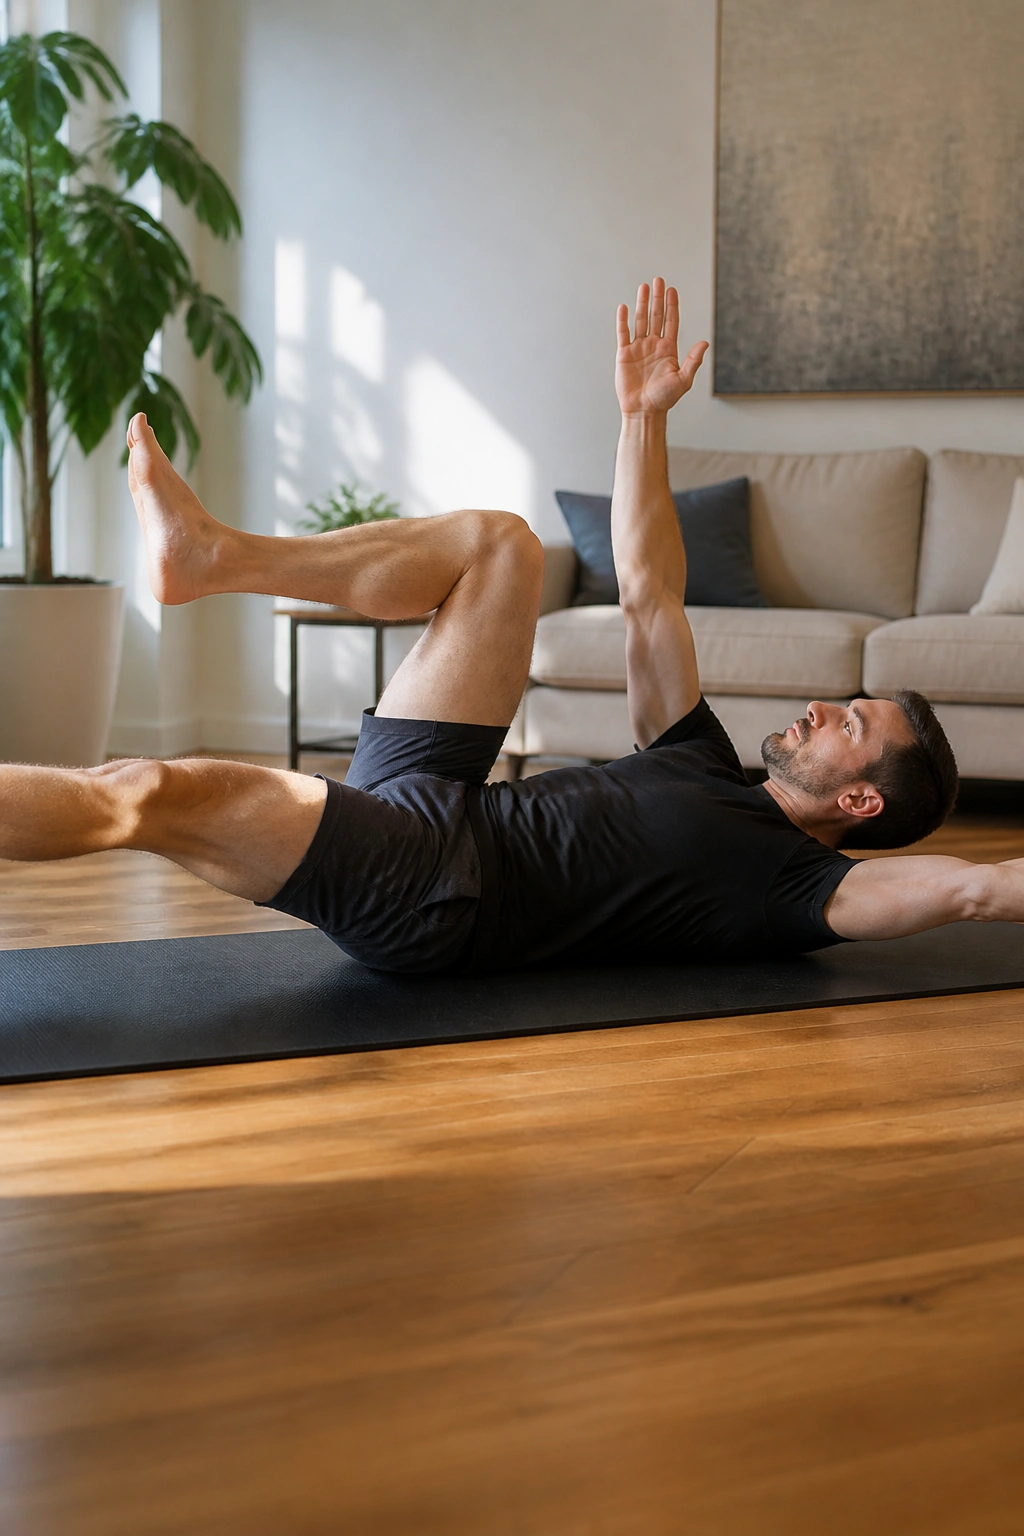
The dead bug looks almost too easy from the outside. It isn’t. Done well, it’s one of the cleanest ways to teach your core to brace while your arms and legs move in opposite directions.
Lie on your back with your arms reaching toward the ceiling and your knees bent above your hips. Press your lower back gently into the floor, then lower one arm and the opposite leg at the same time, only as far as you can go without losing that contact. Return, then switch sides.
The Slow Version Is the Real Version
- Move one limb pair at a time.
- Exhale as the leg extends.
- Keep the low back heavy against the floor.
- Pause for a second before switching sides.
If the back pops off the floor, shorten the reach. If the neck feels tense, lower the arms a little and keep the chin soft. This exercise rewards patience. Rushing through dead bugs turns them into flailing, and flailing is not the point.
7. Bird Dog
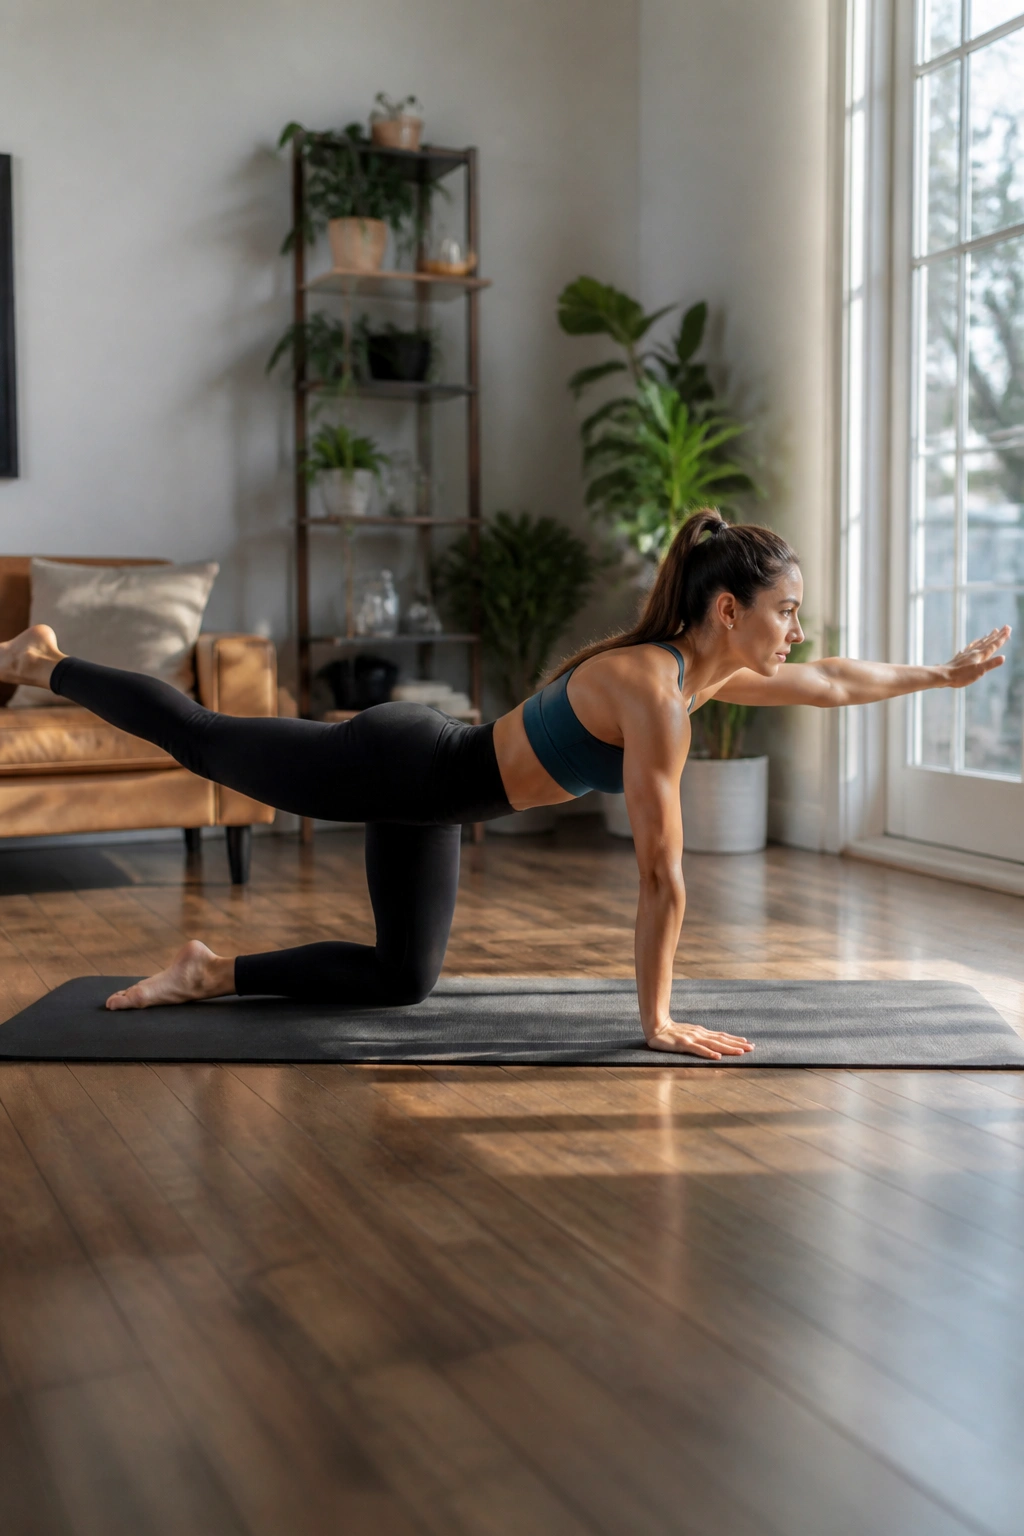
Bird dog is the cousin of dead bug, but it changes the game by putting you on your hands and knees. That adds balance and makes the core work a little harder to stop the trunk from twisting.
Start on all fours with your hands under your shoulders and knees under your hips. Reach one arm forward and the opposite leg back, keeping the hips level and the ribs quiet. Think long, not high. A giant leg lift usually means the low back has taken over.
The best bird dog reps look boring. Good. Boring is what stable spinal control looks like. Reach away from the center line, hold for a beat, then return without dropping or shifting side to side.
If you want a little more challenge, pause when your arm and leg are fully extended and exhale slowly before returning. That tiny pause exposes the sloppy version fast. It also makes the exercise useful instead of just decorative.
8. Wall Sit
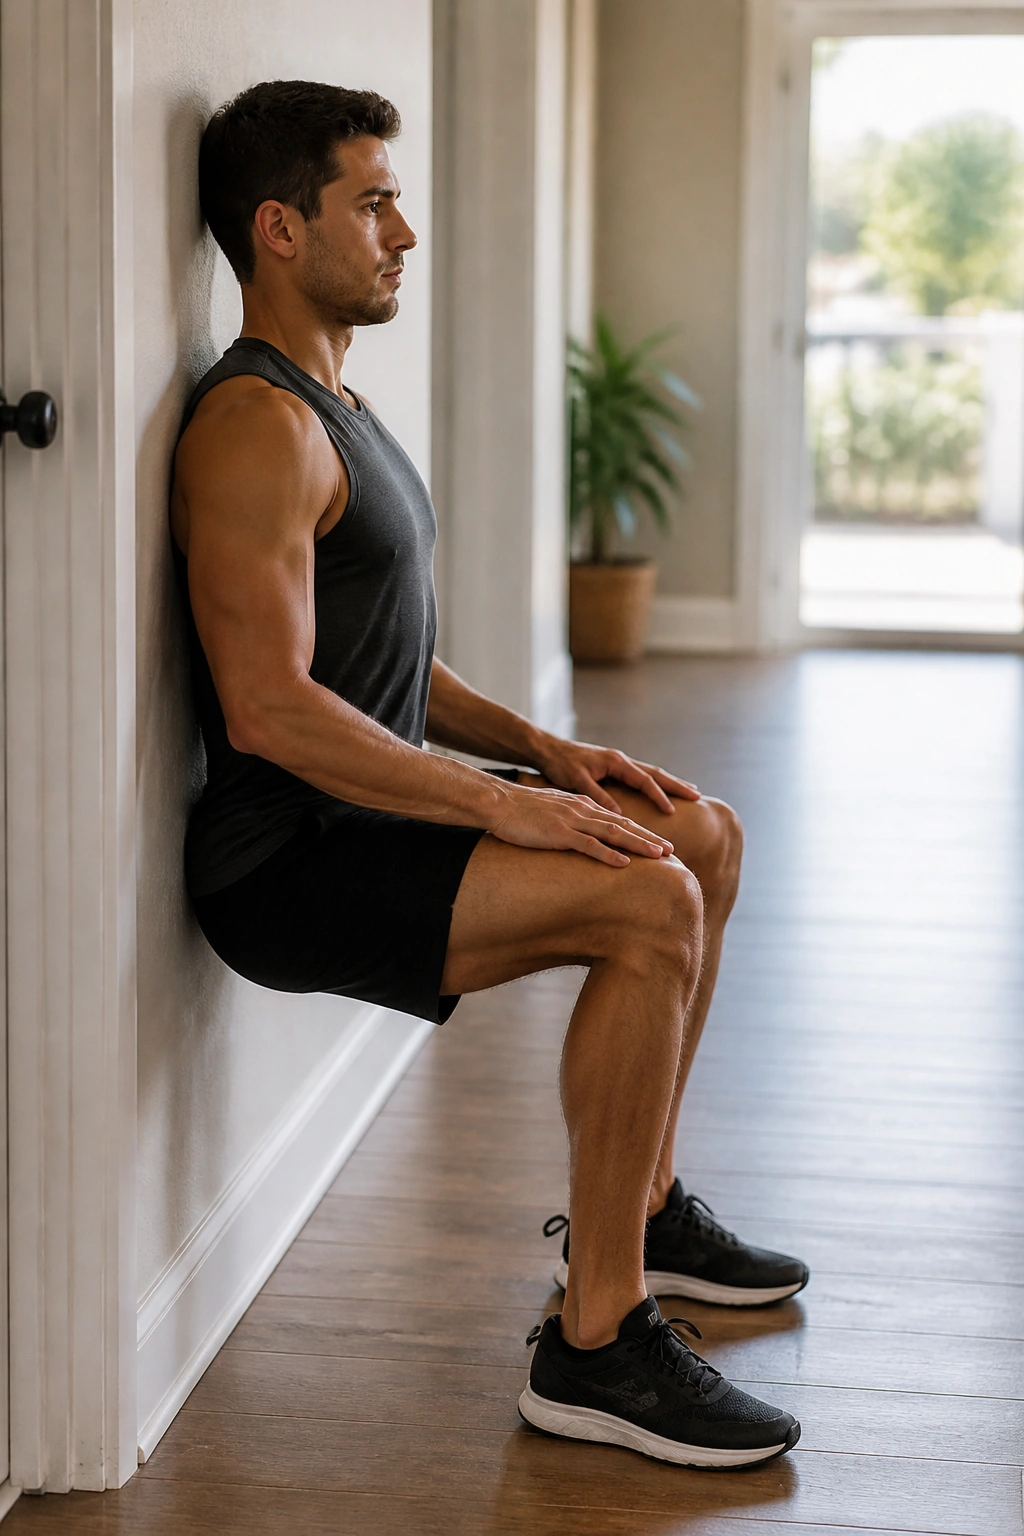
A wall sit looks simple right up until the quads start burning. Then it gets honest. Fast.
Slide your back down a wall until your thighs are near parallel to the floor, or a little higher if parallel feels like too much. Keep your feet about a step out from the wall, with both heels flat. Your lower back should stay in contact with the wall, and your knees should track over the toes.
- Hold for 20 to 60 seconds.
- Keep the weight spread through the whole foot.
- Breathe in short, steady breaths.
- Stop before you start sliding or shaking apart.
The beauty of a wall sit is that it needs almost no technique after setup. It’s just a long hold with a lot of leg tension. That makes it useful for beginners, busy people, and anyone who wants a leg burn without jumping around.
9. Calf Raise
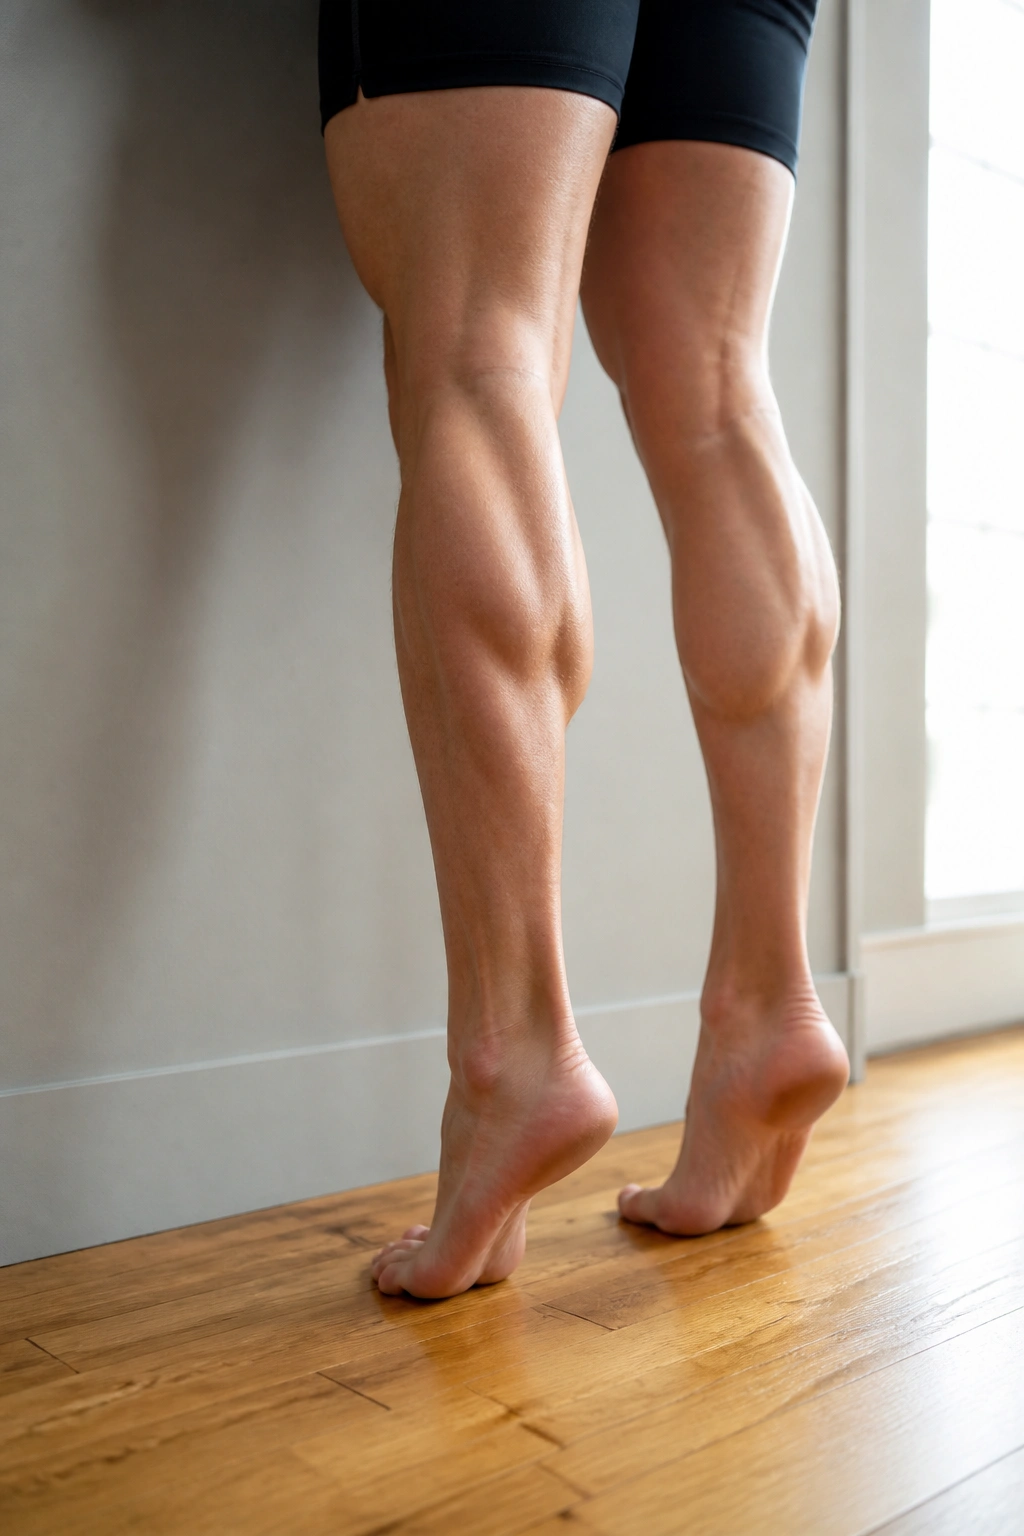
Tiny movement, annoying burn. Calf raises are often dismissed because they don’t look dramatic, but they matter more than people think—especially if your ankles feel stiff or your lower legs fatigue quickly.
Stand tall near a wall or countertop for balance. Lift your heels as high as you can, pause for a second, then lower slowly until the heels touch down and the calves stretch. The lowering phase matters. A lot. If you drop fast, you miss most of the work.
You can do these with both feet together, or shift to one leg when 15 to 20 clean reps feel easy. A step edge gives you a deeper stretch at the bottom, but the floor works fine.
One clean cue helps here: rise smooth, lower slower. If the ankles wobble, widen your stance a touch. If the calves cramp, shorten the set and drink some water before trying again. Boring little exercises like this are how lower legs get stronger without much fuss.
10. Shoulder Tap
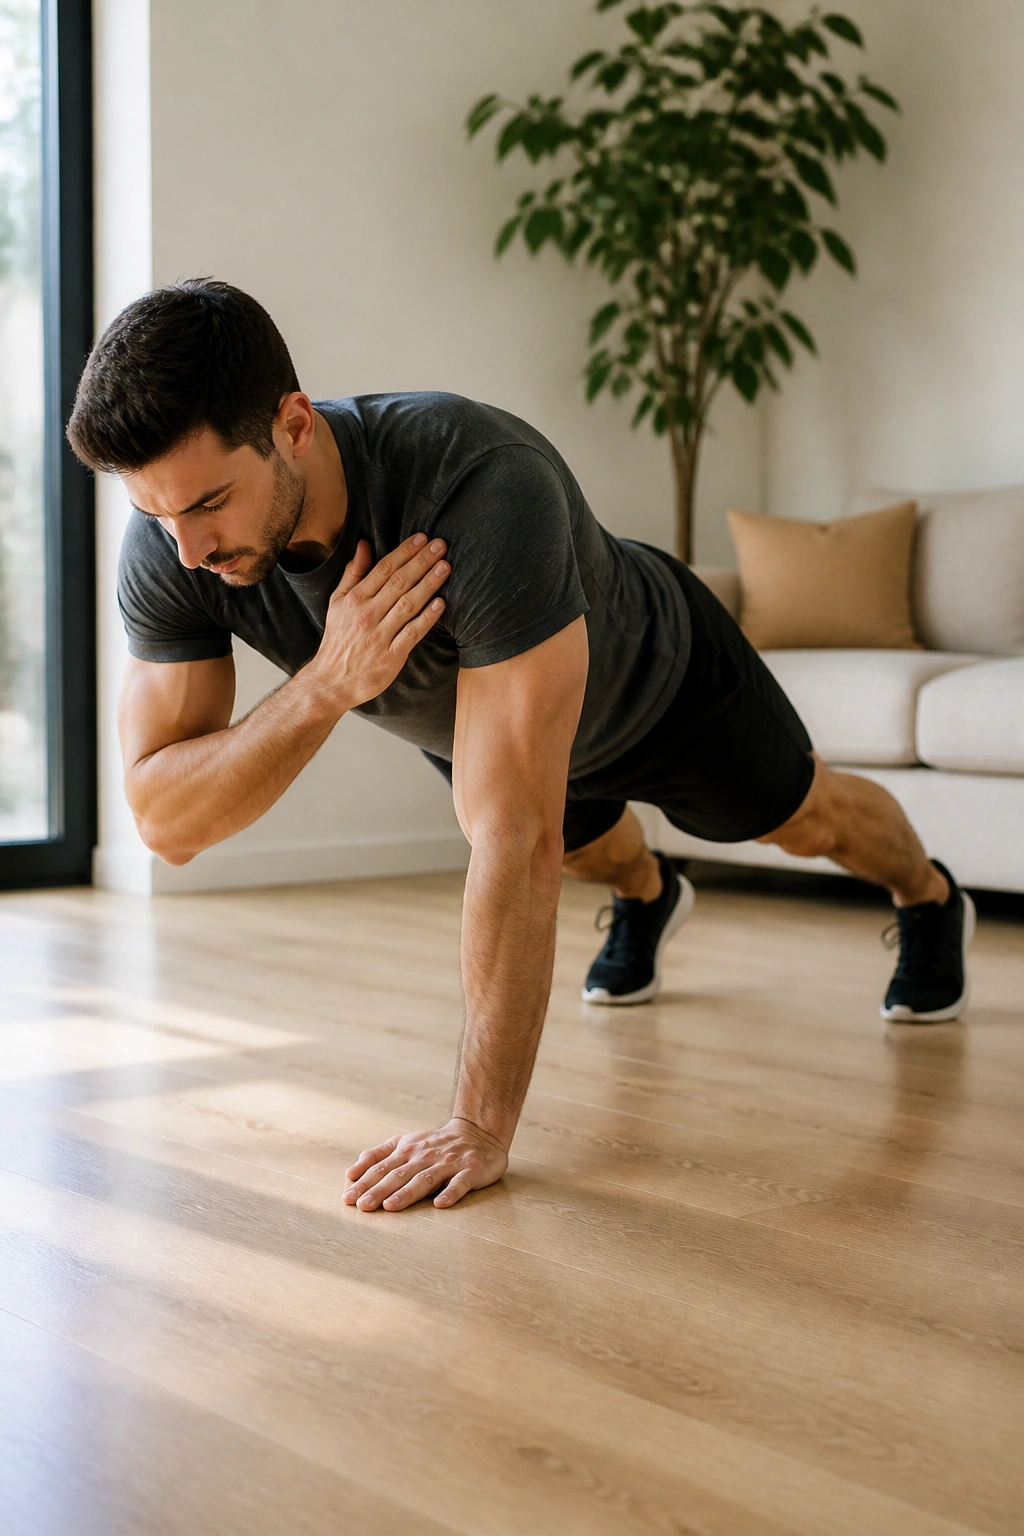
Shoulder taps look like a simple plank variation. Then your hips start rocking, and suddenly the whole exercise feels very expensive.
Set up in a high plank with your hands under your shoulders and your feet a little wider than hip-width. Tap one shoulder with the opposite hand, then return it to the floor and switch sides. The trick is to keep your torso as still as possible while one arm moves.
Keep the Hips from Wagging
- Spread the feet wider for more stability.
- Press the floor away with the supporting hand.
- Move the tapping hand slowly.
- Keep the ribs from flaring.
If the full version is too hard, do it with your knees down and your hips stacked over your knees. That still teaches control. You’re training the core to resist rotation, which is the whole point. Fast taps with a swaying pelvis do not count as progress, even if they look busy.
11. Side Plank
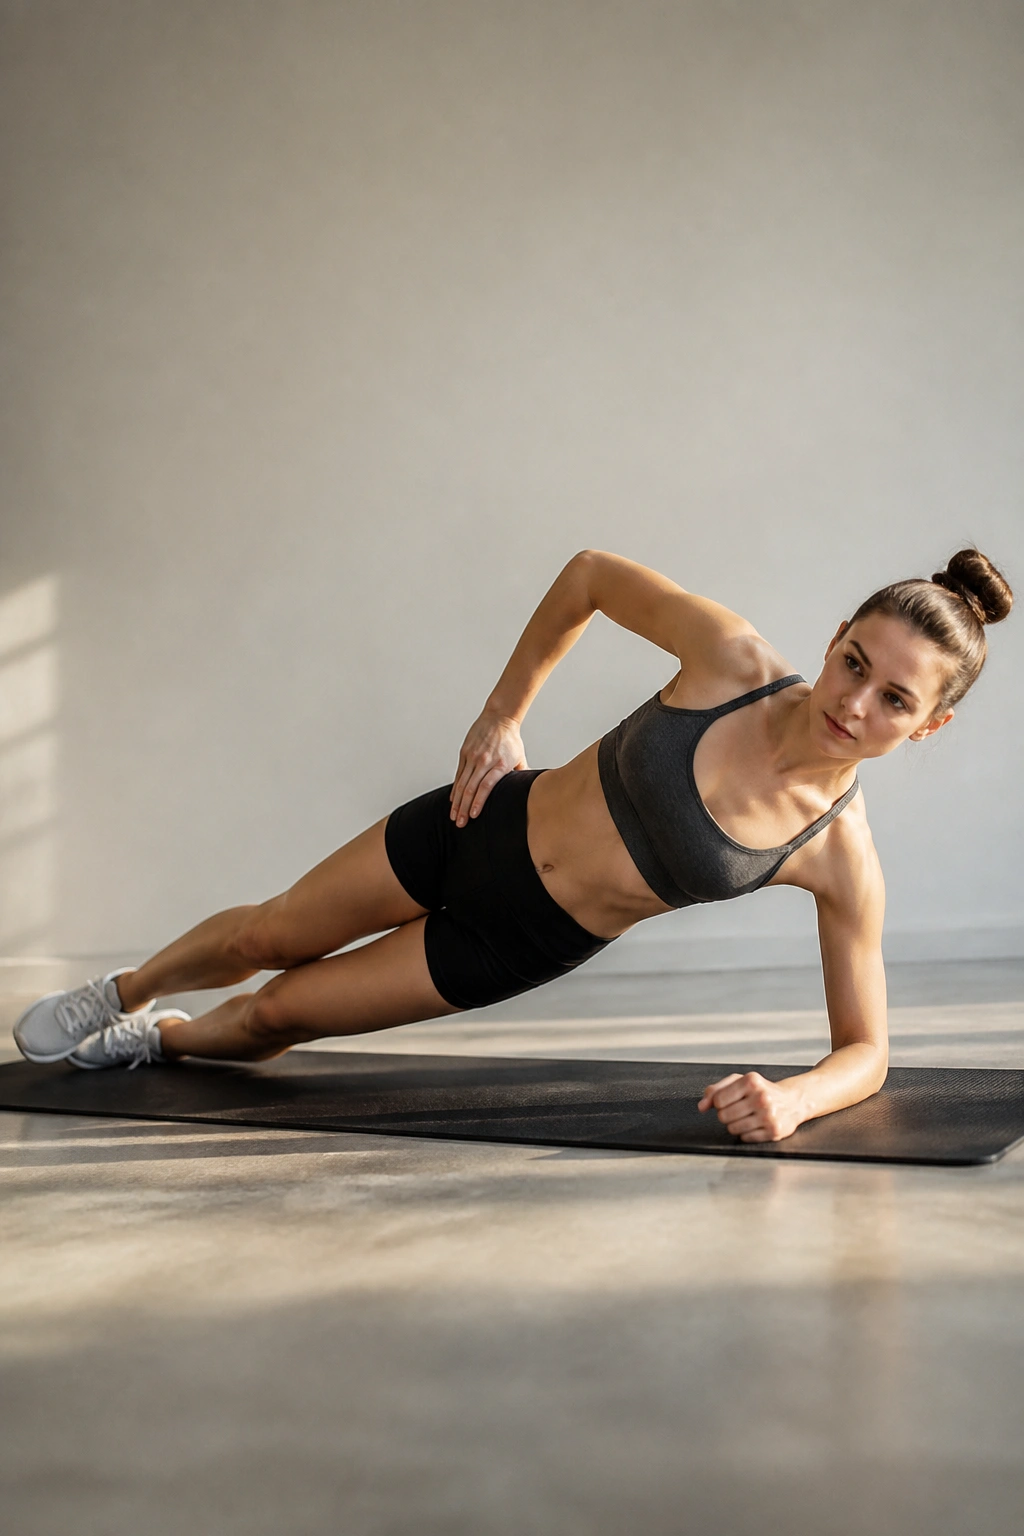
Why bother with a side plank when a front plank already feels demanding? Because the side plank hits the side core and the outer hip in a way the front plank simply can’t.
Lie on one side, stack the feet or place the lower knee down for a lighter version, and prop yourself up on the forearm with the elbow under the shoulder. Lift the hips so your body forms a straight line from head to heels, or head to knees if you’re using the easier setup.
The goal is not a heroic hold. It’s a clean line and steady breathing. Start with 10 to 20 seconds per side if needed, then build from there. If the shoulder gets cranky, shorten the set and check your elbow position. Too far forward or too close can both make it ugly.
A side plank can feel awkward for the first few tries. That’s normal. Side-body strength often lags behind front-core strength, and this move exposes that gap in a hurry.
12. Superman Hold
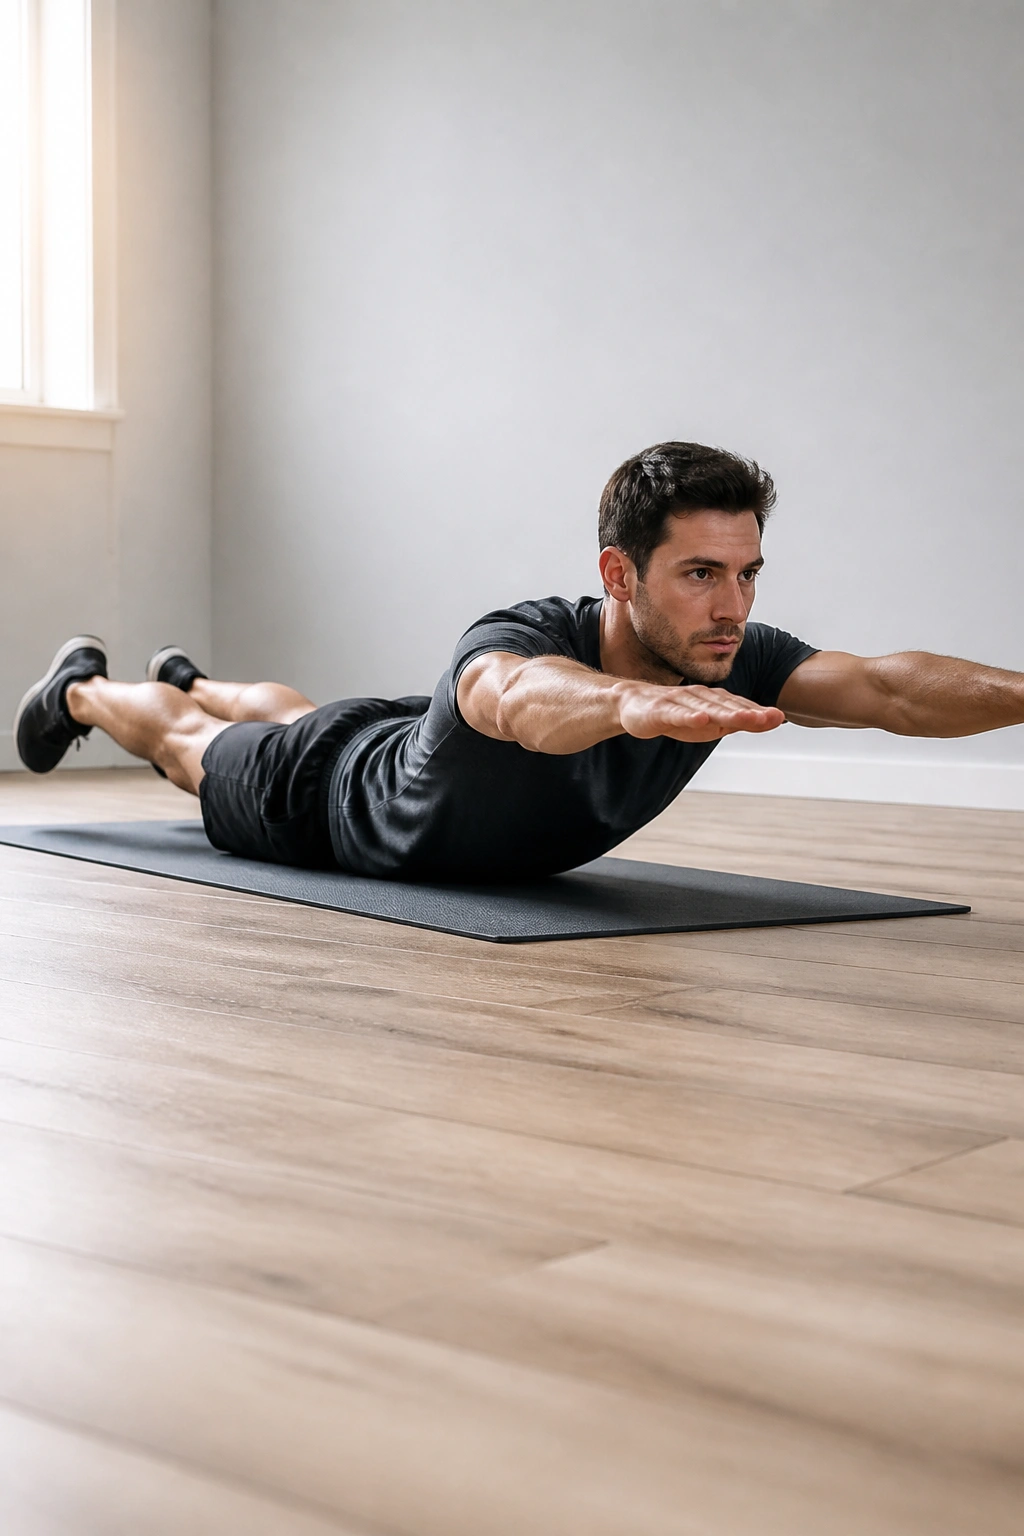
Lie face down, reach your arms forward, and lift the chest and thighs just a little off the floor. Not a giant arch. A small, controlled hover. The point is to wake up the back line—glutes, upper back, spinal muscles—without turning the low back into a hinge.
Your neck should stay long, not cranked upward like you’re trying to see the ceiling from the floor. Keep the lift modest and the squeeze gentle. If the movement feels pinchy in the lower back, lower the range or skip it for the day.
This is one of those exercises where less is more. A 5 to 15 second hold done well can tell you a lot about your posterior chain. You’ll feel the upper back work first, then the glutes, then the whole trunk settling in.
One honest note: not every back likes this movement. That’s fine. Small lifts are enough, and sometimes a glute bridge or bird dog is the better choice.
13. Split Squat
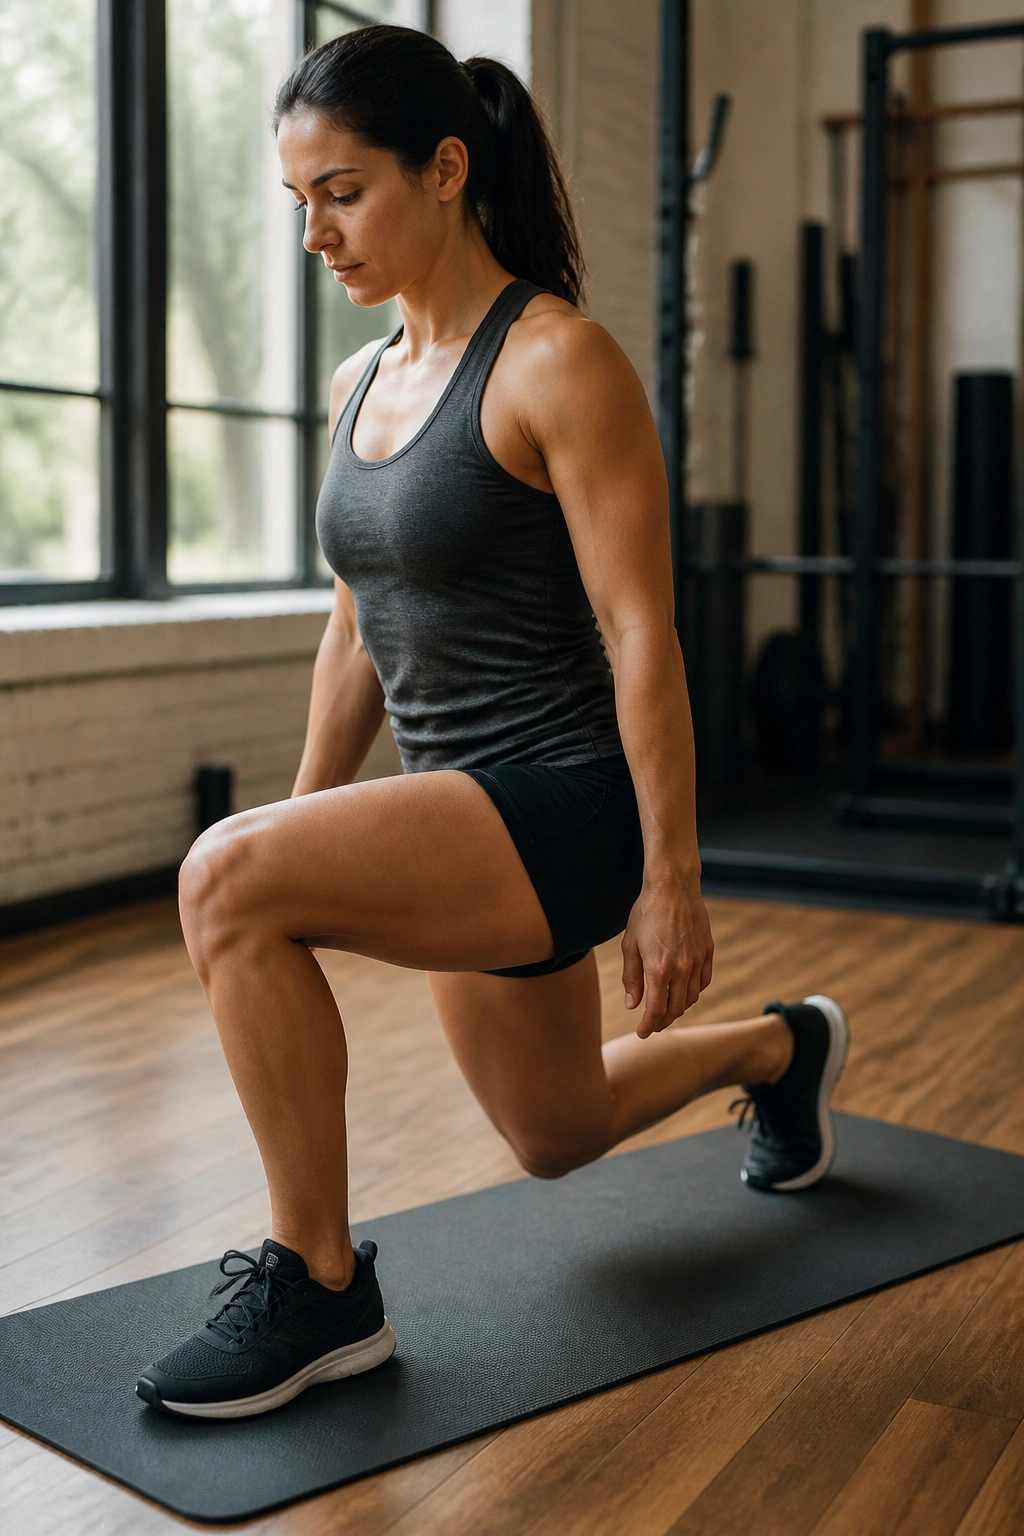
A split squat is a stationary lunge, and that small difference matters. Because your feet stay planted, the move is easier to control and easier to load with your own body weight.
Take a long stance, lower straight down, and keep the front heel rooted. The back heel stays lifted. If you’ve ever felt wobbly in reverse lunges, split squats often feel more stable because the setup doesn’t require that step back every rep.
Shorten the Stance if Your Knees Grumble
- Keep the front foot flat.
- Let the back knee travel down, not forward.
- Use a wall or chair lightly for balance.
- Shorten the range if the front knee feels cranky.
The torso can lean slightly forward, especially if you want more glute involvement. That’s not cheating. It’s normal mechanics. What you want to avoid is collapsing into the front hip or bouncing off the bottom like a sprung toy.
Split squats are plain work. No sparkle. Lots of value.
14. Bear Crawl
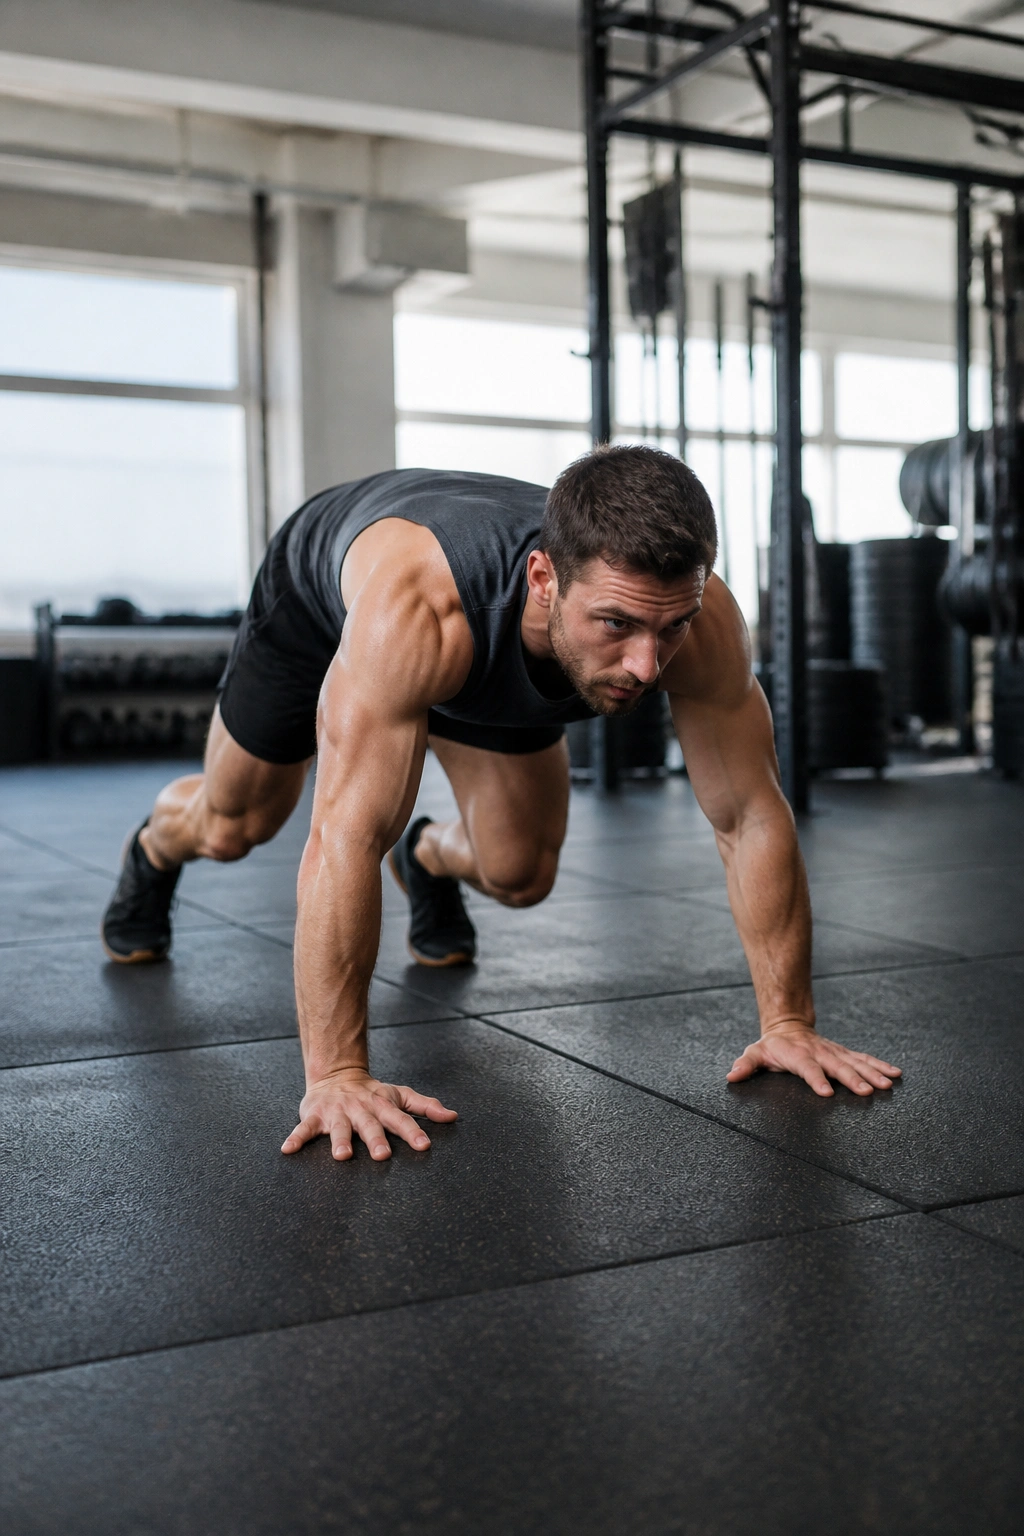
A bear crawl looks playful until your shoulders and abs realize it’s not a game. Then it turns into a full-body drill that lights up coordination, core strength, and shoulder stability all at once.
Start on hands and knees, tuck the toes, lift the knees about one to two inches off the floor, and crawl forward with opposite hand and foot moving together. Keep the back flat and the steps small. Think smooth and quiet, not fast and noisy.
The hips should stay low enough that you feel tension through the trunk, but not so low that your knees drag or your back sags. Five to ten yards is plenty if you’re crawling slowly. Twenty to 30 seconds works too.
A bear crawl is useful because it forces the body to organize itself under movement. That’s different from a static plank. It’s also weirdly humbling. Good. Humbling exercises tend to work.
15. Jumping Jack
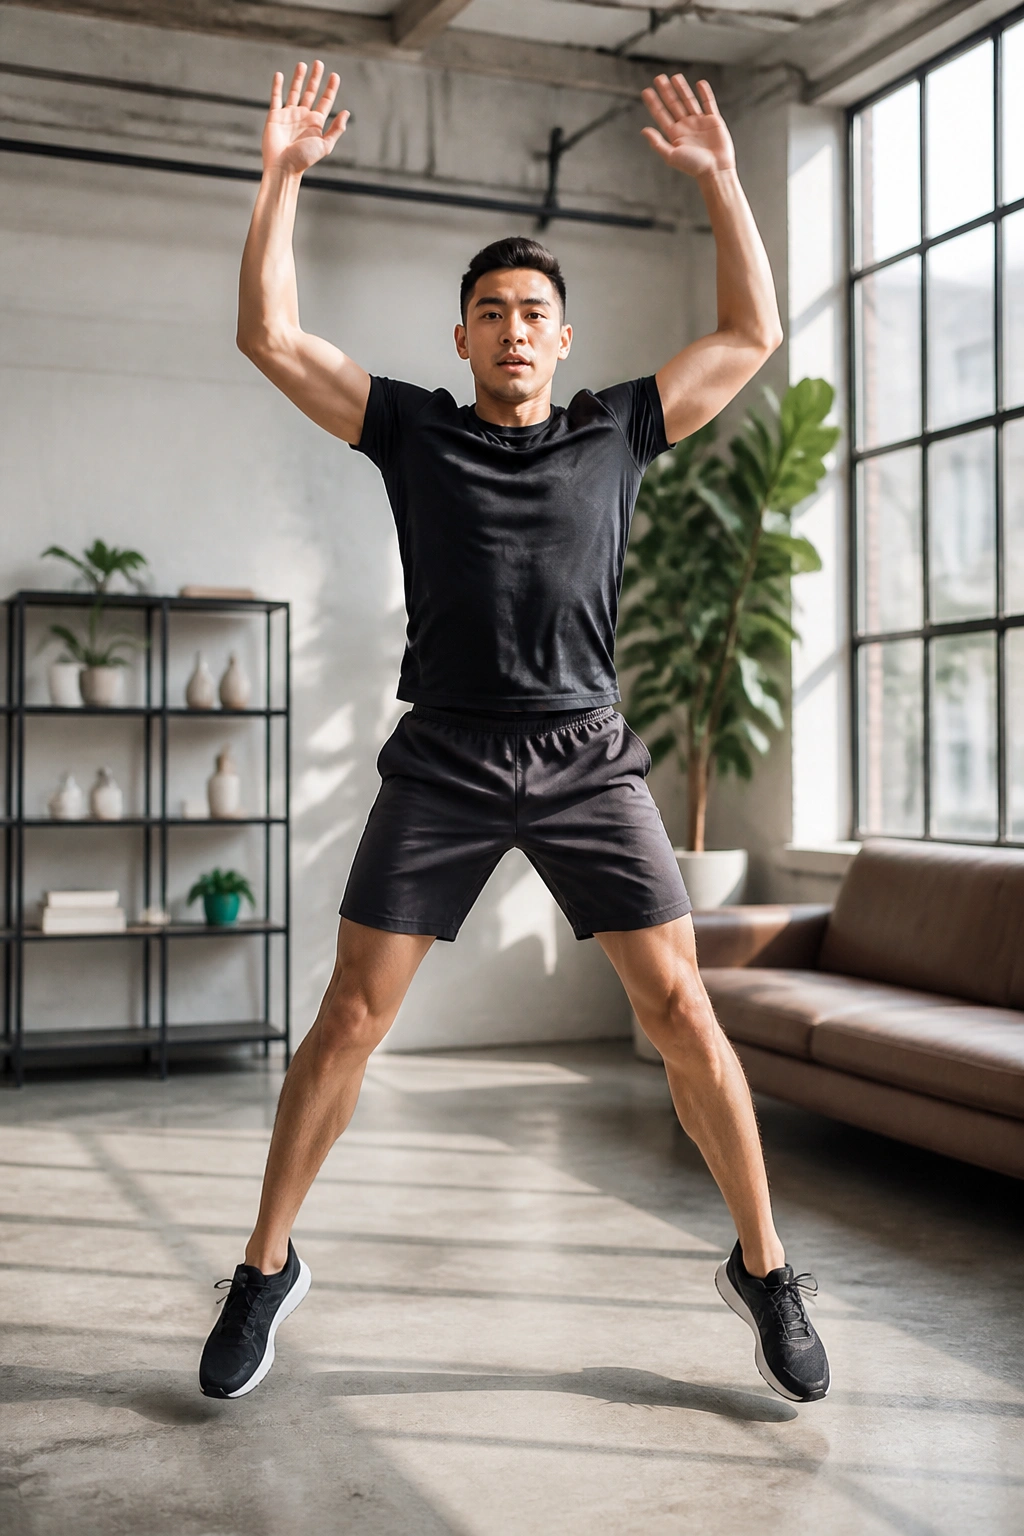
Old-school still works. Jumping jacks raise the heart rate, warm up the joints, and get the arms, hips, and ankles moving without needing anything but space.
Stand tall, jump the feet apart while the arms sweep overhead, then spring back to the start. If impact bothers your knees or ankles, step one foot out at a time and lift the arms in the same rhythm. That low-impact version still does the job.
Use jumping jacks at the start of a workout, between strength rounds, or as a quick way to wake up after sitting for too long. Thirty to 60 seconds is usually enough to feel the temperature rise and the breathing change.
They’re not flashy. They don’t need to be. Sometimes the right move is the simple one that gets you moving before your brain has time to bargain.
16. Hollow Hold
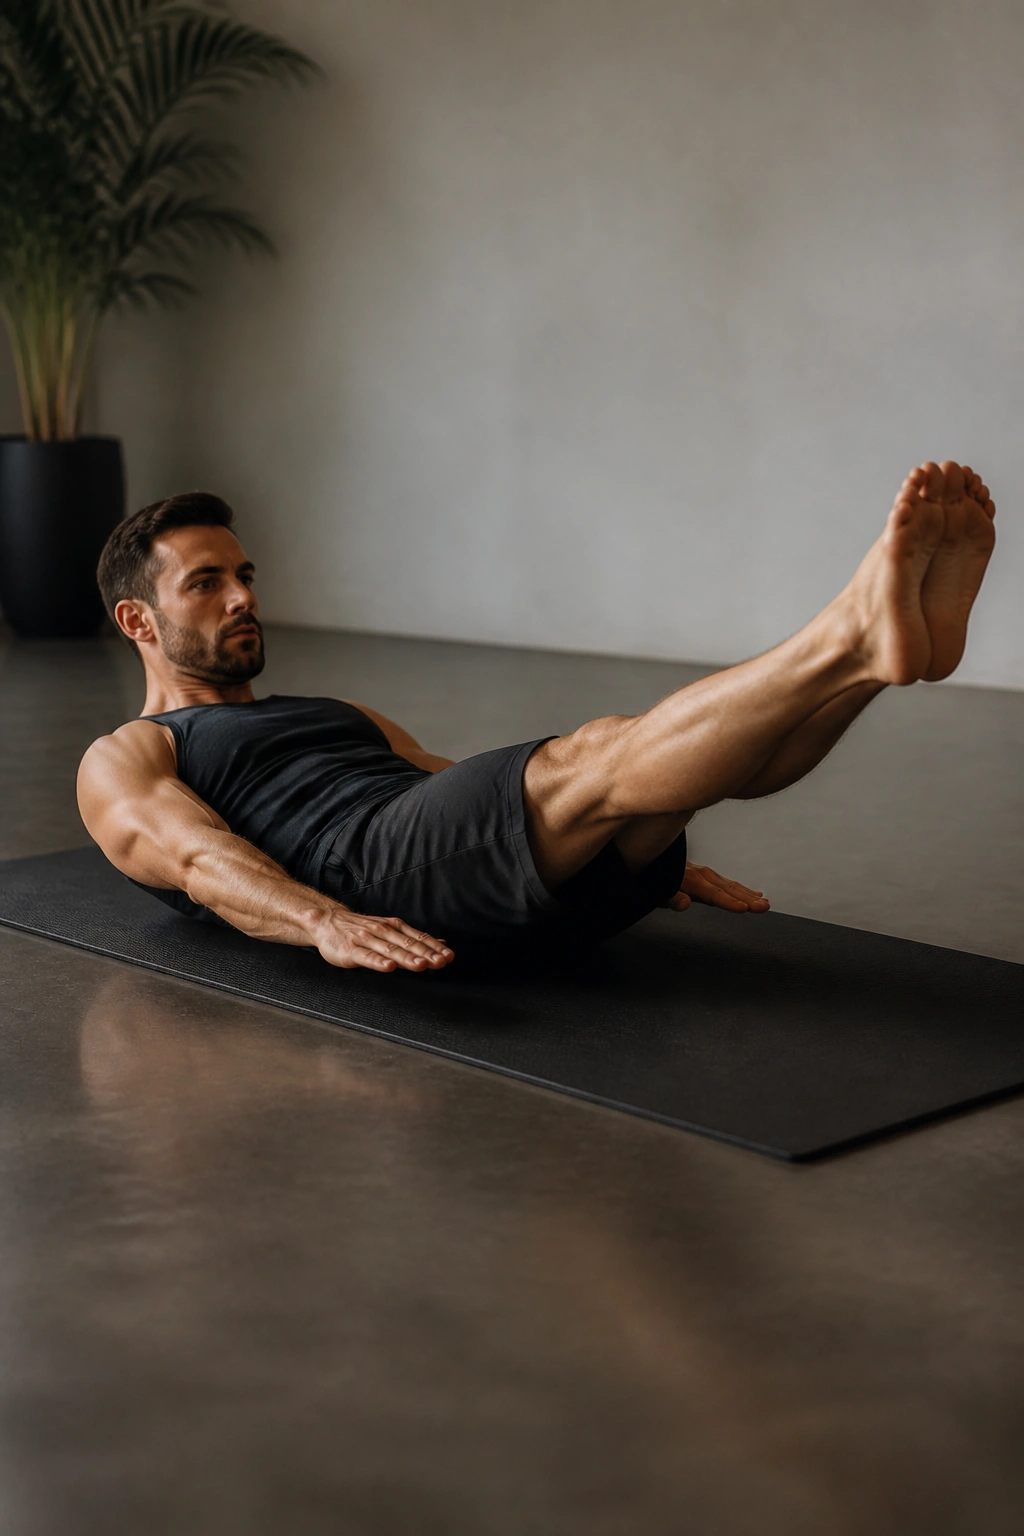
Why do gymnasts and serious core programs love the hollow hold? Because it teaches you to brace the front of the body while keeping the low back pinned down.
Lie on your back, press your lower back into the floor, and lift your shoulders and legs off the ground. Arms can reach overhead if you’re strong enough, or stay by your sides if you’re not. The key is the same either way: the ribs stay tucked and the low back stays heavy.
Make It Easier
- Bend the knees and keep the shins parallel to the floor.
- Keep the arms by your sides instead of overhead.
- Lift the shoulders a little higher if the neck feels tense.
- Hold for 10 to 20 seconds, then rest.
This is one of those core moves that looks tiny and feels serious. If your back arches, stop, reset, and shorten the lever. That’s not failure. That’s proper scaling. A clean hollow hold beats a longer one done badly.
17. Chair Dip
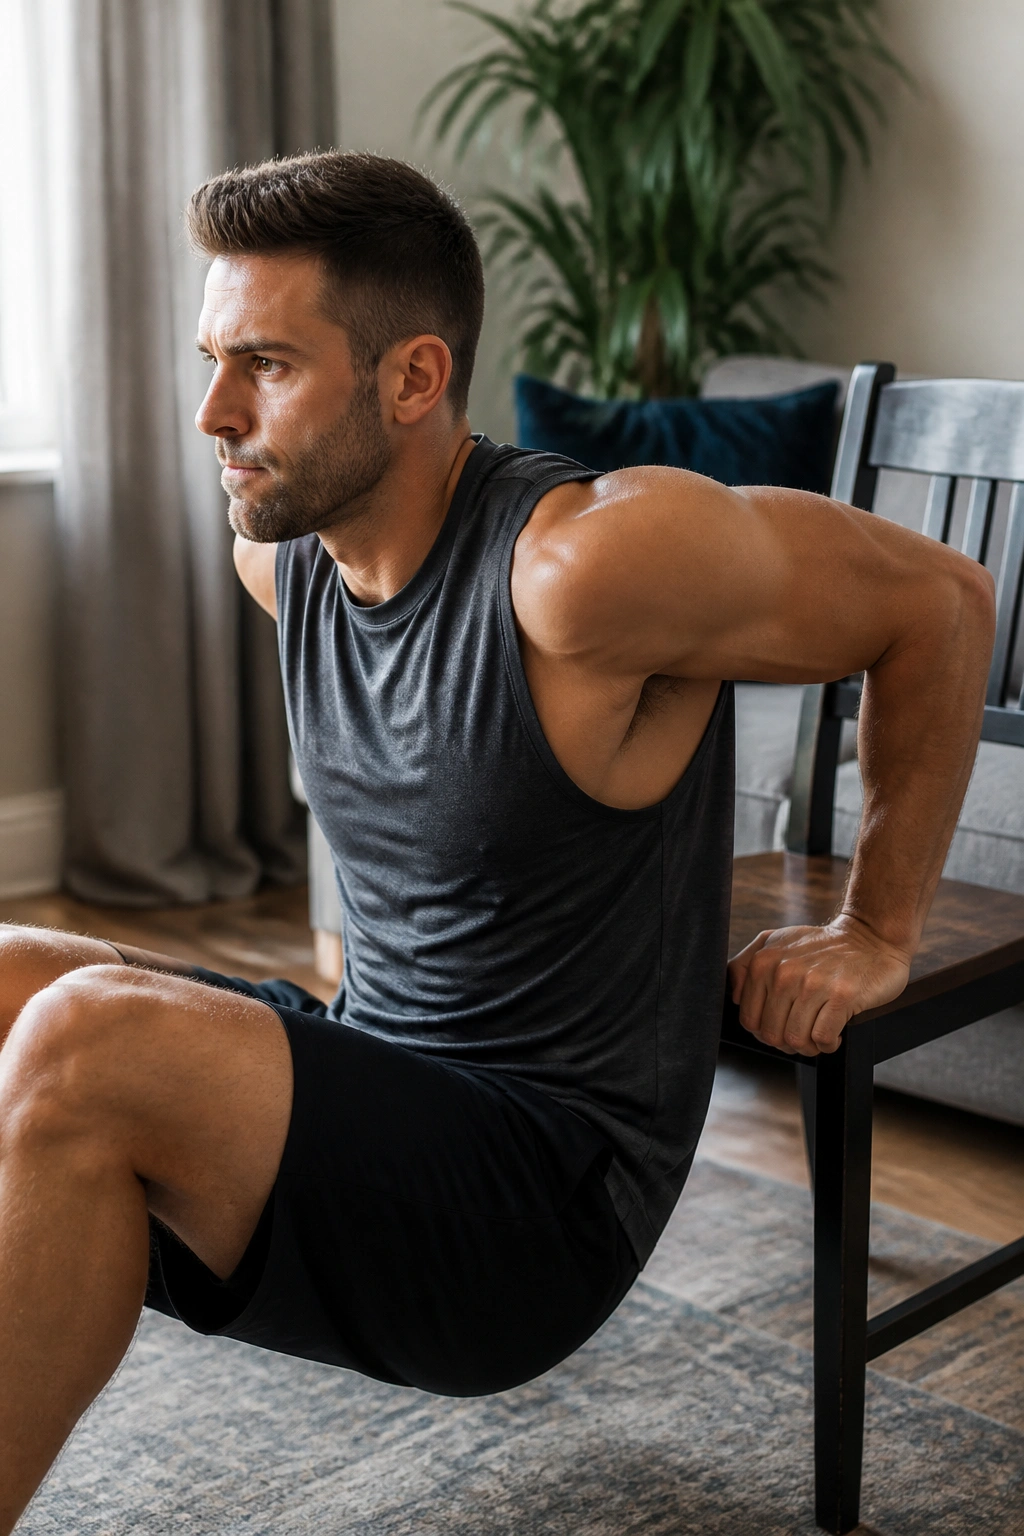
Chair dips can build triceps and shoulder strength, but they ask for a little respect. A sturdy chair is non-negotiable. So is a short range of motion if your shoulders tend to complain.
Sit on the edge of the chair, place your hands beside your hips, walk your feet forward, and slide the hips off the edge. Bend the elbows to lower a few inches, then press back up. Keep the shoulders down and the elbows pointing back rather than flaring wildly out to the sides.
Keep the Range Short
- Lower only until the front of the shoulder still feels comfortable.
- Keep the wrists near the shoulders.
- Use bent knees to make the press easier.
- Skip the move if the chair shifts or tips.
This exercise is not for showing off. It’s for controlled elbow extension. If your shoulders feel pinchy, move on to incline push-ups or a close-grip push-up variation instead. A move that hurts is not somehow more honest than a move that works.
18. Hip Hinge Good Morning
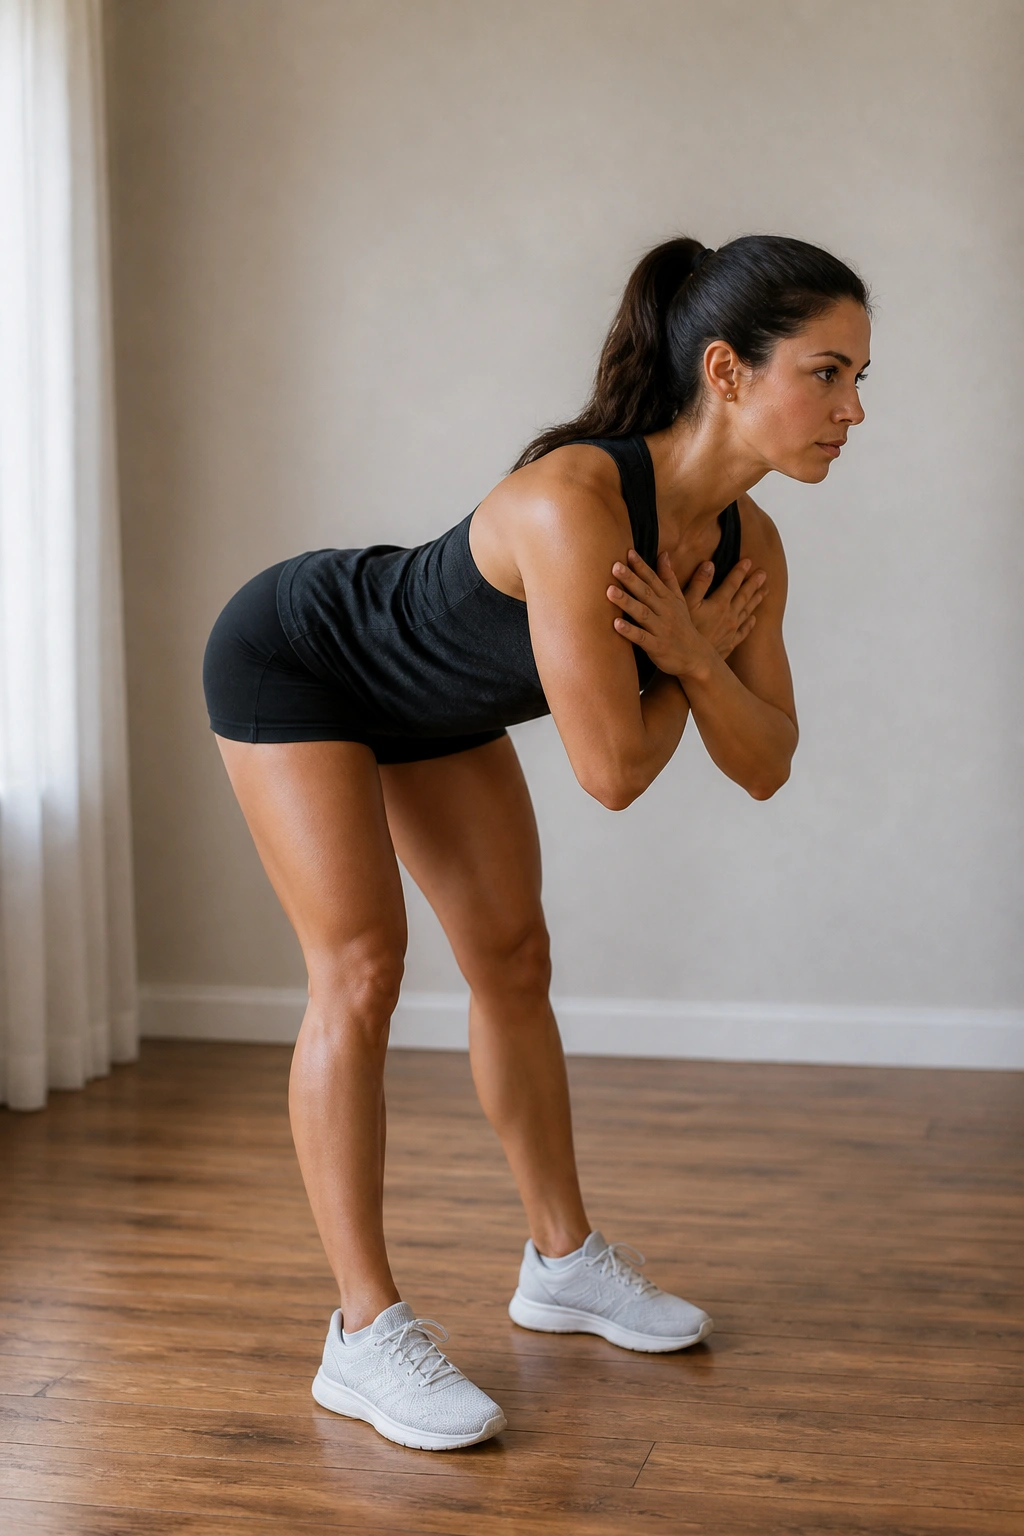
The hip hinge is one of the most useful movement patterns around, and most people learn it badly at first by squatting when they think they’re hinging. A good morning fixes that.
Stand with your feet about hip-width apart, soften the knees, and push the hips back as if you’re trying to close a car door with your butt. Keep the spine long and the chest angled forward without rounding. Then drive the hips forward to stand up tall.
The knees bend a little, but they do not become the main event. The hips do. That’s what makes the hinge different from the squat. It’s a small detail, and it matters a lot for teaching hamstrings and glutes how to do their part.
You can cross your arms over your chest to make the pattern easier to feel. If you have a broomstick or dowel, it helps, but it isn’t required. The bodyweight version still teaches the shape, which is the point.
19. Inchworm
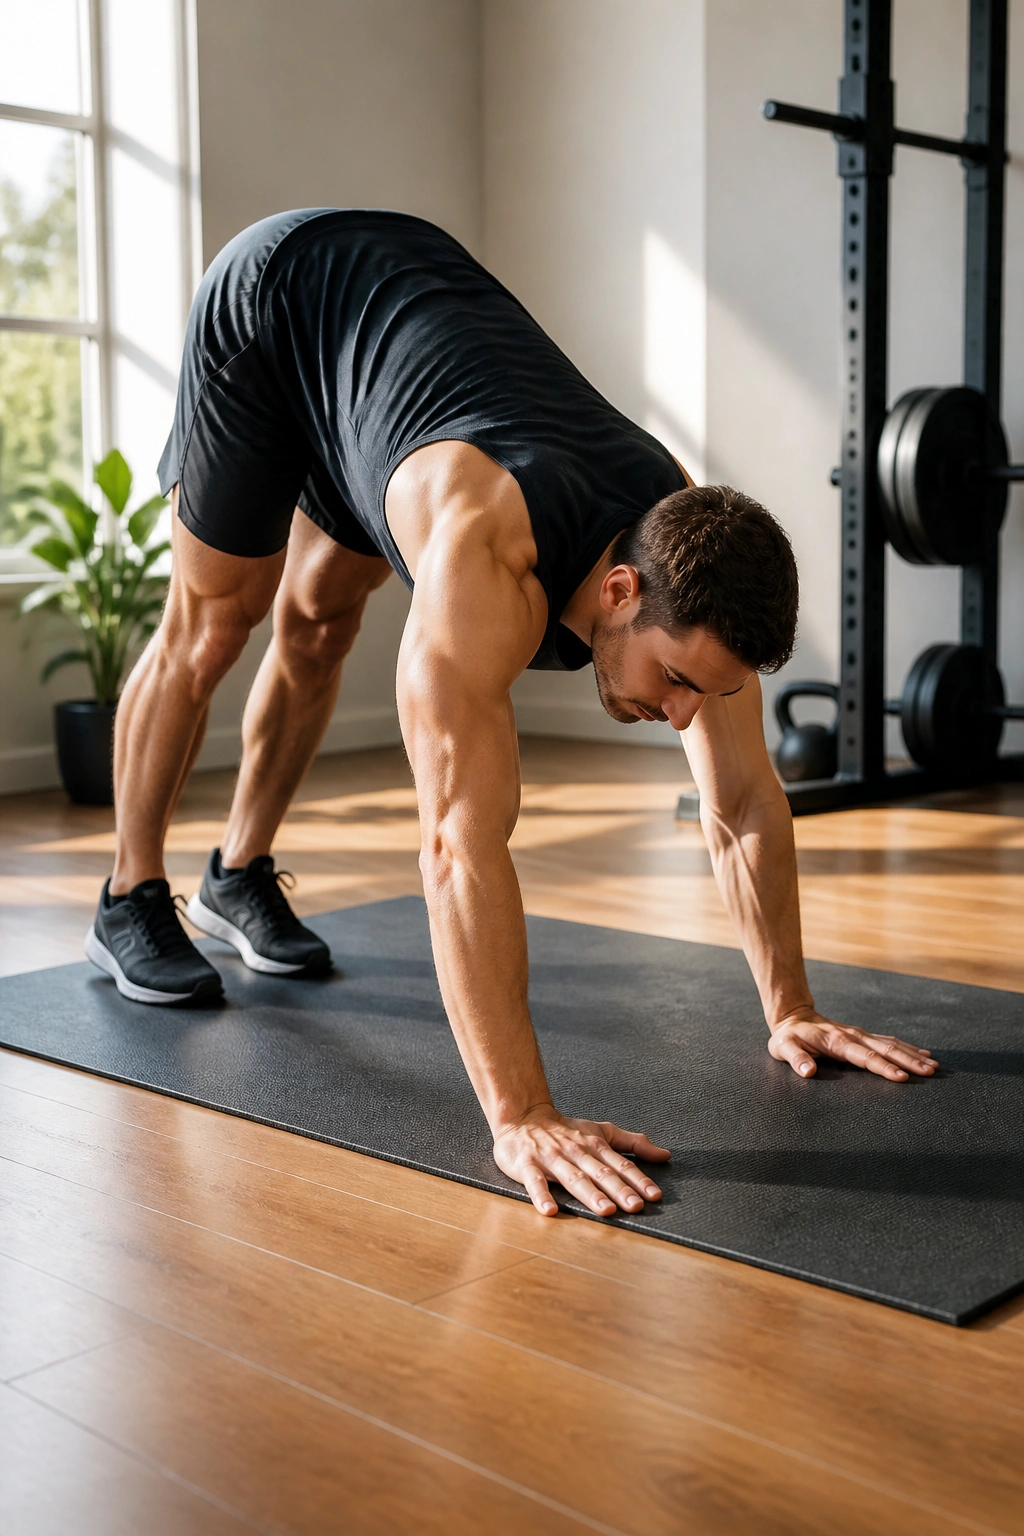
The inchworm is one of those moves that feels like a warm-up and a strength drill at the same time. Stand tall, fold at the hips, walk your hands out to a plank, then walk them back to standing.
It’s simple, but it reveals a lot. Tight hamstrings complain. Weak shoulders wobble. A sloppy core shows up quickly. That’s why it belongs in a body weight routine.
Use It as a Moving Warm-Up
- Bend the knees as much as needed on the way down.
- Keep the hands moving forward until you reach a strong plank.
- Pause for a second if the shoulders feel rushed.
- Walk the hands back in under control instead of yanking yourself upright.
If the full walkout feels too long, stop before the plank and return. That’s fine. The aim is to move with control, not to win some imaginary mobility contest. When done well, inchworms grease the whole system for the rest of the workout.
20. Squat Thrust
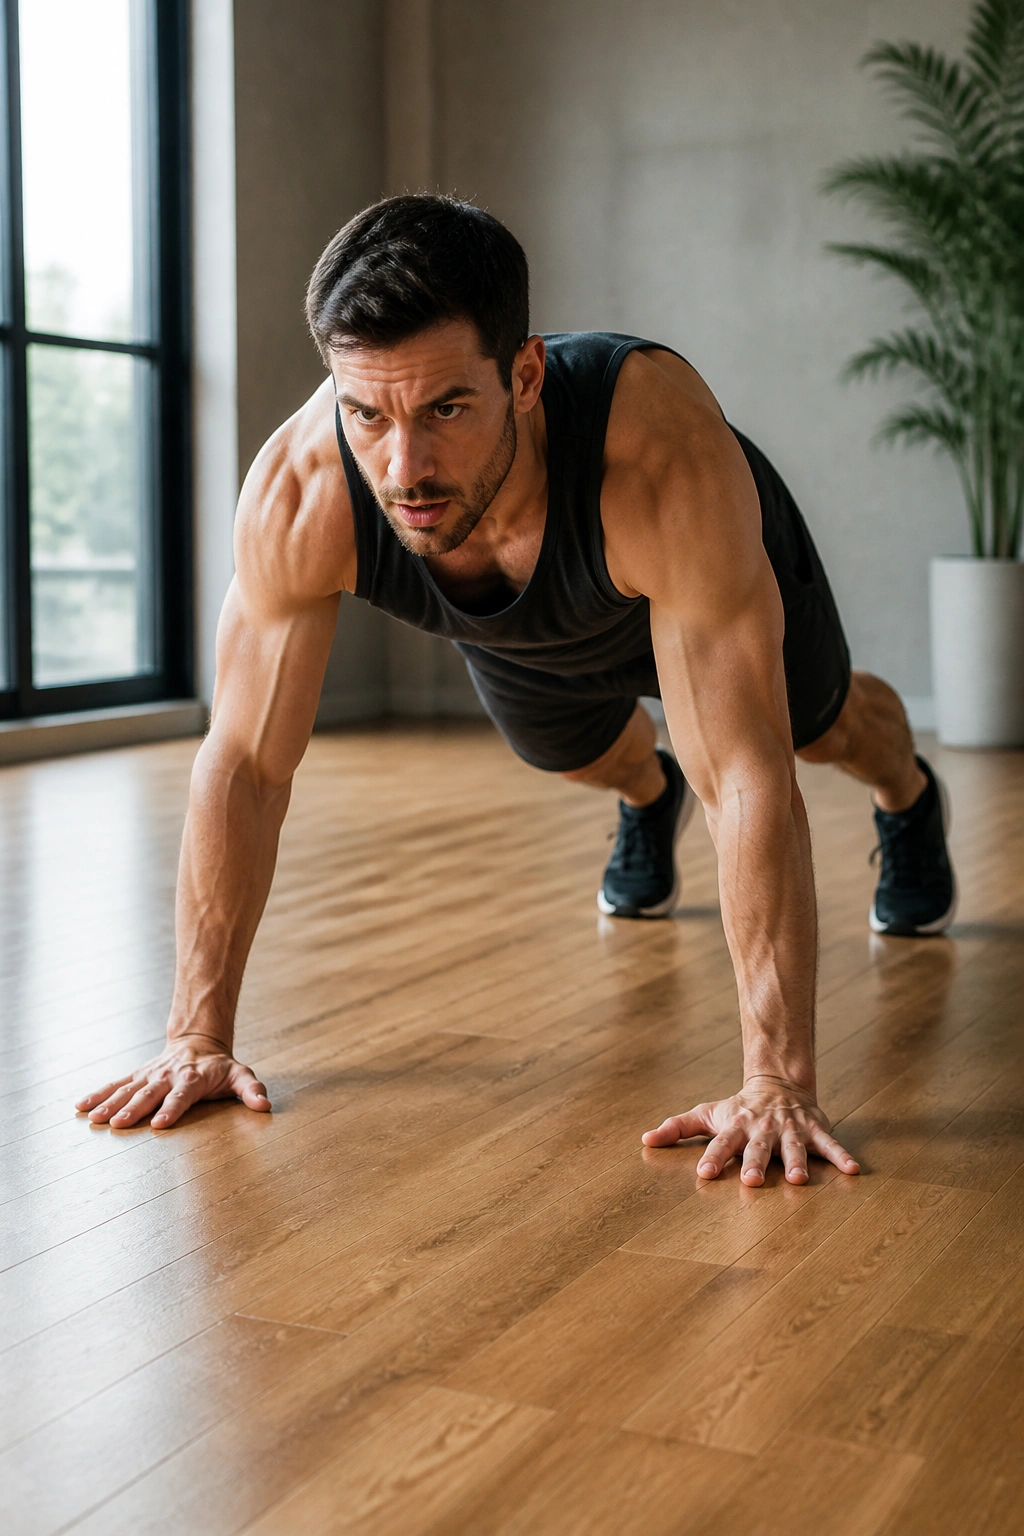
A squat thrust isn’t glamorous, and that’s part of why I like it. It gets the heart rate up, trains the hands-to-floor transition, and gives you a simple no-frills conditioning tool without the push-up and jump that make a burpee feel like a punishment.
Start standing, squat down, place your hands on the floor, and step or hop your feet back into a plank. Then step or hop them back to your hands and stand. That’s the basic version. If you want more pace, move quicker. If your joints prefer less impact, step instead of jump.
The squat thrust sits nicely between strength and cardio. It’s useful when you want the whole body to work but don’t want the extra shoulder fatigue from repeated push-ups. That makes it a smart finisher and a good low-impact burpee substitute.
Put three or four of these moves together—say squat, incline push-up, reverse lunge, plank, and squat thrust—and you already have a solid session. Stack six, slow the pace a little, and the workout gets real fast.
