



A good body weight workout at home does not need a bench, a cable machine, or a room that looks like a gym. It needs a floor, a little space, and moves you can do with control when your lungs start to complain.
That is why body weight workouts at home hold up so well. You can make them easier or harder by changing tempo, range, pauses, or the number of legs and arms doing the work. Three slow, clean reps can be harder than ten rushed ones. Messy form is cheap. Good tension is not.
A kitchen chair, a wall, and a towel on the floor open up more options than most people think. The catch is that home training punishes sloppy habits fast: if your knees cave in, your elbows flare, or your lower back takes over, there is nowhere to hide.
So the smart move is to build around movements that are simple, honest, and easy to scale. Squats, push-ups, lunges, planks, crawls—nothing flashy, but every one of them earns its spot when you know how to use it. The first one is the simplest, and it still deserves respect.
1. Air Squats for Stronger Legs and Hips
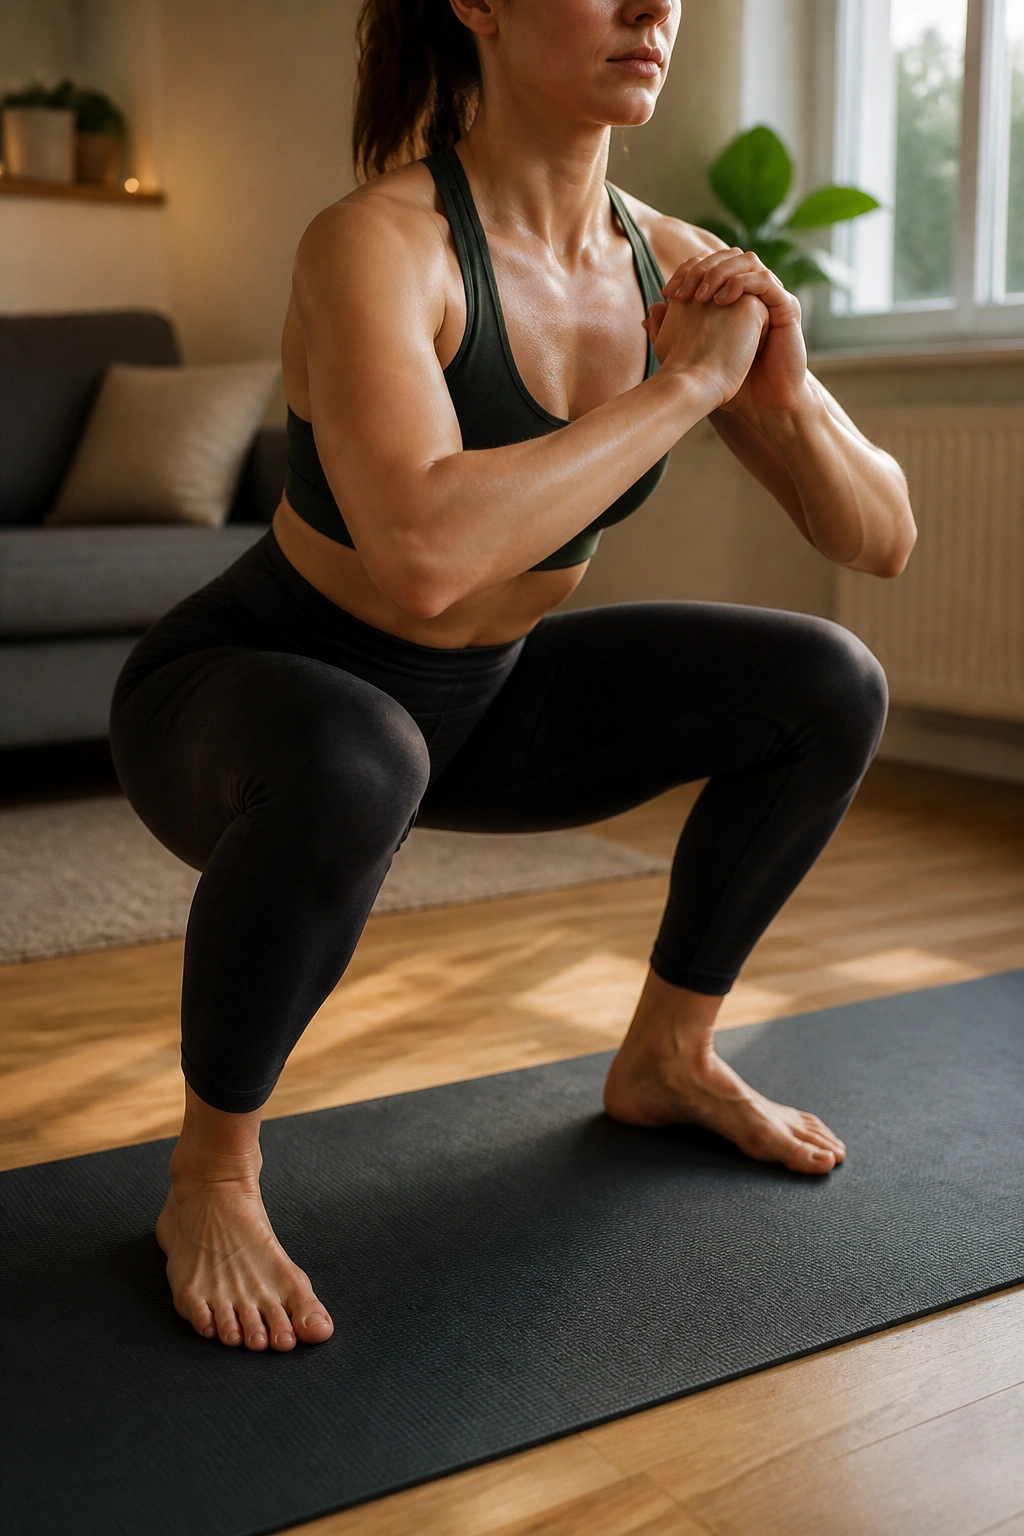
Air squats look basic until you do them slowly. Then they turn into the kind of leg work that makes you notice every weak link: ankles, hips, core, and even the way you balance your weight through your feet.
Stand with your feet about shoulder-width apart, sit your hips back, and keep your whole foot on the floor. The best cue is simple: lower under control, then stand up without bouncing. If your heels pop up or your knees collapse inward, cut the depth a little and clean up the movement first.
How to Make Squats Worth Your Time
A squat is only useful if it looks the same on rep 1 and rep 15. Once your torso starts folding like a lawn chair, the set is done.
- Do 3 sets of 10 to 20 reps with 45 to 60 seconds of rest.
- Lower for 3 seconds to make each rep harder without adding weight.
- Pause for 1 full second at the bottom if you want more control.
- Sit back to a chair if full-depth squats feel sloppy.
Pro tip: put your hands in front of you at chest height. It helps you stay upright and keeps the movement honest.
If your knees feel cranky, squat only as far as you can while keeping your feet flat and your spine calm. That small adjustment matters more than chasing depth for its own sake.
2. Push-Ups for Chest, Shoulders, and Arms
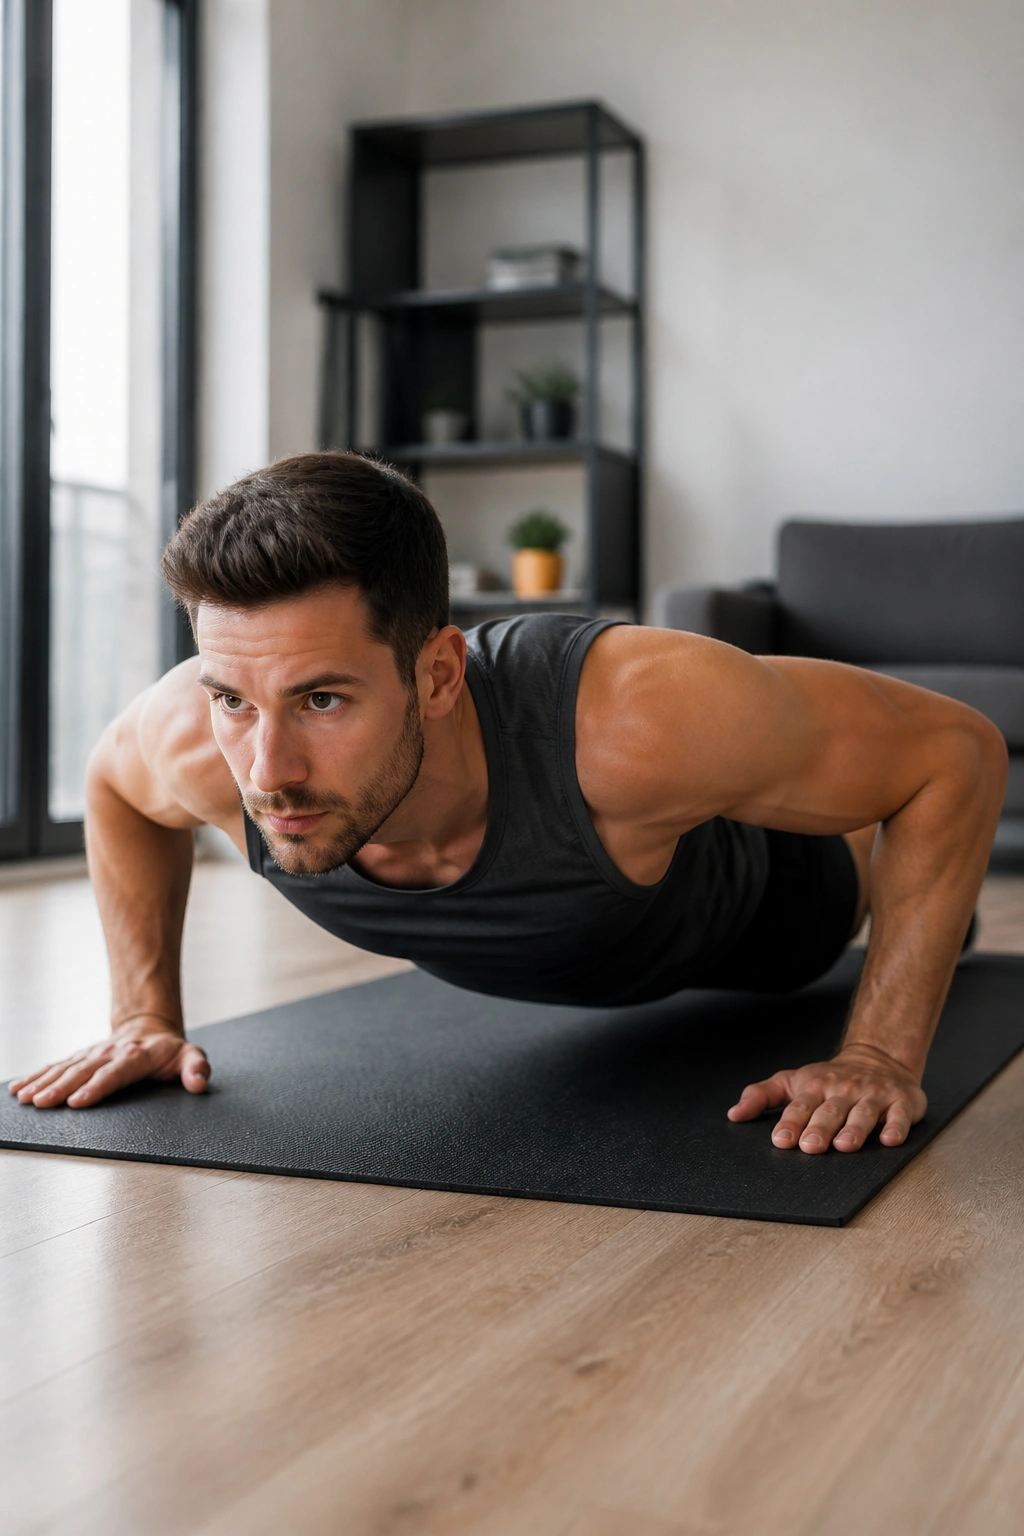
You do not need a gym to train your upper body well. You need push-ups done with enough tension that your torso stays straight and your shoulders do not wander all over the place.
A clean push-up starts with hands under or slightly wider than your shoulders, body in one line, and elbows tracking at a comfortable angle—not flared out like wings. If your hips sag first, the set is already lost. Start on a wall, countertop, or couch if the floor version is too much right now. That is not cheating. That is smart scaling.
Most people rush push-ups. Bad move. Lower for a count of two, touch the floor lightly or stop just above it, then press back up with control. If you can do 8 to 15 clean reps, you are in a useful range. If you can do 20 without strain, slow the descent or pause at the bottom.
A tiny detail matters here: keep your neck neutral and look a few feet ahead of your hands. Looking straight up strains the neck, and looking straight down tends to collapse the upper back.
3. Reverse Lunges for Balance and One-Leg Strength
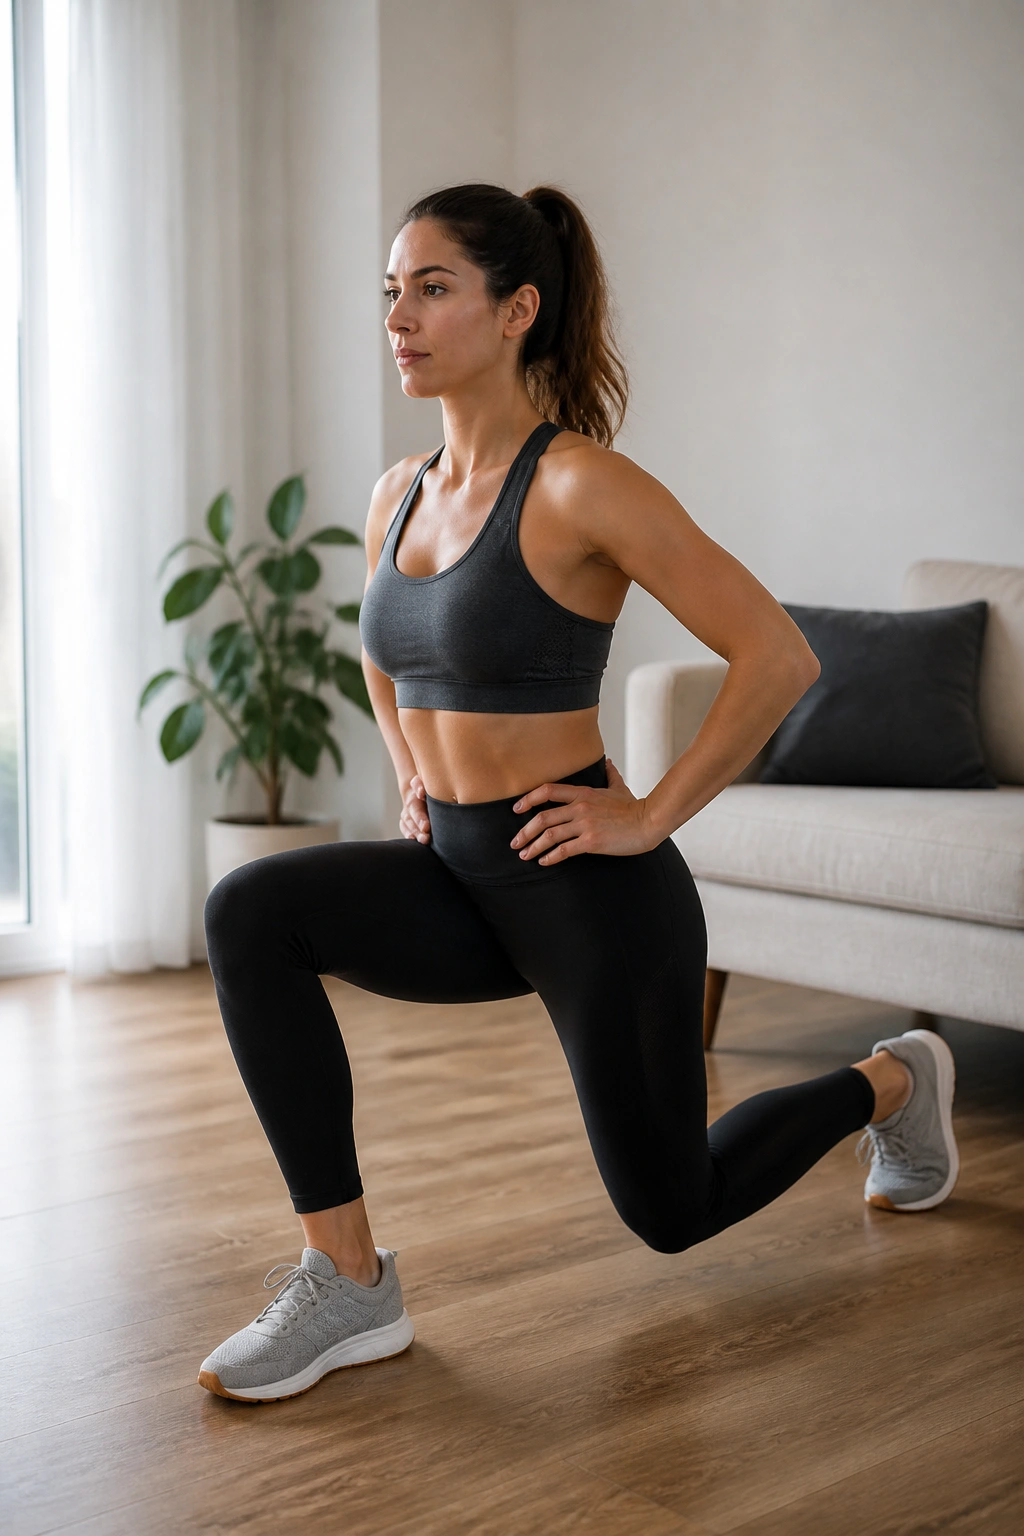
Why do reverse lunges feel kinder than forward lunges for many people? Because stepping back usually gives you more control, less knee drama, and a cleaner way to load the front leg.
Step one foot straight back, drop the back knee toward the floor, and keep most of your weight in the front heel and midfoot. Your front shin can move a little, but it should not shoot way forward while your heel lifts. The rep should feel steady, not wobbly. If you rush the return, the whole thing turns into a balance drill with poor leg work attached.
A Clean Lunge Looks Like This
- Step back far enough that the front knee can bend without the heel lifting.
- Lower until both knees are bent and the back knee hovers near the floor.
- Keep your chest tall and your ribs stacked over your hips.
- Drive through the front foot to stand back up.
Do 8 to 12 reps per side for controlled strength work, or alternate legs for a time-based circuit. If your balance is shaky, hold a wall or chair with one hand. That small support lets your legs do the work instead of your brain worrying about falling over.
Reverse lunges are one of those moves that feel plain until you realize how much they expose. Left side. Right side. Different story on each.
4. Glute Bridges for Hips and Lower Back Support
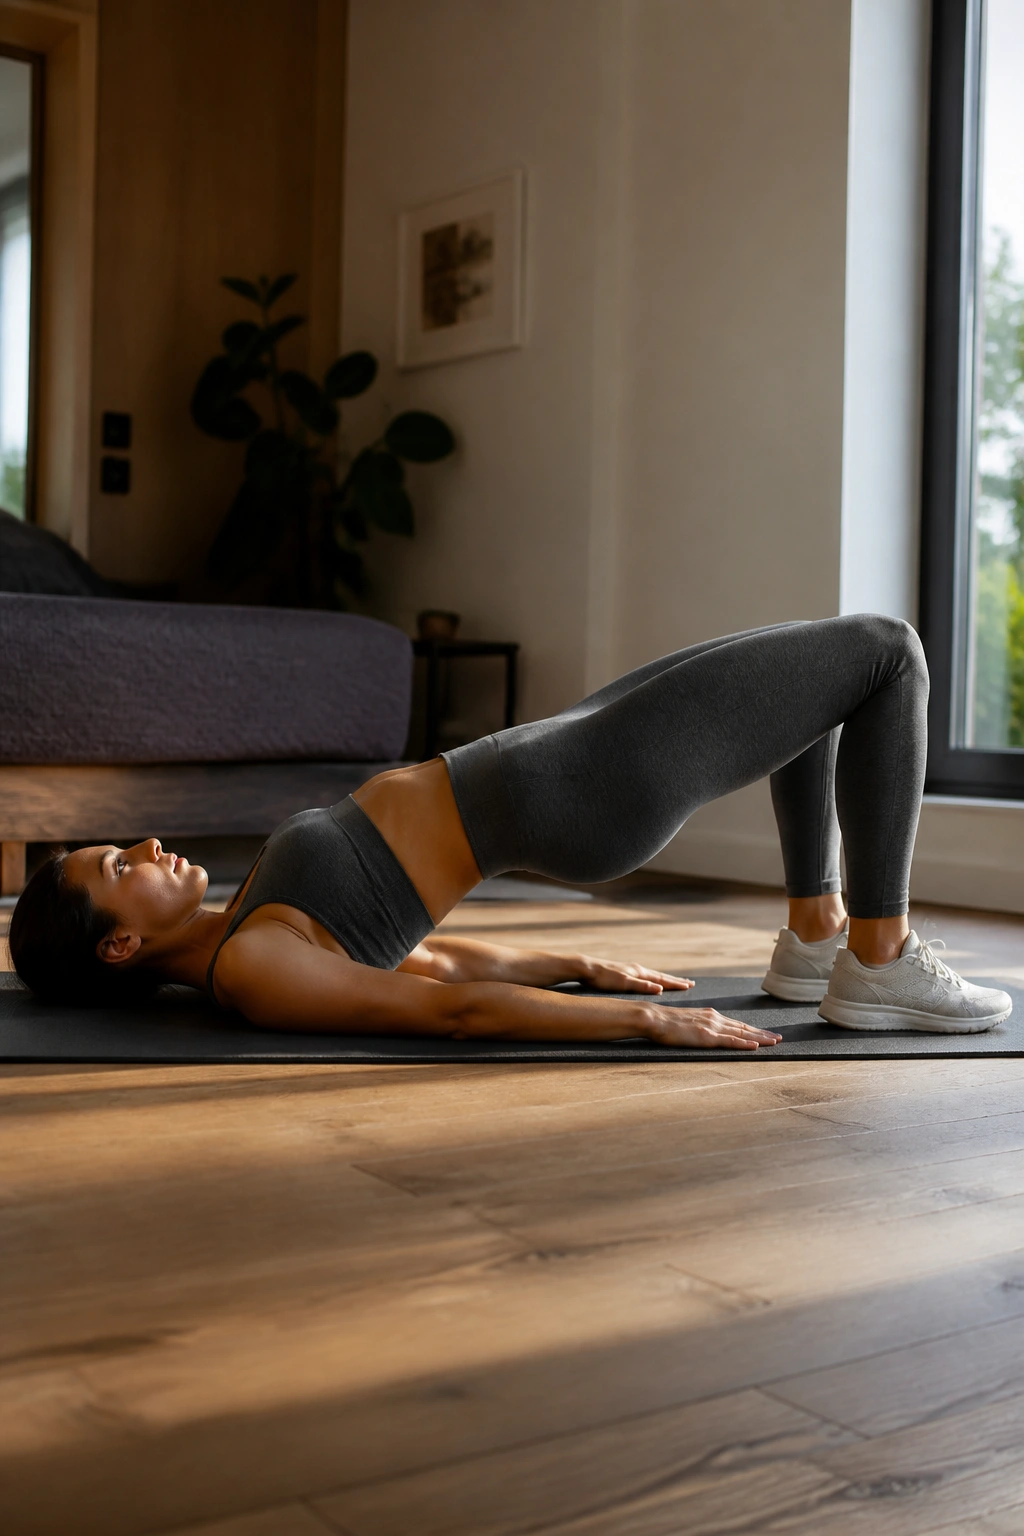
If you sit a lot, glute bridges can feel like a release valve. The move wakes up the muscles that are supposed to extend your hips, and it does it without pounding your knees or your lower back.
Lie on your back with your knees bent and feet flat on the floor. Your heels should be close enough that you can brush them with your fingertips. Press through your heels, lift your hips, and squeeze your glutes at the top for a count of one. Do not throw your ribs up and arch your back to fake the lift. That’s the mistake.
A lot of people feel this in their hamstrings at first. Usually that means the feet are too far away or the glutes are not doing their share. Pull your heels closer and shorten the range if needed. The top position should feel like your hips are fully open, not like your lower back is pinching.
- Do 2 to 4 sets of 12 to 20 reps.
- Add a 2-second hold at the top.
- Try a single-leg bridge when the regular version gets easy.
- Use a folded mat if the floor feels hard on your spine.
A bridge is boring in the best way. It gives you a clear yes-or-no answer about whether your hips are actually helping when you walk, climb stairs, or stand up from a chair.
5. Forearm Planks for Deep Core Tension
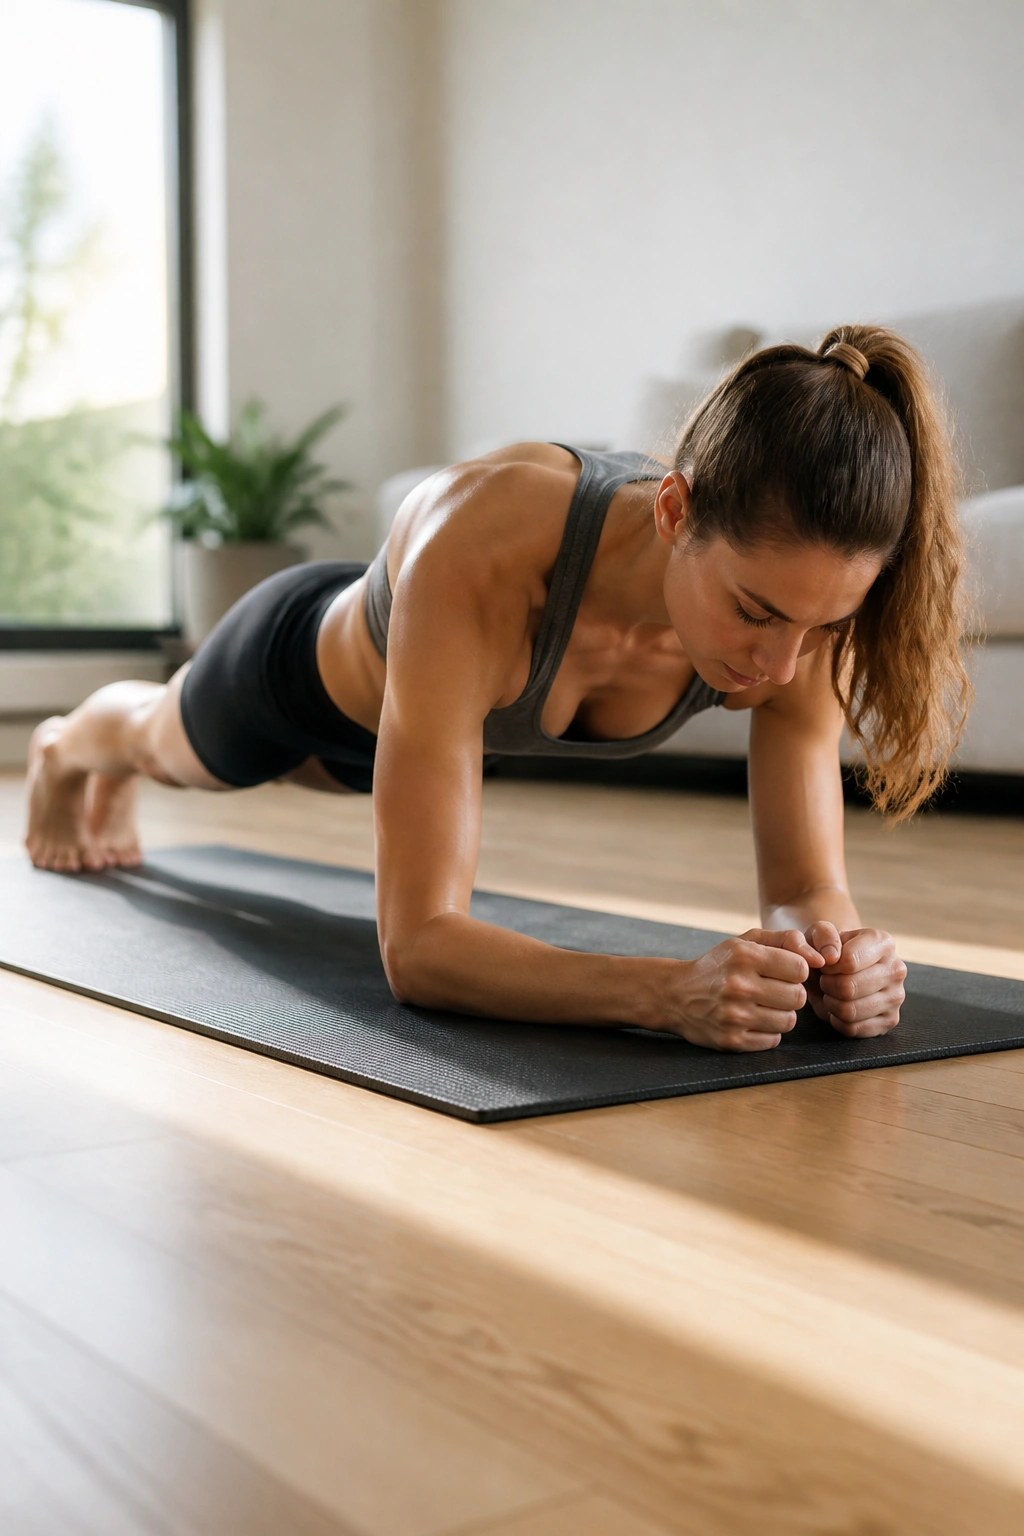
A plank is not a test of how long you can suffer on the floor. It is a test of whether your trunk can stay solid while your breathing stays calm.
Set your forearms on the floor, elbows under your shoulders, and legs long behind you. Tuck your pelvis slightly, squeeze your glutes, and think about pulling your ribs down toward your hips. If your low back starts sagging, stop the set. Time is not the point. Shape is.
The first few seconds should feel manageable. After that, the shake starts. Fine. That tremor is your body working hard to keep everything lined up. Keep breathing through your nose if you can, or take slow controlled breaths through the mouth if that helps more. Holding your breath makes the whole thing worse.
A good starting target is 15 to 30 seconds. Build toward 45 to 60 seconds only if your form stays crisp. If your shoulders get irritated, put your forearms on a couch or sturdy table for an incline plank. Same drill, less pressure.
A lot of people chase long plank holds and miss the point. A shorter, cleaner plank pays off more than a long, saggy one.
6. Mountain Climbers for Fast Cardio at Home
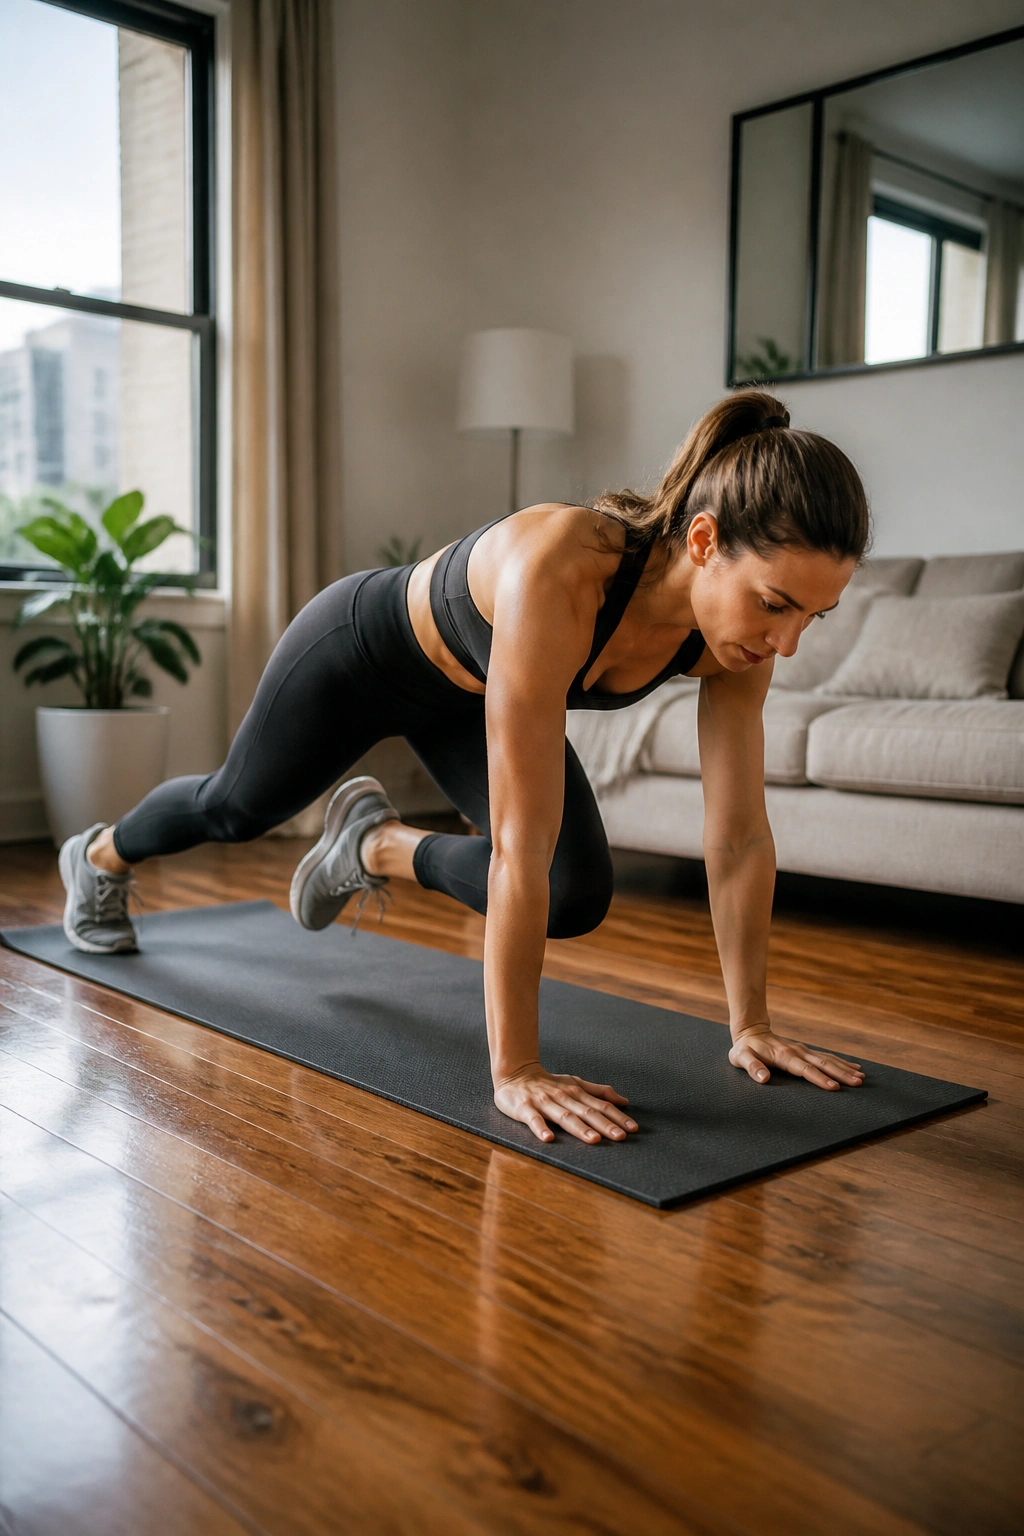
Mountain climbers are what happens when a core exercise decides to act like cardio. They are fast, they’re loud on hard floors, and they make your shoulders, hips, and lungs work at the same time.
Start in a high plank with hands under shoulders. Drive one knee toward your chest, then switch legs in a steady rhythm. The goal is not wild speed. It is controlled speed. If your hips bounce all over the room, shorten the range and slow down.
These feel different from jogging in place because your body has to support itself through your hands. That extra load is why they hit the shoulders and trunk harder than people expect. On a yoga mat, they can feel smooth. On carpet, they may feel a little sticky. That is normal.
Try 20 to 40 seconds of work, then rest for 20 to 30 seconds. If your wrists are touchy, place your hands on a couch or sturdy chair to raise the floor a bit. If you want less impact, step the feet in and out one at a time.
Short sets work well here. One long messy set usually turns into flailing.
7. Pike Push-Ups for Shoulder Strength
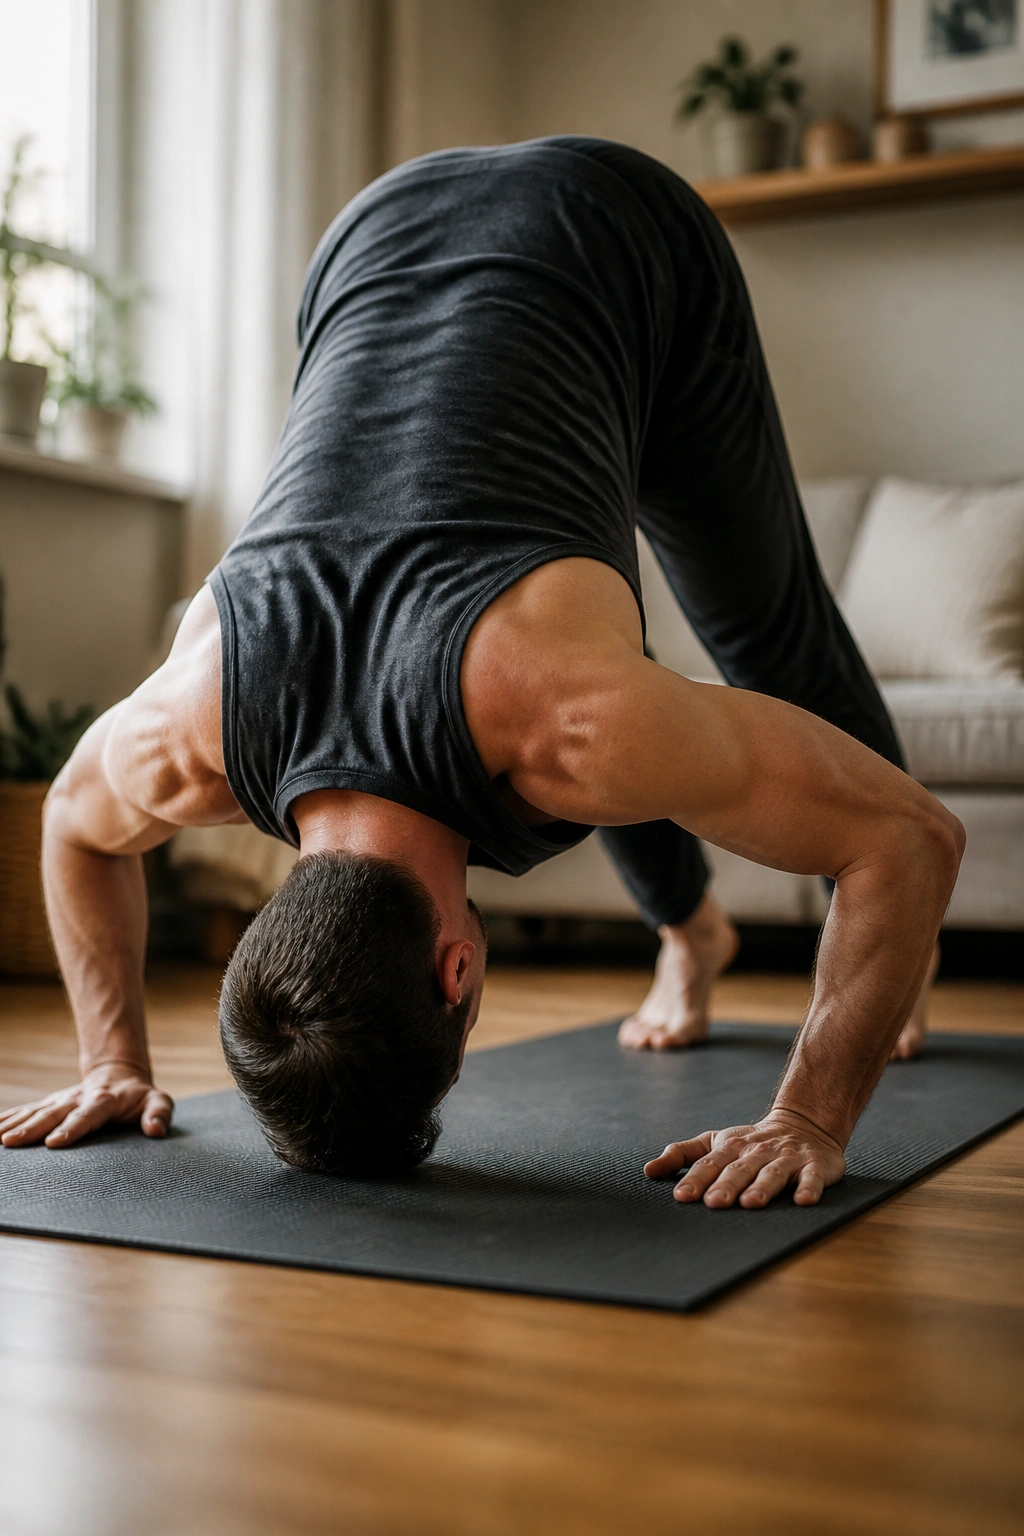
A lot of home routines miss the shoulders completely, and that is a shame because pike push-ups give you a solid overhead pressing pattern without weights.
Start in a downward-dog shape with your hips high and hands planted firmly. Bend your elbows and let the top of your head travel toward the floor between your hands, then press back up. Keep the movement vertical as much as you can. That is what makes it feel like a shoulder press instead of just another push-up.
Make the Angle Work for You
If full pike push-ups are too hard, raise your hands on a couch or use a wall for a wall-supported version. If you want more challenge, put your feet on a chair and make the angle steeper. Small changes matter here.
- Use 5 to 10 reps per set.
- Keep your neck long and relaxed.
- Stop before your lower back starts to sag.
- Use slow lowers of 2 to 3 seconds.
A lot of people rush the descent and slam their head toward the floor. Skip that. The move should feel deliberate, not chaotic. Your shoulders will tell you when the angle is right, and they’ll tell you fast.
8. Burpees for Full-Body Conditioning
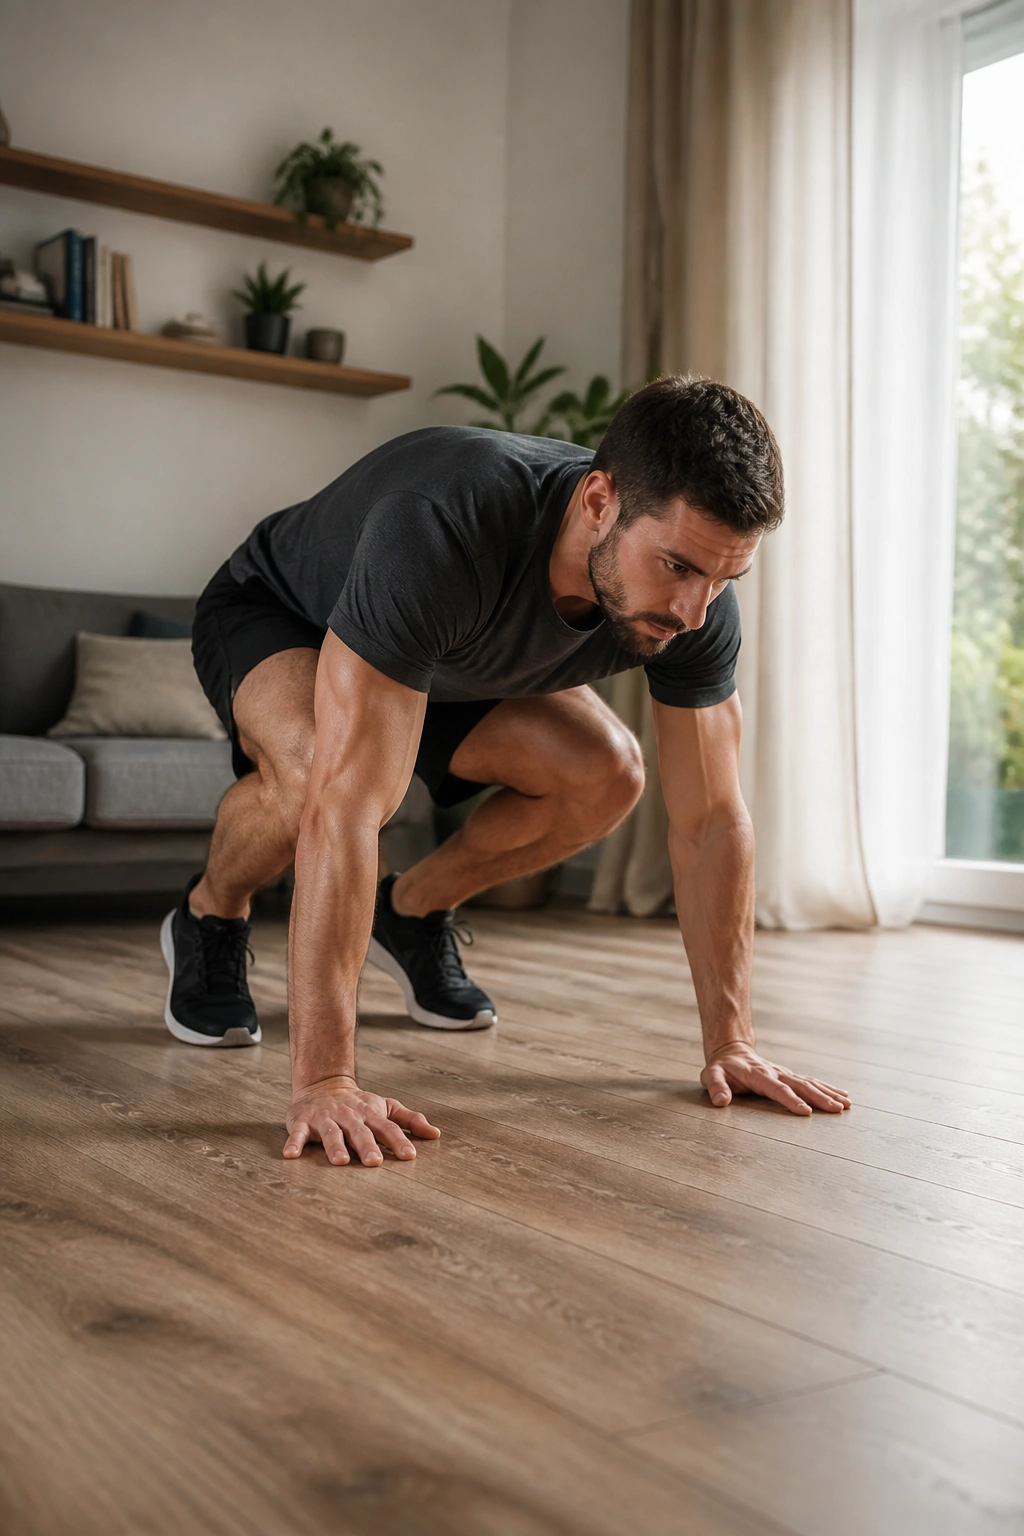
Burpees are not magical. They are just a blunt, honest way to combine a squat, a plank, and a stand-up with a jump tacked on if you want it.
What makes them useful is how little they let you hide. Drop into a squat, place your hands on the floor, step or jump back to a plank, come back in, and stand. If your lower back sags or your landings get sloppy, slow the pace down immediately. There is no prize for looking frantic.
You can keep burpees low-impact by stepping back instead of jumping back, and stepping forward instead of hopping in. That version is still hard when you do it for a few rounds. It also spares your joints and keeps the noise down if you live upstairs. Worth it.
A practical range is 5 to 10 reps per round. If you want conditioning, do several rounds with 45 seconds of rest. If you want a strength-leaning version, remove the jump and keep every movement crisp.
Burpees are useful, but they are not the move to start with if you have not built some squat and plank control first.
9. Dead Bugs for Core Control
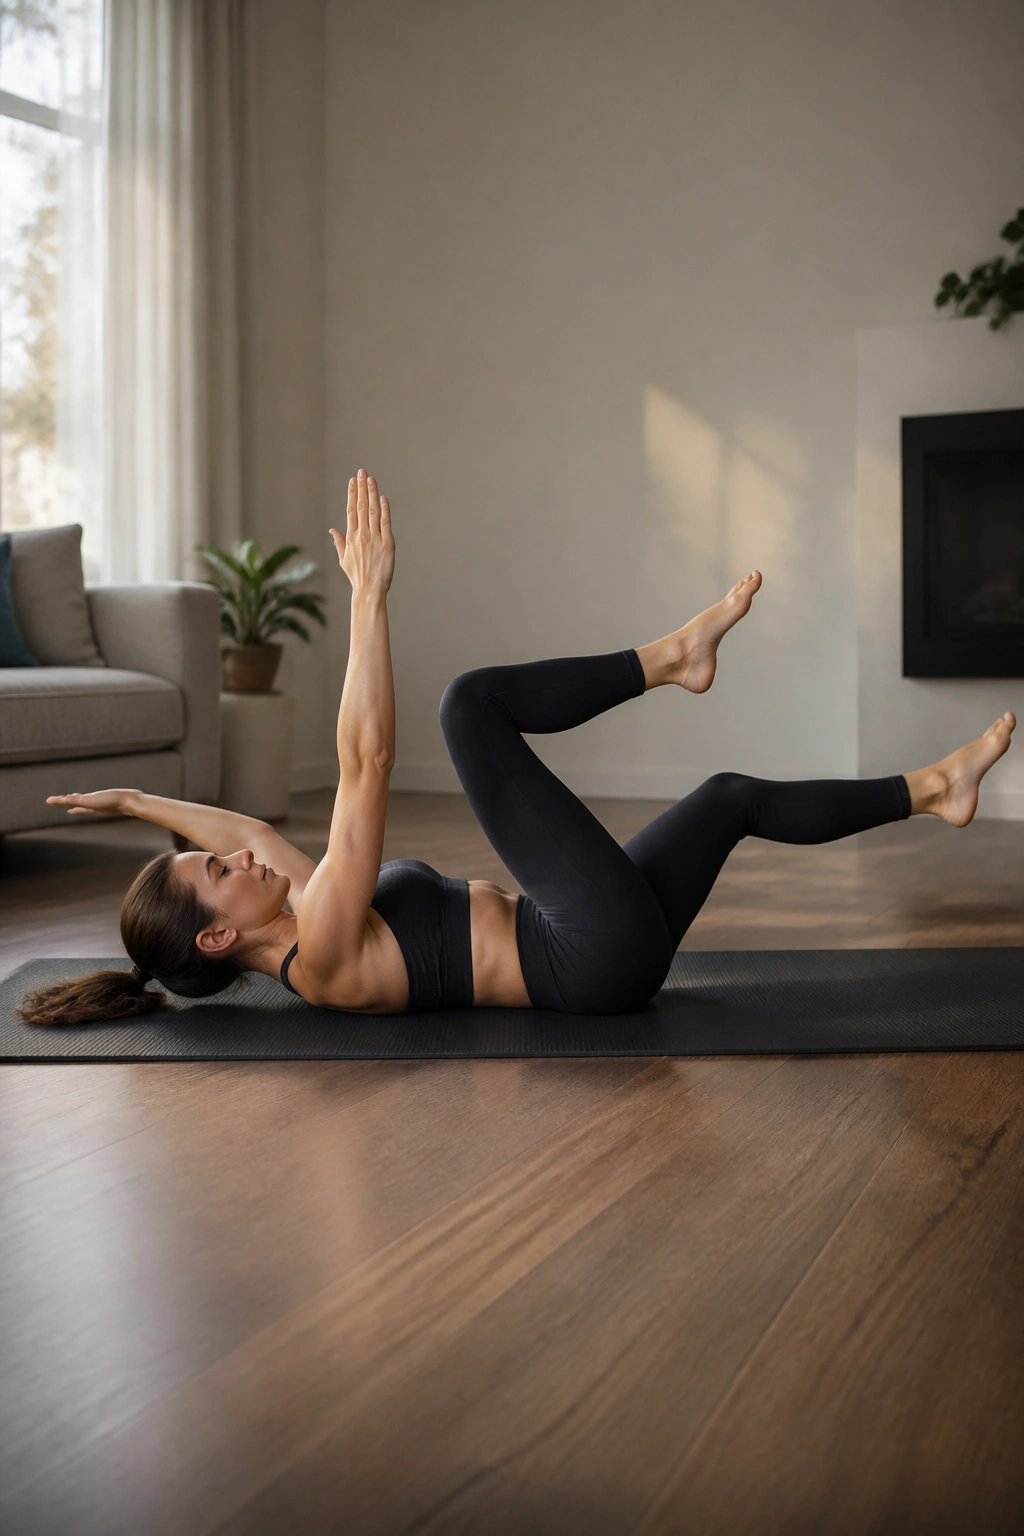
Why do dead bugs feel harder than they look? Because the work is not about moving arms and legs. It is about keeping your spine from arching while your limbs move away from the center.
Lie on your back, arms up, hips and knees bent at 90 degrees. Press your lower back gently into the floor, then lower the opposite arm and leg at the same time. Bring them back, switch sides, and keep your ribs from popping up. If your back arches, the rep no longer counts.
How to Get the Most From It
Move slowly enough that you can feel the floor with your low back the whole time. The slower pace also makes the exercise much harder, which is a pleasant surprise if you like your workouts honest.
- Do 6 to 10 reps per side.
- Exhale as the leg extends.
- Keep the opposite knee bent and stable.
- Stop the range before your back starts lifting.
Dead bugs are sneaky. They look gentle, almost too gentle, and then your stomach starts shaking after a few controlled reps. That is usually the sign you’re doing them right.
10. Superman Holds for Your Back and Glutes
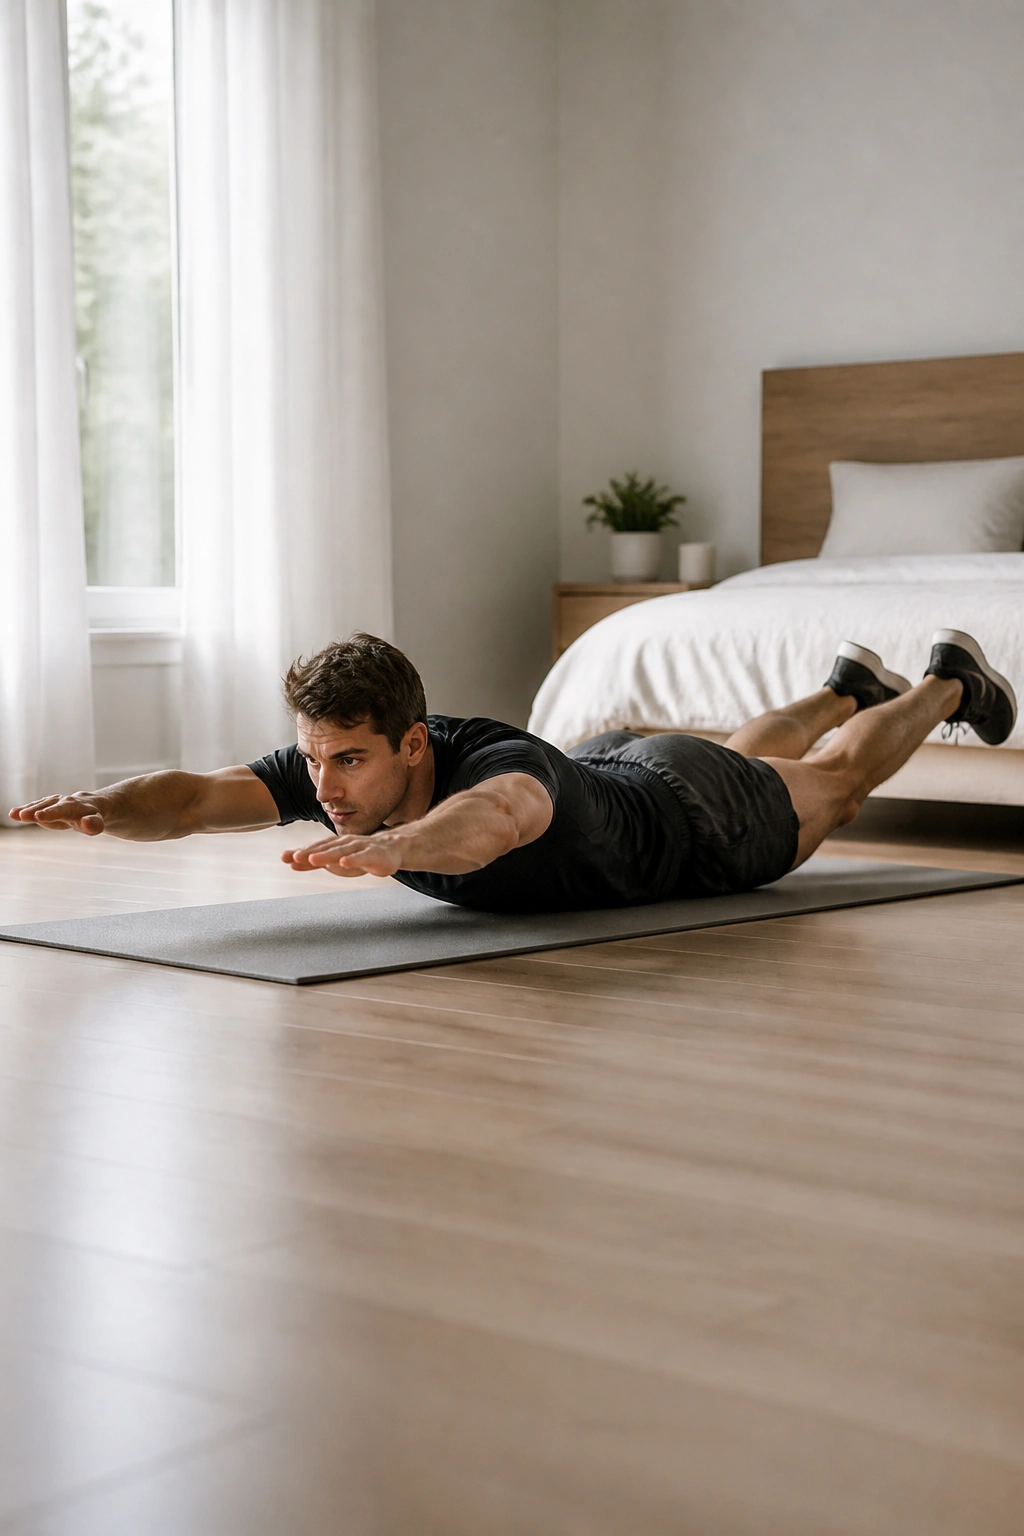
If your upper back feels stiff and your glutes tend to disappear in lower-body work, the superman hold gives both a job to do.
Lie face down with your arms stretched forward and legs long behind you. Lift your hands, chest, and thighs a few inches off the floor, then hold. You do not need to lift high. In fact, lifting too high usually cranks the neck and lower back in a bad way.
The hold should feel like a smooth squeeze through the back of the body, not like a hinge jammed too far back. Keep your gaze down so your neck stays neutral. If your lower back pinches, lower your lift and shorten the hold.
- Hold for 10 to 20 seconds.
- Do 3 to 5 rounds.
- Rest for 20 to 30 seconds between holds.
- Squeeze the glutes lightly to keep the lower back from doing everything.
A good superman hold is quiet. No swinging. No jerking. Just a steady lift, a steady brace, and a controlled return to the floor.
11. Bear Crawls for Coordination and Stability
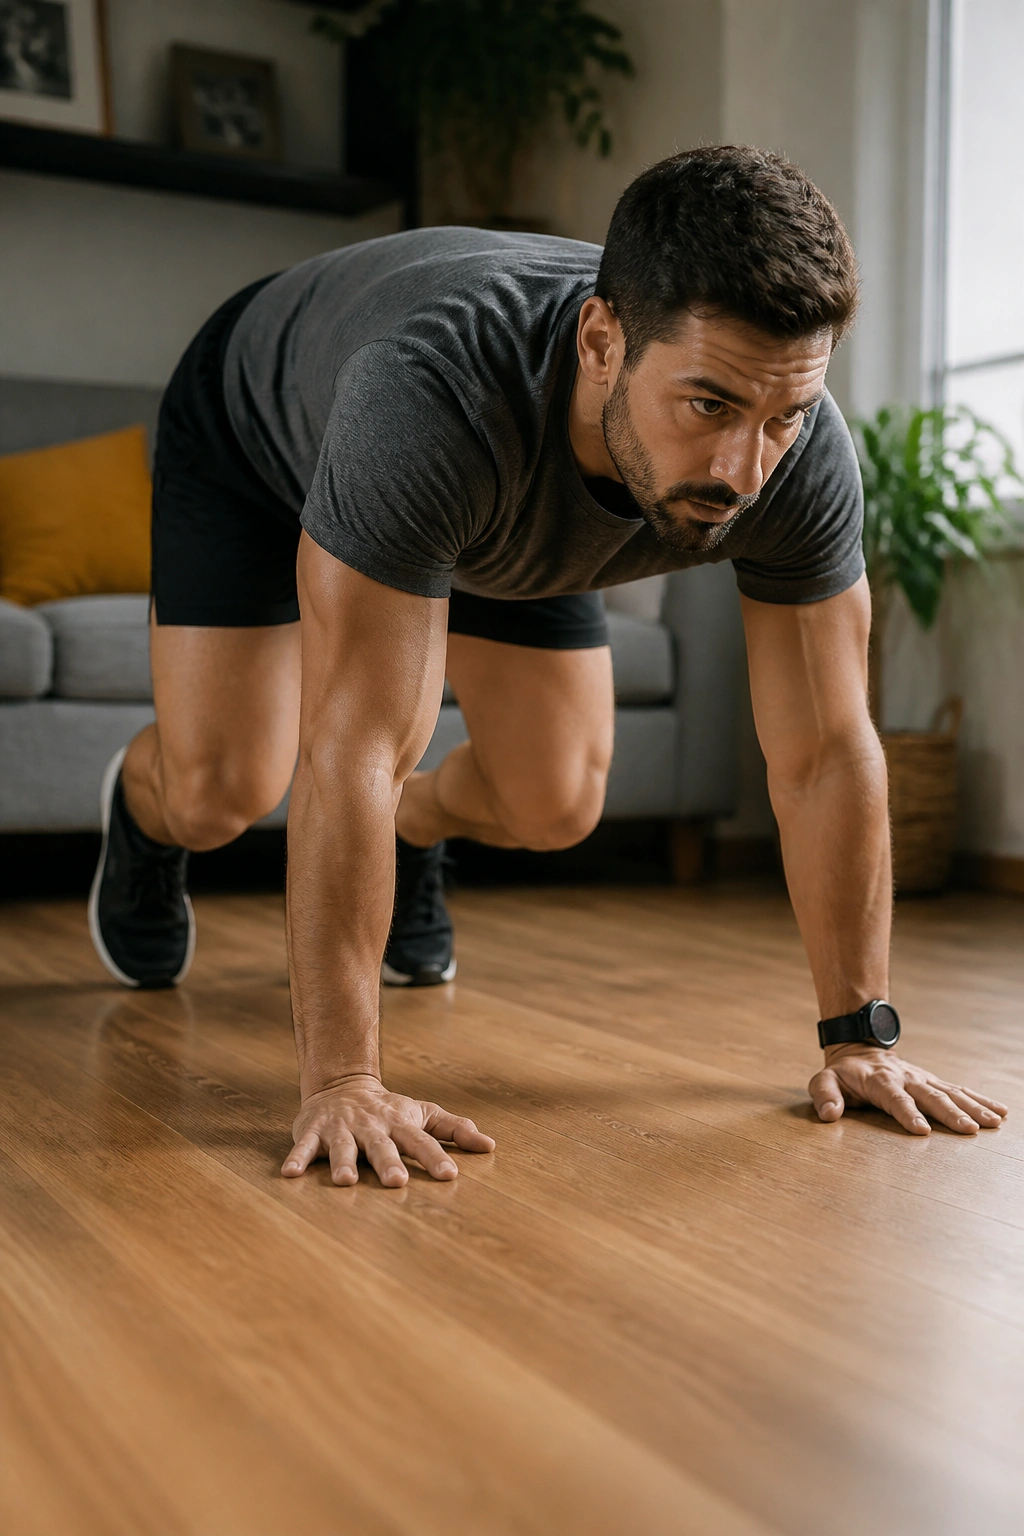
Bear crawls are one of those home exercises that looks odd until you try them. Then you realize how quickly they light up the shoulders, core, hips, and wrists.
Get on all fours, lift your knees an inch or two off the floor, and move forward with opposite hand and foot. Right hand with left foot. Left hand with right foot. Short steps win here. Big lunging crawls usually wreck the rhythm and make the whole thing sloppy.
The nice thing about bear crawls is that they train bracing while you move. A plank is static. A crawl asks your body to stay tight while your weight shifts, which feels much more like real life. Crawling to the other side of a room and back can be enough.
Keep the pace low and controlled for 15 to 30 seconds per round. If your wrists complain, put your hands on push-up handles, dumbbells, or even a folded towel to soften the angle a bit. If your knees drift too close to the floor, reset and make the shape cleaner.
They are awkward at first. Then they get useful.
12. Side Planks for Obliques and Hip Control
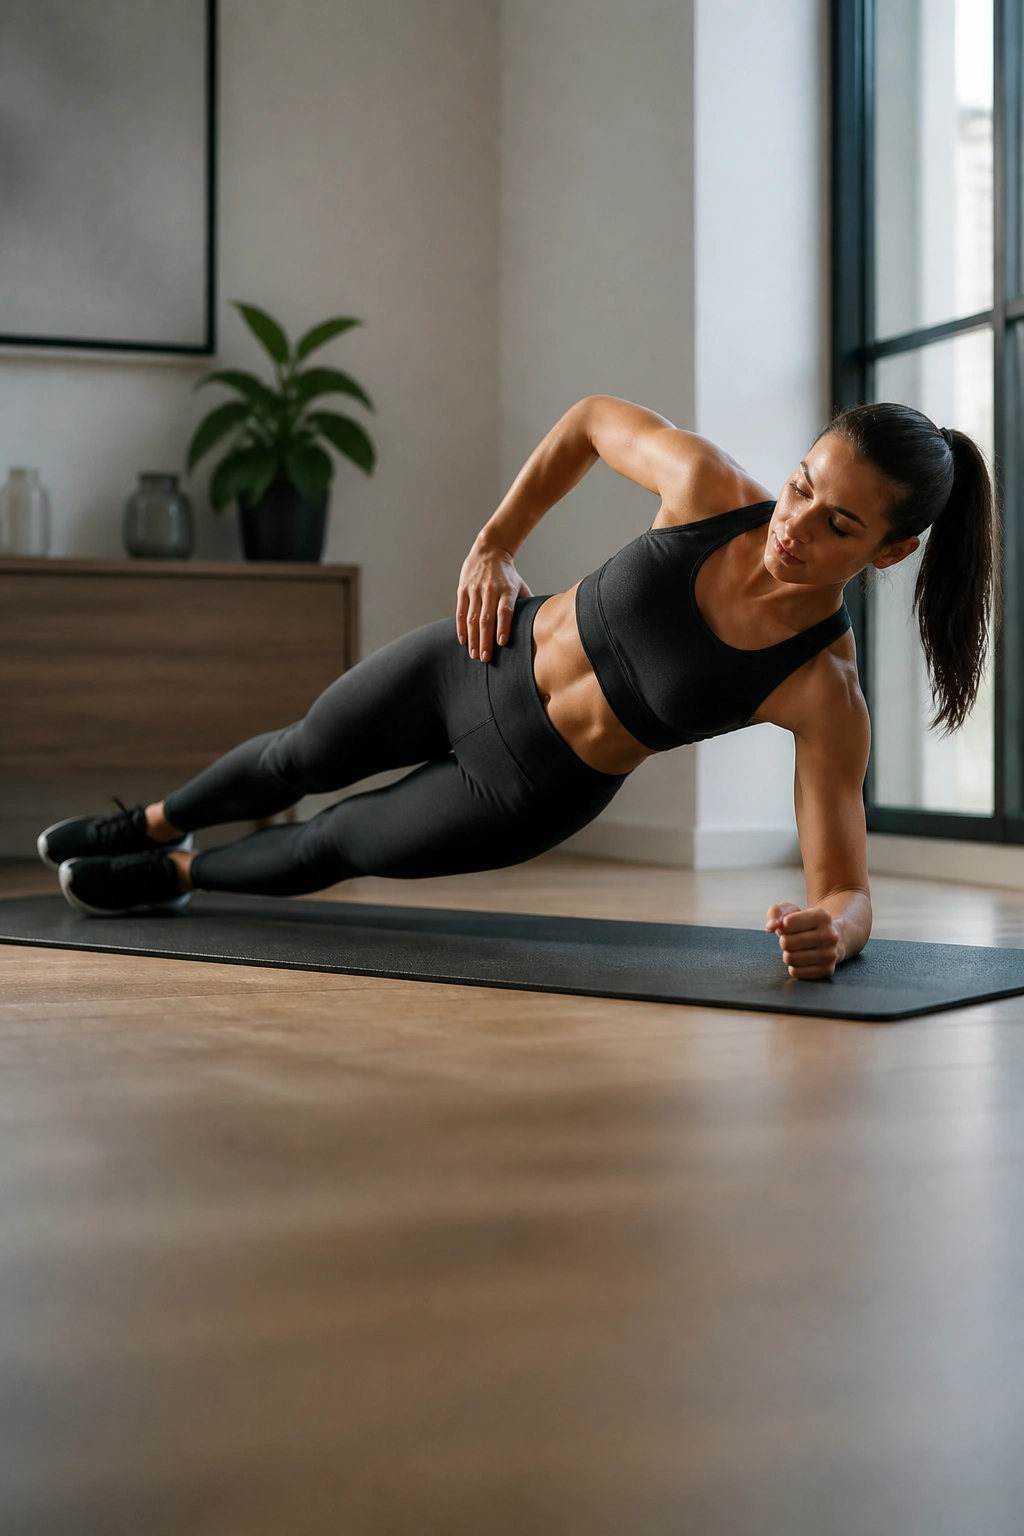
Side planks do a better job than a lot of people expect because they train the side of the trunk and the hip that usually gets ignored in straight-ahead work.
Set one forearm on the floor, stack your feet or place one knee down if you need a gentler version, and lift your hips so your body forms a straight line. The key is keeping the waist from sagging toward the floor. If that happens, the set is over.
A side plank is a nice counterpoint to regular planks because it teaches your body not to collapse sideways. That matters for running, carrying groceries, and even standing on one leg. It is not glamorous. It is useful.
Use 15 to 30 seconds per side to start. If the full version feels shaky, drop the bottom knee and keep the top leg long. Once that gets steady, stack the feet again and build from there. You can also raise the top arm toward the ceiling for a little more challenge, but only if your shoulders stay calm.
This is one of those moves people skip until they notice a weak side. Then they go back to it fast.
13. Split Squats for Harder Leg Work
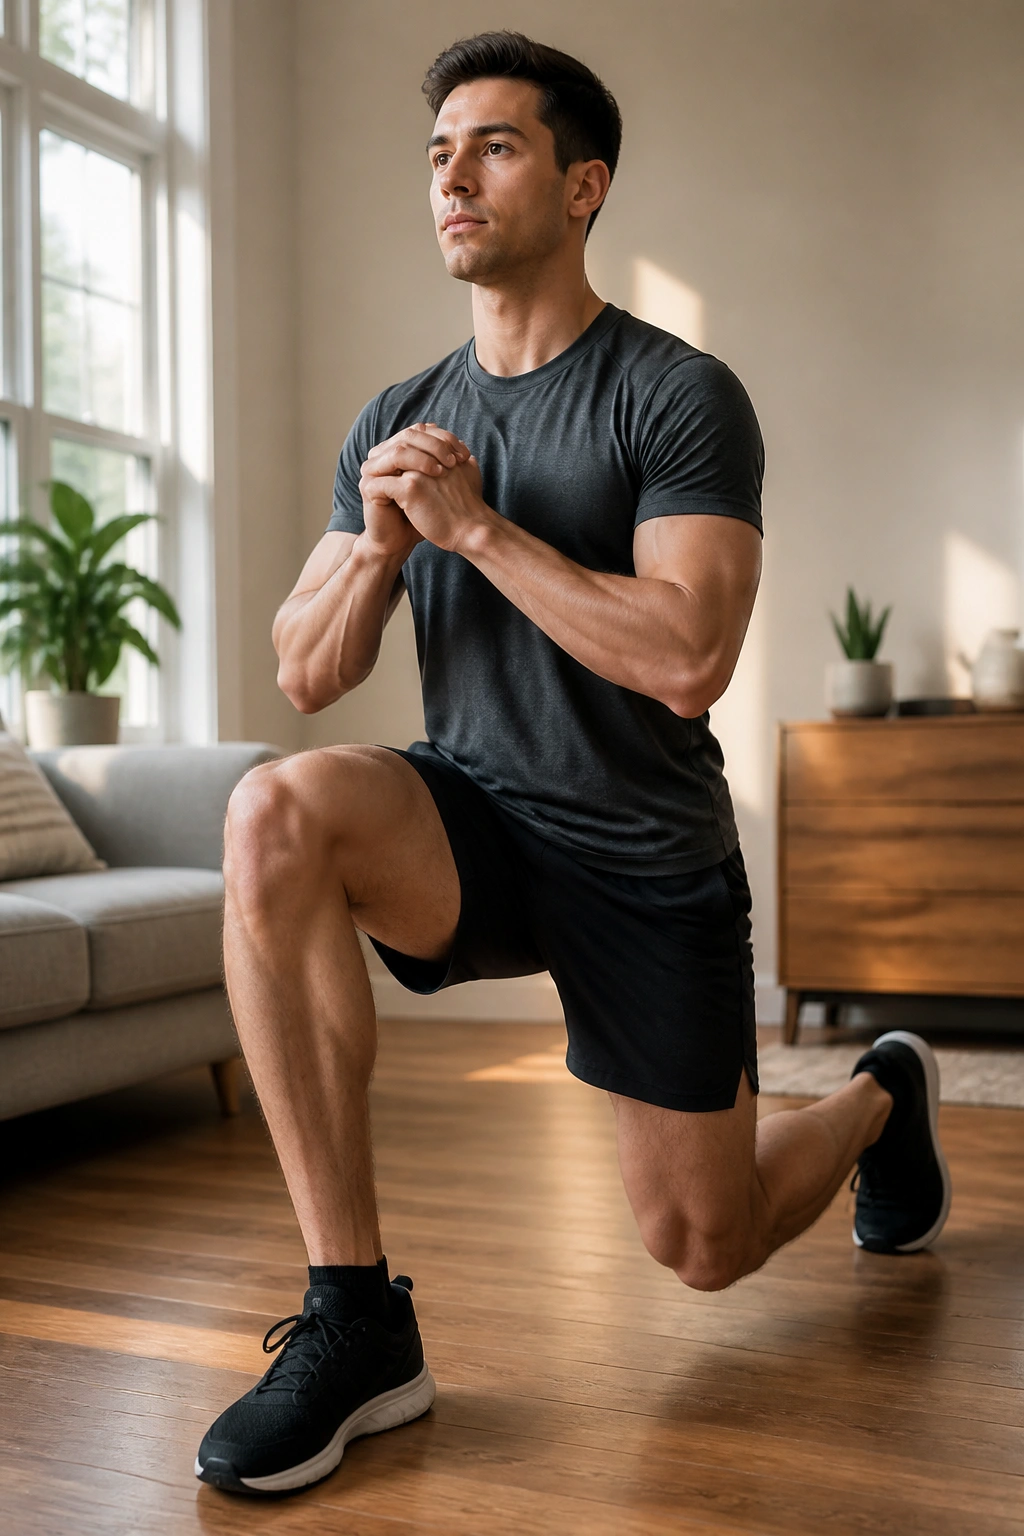
Split squats are sneaky. They look like a lunge that forgot to travel, but the fixed stance makes them brutal in a good way.
Set one foot forward and the other back, keeping both feet planted. Lower straight down until the back knee approaches the floor, then drive back up. Do not bounce between reps. The whole point is to load one leg hard while forcing the hips to stay square.
How to Set the Stance
If your front foot is too close, your knee will jam forward and the movement will feel ugly. If it’s too far, you’ll lean and lose balance. A few inches make a big difference.
- Keep most of your weight in the front foot.
- Let the back heel stay light.
- Use a wall or chair for balance if needed.
- Aim for 6 to 10 reps per side.
Split squats are excellent when regular squats start feeling too easy. They also reveal asymmetries fast. One side almost always feels cleaner than the other. That is useful information, not a flaw.
14. Wall Sits for Leg Endurance
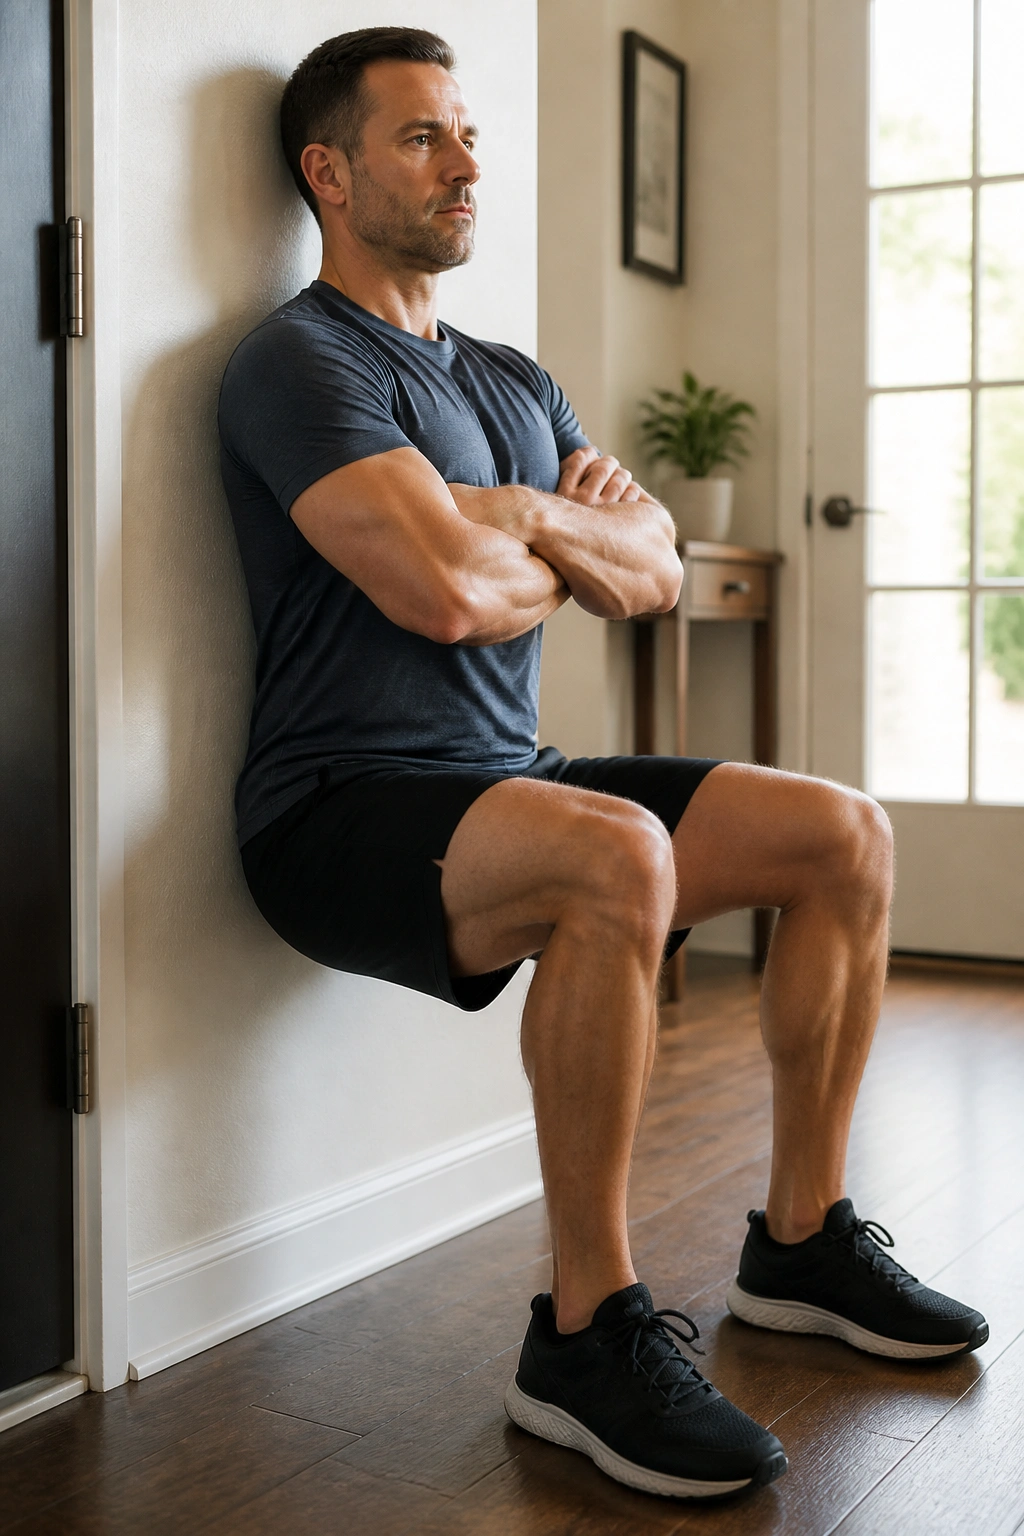
Wall sits are brutally simple. No movement. No bouncing. Just your legs holding a bent-knee position while your quads start to shout about it.
Slide down a wall until your knees are near a right angle, or a little higher if that angle is too much. Keep your back flat against the wall and your feet about a foot out from it. If your knees drift inward or your lower back arches off the wall, reset the position. The hold only works when it’s clean.
A wall sit is a nice finisher after squats or lunges because it keeps tension on the quads without requiring extra balance. It also teaches you to stay calm while the burn rises. That sounds dramatic. It isn’t. It’s just what the exercise does.
Hold for 20 to 60 seconds depending on your level. Beginners can start with shorter holds and repeat them for a few rounds. More advanced folks can keep the same shape longer, but there is no need to turn it into a contest. The moment your hips start sliding lower than your knees want to go, the form is gone.
Shaking is part of it.
15. Jumping Jacks and High Knees for a Quick Finisher
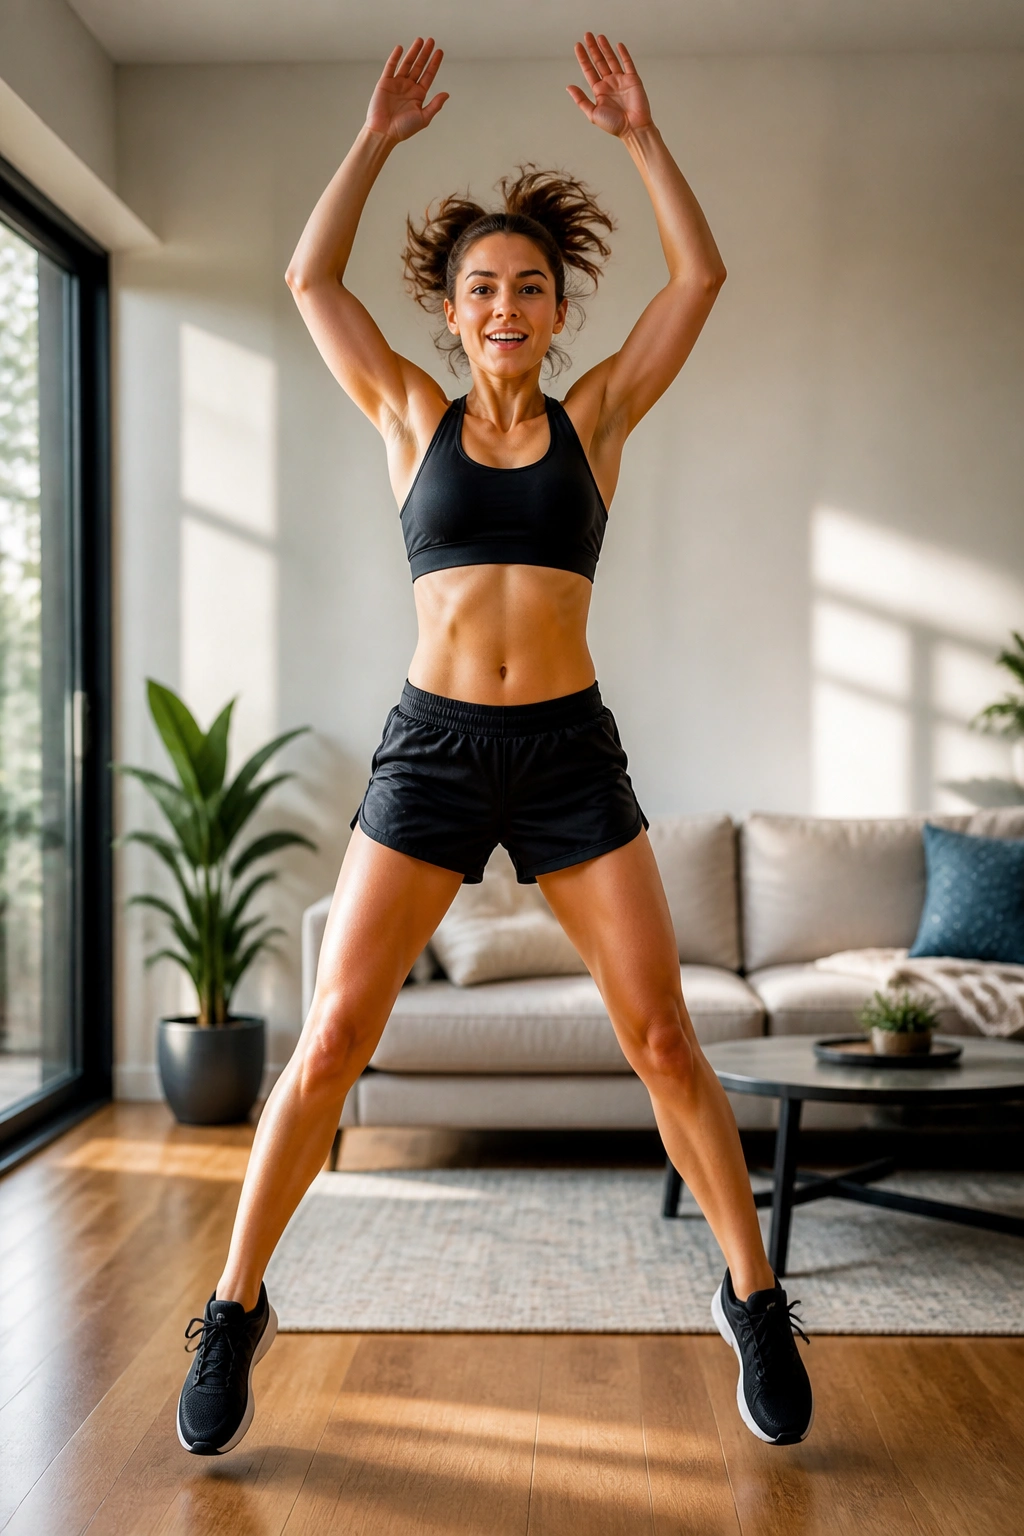
Need a fast finish when you only have a few minutes left? Pair jumping jacks with high knees and keep the pace honest.
Jumping jacks are the easy choice for getting the whole body warm and moving. High knees push the heart rate up a notch and ask a bit more from the hips and trunk. Together, they make a simple cardio finisher that fits almost anywhere. No equipment. No setup. No excuses, which is probably why people either love them or avoid them.
If your joints prefer less impact, do step jacks instead of full jumps. Lift one knee at a time instead of sprinting in place if high knees feel rough on the ankles. The best version is the one you can repeat without your form falling apart.
Try 30 seconds of jacks, 30 seconds of high knees, then 30 seconds of rest. Repeat that for 3 to 5 rounds. If you want a slightly longer session, add one of the strength moves above between rounds: squats, push-ups, or planks. That keeps the workout from feeling one-note.
A good home routine does not need to be complicated. Pick one leg move, one push move, one core move, and one cardio finisher. Do that often enough, and the little floor in your living room starts to feel like a useful place after all.
