



If your ab work keeps turning into lower-back work, your body is asking for mobility before it asks for more effort. A smart belly fat stretches routine will not burn stomach fat by itself—nothing works that way—but it can make your walks, strength sessions, and core training feel smoother, longer, and more productive. When your hip flexors are tight, your ribs flare, and your lower back takes over, even a short workout feels harder than it should.
No stretch peels fat off one spot.
Fat loss still comes down to the boring stuff that keeps winning: food intake, daily movement, sleep, and resistance training. Stretching matters because it helps those habits stick. You move with less stiffness, breathe with more control, recover better between sessions, and stop quitting workouts early because your back or hips feel cooked after 12 minutes.
The American College of Sports Medicine has long treated flexibility as part of a full training plan, not as an afterthought, and that lines up with what works in real life. Most people do well with 10 to 30 seconds per hold, repeated a couple of times, while dynamic moves like cat-cow work better for 6 to 10 slow reps. I like using a short stretch block after a brisk walk or at the end of a core workout, when the body is warm and you can actually get into the positions without fighting yourself.
Pick 6 to 8 of the moves below and spend 8 to 12 minutes on them. Use one front-body opener, one hip stretch, one hamstring move, one twist, one side bend, and one quiet reset. That small bit of structure does more than random stretching ever will.
1. Cobra Stretch for the Front of the Abdomen
Start here.
The cobra stretch is one of the few moves that directly opens the entire front of the torso—abs, hip flexors, even the chest if you do it well. Lie face down, place your hands under your shoulders, and press the floor away until your chest lifts. Your pelvis stays heavy on the floor, your shoulders slide down, and your gaze stays forward or a little down instead of cranking your neck up.
Why cobra earns its spot
A lot of people chasing belly fat loss spend half the day folded over a desk, a steering wheel, or a phone. Cobra does the opposite. It lengthens the abdominal wall, counters that rounded posture, and teaches you to extend through the upper back instead of dumping everything into the low back.
Quick setup cues
- Hold for 20 to 30 seconds and breathe into the front of your ribs.
- Keep a soft bend in the elbows if locking them makes your lower back feel pinched.
- Think about lifting your sternum forward, not only upward.
- Do 2 rounds, resting for a breath or two between them.
Best tip: if your glutes clench like a vise in cobra, back off a little. You want a stretch across the stomach and the front of the hips, not a lower-back wrestling match.
2. Cat-Cow for a Stiff Core and Lower Back
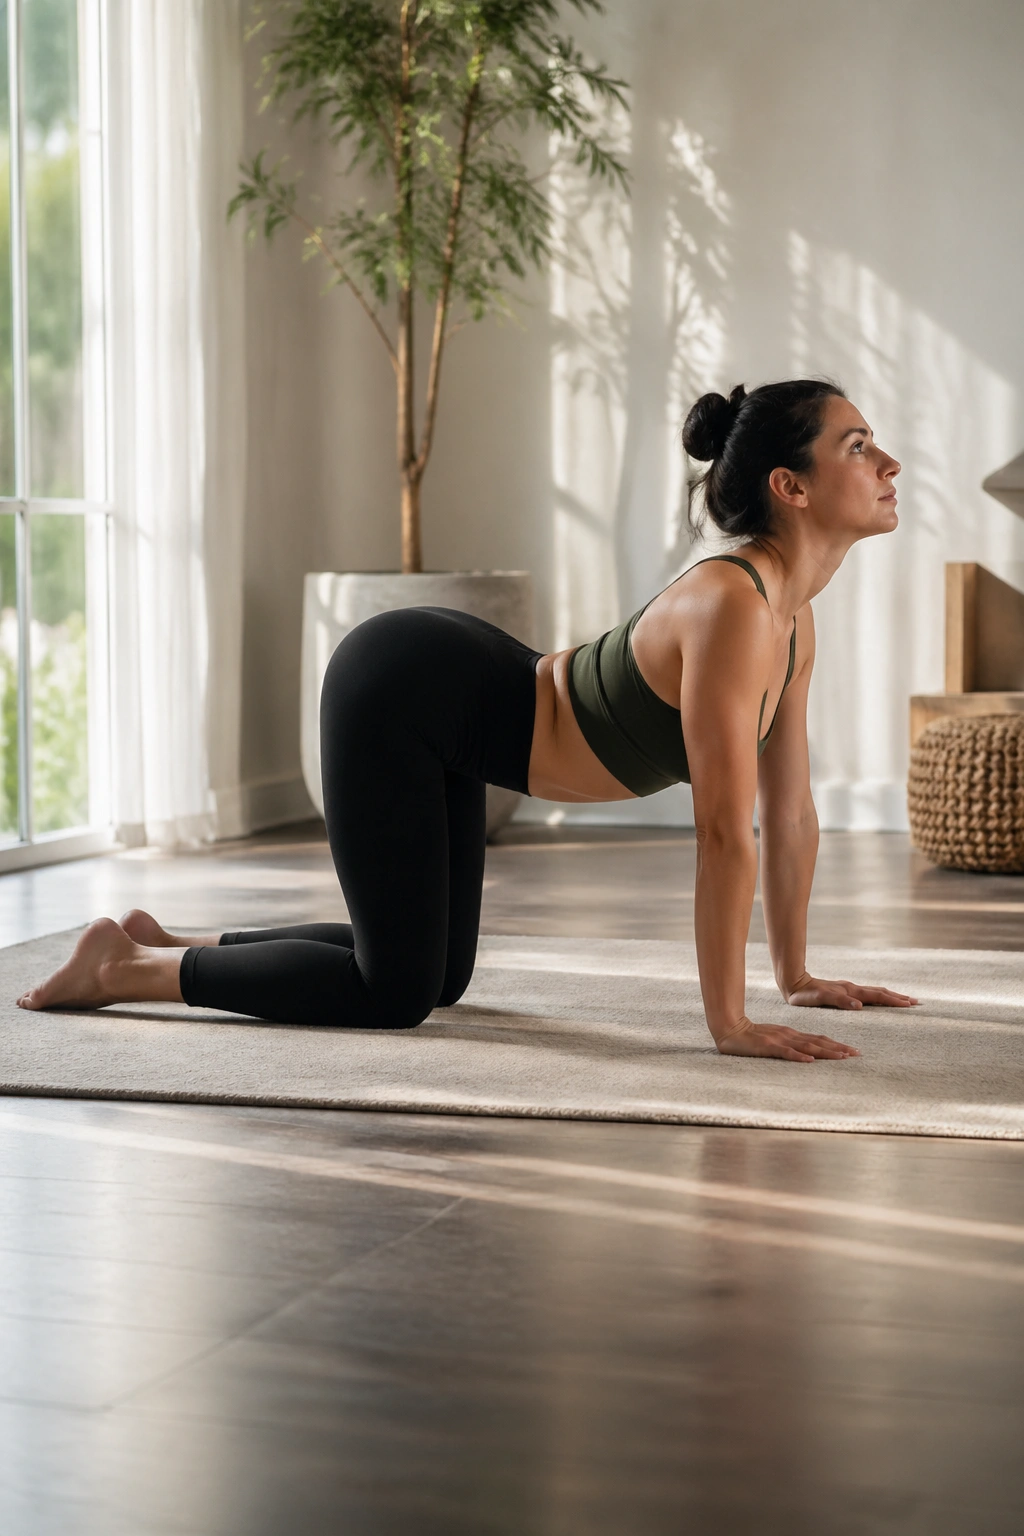
Cat-cow looks easy, and that is exactly why people rush it. Slow it down and it turns into one of the best ways to wake up the spine before any belly fat workout.
Set up on all fours with your hands under your shoulders and knees under your hips. On the cow phase, let your chest move forward, tilt your pelvis, and allow the belly to lengthen as you inhale. On the cat phase, press the floor away, tuck your tailbone, and round the middle of your back while you exhale fully. That long exhale matters more than most people realize; it helps the rib cage come down and gives your deep core muscles a shot to join the party.
I like 6 to 10 controlled reps here, not 20 sloppy ones. When you move vertebra by vertebra—yes, that sounds fussy, but it works—you start to feel where you are stiff. Some people discover the tight spot sits near the bra line. Others realize the pelvis barely moves at all. Both matter.
Use cat-cow before planks, dead bugs, brisk walking, or any session where your back tends to take over. It is one of the fastest ways to shift from “everything is tight” to “okay, I can move.”
3. Standing Side Bend to Open the Obliques
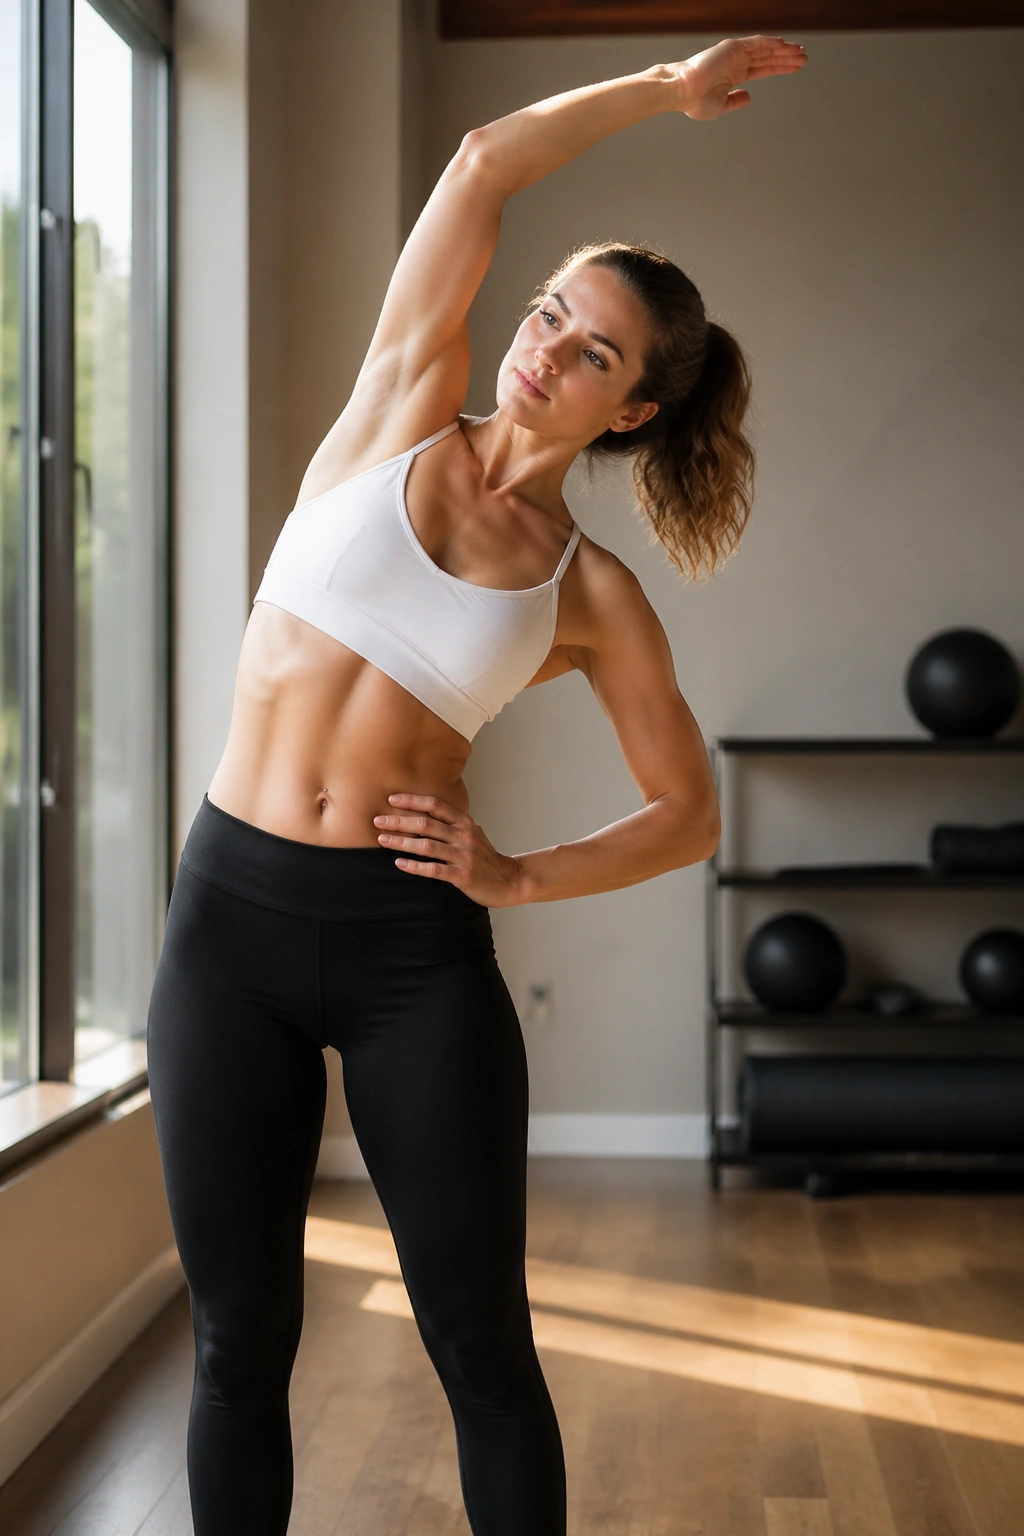
Why bother with a side bend if the goal is losing abdominal fat?
Because tight obliques and lats can lock your rib cage down on one side and hike it up on the other, which makes breathing shallow and torso movement choppy. A clean standing side bend gives the waist area room to move again. It will not shrink your love handles on contact, but it can make rotational work, walking pace, and overhead training feel better within a few sessions.
Stand tall with your feet about hip-width apart. Raise one arm overhead, keep the other hand on your hip, and arc gently to the opposite side. Stay facing forward. If you turn your chest toward the ceiling, you have turned a side bend into a lazy backbend.
How to get more from it
Reach upward before you reach sideways. That one change makes the stretch hit the obliques, serratus, and lats instead of collapsing into the low back.
Hold each side for 15 to 25 seconds, switch, and do 2 passes per side. If you walk a lot for fat loss, this stretch is gold afterward. A long arm swing with a tight rib cage is wasted motion.
4. Child’s Pose to Reset Between Belly Fat Workouts
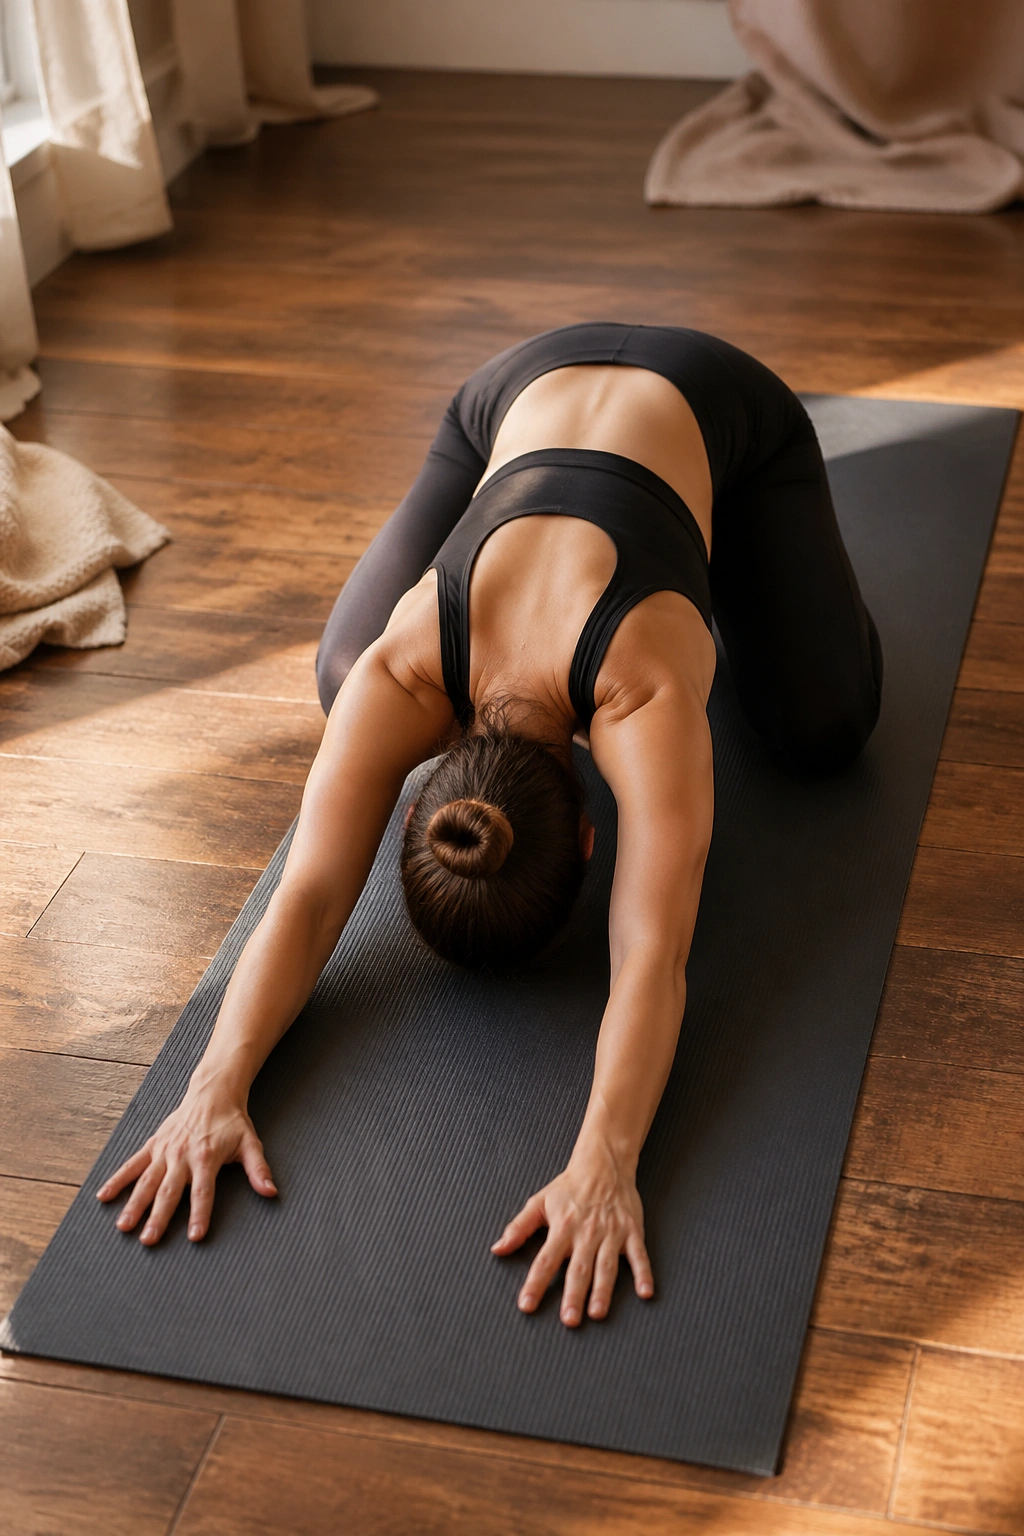
After a long walk, kettlebell circuit, or clumsy attempt at mountain climbers, child’s pose can feel like your body finally exhales. Kneel on the floor, sit your hips back toward your heels, and reach your arms forward while your forehead rests on the mat, a towel, or a yoga block.
What makes child’s pose useful is not drama. It is the combination of hip flexion, spinal lengthening, and slower breathing. If your lower back gets tight when you train abs, this pose gives you space without asking for much skill. You do not need to chase the deepest version. You need the one that lets your ribs settle and your breathing slow down.
A few setup details change everything:
- Keep your knees wide if your belly or hips need room.
- Bring your big toes together if that feels better on the low back.
- Stay for 5 slow breaths or about 30 to 45 seconds.
- Put a folded blanket behind your knees if kneeling feels rough.
I use child’s pose as a checkpoint. If you cannot breathe calmly here, your session was either too rushed or your body is carrying more tension than you thought.
5. Child’s Pose Side Reach for the Waist
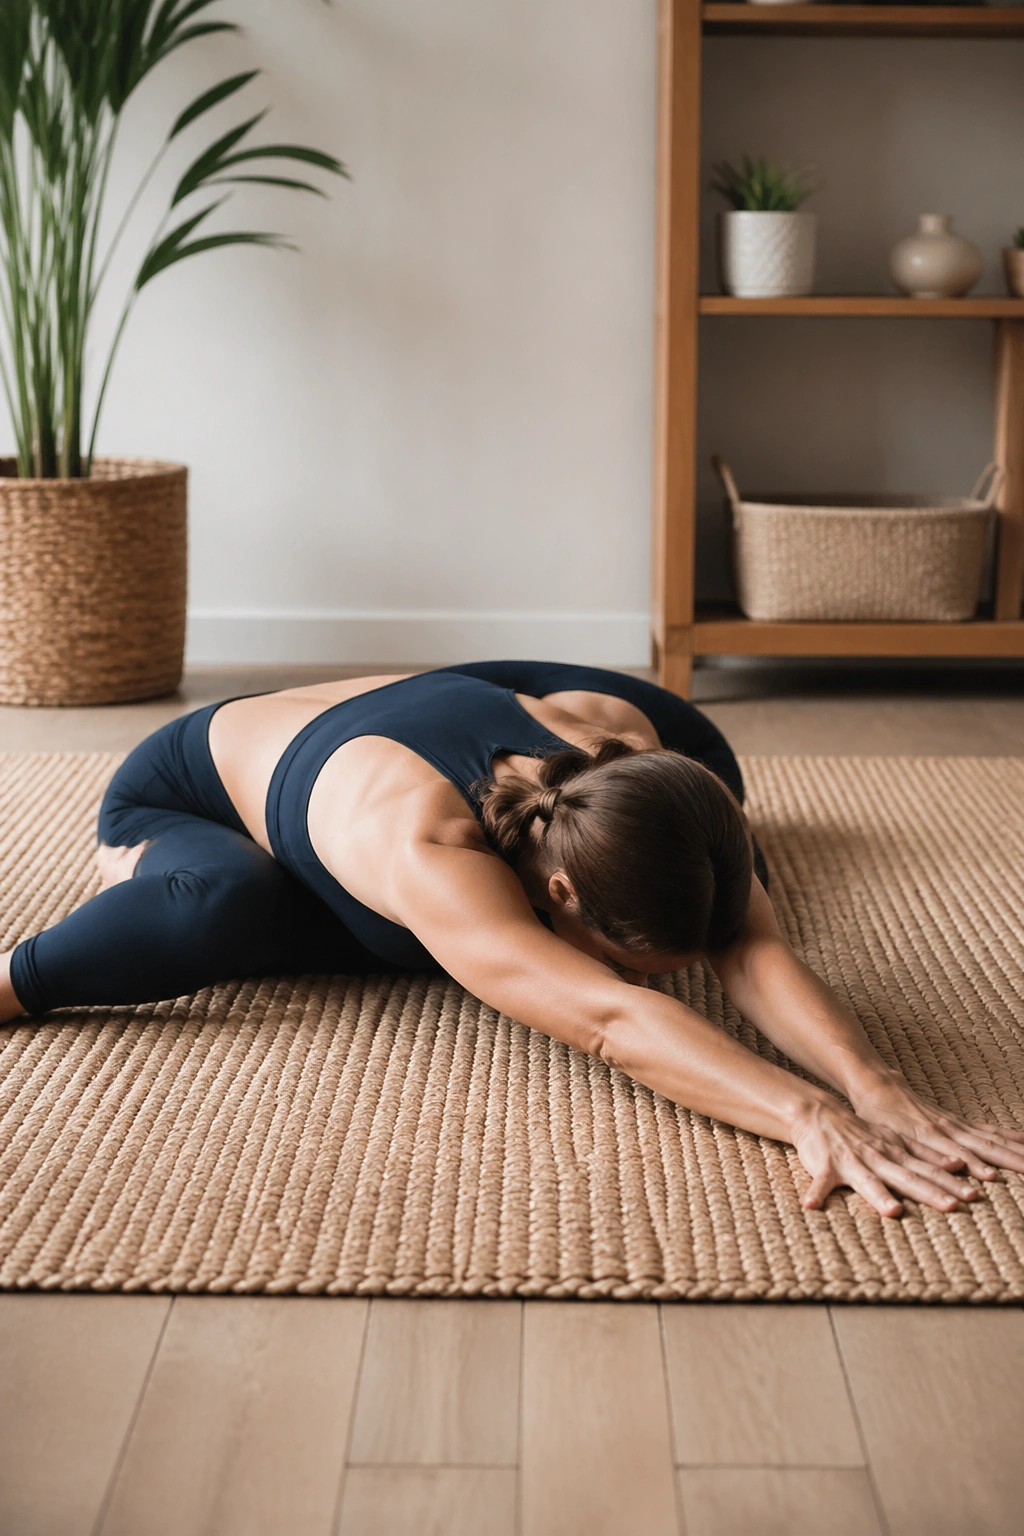
Reach both hands forward in child’s pose, then walk them a few inches to the right. Stay there. You should feel the stretch run from the outside of the left hip up through the left side of the waist and sometimes into the armpit. That long line matters more than it looks.
This version targets the tissues that regular crunching ignores. The side waist, lats, and outer ribs all feed into how your torso twists, braces, and swings when you move. If those areas are stiff, your body steals motion from the lower back. That is where the annoying ache shows up after “ab day.”
Keep your hips heavy. That is the part people lose.
If your left hip lifts as your hands walk right, ease back a touch until the stretch spreads out again. Stay for 20 to 30 seconds, then switch sides. I like two rounds each way, especially after a rowing machine session or a long day sitting crooked in a chair—which, if we are being honest, is half the population.
There is also a sneaky breathing benefit here. With the ribs opened on one side, you can often take a fuller breath into the stretched area. That makes the move feel less like yoga homework and more like actual relief.
6. Seated Forward Fold for Hamstrings and Pelvic Position
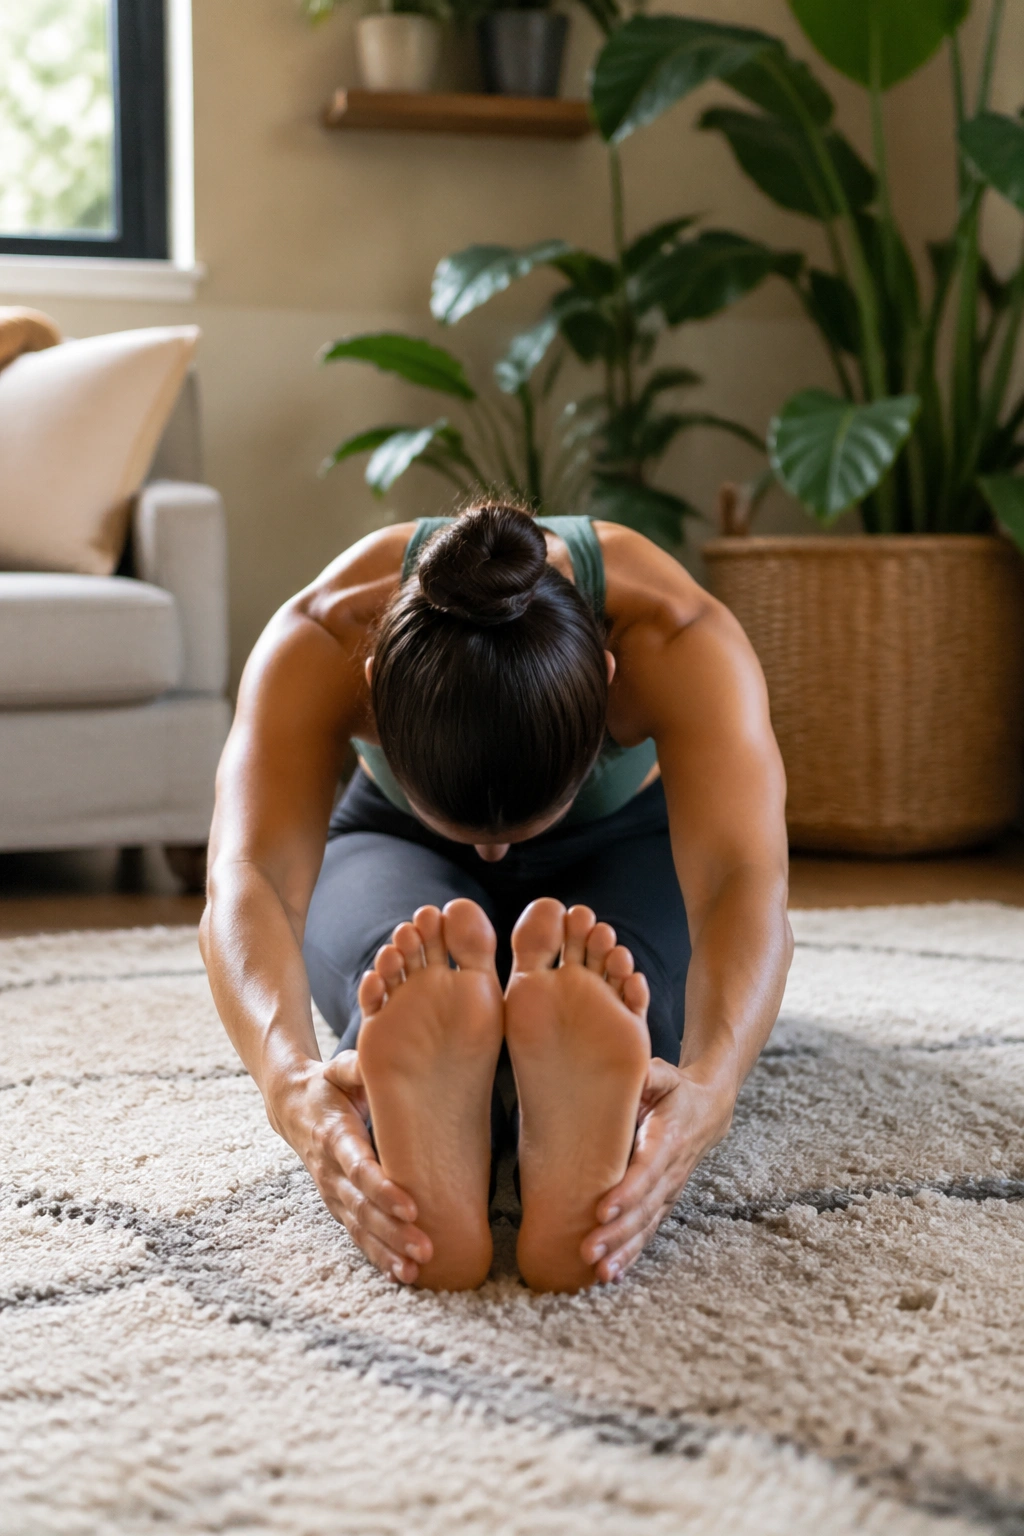
Unlike crunch-heavy routines, a seated forward fold works on the part of your body that often sets your pelvis in a bad position before your core session even starts. Tight hamstrings can tug on the pelvis, limit hip hinge range, and make simple moves like leg raises or dead bugs feel awkward.
Sit with your legs straight in front of you. If your back rounds the second you do that, sit on a folded towel or yoga block. That tiny height change is not cheating. It is what lets the stretch land in the hamstrings instead of turning into a collapsed C-shape through your spine.
Lean forward from the hips and stop where the stretch feels steady, not sharp. Hold for 20 to 40 seconds. If your knees need a slight bend, take it. People get weirdly stubborn about straight legs here, and it helps no one.
This is a good pick if you walk hills, do Romanian deadlifts, or spend hours sitting. Better hamstring length can help your pelvis move with less resistance, which makes the rest of your belly fat workouts cleaner. It is not glamorous. It works.
7. Knees-to-Chest Stretch for the Lower Belly and Hips
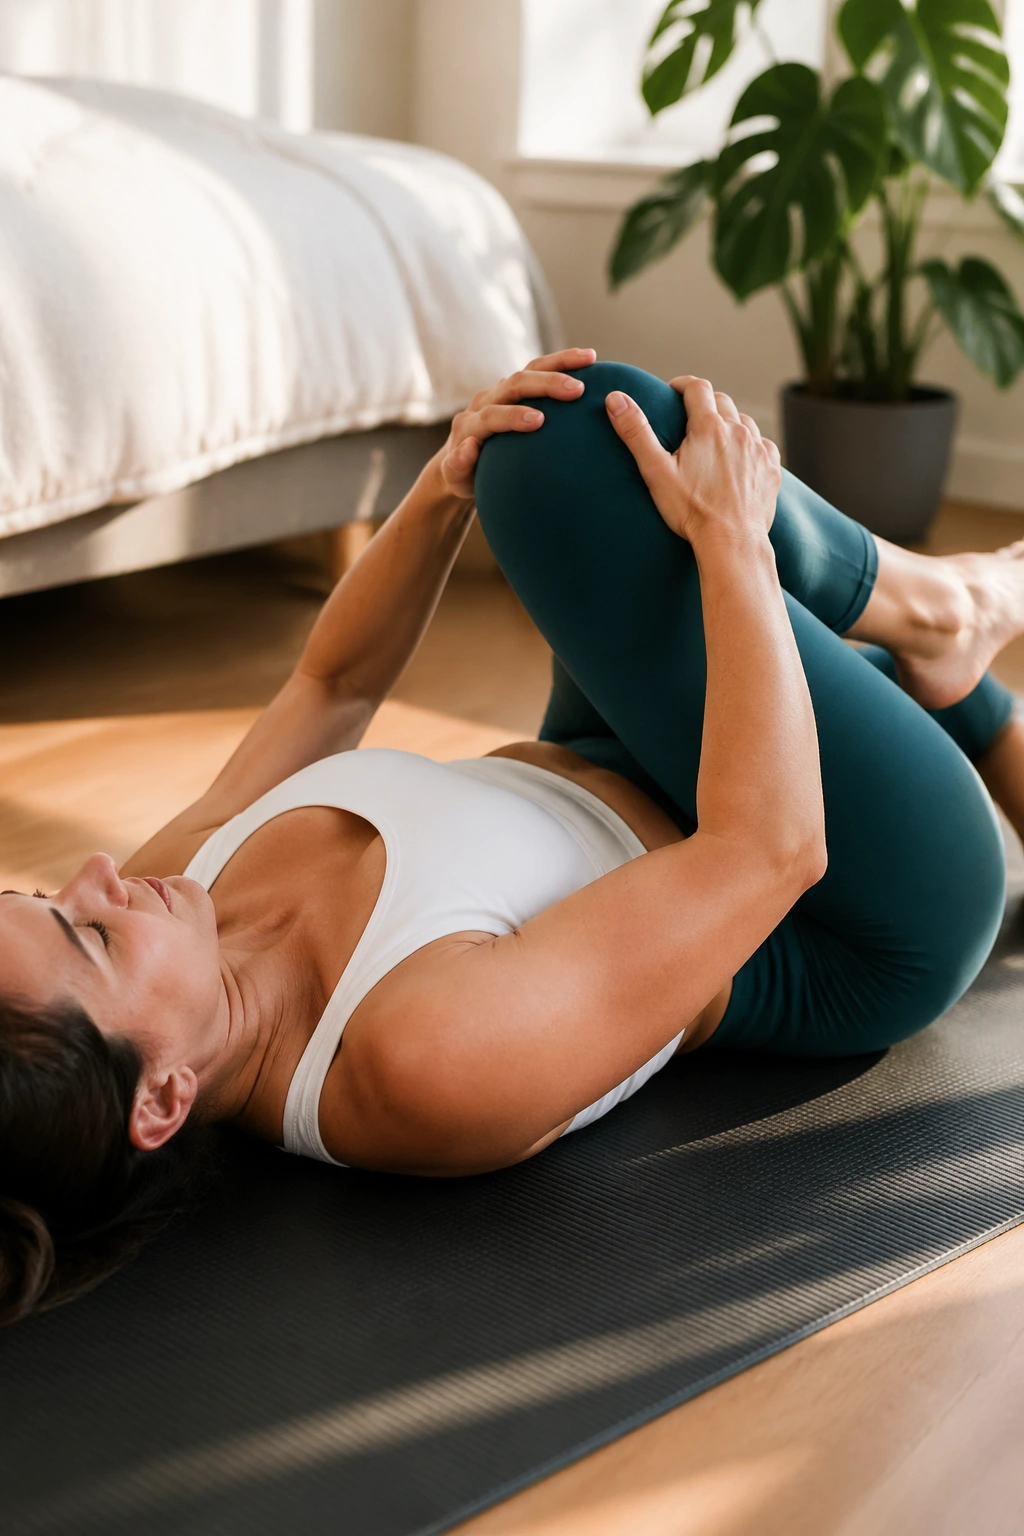
Lie on your back and pull one knee toward your chest. That is the start, not the whole story.
A proper knees-to-chest stretch quiets the lower back, opens the back of the hip, and gives the lower belly area a gentle compression that feels good after harder work. Start with one leg at a time for 20 seconds per side, then hug both knees in together if it feels comfortable. Keep your shoulders relaxed and your jaw unclenched—people carry tension in strange places.
Why this one helps after training
You spend a lot of fat-loss workouts standing, stepping, walking, bracing, and extending the hips. Pulling the knees in does the opposite. It gives the lumbar spine a break and lets the pelvis tilt without effort.
Small details that make it better
- Pull with your hands on the shin, not jammed over the kneecap.
- Let the opposite leg stay bent if a straight leg makes your back arch.
- Take 3 to 5 slow exhales while the knee is in.
- Use this at the end of the session, not as a cold start.
Quick call: if you feel pinching at the front of the hip instead of a release through the back body, pull less and adjust the angle a few inches outward.
8. Supine Spinal Twist for Waist Rotation
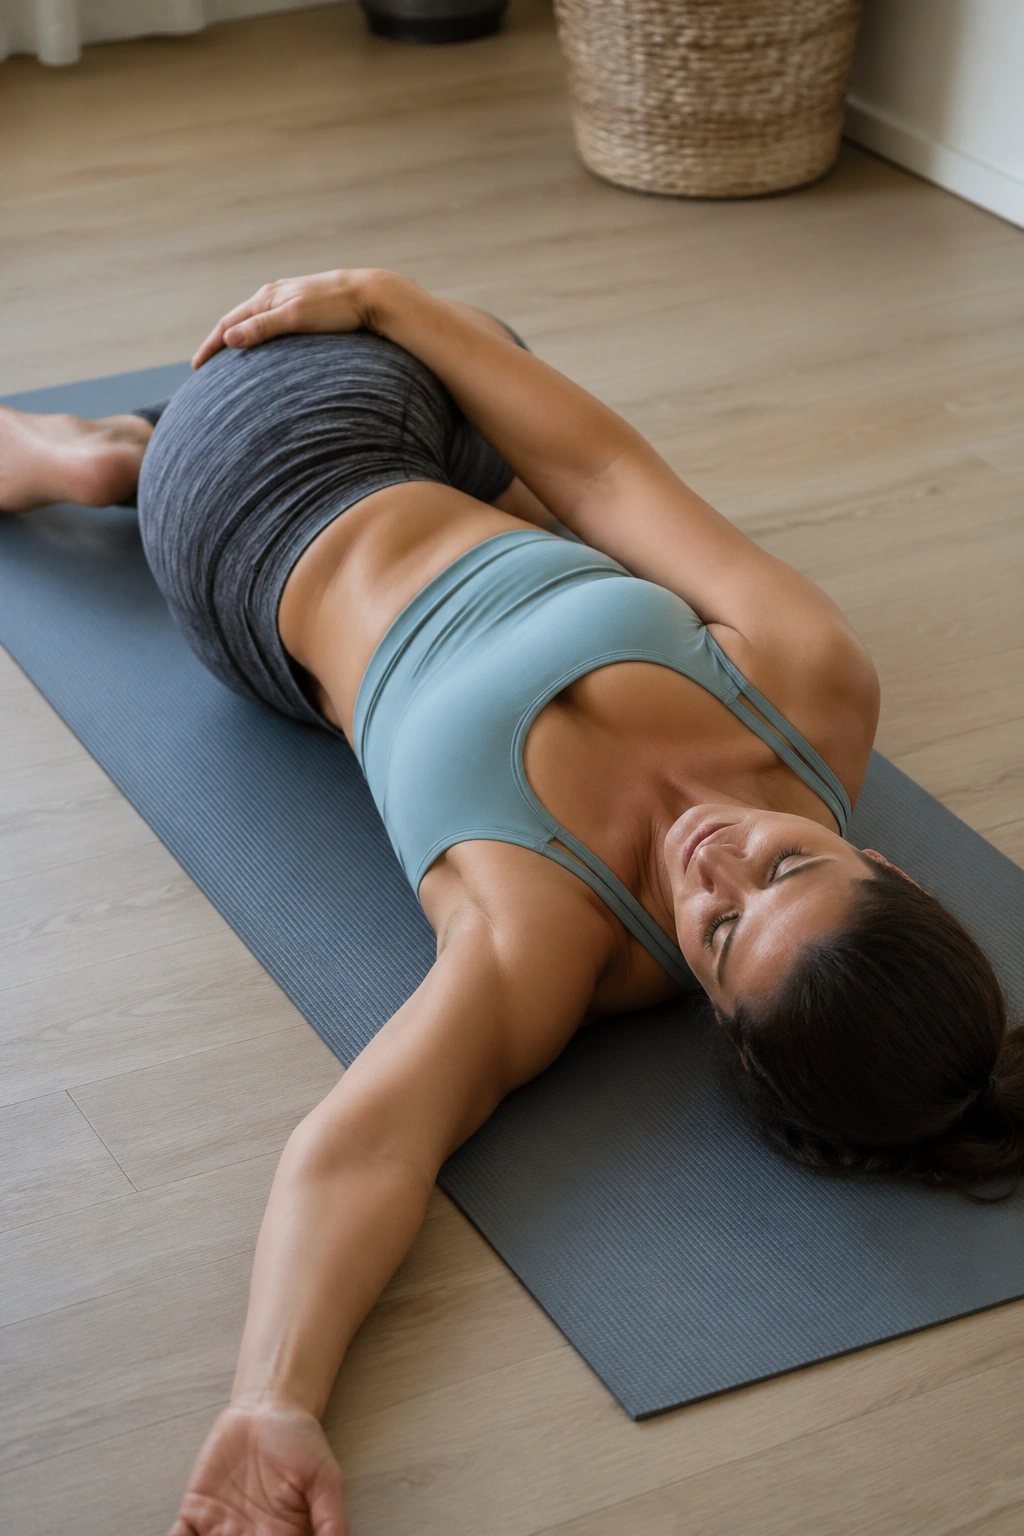
Rotation is where stiffness shows up fast.
The supine spinal twist opens the outer hip, lower back, and waist in one shot. Lie on your back, bring one knee toward your chest, then guide it across your body while your opposite shoulder stays heavy on the floor. Your head can turn the other way if that feels natural, though I do not force that part.
This stretch earns its keep when your torso feels locked after loaded carries, fast walking, or too much sitting. A tight waist does not only affect how you look; it affects how you move. When your thoracic spine and rib cage refuse to rotate, your lower back tends to fill in the gap. That trade is expensive.
Stay for 20 to 30 seconds per side, breathing into the ribs that are facing the ceiling. If the knee hovers high above the floor, place a pillow or block under it. Supported twists feel better and let you relax into the position, which is the whole point.
Deep twists are not a badge of honor. A clean, easy twist that lets you breathe is the better version nine times out of ten.
9. Half-Kneeling Hip Flexor Stretch With Reach
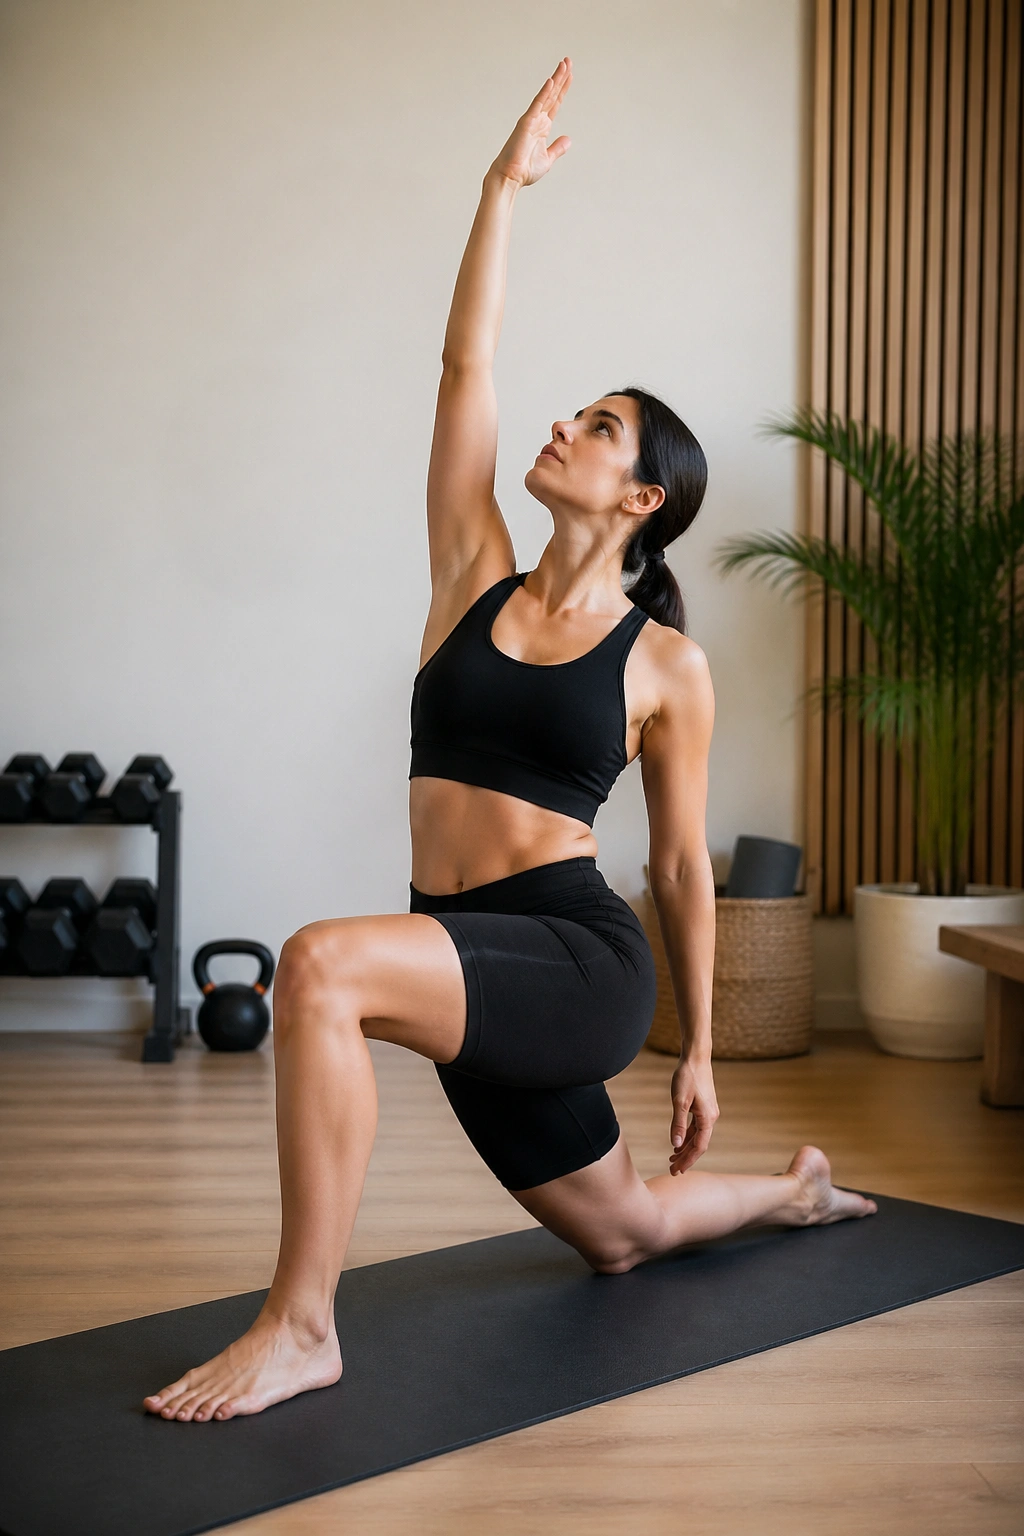
Desk chairs shorten hip flexors by the hour. Then people stand up, go straight into a walk, incline treadmill session, or lower-body workout, and wonder why the front of the hips feel welded shut.
Set up in a half-kneeling position with one knee down and the other foot forward at a 90-degree angle. Tuck your pelvis slightly—think belt buckle up toward the ribs—then shift your body forward until you feel the stretch in the front of the kneeling hip. Raise the arm on that same side and reach overhead for extra length through the front line.
What makes this one different
A lot of hip flexor stretches fail because people lean forward without changing pelvic position. That turns the move into a wobbly lunge. The posterior pelvic tilt is the key. Get that first, then add the forward glide.
Best way to use it
Hold 25 to 35 seconds per side and do 2 rounds. If you lift, walk hills, cycle, or sit for work, keep this one in heavy rotation. A better hip extension pattern means your glutes can do their job, and that makes fat-loss training less sloppy.
Your front thigh should feel long. Your lower back should feel quiet.
10. World’s Greatest Stretch for Full-Body Mobility
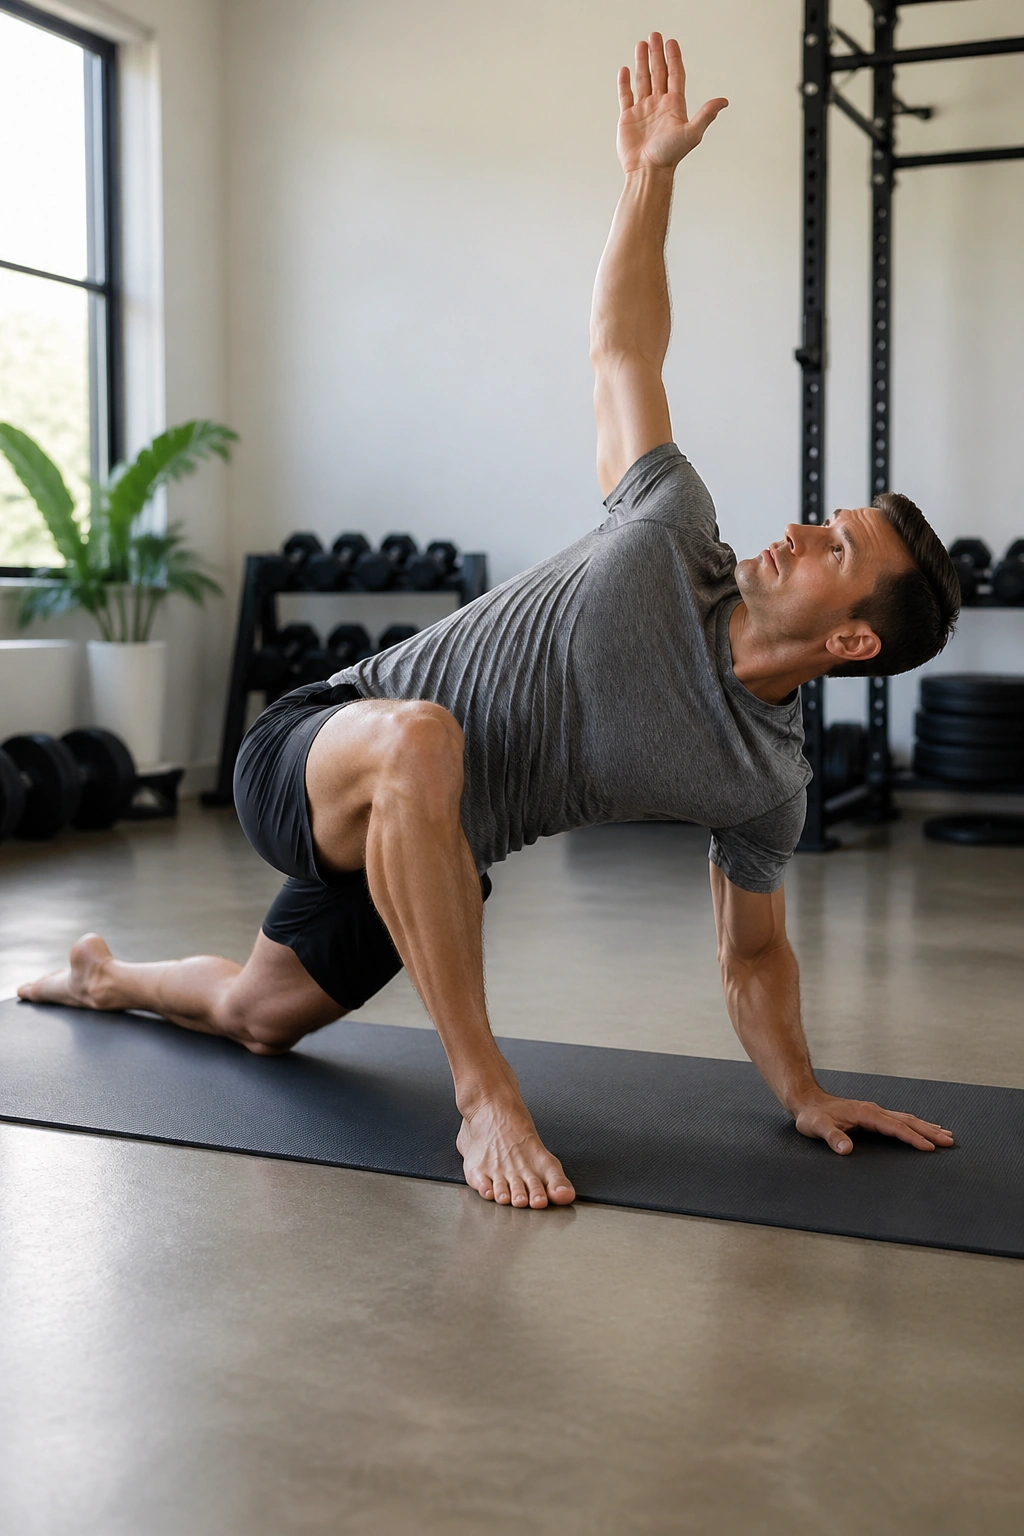
This one looks like a warm-up made by someone who got tired of choosing between hip work, hamstring work, and rotation. Fair enough. It covers a lot.
Start in a push-up position. Step your right foot outside your right hand. Drop your left knee if needed. From there, let your hips sink, place your right elbow toward the floor or near your ankle, then rotate your right arm up toward the ceiling. Step back and switch sides. Done slowly, this stretch opens the hip flexors, groin, hamstrings, thoracic spine, and waist in one sequence.
Here is where people rush and ruin it:
- Spend 2 to 3 breaths in the low position before you rotate.
- Keep the front foot planted flat.
- Rotate from the chest, not by yanking the shoulder back.
- Do 3 to 5 reps per side, not 15 frantic ones.
I like this before training more than after it. It is one of the few moves on this list that can work as a bridge between sitting still and asking your body to move like an athlete. If a stretch could earn a reputation on usefulness alone, this one already has.
11. Downward Dog for the Front and Back Body
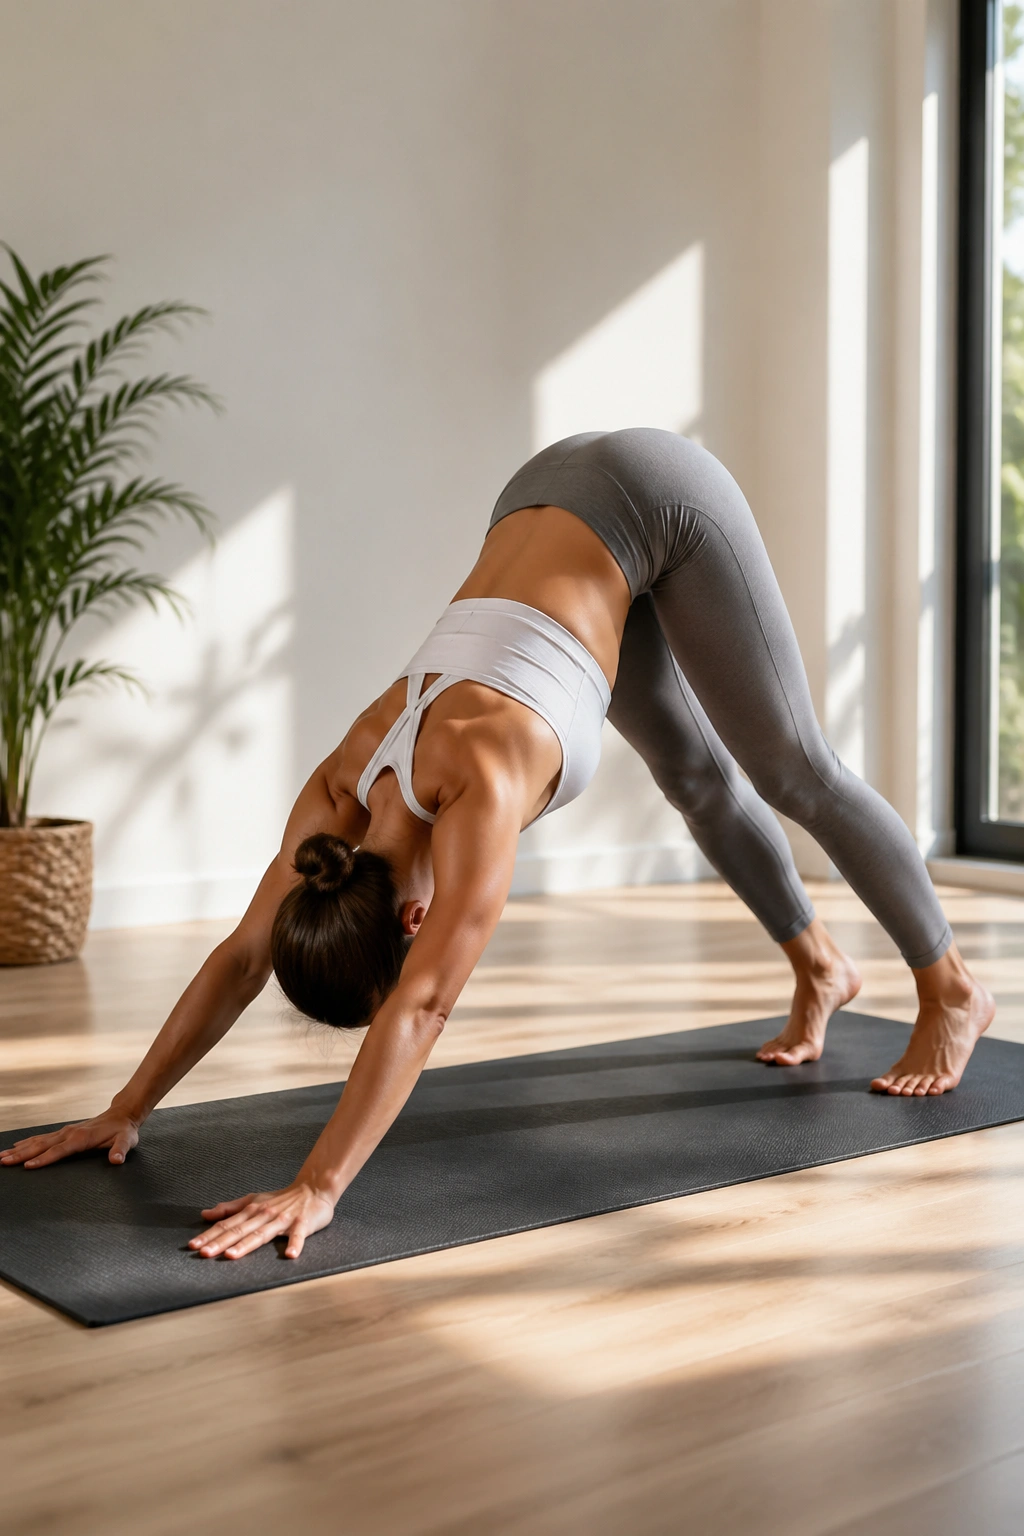
Few stretches expose hidden tightness like downward dog. Calves, hamstrings, shoulders, lats, even the sides of the waist—someone always complains first.
Push into an upside-down V with your hands shoulder-width apart and feet hip-width apart. Bend your knees a little at first. That is not the beginner version; it is often the smart version. When the knees soften, the spine has room to lengthen, and the stretch travels from the hands through the hips instead of getting trapped behind the knees.
I do not chase heels to the floor here. Most people do not need that. They need a long back, active shoulders, and a steady breath. Try 20 to 30 seconds, rest, then repeat once or twice. Pedaling the legs can help, though I prefer holding still for a few breaths after the first pedal or two.
Downward dog fits well after walking, rowing, circuits, or core training. It opens the front body a bit through the shoulders while lengthening the back chain. That mix can make your posture feel lighter the minute you stand up, and that is not nothing when you are trying to stay active every day.
12. Triangle Pose for Obliques, Hips, and Hamstrings
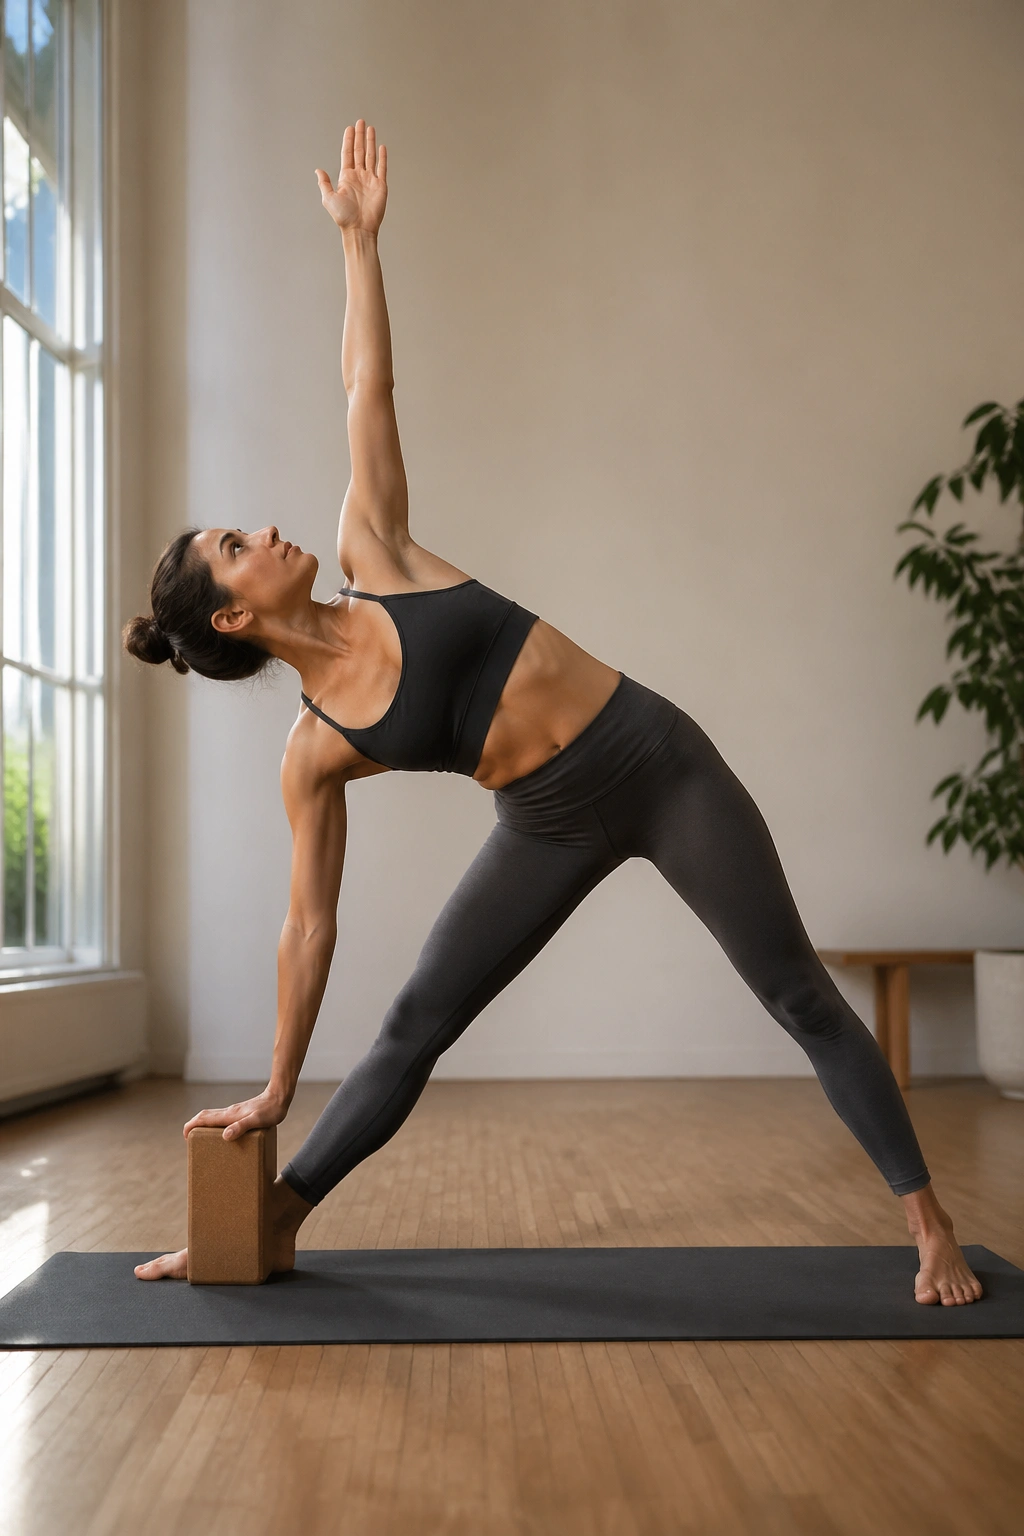
Triangle pose is humbling.
Unlike a plain standing hamstring stretch, triangle asks you to control space through the side body while your legs work hard underneath you. Stand with your feet wide, turn one foot out, hinge over that leg, and place your lower hand on your shin, a yoga block, or the floor if your range allows. The top arm reaches up, and the chest stays open.
Who gets the most out of this? People whose waist feels tight during side bends, whose hamstrings tug during walks, and whose inner thighs stay stiff no matter how much they stretch seated on the floor. Triangle gets all of those areas talking to each other.
You do not need a deep bottom hand to make it count. A block often gives a better stretch because you can keep length through both sides of the torso. Hold 20 seconds per side, then come up with control. If balance is shaky, shorten your stance.
I like triangle in the middle of a routine, once the body is warm enough to take a longer line. Put it too early and it feels cramped. Put it at the right time and it opens half the body at once.
13. Crescent Lunge With Overhead Reach
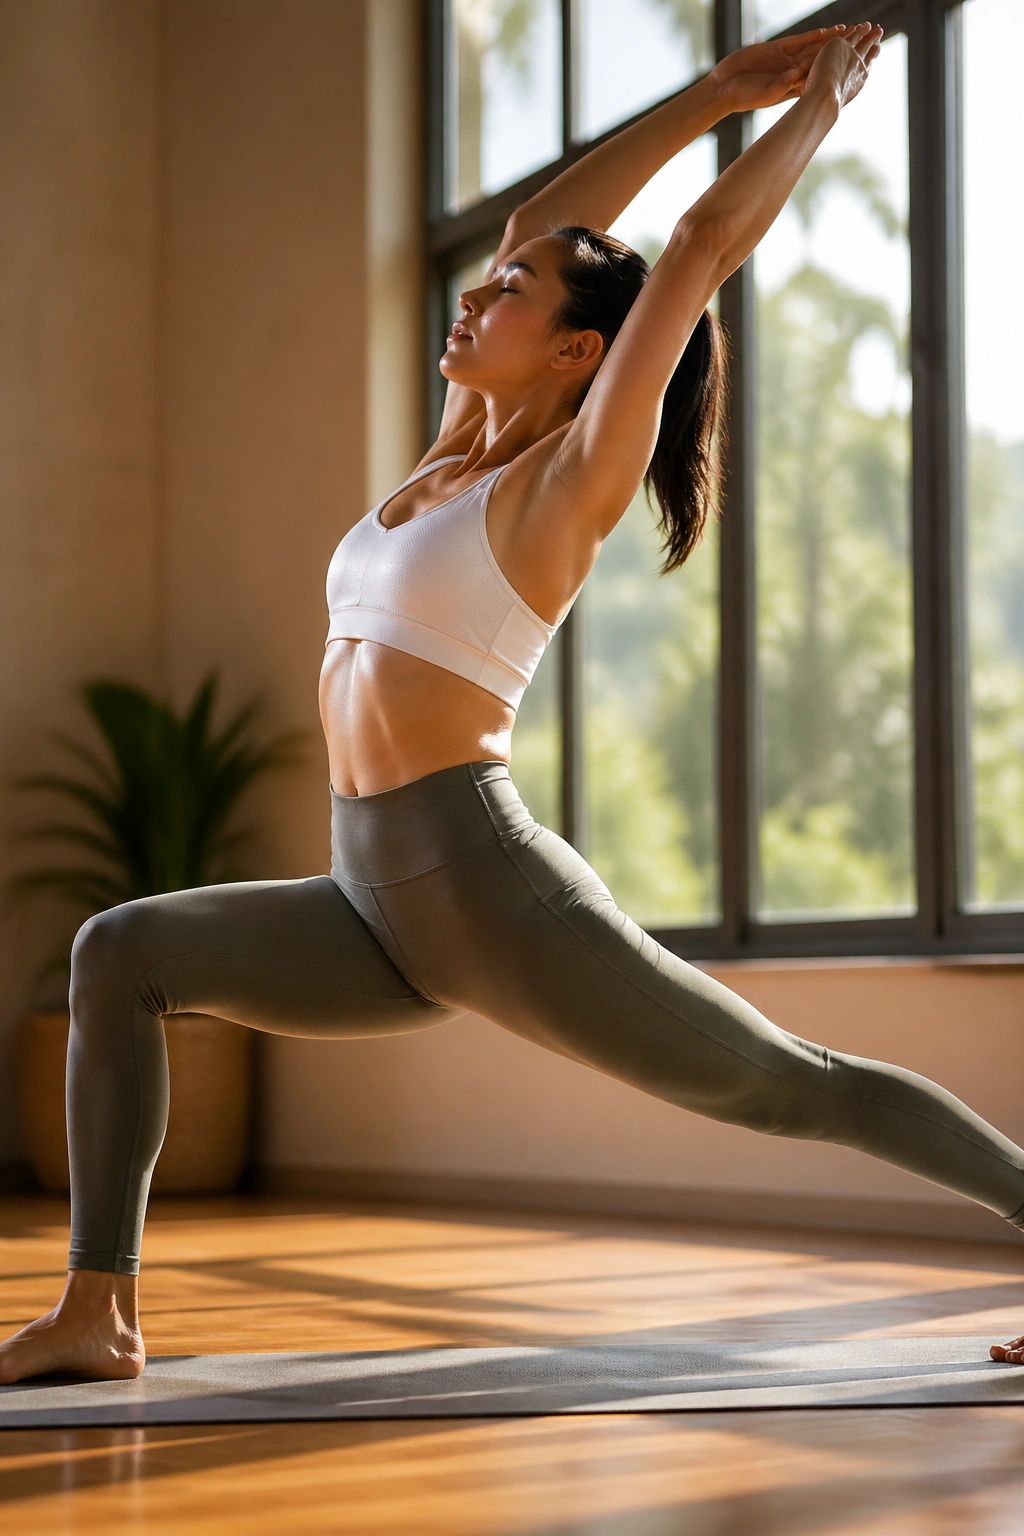
A lunge plus an overhead reach changes the entire front line of the body. You feel the back-leg hip flexor, the lower abs, the ribs, and often the lat on the reaching side too.
Step into a split stance or kneeling lunge. Sink your hips a little, then raise both arms overhead. If you want more stretch, clasp one wrist and lean away from the back leg by a few inches. That tiny side arc turns a standard lunge stretch into something far more useful for the waist and front torso.
Why it works well for fat-loss training
Walking, climbing stairs, and lower-body lifting all need hip extension. Tight hip flexors shorten that stride and shift the workload forward into the quads and low back. Opening the front of the hip gives you a cleaner push-off and a taller posture.
Use these cues
- Keep the front ribs stacked over the pelvis.
- Spend 20 to 25 seconds per side.
- Squeeze the glute of the back leg lightly.
- If balance is messy, hold a wall with one hand.
Best time for it: after a treadmill incline session or between sets of lower-body training, when your hips feel glued together.
14. Sphinx Pose for a Gentle Abdominal Stretch
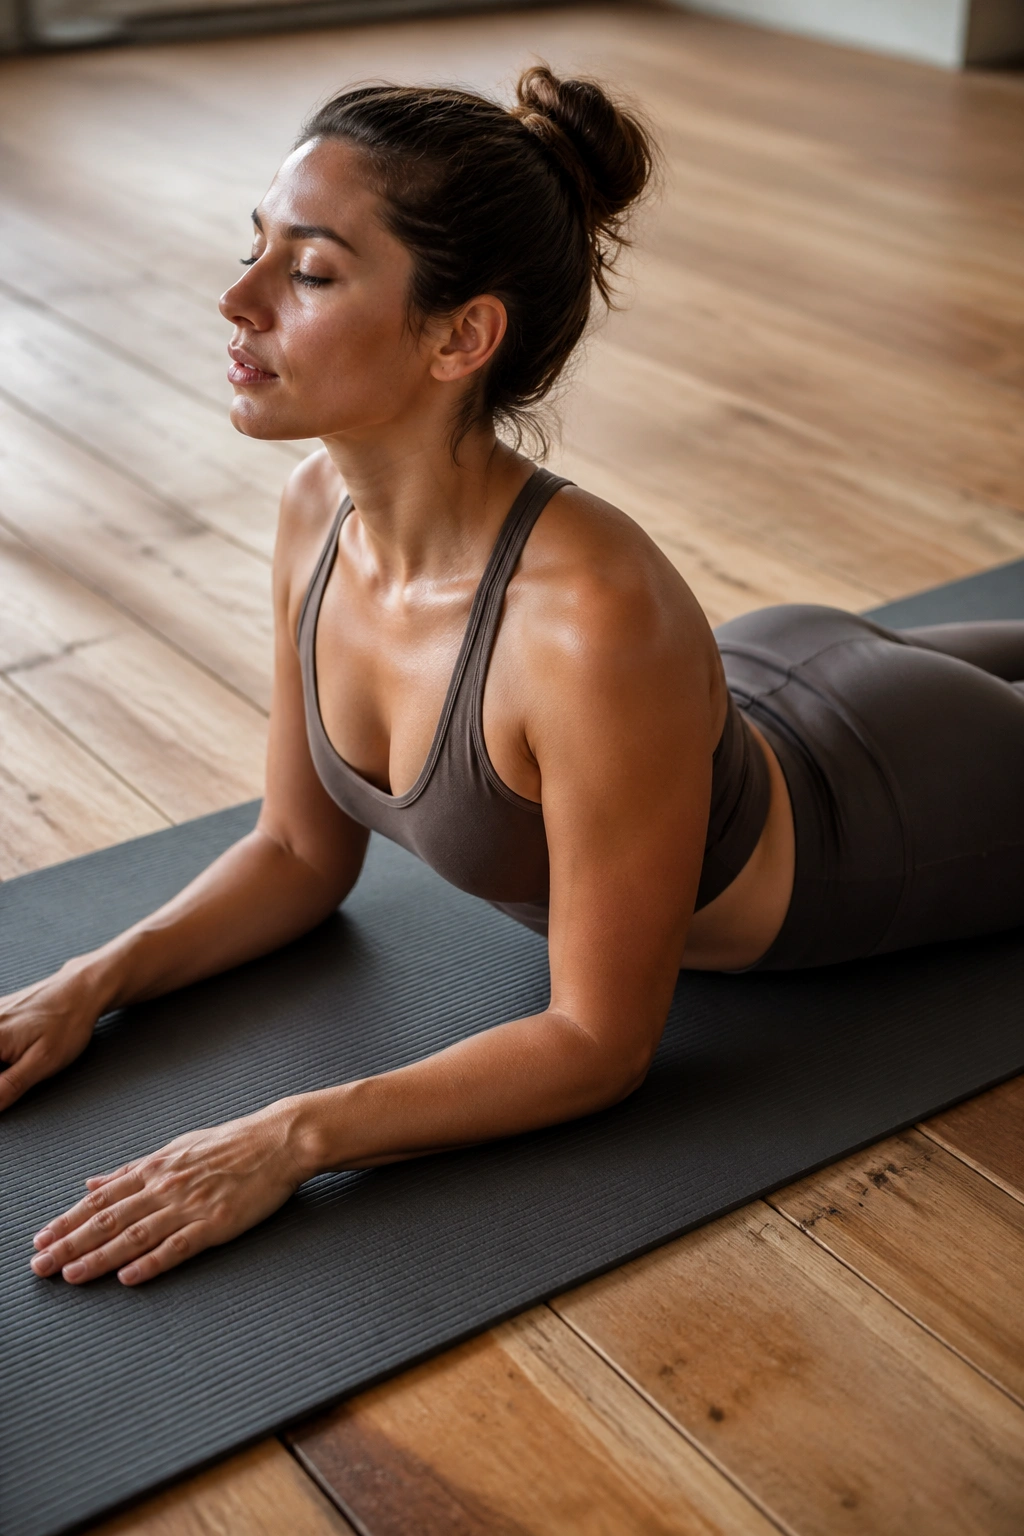
Not every backbend needs to be dramatic. Sphinx is the calmer cousin of cobra, and for a lot of people it is the better place to start.
Lie face down and prop yourself up on your forearms with your elbows under your shoulders. Press gently through the forearms and let your chest widen. Your pubic bone and thighs stay heavy on the floor, and your glutes stay relaxed enough that the stretch lands across the front of the stomach instead of jamming your spine.
If cobra feels sharp or too intense, use sphinx for 30 to 45 seconds. It gives you the same general front-body opening with less leverage, which means less chance of forcing range you do not own. People with stiff upper backs often feel this more in the chest and upper abs than in the low back, which is a good sign.
This is also a sneaky breathing drill. Stay quiet, breathe low and wide into the ribs, and let the belly rise into the floor on the inhale. That little contact cue teaches relaxed abdominal expansion, something tight, stress-breathing bodies often forget how to do.
15. Camel Pose for a Deep Front-Body Opening
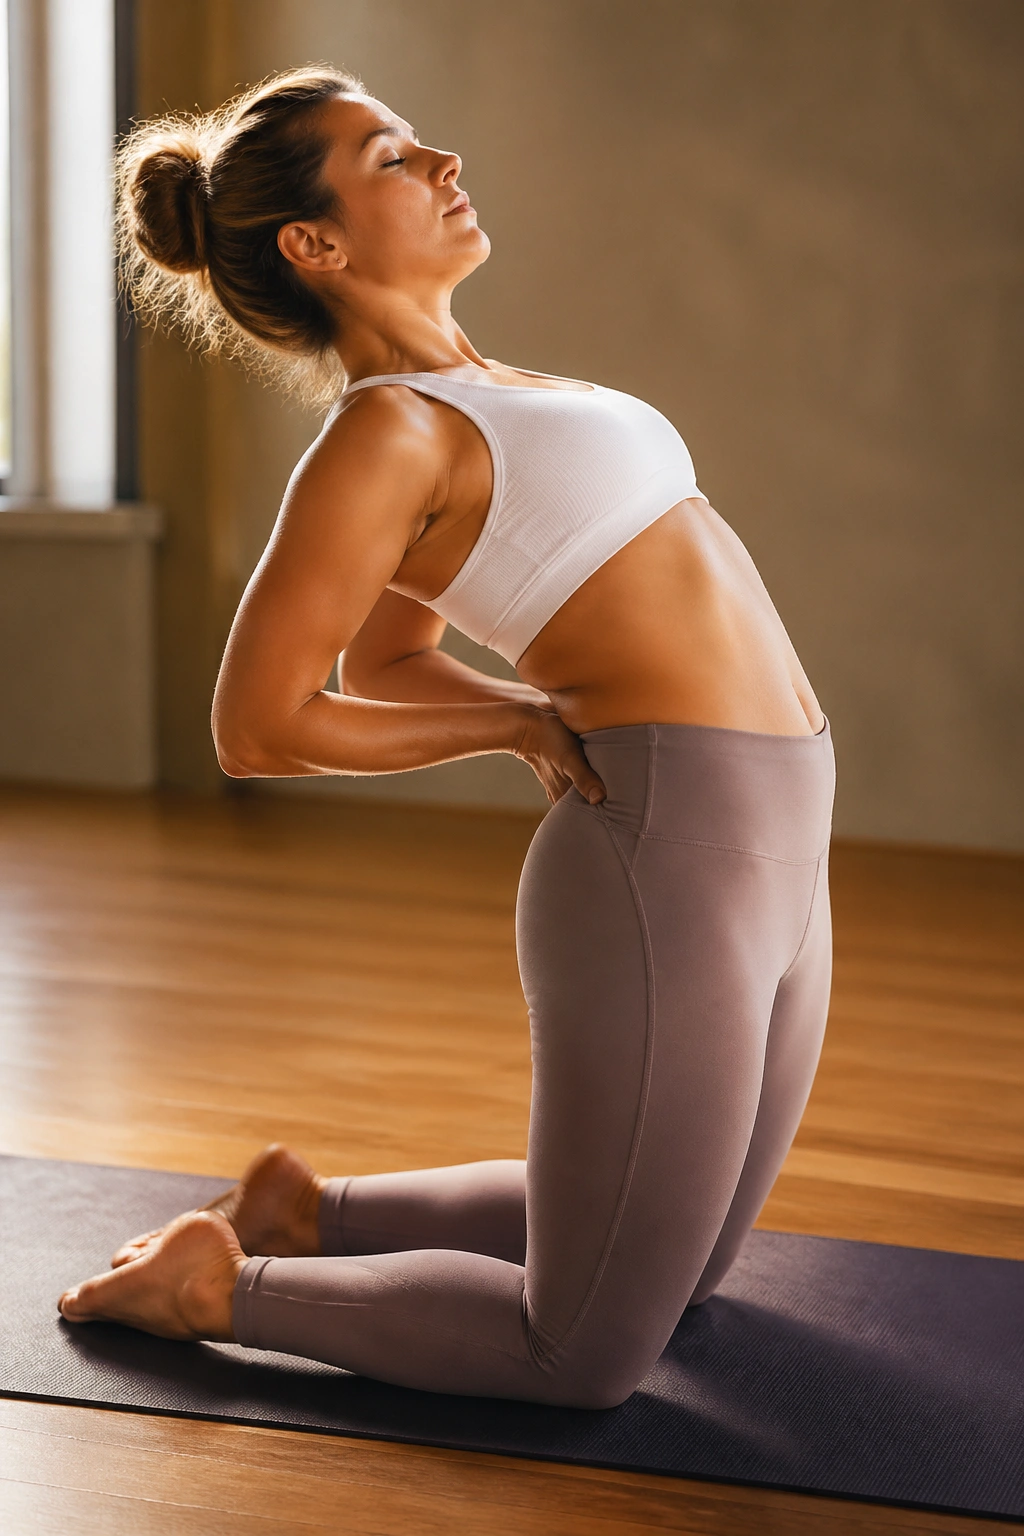
Camel pose is not a beginner flex. It is a deep front-body stretch that asks for control, patience, and a bit of honesty about your range.
Kneel upright with your knees about hip-width apart. Place your hands on your lower back first, lift your chest, and press the hips gently forward. If that feels good and steady, reach for your heels one hand at a time. The aim is not to collapse backward. The aim is to lift through the sternum and spread the stretch through the quads, hip flexors, abs, and chest.
What to watch for
If your neck feels crunchy, keep your chin slightly tucked. If your lower back grabs instantly, stay with hands on the low back and work there. That version counts.
Dose matters here
Hold for 10 to 20 seconds, come out slowly, and sit back briefly before repeating once. I save camel for later in the session, once hip flexors and upper back are already open. Skip it if you have a history of back irritation from extension. There is no medal for forcing a pose that your body hates.
When it fits, though, camel is one of the strongest “undo the desk posture” stretches on the list.
16. Bridge Pose to Open the Hips and Wake Up the Core
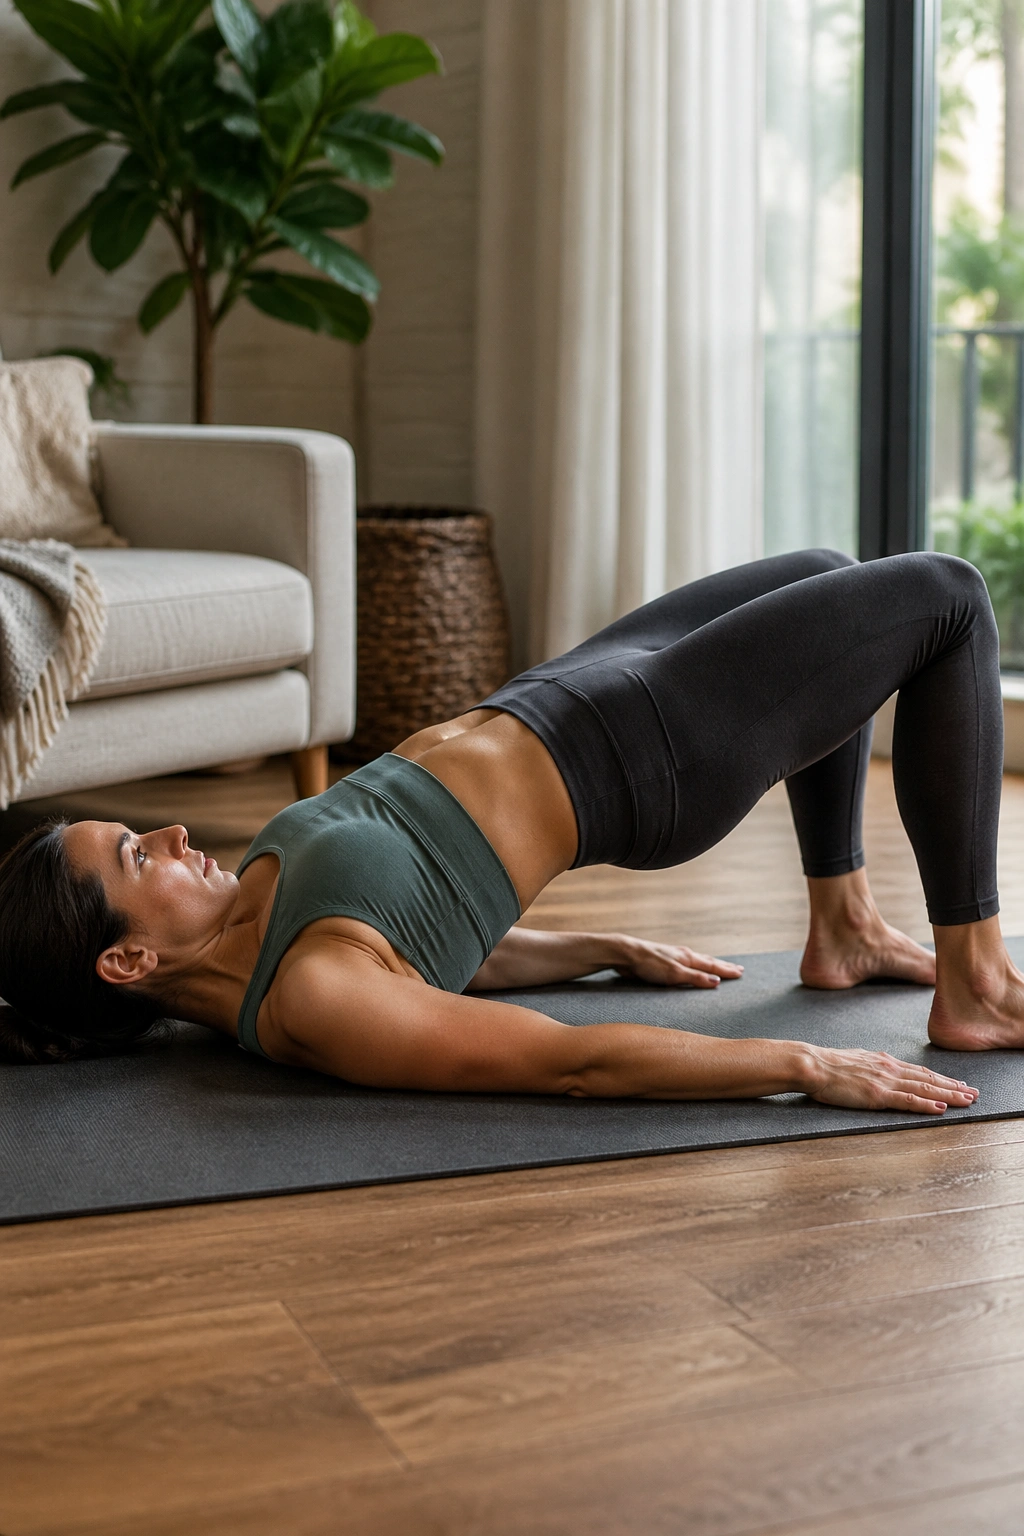
Bridge gets labeled as a glute move and left there. That undersells it.
Lie on your back with your knees bent and feet flat, about a hand’s length from your hips. Press through your heels and lift your pelvis until your body forms a gentle slope from shoulders to knees. You are not trying to arch high enough to impress anyone. You are trying to open the front of the hips while teaching the glutes and lower abs to share the work.
That combination is a big deal. When the glutes wake up, the hip flexors can stop acting like they own the place.
A few cues sharpen it fast:
- Exhale as you lift so the ribs stay down.
- Hold the top for 5 to 10 seconds.
- Do 5 to 8 reps instead of one long sloppy hold.
- Keep pressure even through both feet.
Bridge sits in the gray area between stretch and activation, which is one reason I like it so much. Some moves loosen tissue. Some teach better movement. This one does both, and your next exercise usually feels stronger because of it.
17. Figure Four Stretch for Glutes and Pelvic Ease
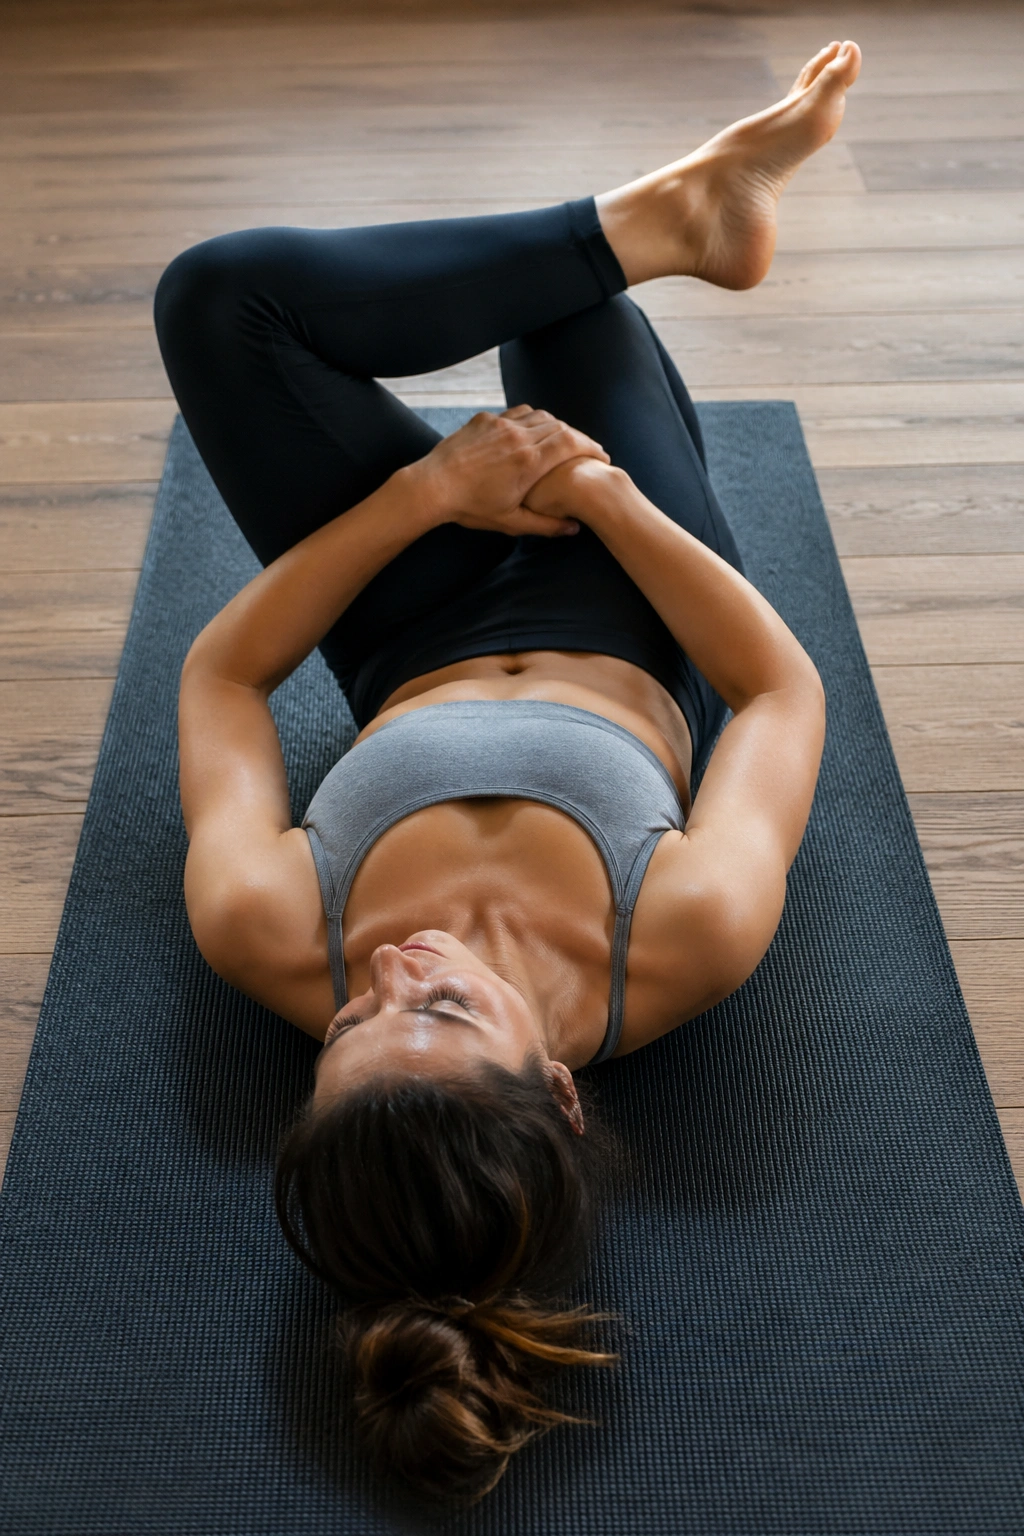
Cross your right ankle over your left knee while lying on your back. Pull the left leg in. Suddenly the outside of the right hip starts talking.
The figure four stretch is one of the best fixes for people who swear their “tight hamstrings” never loosen up. Half the time the problem is actually the glutes and deep hip rotators. When those tissues stay stiff, the pelvis has a harder time moving cleanly, and that feeds tension up into the lower back and across the waist.
Keep the right foot flexed so the knee feels supported. Thread your hands behind the left thigh, not over the shin if that cranks the knee. Hold for 25 to 35 seconds, then switch sides. If reaching the leg is awkward, do the same setup seated on a bench or chair.
This stretch pairs well with walking and cycling, since both can leave the hips feeling compressed. I also like it after deadlifts or squats, when the glutes are tight in that dull, deep way that does not go away with a quick toe touch. Figure four reaches the spot you were missing.
18. Happy Baby for the Low Back and Inner Hips
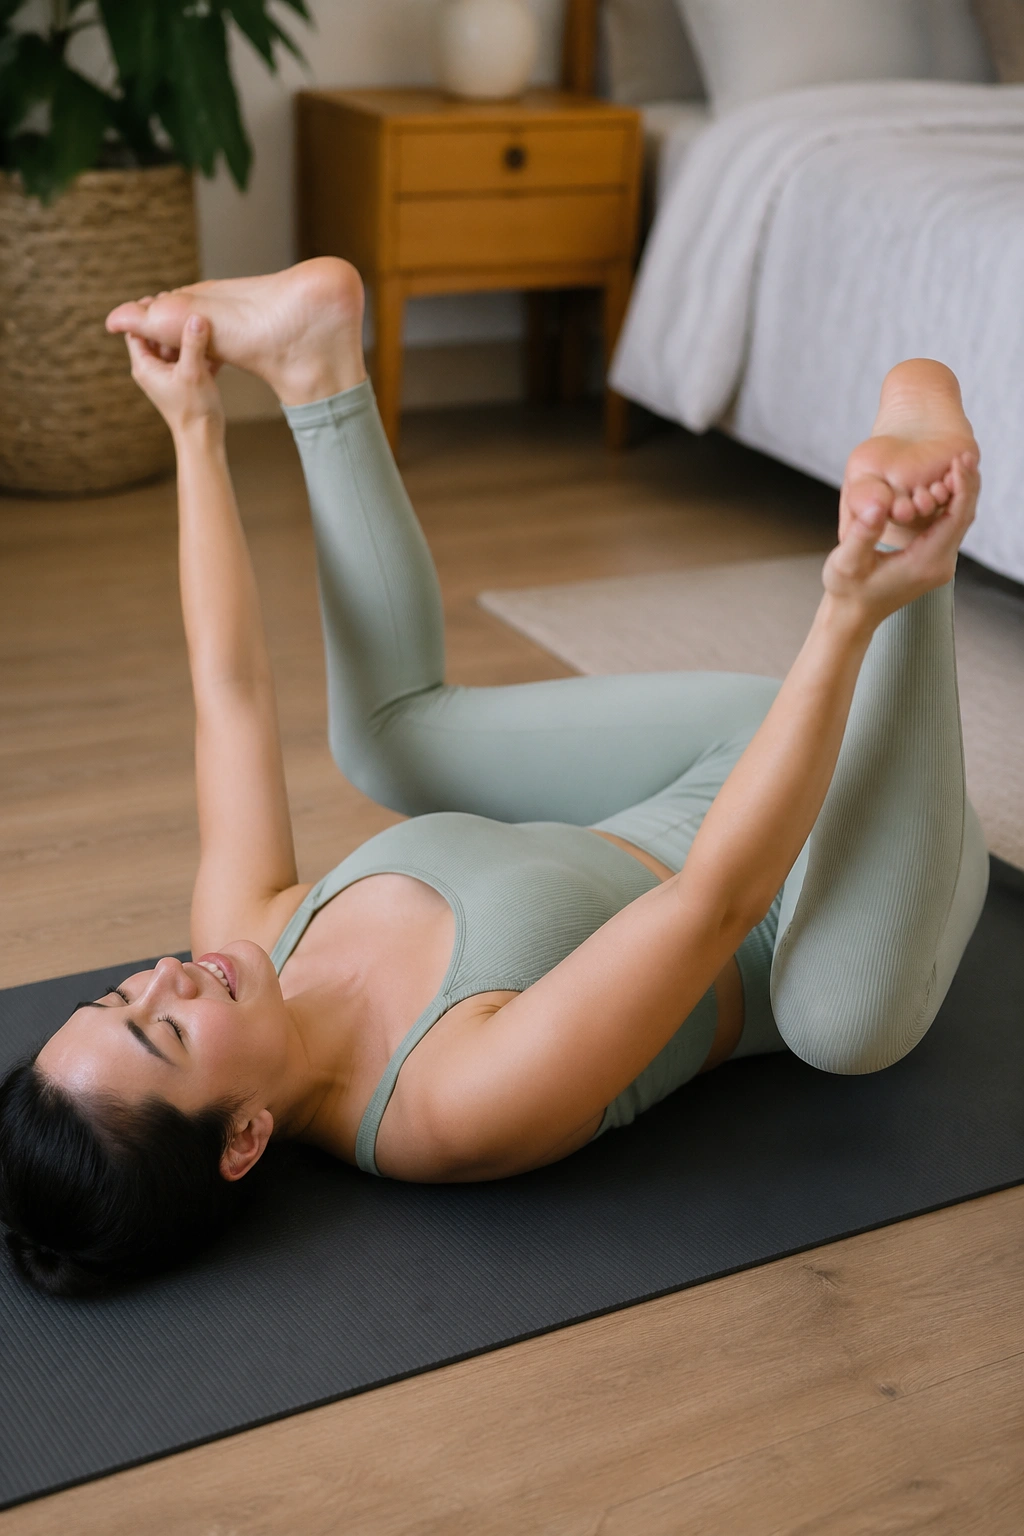
Happy Baby looks a little ridiculous. I am fine with that. It works.
Lie on your back, bring your knees toward your armpits, and hold the outsides of your feet, ankles, or shins. Keep the tailbone heavy and let the knees drift wide. The stretch lands through the inner hips, groin, lower back, and back of the pelvis, which is a useful mix when your body feels compressed after a hard session.
Unlike a seated groin stretch, Happy Baby takes gravity off the spine. That is why people with tight low backs often prefer it. You can stay still for 20 to 30 seconds or rock gently side to side for a small massage effect across the sacrum.
Who benefits most? People who sit for long stretches, walkers with stiff hips, and anyone whose lower back gets cranky after core circuits. If grabbing the feet feels like too much, hold behind the thighs and keep the same shape. The stretch still lands.
I do not use this one at the start of training. It is more of a late-session or evening move, the kind that tells your nervous system the hard part is done.
19. Thread the Needle for Upper-Back Rotation
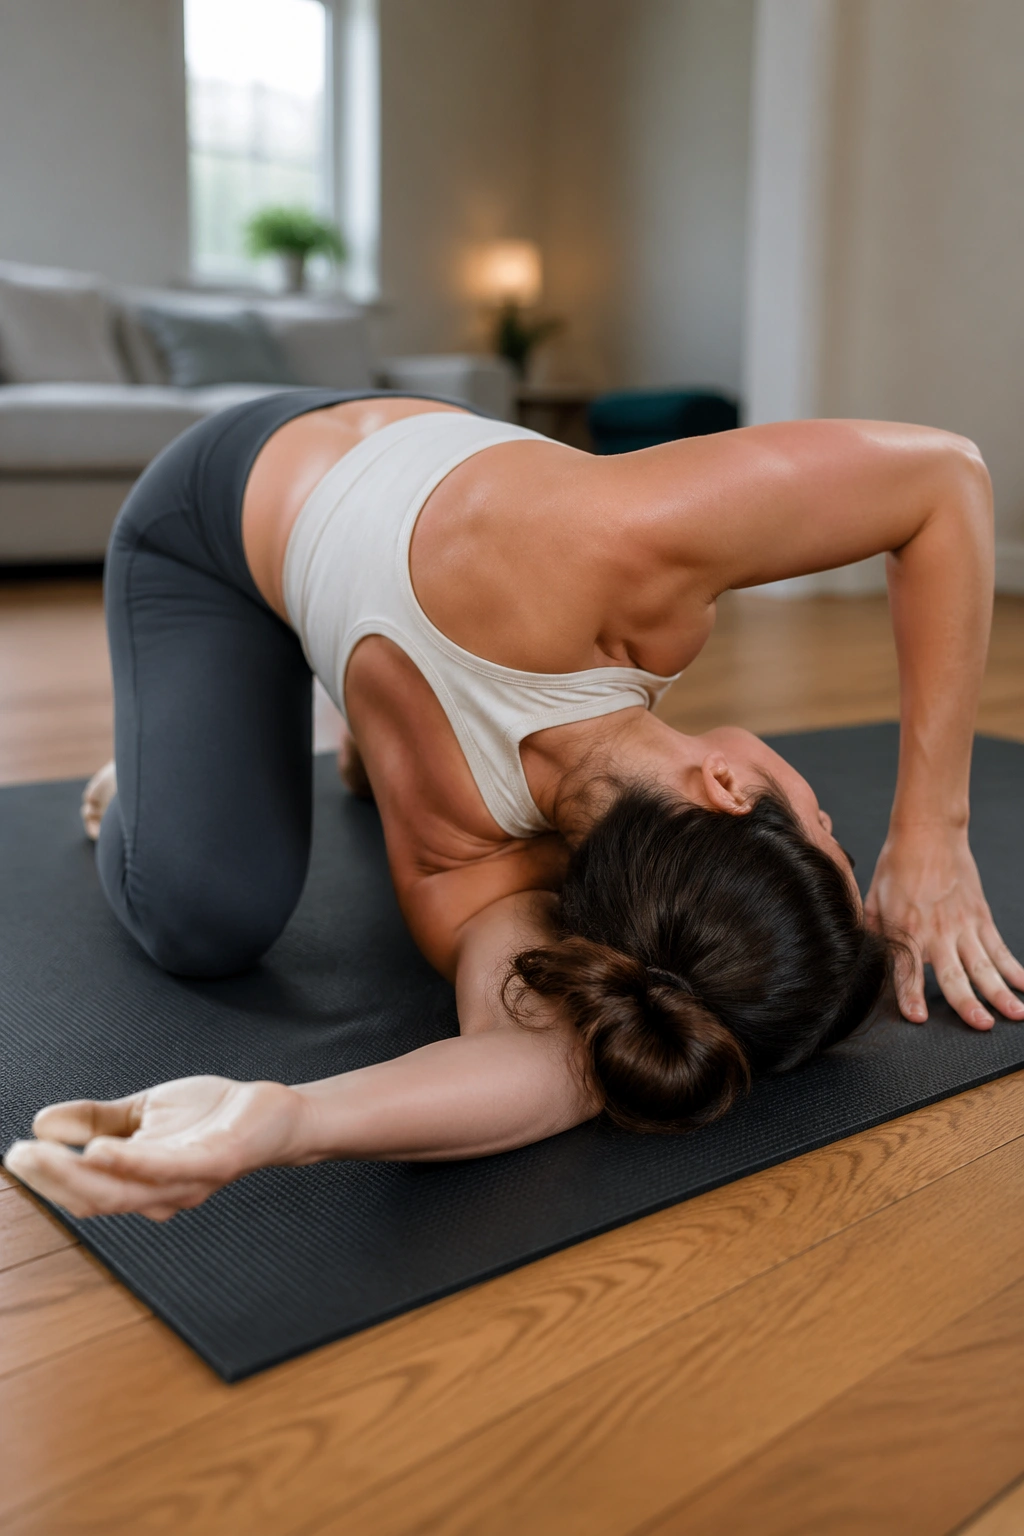
Upper-back stiffness can make stomach training feel worse than it should. When the thoracic spine will not rotate, the neck and lower back jump in to fake it. Thread the Needle cleans that up.
Start on all fours. Slide your right arm under your left arm, palm facing up, and lower your right shoulder and the side of your head toward the floor. Your left hand can stay planted for support or reach forward to deepen the stretch.
Where you should feel it
Look for a stretch through the back of the shoulder, outer rib cage, and upper back. If you only feel wrist pressure, change the angle and slow down.
A few practical cues
- Stay for 20 to 30 seconds per side.
- Keep your hips stacked over the knees.
- Press lightly into the support hand to control the amount of rotation.
- Breathe into the back ribs, not just the chest.
Why it matters for belly fat workouts: better thoracic rotation helps your posture, arm swing, and core control during loaded carries, rows, and twists. That makes training feel less jammed up and more efficient.
20. Seated Torso Twist to Finish the Routine
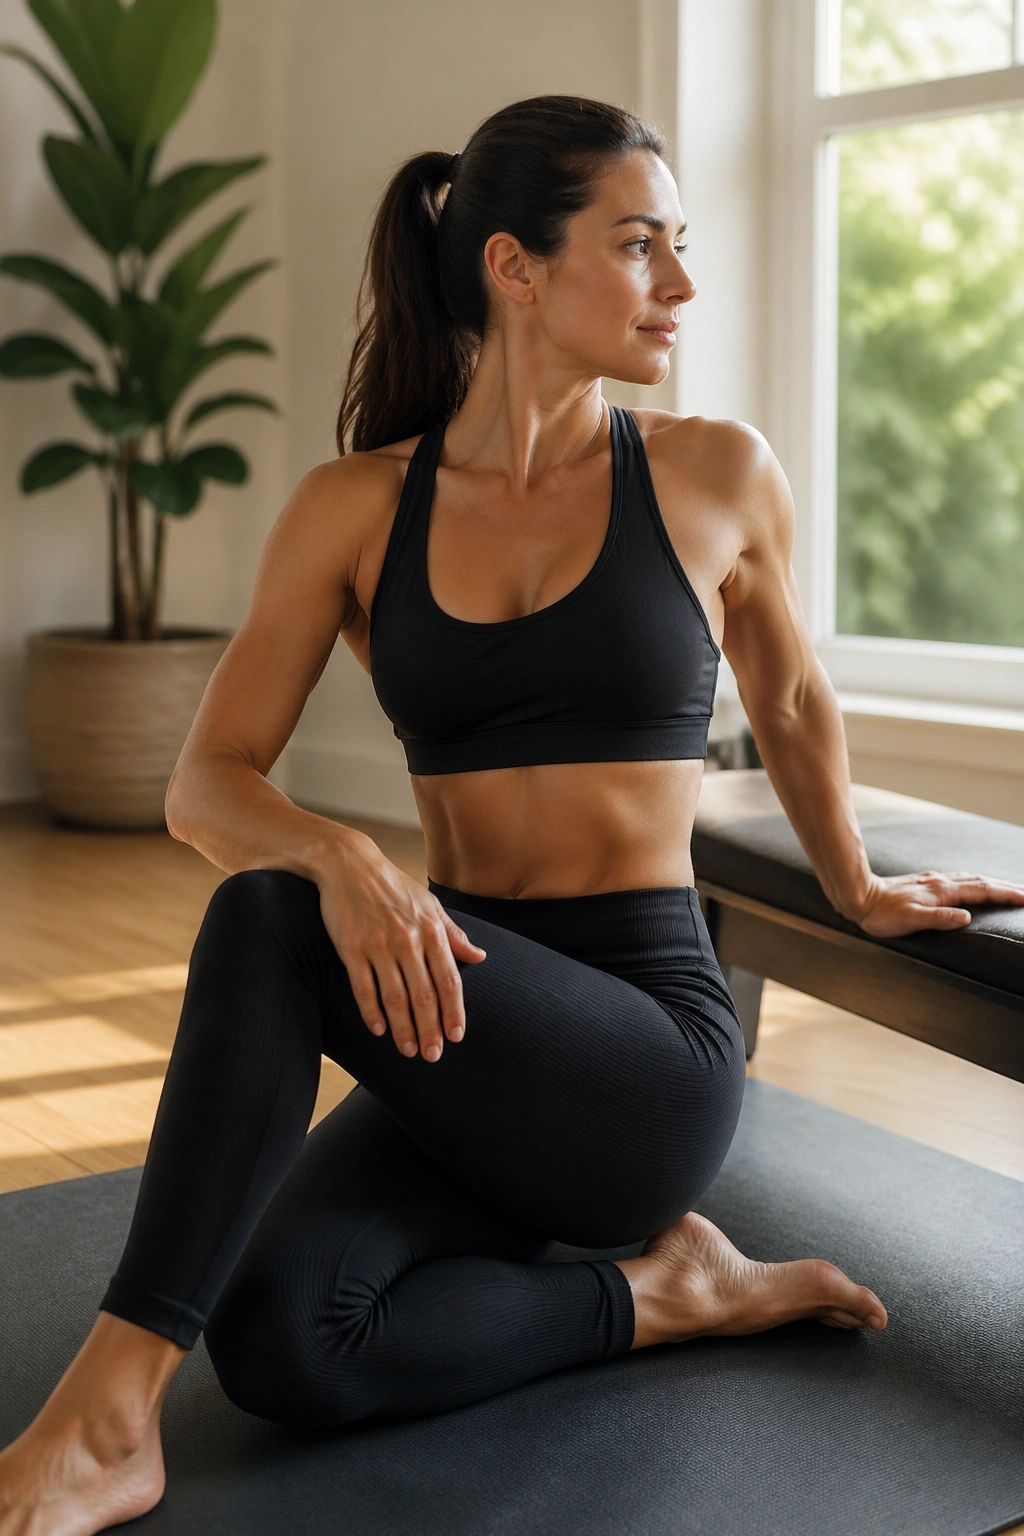
Finish with this one and your whole session tends to settle.
Sit tall on the floor or on the edge of a bench. Bend one knee, keep the other leg relaxed, and rotate your torso toward the bent knee. One hand goes behind you for support; the other can rest on the outside of the thigh. The twist should feel clean and tall, not cranked. If you collapse before you rotate, sit on a cushion and try again.
This move is less about chasing range and more about organizing the spine after other stretches. You have already opened the hips, front body, and hamstrings. A seated torso twist gives the waist and rib cage one last controlled turn. Hold for 15 to 25 seconds per side, take two slow breaths, and switch.
I like this as the closing stretch because it is easy to read. If one side feels sticky, you know where your body still holds tension. If both sides feel smoother than they did at the start, you know the routine did its job.
Short. Clean. Useful.
Final Thoughts
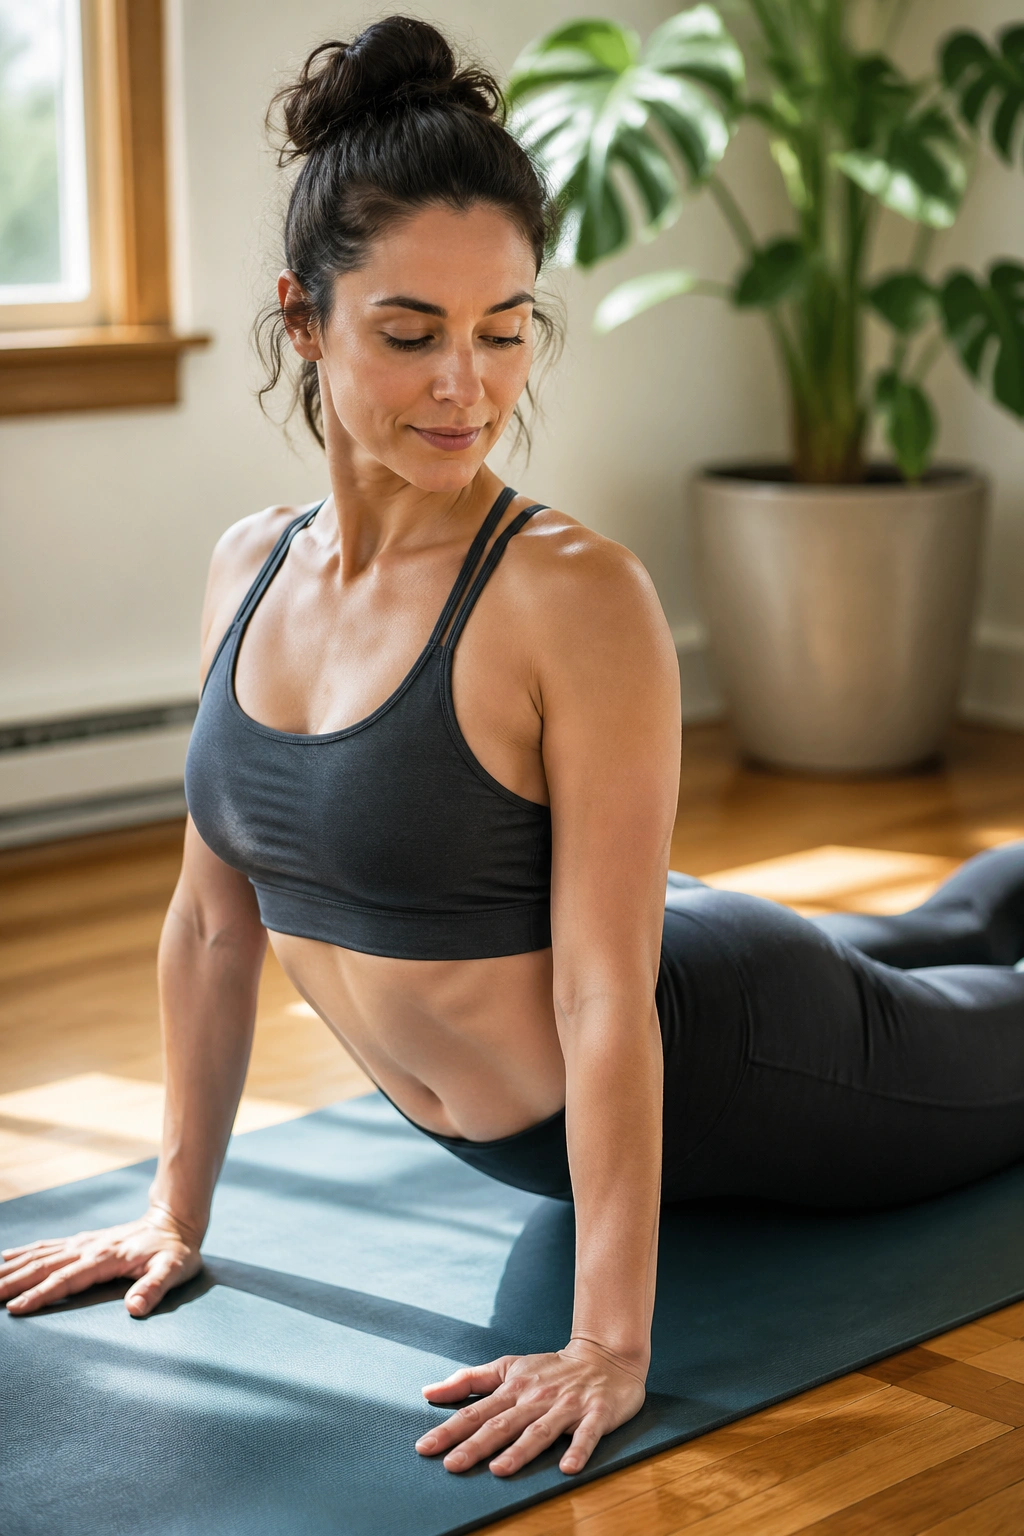
If you only have time for six moves, my short list is cat-cow, cobra, half-kneeling hip flexor stretch, figure four, supine spinal twist, and child’s pose. That combination covers the front body, hips, glutes, waist, and spinal movement without dragging the routine out forever.
A stretch routine works best when it is attached to something you already do. Tag it onto your walk. Put it after your strength workout. Do it while the shower warms up. Tiny routines beat heroic plans that last four days and disappear.
And one last honest note: the people who get faster results with belly fat workouts are often the ones who can stay consistent for months without their body feeling beat up. These stretches help with that part, which is the part that decides almost everything.
