



Beginner workouts for obese women at home work best when they do not punish your knees. A chair, a wall, and a little open space can do far more than most people think, especially when the goal is to build stamina without getting wiped out.
That matters because a lot of start-up routines look tidy on video and feel awful in real life. If you carry extra weight, jumping, deep floor work, and fast burpees can hit ankles, knees, wrists, and the lower back all at once. That is not a mindset problem. It is a mismatch.
The smarter approach is almost boring. Short bouts, joint-friendly moves, and enough support to let you finish the session without dreading tomorrow. Five minutes done often beats one heroic workout that leaves you sore for three days.
If you have chest pain, dizziness, numbness, or sharp joint pain, stop and get medical advice before pushing on.
1. Seated March and Reach
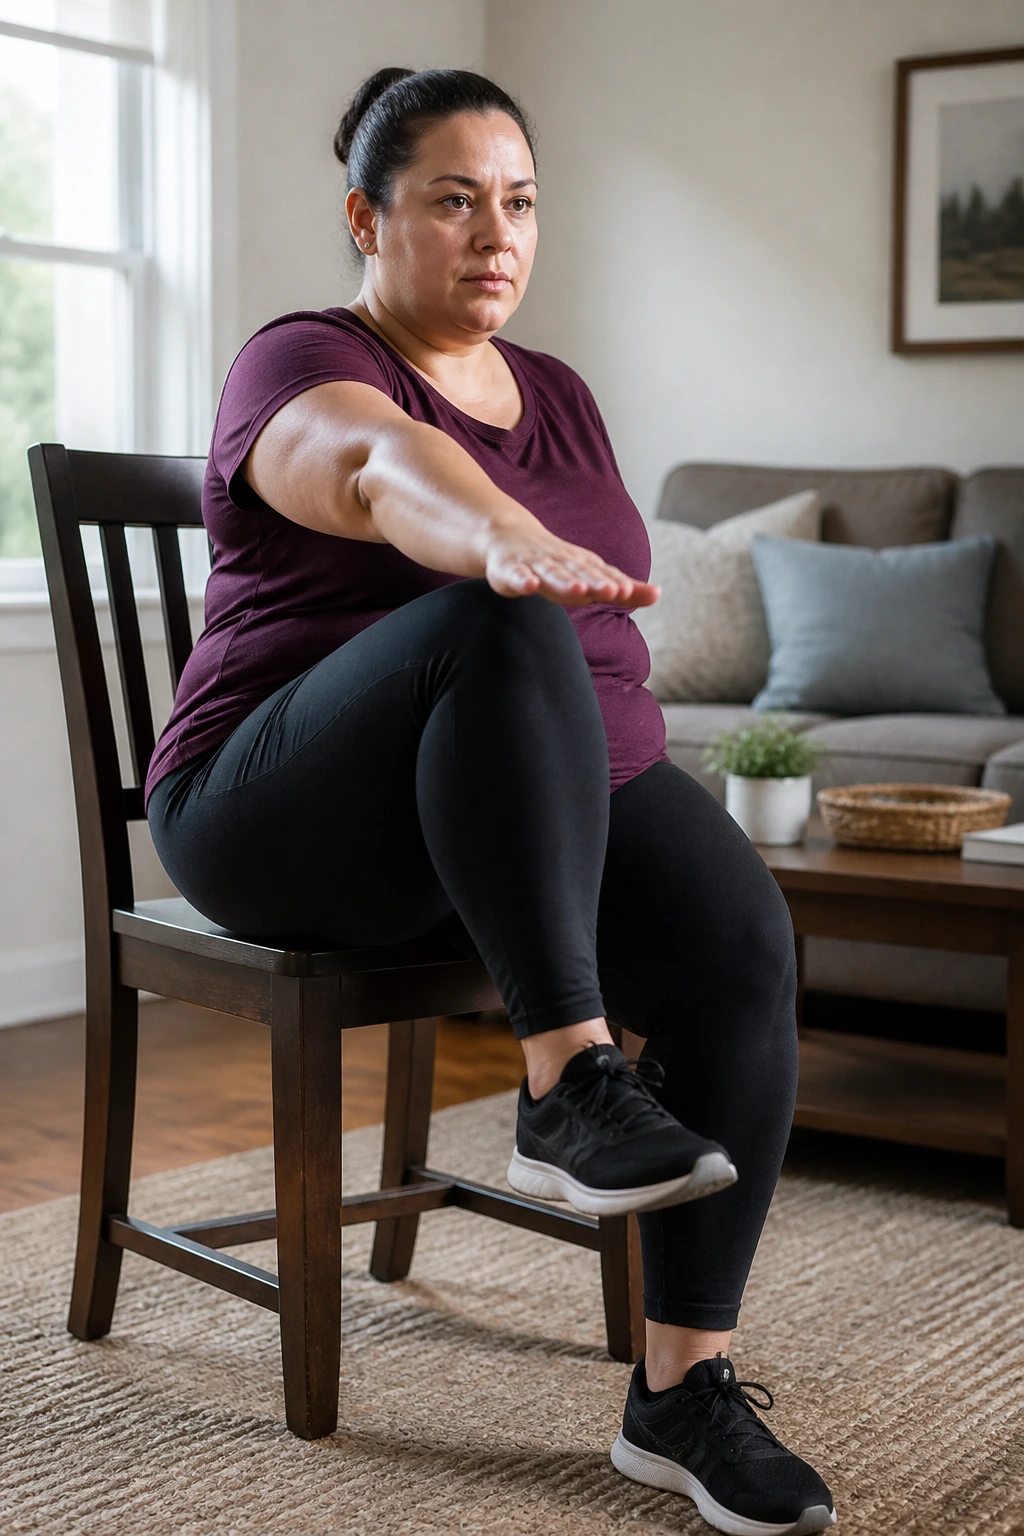
A seated march sounds tiny until you do it for two minutes straight. Then it starts to feel like real work, especially if you keep your spine tall and your arms moving with purpose.
Why it works
Sit near the front edge of a sturdy chair, feet flat, and lift one knee at a time as if you’re marching in place. Add an opposite-hand reach toward each lifted knee, and you’ve got a simple low-impact cardio drill that wakes up the hips, waist, and shoulders at the same time. The chair takes the fear out of balance, which is a big deal when you’re starting from zero.
Use 30 seconds on, 30 seconds off for 6 to 10 rounds. If that feels too easy, speed up the march a little. If your hip flexors get cranky, slow it down and lift the knees only as high as you can control.
Quick setup that helps
- Keep both feet planted between marches.
- Sit tall, not slumped.
- Move the arms, even if it feels silly. That’s part of the work.
- Aim for a steady breathing pattern, not gasping.
Pro tip: If you start hunching, you’re going too fast. Back off, then build again.
2. Chair Sit-to-Stand Intervals
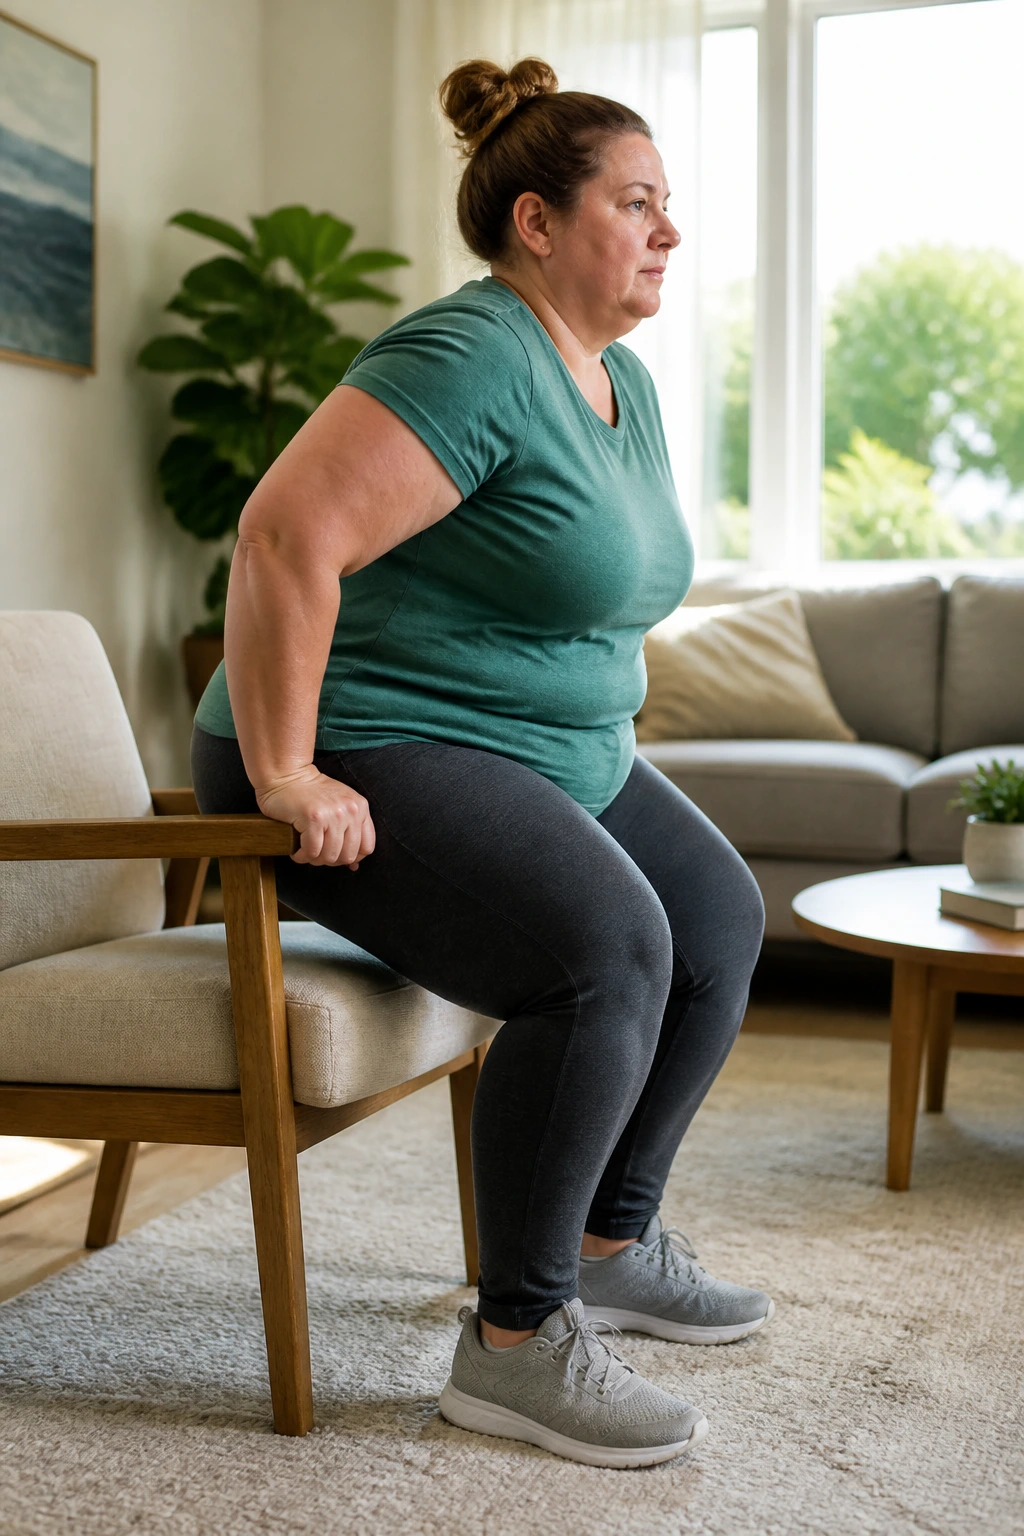
If I had to pick one lower-body move for a beginner who needs confidence fast, this would be it. Chair sit-to-stands train the legs, glutes, and core in a way that carries over to real life every single day.
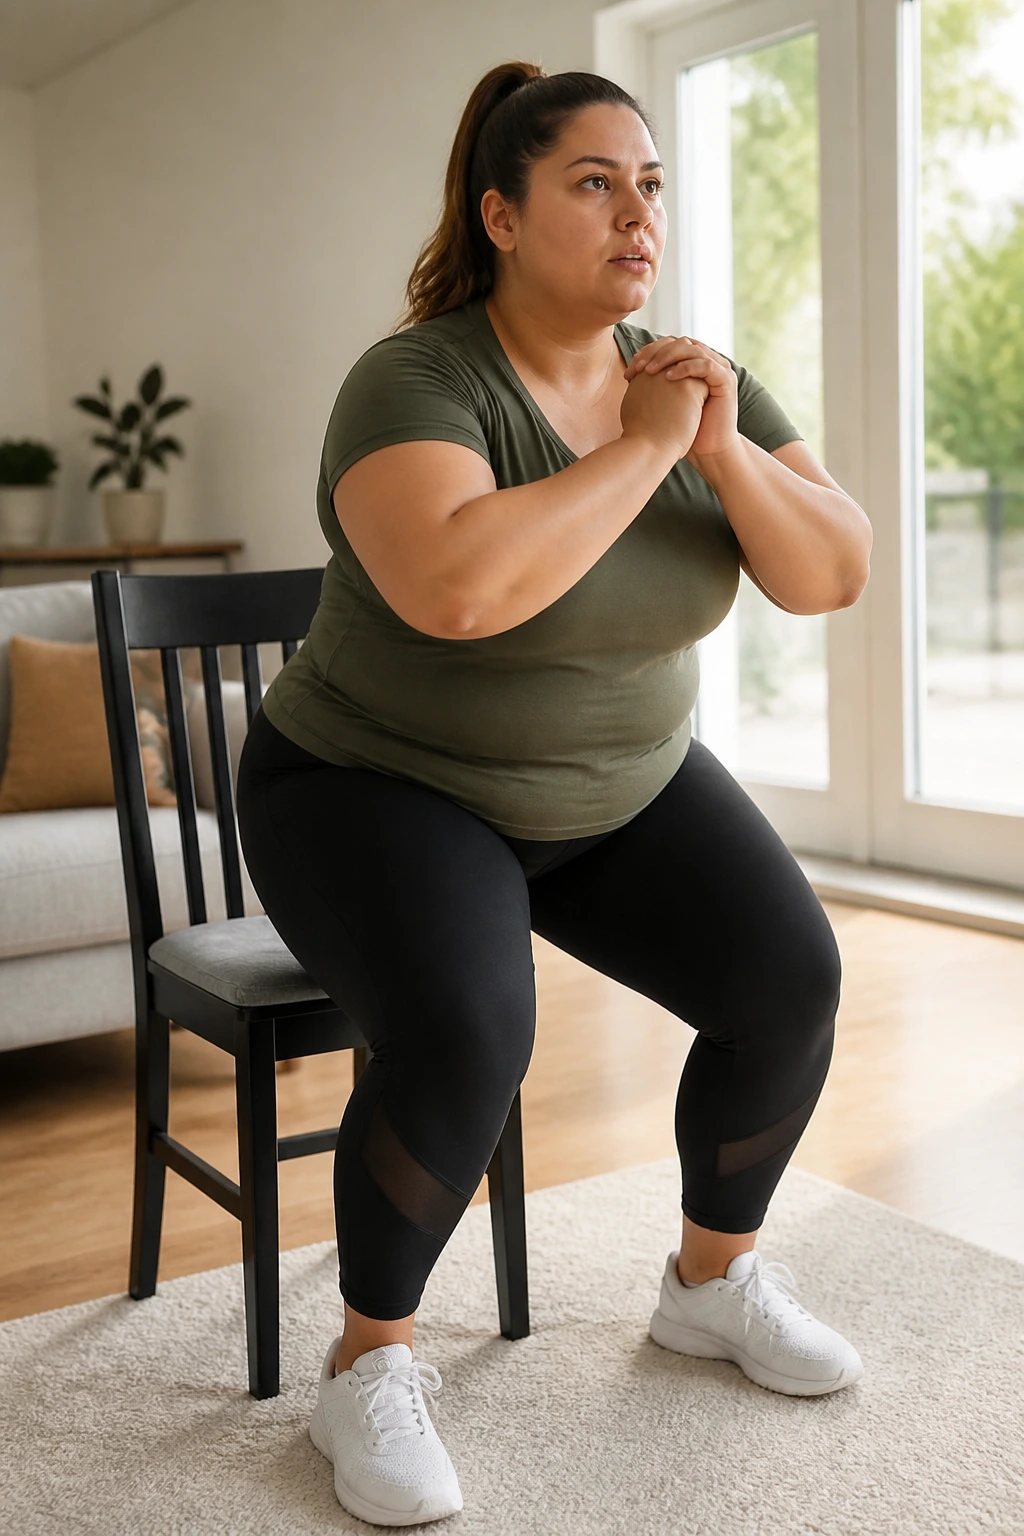
Stand up from the chair, sit back down under control, and repeat. That’s it. But the details matter. Keep your feet about hip-width apart, lean your chest forward slightly, and push through the whole foot instead of just the toes. If getting up is tough, use your hands on the armrests or thighs for help at first. That’s fine. Use the help, then gradually use less.
Try 5 reps for 3 rounds to start. Rest for 45 to 60 seconds between rounds. If the chair is low and you struggle to get up, place a firm cushion on the seat to raise the height by a couple of inches.
One rep done well beats five ugly ones. Every time.
3. Wall Push-Up Ladder
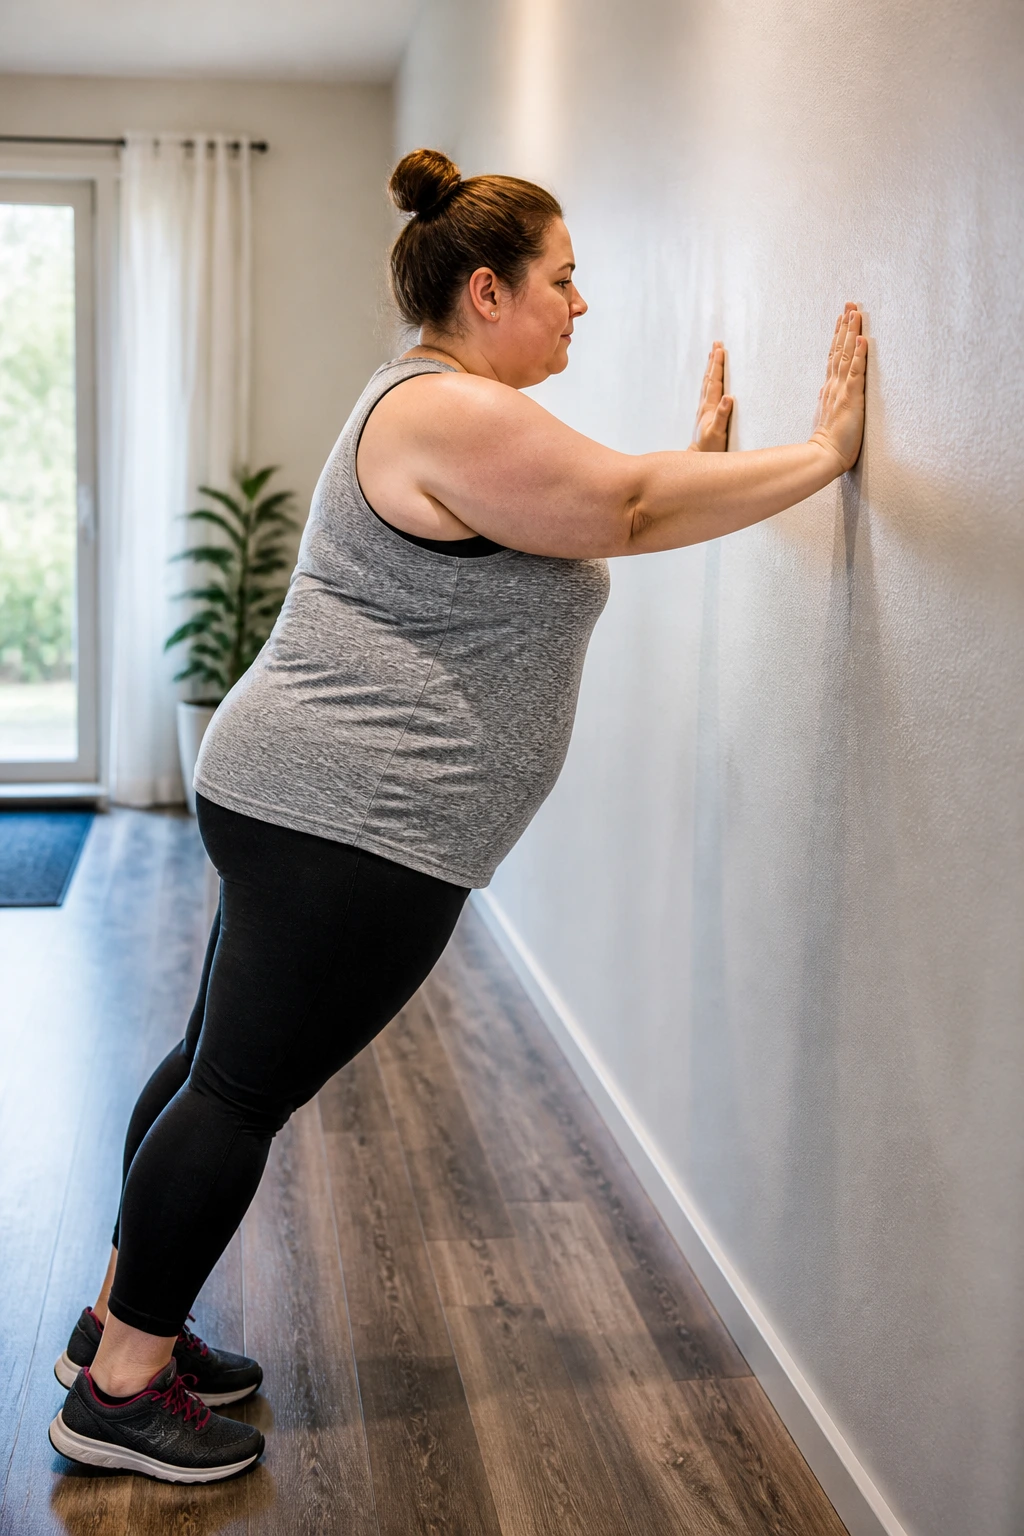
Why do wall push-ups belong on a beginner plan when floor push-ups feel impossible? Because they teach you the same pushing pattern without dumping your whole body weight into your wrists and shoulders.
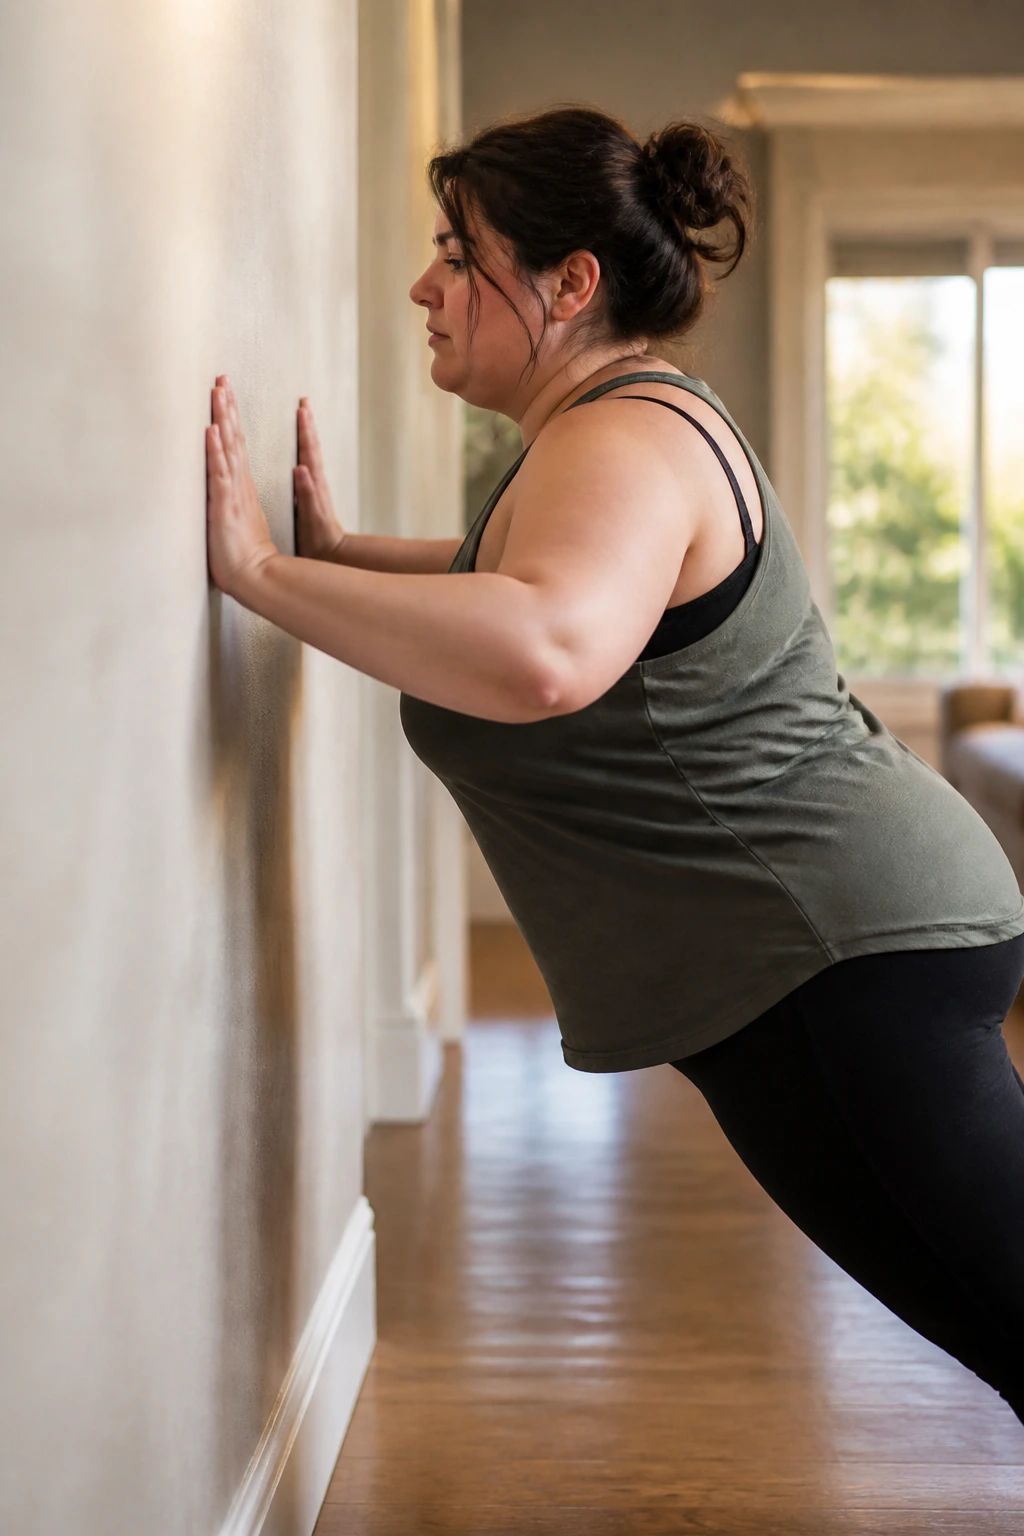
Stand about arm’s length from a wall, place your hands at chest height, and bend your elbows to bring your chest toward the wall. Keep your body in a straight line from head to heels. The trick is to move as one piece. Don’t poke your chin forward. Don’t let your lower back sag.
How to scale it
Start with 6 to 8 reps. If that’s easy, walk your feet farther from the wall. If it’s still too easy, lower the hand placement a little or switch to a sturdy countertop. Higher hand placement is easier. Lower hand placement is harder.
A good ladder looks like this:
- 8 wall push-ups
- 6 push-ups with slower lowering
- 8 wall push-ups again
- 6 push-ups with a 2-second pause at the bottom
That little pause makes a difference. A big one, actually.
4. Side-Step Cardio in the Hallway
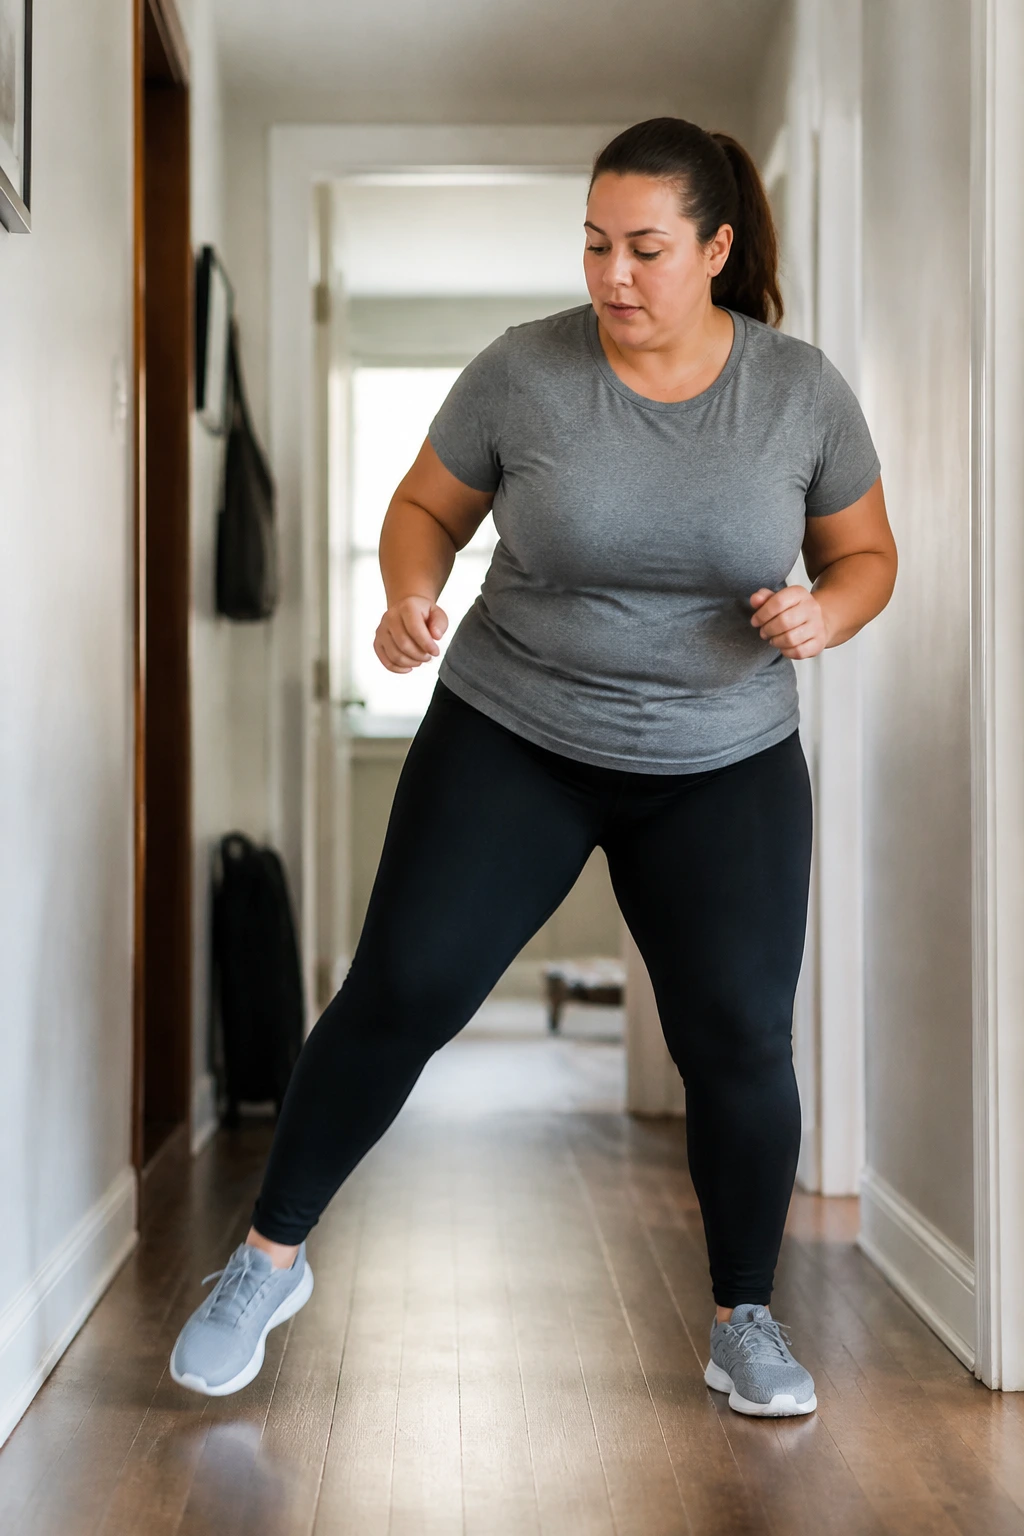
You can turn a hallway, kitchen strip, or living room edge into a usable cardio lane. Side-step work is one of those moves that looks harmless right up until your breathing changes.
Step to the right, bring the left foot in, then step to the left and bring the right foot in. Add a small arm swing and keep your knees soft. The whole point is rhythm. You’re not trying to stomp the floor. You’re trying to stay light and repeat the pattern long enough for your heart rate to rise.
A simple format is 30 seconds of side steps, 15 seconds of rest, repeated 8 times. If you want more challenge, add a gentle reach overhead every third step. If your balance is shaky, keep one hand near a wall or counter.
- Don’t cross the feet.
- Keep the steps small if your hips feel tight.
- Land softly.
- Breathe out on the bigger arm swing.
This is one of the easiest ways to get moving without pounding your joints.
5. Glute Bridges on the Floor or Bed
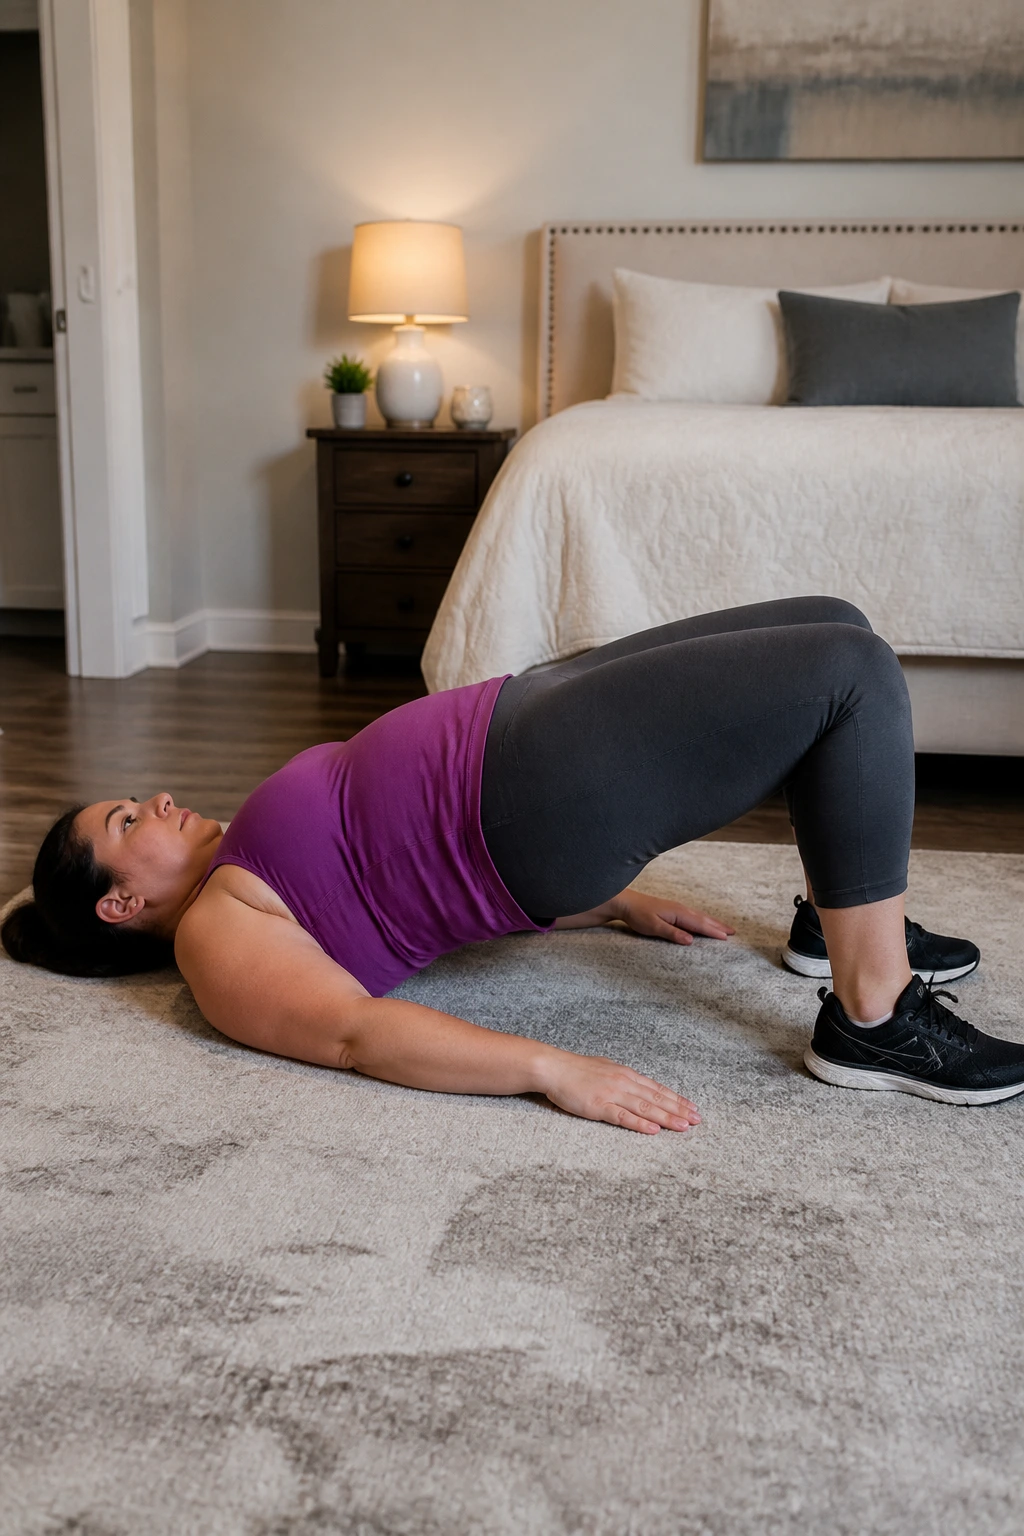
Glute bridges look quiet, almost boring, and then your backside starts talking. They’re one of the best beginner strength moves for the hips, glutes, and lower back support, especially if you sit a lot.
Lie on your back with knees bent and feet flat. Press through your heels, tighten your glutes, and lift your hips until your body forms a straight line from shoulders to knees. Pause for 1 to 2 seconds at the top, then lower slowly. The top should feel like a firm squeeze in the butt, not a hard arch in the lower back.
If the floor is a no-go, try a firm mattress. A soft bed reduces the range, so the movement may feel a little strange, but it’s still useful when getting down to the floor is the real obstacle.
Do 8 to 12 reps for 2 or 3 rounds. If your hamstrings cramp, walk your feet a little closer to your hips. If your back pinches, stop lifting so high.
Simple. Useful. No drama.
6. Countertop Incline Plank Holds
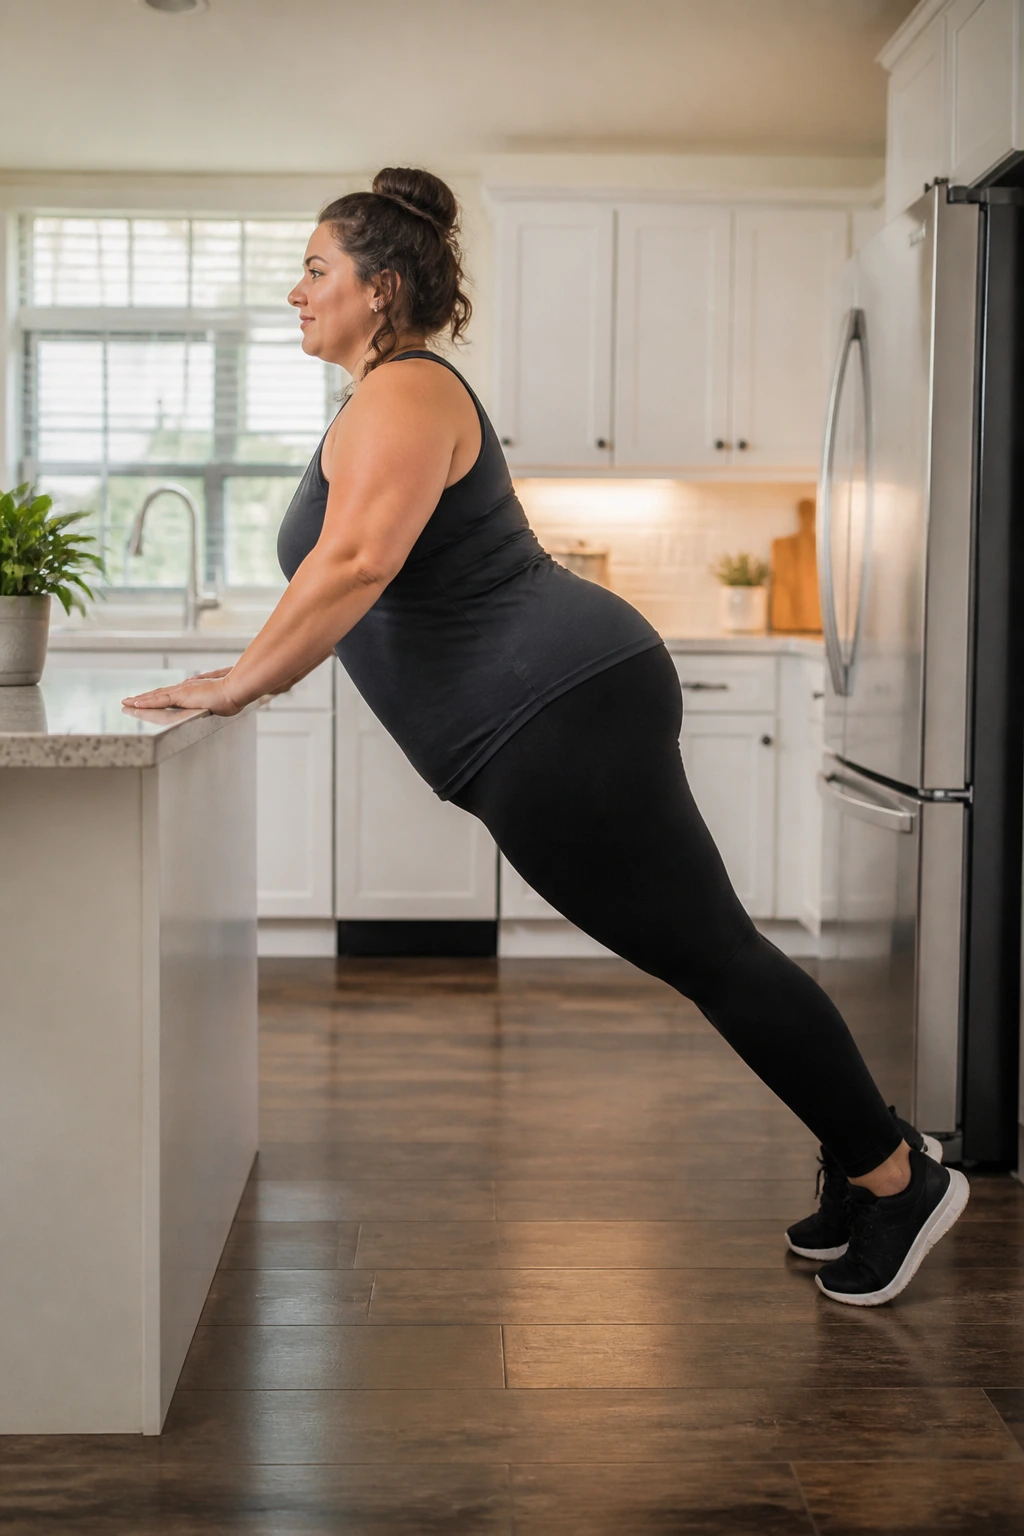
A floor plank can feel like a punishment when you’re just starting out. A countertop plank feels like a training tool instead.
Place your hands on a solid counter, step your feet back, and make a straight line from head to heels. Hold for 15 to 30 seconds, rest, then repeat 3 or 4 times. Keep your ribs tucked in a bit, as if you’re zipping up a snug jacket. That tiny cue keeps the lower back from sagging.
The higher your hands, the easier it gets. That means a kitchen counter is simpler than a sofa arm, and a wall is simpler than a counter. There’s no prize for choosing the hardest version too soon. Pick the version that lets you stay tight through the middle without shaking apart.
If your wrists complain, widen your hand placement a touch. If your shoulders creep up toward your ears, push the counter away and reset. This move builds core strength without the floor-fight feeling.
7. Marching Step-Touches with Arm Swings
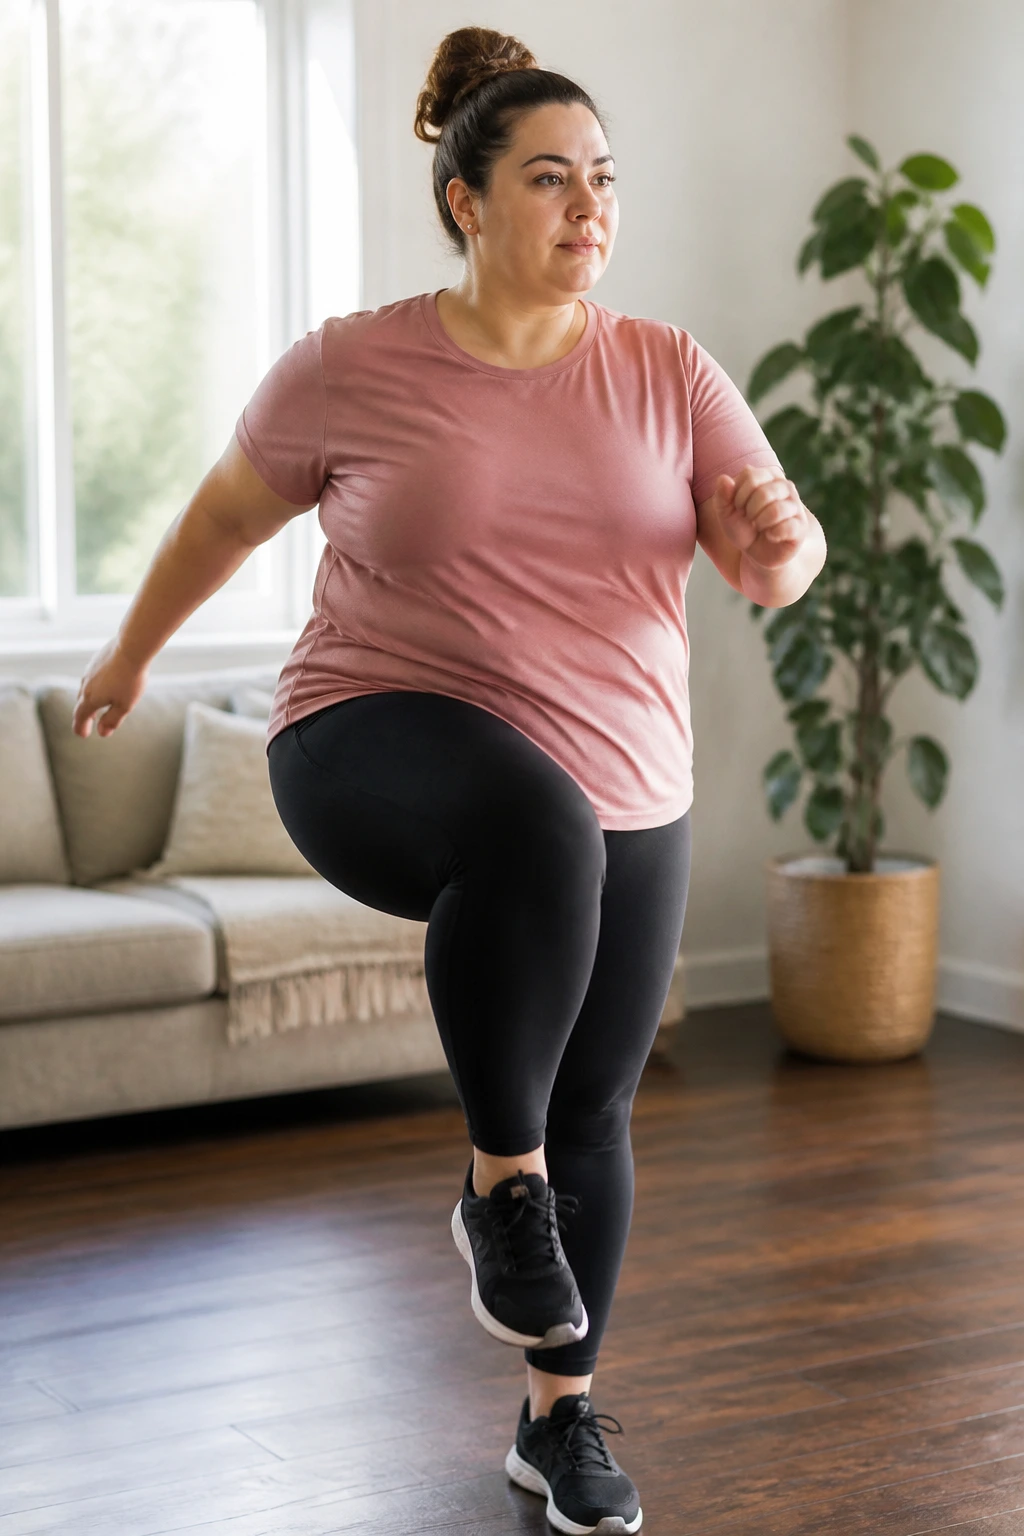
This is the kind of low-impact cardio that feels almost too easy for the first minute. Then the second minute hits, and you remember why it works.
March in place for 4 counts, then step-touch side to side for 4 counts. Swing the arms naturally. Keep the chest open and the knees soft. You can do this while watching TV, which is more useful than it sounds because consistency beats perfection every time.
Try 1 minute of marching, 1 minute of step-touches, repeated 5 to 8 times. If you want a little more effort, reach the arms higher on the march and lower them on the step-touch. If you want less, keep the arms close to the body and slow the feet down.
One thing people miss: this kind of rhythm work helps with coordination as much as conditioning. That matters when you’re building a habit from scratch. A move you can follow without thinking is a move you’ll actually repeat.
8. Resistance Band Rows
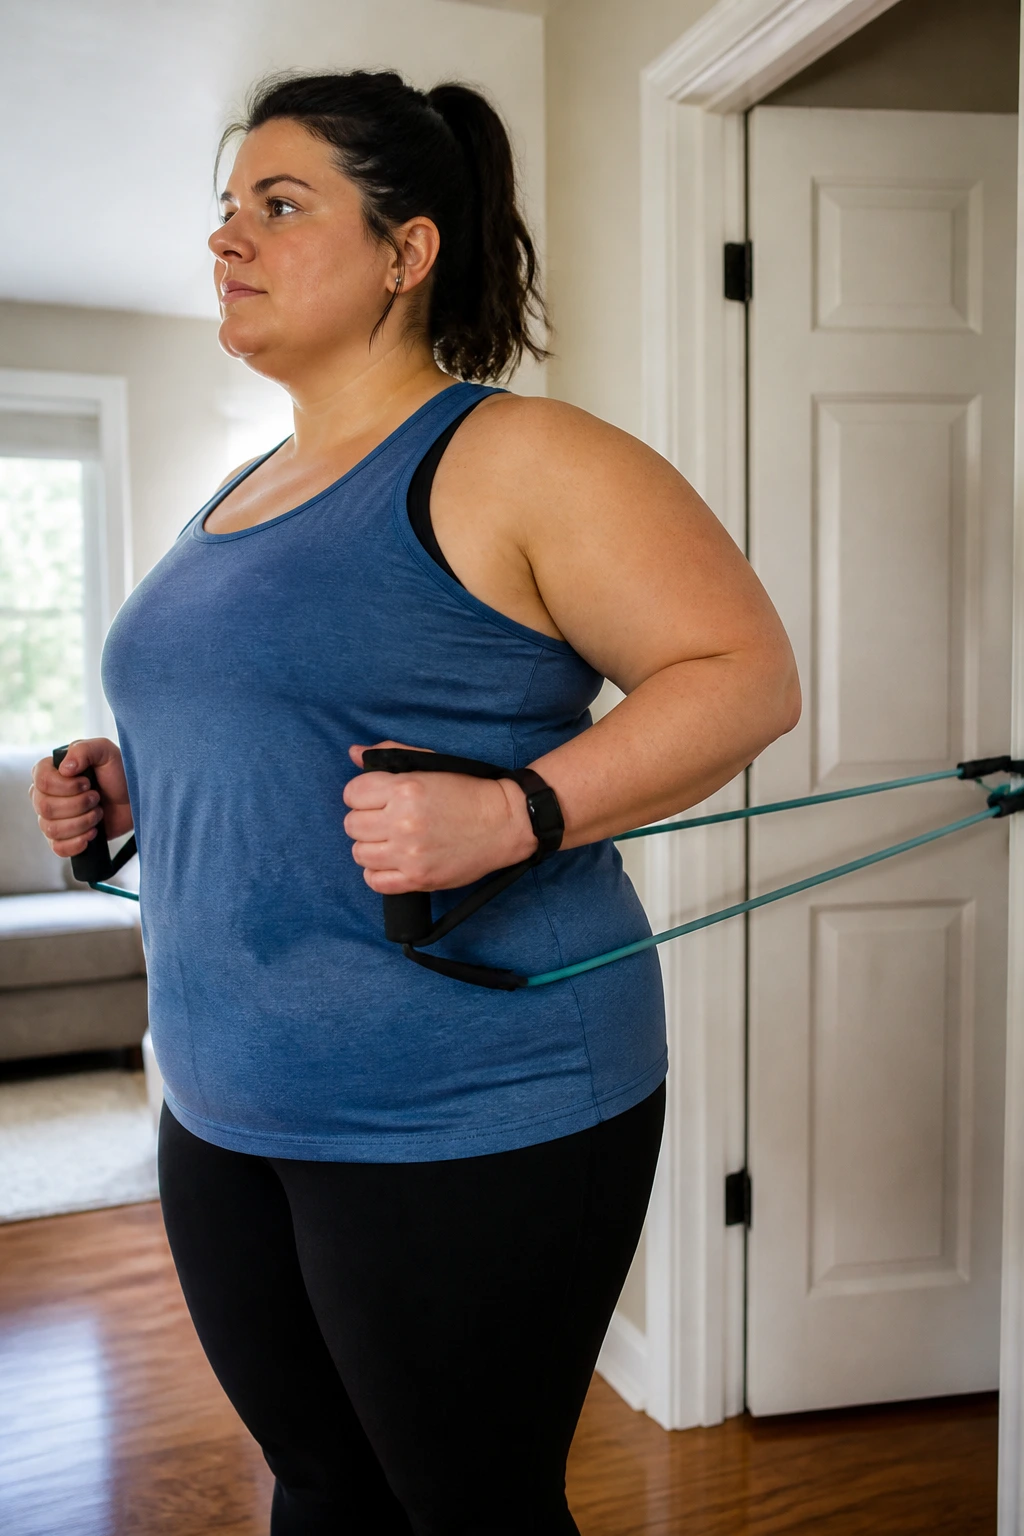
A row is a pull, not a push, and that matters because so many home routines forget the back entirely. If you spend much of the day sitting, rows can feel like a relief.
Anchor a resistance band securely around a sturdy post, door anchor, or heavy piece of furniture that will not move. Pull the handles or band ends toward your ribs, squeezing your shoulder blades back and down. Then return slowly. The slow return is where the control lives.
What to watch for
- Keep the neck long.
- Don’t shrug.
- Pull with the elbows, not the hands.
- Stop if the anchor shifts.
Do 10 to 15 reps for 3 rounds. If the band feels too strong, step closer to the anchor. If it feels too weak, step farther away or choose a thicker band. The movement should feel like work by rep 8, not like a fight.
Rows are one of the fastest ways to make your upper body feel steadier. That steady feeling carries over to everything else.
9. Standing Knee Lifts with Core Brace
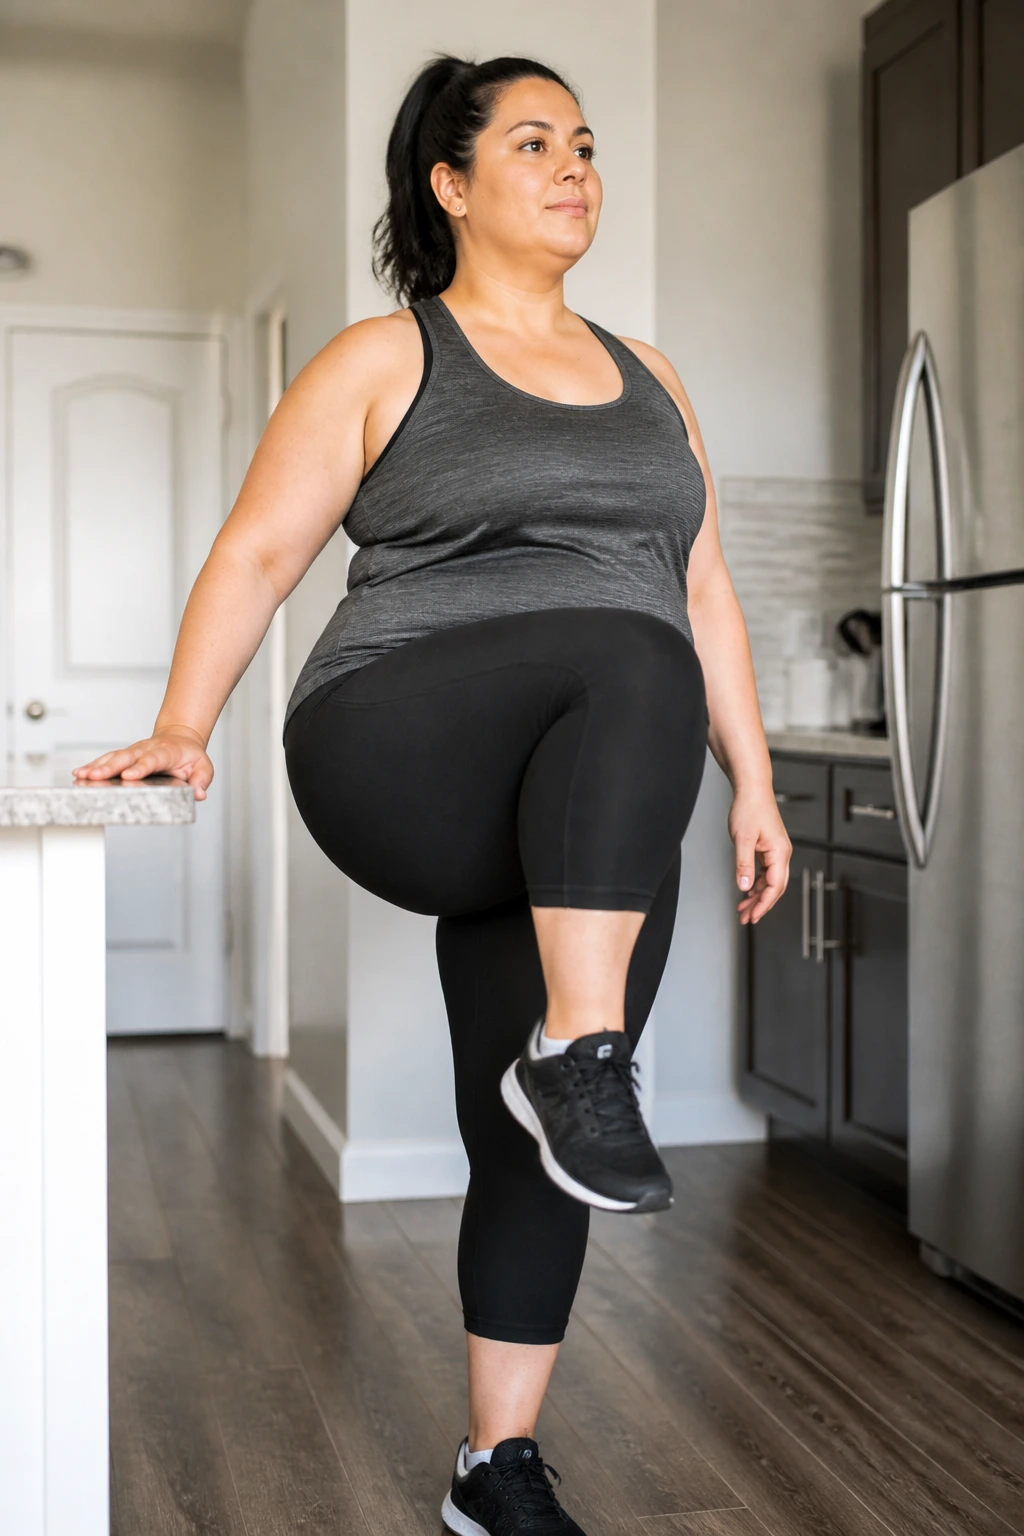
A knee lift is tiny, but tiny doesn’t mean useless. Done slowly, it teaches balance, core control, and hip strength all at once.
Stand beside a counter or chair and lift one knee toward hip height, or as high as you can manage without leaning backward. Exhale as the knee rises. Lower it with control. Then switch sides. The goal is not to whip the leg up fast. The goal is to stay tall while one foot does the work.
Use 10 lifts per side for 2 or 3 rounds. If balance is shaky, keep one fingertip on the counter. If your torso rocks side to side, lower the lift height by a few inches and try again. Smaller, cleaner reps matter more than bigger sloppy ones.
This move is great when you need a standing drill that won’t jar the joints. It also sneaks in a little core work without floor exercises, which is useful on days when getting down and back up feels like a project.
10. Calf Raises and Toe Taps
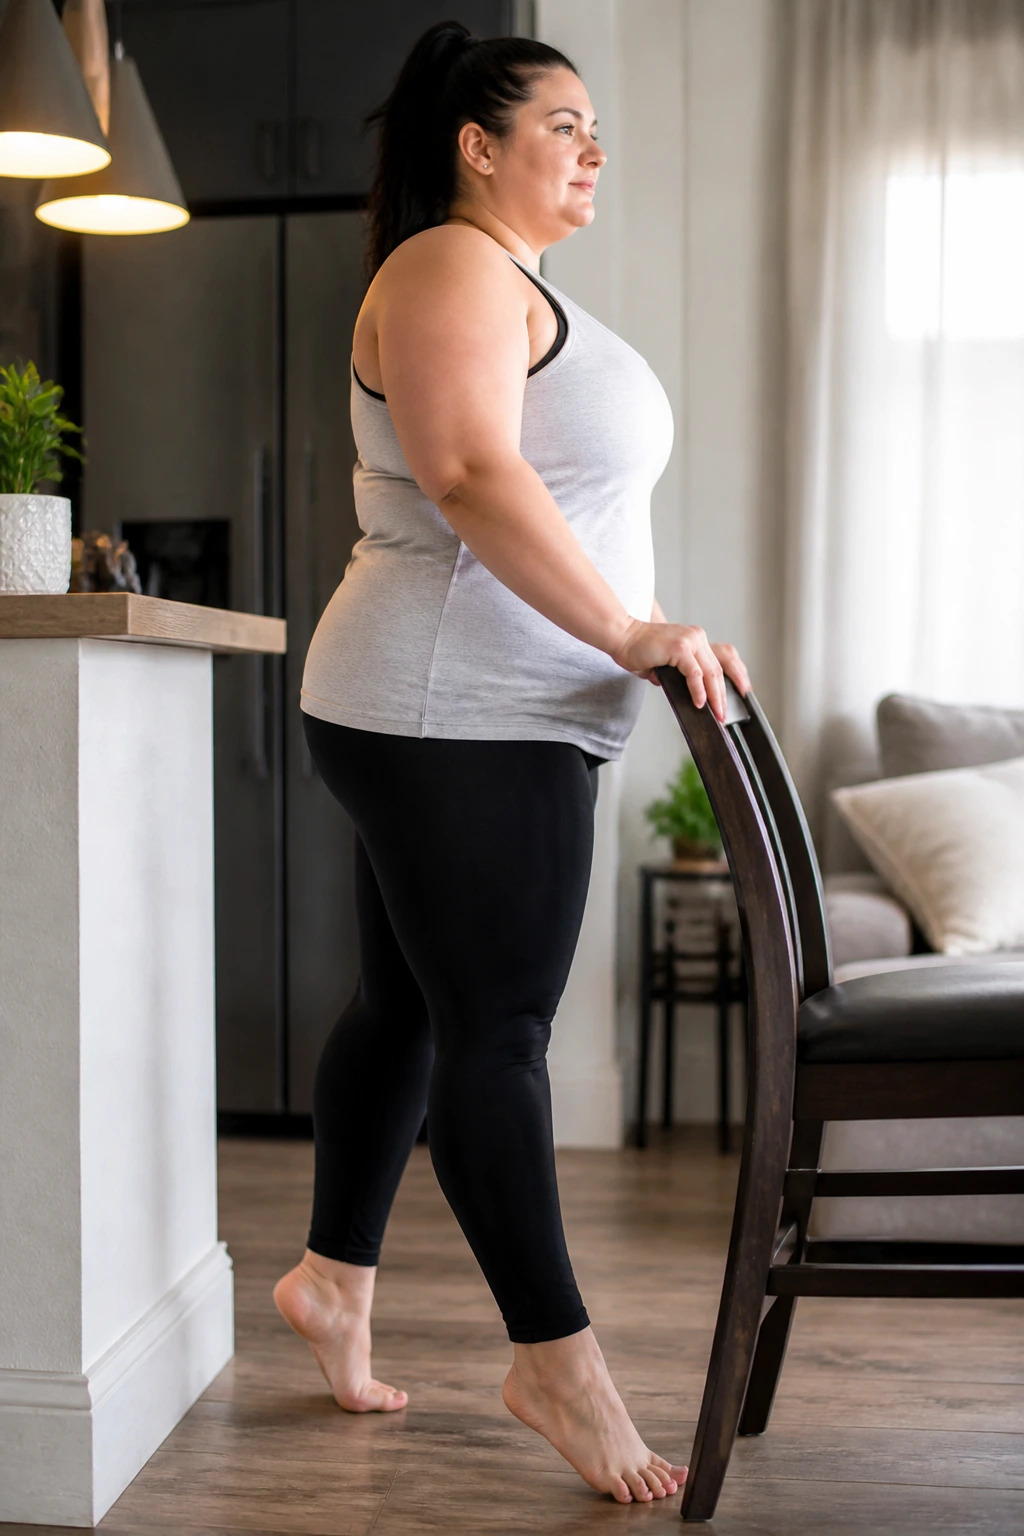
Calf raises are the kind of movement people skip because they look too simple. Then they discover their ankles feel tighter than expected and their lower legs wake up after the first set.
Stand behind a chair or near a counter. Rise onto the balls of your feet, hold for a second, and lower slowly. Then switch to toe taps: keep your heels down and tap one toe forward, then back to center, alternating sides. The combination gives you both strength and ankle motion.
A smart beginner dose is 15 to 20 calf raises, followed by 20 toe taps per side, for 2 rounds. If balance is an issue, keep one hand on the counter. If your calves cramp, slow the lowering phase and don’t come up quite as high.
These aren’t flashy. They’re useful. That’s the point.
The lower legs do a lot of quiet work during walking, standing, and climbing stairs. Keeping them strong helps the whole body feel less shaky.
11. Dead Bug Breathing Drill
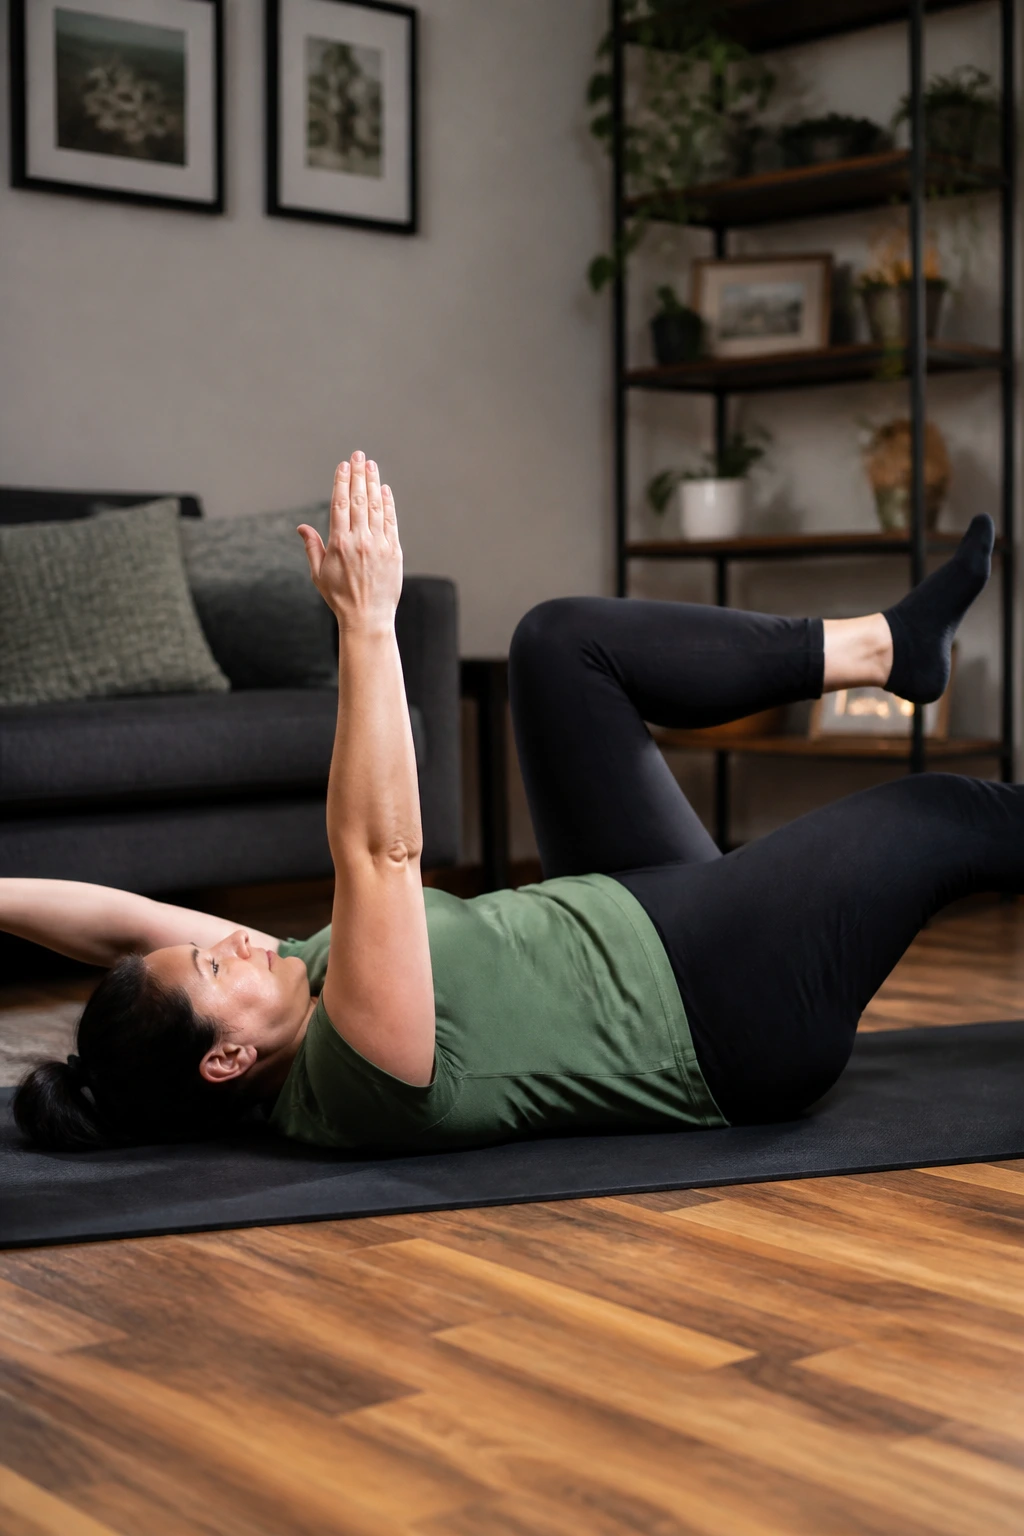
Not every workout has to make you sweaty. Some of the best beginner work is slower and more controlled, and the dead bug is a perfect example.
Lie on your back with knees bent and arms pointed toward the ceiling. Brace your core lightly, then slowly lower the opposite arm and leg away from the body while keeping your lower back gently pressed toward the floor. Return to center and switch sides. If the leg extension feels like too much, keep the knee bent and just tap the heel down.
How to use it
Start with 5 to 6 slow reps per side, resting briefly between each rep if needed. Exhale as the arm and leg move away from center. That breath cue helps the core turn on without tightening your neck or jaw.
This is one of the best moves for people who hate crunches. It trains the deep abdominal muscles with much less neck strain and usually feels kinder on the back. If your lower back lifts off the floor, shorten the reach. That’s your signal, and it’s worth respecting.
Quiet work. Big payoff.
12. Chair Boxing Workout
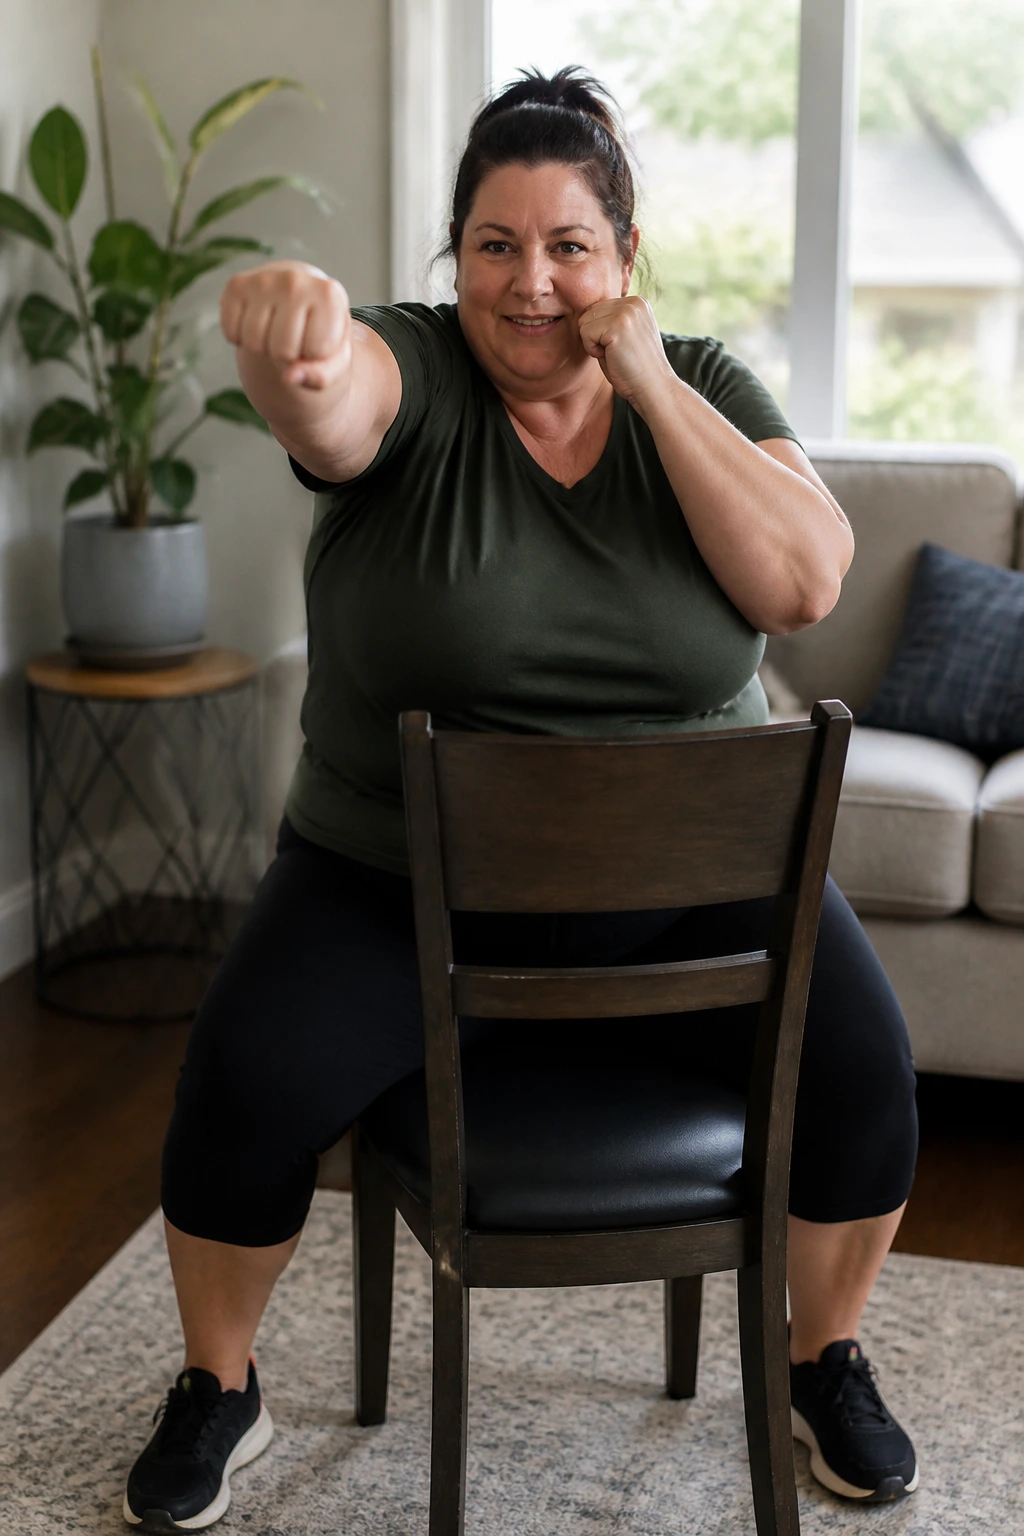
A chair boxing round can raise your heart rate faster than people expect, and it doesn’t require jumping, equipment, or special foot speed. Just a sturdy chair and some space in front of it.
Sit tall or stand with light knees, then throw straight punches, hooks, and uppercuts in short bursts. Keep the fists loose, the shoulders down, and the elbows from locking out. Punching hard is not the goal here. Punching with rhythm is.
Try 30 seconds of punches, 30 seconds of rest, for 8 to 10 rounds. If you’re standing, shift your weight gently from foot to foot. If you’re seated, brace your core so the torso doesn’t flop around.
A lot of people like boxing drills because they feel more like play than exercise. That matters. If a workout makes you forget to watch the clock, it’s often a keeper.
13. Wall Angel Mobility Sequence
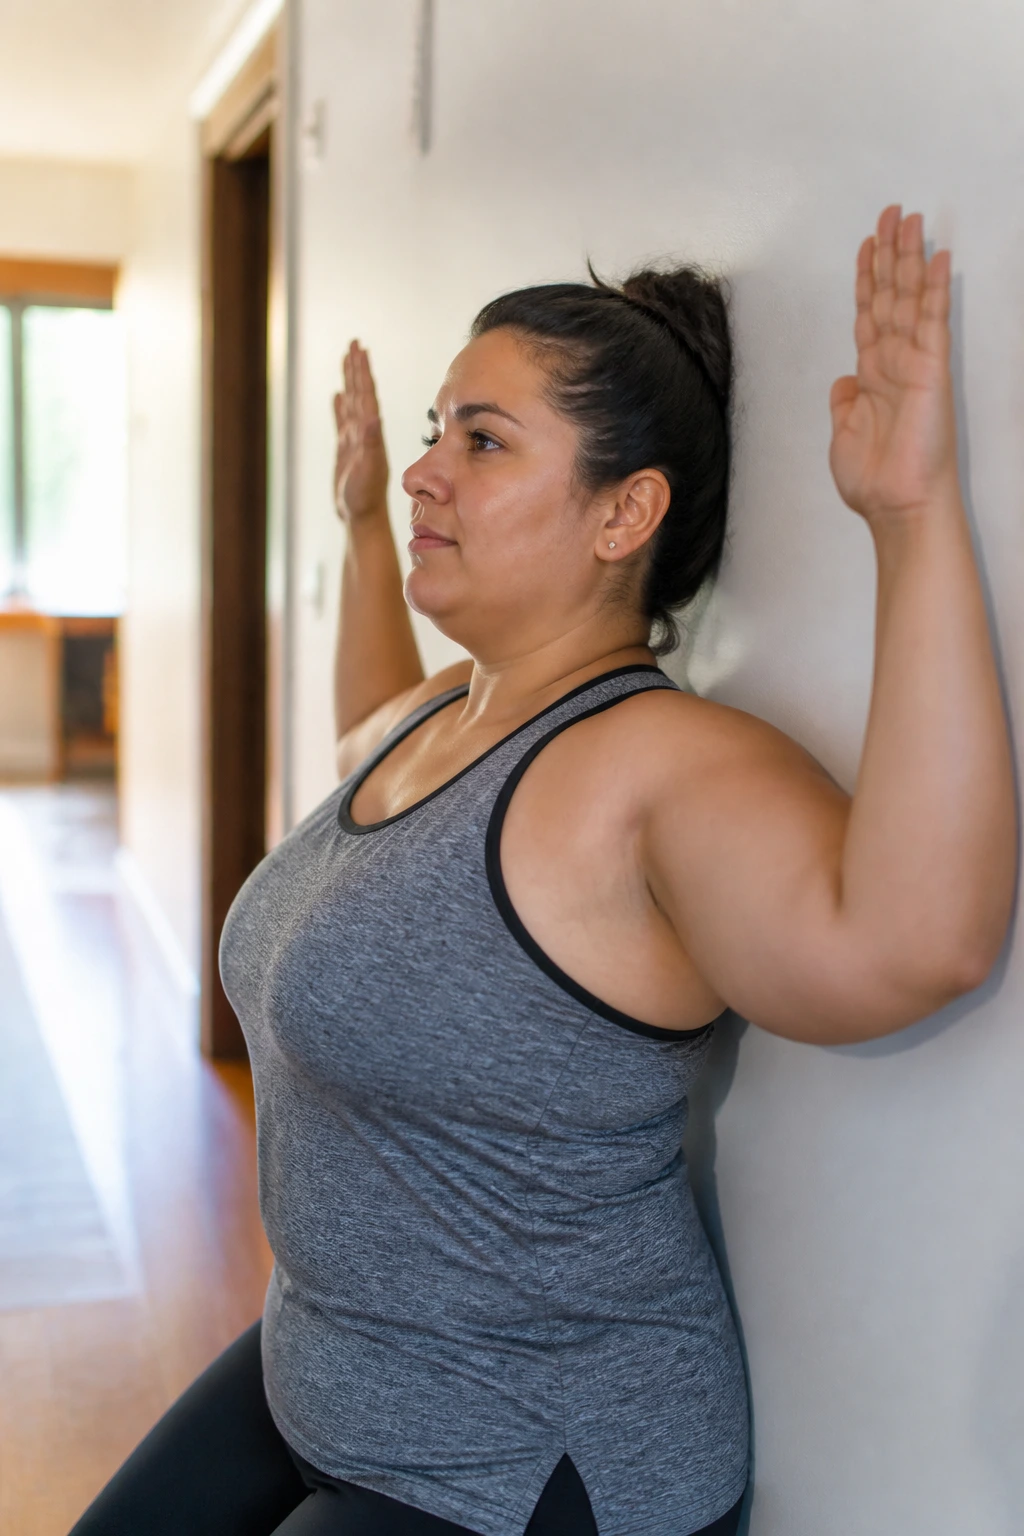
Why do so many beginners feel stiff before they even start? Because the upper back, chest, and shoulders spend too much time folded forward during the day.
Stand with your back against a wall, feet a few inches out from it, and press the back of your head, upper back, and hips toward the surface as best you can. Raise your arms like a goalpost, then slowly slide them up and down the wall. If your hands or elbows can’t stay fully on the wall, reduce the range and keep moving.
How to make it easier
- Step your feet a little farther from the wall.
- Keep the ribs from flaring.
- Move slowly enough to feel where the tight spots are.
- Stop before the shoulders pinch.
Do 6 to 10 slow reps. This is less about sweat and more about opening the chest, loosening the shoulders, and making your posture feel less locked up. It pairs well with seated work or a short walk around the house.
Not glamorous. Very useful.
14. Low Step-Ups on a Stair or Stable Step
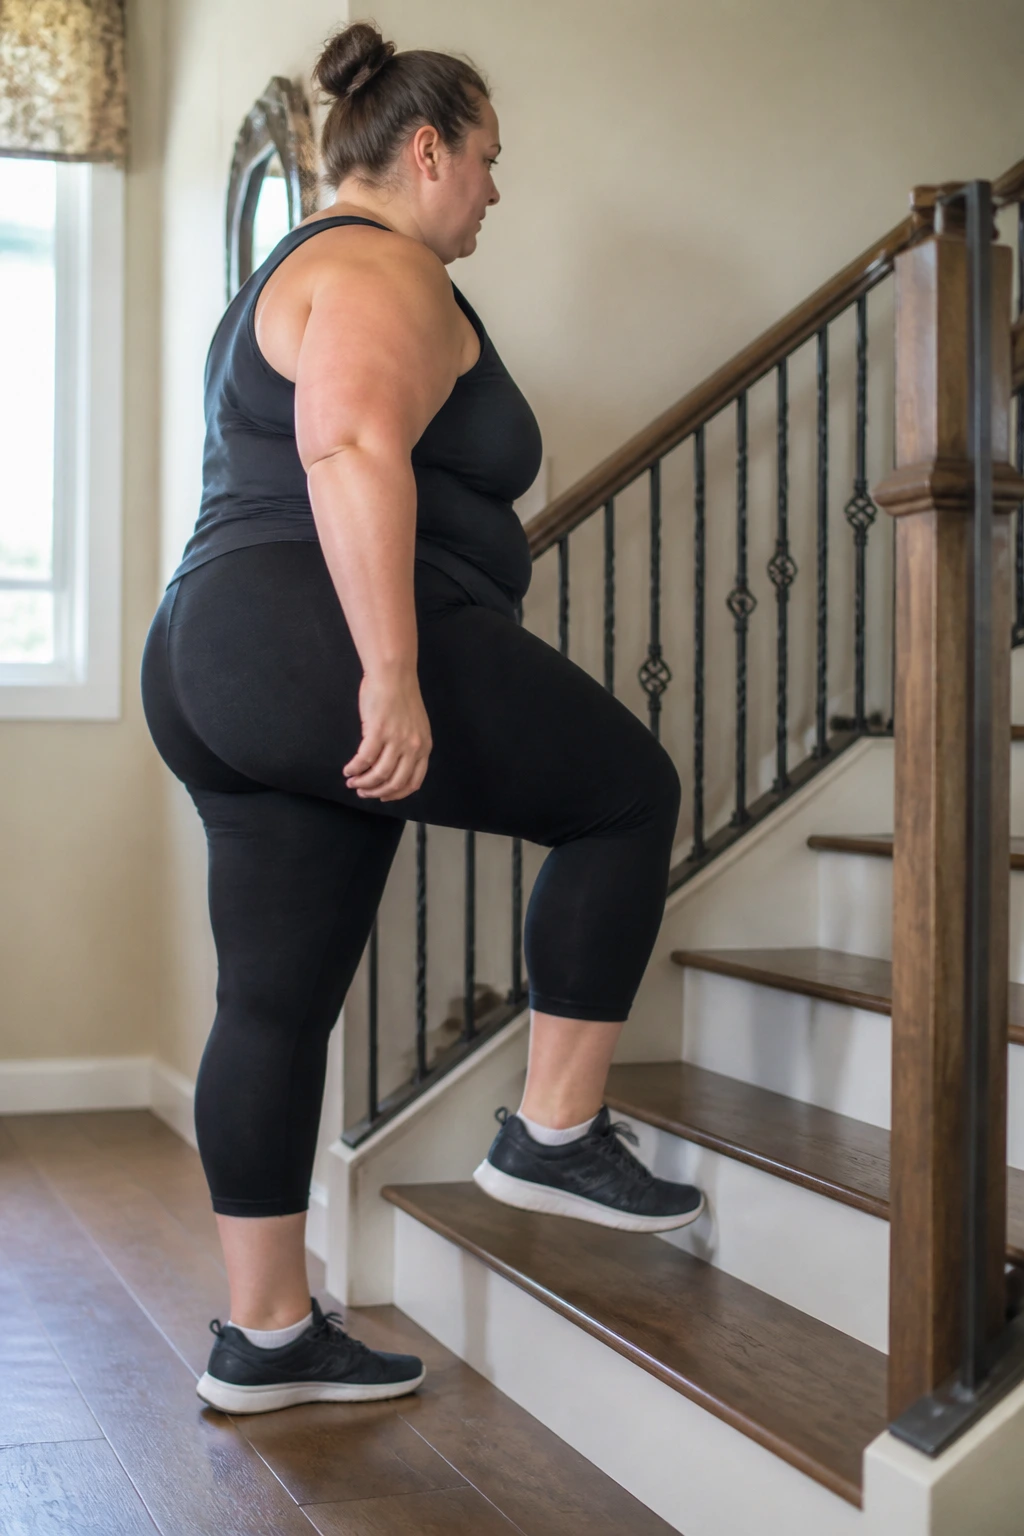
Step-ups are one of the best ways to train legs for real-life movement, but the step height matters. Start low. The bottom stair is usually enough.
Place one foot fully on the step, press through the heel, stand up, then step back down with control. Use a rail, wall, or counter for balance if needed. The motion should feel smooth, not rushed. A stable surface is nonnegotiable here; a wobbly stool is a bad idea.
Use 5 to 8 step-ups per leg, then rest and repeat for 2 or 3 rounds. If your knees feel cranky, shorten the range and slow the descent. The lowering phase matters more than people think because it builds control and can be harder on the legs than the upward push.
- Keep the knee tracking in line with the toes.
- Don’t bounce off the step.
- Use the same pace on both legs.
This move is a quiet monster for building leg confidence.
15. Seated Leg Extensions and Squeezes
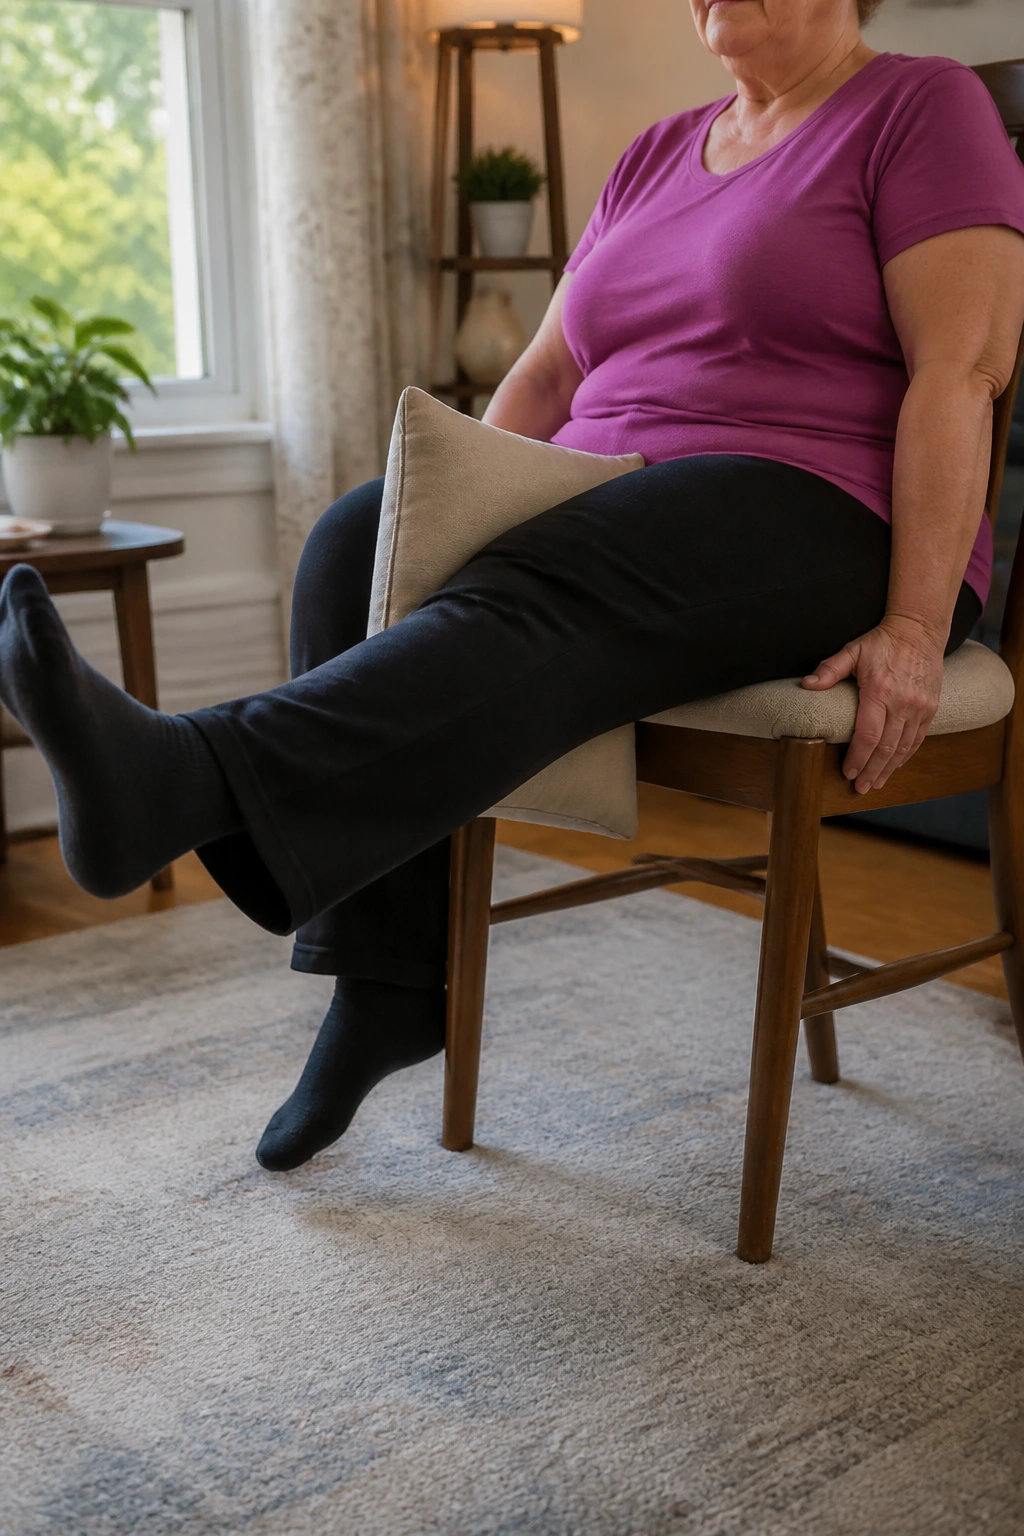
This one is a gift on days when standing feels like too much. Sit tall in a chair and extend one leg until it’s straight or nearly straight, tightening the front of the thigh at the top. Lower slowly, then switch sides.
You can make it a little more interesting by squeezing a small pillow or rolled towel between the knees while you work. That adds a gentle inner-thigh and pelvic squeeze without needing to get on the floor. It also helps people who feel unstable standing for long periods.
Do 10 reps per leg for 2 or 3 rounds. Pause for a second at the top if you want more challenge. If your knee clicks but doesn’t hurt, that’s often fine. If it hurts, shorten the range and slow down.
This is the sort of exercise that looks plain and ends up being one of the most practical moves in the whole lineup. It gives your quads something real to do.
16. Standing Hip Abductions with Counter Support
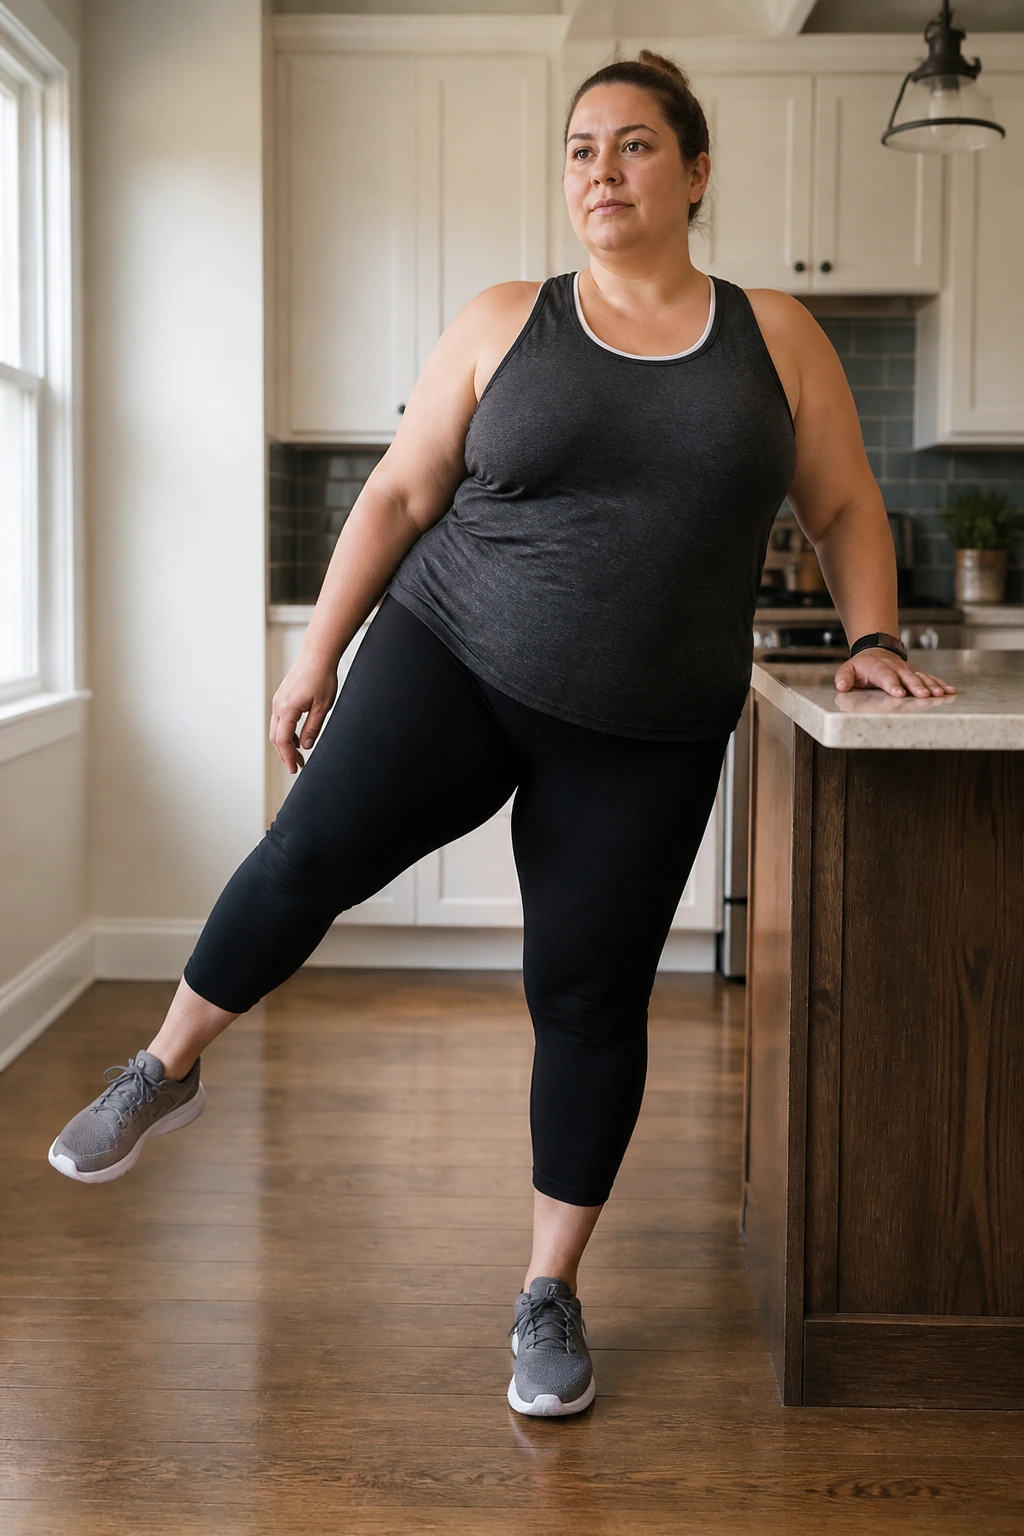
Here’s a move I wish more people used early: standing hip abductions, which means lifting one leg out to the side while standing tall.
Hold a counter lightly, shift your weight onto one leg, and move the other leg out to the side without leaning your torso. Bring it back in with control. The working hip should feel the effort. If your body tips sideways, the range is too big. Smaller is better.
Compare this with side leg lifts on the floor, and the standing version wins for a lot of beginners because it gets you moving without floor transitions. It’s also easier to fit into a short routine. If balance is the main issue, keep both hands on the counter and use a smaller lift.
Do 10 to 12 reps per side. The move helps the side glutes, which matter for balance, walking, and knee support. That’s not fancy fitness language. It’s real-life usefulness.
17. Farmer Carry Walks with Water Bottles
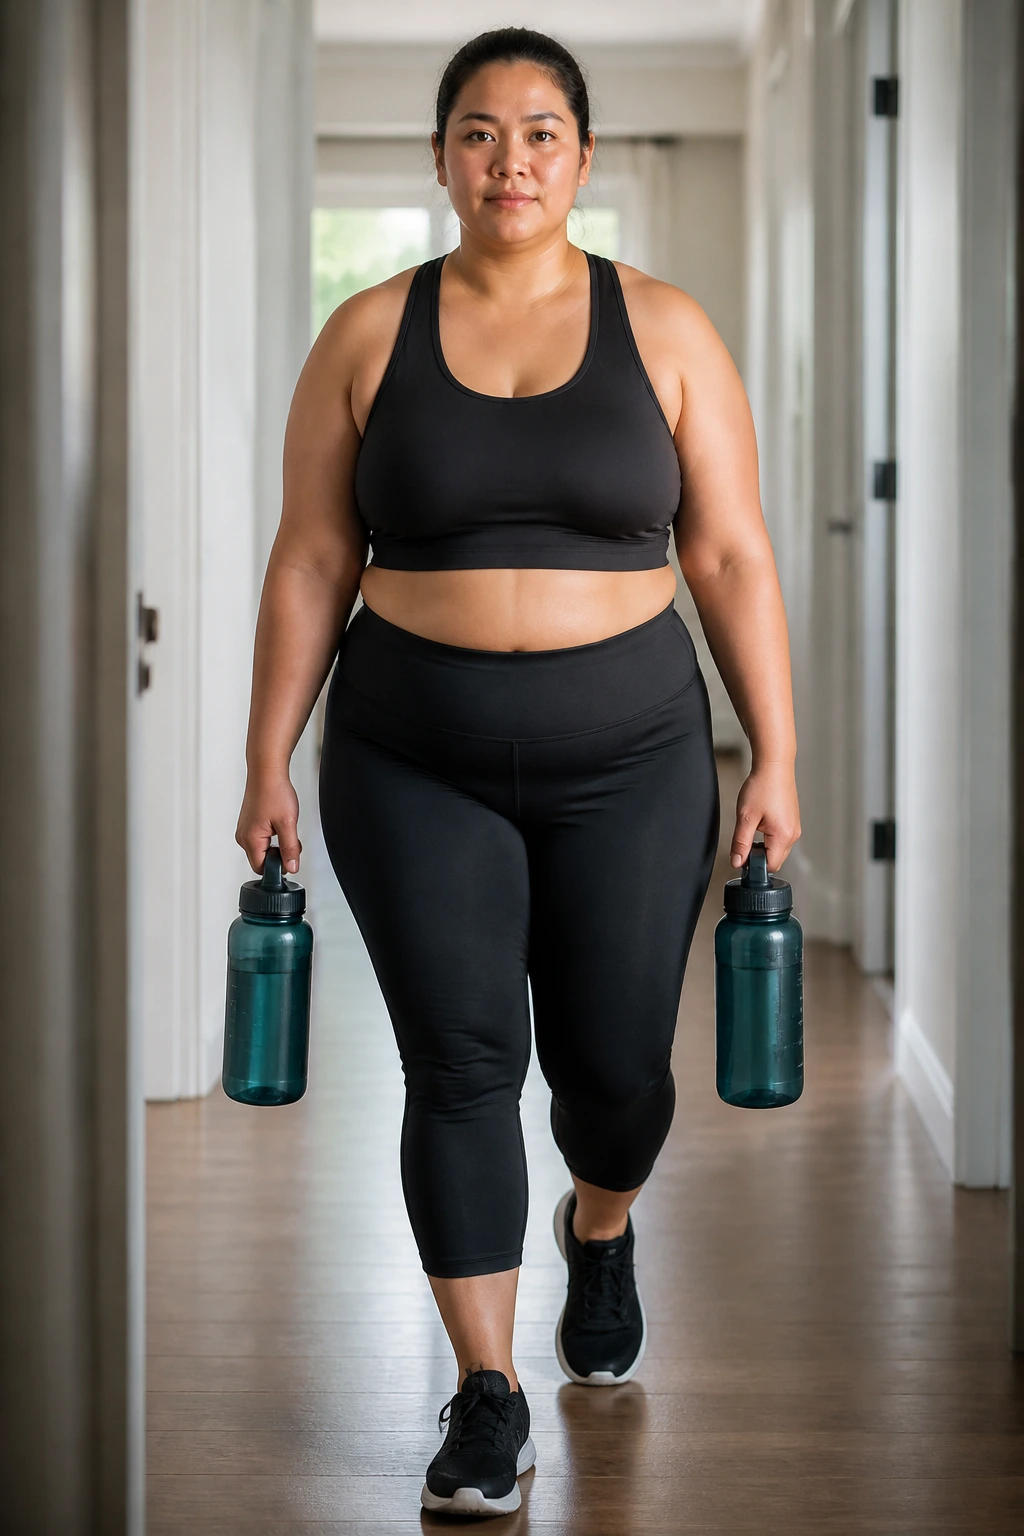
Carrying things around the house may sound too ordinary to count as exercise, and that is exactly why I like it.
Hold two equal water bottles, grocery bags, or light dumbbells at your sides and walk for 30 to 60 seconds with a tall posture. Shoulders stay down. Ribs stay stacked over the hips. Don’t lean back and don’t wobble just because the bottles feel awkward at first.
This is one of the best total-body drills for beginners because it trains grip, core tension, posture, and breathing all at once. If your hands hurt, use lighter bottles or carry one side at a time. If your hallway is short, walk in a small loop through the kitchen and living room. No fancy setup.
The trick is to look calm while working. That upright, steady posture is the work. The walking just lets you keep it for long enough to matter.
18. Bed-Based Hamstring Heel Slides
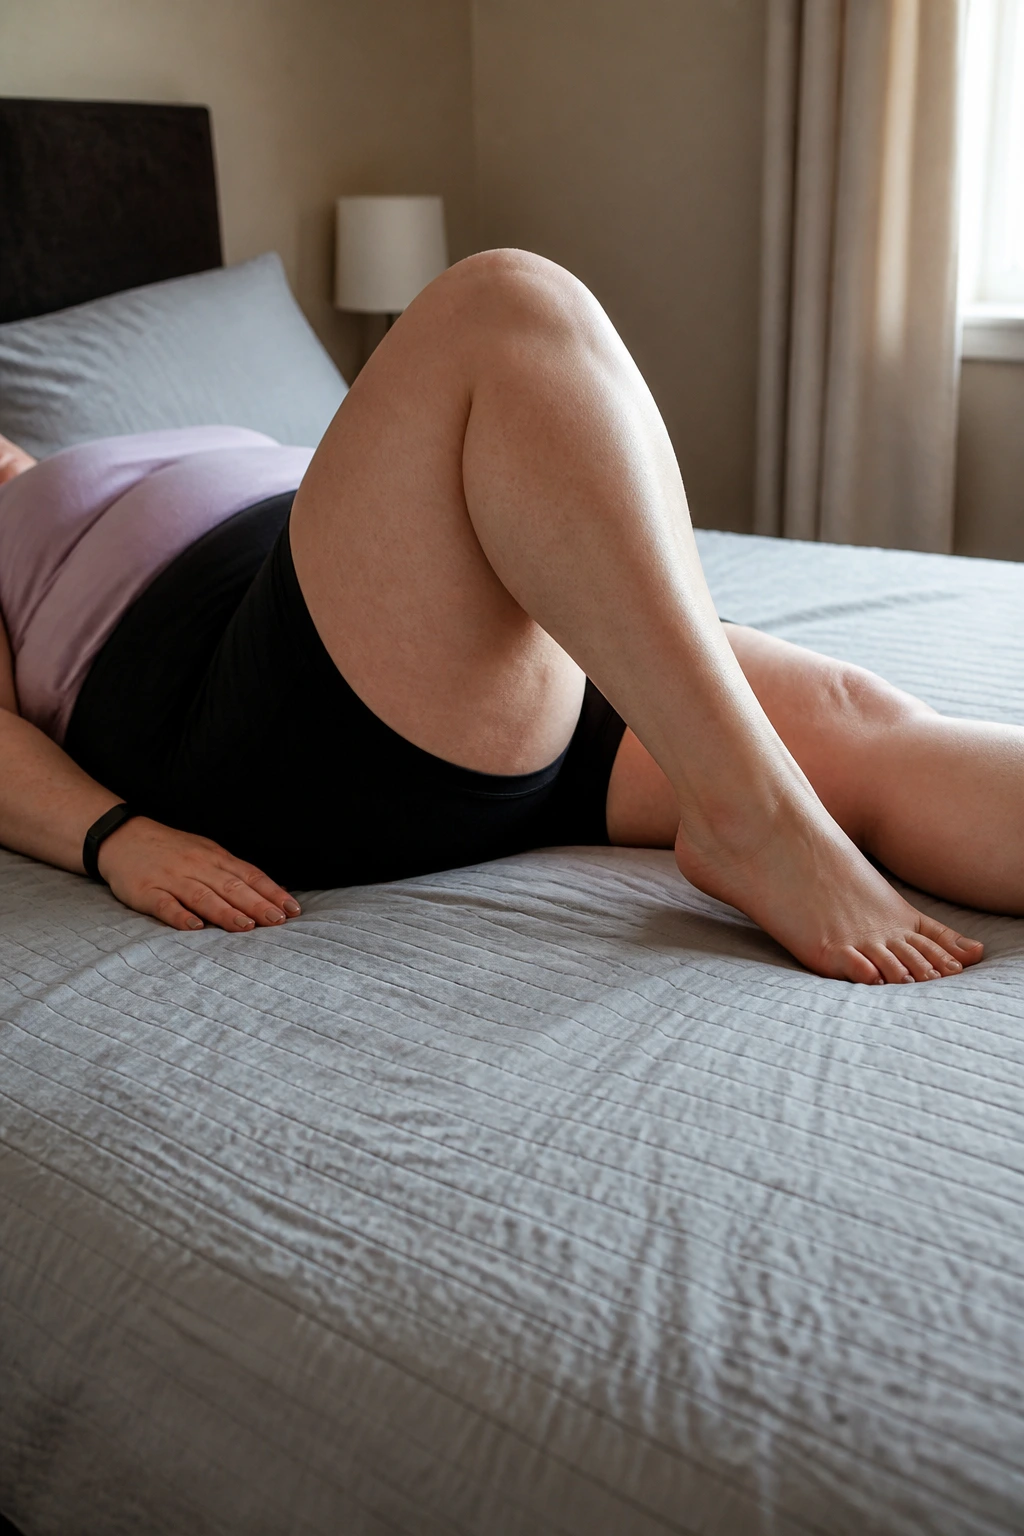
Can you exercise from the bed and still count it? Absolutely, especially on a day when your joints are being annoying or you’re easing back in after a long break.
Lie on your back on a firm bed or mat with one heel on the surface. Slowly slide that heel toward your body, bending the knee, then slide it back out until the leg is long again. Keep the movement slow enough that you can feel the hamstring and the back of the thigh doing something useful.
When to use it
Use heel slides when you want a lower-body drill that doesn’t involve standing or getting on the floor. They’re handy after a rough day, during a warm-up, or as a bridge between pure rest and harder work.
Do 8 to 10 reps per leg. If the bed is too soft, the movement may feel sloppy, so use a firmer surface if possible. If your knee aches, shorten the slide and keep the range small.
This is one of those moves that looks tiny and quietly restores confidence.
19. Full-Body Mini Circuit
A good circuit takes the pressure off choosing a single move and lets you build momentum fast. That can be a relief when motivation is thin.
Try this sequence: 5 chair sit-to-stands, 8 wall push-ups, 30 seconds of marching, 10 band rows, and 10 calf raises. Rest for 60 seconds. Repeat the whole thing 2 or 3 times. You’ll get legs, arms, back, and cardio in one compact block without needing to jump, run, or lie on the floor.
This works because the body never gets stuck in one position for long. The heart rate stays up, but not in that panicky, gasping way that makes people quit early. If one piece feels too hard, cut the reps in half and keep the circuit moving.
The best home workout for a beginner is often the one that feels finishable. That’s not a small thing. It’s the whole game.
20. The 10-Minute Repeatable Routine
If I were handing someone a starter plan with almost no fuss, I’d make it this: 1 minute seated march, 1 minute chair sit-to-stand, 1 minute wall push-ups, 1 minute side steps, 1 minute rows, 1 minute knee lifts, 1 minute calf raises, 1 minute glute bridges, 1 minute boxing, 1 minute breathing and reset.
The order matters less than the total. Ten minutes is enough to create a real training habit without turning the day into a project. If you’re tired, do five minutes. If you feel good, repeat it once. The point is to keep the routine flexible enough that you won’t avoid it.
A lot of beginners wait for the perfect mood, the perfect outfit, or the perfect amount of energy. That’s usually a trap. A sturdy chair, a wall, and a timer will do more for you than a complicated plan you keep postponing.
Start where your body actually is. Not where you wish it were. Then keep coming back to the same simple moves until they feel like yours.
