



Pilates workouts for men at home usually get underestimated until you actually try one and realize how hard it is to keep the ribs, pelvis, and shoulders from drifting apart. If your day is built around sitting, lifting, running, or all three, the first thing Pilates exposes is not weakness; it’s compensation. The body cheats everywhere.
You do not need a reformer room or a pile of gear. A mat, a towel, and a wall will get you farther than most people expect. What matters is slow control, clean breathing, and the ability to feel your abs working before your hip flexors or lower back jump in and steal the job.
The best home Pilates sessions for men tend to look almost too calm at first glance. Then the hundred starts to burn. Then a side plank makes the obliques light up. Then a bridge reveals how much your glutes have been phoning it in. Start with the easier versions, move with intention, and let the small movements do their work.
1. The 10-Minute Home Pilates Mat Reset
Start here if your body feels welded together. A short mat reset is the easiest way to turn on your deep core before you ask it to do anything harder. It is also the fastest way to find out whether you’re actually breathing well or just holding your breath and bracing your jaw.
Why It Works
This little sequence pulls three jobs at once: it wakes up the abdominals, loosens the spine, and gets the hips talking to the ribs again. That matters more than it sounds. If your pelvis is tipped forward and your rib cage is flared up, almost every other Pilates move turns messy fast.
Do these in order, slowly:
- 90/90 breathing on your back for 5 slow breaths
- Pelvic tilts for 8 reps, pressing the low back gently into the mat and then releasing
- Cat-cow on hands and knees for 6 rounds
- Toe taps in tabletop for 6 per side, if your back stays quiet
Best cue: make the exhale longer than the inhale. That one habit changes the whole workout. Short, sharp breaths make people tense up. A long exhale helps the lower abs engage without turning your neck and shoulders into clenched stones.
2. The Hundred That Teaches Your Core to Stay On
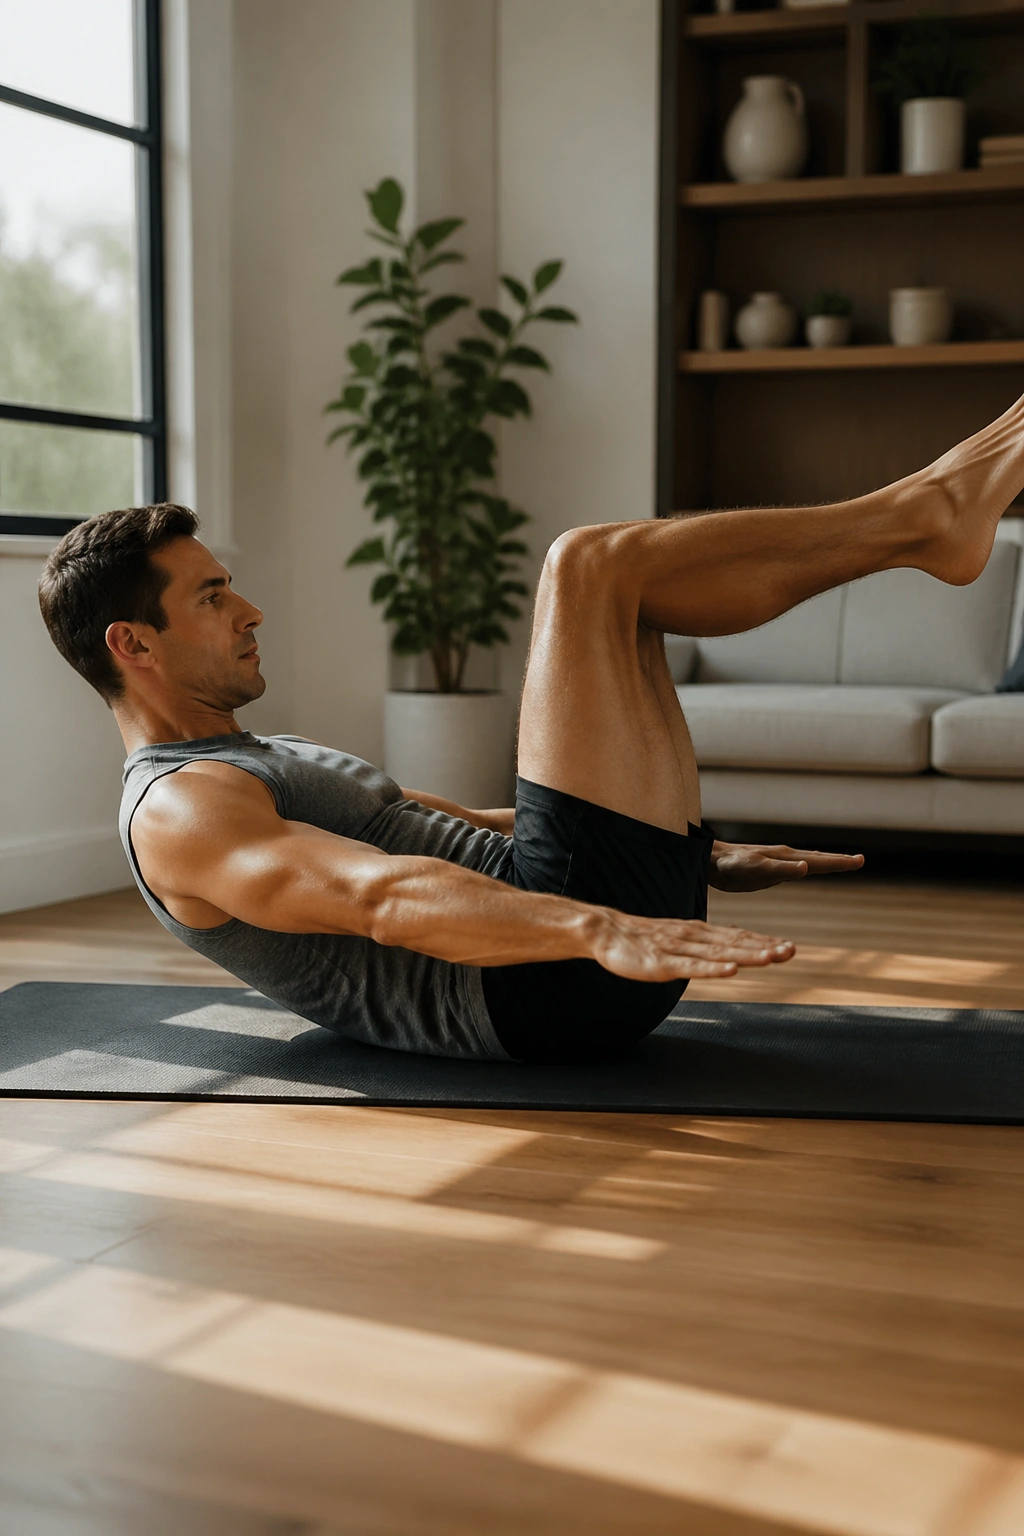
The hundred looks simple on paper and mean in practice. That’s part of the reason it works so well. Your arms are pumping, your legs are fixed in space, and your torso has to stay organized while your breathing stays smooth.
If you have ever done a set of curls and felt your whole upper body take over, you’ll recognize the lesson here. The hundred is the opposite of that mess. It asks for endurance without sloppiness.
Start with your knees bent in tabletop or your feet on the floor if your back arches too much. Lift the head and shoulders only if your neck can stay long. Pump the arms up and down for 5 inhale counts and 5 exhale counts, which gives you 100 arm beats total.
That burn in the belly is real. So is the temptation to rush. Don’t.
If your lower back starts peeling off the mat, lower the legs or keep one foot down. If your neck gets cranky, put your head back down and keep the arms pumping. The value is in the control, not in proving you can suffer through a prettier version.
3. The Shoulder Bridge Ladder for Glutes and Hamstrings
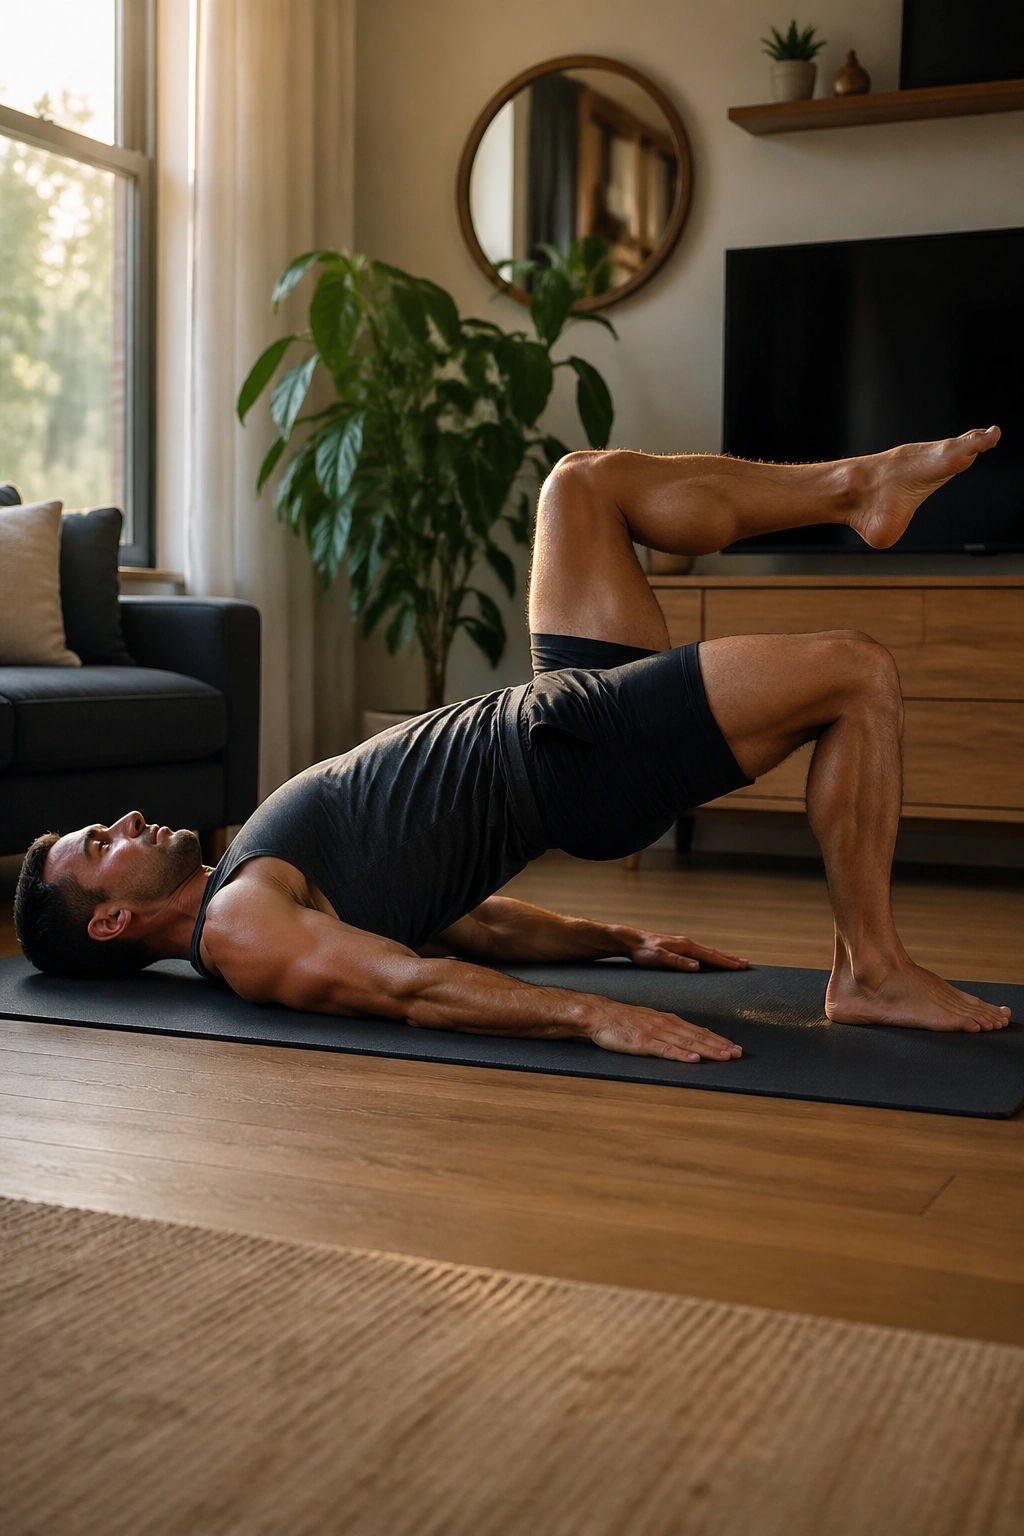
A lot of men feel this one in the wrong place at first. That usually means the quads are barging in while the glutes sit on the bench. The bridge is supposed to teach your hips how to extend without turning every rep into a low-back arch.
Lift one vertebra at a time until your body forms a long slope from shoulders to knees. Then hold, breathe, and march one foot a few inches off the floor if the pelvis stays level. That tiny march is where the real work starts.
How to Feel It in the Right Place
- Keep your feet hip-width and close enough that your fingertips can brush your heels
- Press through the heels, not the toes
- Squeeze the glutes only after the hips leave the mat
- Keep the ribs heavy instead of flaring upward
- Lower slowly, one bone at a time
A bridge ladder can be three rounds of 8 basic lifts, 6 marching lifts, and 4 slow lowers. That’s enough to wake up the posterior chain without frying it. And yes, it feels different from a gym bridge. Slower. Meaner. More honest.
4. Dead Bug Toe Taps That Stop the Lower Back From Taking Over
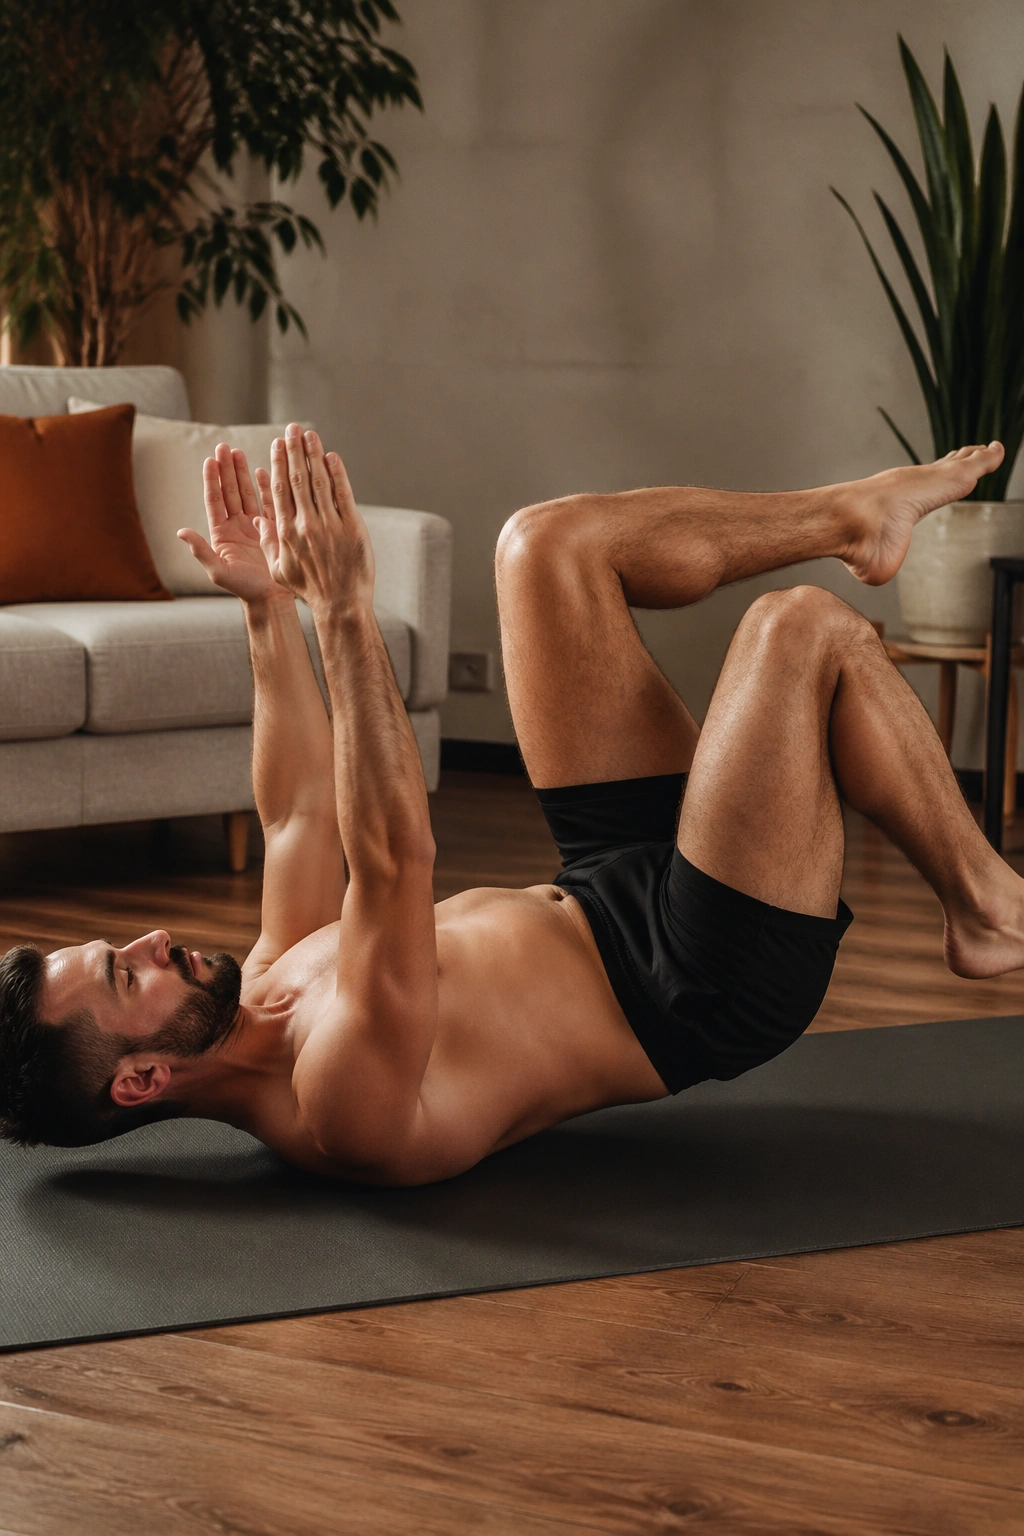
Why does a dead bug belong in a Pilates list? Because it punishes sloppy bracing in a way that almost no other floor move does. The second your low back arches, you know it. No guessing.
Lie on your back with your knees stacked over your hips and your arms reaching toward the ceiling. Lower one heel to the mat with a quiet exhale, then bring it back up. Keep the pelvis steady. If your lower back starts to pop up, shorten the range before you even think about making it harder.
Set-Up Details That Matter
- Knees at about 90 degrees
- Ribs soft, not shoved up toward the ceiling
- Chin gently tucked, like you’re holding an egg under it
- 6 to 8 toe taps per side
- 2 rounds if your form stays clean
People love to rush this exercise because it looks easy. Bad idea. Slow toe taps teach control in the exact range where a lot of backs get cranky. If you lift weights, run, or sit for long stretches, that kind of control pays off fast.
5. Side Plank and Reach for Obliques, Hips, and Shoulder Control
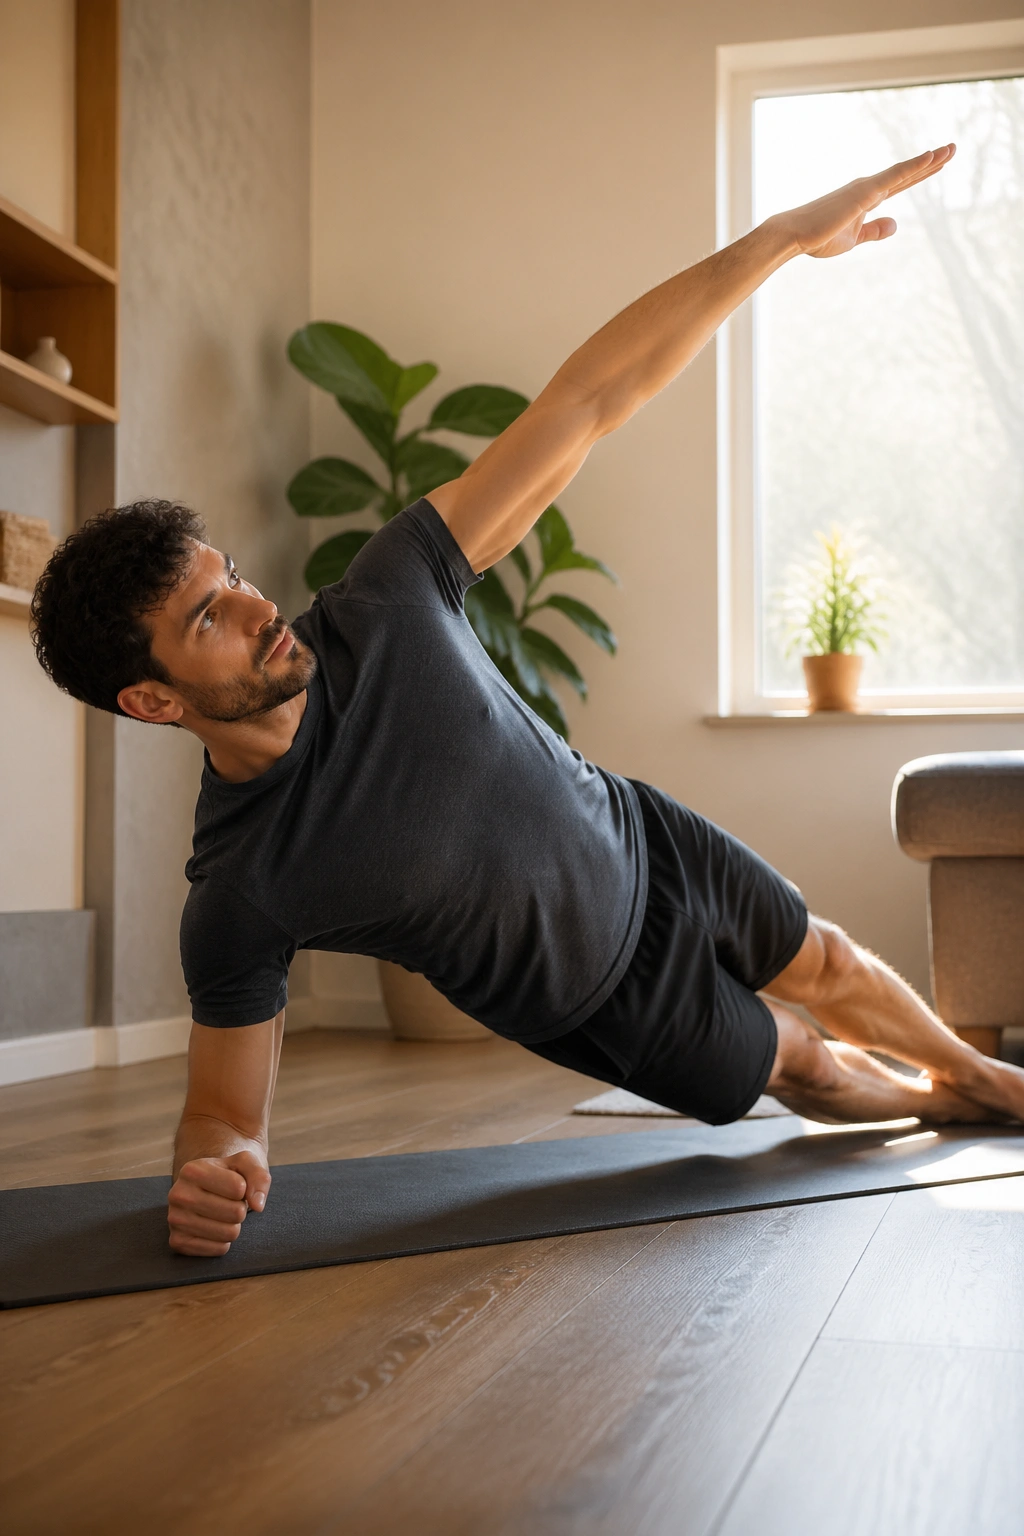
This is where a lot of guys get surprised. They expect a core burn and get a shoulder lesson too. A good side plank asks the obliques to hold the body up while the shoulder stops the whole thing from collapsing sideways.
You can do it from the knees or from the feet. Either version works if the body stays straight and the rib cage doesn’t twist toward the floor. Reach the top arm long over the ear, then thread it under the ribs and open it back up. That rotation wakes up the side body in a way crunches never will.
One clean set on each side is enough to tell you where the weak link is. Maybe it’s the shoulder. Maybe it’s the obliques. Maybe it’s the hip that keeps sagging a half inch lower than the rest of you.
That half inch matters.
Keep the bottom waist lifted. Keep the neck long. If your hand placement feels wrong, move the support hand a little farther out and stack the shoulder directly over the wrist. The position should feel demanding, not sloppy.
6. Bird Dog Hovers That Clean Up Your Balance
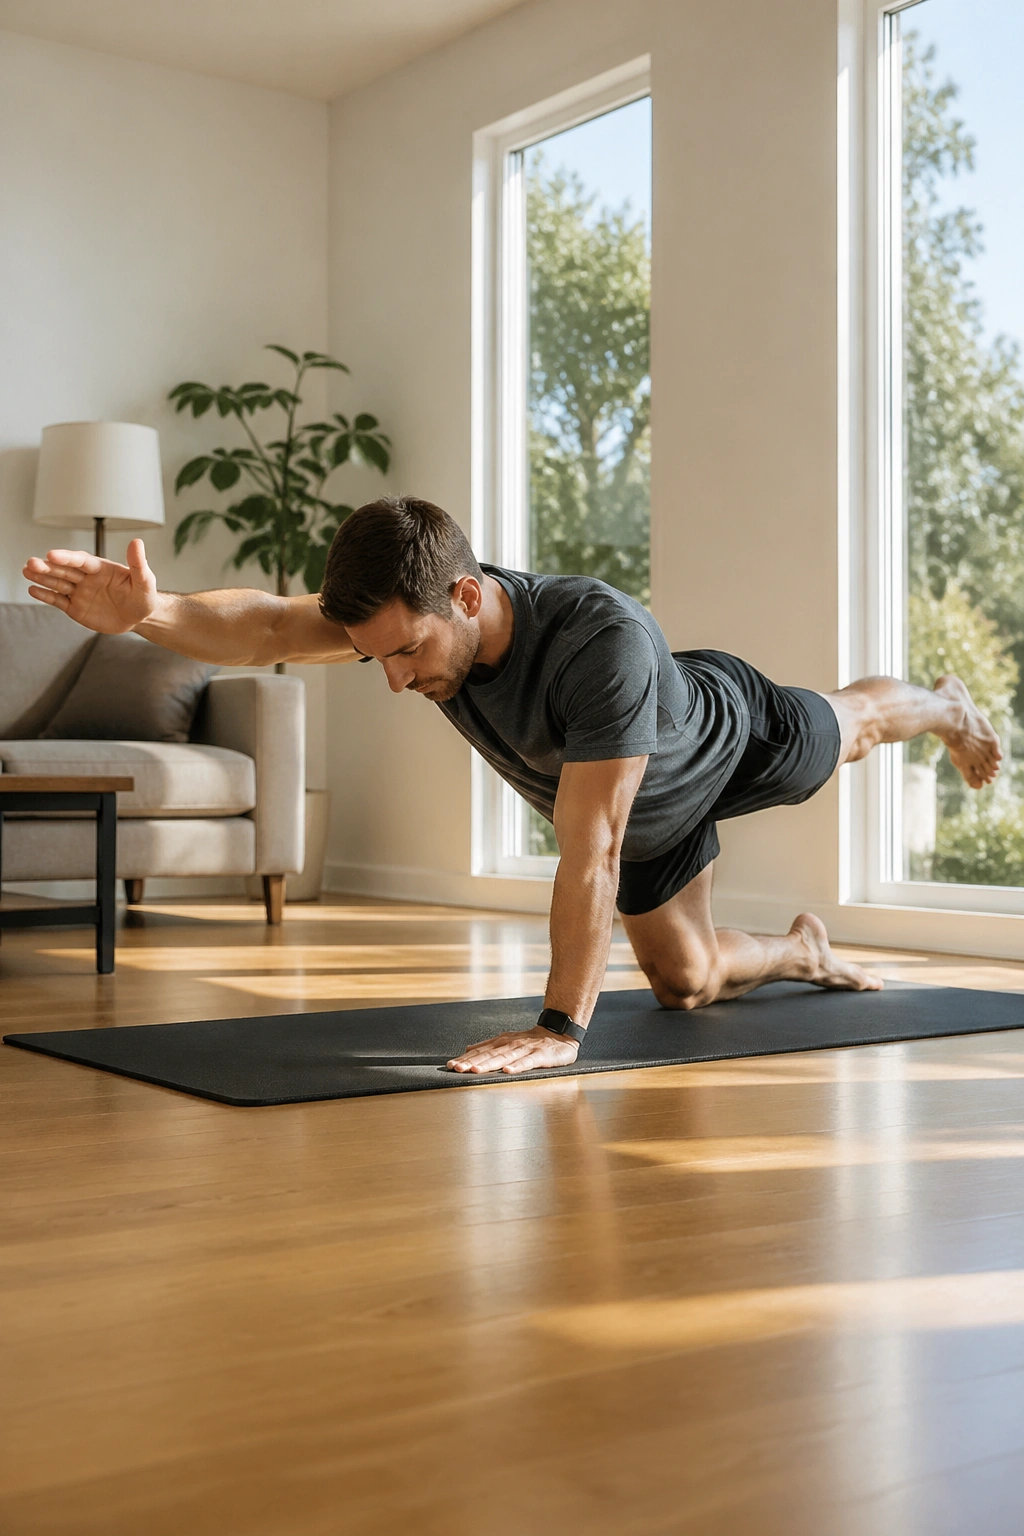
The hover is the part that matters. A regular bird dog is fine, but a hover makes you honest about how much weight your core can actually control before the spine twists or the pelvis shifts.
Start on all fours. Lift one knee about an inch off the mat while reaching the opposite hand forward. Hold for 3 breaths. Lower with control. Then switch sides. It’s small. It looks almost too small. That’s the point.
What to Watch For
- Hands under shoulders, knees under hips
- Belly gently pulled in, not sucked hard
- Neck long and eyes down
- Hips squared to the floor
- 5 holds per side if the form stays stable
If your wrists get annoyed, come down to forearms for a version of the hold that still challenges the core without beating up the joints. And if your lower back feels the lift more than your abs do, shorten the reach and keep the hovering knee lower. A bird dog should feel steady. Not dramatic.
7. Home Pilates Push-Up and Plank Control
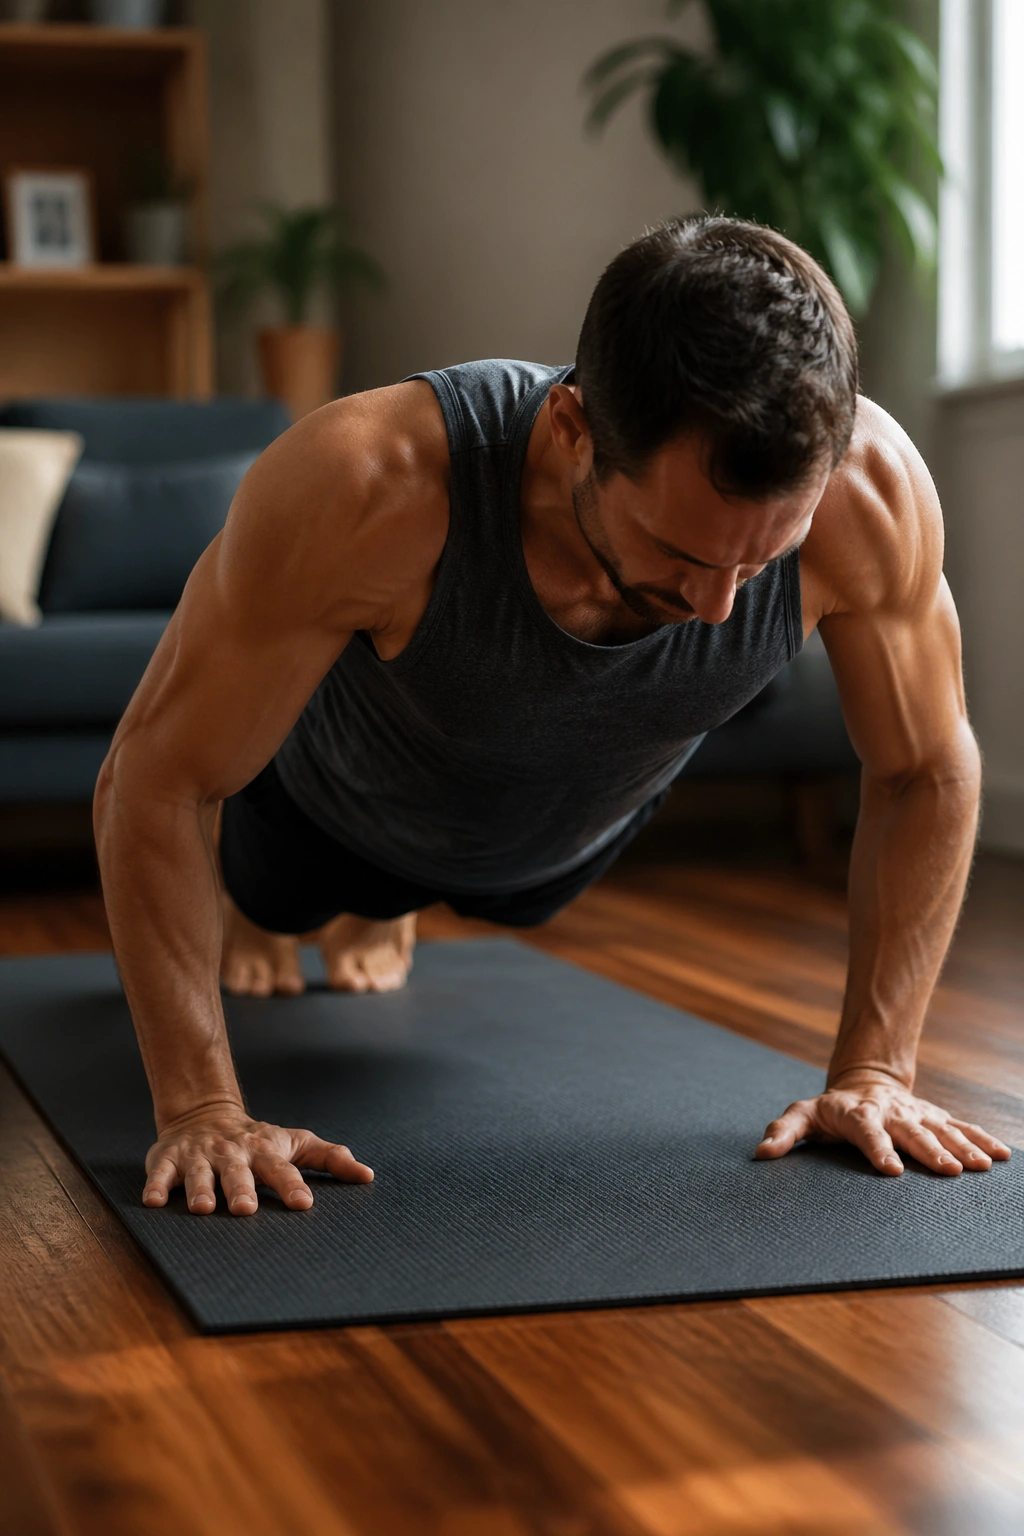
Can you do a push-up without rushing? That’s the real question here. In Pilates, the push-up becomes a test of body line, breath, and control instead of a race to the floor and back.
Walk your hands out from standing, roll into a plank, then bend the elbows close to the ribs as you lower. Press back up, walk the hands back toward the feet, and stand with control. If that full version feels like too much, drop the knees for the lowering phase and keep the torso quiet.
The tricky part is not the arm strength. It’s the urge to let the hips sway or the ribs dump forward. Keep the glutes lightly on, the neck long, and the shoulders wide across the back. That keeps the work in the right place.
A few clean reps beat a sloppy set of ten. Always.
If you want to make it harder without adding chaos, pause for one breath at the bottom of the push-up. That little pause exposes whether your trunk can hold the line when the arms are doing real work.
8. Spine Stretch and Roll-Down Flow for Tight Backs
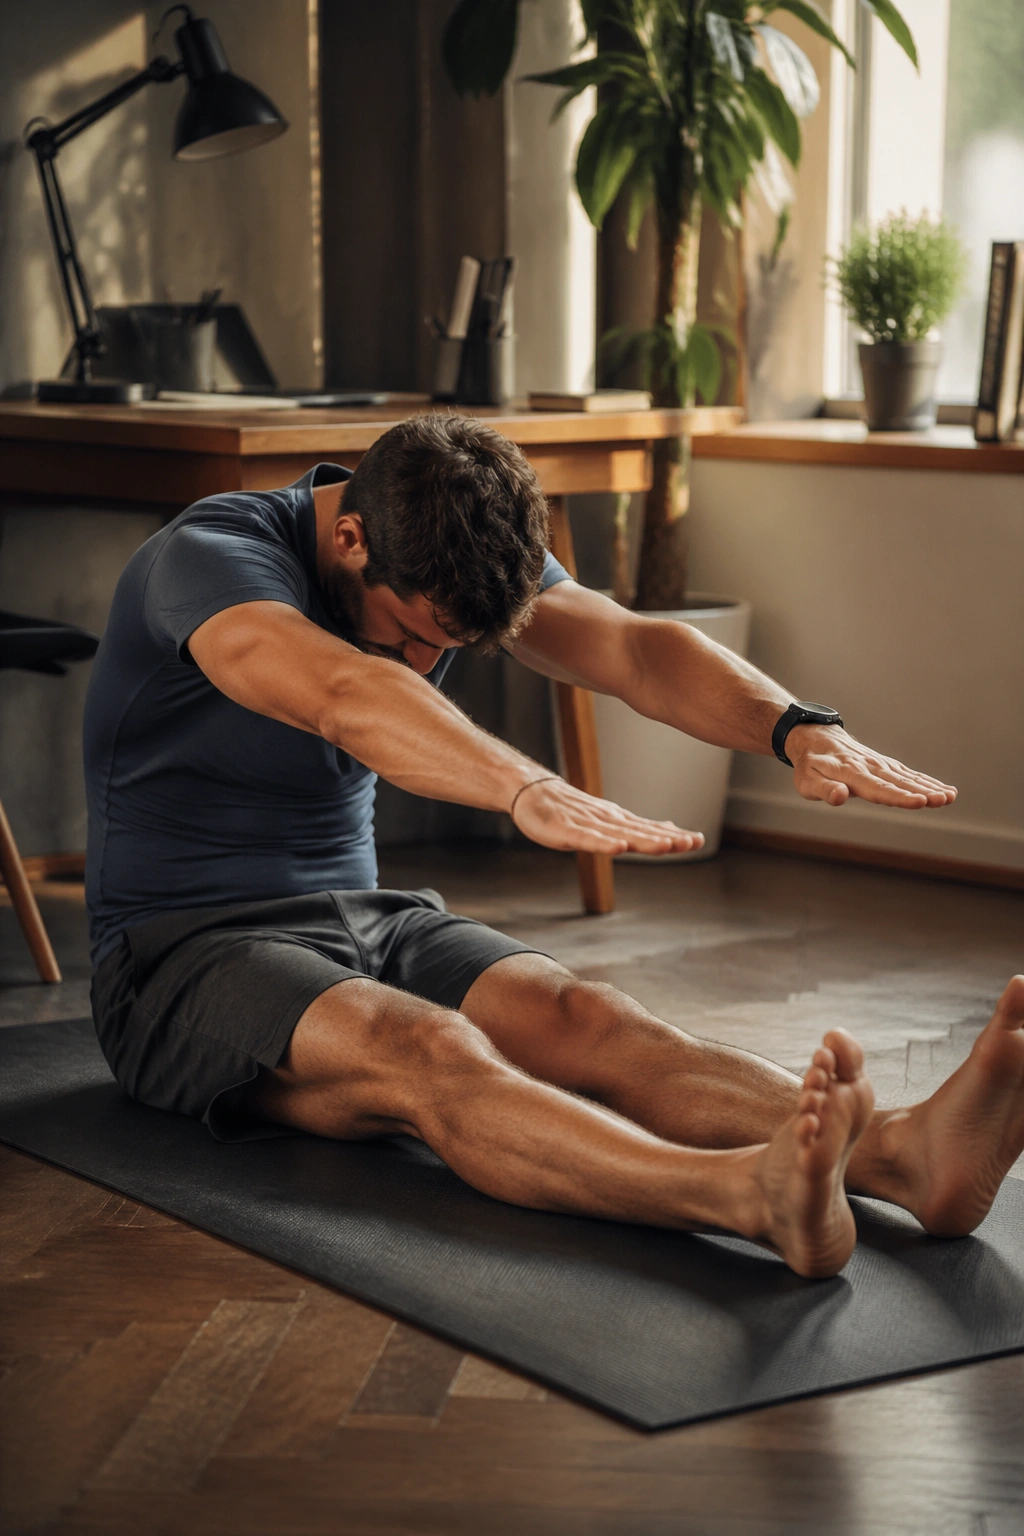
After a long desk day or a hard lifting session, the spine can feel like it forgot how to move one segment at a time. The spine stretch fixes that feeling better than most people expect.
Sit tall with your legs straight, or bend the knees if your hamstrings are stubborn. Reach the arms forward at shoulder height, inhale to grow taller, then exhale and curl forward from the head through the tailbone. The movement should feel like a smooth peel, not a collapse.
What to Watch For
- Keep the sit bones grounded
- Reach forward, not downward
- Stop before the shoulders round into a heap
- Use the exhale to soften the ribs
- Roll back up slowly, stacking the spine one piece at a time
Six slow reps is plenty. If you rush, it turns into a hamstring tug. If you move well, it becomes a neat little map of how your spine wants to move when nobody is bullying it.
This is one of those Pilates pieces that looks boring until you realize your back feels a little easier afterward. Not flashy. Useful.
9. Single-Leg Kick for Hamstrings and Back Support
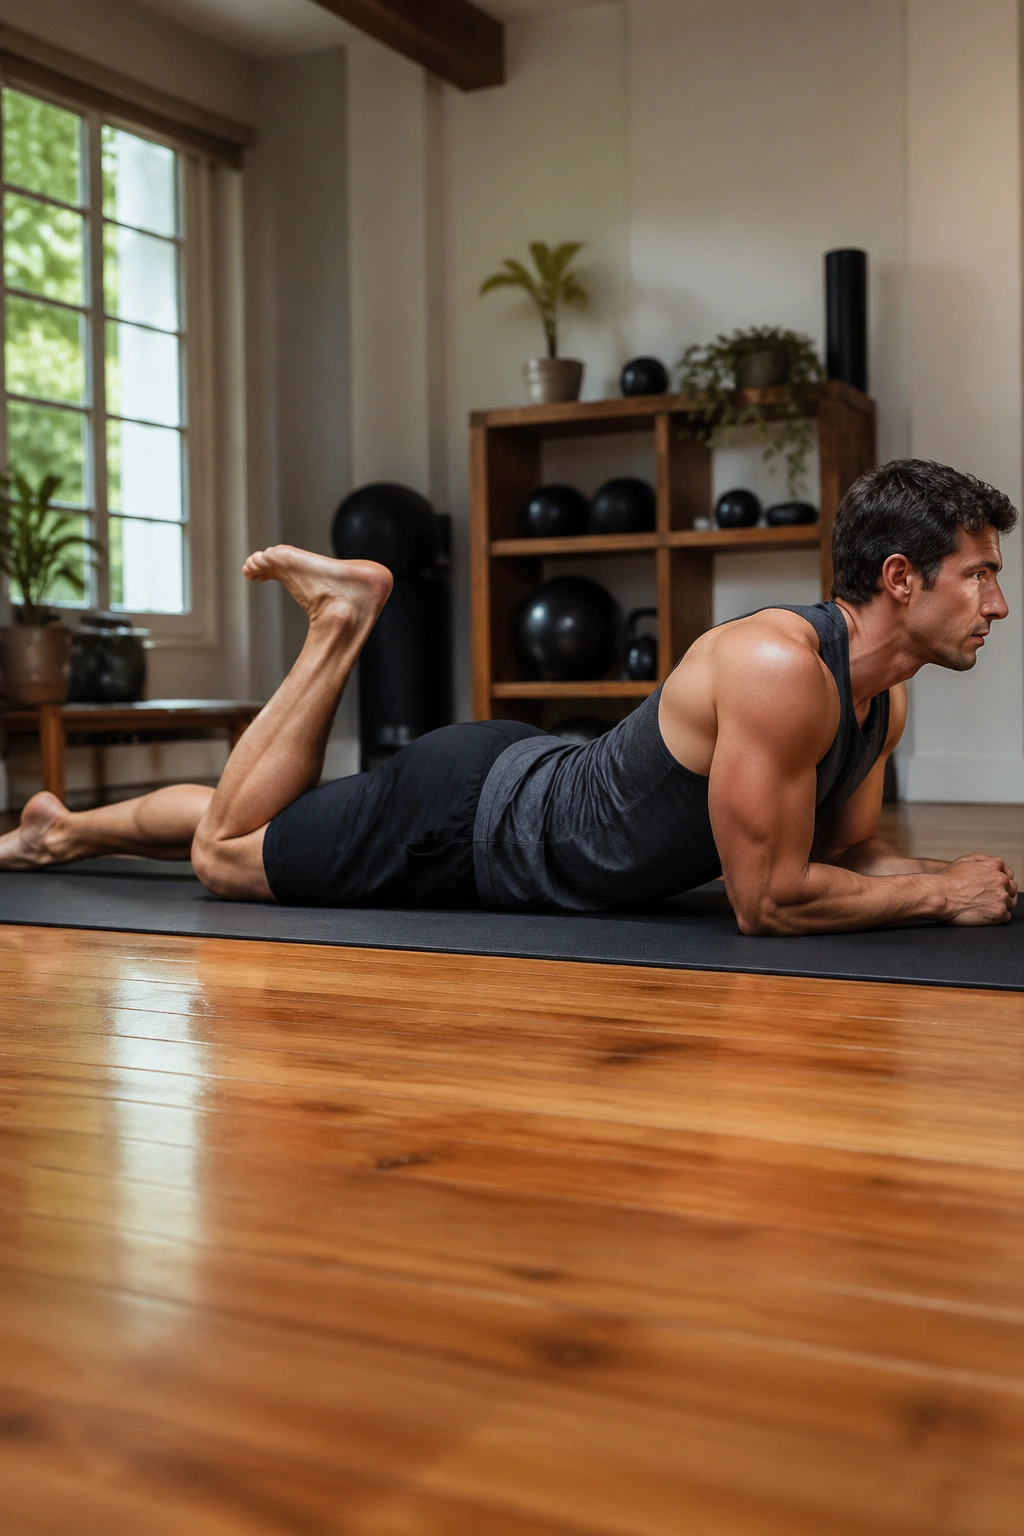
Single-leg kick is a prone move, which means you lie on your stomach and do the work from there. That alone filters out a lot of fake effort. If your hips are tight and your lower back tends to grumble, this one is worth keeping.
Prop yourself on your forearms, chest gently lifted, and kick one heel toward your glute for two quick pulses before switching legs. The pelvis stays heavy. The abs stay lightly engaged. The neck stays long instead of craned upward like you’re trying to peek over a fence.
The kicks are tiny. Keep them that way.
A set of 6 to 8 kicks per leg is enough. If the lower back starts pinching, lower the chest a little and press the hip bones down more firmly. If the hamstrings cramp, reduce the bend and slow the rhythm. The move should feel active but controlled, never jerky.
This is one of those workouts that quietly improves how you walk and stand. It’s not glamorous. It works.
10. Swimming Series That Fires Up the Whole Back
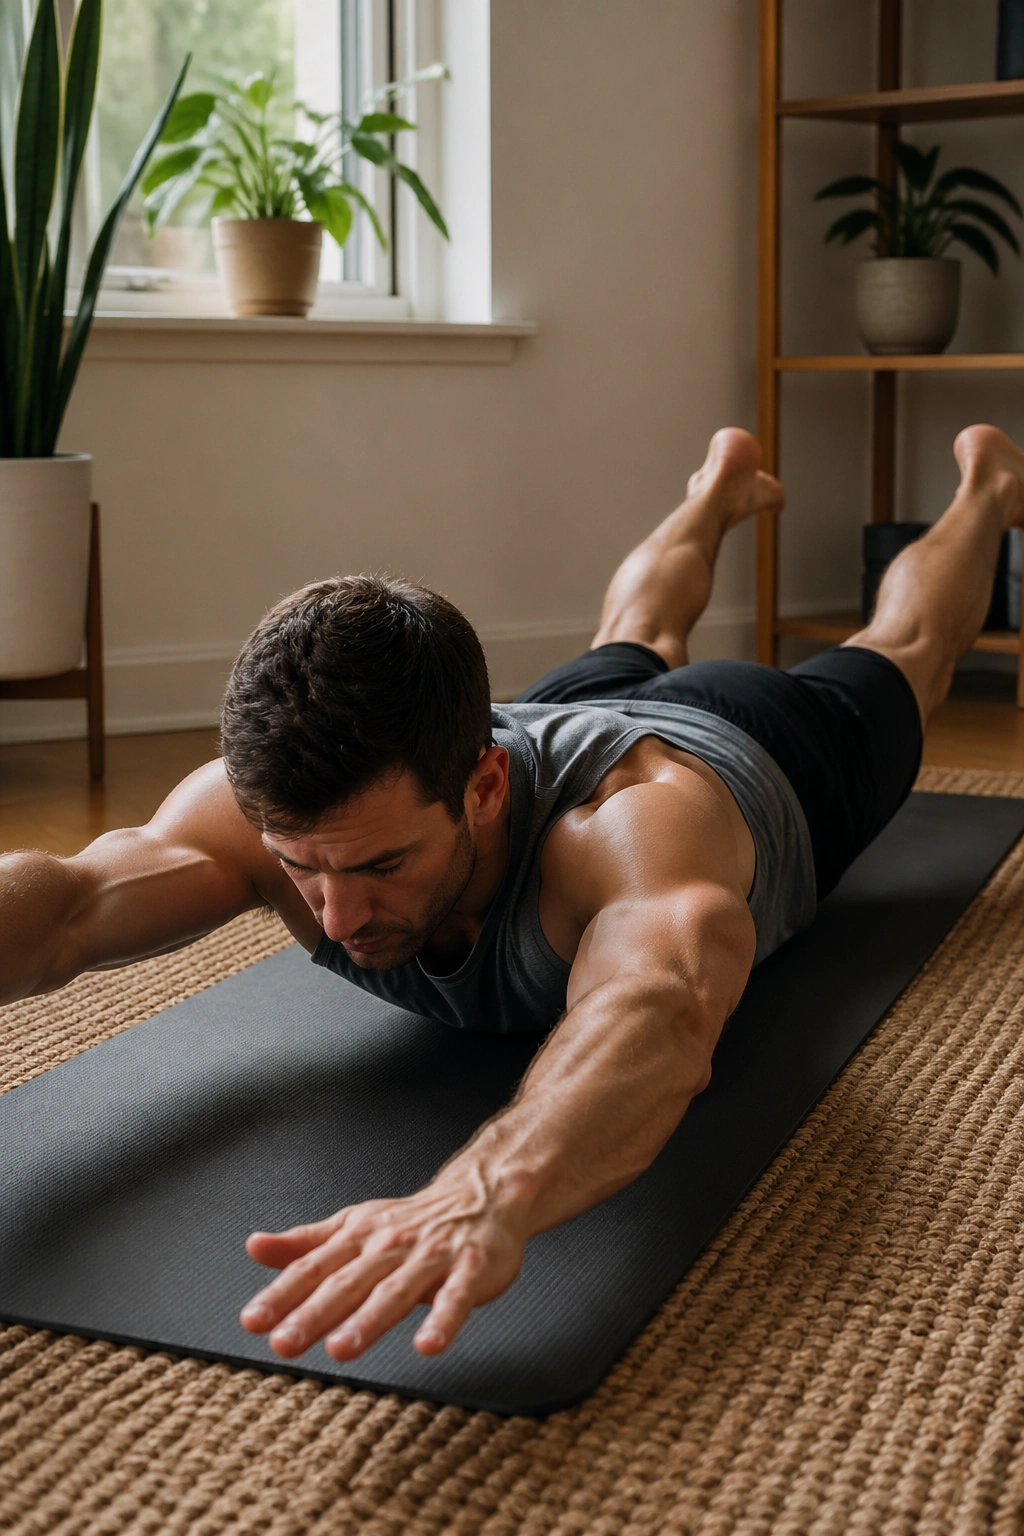
Your back should work, not your neck. That’s the cleanest rule for swimming, and it saves a lot of bad reps.
Lie facedown with arms reaching long overhead. Lift the opposite arm and leg a few inches off the mat, then switch in a steady flutter. The movement is quick enough to build endurance but small enough to keep the low back from taking over. If your chest lifts too high, lower it. If your legs start flailing, slow down.
How to Keep It Honest
- Face stays down on the mat
- Hands and feet reach away, not up
- Lift only 2 to 3 inches
- Breathe in for 4 beats, out for 4 beats
- Stop when the movement gets sloppy
Ten to 20 seconds is a solid first round. Rest, then do another. What you want is a warm, worked feeling across the upper back, glutes, and hamstrings. If all you feel is your neck, something is off.
This one is especially good after a day hunched over a laptop. It opens the front enough to let the back muscles do their job.
11. The Saw Twist for Rotation Without the Crank
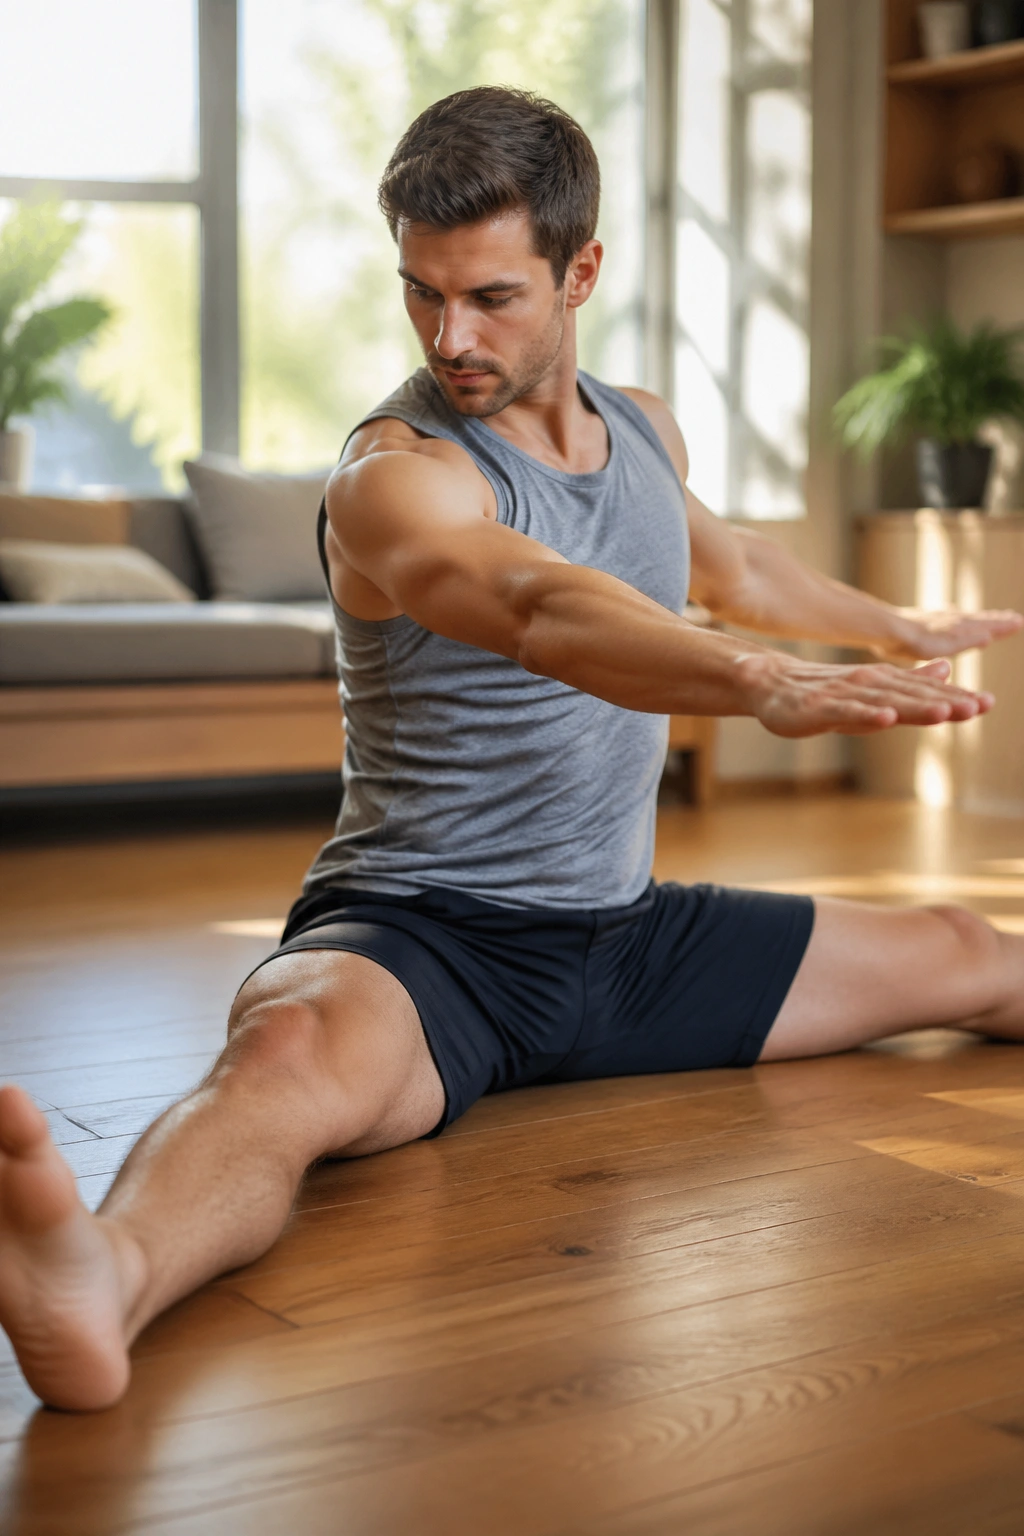
Want rotation without cranking your lower back? Use the saw. It gives you a long twist, a forward fold, and a hamstring stretch all in one clean package.
Sit with your legs wide and your arms stretched out at shoulder height. Rotate the torso toward one leg, then reach the opposite hand toward the outside of that foot like you’re sawing off the pinky toe. Come back up and switch sides. Keep the sit bones pressing into the floor.
This move teaches something a lot of men miss: rotation should come from the rib cage and upper back first, not from yanking the lumbar spine around like a wrench.
A good saw feels long. Not squashed. The opposite shoulder stays open, the chest keeps breathing, and the head follows the spine instead of leading the whole mess. Do 4 to 6 reps per side and keep the range modest if your hamstrings pull hard.
If you want to make it smoother, sit on a folded towel. That tiny lift often makes the pelvis easier to tip forward.
12. Side-Lying Leg Series for Hips That Stop Cheating
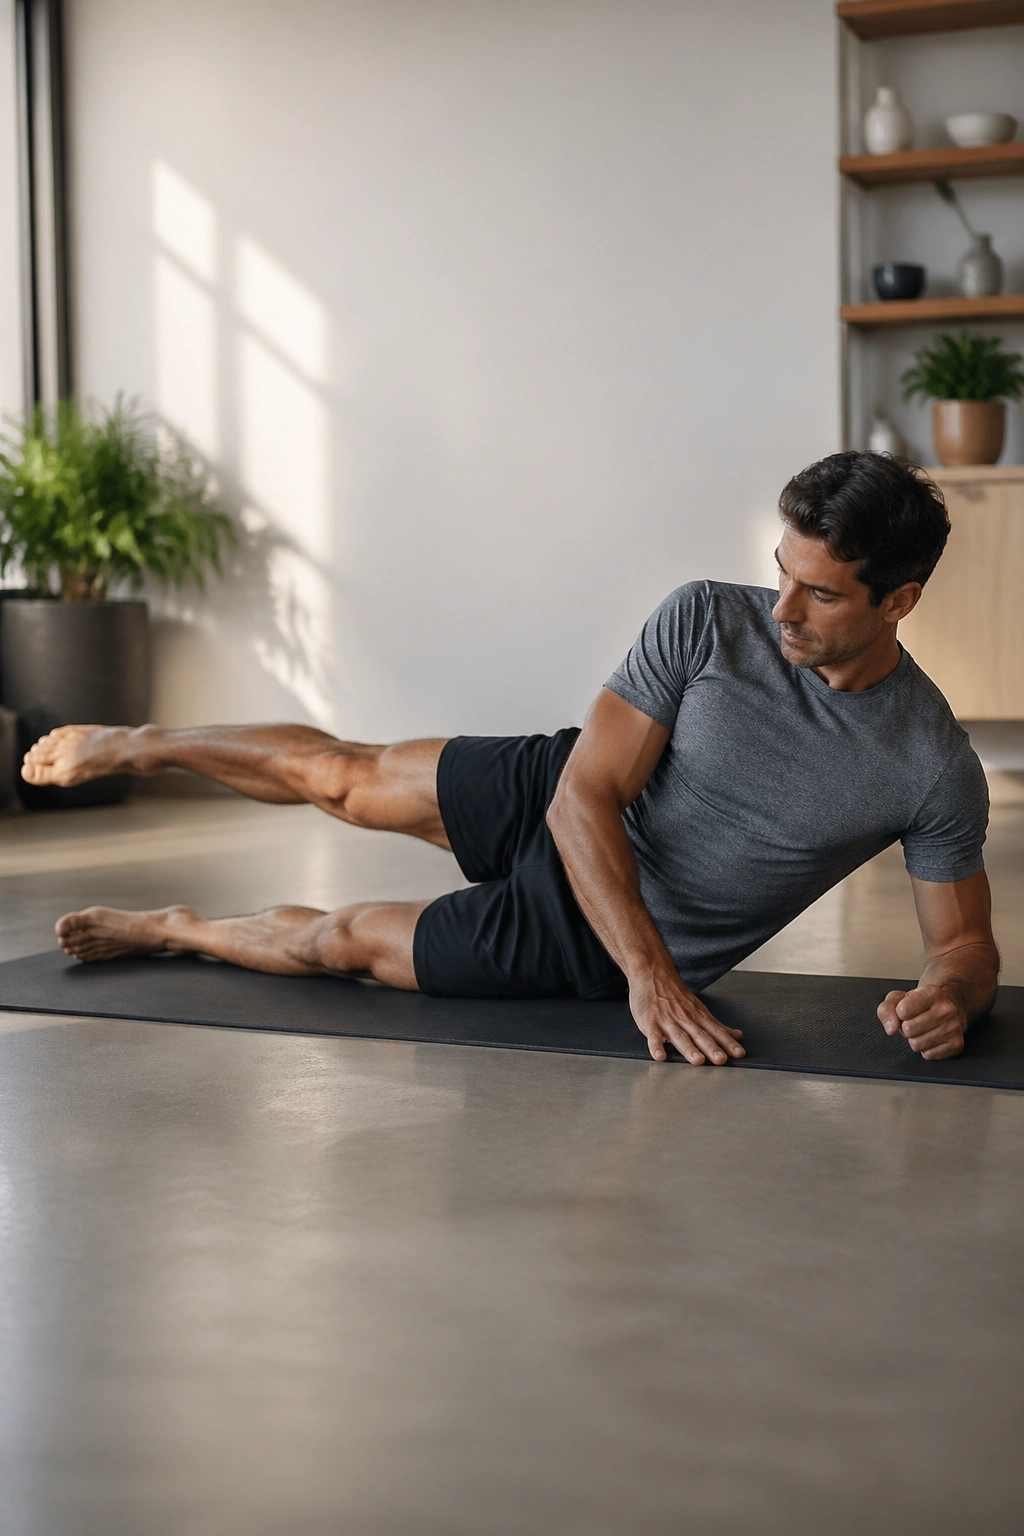
This is where a lot of men get surprised. Side-lying leg work looks harmless until the hip stabilizers start lighting up and the top leg stops drifting all over the place.
Lie on one side with your head supported and your body in one straight line. Lift the top leg a few inches, sweep it forward and back, then circle it slowly. Keep the waist lifted away from the mat if you can. That little space under the side body matters more than the height of the leg.
Keep the Pelvis Stacked
- Hips stacked one on top of the other
- Bottom knee bent for more support, if needed
- Foot flexed to wake up the hip
- Small circles, about the size of a dinner plate
- 8 lifts, 6 sweeps, and 6 circles each direction
If you feel the front of the hip gripping hard, the leg is probably going too high. Lower it. Side work is more about control than range, and a smaller shape is often the better one.
This series is a quiet hero for runners, lifters, and anyone whose hips drift inward during squats or stairs.
13. Roll-Up Progressions That Build Real Ab Strength
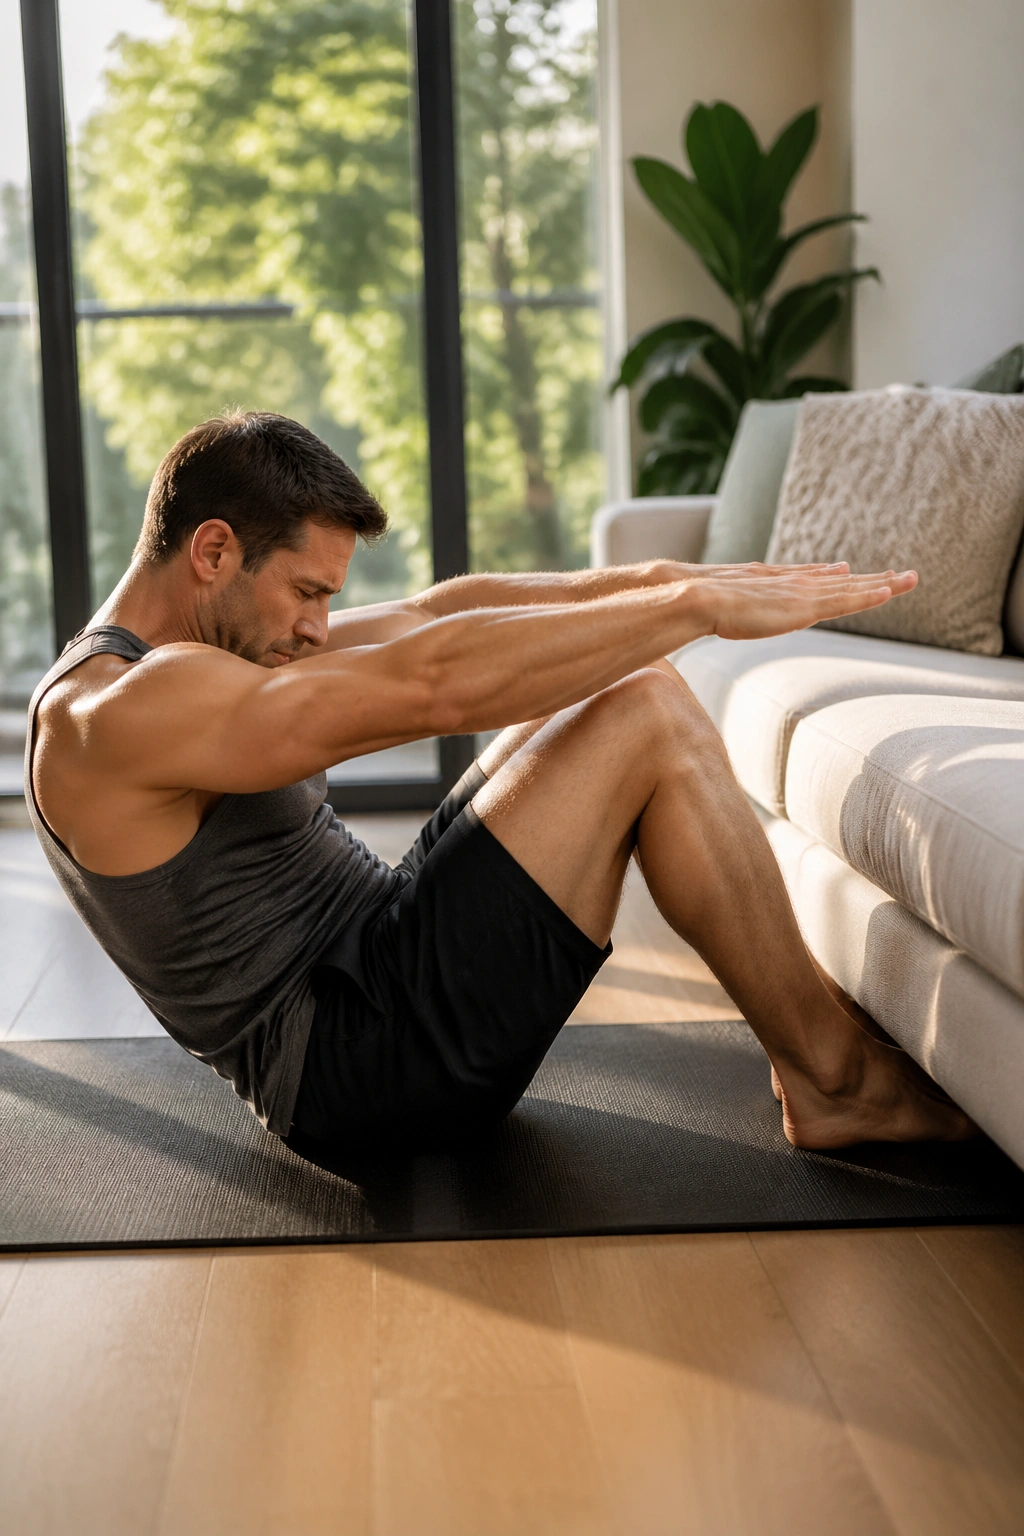
Roll-ups are better than crunches for one simple reason: they teach the spine to move with control instead of letting the neck yank the torso up. That difference matters.
If a full roll-up is too much, start with a bent-knee version. Reach forward, curl the head and shoulders up, then roll halfway down before coming back up. Use your arms lightly if needed. The goal is not to muscle through it. The goal is to keep the abs in charge from start to finish.
A clean roll-up has a smooth rhythm. You feel the abdominal wall shorten on the way up and lengthen on the way down. If the hip flexors take over or the feet fly off the floor, shorten the range and slow it down.
Try 5 controlled reps. If you can do those without jerking, add a second set. A good roll-up should leave your stomach working and your hip flexors quiet. That silence is the giveaway.
One small trick: hook the feet under a low couch edge or tuck them under a heavy dumbbell if you need more anchoring. Not ideal, but useful when you’re learning.
14. Wall-Supported Home Pilates Standing Series
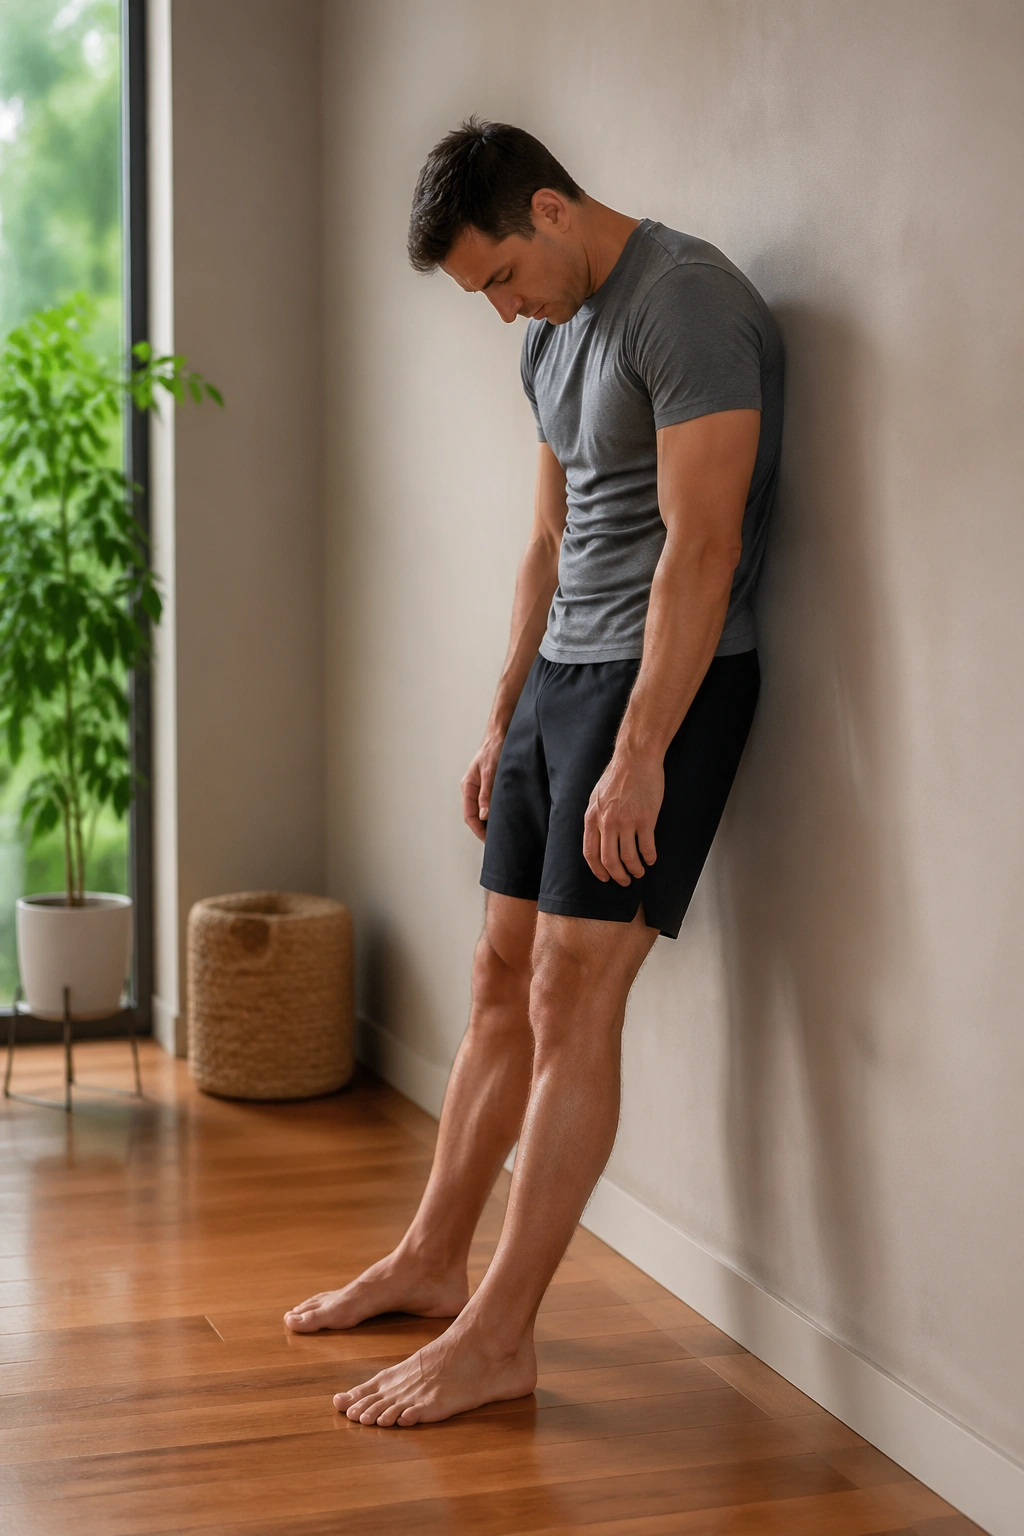
If getting down to the floor is the excuse, use a wall. Standing Pilates can be just as demanding when the line from head to heel has to stay organized without help.
Stand with your back near a wall and your feet a few inches forward. Roll the spine down one vertebra at a time, then stack back up. From there, add a single-leg balance, a wall angel, or a knee lift while keeping the ribs quiet. It sounds easy. It isn’t.
Three Moves to Pair
- Wall roll-downs for 5 slow reps
- Single-leg balance holds for 20 seconds per side
- Wall angels with elbows and wrists gliding against the surface for 6 reps
This type of workout is excellent for posture because it shows you exactly where the rib cage wants to flare or the chin wants to poke forward. The wall does not lie.
Use it on days when your hips feel stiff but you still want a real session. You’ll get enough core work to matter and enough standing balance work to make it interesting.
15. Inner Thigh Lift Circuit That Quietly Strengthens the Pelvis
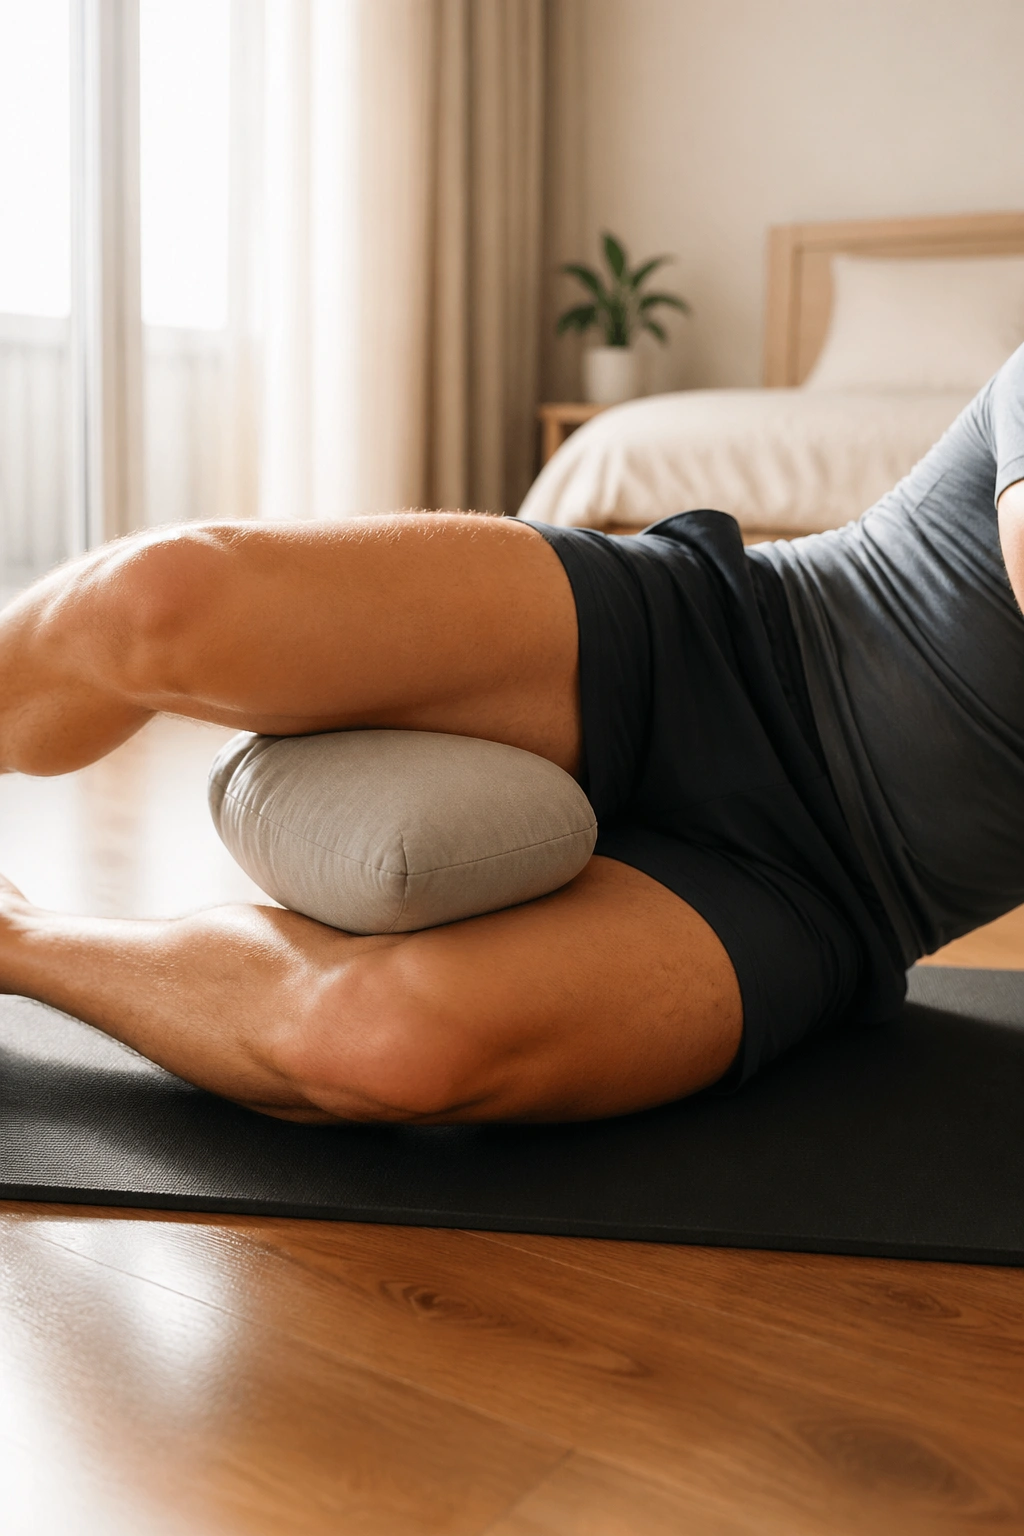
Inner thighs matter more than people think. They help stabilize the pelvis in squats, running, and any move where one leg has to support the body while the other one swings free. Ignore them long enough and they make themselves known.
Lie on your side or on your back with a pillow between the knees. Do small inner-thigh lifts, gentle squeezes, and bridge holds while the knees press inward just enough to feel the connection. The work is subtle. That’s normal. Don’t turn it into a power contest.
A simple circuit works well:
- Pillow squeeze for 20 seconds
- Side-lying inner thigh lifts for 8 per side
- Bridge with a soft knee squeeze for 6 reps
That combination wakes up the adductors without beating up the knees. If your hips have a habit of feeling loose or unstable, this is a smart place to spend a few extra minutes.
The men who usually skip this work are the ones who need it most.
16. Teaser Prep and Hollow Holds for Real Core Control
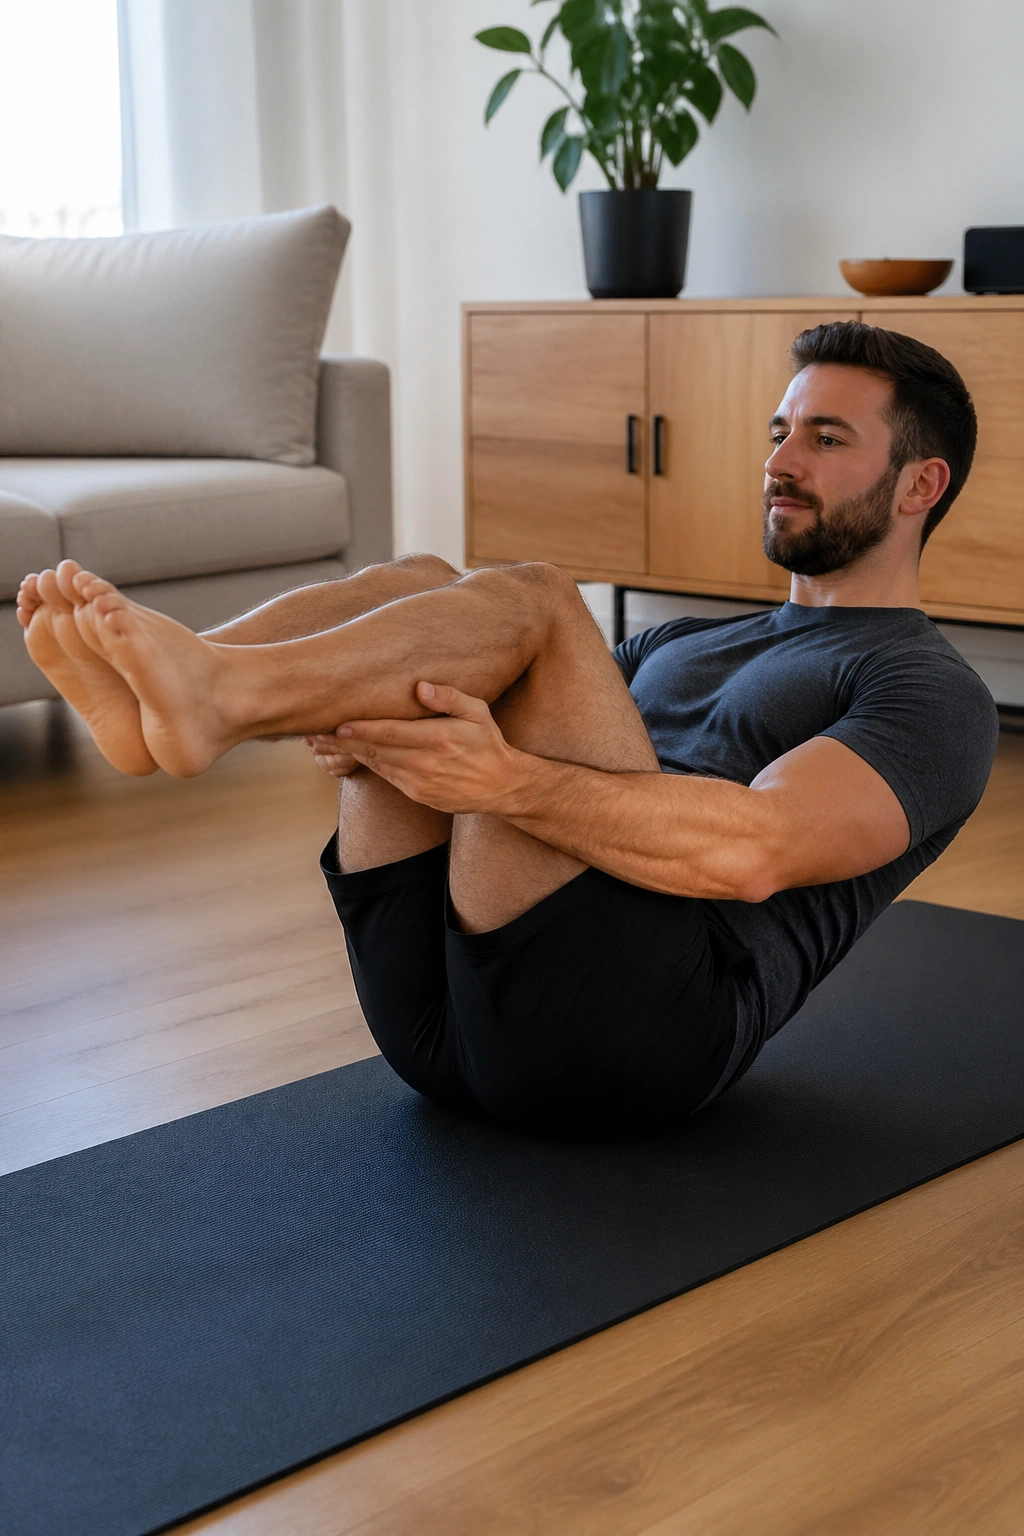
If the teaser scares you, good. It should. Not because it is impossible, but because it refuses to hide sloppy core work. The prep version is enough for most people, and that is not a downgrade.
Start with knees bent, shins parallel to the floor, and hands behind the thighs if needed. Roll back a few inches, hold the hollow shape for 2 to 3 breaths, then come back up with control. If that feels solid, extend one leg at a time. Keep the chin gently tucked so the neck does not become the weak link.
Scale It So You Can Own It
- Bent-knee hollow hold: 10 to 20 seconds
- One-leg teaser prep: 4 reps per side
- Full teaser only if the lower back stays long and the neck stays calm
The hollow position is the part worth respecting. It teaches the ribs to stay down while the hips and abs do their jobs. That control transfers into nearly everything else, from planks to standing lifts.
No need to chase the full version on day one. Clean prep work pays better.
17. Leg Pull Front and Reverse for Shoulder and Hip Line
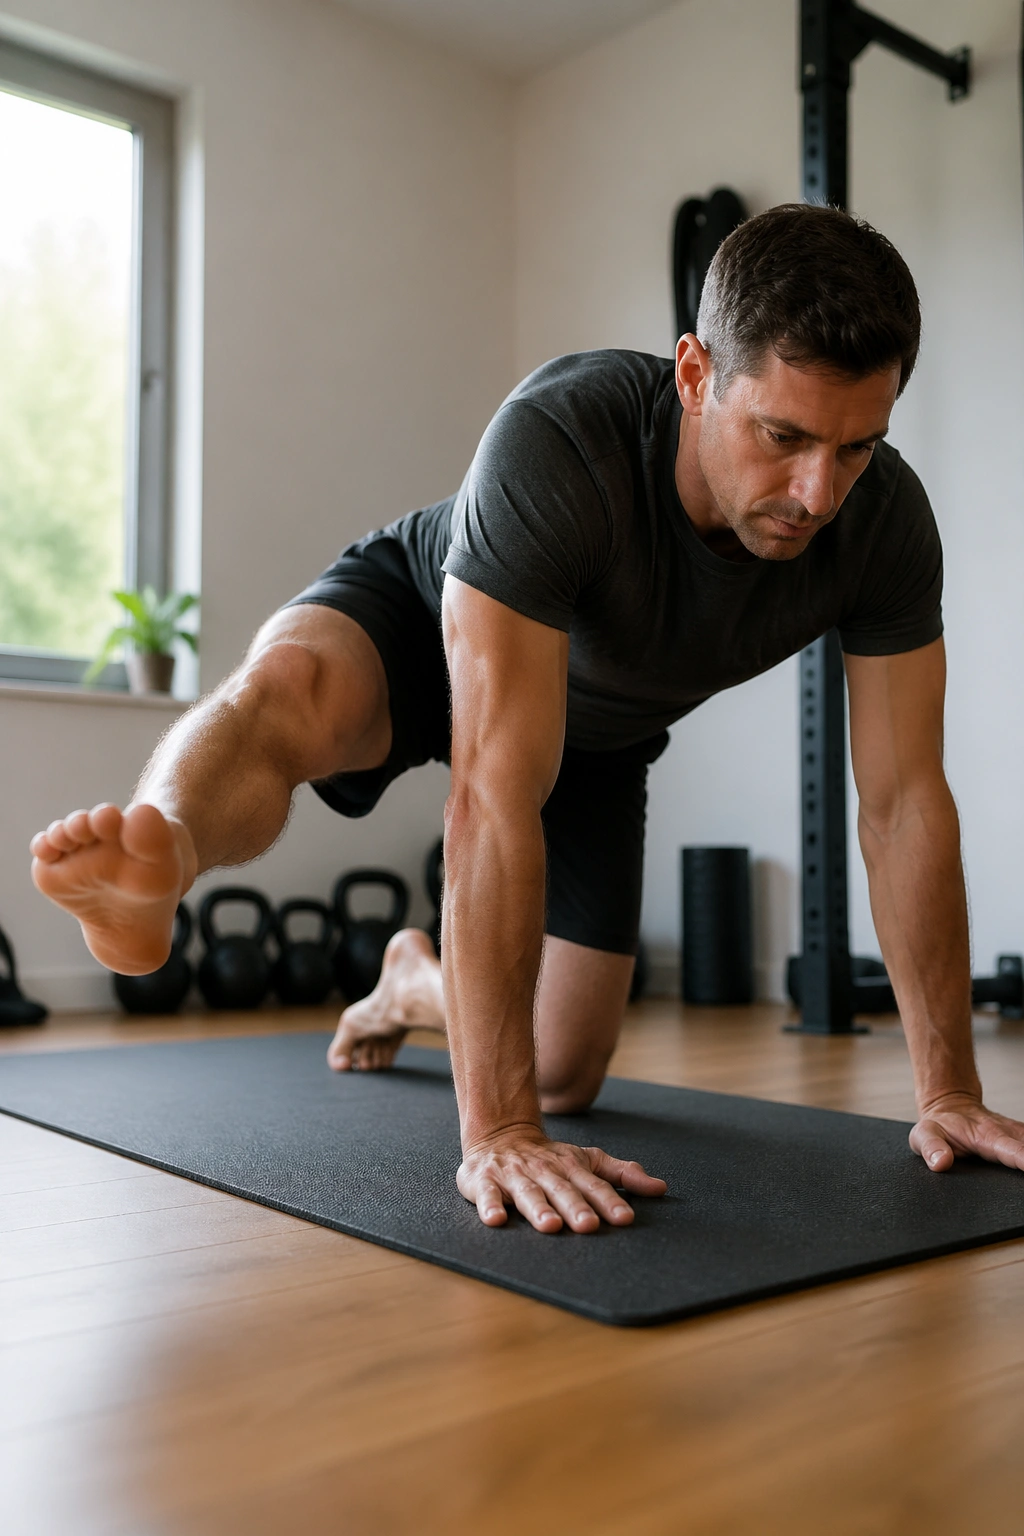
Leg pull front and reverse are basically plank work with stricter manners. They ask for shoulder stability, hip extension, and enough core control to stop the pelvis from wobbling around.
In the front version, hold a plank and lift one leg a few inches without letting the hips tilt. In the reverse version, sit with your hands behind you, lift the hips, and alternate leg lifts from that table-top-like position. Both versions are hard in different ways. Both expose lazy bracing fast.
The front version is better if your shoulders need work. The reverse version is better if your glutes and hamstrings have been asleep. Together, they give you a cleaner sense of how your body handles weight through the hands and feet.
Use 4 to 6 lifts per side, then rest. If the wrists complain, do the reverse version on fists or on yoga blocks. If the shoulders shake early, shorten the hold before you add more reps.
There’s a reason this pair stays in Pilates playlists. It asks for a lot without needing fancy gear.
18. Mermaid and Thoracic Mobility Flow for Stiff Sides
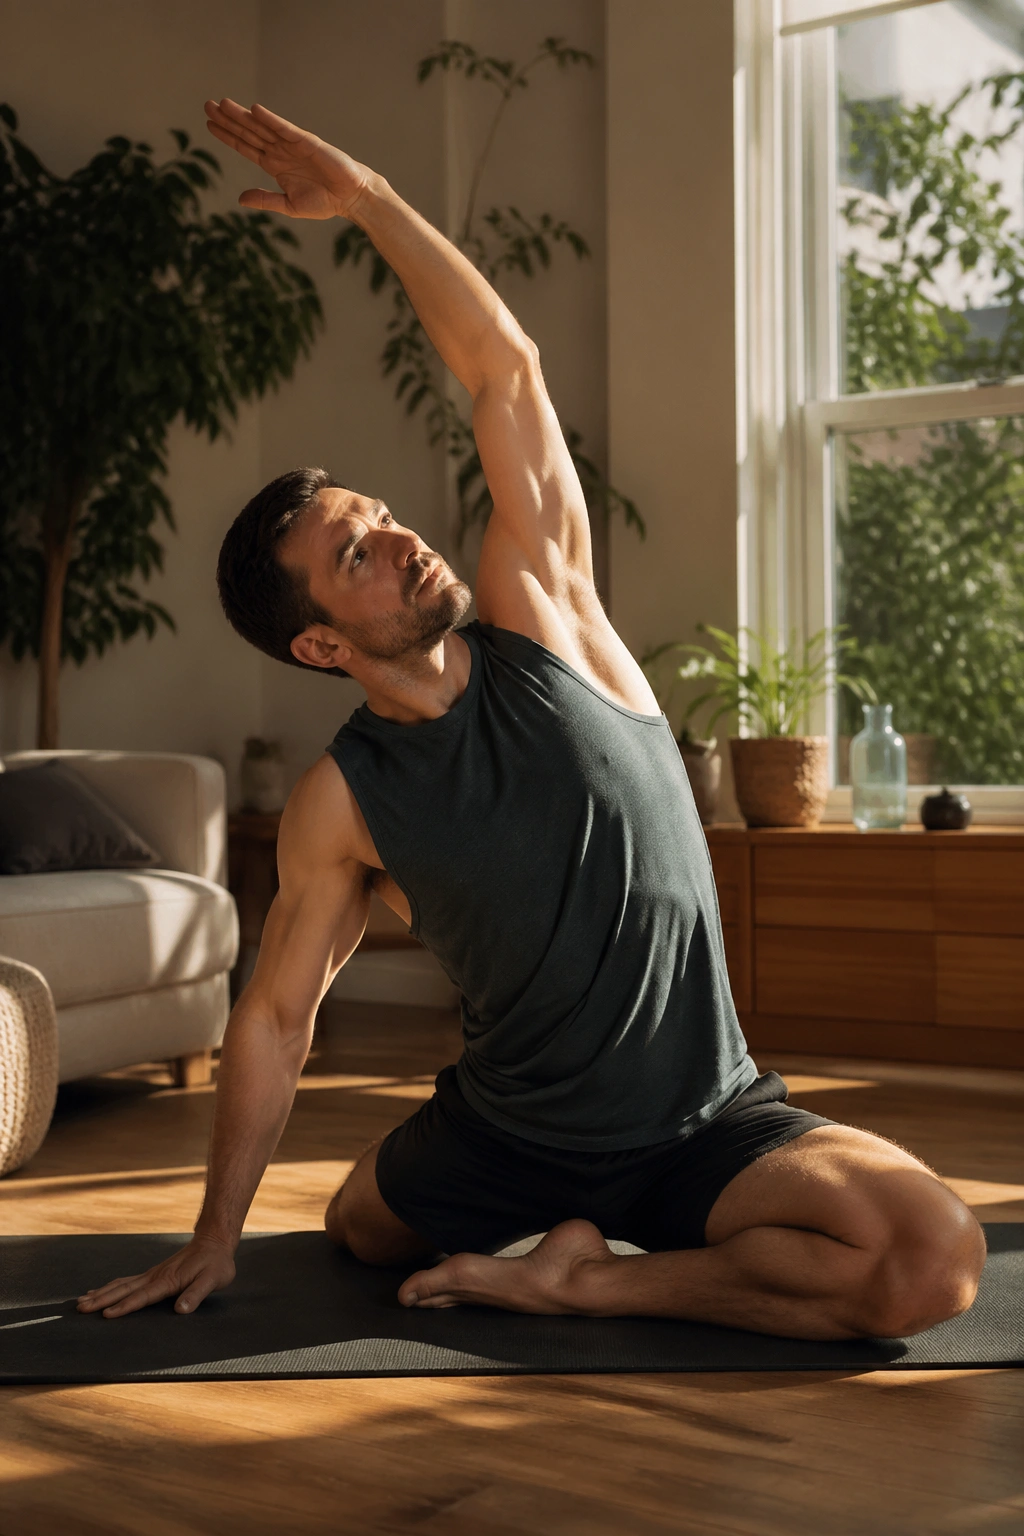
Your ribs and side body should feel long, not jammed. That’s the whole point of mermaid work, and it is a relief after all the plank-heavy pieces above.
Sit to one side with the legs folded in a comfortable shape. Reach the top arm overhead, side bend away from the hip, and breathe into the open side ribs. Then rotate the chest slightly toward the floor and come back up. The movement should feel like space opening between your ribs.
The Bend, the Lift, the Breath
- Inhale to grow tall first
- Exhale to side bend slowly
- Keep both sitting bones as grounded as possible
- Rotate only as far as the spine can stay long
- Do 4 or 5 smooth rounds per side
This is one of those moves that often feels better than it looks. It opens the chest, loosens the lats, and helps the upper back move without the lower back doing all the work. If you row, lift, bike, or sit for hours, this one earns its place.
And it’s a decent reset between harder pieces. Sometimes that matters more than another hard set.
19. Chair-Based Stability Work When the Floor Feels Like Too Much
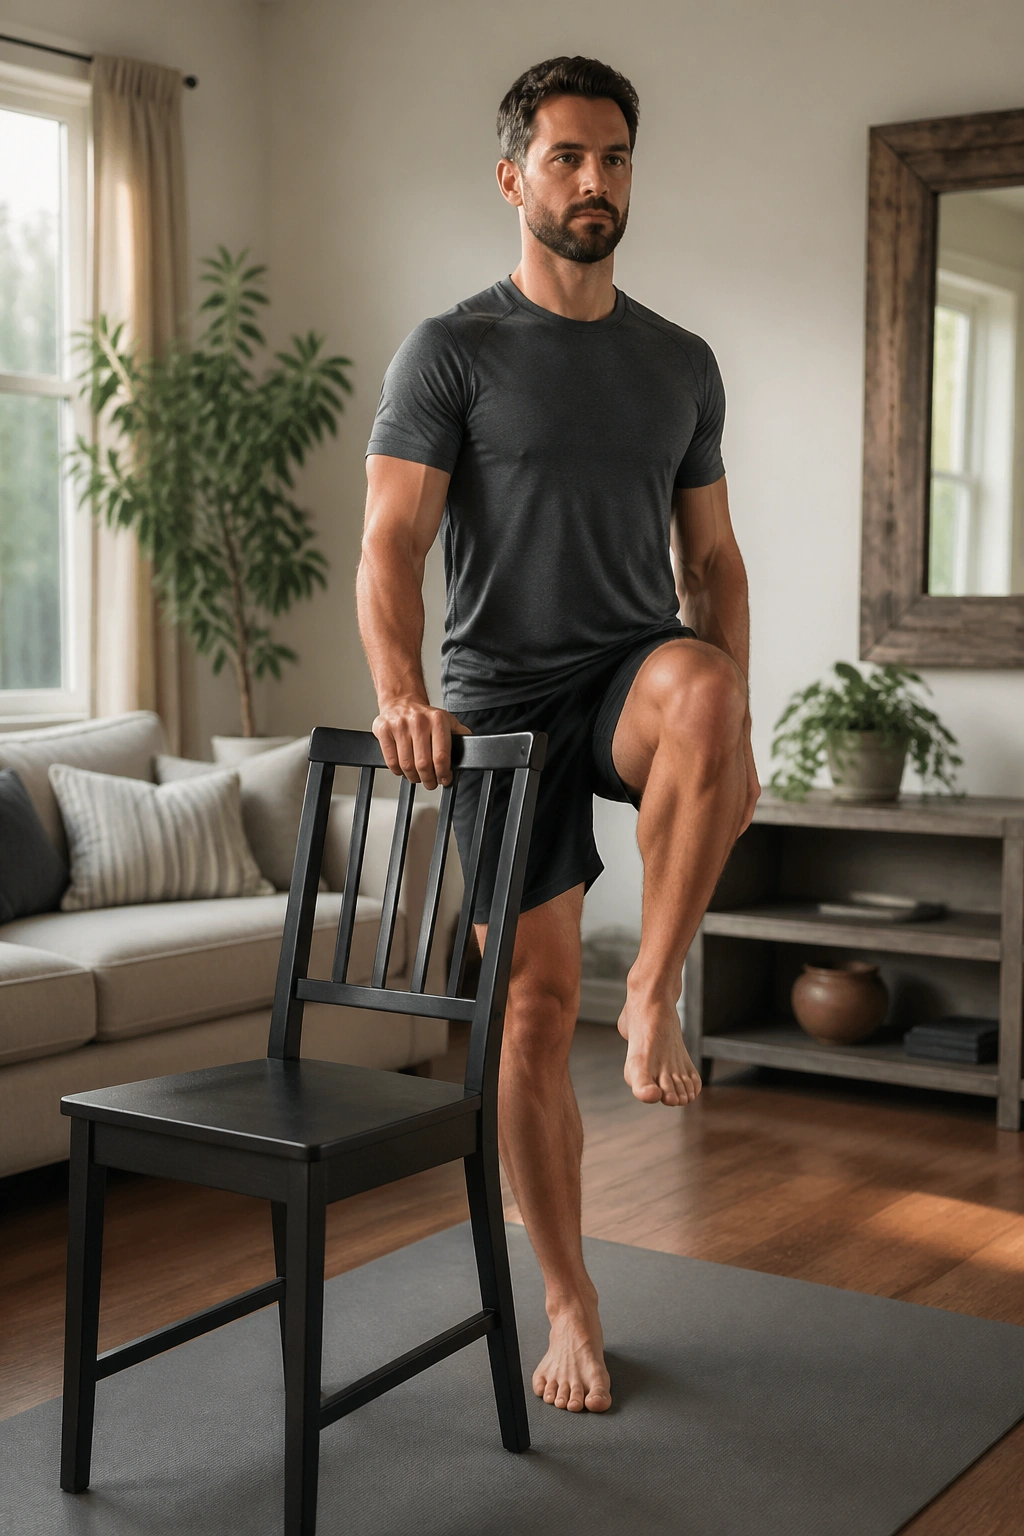
Not every good Pilates session has to begin on the mat. A sturdy chair can give you enough support to make balance work safer and more useful, especially if your knees or wrists are cranky.
Stand behind the chair and lightly hold the backrest. Lift one knee into a controlled march, then extend the leg back a few inches without arching the low back. Try a slow side lift next. Finish with a seated spine stretch or seated knee lift if you want a low-impact burner.
A Simple Chair Set
- 8 knee lifts per side
- 6 small leg extensions per side
- 20-second standing balance hold per side
- 6 seated spinal curls if you want a core finish
The point is not the chair itself. It’s the honesty the chair gives you. You can feel whether the standing leg is steady and whether the torso stays quiet when the free leg moves.
Use a heavy chair that does not slide. Seriously. A wobbly chair turns a useful workout into a stupid one fast.
20. The Finish-Strong Home Pilates Circuit
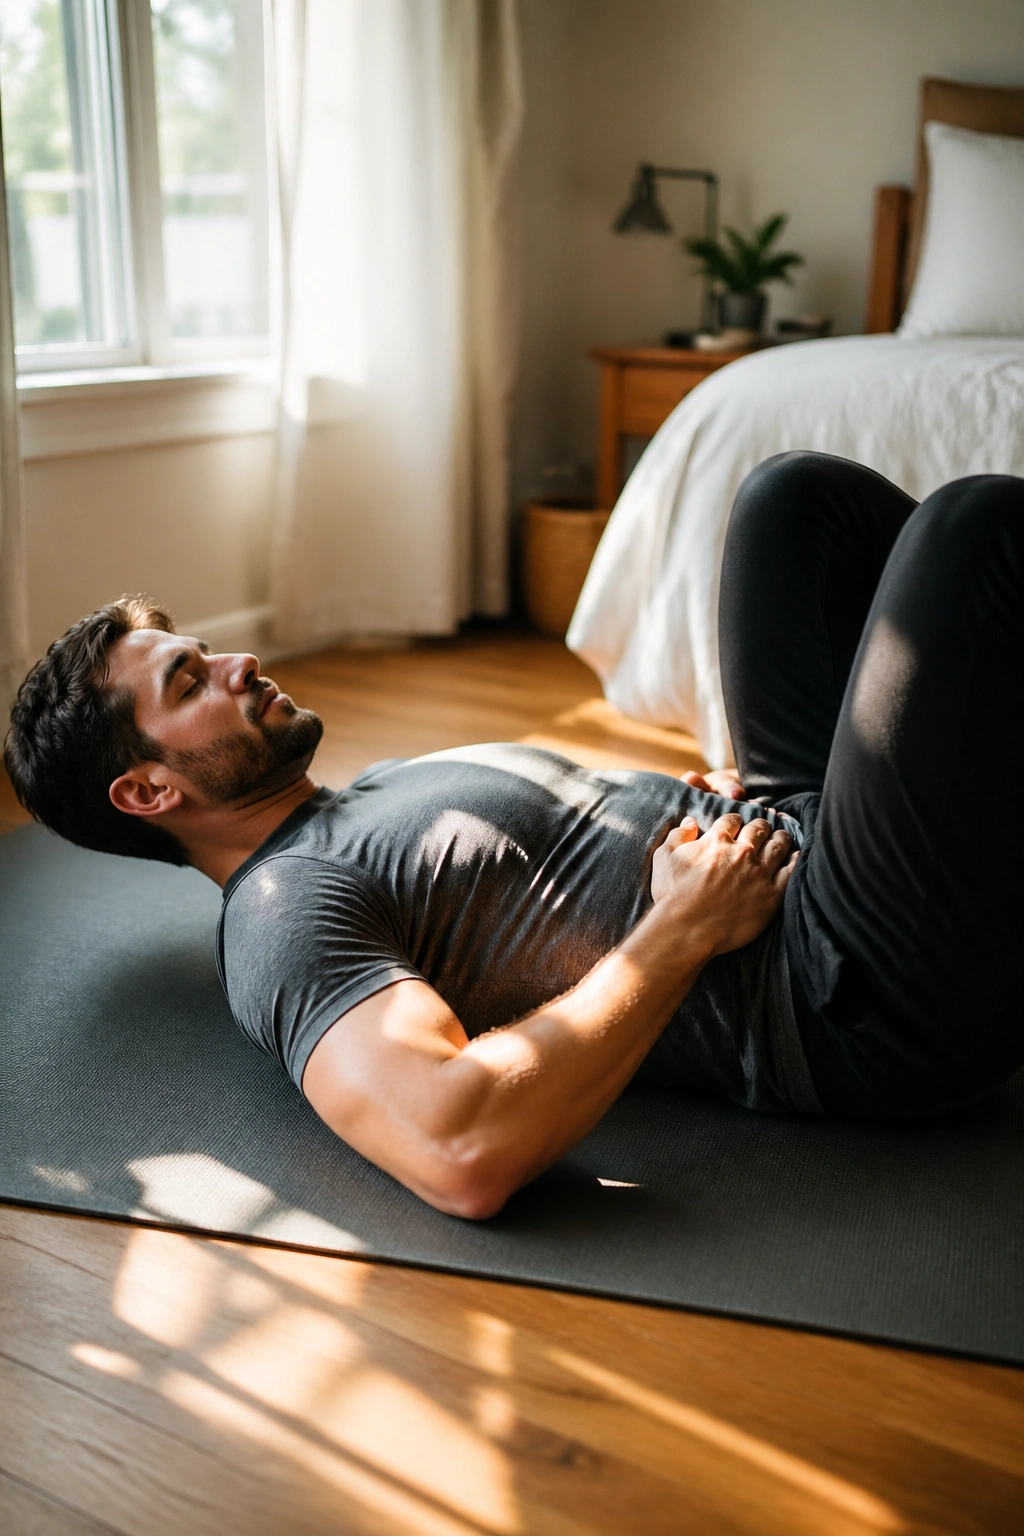
This is the one I’d save for when you want the whole body to feel switched on without wrecking yourself. It uses the same control you’ve been building all along, but now the pieces start talking to each other.
Run this as a 12- to 15-minute circuit:
- The Hundred for 30 seconds
- Shoulder Bridge for 8 reps
- Side Plank for 20 seconds per side
- Saw Twist for 4 reps per side
- Swimming for 20 seconds
- Mermaid for 4 breaths per side
Move from one exercise to the next with only enough rest to keep the form clean. The point is not speed. The point is staying organized when your core is tired and your shoulders want to shrug.
If you only have time for one session on a busy day, this is a solid one. It gives you breathing, hip extension, rotation, side-body strength, and some spine work in a single sweep. Nothing fancy. A lot of payoff.
The men who stick with Pilates usually stop trying to make it look hard and start caring about how their body feels when they stand up, lift a bag, or walk down stairs. That shift matters. And once you feel it, the mat starts looking less like a side quest and more like a place where real training happens.
