



There is a specific kind of burn that happens during a barre class—a deep, trembling fatigue that sets in right around the third set of pulses. It’s not the sharp, breath-stealing exhaustion of a sprint or the heavy, crushing fatigue of lifting a barbell. Instead, it is a localized, precise fire deep within the muscles. This “barre shake” is your body’s signal that you have successfully isolated a muscle group and exhausted its endurance.
You do not need a mahogany ballet barre, a studio membership, or expensive resistance equipment to achieve those results. The beauty of this method lies in its minimalism. It relies on body weight, gravity, and the mechanics of small, controlled ranges of motion. When you work with your own body as the resistance, you force your stabilizing muscles to fire, which is exactly how you build long, lean, defined lines in the legs.
If you are looking to change the composition of your legs without putting unnecessary impact on your joints, this is the path forward. We are talking about high-repetition, low-impact movements that prioritize muscle endurance and structural alignment. Your goal is to move slowly enough that you maintain total control, fighting gravity on the descent and squeezing through the resistance on the ascent. Let’s look at the foundational exercises that will turn your living room into an effective studio space.
1. First Position Plié Squats
This is the cornerstone of the barre method. It builds the foundation for everything else, specifically targeting the inner thighs and the entire quad. You start by bringing your heels together and toes apart—what is known as first position. Keep your shoulders stacked directly over your hips.
The Proper Setup
Do not lean forward. If you feel your chest dipping, you are losing the engagement of your core. As you bend your knees, imagine sliding your back down an invisible wall behind you. Your knees should track directly over your second and third toes. If they collapse inward, widen your stance or reduce your range of motion.
The Pulse Factor
Once you reach the bottom of your squat, stay there. Drop just an inch lower, then lift an inch higher. That tiny movement is where the change happens. Keep your glutes squeezed tight throughout the entire set. You will know you are doing it right when your inner thighs start to protest after about thirty seconds.
2. Standing Side Leg Lifts
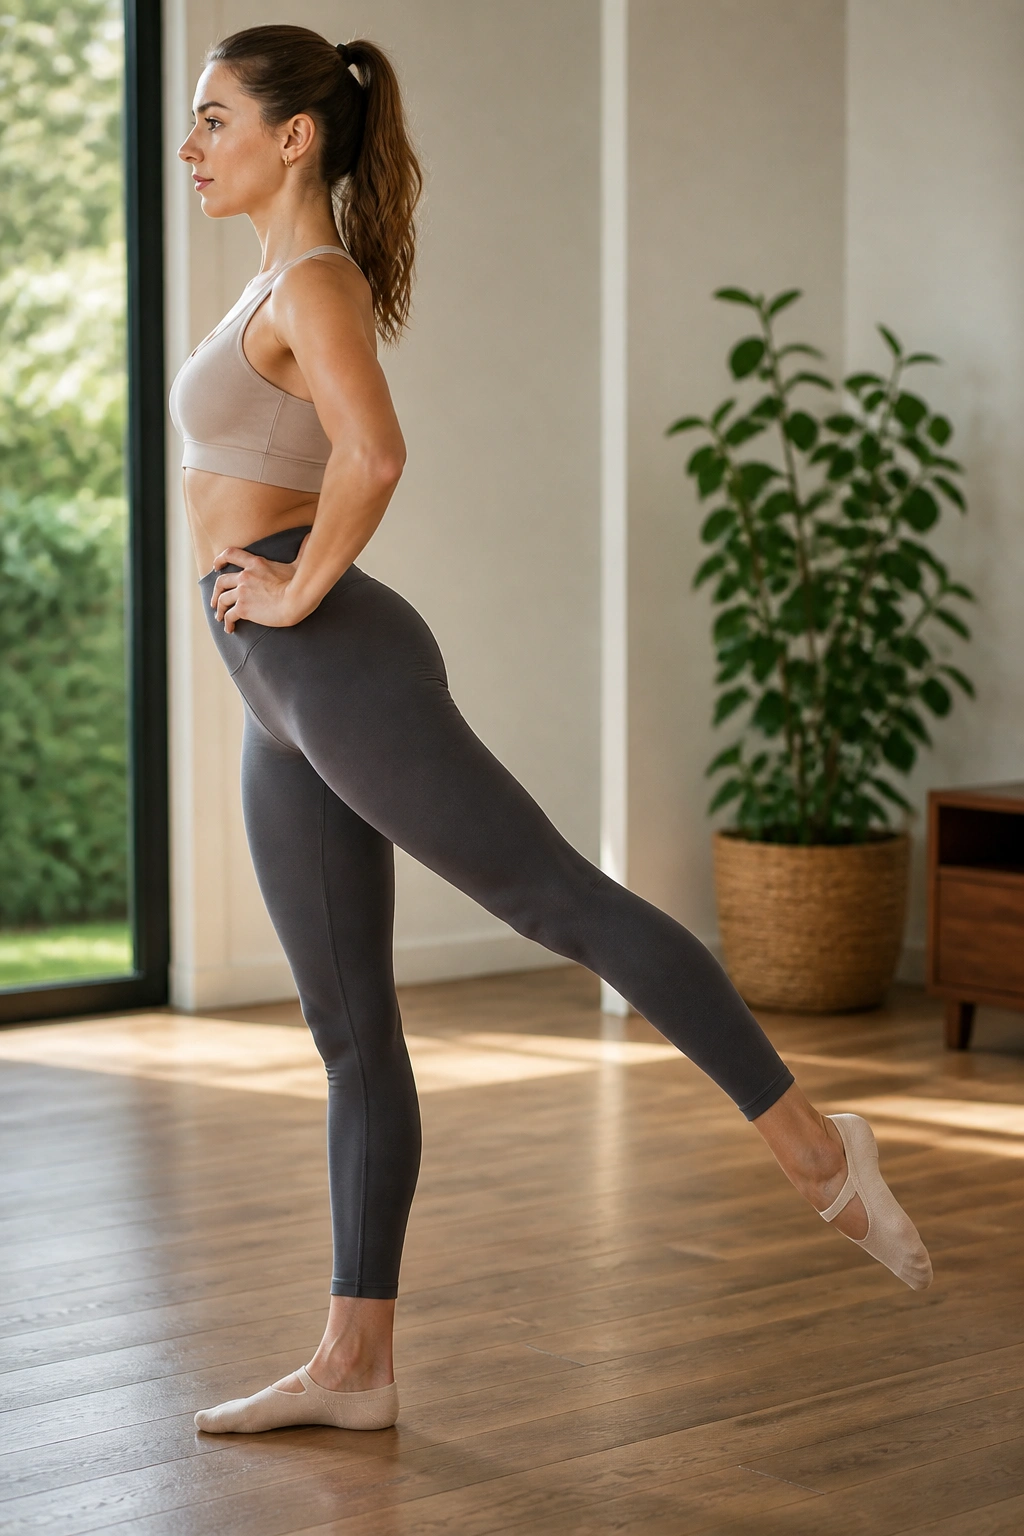
After the heavy quad work of a plié, shifting to a standing side leg lift provides a necessary change in leverage. This move targets the abductors and the outer glutes, helping to create that sculpted look along the side of the thigh. Stand with one hand on a chair or countertop for balance.
Focusing on the Hip
Lift your outer leg just a few inches off the floor. The key here is to lead with your heel, not your toe. If you turn your foot upward, you engage the wrong muscles—the hip flexors—which can cause cramping. Keep the toes pointed forward or slightly down toward the floor to keep the work in the side of the glute.
Avoiding the Sway
A common mistake is leaning your entire upper body away from the leg you are lifting. Resist that urge. Keep your spine perfectly vertical. By keeping your torso centered, you force the stabilizing leg and the working hip to do all the heavy lifting. You want a small, controlled movement—think of it as a tap rather than a swing.
3. The Barre Attitude
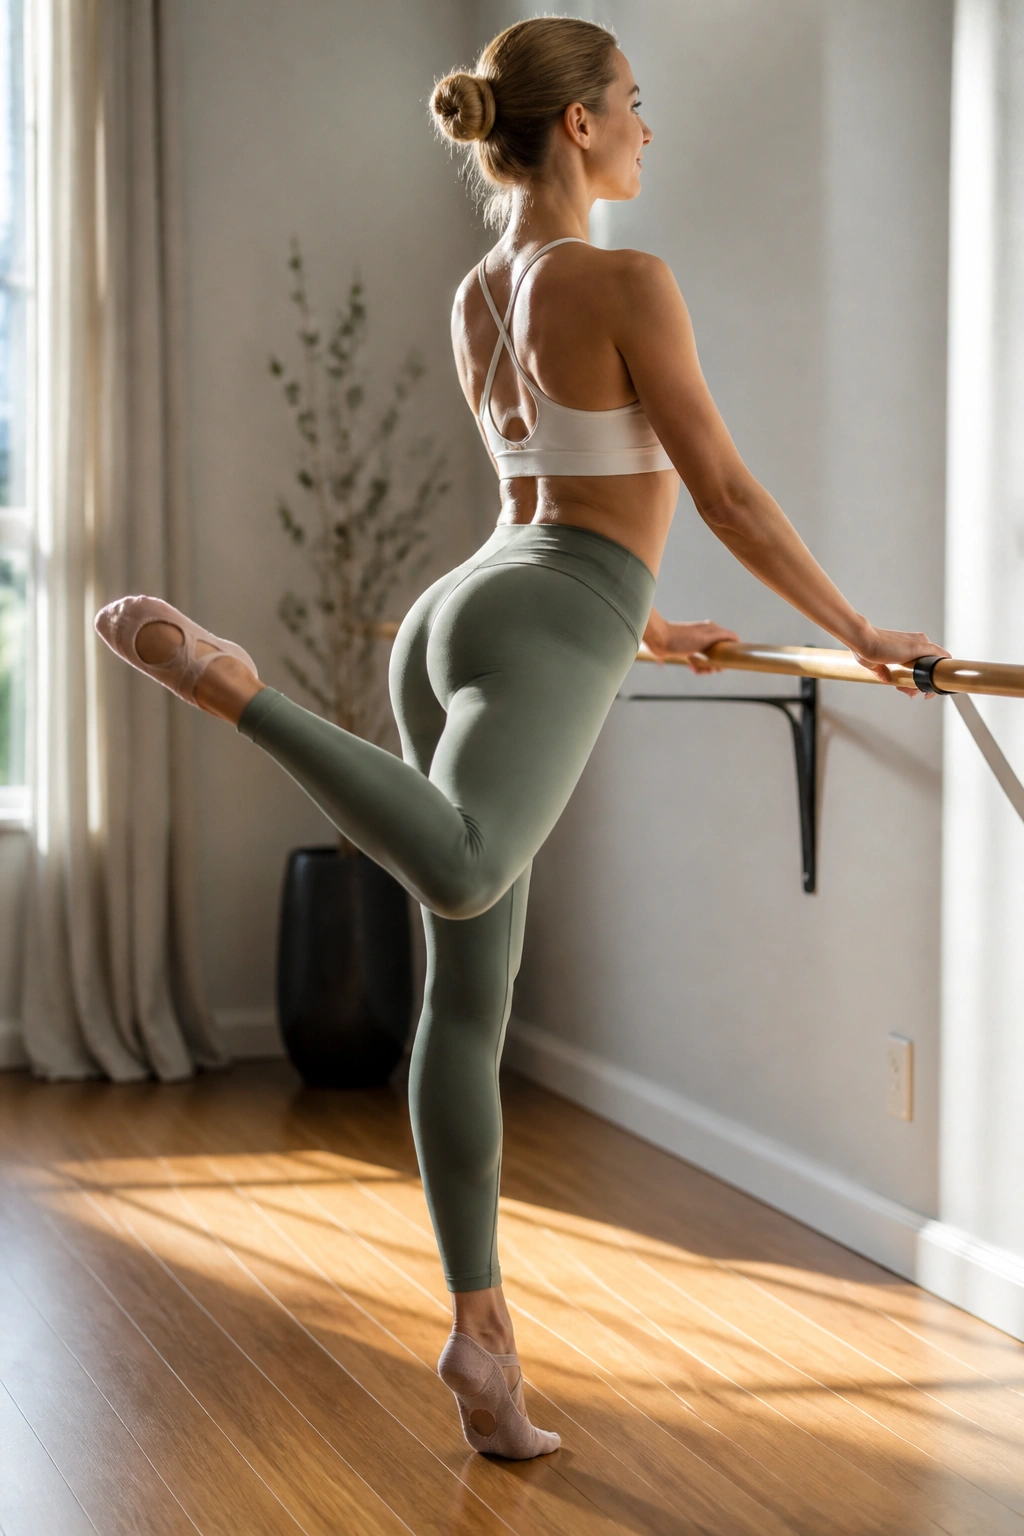
The attitude position is a classic ballet move that translates exceptionally well to home workouts because it requires deep engagement from the glutes and hamstrings. Start facing your chair or counter, hands resting lightly on the surface. Bend your working leg and lift it behind you, creating a curved shape with your foot.
The Lift and Squeeze
Lift the bent knee slightly higher than your hip. Without letting the knee drop, pulse the leg upward toward the ceiling. Every time you lift, think about squeezing your glute as if you are holding a coin between your buttock and your hamstring.
Why It Works
This exercise is brilliant for the “glute-hamstring tie-in”—that spot right under the glute where the leg meets the muscle. Because you are working in a bent-leg position, you are isolating the hamstrings more effectively than with a straight leg. Keep your hips square to the floor. If one hip hikes up, you lose the isolation.
4. Curtsy Lunges
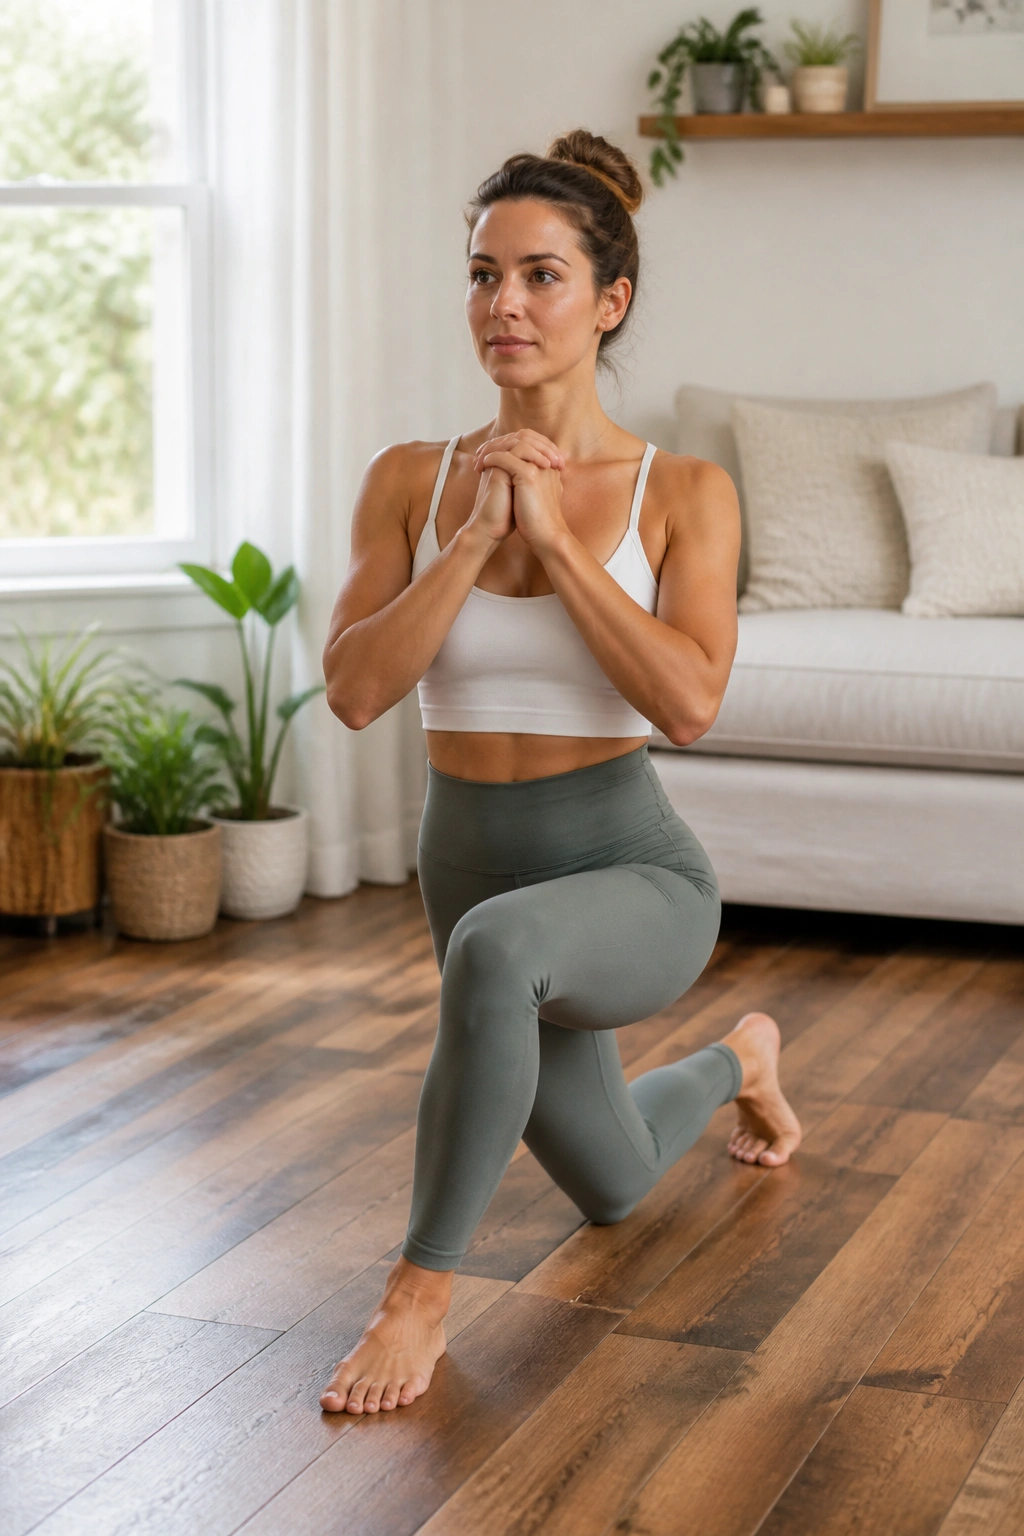
Curtsy lunges are an incredible way to hit the gluteus medius, a muscle often neglected in standard forward lunges. Stand with feet hip-width apart. Take a step back and across with your right foot, planting it behind your left leg.
Precision Matters
Your back knee should hover just an inch or two above the floor. Focus on keeping your front knee pointed straight ahead, not caving inward. When you push back up to the starting position, drive through the heel of your front foot.
Adding Intensity
If you want to make this harder, add a pulse at the bottom of the movement. Stay low in the curtsy, pulse three times, and then stand up. This keeps the tension on the glutes for an extended period, which builds endurance much faster than standard lunges. Do not rush through these; slow, controlled, and intentional is the rule.
5. Glute Squeezes with Straight Leg
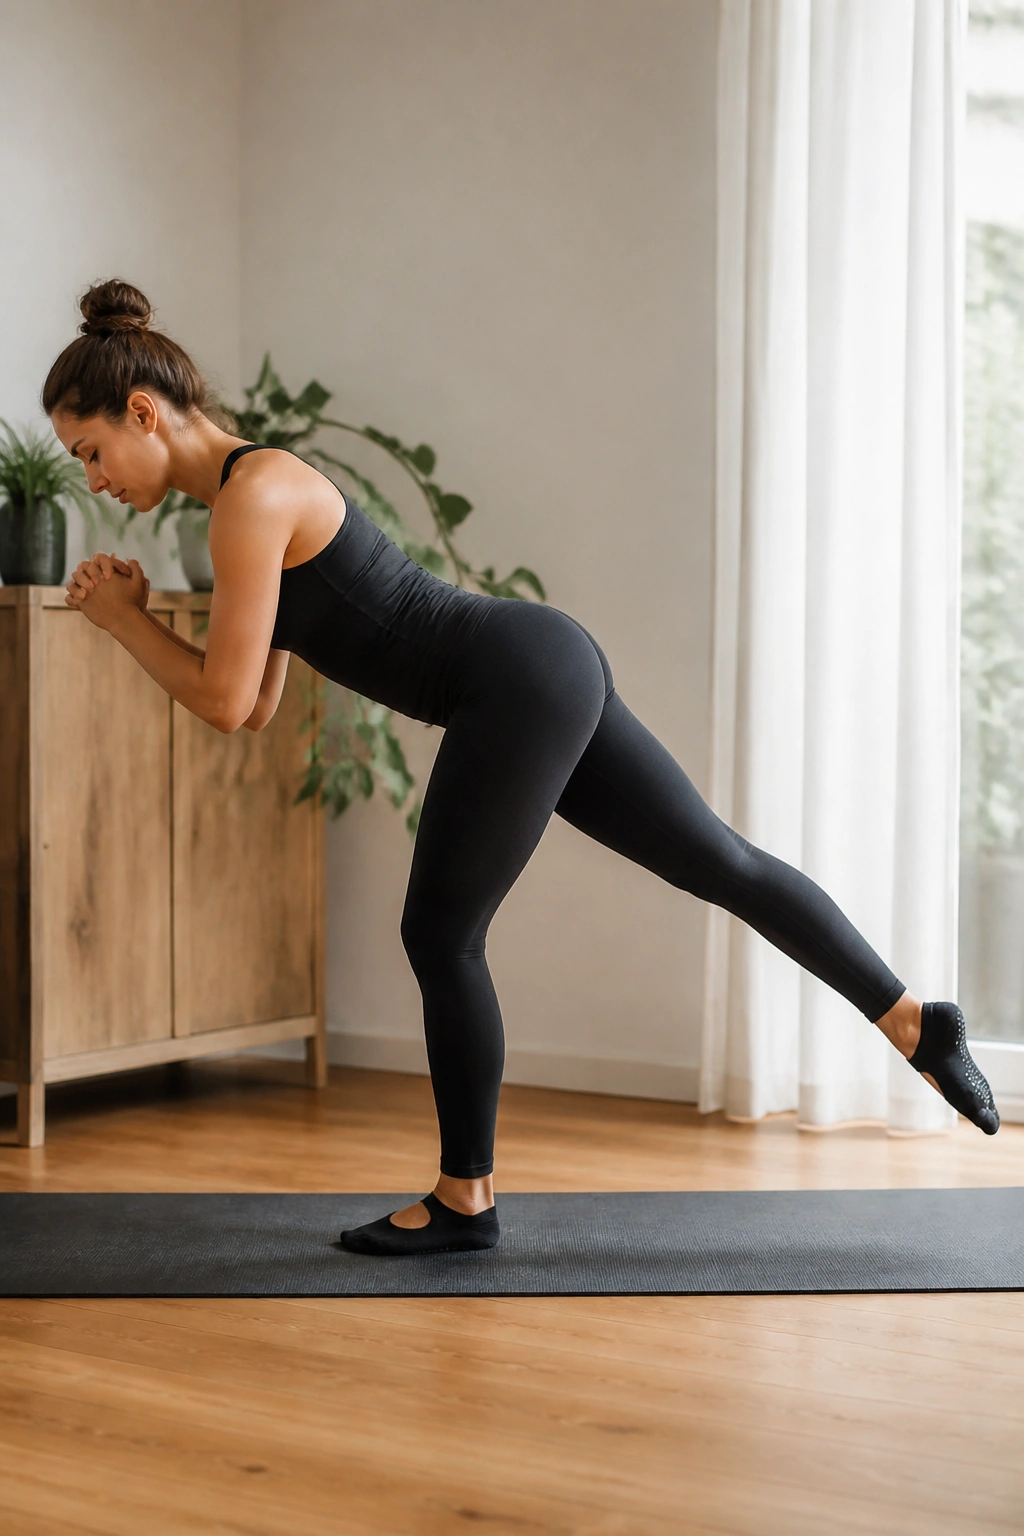
This is a subtle, almost invisible movement that produces massive results. Face your support surface and hinge forward at the hips, keeping your back flat. Extend one leg straight back behind you, touching your toe to the floor.
The Mechanism
Lift that straight leg a few inches off the floor. Keep it as straight as possible—imagine pulling your kneecap up into your thigh to keep the leg engaged. Pulse the leg upward, focusing entirely on the glute muscle. Your lower back should not be doing the work; keep your core braced to protect your spine.
The Range of Motion
You are aiming for a range of motion of maybe two or three inches. If you are swinging your leg high and arching your back, you are likely putting too much strain on your lumbar spine. Keep it small, tight, and focused. You are trying to tire out the gluteal muscles with volume, not height.
6. Calf Raises for Definition
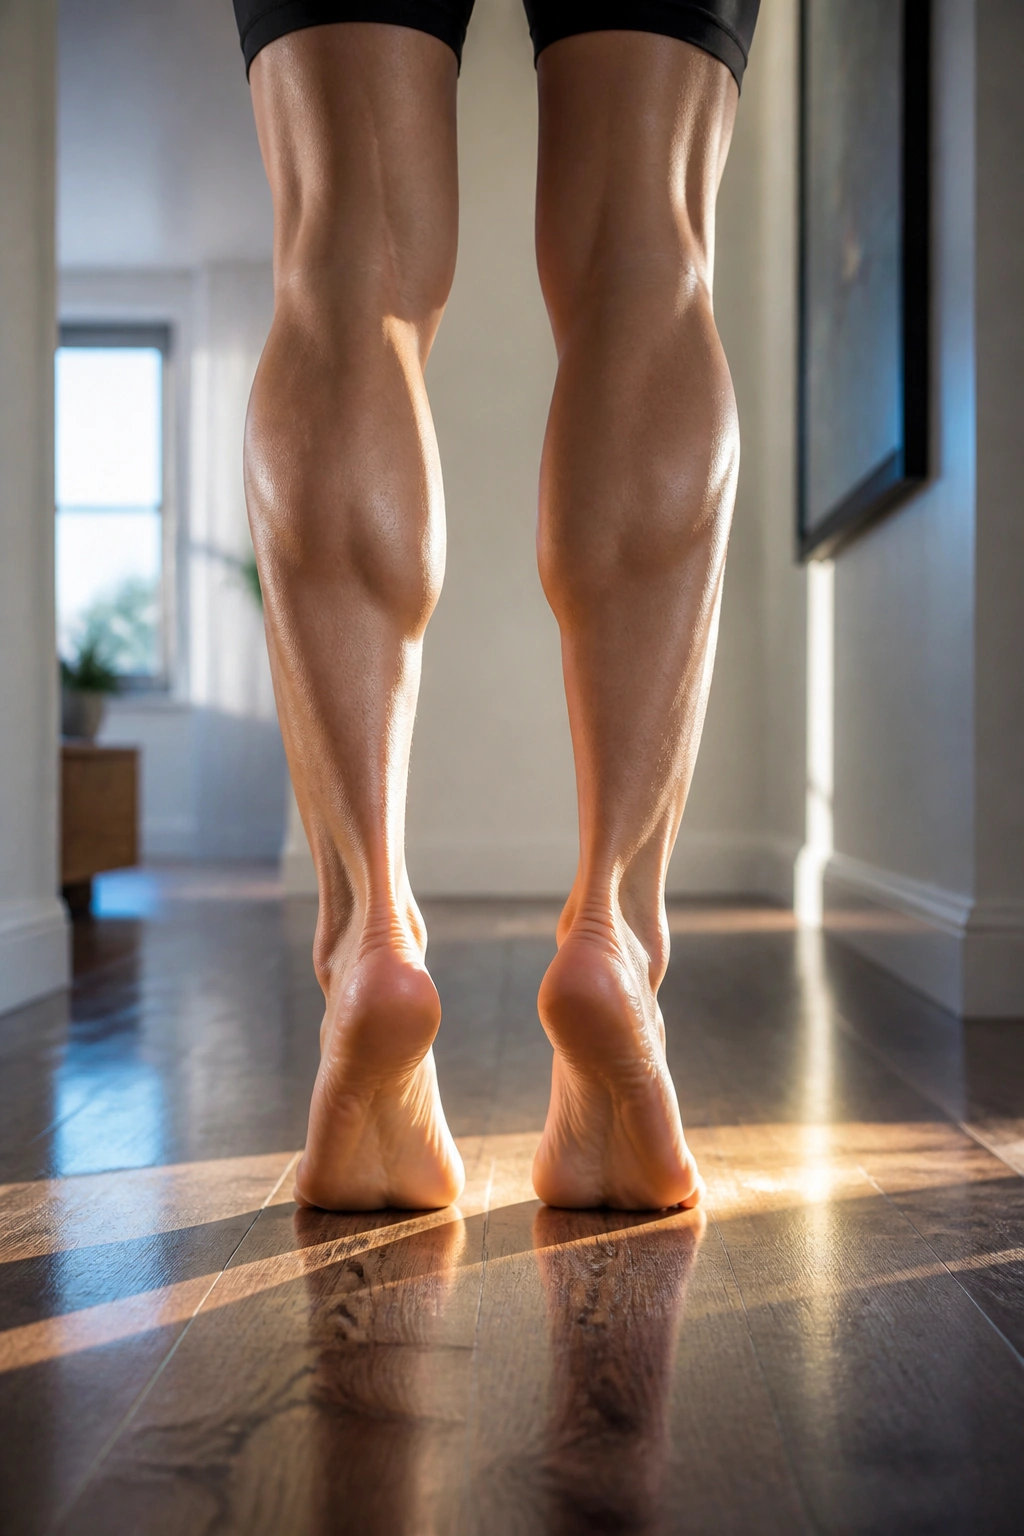
Lean legs are often defined by the lower leg. Calf raises are simple but effective, provided you do them with proper form. Stand with your feet parallel, hip-width apart. Rise up onto the balls of your feet, squeezing the calves at the top.
The Full Range
Come all the way down, but do not let your heels fully rest on the floor if you want maximum burn. Keep them hovering an inch above the ground. By keeping the tension constant, you prevent the muscle from resting.
Variety in Position
Change the angle of your feet. Do one set with toes pointing forward, one set with toes turned slightly out, and one set with toes turned slightly in. This rotation hits all three heads of the gastrocnemius and soleus muscles, ensuring you get a balanced look across the entire lower leg.
7. Side-Lying Leg Circles
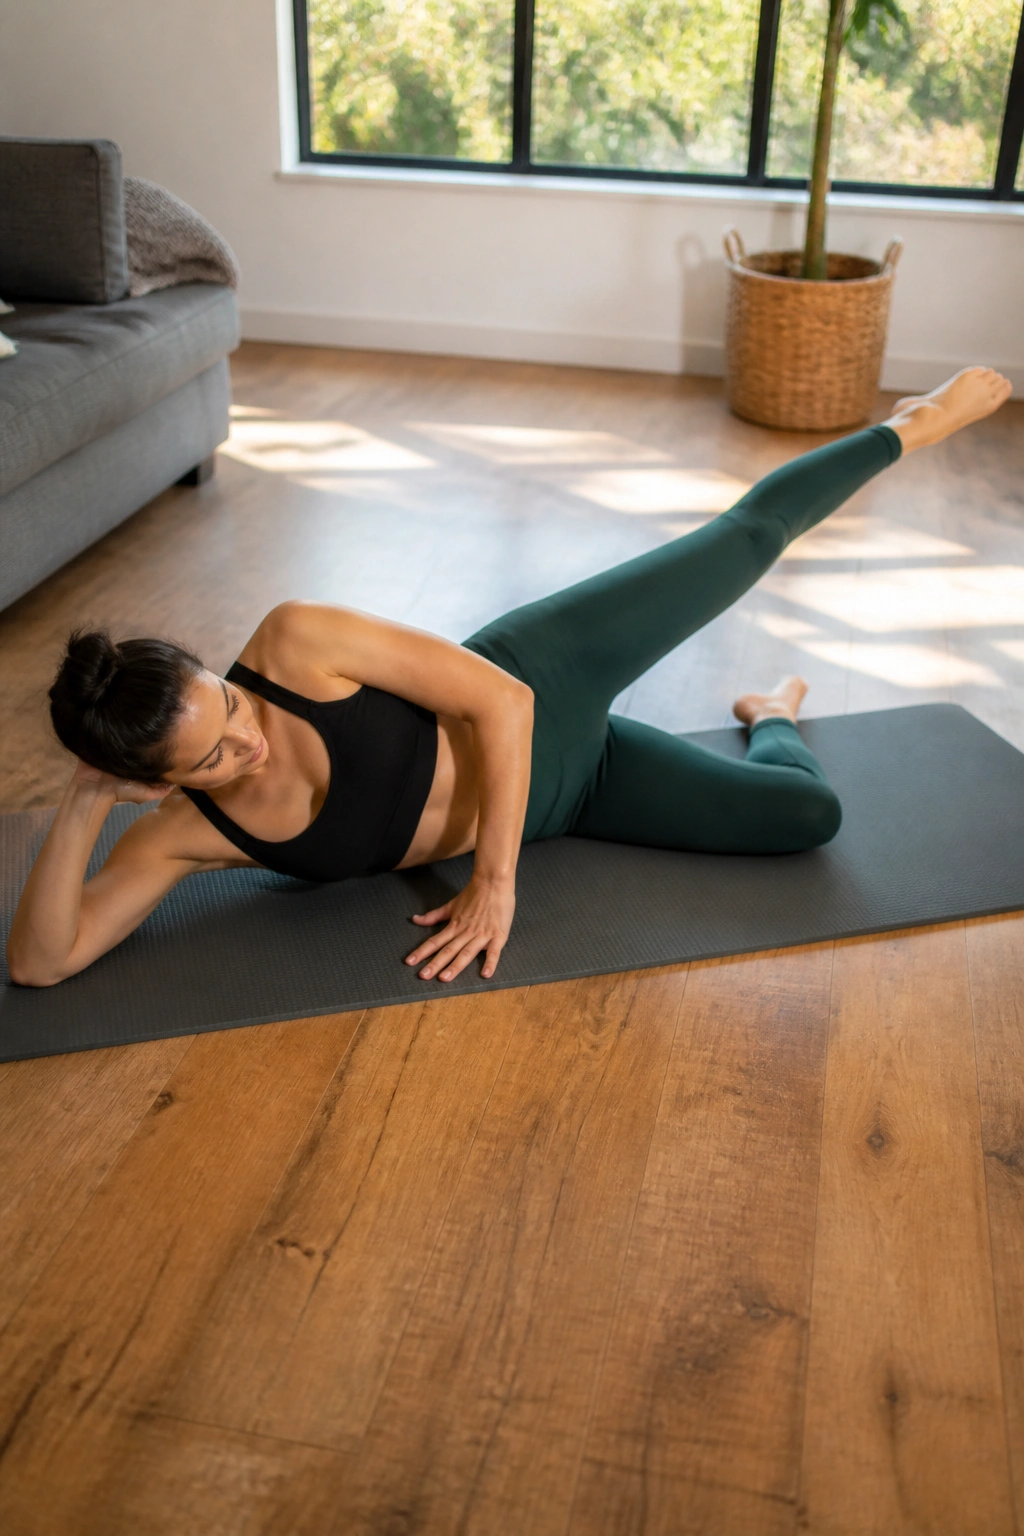
Take this work to the floor. Lie on your side, propping your head up with your hand. Keep your bottom leg slightly bent for stability and extend the top leg straight out in front of your hip.
The Circle Technique
Draw small, controlled circles with your top leg. Keep the leg straight and the movement fluid. After ten circles, reverse the direction. The goal is to keep the hip stacked—do not let your top hip rock backward.
Why This Hurts (In a Good Way)
This move forces the side of the glute to stabilize the leg while it moves. Because you are lying on the floor, you remove the balance component, which allows you to focus purely on the muscle activation. If you find your leg hovering higher and higher, lower it back down to hip height. That is where the real work happens.
8. The Parallel Squat Pulse
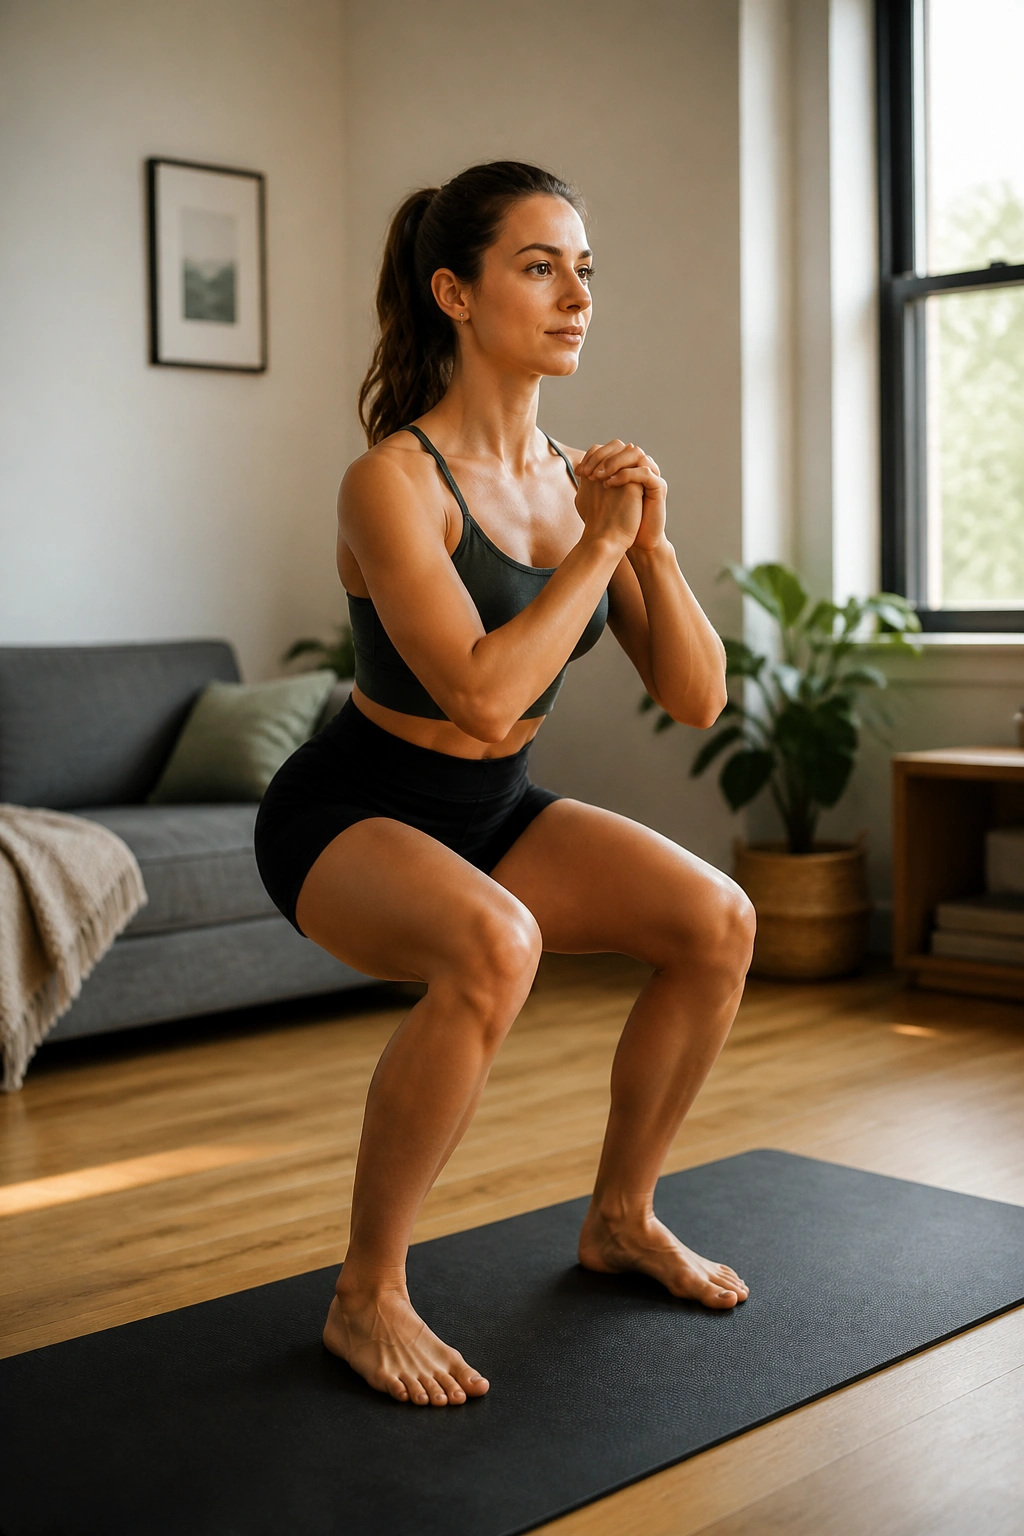
While the plié squat targets the inner thighs, the parallel squat shifts the emphasis to the quads and the glutes. Stand with feet parallel, hip-width apart. Squat down as if you are sitting into a chair, keeping your weight firmly in your heels.
Maintaining Tension
Pulse at the bottom of the squat. Keep your chest up and your shoulders back. Many people make the mistake of looking down at their feet, which causes the shoulders to round. Keep your gaze forward to maintain a neutral, strong spine.
Breath Control
In the midst of the burn, it is tempting to hold your breath. Do not do that. Inhale as you lower, and exhale as you press up. Deep, rhythmic breathing helps keep your muscles oxygenated so they can perform those extra few reps that really count.
9. Inner Thigh Squeezes (Ball/Block)
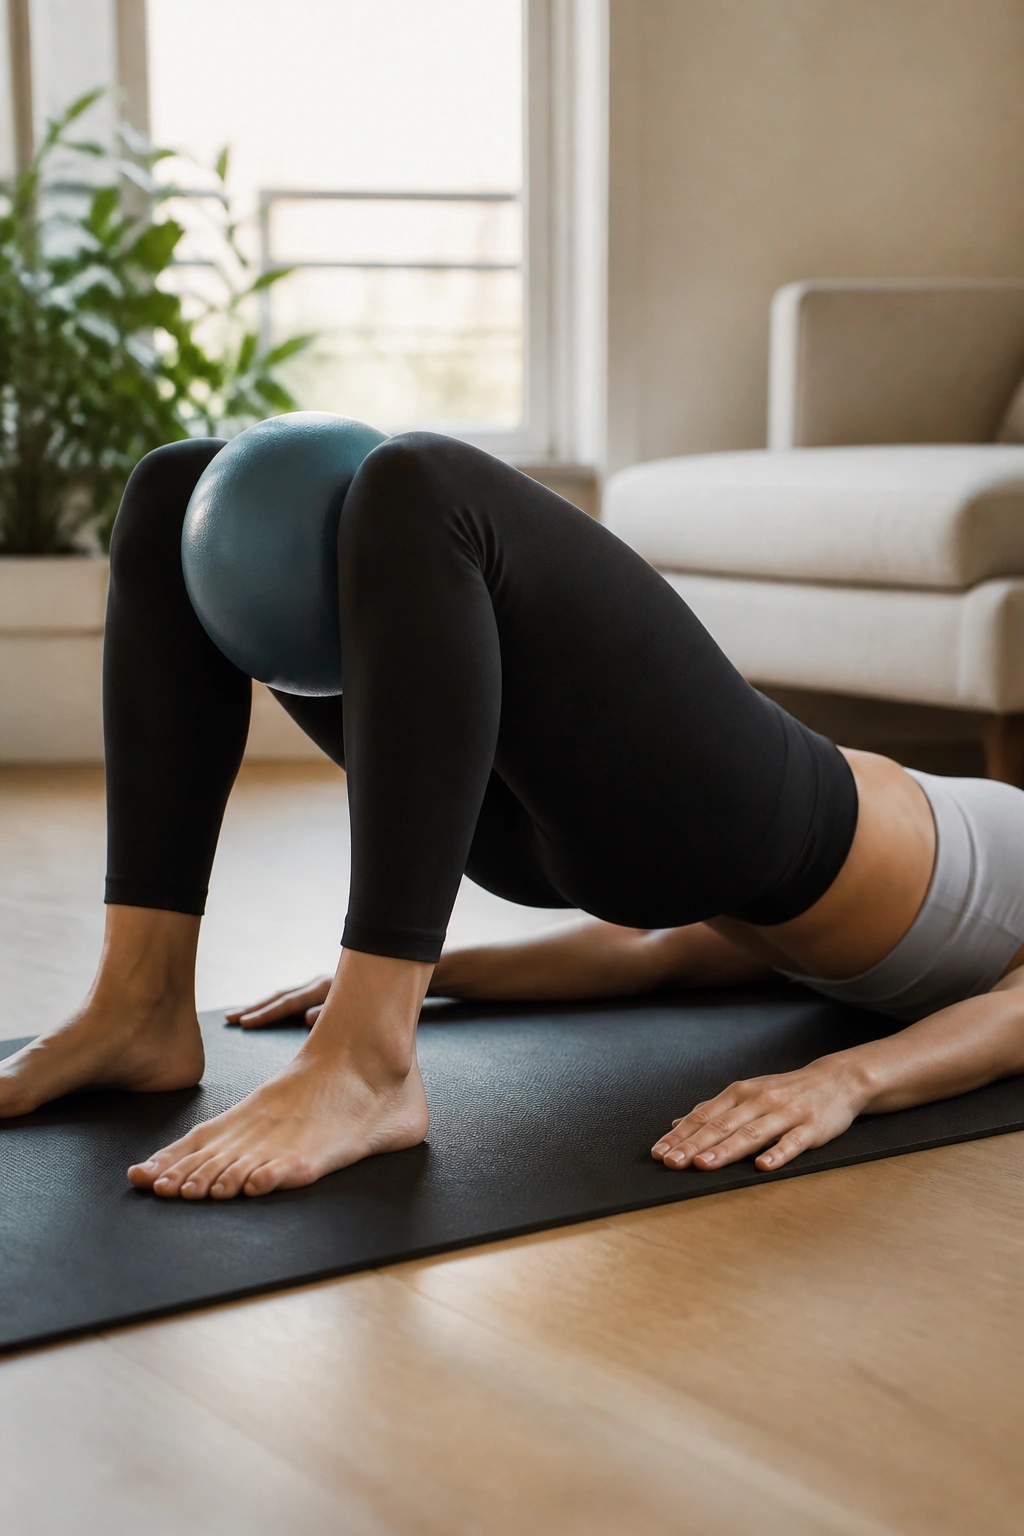
If you have a small Pilates ball, use it here. If not, a yoga block or even a thick folded towel will work. Lie on your back with your knees bent and feet flat on the floor. Place the object between your knees.
The Isometric Hold
Squeeze the object as hard as you can, hold for a count of five, and release slightly—but do not let the object fall. Repeat this squeeze-and-hold for the entire set. You will feel an intense contraction in your inner thighs.
Combining with Glute Bridges
To increase the intensity, lift your hips into a bridge position while maintaining the squeeze on the ball. This forces your inner thighs to work against the load of your hips. Keep your lower back pressed toward the floor—do not let it arch excessively.
10. Tabletop Donkey Kicks
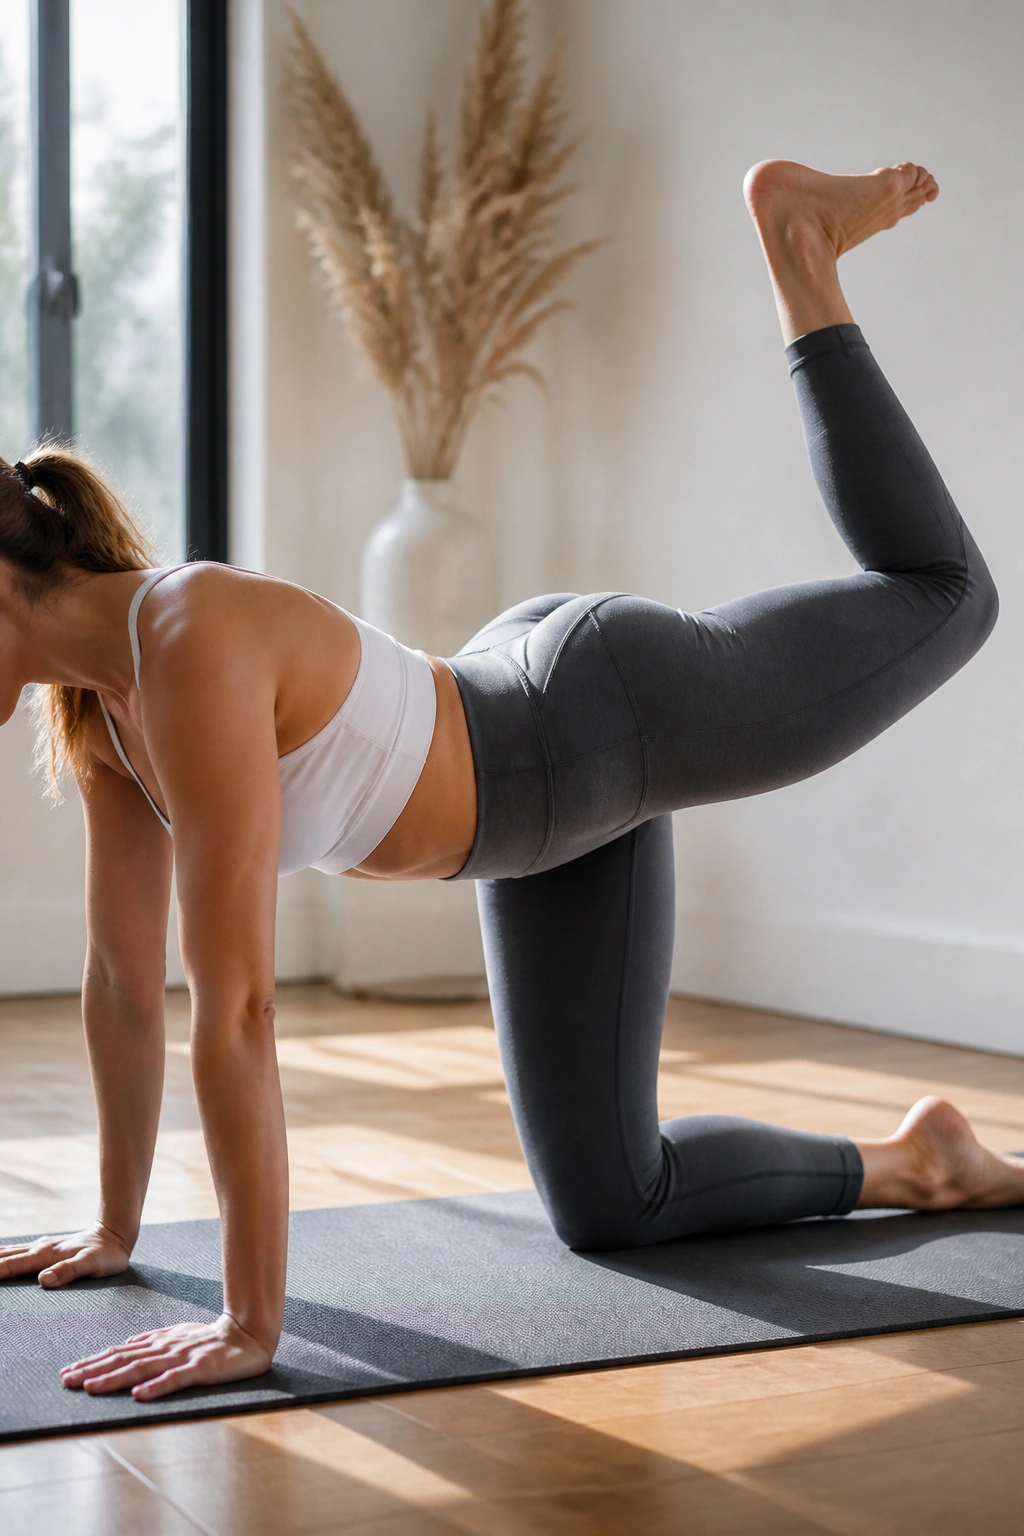
Get on your hands and knees in a tabletop position. Ensure your wrists are directly under your shoulders and your knees are under your hips. Keeping your right knee bent at a 90-degree angle, lift it up toward the ceiling.
Focus on the Glute
The motion should be driven by the glute, not the lower back. Keep your foot flexed—this helps engage the hamstring. Push the sole of your foot toward the ceiling as if you are stamping a footprint on the sky.
Staying Square
Watch your hips. A common error is tilting the pelvis to one side to get the leg higher. Keep your hips parallel to the floor at all times. If you are doing this correctly, you should feel a massive amount of tension in the glute of the working leg.
11. Clamshells with Resistance
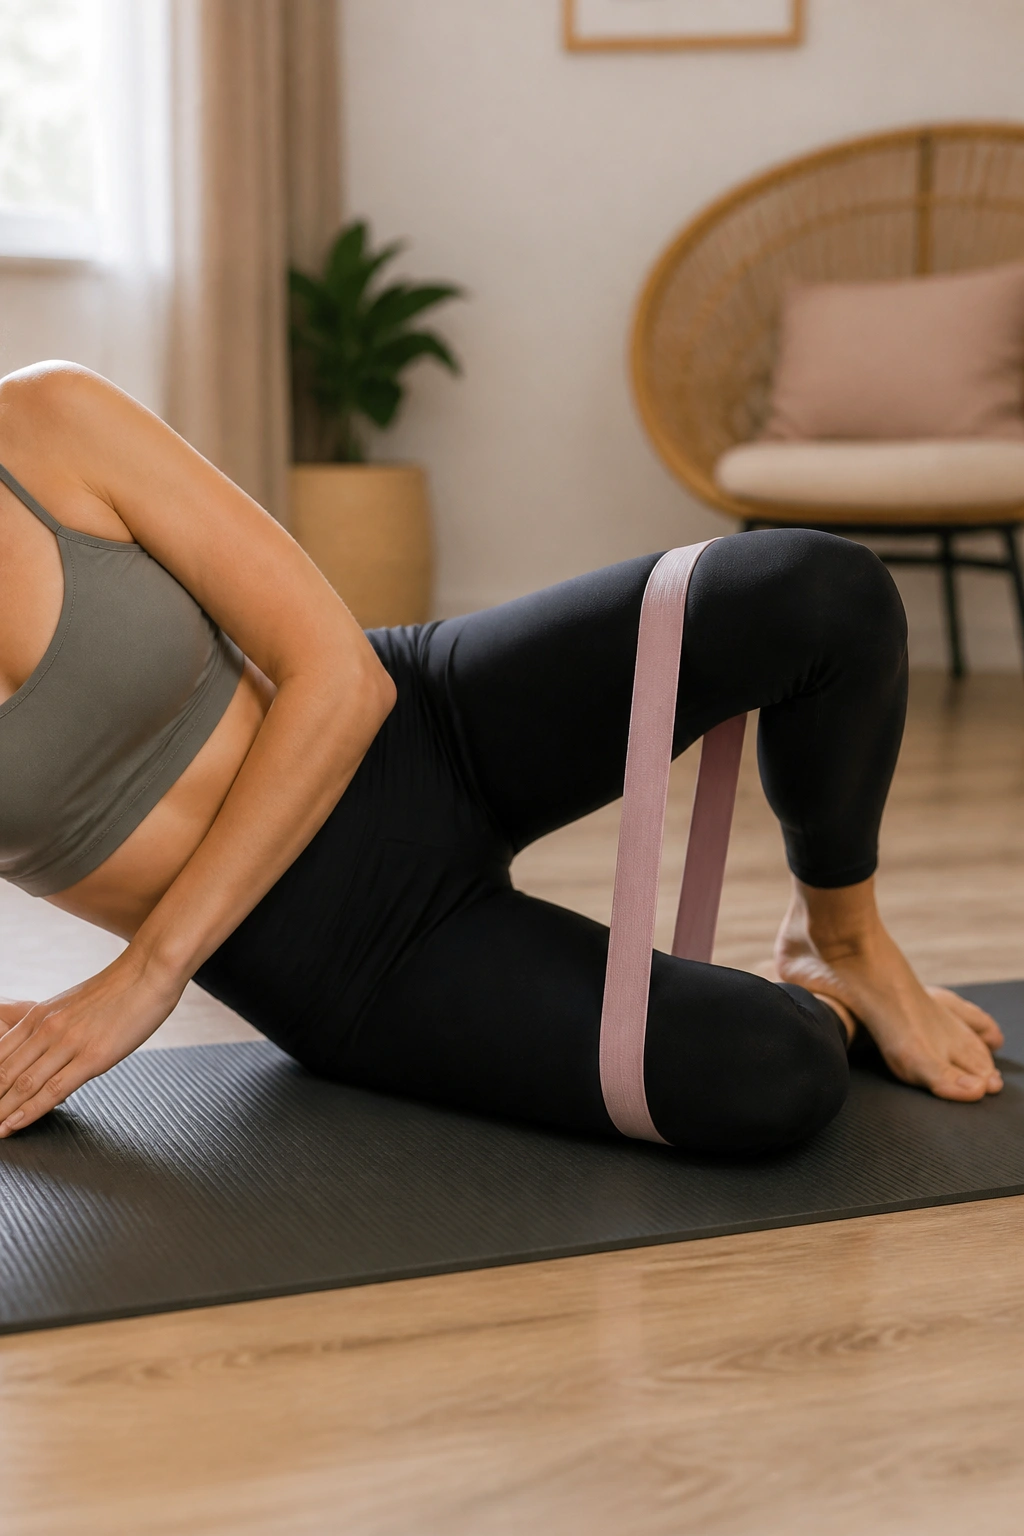
Clamshells are essential for the gluteus medius, the muscle responsible for hip stability. Lie on your side with your knees bent at a 45-degree angle, stacked directly on top of each other. Keep your feet touching.
The Opening
Open your top knee like a clamshell, keeping your feet pressed together. The movement should be slow. Do not let your hips rotate backward. That is the most common mistake—people try to open the knee wide by rolling the hips, which defeats the purpose.
The Resistance
If you have a resistance band, place it just above your knees. This adds significant tension and forces the outer glute to work harder to overcome the band. If you do not have a band, focus on the “squeeze” at the top of the movement. Hold that contraction for a second before slowly lowering the knee.
12. Relevé Holds
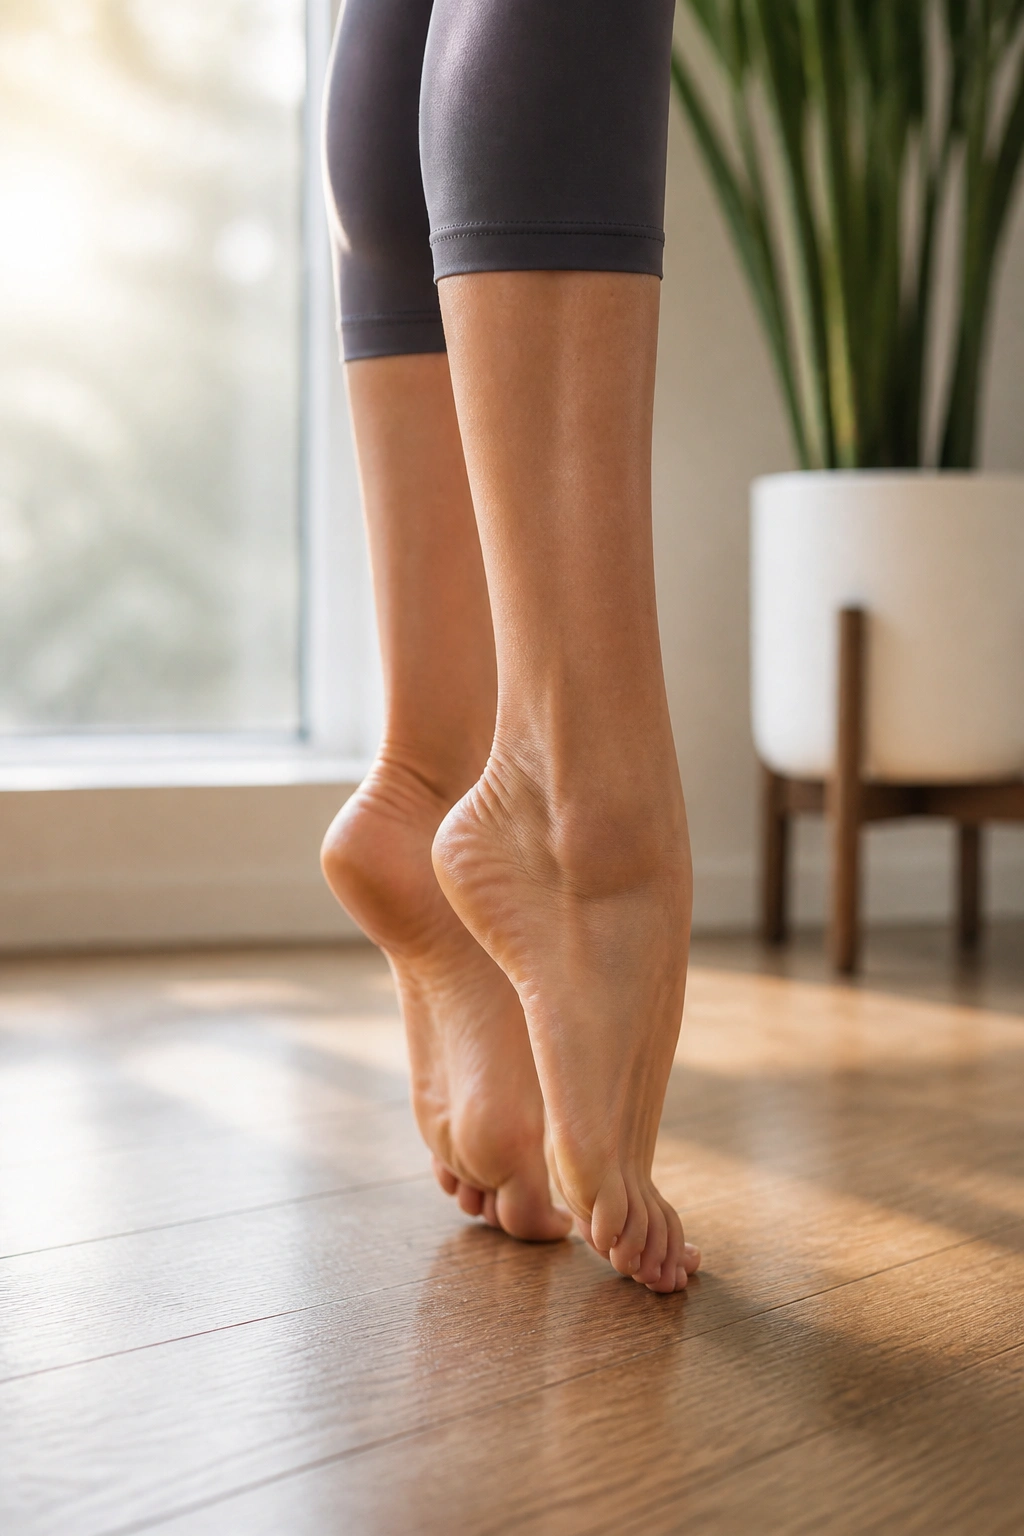
Relevé is a ballet term for rising onto the balls of your feet. This is an isometric exercise that builds incredible endurance in the lower legs and ankles. Stand with feet in parallel or first position. Lift your heels as high as possible.
The Balance Component
Hold that position. Engage your core and keep your legs perfectly straight—don’t let the knees soften. If you feel shaky, that is good. That shakiness is the small stabilizer muscles working to keep you upright.
Adding Pliés
Once you feel steady, keep your heels lifted and bend your knees into a plié. This requires immense control. You are balancing on the balls of your feet while moving through a squat. It is a fantastic way to develop total leg stability.
13. Arabesque Pulses
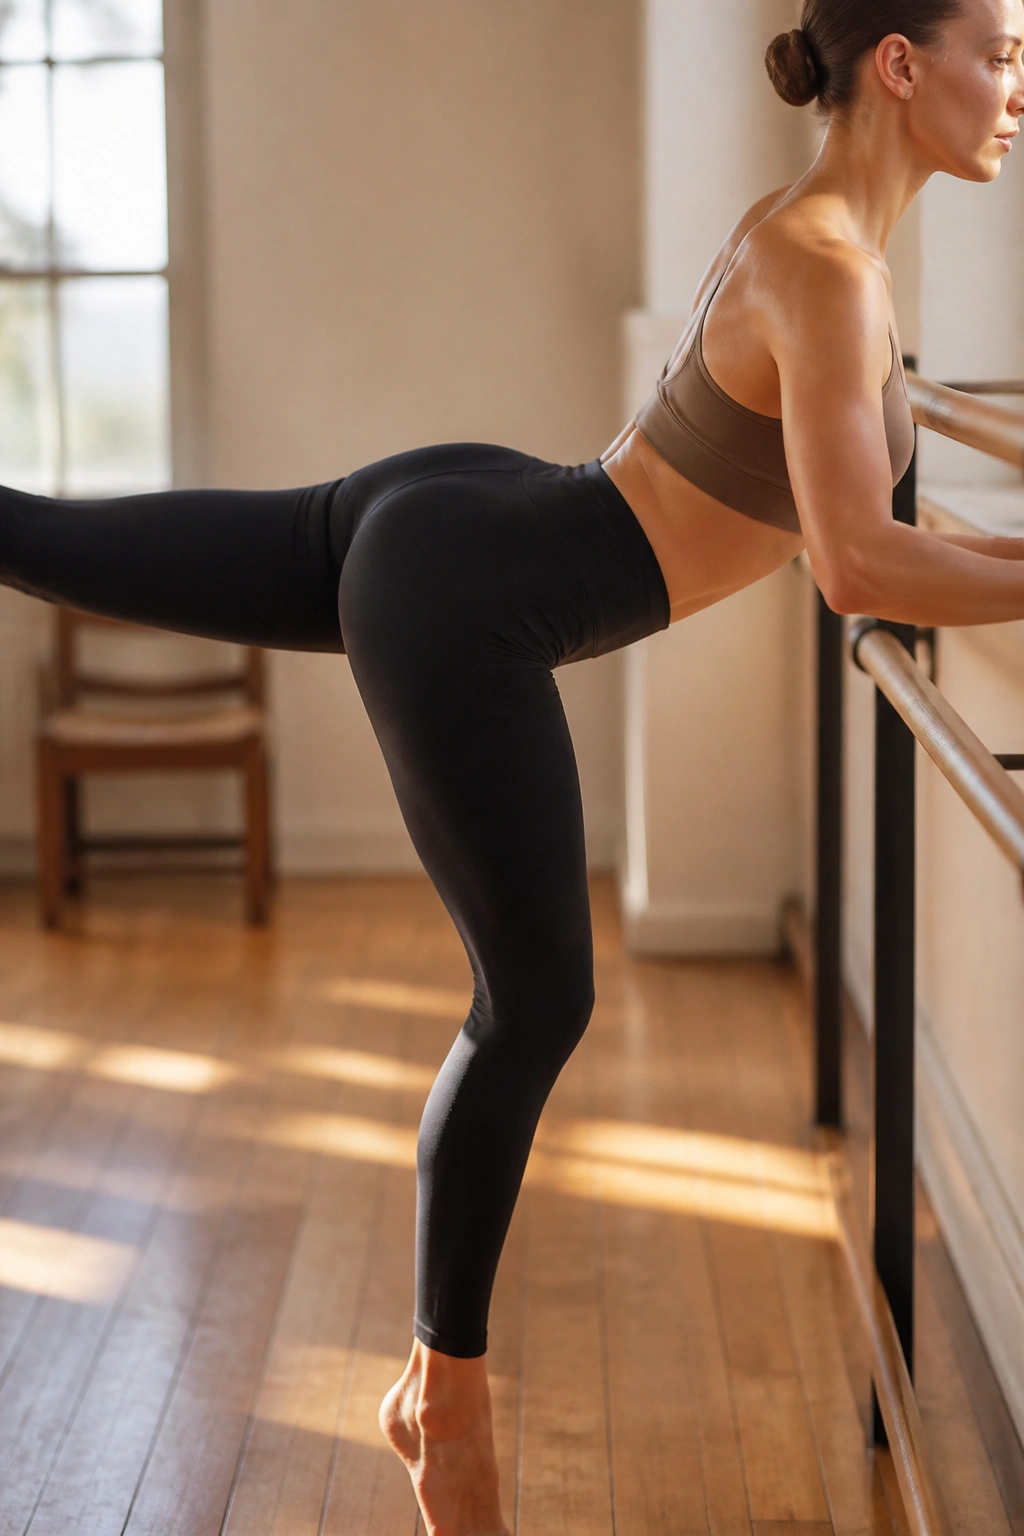
This is a move for those who want a bit more of a challenge. Stand facing your chair. Hinge forward at the hips, keeping your back flat. Extend your right leg straight back. This time, keep it straight.
The Vertical Pulse
Lift the straight leg as high as you can without arching your back. Pulse the leg upward, keeping the leg straight. The goal is to keep the hips level. Imagine your hips are two headlights pointing directly at the floor—they should not tilt to the side.
The Focus
Keep your standing leg slightly bent to protect the knee and engage the quad. The working leg should feel like it is lengthening out of your hip socket. This is excellent for toning the back of the leg and the glute-hamstring connection.
14. Fire Hydrant Extensions
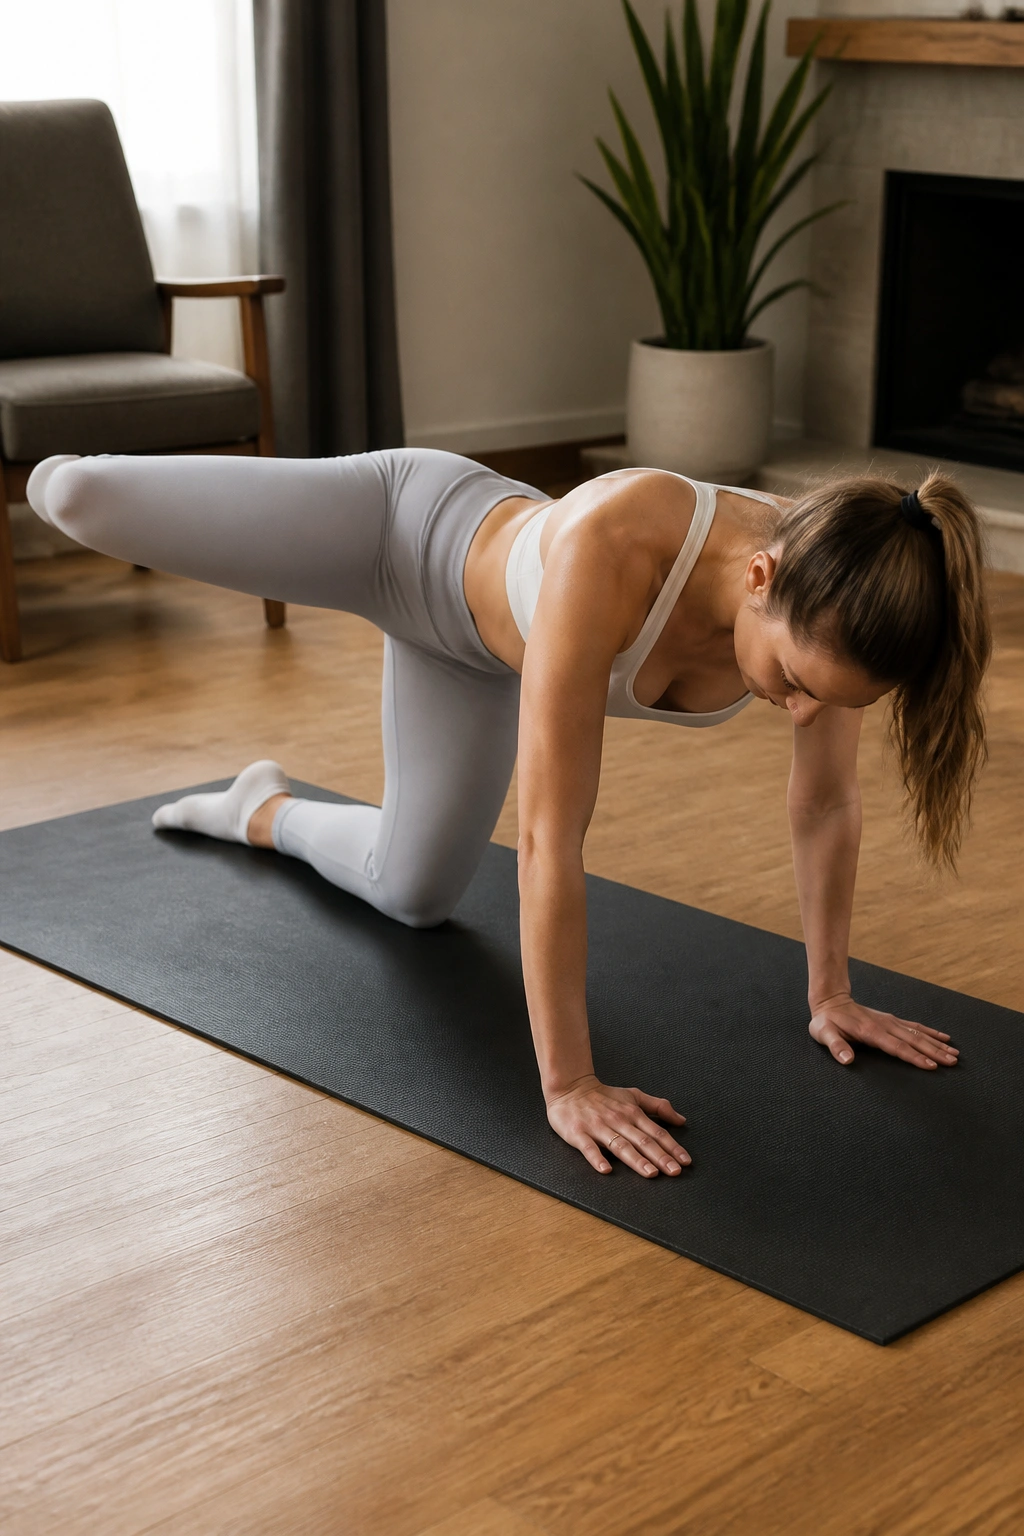
Start in the tabletop position again. Lift your right leg out to the side, keeping the knee bent at a 90-degree angle, like a dog at a fire hydrant. From this position, kick the leg straight out to the side, then bend it back in and lower it.
Why This Move Is Tough
You are working both the outer glute and the side of the thigh simultaneously. By adding the extension, you change the lever length, which makes the exercise significantly harder. Keep your torso completely still. If your body is swinging to compensate for the leg movement, your core isn’t tight enough.
The Repetition
Do not rush the extension. Extend fully, hold for a half-second, and return to the bent-knee position before lowering. This keeps the muscle under tension for longer.
15. The “Pretzel” Move
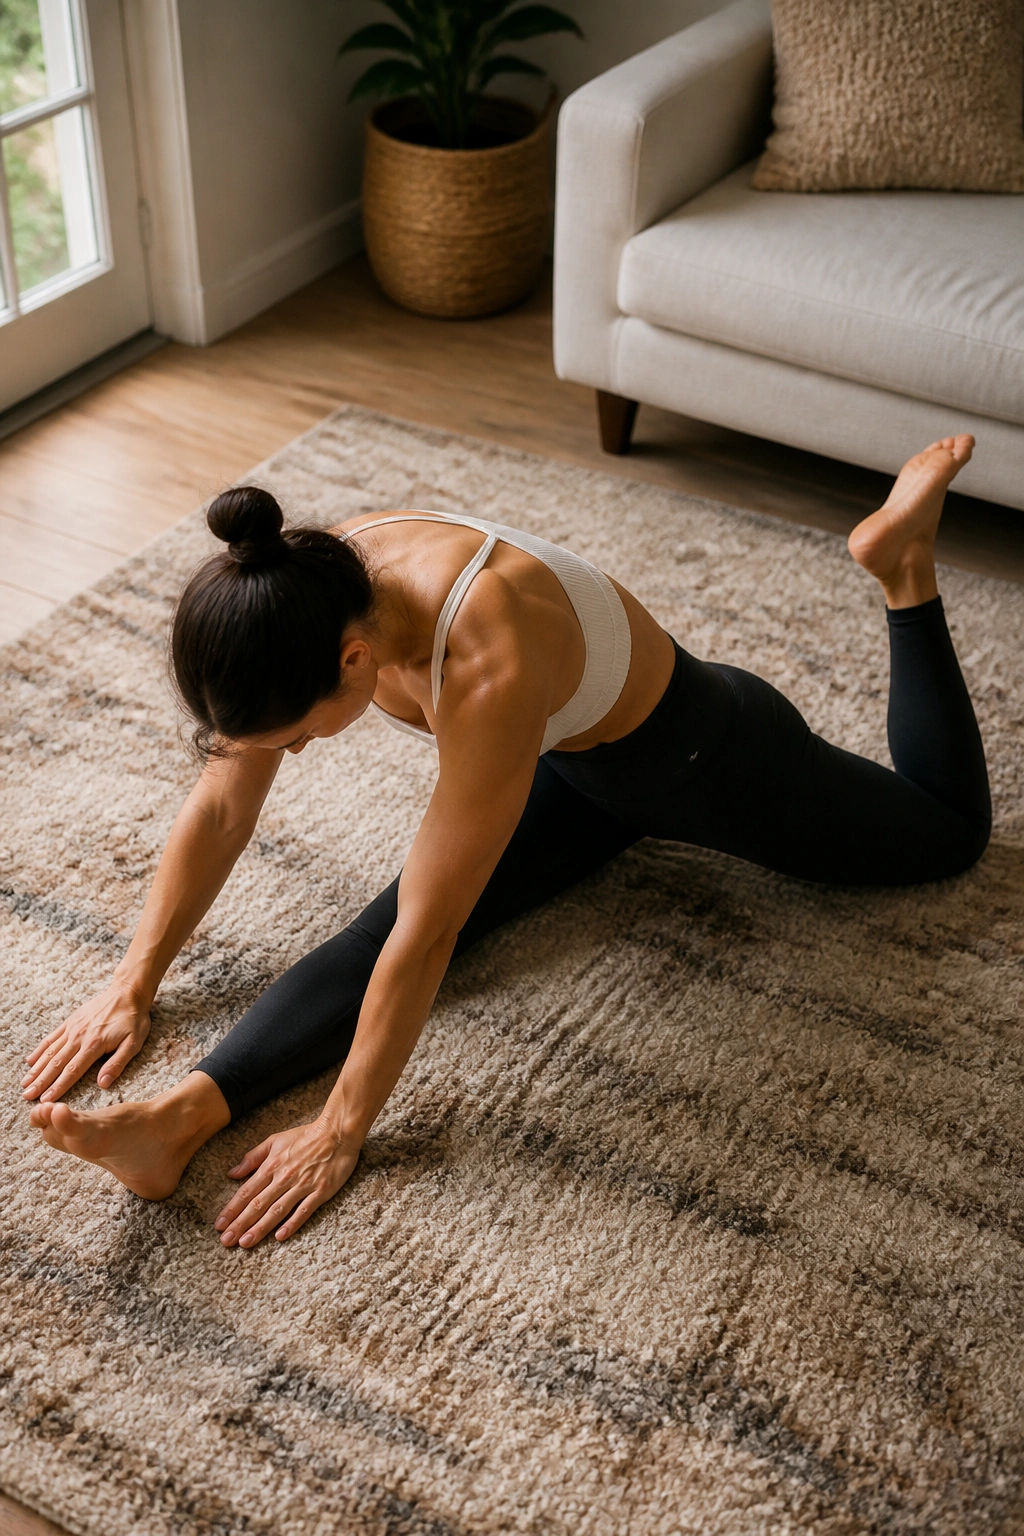
The “pretzel” is a signature barre move that targets the hip and glute in a unique, highly effective way. Sit on the floor with your right leg bent at a 90-degree angle in front of you and your left leg bent at a 90-degree angle behind you.
Getting Into Position
Lean your torso slightly toward the front leg. Your goal is to lift the back leg off the floor. It doesn’t need to be high—just an inch or two is enough to feel it. Pulse the back knee upward.
The Feeling
You will likely feel a deep burn in the side of your back hip. This is one of the most effective exercises for targeting the glute medius and minimus. Keep your chest up and don’t collapse into your shoulders.
16. Lying Bridge Leg Extensions
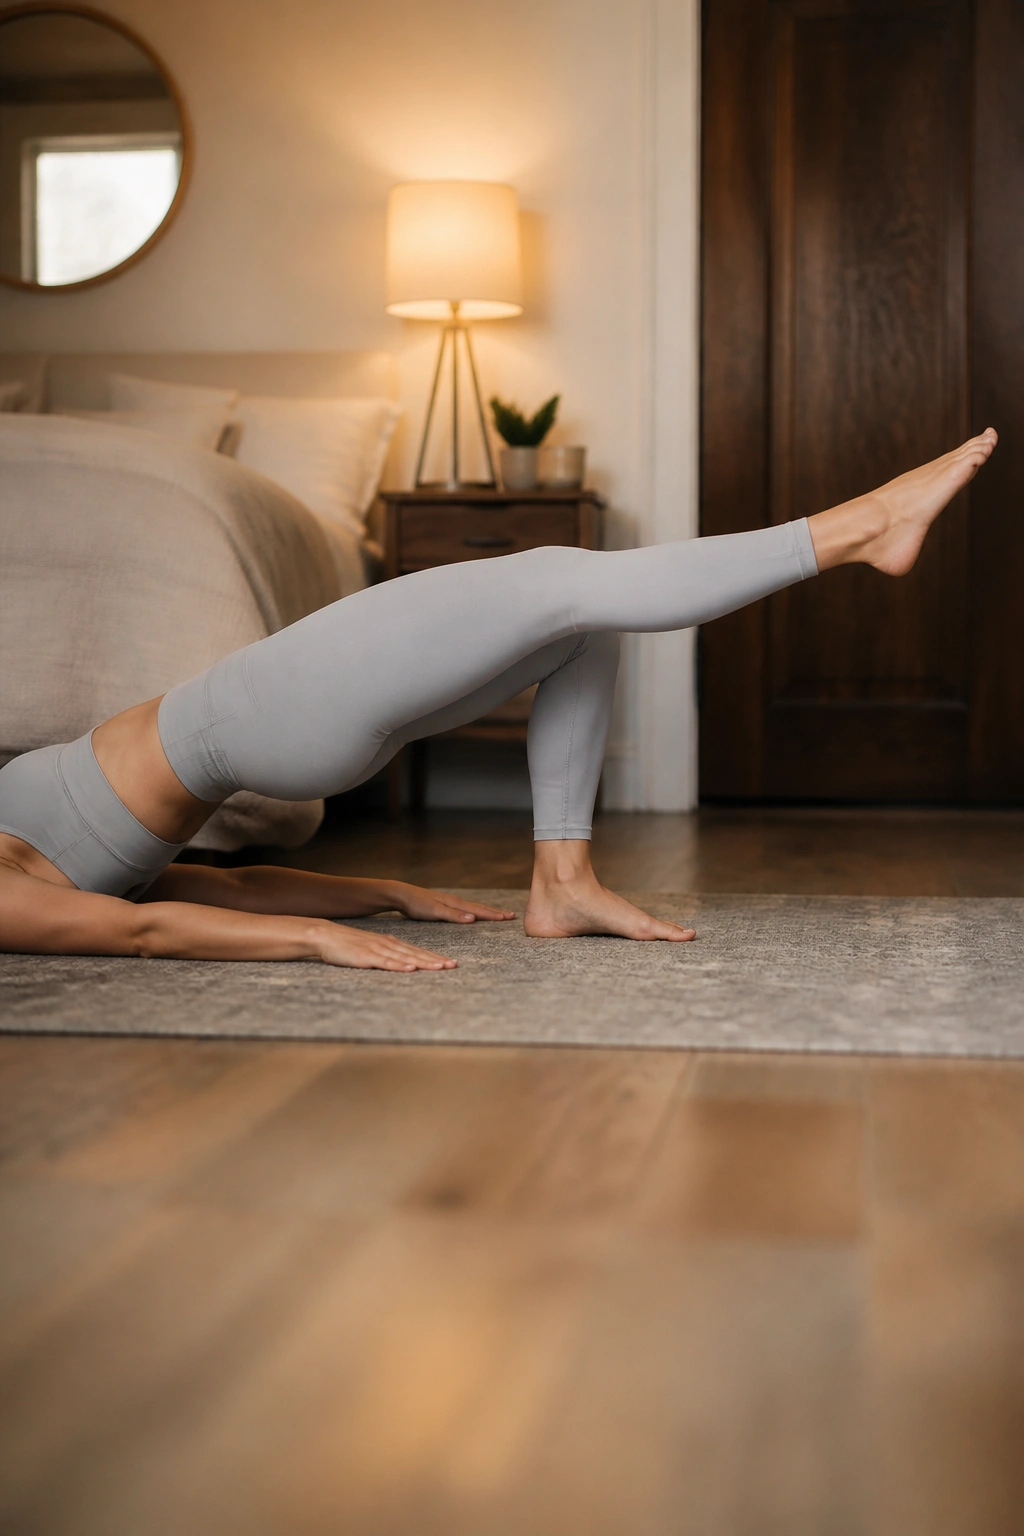
Lie on your back, knees bent, feet flat on the floor. Lift your hips into a bridge. Now, extend your right leg straight out, keeping it level with your left knee.
Keeping the Bridge
Your hips must stay level. Do not let the side with the extended leg drop. This requires massive engagement from the glute of the leg that is still on the floor. Hold the bridge and perform small pulses with your hips, or hold the bridge steady while you pulse the extended leg up and down.
The Stability
This is as much a core exercise as it is a leg exercise. Your abdominals need to be braced to keep your hips from tipping. Focus on pushing through the heel of your grounded foot.
17. Single-Leg Chair Squats
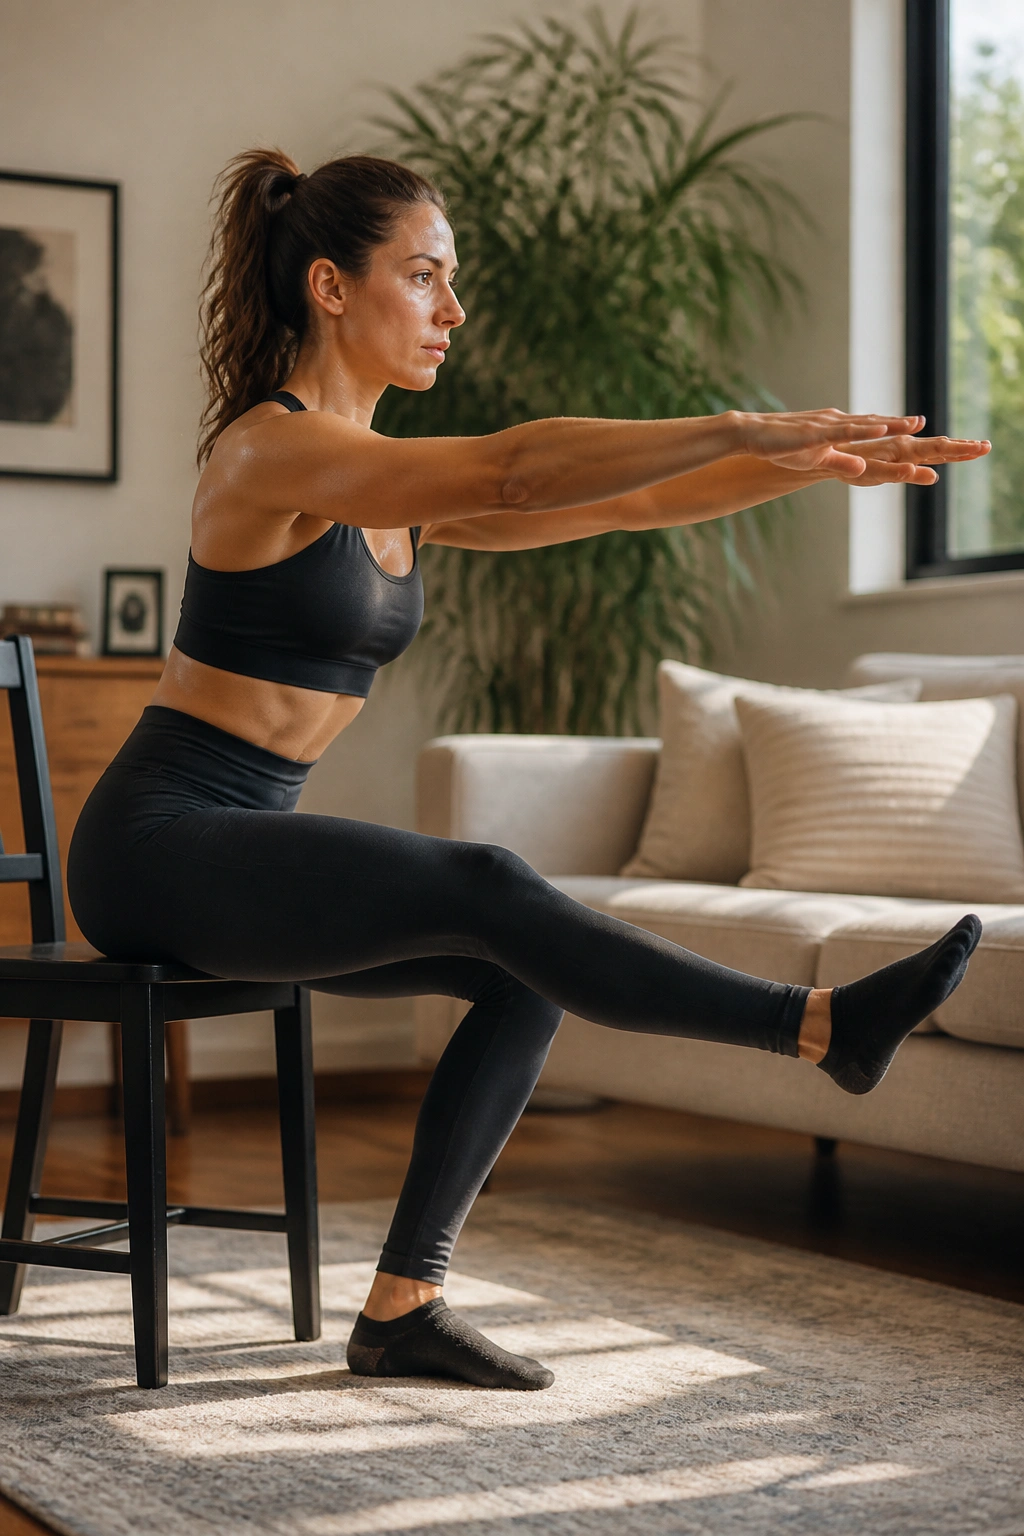
Stand in front of a chair as if you are going to sit down. Lift one foot off the floor and extend it slightly in front of you. Sit down using only the standing leg, then stand back up.
The Control
If you find this too difficult, hover just above the chair seat before standing back up. The descent is the most important part—move slowly to engage the quads and glutes through the full range of motion.
Why It’s Effective
Single-leg work is the fastest way to correct muscle imbalances. If one leg is stronger than the other, you will notice it immediately. Focus on keeping your knee from wobbling as you lower and rise.
18. Lateral Leg Raises
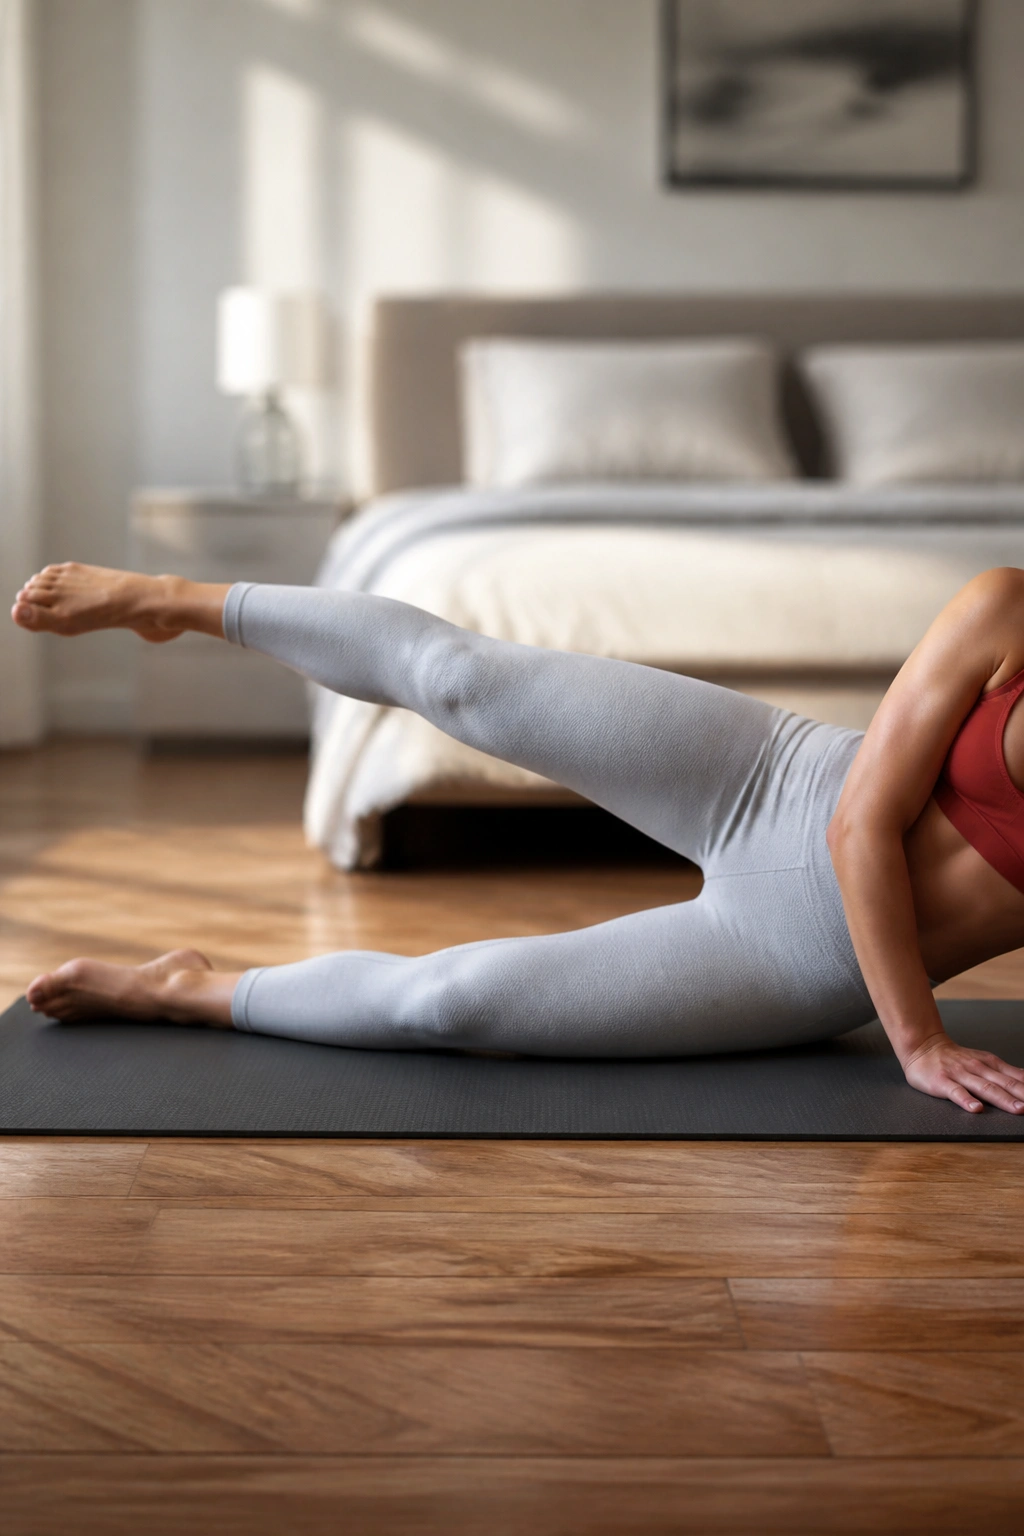
Lying on your side, stack your hips and legs. Straighten both legs. Lift the top leg straight up toward the ceiling, keeping it parallel to the bottom leg.
The Tempo
Slowly lower the leg back down, but do not let it touch the bottom leg. Keep the tension constant. The slower you go, the more you will feel this in the side of the hip.
Avoiding Momentum
Do not use momentum to swing the leg up. Use the muscles of the outer hip. If you find your leg keeps moving forward, focus on keeping your heel in line with your hip.
19. Hamstring Curls (Standing)
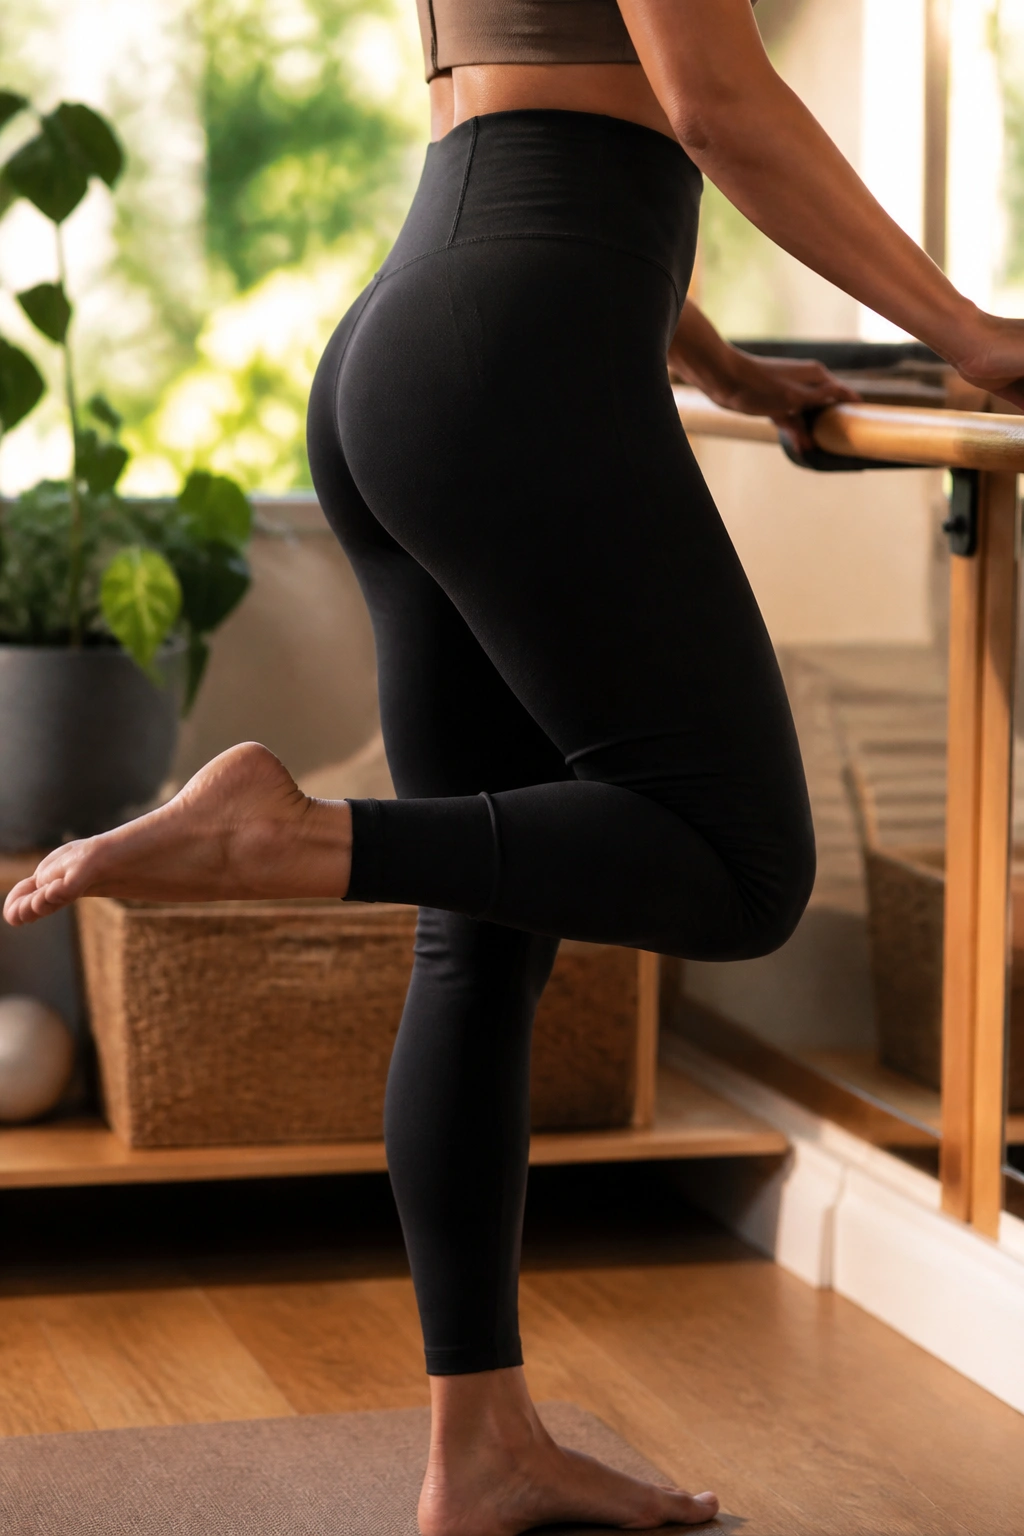
Stand facing your barre or counter. Keep your legs parallel. Lift your right heel toward your glute, bending the knee.
The Squeeze
Squeeze your hamstring as hard as you can at the top. Lower the foot halfway down, then curl back up. This is purely for the hamstring muscle.
Isolating the Muscle
Do not let your knee drift forward. Keep your working knee aligned with your standing knee. By keeping them glued together, you ensure the hamstring is doing all the work rather than the hip flexors.
20. The Isometric Squat Hold
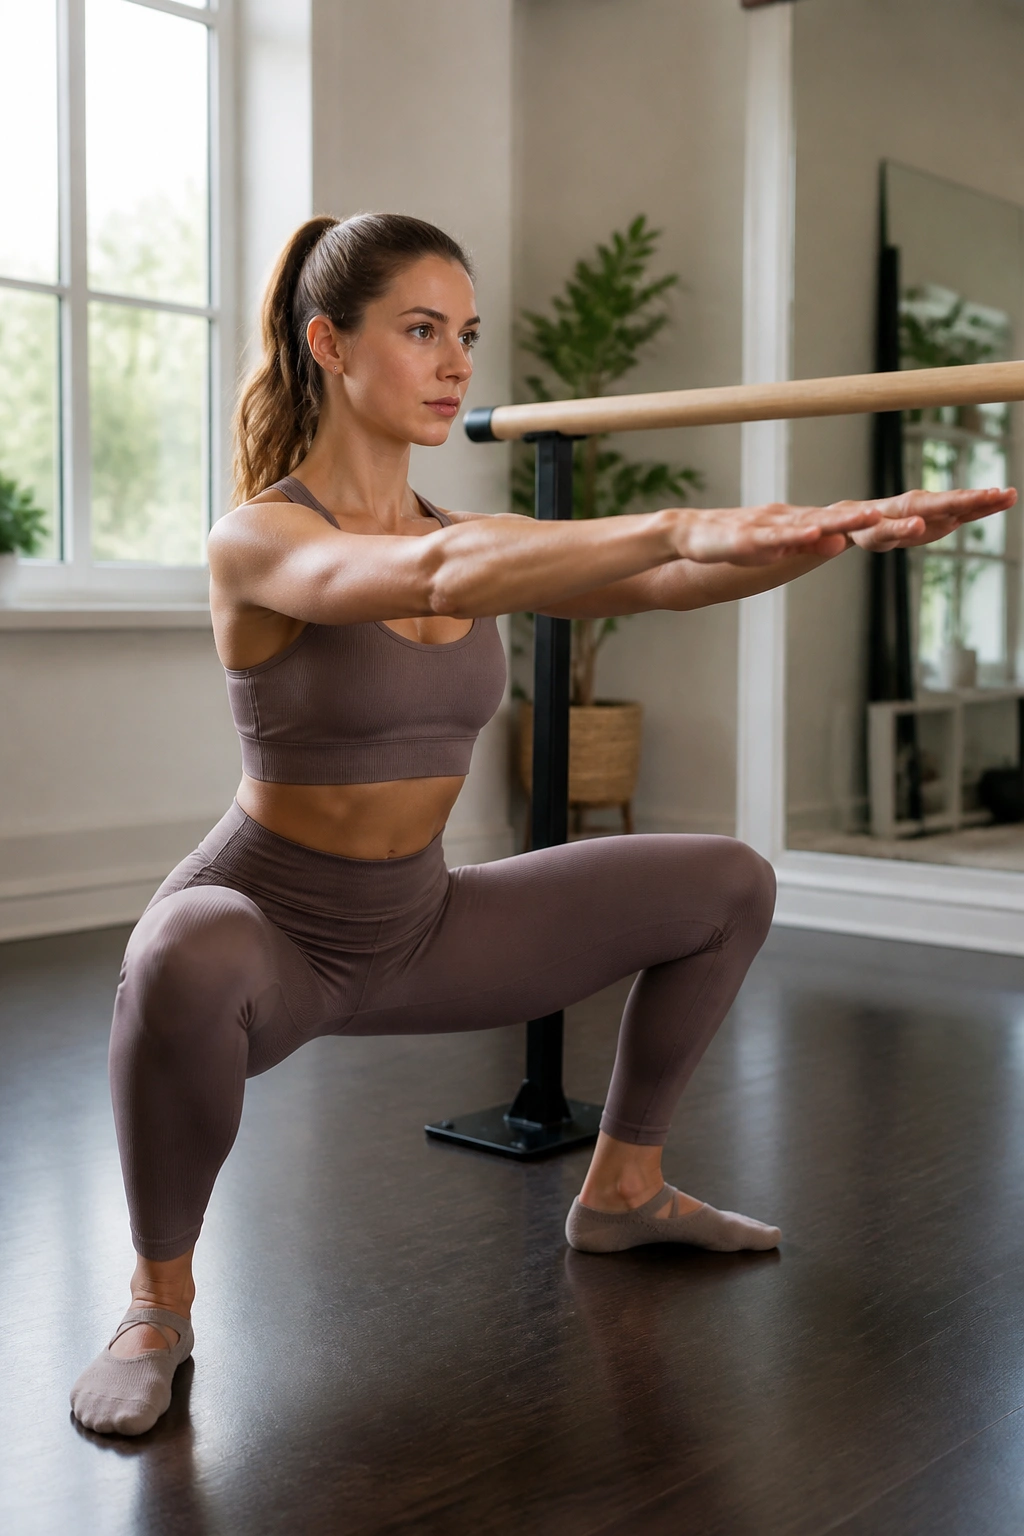
Finish your workout with an isometric hold. Get into your widest, lowest squat. Pulse for ten seconds, then hold at the absolute lowest point for thirty seconds.
The Mindset
When your legs start to shake, that is when the workout actually begins. Smile through the shaking. Your muscles are adapting to the stress. This isometric hold ensures that every muscle fiber has been fully fatigued.
The Recovery
After the hold, stand up slowly. Shake out your legs. A good workout should leave you feeling strong and energized, not shattered. Stretch out your quads and hamstrings to finish, and you have successfully completed a full-body barre-inspired leg session.
Final Thoughts
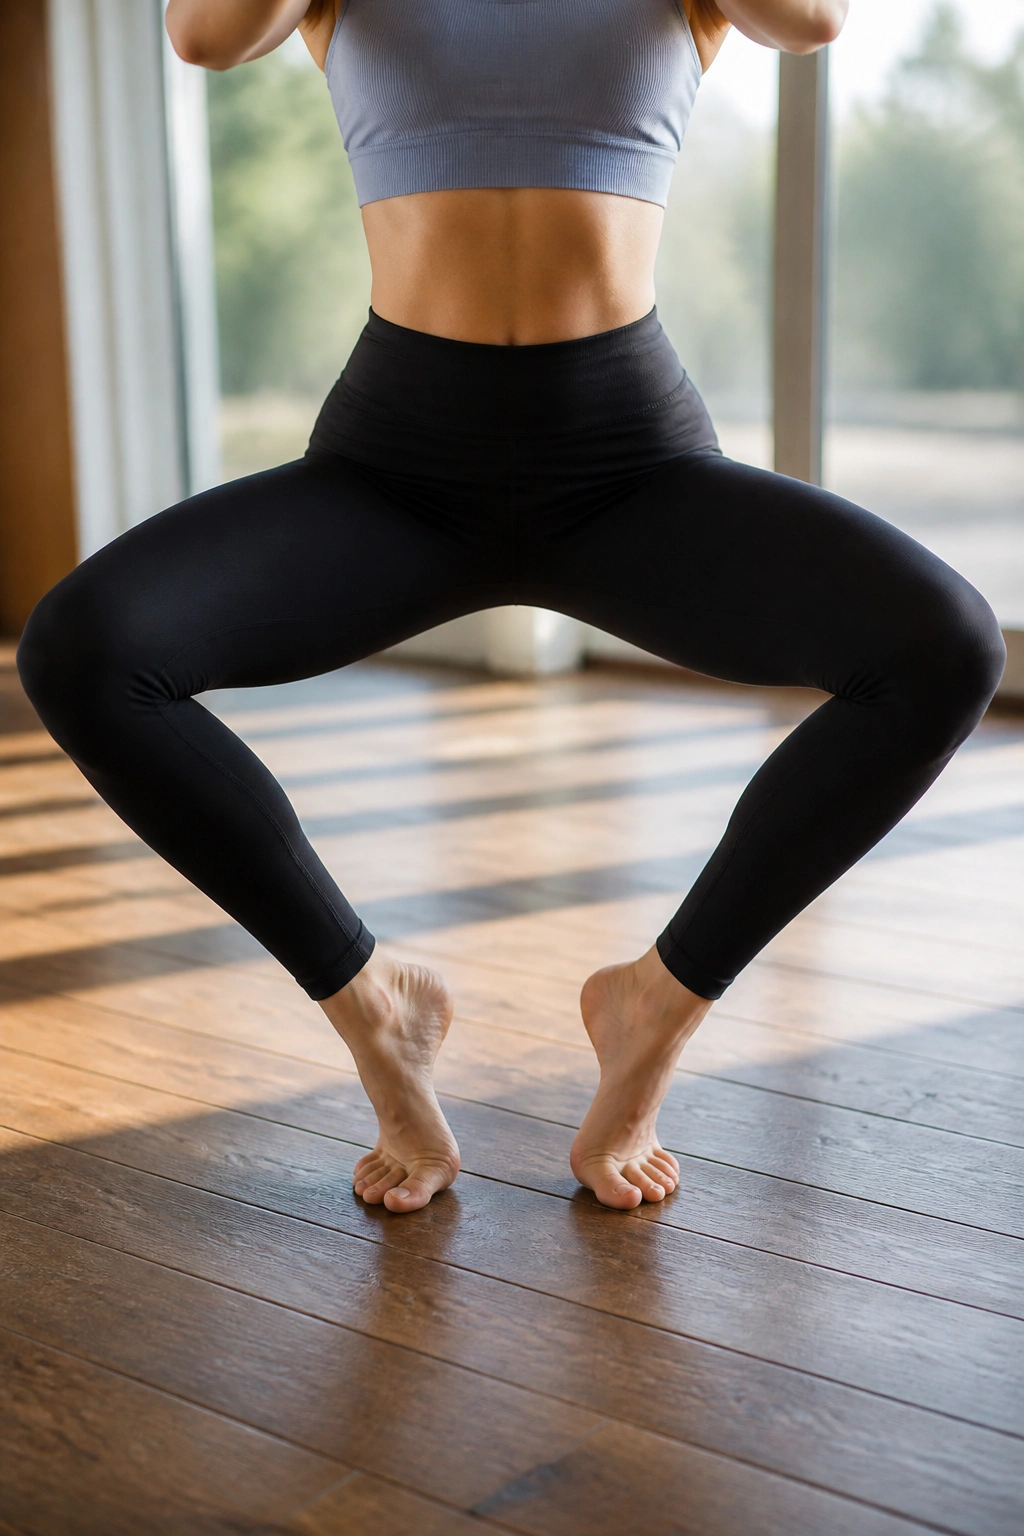
The beauty of these barre-inspired moves is that they don’t require you to be a ballerina. You don’t need years of training or a specific body type. You only need the willingness to embrace that shaky, burning sensation and the patience to move with precision.
Consistency is the real secret here. A single, intense session is great, but a dedicated routine—performing these movements with focus and intent—is what truly builds definition. Keep your movements controlled, keep your core engaged, and remember that those small, subtle pulses are doing the heavy lifting. You are building structural strength from the ground up, one movement at a time.
