



Many people assume that to get the benefits of a classic barre workout, you need a heavy, studio-grade wooden bar bolted to the wall. That is a myth that keeps far too many people from experiencing the muscle-sculpting, posture-perfecting magic of this discipline. In reality, all you truly need is a vertical surface—a plain wall, a door frame, or even a sturdy piece of furniture. The wall provides something arguably better than a studio bar: a constant feedback loop for your body.
When you use a wall for barre, you have no choice but to be honest with your alignment. You cannot lean excessively forward or compensate with bad habits because the wall is right there, marking your path. It forces your spine to stay tall, your shoulders to stay back, and your core to remain engaged. Whether you are living in a small space or simply want to squeeze in a high-intensity session without driving to a gym, this approach is as effective as it gets.
The exercises below are designed to target the muscles most commonly ignored in daily life: the stabilizers, the deep abdominal wall, and the smaller muscle groups in the hips and glutes. You will not need fancy equipment, yoga mats, or resistance bands. Just find a flat wall, clear a few feet of floor space, and prepare to feel a level of muscle fatigue that usually requires a membership to achieve.
1. Wall Plies
The wall plie is the bread and butter of your home practice. While you might think of a standard squat as a general leg exercise, the barre-inspired plie is about precision. Stand with your back flat against the wall, feet about six inches away from the baseboard, and heels touching. As you slide down, keep your spine fused to the surface. Your goal isn’t just to bend your knees; it is to keep your glutes, mid-back, and head in contact with the wall the entire time.
Why This Matters
Most people tilt their pelvis forward when they squat, which puts unnecessary pressure on the lumbar spine. By staying against the wall, you eliminate that option. Your pelvic floor is forced to remain neutral, and your quads and inner thighs take the full load. If you feel your lower back pulling away from the wall, you have gone too deep. Rise back up two inches. That subtle adjustment is where the real work happens.
The Execution
- Slide down until your thighs are roughly parallel to the floor—or as deep as your flexibility allows.
- Hold at the bottom for three counts, feeling the shake in your legs.
- Pulse upward just an inch, then sink back down an inch, keeping that constant, searing tension.
- Repeat this for at least sixty seconds without standing all the way up.
2. Wall-Supported Arabesque
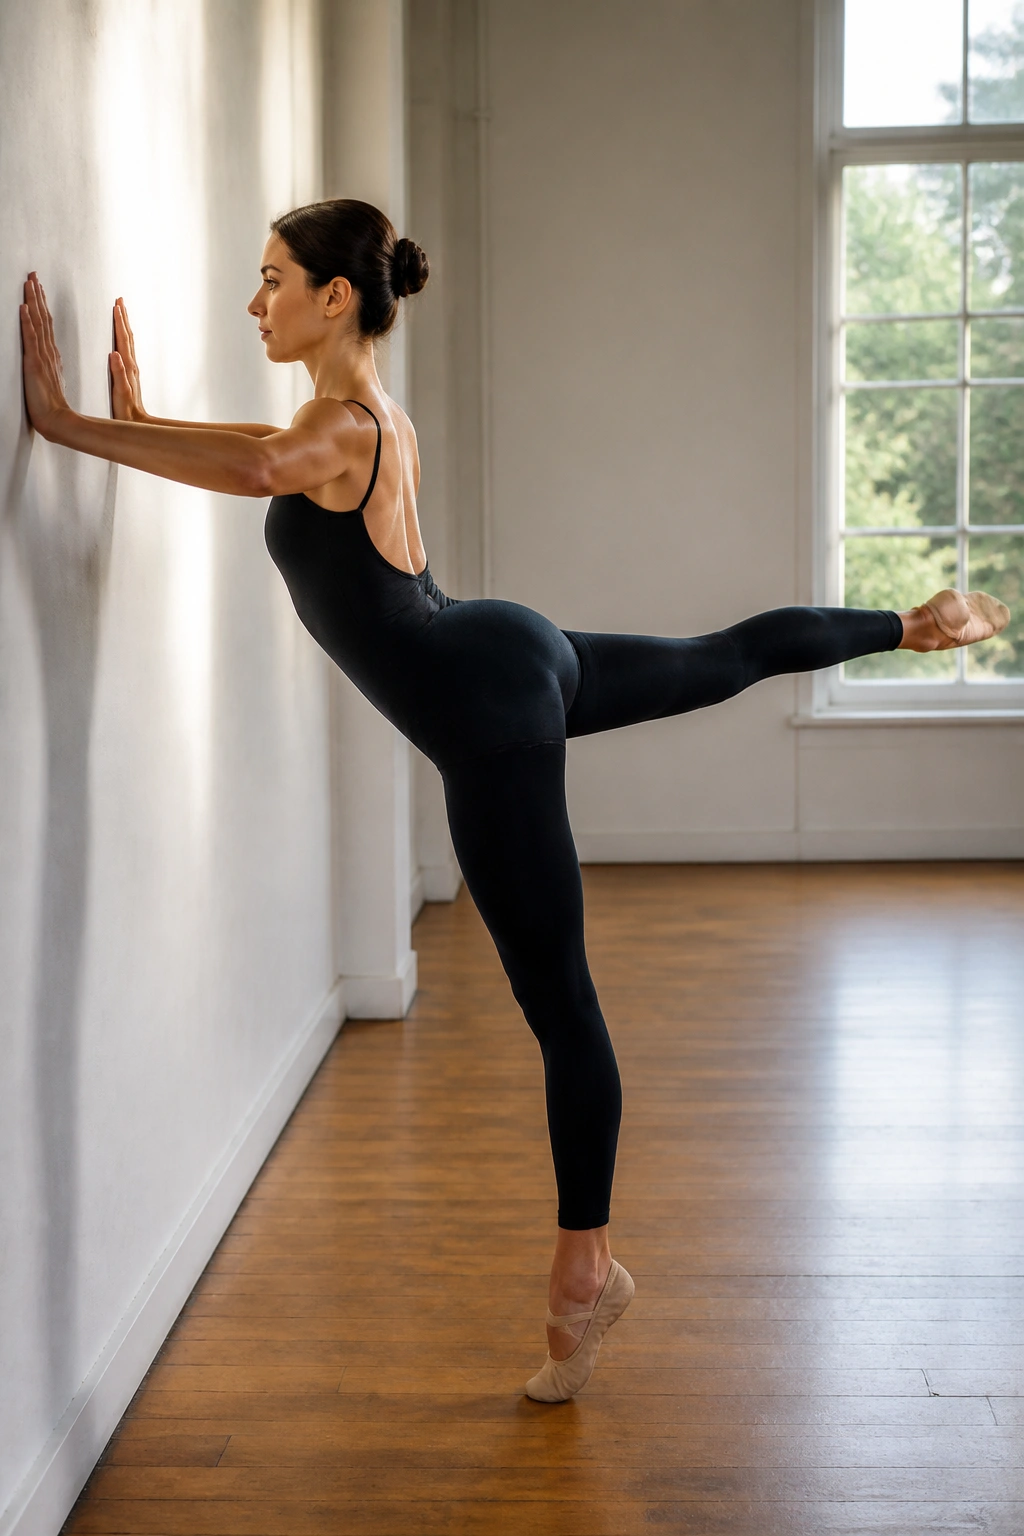
The arabesque is the quintessential ballerina move, but doing it with a wall turns it into an intense glute isolation exercise. Stand facing the wall, placing both hands flat against it at shoulder height. Step back slightly so your torso is tilted forward, creating a long line from your head to your hips. You are essentially using the wall as an anchor to keep your torso perfectly still while your leg does the work.
Focusing on Glute Isolation
Lift one leg straight behind you, keeping the knee locked and the toes pointed. The most common mistake here is lifting the leg too high, which causes the lower back to arch. Avoid that at all costs. Instead, imagine lengthening your leg out of the hip socket rather than lifting it toward the ceiling. Squeeze the glute muscle of the lifting leg hard at the peak of the motion. If your hips are square to the floor—meaning the hip bone of your lifting leg is pointing straight down—you are doing it right.
3. Wall-Assisted Second Position Pulse
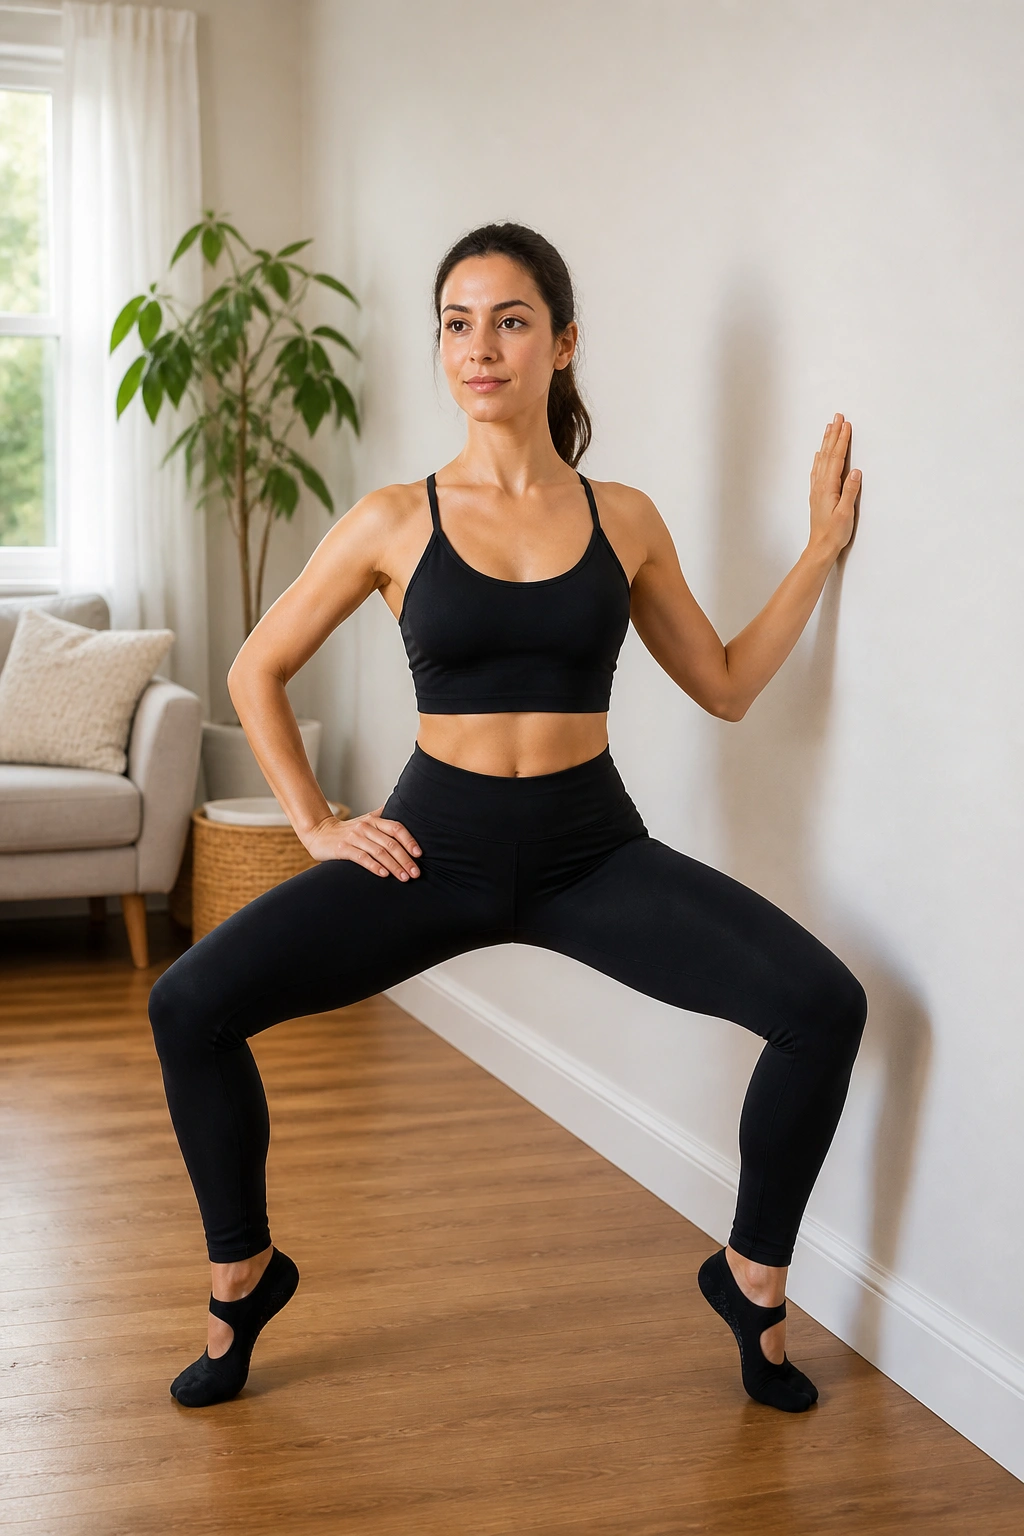
Wide-stance exercises are often butchered in general fitness classes because the knees cave inward. Using a wall for your second position—feet wider than shoulder-width, toes turned out—gives you an external guide for your alignment. Stand sideways to the wall, resting one hand lightly on it for balance. Sink into a wide plie. Your knees should be tracking directly over your second and third toes.
The Setup
- Keep your shoulders stacked directly over your hips; do not lean toward the wall.
- Tuck your tailbone under slightly to activate the lower abdominals.
- Sink lower until you feel that familiar trembling in your inner thighs.
The Pulse
Once you are deep in the stance, pulse your hips downward in small, one-inch movements. The key is to never come out of the tension. Stay at the bottom of the movement. If you find your knees drifting forward, adjust your foot placement. Your knees should be pulling backward toward an imaginary wall behind you, opening up the hips and firing the glute medius.
4. Standing Leg Lifts
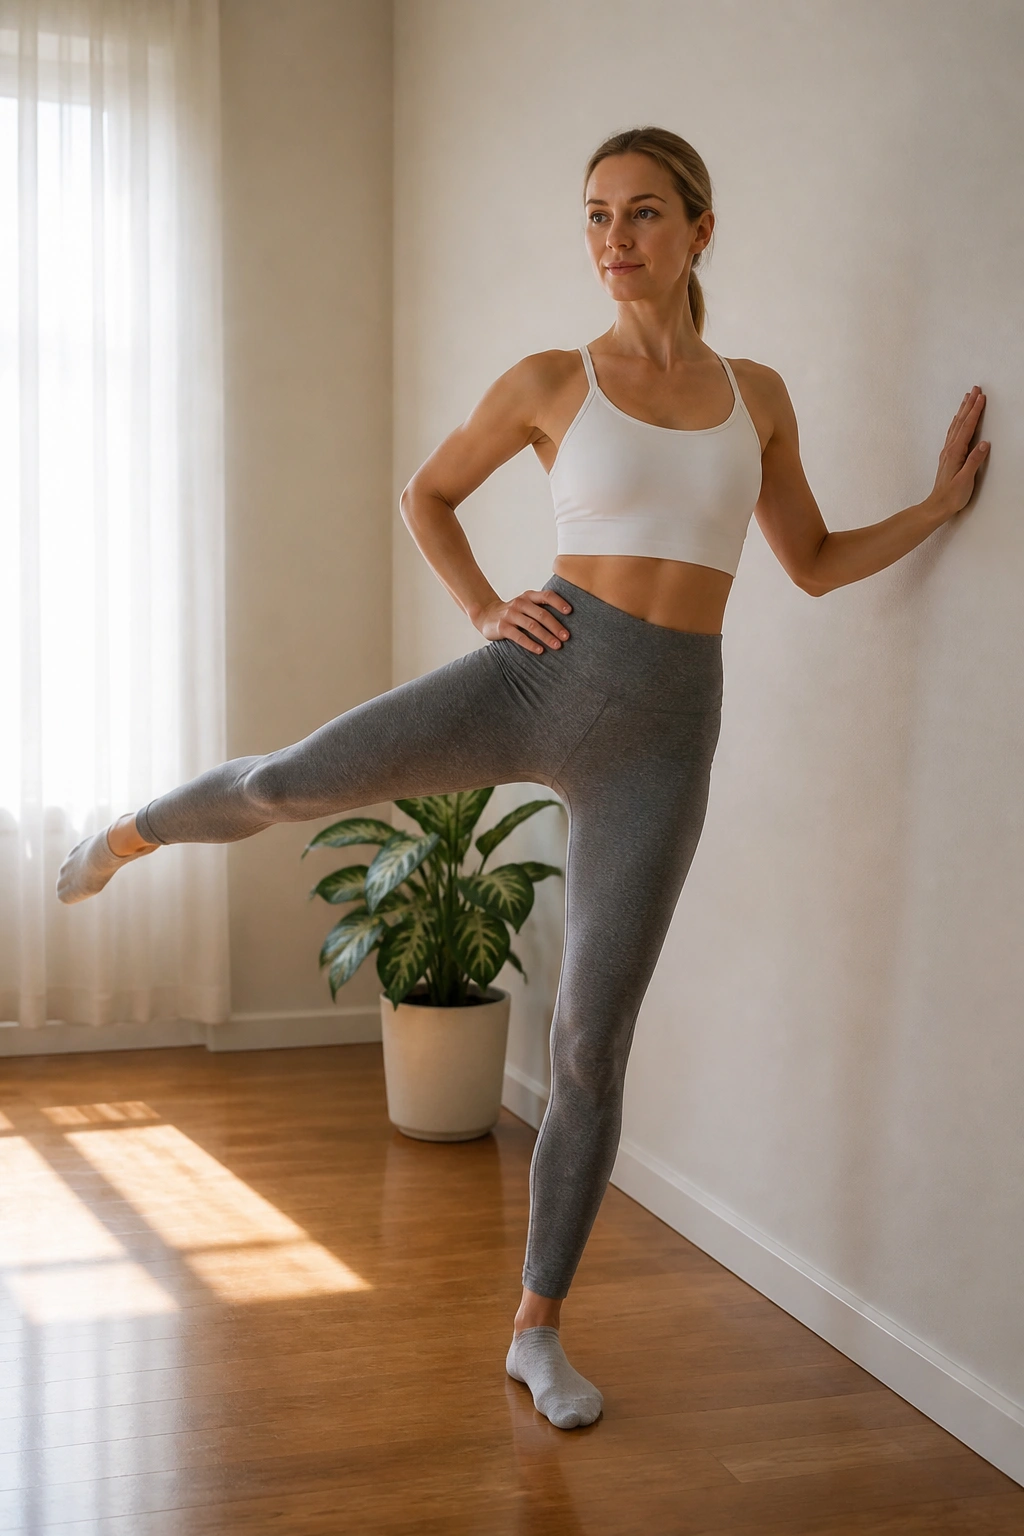
This move looks simple, but it is one of the most effective ways to target the outer hips and the gluteus medius, the muscle responsible for pelvic stability. Stand parallel to the wall, resting your inside hand on it for stability. Ensure your standing leg is strong and slightly bent, while the outside leg remains straight with the toes pointed.
Finding the Rhythm
Lift the outside leg out to the side. The height matters less than the control. Do not swing the leg. Use your hip muscles to lift it. If you feel your torso swaying, you need to tighten your core muscles immediately. Think of your torso as a pillar of stone; only the leg is moving. Perform twenty lifts, then hold the leg at the top for ten seconds, pulsing it up another half-inch. That final hold is where you will feel the burn shift from manageable to intense.
5. Wall Calf Raises
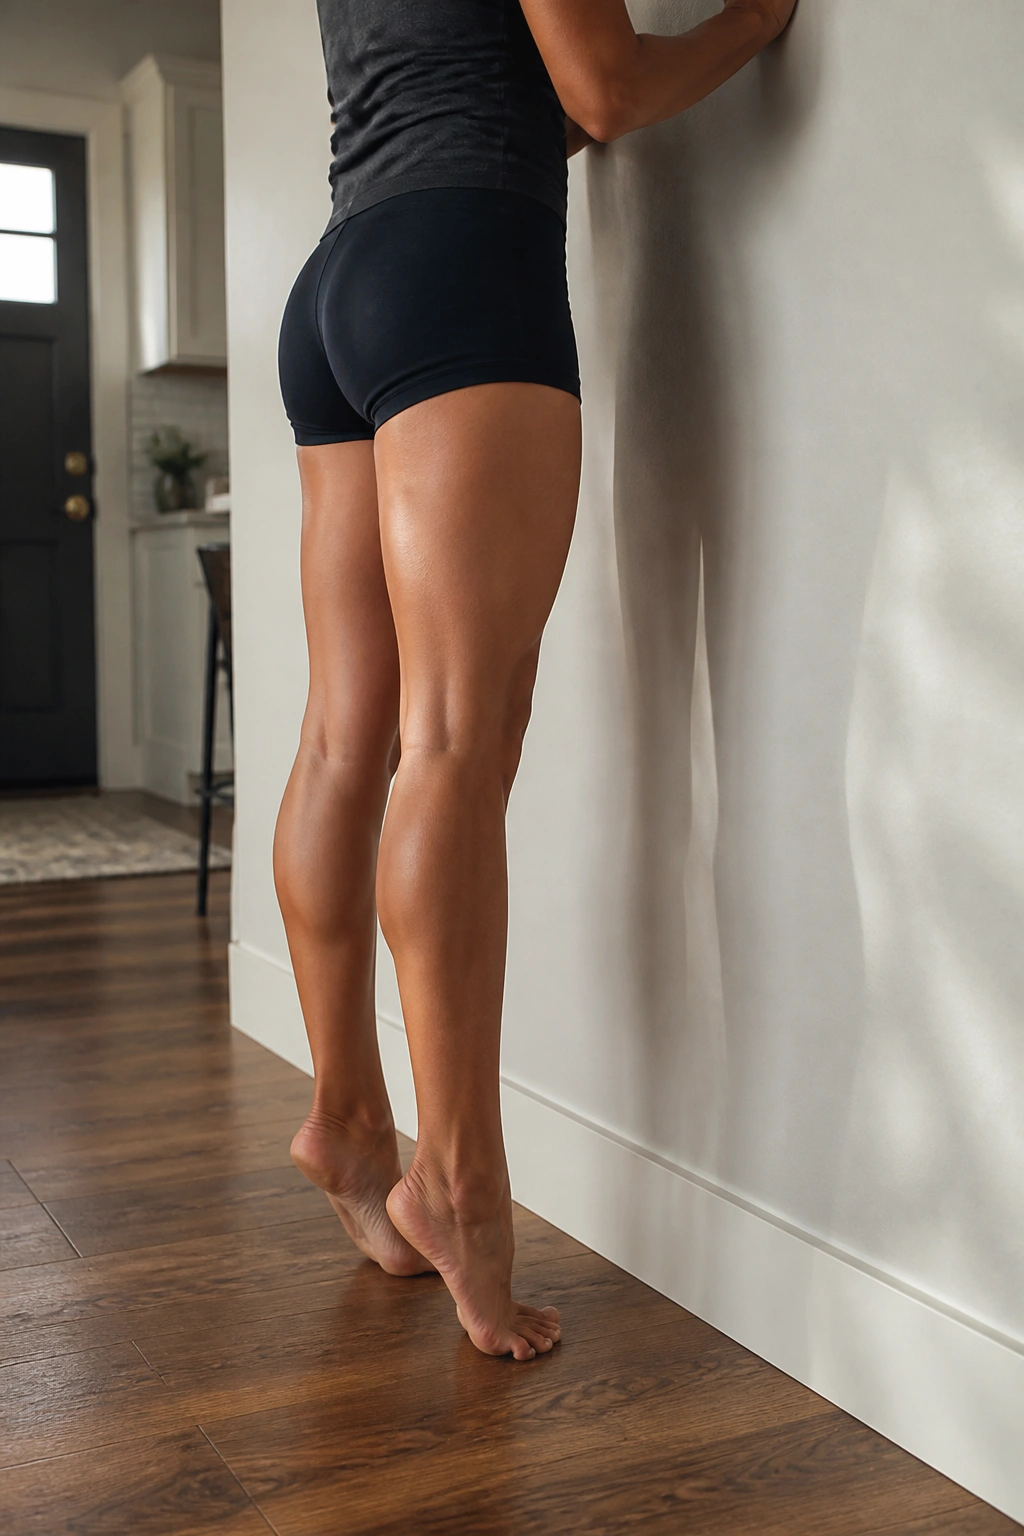
Calf raises are often overlooked, but strong calves provide the foundation for balance in all other barre exercises. Stand facing the wall, hands pressed flat against it. Place your feet in a parallel position, toes facing forward. Rise onto the balls of your feet, lifting your heels as high as possible.
The Anatomy of the Calf
There are two main muscles in the calf: the gastrocnemius and the soleus. You hit both by varying your foot position. Start with parallel feet to target the bulk of the calf. Once you finish a set, turn your heels together and toes out—the “first position” stance—and do another set. This rotation targets the medial (inner) portion of the calf. Control the descent. Do not just drop your heels back to the floor. Lower them slowly, counting three seconds on the way down, to maximize the eccentric contraction of the muscle fibers.
6. Wall-Supported Attitude
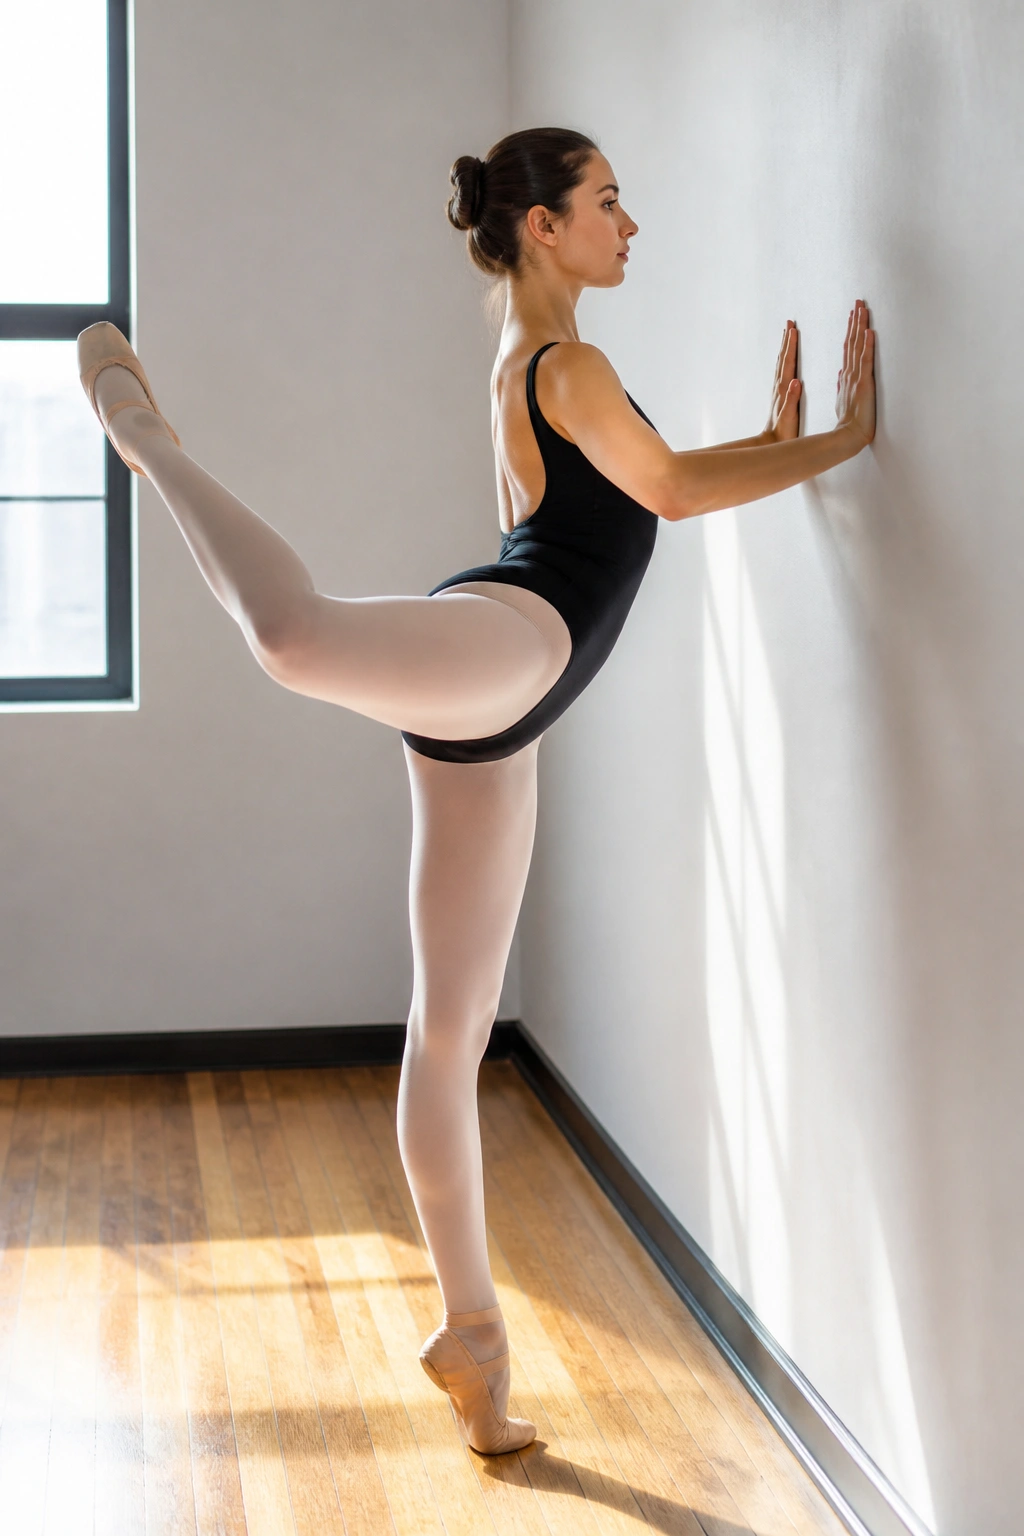
The attitude position is a bent-knee version of the arabesque. It is physically more demanding because the weight of your lower leg creates a longer lever, putting more stress on the glutes and hamstrings. Stand facing the wall, hands resting on it, and lean your torso slightly forward. Lift your right leg behind you, bending the knee to a ninety-degree angle.
Achieving Form
Your knee should be slightly higher than your foot. Imagine you are holding a heavy object behind your knee. Keep your torso rock-steady. The movement here is very small—a tiny lift of the knee, then a small release. Focus on the connection between your hamstring and your glute. If you feel a cramp, that is normal. Flex your foot to alleviate the cramp and continue pulsing. The beauty of this move is how quickly it fatigues the posterior chain.
7. Wall-Assisted Passé Relevé
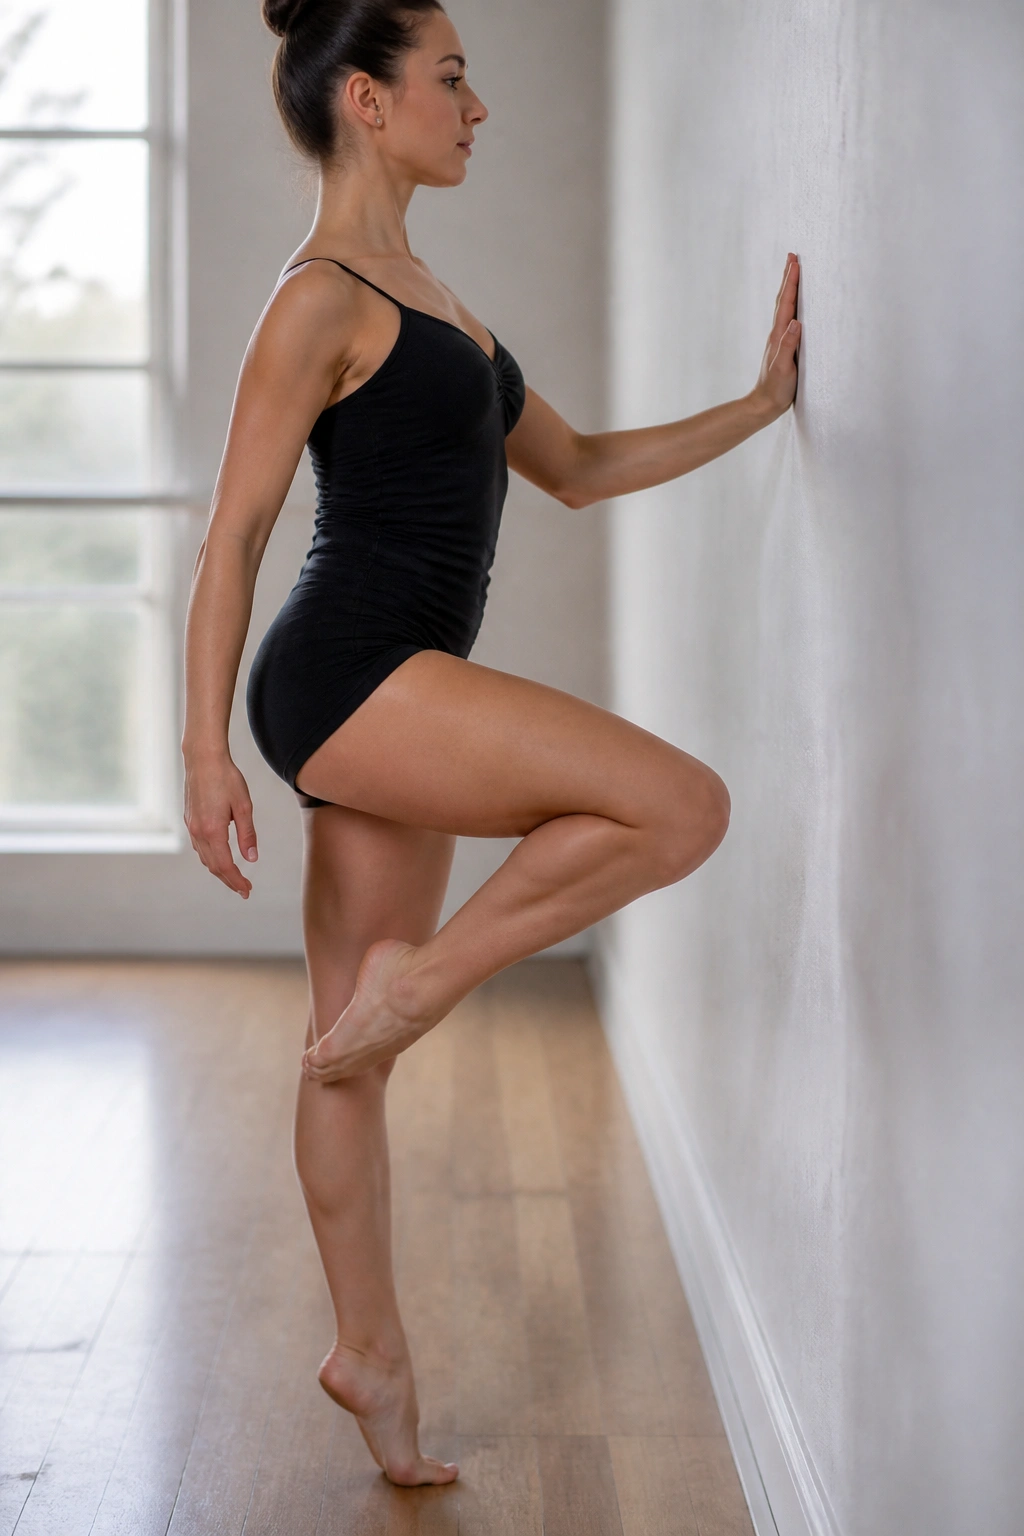
Passé is the classic move where one foot rests against the inside of the opposite knee. Doing this in a relevé—up on the toes—is the ultimate test of balance and core engagement. Stand sideways to the wall, one hand resting on it for support. Pull your outside foot up until the toe touches the inner knee of your standing leg.
The Balance Component
Rise up onto the ball of your standing foot. The wall is there to help, but try to use only one or two fingers. Your goal is to rely less on the wall over time. As you balance, engage your core so hard that your ribcage knits together. If you are wobbling, visualize a string pulling the crown of your head toward the ceiling. Hold this position for thirty seconds on each side. The micro-adjustments your standing ankle makes are exactly what builds strong, injury-resistant joints.
8. Wall Side Bends
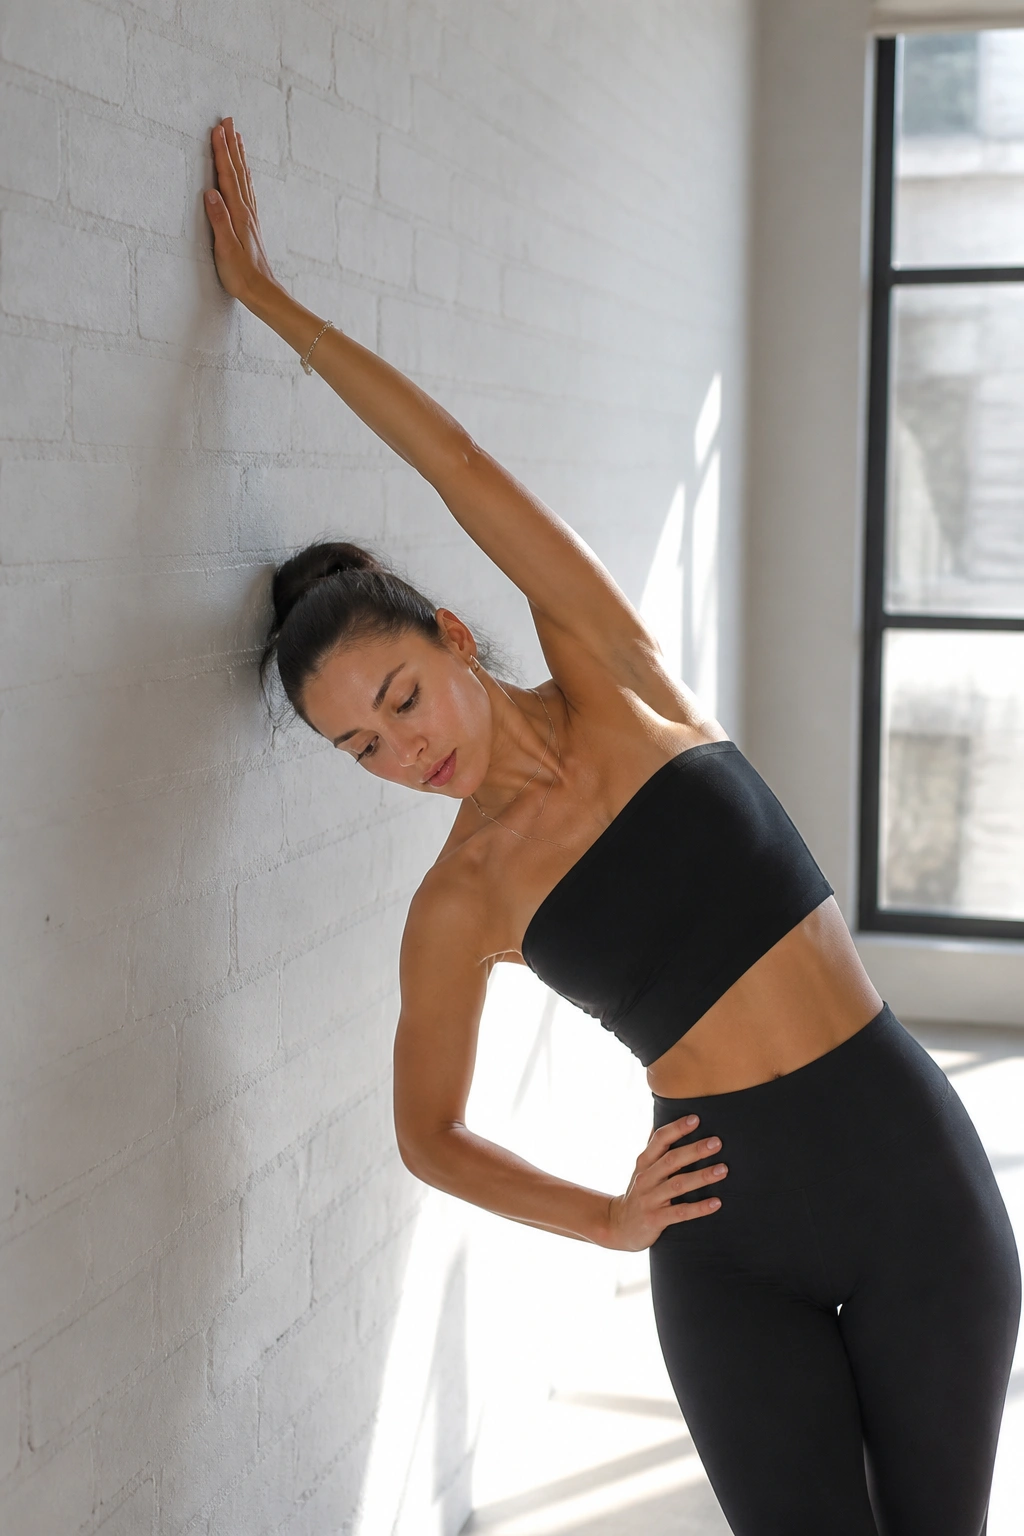
Barre is not just about the lower body; it is about creating a long, lean line throughout the entire torso. Stand sideways to the wall, about six inches away. Extend your arm closest to the wall up and over your head, pressing your palm against the wall to create leverage.
Stretching and Toning
Lean your body into the wall, letting your hips push slightly outward. You will feel a deep stretch in the lats and the obliques. Now, use your core muscles to pull yourself back to an upright position. You are using your obliques to perform a side-crunch against gravity. Do this twelve times on each side. This is an active stretch, meaning you are engaging the muscles even while they are being lengthened. It is incredibly effective for creating that “long” look that is the hallmark of the barre aesthetic.
9. Wall Plank Leg Lifts
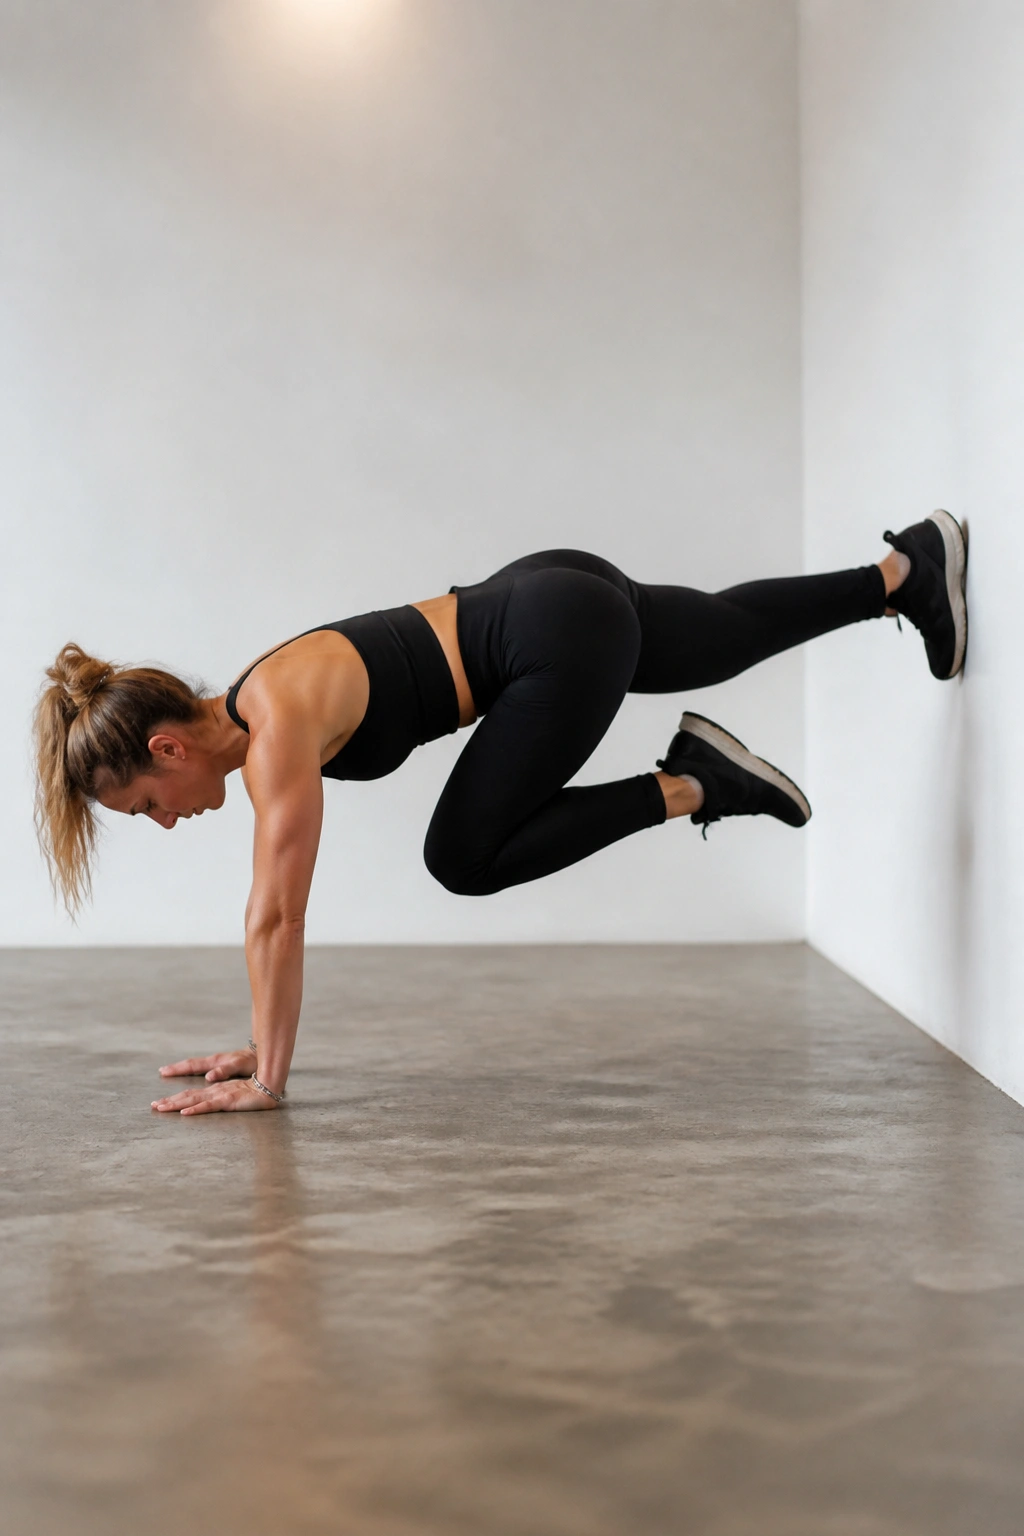
Turn your back to the wall and place your hands on the floor in a plank position. Your heels should be pressed against the wall, toes pointing down. This creates a decline plank, which is significantly more difficult than a standard floor plank. Your shoulders are immediately under more load, and your core has to work twice as hard to prevent your hips from sagging.
Maintaining Stability
From this position, lift one leg off the wall and bring it toward your chest, then return it to the wall. Alternate legs. Because you are on an incline, your core must remain rock-solid to keep your torso from swaying. Do not let your hips pike upward. Keep your body in a straight line from heels to head. This is as much a core workout as it is a shoulder burner.
10. Wall-Supported Hamstring Stretch and Hold
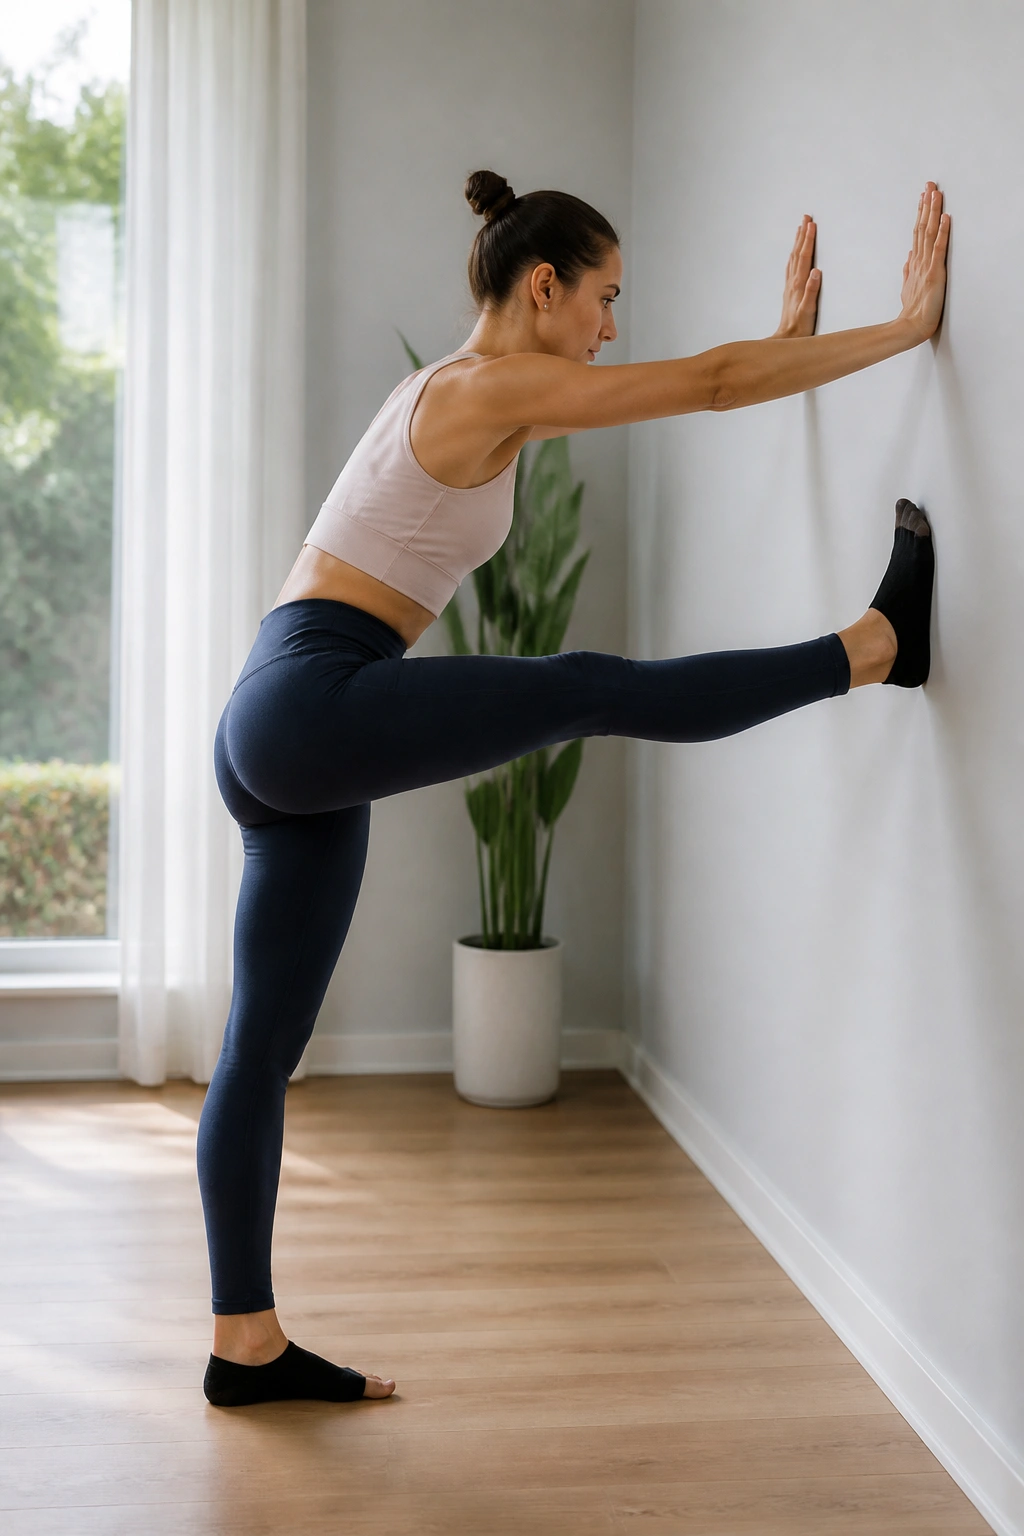
Recovery is part of the work. Stand facing the wall and place one heel up on the wall at hip height. This is a modified, wall-assisted hamstring stretch. Most people rush through this, but the secret is in the engagement. Keep both legs straight. Flex the foot that is on the wall, pointing your toes back toward your face.
Deepening the Mobility
Engage your quadriceps on the leg resting on the wall. By actively contracting the quad, you send a signal to the hamstring to relax. This is called reciprocal inhibition. Hold for forty-five seconds. Do not bounce. Just breathe, and with every exhale, see if you can pull your torso an inch closer to the wall. This builds the flexibility required for higher extensions in other moves.
11. Wall Push-Ups
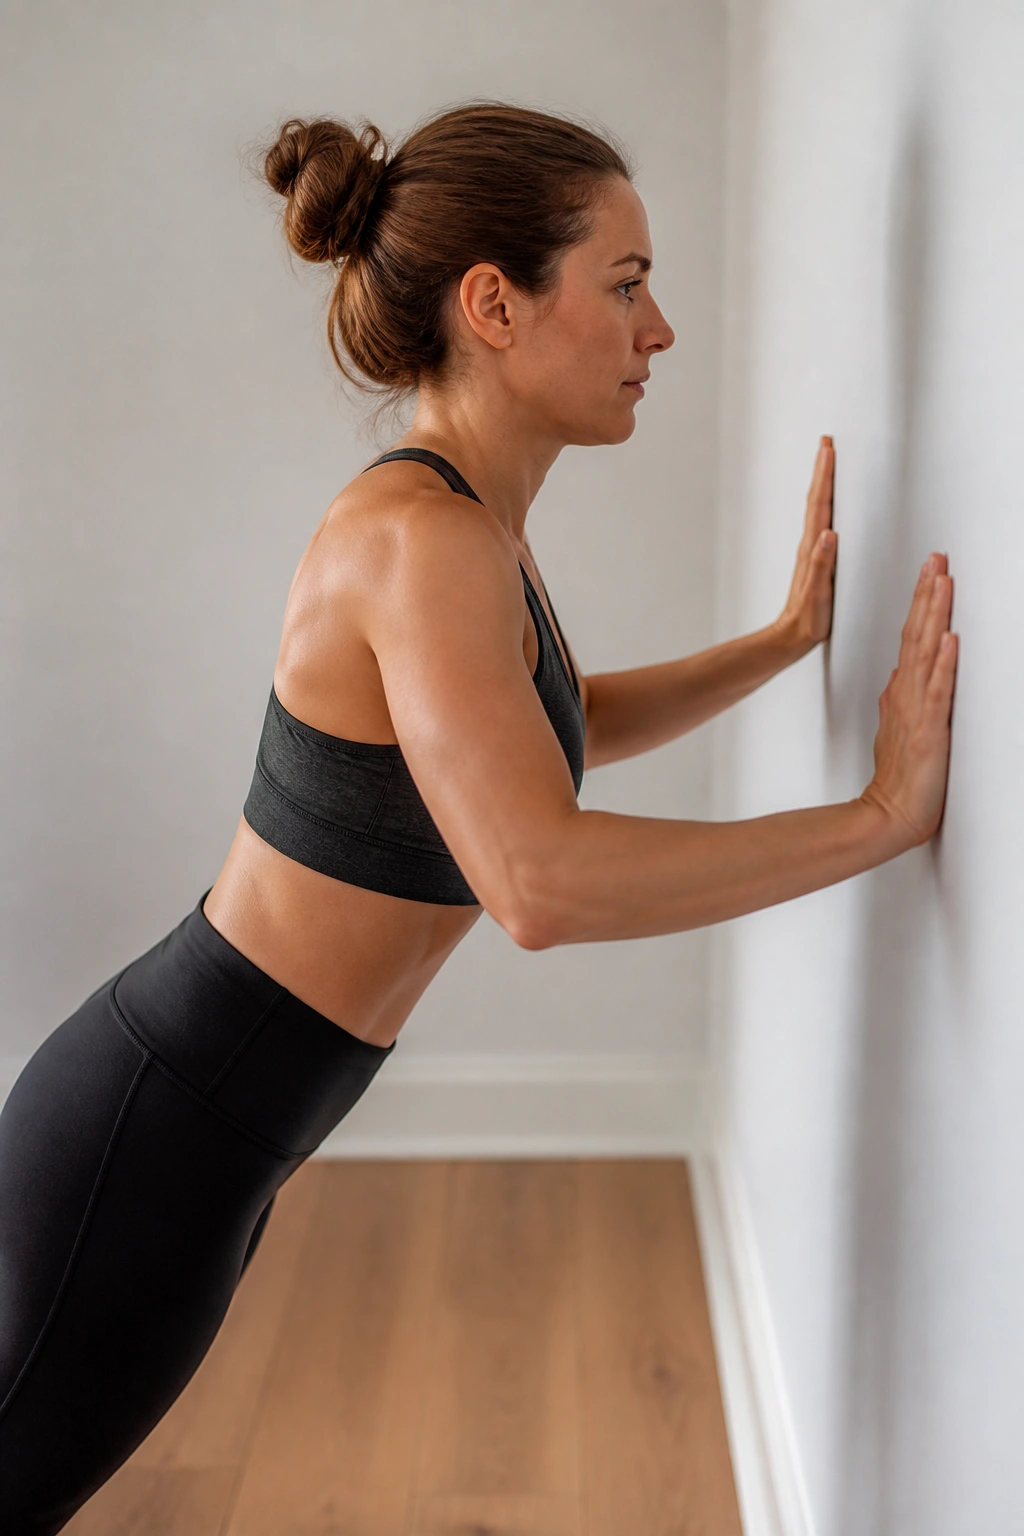
Classic push-ups on the floor can be brutal on the wrists if you do not have the upper body strength yet. The wall version allows you to perfect your form—keeping your elbows tucked close to your ribs rather than flared out—while building the necessary foundation. Stand about two feet away from the wall, arms extended, hands at shoulder height.
The Mechanics of the Push
Lean in, letting your elbows graze your ribcage. Push back. The key is to keep your core engaged. Do not let your stomach collapse forward; your body should move as one solid plank. To make it harder, move your feet further away from the wall. To make it easier, move closer. The closer your elbows stay to your body, the more you hit your triceps. If your elbows flare out like chicken wings, you are engaging the chest but losing the tricep benefit.
12. Wall-Supported Inner Thigh Lifts
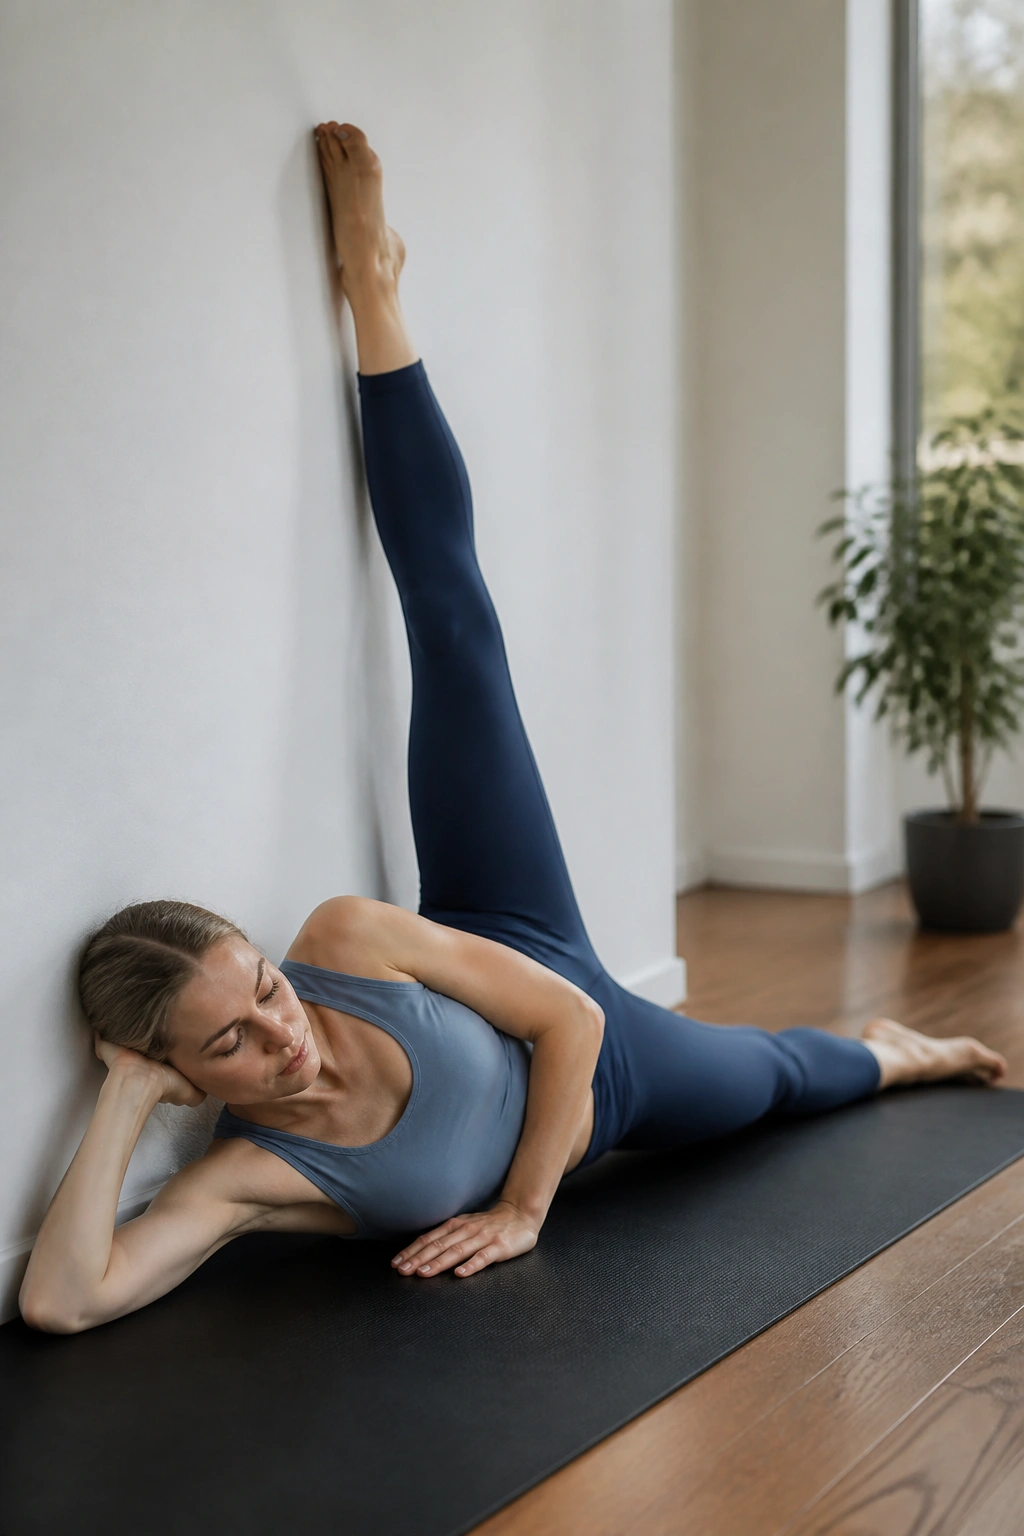
Lie on your side with your back flat against the wall and your legs extended out. This is a challenging way to isolate the adductors, or inner thighs. Place your top leg in front of your bottom leg, bending the knee so the foot rests on the floor. The bottom leg stays straight, pressed against the floor.
Targeting the Adductors
Lift the bottom leg up toward the ceiling. The wall behind you acts as a physical barrier, ensuring you cannot roll your hips forward or backward. You have to keep your pelvis neutral. This is a very small range of motion; the muscle fibers in the inner thigh are short and respond best to small, controlled, pulsing movements. Do twenty lifts, then hold at the top for ten seconds. The burn will be immediate.
13. Wall Tricep Dips
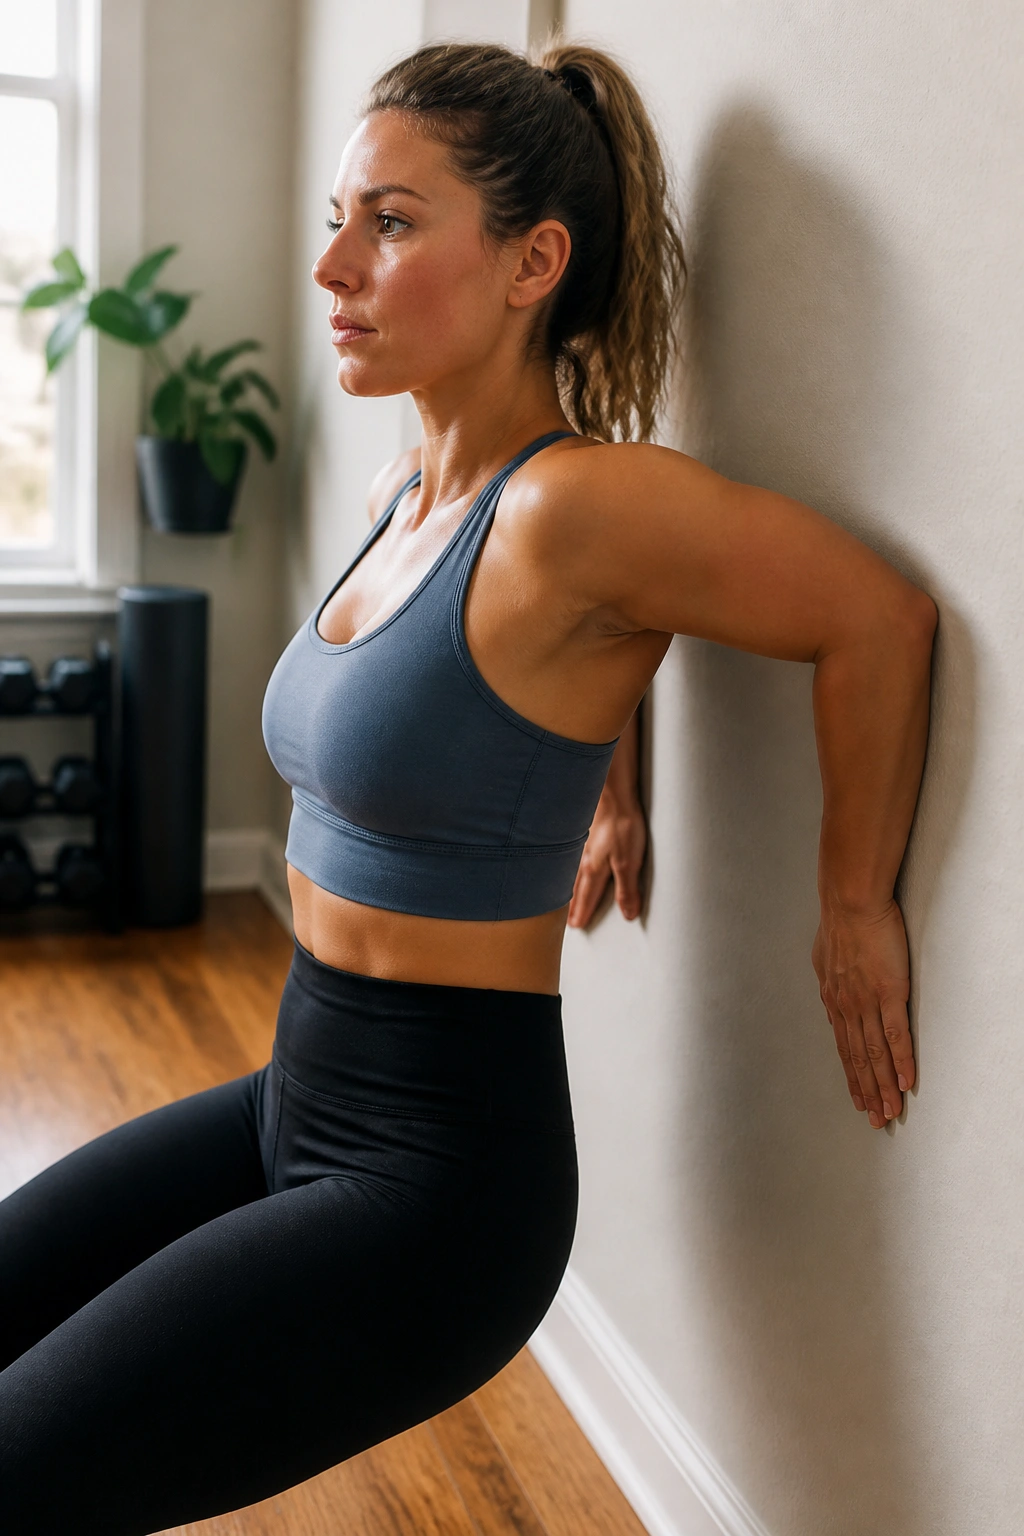
Find a corner or a flat wall and stand with your back to it, feet a few inches out. Place your palms on the wall behind you, fingers pointing down if you have the flexibility, or out to the side. Sink down into a shallow squat, bending your elbows to lower your upper body toward the wall.
Controlling the Descent
This is an excellent way to isolate the triceps without needing a chair or bench. Your back should graze the wall as you go down. Push back up using only your triceps—do not use your legs to help. Keep your core tight. If you let your lower back arch, you lose the isolation. Focus on the back of your arms. If you feel it in your shoulders, adjust your hand position to be slightly lower.
14. Wall-Supported Curtsy Lunge
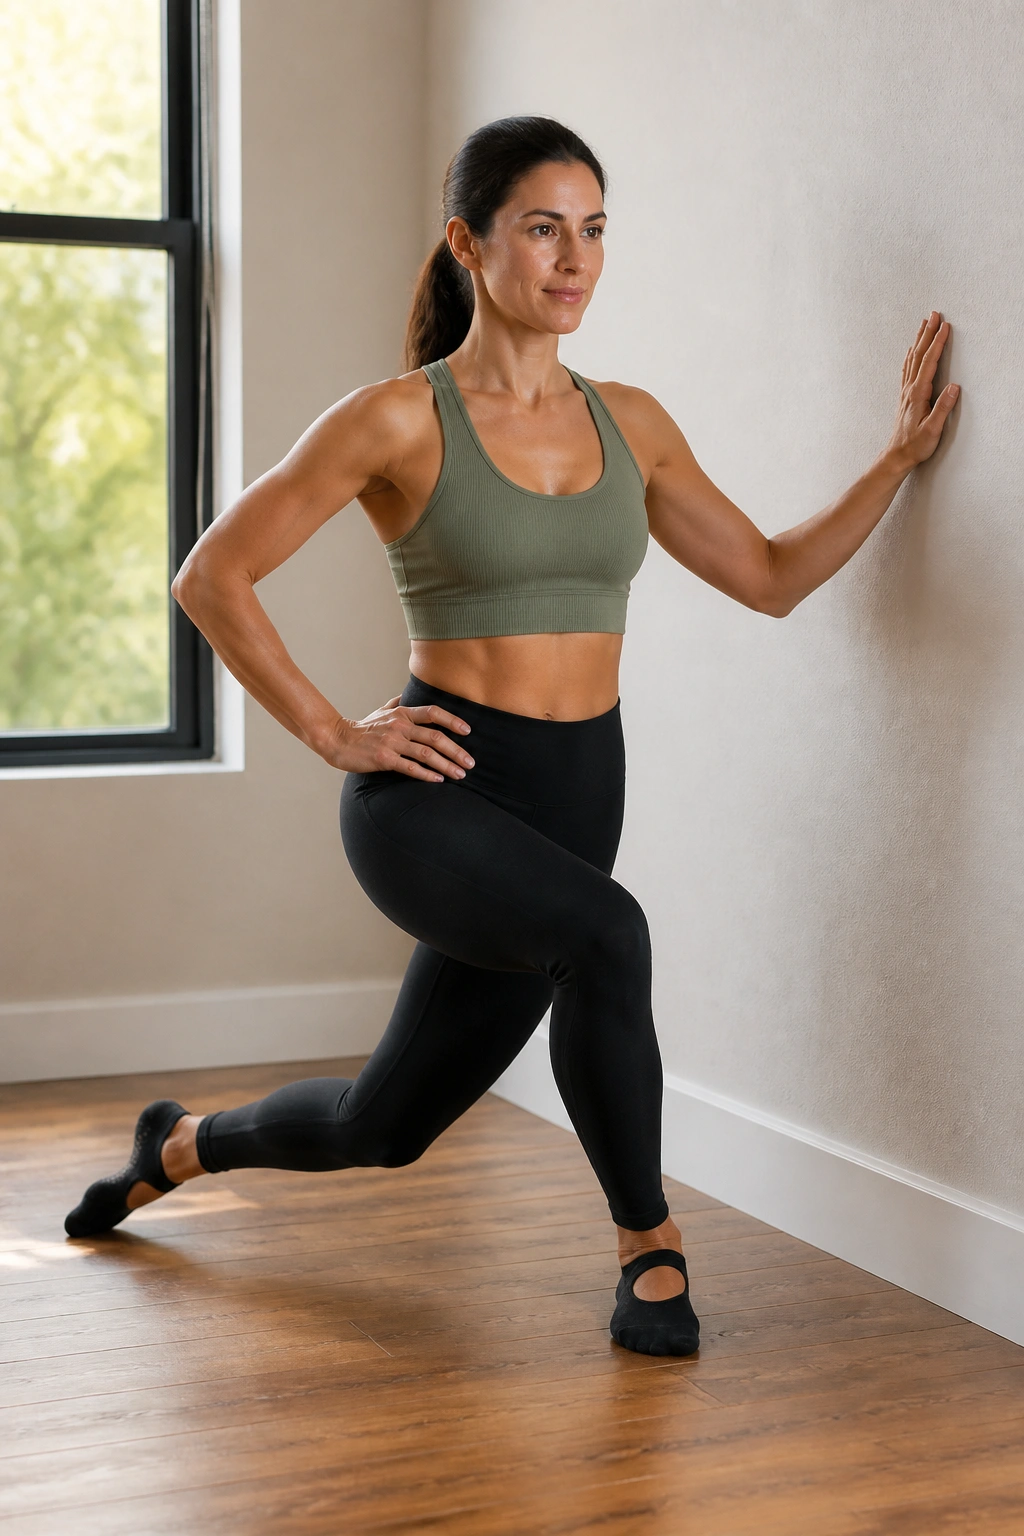
The curtsy lunge is fantastic for the glute medius and the inner thighs. Stand sideways to the wall, one hand on it for balance. Step your outside leg back and across behind your standing leg, dropping into a lunge. Your back knee should aim for the floor behind your front heel.
Finding the Depth
The wall provides the confidence to go deeper. Because you have support, you can focus entirely on the depth of the lunge and the activation of the glutes. As you stand back up, squeeze the glute of the front leg. Do not just stand up; push through your heel to return to the starting position. This movement is all about controlled depth. If you lose your balance, your hand on the wall will catch you, allowing you to get back into the rhythm instantly.
15. Wall-Supported Developpé
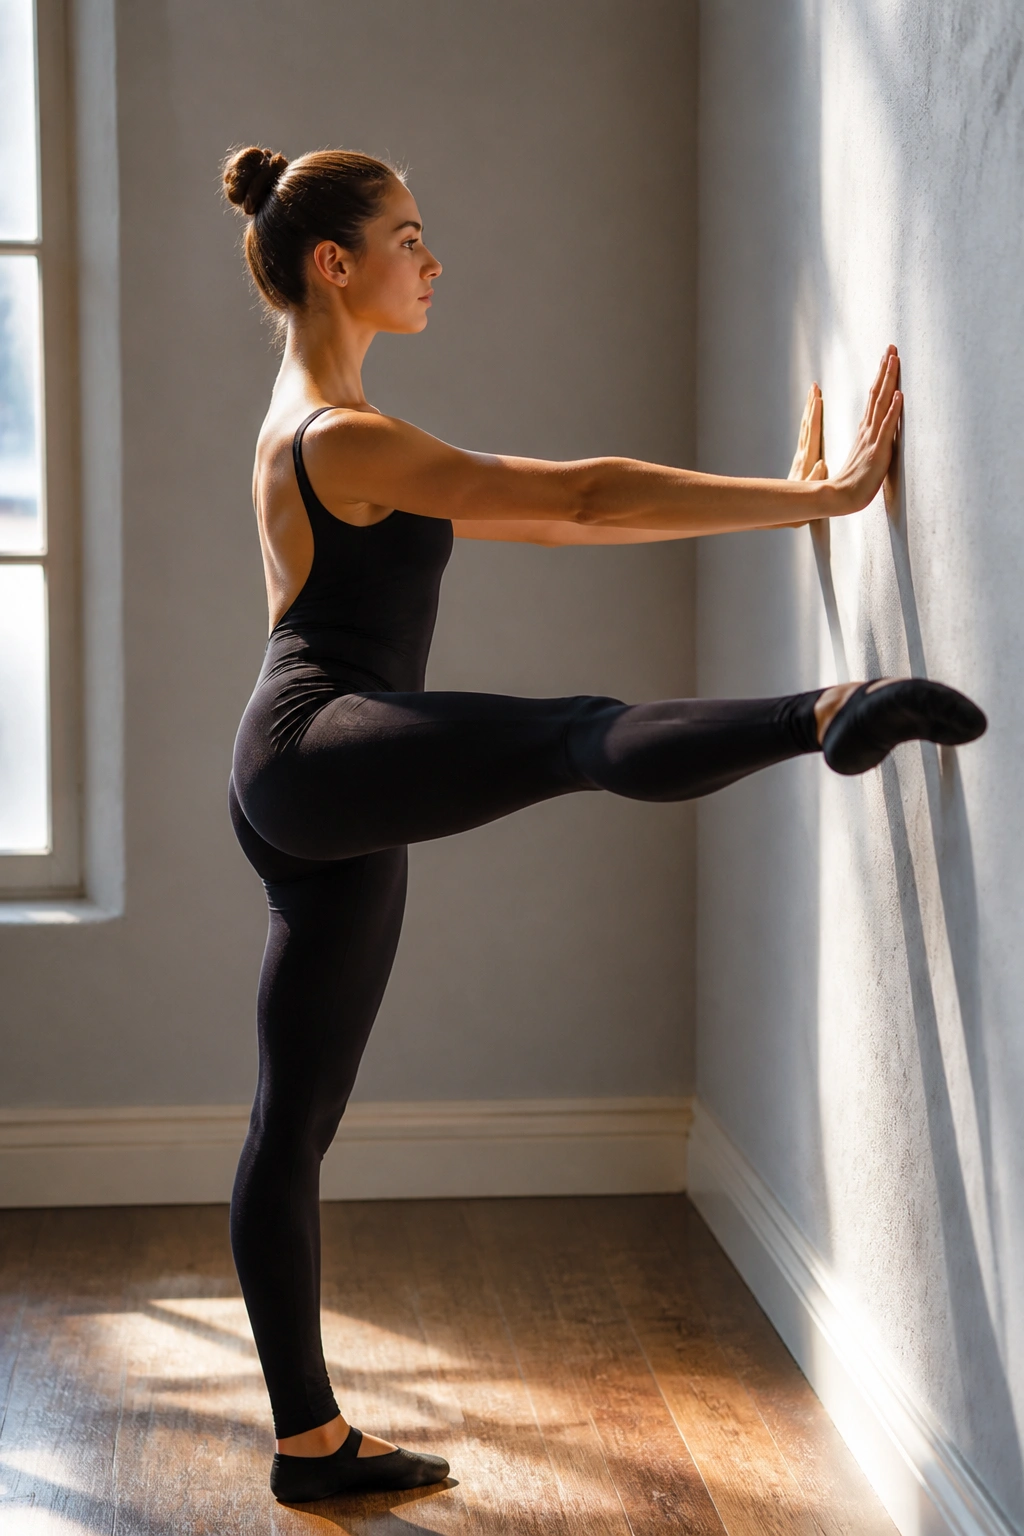
The developpé is the art of bringing your leg from a bent position to a fully extended straight line. It is a slow, graceful move that requires immense core strength. Stand facing the wall, hands resting on it. Pull your knee up toward your chest, then slowly extend the leg until it is straight in front of you.
The Controlled Extension
This should not be a kick. It is a slow, deliberate extension. Think of yourself as moving through water. As you extend the leg, maintain a perfect vertical posture. If you lean back to compensate for the weight of your leg, you are missing the point. The abdominal muscles must contract forcefully to keep your spine straight while the leg extends. This is excellent for hip flexor strength and overall coordination.
16. Wall Plank Knee Tucks
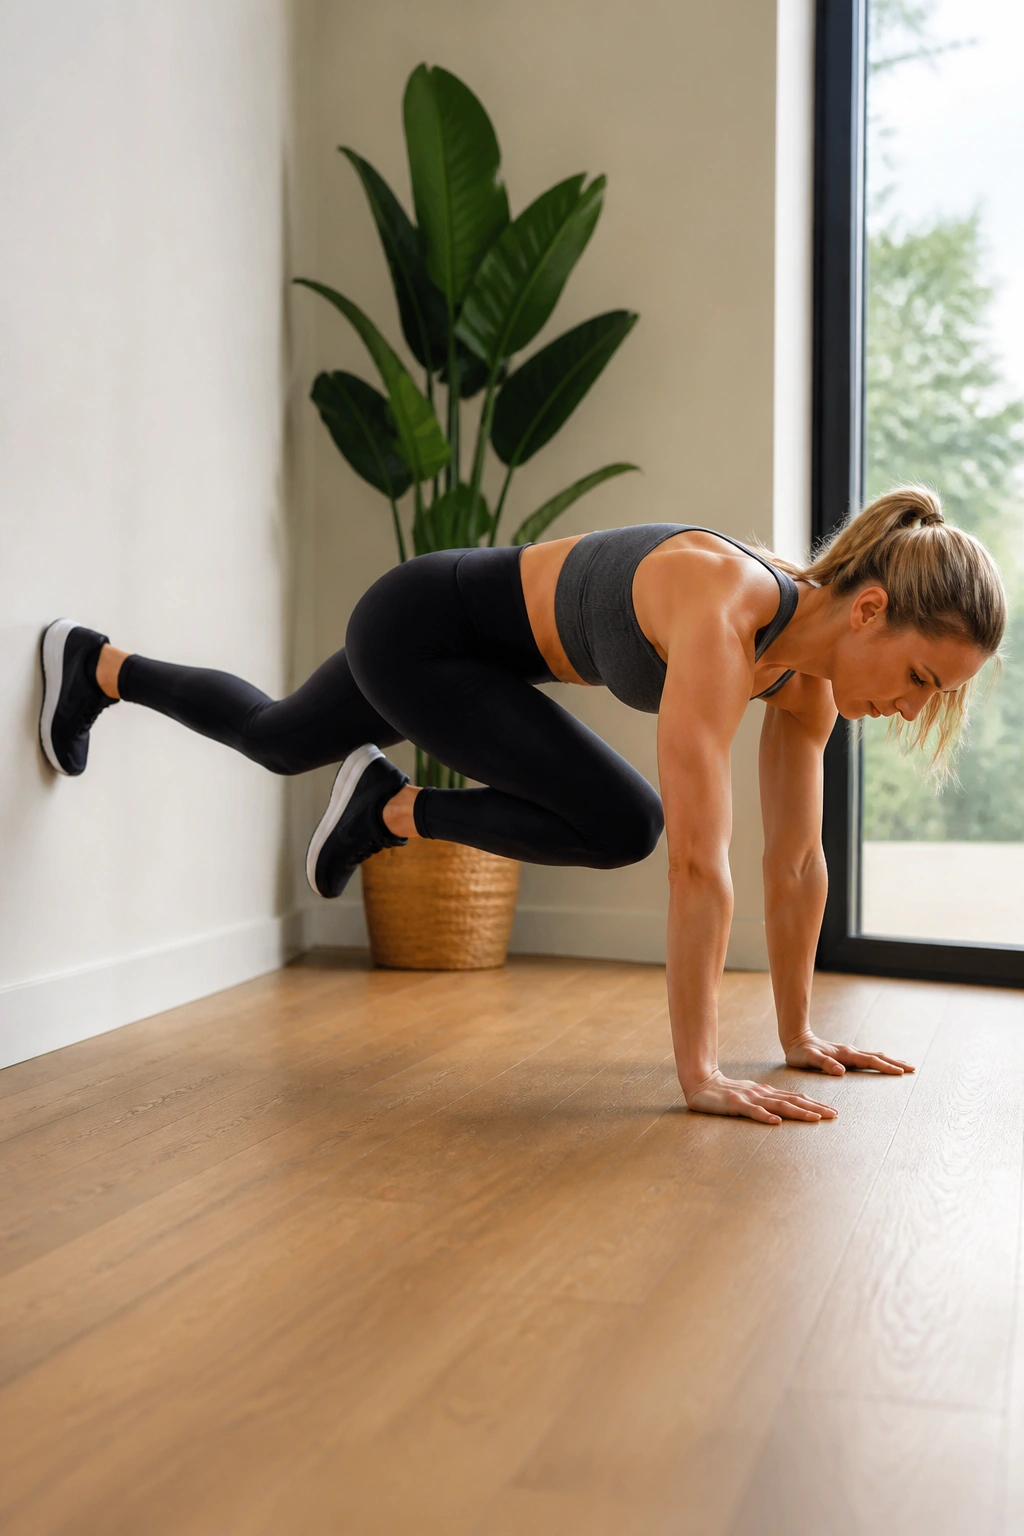
Return to the plank position with your heels on the wall. Once you are stable, tuck your right knee in toward your chest, rounding your upper back slightly. Push the leg back to the wall, then tuck the left knee. This is a dynamic core exercise that hits the lower abs and the stabilizers simultaneously.
The Engagement
The movement should be fluid. Do not rush. Every time you tuck the knee, exhale forcefully. That breath helps engage the transverse abdominis, the deepest layer of your abdominal muscles. Keep your hands directly under your shoulders. If your hands start to slip forward, you will lose the effectiveness of the exercise.
17. Wall-Supported High Kicks
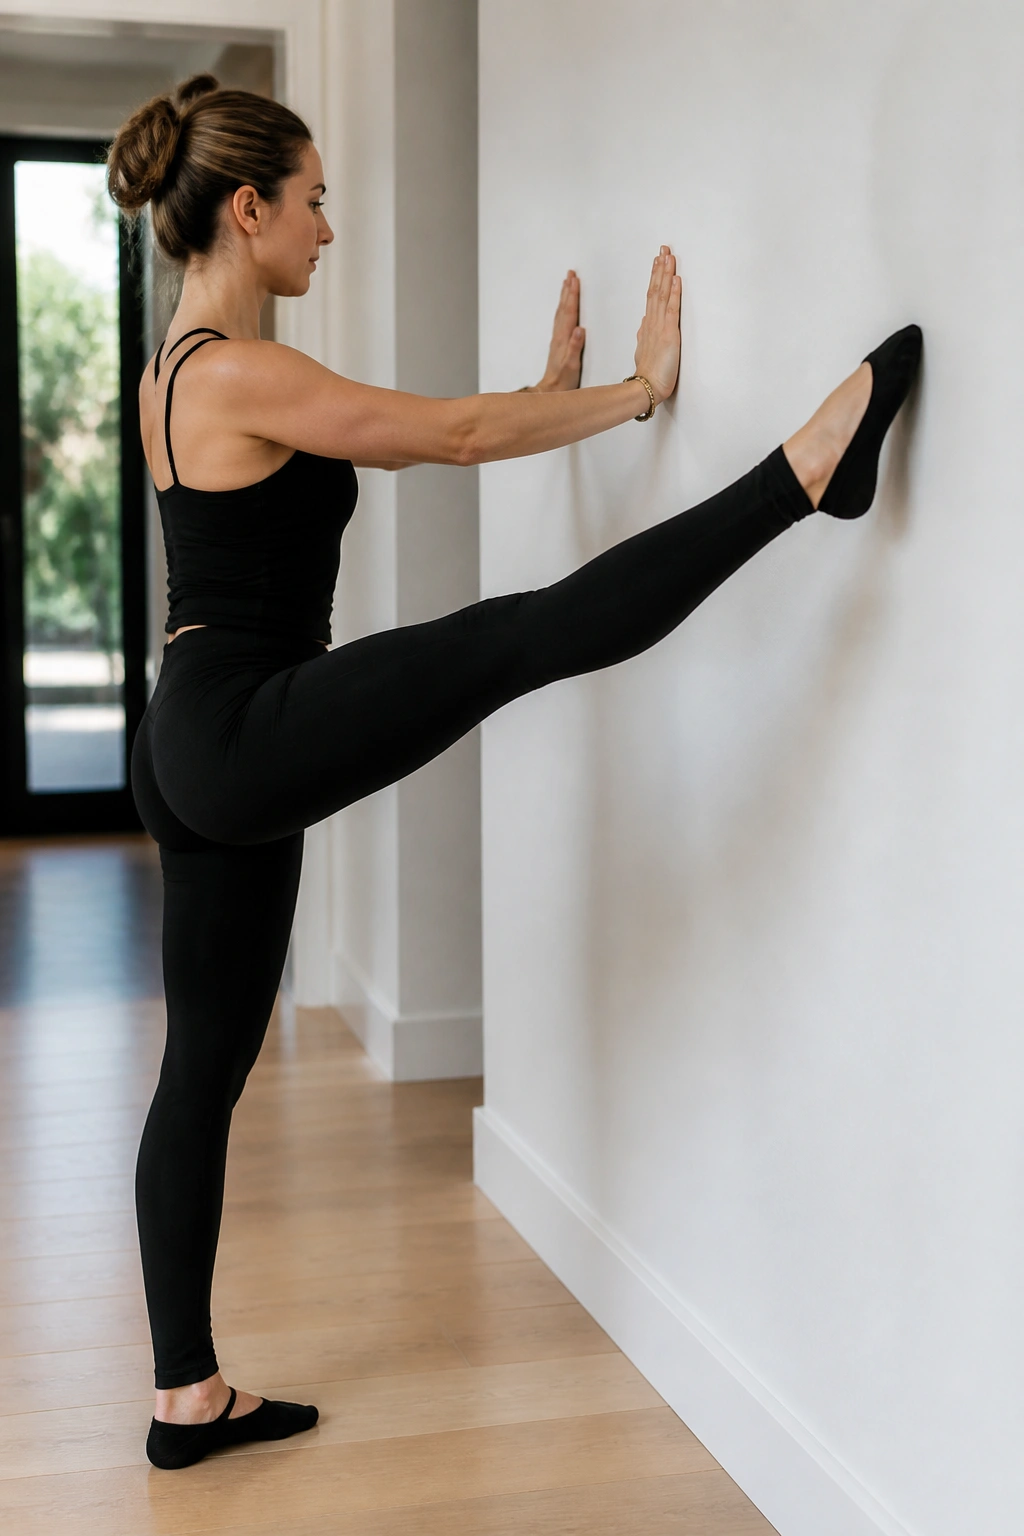
Kicks are a staple of barre because they combine flexibility with explosive power. Stand facing the wall, hands flat against it. Keep your core tight and your standing leg strong. Kick your right leg forward toward the wall—controlled and sharp, not floppy.
The Precision Kick
Your goal is to kick at a height that challenges you while maintaining a completely motionless torso. Most people kick, and their whole body swings with the momentum. The wall is your guard against that. If you are hitting the wall with your chest, you are leaning too far forward. If you are rocking back, you are relying on momentum. Aim for a sharp, crisp movement. Your leg goes up and down with precision, and your upper body remains as still as a statue.
18. Wall Back Stretch
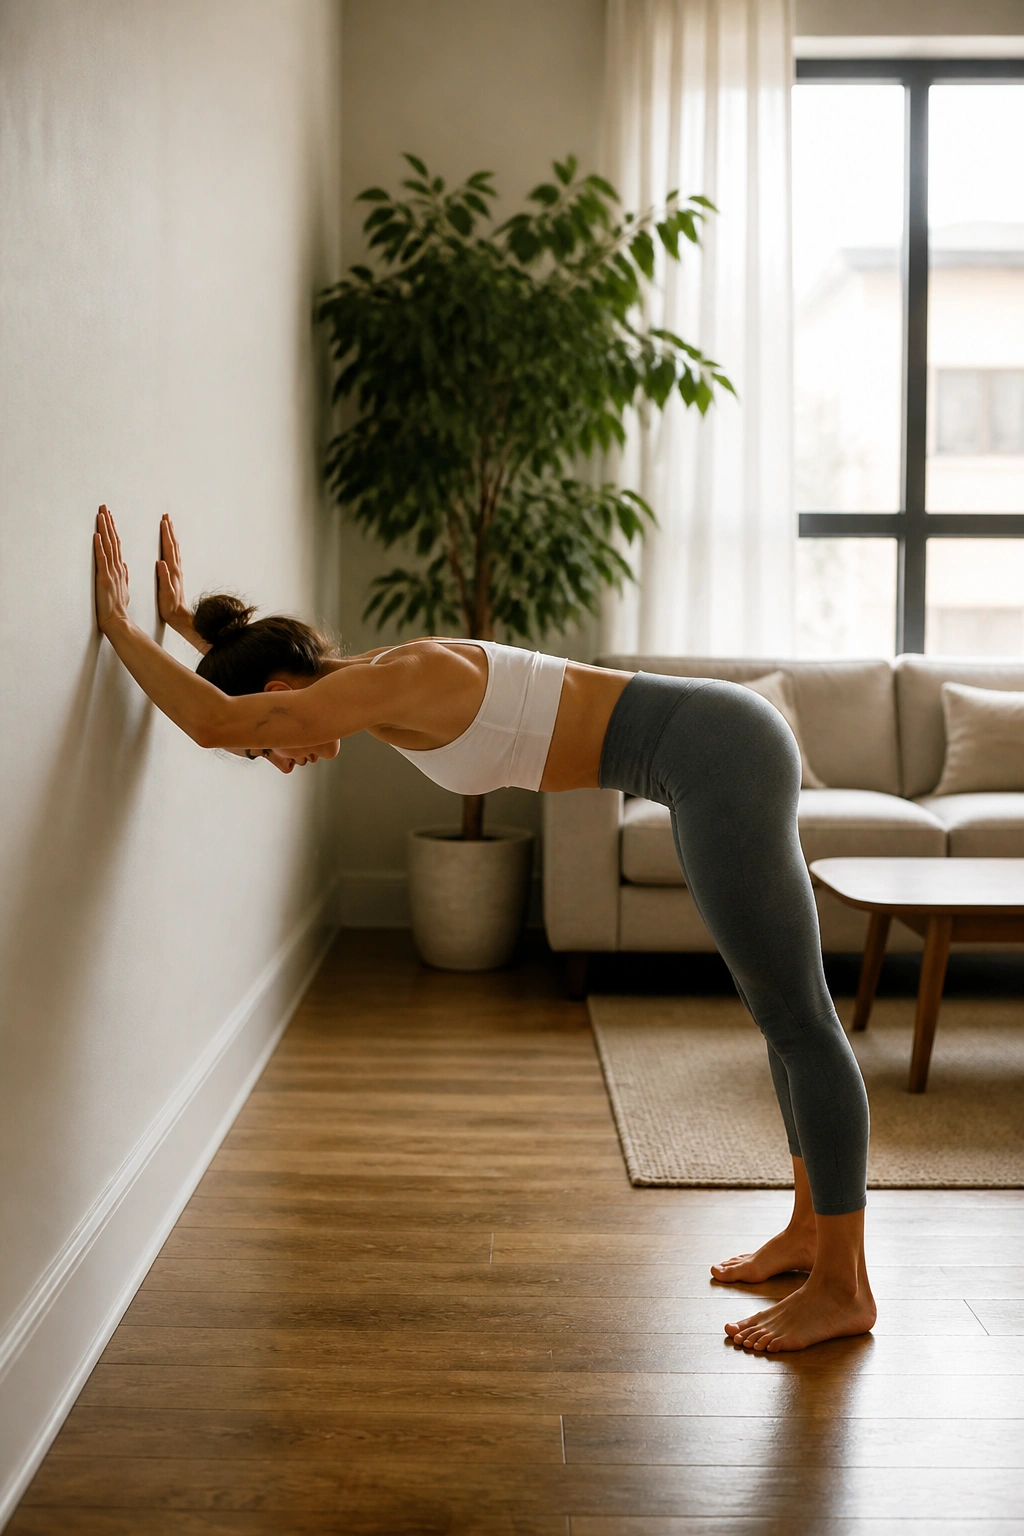
After eighteen exercises, your spine needs decompression. Stand facing the wall, about two feet away. Place your hands on the wall at shoulder height. Walk your feet back until your body forms a perfect right angle—your arms are straight, your back is flat, and your legs are under your hips.
The Final Lengthening
Press your chest down toward the floor, feeling a deep stretch through your shoulders, lats, and spine. This is a modified downward dog, but using the wall allows you to focus on the length of your spine rather than just the flexibility of your hamstrings. Breathe deeply into your back. Let your head hang heavy between your arms. This final stretch resets your posture, undoing any tension you might have accumulated during the workout.
Final Thoughts
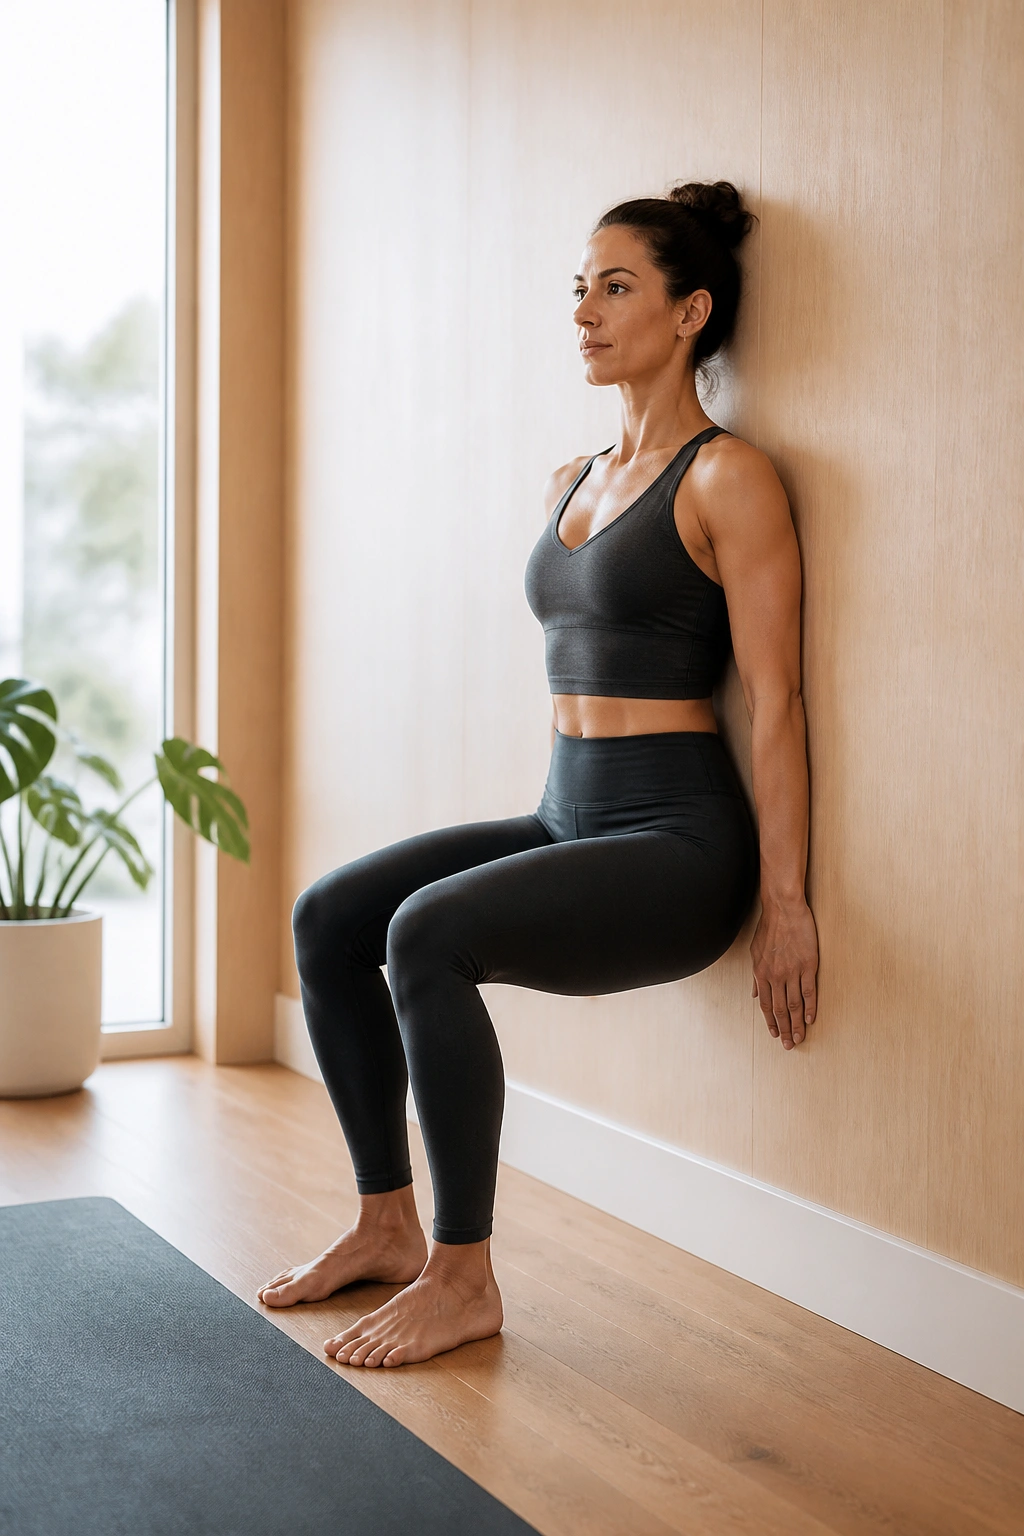
The beauty of using a wall for your barre practice lies in its absolute honesty. You cannot hide from the wall. If your posture slips, you will feel it. If you lose your engagement, you will know. This simplicity is exactly what makes these exercises so potent for long-term body conditioning.
You do not need to perform every single one of these exercises in a single session. Pick five or six, mix and match them, and focus on the quality of the movement. If you find your muscles shaking—that “good” kind of fatigue—you are exactly where you need to be. Consistent, small movements, done with intention against a stable surface, will build the kind of strength that lasts. Take your time, breathe through the discomfort, and remember that the wall is not just a prop; it is your training partner.
