



A loop band can make your glutes work harder than a pair of dumbbells if you use it with a little patience. That surprises people at first. The band never gets tired, which means your hips stay under tension from the first rep to the last one, and sloppy form shows up fast.
That is why banded glute workouts at home are worth taking seriously. You do not need a fancy setup. You need a decent mini band or long resistance band, a floor that does not slide, and the willingness to slow down enough to feel what your hips are actually doing.
Most home lower-body training goes wrong in a predictable way: the band goes on, the reps go up, and the glutes do almost none of the work. Knees cave, lower backs arch, feet roll outward, and the whole thing turns into movement without much muscle. Clean reps fix that. So does picking the right exercise for the job.
Tiny band. Big sting. That’s the charm.
1. Banded Glute Bridge Off the Floor
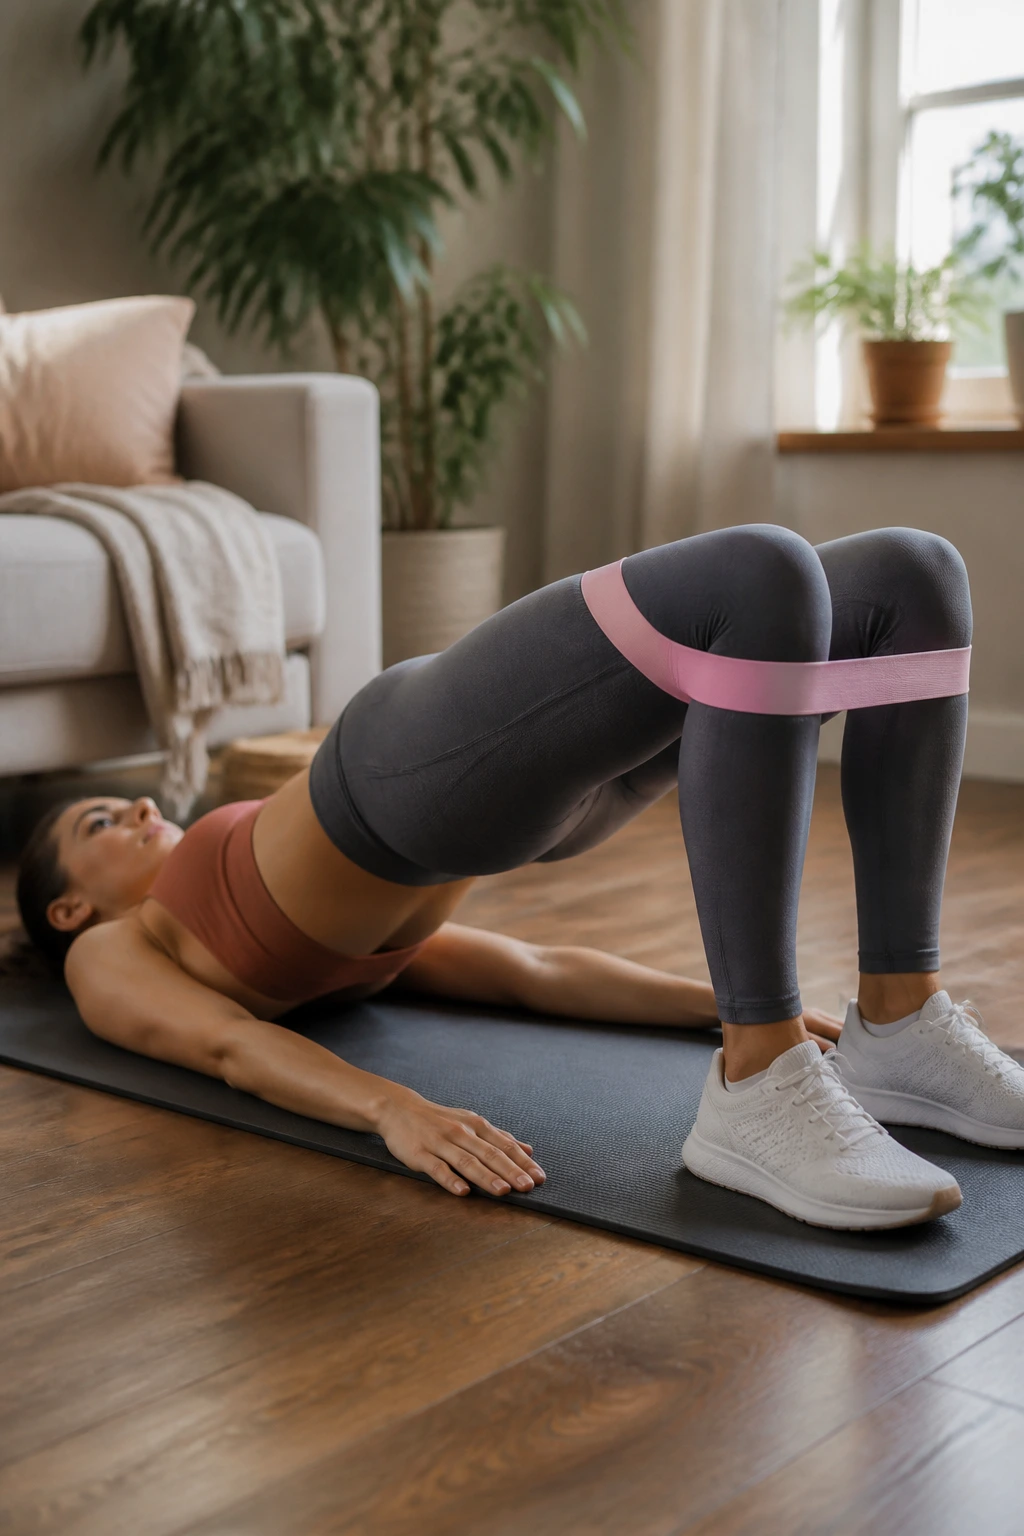
If you only keep one banded glute move, make it this one. The floor gives you a stable base, and the band above your knees forces your hips to stay awake while you bridge. It is simple enough for beginners, but the burn gets serious fast when you slow the lowering phase.
Why this one earns its spot
The glute bridge is the kind of exercise that looks easy until the third set. You lie down, feet flat, ribs tucked, and drive the hips up until your torso makes one long line from shoulders to knees. With the band pressing your knees outward, the outer hips have to help, not just the big glute muscle on the back of the pelvis.
A good version feels like work in the cheeks, not a crunch in the low back. If you feel your lower spine taking over, shorten the range a little and reset. That’s not a failure. That’s the cue doing its job.
Setup that keeps the band honest
- Place a mini band just above the knees.
- Plant your feet about hip-width apart, with heels close enough that your shins stay near vertical at the top.
- Brace your abs lightly so your ribs do not flare.
- Press through the heels and lift until the hips are level with the knees and shoulders.
Hold the top for 1 to 2 seconds, then lower for 3 seconds. Do 3 to 4 sets of 12 to 20 reps. If the band starts sliding, move it slightly lower on the thighs and slow down. That fixes a lot of mess right away.
Pro tip: push the knees out only as far as you can keep the feet flat. Bigger is not better here.
2. Sofa Hip Thrust with a Loop Band
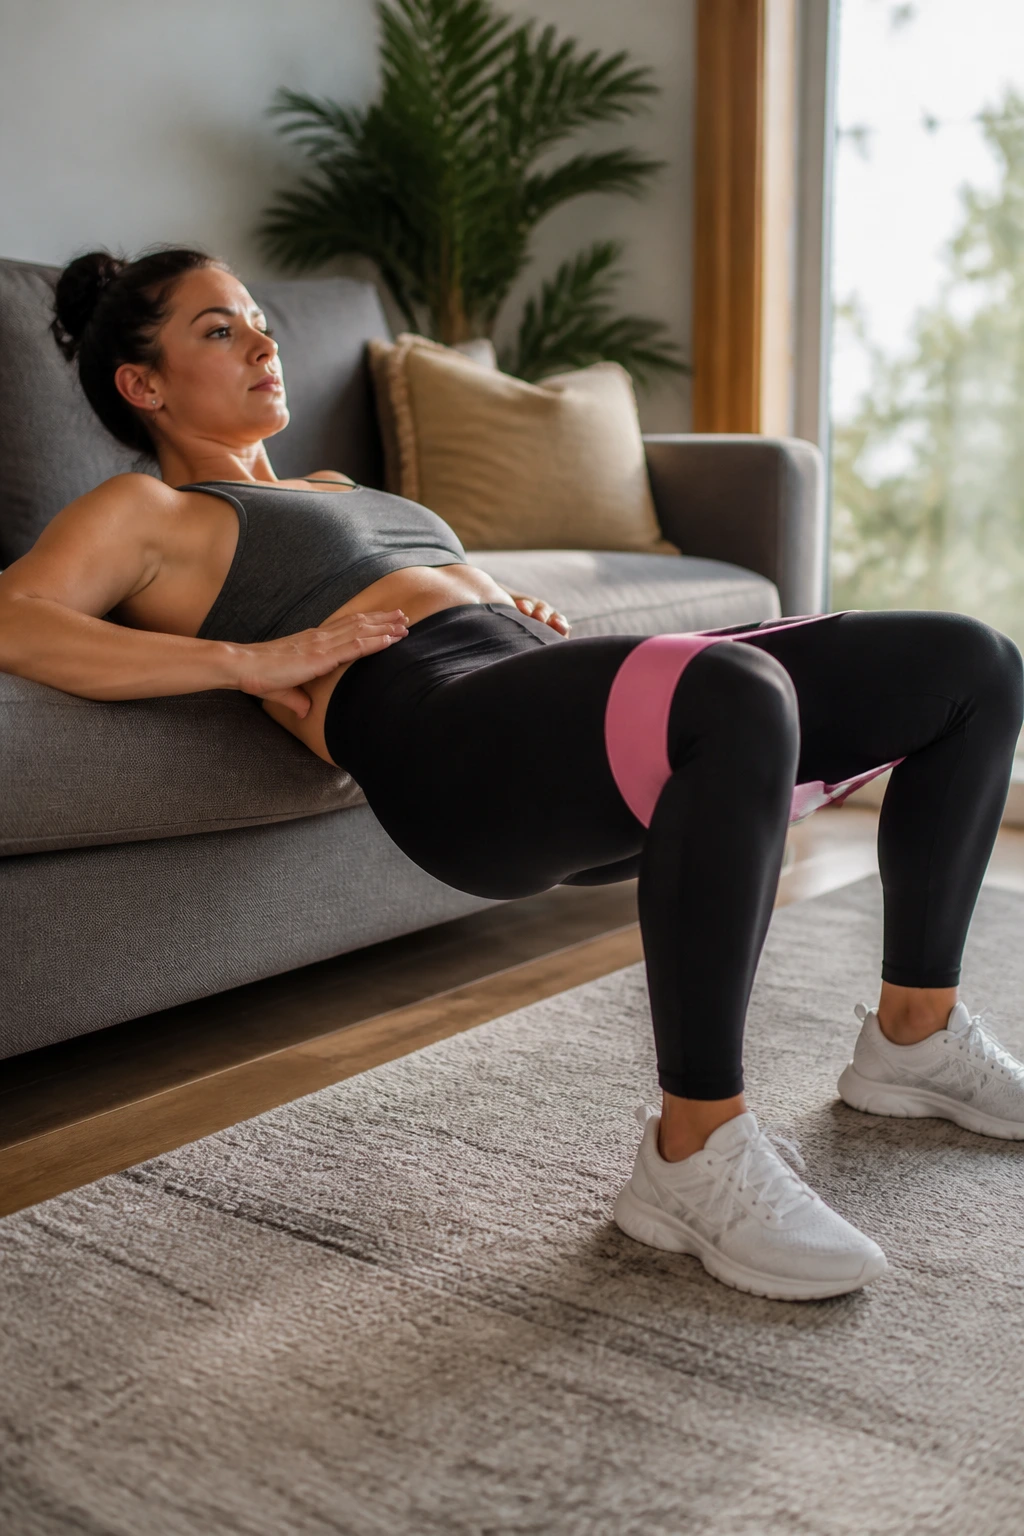
A hip thrust on a sofa looks improvised. That is exactly why it works. Home furniture gives you a higher range of motion than the floor, so the glutes have to finish each rep with more force. Add a loop band around the thighs and the exercise stops feeling polite.
The setup is simple. Put your shoulder blades on the edge of a sturdy couch or bench, feet flat, knees bent around 90 degrees at the top, and tuck the pelvis slightly before you drive up. That small pelvic tuck matters. Without it, the low back starts helping too much and the whole movement gets sloppy.
A good hip thrust should feel strong at the top and controlled on the way down. Pause for a full second at lockout, then lower under control for 2 to 3 seconds. 4 sets of 8 to 12 reps works well when the band has real tension and your feet stay planted.
Keep your chin tucked a little. It sounds fussy, but it helps. The moment you start looking around the room and arching through the ribs, the glutes lose some of the work and the lumbar spine steals it.
3. Frog Pumps That Light Up the Top of the Glutes
Why do frog pumps feel so intense when the movement barely travels an inch or two? Because the glutes never get a clean break. The hips stay tucked, the knees fall open, and the band keeps tension on the outer thighs the whole time. It is a small range with a nasty payoff.
This move is one of my favorite finishers after bridges or thrusts. It works well when you want a high-rep burn without loading the knees much. The soles of the feet touch, the knees drop out wide, and the heels stay close to the body. Then you pulse the hips up in short, quick reps.
How to use it
- Put a mini band above the knees.
- Lie on your back and bring the soles of your feet together.
- Keep the feet close enough that your knees stay wide and your hips can still move.
- Pump the hips up 1 to 2 inches at a time.
Start with 2 to 3 sets of 25 to 40 reps. The last 10 reps should feel ugly in the best possible way, with the glutes doing the work and the neck staying relaxed. If your lower back starts squeezing, lower the hips a little and keep the motion small.
A lot of people rush frog pumps. Don’t. The point is tension, not speed.
4. Standing Kickbacks with a Door-Anchor Band
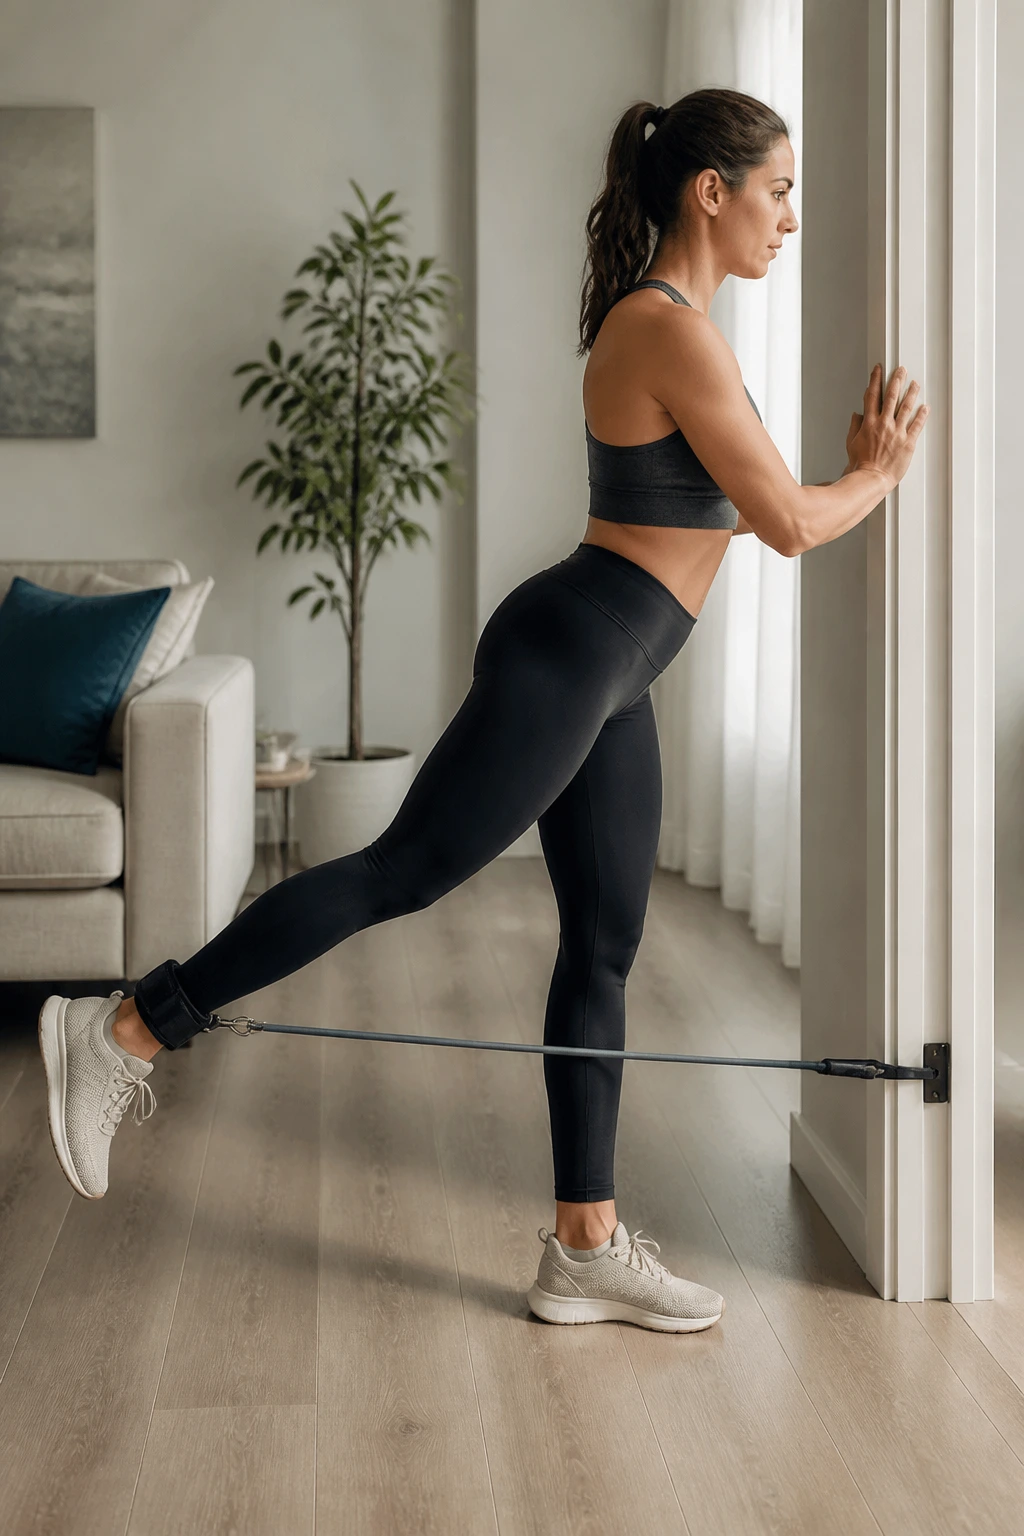
If your living room has a sturdy door anchor, this one feels closer to a cable machine than most home moves. That matters because standing kickbacks train hip extension while forcing your torso to stay quiet. No rolling onto one hip. No bouncing. Just a clean kick straight back.
Anchor the band low, loop it around one ankle, and stand tall with a soft bend in the supporting knee. The working leg moves behind you without the pelvis twisting open. Your torso should stay stacked over the standing foot. If you lean forward too much, the movement turns into a weird lower-back swing.
- Keep the standing foot rooted hard.
- Kick the working leg back until the glute tightens hard.
- Pause for 1 second at the end range.
- Use 12 to 15 reps per side for 2 to 4 sets.
A sturdy anchor is non-negotiable. If the door is flimsy or the band slips, skip the move and choose something safer. No home workout is worth a band snapping loose.
The best cue is simple: move the leg, not the spine. That one phrase fixes a lot.
5. Quadruped Donkey Kicks with Band Tension
On paper, donkey kicks look like a warm-up drill. In practice, they can be one of the best ways to teach the glutes to extend the hip without help from the lower back. The band adds enough resistance to make the top position matter, which is where a lot of people cheat.
Get on hands and knees, wrists under shoulders, knees under hips. Keep the band above the knees if you want more outer-hip work, or use a long band if you prefer more direct loading. Drive one heel toward the ceiling while keeping the knee bent. The goal is not height. The goal is a hard squeeze with a quiet torso.
A clean donkey kick feels like the working glute does the lifting while the ribcage stays still. If the spine arches, the leg has probably gone too high. Bring it down a few inches and try again. That is usually enough.
Do 2 to 4 sets of 12 to 15 reps per side, with a 2-second pause at the top if you want more burn. If the wrists get cranky, drop to your forearms and keep the same leg pattern. Still works. Less fuss.
6. Side-Lying Clamshells for the Outer Hip
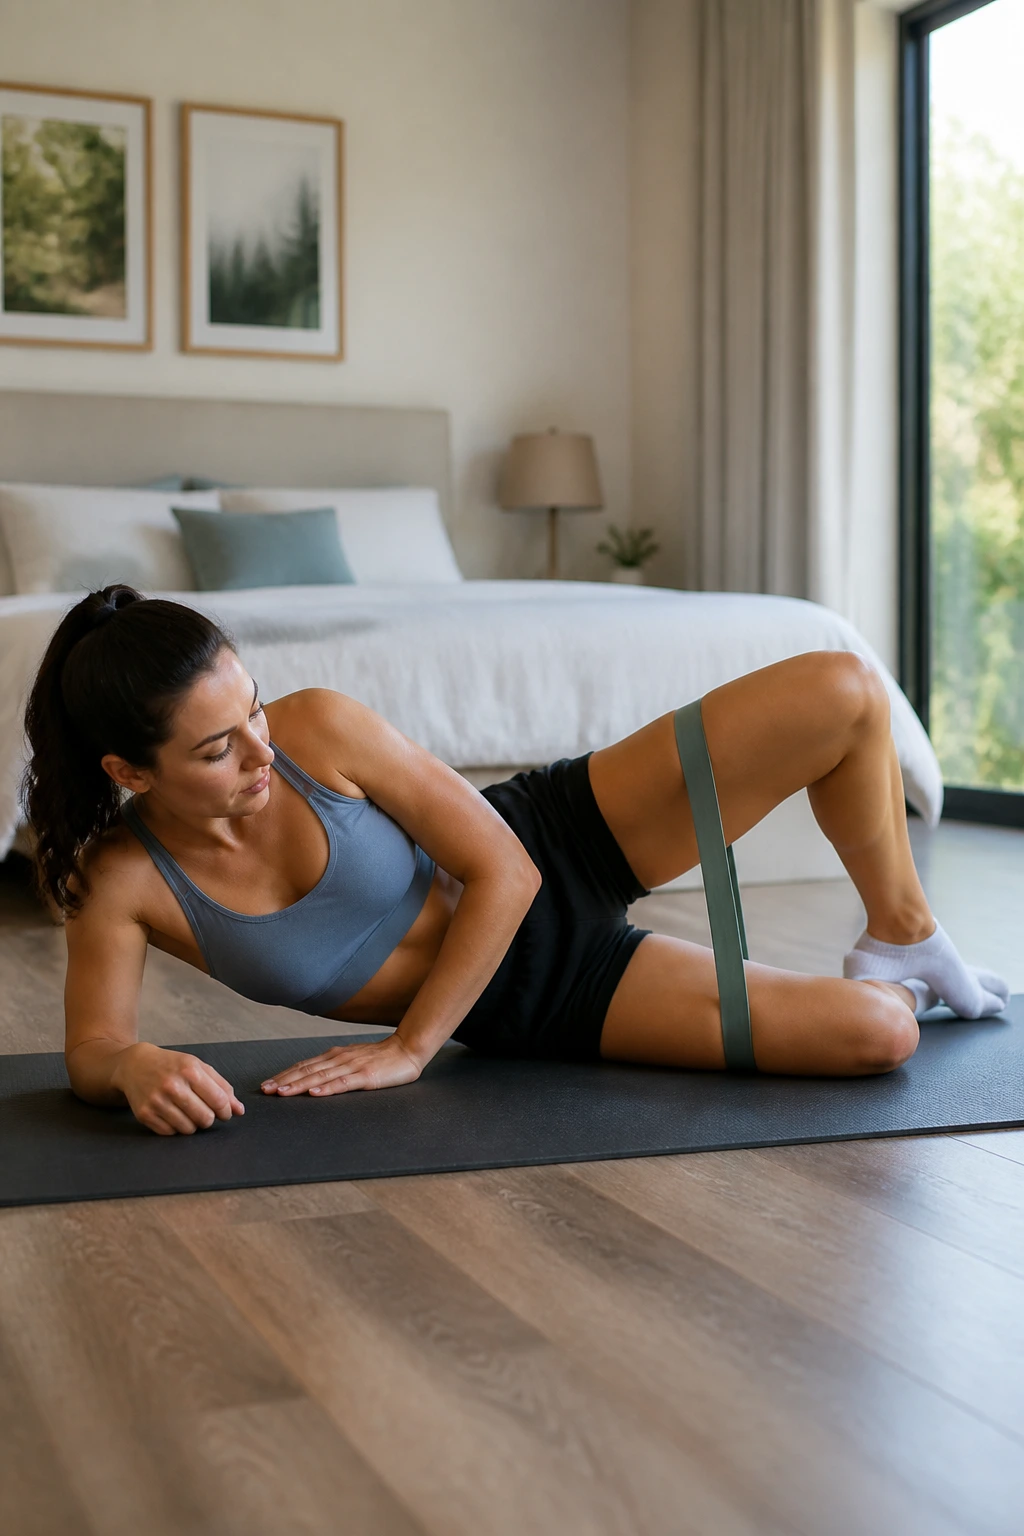
Unlike a bridge, the clamshell is not trying to blast the biggest glute muscle first. It’s about the outer hip, especially the glute med, which helps keep your pelvis level when you walk, squat, or climb stairs. Weak glute med muscles are one reason knees drift inward and hips feel wobbly.
Lie on your side with hips stacked and knees bent. Put the band just above the knees, keep the feet together, and open the top knee without rolling the pelvis backward. That last part is where people cheat. They twist open, the range looks bigger, and the useful work drops off.
This move is best when you want to feel the side of the hip burn without much spinal load. It is also one of the easiest band exercises to do when you are tired but still want quality reps. Use 15 to 25 reps per side, and stop when the last few reps get sloppy.
If your hip flexors steal the sensation, slide your heels a touch closer to your butt and slow the tempo. A 1-second pause at the top is plenty.
7. Banded Lateral Walks in a Half-Squat
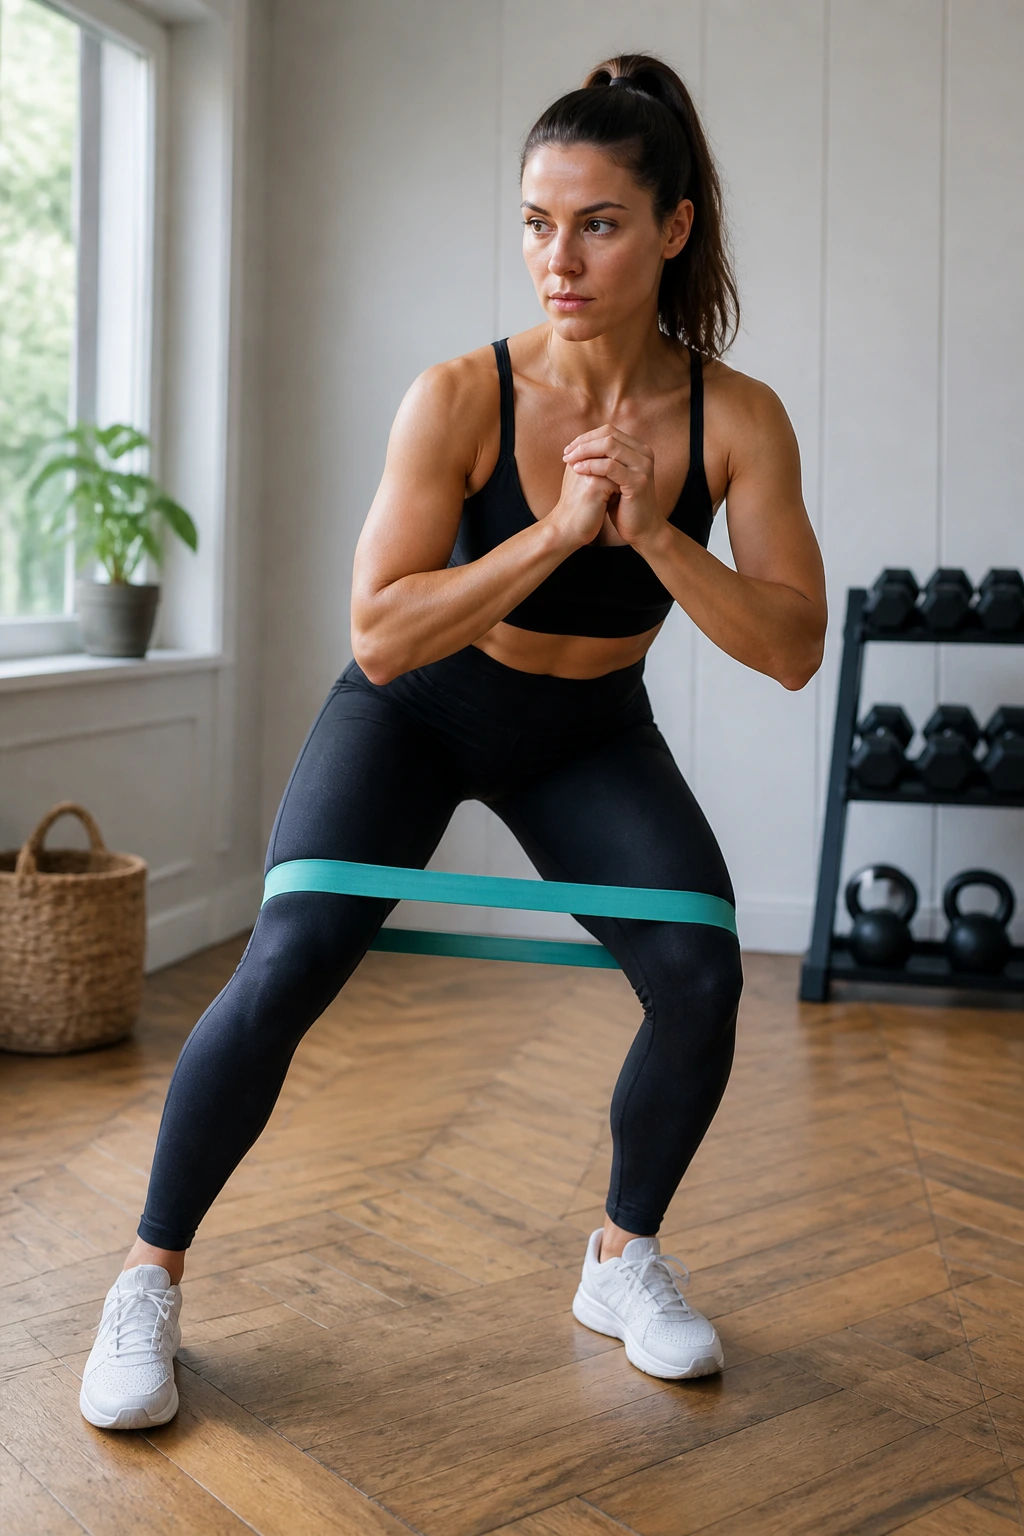
Small steps. Big burn.
That is the whole story with lateral walks, and people still manage to rush them. Put a band above the knees for a gentler version or around the ankles if you want the outer hips to work harder. Sink into a shallow squat, keep the chest tall, and step side to side without letting the knees snap inward.
Band placement that changes the feel
- Above the knees: easier on the hips, good for warm-ups.
- At the ankles: harder, because the leverage is longer.
- Low on the shins: nasty in a useful way if your form stays clean.
Take 8 to 12 controlled steps in one direction, then walk back. Your feet should stay parallel, not turned out like a duck parade. If your toes flare, the glutes lose some of the tension and the quads and calves start grabbing the work.
A clean lateral walk should make the side hips feel hot within the first round. If you feel it mainly in the outer thighs, widen the stance a touch and keep the pelvis level. The movement is small. That is not a flaw. It is the point.
8. Monster Walks for a Faster Glute Warm-Up
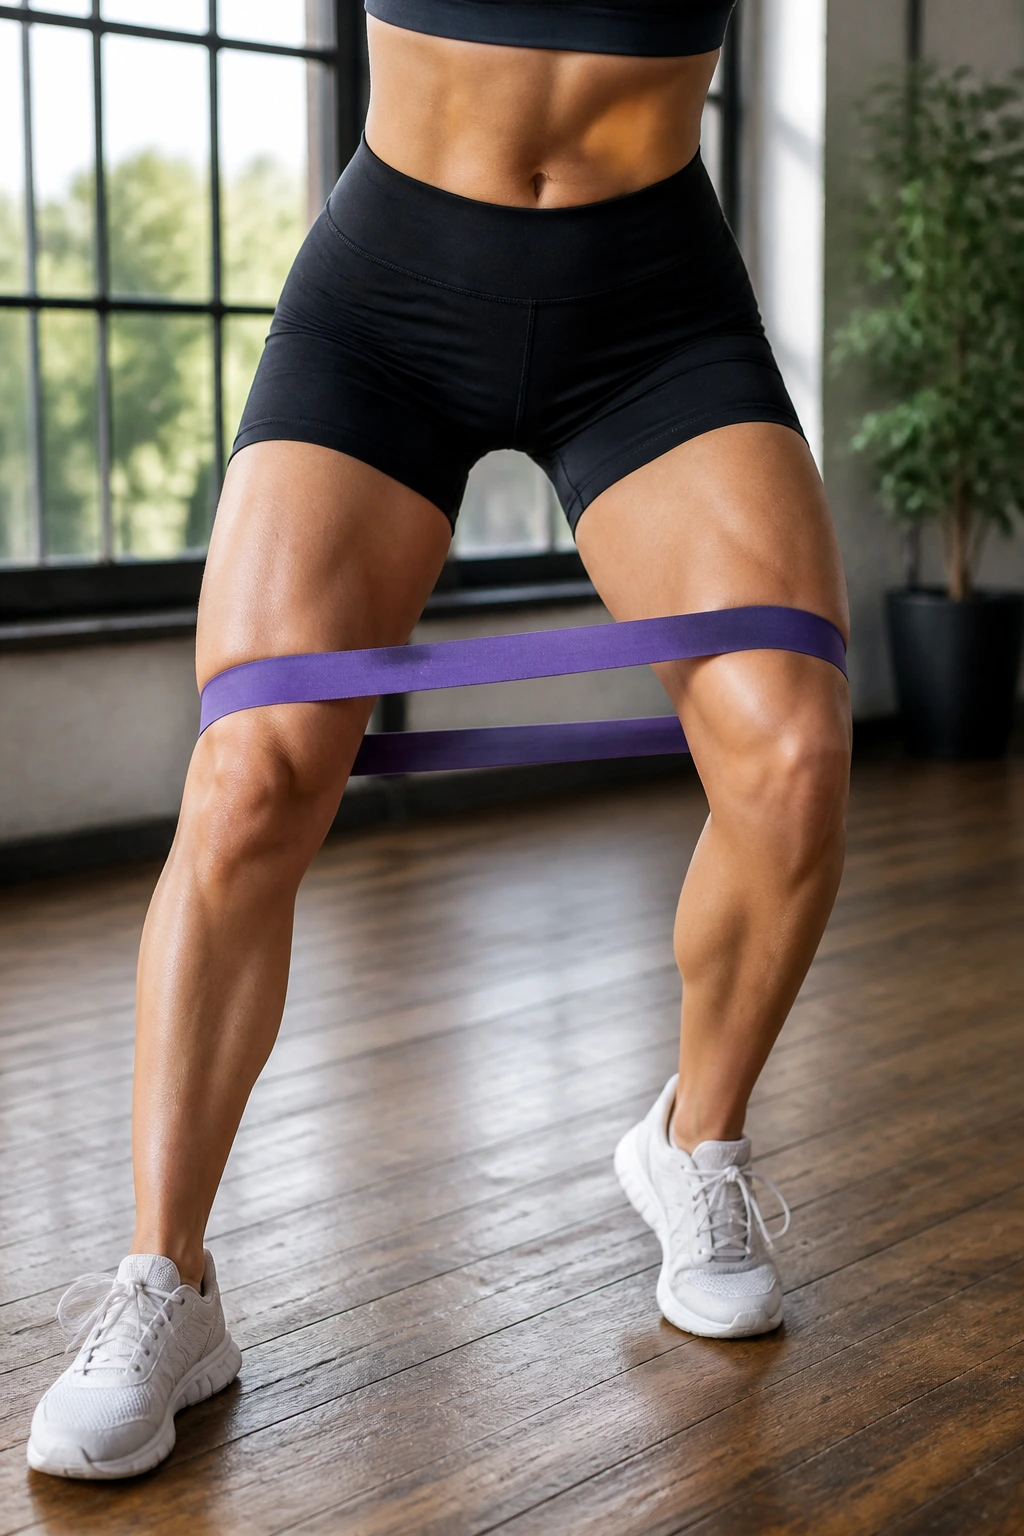
A monster walk looks a little ridiculous. That is fine. The side benefit is that the glutes never get a clean rest, because you are stepping forward and diagonally while keeping the band under tension. Straight-ahead walking gives you one line of force. The diagonal version asks more from the hips.
Use a mini band above the knees or at the ankles, bend the knees slightly, and step forward at a gentle angle. The trunk stays quiet. The knees stay soft. The band should never go slack, even for a second, or the exercise turns into a stroll.
This is one of the best ways to wake up the hips before squats, lunges, or deadlift work. 2 to 3 rounds of 10 steps forward and 10 steps back is enough for most people. If you go much longer, the form tends to get mushy and the upper body starts bouncing.
I like monster walks because they tell you quickly whether the outer hips are awake. If they are not, the knees drift. If they are, the whole lower body feels more stable by the end of the set.
9. Squat Pulses with a Mini Band Above the Knees
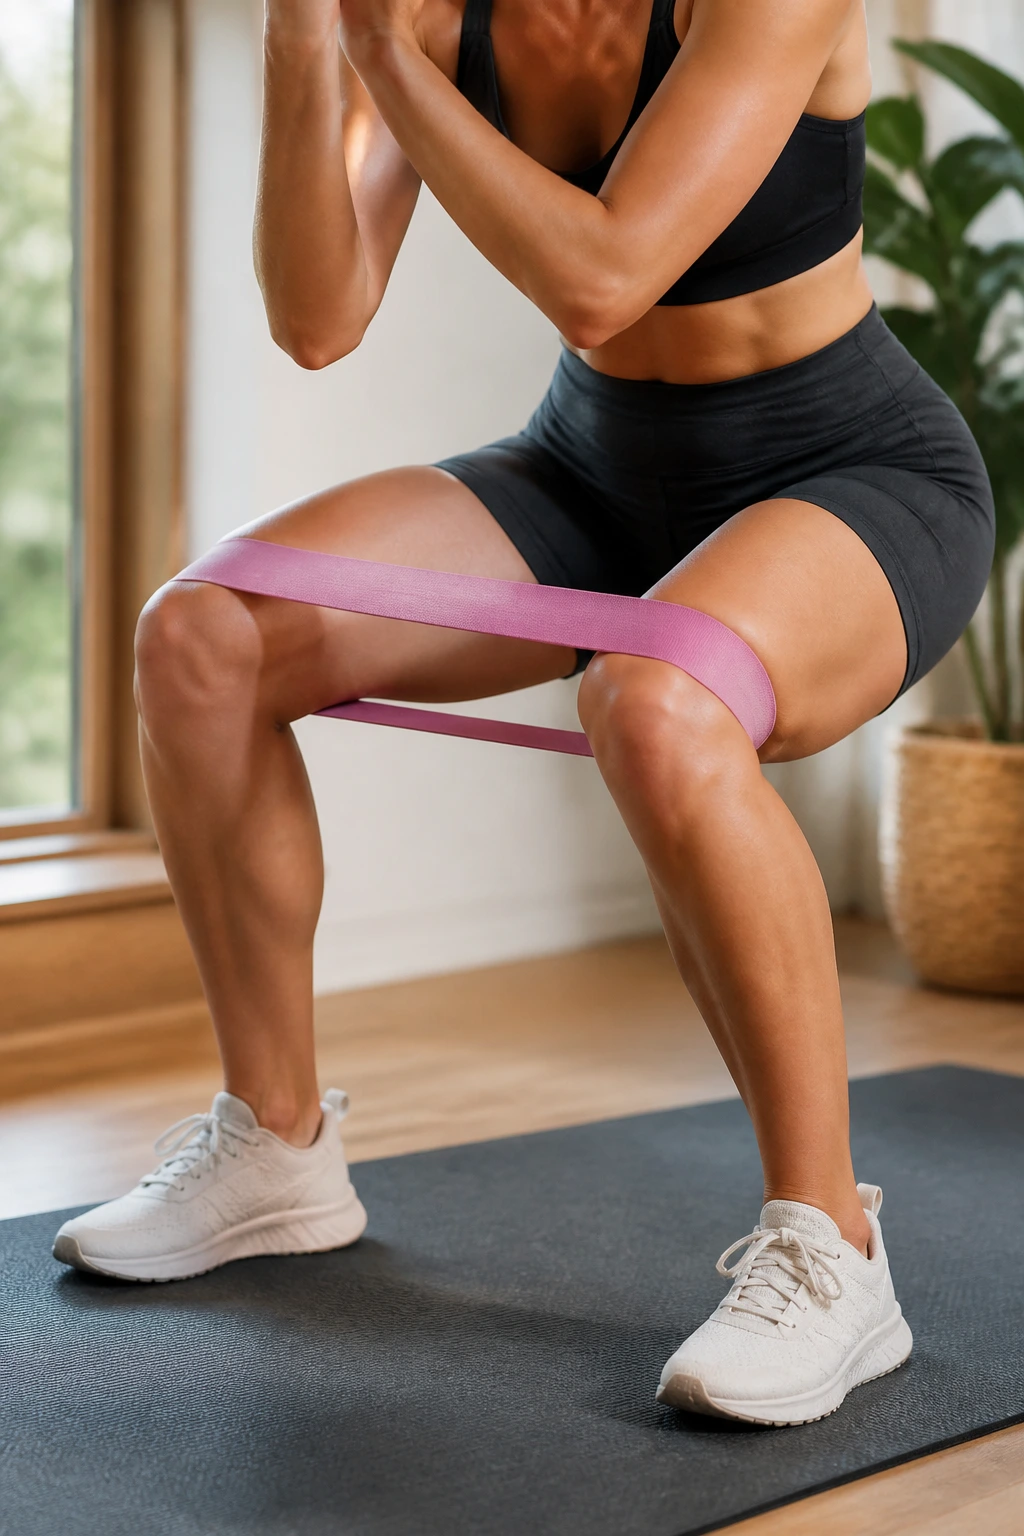
Why do pulses feel so nasty after a normal set of squats? Because the band keeps the tension on while the muscles have nowhere to hide. You are not resetting at the top. You are staying in the working zone and making the glutes hold their shape.
Drop into a half squat with a mini band above the knees, then pulse up and down just a few inches. Keep the chest proud, the heels down, and the knees gently pressing out against the band. The motion should stay smooth. If you bounce like a pogo stick, the quads take over and the hips miss the point.
How to use it without turning it into random cardio
- Pair pulses with 10 slow squats first.
- Then do 15 to 25 pulses at the bottom half of the range.
- Rest 30 to 45 seconds and repeat for 2 to 4 rounds.
The best cue is to think “sit back and stay there.” You do not need depth here. You need control. If the knees start caving, shrink the range and reset the stance. A little adjustment beats a lot of ugly reps.
10. Banded Romanian Deadlifts from the Floor
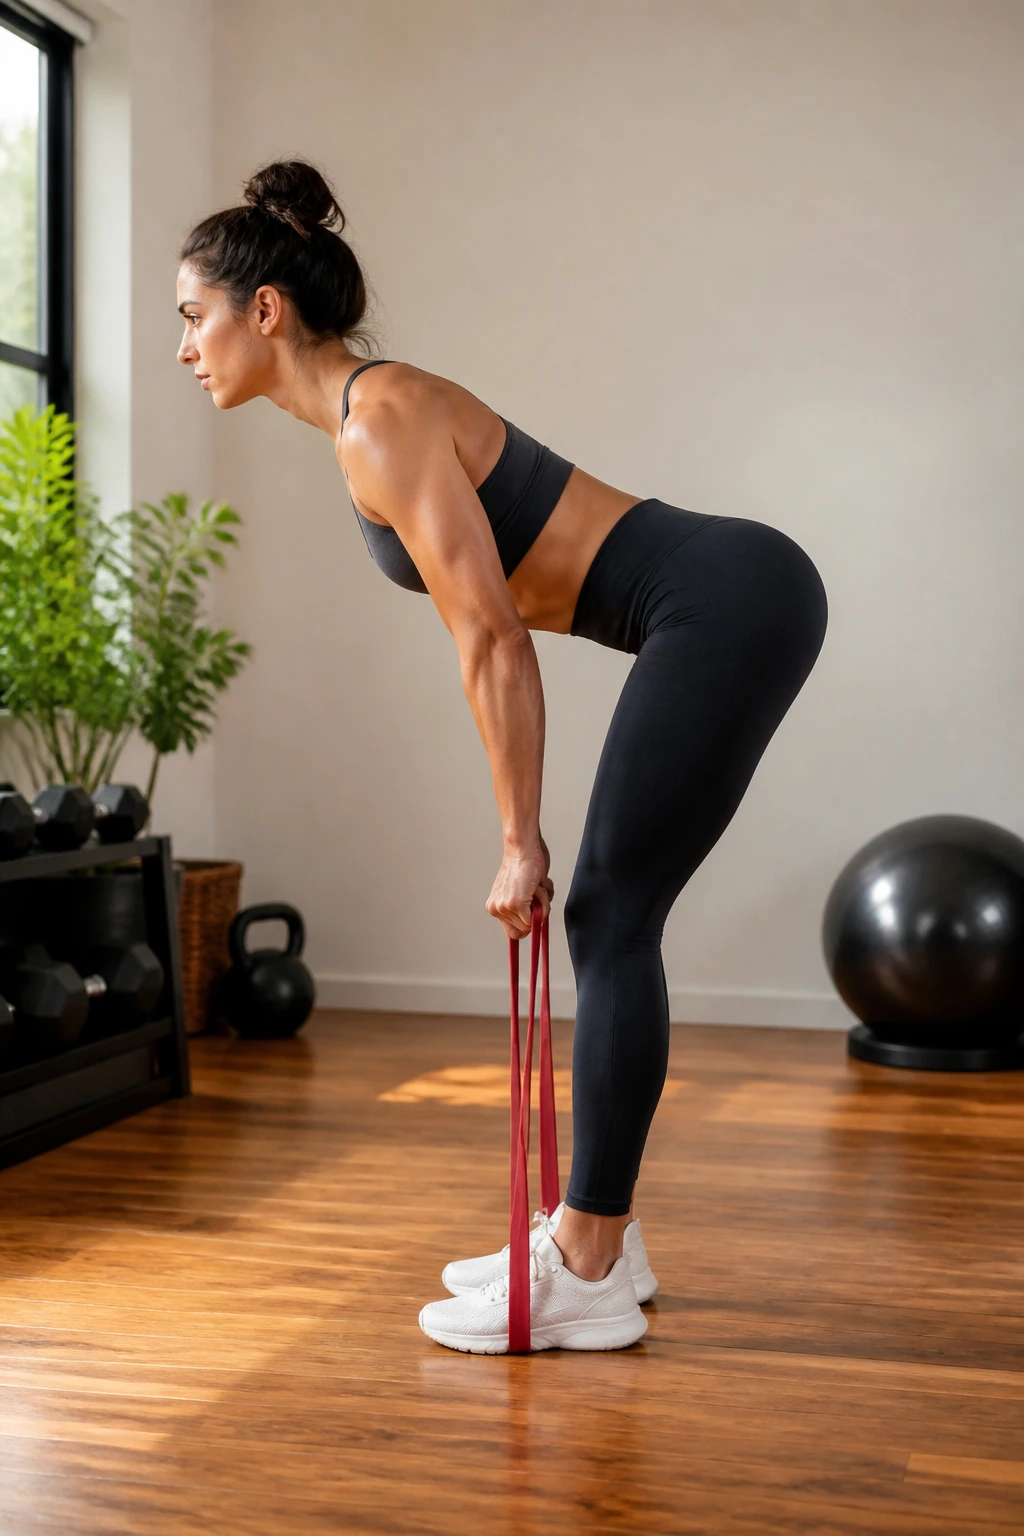
A pair of dumbbells helps, but a band under the feet and through the hands can still load the hinge well enough for a solid home session. The trick is to treat the movement like a hip fold, not a squat. The glutes and hamstrings should lengthen as the hips move back.
Stand on the band with feet about hip-width apart, hold the other end in both hands, and keep a soft bend in the knees. Send the hips back until you feel a clear stretch along the back of the legs, then stand by driving the hips forward. The spine stays long the whole time. If your back rounds, the range is too deep.
- Use a long resistance band with enough tension to challenge you at the top.
- Pause briefly in the stretch, then stand with control.
- Do 3 to 4 sets of 10 to 15 reps.
This is not a flashy move. It does not need to be. It is a clean hip hinge, and clean hip hinges make stronger glutes. If your hamstrings cramp, take a wider stance and shorten the descent a little.
11. B-Stance Glute Bridges for One-Side Strength
A B-stance bridge is my favorite halfway point between a two-leg bridge and a single-leg bridge. One heel does most of the work, while the other foot stays lightly on the floor as a kickstand. That little setup lets you load one side more without making balance the whole event.
Lie on your back with one foot flat and the other foot just touching the floor a few inches forward, toe down. Keep a mini band above the knees if you want extra outer-hip work. Drive through the planted heel, lift the hips, and keep the pelvis square. The kickstand leg is there for balance, not for cheating.
This is a good choice when one side feels weaker or when a full single-leg bridge cramps the hamstring too fast. 8 to 12 reps per side usually works well, and a 2-second squeeze at the top makes a big difference.
The nice part is how honest this movement feels. If one hip drops, you know it. If one side does less work, you know that too. No guessing.
12. Curtsy Lunges That Hit the Side Glutes
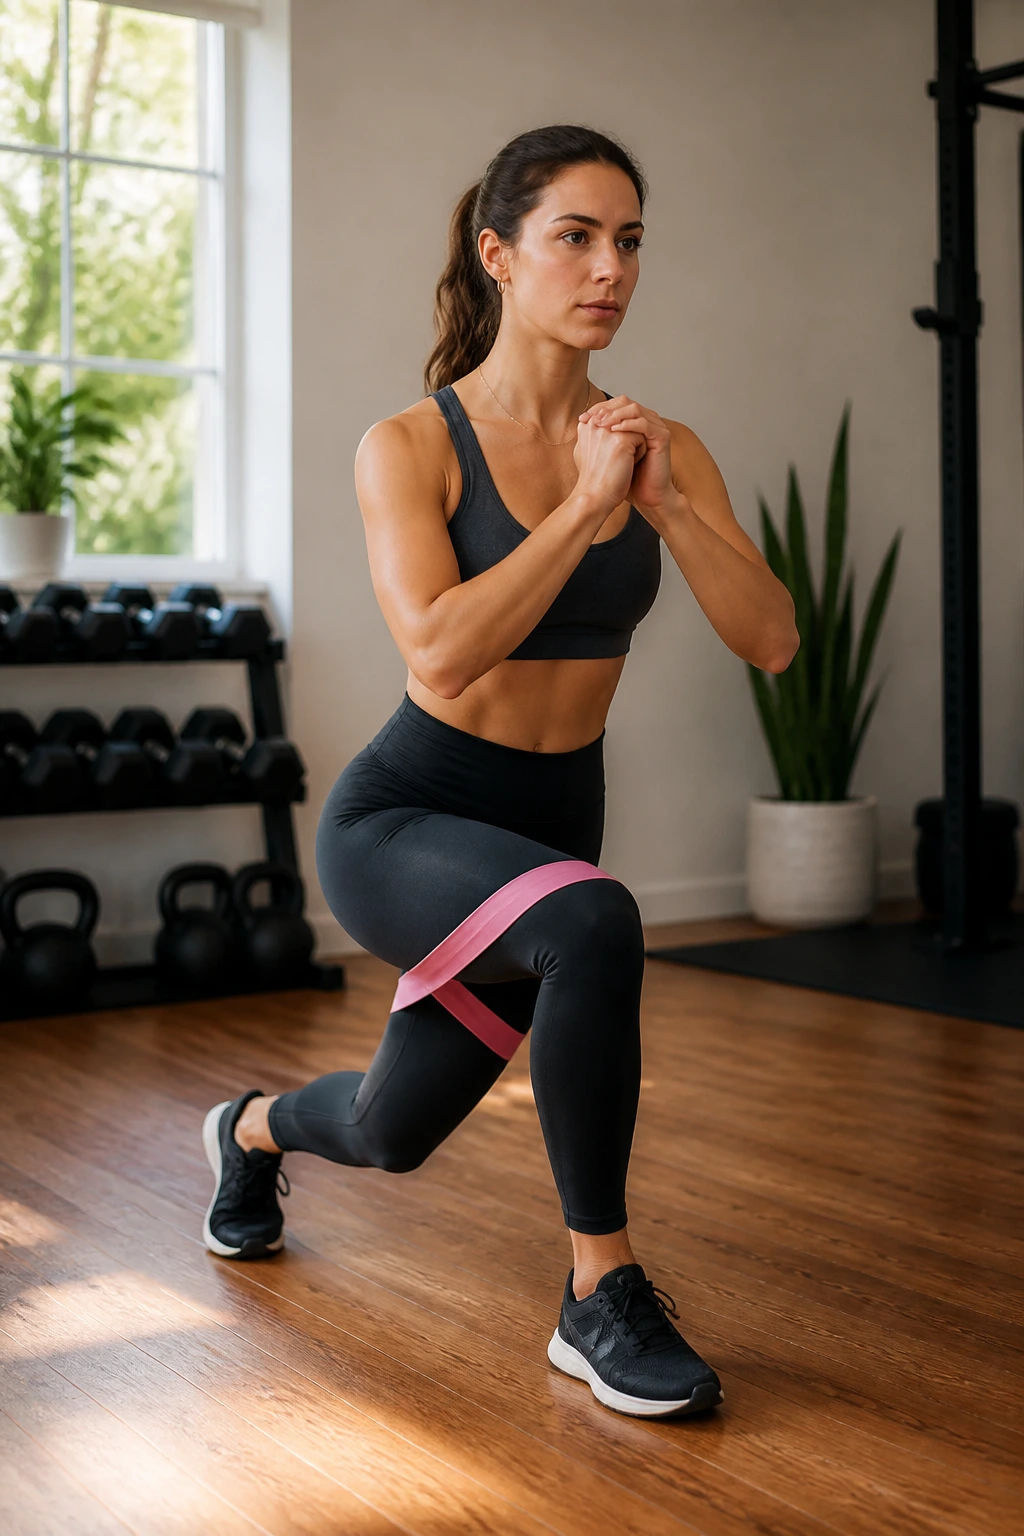
Curtsy lunges look odd the first time you do them. Cross one leg behind the other, lower into a shallow dip, then drive back up. The diagonal line of the movement asks the side glutes and inner thighs to help more than a straight lunge does.
This is not the move I would pick if the knees already complain on stairs. The cross-body angle can feel cranky if you dive too deep or let the front knee collapse inward. Keep the step back small at first. A shorter range is still useful, and it is a lot safer for most people.
Compared with a forward lunge, the curtsy variation shifts more demand to the glute med and the stabilizers around the hip. That makes it a smart choice when the outer hips need work. It also pairs well with a band above the knees if you want the legs to fight inward drift.
Use 2 to 3 sets of 8 to 12 reps per side. Stop a rep or two before the form gets messy. Curtsy lunges punish slop quickly.
13. Split Squats with Band Resistance
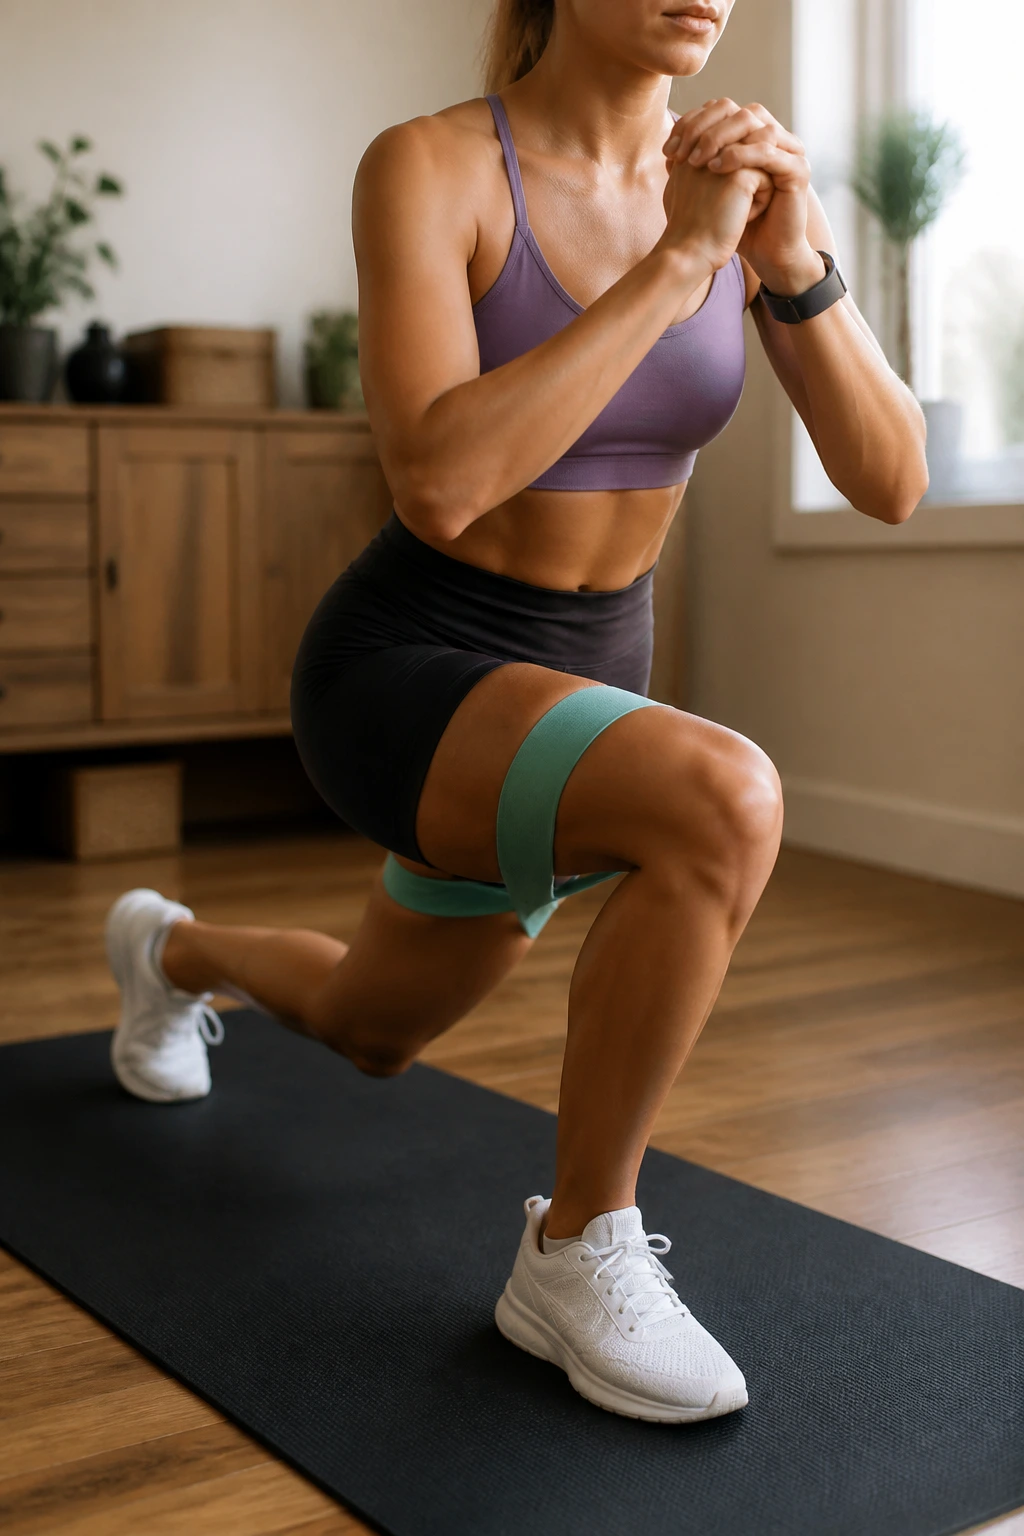
This is the move that exposes whether your rear leg is helping too much. A split squat looks simple, but once you add a band around the thighs or hold a long band under the front foot, the front glute has to do much more of the stabilizing.
Make it glute-biased
- Take a longer stance than you would for a quad-heavy lunge.
- Lean the torso slightly forward while keeping the spine long.
- Press the front heel down and keep the knee tracking over the second toe.
- Use a mini band above the knees if your knees drift inward.
A glute-biased split squat should feel like the front hip is doing the pushing. Lower under control until the back knee hovers close to the floor, then come up without bouncing. 8 to 10 reps per side is a good place to start, and 2 to 4 sets can be plenty.
What goes wrong
If your front heel lifts, the stance is usually too short or the weight is too forward. If your back leg burns more than the front glute, shift the torso slightly forward and shorten the rear step. That tweak usually changes everything.
14. Step-Ups on a Sturdy Chair or Bench
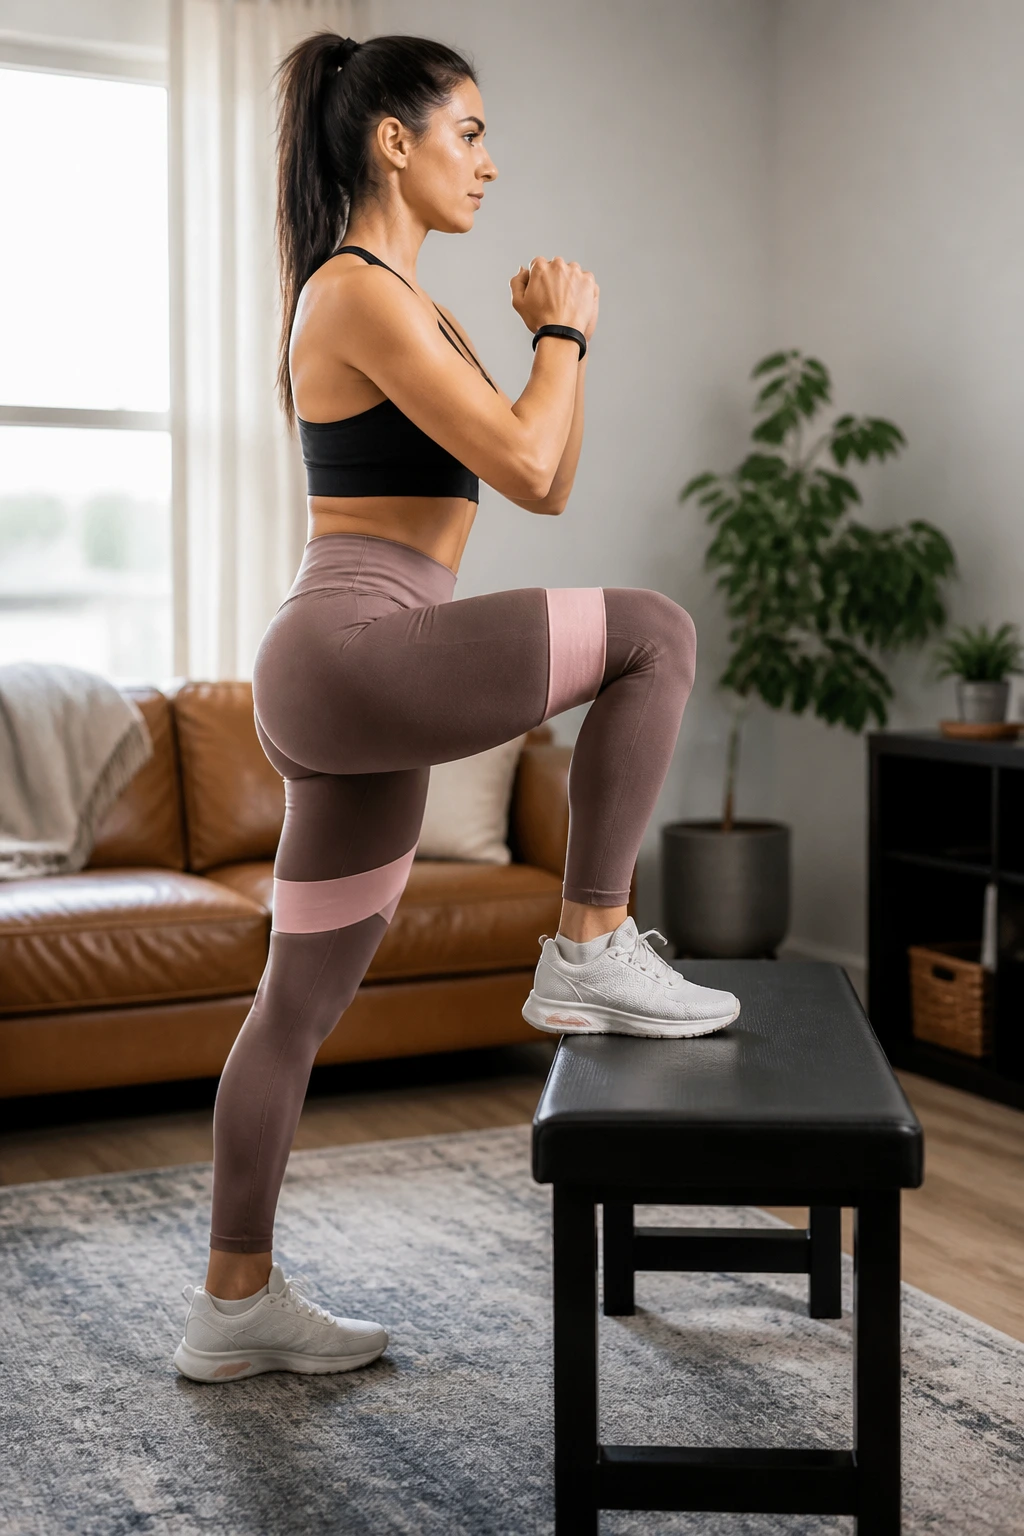
A low box beats a tall one more often than not. That surprises people because a high step looks more impressive, but a too-tall step turns the exercise into a hip flexor grind and a balance test. A lower step lets the glute drive the body up without making the movement sloppy.
Stand in front of a sturdy bench, stair, or chair that does not wobble. Place one whole foot on top, lean slightly forward, and drive through that working leg until you stand tall. The other foot should not be jumping off the floor to help. If it does, the step is probably too high or the working leg is not doing enough.
A mini band above the knees can keep the front knee from collapsing inward. It also makes the top position harder, which is useful if bodyweight step-ups feel too easy. Aim for 8 to 12 reps per side and keep the lowering phase slow.
The best reps feel clean and quiet. No slamming down. No pushing off the back foot. Just one leg doing the job like it means it.
15. Single-Leg Glute Bridges That Expose Weak Sides
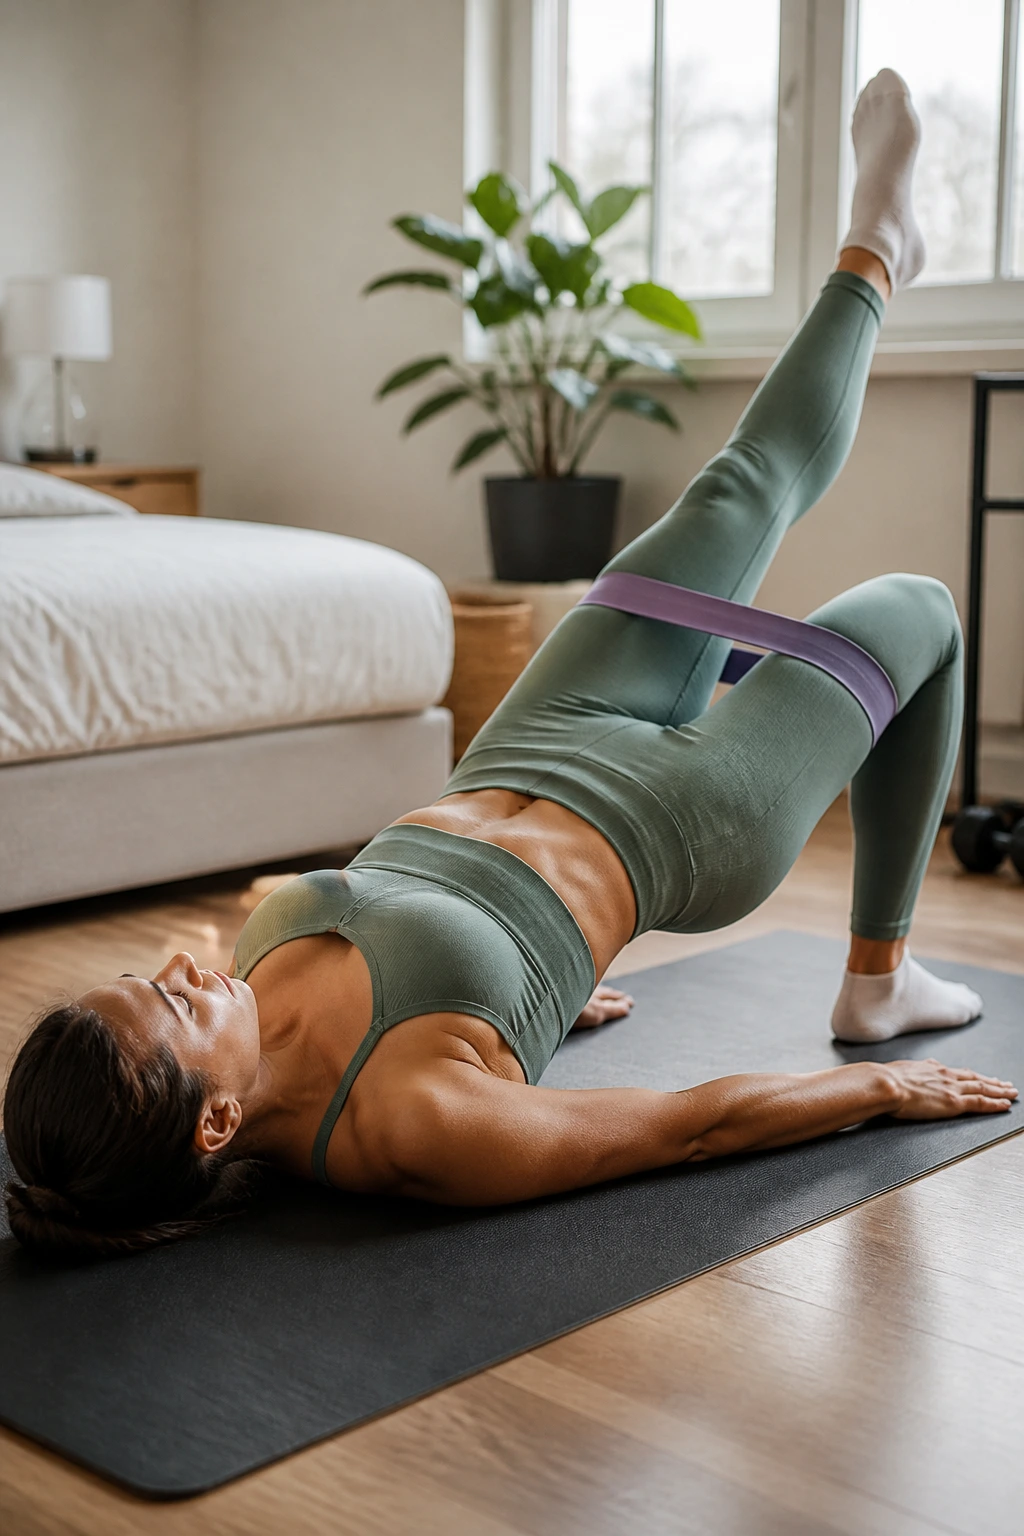
Why does one side shake and the other side sail through? Usually because the pelvis is not staying level. A single-leg bridge makes that obvious in a hurry, which is exactly why it belongs in a serious home glute session.
Set up like a normal bridge, then extend one leg so the knee stays bent or the leg reaches straight, depending on comfort. Lift the hips by driving through the planted heel. Keep the hips square to the ceiling and resist the urge to twist toward the working side. That twist is the cheat.
How to keep the pelvis level
- Keep both hip bones aimed straight up.
- Hold the top for 1 to 2 seconds.
- Stop if the hamstring cramps; reset and lower the hips a little.
- Use 8 to 15 reps per side, depending on how clean the movement stays.
A mini band above the knees adds a second job for the outer hips, though it also makes the exercise harder to control. If the band turns the movement messy, remove it and earn the clean rep first. There is no prize for doing a harder version badly.
16. Fire Hydrants with Slow, Controlled Reps
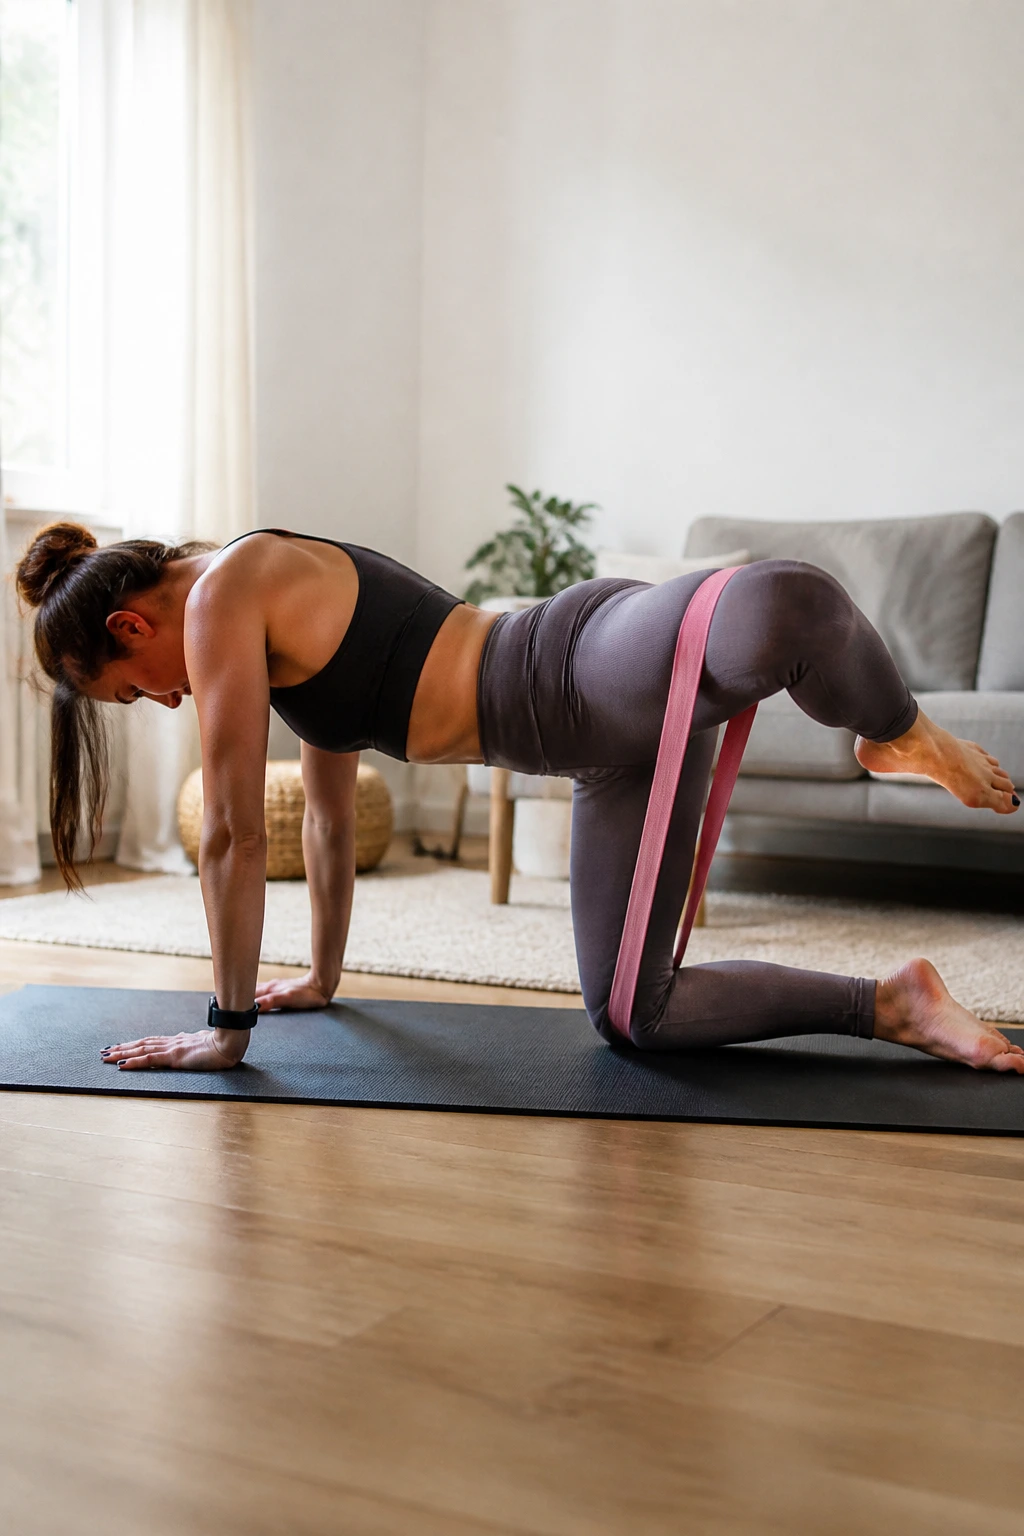
Fire hydrants get rushed because they look like fluff. That’s a mistake. Done slowly, they train hip abduction and external rotation while keeping the pelvis from rocking all over the floor. That’s a useful skill, not just a burn.
Get on hands and knees with a band above the knees. Lift one knee out to the side until the hip tightens, then lower it without touching the floor if you can help it. The torso should stay square. If the body leans away from the working leg, the rep stops being a hip drill and starts becoming a balance trick.
Use 12 to 20 reps per side with a 1-second pause at the top. That tiny pause matters more than people think. It gives the glute med time to actually contract instead of just flinging the leg around.
If you want to make the exercise harder without adding wild tempo, move the band lower toward the shins. That increases the leverage right away. Brutal, but useful.
17. Diagonal Kickbacks to the Back-Outer Pocket
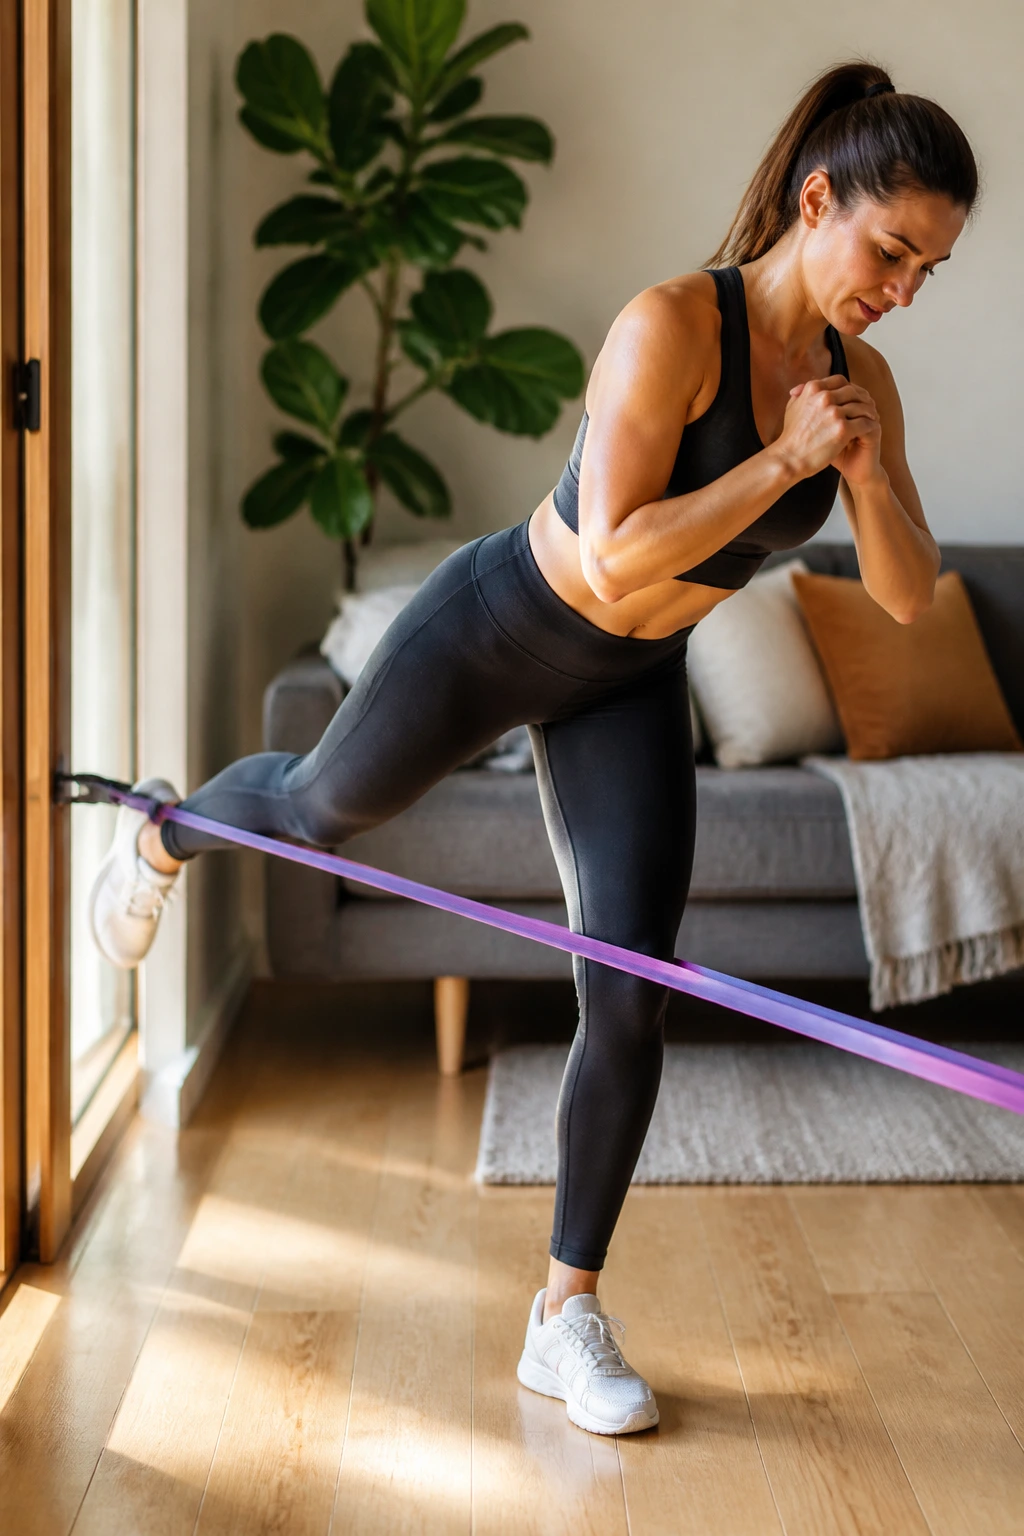
Straight-back kickbacks are fine. Diagonal kickbacks are sneakier. When the leg travels back and a little out to the side, the glute max and glute med have to cooperate, which is helpful if you want the back of the hip to feel fuller and more stable.
This can be done standing with a band anchor or on all fours with a band loop. The important part is the line of travel: send the heel toward the back pocket, then a few inches out. Not high. Not fast. The movement should stay smooth and almost controlled to the point of being boring.
A small bend in the knee keeps the hamstring from taking over. A pause at the top makes the squeeze obvious. 10 to 15 reps per side is enough when the range is clean and the band has enough tension to make the last few reps real work.
A lot of people need this move more than they realize. It fills the gap between pure bridges and pure lateral work, which is why the hips feel more balanced when they get it.
18. Banded Good Mornings for Hip-Hinge Control
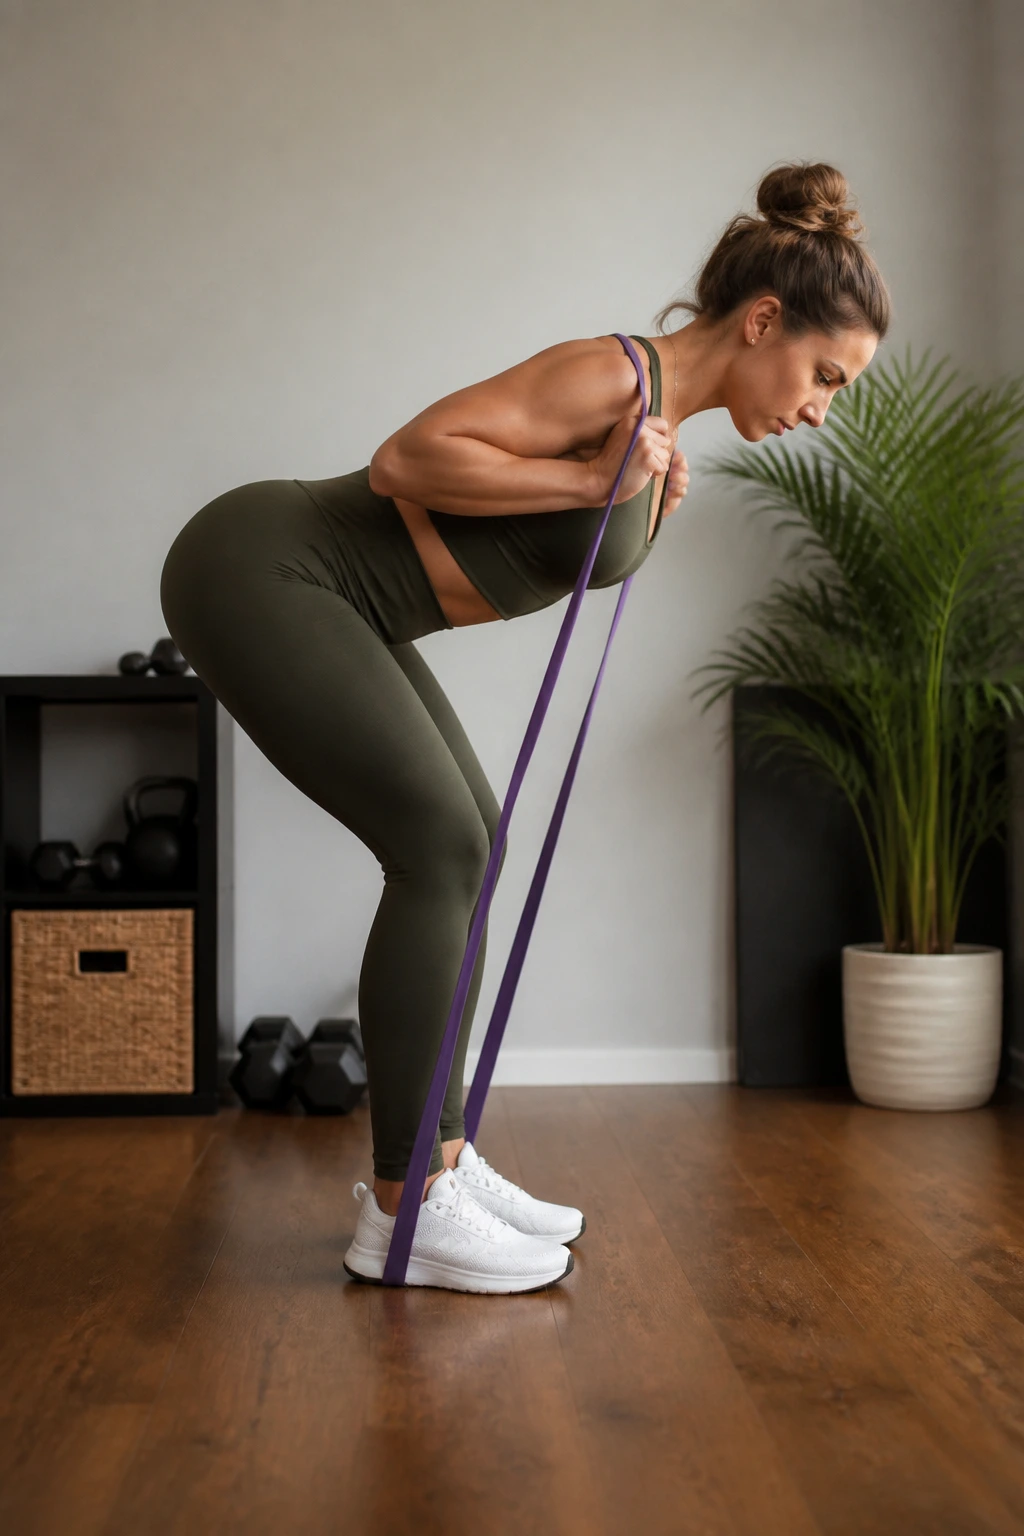
A banded good morning is not the same as a Romanian deadlift, even though people mix them up all the time. In a good morning, the band usually sits under the feet and behind the shoulders or upper back, and the hands help steady it while the hips hinge back. The load feels a little different. More upper-back tension. More reminder to keep the torso honest.
Compared with an RDL, the good morning can feel friendlier if you like a light load and a clear hinge cue. It is especially useful when you want to teach the body to fold at the hips without bending the knees too much. The glutes and hamstrings still do the work, but the posture feedback is what makes the move stand out.
Keep the knees soft, the spine long, and the chest open without flaring the ribs. Hinge back until the hamstrings stretch, then return to standing by squeezing the glutes. 12 to 20 reps with a moderate band works well. If the band digs into the neck, stop and reset the setup. That never needs to happen.
This is one of those exercises that looks plain and feels plain until the posterior chain starts shaking.
19. Glute Bridge Abduction Holds for Pure Burn
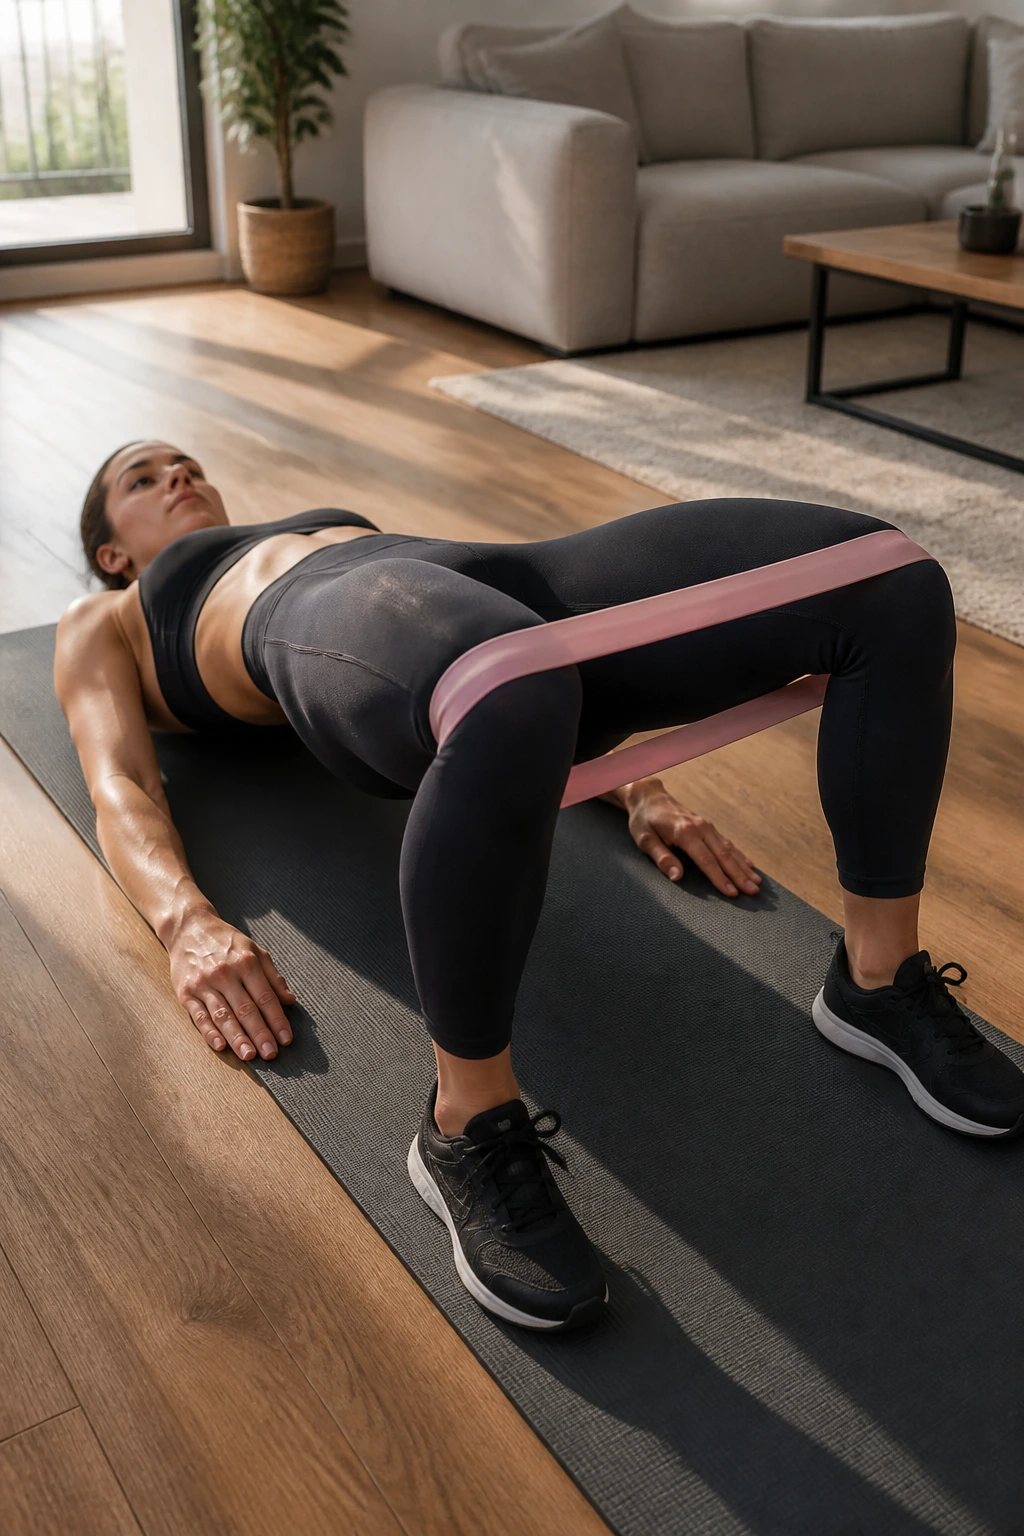
Pause work is boring for about ten seconds, then it gets honest. That is the magic of a glute bridge abduction hold: you lift into a bridge, press the knees out against the band, and stay there long enough for the hips to complain.
Set up exactly like a normal bridge, then hold the top position and keep gentle outward pressure on the band. Do not crank the knees so wide that the feet roll outward. Keep the heels rooted and the ribs down. The point is to hold a stable shape, not to twist yourself into a bigger-looking rep.
Why this one bites
- The glutes stay under tension the whole time.
- The outer hips do not get a break.
- The core has to stop the ribs from flaring.
- The low back gets exposed fast if the brace disappears.
Try 3 holds of 20 to 30 seconds or 2 rounds of 10 slow reps with a 5-second hold on each rep. Either version works. If the neck or lower back starts talking louder than the glutes, lower the hips and rebuild the brace.
This is a small move with a rude finish.
20. Six-Minute Banded Glute Finisher Circuit
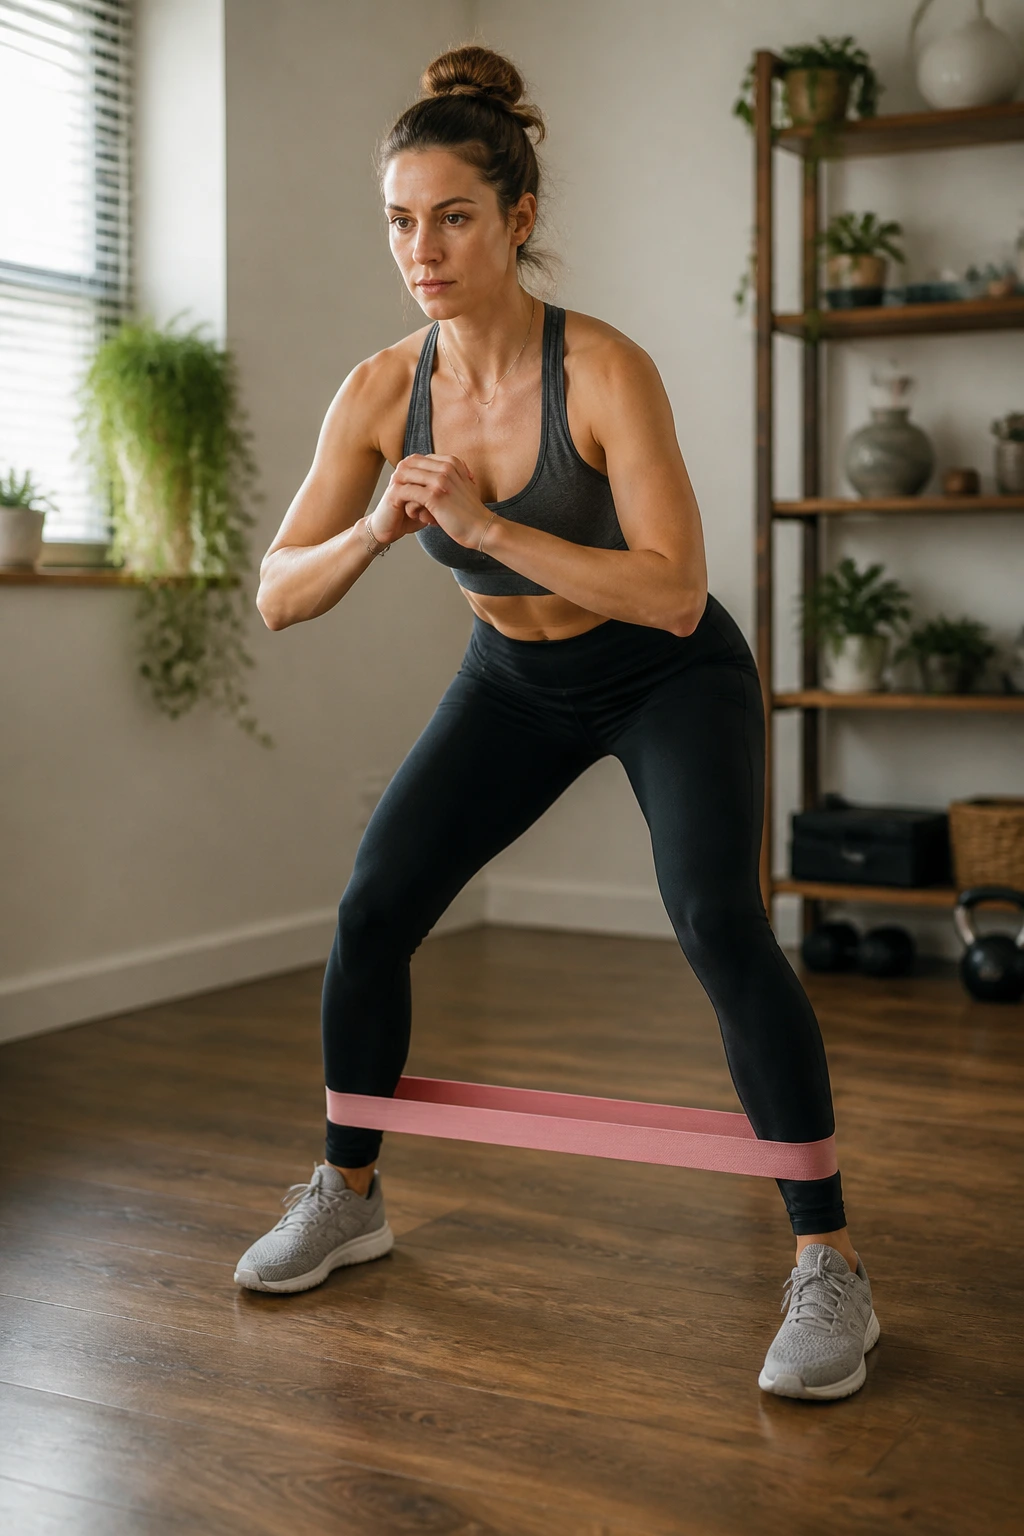
When the main session feels too tidy, a short band circuit leaves a better impression. This is the piece I’d use when I want the glutes to stay on after the heavier work or when I only have a few minutes and still want the lower body to earn its keep.
Pick three moves from the list above and run them back-to-back for 2 rounds. A clean setup might look like this: 20 frog pumps, 10 lateral walks each way, 15 bridge pulses, then rest 45 seconds and repeat. Or swap in fire hydrants, kickbacks, or squat pulses if one pattern needs more attention than another.
The rule is simple: use combinations that hit different lines of motion. One bridge pattern. One side-to-side pattern. One hinge or kickback pattern. That keeps the hips from getting bored and gives you a better all-around glute hit than hammering the same motion for six straight minutes.
Stop the circuit the moment form starts slipping. Seriously. A clean finisher is worth more than a sloppy one that leaves your low back irritated for the rest of the day. The goal is a hard, honest lower-body burn — not chaos for its own sake.
