



The fastest way to make yoga feel less mysterious is to stop trying to do everything at once. A new practitioner usually needs a few dependable yoga techniques, not a long parade of dramatic shapes, and the best ones are often the ones that look plain from the outside.
If you’ve ever rolled out a mat, glanced at a class flow, and thought, my body does not know these directions, that reaction is normal. Tight hips, stiff shoulders, a short breath, wobbly balance — all of it shows up fast when you’re new, and none of it means you’re bad at yoga.
Start with the floor, the wall, and the breath. Those three things make the practice feel less slippery, and they keep you from turning every pose into a contest you never agreed to enter. Some days you’ll want more strength, some days more release. Fine. Both belong here.
Mountain Pose is where that starts: not with a fancy bend or a deep stretch, but with learning how to stand like your body belongs to you.
1. Mountain Pose for Building a Solid Standing Base
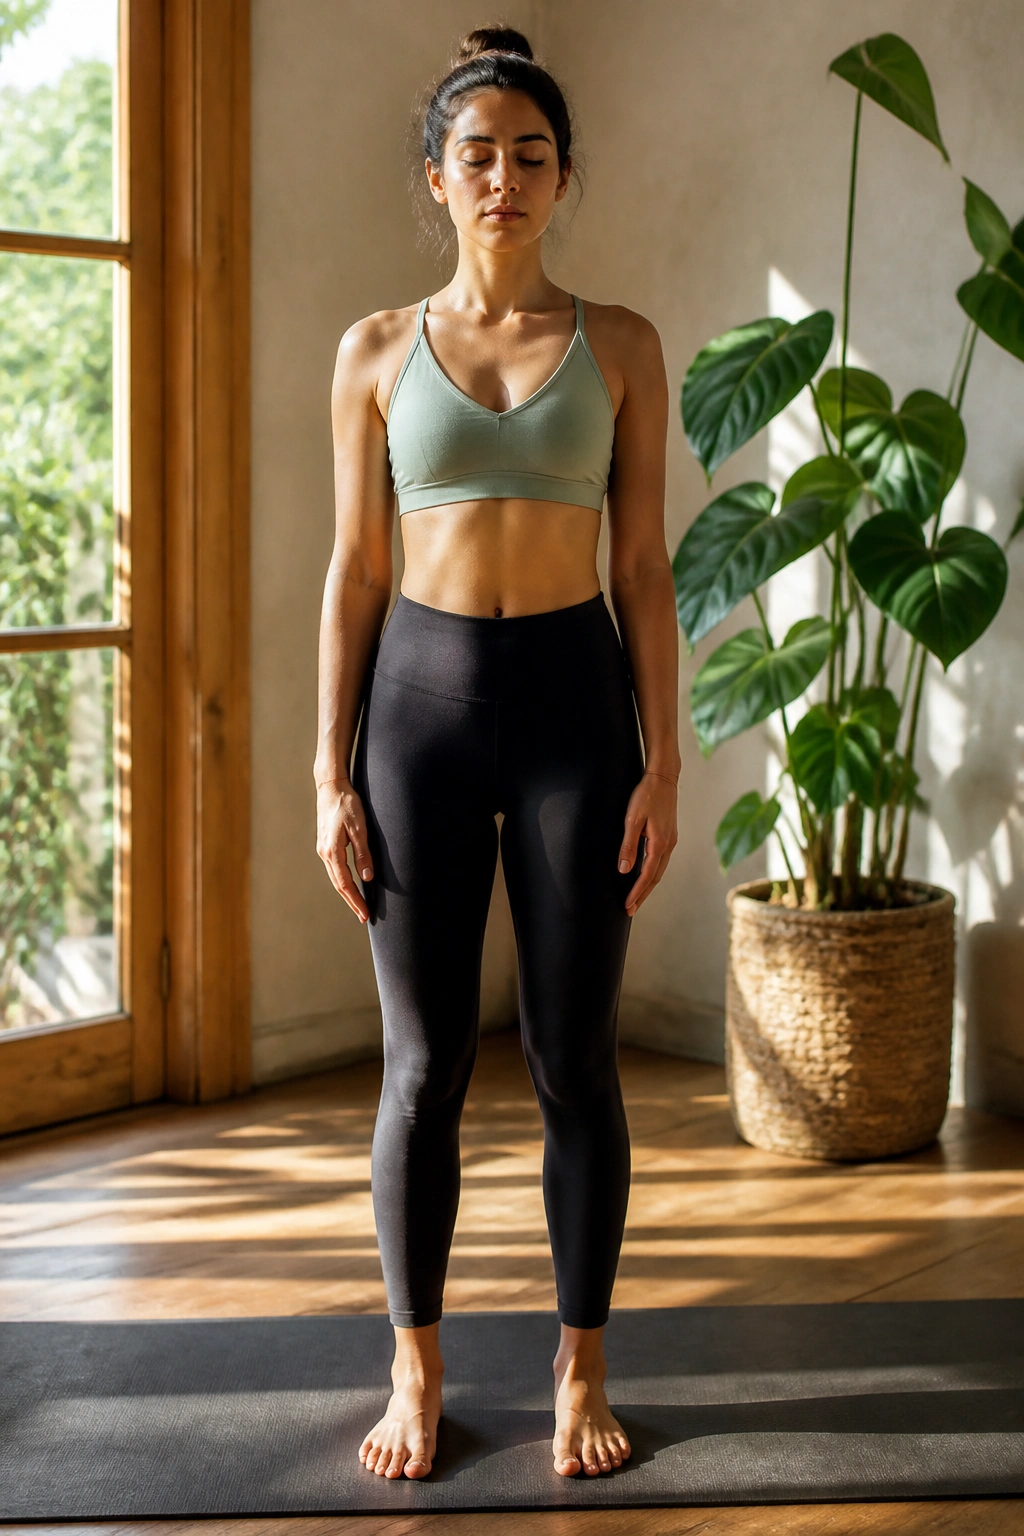
Mountain Pose looks plain. That is the point.
A lot of beginners skip straight past it because nothing seems to be happening. I’d argue the opposite: everything starts happening here. Your feet learn how to spread, your knees stop locking, your ribs settle, and your shoulders quit riding up toward your ears.
What to Feel in the Pose
Stand with your feet about hip-width apart or together if that feels steady. Press down through the base of each toe, the outer edge of the foot, and the heel. Then lift the chest a little without flaring the ribs or throwing the pelvis forward.
- Weight even across both feet
- Knees soft, not jammed back
- Arms relaxed by your sides
- Chin level, jaw unclenched
Tip: stand near a wall the first few times. Touching it lightly with one shoulder or heel can show you where you’re leaning before you even notice it yourself.
Mountain Pose teaches a beginner how to stop collapsing into one hip or hanging in the lower back. That habit sneaks into almost every other pose. Fix the standing base, and the rest of the practice gets cleaner.
2. Diaphragmatic Breathing for Settling the Nervous System

Why start with breath before the shapes? Because shallow breathing makes even easy poses feel rushed.
Diaphragmatic breathing is the first yoga technique I’d hand to anyone new on the mat. One hand on the belly, one on the chest. Inhale through the nose for about four counts and let the lower hand rise more than the upper one. Exhale for the same count and feel the belly drop back in.
How to Try It
Sit or lie down. Keep the shoulders still. The movement should come from the lower ribs and belly, not from lifting the chest like you’re trying to impress someone.
- Inhale for 4 counts
- Exhale for 4 counts
- Repeat for 5 to 10 rounds
- Keep the jaw soft and the face relaxed
If counting feels awkward, use the length of the breath instead. A smooth inhale and an unforced exhale matter more than hitting a perfect rhythm. And no, you do not need a huge breath. Big breath, in this case, often turns into tension.
I like this as a first drill because it gives beginners a point of contact with the practice that isn’t performance. Breath is where yoga starts to feel like yoga.
3. Cat-Cow for Waking Up a Stiff Spine
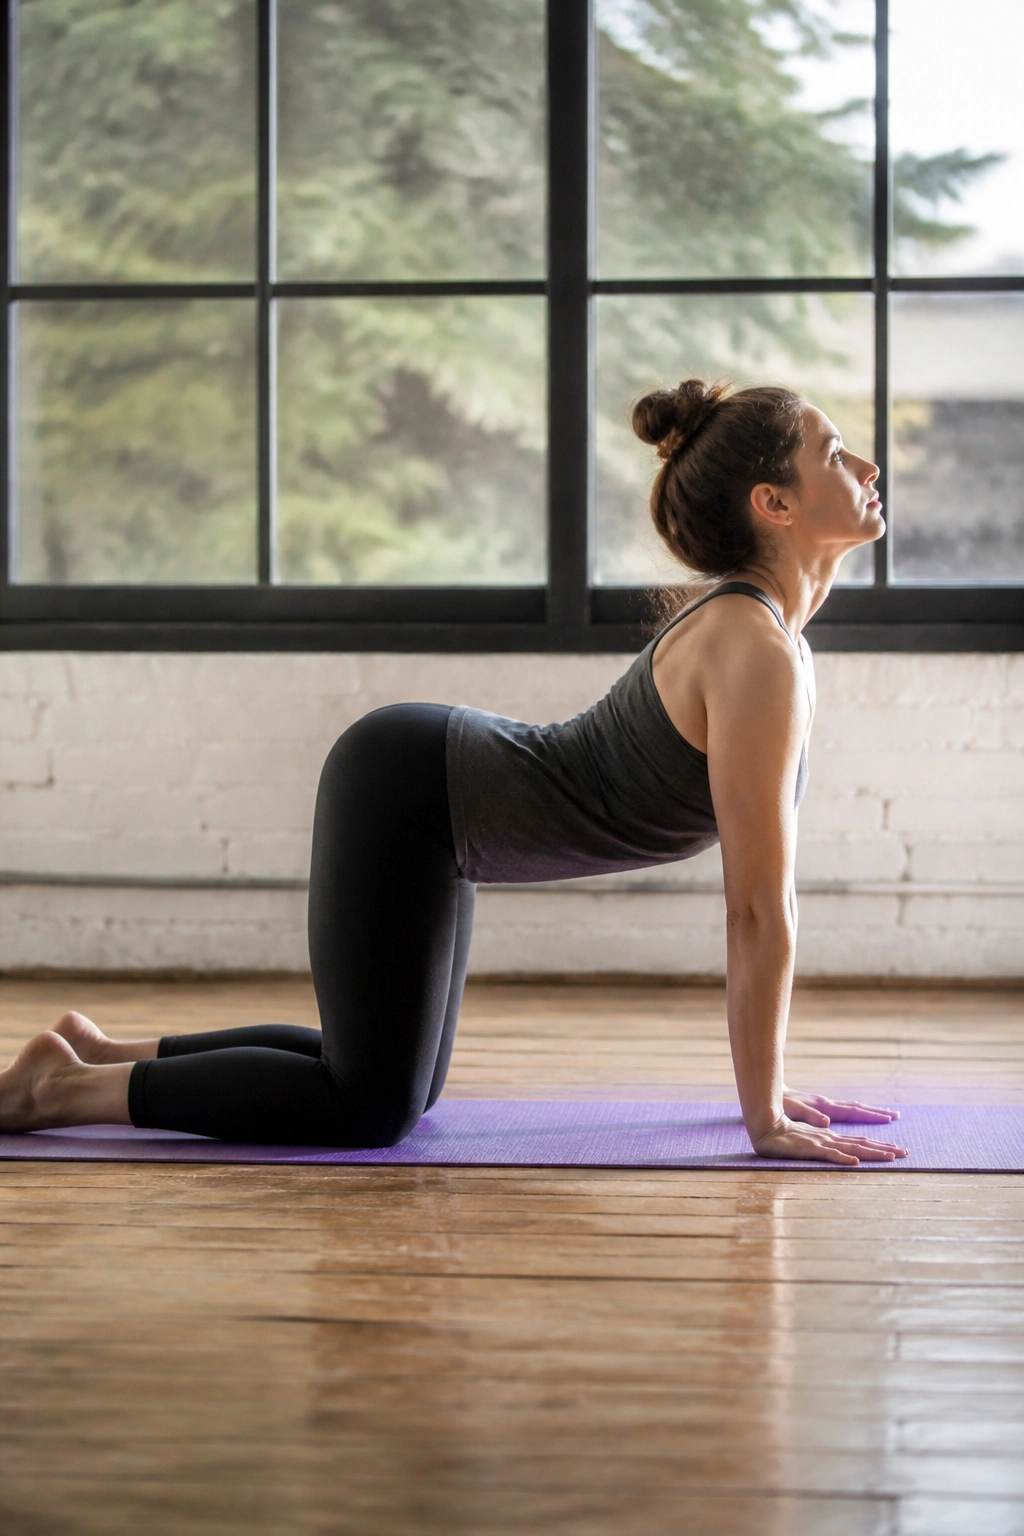
Cat-Cow is the pose people dismiss and then reach for after one stiff morning.
It’s a slow spinal wave on hands and knees. As you inhale, tip the pelvis and lift the chest into Cow. As you exhale, round the back into Cat and press the floor away. The movement is gentle, but it gives you a lot of information about where your spine likes to move and where it resists.
Why It Works So Well
A new practitioner often tries to jump straight into deeper shapes without noticing how the spine moves first. Cat-Cow fixes that. It also links breath to motion in a way that feels easy to understand, which matters when every pose still feels a little foreign.
- Hands under shoulders, knees under hips
- Spread the fingers wide
- Move slowly with the breath
- Keep the neck long in both directions
If the wrists complain, come down to fists, forearms, or place your hands on yoga blocks. That tiny adjustment can make the pose usable instead of irritating.
One good round of Cat-Cow can change the whole tone of a practice. Not dramatic. Just useful.
4. Child’s Pose for Resetting Without Quitting
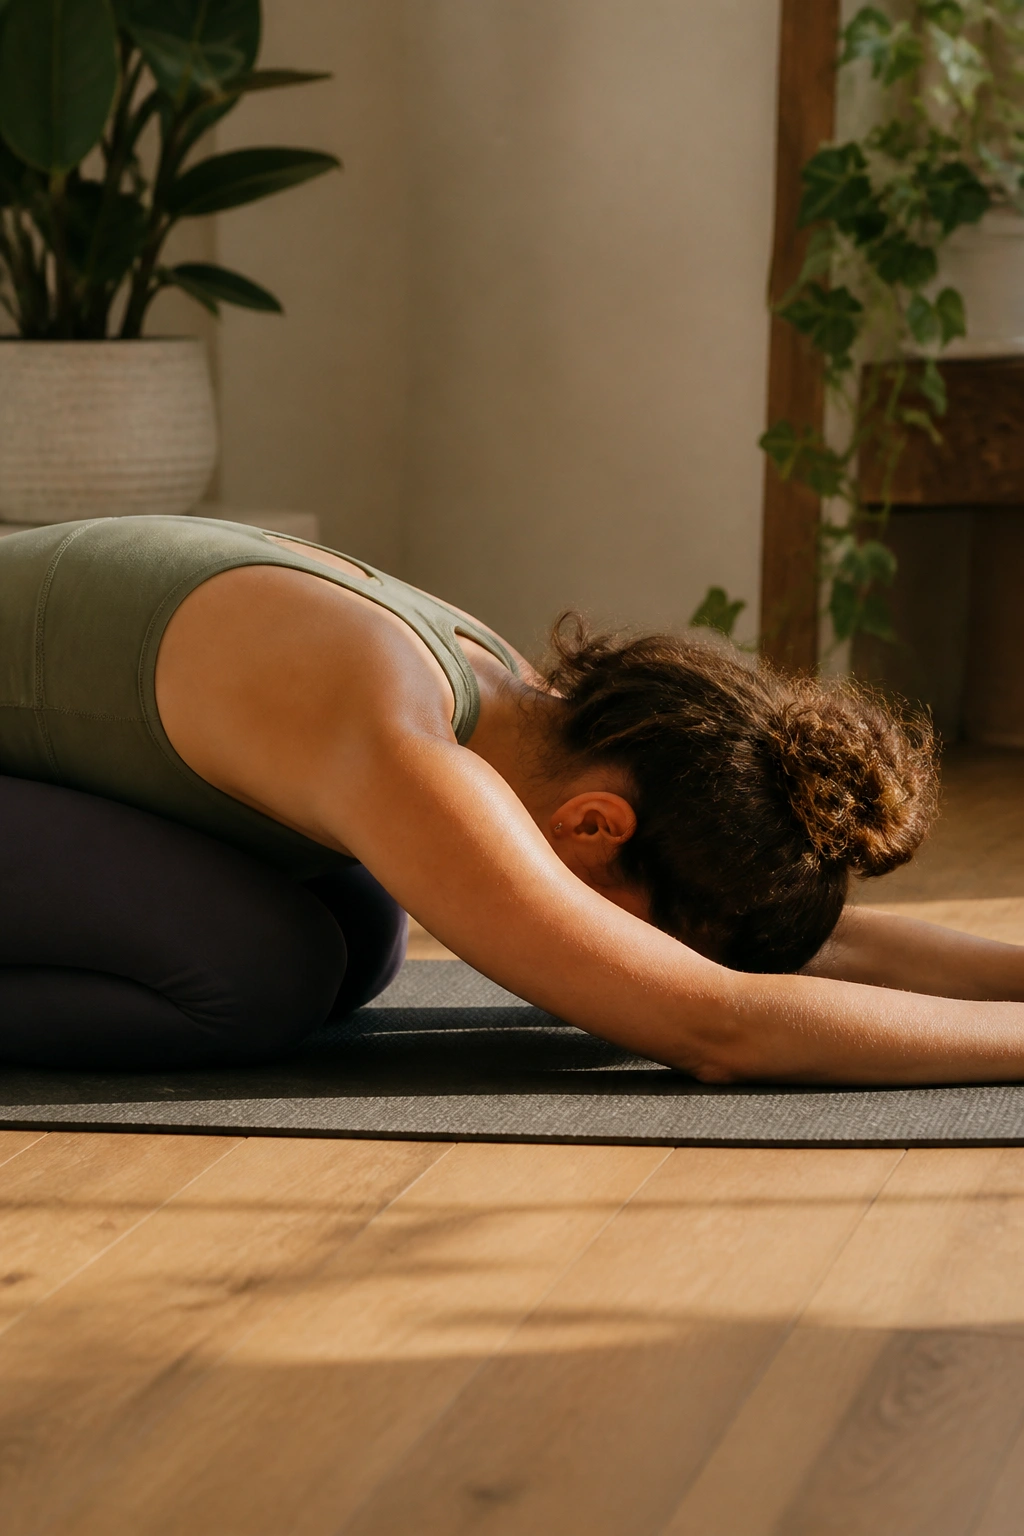
Child’s Pose has a bad reputation among people who think rest is laziness.
I use it as a reset, and I mean that quite literally. Kneel, bring the big toes together, knees wide or together depending on your hips, and fold forward. Arms can stretch in front, rest by your sides, or reach to a block if the floor feels too far away. The forehead should land somewhere comfortable — the mat, a folded towel, a block, even stacked fists.
What matters is that the pose gives your back and breath a chance to soften. If the belly feels compressed, widen the knees more. If the knees get cranky, put a folded blanket under them. No heroics here.
I also like the way Child’s Pose teaches new practitioners to stop bracing every second. You can stay for three breaths or three minutes. Both are fine. Sometimes the best thing in a practice is the moment when nothing is being asked of you except to breathe and let the shoulders melt down.
5. Downward-Facing Dog for Length, Not Perfection
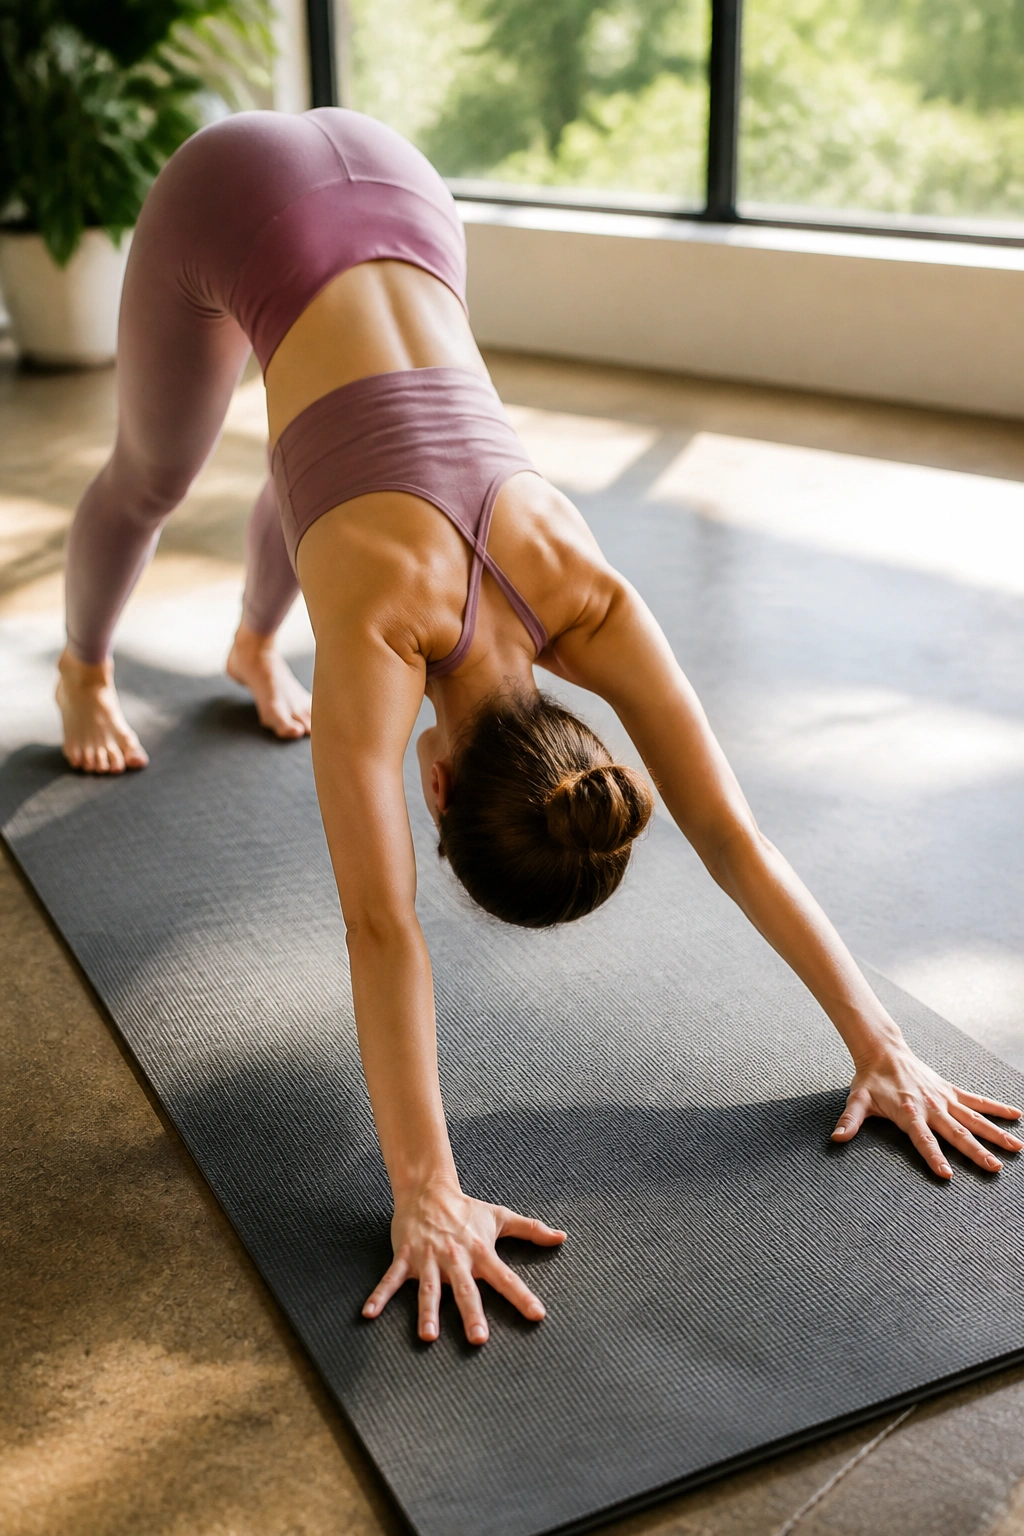
Downward-Facing Dog is not about getting your heels flat.
That’s the piece most beginners obsess over, and it’s the wrong goal. The real job is to create a long line from the hands to the hips, then from the hips to the heels, even if the knees stay bent and the heels hover an inch or more off the floor.
A Better Way to Set It Up
Start from hands and knees. Tuck the toes, lift the hips, and push the floor away so the upper back broadens. Bend the knees as much as you need. Seriously. Bent knees are often the cleanest way to make this pose feel spacious instead of cramped.
- Hands shoulder-width apart
- Feet hip-width apart
- Fingers spread wide
- Spine long, not rounded
- Head hanging between the arms, not jammed up
If your hamstrings are tight, pedal the feet slowly, one calf at a time. That small motion helps the back of the legs wake up without forcing them. If the wrists get sore, shorten the time in the pose or work with hands on blocks.
Downward Dog should feel like a long, sturdy shape. It does not need to look like a magazine photo.
6. Half Lift for Learning a Long Spine
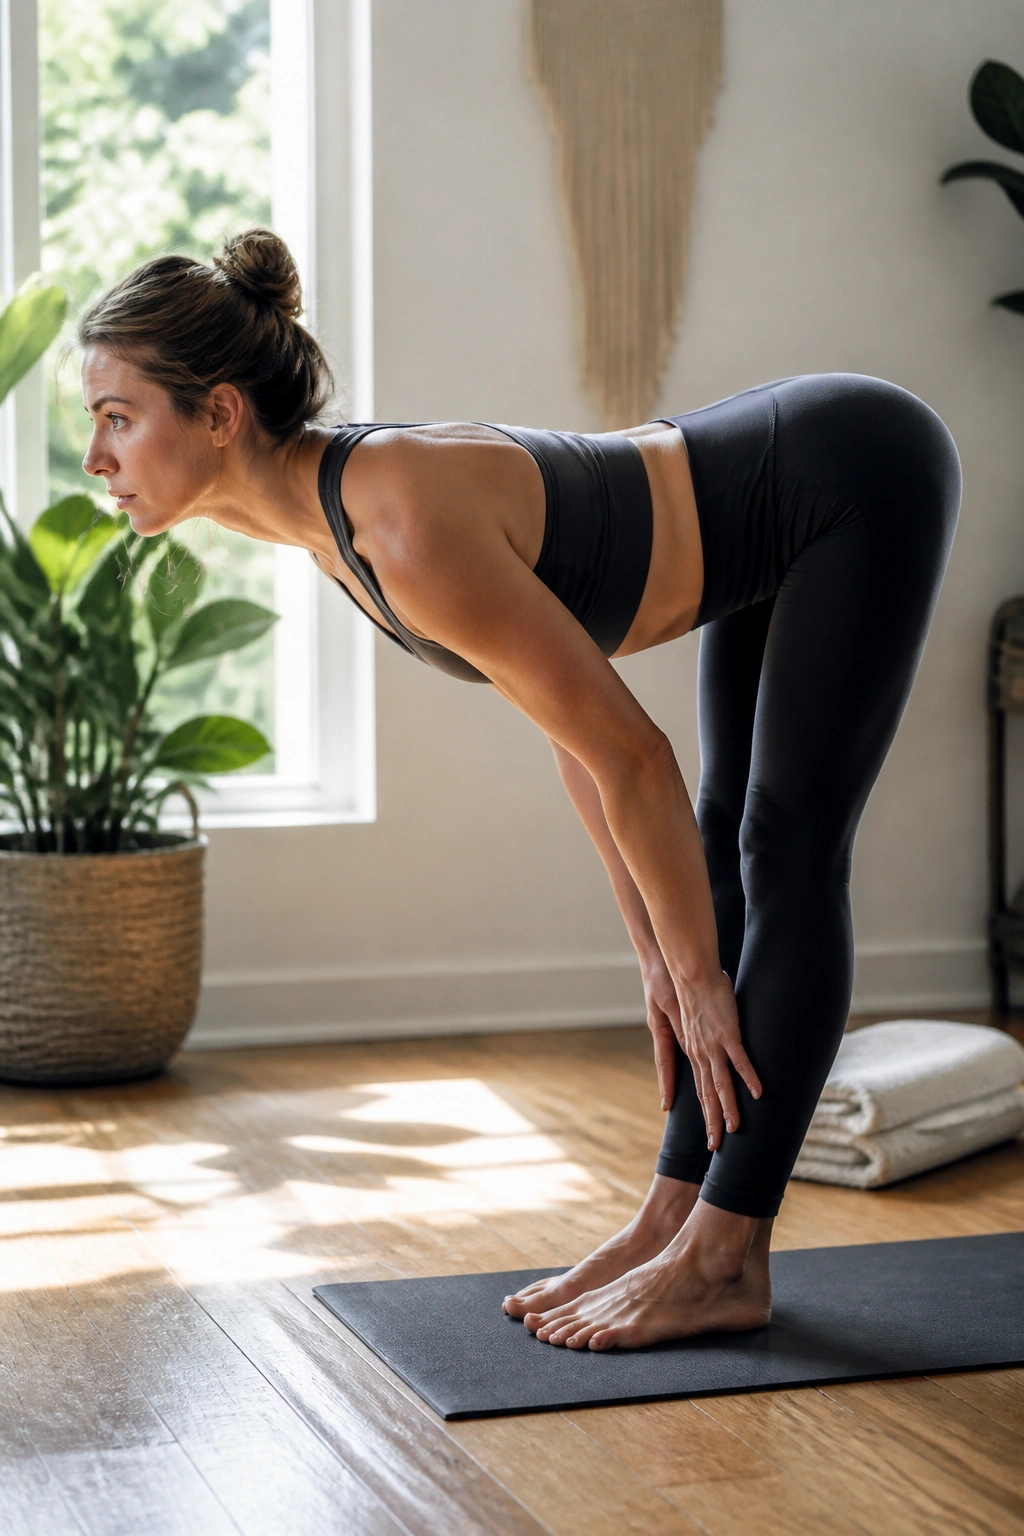
Half Lift is the quiet hinge that teaches a beginner how to keep the spine long.
You’ll see it in almost every beginner flow: come up halfway from a forward fold, place the hands on shins, blocks, or fingertips, and lengthen the crown of the head forward. The back flattens, the neck stays in line, and the hips stay folded.
What Makes It Different From Standing Up
A lot of new practitioners pop straight from a fold into standing and never notice the middle part. That middle part matters. It’s where you learn the difference between rounding the spine and actually hinging at the hips.
- Hands on shins or blocks
- Back flat and long
- Belly lightly engaged
- Neck in line with the spine
Think of Half Lift as a checkpoint. If your lower back feels jammed, bend the knees a little more. If your shoulders hunch toward your ears, slide the shoulder blades down the back and try again.
One sentence is enough here: Half Lift makes every other fold safer and cleaner.
7. Standing Forward Fold for Releasing the Back of the Legs
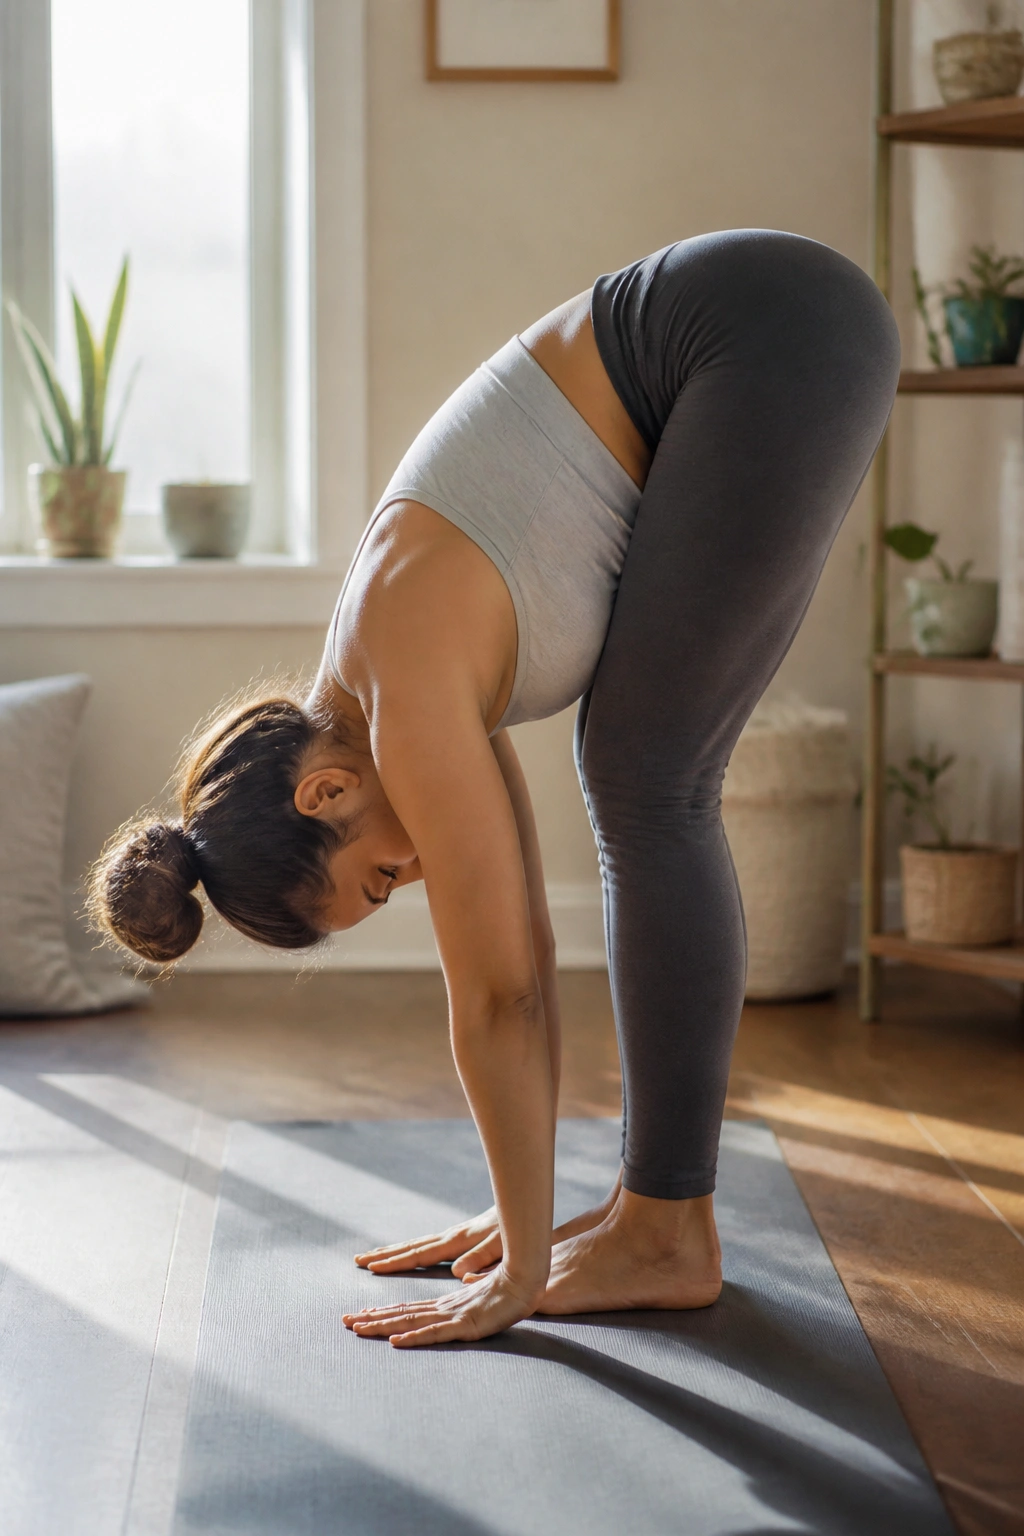
How low should a forward fold go? Not as low as the photo usually suggests.
The point isn’t to fold until your head kisses the shins. The point is to let the hips tip forward while the spine stays as relaxed as it can be. Knees can stay bent. A lot of the time, they should stay bent. That keeps the hamstrings from fighting the pose and gives the lower back a chance to release.
If the stretch feels sharp behind the knees, soften the bend more. If the head dangles and makes you dizzy, come up halfway or rest the hands on blocks. You’re not trying to win a flexibility contest.
A useful cue: shift the weight a little toward the balls of the feet, then back toward the heels until it feels even. That tiny adjustment changes the whole feel of the fold.
I like this pose because it teaches honesty. You can’t fake ease here. The body tells you right away if you’re forcing it.
8. Low Lunge for Opening Tight Hip Flexors
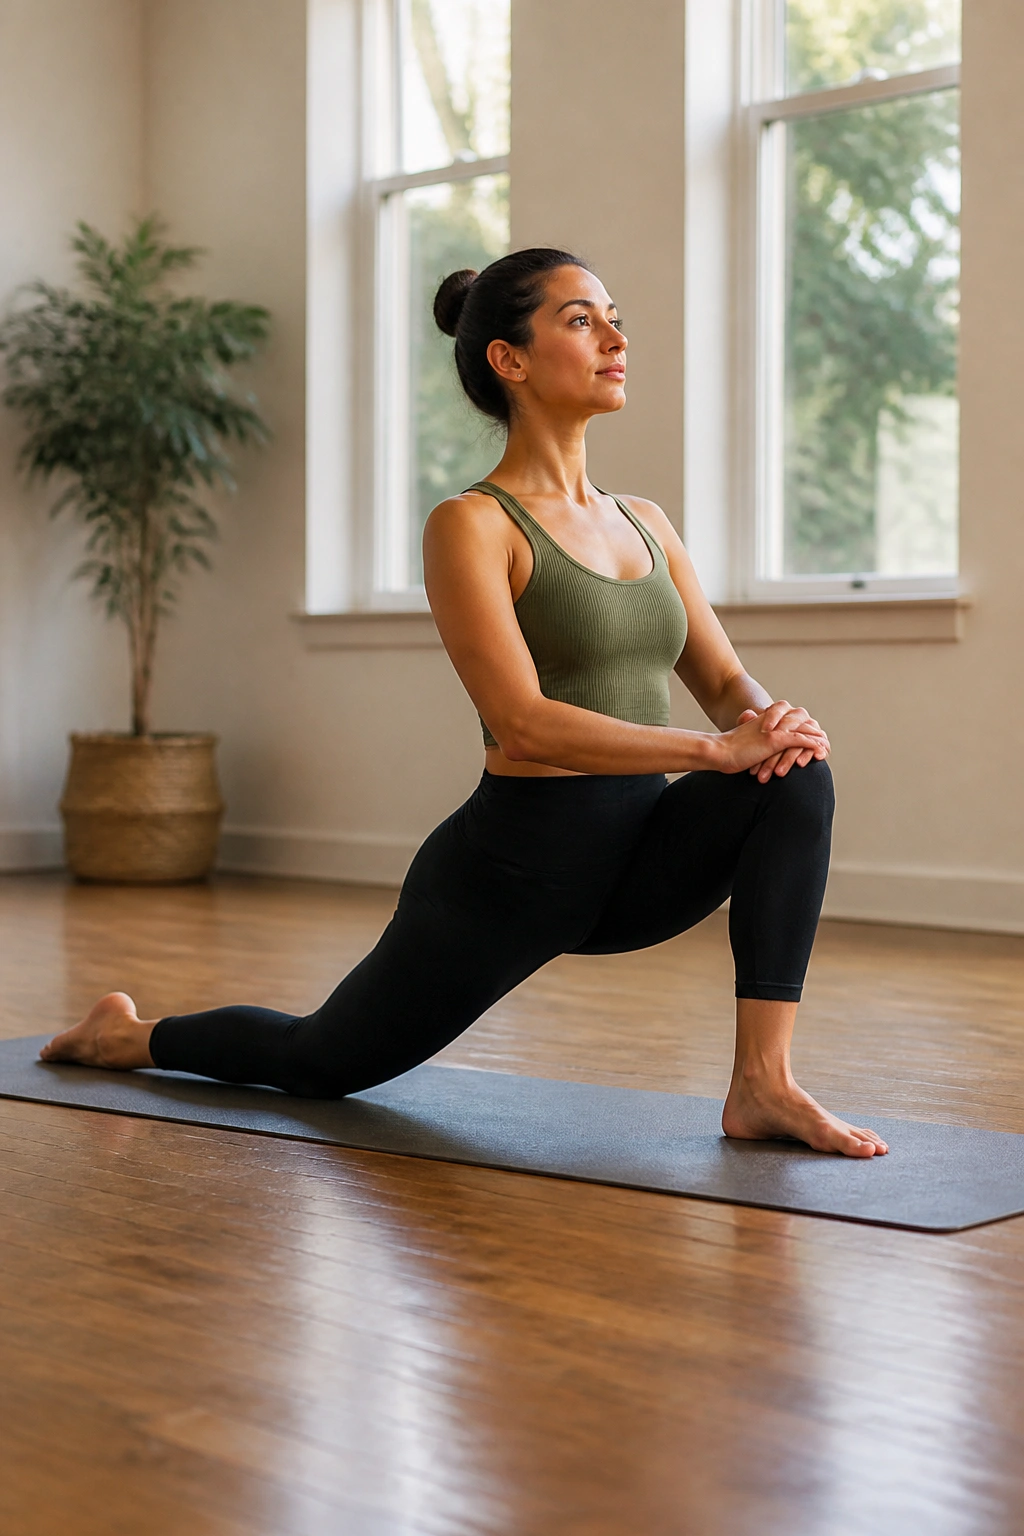
The first time you step into Low Lunge, the back leg can feel miles away from the front one.
That’s normal. One knee down, the other foot forward between the hands, and the pelvis settling into a shape that asks a lot from the front of the back leg. Tight hip flexors show up fast here. So do balance issues. So does the urge to throw the torso forward and call it done.
Make It Feel More Friendly
Place a folded blanket or mat under the back knee. Keep the front knee stacked roughly over the ankle. Then draw the lower ribs in a touch so the spine doesn’t dump into the low back.
- Back knee cushioned
- Front shin vertical or close to it
- Hips facing forward as much as they can
- Hands on blocks if the floor is too low
A small tuck of the tailbone can help, but don’t overdo it. If the front of the hip still feels blocked, slide the back knee farther behind you and shorten the stance a little.
Low Lunge is one of those shapes that teaches beginners how to work with tension instead of wrestling it. That lesson pays off everywhere.
9. Warrior I for Building Strength Without Stiffness
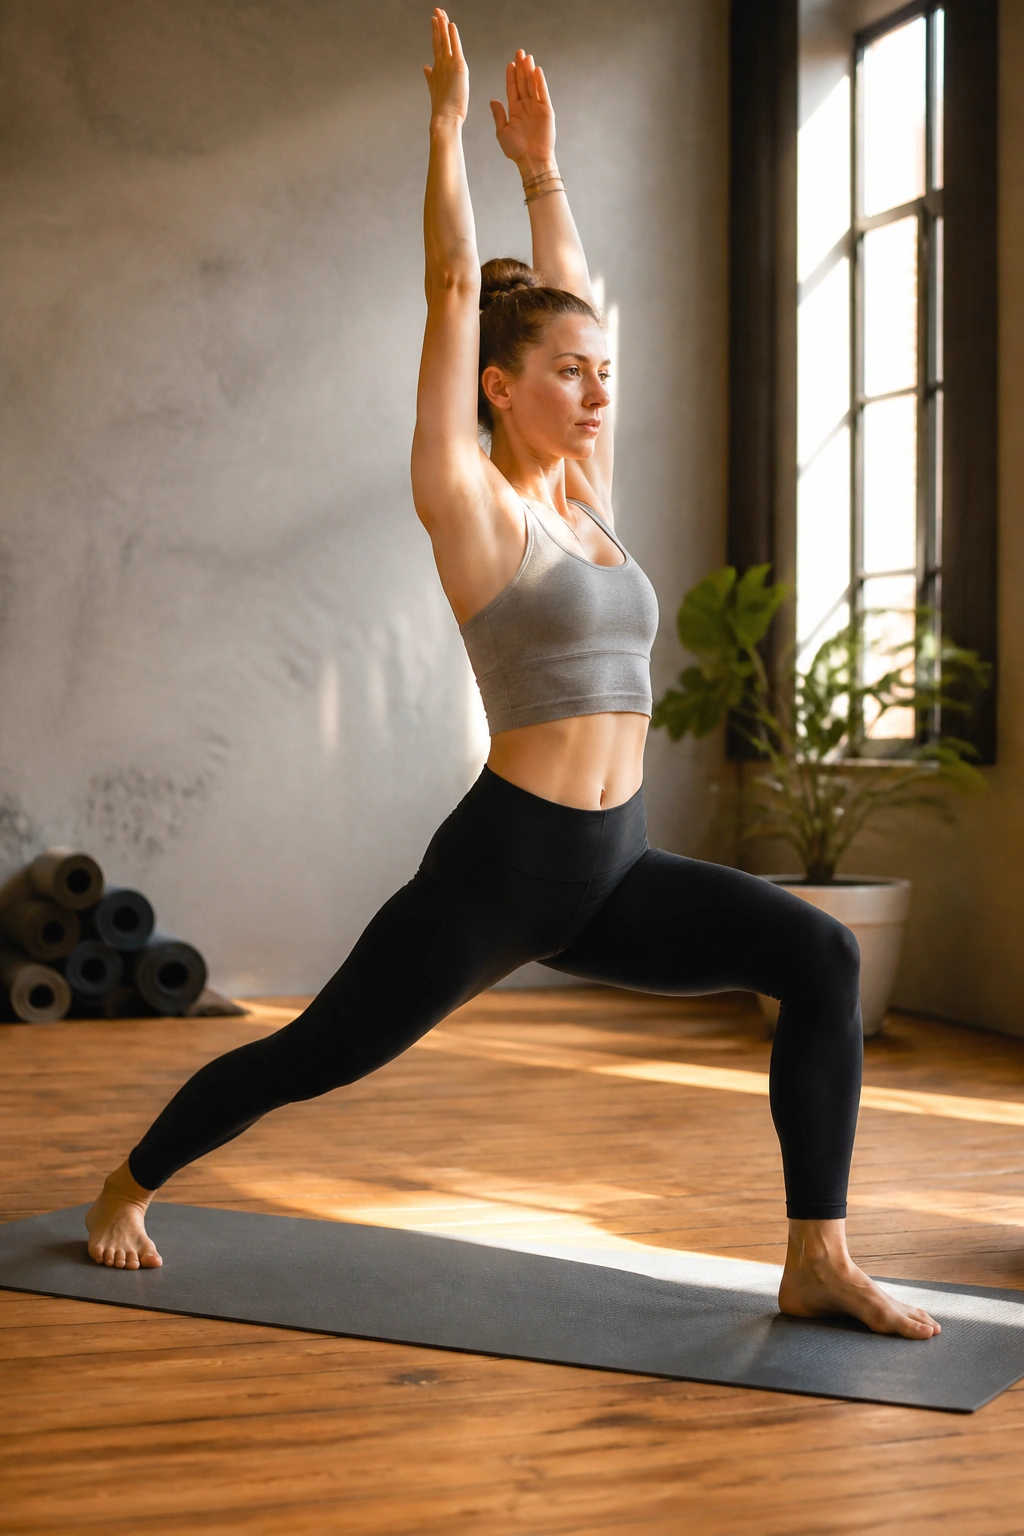
Warrior I asks for effort, but it should still feel organized.
The back heel grounds, the front knee bends, and the torso lifts up between the legs. Arms can reach overhead, though they don’t need to lock straight if the shoulders are tight. The stance is where most beginners go wrong: too short and cramped, or too long and wobbly. A moderate stance is usually better.
A nice cue is to keep the front hip pointing forward while the back foot stays anchored at an angle. If your low back arches hard, drop the ribs slightly and bring the pelvis back toward neutral.
Warrior I is useful because it teaches a new practitioner how to build shape from the legs instead of hanging everything on the lower back. That distinction matters. A lot.
Try this: bend the back knee a tiny bit if the heel wants to lift or the pelvis wants to twist open. You’ll usually get a steadier base right away.
10. Warrior II for Feeling Grounded in an Open Shape
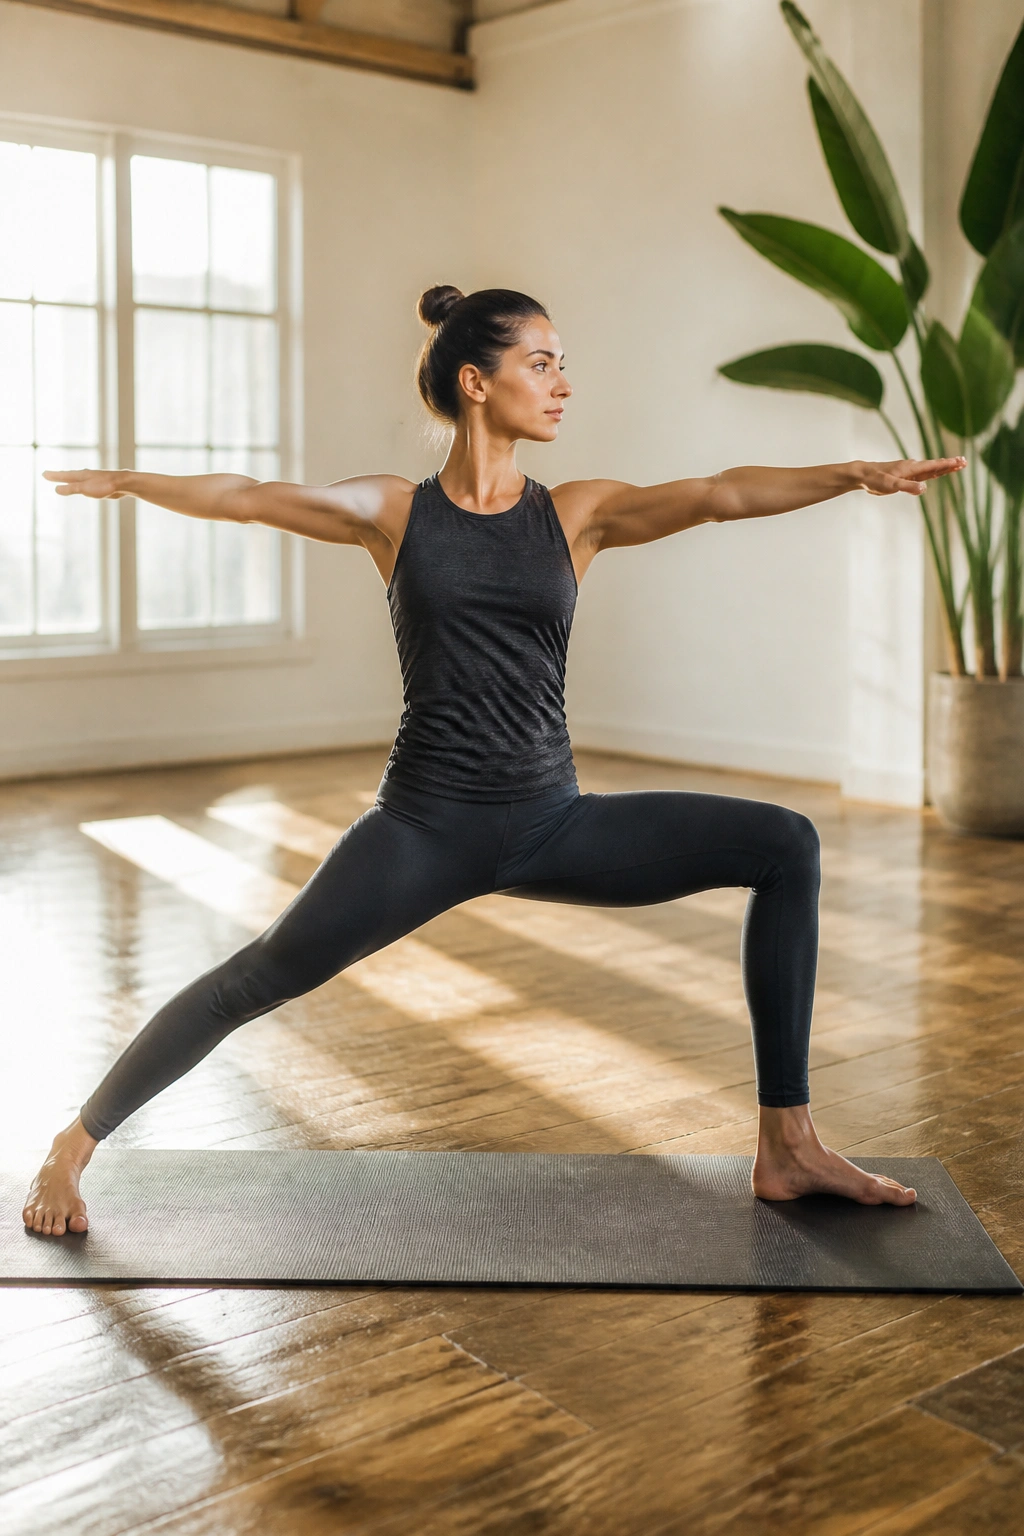
Warrior II looks open and generous, yet it demands more leg work than most new practitioners expect.
The front knee bends, the back leg stays long, the arms stretch in opposite directions, and the gaze settles over the front hand. Simple on paper. Trickier in the body. The back foot often slips too far out, the front knee caves inward, and the shoulders climb toward the ears. All of that is fixable.
Why It Feels Different From Warrior I
Warrior I is more closed and upward. Warrior II asks you to stay wide while you hold your center. That means your legs do the heavy lifting while the torso stays calm. The pose can feel almost blunt at first, but I like that about it. It gives you a clean read on how your legs are working.
What to Watch For
- Front knee tracks over the middle toes
- Back arch of the foot stays heavy
- Arms reach long, not clenched
- Gaze stays soft, not strained
If the front thigh burns fast, shorten the stance. If the shoulders tense, lower the arms for a round or two and rebuild from there. Warrior II rewards patience more than force.
11. Cobra Pose for Gentle Back Strength
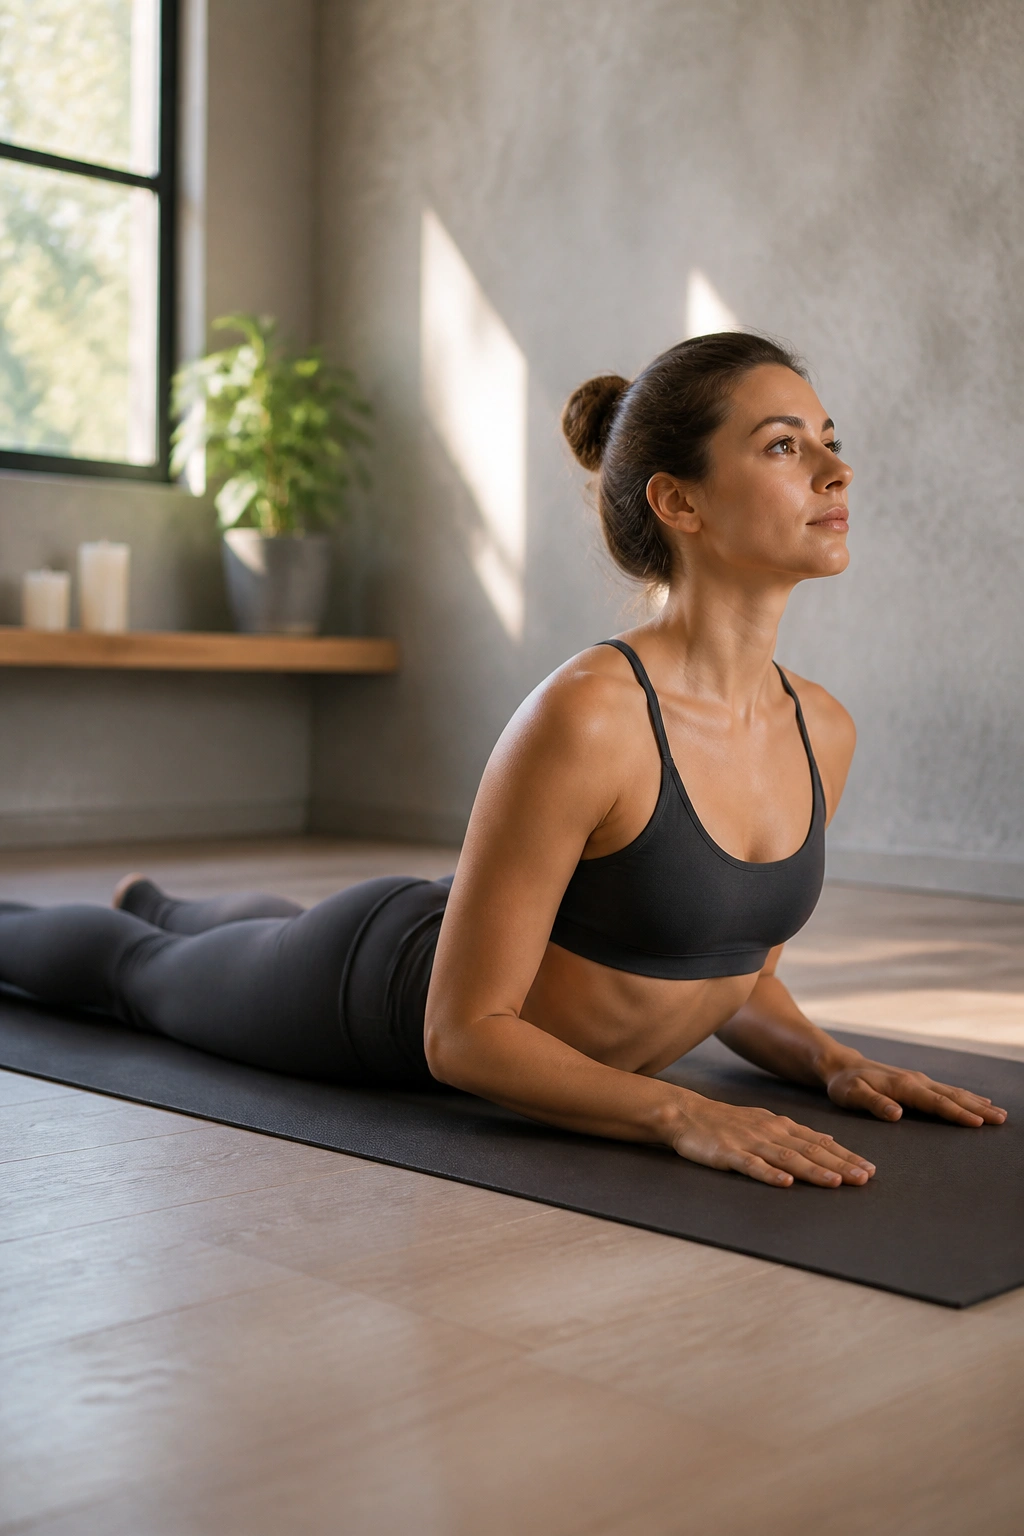
Cobra Pose is one of those backbends that looks bigger than it needs to be.
That’s a good thing. A beginner-friendly Cobra is low, controlled, and built more from the back body than from yanking the chest upward. Lie face down, place the hands under the shoulders, and keep the elbows tucked close. Press the tops of the feet into the floor, firm the legs, and lift the chest only a few inches.
If the lower back pinches, lift less. Maybe much less. The goal is space, not height. A tiny Cobra done well beats a big one that leaves you crunchy for the rest of the day.
I also like this pose because it teaches the front of the body to soften while the back body works. That’s a useful pattern in yoga, and in life, honestly. If the shoulders bunch up toward the ears, lower the chest and try again. Small is not a failure here. Small is smart.
12. Bridge Pose for Lifting Through the Hips
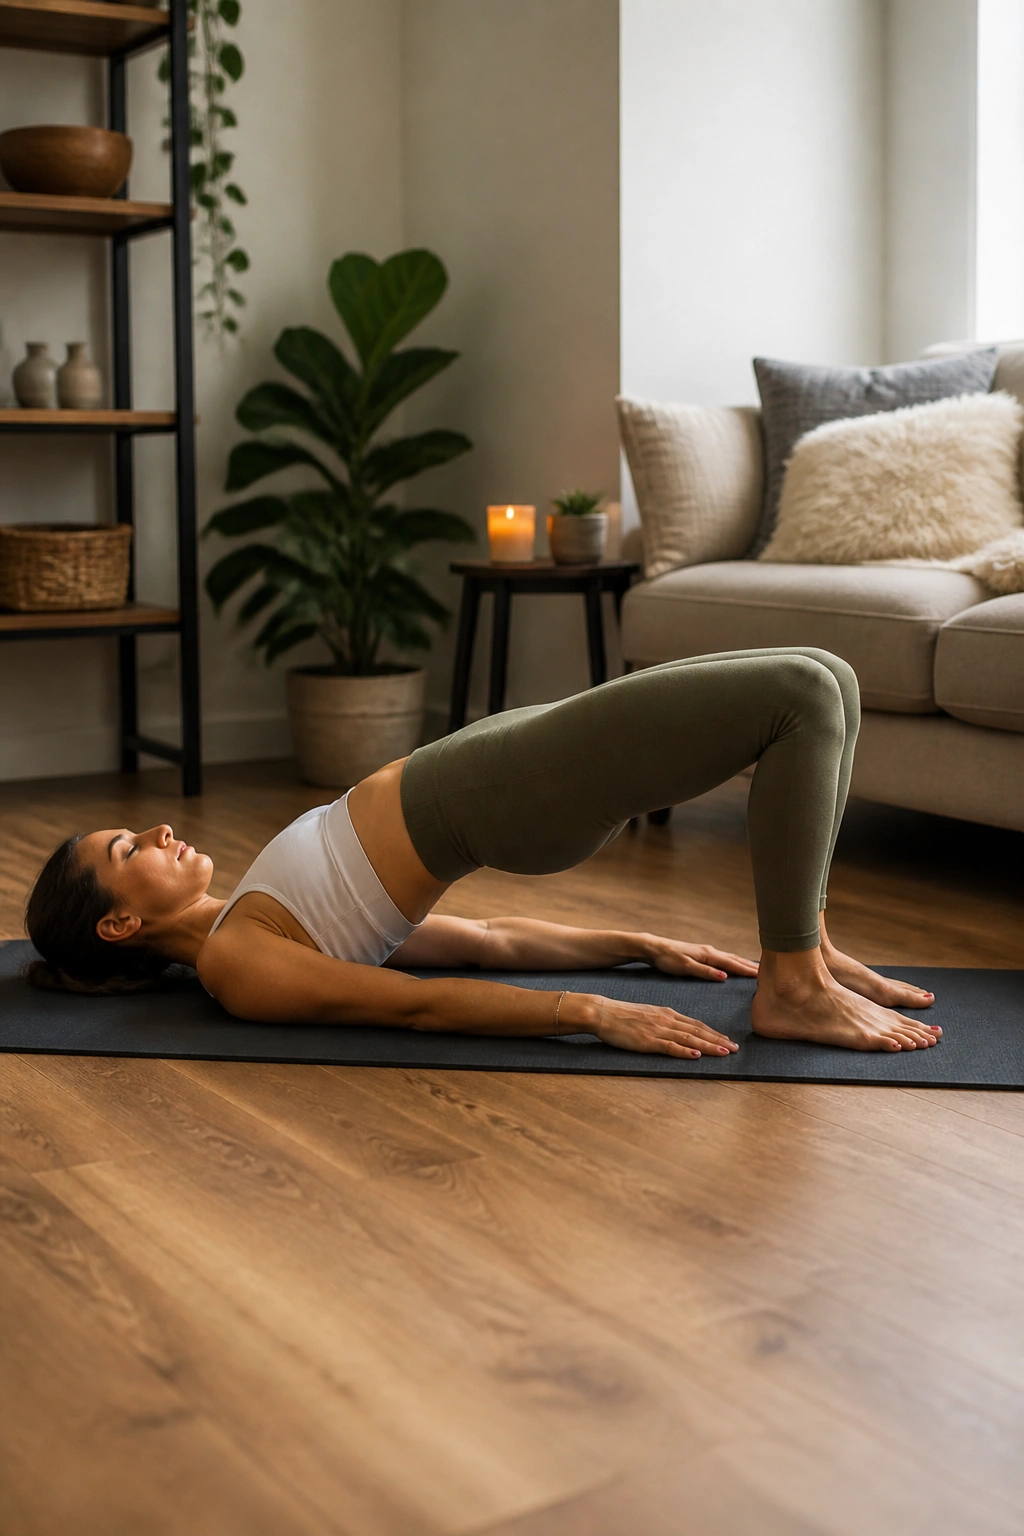
Can a beginner do Bridge Pose safely? Usually, yes—if the lift stays small at first.
Lie on your back, knees bent, feet hip-width apart, heels close enough that the fingertips can brush the backs of the heels. Press the feet down and lift the hips just until the thighs and torso feel supported. The chin stays slightly tucked, and the neck stays quiet.
Start With a Mini Lift
You do not need to chase a big arch. In fact, a small bridge often teaches more. If the knees splay outward, draw them back toward parallel. If the low back feels pinched, lower halfway and reset.
- Feet grounded evenly
- Knees stay about hip-width
- Hips rise on the inhale or exhale, either one works
- Shoulders roll gently under, not jammed
Some beginners like a block under the sacrum for a supported version. That can feel more restorative and less demanding on the glutes. If you have neck trouble, keep the lift modest and skip any deep turning of the head.
Bridge is useful because it builds a little back-body strength while giving the front of the hips a break. Quietly hard. Good yoga often is.
13. Seated Spinal Twist for Moving Without Jerking
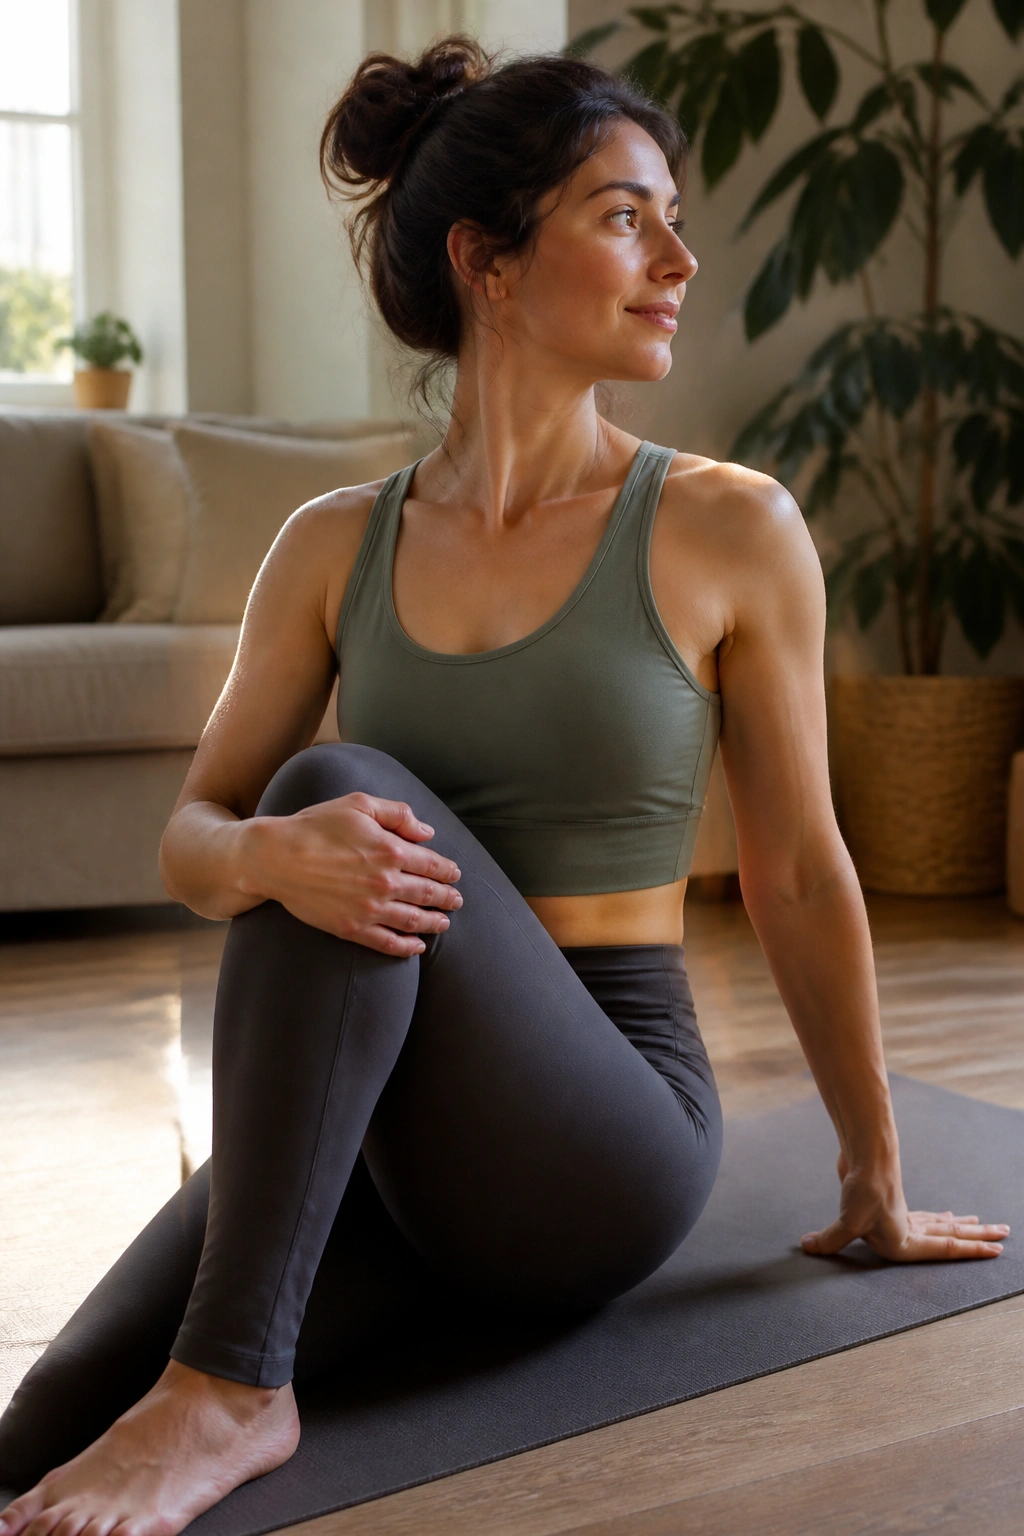
A seated twist can feel a little awkward on the first try.
That awkwardness is part of the deal. Sit with the legs extended, crossed, or in a simple half-lotus-free seat if the hips allow it. Grow tall through the spine first. Then, on an exhale, turn the ribs gently to one side while keeping both sit bones rooted.
The key is to twist from the spine and rib cage, not from yanking the shoulder around. If one hand needs to stay behind you for support, let it. If the knees are floating up, sit on a folded blanket to make the pelvis tilt forward a bit.
What Makes It Worth Practicing
Twists help beginners notice the difference between length and rotation. That difference matters a lot. If you twist while collapsed, the lower back takes the strain. If you grow tall first, the twist has more room and feels cleaner.
- Sit tall before turning
- Inhale to lengthen
- Exhale to rotate
- Keep the jaw soft
A gentle twist after a standing sequence can feel like wringing out tension without force. That’s the sweet spot.
14. Legs-Up-The-Wall for Recovering Without Lying Flat
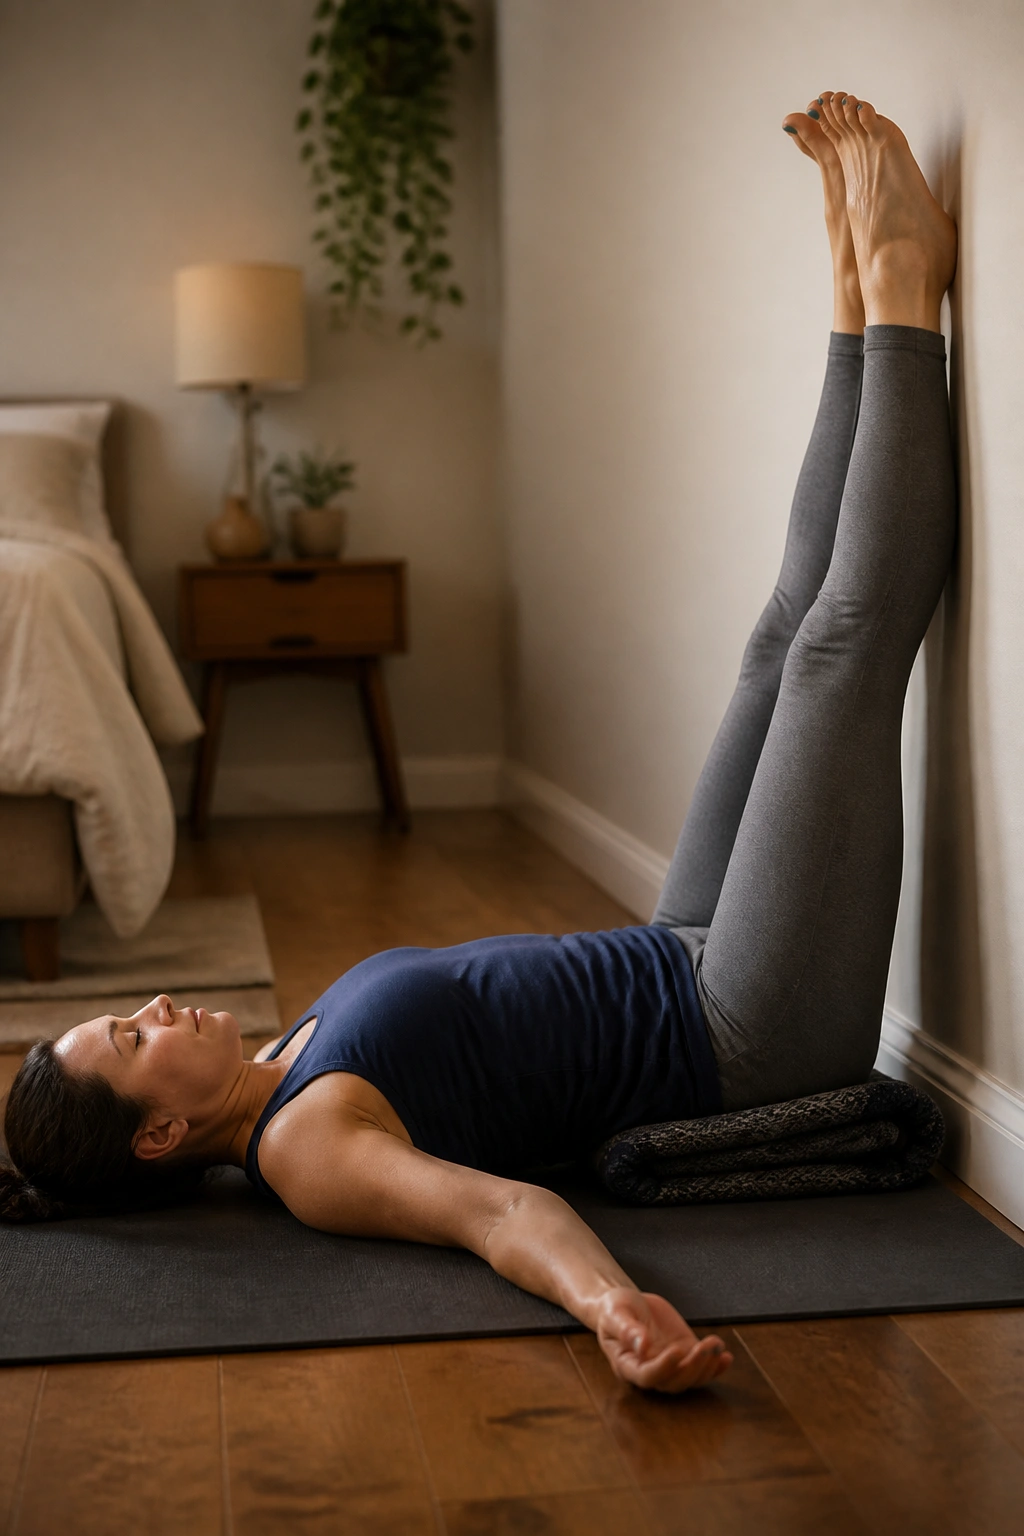
Legs-Up-The-Wall is the pose I suggest when a beginner looks wiped out but still wants to do something useful.
Scoot one hip close to a wall, swing the legs up, and let the back rest on the floor or on a folded blanket. The hips do not have to touch the wall. Actually, a little distance often feels better. Knees can stay slightly bent. Arms can rest by the sides, and the eyes can close.
The sensation is odd in a nice way: the legs feel lighter, the lower back usually settles, and the breath gets slower without you trying to force it. If the hamstrings pull, move farther from the wall. If the lower back arches, slide a thin blanket under the pelvis.
This is the kind of pose people ignore because it doesn’t look hard. That’s a mistake. A few minutes here after standing work or before bed can change how the whole body feels.
One more thing: if lying flat makes you uneasy, place a pillow under the head. Small comfort shifts matter here.
15. Chair Pose with Wall Support for Learning Leg Work
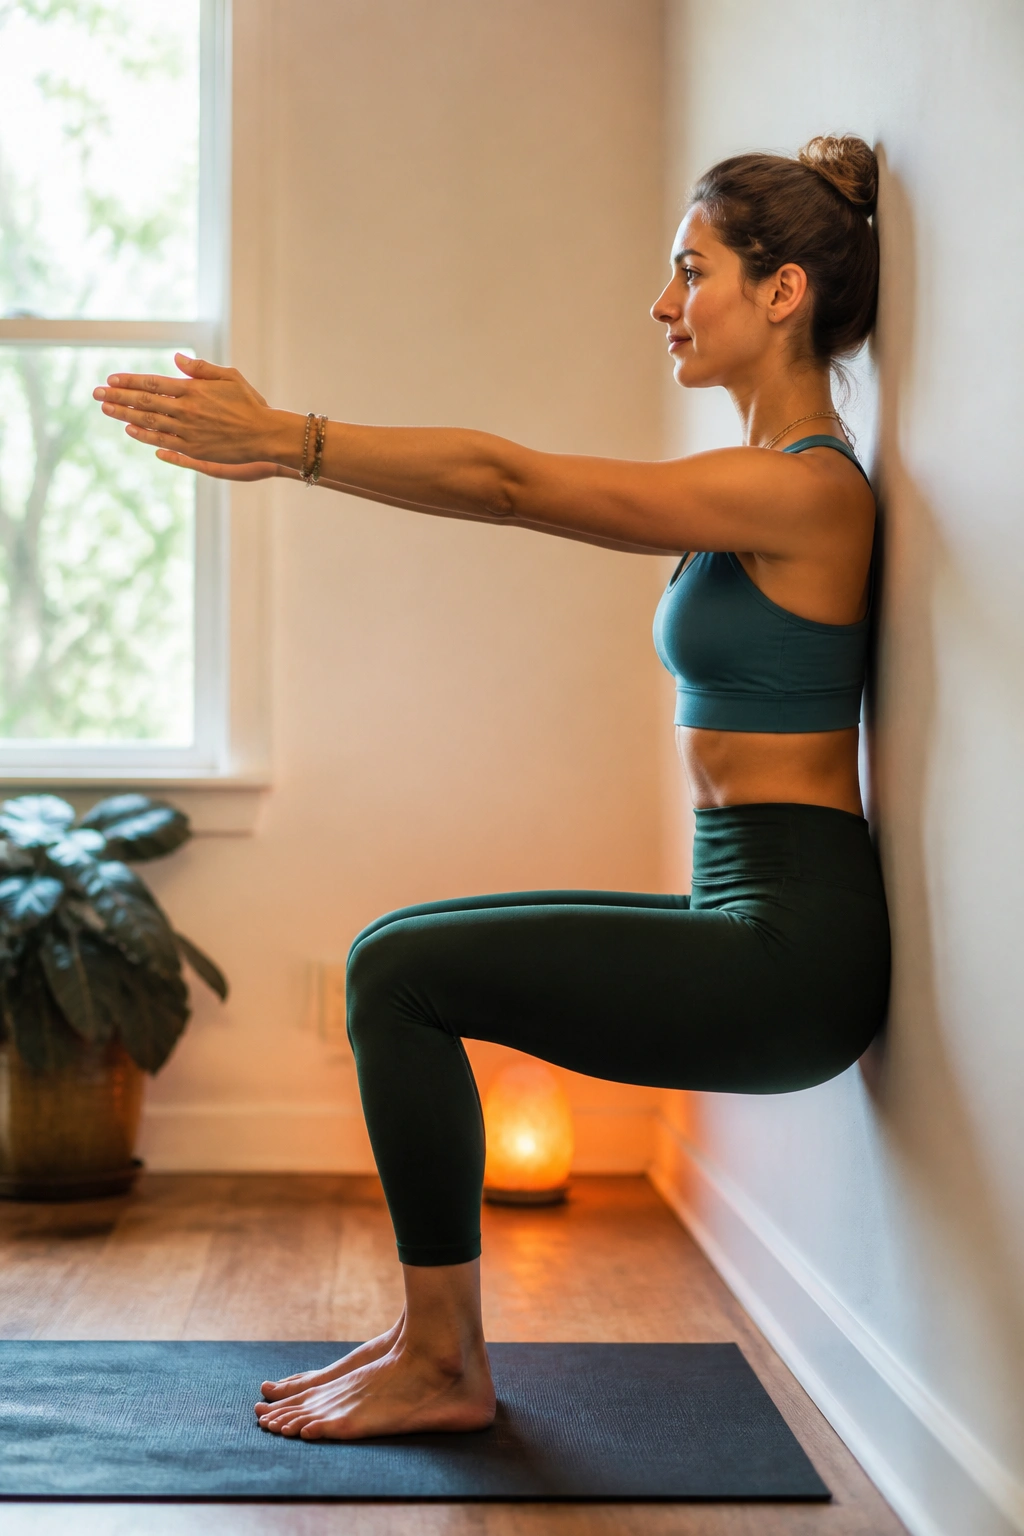
Chair Pose with wall support is not cheating.
It’s smart. Stand with your back near a wall, feet a little forward of the body, and bend the knees as if sitting back into a sturdy chair. Let the wall catch your spine lightly if needed. Arms can reach forward, overhead, or stay at the chest until the legs understand what’s being asked.
Why the Wall Helps
New practitioners often tip the torso too far forward or dump all the work into the knees. The wall gives you a clear boundary. It also teaches you how to keep the weight in the heels without collapsing into the low back.
- Knees track over toes
- Chest stays lifted
- Weight sits back in the heels
- Thighs work, but the jaw stays loose
If your quads start shaking, good. That’s normal. If the knees hurt, reduce the depth and make the sit smaller. The shape can stay shallow and still count.
Chair Pose is a bridge between strength and control. Without a wall, it can feel messy fast. With one, it becomes much easier to understand.
16. Tree Pose for Balance That Starts From the Ground
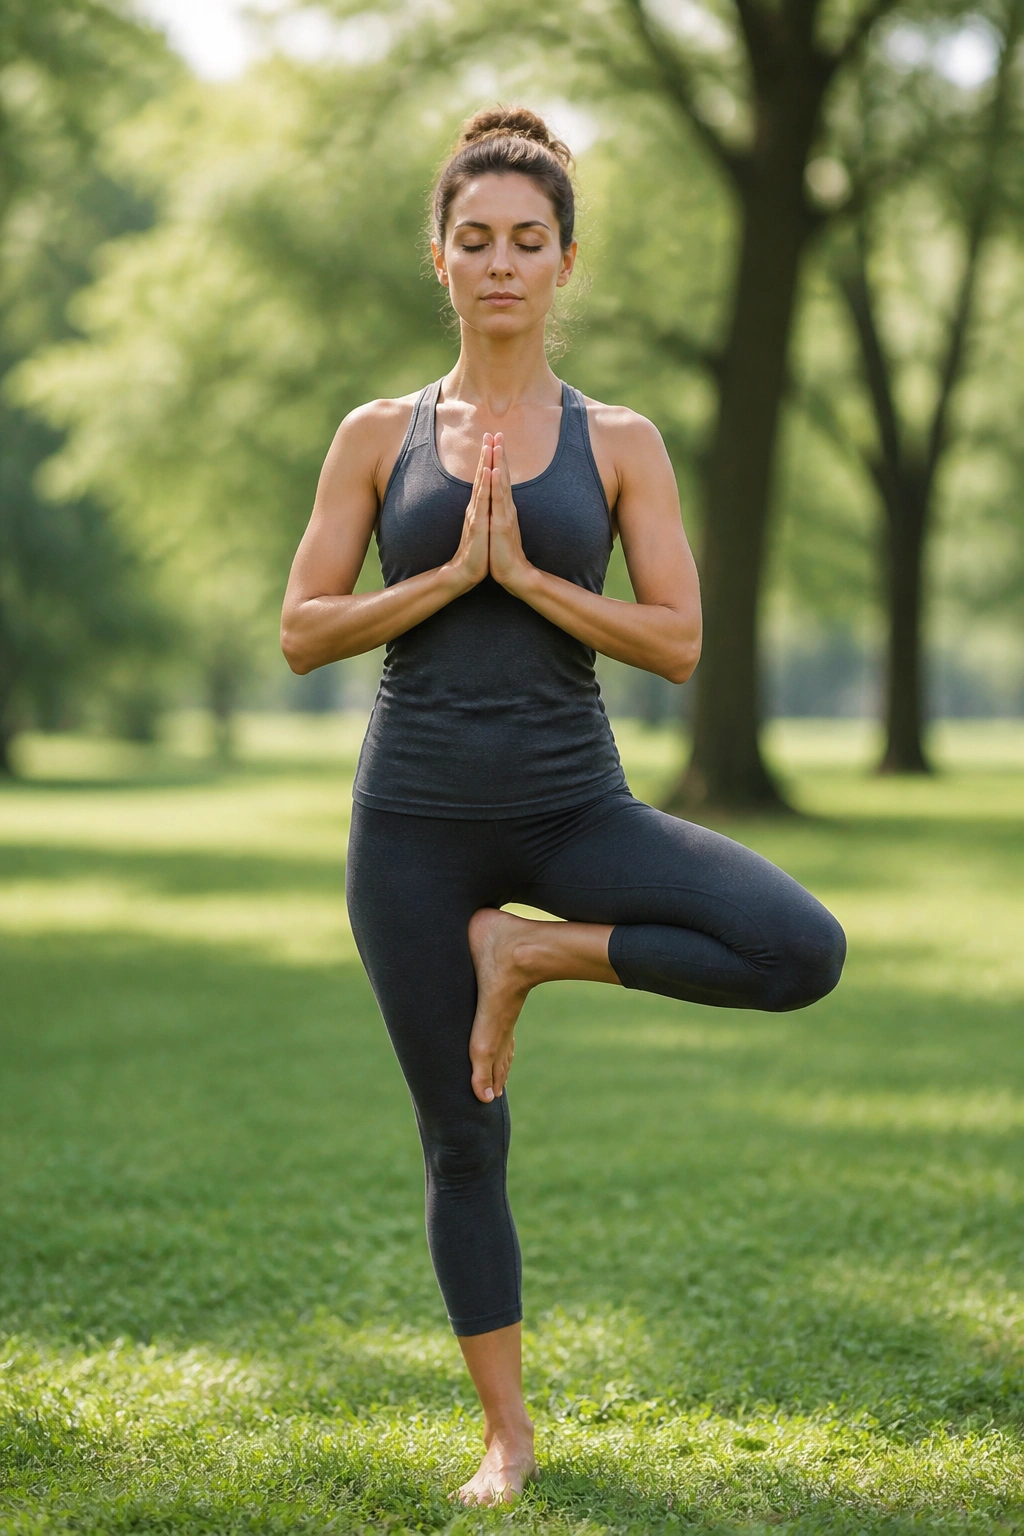
Tree Pose teaches balance by subtraction.
Unlike standing still, Tree asks one foot to do less so the other can do more. Start in Mountain Pose, shift weight into one leg, and place the other foot low on the ankle, calf, or inner thigh — never on the knee. Hands can stay at the heart or reach overhead if that feels stable.
Where to Put the Foot
The safest place for most beginners is the calf or ankle. The higher the foot goes, the more the hips and ribs tend to wobble. That’s not bad, but it can turn the pose into a wrestling match. Start low. Always.
How to Make the Wobble Smaller
- Pick one still point to look at
- Keep the standing knee soft
- Press the lifted foot into the leg and the leg back into the foot
- Come out before you’re exhausted
Tree Pose is less about looking graceful and more about learning the quiet work of standing on one leg without gripping the floor with your toes. That sounds small. It isn’t.
17. Savasana for Letting the Practice Sink In
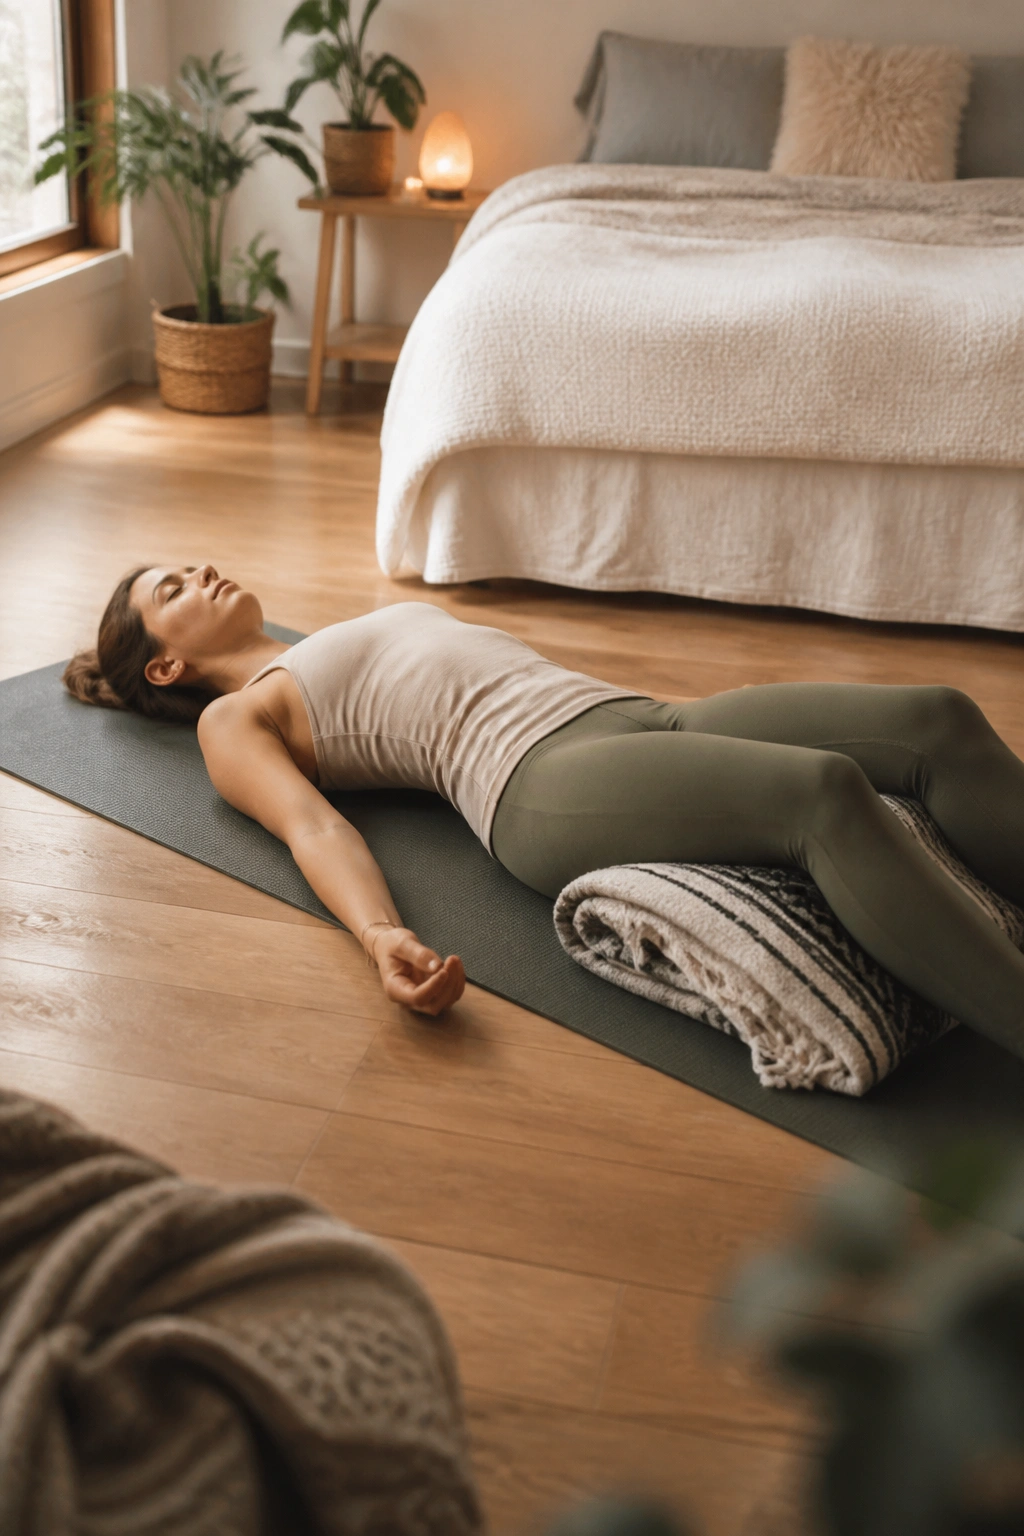
Why does lying still count as yoga? Because it is the part where the work settles in.
Savasana is the final rest, and beginners often rush past it because resting feels too easy or too unproductive. Lie on your back, let the feet fall open, and place the arms a little away from the sides. A folded blanket under the knees or a small pillow under the head can make the whole position easier to stay in.
The point is not to fall asleep, though that happens sometimes. The point is to stop doing. After all the breath work, the standing work, the folds, and the little balances, the body gets a chance to register what just happened.
A blanket over the body can make the pose feel steadier. So can closing the eyes and softening the tongue away from the roof of the mouth. If your mind starts sprinting, that is normal. Let it. Then return to the weight of the body on the floor.
Savasana may be the least flashy technique here. It is also the one people miss most.
18. A Slow Beginner Sun Salutation for Linking Everything Together
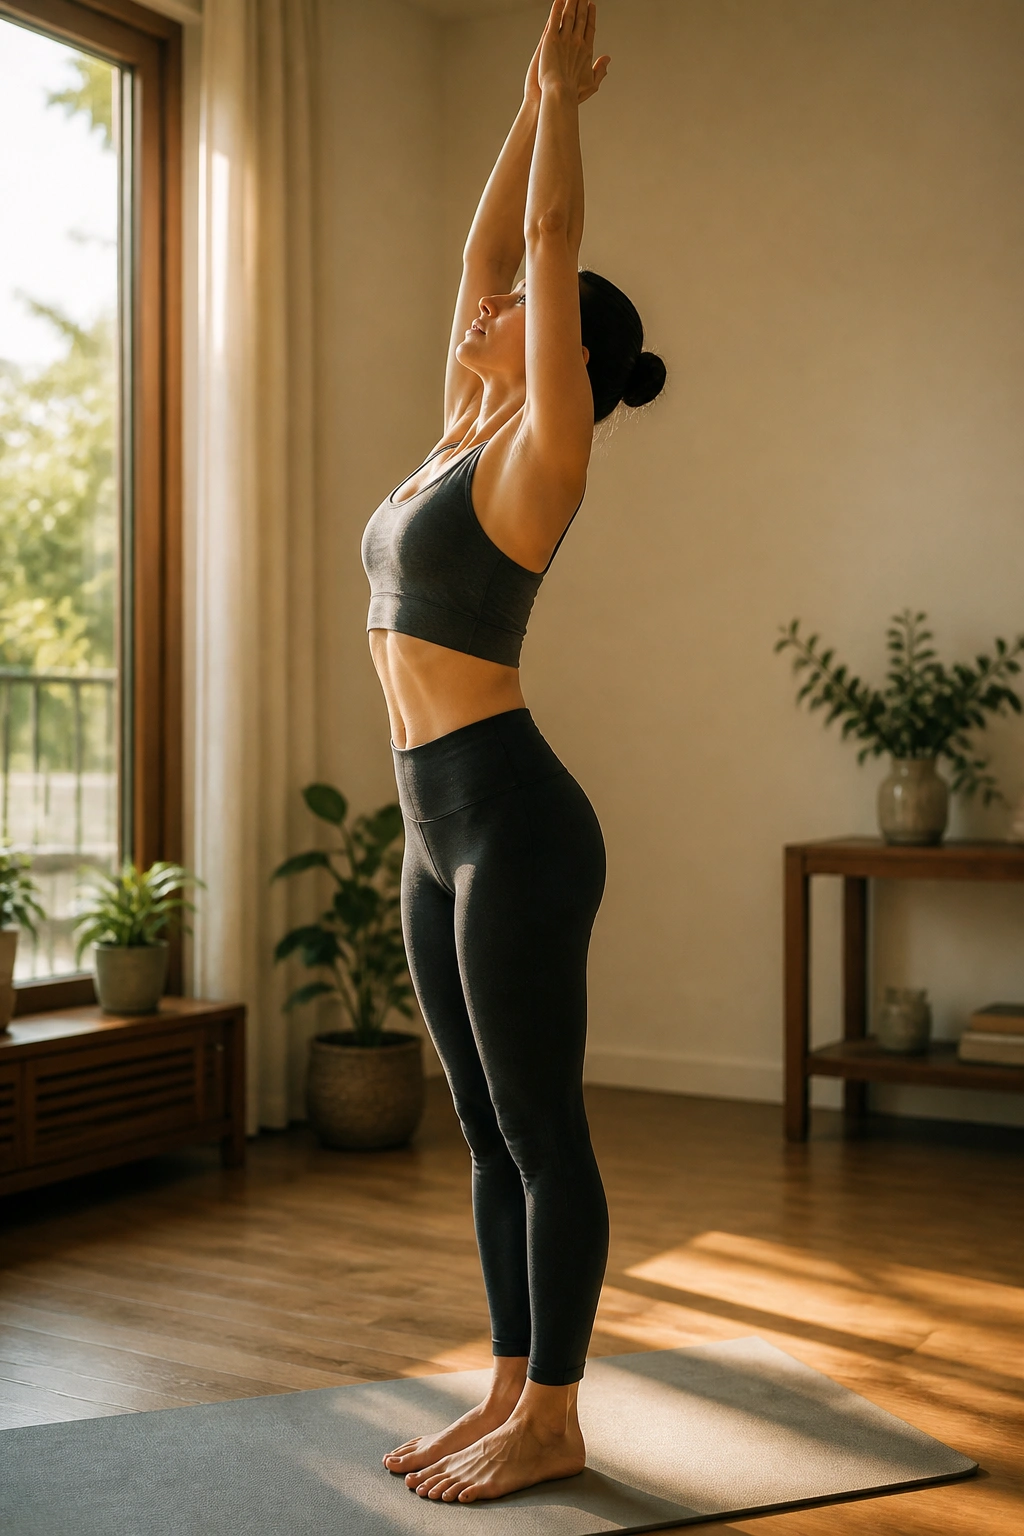
A short sun salutation is where these yoga techniques start talking to each other.
Instead of treating each pose like a separate event, a beginner-friendly flow strings a few familiar shapes together: Mountain Pose, Forward Fold, Half Lift, Low Lunge, a gentle plank or step-back, Cobra or Downward Dog, then back to standing. Move slowly. One breath, one shape. No jumping. No rushing.
A Cleaner Way to Practice It
Use the sequence as a small circuit, not a race. If Downward Dog still feels too much, skip it and return to Child’s Pose or a standing fold. If stepping back into a lunge feels awkward, step one foot back at a time. The point is to make transitions feel controlled.
- Start standing and breathe once
- Fold forward on an exhale
- Lift halfway with a long spine
- Step back with care
- Return to the front with patience
What makes this useful is the rhythm. A new practitioner starts to learn how poses connect, how breath leads movement, and how to move without bracing every muscle. That connection is where yoga starts to feel less like a pile of positions and more like a practice.
Final Thoughts
A beginner does not need a huge library of poses to get value from yoga. A steady Mountain Pose, a few honest breaths, one or two floor stretches, and a short flow can do a lot more than trying to force your way through advanced shapes too soon.
The real win is consistency. Ten calm minutes with good form will help more than thirty frantic minutes spent hanging on by the wrists and hoping for the best. That sounds plain because it is plain. Plain works.
Start with the techniques that make your body feel more available, not the ones that look the fanciest from across the room. Then keep returning to them. That repeat visit is where the practice starts to settle into your body and stop feeling like a strange language.
