



A power yoga practice gets interesting after the basic shapes stop feeling hard. At that point, the work shifts from simply getting through a vinyasa to moving with control: clean lines in Warrior III, steady breath in chaturanga, hips that open without dumping into the knees. That is the sweet spot for people past beginner. Not flashy. Just honest.
The biggest mistake I see is speed for its own sake. A fast flow can feel strong, sure, but if your shoulders cave, your feet skitter around, and your breathing turns ragged, you are rehearsing slop. Better to build sequences that ask for balance, leg drive, core tension, and a little patience.
Keep a mat with good grip, a block, and maybe a folded blanket nearby. If your wrists or hamstrings get cranky, adjust the shape instead of forcing it. A smart intermediate practice feels demanding from the first Sun Salutation, then leaves you standing taller afterward — sweaty, focused, and not wrecked. The first flow below is the one I’d use to get there.
1. Sun Salutation A With Plank Holds
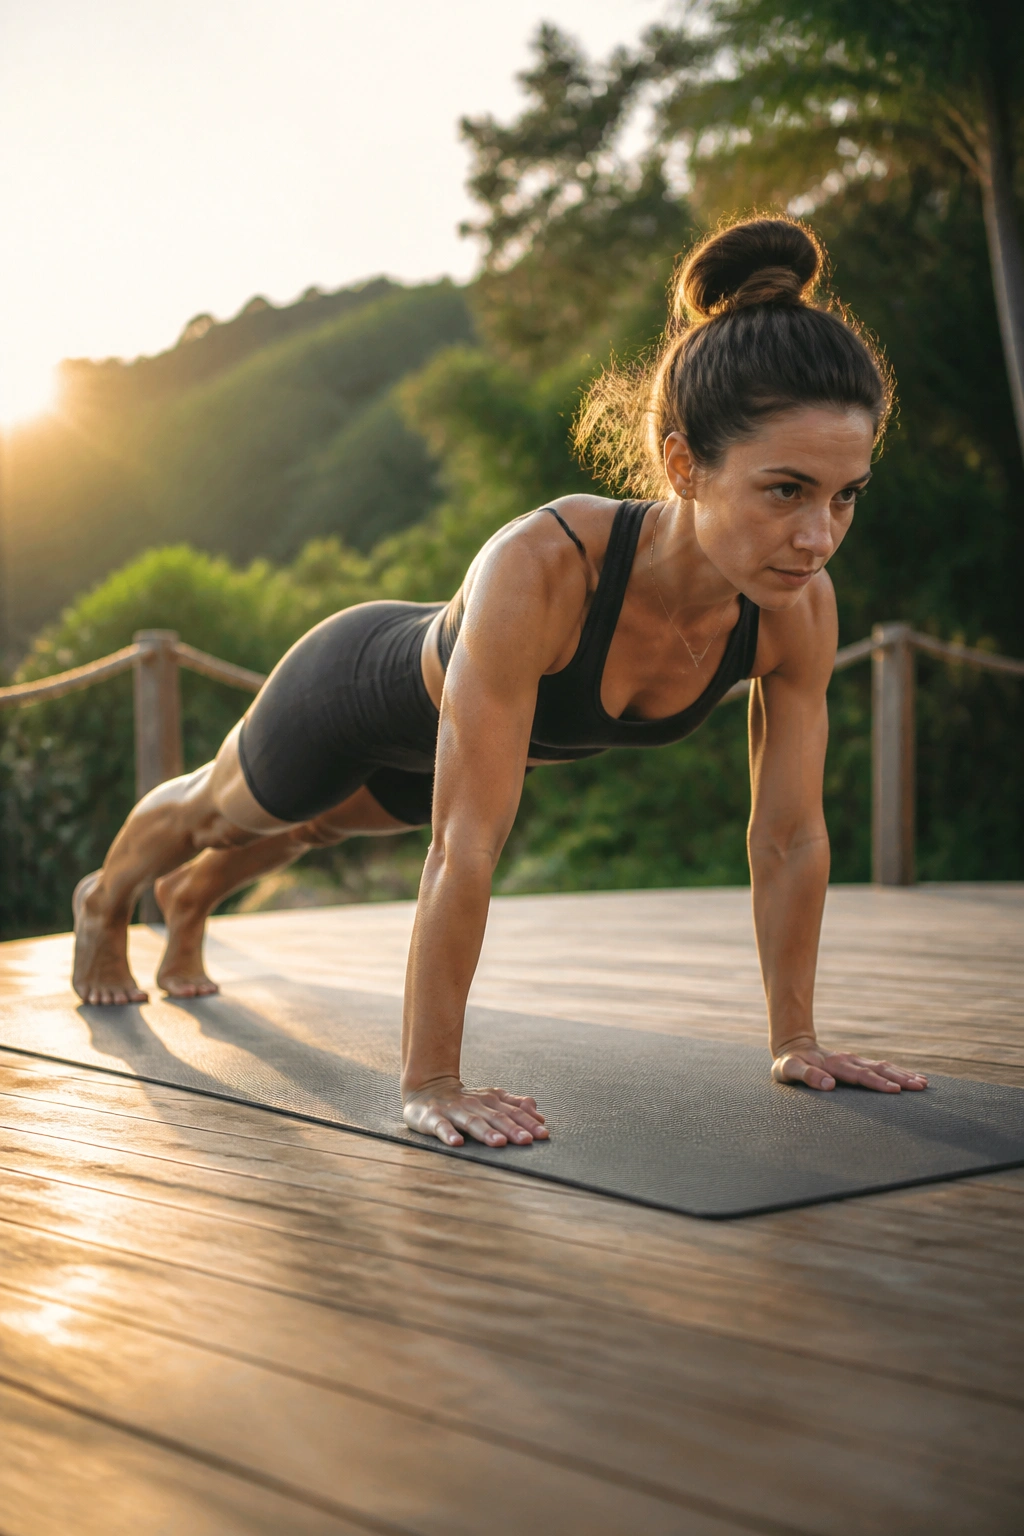
This is the backbone flow I trust when I want heat without chaos. Sun Salutation A sounds basic because it is basic, and that’s exactly why it works so well for people who already know the poses. The trick is not doing it faster. The trick is making each transition cleaner than the last.
Run it with a deliberate pause in plank. Step or hop back, lower halfway in chaturanga if it’s in your practice, then hold plank for 2 to 3 breaths on every second round. That little pause wakes up your shoulders, your front body, and your feet. It also tells you immediately whether your core is doing its job or freeloading.
- Start in mountain pose and fold on an exhale.
- Step back to high plank and keep your heels pressing back.
- Lower with control, then rise to upward-facing dog or cobra.
- Press into downward dog for 3 to 5 breaths before repeating.
Do not rush the return to standing. If you jump forward, land softly. If you step, place the feet lightly between the hands and lift the chest before you think about speed. This flow is plain, but plain is not the same as easy.
2. Crescent Lunge to Warrior III
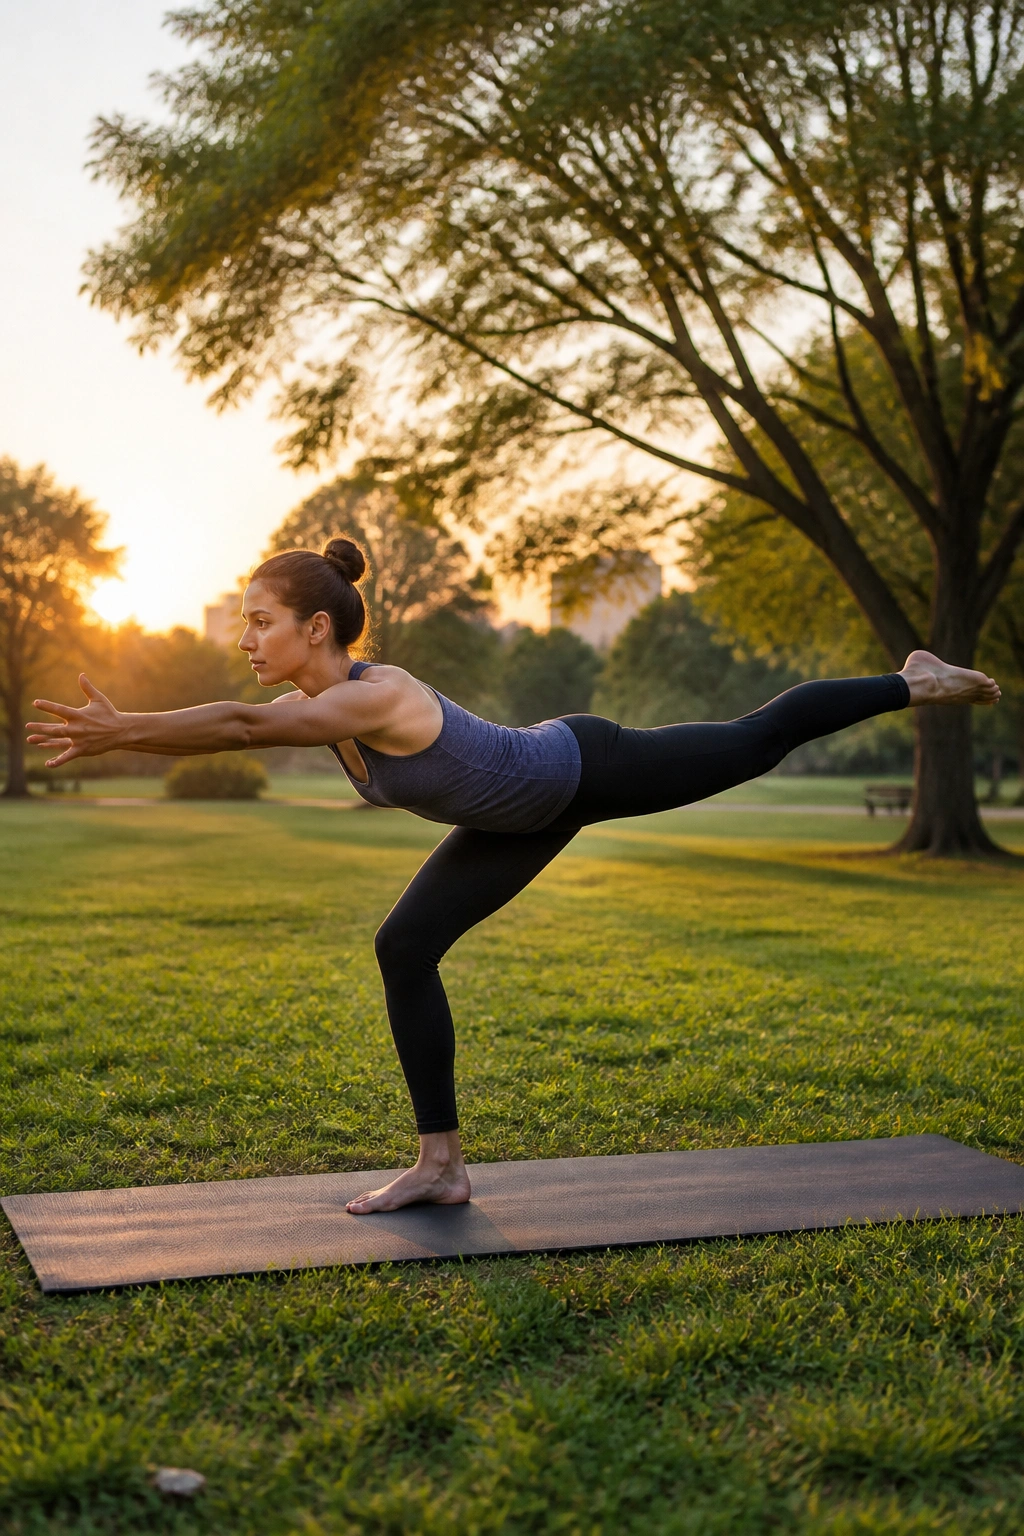
What makes this sequence so good is the moment your back foot leaves the floor. That tiny shift turns a familiar lunge into a full-body balance test, and it exposes every lazy habit in your standing leg and hip line. It’s also one of the best ways to build the kind of control that makes harder flows feel less messy.
Start in crescent lunge, with the back heel lifted and the front knee stacked over the ankle. Rise onto the ball of the back foot, tip the torso forward, and send the back leg long into Warrior III. Hold for 3 breaths, then return through crescent and repeat on the other side. The movement should feel like one long line, not a lunge followed by a desperate lunge-shaped wobble.
How to keep the hips level
Think about the back heel reaching toward the wall behind you while the chest stays broad. If one hip opens upward, shorten the range and reset. A lot of people try to get the leg higher, but a lower leg with a quiet pelvis is far stronger.
What to feel
- Front glute working hard.
- Standing foot gripping through all four corners.
- Rib cage drawing in so the low back does not collapse.
- Back leg engaged from the heel to the toes.
A block under the hands can help if the floor feels too far away. I like this one because it rewards honesty. Cheat, and it falls apart. Move cleanly, and it feels almost smooth.
3. Side Plank Ladder
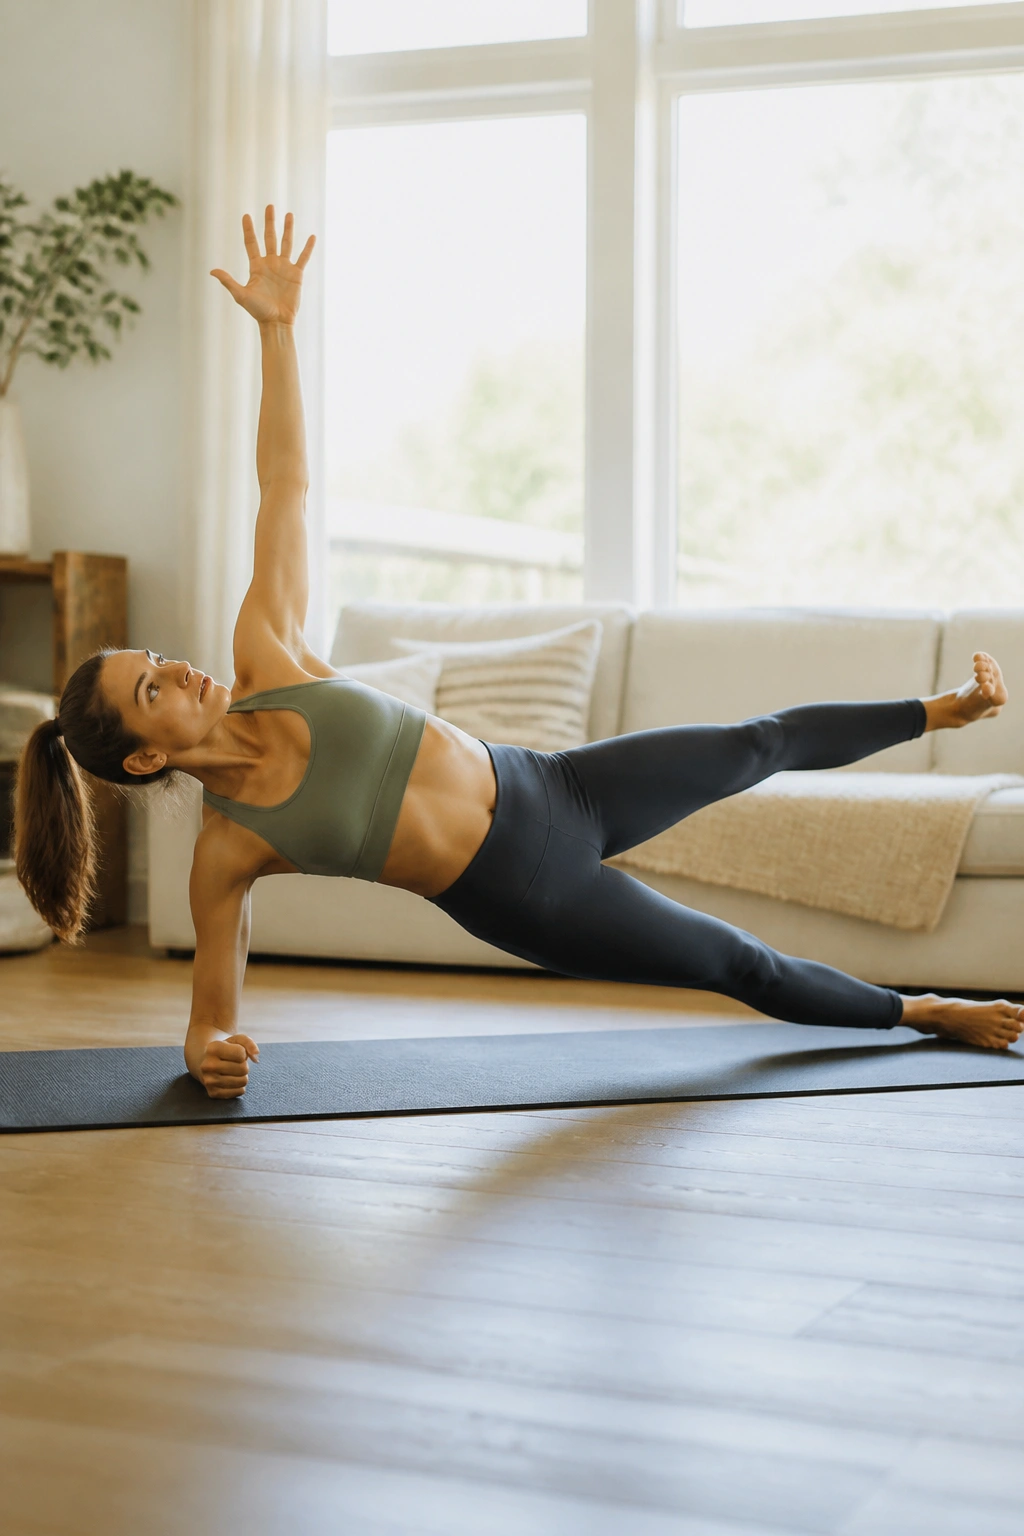
Your shoulder will wake up fast here. Side plank is one of those shapes people often treat like a pause, but it’s really a strength builder for the obliques, wrists, and the side of the hip. Once you stop collapsing into the bottom shoulder, the pose gets much more interesting.
Move from plank to side plank on the right, stack the feet or stagger them, and hold for 2 breaths. Return to plank, then repeat on the left. If that feels steady, lift the top leg for one breath, lower it, and repeat. You can also add a knee-to-elbow crunch from full side plank if you want a more obvious core hit.
A lot of shoulder pain comes from hanging out in the joint instead of pressing the floor away. That’s the whole game here. Reach through the crown of the head, press through the base of the index finger, and keep the hips from sagging. Small adjustment, big difference.
Best version for intermediate practice: 3 rounds per side, with the last round held for 4 breaths. By the end, your wrists should feel alive, not angry. If they’re angry, switch to forearm side plank and keep going.
4. Revolved Chair to Prayer Twist Flow
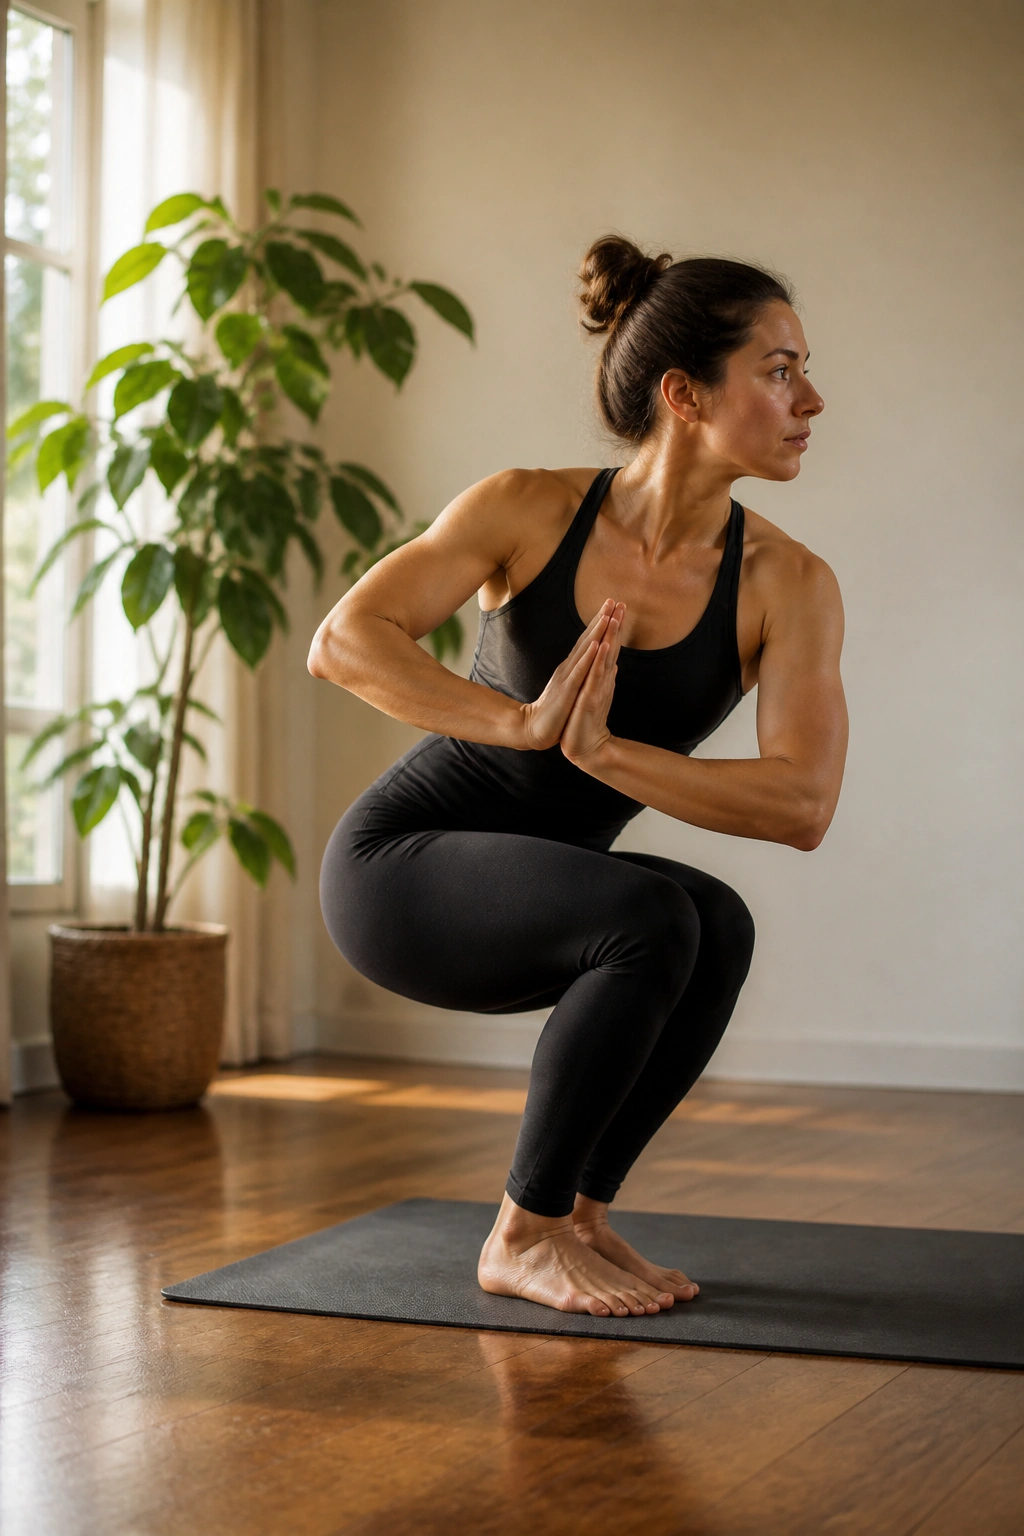
Twists are not a warm-up. They’re a test. If your spine is long and your legs are awake, the twist feels clean. If you’re slumped in the ribs and half-sitting in the hips, the whole thing turns into a knee-and-back negotiation you did not need.
Sit back into chair pose, bring your hands to prayer, and rotate the rib cage to the right while keeping the knees even. Hold for 2 to 3 breaths. Step or fold forward, then repeat on the left. The flow gets better when you keep the twist high in the torso instead of wrenching the lower body.
Twist from the rib cage, not the knees
The knees can drift a little, but they should not become the main event. Keep both heels weighted and your chest lifted before you rotate. That order matters. Twist first, then deepen.
Common cue that helps
- Inhale to lengthen the spine.
- Exhale to rotate one more inch.
- Keep the belly firm so the low back stays quiet.
- Unwind slowly and stand up with control.
This one pairs well with a short vinyasa between sides. I like it after a few rounds of sun salutations, when the body is warm but not tired enough to fake the movement.
5. Boat Pose to Forearm Plank Circuit
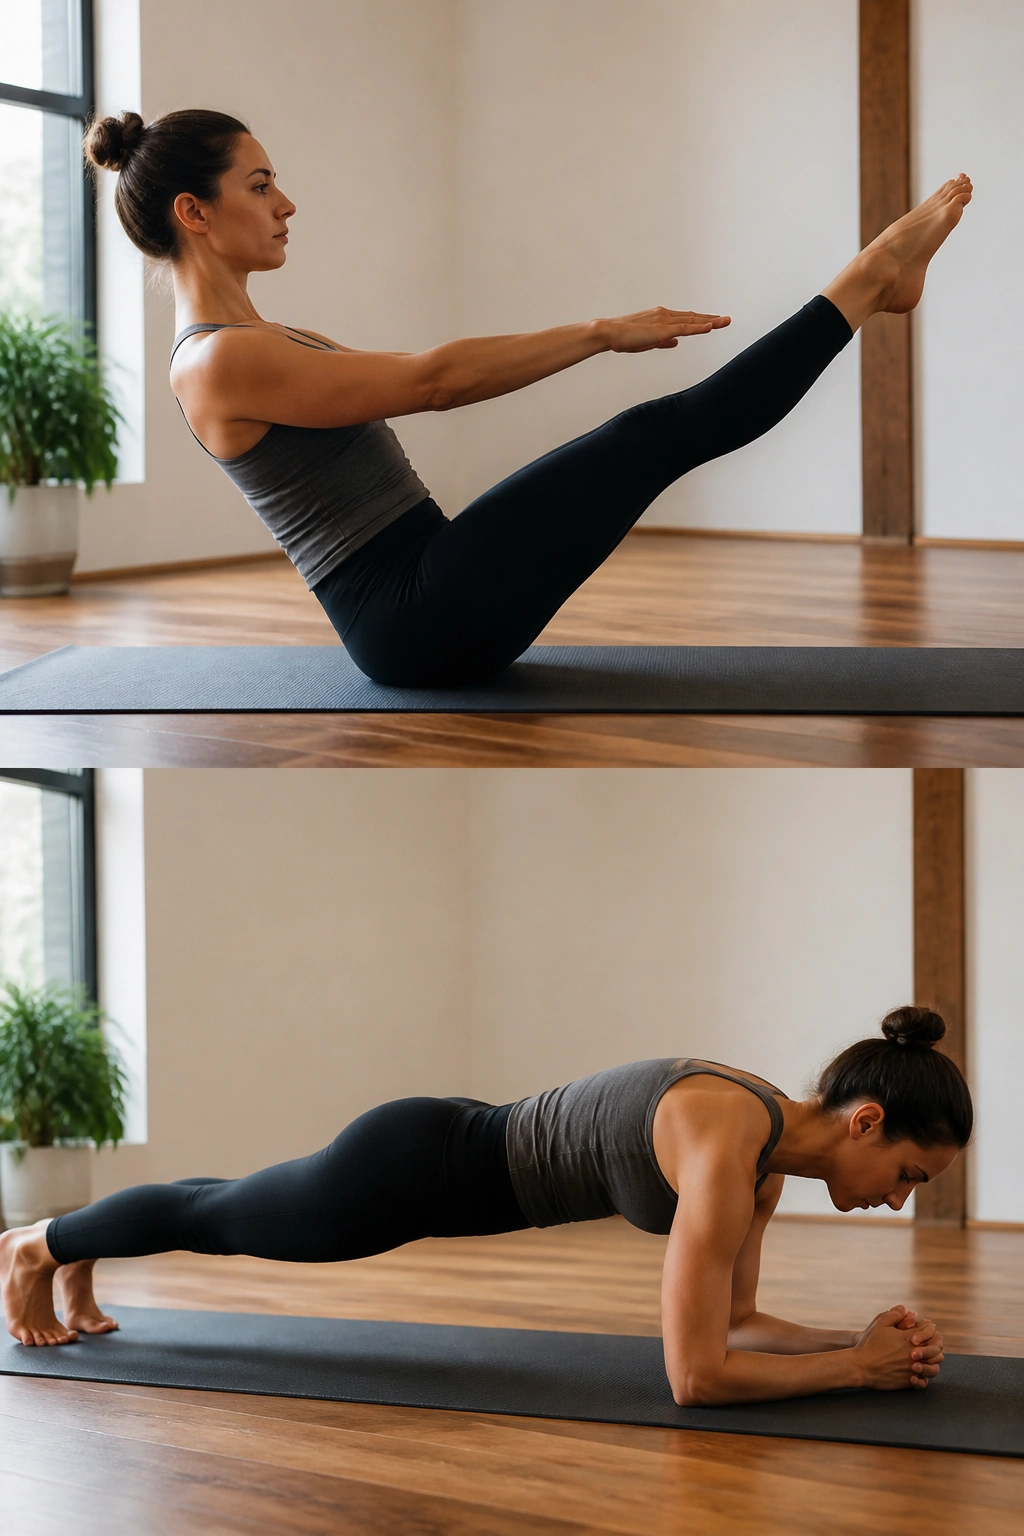
Three rounds are enough to make your abs complain in a useful way. Boat pose gets a bad reputation because people slump in it or yank on the neck, but used well, it’s one of the cleanest ways to build front-body endurance for stronger flows. Forearm plank adds the shoulder work without asking the wrists to do everything.
Lower into boat pose and hold for 3 breaths. Roll or step down into forearm plank and stay there for 3 to 5 breaths. From there, press back to downward dog, then repeat. If you want a sharper challenge, lower halfway from forearm plank into sphinx and push back up again with control.
The key is not letting the lower back steal the job. Keep the ribs knitted in, keep the chin slightly tucked, and stay honest about how much lift you can hold. I’d rather see a low, steady boat than a flailing high one any day.
This circuit is especially good on days when standing work feels stale. It brings the practice back to the center line, and that usually makes the rest of the class feel more organized.
6. Warrior II, Reverse Warrior, and Extended Side Angle
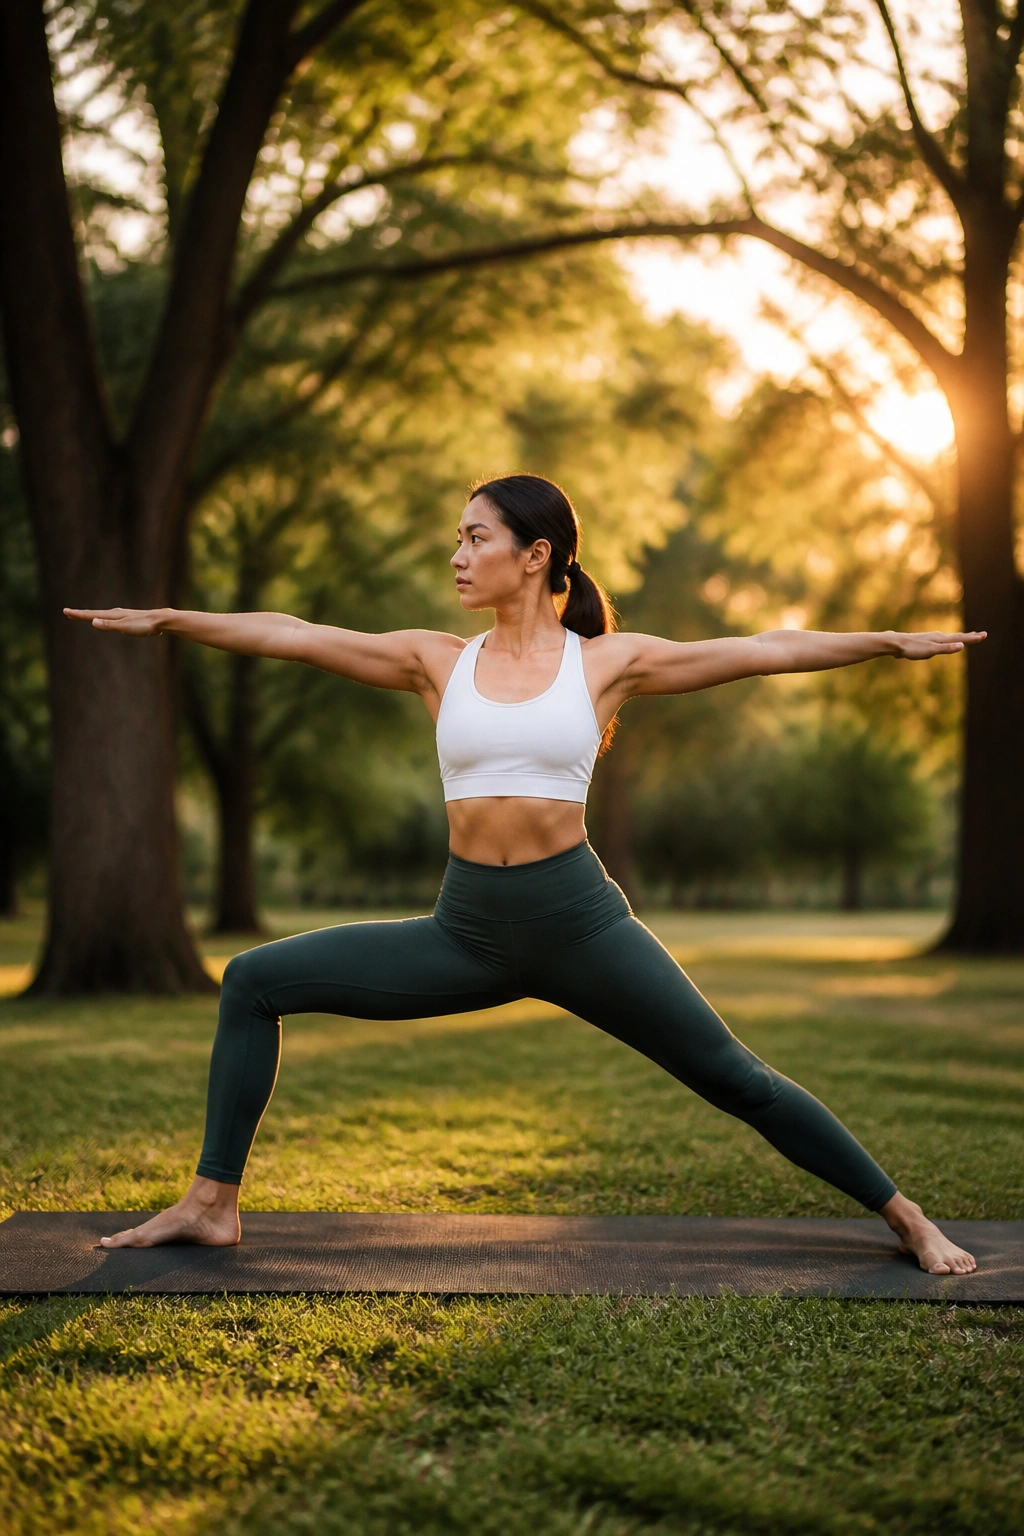
This one looks simple until you hold it for real. Warrior II, reverse warrior, and extended side angle are old-school shapes, but they keep showing up because they build leg stamina and side-body strength without needing tricks. There’s a reason good teachers keep coming back to them.
Step into Warrior II and sit deep into the front knee. Rise into reverse warrior on an inhale, then tip forward into extended side angle on the exhale. Move between them for 3 rounds on each side, holding each pose for 2 to 4 breaths. Keep the back leg alive the whole time; dead back legs make the whole sequence wobble.
A lot of people sink too much weight into the front thigh and forget the back inner arch. That’s a shame, because the back leg is doing more work than it gets credit for. Press the outer edge of the back foot down, and you’ll feel the pelvis settle in a better way.
If you want a stronger version, thread the top arm around the front shin in side angle or take a half bind. If you want a cleaner version, stay open and smooth. The sequence has enough meat on it without extra drama.
7. Twisting Pyramid and Half Split Flow
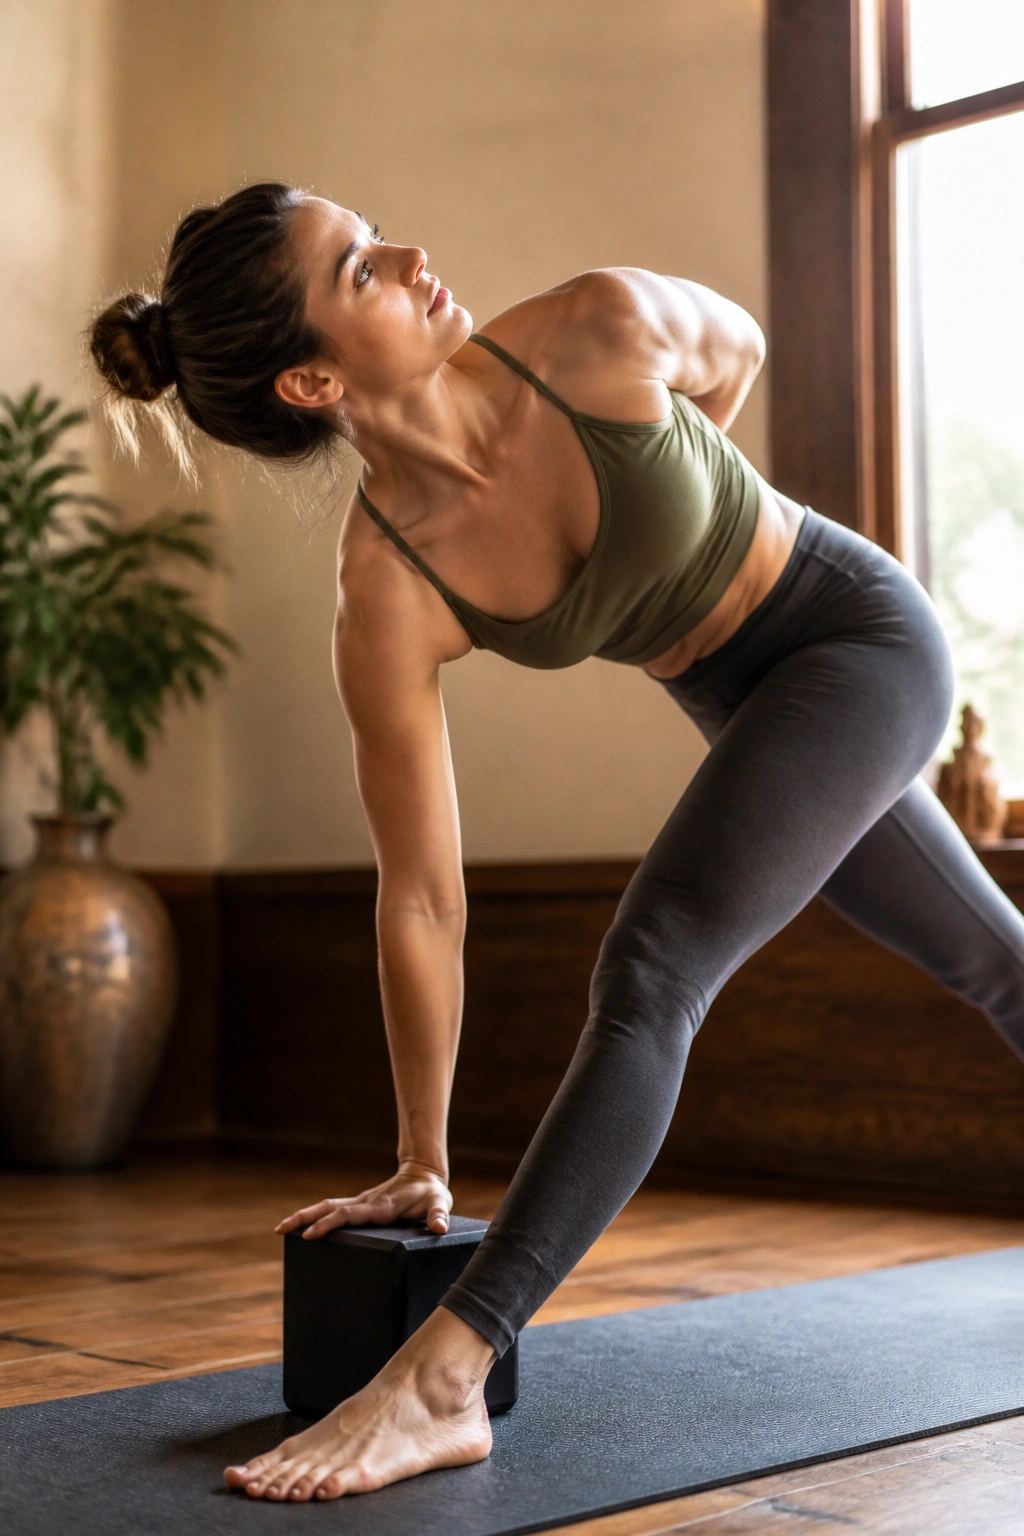
Want hamstrings that can actually work, not just stretch? This is where to go. Twisting pyramid asks for forward-bending control, spinal length, and enough leg strength to avoid collapsing into the joint. It’s a smarter choice than yanking on cold hamstrings and calling it mobility.
Start in high lunge, straighten the front leg into pyramid, then rotate into revolved pyramid with the opposite hand grounded or on a block. Step back into half split, flex the front foot hard, and repeat the cycle 2 or 3 times before switching sides. The transitions should feel like a hinge, not a dive.
What to watch for
- Keep the front foot active in pyramid.
- Bend the standing knee a little if the hamstring grabs.
- Use a block on the outside of the front foot if the floor is far away.
- Stop the twist if the low back starts to pinch.
I like this flow because it punishes ego in a useful way. If you overreach, you’ll know. If you keep the spine long and the front thigh engaged, the stretch opens in a much better place.
8. Lizard, Half Split, and Skandasana
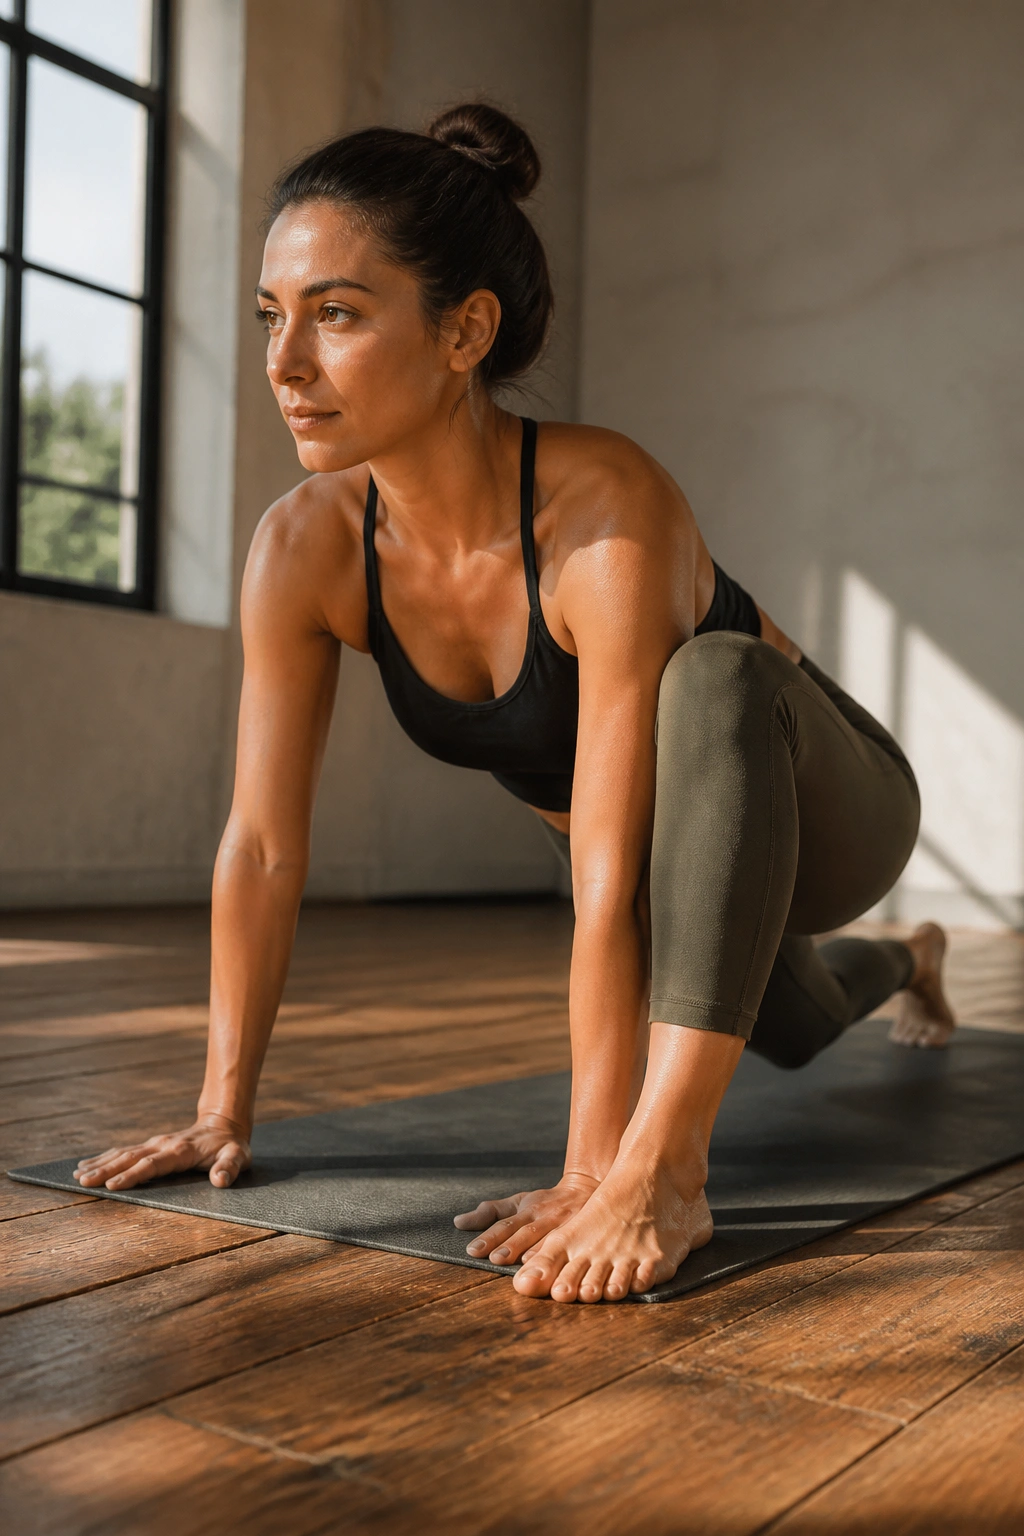
If your hips feel glued shut after long sitting, this is the antidote. The catch is that it has to stay active. Passive hip opening can feel lovely in the moment and do very little for a stronger practice. Active mobility, on the other hand, teaches the body to move and hold under load.
Drop into a low lunge, step the front foot outside the hand for lizard, and hover the hips if that feels okay. Shift back to half split, flex the front foot, then slide into skandasana on the side. Move back through the lunge and repeat 2 to 4 times per side.
Make the stretch active
Press the hands down in lizard as if you’re trying to move the floor away. In half split, pull the front toes toward the shin so the hamstring works instead of hanging. In skandasana, keep the bent knee tracking over the toes, not collapsing inward.
That’s the part most people skip. They think the goal is depth. It isn’t. The goal is usable range, which is a much better deal. If your knee complains in skandasana, shorten the stance and lift the heel a little.
This sequence feels especially good after standing work. The legs are warm, the hips are receptive, and the body is ready to move sideways for once.
9. Locust, Cobra, Upward Dog, and Bridge
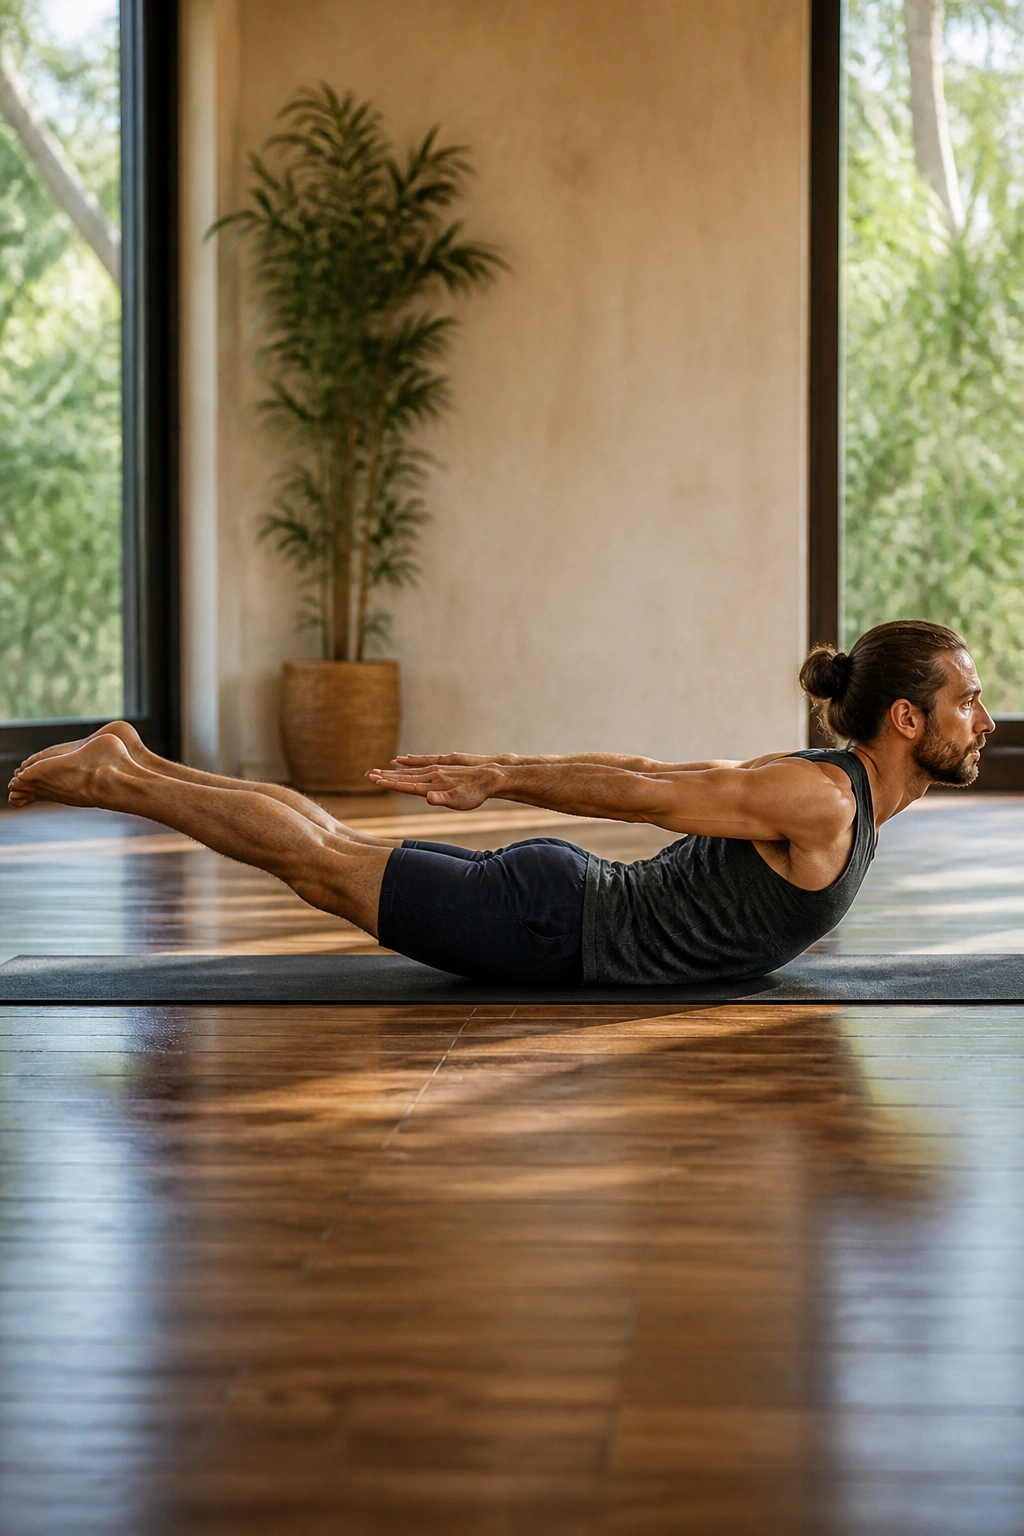
Backbends are stronger when they are smaller. That sounds backward, but it’s true. A controlled cobra or locust can do more for your spine and glutes than a collapsed, high backbend that dumps everything into the low back.
Lie on your belly and lift into locust for 2 breaths, then lower into cobra with the hands light on the floor. Press up to upward-facing dog only if your shoulders and low back feel fine. Finish the round with bridge pose on your back, lifting the hips and pressing the feet firmly down. Repeat 3 times.
Why this sequence matters
Locust teaches the back body to work without help from the arms. Cobra lengthens the front line without overdoing the lumbar spine. Bridge gives you hip extension with a different load pattern, which is useful when one version starts to feel stale.
If your low back takes over, reduce the height. If your neck tightens, keep the gaze down. That’s not a failure; that’s the body giving feedback. And feedback beats ego every time.
A lot of people only train the front of the body in yoga. This flow fixes that. It’s one of the best reasons to keep backbends in a power practice.
10. Eagle to Half Moon Balance Flow
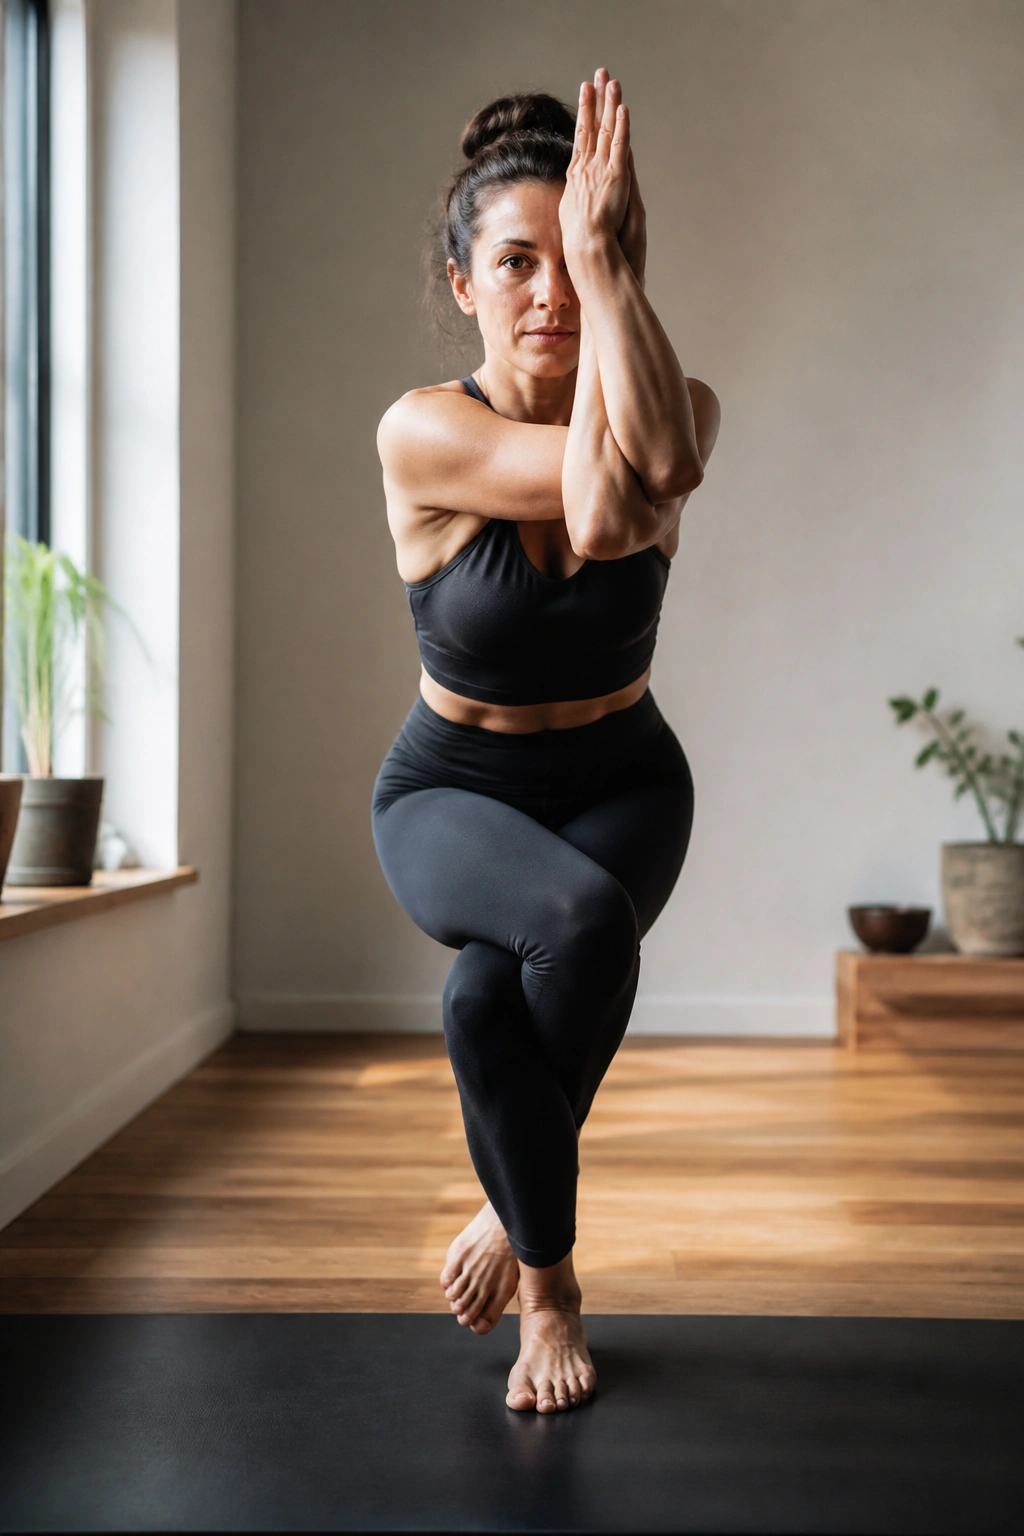
Balance gets harder when you’re tired. That’s why this flow belongs in an intermediate practice, not at the very beginning when everything still feels fresh and neat. Eagle compresses, half moon opens, and the switch between them asks for control from the standing foot all the way up to the fingers.
Start in eagle pose for 3 breaths, unwind into a standing lunge or a small forward fold, then step into half moon with the lower hand on a block. Hold half moon for 2 breaths. Return to eagle on the other side and repeat. If you want a stronger challenge, float the top leg an inch higher in half moon and keep the chest from spiraling open.
A useful ladder
- Eagle for compression and focus.
- Standing fold to reset the breath.
- Half moon for extension and hip stability.
- Standing split if you want one more layer.
The best thing about this sequence is how it cleans up sloppy habits. If the standing knee locks back, you feel it right away. If the core stops working, the torso tips. No mystery. No fluff. Just feedback.
11. Plank Taps, Crow Leans, and Side Crow Prep
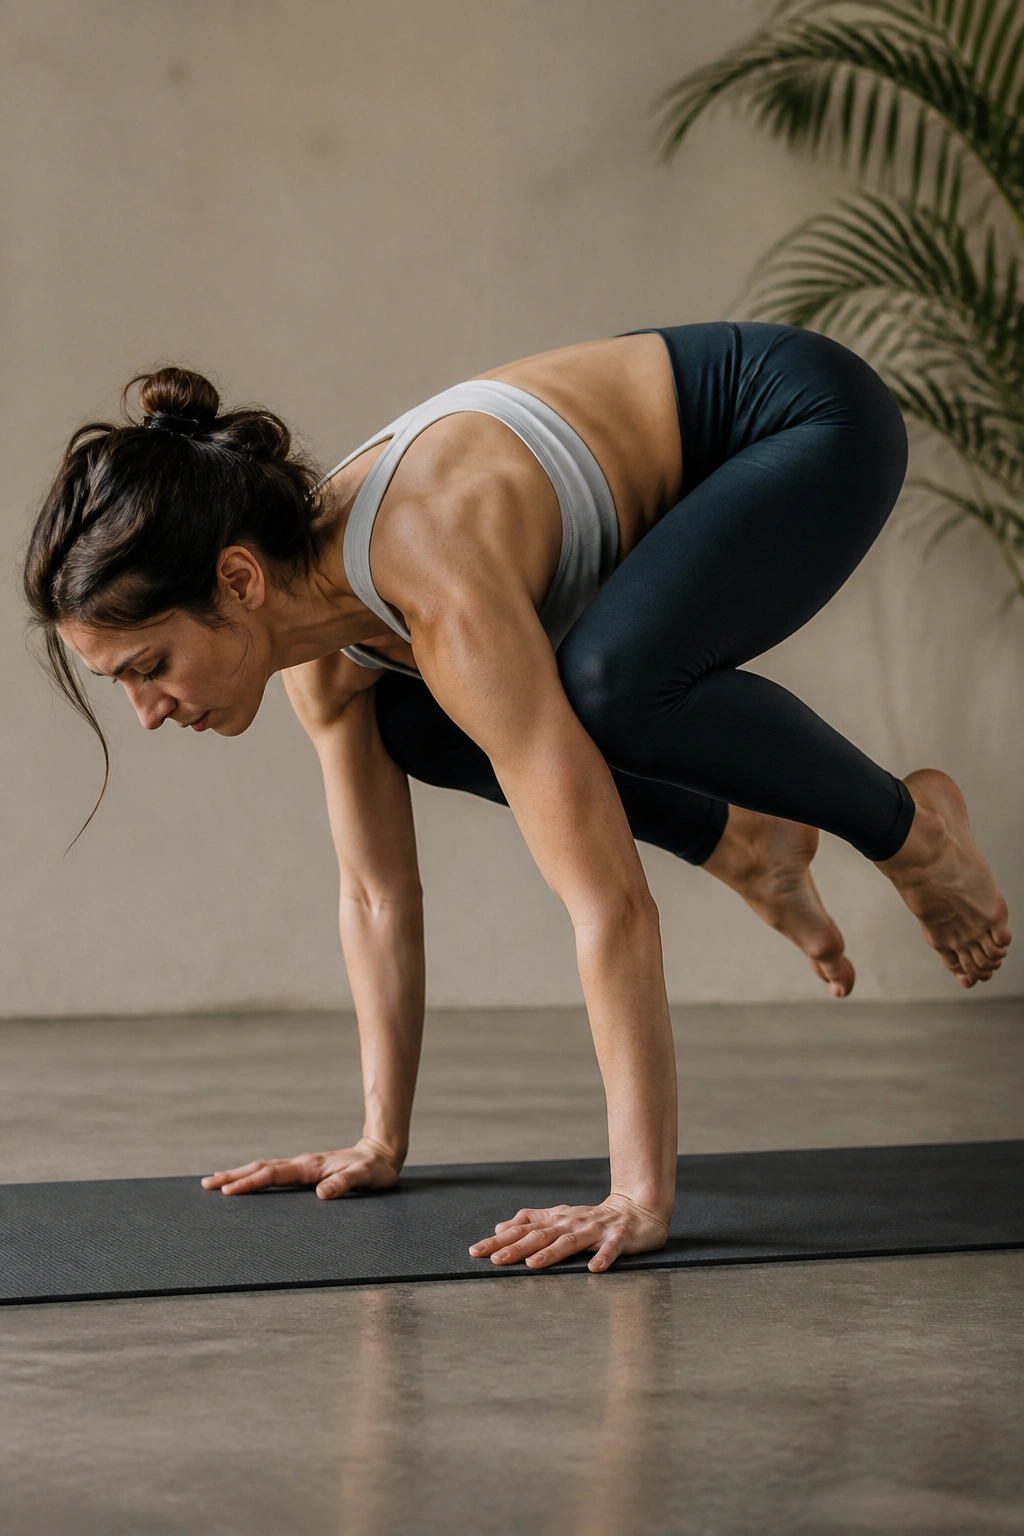
Arm balances scare people for a reason. They ask your wrists, shoulders, and center line to cooperate before your confidence has time to fake it. That is exactly why they belong in a power yoga session for people past beginner.
Begin in high plank and tap each shoulder 10 times with slow control. Shift into a deep squat and lean forward into crow prep, keeping the toes light and the gaze a foot ahead of the hands. If that feels solid, try a tiny lift of one foot at a time. Side crow can wait until the lean feels boring.
Where arm balance starts
It starts in the lean, not the lift. The shoulders need to move slightly past the wrists, the core needs to stay tight, and the elbows need to stay tucked enough that the arms form a shelf. If you fling the legs, you’ll miss the point.
Use a block under the forehead if fear makes you stiff. That one change can calm the whole thing down. It gives you a reference point and takes some drama out of the attempt, which is often all you need.
Do not chase the full pose on the first round. A few controlled leans are worth more than a messy launch. Messy launches are expensive.
12. Low Lunge, Quad Stretch, and Split Hover
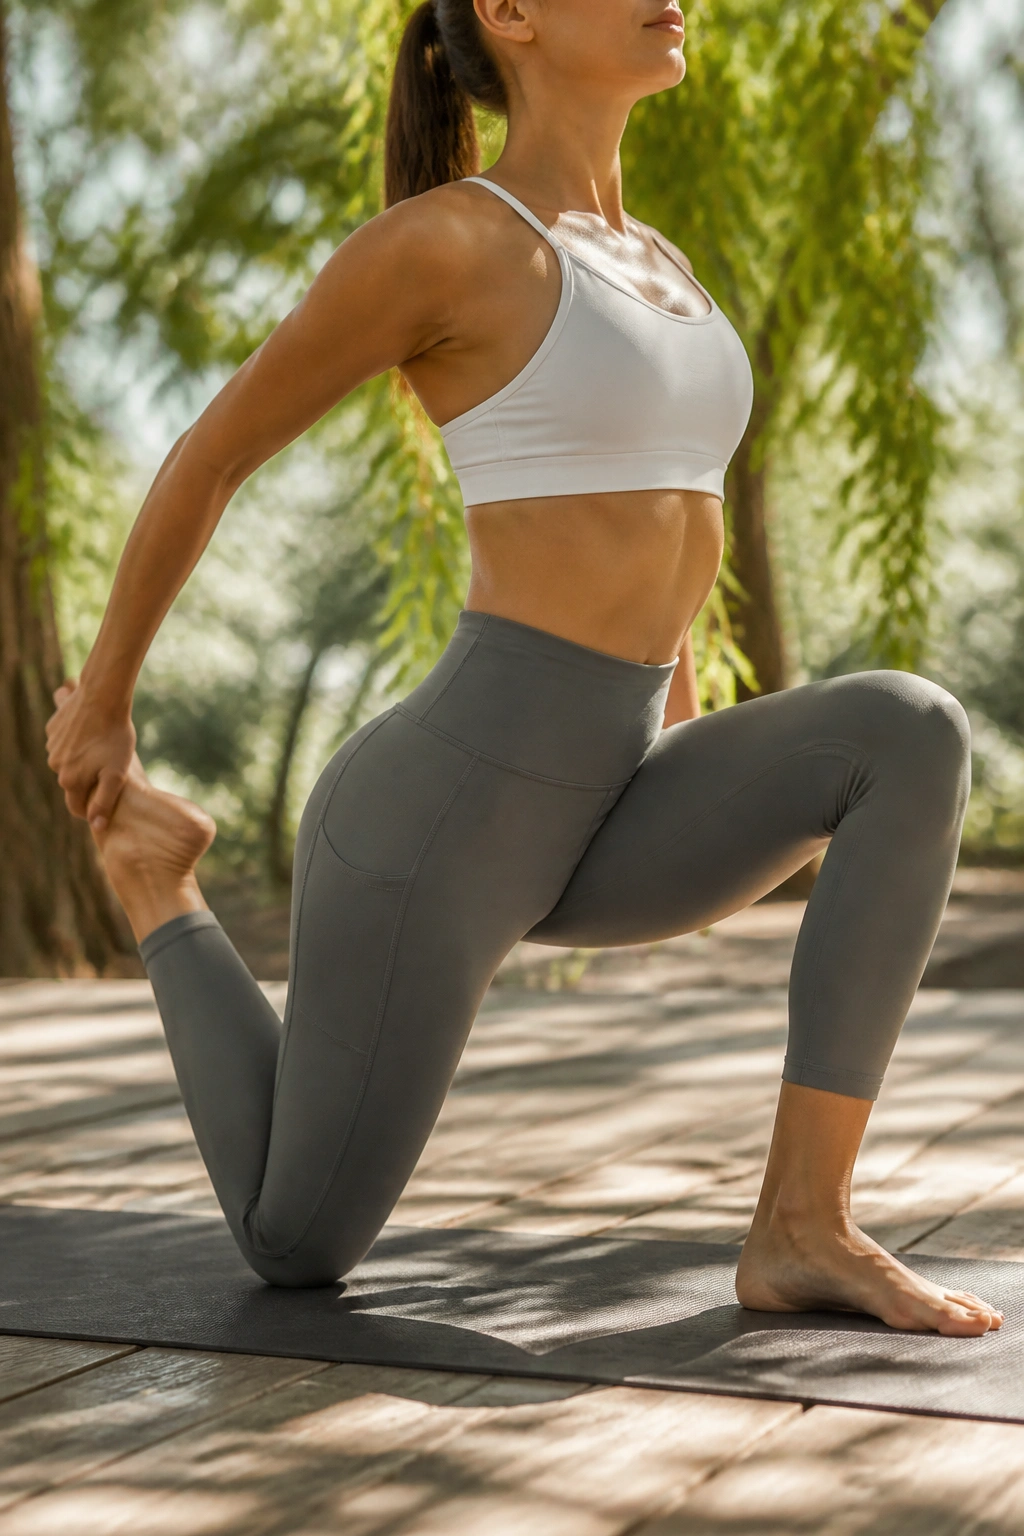
The hip flexors do not get a vote here. They have been sitting all day, and a strong practice should ask them to lengthen and work at the same time. That’s what makes this sequence so useful for runners, cyclists, and anybody who gets tight through the front of the thighs.
From downward dog, step to a low lunge. Lift the back knee, bend it for a quad stretch if that feels safe, then send the hips back into a half split. Hover the front heel an inch off the floor if you want more work, then return to low lunge. Repeat 3 times per side.
What to feel
- A long line from the back hip to the back knee.
- Front hamstring working in half split.
- Quad stretch without cranky low-back compression.
- Enough core engagement to stop the pelvis from dumping forward.
The hover matters more than people think. It forces the front leg to stay awake instead of collapsing into the stretch. That one detail changes the whole character of the pose.
If your balance is shaky, keep the back knee down and take the movement slower. The point is not to win a pose photo. The point is to build legs that can hold up under real work.
13. Five-Breath Power Yoga Flow
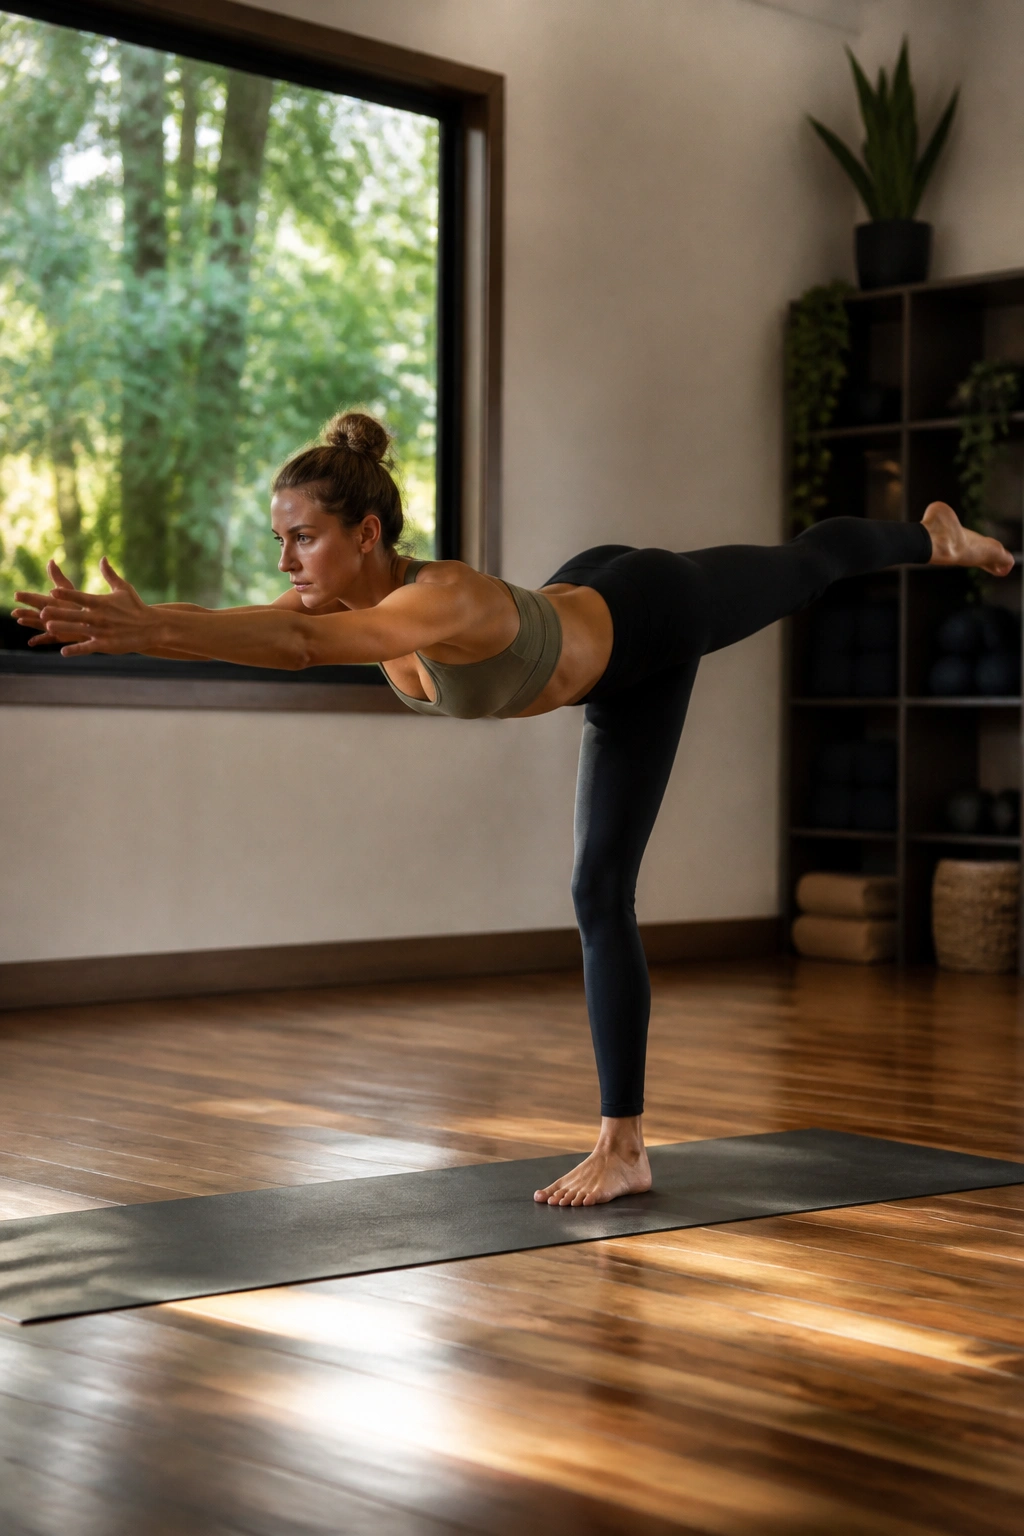
Five breaths is enough if you mean them. This shorter flow is the one I like when the goal is conditioning, not wandering around the mat. The sequence is tight, the pace is brisk, and the transitions matter more than the pose names.
Move from mountain to forward fold, step or hop to plank, lower through chaturanga if it belongs in your practice, then rise to upward dog and press back to down dog. Stay in each shape for exactly 5 breaths on the first round, then shorten to 3 breaths on the next round. Two rounds can leave you sweaty. Four rounds can leave you humbled.
A simple interval structure
- Round 1: 5 breaths in each major pose.
- Round 2: 3 breaths in each major pose.
- Round 3: 1 to 2 breaths and quicker transitions.
- Round 4: repeat only if the form stays clean.
The beauty of this flow is that it teaches pace without turning into a race. The breath should still have a little room. If you lose it completely, slow down before the rest of the sequence falls apart.
I’d use this on days when the body feels decent but not especially eager. A short, disciplined practice often beats a long one that never sharpens up.
14. Tempo Chair, Tempo Lunge, and Tempo Warrior II
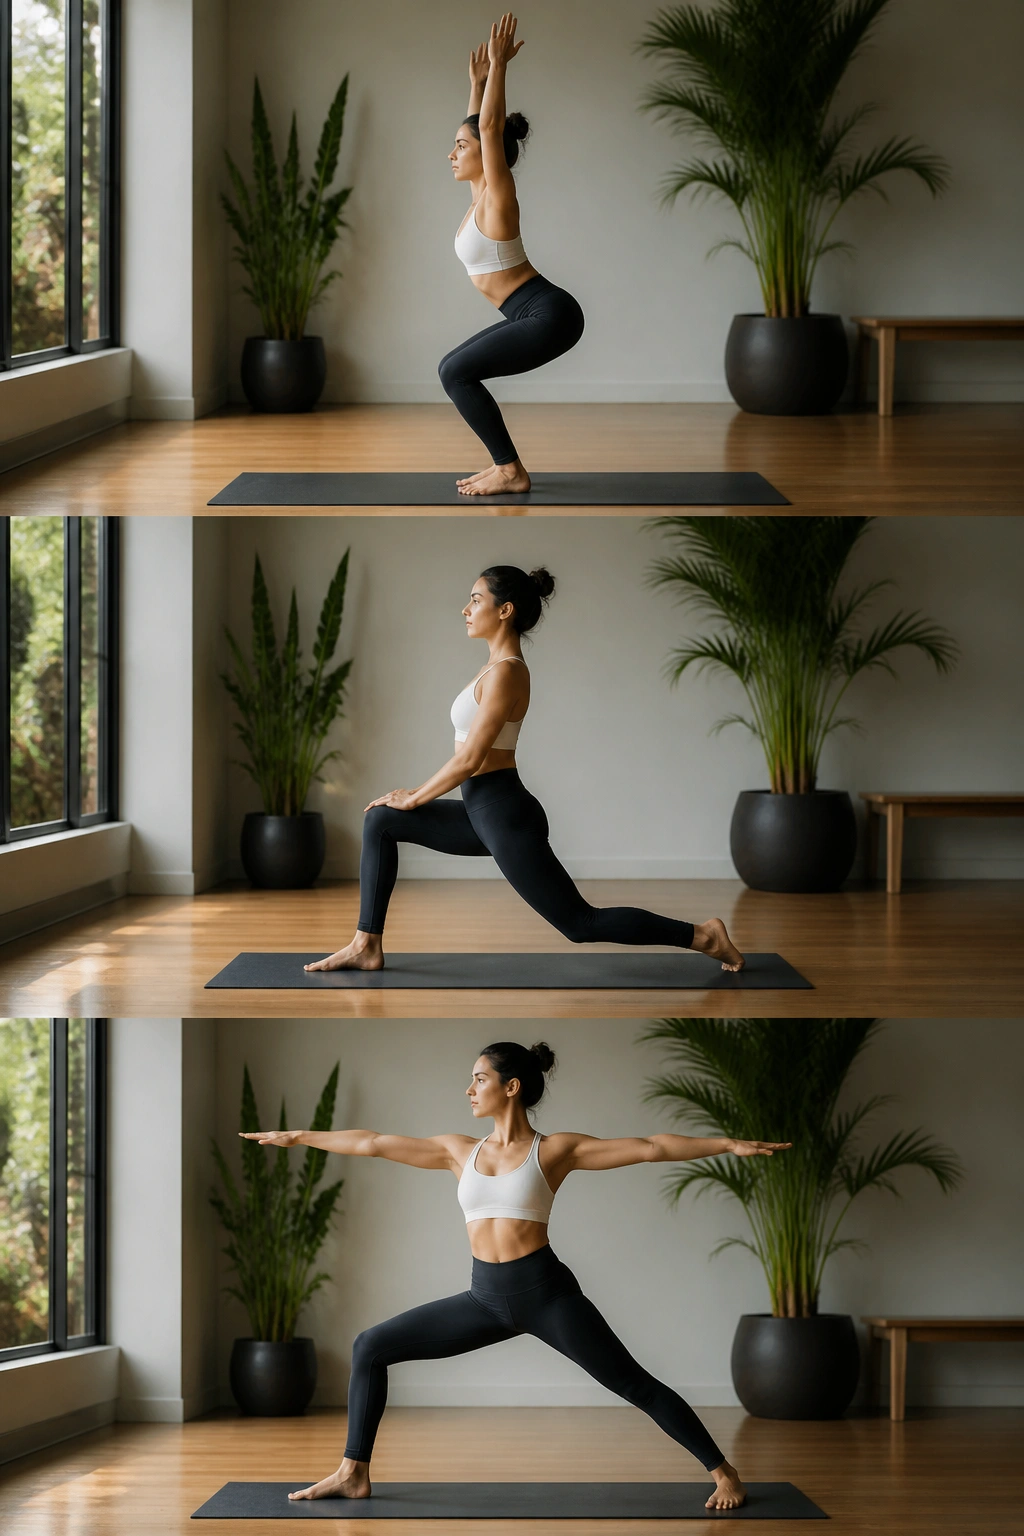
Slow is harder than fast. That is the whole secret, and people keep relearning it because speed is easier to brag about. Tempo work exposes weak points that a rushed flow lets hide, which makes it useful for building real strength.
Drop into chair pose over 4 counts, hold for 2, and stand for 4. Step into crescent lunge over 4 counts, pause, then rotate into Warrior II over another 4. Do 2 rounds per side and keep the breath calm. If the shaking starts, stay there a second longer.
A four-count tempo that bites
- 4 counts down into the shape.
- 2 counts to settle and breathe.
- 4 counts back out.
- Repeat without collapsing into the joints.
This style is sneaky. It does not look dramatic from across the room, but your thighs will know. Your feet will know too, because tempo work asks them to grip and release instead of just surviving the pose.
The best part is how it cleans up habits. If you rush through transitions, you notice. If your knees cave, you notice. If your breath turns sharp, you notice. That’s useful data, even when it is annoying.
15. Legs-Up-The-Wall With Supine Twist and Breath Holds
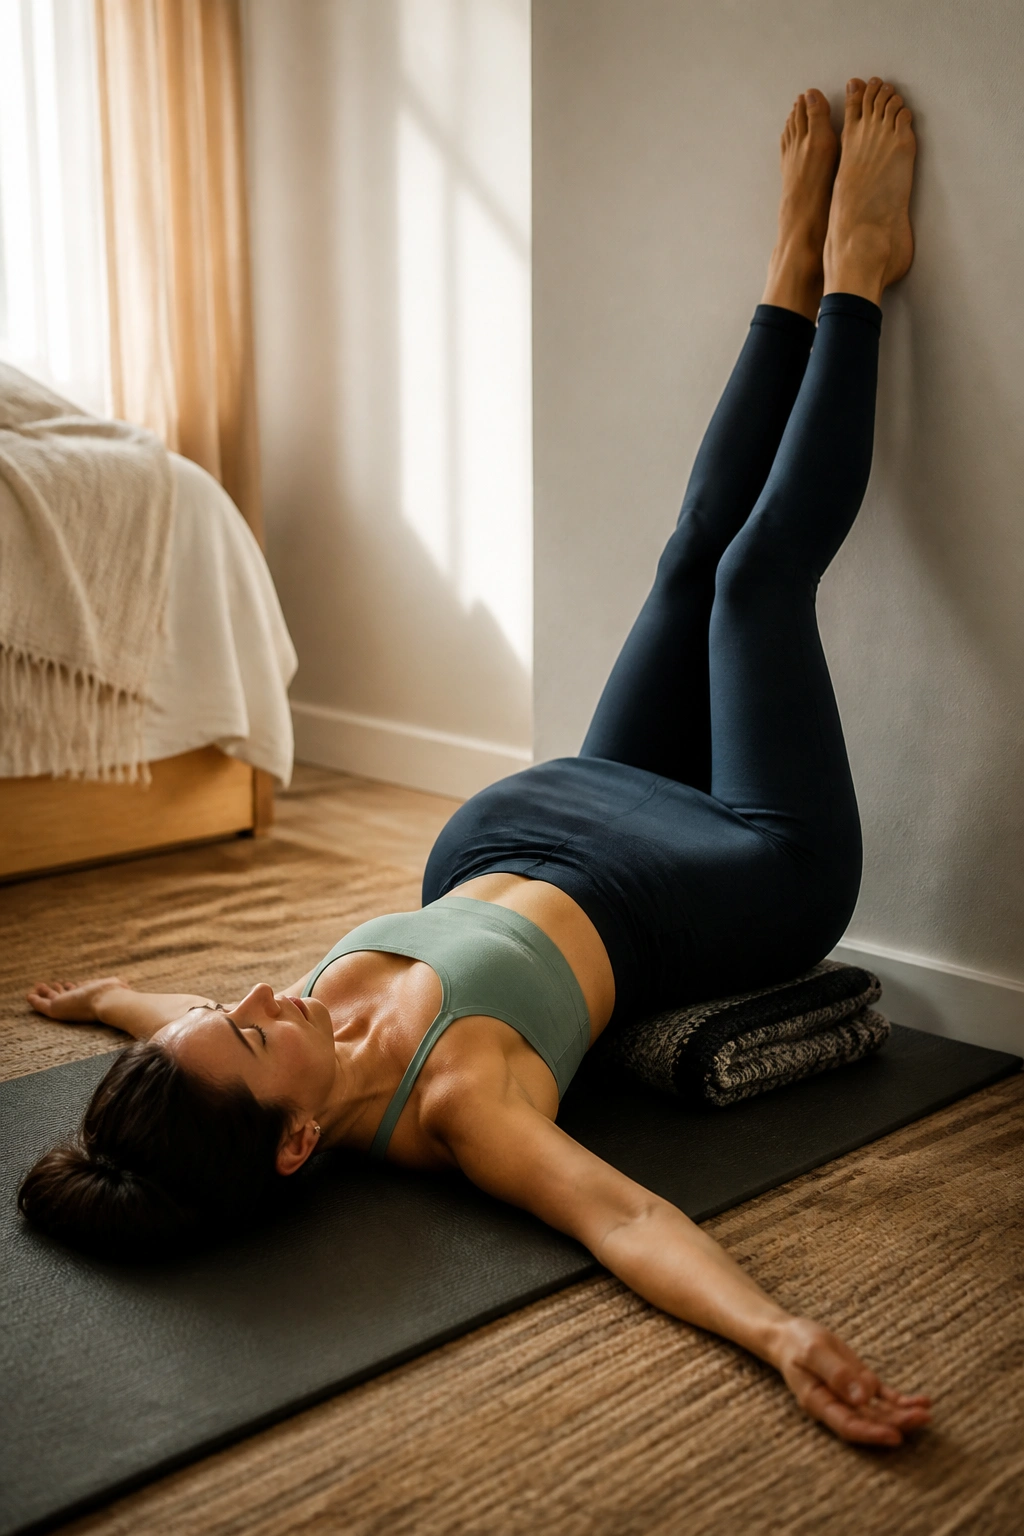
Finishing well matters. A power practice that ends with a hard stop feels unfinished to me, like slamming a car door and walking away. This closing flow keeps the body honest while letting the nervous system come back down.
Lie with your legs up the wall for 2 to 5 minutes. Bend the knees, drop them to one side for a gentle supine twist, then return to center and switch sides. Finish with a few slow breath holds: inhale for 4, exhale for 6, and let the exhale feel longer than the inhale. If that ratio feels too sharp, use 3 and 5 instead.
There is still strength here, by the way. Holding the legs up takes some work in the belly and hip flexors, and the twist helps the spine settle after all the standing and balancing. It’s not passive in the lazy sense. It’s controlled recovery, and that’s different.
A folded blanket under the hips can make the wall pose feel better, especially if the hamstrings pull hard. If your lower back feels tight, stay in the bent-knee version longer. Strong practices age better when the finish is thoughtful, not abrupt.
A good place to stop is when the breath feels smooth and the jaw has unclenched. After that, roll to one side, sit up slowly, and carry the calm part with you.
