



Lower back pain has a nasty habit of showing up after a long drive, a bad chair, or the wrong twist while lifting a grocery bag. The right yoga poses for lower back pain relief can calm that grabby feeling without asking your spine to do anything dramatic.
A lot of the time, the trouble is not the back alone. Tight hips, sleepy glutes, stiff hamstrings, shallow breathing, and too many hours sitting can all make the lumbar area work harder than it should. That is why the best relief usually comes from a mix of gentle movement, a little strength, and a few positions that let the nervous system unclench.
That matches the way conservative care is often handled in plain medical advice from groups like the American College of Physicians and the National Center for Complementary and Integrative Health: move when you can, keep things gentle when pain is cranky, and get checked if the pain comes with numbness, weakness, fever, a fall, or bowel and bladder changes. Sharp, shooting pain is not a “stretch through it” moment. It is a stop and reassess moment.
The poses below move from soft unloading to more active support. Start with the ones that feel easy. Small is fine. That is usually where the relief starts.
1. Child’s Pose With Wide Knees
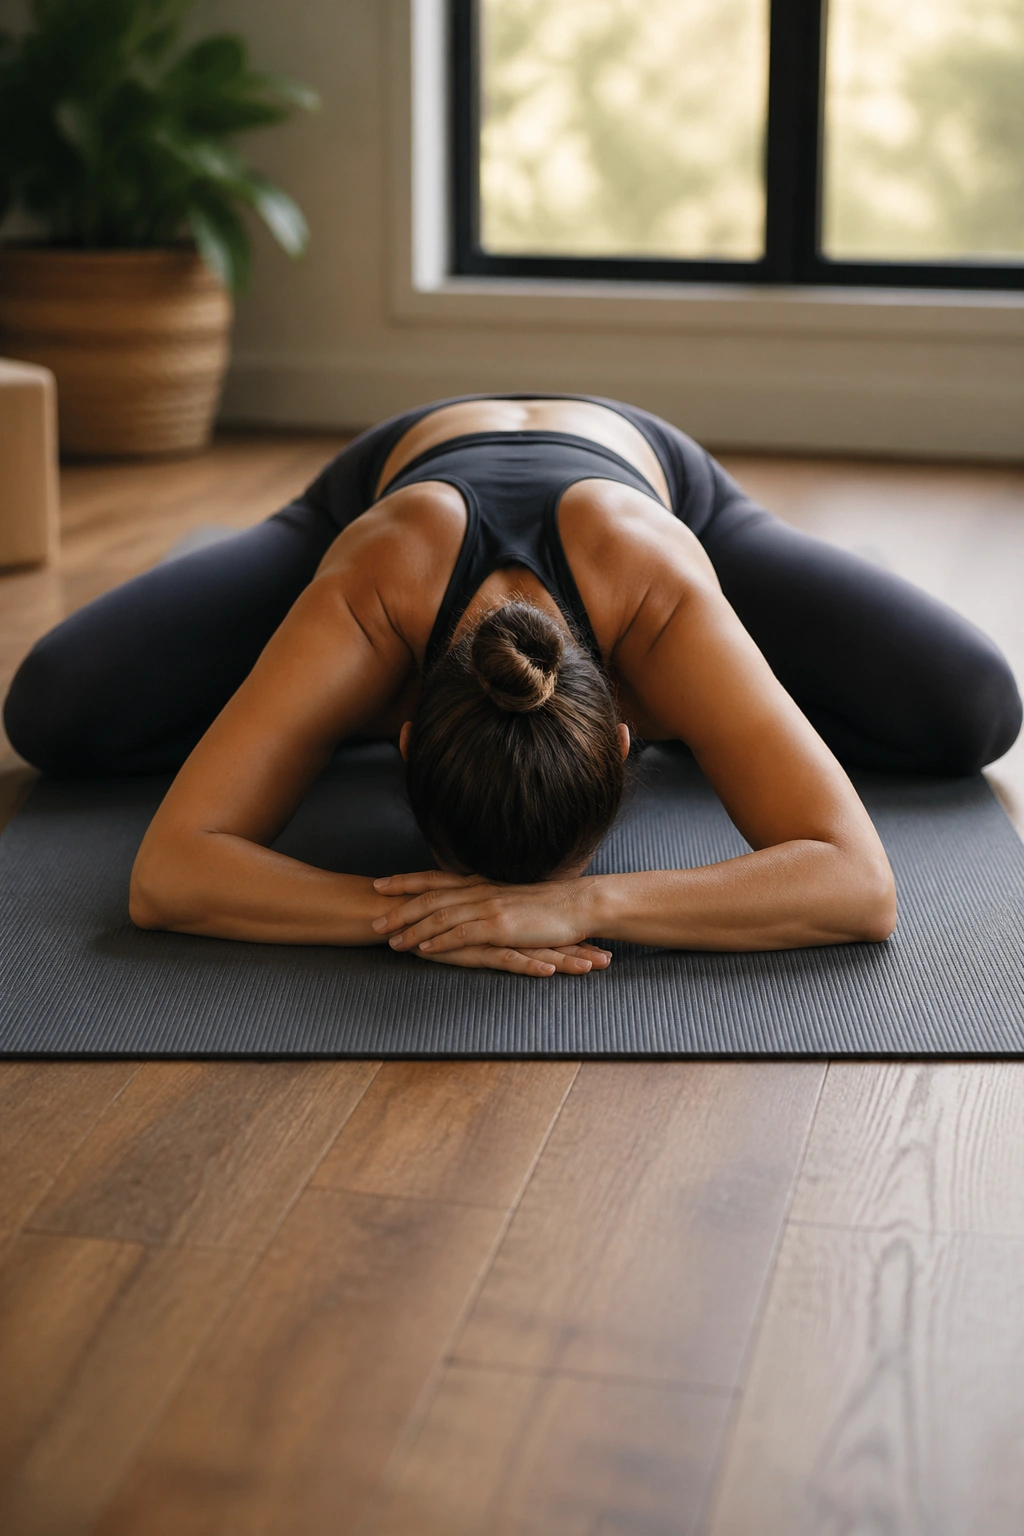
Child’s Pose is one of those shapes that looks almost too simple to matter, and then your low back tells the truth within three breaths. Spreading the knees wider gives the belly space to drop between the thighs, which often takes pressure off a tight lumbar spine.
How to Set It Up
Kneel on the mat, bring your big toes together, and open your knees wider than hip width. Sit your hips back toward your heels, then stretch your arms forward or rest them by your sides if your shoulders feel tired.
If your forehead does not reach the floor, place it on stacked fists, a block, or a folded towel. That small lift matters. It keeps you from jamming the neck and lets the breath move into the ribs instead of getting stuck high in the chest.
A good hold is 5 to 8 slow breaths. You should feel the back of the body lengthen, not a sharp pinch in the knees or a hard fold in the low back. If the hips feel too cramped, slide a pillow between your heels and seat. Tiny adjustments can turn a useless stretch into a useful one.
Best cue: let the exhale get a little longer than the inhale. That is often the part that tells the back to stop guarding.
2. Cat-Cow on Hands and Knees
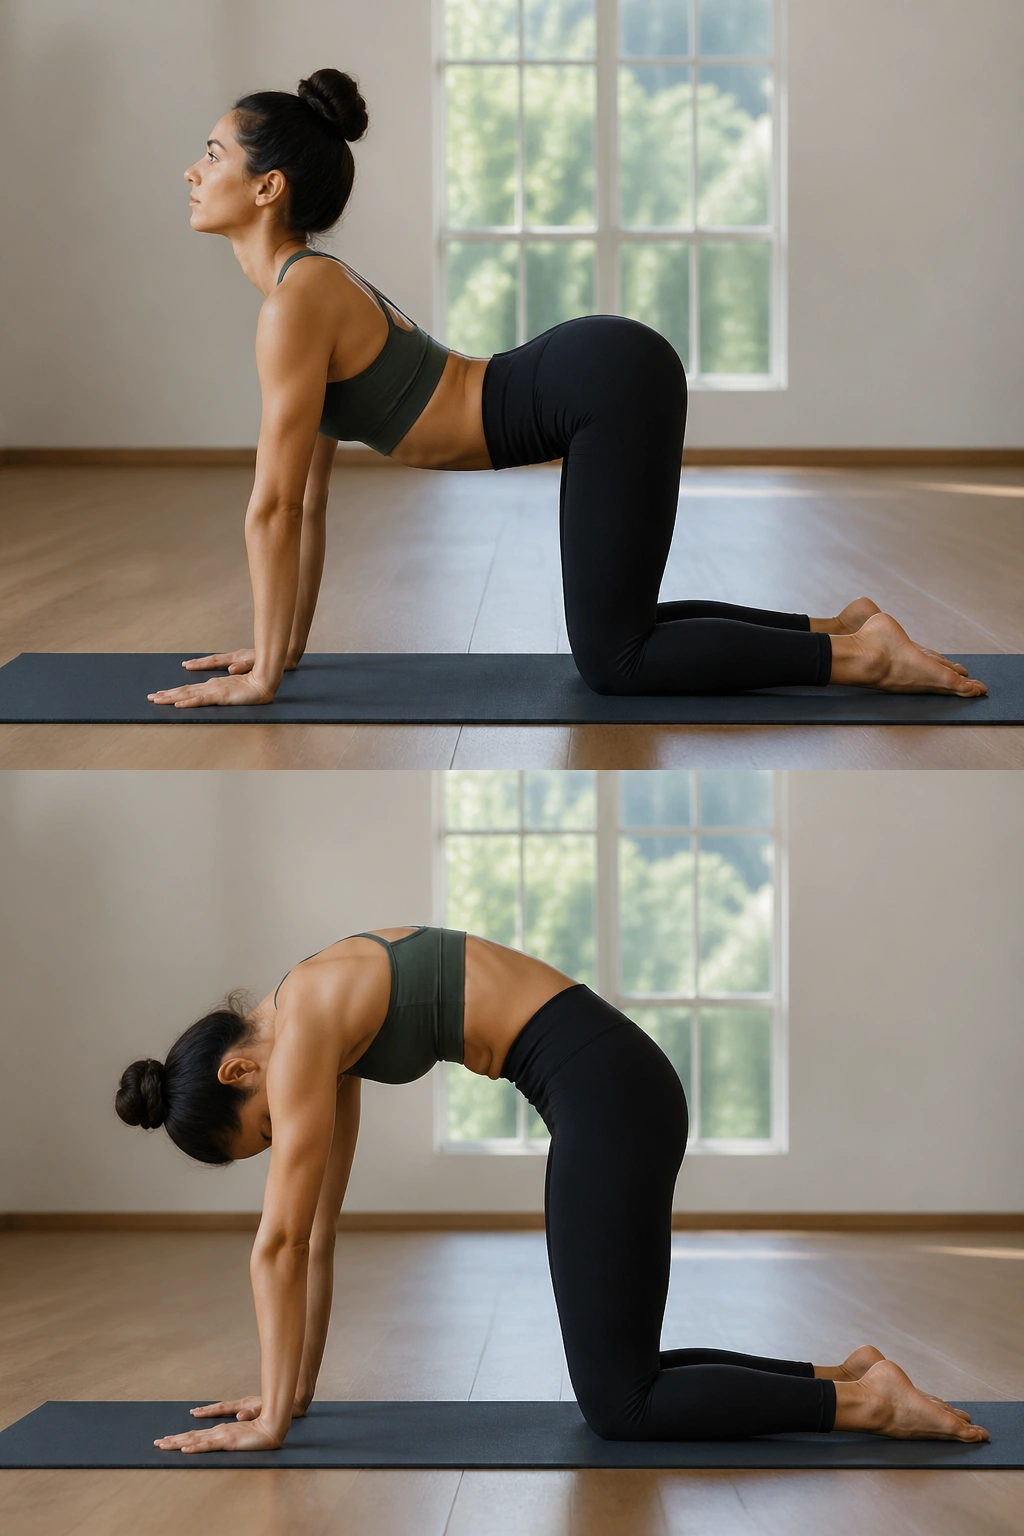
Cat-Cow is boring in the best way. It gives your spine a chance to move through flexion and extension without force, which is often exactly what a stiff back wants after a day of sitting.
Start on hands and knees with your wrists under shoulders and knees under hips. Inhale as you drop the belly slightly and lift the chest. Exhale as you round the spine and tuck the tail. Keep the motion small at first. Small can be powerful here.
The main mistake is chasing the biggest arch possible. Don’t. The low back does not need a circus trick. Let the curve spread through the whole spine, from tailbone to upper back, and keep the neck soft. Six to eight slow rounds are plenty.
If your wrists complain, put your hands on yoga blocks or make fists. If your knees dislike the floor, double the mat or place a folded blanket under them. Comfort changes everything.
One sentence is enough here: smooth motion beats big motion.
3. Thread the Needle
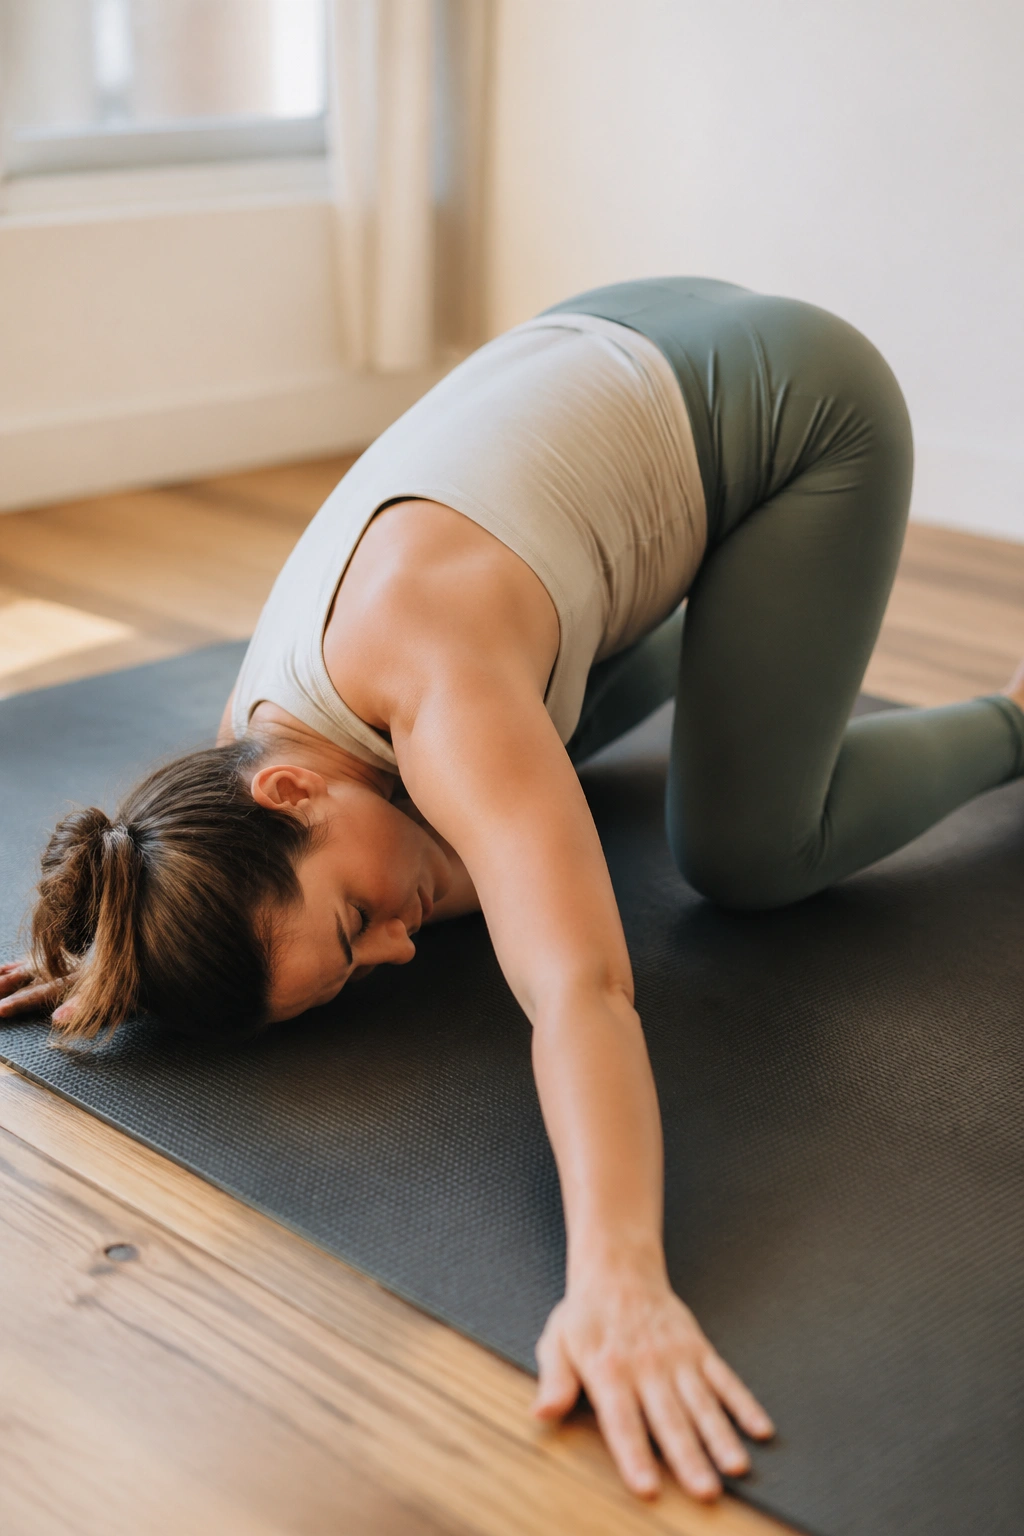
Why does a shoulder-and-upper-back stretch help the lower back? Because the body cheats when one area gets stiff. If the thoracic spine won’t rotate, the lumbar spine often tries to steal the job, and that is where things get cranky.
Thread the Needle is a gentle twist that gives the upper back a chance to move without forcing the low back to do all the work. From tabletop, slide one arm under the other and lower the shoulder and side of the head to the mat or a block. Keep the hips mostly stacked over the knees so the twist stays honest.
How to Make It Feel Easy
Use a folded blanket under the knees if the floor feels harsh. A block under the shoulder can help if the mat is too far away. Hold the pose for 4 to 6 breaths per side, then come back to tabletop slowly.
Do not yank the arm farther than your shoulder likes. That does nothing useful. What you want is a warm, clean twist across the upper back and ribs, not a torque through the lumbar area.
If the neck gets grumpy, rest the head on a fist or block and stop trying to make the floor happen. The floor is not the prize.
4. Sphinx Pose
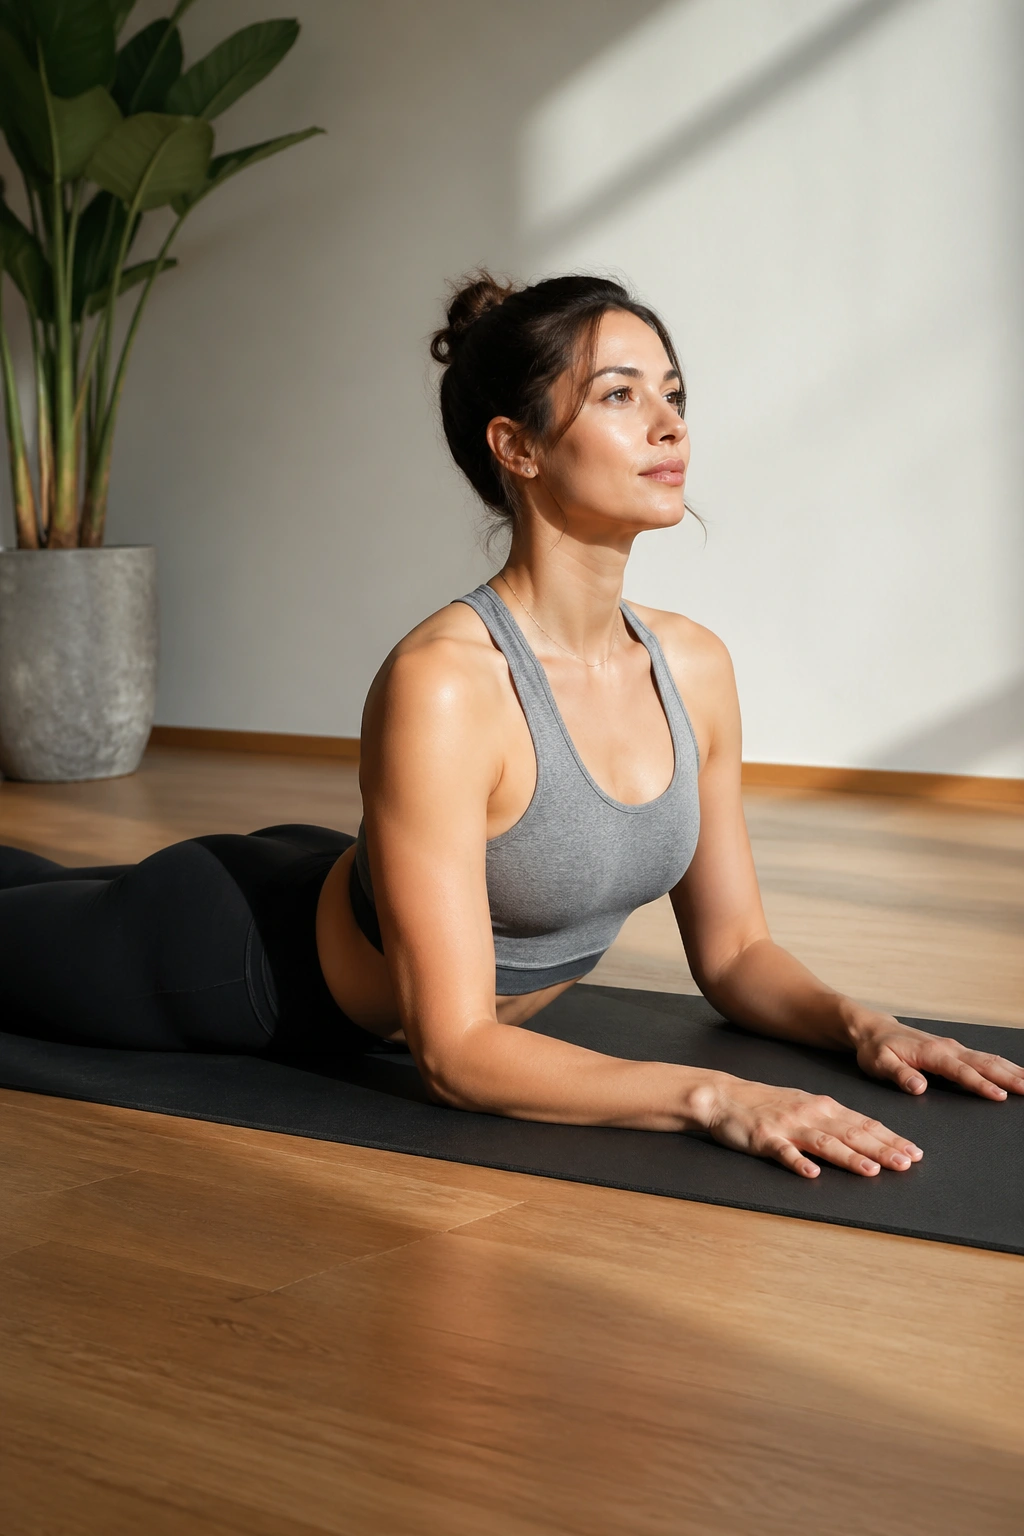
After a day of sitting, Sphinx can feel like opening a window. It is a small backbend, but the small part is the point. The pose helps the front body lengthen while encouraging a gentle lumbar extension, which many stiff backs find soothing.
Lie on your belly and place your elbows under your shoulders, forearms parallel or slightly angled inward. Press lightly through the forearms, keep the pubic bone heavy, and let the lower back stay long instead of pinched. The glutes should not be clamped down hard.
A lot of people push too much here. They throw the chest up and dump the entire shape into the lumbar spine. That is not the goal. Think of the pose as a long line through the crown of the head and the tailbone, with the belly resting.
Hold for 20 to 40 seconds or 5 slow breaths. If the low back feels pinchy, come down. If it feels spacious, this can be one of the nicest poses on the list.
Useful note: Sphinx is often a safer first stop than a bigger backbend. Respect that.
5. Baby Cobra
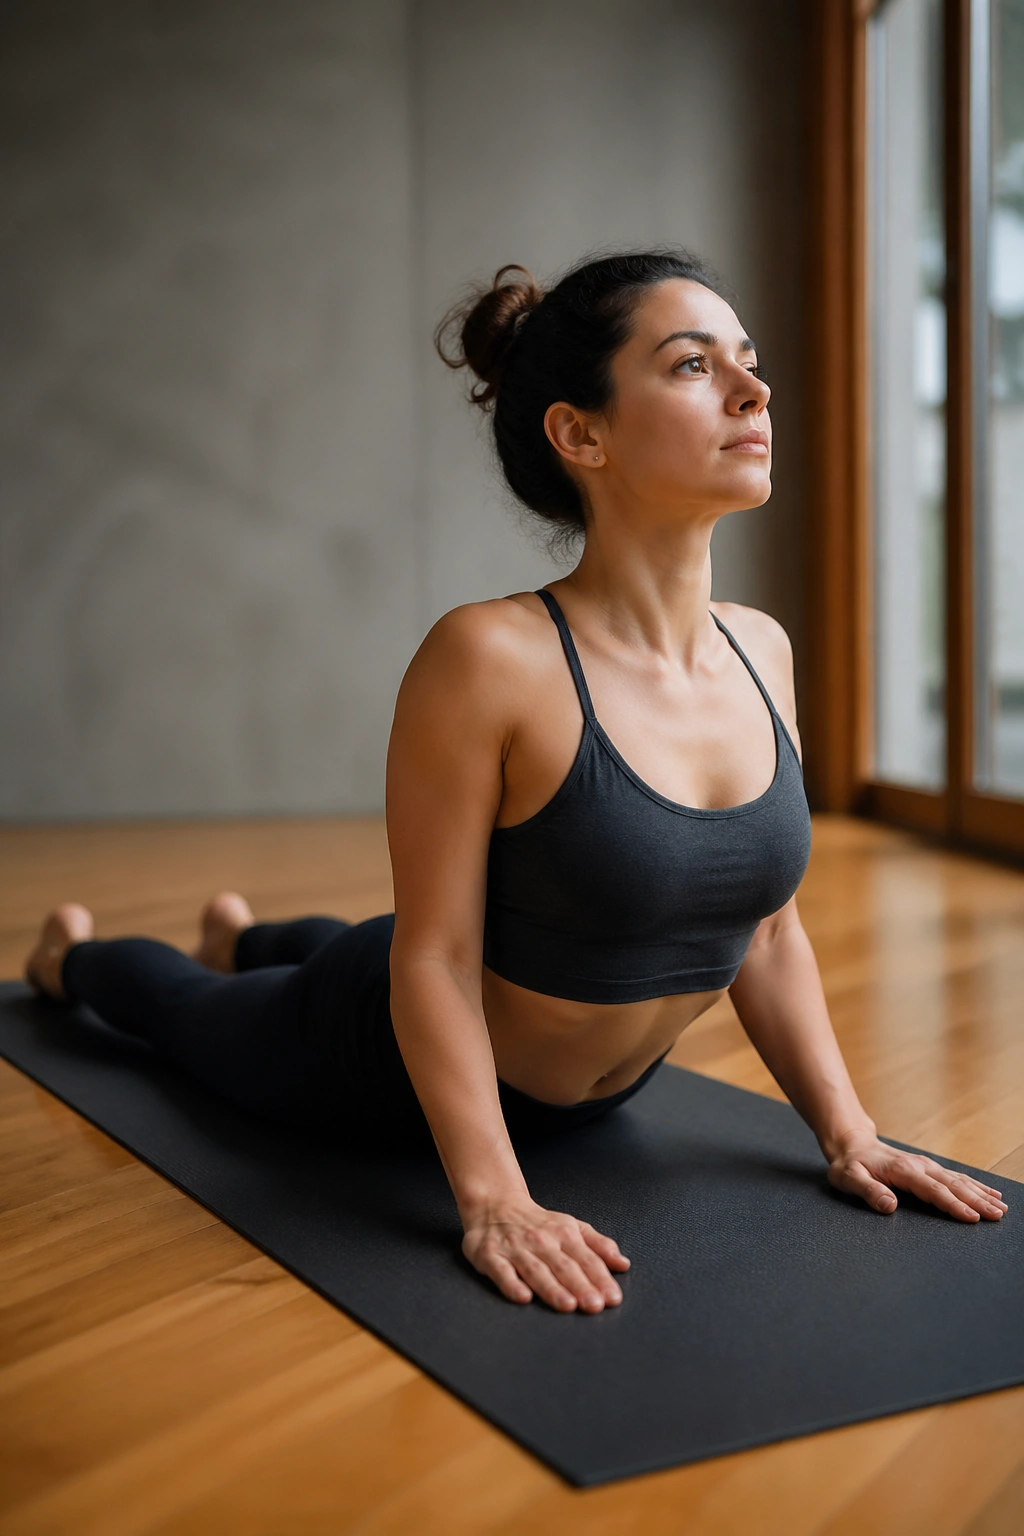
Baby Cobra is where many backs either wake up or complain. The difference usually comes down to height. Tiny lift. That is enough.
Lie face down with your hands under your shoulders or lightly beside the ribs. Press the tops of the feet into the mat, engage the legs just enough to protect the lower back, and lift the chest only a few inches. The hands should feel almost light. If they are doing a lot of pushing, the lift is too high.
This pose builds a little strength through the spinal muscles and back line while asking the front of the body to open. It can feel especially good after long sitting, because the low back often likes some support from the muscles around it instead of only passive stretching.
If Sphinx feels fine, Baby Cobra may also feel fine. If Sphinx already pinches, skip this one for now. No prize for forcing it.
Try 3 to 5 short holds, each about 3 breaths long. Rest fully between rounds. That pause matters more than people think.
6. Bird Dog in Tabletop
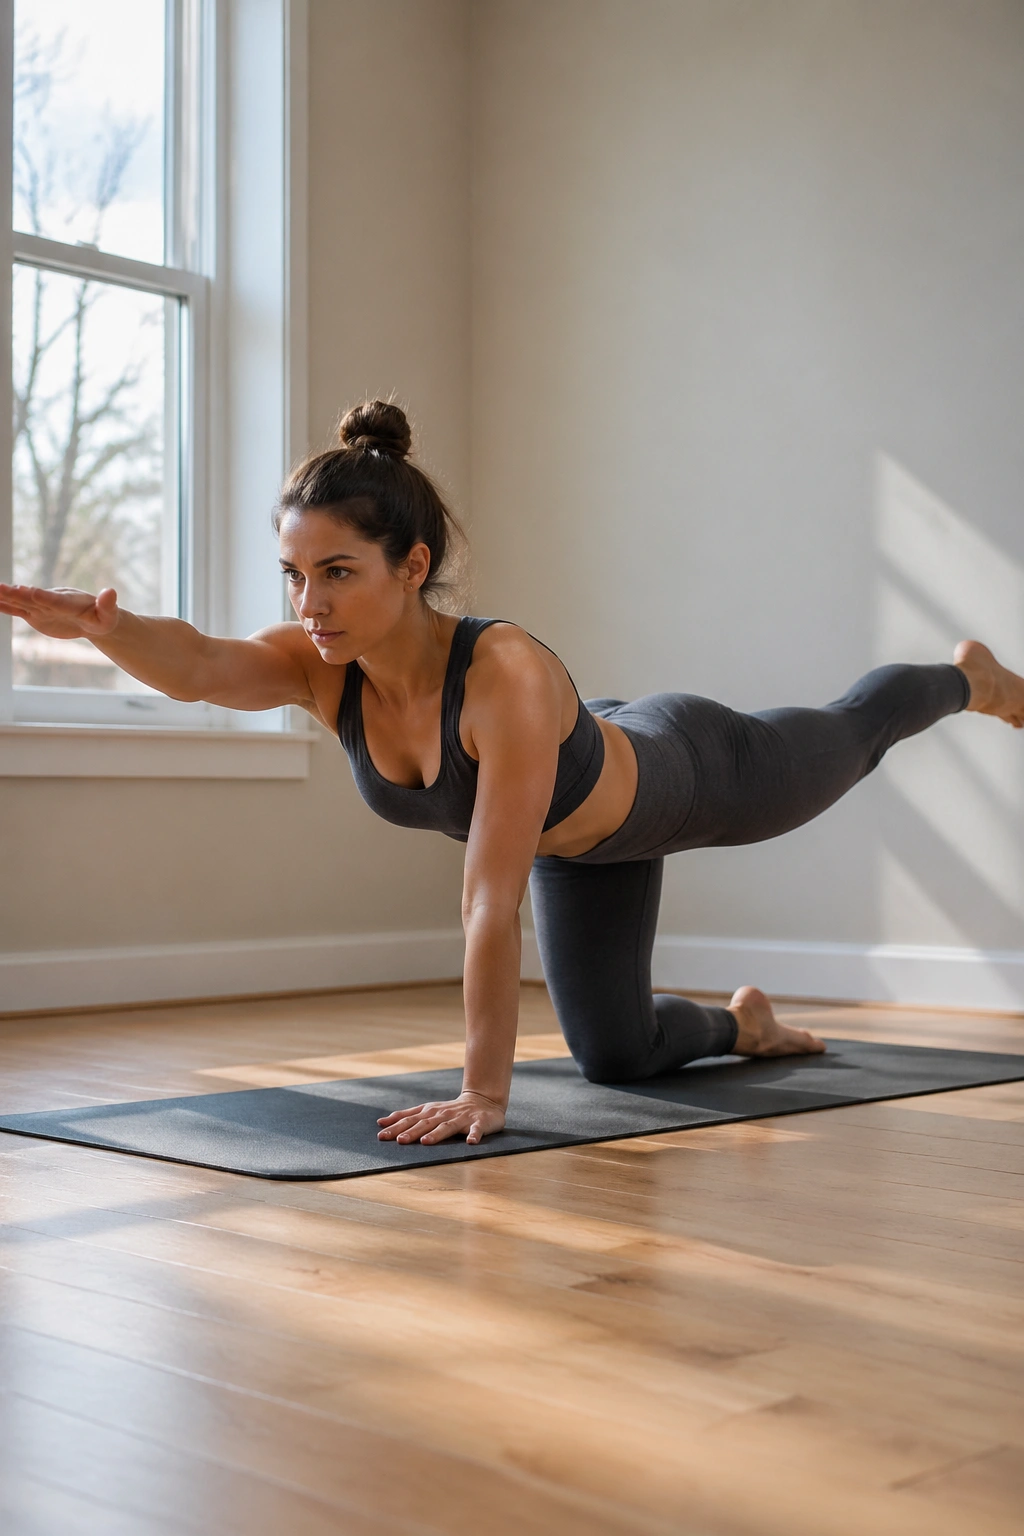
Unlike passive stretches, Bird Dog asks the trunk muscles to hold steady. That makes it one of the better moves for lower back pain relief when the back needs support more than it needs another deep stretch.
Start on hands and knees. Reach one arm forward and the opposite leg back without letting the pelvis swing open. Keep the ribs tucked in gently and imagine a glass of water balanced on your low back. If the spine wobbles, shorten the reach.
This is a control exercise as much as a yoga pose, and I mean that in the nicest way. The goal is not height. The goal is steadiness. Hold for 2 to 4 breaths, lower with care, then switch sides for 4 to 6 reps.
People who sit a lot often need this kind of work more than another big hamstring stretch. It teaches the back to share the load with the glutes and core instead of carrying everything alone.
Best use: start with Bird Dog before your deeper stretches if your back likes to feel supported first.
7. Knees-to-Chest Pose
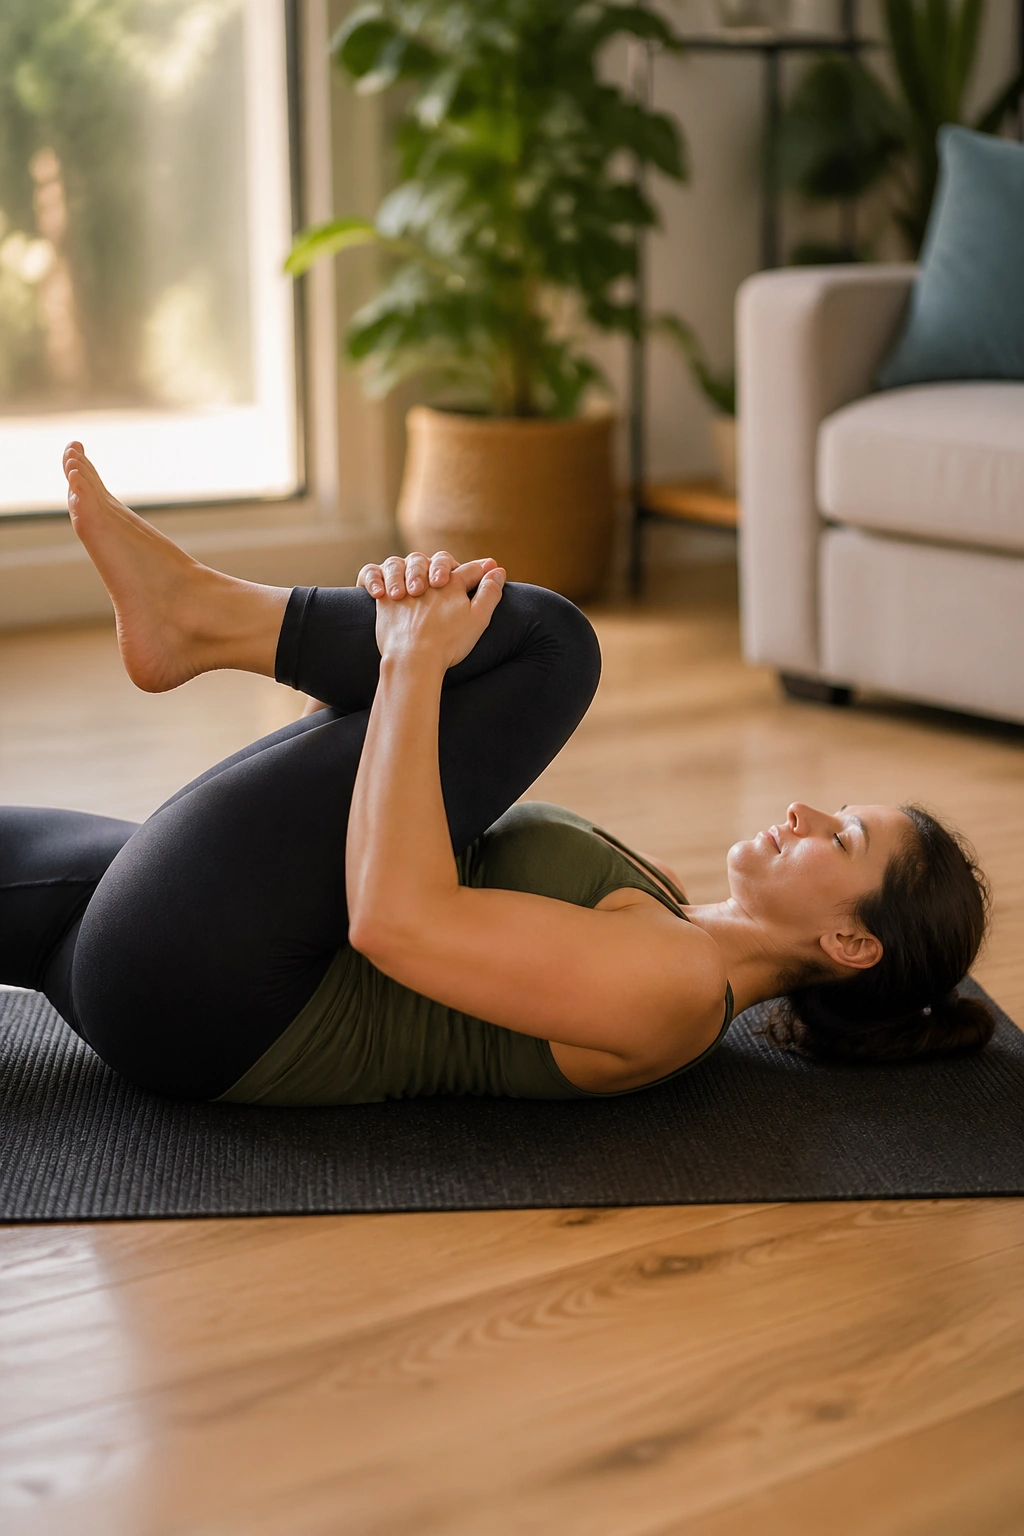
Knees-to-Chest is the closest thing yoga has to a reset button. It gently rounds the lower back, takes tension out of the spinal muscles, and gives the pelvis a chance to stop bracing for a minute.
Lie on your back and draw one knee in first, or both knees if that feels good. Hold behind the thighs or around the shins. Keep the shoulders soft and the tailbone heavy. If your hips feel squashed, open the feet wider or try one knee at a time.
What It Feels Like When It’s Working
You should feel a mild stretch across the low back and maybe the outer hips. You should not feel a hard pinch or a tug that shoots down the leg. If that happens, back off and keep the range smaller.
A gentle rock side to side can feel nice here. So can tiny circles with the knees, but only if the movement stays smooth. Hold for 5 to 10 breaths and come out slowly.
Sometimes the simplest pose is the one a sore back trusts first.
8. Supine Figure Four
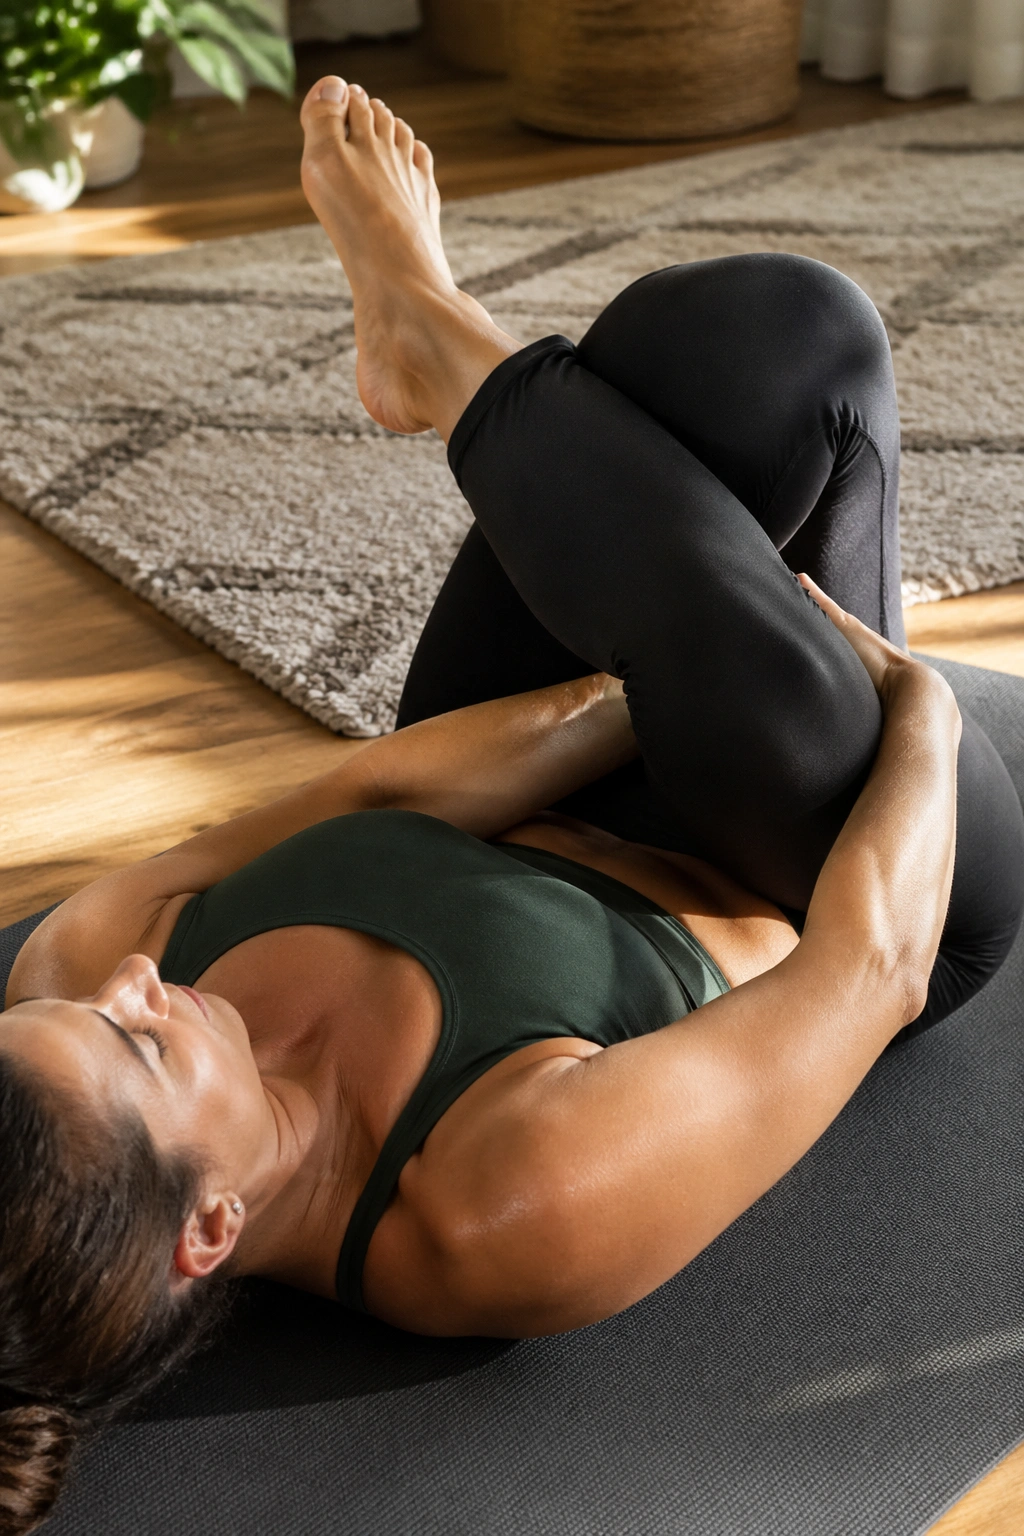
Stubborn hips often show up as a cranky back. The glutes and the deep hip rotators can get tight from sitting, walking, running, and all the other normal things we ask them to do. Supine Figure Four gives those muscles a stretch without loading the spine.
Lie on your back, cross one ankle over the opposite thigh, and keep the crossed-foot flexed if your knee likes that better. Stay there if that is enough. If you want more stretch, thread your hands behind the supporting thigh and draw the legs toward you.
The shape should feel deep in the outer hip and seat, not in the knee. That distinction matters. If your knee complains, back out, flex the foot more, or hold a little farther away from the chest.
A good hold is 30 to 60 seconds per side. If the low back wants to arch, keep the tailbone heavy and do not pull so hard that the pelvis lifts. That is the trap.
This is one of the best poses for people whose back pain seems tied to tight hips more than a sore spine.
9. Reclined Hamstring Stretch With a Strap
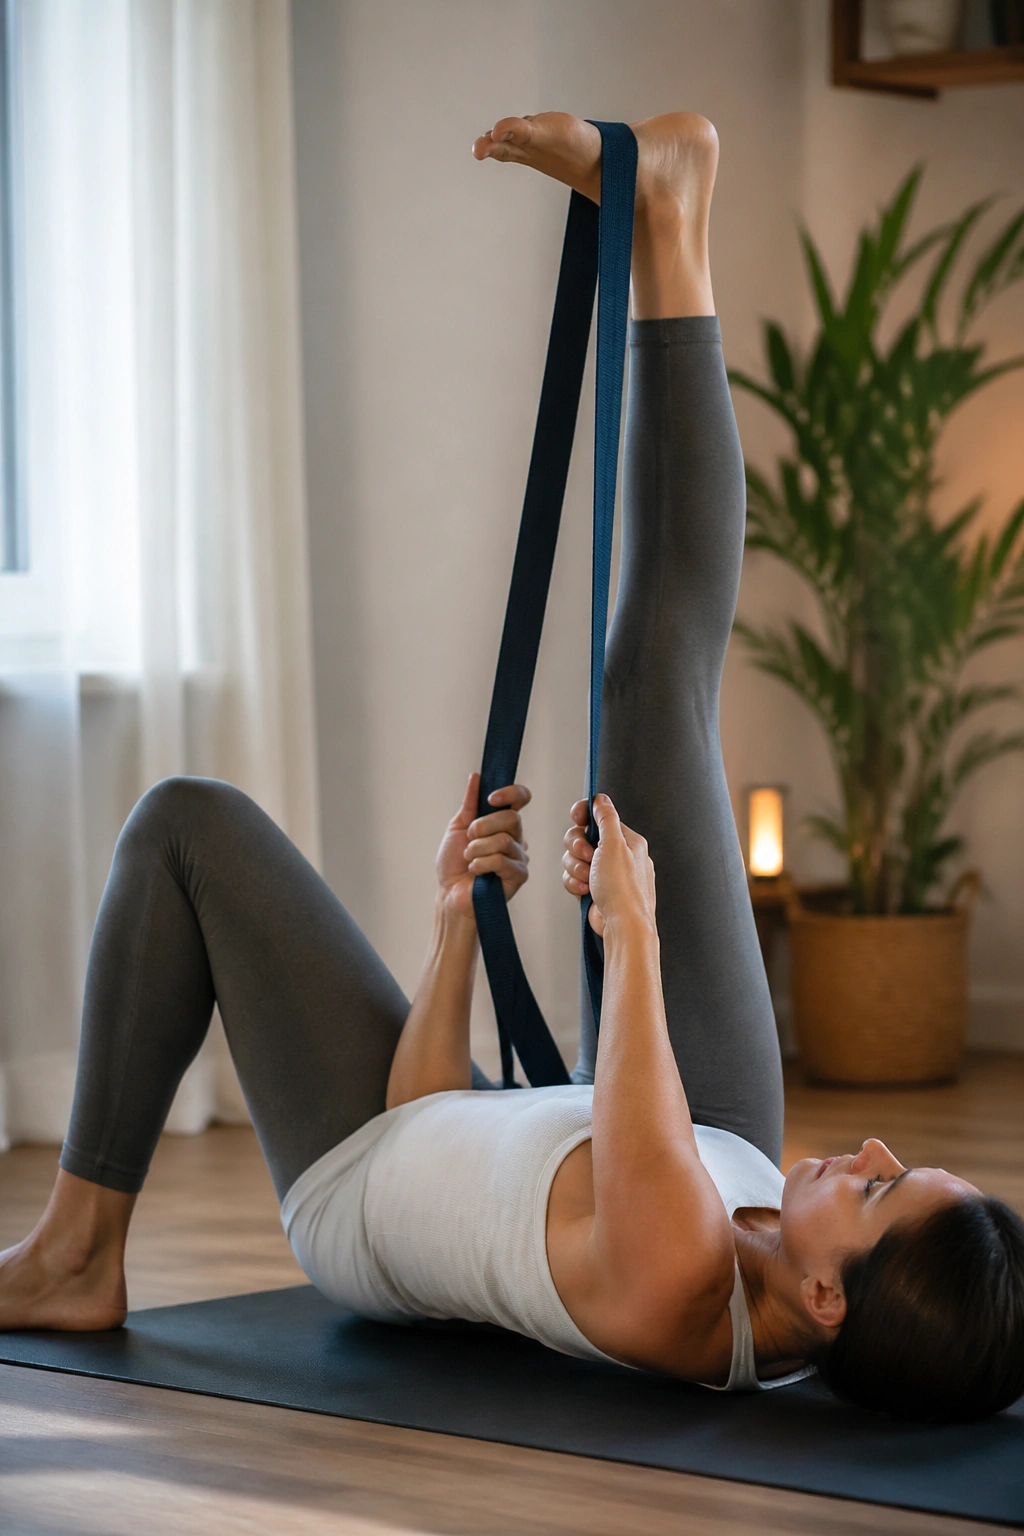
Do hamstrings cause low back pain? Sometimes they do, and sometimes they just get blamed for everything. The better way to think about this pose is that it helps keep the back of the body from tugging the pelvis into a position the lumbar spine hates.
Lie on your back and loop a strap, towel, or yoga belt around one foot. Extend that leg toward the ceiling with a soft bend in the knee if needed. Keep the other knee bent or the foot on the floor so the low back stays quiet.
How to Keep It from Getting Irritating
The stretch should land behind the thigh, not behind the knee. If you feel a nerve-like zing, soften the knee and bring the leg closer to your body. If the opposite hip lifts, stop pulling and shorten the range.
Use the strap to guide the leg. Do not drag it upward with force. Thirty seconds is enough for many people, though 5 slow breaths on each side can be plenty if the body is touchy.
This is a good one after walking or sitting. It is less useful if your pain hates forward bending, so pay attention to the first few breaths and decide from there.
10. Reclined Twist
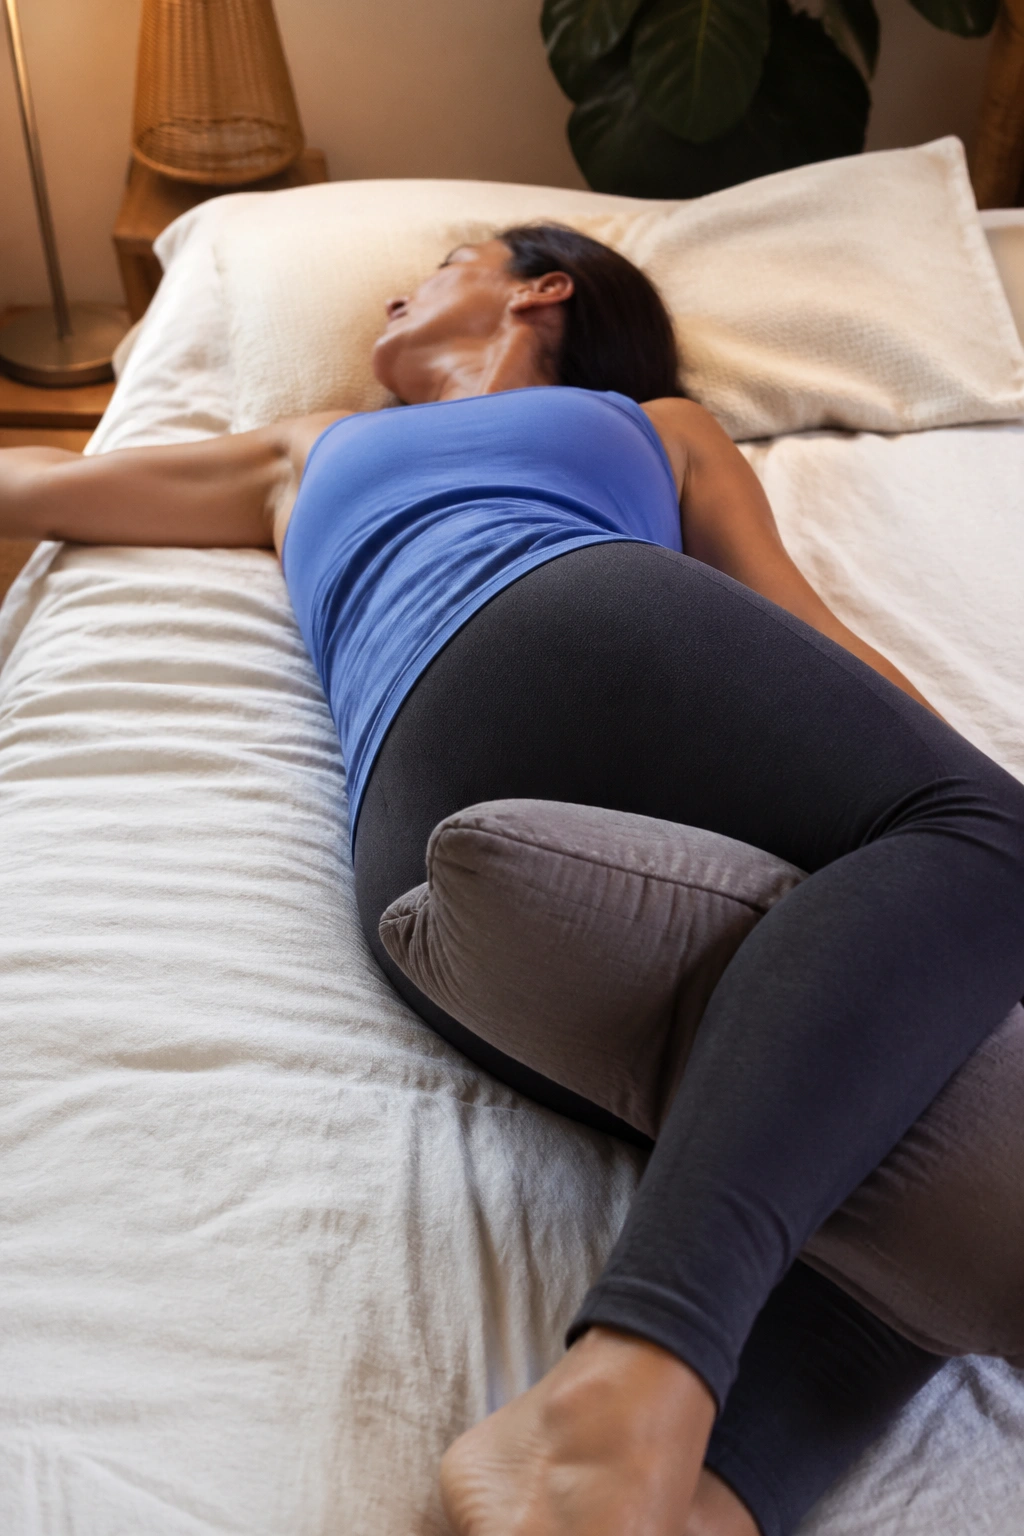
Twists can help, but only when they are soft and boring. A hard twist feels like a dare. A soft twist feels like the spine is getting permission to exhale.
Lie on your back, hug both knees in, then drop them together to one side while the shoulders stay heavy. You can place a pillow between the knees or under the top thigh if the twist is too deep. Turn the head the opposite way only if that feels easy on your neck.
Key Details That Matter
- Keep the knees stacked or nearly stacked.
- Let the top shoulder stay grounded, but don’t force it.
- Breathe into the side of the ribs and the low back.
- Stay for 4 to 6 breaths, then switch sides.
The twist should feel spacious through the torso and low back, not like your pelvis is being cranked to the floor. If one side feels much tighter, spend a little longer there, but don’t fight it.
A small twist often does more than a dramatic one.
11. Bridge Pose
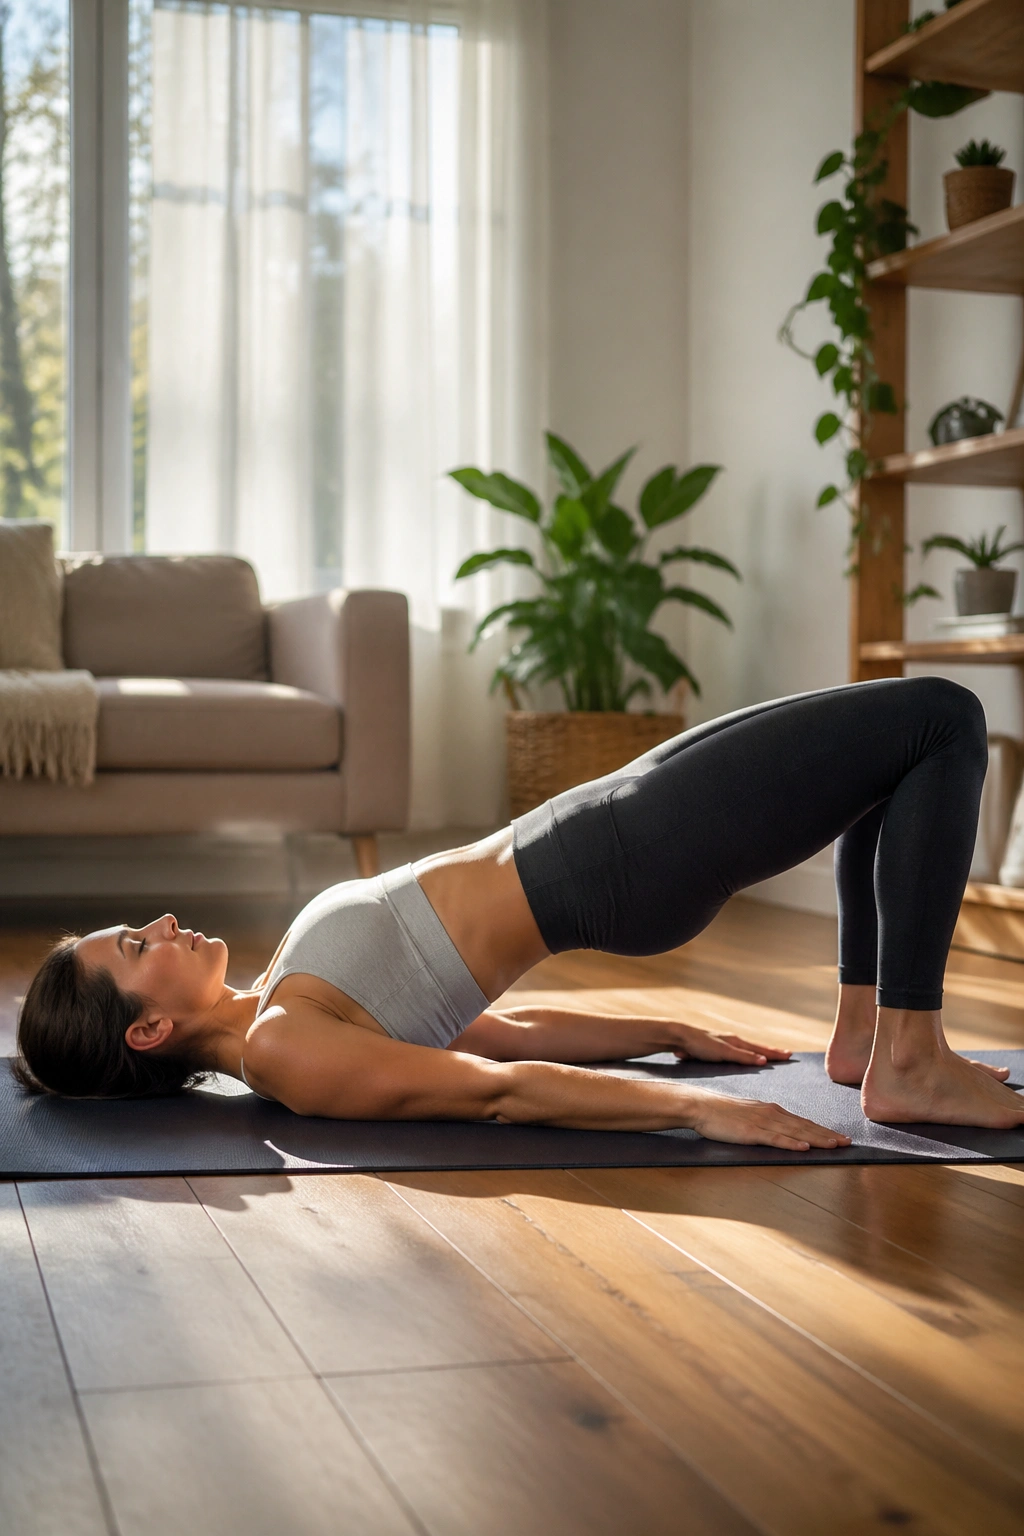
Bridge Pose is the one on this list that earns its keep by building strength. A lot of backs feel better when the glutes do more of the lifting, because tired glutes leave the lumbar area doing jobs it was never meant to do all day.
Lie on your back with knees bent and feet flat about hip-width apart. Press the feet down, lengthen the tailbone toward the heels, and lift the hips only until the body makes a smooth line from shoulders to knees. The lift should feel controlled, not explosive.
If your hamstrings cramp, walk the feet a little closer to the hips. If the low back arches hard, lower a bit. You are looking for a balanced effort through the glutes, hamstrings, and back line, not a squeeze-fest in one place.
Hold for 3 to 5 breaths, lower slowly, and repeat 3 to 5 times. For a gentler version, slide a block under the sacrum and rest in supported bridge for a few breaths.
This pose matters because it gives the back support from the hips, not just relief from the hips.
12. Low Lunge With the Back Knee Down
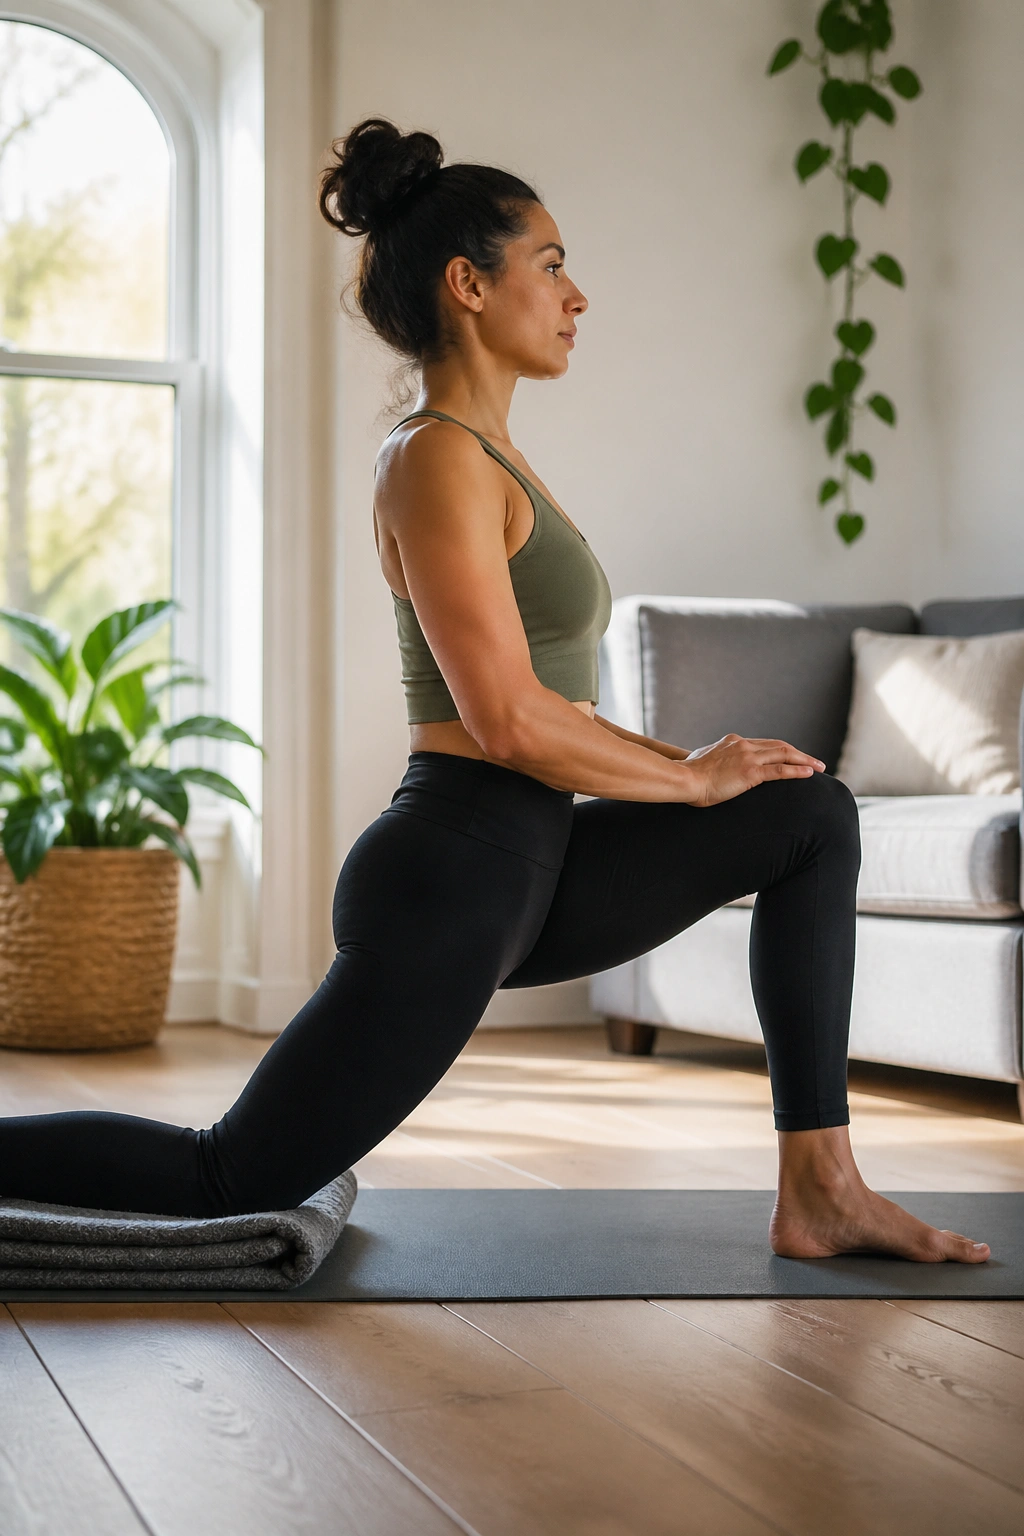
Low Lunge with the back knee down is a hip flexor stretch for people who live in chairs. That may sound blunt, but it is accurate. The front of the hip shortens from sitting, and the lower back often pays for it.
Start in a kneeling lunge with the back knee on a folded blanket. Bring the front knee over the ankle, then gently tuck the tailbone a little so the pelvis does not dump forward. Shift the hips forward only an inch or two until you feel the front of the back-leg hip open.
Unlike a deep lunge, this version lets you stretch without collapsing into the lumbar spine. That is the difference between useful and annoying. Keep the torso upright or lift the arms only if the ribs stay stacked over the pelvis.
Hold for 20 to 30 seconds, then switch sides. If the stretch lands in the front of the hip and upper thigh, you are in the right place. If the low back pinches, pull back and re-tuck the pelvis.
This is one of the best poses for desk-heavy days.
13. Half Split With Blocks
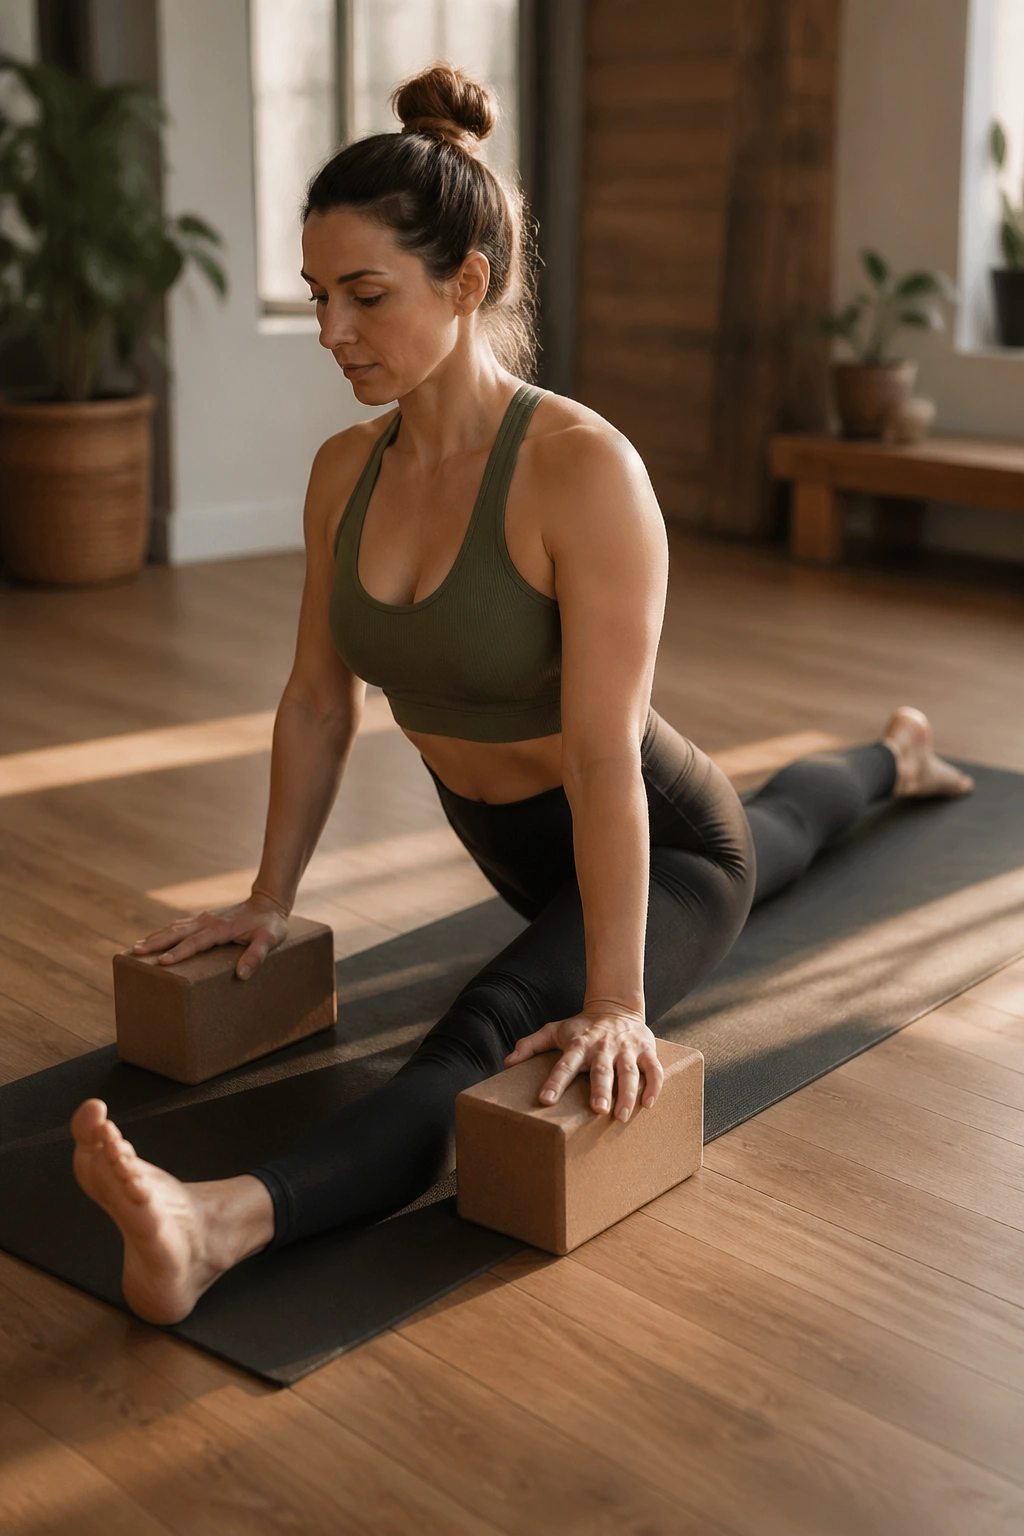
Half Split looks simple, and that is precisely why people butcher it. They fold too far, round the spine, and call it a hamstring stretch when the low back is doing all the work.
From low lunge, slide the hips back so the front leg straightens and the front foot flexes. Place your hands on blocks or on the floor beside the leg. Keep the spine long and hinge from the hips as if you were trying to tip the chest forward without collapsing the ribs.
What to Watch For
- The stretch should stay in the hamstring or calf, not the lumbar spine.
- A bent front knee is fine.
- Blocks are not cheating.
- Stop when the front of the pelvis wants to twist open.
If you feel nerve tension, back off immediately and bend the knee. If you feel like you are folding into a C-shape, come back up. The goal is length, not depth.
Hold for 4 to 6 breaths and move slowly when you come out. This pose rewards patience far more than ambition.
14. Supported Pigeon Pose
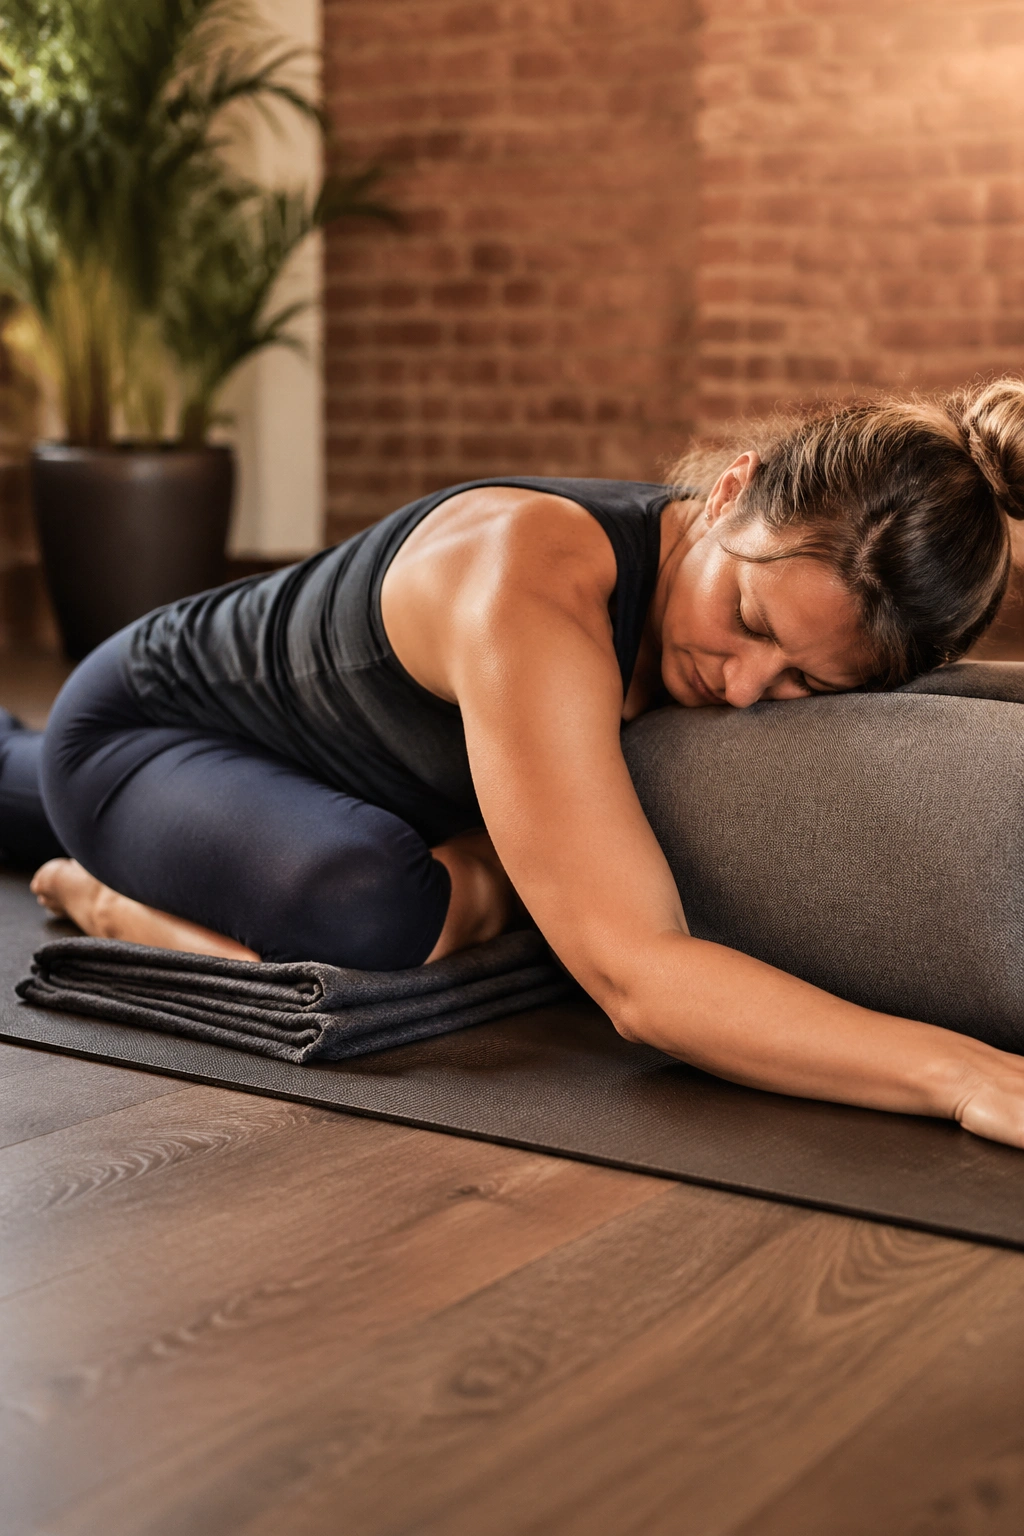
Supported Pigeon can feel either like a blessing or a knee story you don’t want. The supported part matters. Without it, the pose can get too intense, too fast.
If you do the floor version, place a blanket or block under the hip of the front-leg side so the pelvis stays level. Keep the back leg relaxed and the torso supported on a bolster, stack of pillows, or blocks. A more forgiving option is the reclined version on your back, which gives you the same hip-opening shape without the same knee and hip load.
This pose works best when the deep outer hip is part of the problem. Tight glutes and rotators can pull on the pelvis and make the low back feel stuck. When the hip lets go, the back often gets a little relief too.
Do not chase a square-looking pose if the body hates it. If the front knee or outer hip feels cranky, switch to Figure Four and keep your day moving. That is the smarter move.
For people who tolerate it well, 5 slow breaths is enough to start.
15. Downward Dog at the Wall
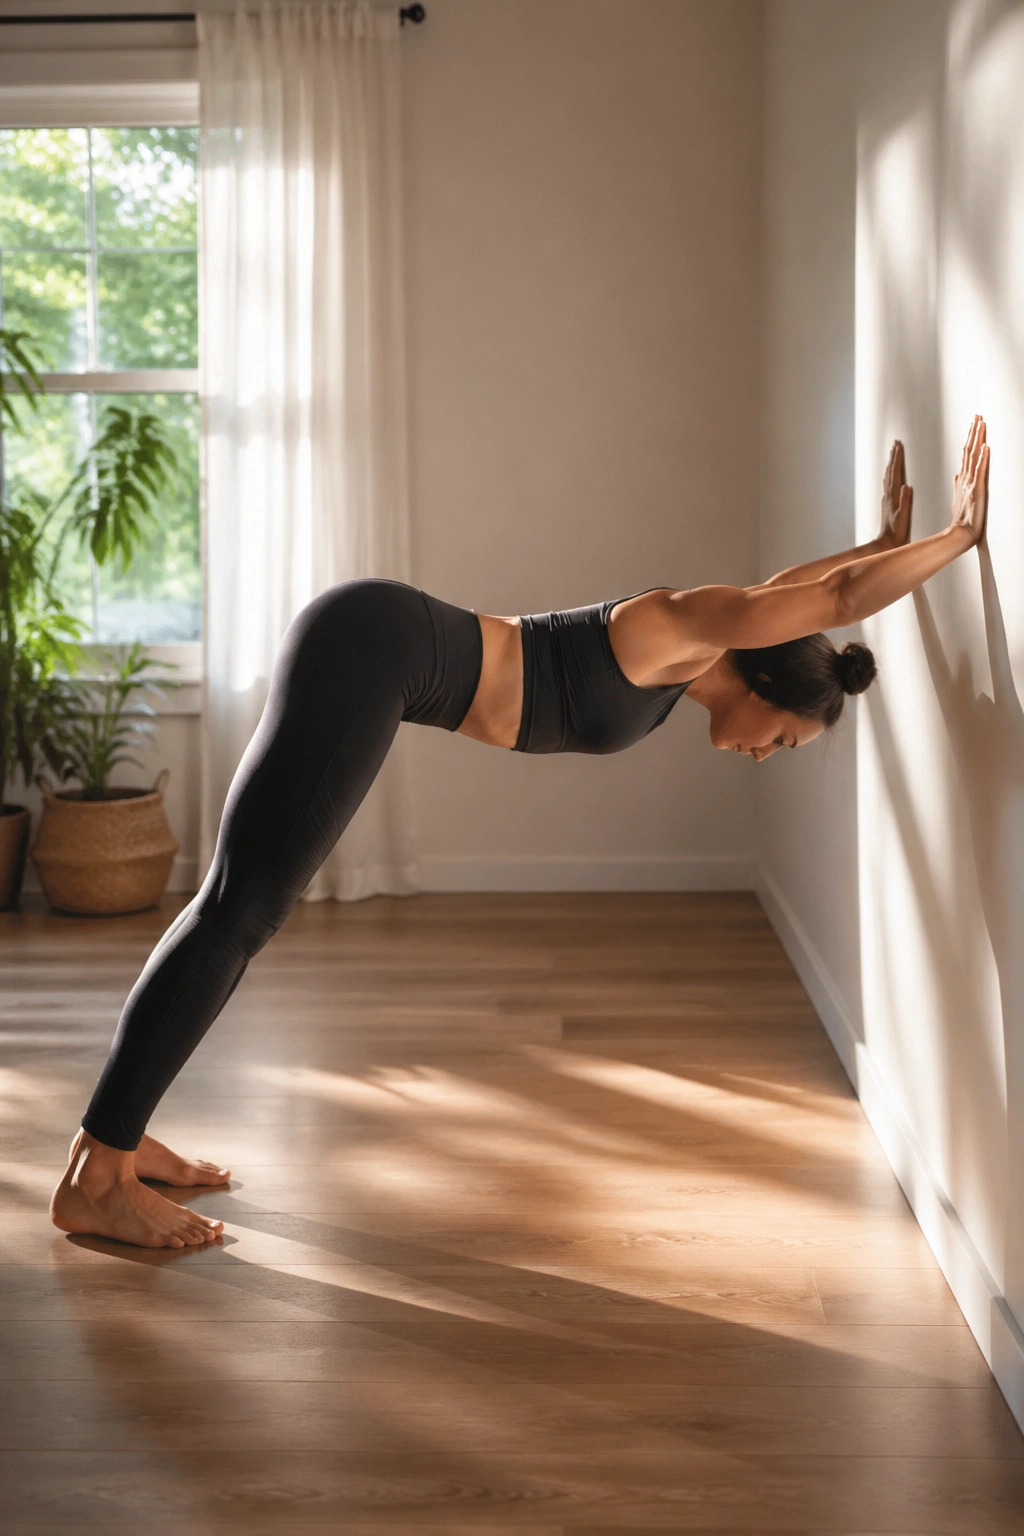
Want the length of Down Dog without making your wrists or lower back annoyed? Use a wall. It is a cleaner version for a lot of people, and it works better than most people expect.
Place your hands on the wall at shoulder height, step back until your arms are straight, and hinge your hips away from the wall. Keep the knees bent as much as needed so the spine can stay long. Press the hands into the wall and let the tailbone reach back.
How to Use It for Back Relief
- Keep the ribs from flaring.
- Bend the knees if the hamstrings pull hard.
- Walk the feet back until the stretch feels even.
- Hold for 20 to 30 seconds, then breathe out slowly.
This is a nice way to get traction through the spine without hanging all your weight into your hands. It can also help the shoulders and hamstrings, which are often part of the back pain picture.
If you feel pressure in the low back, bend the knees more and bring the hips a little higher. That usually fixes the problem.
16. Extended Puppy Pose
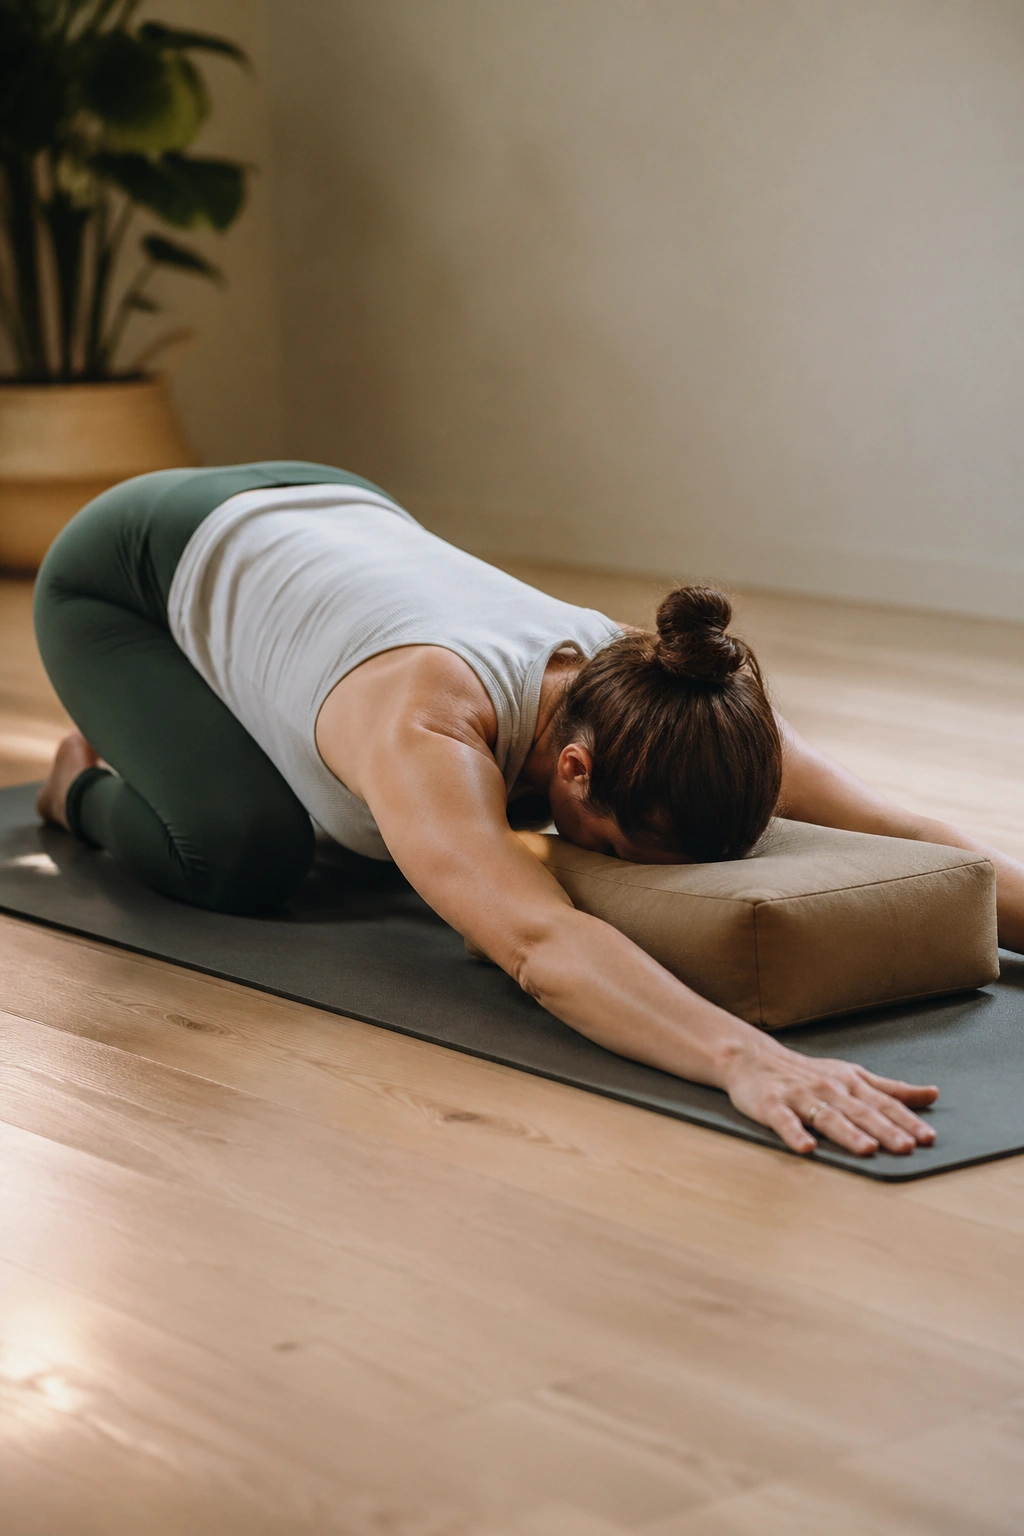
Extended Puppy Pose is the sneaky one on the list. It looks like a shoulder and chest opener, but the long reach through the spine can take some pressure off the lower back by giving the rib cage room to move.
Start on hands and knees, then walk the hands forward while keeping the hips above the knees. Lower the chest toward the mat or a bolster. The forehead can rest on the floor, a block, or stacked fists. If the low back feels compressed, back the hands up a bit and shorten the shape.
A few details make this pose work better:
- Keep the hips from drifting way back.
- Let the belly soften without collapsing.
- Use a bolster under the chest if the floor is too far away.
- Breathe into the sides of the ribs.
This is not a pose to force. If the shoulders feel jammed or the neck feels cranky, come out early. A shorter version done well beats a long version done badly every time.
For many backs, 30 to 45 seconds is enough to feel the change.
17. Happy Baby
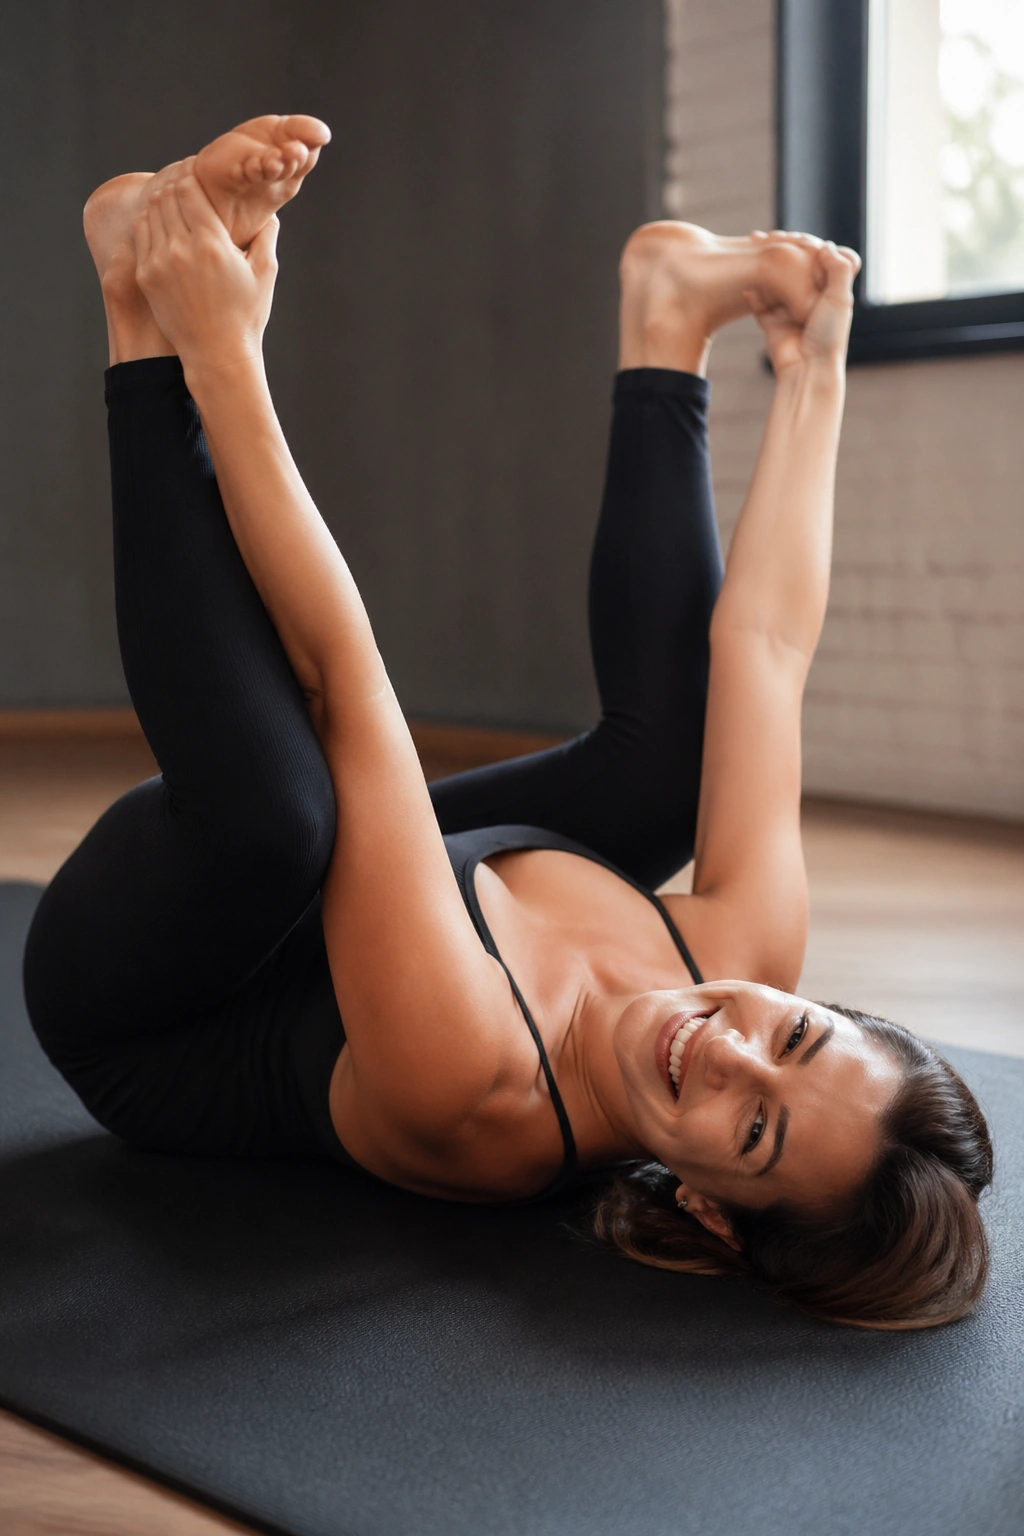
Happy Baby looks silly because it is a little silly. That does not make it less useful. It opens the hips, softens the sacrum area, and gives the lower back a break from all the holding it does during the day.
Lie on your back, bring the knees toward the chest, and hold the outer edges of the feet or the backs of the thighs. Keep the tailbone heavy. Gently pull the knees toward the armpits only as far as the body allows. If the feet are hard to reach, use a strap around the feet or hold one leg at a time.
The stretch should feel broad and mellow through the hips. If the low back starts to arch hard, ease off. If the neck strains from lifting the head, set it back down. Small adjustments make this pose far kinder.
A tiny rock from side to side can feel good here. So can a long exhale. Sometimes the odd-looking pose is the one your back trusts because it does not ask for much.
Hold for 5 to 8 breaths and let the pelvis stay heavy.
18. Legs Up the Wall
Legs Up the Wall is not flashy, and I like it for that reason. Unlike the more active poses on this list, it asks almost nothing from the spine. That makes it a strong choice when the back feels tired, tight, or a little inflamed from too much sitting or standing.
Sit sideways beside a wall, swing the legs up, and lie back so your hips are close to the baseboard. If your hamstrings pull hard, scoot a few inches away from the wall and bend the knees. You can also place a folded blanket under the sacrum if that feels nicer. The shoulders should relax. The jaw too.
Breathe slowly for 3 to 10 minutes. There is no medal for doing more. The point is to let the back stop managing everything for a few minutes while gravity does some quiet work.
This is a good finish after any of the earlier poses, especially if your back likes rest more than stretching. On days when the spine is touchy, this may be the one pose that feels worth doing at all.
A good back routine is often plain, calm, and a little repetitive. That is not a flaw. That is what gives the body a chance to settle.
