



A mat, a wall, and ten quiet minutes are enough.
That’s the part a lot of total beginners miss. They picture yoga as a polished studio class with people folding themselves into shapes that look impossible from the hallway, so they skip the whole thing and keep waiting until they feel “ready.” You do not need to be ready. You need a simple place to start, a few clear poses, and the patience to repeat them until they stop feeling strange.
Home is actually a good place to learn beginner yoga. You can pause without feeling watched, use a chair or folded blanket without apologizing for it, and stay with a pose long enough to notice what your body is doing. That last part matters more than people think. The real win at the beginning is not fancy flexibility. It is learning how to breathe without holding your shoulders up by your ears, how to move your spine without yanking on it, and how to stand on one leg without wobbling into a wall.
Some of the best yoga workouts for total beginners at home look almost too plain on paper. Mountain pose. Cat-cow. Low lunge. Bridge. A supported twist on the floor. Plain does not mean weak. Plain means repeatable, and repeatable is what makes a home practice stick.
1. Mountain Pose Reset to Set Your Posture
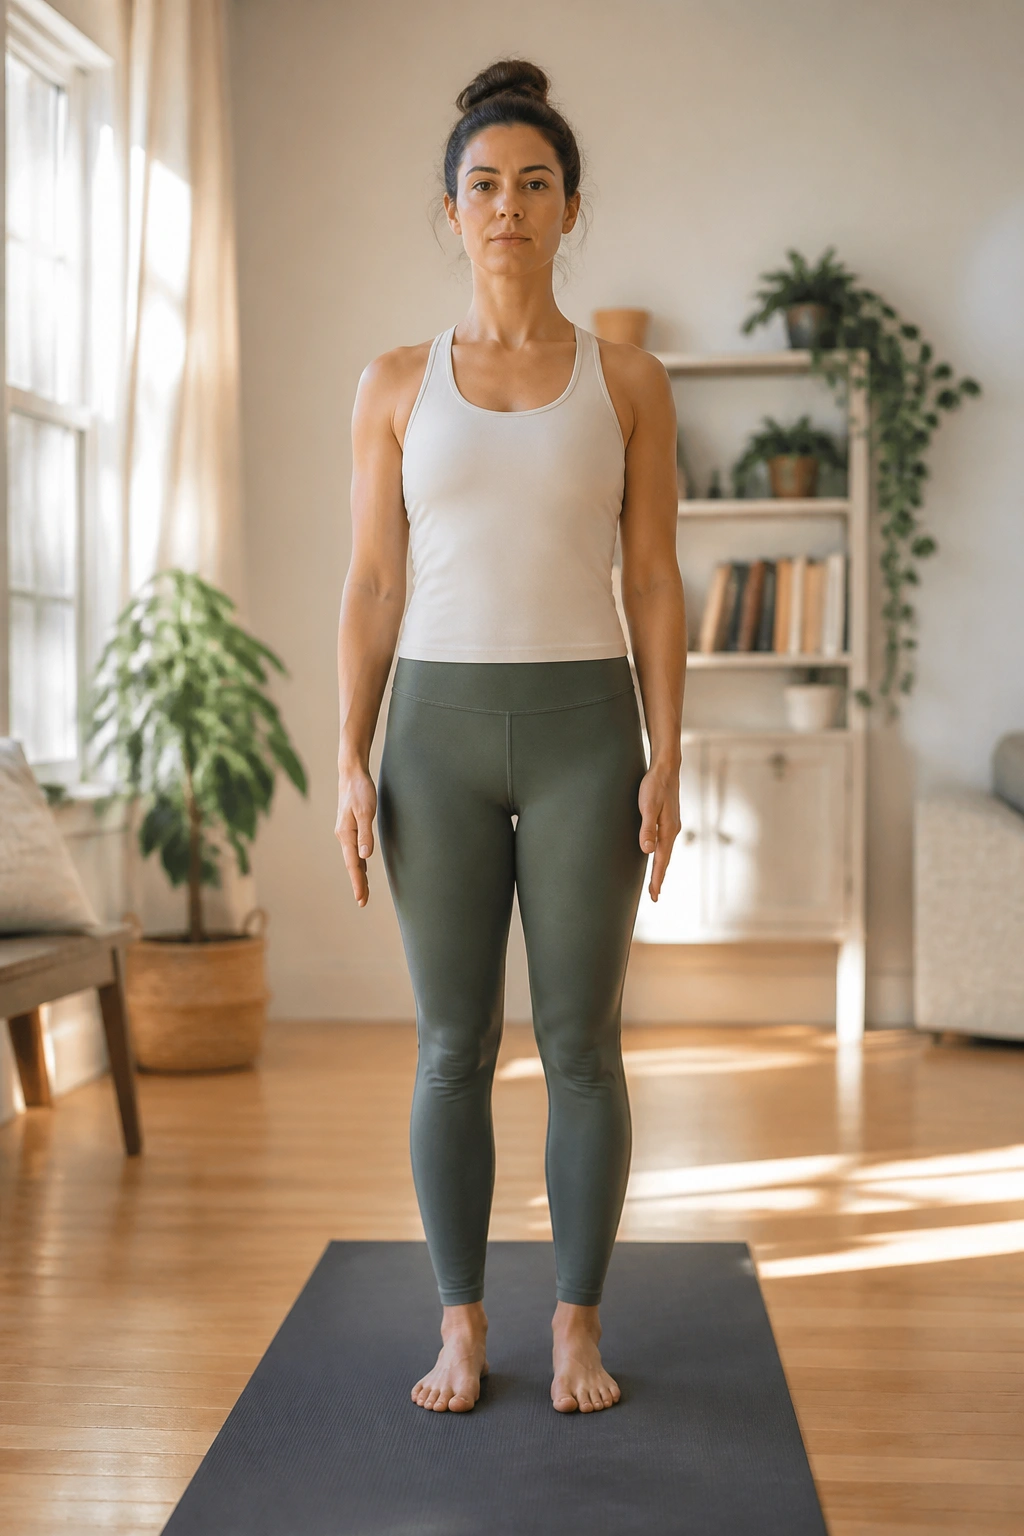
Mountain pose looks like standing there and doing nothing. That is the trick, and it is why it helps so much.
Stand with your feet about hip-width apart, or bring them together if that feels steadier. Let your toes spread out on the mat. Soften your knees a little, because locked knees make the whole body feel stiff and fake. Then stack your ribs over your hips, lift the crown of your head, and let your arms hang beside you with the palms facing in.
What to Feel Here
Take 5 slow breaths. On each inhale, feel your ribs widen. On each exhale, let your shoulders drop a little lower. If you want a tiny extra challenge, press your big toes down and notice how that changes your balance.
- Keep the weight even on both feet.
- Relax your jaw.
- Lengthen the back of your neck.
- Let your hands be heavy, not posed.
That is the whole workout if you only have two minutes. Seriously. People skip this because it seems too small, then wonder why every other pose feels scattered. Mountain pose teaches alignment without drama, and for a total beginner that is a gift.
2. Cat-Cow for a Stiff Back and Tight Shoulders
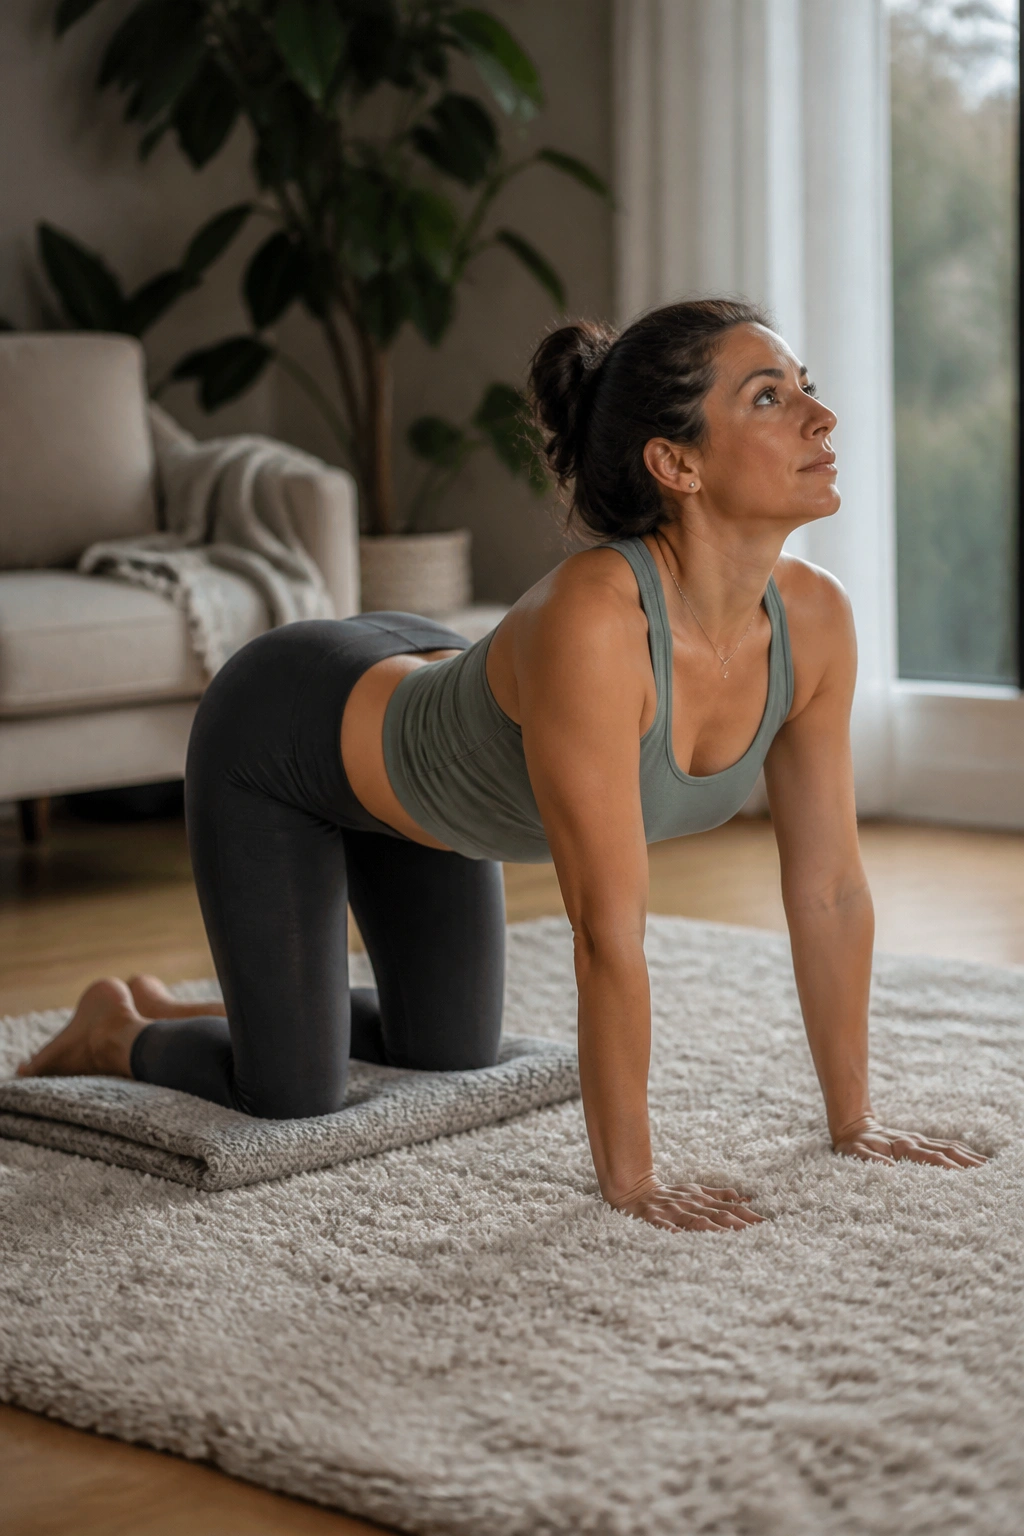
If your lower back feels like a board after sitting, cat-cow is usually the first thing worth doing.
Come onto your hands and knees with your wrists under your shoulders and your knees under your hips. Spread your fingers. Press the floor away a little so your chest feels open without sinking between your shoulder blades. Inhale as you drop your belly and lift your tailbone into cow pose. Exhale as you round your spine, tuck your chin, and pull your belly gently in for cat pose.
Repeat that 6 to 8 times. Slow beats big.
A folded blanket under the knees makes this kinder on hardwood floors, and if your wrists complain, you can come down onto your forearms or place your hands on the edge of a couch. The movement should feel smooth, almost like a slow wave. No jerking. No racing.
The best part is how quickly it wakes up the whole back line. The neck gets a little room. The ribs move. The pelvis stops feeling glued in place. It is one of those beginner yoga exercises that looks simple and still earns its keep.
3. Child’s Pose and Thread the Needle for the Upper Back
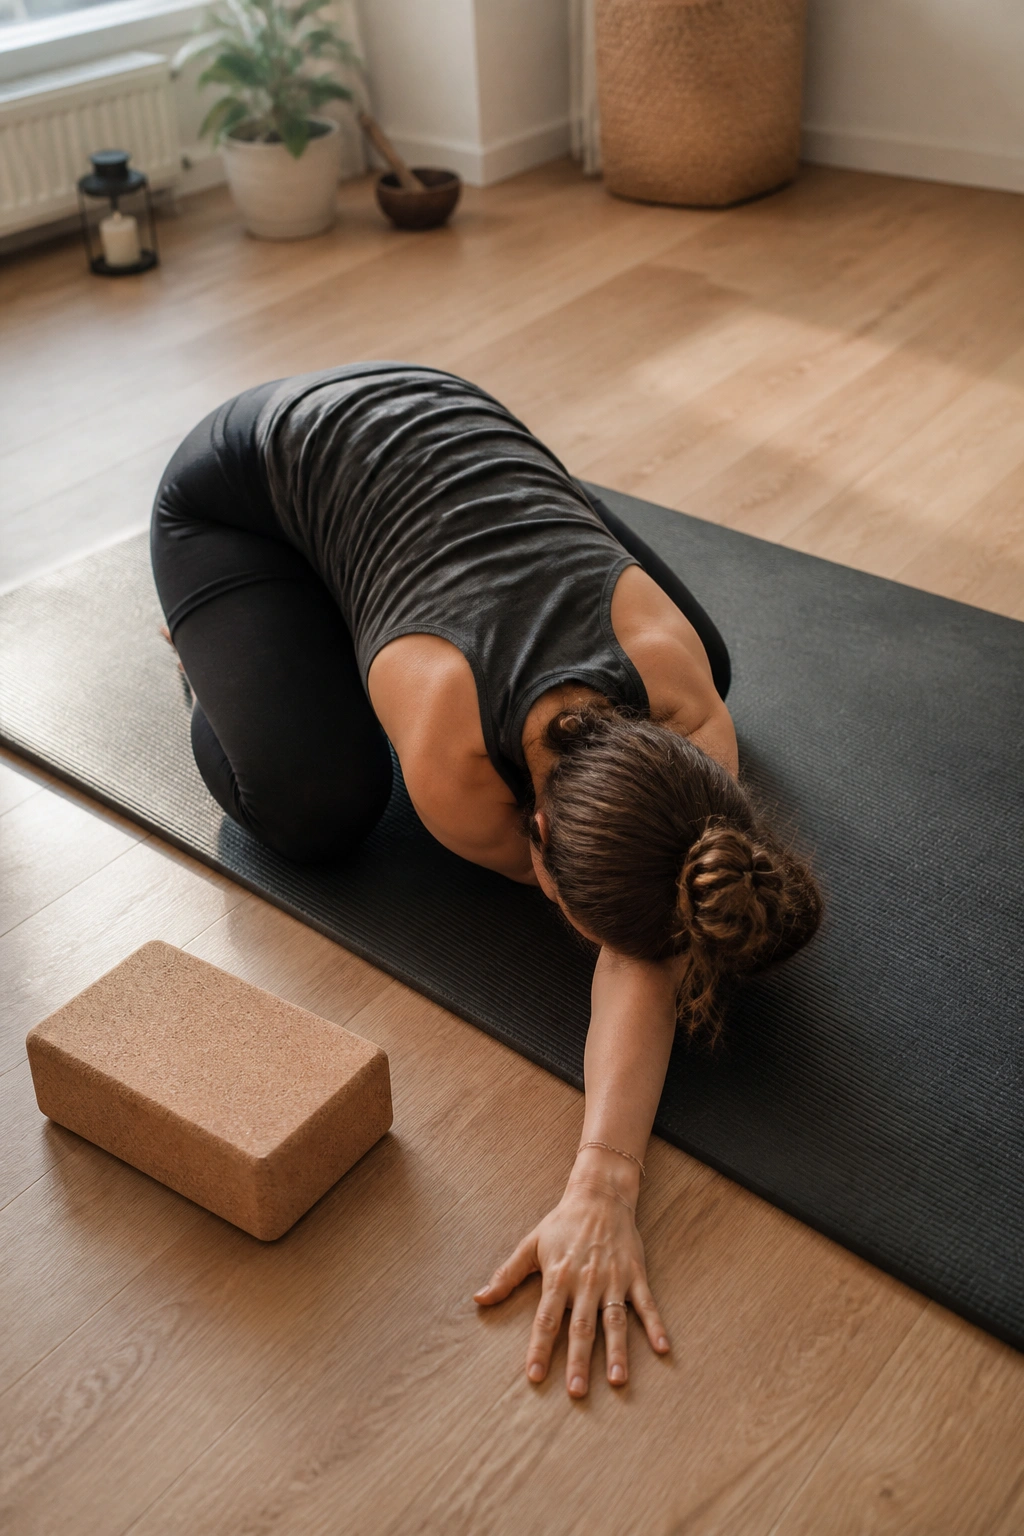
Ever notice how stress likes to live between the shoulders?
This little floor sequence goes after that spot without asking for much flexibility. Start in child’s pose with your knees wide if that feels easier, big toes touching, and your hips sitting back toward your heels. Stretch your arms forward, or stack them by your sides if reaching feels too intense. Stay for 5 breaths and let your forehead rest on the mat or a block.
Then slide one arm under the other for thread the needle. Keep your hips lifted over your knees if you can, or sit all the way back if you need more support. Breathe into the side of the rib cage and the back of the shoulder for 3 to 5 breaths, then switch sides.
Two Things That Make It Work
A pillow under your chest can keep this from turning into a neck strain. A folded blanket under the knees helps if kneeling feels cranky.
- Keep the supporting arm active.
- Do not force the shoulder deeper than it wants to go.
- Let the breath get slower on the second side.
This is not a flashy sequence. Good. The quiet stuff is often the stuff you come back to.
4. Wall Downward Dog for Tight Hamstrings
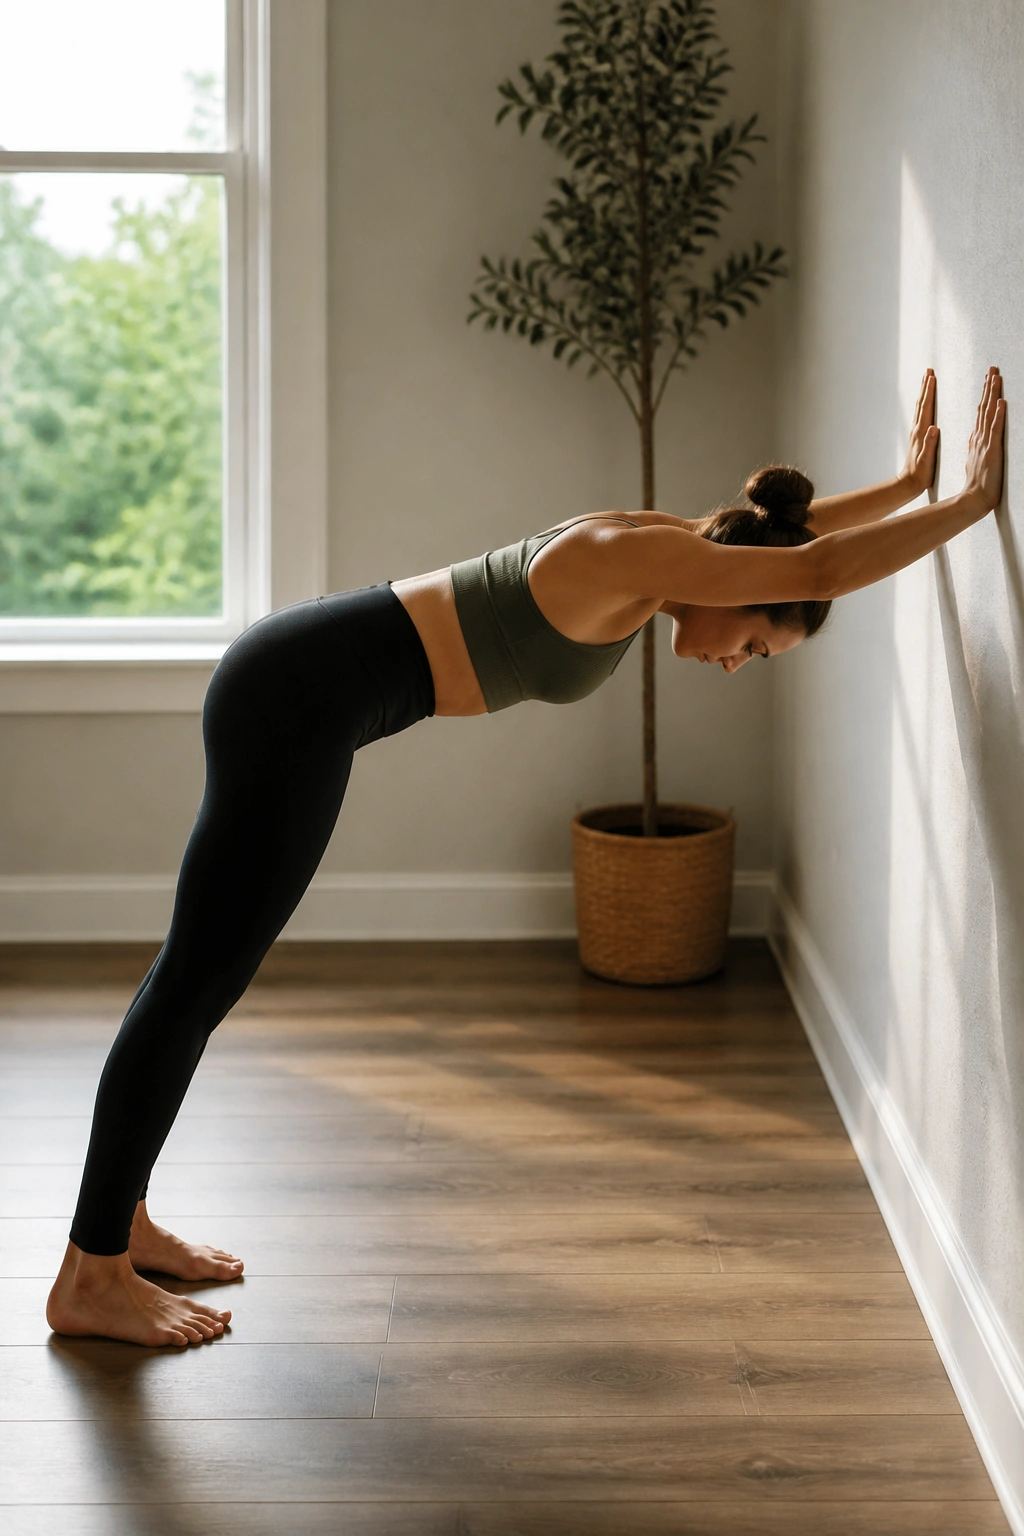
Floor downward dog can feel like a rude surprise if your hamstrings are tight.
The wall version is a better first step. Stand facing a wall, place your hands on it at shoulder height, and walk your feet back until your arms are long and your torso makes a straight diagonal line. From there, push your hips back, keep a small bend in your knees, and let your heels stay light on the floor. Your body should look like a firm ramp, not a collapsed hinge.
Hold for 5 breaths, then walk a little closer and try again. That small change matters. It teaches you the shape of the pose without cranking on the backs of your legs.
If you want to turn it into a mini workout, add a gentle pedal: bend one knee, then the other, just enough to wake up the calves. Don’t chase the heels. Chasing the heels is how beginners turn a useful stretch into a grumpy one.
The wall gives you feedback. It also takes the pressure off the wrists, which is useful if you are still figuring out how your hands should spread on the mat.
5. Low Lunge for Hip Flexors That Hate Sitting
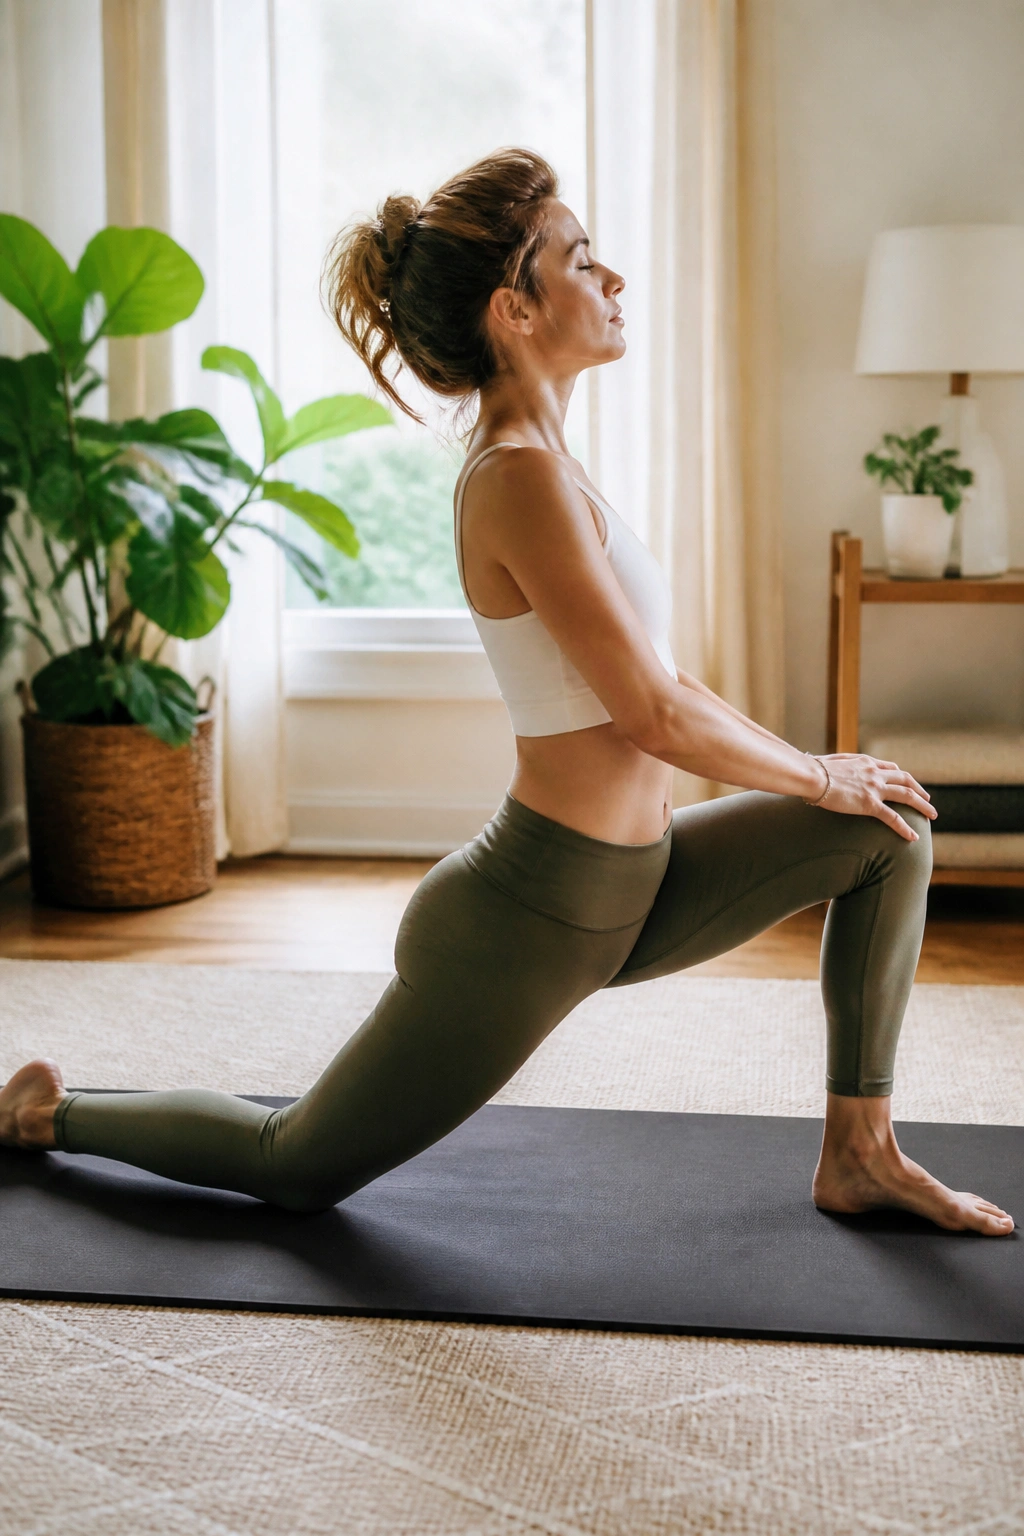
Long sitting days shorten the front of the hips. Low lunge is the fix I reach for when that tight, pinchy feeling shows up after too much chair time.
Step one foot forward between your hands and lower the back knee to the mat. Put a folded blanket under that knee if the floor feels hard. Walk the front foot forward enough that the knee lands over the ankle or a little behind it. Then lift your chest, keep your hips square, and breathe for 4 to 6 breaths.
You can stay here with your hands on the floor, or bring them to blocks if that makes the spine feel longer. If the front of the back leg is cramping, tuck the toes and lift the back knee for a higher lunge. That version works the legs more and often feels steadier.
What Beginners Usually Miss
They try to sink too deep. That is a bad trade.
A tiny, controlled stretch beats a dramatic one every time. You want a mild pull across the front of the back hip, not a sharp tug in the groin or lower back. Switch sides and you’ve got one of the best at-home yoga workouts for loosening up before walking, strength work, or even another short flow.
6. Half Sun Salutations for a Simple Warm-Up
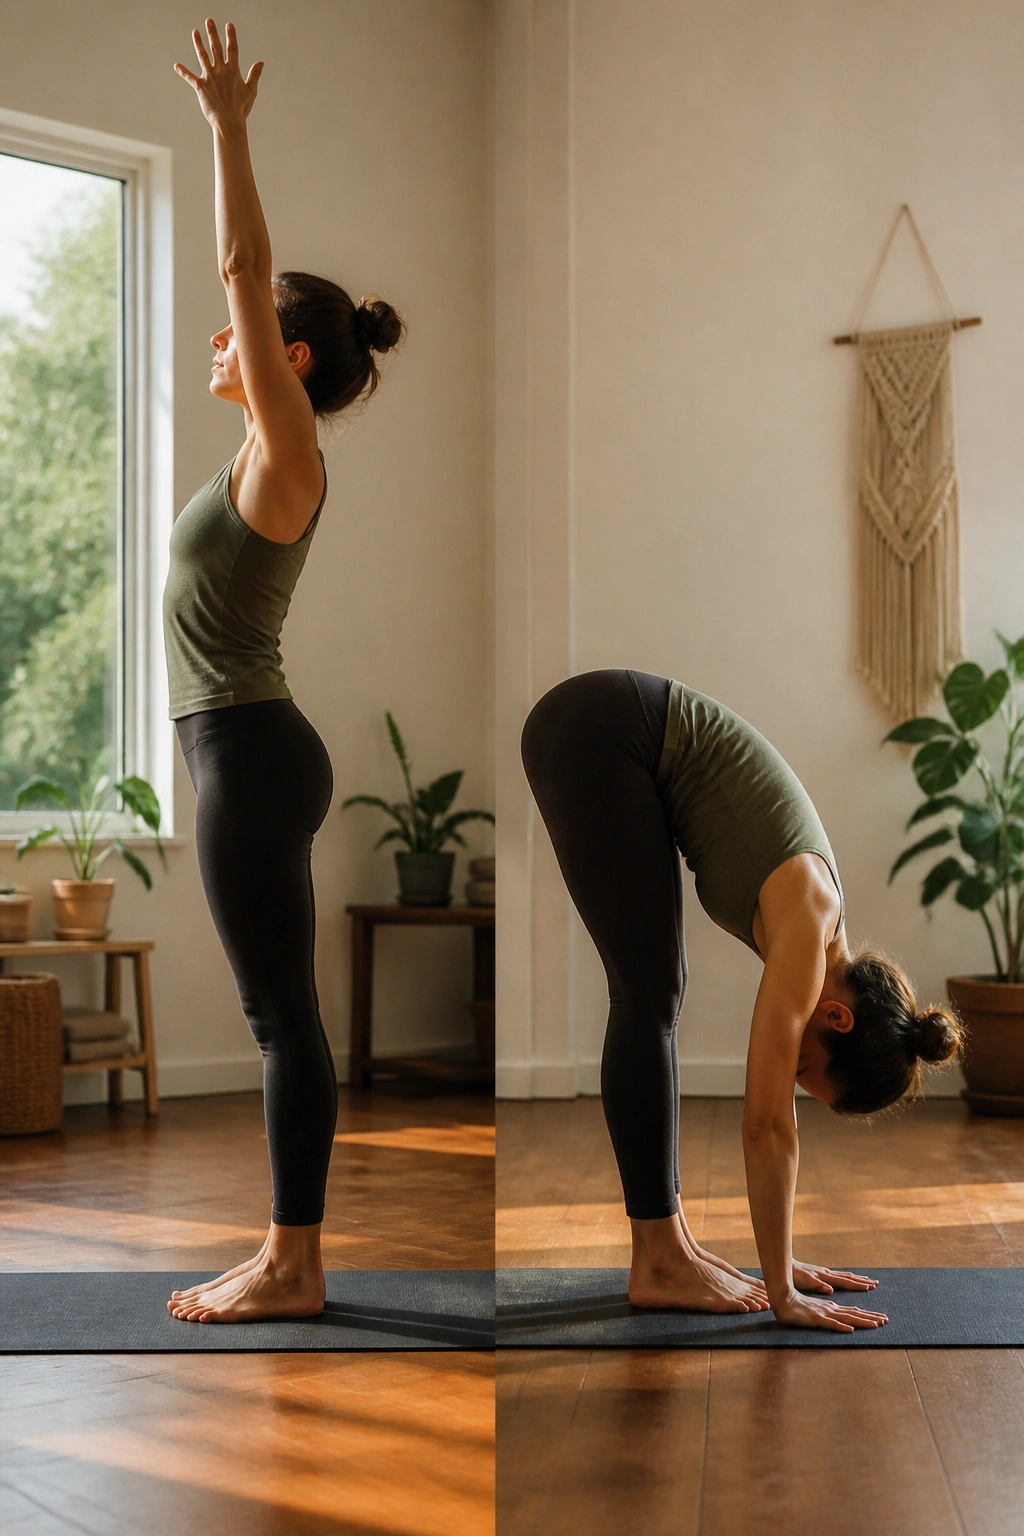
Half sun salutations are the kind of beginner flow that teaches rhythm without making you memorize a dozen poses.
Start in mountain pose. Inhale and sweep your arms up. Exhale and fold forward with soft knees. Inhale and lift halfway, hands on shins or thighs, spine long. Exhale and fold again. Then step back to a high plank only if it feels manageable; otherwise, step back to hands and knees. Lower to the floor or come down through knees-chest-chin. Inhale into a low cobra, then exhale into child’s pose or downward dog.
Repeat 3 rounds at a slow pace.
How to Keep It Gentle
- Keep the forward fold loose in the knees.
- Skip plank if your wrists or shoulders feel shaky.
- Use knees-down cobra instead of a full backbend.
- Pause for a breath at the top of each round.
This is a nice place to learn transitions. That matters. A lot of people can hold a pose but get lost between poses, and that is where the wobble starts. Half sun salutations give you a clean path from standing to floor and back again.
7. Warrior I and Warrior II for Steadier Legs
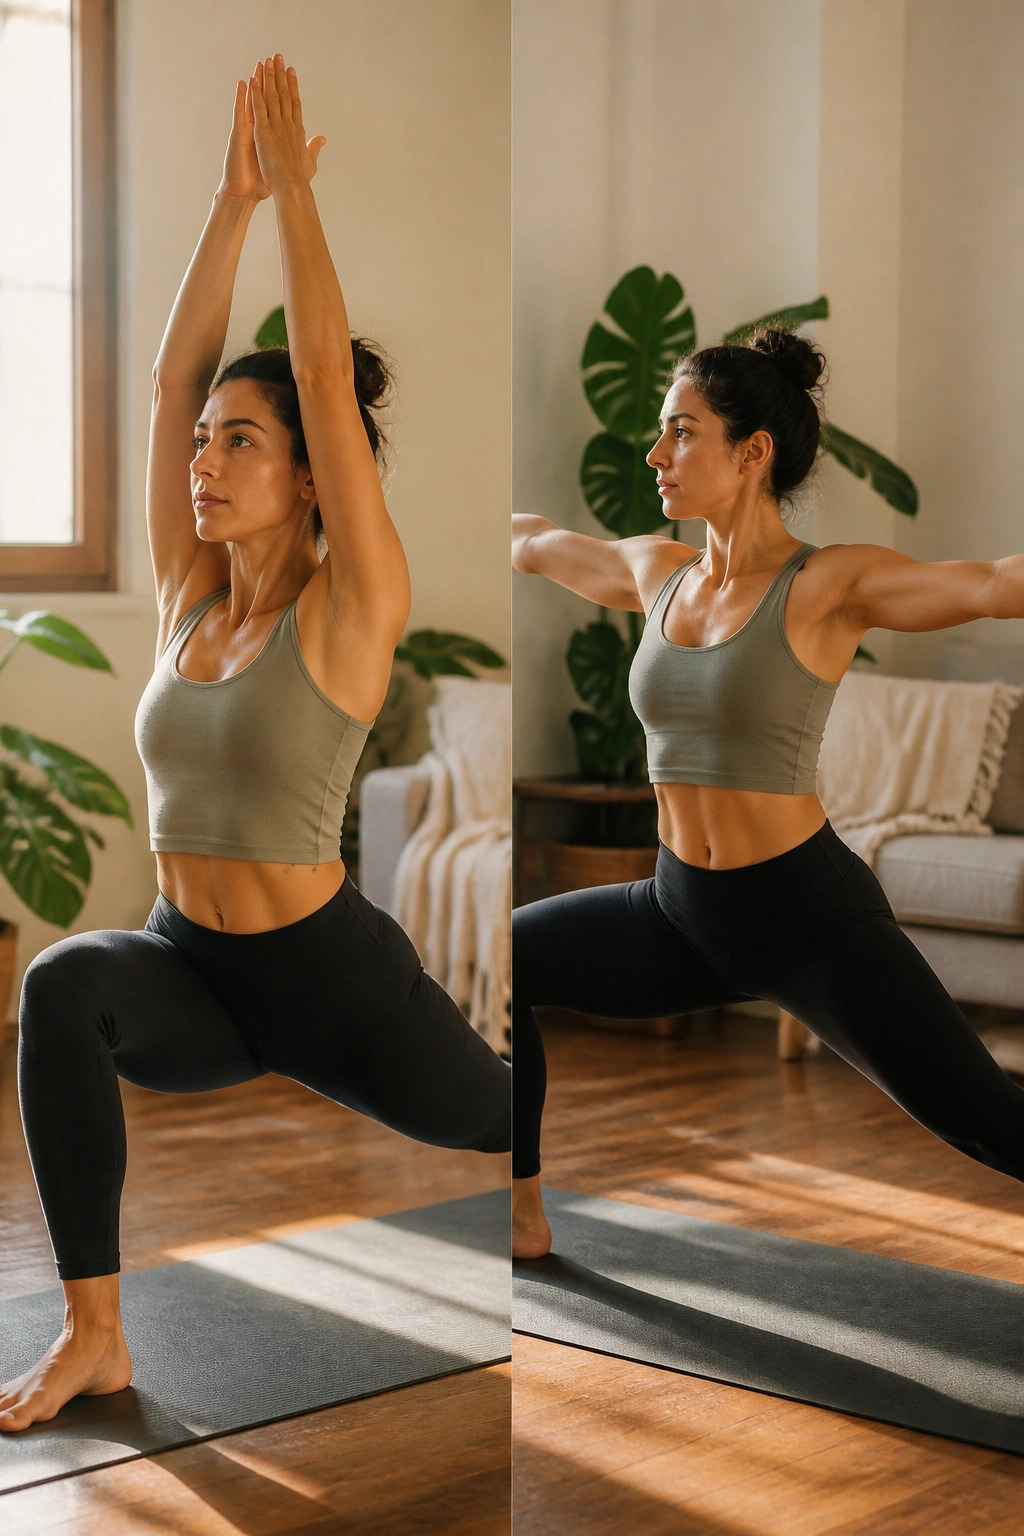
Warrior poses look dramatic, but the beginner version is more about balance and leg work than depth.
Step one foot back into a short stance. Turn the back heel down for Warrior I, or keep it slightly lifted if that feels better in your hips. Bend the front knee a little, not a mile. Raise your arms overhead for Warrior I, or stretch them out to the sides for Warrior II. Hold for 3 to 5 breaths, then switch sides.
The first time you do these at home, keep the stance shorter than you think you need. A too-long stance makes people wobble and dump weight into the front knee. A shorter stance gives you room to stack the joints and actually feel the legs working.
Warrior I asks for more front-facing shape. Warrior II opens the chest and shoulders a bit more. I like using both in the same workout because they teach two different kinds of steadiness. One is upright and focused. The other is broad and grounded.
If your front thigh starts shaking, good. That means you are doing work.
8. Chair Pose and Bridge Pose for Core and Glutes
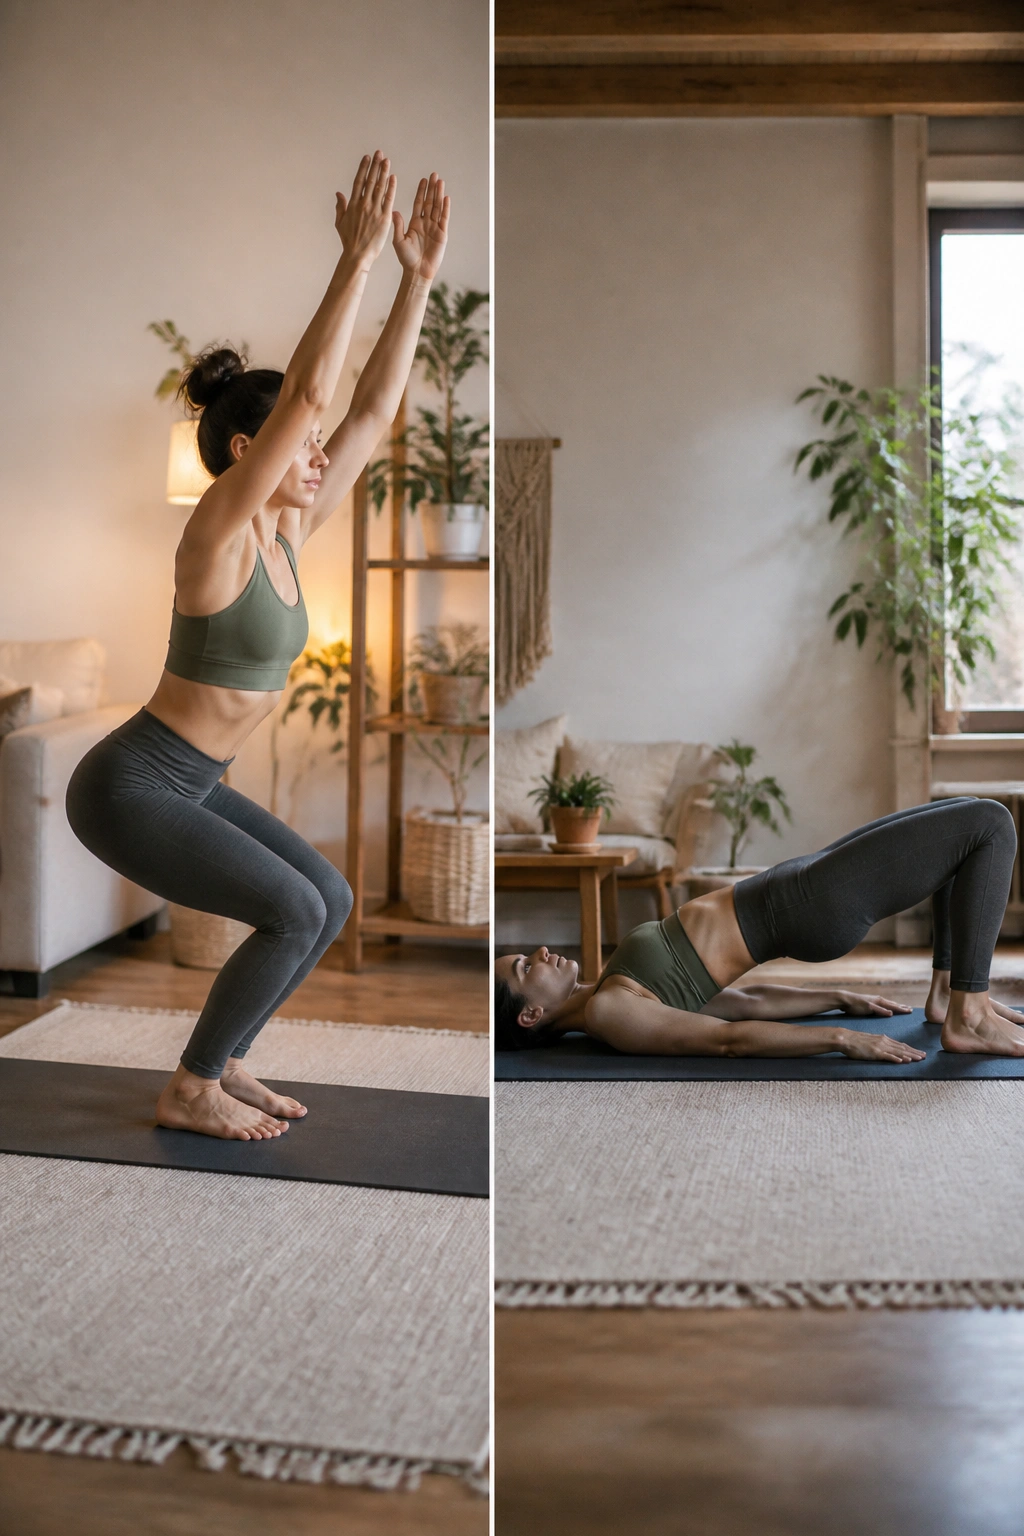
You do not need endless crunches to wake up the middle of the body. Chair pose and bridge pose will do a lot of the heavy lifting.
For chair pose, stand with your feet hip-width apart, bend your knees, and sit your hips back as if you are reaching for a chair that is not quite there. Lift your arms if you want more challenge. Keep your chest from collapsing onto your thighs. Hold for 3 breaths, stand up, and repeat 2 or 3 times.
Bridge pose takes you to the floor. Lie on your back with your knees bent and feet flat, about hip-width apart. Press through your heels and lift your hips until your body makes a straight line from shoulders to knees. Hold for 5 breaths. Lower slowly. If your lower back feels pinched, lift only halfway.
A block under the sacrum turns bridge into a supported version that feels calmer and less effortful. That is a fine choice, not a cheat. The glutes still work. The spine gets a break.
This pairing is useful because one pose builds standing strength and the other teaches you how to support the back without gripping it. That balance matters more than people think.
9. Seated Forward Fold for Gentle Hamstring Stretching
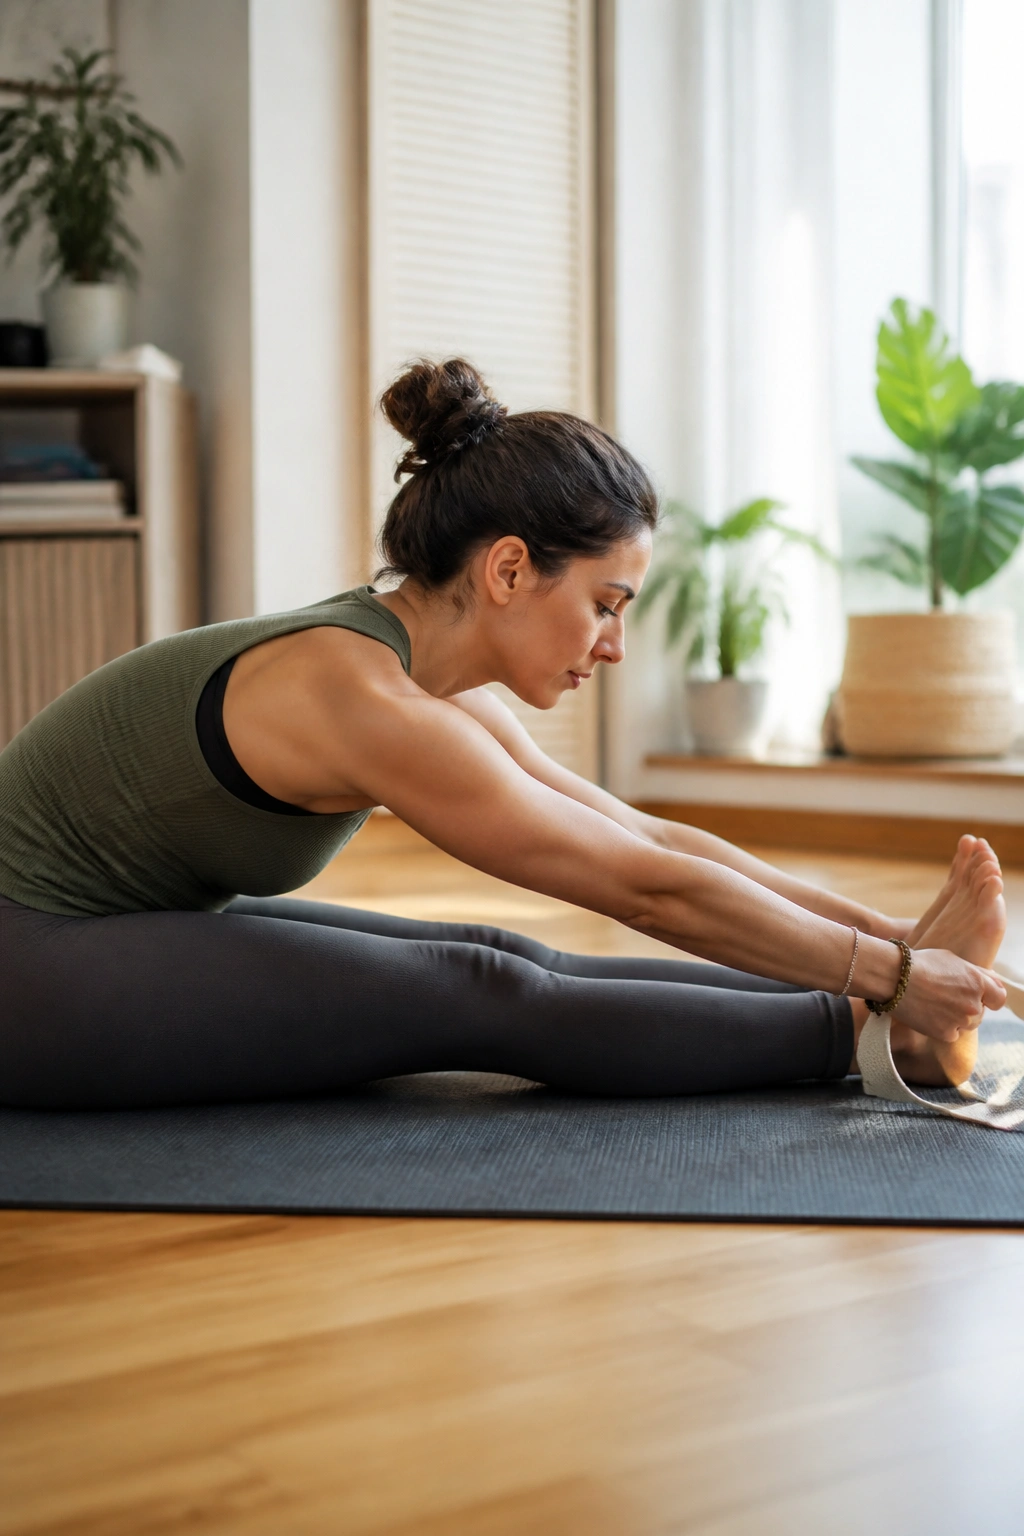
Can you touch your toes? You do not need to.
Sit on the floor with your legs straight out in front of you, or bend your knees a lot if that’s where your body starts. Sit on a folded blanket if your lower back rounds a lot when you sit. Inhale to lengthen the spine. Exhale and walk your hands forward until you feel a mild stretch in the backs of the legs. Stay for 5 breaths.
The classic mistake is yanking the toes and chasing the deepest fold. That usually just pulls the shoulders forward and makes the hamstrings guard harder. Bend the knees. That is the move most beginners need. A strap around the feet can help if reaching the shins feels like too much on a given day.
A Small Cue That Helps
Think “length first, fold second.”
That order changes everything. You’re not dropping the chest to the legs so much as folding from the hips while keeping space in the front of the torso. If the stretch moves into the lower back, come up a little. The right version feels steady, not desperate.
10. Supine Twist and Happy Baby for a Softer Spine
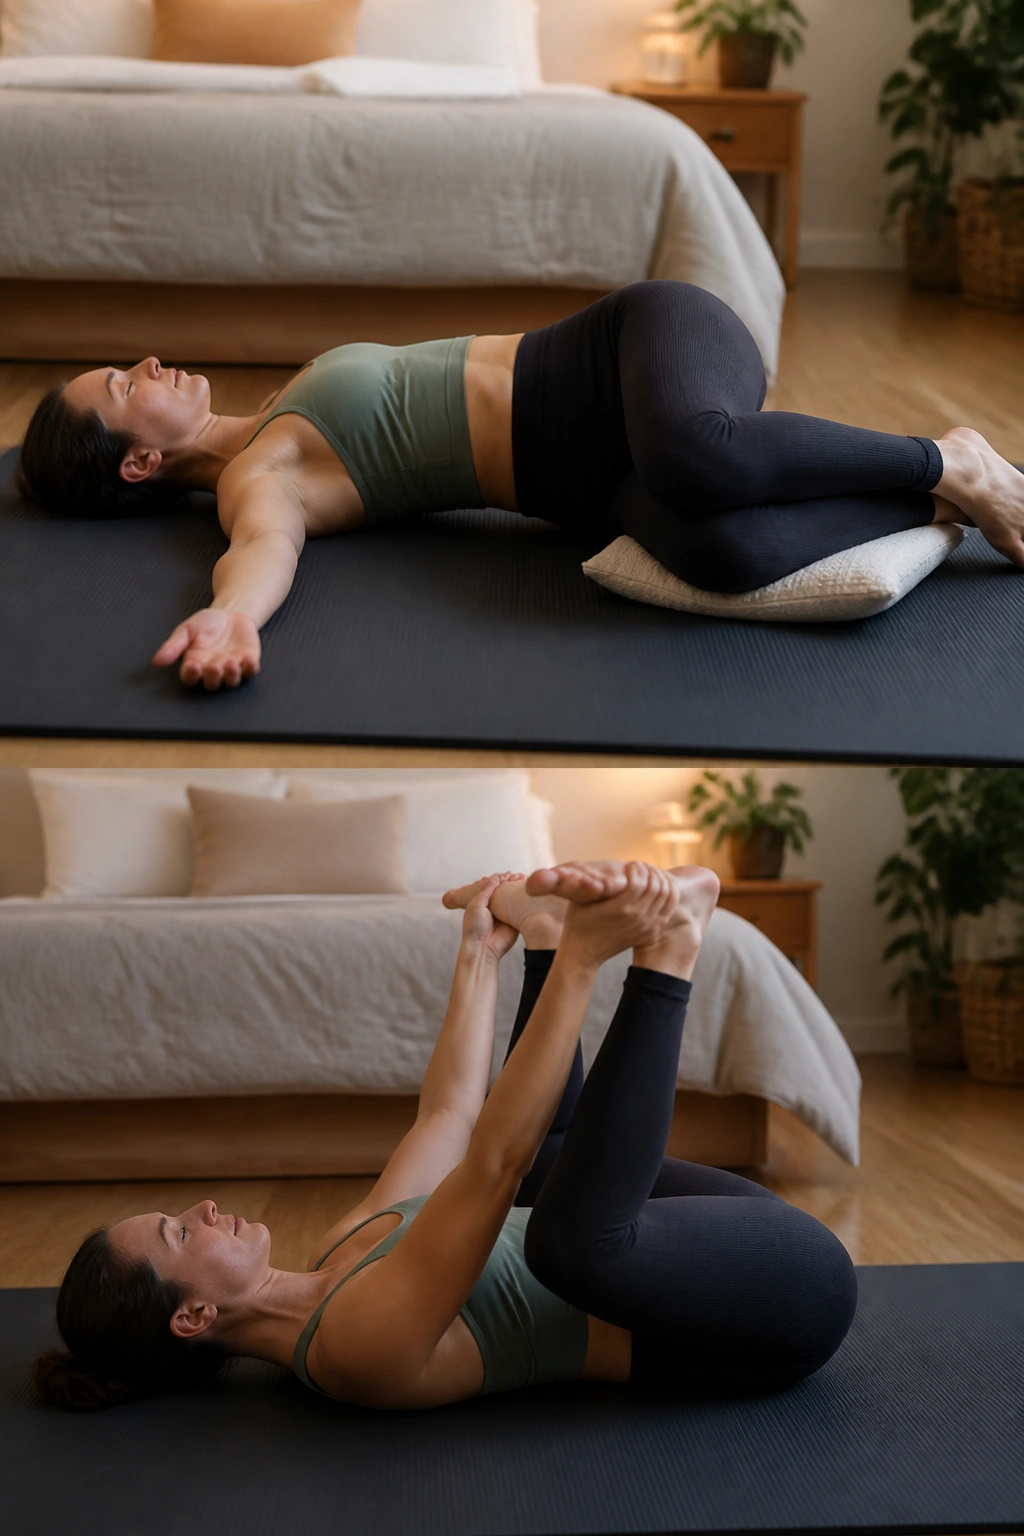
Floor work has a way of making everything feel less serious.
Lie on your back and bring your knees into your chest. Let both knees fall to one side for a supine twist, keeping your shoulders heavy on the mat. If the top knee hovers too much, place a pillow under it. Hold for 4 to 6 breaths, then switch sides. After that, come back to center and take happy baby, holding the backs of your thighs, shins, or even your ankles if that is where you can reach without strain.
Twists are useful because they ask the spine to move in a way most daily life doesn’t. Happy baby is nice because it opens the hips without the rush of standing work.
Neither pose should feel like a wrestling match. If your knee complains in the twist, back out. If your neck tightens, lower your head or keep it on the floor. Quiet, supported versions of these poses are often better than the picture-perfect ones.
This is a good mini workout for the end of the day, especially if your lower back feels compressed from standing or sitting too long.
11. Tree Pose at the Wall for Balance Practice
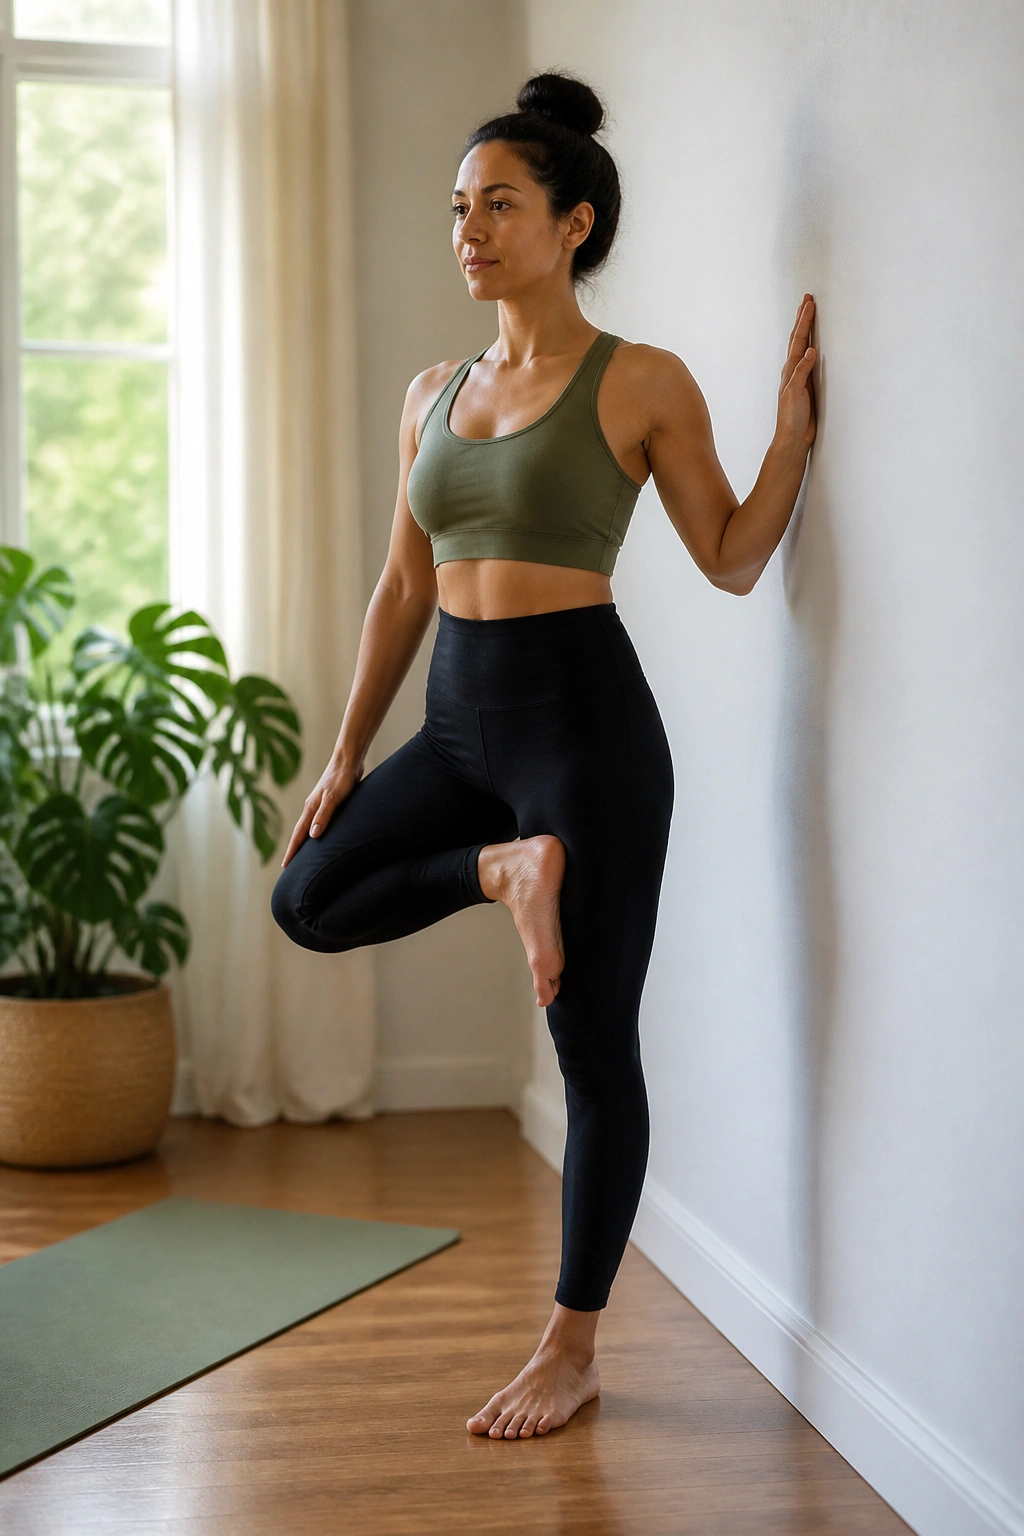
Balance work gets easier when you stop trying to prove anything.
Stand near a wall and place one hand lightly against it. Shift your weight into one foot and bring the other foot to the ankle, calf, or inner thigh. Avoid the knee. That part matters. Press your foot and leg together gently, then bring your palms to your chest or keep one hand on the wall until you feel steady. Hold for 3 to 5 breaths, then switch sides.
What Makes This Version Beginner-Friendly
The wall takes away the panic of falling. That alone can change the whole experience.
- Pick a steady spot on the floor to look at.
- Keep the standing knee soft, not locked.
- Use the wall as a fingertip touch, not a crutch.
- Set the lifted foot lower if the hip opens feel wobbly.
Tree pose teaches more than balance. It teaches patience. The pose often feels better on the second try, not the first, which is a nice reminder that practice is a skill, not a mood.
12. Side Angle and Triangle for Longer Sides
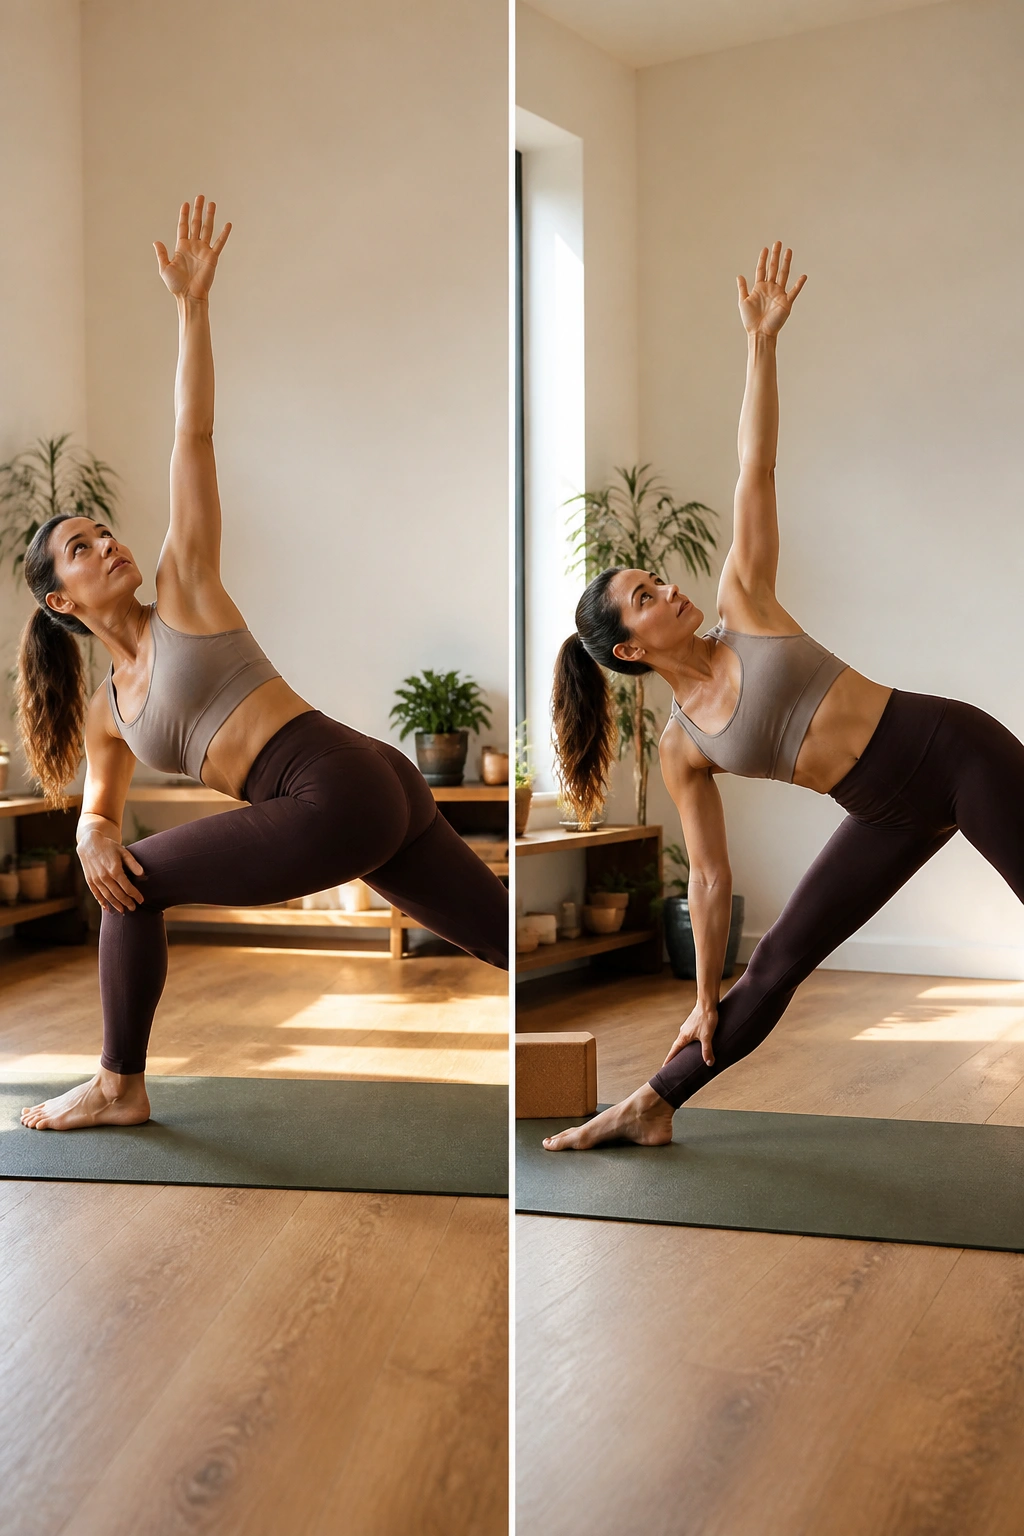
These two poses are cousins, and they work best together.
Warrior II legs set you up nicely for side angle and triangle. For side angle, keep the front knee bent, place your lower forearm on the front thigh, and reach the top arm overhead. For triangle, straighten the front leg a little more, tip from the hip, and rest the lower hand on your shin, a block, or your thigh. The shape should feel long, not collapsed.
Triangle often scares beginners because they think the hand must reach the floor. Nope. A block is smarter. So is the thigh. The goal is to lengthen the side body and keep the chest open, not to twist yourself into a bargain-version photo pose.
I like this pair in an at-home yoga workout because it spreads effort across the whole body. The front leg works. The back leg stays awake. The side waist stretches. The shoulders learn to stay open even when the legs are doing the hard part.
Move slowly between the two. That tiny transition teaches control, and control is what keeps beginner yoga from turning sloppy.
13. A Slow Full-Body Flow for Rusty Days
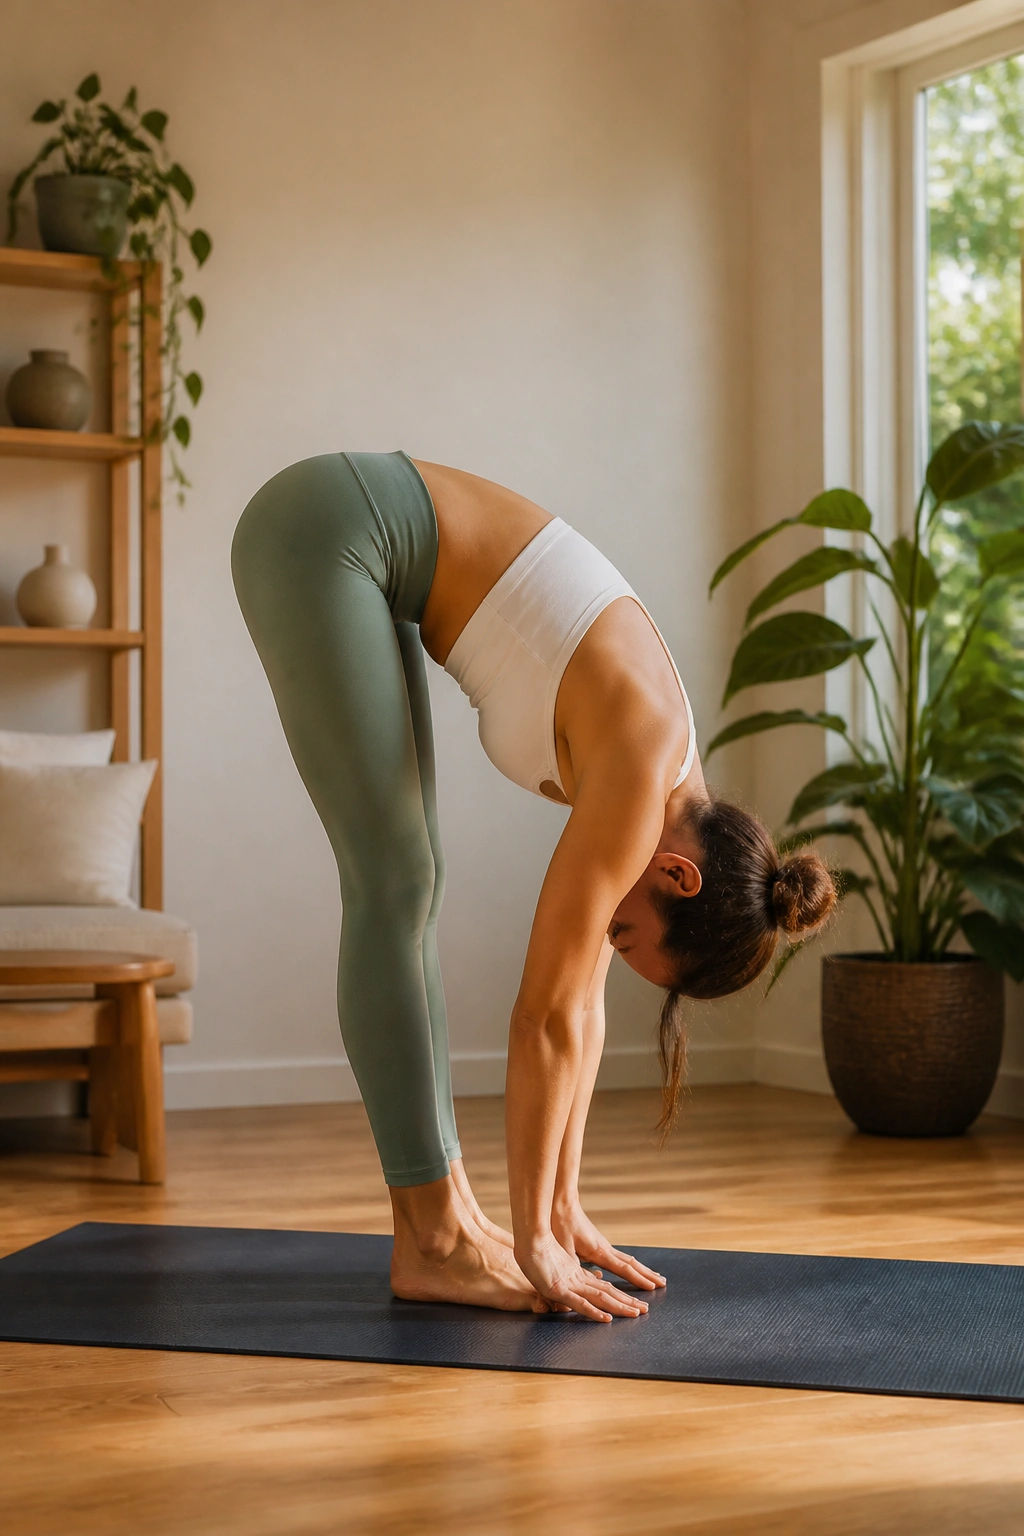
Some days you do not want a named pose parade. You want a flow that feels like getting the joints back online.
Start standing. Move to a forward fold. Step back to hands and knees. Do 4 cat-cows. Slide into low lunge on the right, then the left. Come down for bridge pose, roll up carefully, and finish with a standing forward fold before you return to mountain pose.
That is enough.
Repeat the whole thing twice if you have the energy, or once if you don’t. The point is not to sweat your way into exhaustion. The point is to reconnect the parts of the body that have gone a little sleepy. Hips. Shoulders. Spine. Feet.
This kind of beginner yoga routine is useful on days when you feel stiff but also mentally tired, because it does not demand memorization. You can follow your breath and let the sequence carry you. If you want a touch more effort, hold each lunge for 5 breaths and each bridge for 6. If not, keep moving and stay light.
A slow flow like this is also a good bridge between workouts. It keeps your practice from feeling like a start-over every time.
14. A Prop-Based Evening Wind-Down
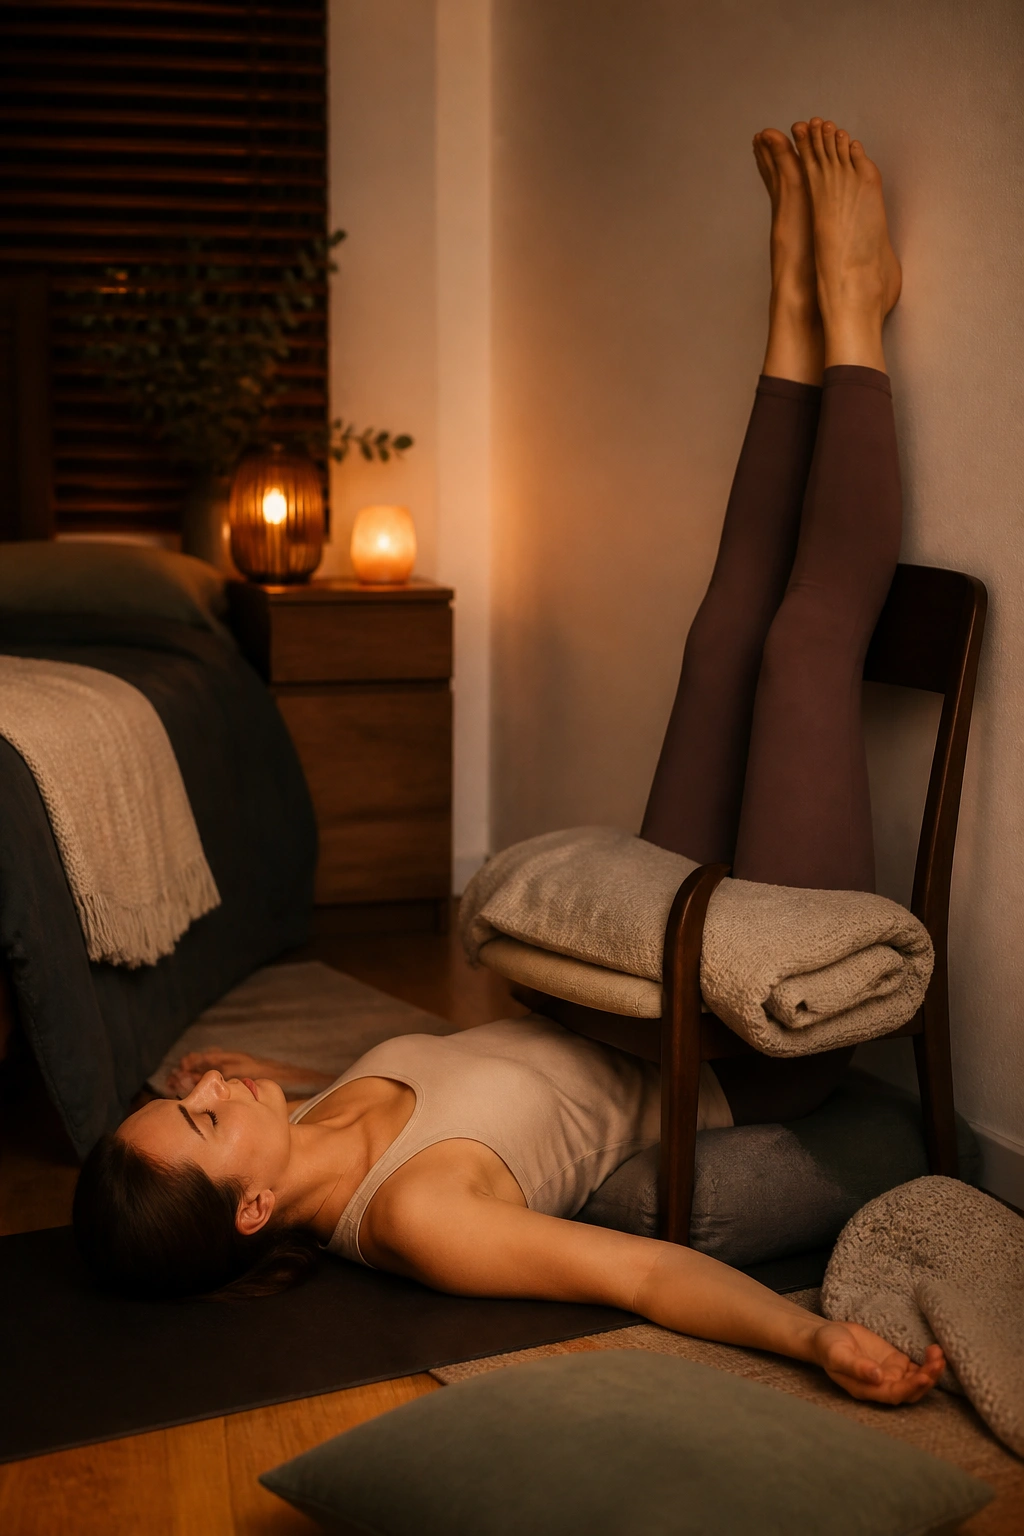
A blanket, a pillow, and a little floor space can do more than a hard workout sometimes.
Lie on your back with your calves on a chair or your legs up the wall for 2 to 5 minutes. Then bring the soles of the feet together into a supported bound angle, with blocks or pillows under the knees if needed. Finish with a gentle supine twist on each side. Keep your lights low if you can. The body notices that.
The Prop Choices That Matter
- Use a firm pillow under the knees if the low back feels tight.
- Stack blankets under the head only if your neck wants support.
- Keep the legs higher than the heart for a few minutes if that feels soothing.
- Stay still long enough to notice your breath slow down.
This is the kind of practice people dismiss because it looks easy. Then they try it on an actual tense evening and realize how good a supported position can feel after standing all day or staring at a screen. Calm is work, too.
If you only have time for one floor sequence, make it this one. It helps the body stop bracing.
15. A 15-Minute Mixed Beginner Yoga Circuit
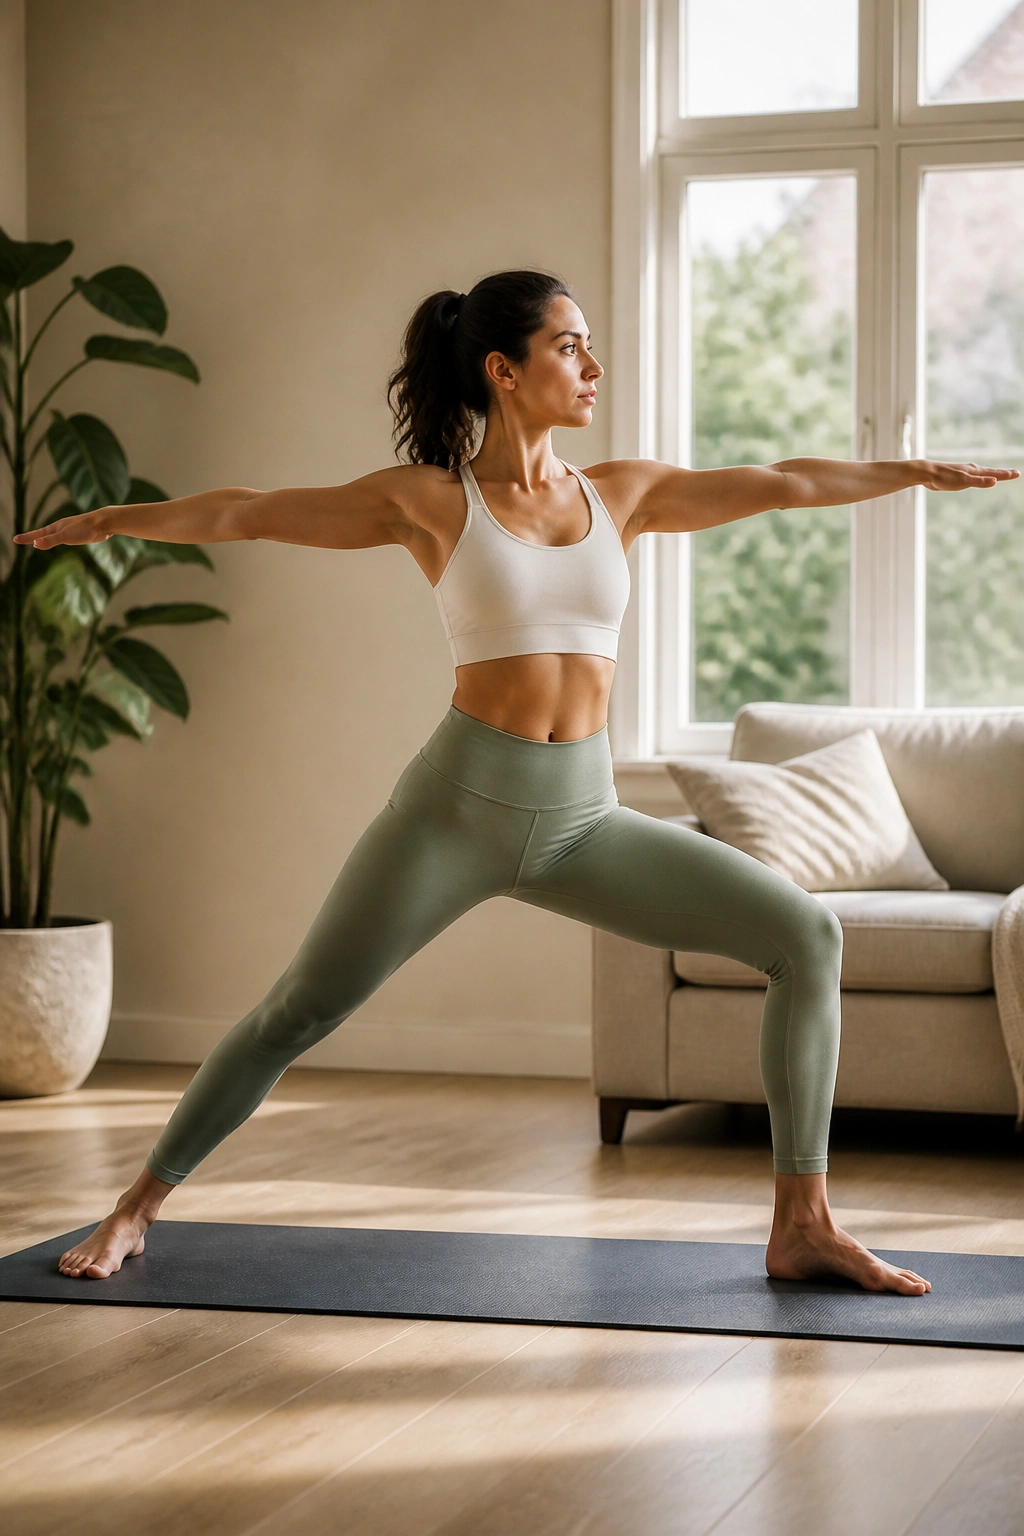
This is the version I’d hand to someone who wants one repeatable home routine and doesn’t want to think too much.
Start with 1 minute of mountain pose breathing. Move into 4 rounds of cat-cow. Step into a low lunge on each side for 4 breaths. Flow through one round of half sun salutations. Hold Warrior II on both sides for 3 breaths each. Drop to the floor for bridge pose twice, then finish with a supine twist and a short child’s pose.
That gives you a little standing work, a little mobility, and a little floor recovery in the same session. Nothing complicated. No weird choreography. Just enough structure to make the practice feel real.
If you want to keep this routine going through the week, alternate emphasis. One day keep the flow short and use more breathing. Another day stay longer in the standing shapes. Another day stay mostly on the floor and let the hips and back get the attention. That keeps the practice from turning stale, which is usually where beginners drift off.
A final thought: your first few home yoga workouts do not need to look graceful. They need to be clear. Clear enough that you can repeat them next week without dreading them, clear enough that your body starts to recognize the shapes, clear enough that you stop treating movement like a test. That’s the real payoff, and it shows up sooner than people expect.
