



If your arms shake halfway through a plank, that does not mean you’re weak. It usually means the pose has found the muscles that have been getting away with too little work.
arm yoga poses build strength in a way dumbbells cannot quite copy. They ask your triceps, shoulders, forearms, and the small stabilizers around your shoulder blades to work together, which is why the change shows up not only in the mirror but in the way you push a door open, carry groceries, or hold yourself upright at a desk.
People love to talk about “toned arms” as if the answer is one magic move. It isn’t. The cleanest line between weak and strong often runs through the boring-looking stuff: planks, controlled lowers, holds against gravity, and balances that make your wrists pay attention.
A clean ten-second hold beats a sloppy thirty-second collapse. That matters more than most people want to hear. Keep your ribs in, breathe on purpose, and treat the setup as part of the exercise instead of a prelude to the “real” work.
1. High Plank for Stronger Arms
High plank is plain, and that’s why it works. No flourishes. No place to hide.
It loads the wrists, triceps, shoulders, and serratus anterior all at once, while your core keeps your body from sagging into a shape your lower back will hate. If you want one pose that tells the truth fast, this is it.
Why It Belongs in an Arm Routine
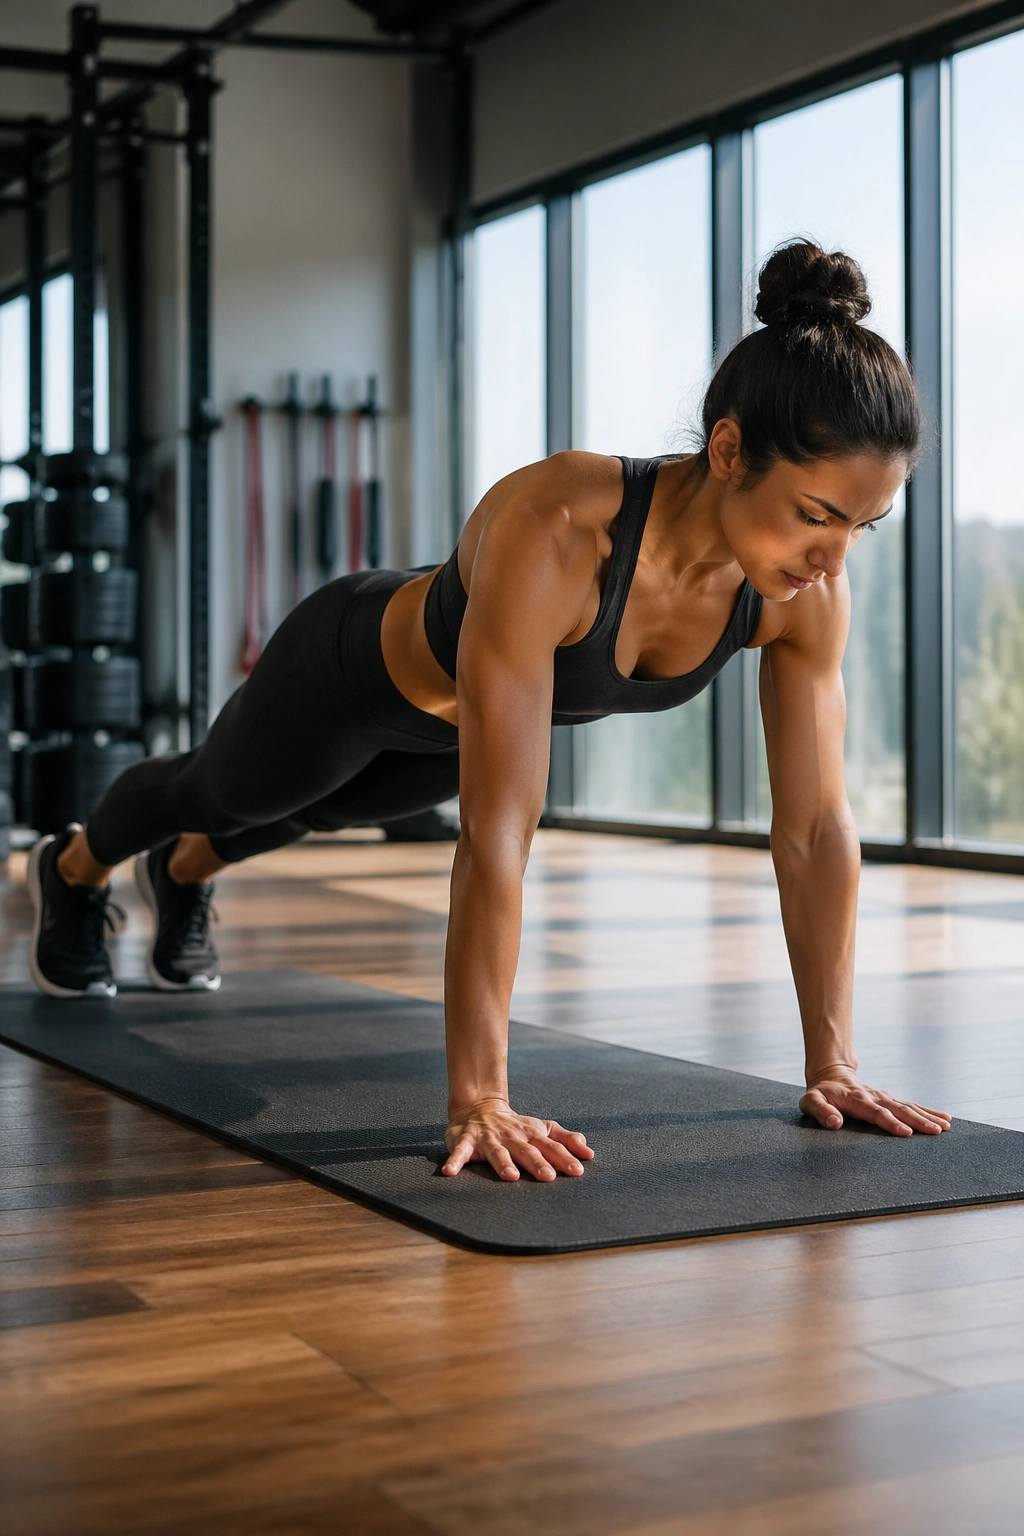
Set your hands directly under your shoulders, spread your fingers wide, and press the floor away as if you were trying to leave handprints in the mat. Your body should look like one long line from the back of your head to your heels.
The details matter here: keep your shoulders slightly forward of your wrists, squeeze your thighs, and stop your ribs from flaring. If your hips drop, shorten the hold to 10 or 15 seconds and repeat it three times instead of forcing a messy minute.
- Hands shoulder-width apart
- Fingers active, not lazy
- Heels reaching back
- Belly firm, but not clenched like a fist
Pro tip: if your shoulders shake but your form stays clean, you’re doing it right.
2. Forearm Plank for Shoulder and Triceps Endurance
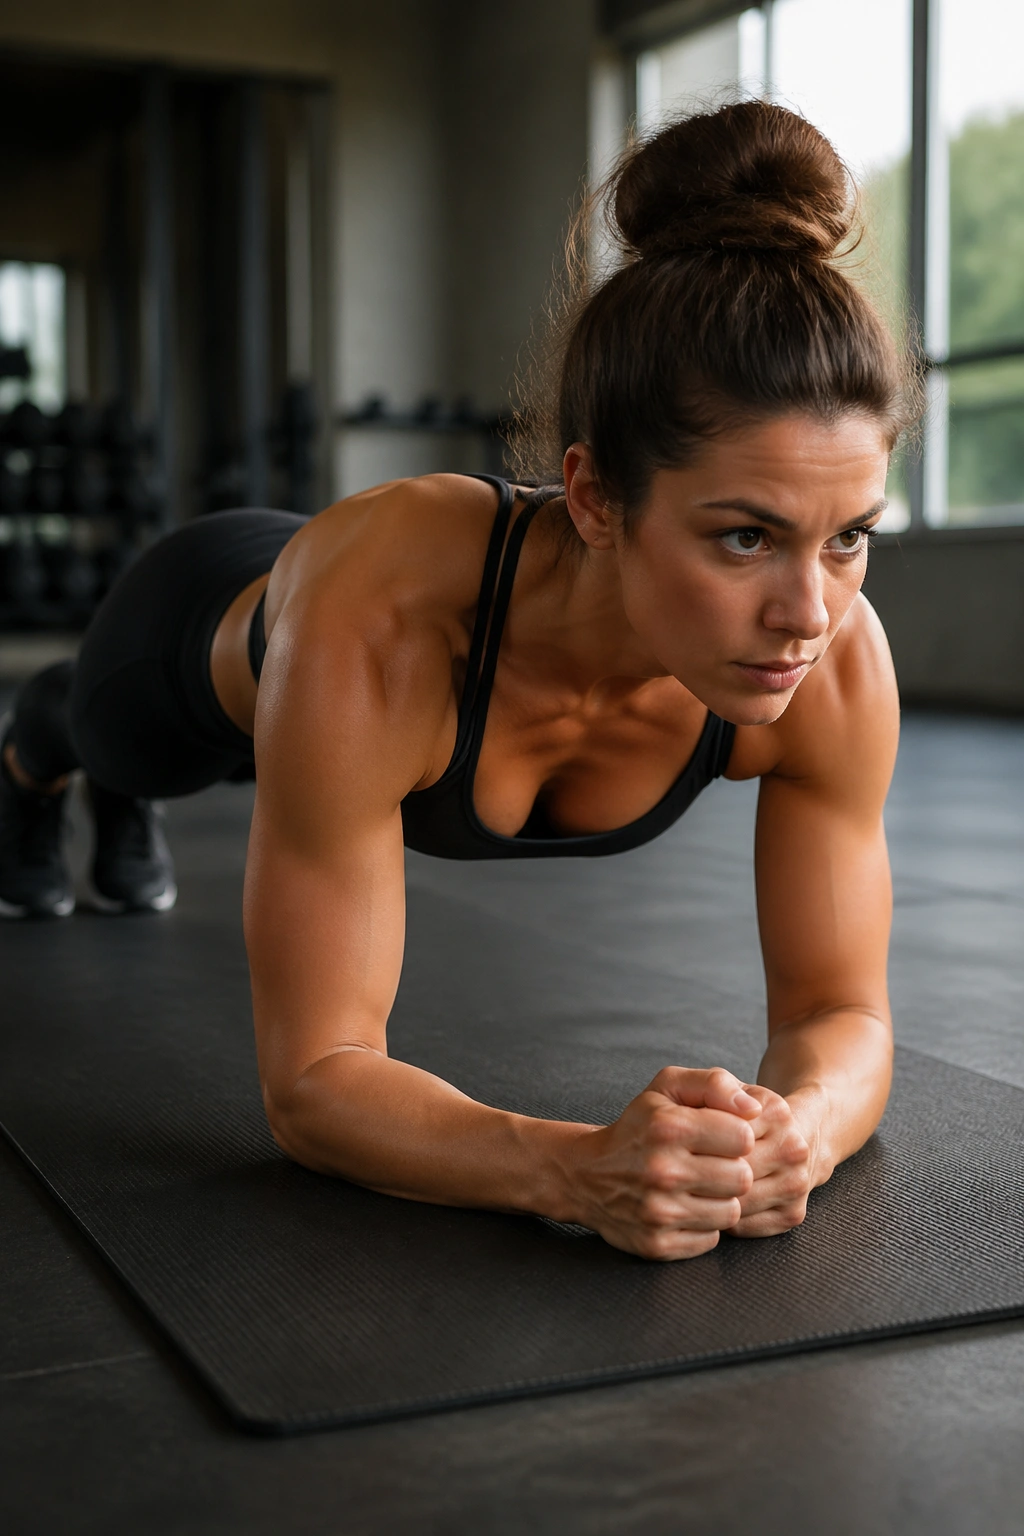
Forearm plank is the quieter sibling. It looks easier from across the room. It usually isn’t.
By moving the support point lower, you make the shoulders work from a slightly different angle, and that change can wake up the triceps in a way high plank does not. It also gives the wrists a break, which is a gift if you practice often.
Lie face down, then lift onto your forearms with elbows under shoulders and forearms parallel. Press the forearms into the mat, spread your shoulder blades across your back, and tuck the tail just enough to keep the lower ribs from sagging forward.
Do not let the hips hike high just to make the pose feel easier. That turns the plank into a weird upside-down V and takes the arm work away. A small wobble is fine. A collapsed middle is not.
One good rule: if you can’t keep breathing through your nose for at least three slow breaths, the hold is probably too long for now.
3. Side Plank for Arm Stability
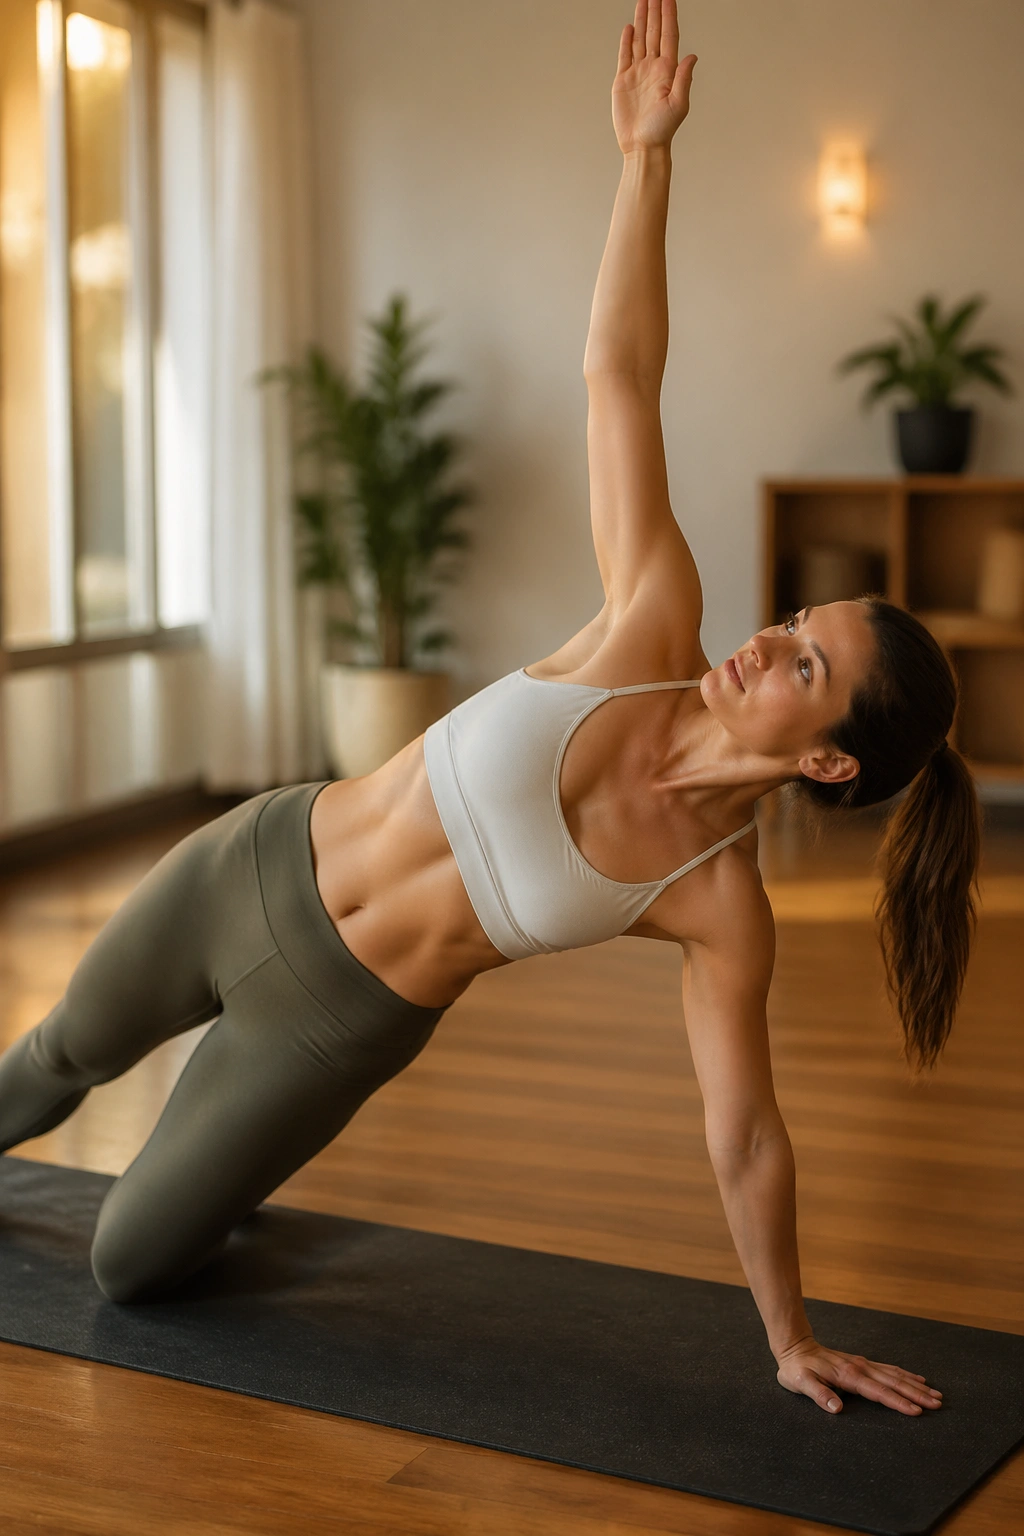
Why does side plank show up in so many arm-strength sequences? Because one arm has to carry almost everything while the rest of you tries not to tip over.
That single supporting shoulder is doing a lot of work, but the benefits travel farther than the arm. Side plank also trains the obliques, the outer hip, and the muscles that keep the shoulder blade stable when your weight shifts to one side. That stability is part of what makes arms look and feel stronger.
How to Make It Less Wobbly
Start with your bottom knee down if balance is shaky. Stack your shoulders first, then open the top arm toward the ceiling once the base feels steady. Keep the supporting palm firm and your wrist creases facing forward, not collapsed inward.
- Bottom hand under shoulder
- Feet stacked, or one foot in front for support
- Hips lifted, not rolling backward
- Chest open and neck long
A lot of people rush the lift and dump into the bottom shoulder. Slow it down. Even 5 to 8 seconds of real work on each side can be enough to build the kind of control that shows up later in plank, crow, and handstand work.
4. Dolphin Pose for Forearms and Shoulders
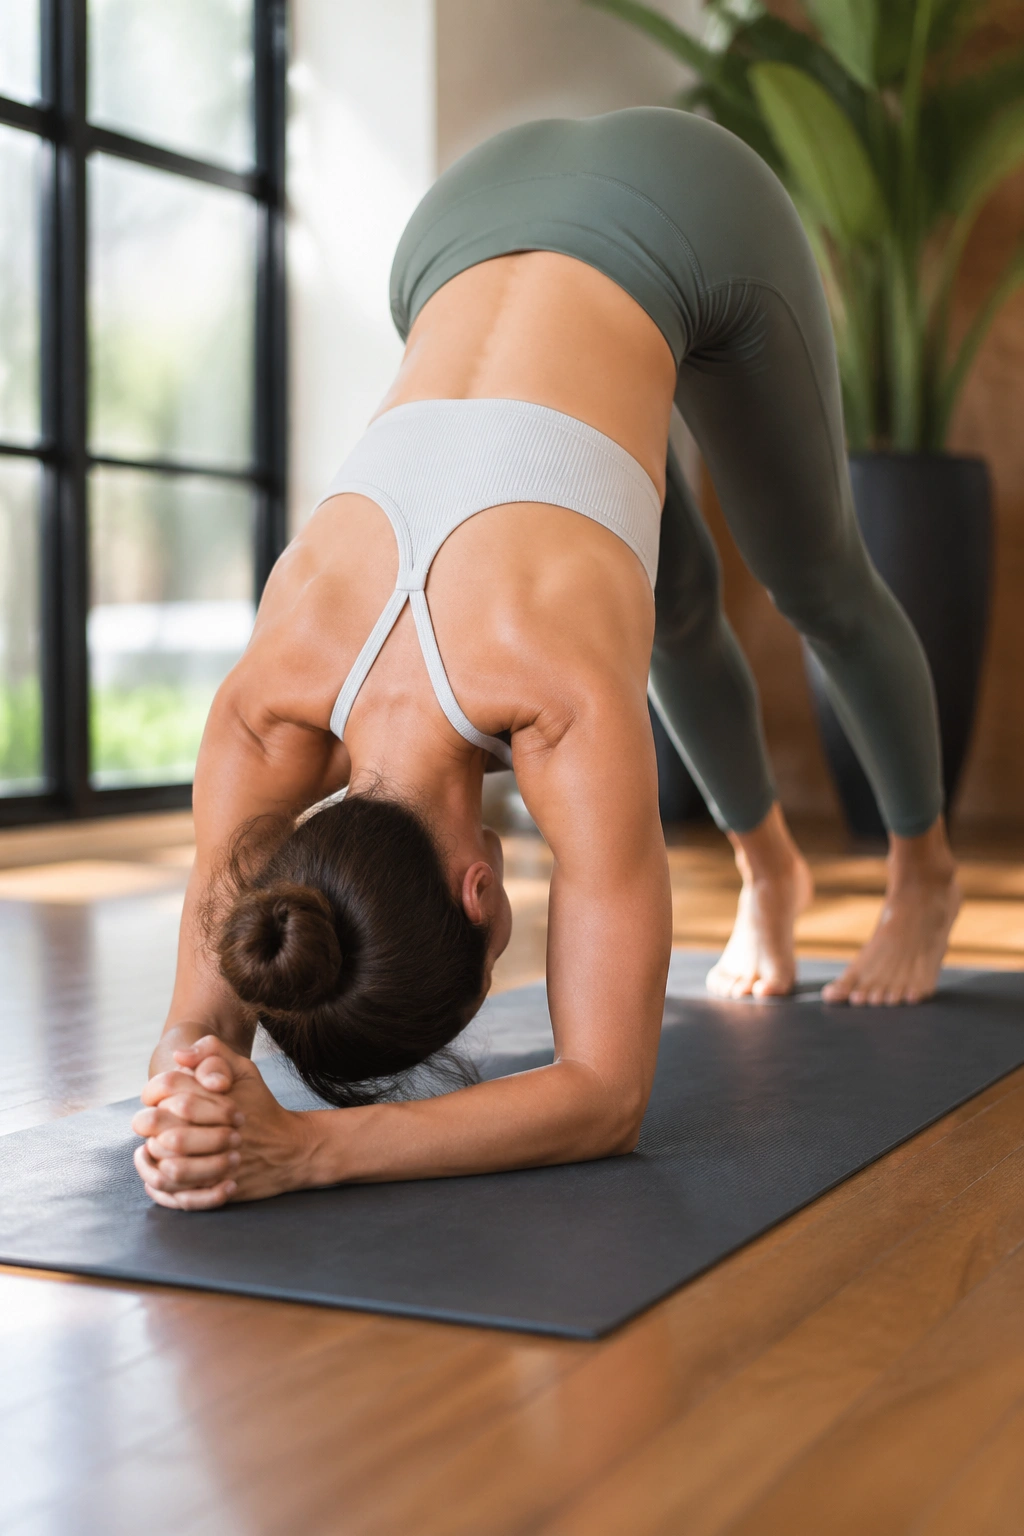
Dolphin feels like forearm plank after a long day. The shoulders wake up, the neck gets quieter, and the breath turns louder because the upper body is doing more of the talking.
This pose is gold if you want stronger arms without pounding the wrists. It also builds the shoulder strength you need for inversions, which is why so many handstand and forearm stand drills start here.
Forearms go parallel on the mat, elbows about shoulder-width apart. Lift your hips, walk your feet in a little, and press the upper arms away from the floor. Your head should hang between the arms without collapsing into the mat.
What to Watch For
- Elbows creeping wide
- Hands clasped too tight
- Shoulders sinking toward the ears
- Ribs dropping forward
Keep the press active through the forearms and the outer edges of the hands. If your shoulders feel pinched, back the feet away from your elbows and shorten the hold. Dolphin rewards patience, not bravado. Three slow holds of 20 seconds often beat one ugly minute.
5. Chaturanga Dandasana for Controlled Triceps Strength
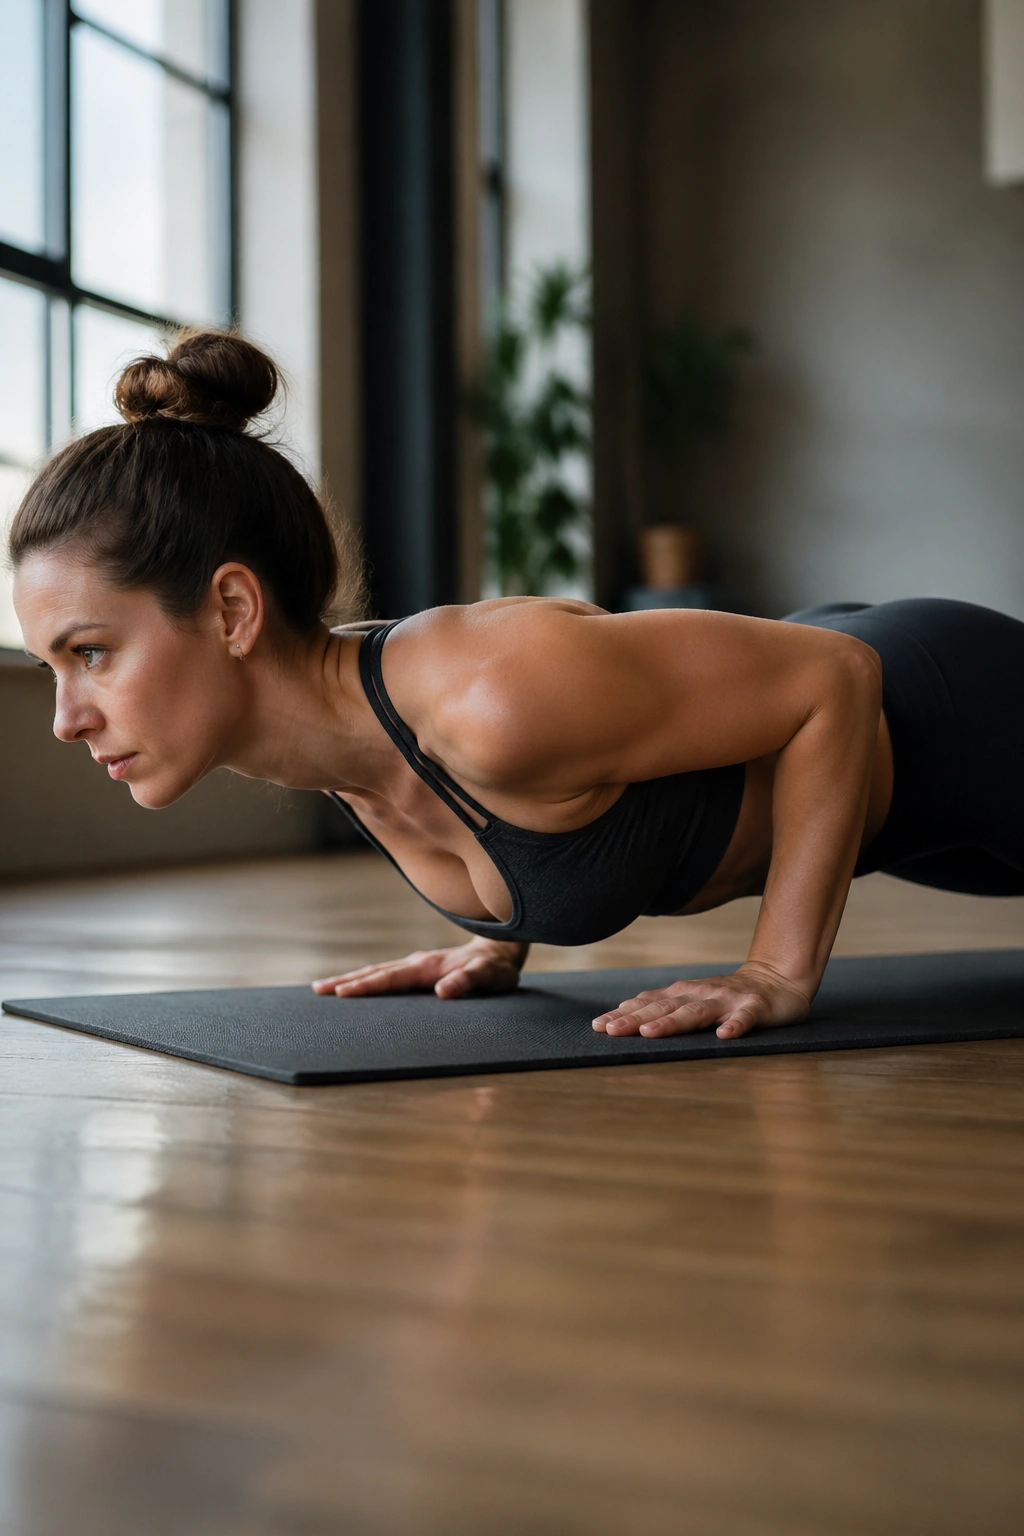
Chaturanga is not a push-up you survive. It’s a controlled hover.
The pose asks for bent-arm strength, but it also demands restraint, which is why so many people rush it and end up dumping their shoulders forward. Done well, it lights up the triceps, front shoulders, chest, and the muscles that keep the upper arm from wandering.
Lower from plank with elbows hugging close to the ribs. Stop when your shoulders are level with, or a touch above, your elbows. The body stays long. The floor does not get the final say.
That small hover is the whole point. If you drop lower than control allows, the shoulders take a beating and the triceps stop doing useful work. Knees-down chaturanga is a smart choice when form starts to slip. Smart beats stubborn here.
I like to think of this pose as a checkpoint, not a destination. You do a few clean lowers, you rest, and you leave some strength in the tank for the rest of class.
6. Downward-Facing Dog for Weight-Bearing Arms
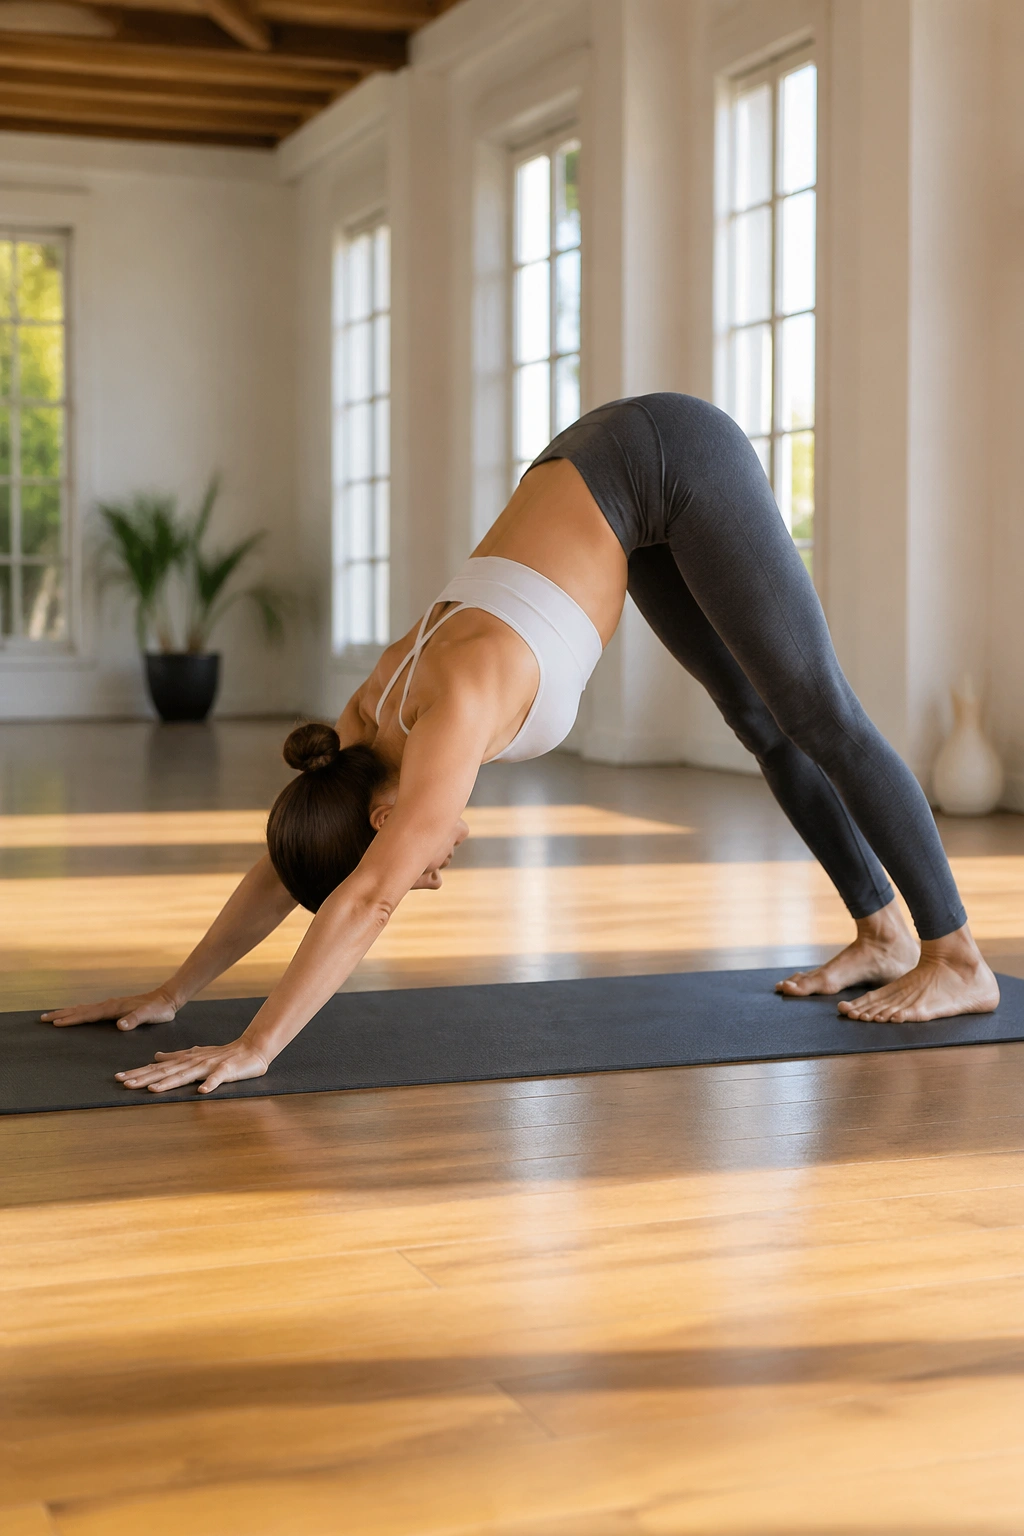
Downward Dog is sold as a stretch, but that misses half the story. It’s also a steady arm and shoulder loader when you place the hands and shoulders with care.
Press evenly through the base of the index finger and thumb, then reach the hips up and back. Bend the knees if you need to protect the spine. Long hamstrings are nice; good shoulder mechanics matter more.
Where the Arm Work Hides
The job is not to hang on the wrists. The job is to create an active, lifted shape through the shoulders so the arms support some of your body weight without the joints feeling jammed.
Keep a micro-bend in the elbows if they lock out hard. Push the floor away. Let the chest move slightly toward the thighs while the ribs stay contained. That combination wakes up the triceps and shoulder stabilizers in a way many people never notice because they’re too busy chasing heel-to-floor perfection.
If your wrists complain, shorten the hold, raise your hands on blocks, or practice from a short down dog with bent knees. The arms still work. Sometimes they work better.
7. Upward-Facing Dog for Open-Chest Arm Strength
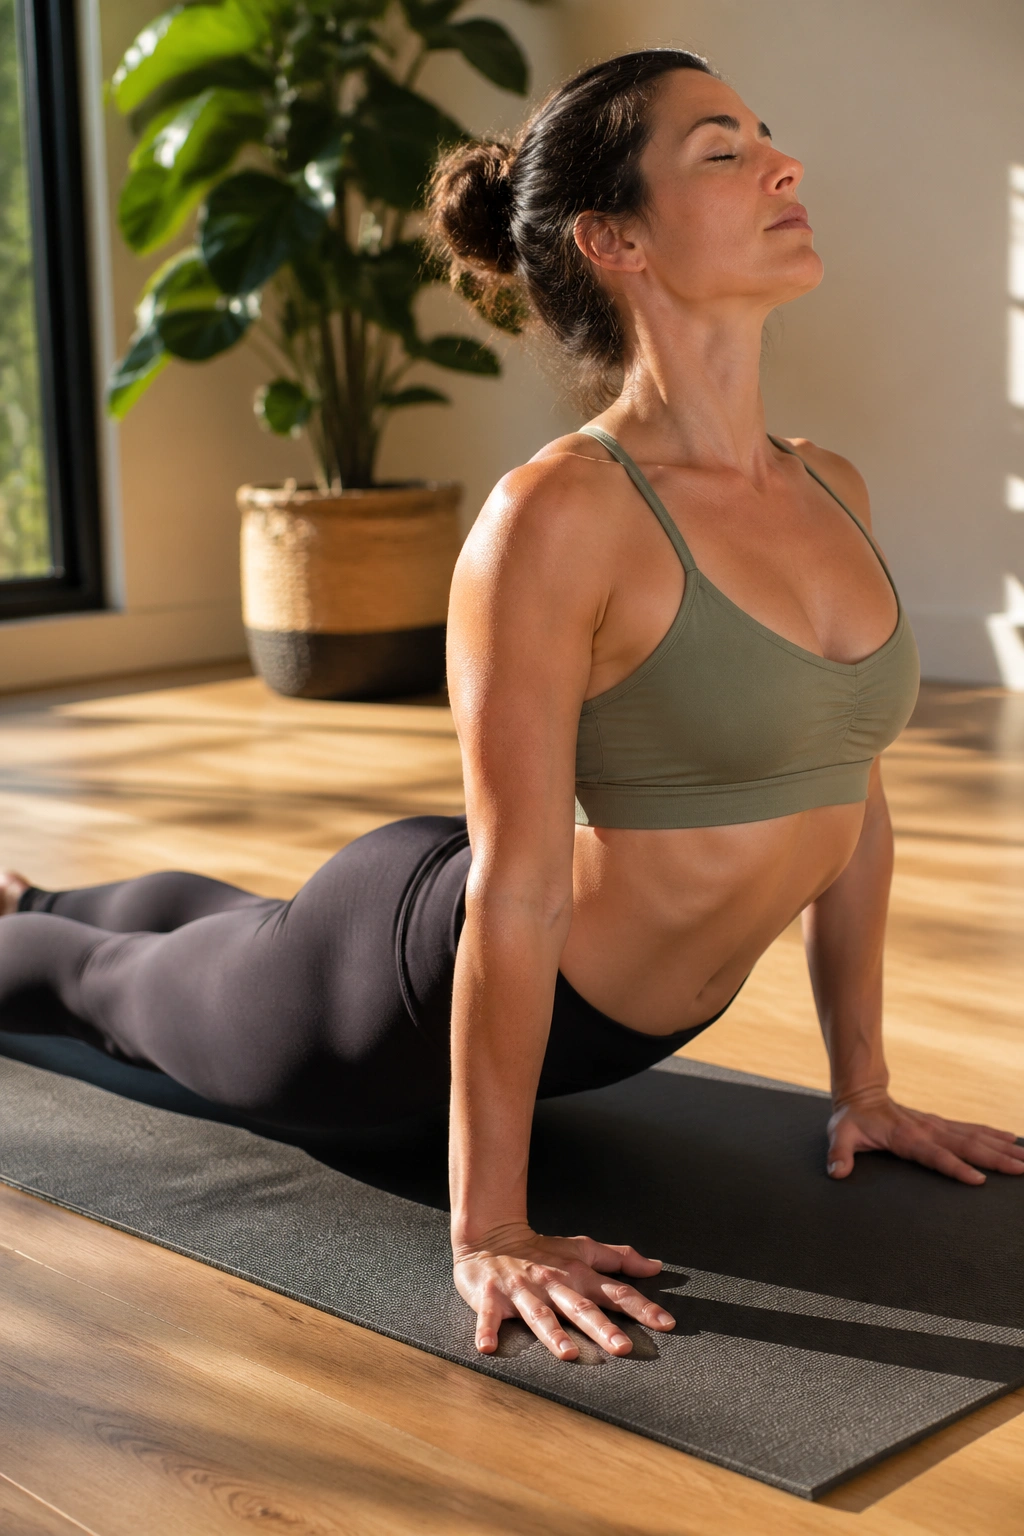
Can a backbend help tone the arms? Absolutely, if you don’t collapse into the joints.
Upward Dog strengthens the triceps and the backs of the shoulders while opening the front of the body. The arm work is subtle at first, then it gets real fast when you insist on lifting the thighs and keeping the chest proud without dumping the weight into the lower back.
Hands stay under the shoulders, fingers spread wide, elbows straight but not locked. Press the tops of the feet into the mat, lift the thighs off the floor, and let the sternum travel forward rather than cranking the neck back.
Make It Safe
- Keep glutes lightly engaged
- Roll the shoulders down and back
- Lengthen through the crown of the head
- Stop if the lower back pinches
Cobra is the kinder version if full Upward Dog feels too aggressive. No shame in that. The stronger choice is the one you can repeat tomorrow without a complaint from your spine.
8. Crow Pose for Balancing on the Hands
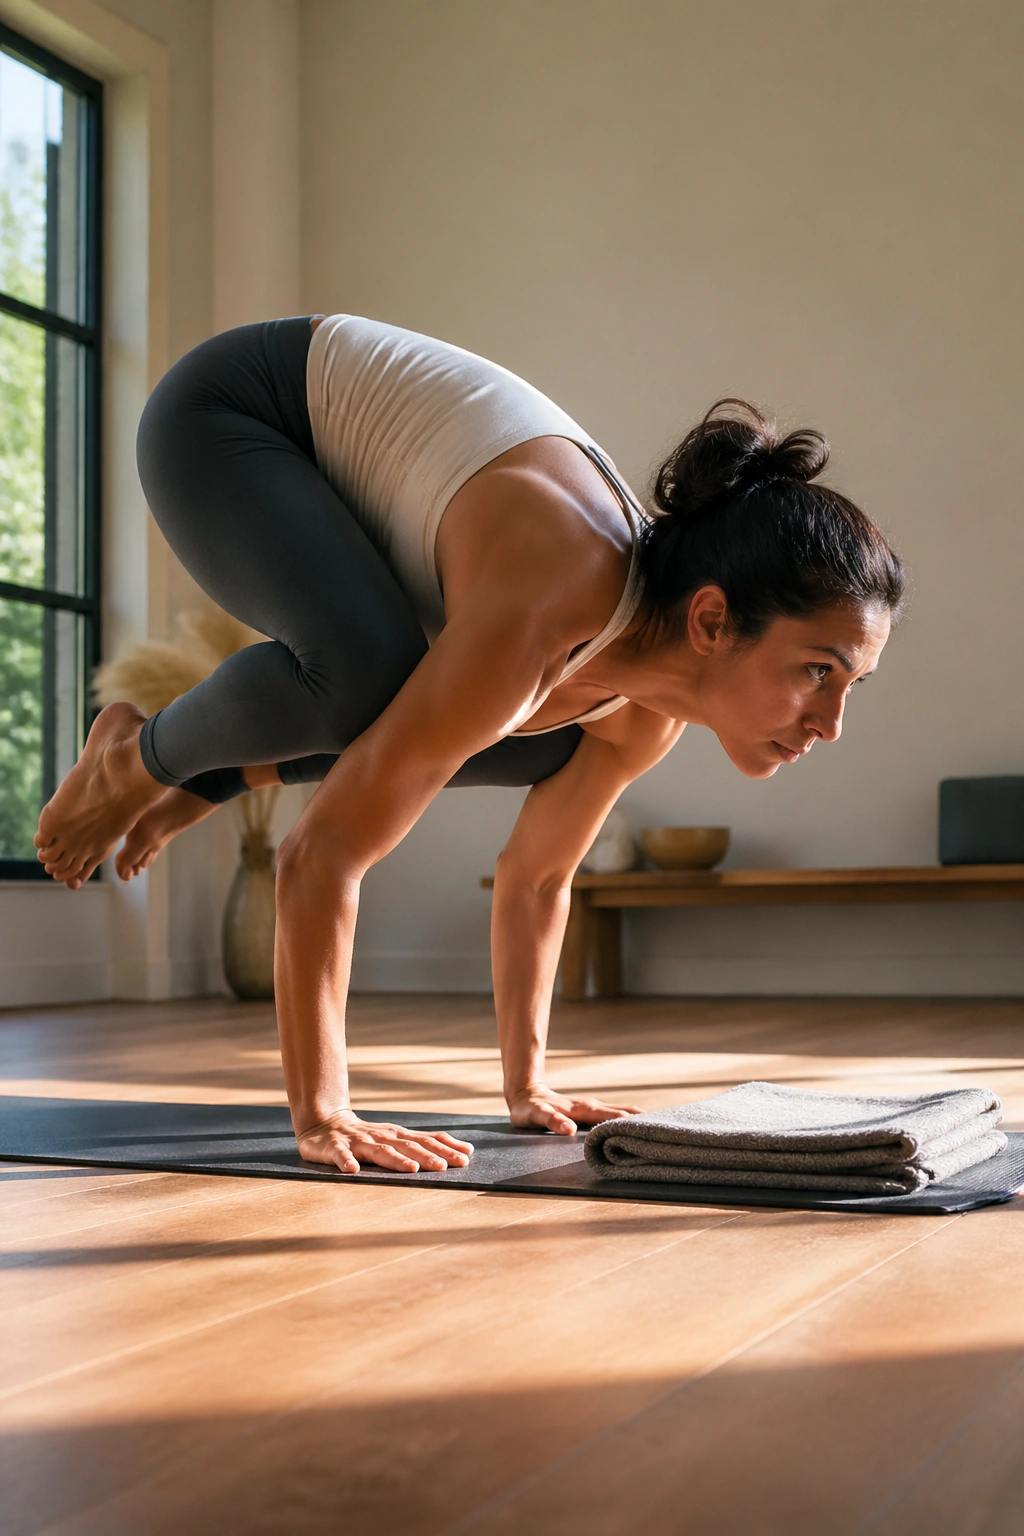
The first successful crow rarely looks graceful. It looks like a small, triumphant mistake that held.
Crow pose is one of the clearest arm yoga poses for building visible strength because you have to lean into your hands, press the floor away, and trust your arms to support your body weight while your knees rest high on the backs of the upper arms. Nothing is passive. Everything is awake.
Start in a squat, bring the knees high onto the triceps, and shift the weight forward until the feet feel light. Gaze a little ahead of the hands, not straight down. That tiny gaze change helps keep the body from toppling forward.
What Makes Crow Work
- Knees high on the upper arms, not down near the elbows
- Elbows bent just enough to create a shelf
- Fingers gripping the mat
- Inner thighs squeezing toward the midline
If you’re afraid of face-planting, place a folded blanket or pillow in front of you. Good. Fear is useful when it keeps the practice honest. Crow teaches you that arm strength is part muscle, part timing, part refusal to panic.
9. Side Crow Pose for Twisting Arm Strength
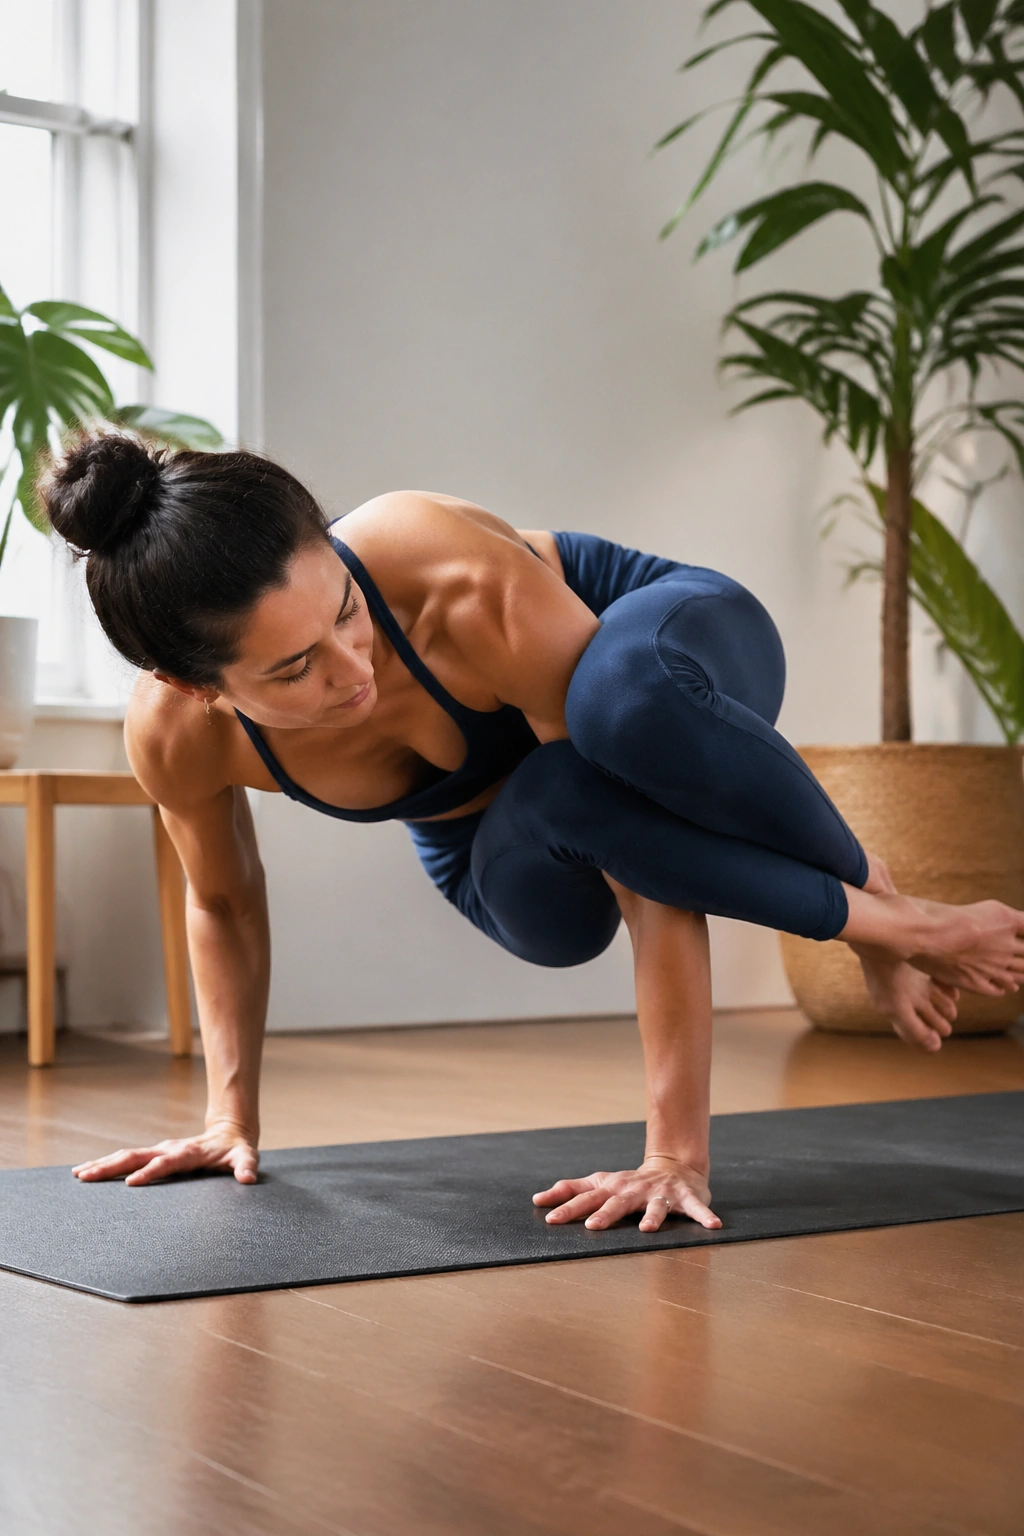
Side Crow is Crow with a twist, and not the cute kind.
The twist changes everything. One arm supports more of the load, the torso wraps across the thigh, and the obliques join the party so the upper body can hold shape while the legs lift. It is a beautiful mess of leverage, pressure, and balance.
Drop into a low twist first. One upper arm threads across the outer thigh, the hands plant shoulder-width apart, and the chest rotates toward the side. Once the shelf feels stable, shift the weight into the palms and begin to lift the feet.
Easier Entry
- Keep one foot on the floor longer
- Use a block under the hands if the floor feels far away
- Enter from a deep squat instead of a standing twist
- Practice the arm shelf before trying to float
This pose is not the place to rush. If the twist is loose, the lift collapses. If the hands are slippery, the whole thing gets ugly fast. But when it clicks, side crow gives you a level of upper-body control that shows up everywhere else in your practice.
10. Eight-Angle Pose for Deep Arm Compression
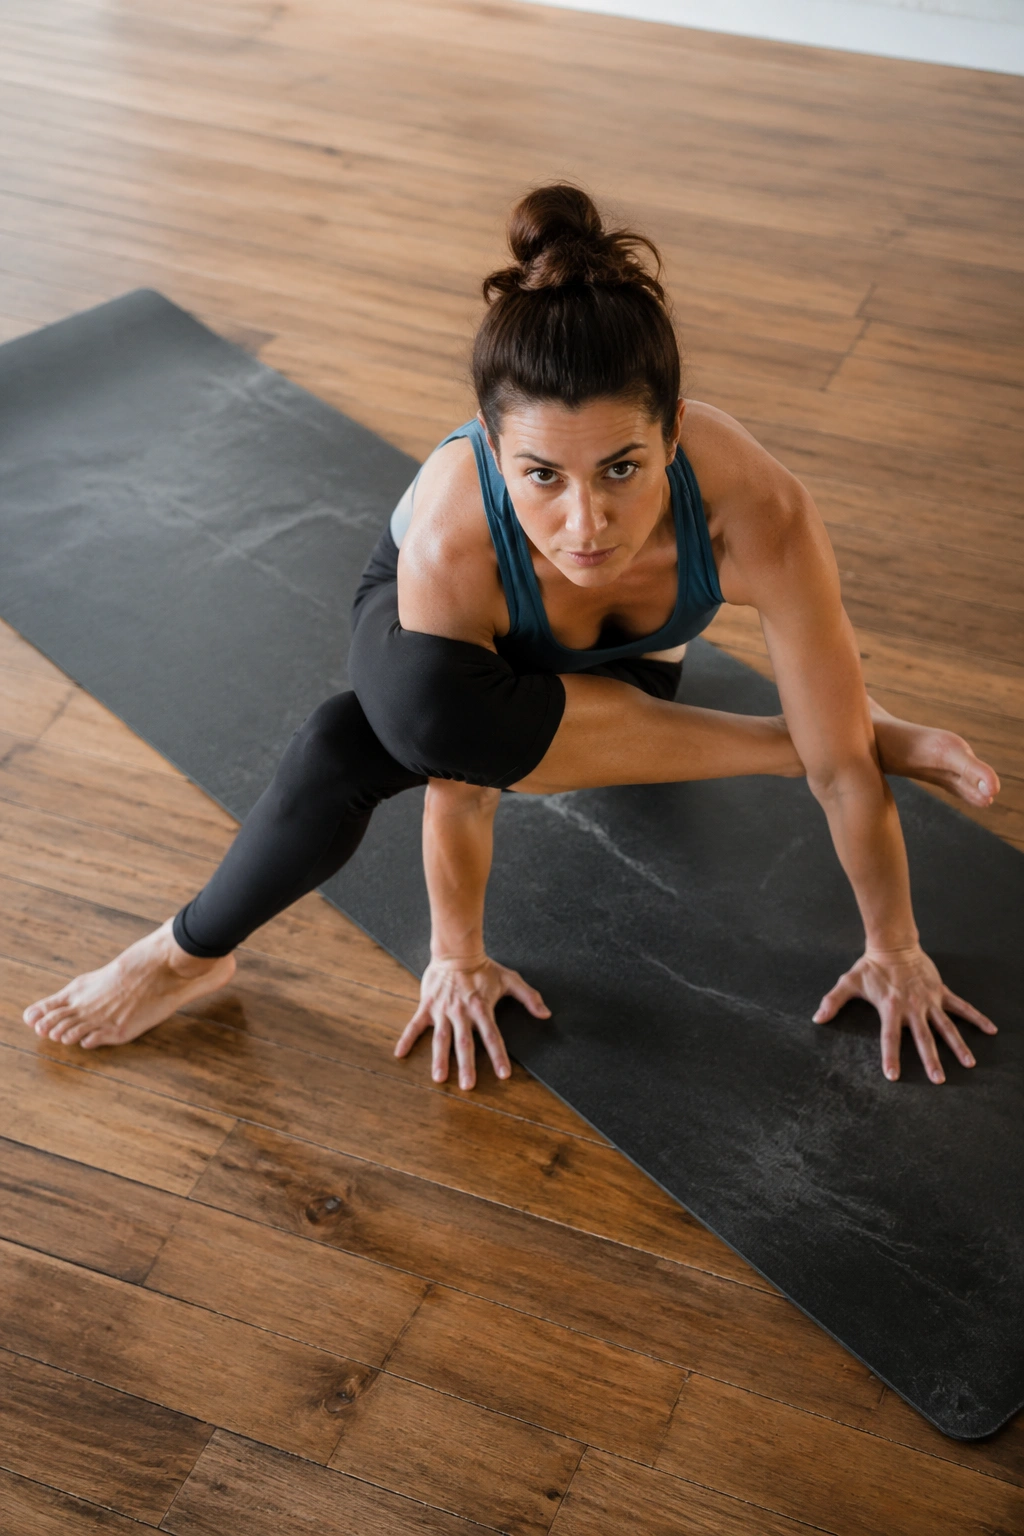
Eight-Angle Pose looks impossible until you break it into three jobs: twist, hook, lift.
The body wraps around the arm like it has somewhere urgent to be. One thigh crosses over the upper arm, the opposite leg extends out to the side, and the shoulders have to stay strong enough to keep the pose from folding. It is a lot. That’s why it works.
Move slowly into the twist first. Hook the leg high on the arm, press the planted hand hard into the mat, and keep the chest lifted enough that the spine doesn’t round like a scared cat. The arm strength comes from the compression and the steady push into the floor.
A Simple Way to Think About It
- Twist first, lift second
- Keep the elbows bent only as much as needed
- Press the floor away through the supporting hand
- Keep the extended leg active, not limp
Eight-Angle is not a beginner pose, and it should not be treated like one. If your hamstrings are tight or your wrists are tired, work on the entry shape without taking the feet off the floor. That still counts. That still builds the pattern.
11. Peacock Pose for Serious Forearm Power
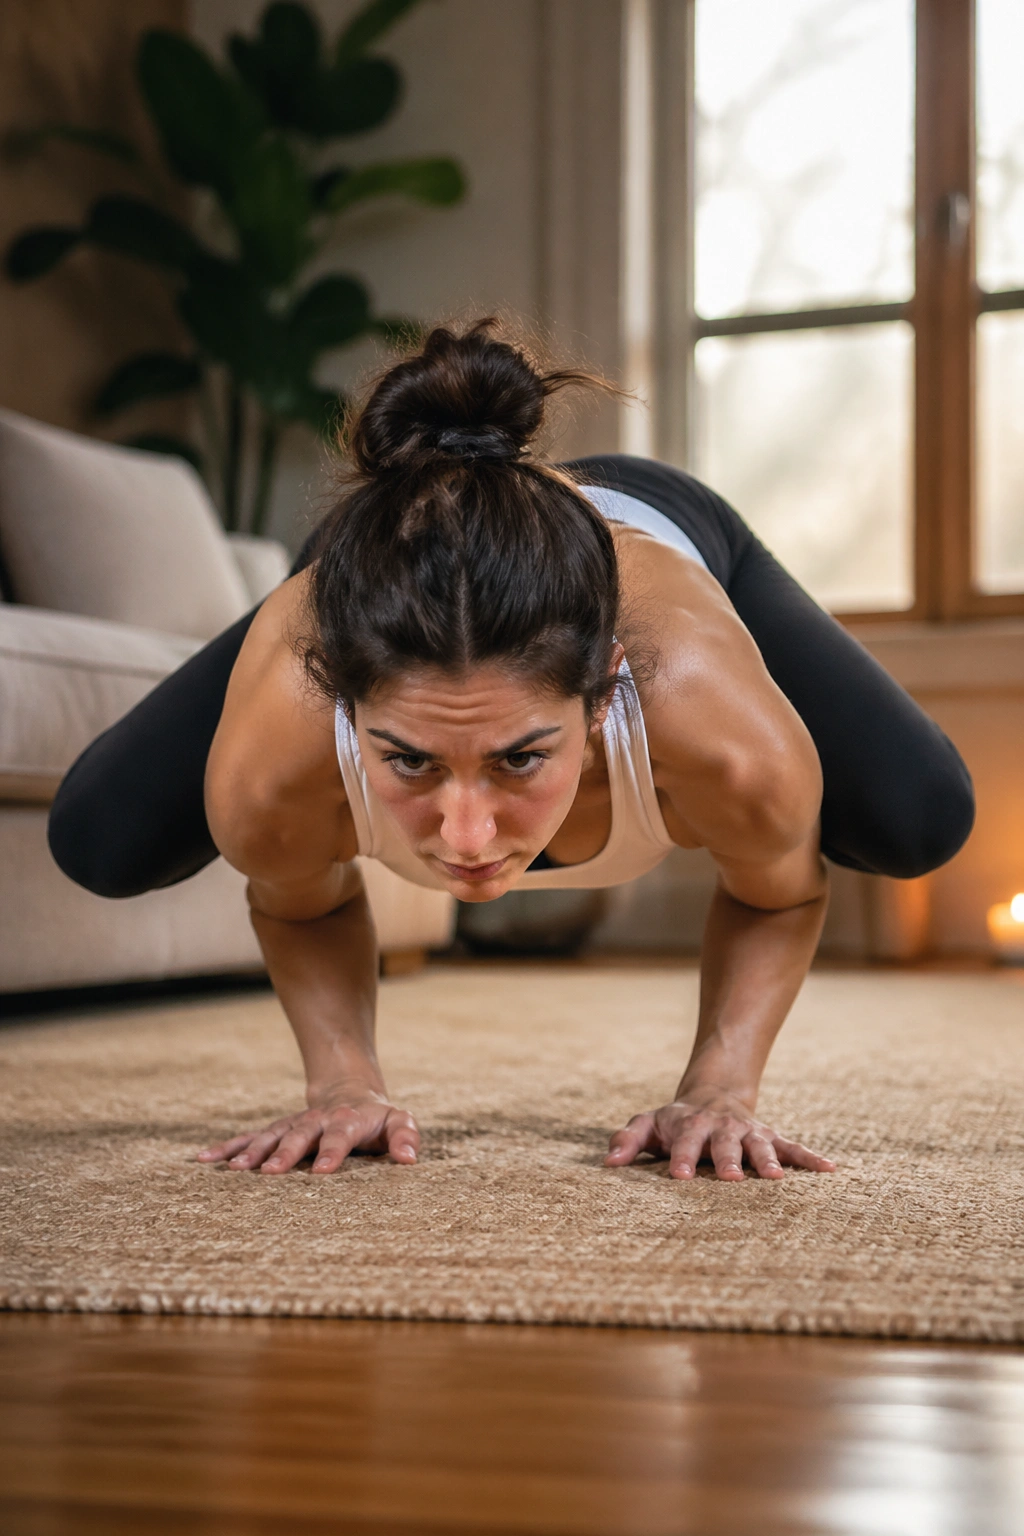
Peacock Pose is not a pose you rush into because it looks dramatic. Your wrists will call your bluff fast.
This old forearm balance asks for shoulder stability, wrist strength, abdominal compression, and enough patience to let the body learn how to balance its own weight on a narrow base. The arms are not just holding you up; they are pressing inward and supporting the whole trunk from underneath.
Hands point back toward the feet, elbows press into the belly, and the chest glides forward as the legs extend behind. The setup feels strange the first dozen times. That’s normal. Strange is often the first stage of useful.
If your wrists are sensitive, warm them up with circles, gentle palm presses, and short dolphin holds before you even think about Peacock. If your shoulders slump, skip the pose for the day. Forcing it helps no one.
A strong pose that you can practice safely beats a beautiful pose that leaves your elbows angry for three days.
12. Wall Handstand Hold for Shoulder Endurance
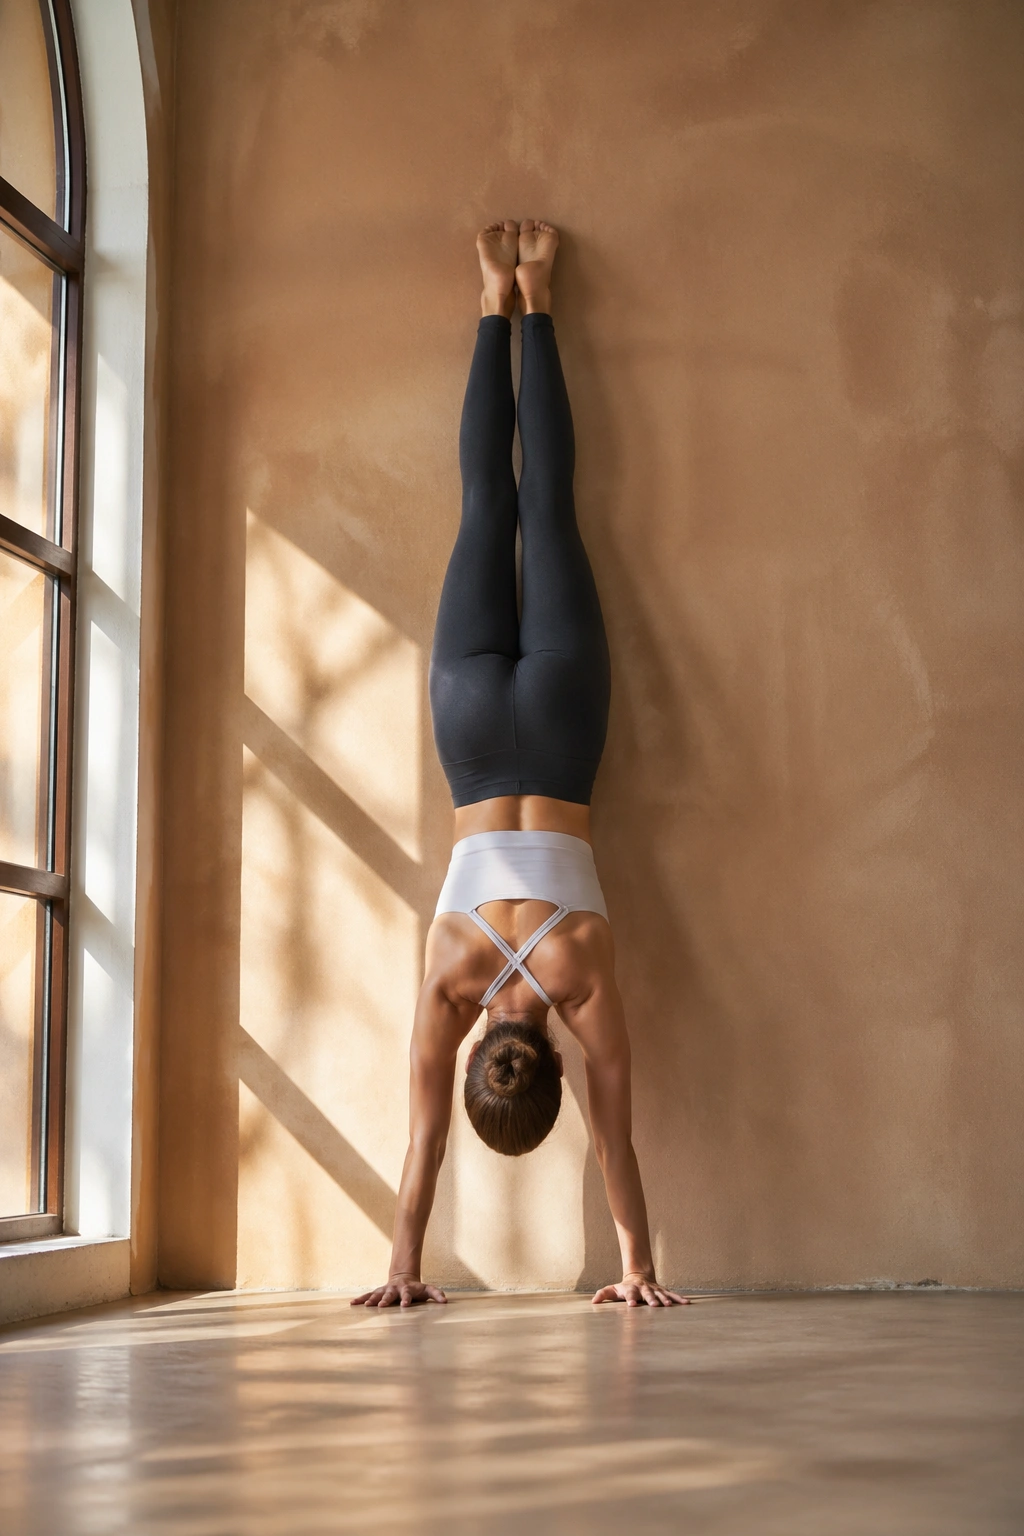
Put your hands on the mat, kick one heel to the wall, and the whole room changes.
Wall handstand hold is one of the most direct ways to build the kind of shoulder and arm endurance that changes how your upper body feels in daily life. Your weight is upside down, your shoulders have to elevate strongly, and your hands have to grip the floor with enough precision to keep you from drifting.
Start with the hands 6 to 10 inches from a wall, fingers spread, eyes looking between the thumbs. Kick up one leg at a time if that feels safer. Once the heels find the wall, press tall through the shoulders and keep the ribs tucked so the lower back does not turn into a banana.
Small Cues That Matter
- Push through the whole hand, not only the heel of the palm
- Keep the neck long
- Squeeze the inner thighs lightly
- Come down before the wrists collapse
Hold for 10 to 20 seconds if that’s where control lives for you. Then rest. Then repeat. The point is not a dramatic hold. The point is teaching your arms and shoulders how to support a vertical line without panic.
13. Forearm Stand at the Wall for Upper-Body Control
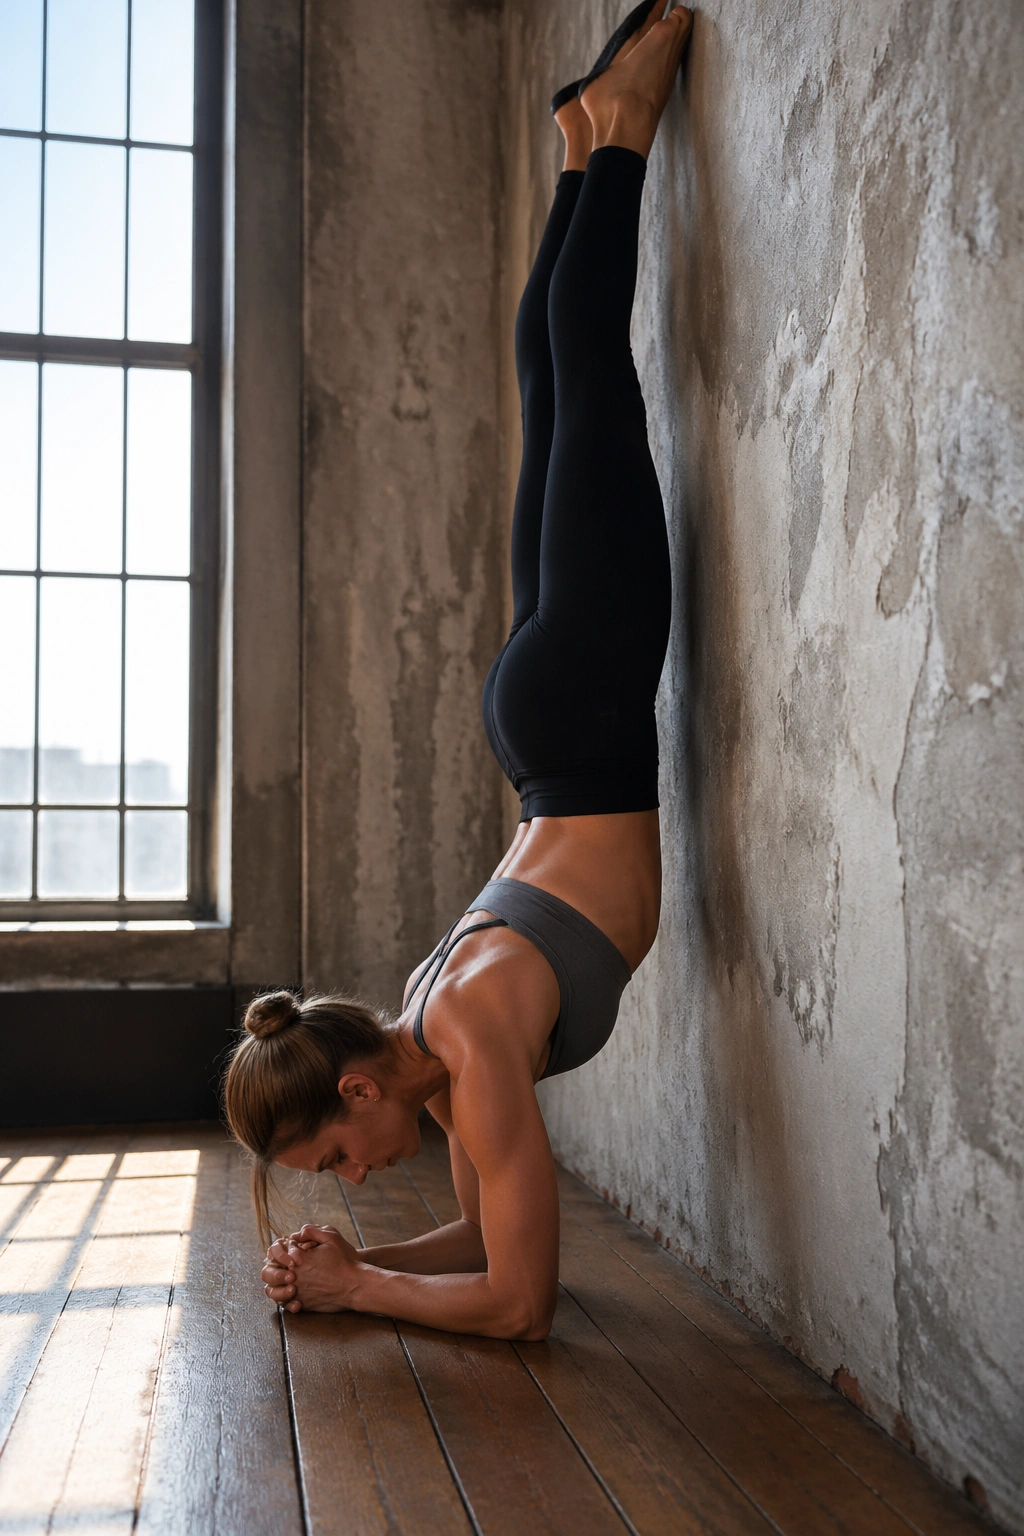
If handstand makes your wrists complain, forearm stand shifts the load where the shoulder girdle can handle more of it.
The pose still asks a lot. Maybe more than people expect. Your forearms bear the base, the shoulders have to stack over the elbows, and the upper back has to stay wide enough to keep the body from sinking between the arms like a hammock with a broken rope.
Come into Dolphin first. Measure your elbows shoulder-width apart. Clasp the hands or keep the palms flat, depending on what feels steadier. Walk the feet in, lift one leg, and let the other leg follow only when the shoulders stay solid.
What to Avoid
- Elbows splaying outward
- Ribs flaring hard
- Pushing from the neck instead of the shoulders
- Kicking with so much force that the lower back takes over
A wall is not cheating. It is sensible. Use it to learn how the body stacks and to build enough confidence that the lift stops feeling like a gamble. The stronger the line gets, the less drama the pose needs.
14. Reverse Plank for Triceps and Shoulder Support
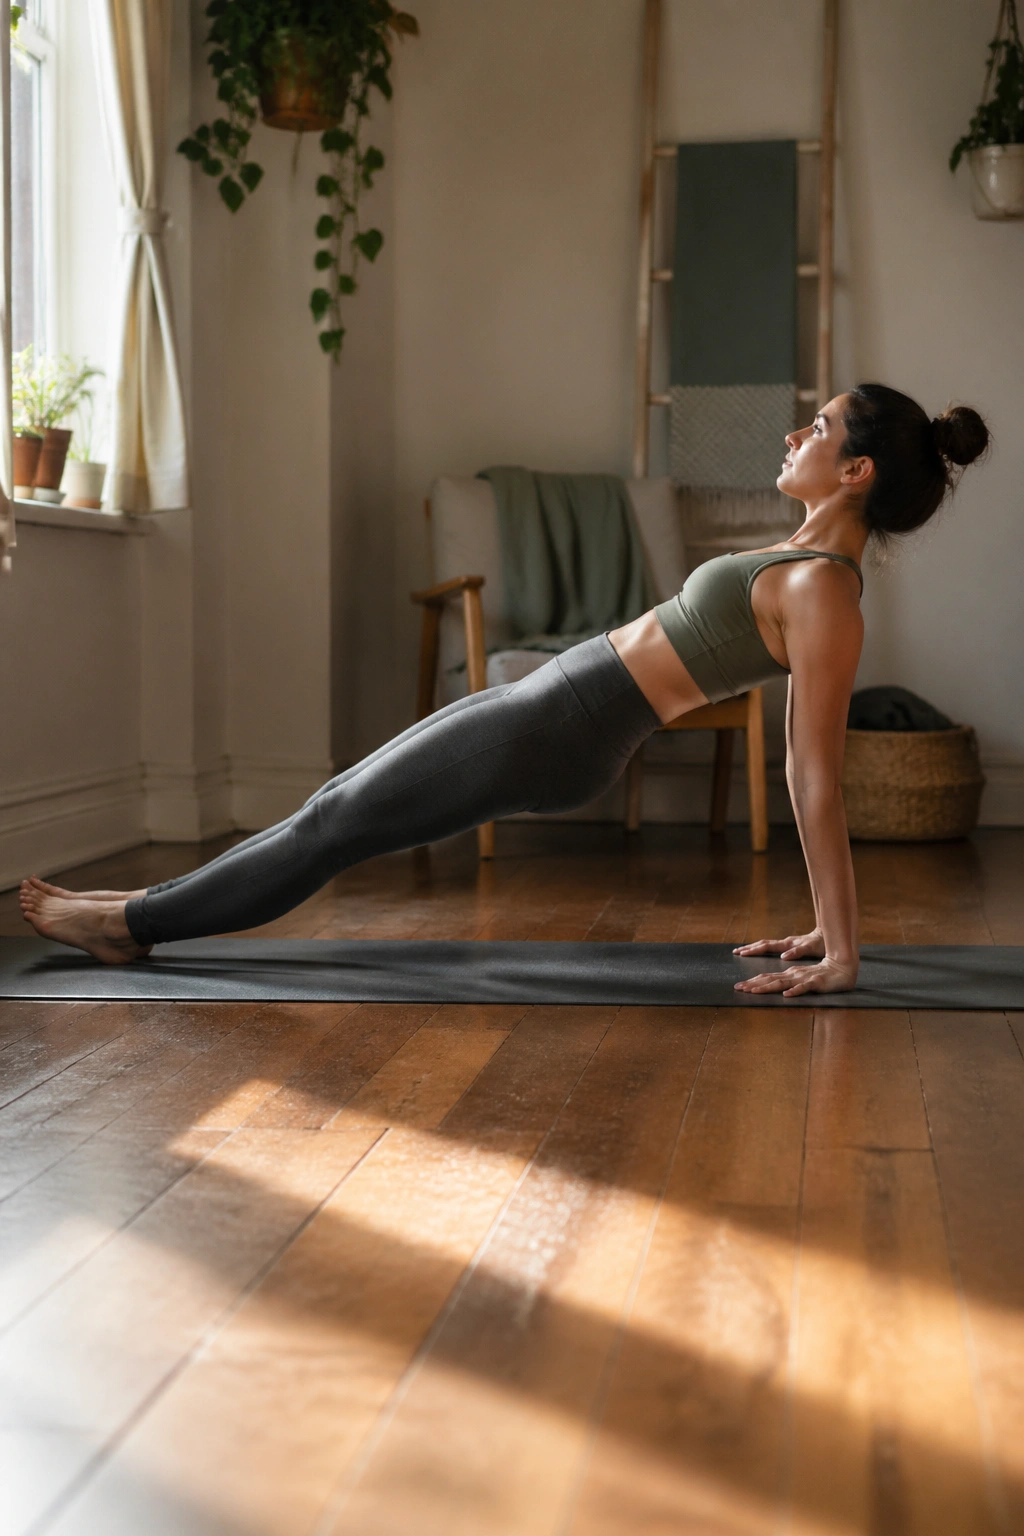
Why include a pose that faces the ceiling? Because the backs of the shoulders matter.
Reverse plank trains the triceps, rear delts, glutes, and hamstrings while opening the front of the body. It also gives the wrists a different kind of load, which can be a nice change after all the forward-facing work in plank, crow, and handstand prep.
Sit with your legs long, place the hands a little behind the hips, fingers pointing toward the feet or slightly turned out if the wrists need relief, and lift the hips until the body makes one long diagonal line. The chest opens. The shoulder blades move down the back. The neck stays quiet.
Tiny Form Fixes
- Press through the heels
- Keep the glutes active without clenching hard
- Avoid dumping the head back
- Soften the elbows if locking them hurts
If the straight-leg version feels rough, bend the knees and hold a tabletop shape first. That version still works the arms. More work, less ego. Good trade.
15. Crab Pose for a Final Upper-Body Burn
Crab pose gives you arm work, chest opening, and a little humility.
It looks simple from a distance. Sit down, place the hands behind you, lift the hips, and try not to collapse into your shoulders. Simple does not mean easy. The triceps fire, the backs of the shoulders wake up, and the upper body has to support the load while the front of the body opens.
Turn the fingers slightly outward if your wrists are tight. Press the feet into the floor, lift the chest, and let the hips rise enough that the weight is shared instead of dumped. If you want more challenge, extend one leg at a time for a few breaths.
It is a good final pose because it reminds you that strong arms are not only for pushing forward. They also help you lift, open, and stabilize from the other side. That matters in yoga and out of it.
A short sequence built from just four poses can be plenty: one straight-arm hold, one bent-arm lower, one balance, and one opener. High plank, chaturanga, crow, crab. Clean reps. Rest between them. Your arms will tell you whether the work was real.
