



By the time dinner dishes are rinsed and the lights feel a little too bright, most bodies are not asking for more effort. They are asking for a floor, a blanket, and a chance to stop bracing. That is exactly where 18 Yin Yoga Poses for a Slow Evening Practice make sense: not as a workout, but as a deliberate way to let the nervous system stop acting like it’s on call.
Yin works because it asks for less. Less force. Less speed. Less of that midnight habit of pushing one more inch just to see if you can. The best holds are usually the ones that feel steady at a 3 or 4 out of 10, with enough sensation to stay attentive and enough ease to keep breathing through your nose.
Props matter here. A bolster under the ribs, a folded blanket under the knees, even a second block under the hands can change a pose from “nice idea” to something your body will actually tolerate after a long day. I’ve always thought that is the real magic of evening yin: it meets you where you are, not where some perfect version of you might be.
You do not need all 18 poses every night. Pick a few, linger, and let the holds get quiet. The first one is almost unfairly simple.
1. Child’s Pose
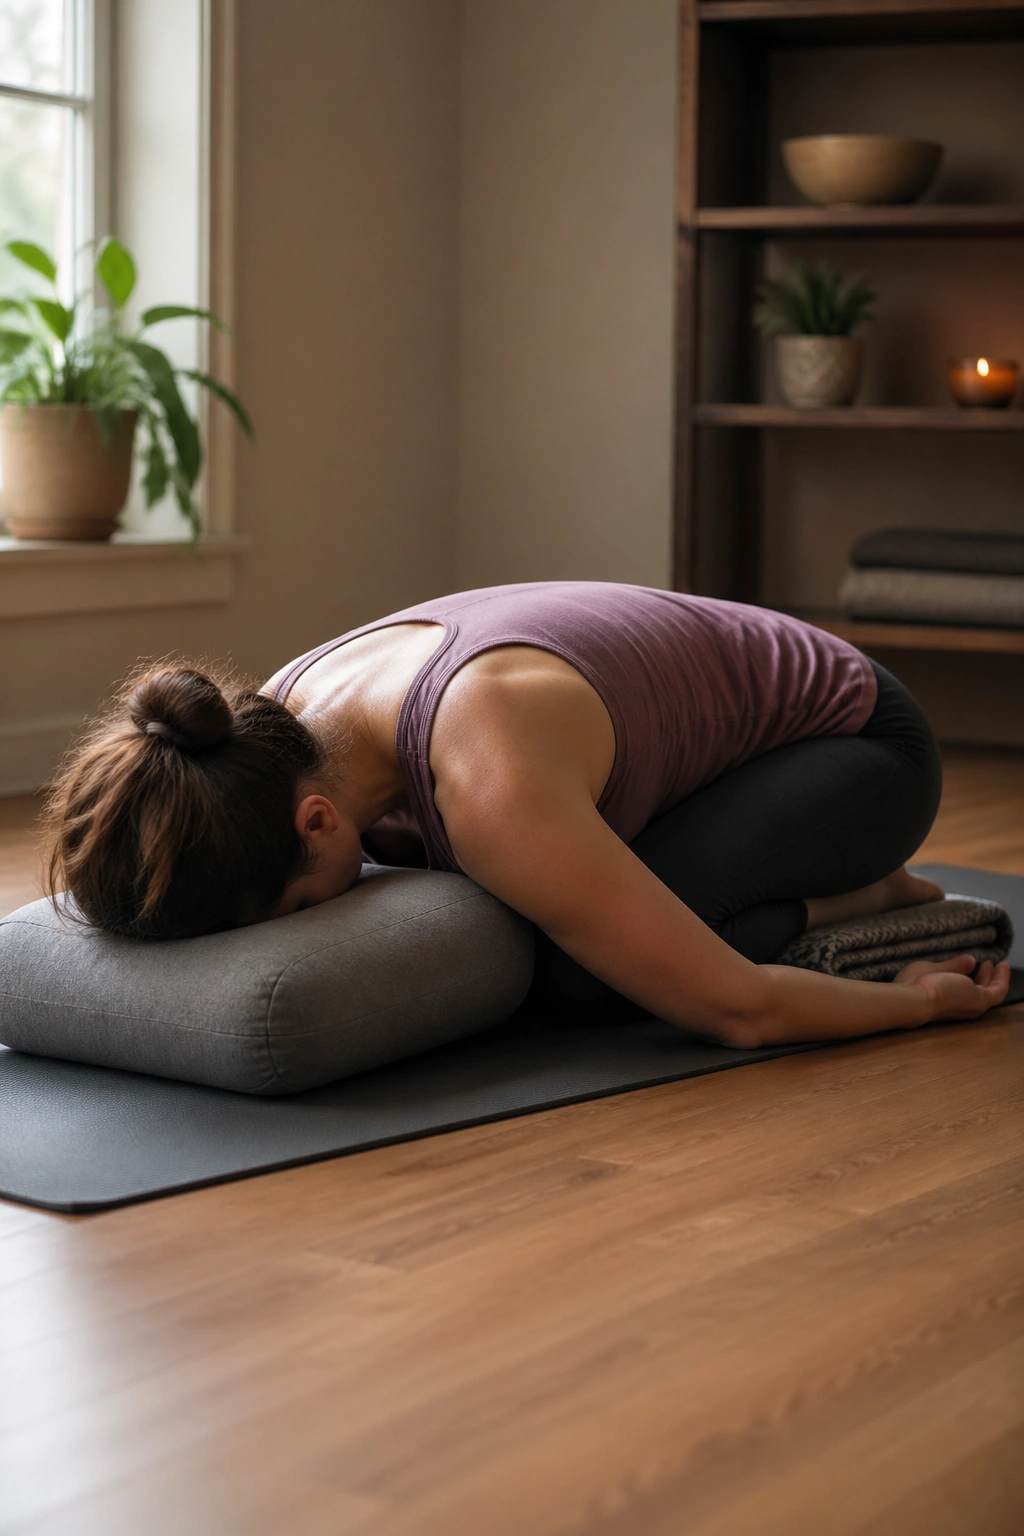
Child’s Pose is where a lot of evening practices should start, but people rush it and end up missing the point. Spread the knees as wide as feels good, or keep them closer together if your back likes that better, then let the belly settle between the thighs. The shape looks humble. It is not humble at all.
What matters here is the permission to be heavy. Rest the forehead on the mat or on a block, and use a bolster under the chest if the hips feel tight or the knees complain. If your arms stretch forward and your shoulders grip, bring the hands back by your sides. That change alone can make the pose feel ten times calmer.
How to make it actually restful
- Place a folded blanket behind the knees if the joints feel pinched.
- Put a bolster lengthwise under the torso for a longer stay of 2 to 4 minutes.
- Let the elbows fall wide if your upper back likes more space.
- Breathe into the low ribs and back waist, not just the chest.
My favorite cue: soften the fingertips. People forget that.
2. Reclined Butterfly
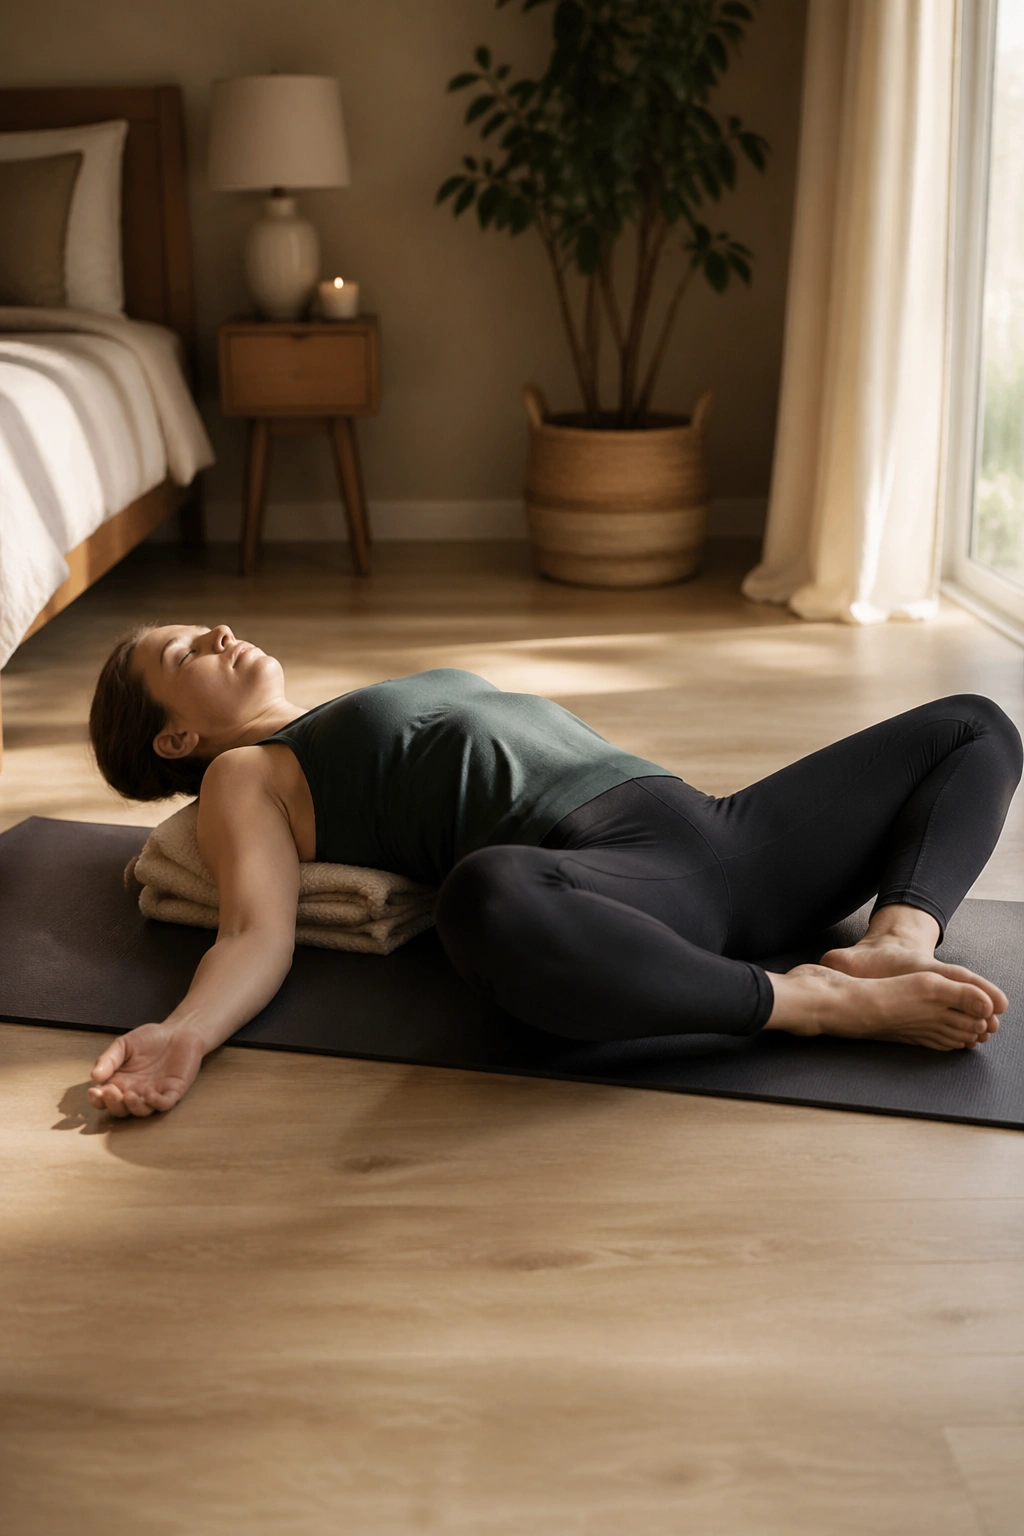
Reclined Butterfly is the pose that tells your inner thighs to unclench without making a big speech about it. Lie back on the floor, bring the soles of the feet together, and let the knees open like pages. The temptation is to press the knees down. Skip that.
A folded blanket or bolster under the spine changes everything here. Without support, the stretch can feel like work. With support, it becomes a long exhale through the groin, the lower belly, and the fronts of the hips. If the knees hover far above the floor, that is fine. Let them be where they are.
I like this one near the start of an evening practice because it is open, but not loud. You can stay for 3 to 5 minutes and still feel intact when you stand up. If the low back arches hard, slide your feet a little farther from the pelvis or place blocks under the thighs. Small adjustments. Big difference.
One quiet bonus: if you rest one hand on the belly and one on the heart, the breath tends to slow on its own.
3. Caterpillar
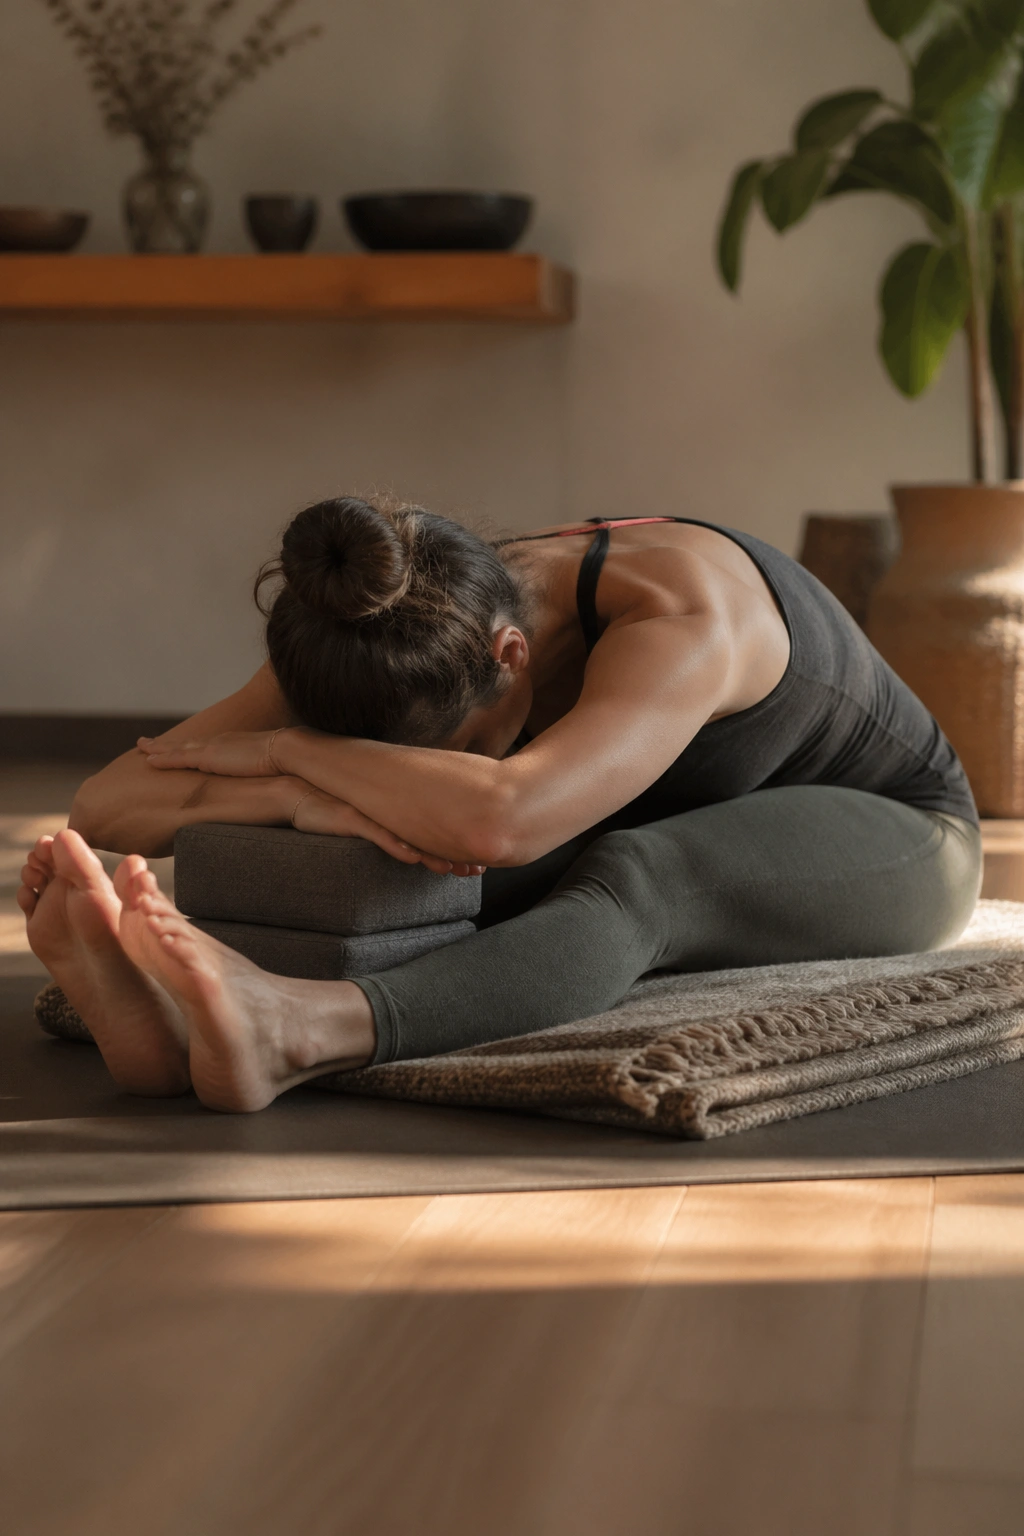
Why does a simple seated fold feel so different at night? Because Caterpillar asks for surrender without drama. Sit on a folded blanket, stretch the legs forward, and let the torso drape over the thighs with the knees bent as much as needed. Straight legs are not the goal.
The real work here is in not trying to make it look like a textbook pose. Round the back if that is where you are tonight. Support the forehead on stacked fists, a block, or a bolster so the neck can stop holding everything together. If the hamstrings tug hard, bend the knees more and let the feet come closer in.
Common ways people make this harder than it needs to be
- Locking the knees straight and pulling the toes back.
- Reaching for the feet and hauling the chest down.
- Sitting on a hard floor with no lift under the hips.
- Holding the breath while waiting for the stretch to “open.”
A better version is smaller, quieter, and easier to stay in for 2 to 4 minutes. That is the point. The pose works when the nervous system stops fighting it.
4. Sphinx
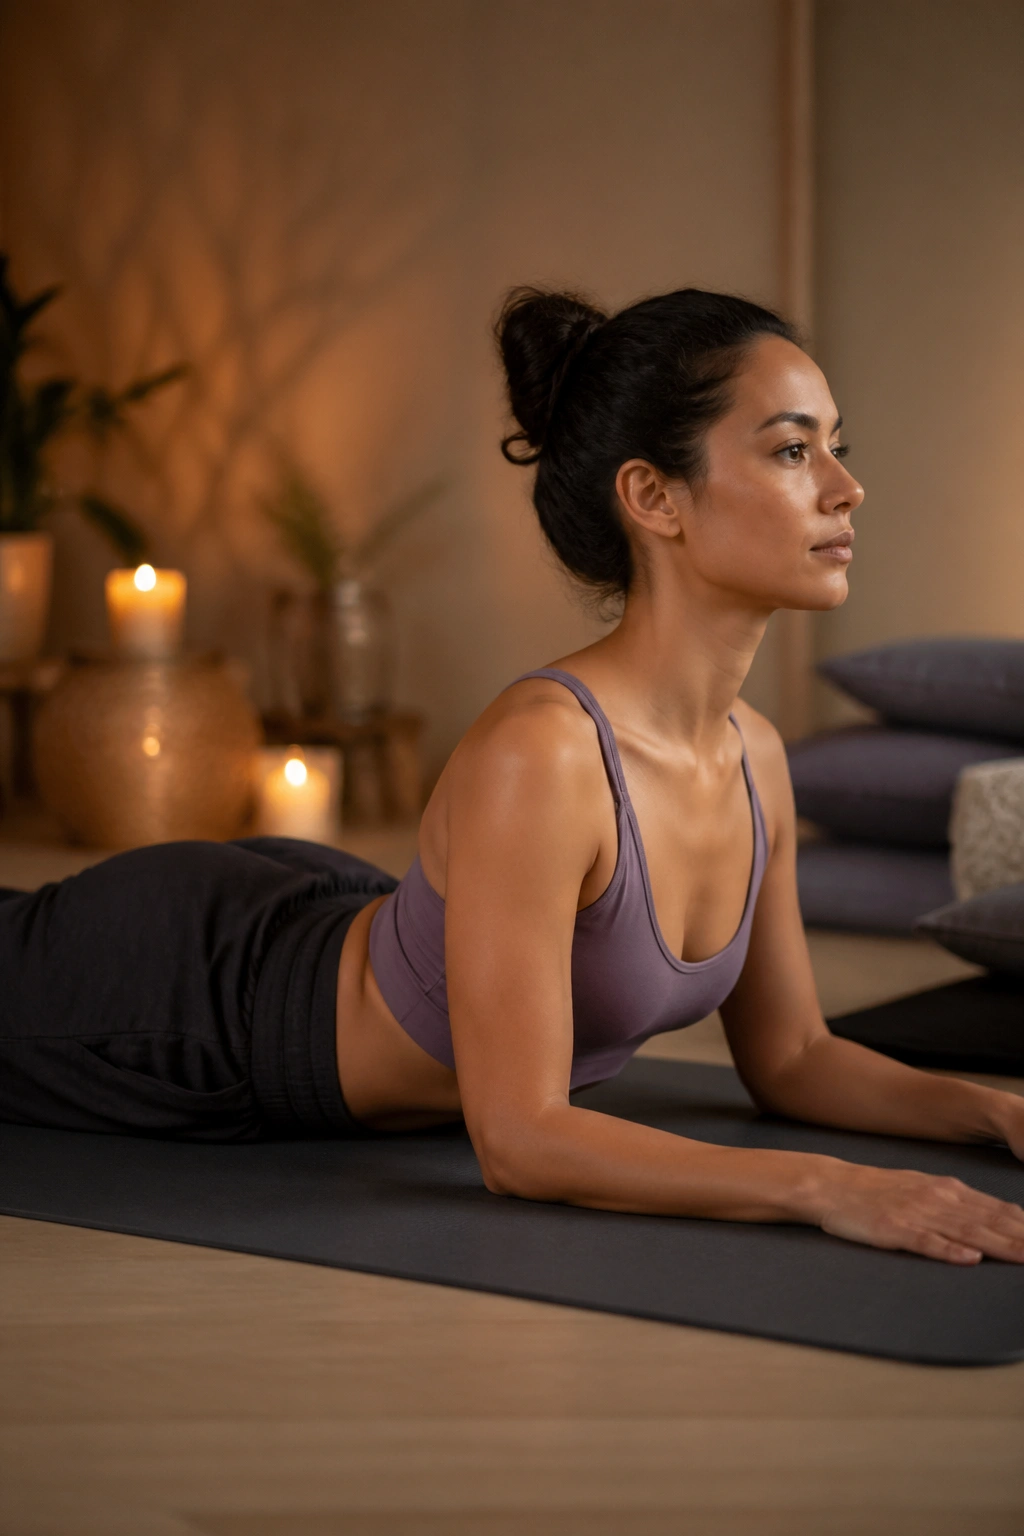
Sphinx is the pose I reach for when the front body feels folded into itself. Forearms on the floor, elbows a few inches ahead of the shoulders, legs long behind you. The pelvis stays heavy. The chest lifts only enough to make the front of the ribs feel spacious.
This is not Cobra, and I am glad it isn’t. Cobra can be useful, sure, but Sphinx gives the lower back more room to behave without being bossed around. If the lumbar spine pinches, move the elbows farther forward or lower onto the chest for a gentler shape. If the neck wants to crane upward, look down and forward instead.
Hold it for 1 to 3 minutes, breathing into the belly and the side ribs. A lot of people discover, halfway through, that their shoulders have been living at their ears all day. Sphinx is where that habit starts to unwind.
What to look for
- A steady, mild opening across the abdomen.
- No sharp compression in the low back.
- The thighs resting on the floor or close to it.
- A feeling of length, not strain.
5. Seal
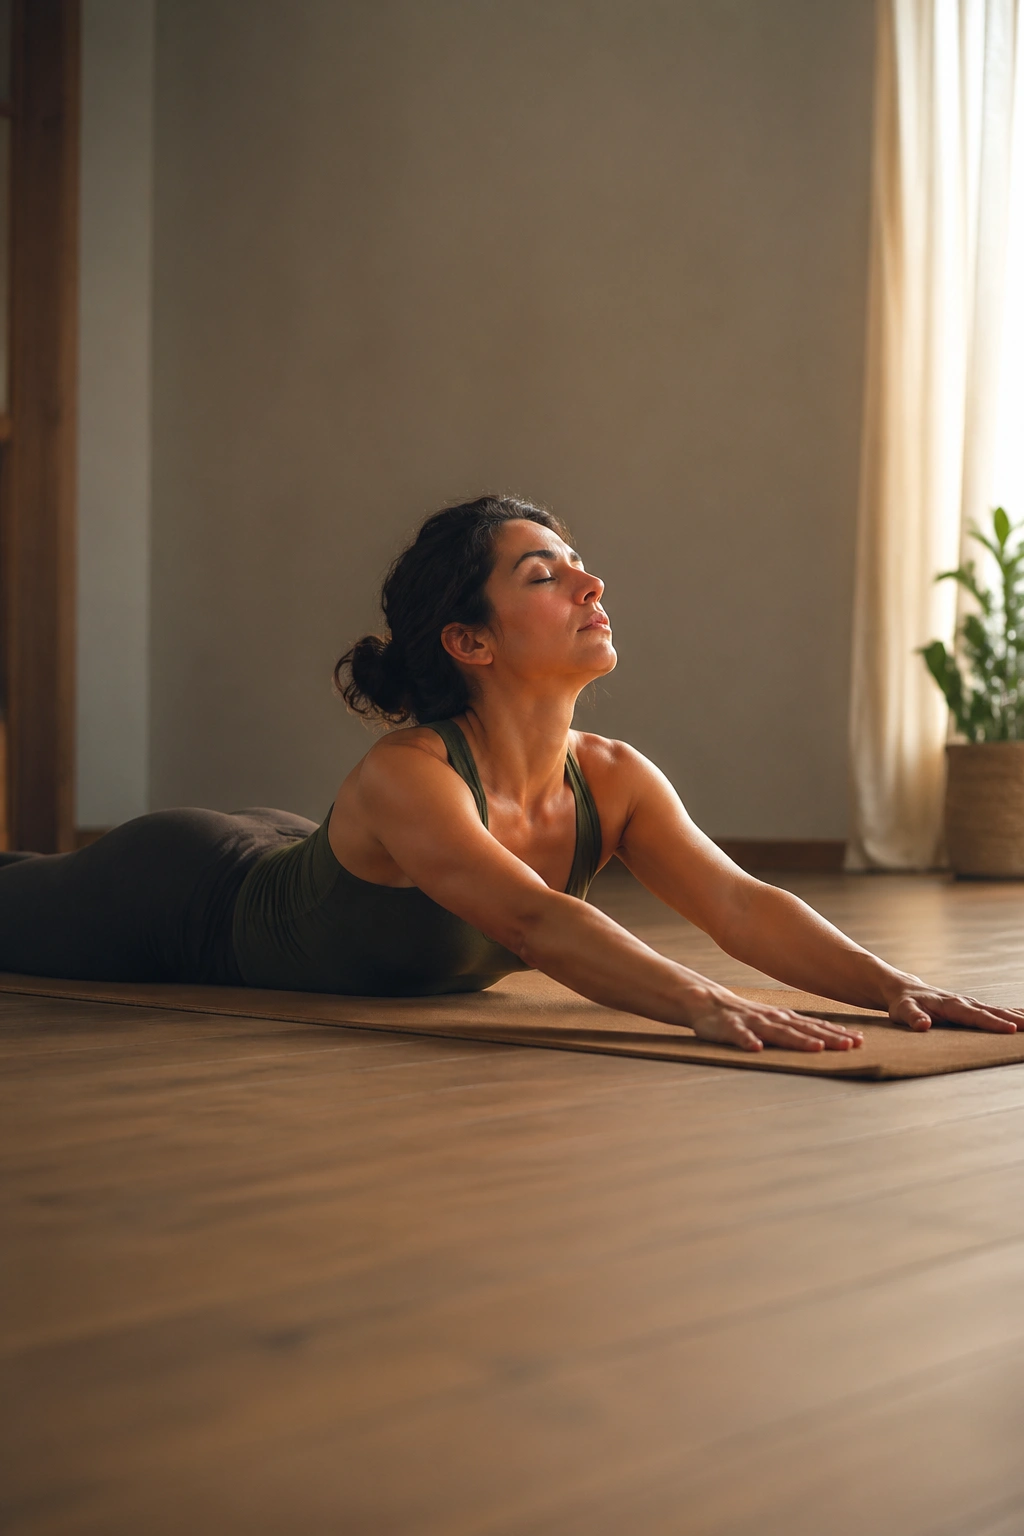
Seal is Sphinx’s louder cousin. Same family, less restraint. Hands farther forward, arms straighter or only slightly bent, chest higher, belly lower. It can feel wonderful or too much, and the difference shows up fast.
If Sphinx feels good and Seal feels pinchy, that does not mean you are weak. It means your spine is giving you honest feedback. Keep the pose small, or skip it and stay with Sphinx longer. A backbend only earns its place if the breath stays smooth.
The shape works best when the pelvis stays grounded and the shoulders don’t creep toward the ears. Try 30 seconds to 2 minutes first, especially if you are new to it. There is no prize for hanging out in Seal longer than your body wants to.
One useful check: if the sensation runs up the front of the hips and across the chest, you’re in the right neighborhood. If it feels like a hinge getting jammed, back off.
6. Dragon
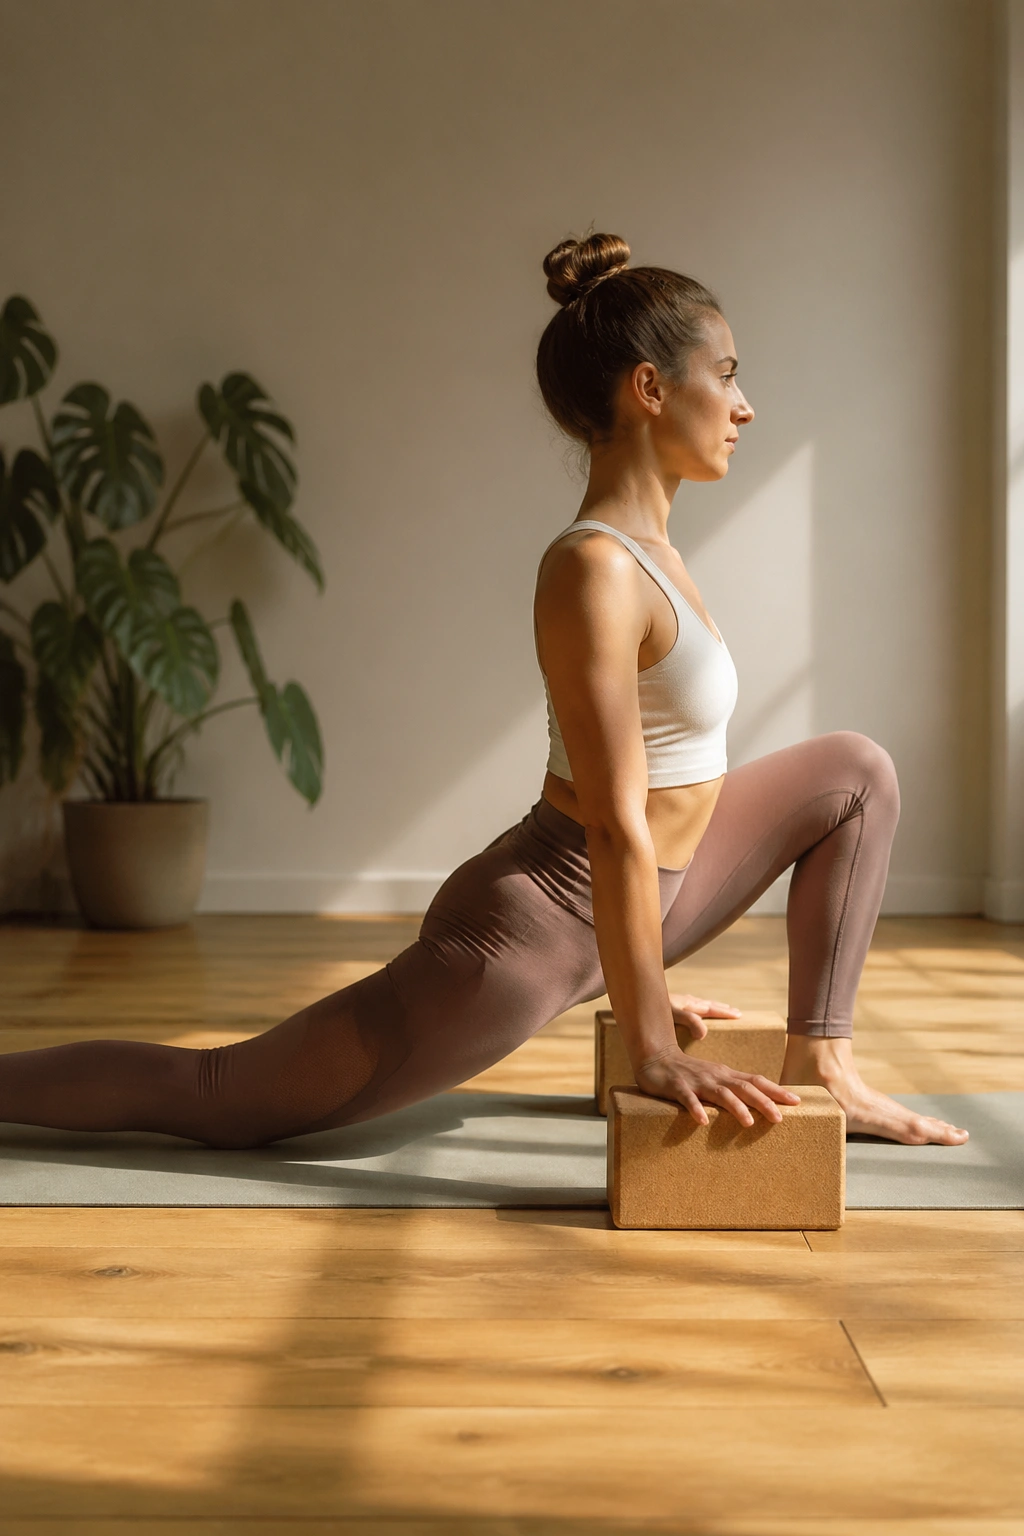
Dragon is the pose that shows you how your hips are really doing. Not how you wish they were doing. Lower one knee to the floor, step the front foot forward, and settle into a lunge with the hands on blocks or the mat. Keep the front knee behind the ankle if that feels better, or let it drift a little forward if your ankles allow it.
The back leg matters here too. A tucked back foot can help some people feel steadier, while an untucked foot feels better for others. Try both. No need to marry one setup. The deep line is through the front of the back leg, the hip crease, and the groin on the front side.
How to keep Dragon from turning into a fight
- Put both hands on blocks to reduce strain.
- Move the front foot a few inches wider if balance feels shaky.
- Stay upright first; fold later if the body wants it.
- Keep the back knee padded with a folded blanket.
Aim for 2 to 4 minutes per side. Slow breathing matters more than depth here. If the hip flexors start to feel like they are arguing with you, take that as useful information.
7. Half Dragon
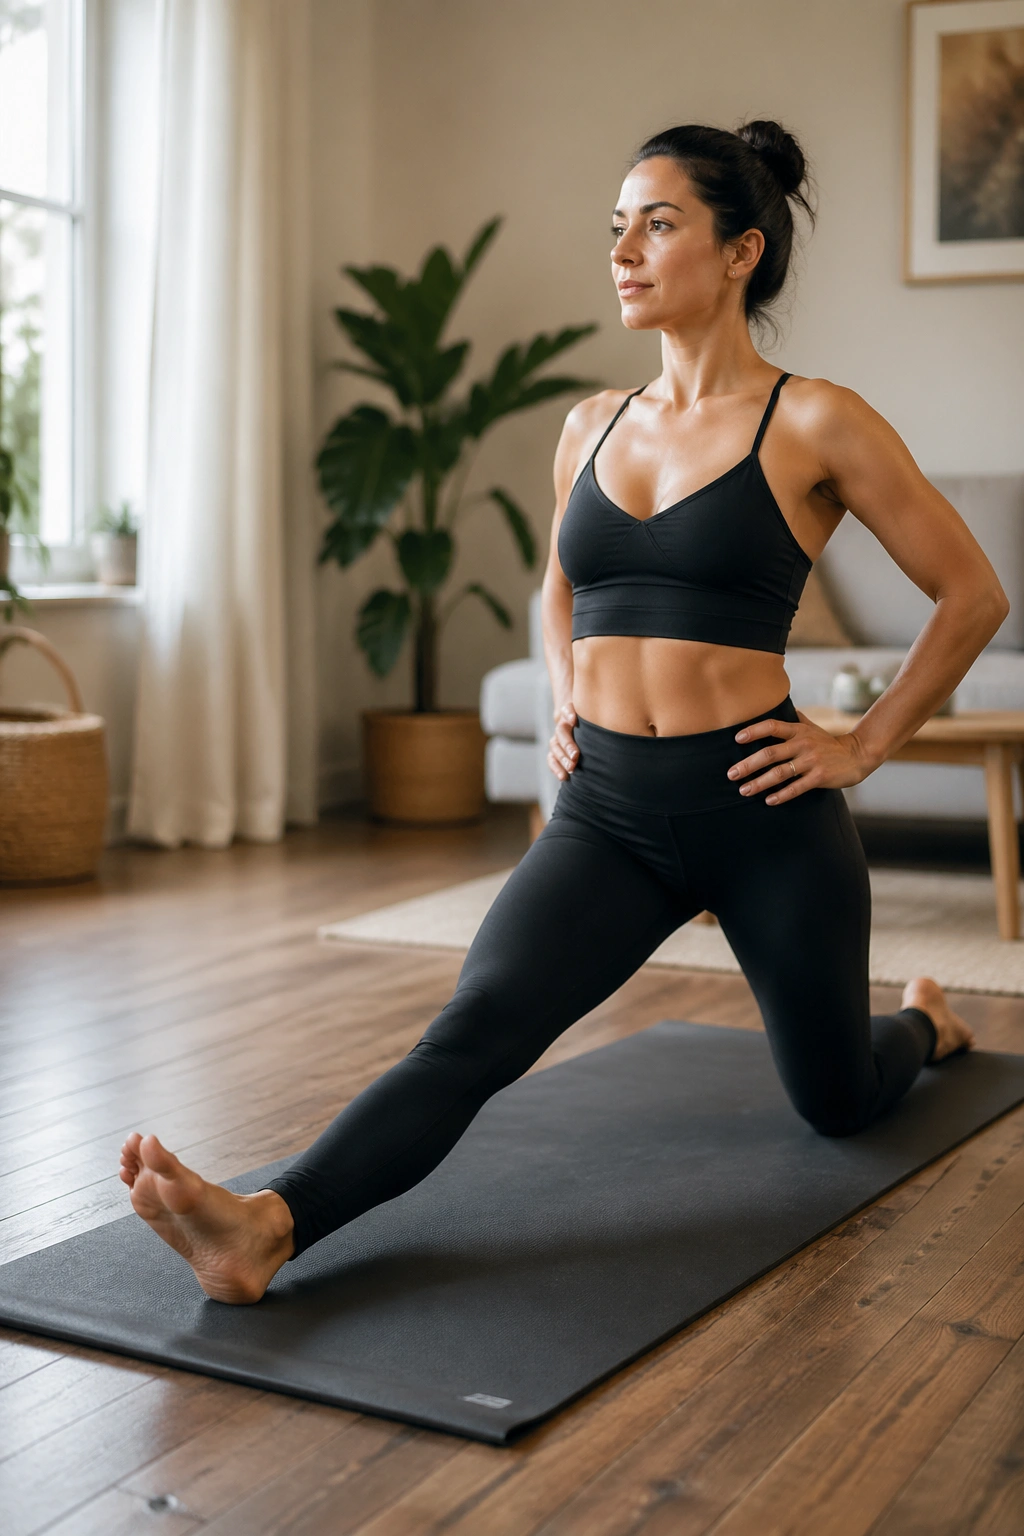
Half Dragon is the same general idea as Dragon, but the front leg is straight or nearly straight. That shifts the work toward the hamstrings and the outer line of the leg. It’s a sharper sensation than people expect, especially after sitting for hours.
Start with the back knee down and the front heel rooted. Then slowly straighten the front leg until you feel a clear stretch without the lower back rounding like a broken hinge. A slight bend in the knee is not cheating. It is often smarter.
Unlike Dragon, this pose is less about the hip socket and more about the back of the leg. That makes it useful after walking, standing, or long drives, when the hamstrings feel shortened and the calves feel stubborn. Keep the torso upright if folding forward makes the stretch turn into strain.
A block under the hands helps. So does a strap around the front foot if the toes want to curl. Stay for 1 to 3 minutes on each side, and don’t be surprised if one side feels twice as intense as the other.
8. Sleeping Swan
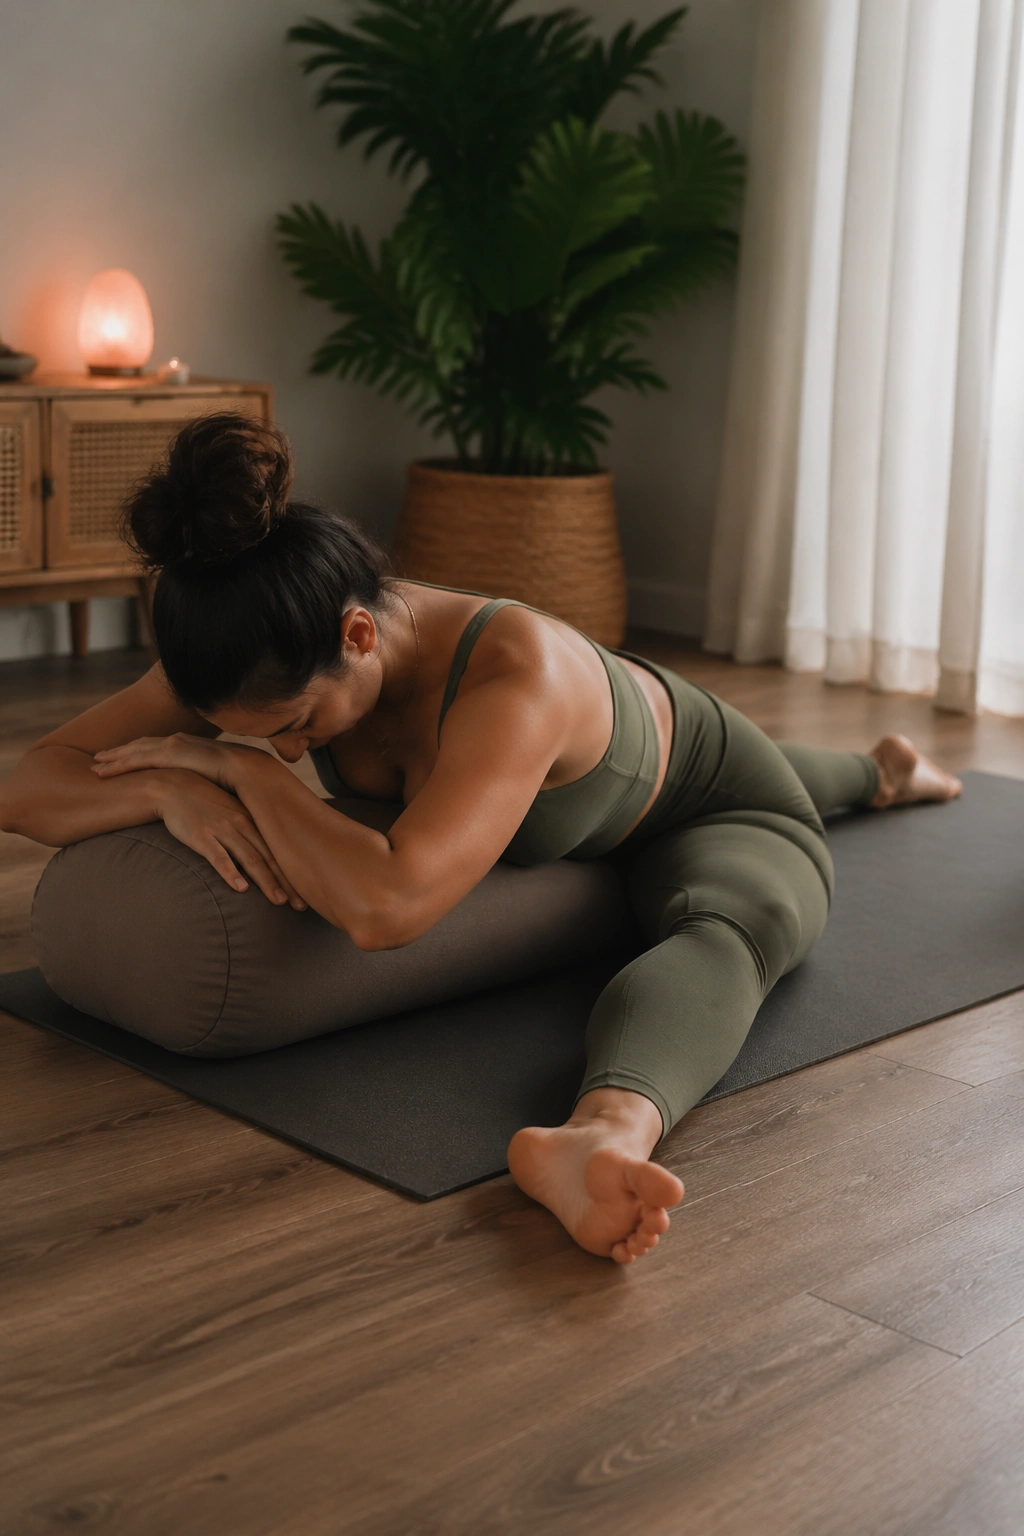
Sleeping Swan has a reputation, and parts of it are deserved. One leg folds in front of the body, the other stretches back, and the front shin angles across the mat in a way that can light up the outer hip fast. When it works, it feels deeply settling. When it doesn’t, it complains in the knee.
The best version starts small. Keep the front foot closer to the opposite hip if the shin angle feels too open. Sit on a bolster or a folded blanket if the pelvis is dropping unevenly. And if the front hip floats high off the floor, support it. That’s not optional for a lot of bodies.
You can stay upright, resting on your hands or blocks, or fold forward onto a bolster. The folded version tends to be more soothing at night, but only if the knee feels safe. No sharp knee pain. Ever.
A good Swan usually looks like this
- Both hips feel supported, not twisted off the mat.
- The front shin is adjusted to the body, not the other way around.
- The breath stays smooth in the side ribs.
- The face softens instead of bracing.
Give it 2 to 4 minutes per side and come out slowly.
9. Deer Pose
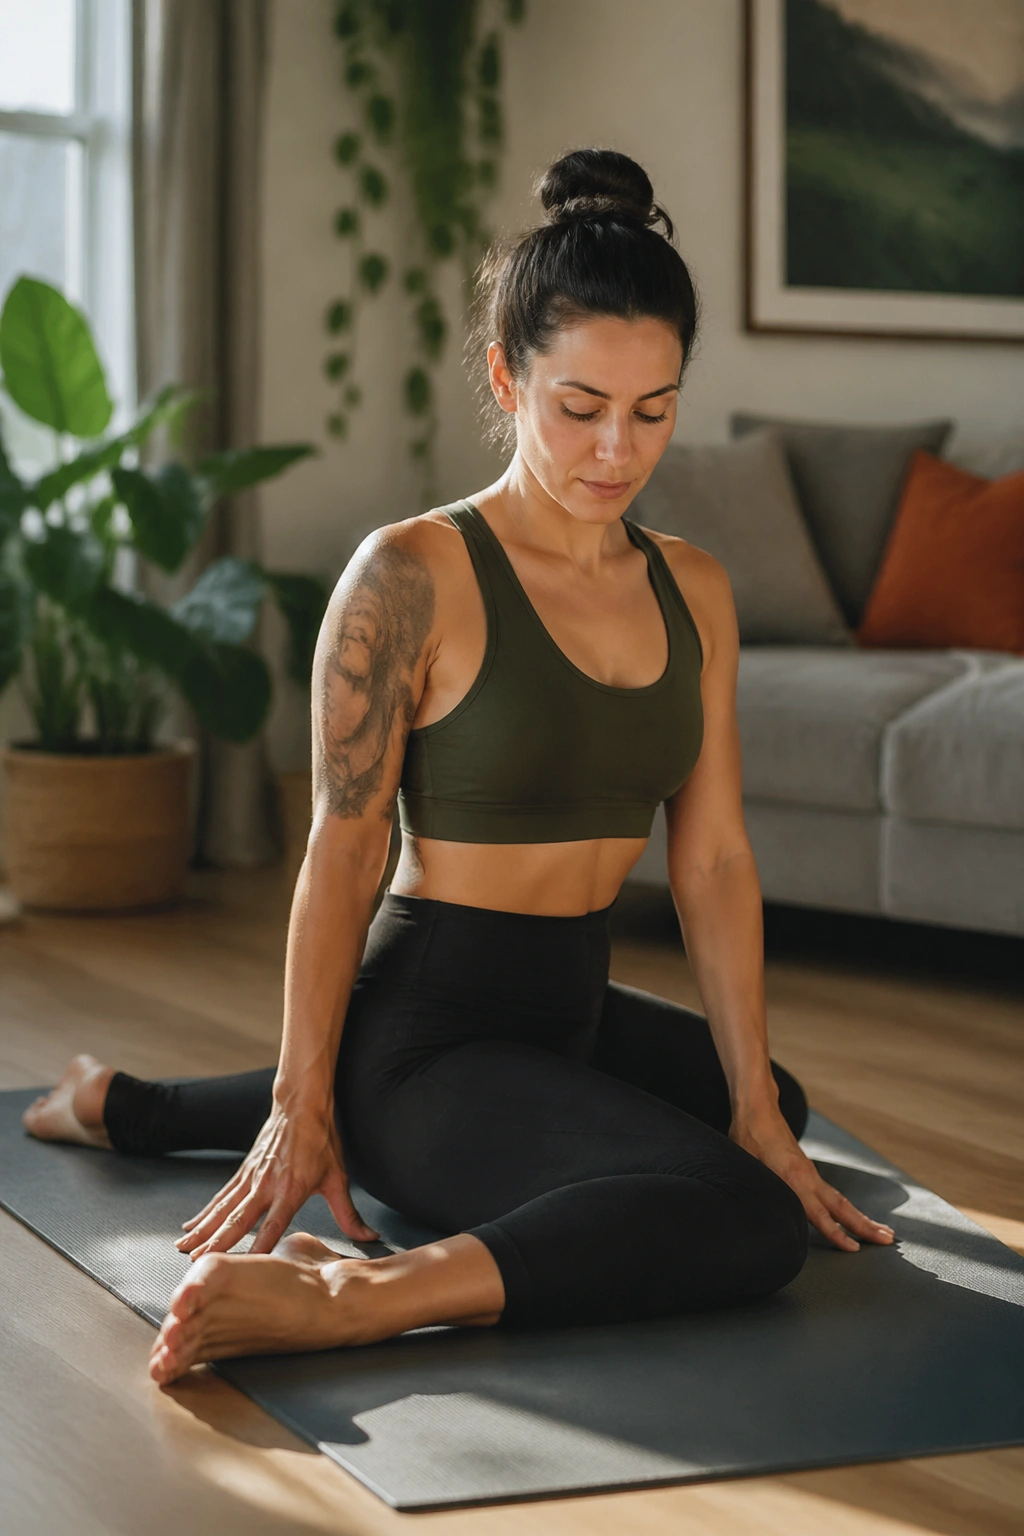
Deer is the sleeper hit of an evening practice. It looks odd, and that’s part of why people underestimate it. Sit with both knees bent, one shin angled in front and the other leg tucked behind, then fold forward gently or stay upright if that feels enough.
What makes Deer interesting is the asymmetry. You get a different line through the hips on each side, and that can be a relief if your body hates symmetrical shapes after a long day. It also tends to feel more manageable than something like Shoelace, which is a blessing when your energy is low.
If one sitting bone floats a lot, pad under it. If the knees protest, move the front shin farther from the torso and keep the fold tiny. You want a clean stretch through the outer hip and glute, not a cranky twist through the knee.
Stay for 1 to 3 minutes, then switch sides with a little care. Deer is not flashy. That’s why it works.
10. Shoelace
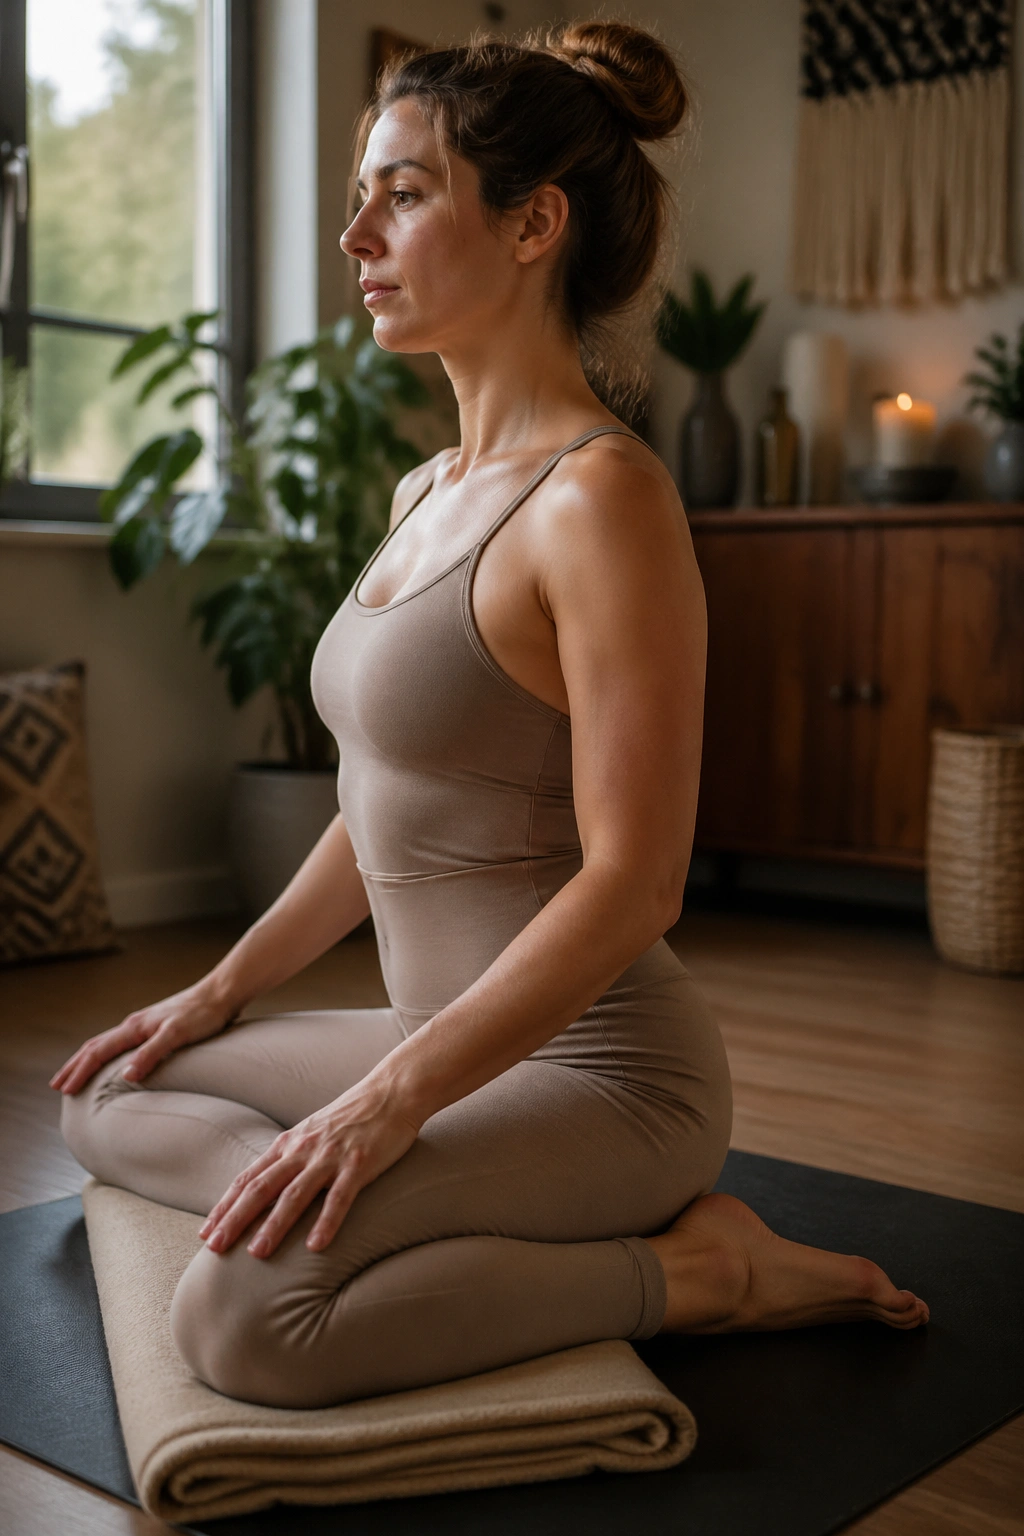
Shoelace is the pose that makes seasoned yoga people go quiet. Stack one knee over the other, let the shins angle out like a zigzag, and sit tall before folding forward. It is a deep hip shape, and it asks for respect.
A lot of people collapse into it too quickly, then wonder why the knees or ankles feel angry. Better to sit on a blanket and keep the torso upright for a while. The fold can wait. If your top knee floats high, use a block or blanket under it so the body doesn’t have to hold the whole shape by sheer effort.
Two ways to practice it
- Upright version: stay tall, hands on thighs, and breathe for 2 minutes.
- Forward-fold version: walk the hands out and rest the forehead on a bolster for 2 to 4 minutes.
If the lower back rounds hard or the knees feel stuck, come out sooner. Shoelace is one of those poses that rewards patience and punishes ego, which is a little rude but also useful.
11. Thread the Needle
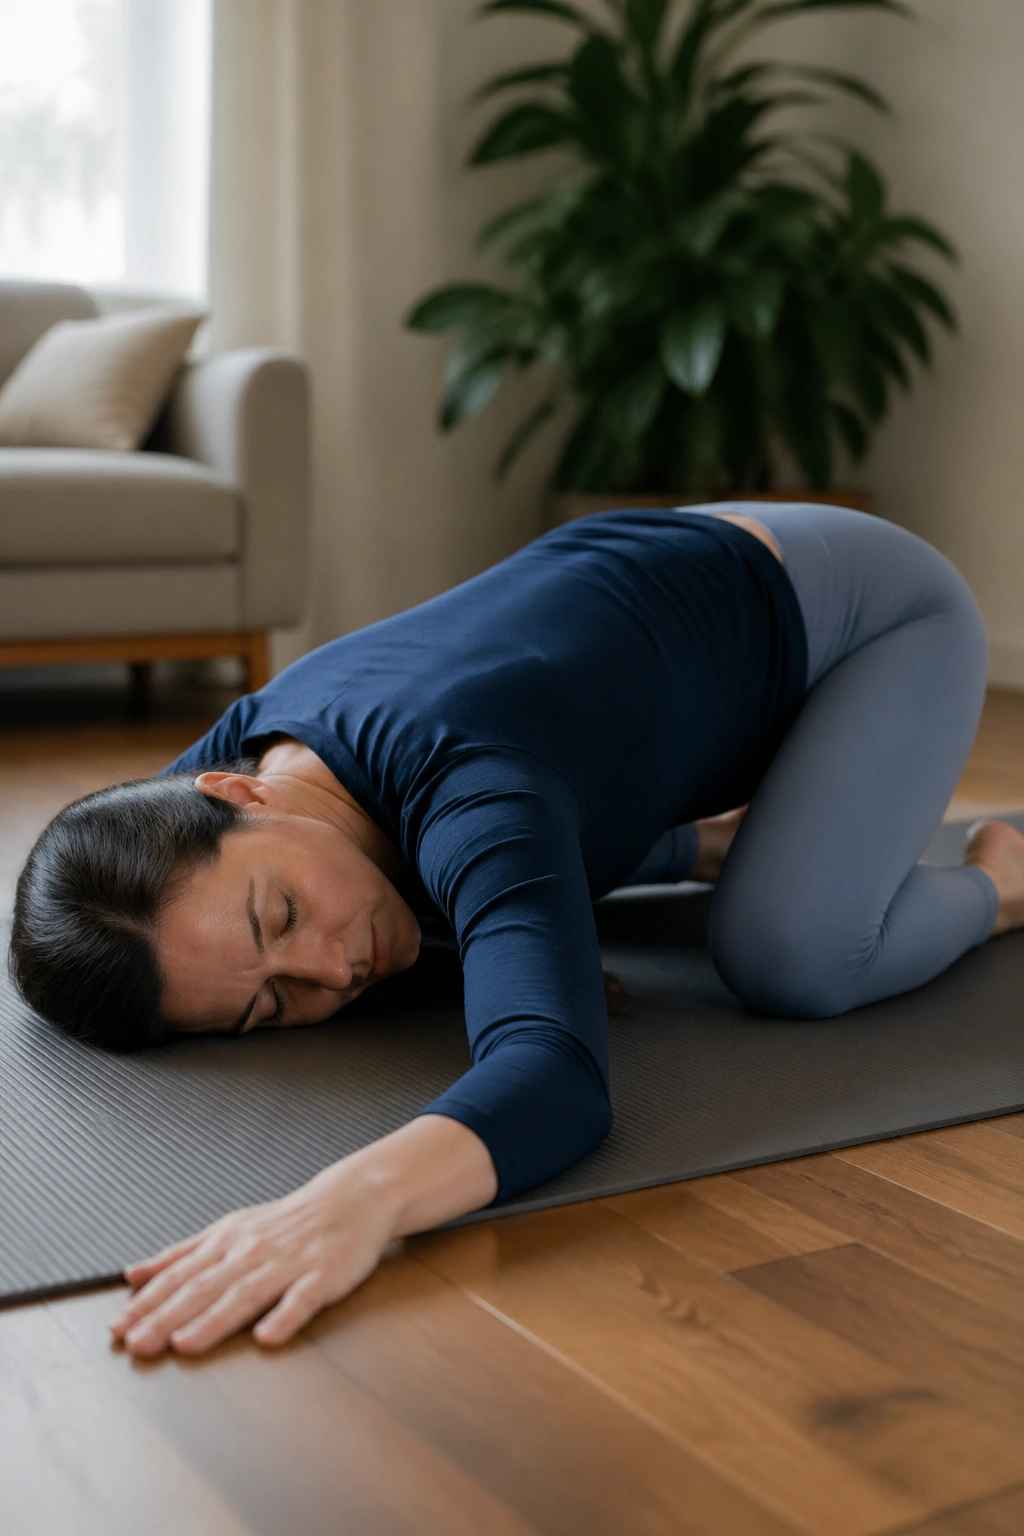
Shoulders carry a surprising amount of the day, and Thread the Needle is one of the cleanest ways to let them down. From hands and knees, slide one arm under the other, turn the palm up, and rest the shoulder and side of the face on the mat.
The stretch is mostly across the upper back, rear shoulder, and side of the neck. Keep most of your weight in the supporting arm and the knees so the bottom shoulder isn’t trapped under a pile of body. If the neck feels squashed, put the head on a blanket or a block.
This is a good pause after hip-heavy poses, because it changes the shape of the practice without waking the system back up. Hold 1 to 2 minutes per side. Breathe into the back ribs and the space between the shoulder blades.
What to watch for
- The bottom shoulder should feel grounded, not jammed.
- The neck stays long.
- The breath reaches the back body.
- The top arm can stay in place or extend for a little more space.
12. Reclined Twist
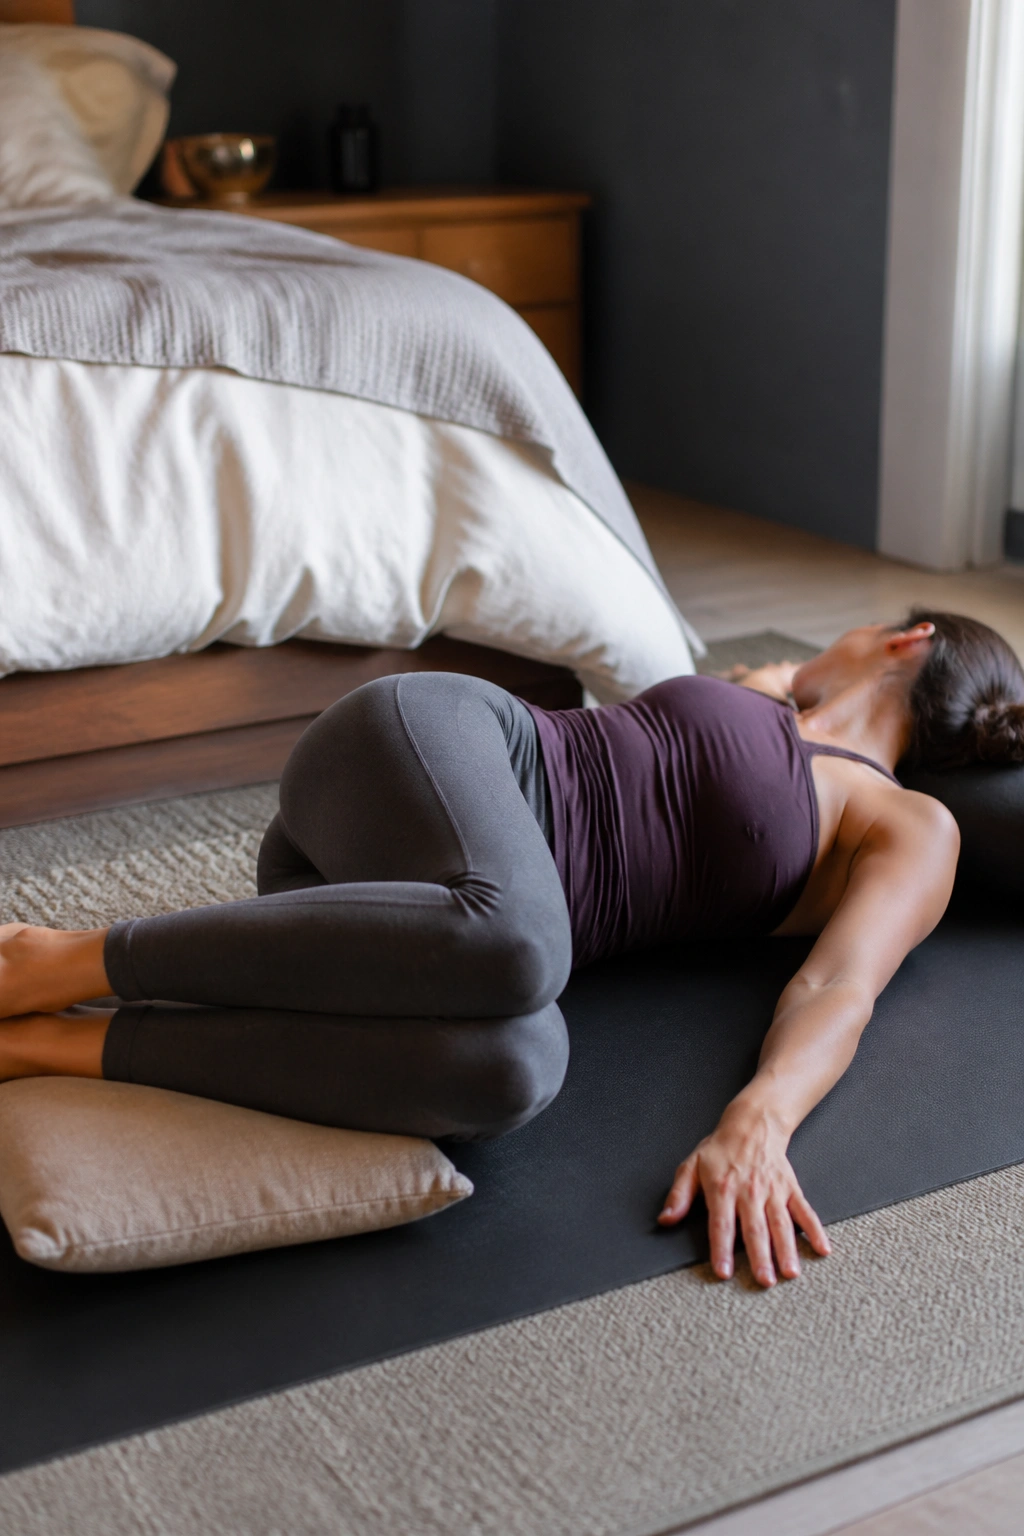
A good reclined twist can make the lower back feel like it finally gets to sit down. Lie on your back, hug one knee in, then guide it across the body while keeping the opposite shoulder heavy on the floor. A pillow or bolster under the knees makes the whole thing friendlier.
I prefer this twist as a downshift, not a wringer. You do not need to force the knee all the way to the floor. In fact, if the upper shoulder lifts or the low back tugs, the twist is already too strong. Let the body rest in the version that lets the breath move through the side ribs.
Turn the head only if your neck is happy with that. Some nights it is. Some nights it really isn’t. There is no virtue in pushing a neck twist when the rest of you is trying to sleep.
Stay 2 to 3 minutes per side and let the exhale get longer. Small, soft, and uninteresting is often exactly right.
13. Banana Pose
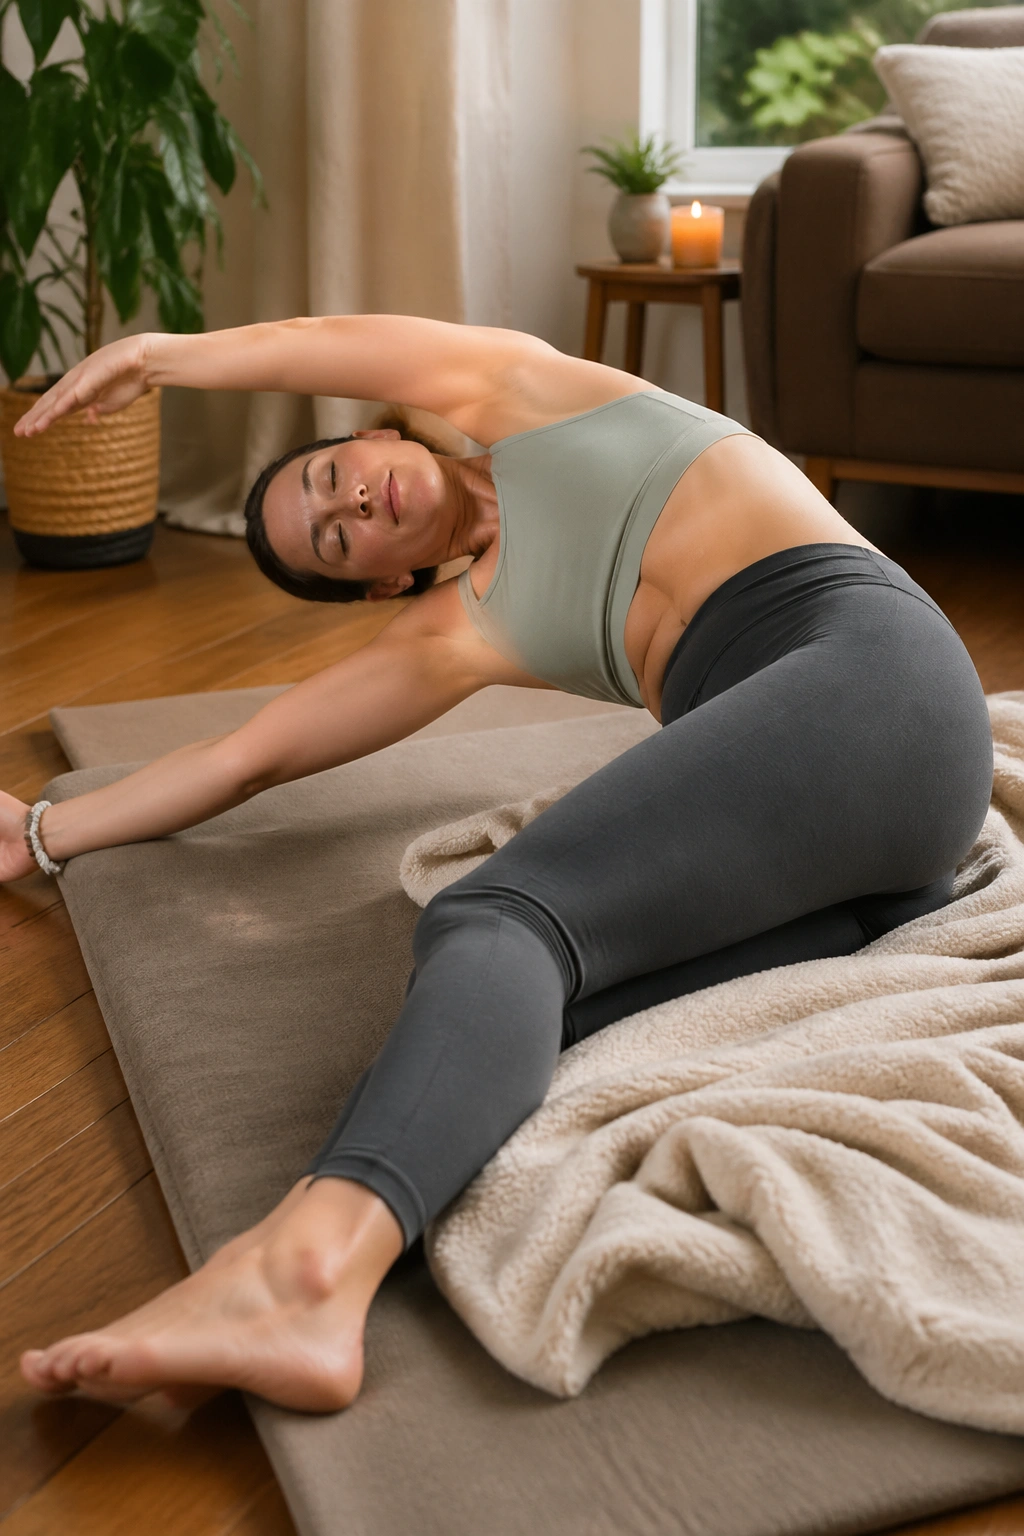
Banana Pose looks almost too mild to matter. Then you stay in it long enough to feel the side body start to open from the ankle all the way to the ribs, and the whole thing makes sense.
Lie on your back and walk both feet and the upper body a few inches to one side so the body curves like a crescent. Keep the hips mostly anchored. The feeling should travel through the lat, the waist, and sometimes the outer hip. If your ribs flare or your lower back arches hard, shorten the curve.
This is one of my favorite late-evening shapes because it doesn’t demand much effort. You can lie there for 2 to 4 minutes per side and feel the breath quietly widen. It’s also a nice change after a long string of forward folds and hip openers.
Best setup cues
- Keep both hips mostly grounded.
- Let the top arm rest overhead or on a blanket.
- If the shoulders are tight, bend the top elbow.
- Move only as far as you can breathe easily.
14. Legs Up the Wall
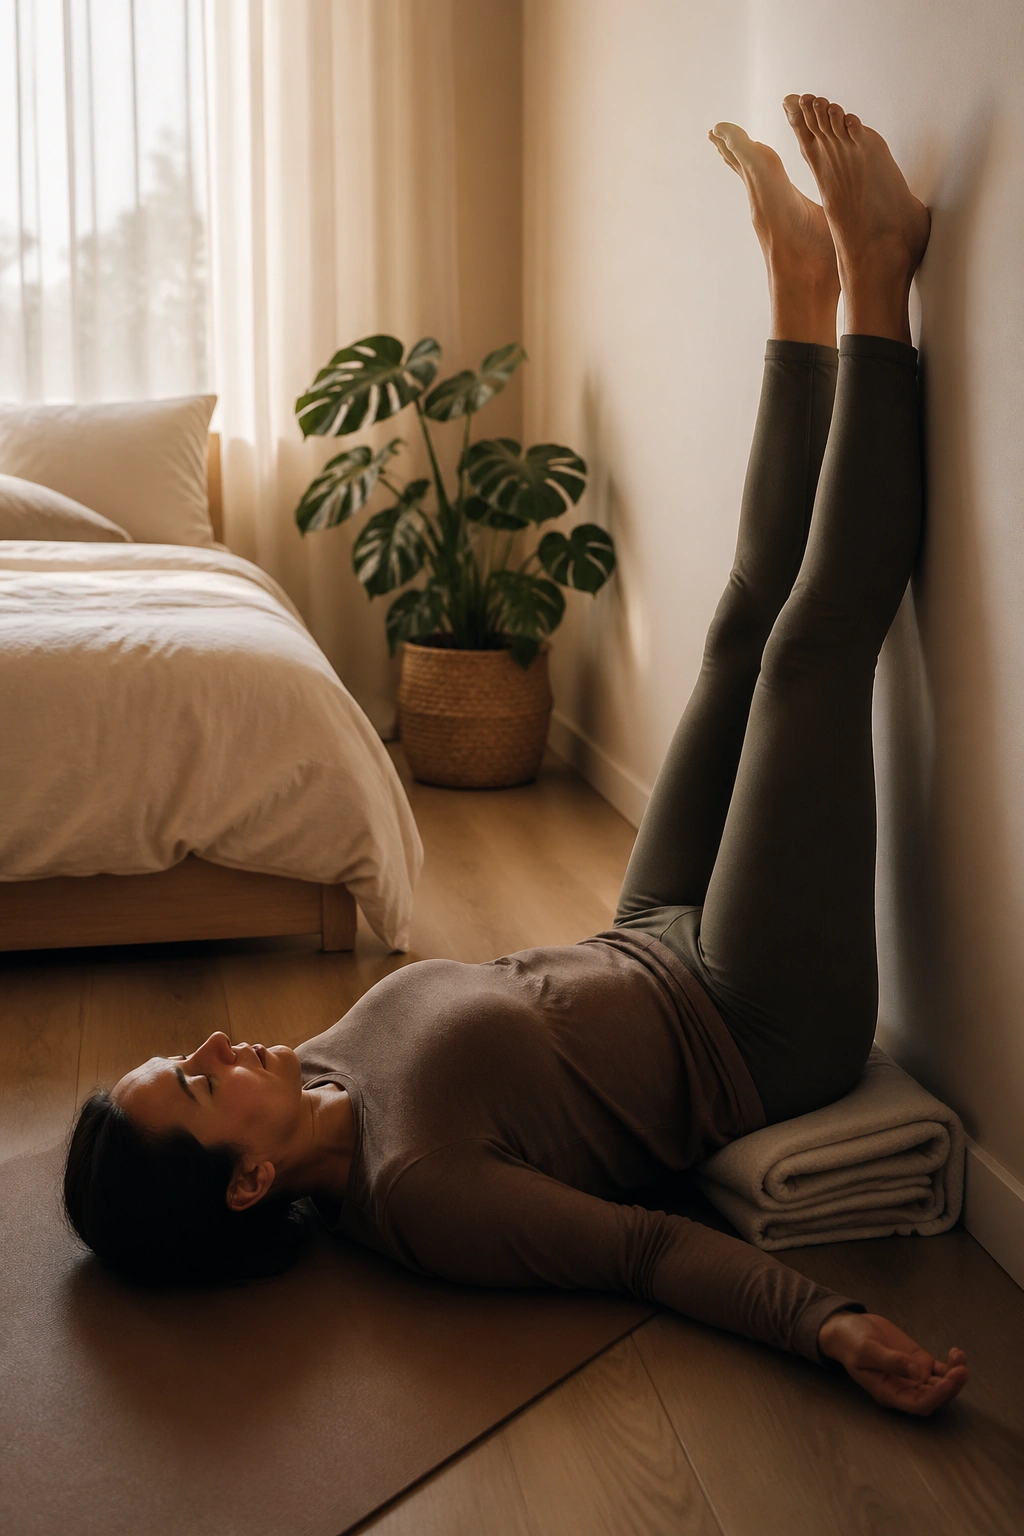
Put your legs on a wall and stop trying to do more. That is the spirit of this one, and honestly, it’s hard to argue with.
Scoot the hips close to the wall or a few inches away if the hamstrings tug too much. The legs can be straight, bent, or even slightly apart. A folded blanket under the pelvis makes the shape softer for some people, but if your lower back lifts and feels compressed, move the hips farther from the wall. Small adjustments matter here.
This is one of the best poses for ending a slow evening practice because it changes the body position without asking for effort. After several floor shapes, the quiet inversion can feel almost suspiciously easy. That’s the point. Let the calves drain, let the breath lengthen, and let the shoulders finally stop carrying your face.
Stay for 3 to 10 minutes if it feels good. If you get dizzy, your heartbeat feels odd, or the pose makes your head feel hot, come out. No heroics.
15. Happy Baby
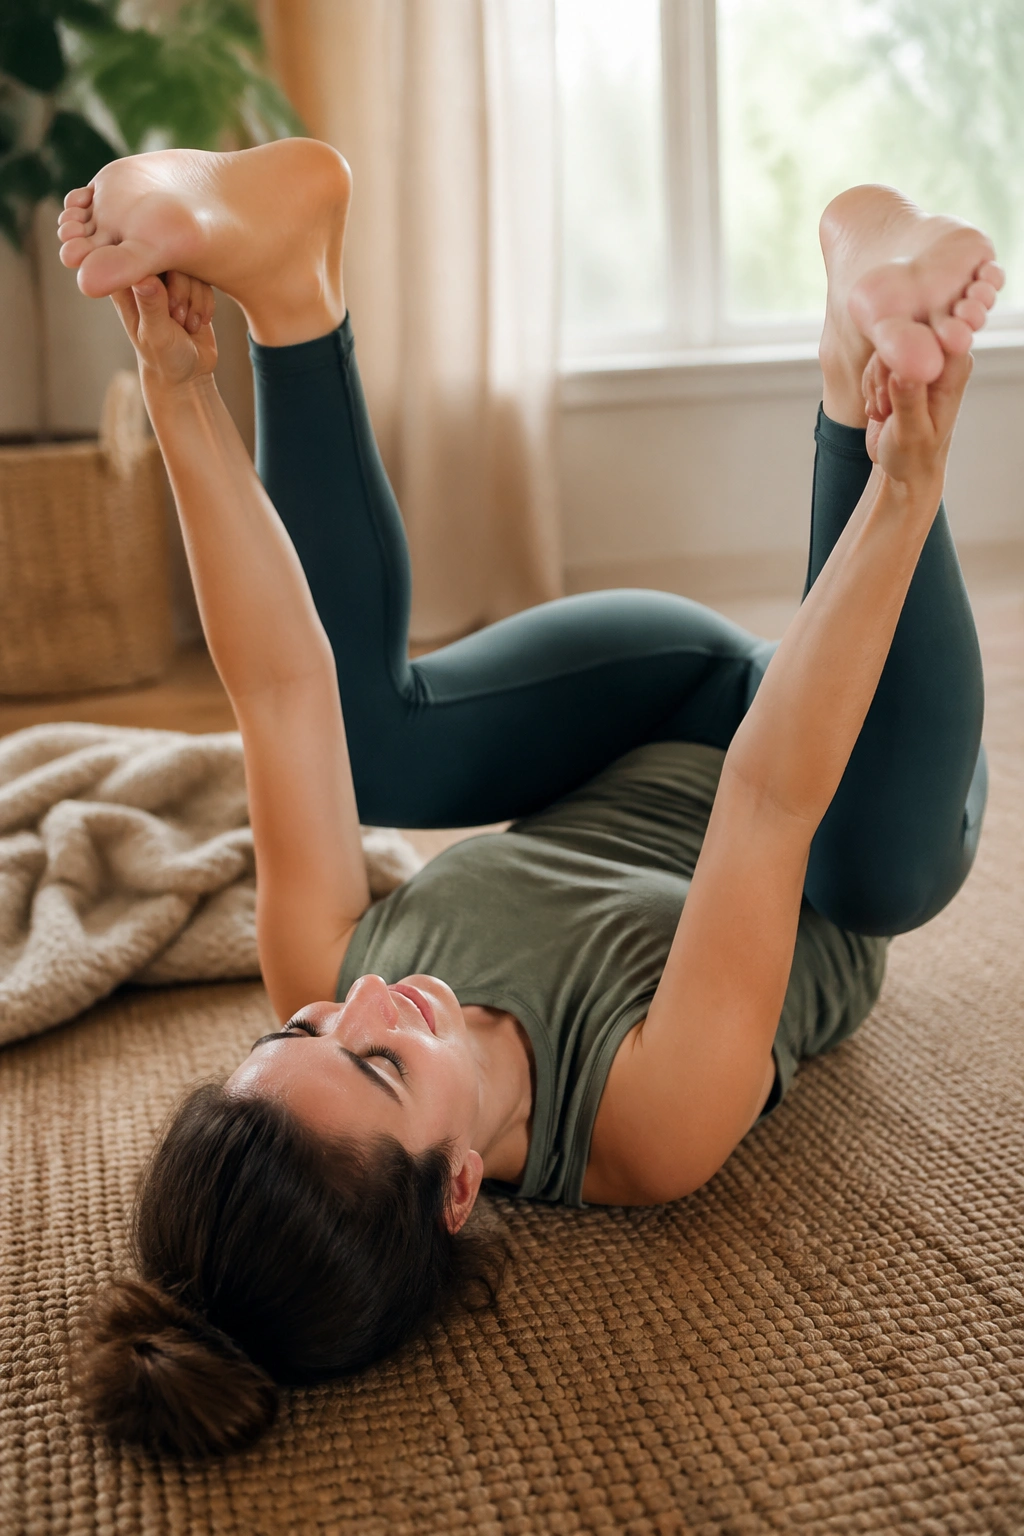
Happy Baby looks playful, but it can also be wonderfully plain. Lie on your back, bring the knees toward the ribs, and hold the outer edges of the feet or the backs of the thighs. The knees open wide, the low back softens, and the whole pelvis gets a little more room.
The main mistake is yanking the feet down. Don’t. That turns a gentle release into a hamstring contest. Keep the shins stacked over the ankles if you can, or hold behind the thighs if your feet are out of reach. Rocking a few inches side to side is optional and can feel lovely.
It’s a good late-stage pose because it reaches the hips without requiring much setup. If the neck feels strained, place a folded blanket under the head. If the sacrum feels pinned, keep the knees wider and the knees lower.
How to get the most from it
- Hold for 1 to 2 minutes.
- Keep the breath slow and easy.
- Use a strap around the feet if the shoulders are tight.
- Skip the rocking if it wakes you up.
16. Square Pose
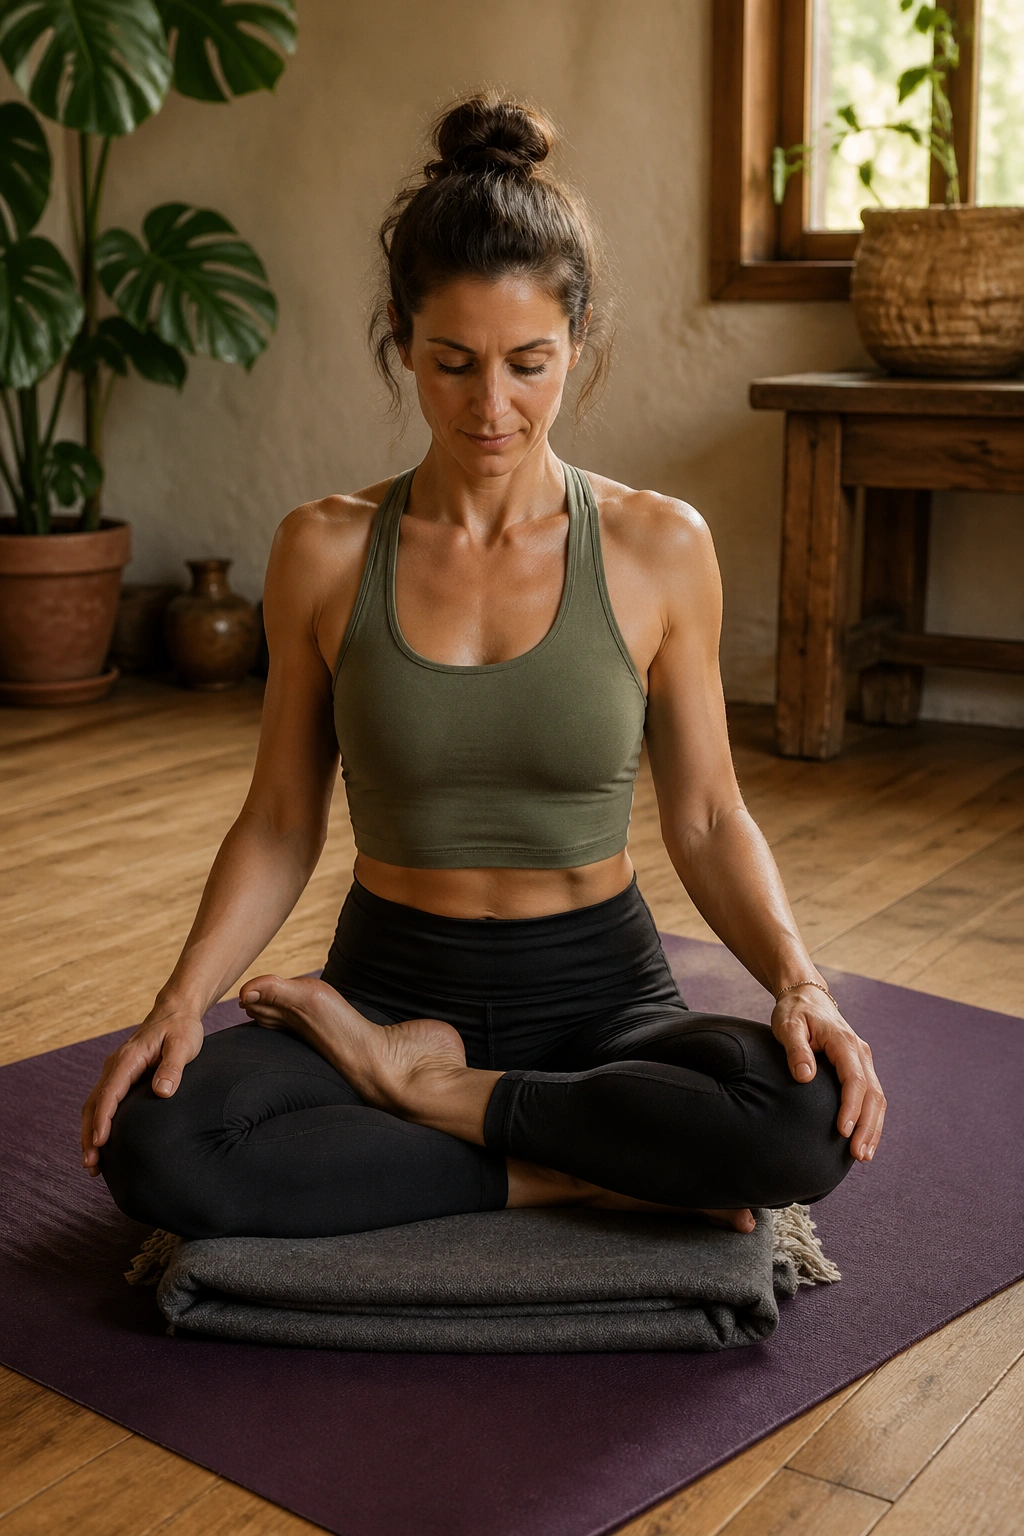
Square Pose is one of the deeper hip shapes in a yin sequence, and it deserves a little caution. Sit with one ankle stacked over the opposite knee, then slide the other ankle beneath the first knee so the legs make a rough square. From there, stay upright or fold forward only if the hips and knees are fine with it.
A blanket under the sitting bones often makes this pose much kinder. Some people need a second blanket under the top knee, especially if the knee floats or the outer hip tugs too hard. If your knees are tender, don’t force the full stack. A lighter version is better than a sore one.
Unlike Shoelace, Square Pose can feel a bit more compressed through the outside of the hips. That makes it excellent for some bodies and a bit much for others. I’d rather see you stay in a smaller version for 2 minutes than wobble in a deep one and spend the rest of the evening annoyed.
If the pose creates numbness or joint pain, back out. Hip stretch is one thing. Joint grumble is another.
17. Supported Bridge
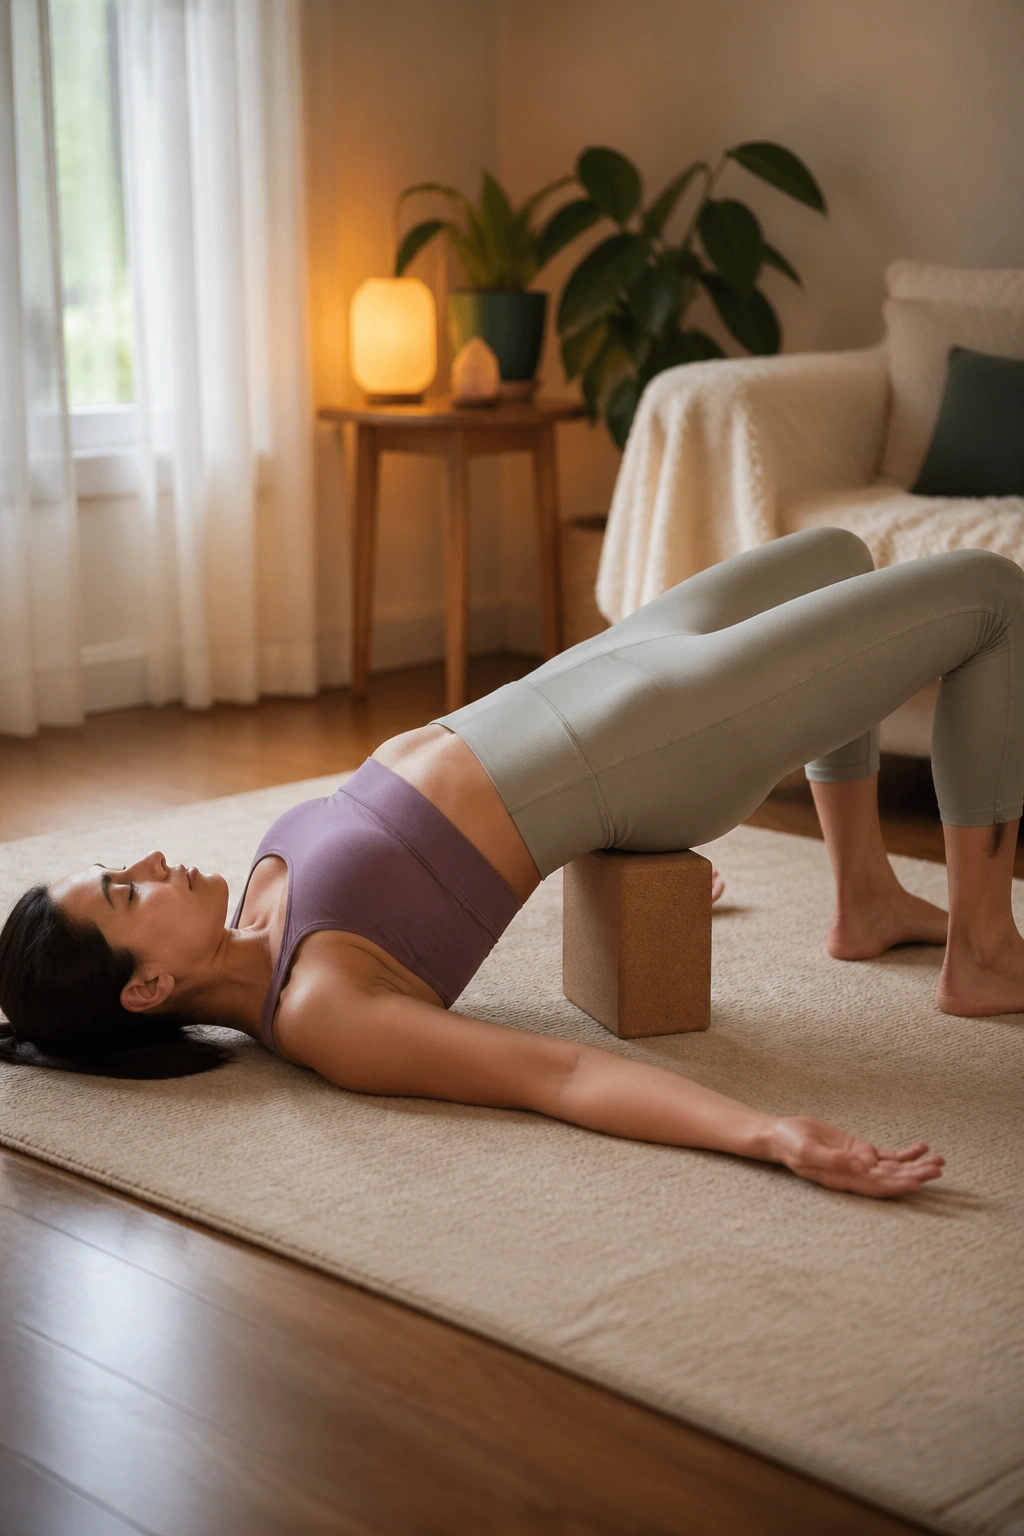
Supported Bridge is where the body gets to be held up instead of holding itself together. Lie on your back, bend the knees, lift the hips, and place a block or bolster under the sacrum. Then let the arms rest wherever they can. That’s the real shape.
The glutes do not need to squeeze hard here. In fact, they usually shouldn’t. The support is doing the work, and your job is to let the front body open while the back body stops clamping down. If the lower back feels compressed, lower the block or remove it entirely.
This is a gorgeous bridge between more active hip openers and final rest. It gives the front of the hips a little opening without demanding balance or strength. Hold 2 to 5 minutes, breathing into the lower belly and the side ribs.
Setup notes that matter
- Use the lowest block height that feels good.
- Keep the chin slightly tucked.
- Walk the feet farther away if the low back arches too much.
- Remove the prop slowly, one inch at a time.
18. Savasana
Savasana is not the leftover part of practice. It is the part that tells the rest what happened. Lie flat, or support the knees with a bolster if your low back likes that better. Let the feet fall open, drape a blanket over the body, and do less than you think you should.
After a slow evening sequence, the body often feels strangely full and quiet at the same time. That’s normal. A longer exhale, a softer jaw, the tiny drop of the shoulders—those are the real signs that the practice landed. If your mind is still noisy, fine. Let it be noisy while the body finishes settling.
I like to keep this final hold at 5 to 10 minutes if time allows. A folded towel over the eyes can help, and a heavier blanket often makes the room feel less like a room and more like a pause. If you only keep one thing from a yin evening practice, keep the willingness to stop trying to improve the moment.
That’s when it turns into rest.
