



Your hips do not care that you sat for six hours, ran hills, or spent the morning under a barbell. They tighten anyway. And when they do, the rest of the body starts cheating: the low back arches, the knees drift, the stride shortens, and even a plain bodyweight squat can feel pinchy.
That is why hip opening yoga poses are worth learning properly instead of treating them like a stretchy afterthought. A good opener is not about yanking your knees toward the floor. It is about easing the muscles that guard the joint — hip flexors, adductors, deep rotators, glutes — until the area stops bracing quite so hard.
People talk about tight hips like it is one problem. It usually is not. Sometimes the front of the hip is annoyed from sitting. Sometimes the outer hip is doing too much work. Sometimes the groin feels like a cable that got wound a little too tight. Different tissues, different fixes.
These 15 poses cover that spread. Some are gentle enough for a quick reset. Others ask for patience, a folded blanket, and a willingness to back off before things get sloppy. That part matters more than people think.
1. Butterfly Pose
Butterfly Pose is one of those shapes that looks almost too simple to count, then surprises you two breaths in. It works the inner thighs, groin, and the deep hip rotators without asking you to haul your body into a dramatic position. That makes it a smart first stop when the hips feel rusty rather than angry.
Why It Helps Tight Hips
Sit on the floor with the soles of your feet together and let your knees drop out to the sides. If your knees hover way up in the air, sit on a folded blanket and move your feet farther from your pelvis. That small adjustment often changes the whole pose.
Keep your spine tall before you fold forward. The classic mistake is collapsing from the ribs and turning the stretch into a back rounding contest. You want length first, then a soft hinge from the hips. A gentle forward lean for 5 to 8 slow breaths is enough.
- Keep your feet 6 to 12 inches from the pelvis if your hips are very tight.
- Support each knee with a block or rolled towel if the groin feels sharp.
- Sit on a folded blanket to tilt the pelvis slightly forward.
- Stop when the stretch feels broad, not biting.
One small cue fixes a lot here: lift your chest before you lean.
2. Low Lunge
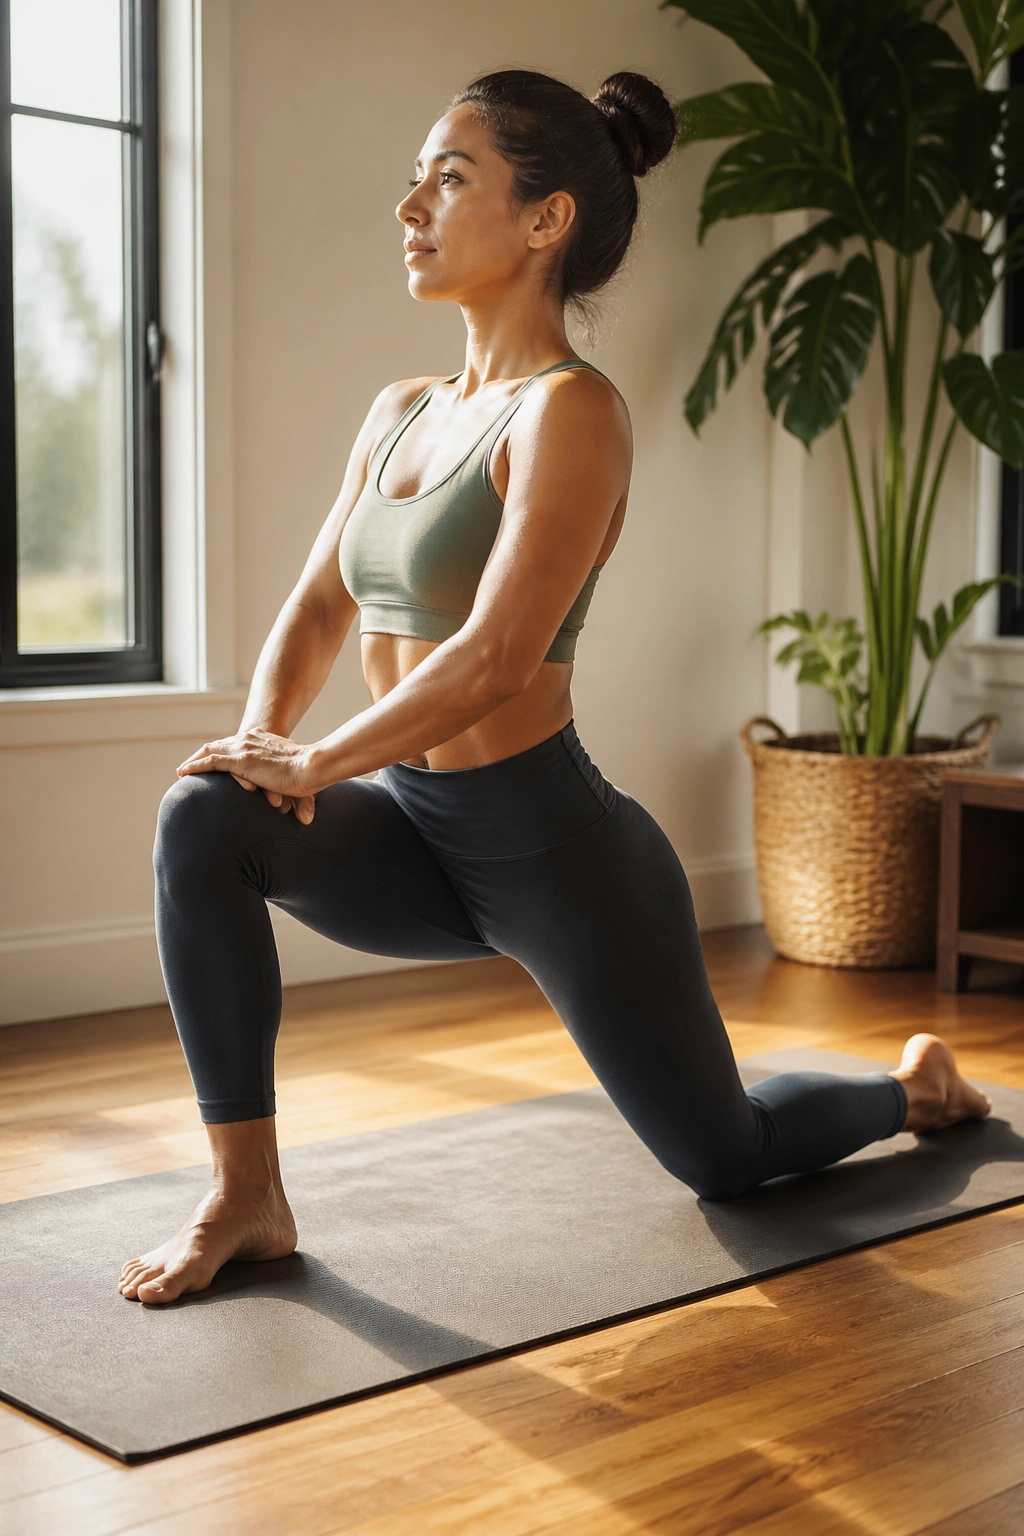
Low Lunge is the pose I reach for when the front of the hip feels glued shut. It opens the hip flexors with a very clear line of pull, which is why it tends to help people who sit a lot, cycle, or spend time in a rounded posture. There is nothing fancy about it. That is part of the appeal.
The back knee comes down, the front foot plants under the knee, and the pelvis settles forward just enough to feel a stretch along the front of the back thigh and hip. Do not dump into the low back. That turns a hip opener into a lumbar crank, and it is a bad trade.
A small posterior pelvic tilt helps here — think tailbone lengthening toward the floor rather than sticking the butt out. If you want a little more, raise the arms and keep the ribs from flaring. If that feels like too much, stay with hands on blocks or fingertips on the floor.
Thirty to 45 seconds per side is plenty when you are using this as part of a regular sequence. Longer is fine too, but only if the shape stays steady and you can breathe through the front of the hip instead of white-knuckling it.
3. Lizard Pose
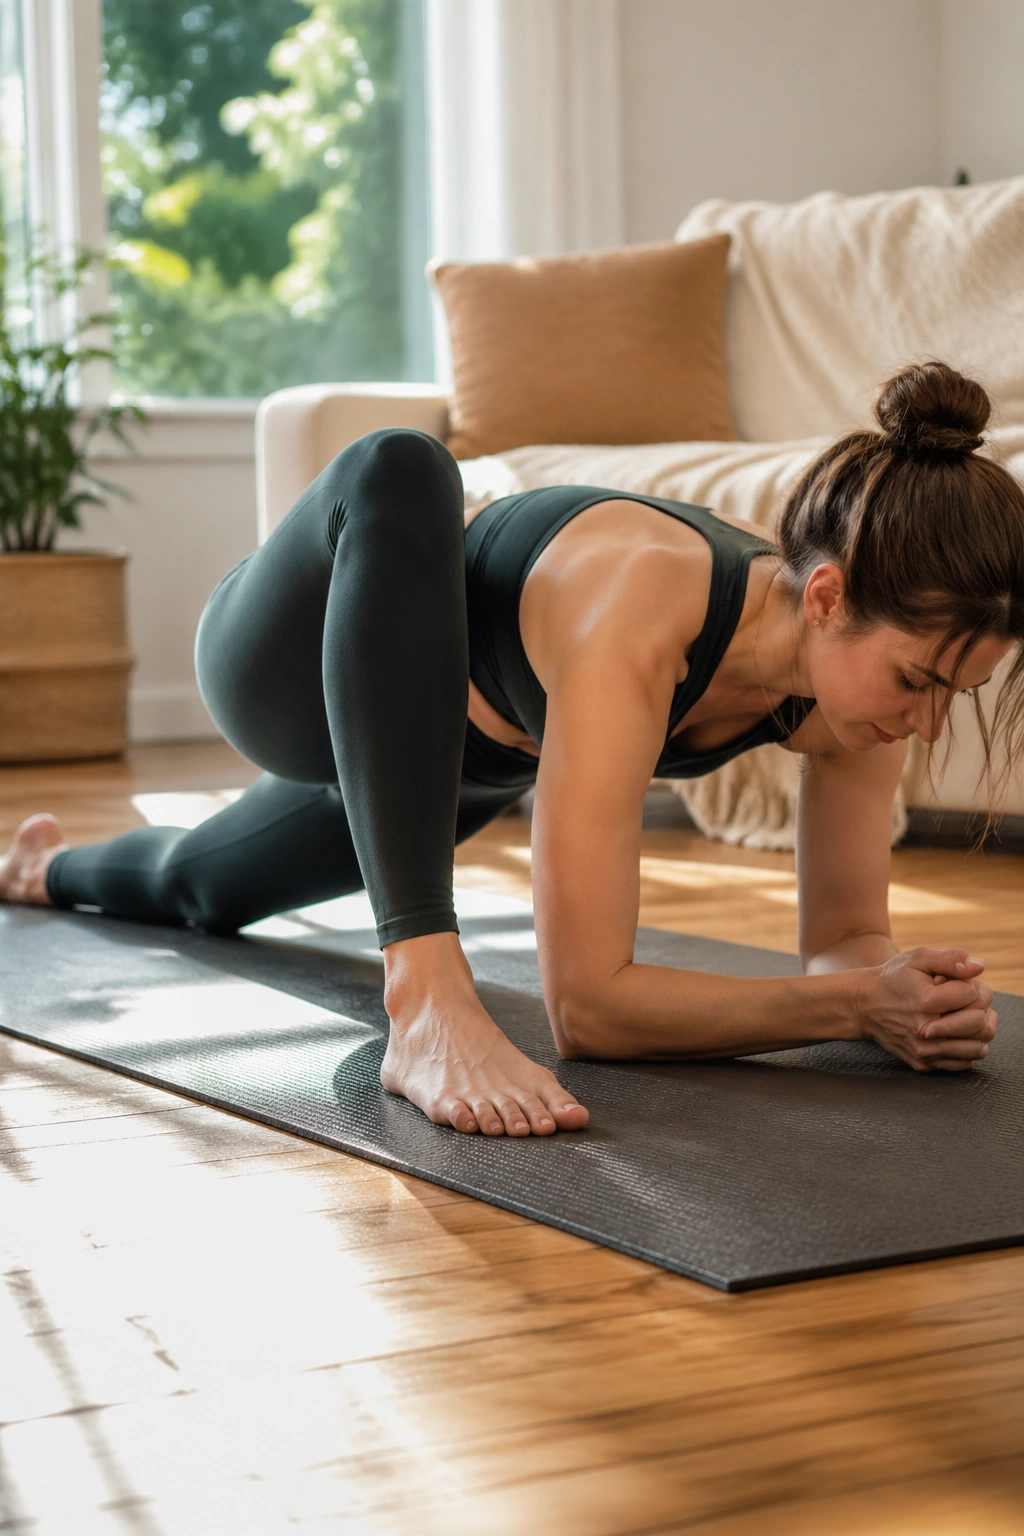
Why does Lizard Pose feel so different from Low Lunge? Because it gives the front hip less shelter. The body weight comes farther forward, the inner thigh gets involved, and the pose starts to talk to the adductors as much as the hip flexors. That extra intensity is useful, but only if you set it up with some common sense.
Start in Low Lunge, then walk both hands inside the front foot. Keep the back knee down if you want a friendlier version. If the floor feels far away, use blocks under your forearms or hands. There is no prize for touching the mat with your elbows. None.
How to Make It Friendlier
- Keep the front foot slightly turned out if the hip protests.
- Drop the back knee for a slower, safer entry.
- Place a folded blanket under the back knee if the joint is tender.
- Stay on your hands instead of collapsing onto the forearms.
- Breathe into the side ribs, not just the belly.
If the stretch feels hot in the groin, ease back 10 percent. That is usually enough. Lizard is one of those poses that rewards restraint more than ambition.
4. Pigeon Pose
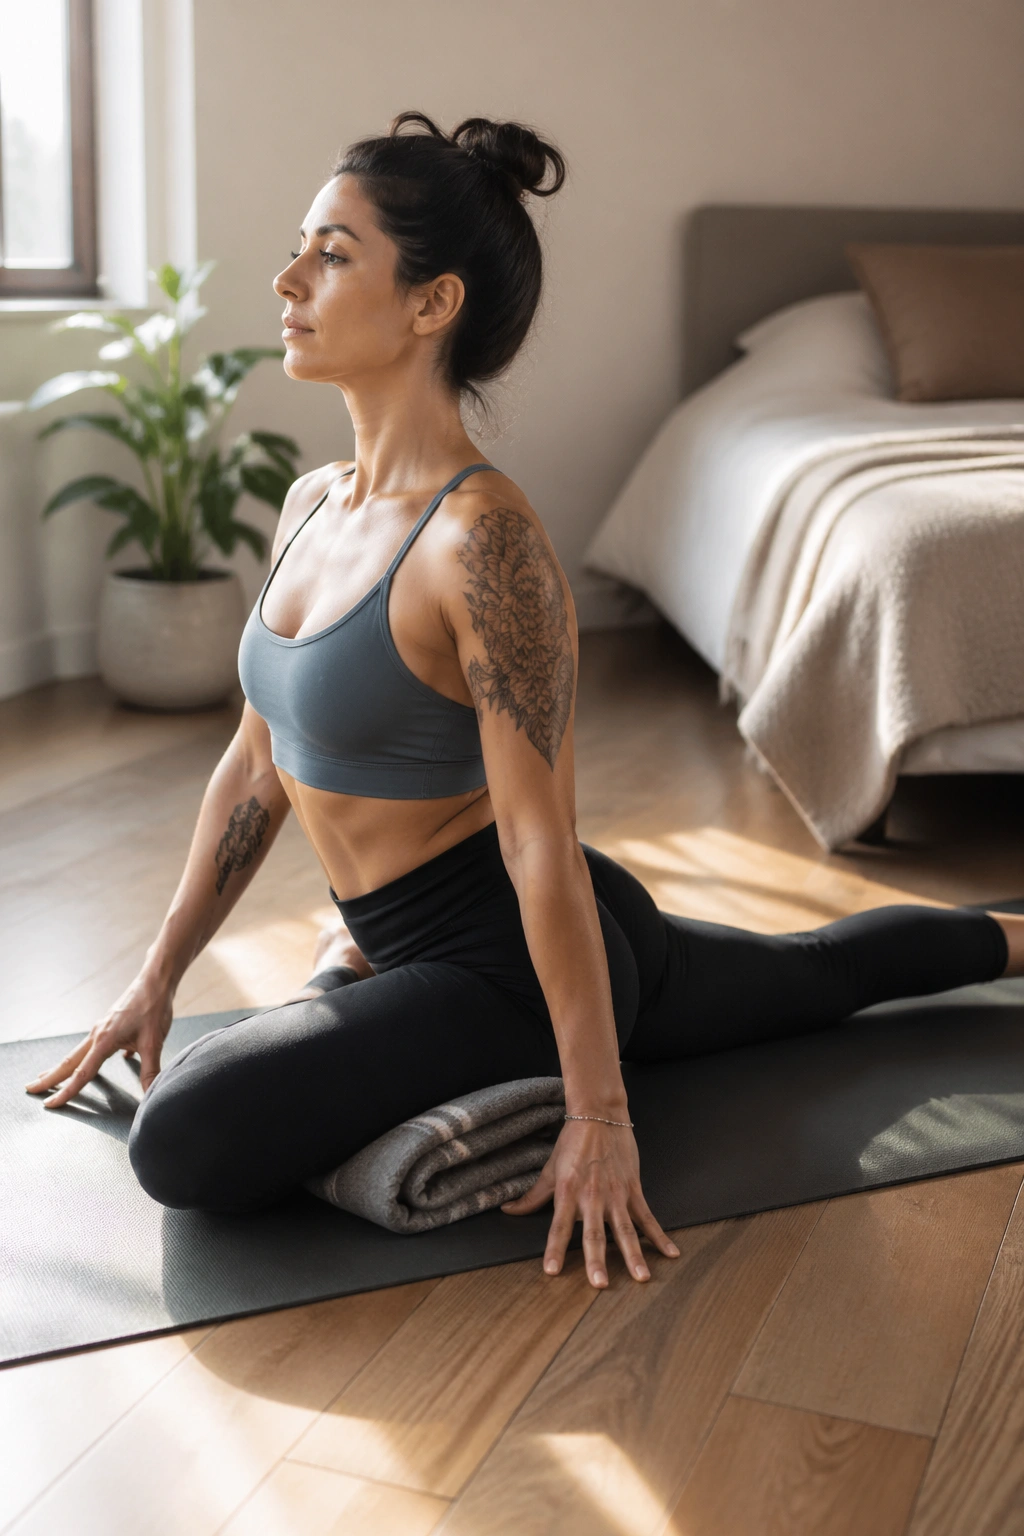
Pigeon Pose is the one people either love or avoid for a long time. After a run, a long drive, or a hard leg day, it can feel like someone finally found the exact knot in the side of the hip. Or it can feel like too much, too fast. Both reactions make sense.
The main target is the outer hip — the glute, the piriformis, and the deeper external rotators. Those muscles often hold a lot of tension when the pelvis has been stuck in one position for hours. Set the front shin down only as far as the knee stays happy, and never force the shin into a perfect horizontal line. Square hips are optional; a quiet, pain-free knee is not.
A folded blanket under the front hip changes the game for a lot of people. It keeps the pelvis from hanging off one side and lets the body settle more evenly. If the front knee complains, use Reclined Figure Four instead. That is not a downgrade. It is just a cleaner setup.
- Keep the front foot flexed if the knee needs support.
- Walk the back leg longer to reduce compression in the low back.
- Stay upright for the first 3 to 5 breaths before folding forward.
- Use a block or bolster under the chest if the fold feels too deep.
Pigeon works best when you treat it like a conversation, not a dare.
5. Reclined Figure Four
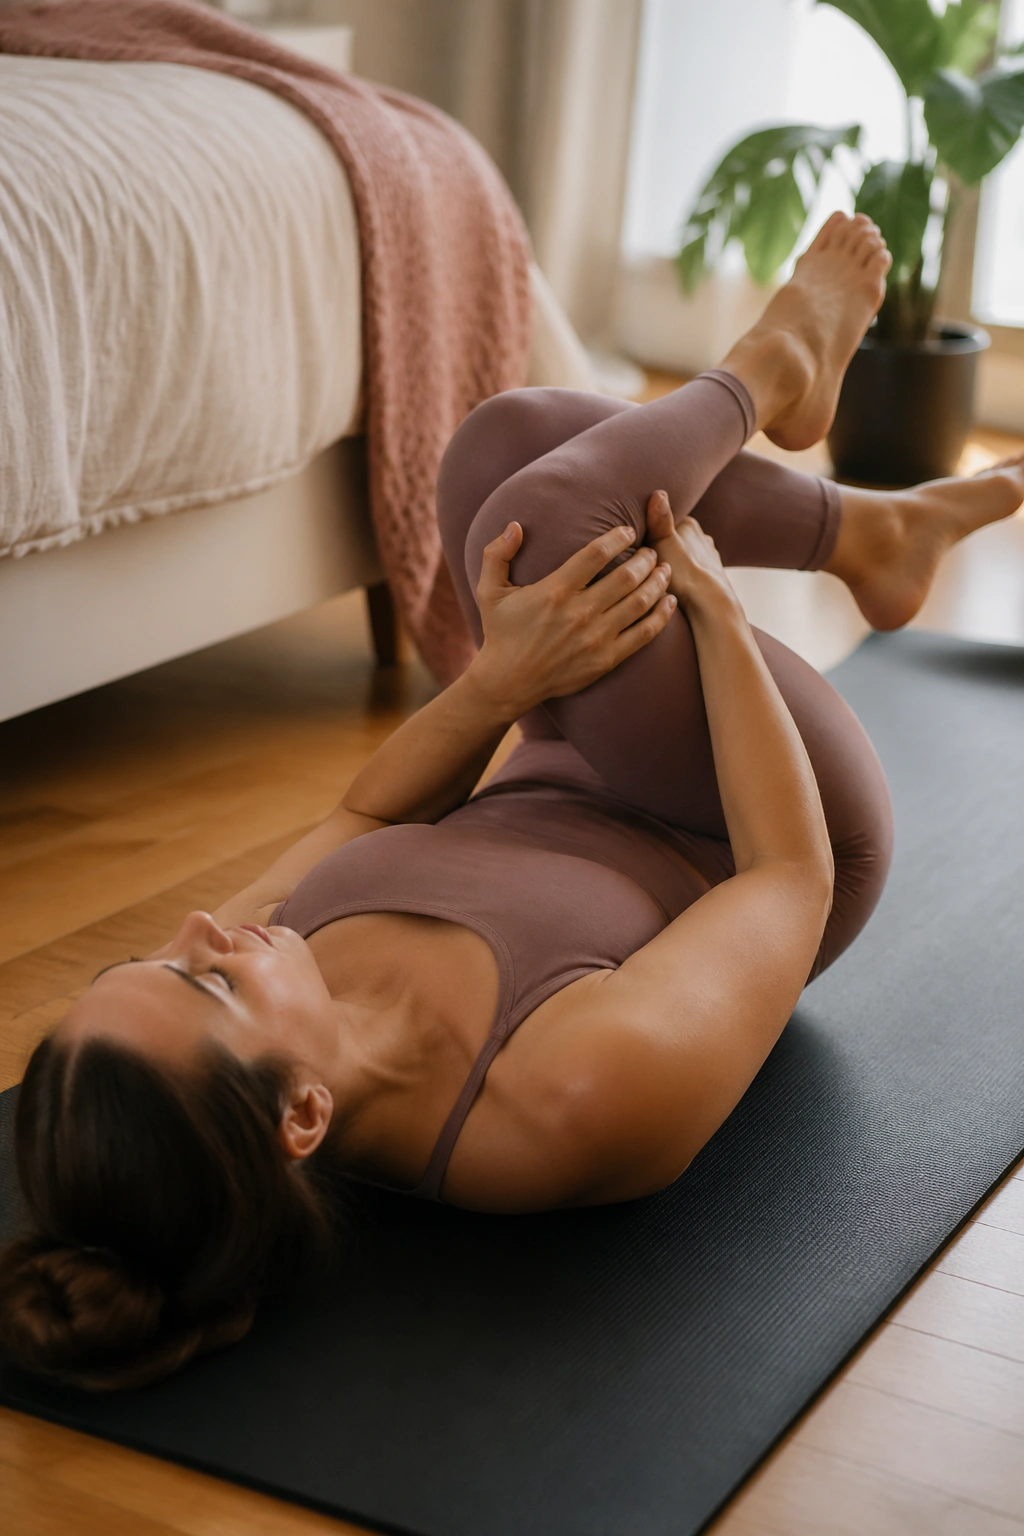
Reclined Figure Four is the pose I recommend when someone wants a hip opener that does not fight back. It gives you the same outer-hip emphasis as Pigeon Pose, but from the floor, with less drama and fewer moving parts. If your knees are sensitive, this is the version worth learning first.
Lie on your back, cross one ankle over the opposite thigh, and make a clear “4” shape. Flex the crossed foot so the knee stays protected. Then draw the supporting thigh toward you until you feel the stretch in the glute and the outside of the hip. That is usually enough. Do not yank the leg close just because your hands can reach it.
The best thing about this pose is its honesty. If the hip is tight, you will feel it. If the stretch is too much, you can back off in an instant by moving the supporting foot farther away. There is no collapse, no wobble, no need to balance on a tired knee.
Hold for 6 to 10 slow breaths per side. If the low back arches, place the free foot on the wall or keep both feet on the floor and work with a smaller shape. For a lot of people, this ends up being the pose they actually stick with.
6. Frog Pose
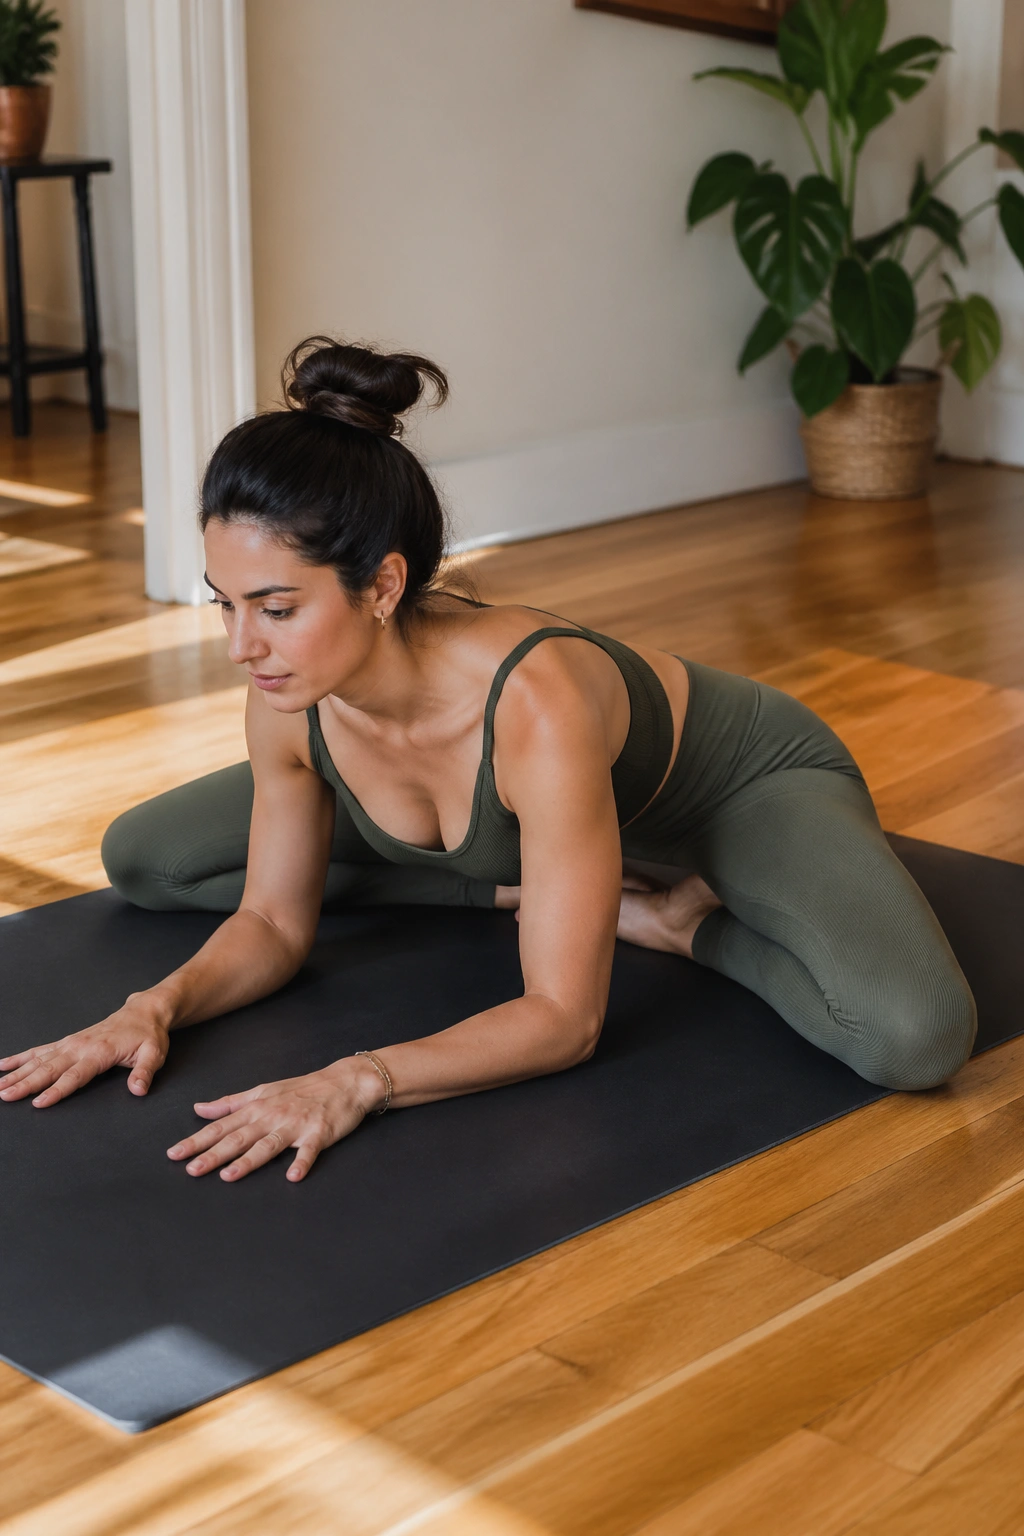
Frog Pose does not flatter your ego. Good. It is one of the clearest ways to open the inner thighs and adductors, and those tissues can be stubborn in a way that surprises people who think their hips are tight on the outside only. Unlike Pigeon Pose, Frog goes straight at the groin and the inside line of the legs.
Come to hands and knees, then widen the knees slowly until you feel a strong but manageable stretch. Keep the ankles in line with the knees if you can, and turn the feet out so the inner ankles rest on the floor or mat. A lot of people go too wide too fast, then spend the whole hold grimacing. That is not useful.
Stay on your forearms if the stretch feels appropriate, or remain on your hands if you need more control. A folded blanket under each knee can take the edge off. The pose should feel deep, not sharp. Sharp means you are too far out or your hips are not ready for that range today.
Frog is best treated as a short, careful hold. Think 3 to 6 breaths to start. Come out slowly and bring the knees back together with control. The inner thighs can feel a little weird afterward, almost loose and tender at the same time. That is normal.
7. Garland Pose
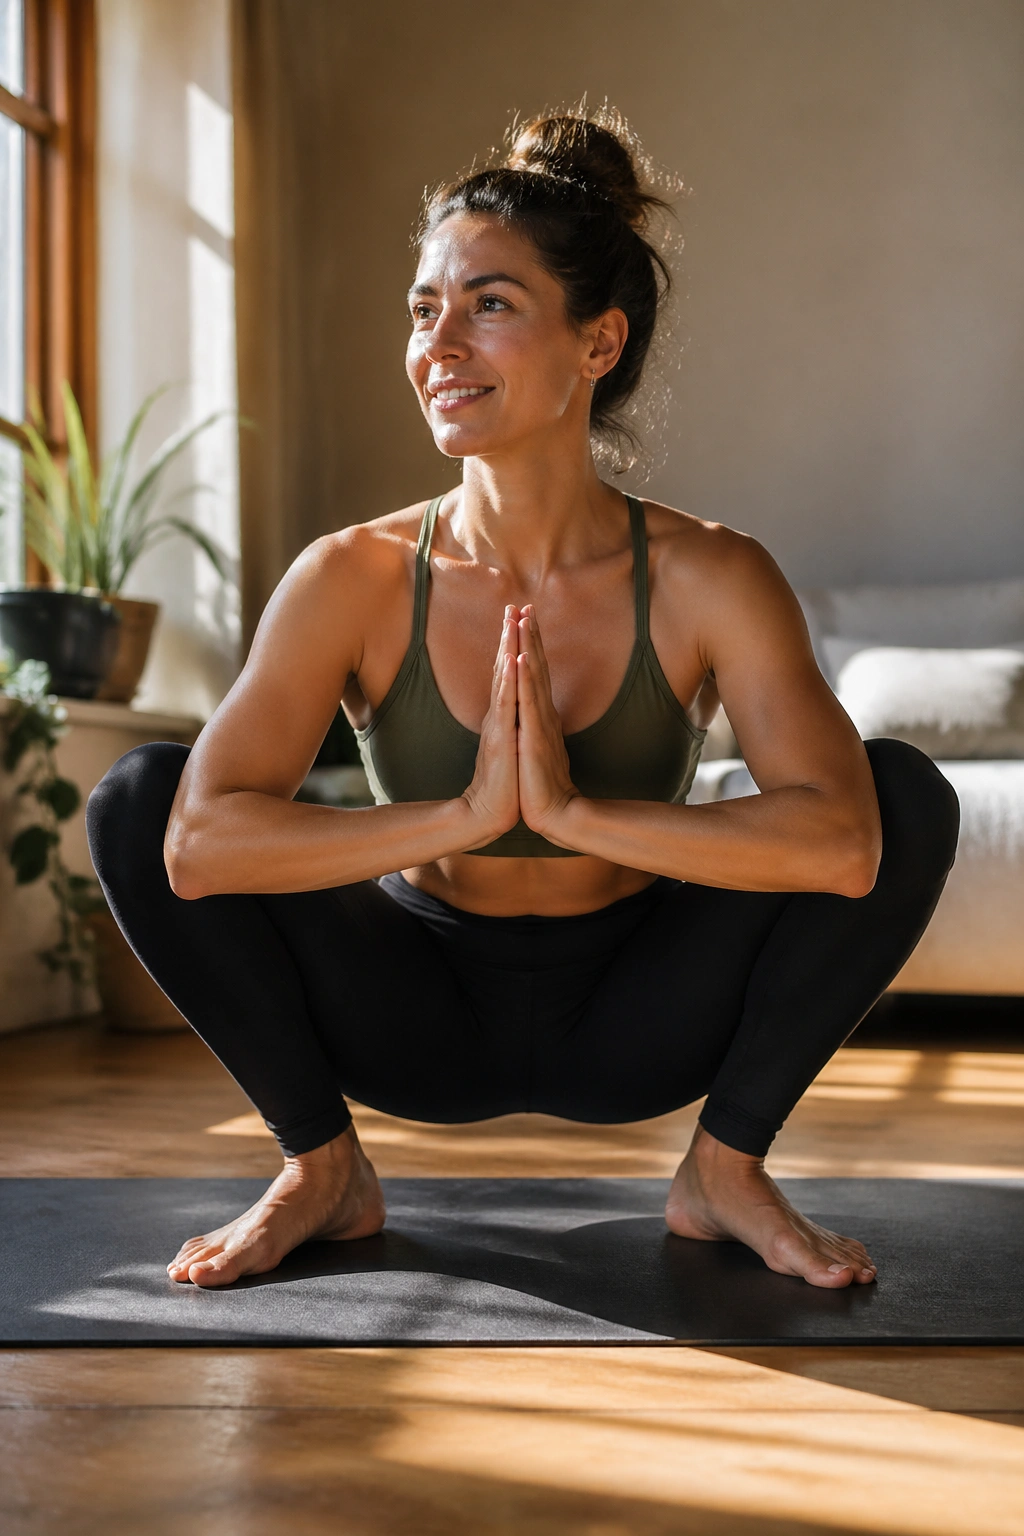
Garland Pose is an underrated hip opener because it looks like a squat, and a squat does not sound glamorous. But the body often responds well to basic shapes done well. It opens the ankles, inner thighs, and hips at the same time, which makes it a tidy choice when the whole lower body feels compressed.
What Makes It Different
The goal is not to crash into the deepest seat possible. It is to lower the hips while keeping the chest lifted enough that the breath can stay easy. If your heels lift, place a folded blanket under them or sit on a block between the heels. That tiny bit of support often makes the pose feel more honest and less like a wrestling match.
You can press the elbows inside the knees and gently encourage the thighs apart. Gentle. Not forceful. If the knees drift inward, the pose becomes sloppier and the hips do not get the clean opening they came for.
- Keep the spine long instead of folding into a ball.
- Use a block under the sit bones if the squat is too deep.
- Turn the toes slightly out if the ankles are stiff.
- Hold for 5 to 8 breaths, then stand and notice how the hips feel.
Garland Pose is especially useful after a short walk or a light flow, when the legs are warm but not tired.
8. Cow Face Pose
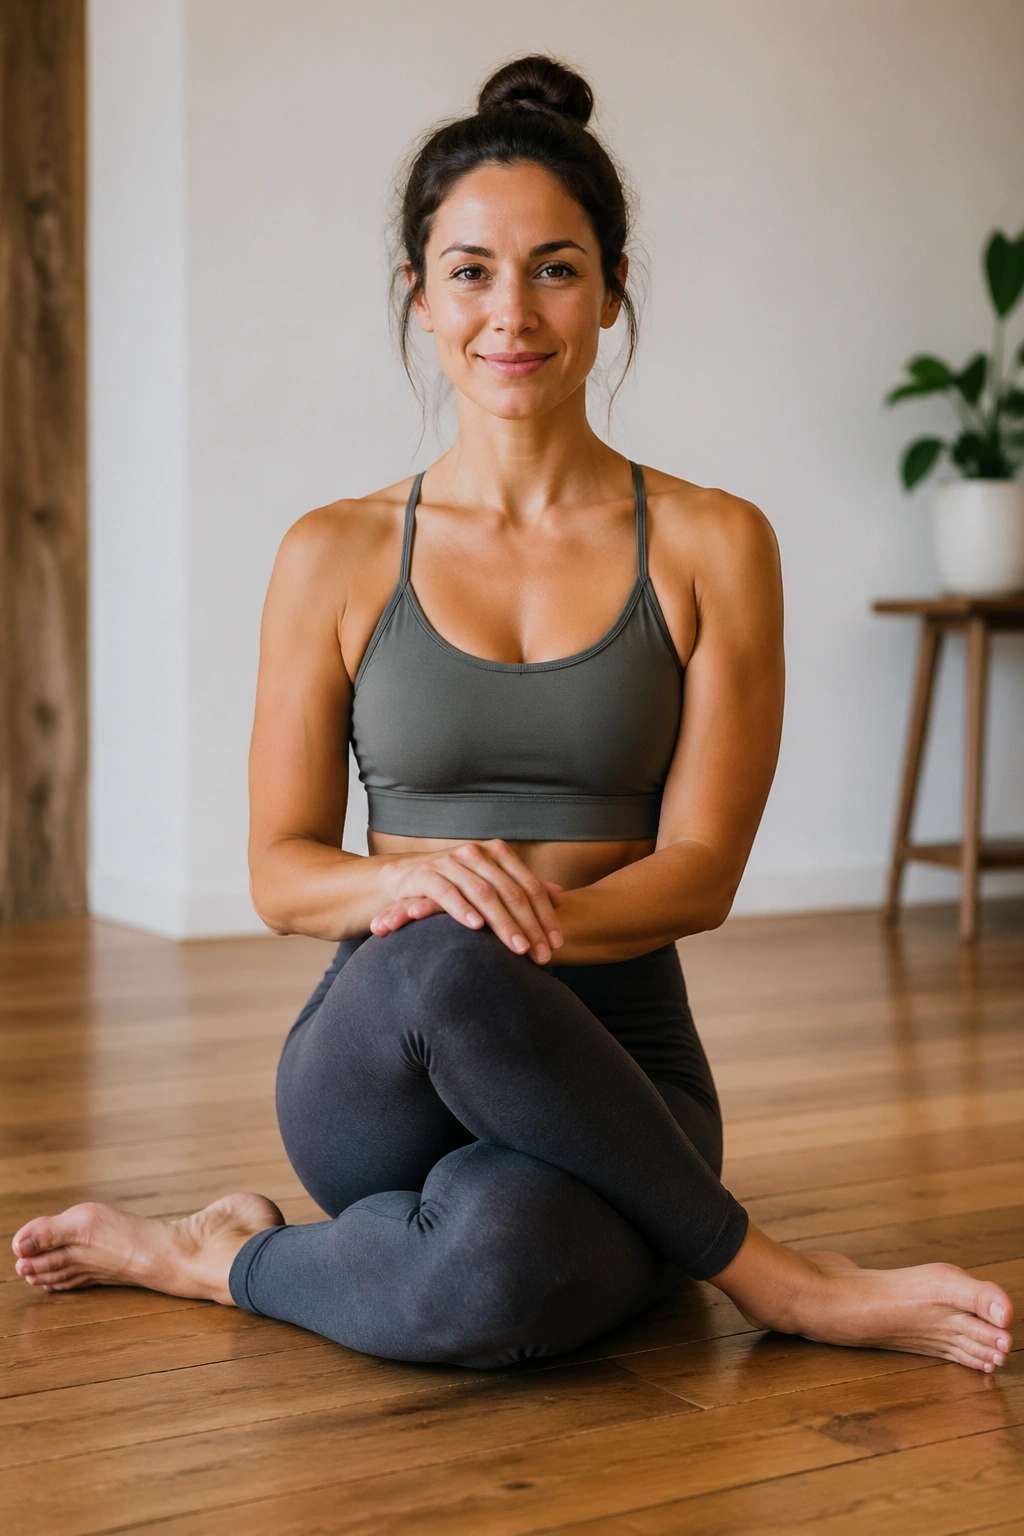
Cow Face Pose sneaks up on people. They expect a shoulder stretch and then the hips start talking back. The crossed-leg position asks a lot from the outer hips and the glutes, especially if one side is much tighter than the other. That asymmetry is common, and it usually shows up fast here.
Sit on the floor and stack the knees as neatly as you can, with one knee over the other. If the top knee hangs way up in the air, sit on a block or a thick folded blanket. That changes the angle enough to make the pose usable. You can stay upright, fold forward, or use a strap if the legs do not stack cleanly. None of those choices is cheating.
What I like about this pose is how specific it is. You feel the tension on one side, not the whole pelvis at once. That makes it useful for checking imbalances. If one hip is dramatically different from the other, Cow Face Pose will usually tell you.
Take 5 to 8 breaths, then switch sides and expect the second side to feel different. It often does. Sometimes the difference is obvious enough to make you rethink how you sit at your desk.
9. Fire Log Pose
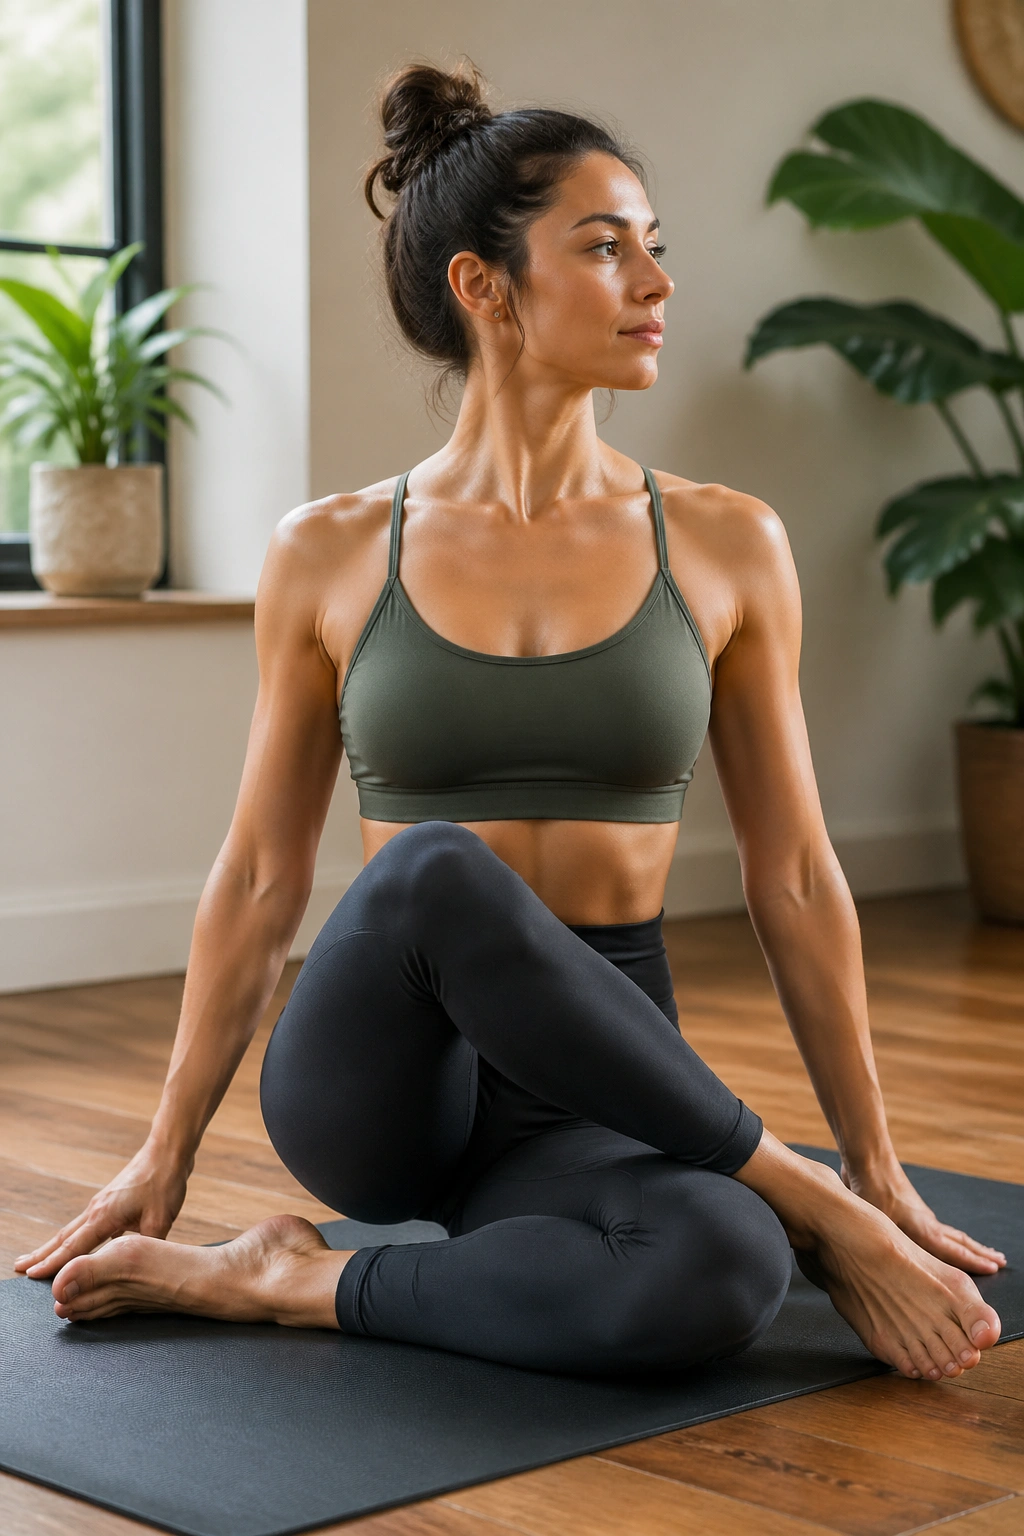
Is Fire Log Pose worth the setup? Yes, if your hips can handle it. This is one of the cleaner external-rotation stretches in yoga, and it gets into the deep outside of the hip in a way that feels almost targeted. It is not a beginner-friendly shape for everyone, but when it fits, it fits well.
Stack one shin on top of the other, with the knees bent and the ankles lined up roughly under the opposite knee. The top knee may hover. That is fine. Sit on a blanket if your pelvis rolls backward and you start slumping. You want to feel the opening in the outer hips, not a fight in the lower back.
How to Use It
Keep the feet flexed if the knees are cranky. If the stack feels impossible, leave the bottom leg extended and only cross the top shin over the lower thigh. That gives you a partial version that is still useful. Stay upright for a few breaths before folding forward.
This pose works well after seated work or after a long warm-up sequence. It usually feels better once the tissues are already warm. A full minute per side is plenty for most bodies.
10. Half Split
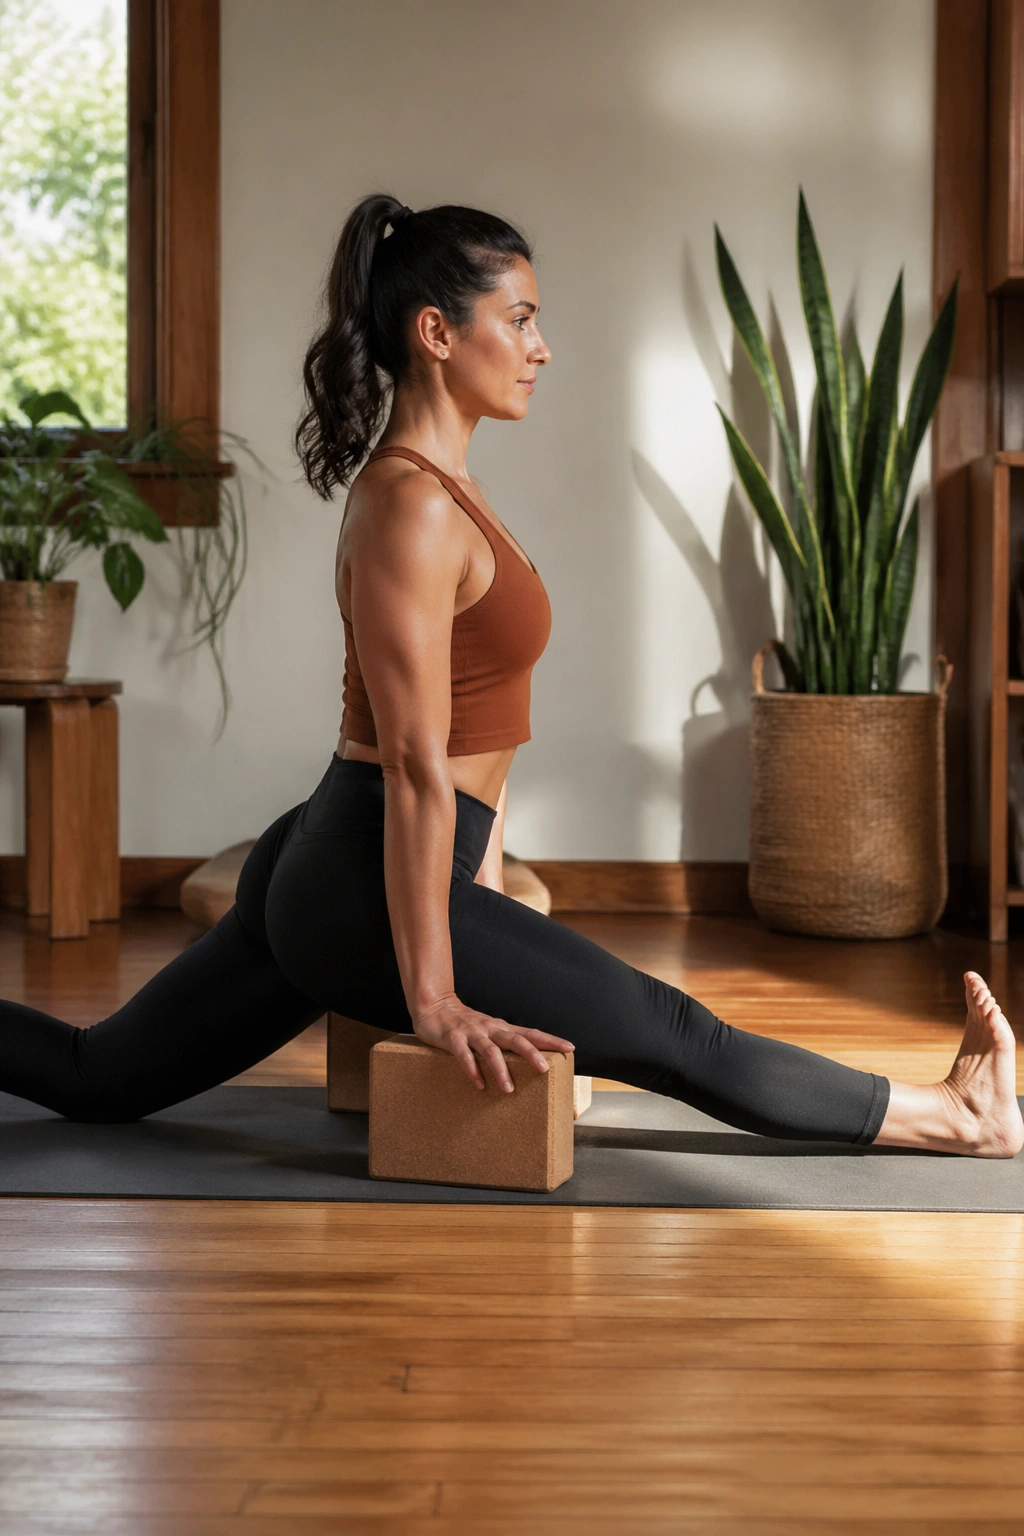
Half Split looks modest, but it does a job that people often ignore. It lengthens the hamstrings while keeping the pelvis honest, which matters because tight hamstrings and tight hip flexors tend to pull on the same pelvis from opposite directions. The result can be a low back that feels overworked for no good reason.
Start in Low Lunge, then shift the hips back and straighten the front leg while keeping a soft bend in the knee. Flex the front foot. That is non-negotiable for a lot of people, especially if the hamstring feels like a guitar string. Fold from the hips, not the waist. The spine can stay long even when the chest lowers.
A common mistake is dragging the hips too far back and letting the pose become a pure forward fold. That changes the stretch and usually makes it less useful for tight hips. Keep the pelvis supported over the back knee for at least part of the hold.
- Use blocks under the hands so the spine stays long.
- Keep the front toes pointing straight up.
- Micro-bend the knee if the hamstring pulls hard.
- Switch sides only after you breathe down the tension.
Half Split is not flashy. It is useful. That is enough.
11. Skandasana
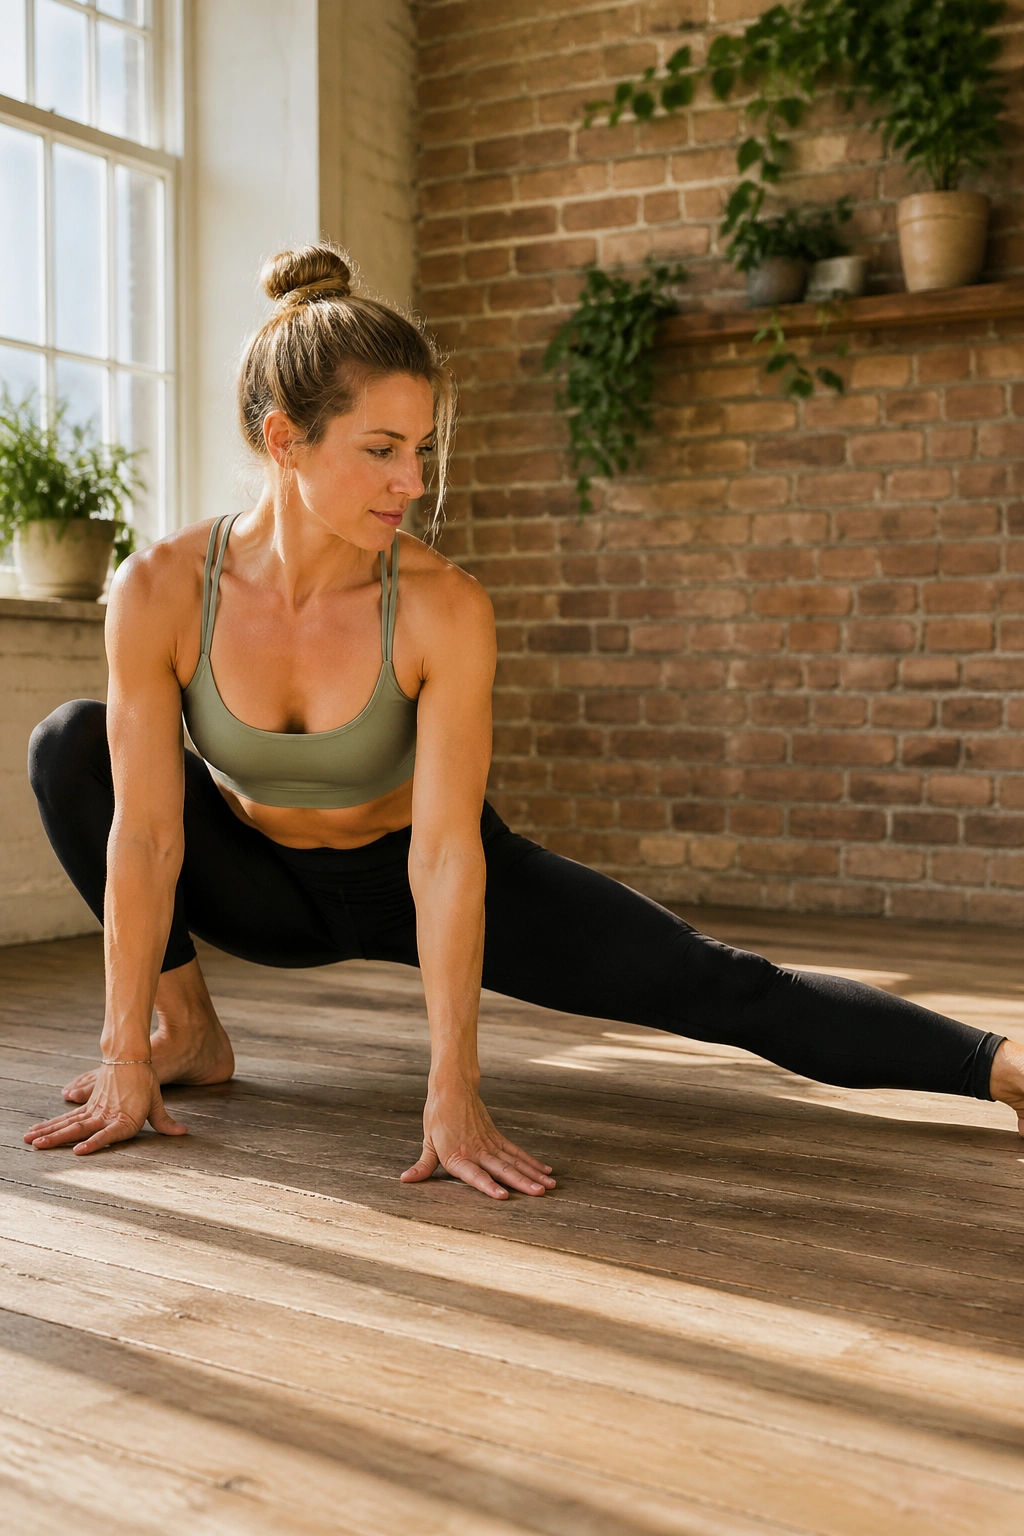
Skandasana is the side lunge people often skip because it feels awkward the first few times. Then they feel it in the groin, the inner thigh, and the side of the glutes all at once and realize why it earns a spot on a tight-hips list. It opens the adductors in a way most front-facing poses do not.
Shift your weight to one side, bend that knee, and send the other leg straight. Keep the lifted foot grounded if possible, or let the heel rise a little if the ankle resists. You can place both hands on the floor or use blocks to keep the chest from crashing forward. The deeper the bend, the more the inner thigh of the straight leg tends to complain — in a useful way, not a painful one.
This pose works well after a few rounds of Sun Salutation or a brisk walk because the body is warmer and the transition feels smoother. Cold muscles tend to gripe. Warm ones negotiate.
I like Skandasana because it teaches patience. One side may feel open and roomy; the other may feel welded shut. Stay with the side that feels stuck for an extra breath or two, but do not force the knee past the point where the heel starts peeling wildly off the floor.
12. Wide-Legged Forward Fold
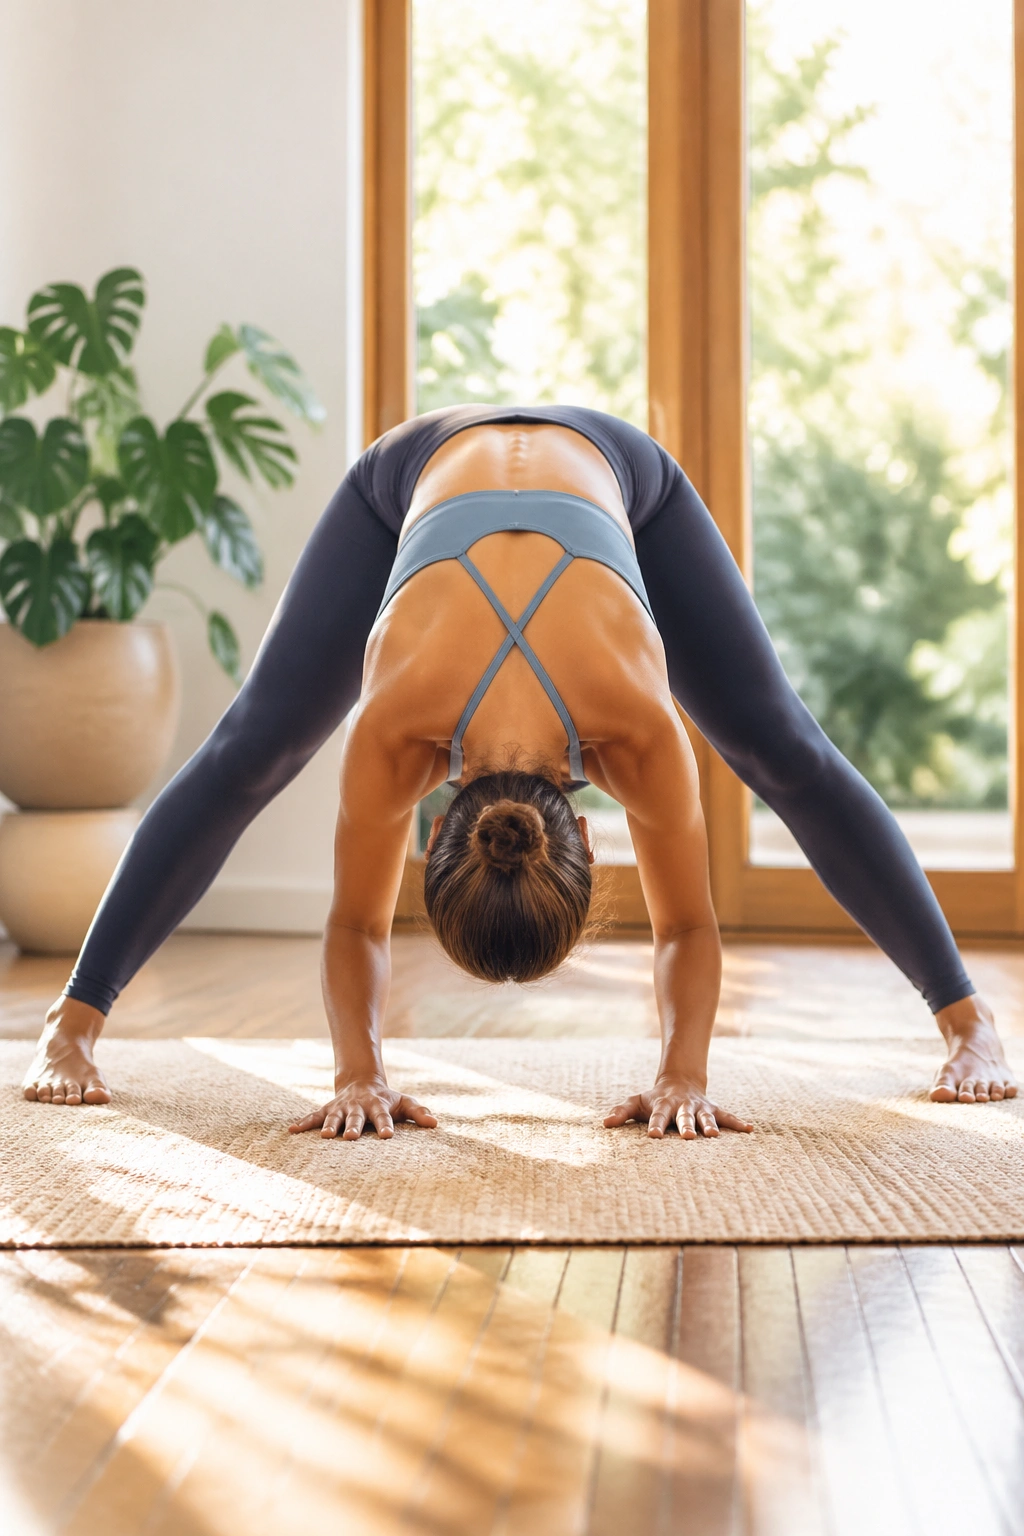
Wide-Legged Forward Fold gives the hips room to breathe in a way that narrow stances do not. Unlike split-stance lunges, this pose lets both legs work at once while taking pressure off the spine. It is one of the cleanest ways to touch the inner thighs, the hamstrings, and the backs of the hips without a lot of drama.
Stand with your feet wider than your shoulders, then hinge forward from the hips. Keep a soft bend in the knees if the hamstrings pull hard. The hands can rest on the floor, on blocks, or on the shins. The point is not to hang like a sack. The point is to create a long line from the pelvis through the crown of the head.
What to Watch For
If the weight drifts into the heels, the stretch often shifts out of the hips and into the lower back. A little forward balance through the feet helps. If the inner thighs feel too intense, narrow the stance by 2 to 4 inches and try again. Small changes matter here.
This is a nice pose to use near the end of a sequence because it can calm the nervous system without becoming sleepy. Three to five breaths is enough if you are just resetting the hips.
13. Crescent Lunge with Quad Stretch
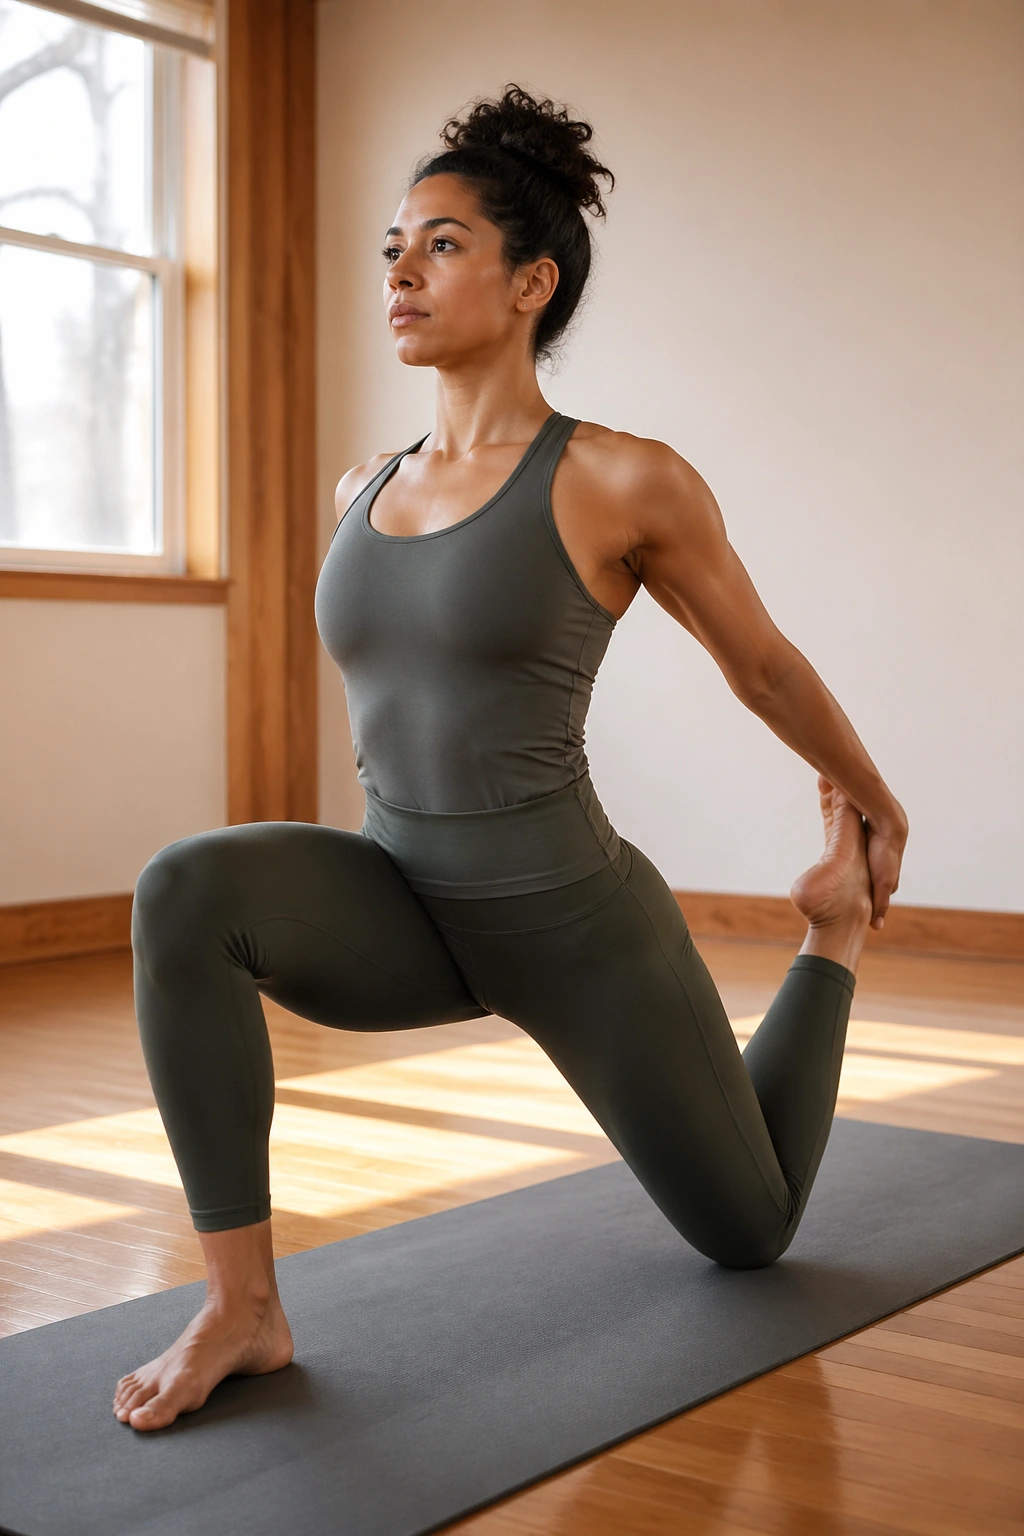
If the front of your hip feels glued shut, Crescent Lunge with Quad Stretch may work better than a passive hold. It loads the standing leg, opens the hip flexor, and wakes up the glutes at the same time. That active piece matters. Sometimes a hip does not need more hanging around. It needs clean strength through the range.
Step into a high lunge, then bend the back knee and grab the back foot or ankle. Keep the pelvis as level as you can and draw the ribs down so the low back does not take over. If balance is shaky, keep one hand on a wall or leave the back leg straight until the rest of the shape feels steady.
Why Active Work Matters
- The glute of the standing leg helps hold the pelvis in place.
- The back quad stretch targets the front line of the thigh.
- A stable core keeps the lower back from pinching.
- The wall can make the pose usable for almost anyone.
The best version of this pose feels strong first, stretchy second. That may sound backward, but it is usually the cleanest way to open a hip that keeps bracing. Hold for 3 to 5 breaths, then step out carefully.
14. Happy Baby Pose
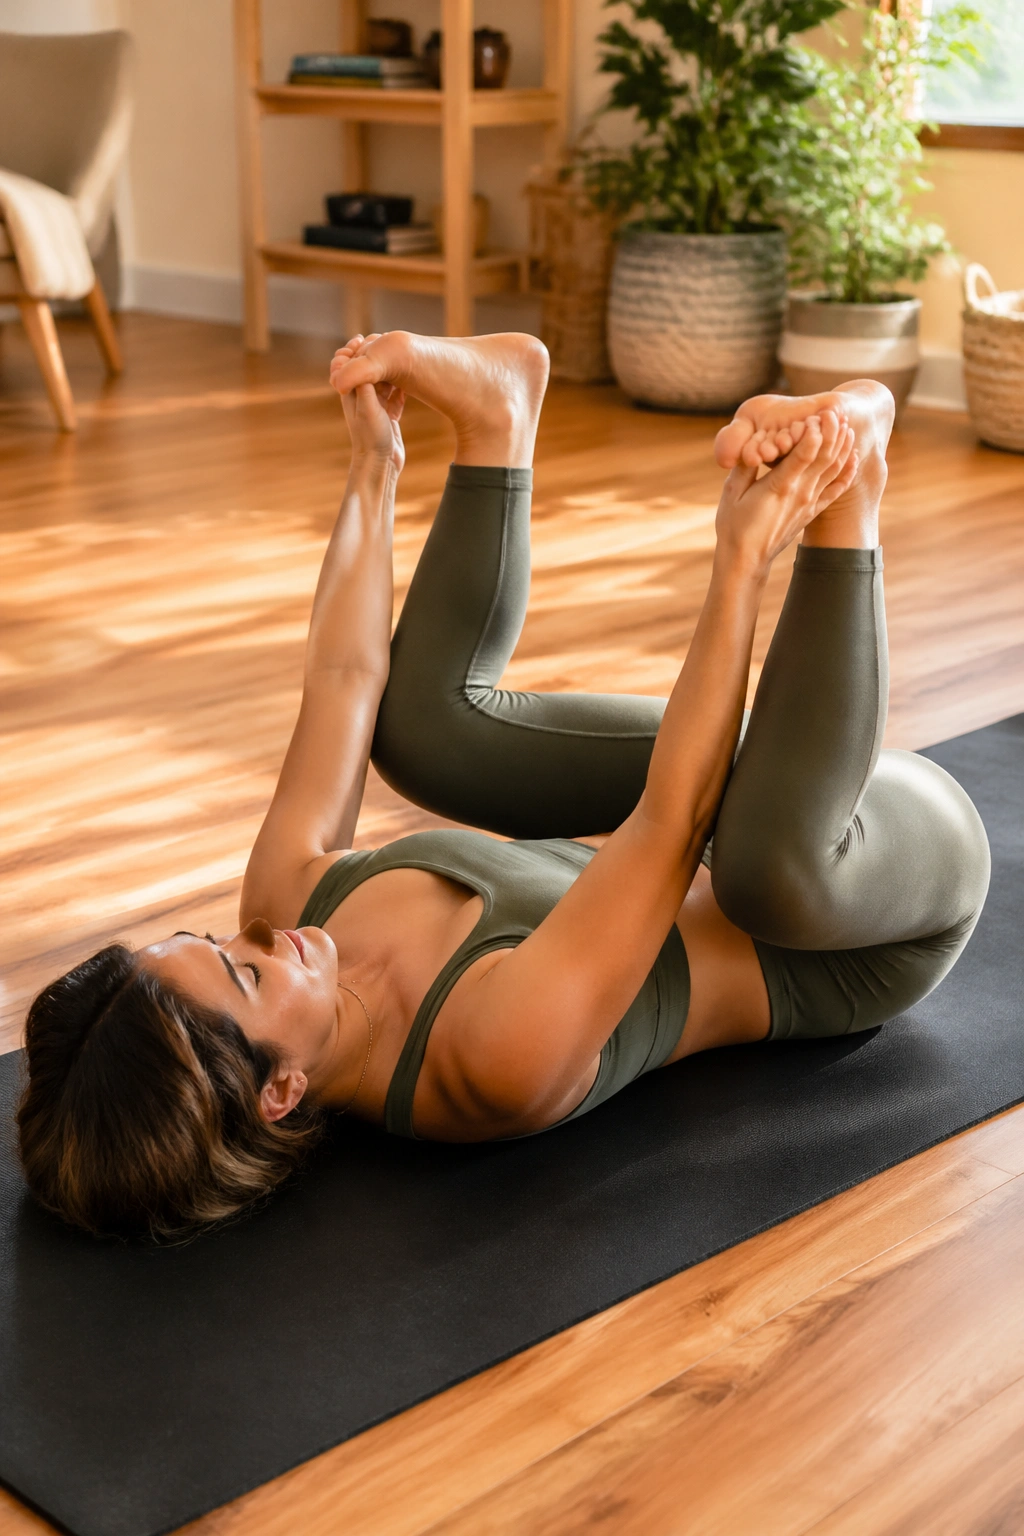
Happy Baby looks playful, and sometimes it is. People also underestimate it. It can open the inner thighs, the hips, and the lower back all at once, which is why it tends to feel so relieving after a long day of sitting or standing. You are basically letting gravity help while the pelvis gets a gentle traction.
Lie on your back and hold the outer edges of the feet or the shins. Bring the knees toward the armpits, but do not force them wider than the pelvis can manage. Keep the tailbone grounded and let the sacrum stay heavy on the floor. If your neck feels strained, lower the head and rest one foot at a time.
A tiny rock side to side can feel wonderful here. Tiny. Not a wild swing. That rocking often releases the deep muscles around the hips more than the still shape alone. If the pose feels like strain in the groin, bend the knees more and hold lower on the legs.
It is also one of the better poses for ending a sequence because it feels expansive without asking for much effort. You can stay for 5 to 10 breaths and let the breath slow down on its own.
15. Standing Figure Four
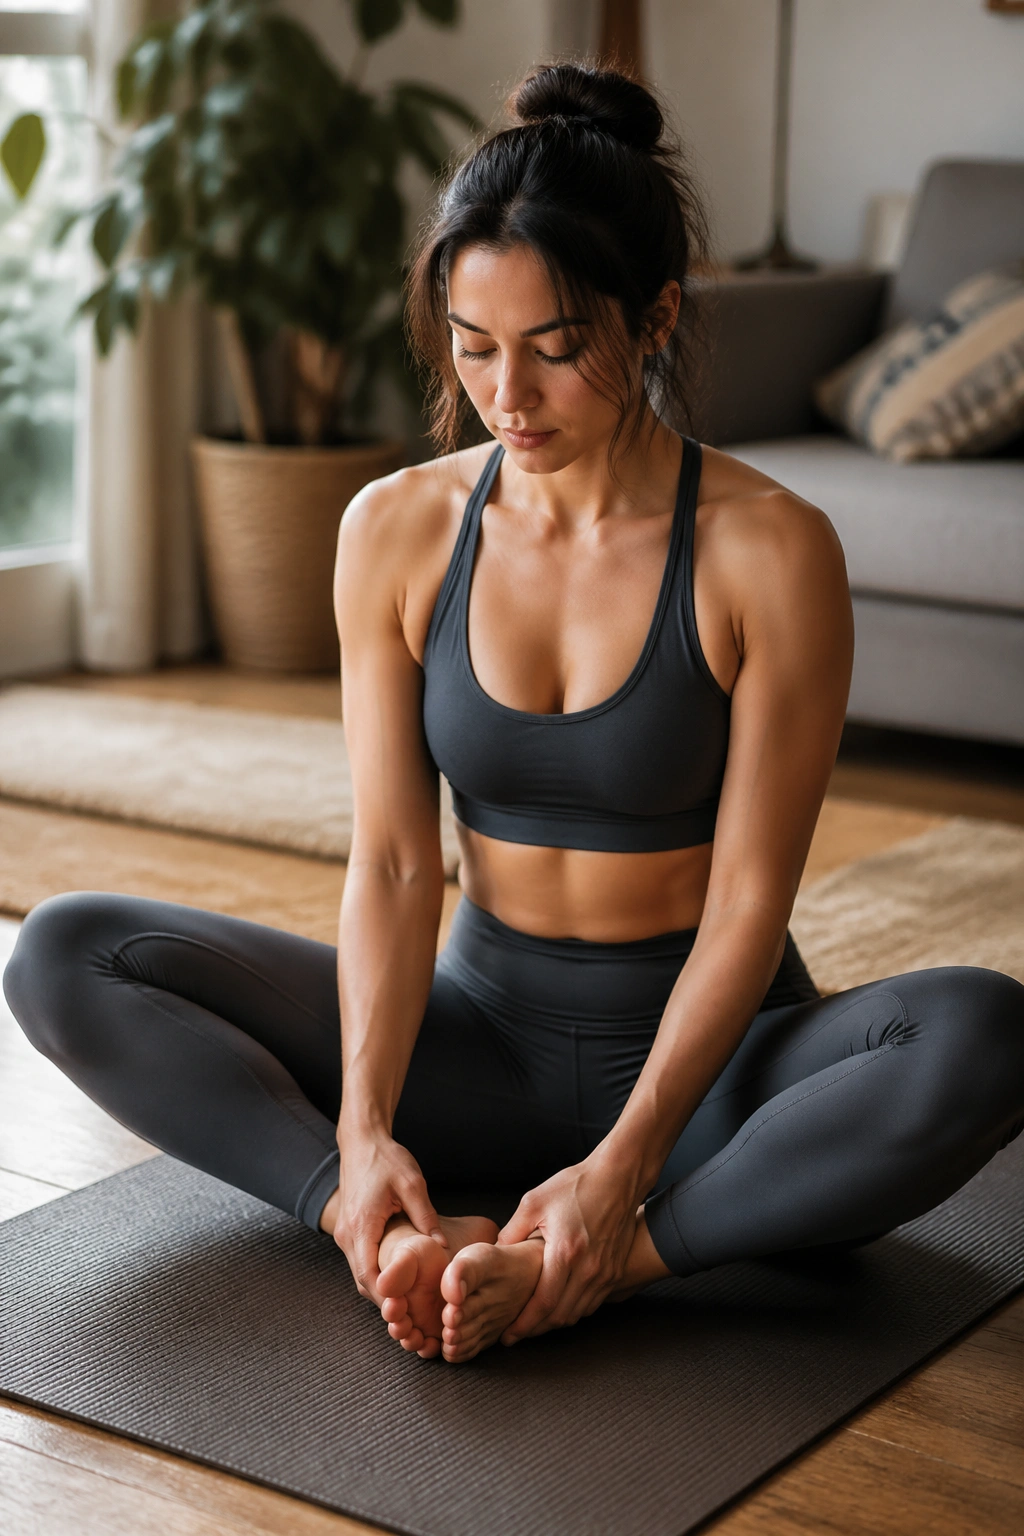
What if the floor poses feel too deep? Standing Figure Four is the cleanest answer. It opens the outer hip without putting you on the floor or folding you into a shape that feels too intense. A wall or a sturdy chair makes it even better.
Stand tall and cross one ankle over the opposite thigh, just above the knee, then sit the hips back as if you are lowering into a chair. Keep the flexed foot active. That protects the knee. If you cannot sit back without wobbling, hold onto a wall and keep the motion small. A few inches are enough.
How to Keep Your Knee Safe
- Keep the crossed foot flexed, not floppy.
- Sit the hips back before you lean forward.
- Stop the hinge if the standing knee turns inward.
- Use a wall with one hand if your balance is shaky.
This pose is especially good as a daily check-in because it tells you what the hips are doing without a lot of setup. One side may feel easy and the other may feel blocked. That is useful information. Hold each side for 5 to 8 breaths, then walk around and notice whether one side of the pelvis feels freer than the other.
If you only keep three of these in your regular practice, I would start with Low Lunge, Reclined Figure Four, and Garland Pose. Those three cover the front of the hip, the outer hip, and the inner thighs without asking you to be heroic about it.
The nicest thing about tight hips is that they usually respond to patient repetition rather than dramatic stretching. A few steady minutes, most days, tends to beat one heroic session followed by two days of soreness.
