



There is a distinct, agonizing, and oddly satisfying sensation that comes with barre training. It is that micro-tremor in your quadriceps when you think you can’t possibly sink an inch lower, or the way your shoulders seem to catch fire during a simple, light-weight arm series. You do not need a posh studio membership or a wall-mounted wooden barre to recreate that intensity. Your kitchen counter, the back of a sturdy dining chair, or even a flat stretch of wall is more than enough to engage those stabilizer muscles and find that specific “shake” that defines the discipline.
The magic of this method lies in isometric contraction and high-repetition, low-range-of-motion movements. Unlike a heavy lifting session where you are fighting gravity with massive external loads, here you are fighting your own body weight and the clock. You are isolating small muscle groups that are often neglected in traditional strength training, forcing them to do the heavy lifting. When you strip away the music and the instructor’s cues, you are left with the raw mechanics of the movement, which is often where the real progress happens.
Commit to these movements with intent. If you just go through the motions without focusing on the engagement of your core or the specific angle of your hips, you will miss the point. This isn’t about how many repetitions you can grind out; it’s about how much precision you can maintain as your muscles begin to fatigue. Prepare your space, clear a small radius around you, and treat this like a private lesson in your living room.
1. The Classic Plié Squat Pulse
This is the bread and butter of the barre method. If you ignore the alignment here, you might as well be doing a standard squat, which defeats the purpose. Stand with your heels touching and toes turned out about 45 degrees, creating a “V” shape with your feet. Your shoulders should be stacked directly over your hips, not leaning forward.
Perfecting the Form
As you lower your hips, focus on keeping your spine completely vertical. Imagine you are sliding your back down a wall. If your chest leans forward, you are shifting the work into your lower back instead of your thighs. Sink down until your thighs are roughly parallel to the floor, or as low as you can go while maintaining that vertical posture.
The Pulse Technique
Once you are at your lowest point, lift your heels about an inch off the floor. Keep them there. Now, pulse your hips up and down just one or two inches. Do not come all the way to the top. Keep the movement small, sharp, and focused on the inner thighs and the lower glutes. If your knees are caving inward, you need to engage your outer glutes to push them back out toward your pinky toes.
Pro tip: If your heels start to wobble excessively, focus your gaze on a non-moving point in front of you. It sounds cliché, but the balance starts in the eyes.
2. Elevated Calf Raises at the Barre
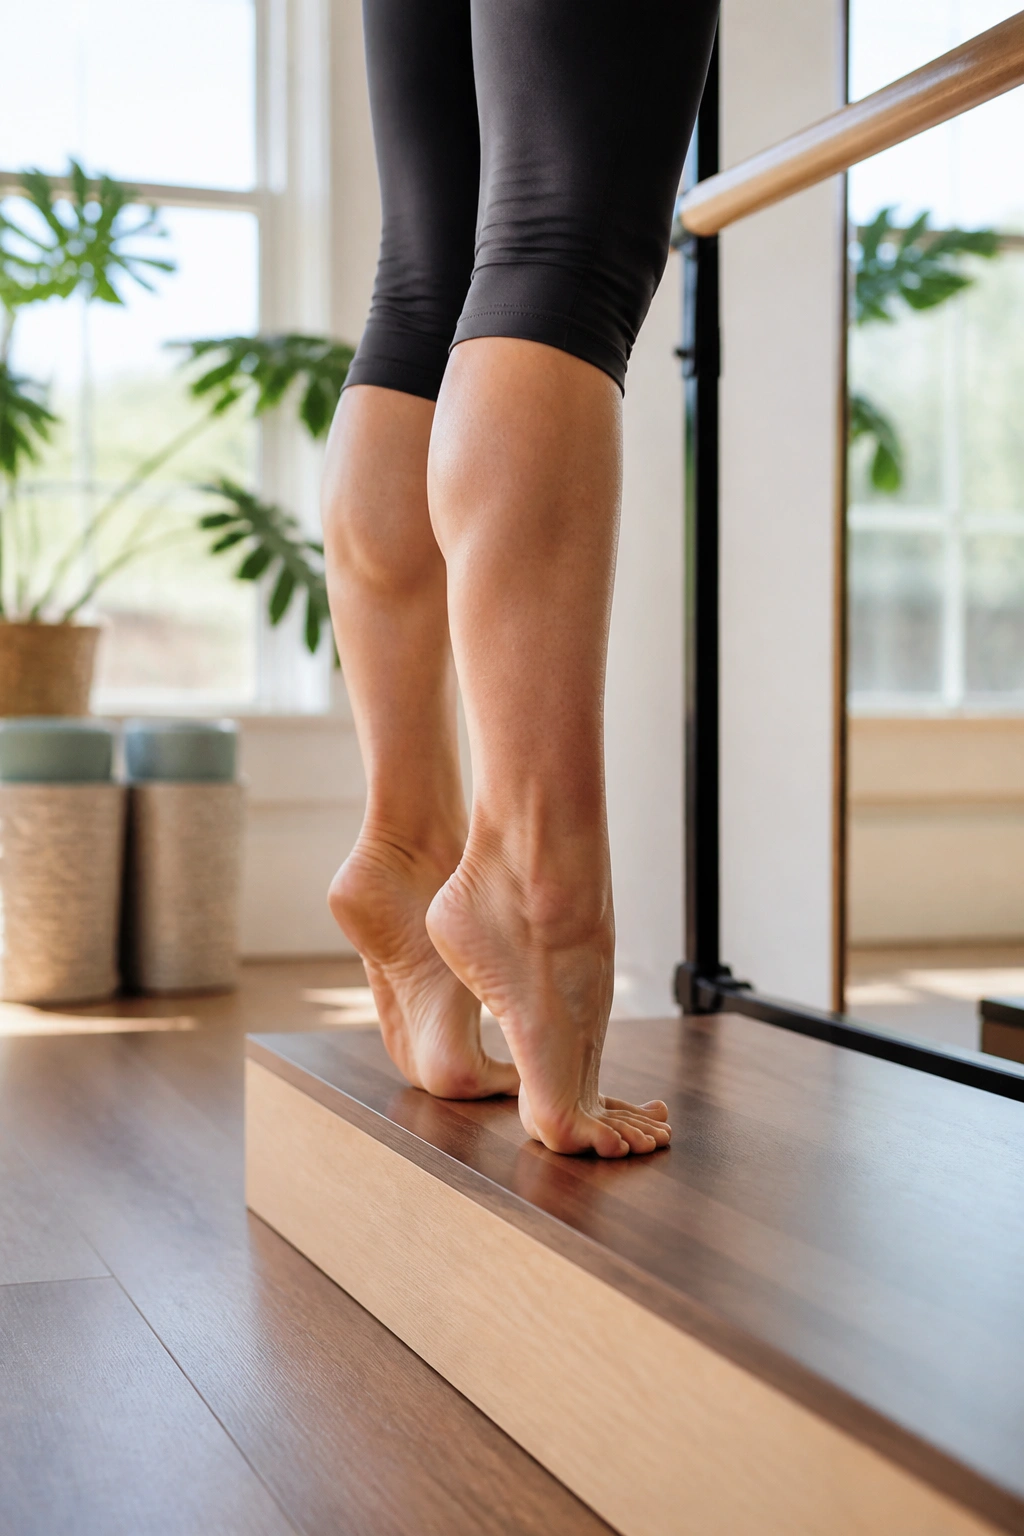
Calf raises might seem like a simple accessory move, but when performed with barre-specific intensity, they become a foundational tool for ankle stability and lower leg endurance. Stand facing your chair or counter, hands resting lightly on the surface—do not grip it; it is there for balance, not to support your body weight.
The Execution
Start with your feet hip-width apart, parallel. Rise up onto the balls of your feet, pushing through your big toe and second toe. Avoid rolling to the outside of your feet; if you feel your ankles turning out, you are losing the alignment. Hold that peak position for a beat, feeling the contraction in your calves, then lower your heels back down with control.
Building Intensity
To make this more challenging, speed up the tempo. Perform two sets: one at a slow, controlled pace, and one where you rapidly pulse at the top of the range. You want to reach a point where your calves feel a distinct “burn”—that localized heat is the sign that you are recruiting the deep muscle fibers.
Why This Matters
Stronger ankles translate to better performance in every other area of your fitness. When you are doing lateral movements or jumping, these muscles are what prevent rolling or twisting. Keep your core tight throughout, as this prevents you from swaying forward and backward as you rise and fall.
3. Chair-Assisted Arabesque Leg Lifts
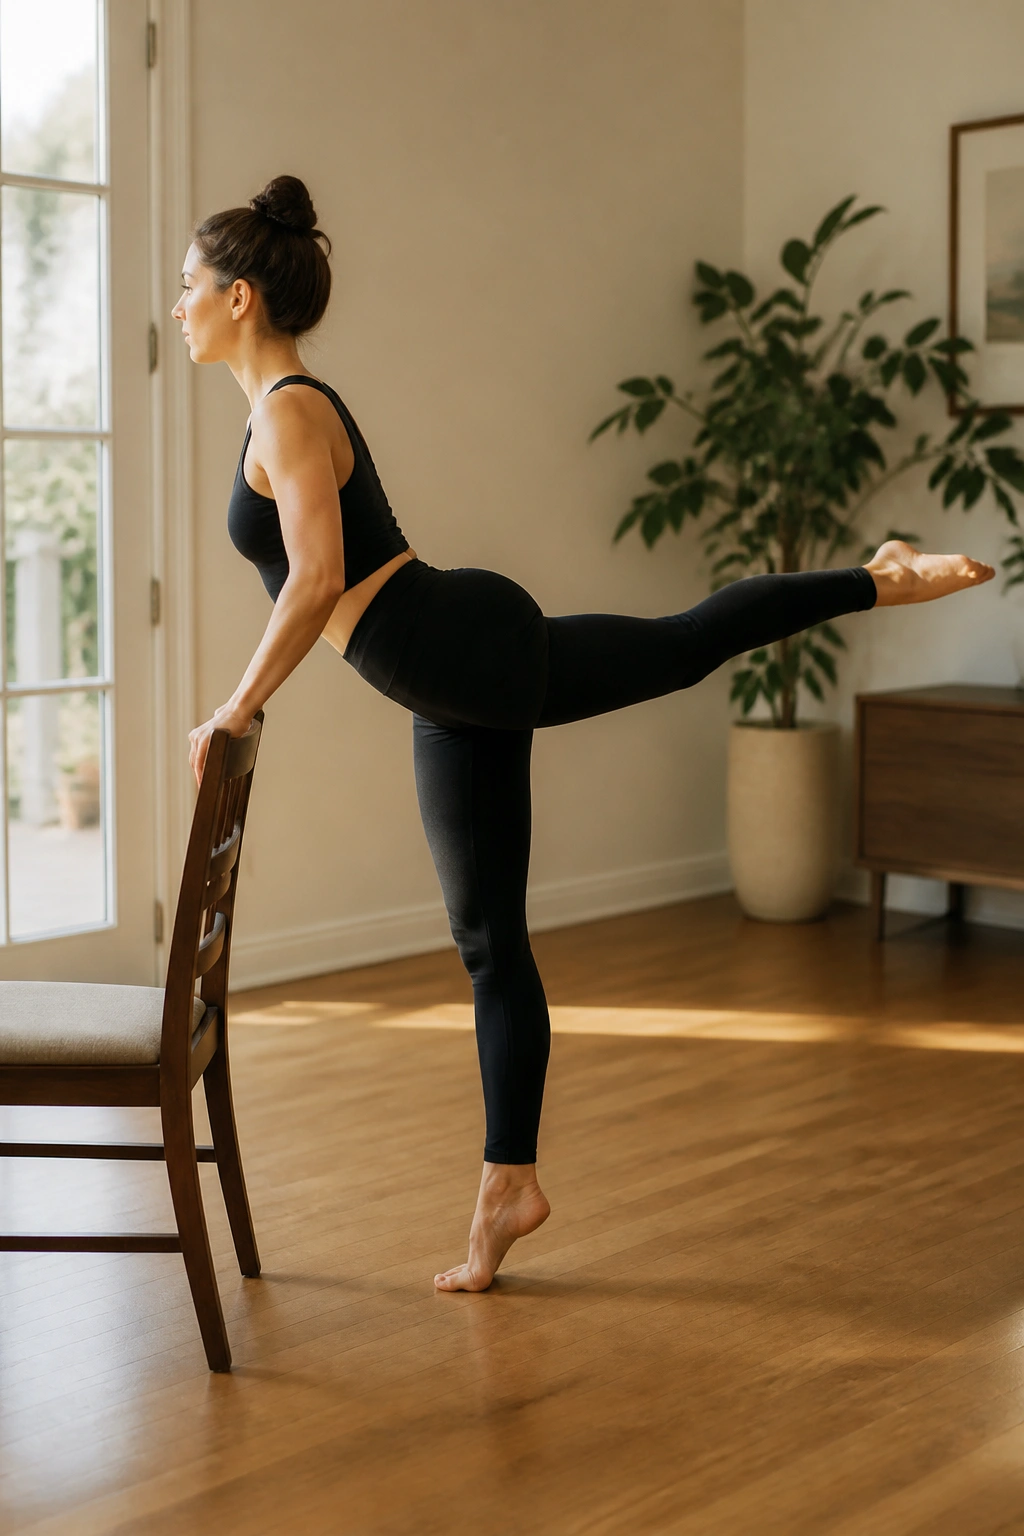
The arabesque is a staple of ballet-inspired training. It targets the glute-hamstring tie-in, which is notoriously difficult to hit without equipment. Stand facing your chair, but keep enough distance so your torso can lean forward slightly—roughly 45 degrees—while keeping your back flat.
Finding the Line
Extend one leg straight back behind you, touching your toe to the floor. Your hips must remain square to the floor. A common mistake is to open the hip of the lifting leg toward the side of the room to get it higher. Do not do this. Keep your hip bones looking down at the mat.
The Movement
Lift your straight leg upward toward the ceiling, engaging your glute to drive the motion. Only lift the leg as high as you can without arching your lower back. If you arch your back, you have gone too far. Pulse the leg at the top of the range. You should feel the work deep in the crease where your glute meets your hamstring.
Warning: If you feel pinching in your lower back, your core is not braced enough, or your range of motion is too high. Lower the leg and focus on tucking your pelvis under slightly to protect your spine.
4. Diagonal Thigh Pulls
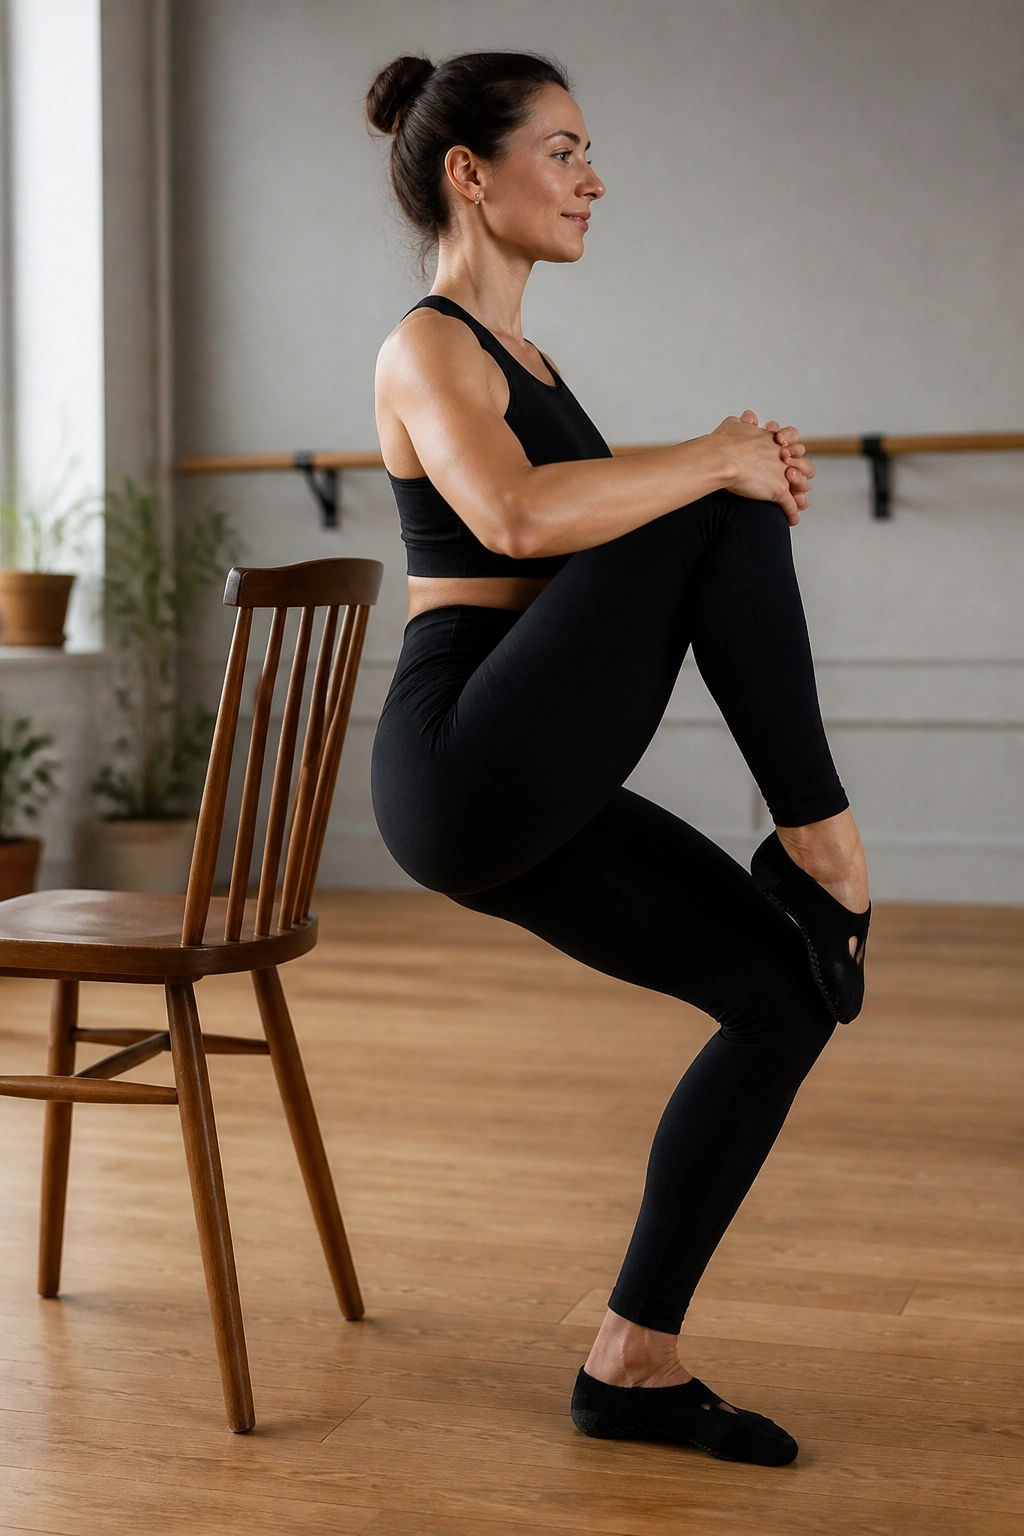
This move targets the often-neglected muscles on the side of the thigh and the hip flexors. Stand with your side to your chair, resting one hand on it. Your outer leg is the one that will do the work. Step that outer leg out slightly into a wide second position, toes turned out.
The Mechanism
Bend both knees into a deep plie. Now, shift your weight entirely into the leg that is closest to the chair. Lift the outer leg, bending the knee, and bring it toward your chest, then push it back out to the side on a diagonal.
Engagement Cues
As you pull the knee in, think about closing the space between your ribs and your hip bone. You are not just moving a leg; you are performing a standing crunch. When you push the leg back out, reach through the heel as if you are trying to touch the wall on the other side of the room. The tempo here should be deliberate. Do not rush the extension.
What to Avoid
Do not let your standing hip pop out to the side. Keep your hips tucked underneath your shoulders. If you feel like you are tipping over, reduce your range of motion and focus on the stability of your standing leg.
5. Tricep Dips on a Sturdy Chair
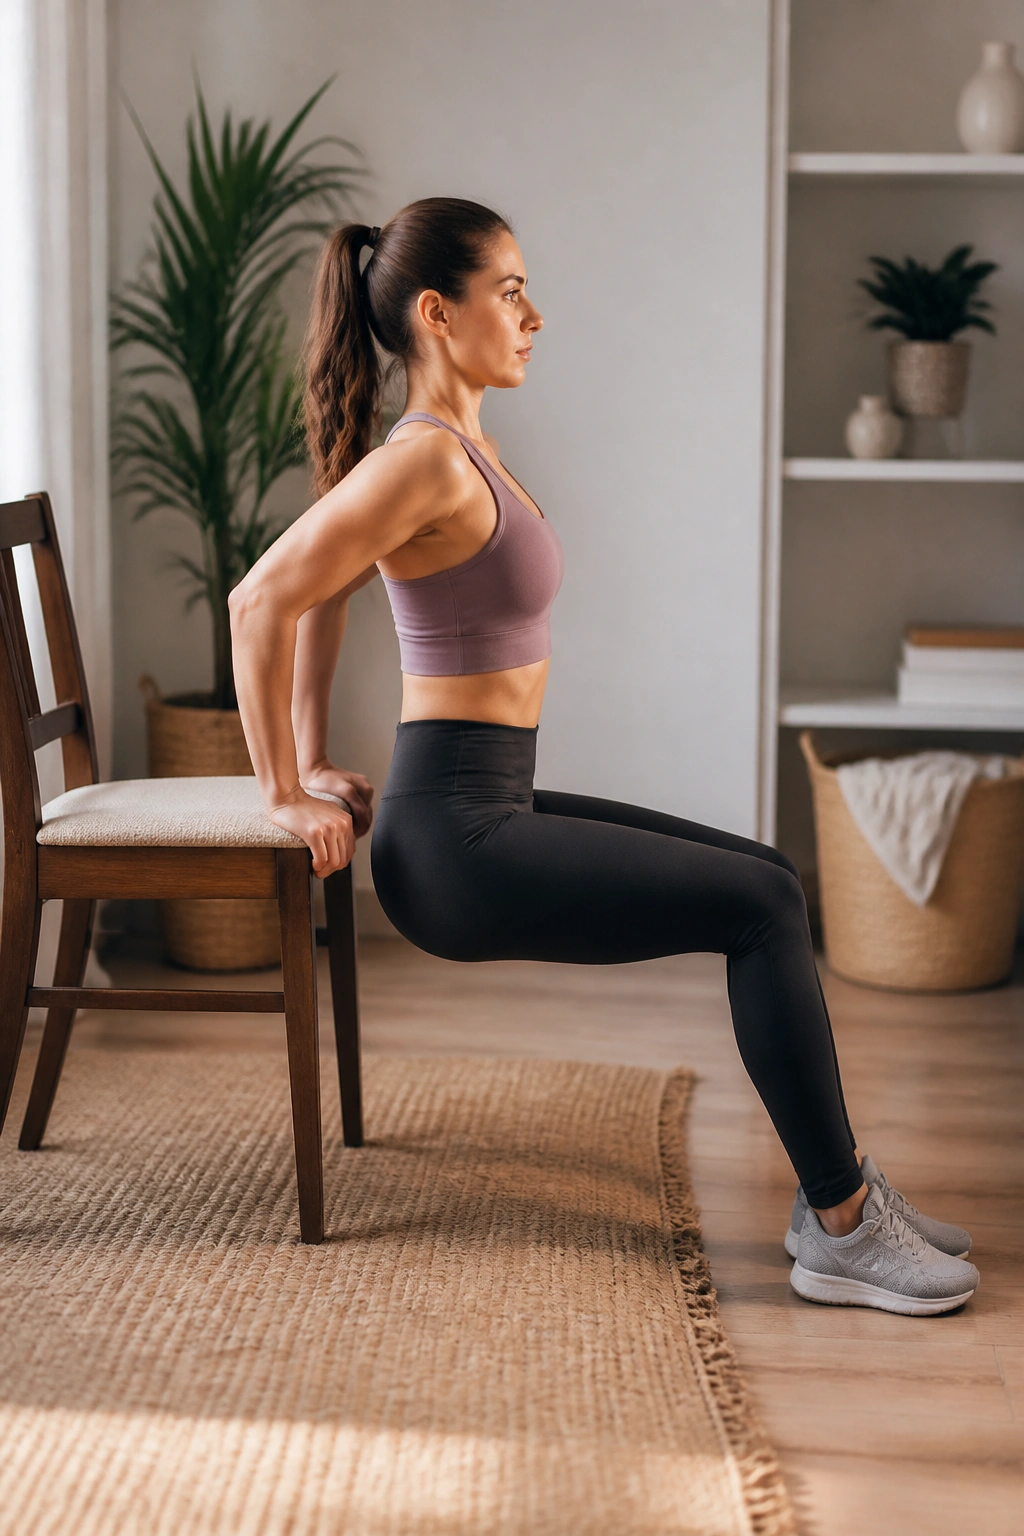
Upper body definition is often a secondary focus in barre, but tricep work is essential for posture. Use a sturdy chair—ensure it is against a wall so it cannot slide—and place your hands on the edge of the seat, fingers pointing toward your heels.
The Setup
Walk your feet out far enough so your hips are hovering just off the edge of the seat. Your knees can be bent to reduce the intensity, or your legs can be extended straight out for a greater challenge. The key is to keep your back close to the chair; do not let your shoulders round forward.
The Motion
Lower your body by bending your elbows, keeping them pointing straight back, not splaying out to the sides. This is a common point of failure. Splay your elbows, and you shift the stress to your shoulder joints rather than the triceps. Push back up, focusing on the back of your arms.
Crucial detail: Do not lock your elbows at the top of the movement. Keep a micro-bend to maintain tension on the muscle. Constant tension is the secret to getting results in shorter home workouts.
6. The Barre Side-Lying Leg Series
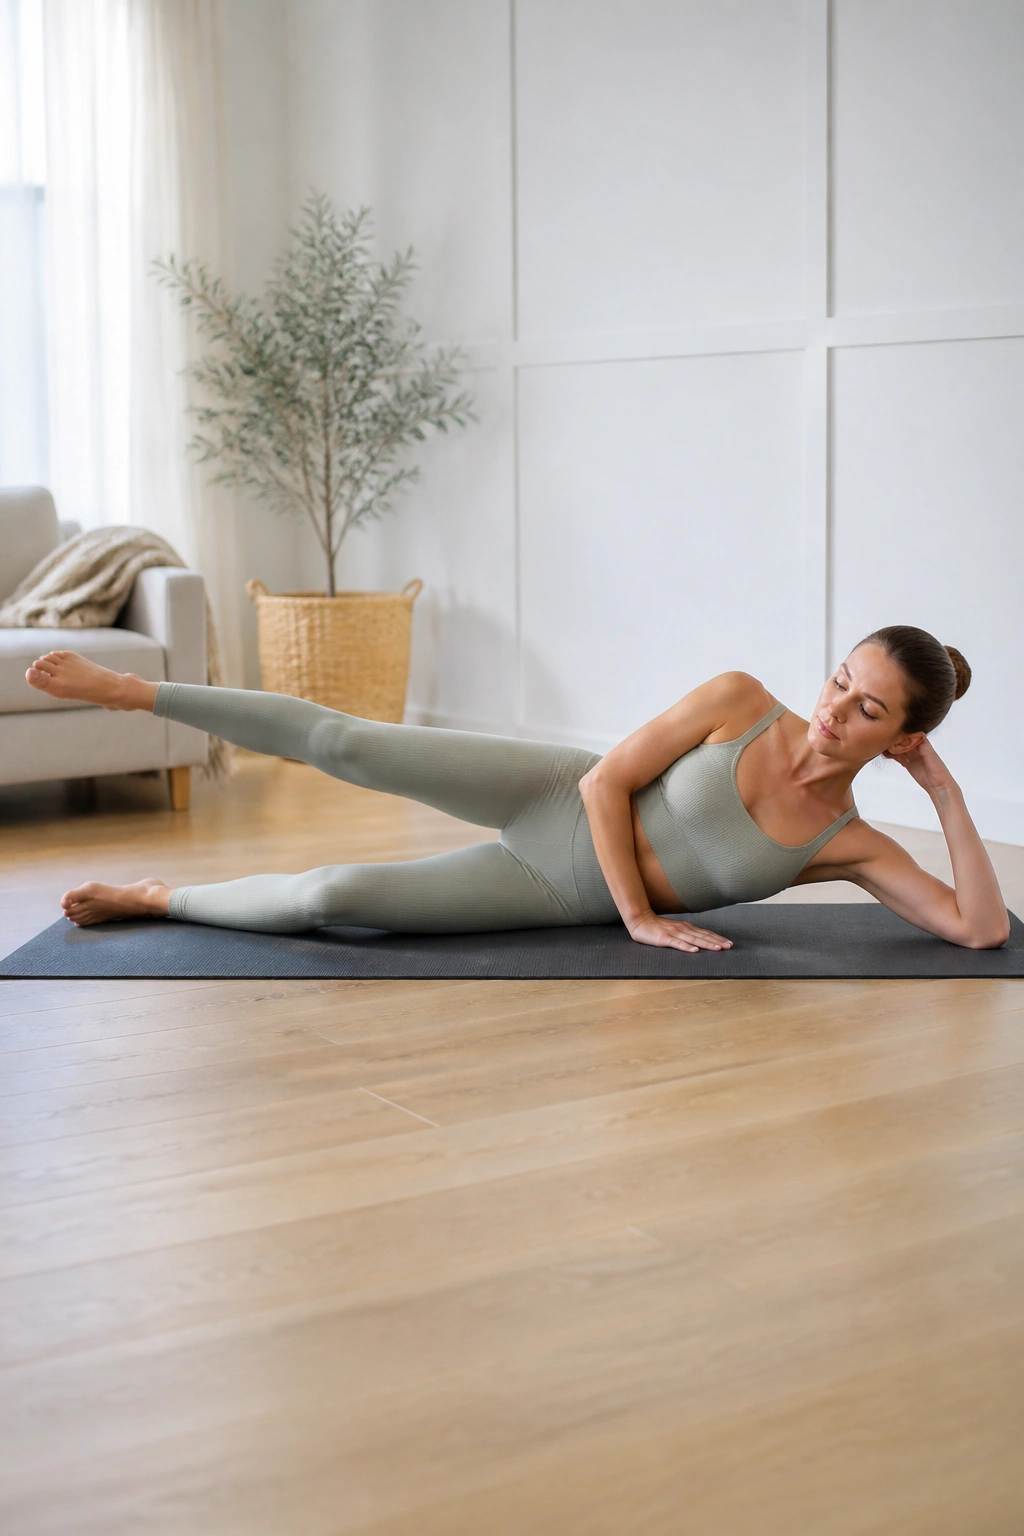
This is pure floor work that effectively isolates the obliques and the outer hip. Lie on your side on a mat, resting your head on your bottom arm. Stack your hips perfectly—one directly on top of the other. Do not let your top hip roll back.
The Lift
Extend both legs straight out. Lift your top leg about six inches off the bottom one. Keeping the leg straight, pulse it upward. You want to feel the work in the side of your hip—the gluteus medius. If you feel it in your lower back, you are likely arching your spine. Keep your belly button pulled in toward your spine throughout the duration.
The Variation
To intensify the burn, bend the top knee, bringing it toward your chest, and then kick it out to a 45-degree angle. This engages the quad and hip flexor in a way that feels surprisingly difficult after only a dozen repetitions. Keep the movement fluid. It shouldn’t look jagged.
Mind-Muscle Connection
This is a great time to focus on your breathing. Exhale on the exertion—the lift—and inhale on the return. It sounds basic, but many people hold their breath during these focused, high-repetition series, which only serves to increase fatigue faster than necessary.
7. Standing Glute Kickbacks
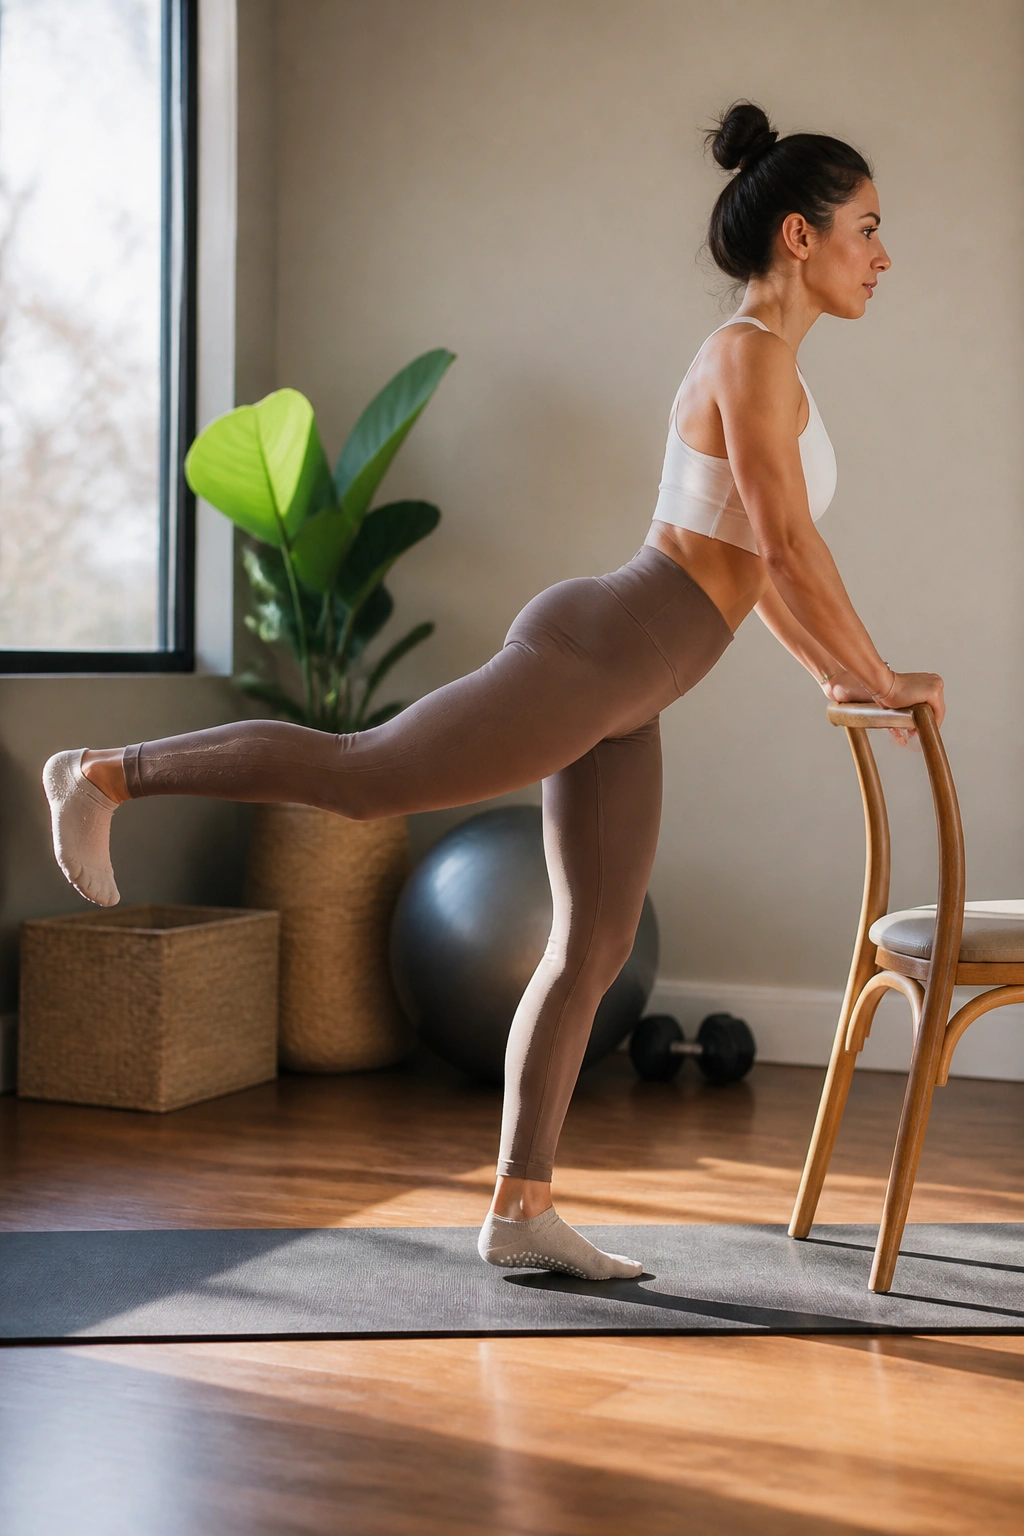
This is a subtle, high-reward move for the posterior chain. Stand facing your chair, with your feet parallel and hip-width apart. Shift your weight into your left leg, creating a solid base. Place a slight bend in that left knee—never lock your standing leg.
The Kickback
Slowly lift your right leg behind you. Do not swing it. Using the muscle in your glute, squeeze and lift the leg until it is parallel to the floor. Hold for a second at the top, then lower it until your toe just taps the mat.
Why It Works
By keeping the toe tap light, you ensure you aren’t resting the muscle. It stays under tension for the entire set. If you are doing 20 repetitions, that is 20 continuous contractions. Focus on the sensation of “shortening” the glute muscle at the peak of the movement.
The Adjustment
If you find your balance is off, engage your core as if you are bracing for a punch. A stable core is the anchor that allows your limbs to move freely without throwing you off-balance. If you still feel unstable, lower your standing leg’s bend slightly or hold the chair more firmly.
8. Weighted Arm Circles
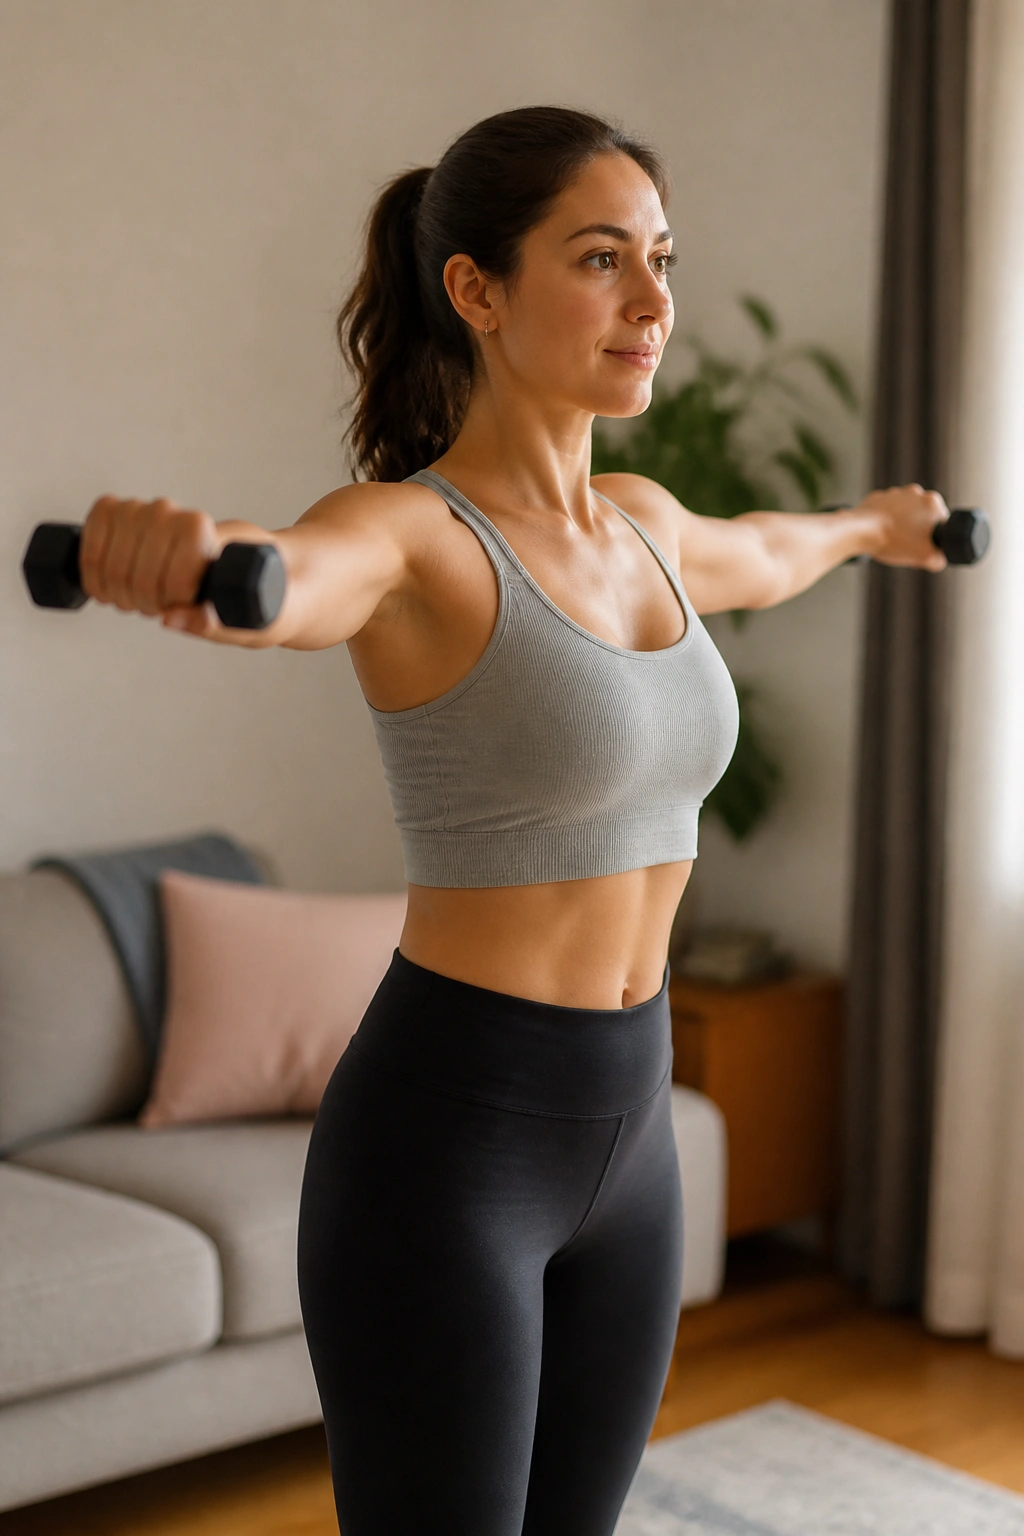
You do not need heavy dumbbells for this. In fact, if you use anything over three pounds, you might lose the ability to maintain the form. Two-pound weights or even two cans of soup are sufficient. Stand with your feet in a first position (heels together, toes apart).
The Circle
Extend your arms out to the sides at shoulder height. Your palms should be facing down. Start making small, controlled circles. Focus on the movement originating from the shoulder blade, not just the wrist. After 30 seconds, flip your palms to face up and continue.
The Burn
The fatigue here is cumulative. You will want to drop your arms. Do not. This is where the work happens. If your neck starts to tighten, you are compensating. Drop your shoulders down and away from your ears—imagine you are sliding your shoulder blades into your back pockets.
The Variation
Try pulsing your arms up and down an inch while simultaneously circling them. This adds a layer of complexity that will have your shoulders shaking within seconds. This move is fantastic for improving posture because it forces you to hold your torso upright, preventing the slouch that we are all prone to during the day.
9. Crouching Cat Hold
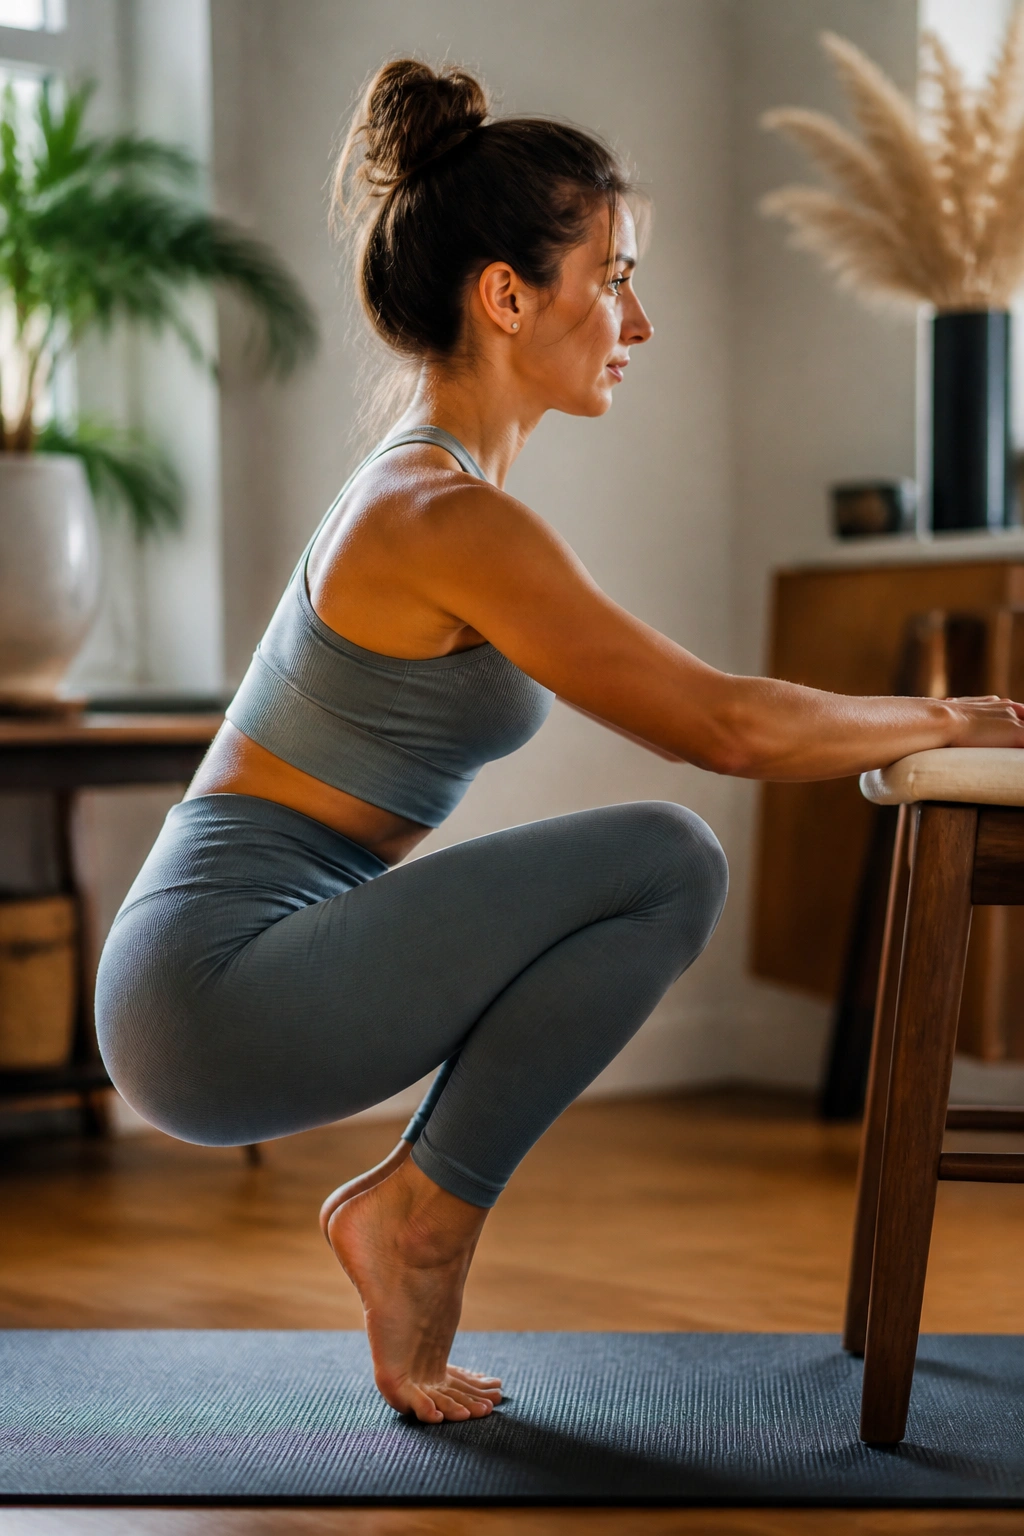
This is an isometric powerhouse that will make your quadriceps scream. Stand facing your chair, feet hip-width apart. Rise onto the balls of your feet. Bend your knees, lowering your hips until they are almost level with your heels.
The Hold
Your knees should be tracking over your toes. Maintain a straight back. Now, hold this position. It seems simple, but the isometric hold forces your quads to work without rest. You should feel the muscles quivering.
The Micro-Movement
To elevate this, shift your knees forward an inch, then pull them back an inch. Keep the movement very small. Do not let your heels drop; if they drop, you are losing the calf engagement and the height that makes this a “barre” move.
Why You’ll Love to Hate It
This move is the great equalizer. It doesn’t matter how strong you are; after 60 seconds in a crouching cat hold, everyone feels the same intense fire. It builds endurance in the thighs that translates well to walking, running, or just standing comfortably for long periods.
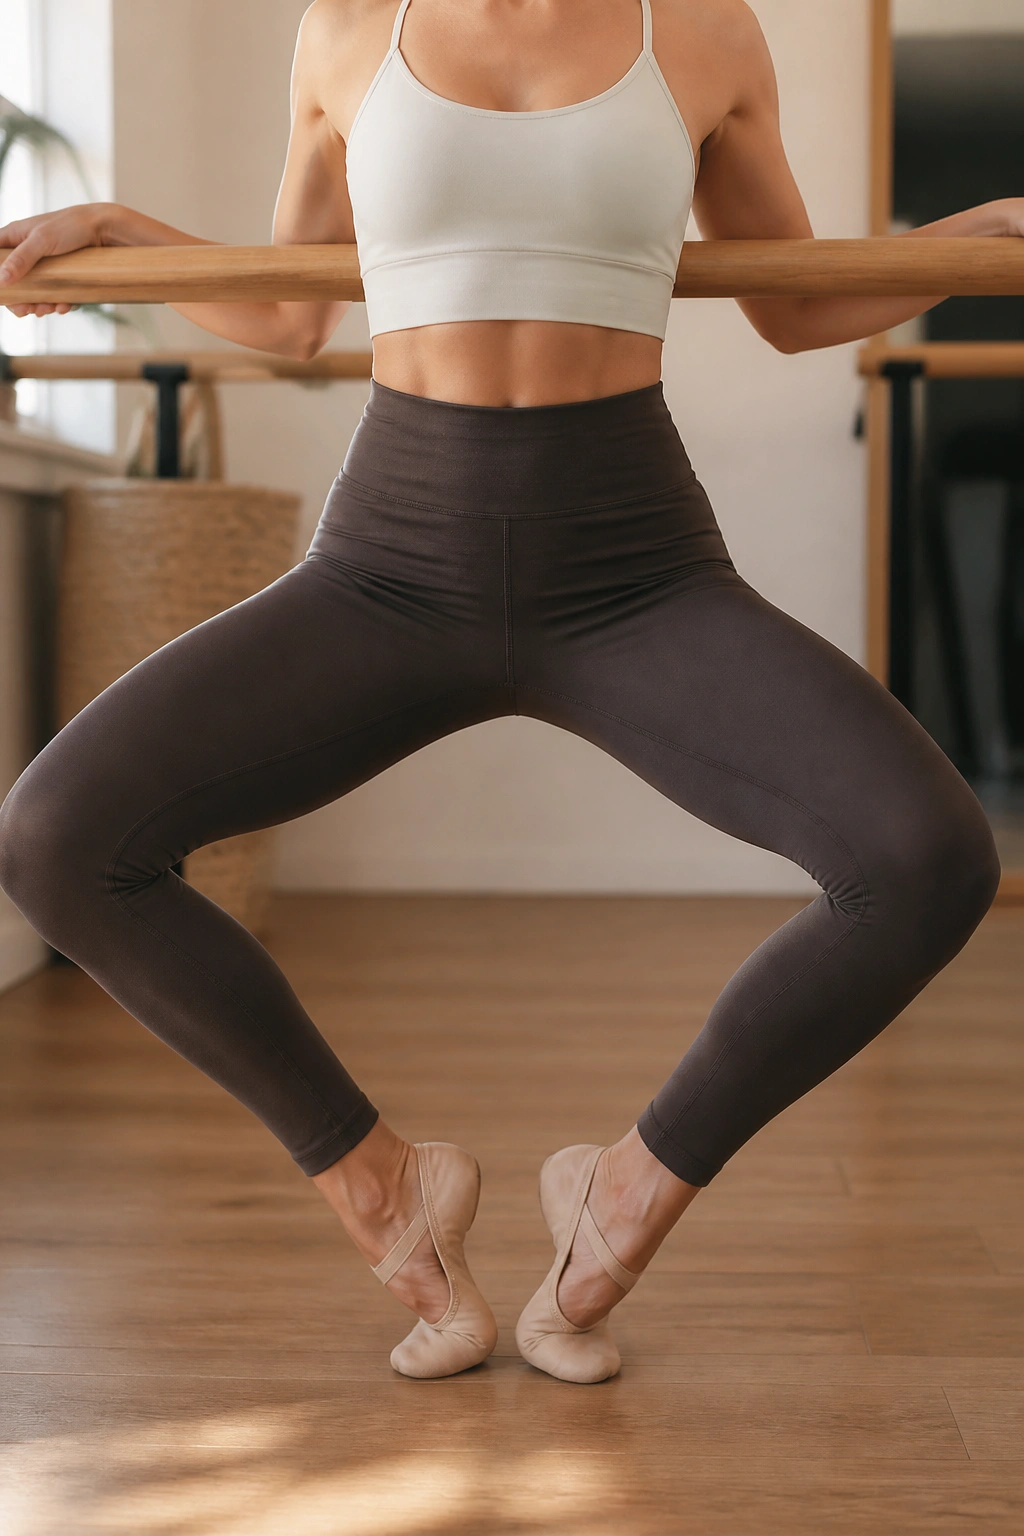
10. Wide Second Position Leg Circles
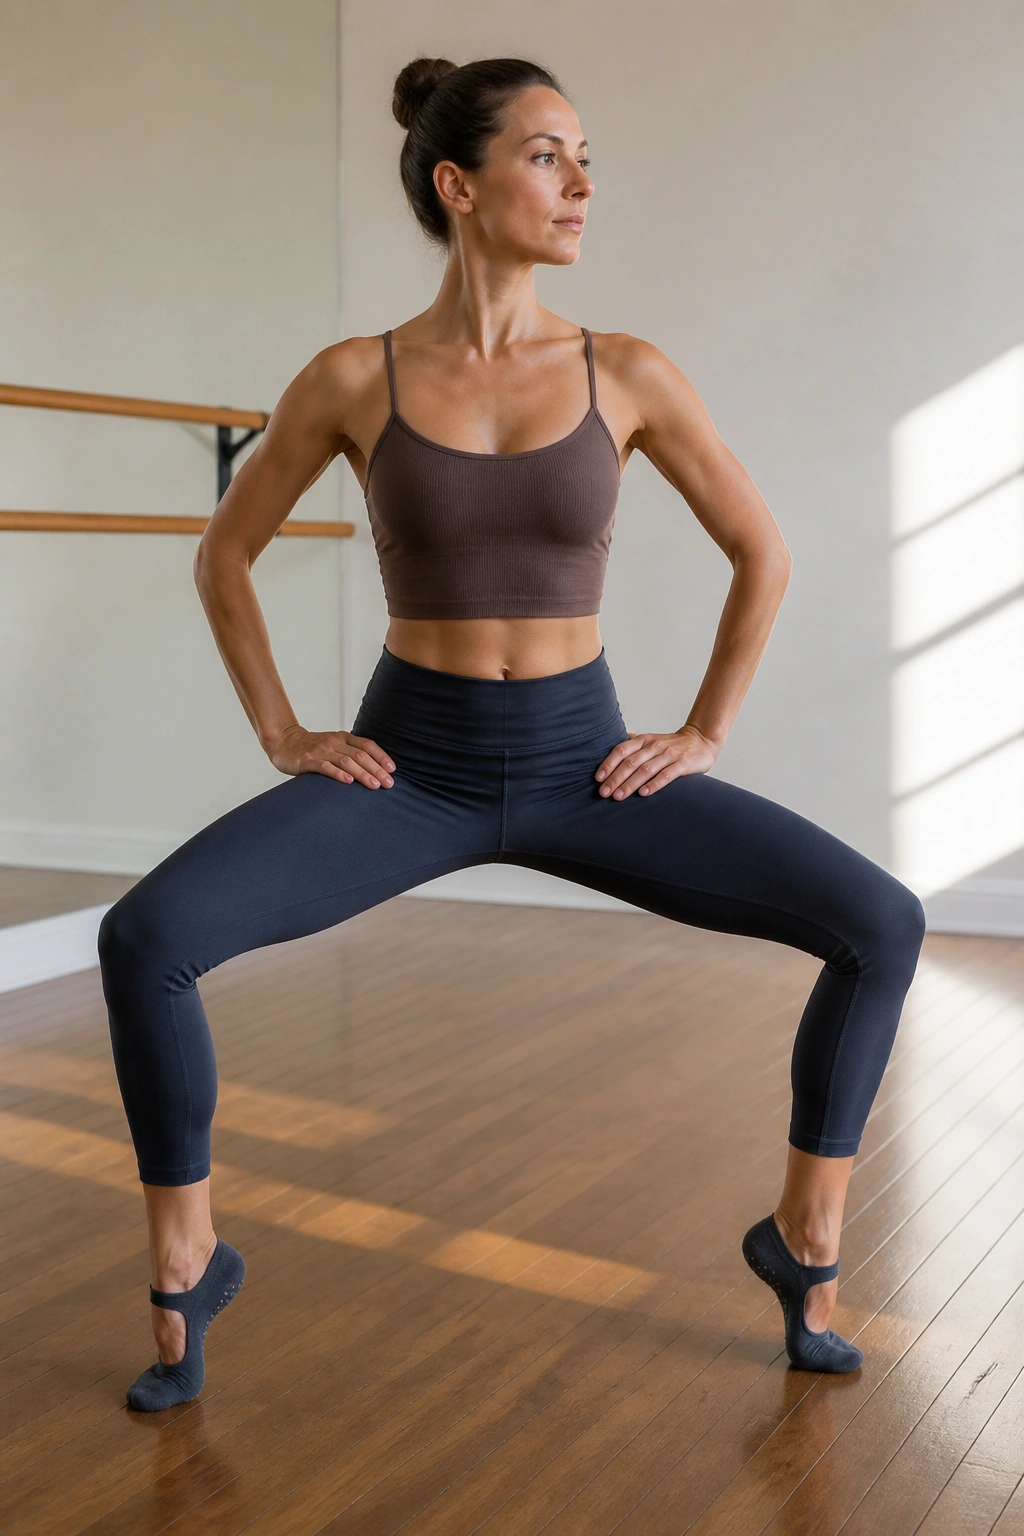
Take a wide stance, much wider than your shoulders, with toes turned out significantly. Sink down into a deep second position squat. Your thighs should feel like they are working to push your knees backward.
The Rotation
Keep your hips low and stable. Lift one heel off the floor. Now, rotate that knee in a small circle. You are aiming to mobilize the hip joint while keeping the rest of the body rock solid. This is a coordination challenge.
The Pitfalls
Watch for the “rocking horse” effect. Many people shift their torso weight to the side of the lifting heel. Keep your shoulders perfectly centered over your pelvis. Imagine there is a rod running through your head down to your tailbone, keeping you upright.
The Burn
After a set number of circles, reverse the direction. You will feel this in the inner thighs and the lower abdominals. If your knees are buckling in, widen your stance or shorten the range of motion. Barre is about precision over range.
11. Standing Plank to Pike
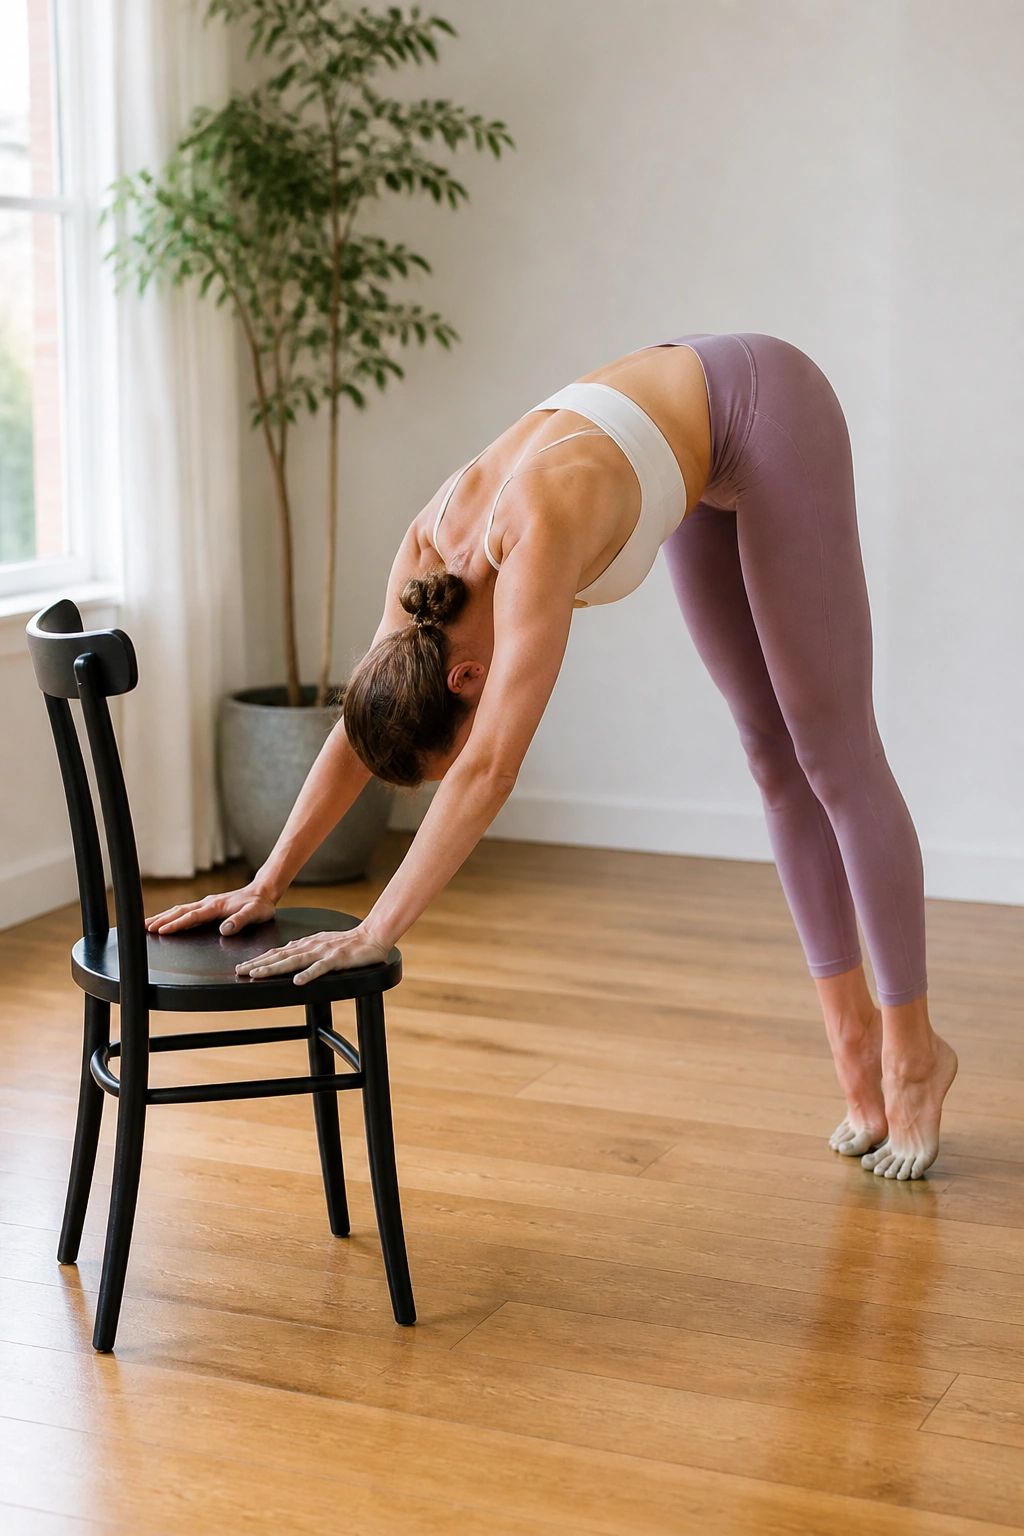
This is an unconventional way to work the core, using the chair as your point of stability. Place your hands on the seat of the chair, extending your legs back into a high plank position. Your body should be in a straight line from heels to head.
The Pike
Keep your legs straight and drive your hips up toward the ceiling. You are essentially doing a downward dog, but focusing on the contraction of your lower abs to pull your hips up. As you pike, look toward your knees.
The Return
Slowly control the descent back into your plank. Do not just drop your hips. Use your abs to guide the movement. This is a slow, methodical exercise. If you move too fast, you lose the core engagement and end up using momentum.
Pro tip: Imagine you are trying to pull your belly button through to your spine as you pike. This mental cue helps ensure the abs are doing the work, not just your shoulders.
12. The Pretzel Stretch and Pulse
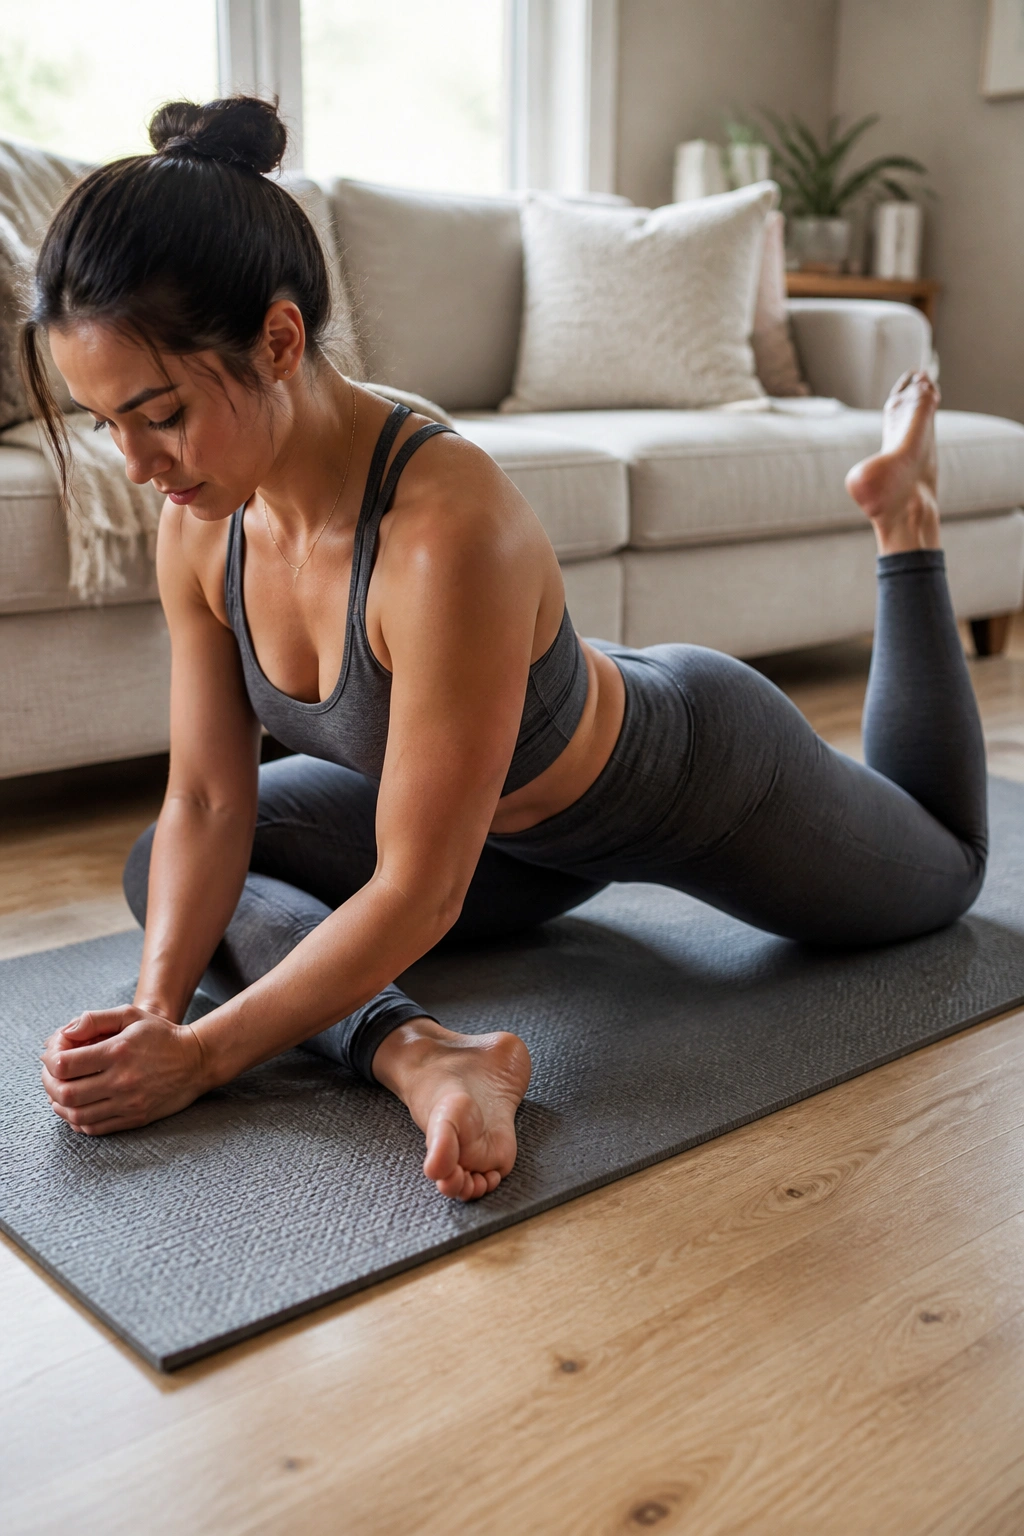
The “pretzel” is perhaps the most iconic barre move. Sit on the floor. Bend your front leg at a 90-degree angle, with your knee in front of you. Bend your back leg at a 90-degree angle as well, positioned behind you. You should look like a pretzel.
The Lean
Lean your torso slightly toward the front leg. Place your hands on the floor for support. Now, lift the back knee off the floor—just an inch or two. You will feel an immediate activation in the glute and the oblique of the back side.
The Pulse
Pulse that back knee up toward the ceiling. It is a tiny movement. If you feel a cramp in your glute, that is normal; it is just a sign that the muscle isn’t used to being recruited in this specific range of motion. Shake it out and try again.
Why It’s Unique
This move targets the gluteus medius and the obliques simultaneously. It is difficult to isolate these muscles in other types of exercise, which is why the pretzel is so effective for creating that “barre-toned” look.
13. Desk-Lean Push-Ups
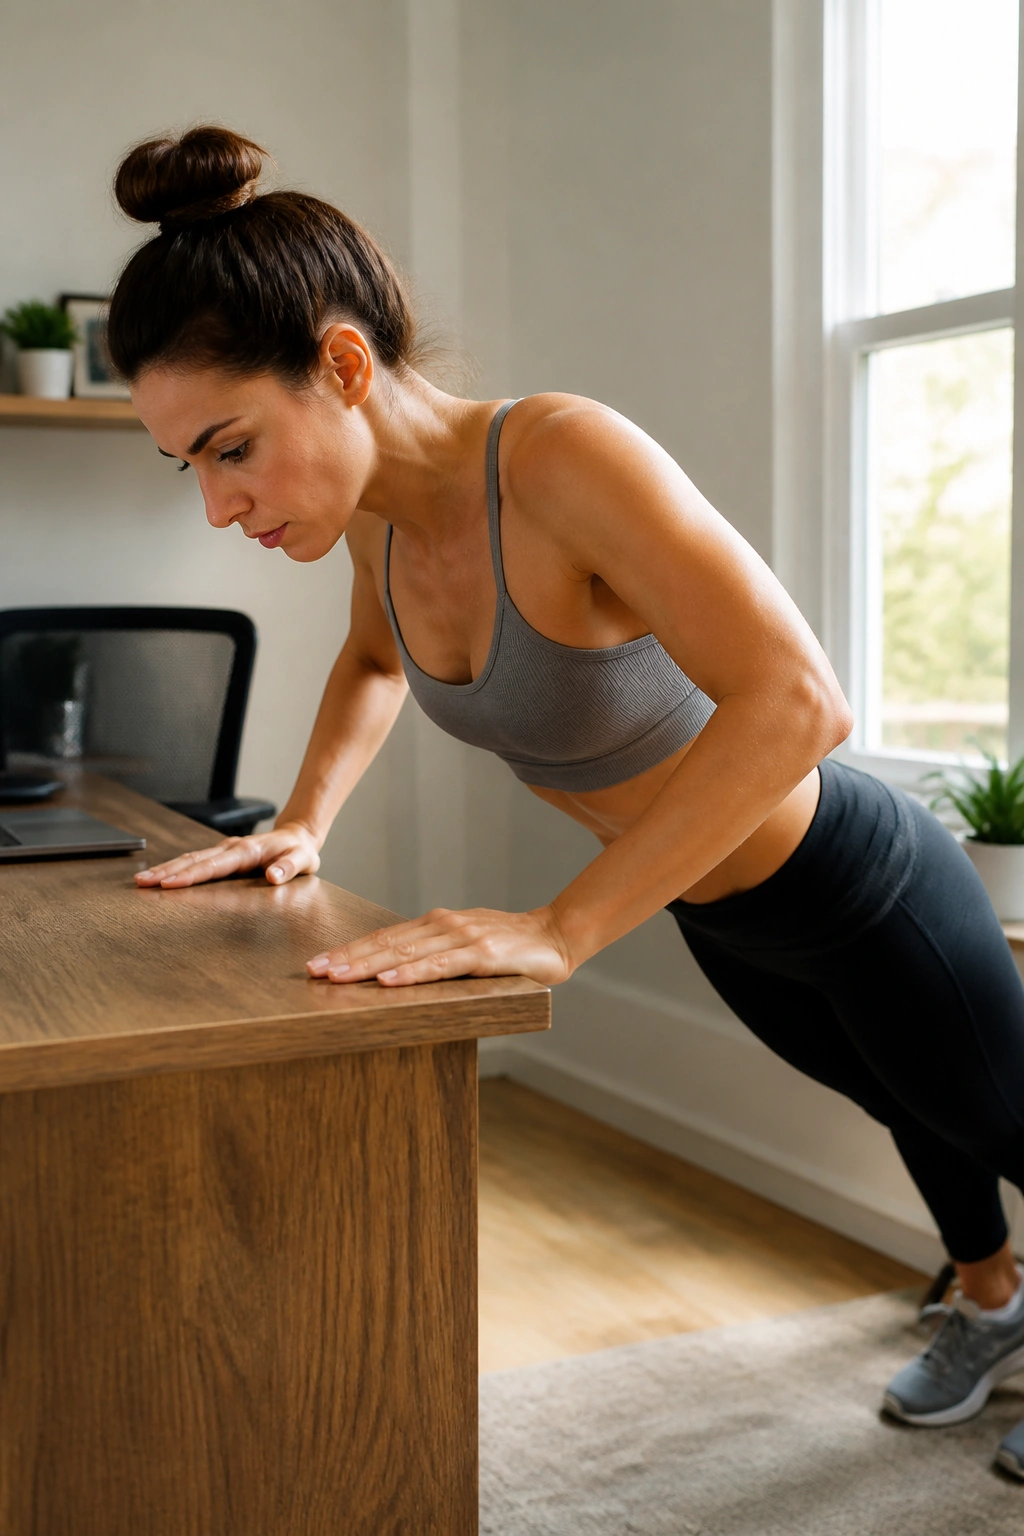
Push-ups are a standard exercise, but doing them at an incline makes them safer for your wrists and better for your form if you are just starting out. Place your hands on the back of a sturdy chair or a sturdy desk.
The Alignment
Step your feet back so your body is at an incline. Keep your core tight—do not let your hips sag toward the floor. Your elbows should bend at a 45-degree angle from your body, not flared out like a chicken wing.
The Tempo
Go down for a count of three, hold for one, and push up for one. This slow-lowering pace creates time under tension, which is crucial for building strength. It also forces you to maintain strict form, because you cannot “bounce” your way through the set.
The Modification
If this is too easy, move your feet further away from the chair, creating a sharper incline. If it is too hard, move your feet closer. The goal is to reach a point where the last two repetitions are extremely difficult to complete with good form.
14. Standing Figure-Four Hip Stretch and Pulse
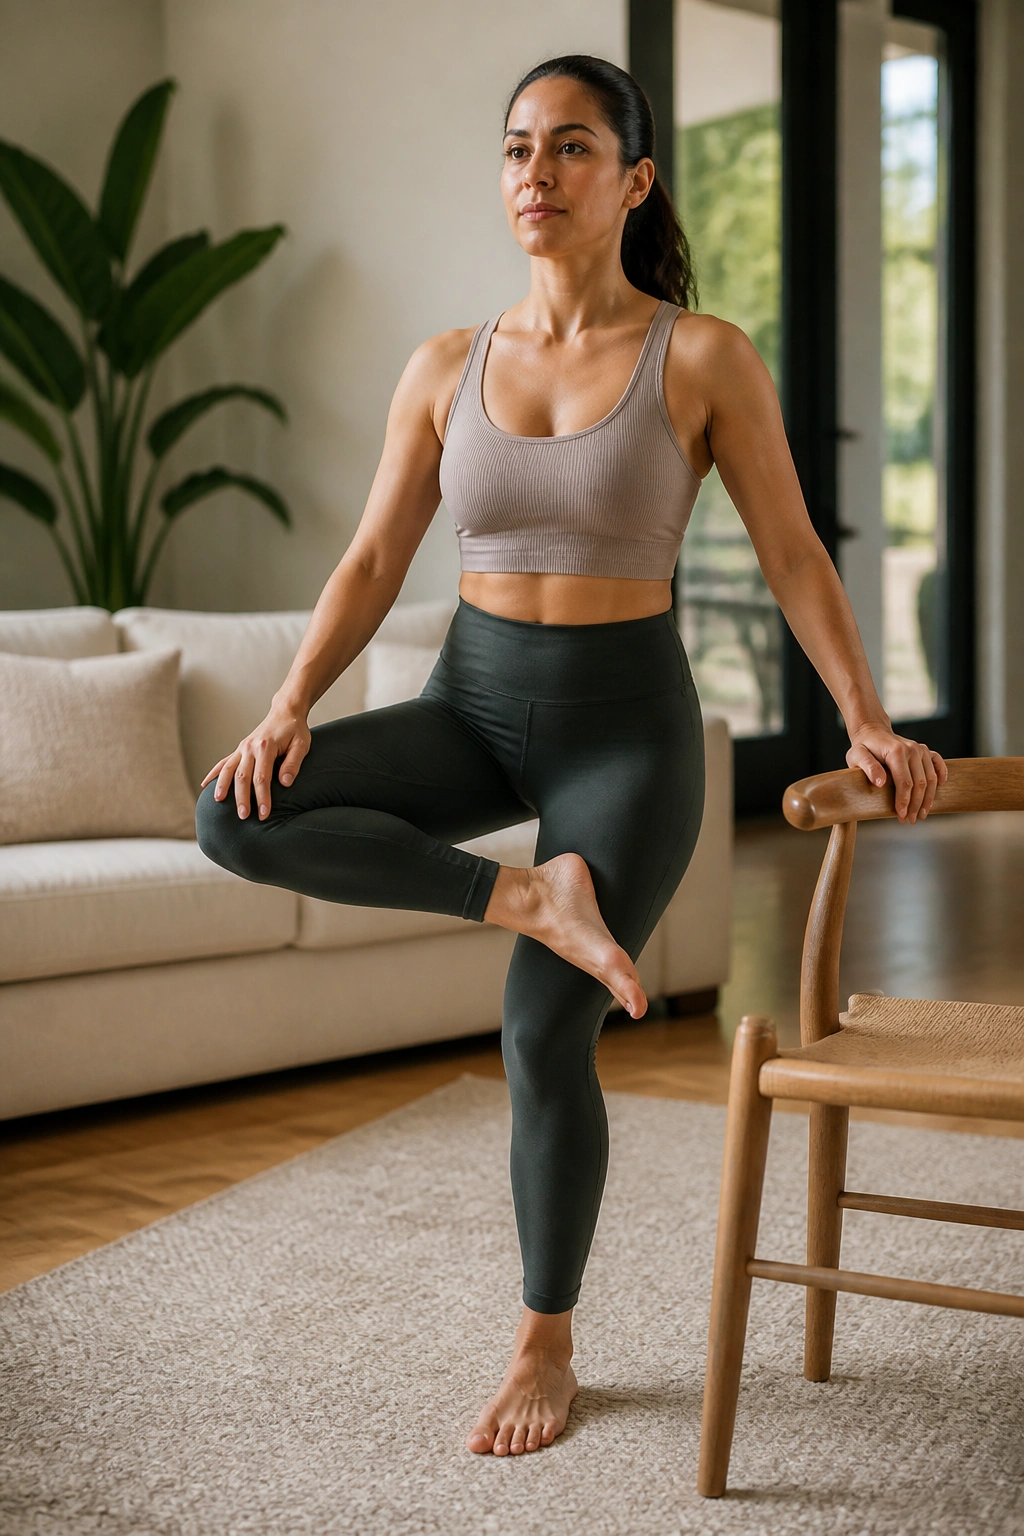
This is a two-for-one move: a stretch and a strengthening exercise. Stand facing your chair, one hand on the back for balance. Lift your right leg and cross your right ankle over your left thigh, just above the knee, forming a figure-four shape.
The Sinking Motion
Bend your standing left knee, sinking your hips back as if you are sitting into a chair. You will feel an intense stretch in the glute of your crossed leg. This is the goal.
The Pulse
While holding this deep stretch, pulse your hips up and down an inch. You are working the standing leg while actively stretching the glute of the other. It is an efficient way to hit both mobility and strength. Keep your chest up—do not fold over your leg.
The Danger Zone
Be mindful of your knee. If you feel any sharp pain in the knee joint, ease out of the squat or reduce your range of motion. Your weight should be in your heel, not your toes.
15. Single-Leg Knee Tucks
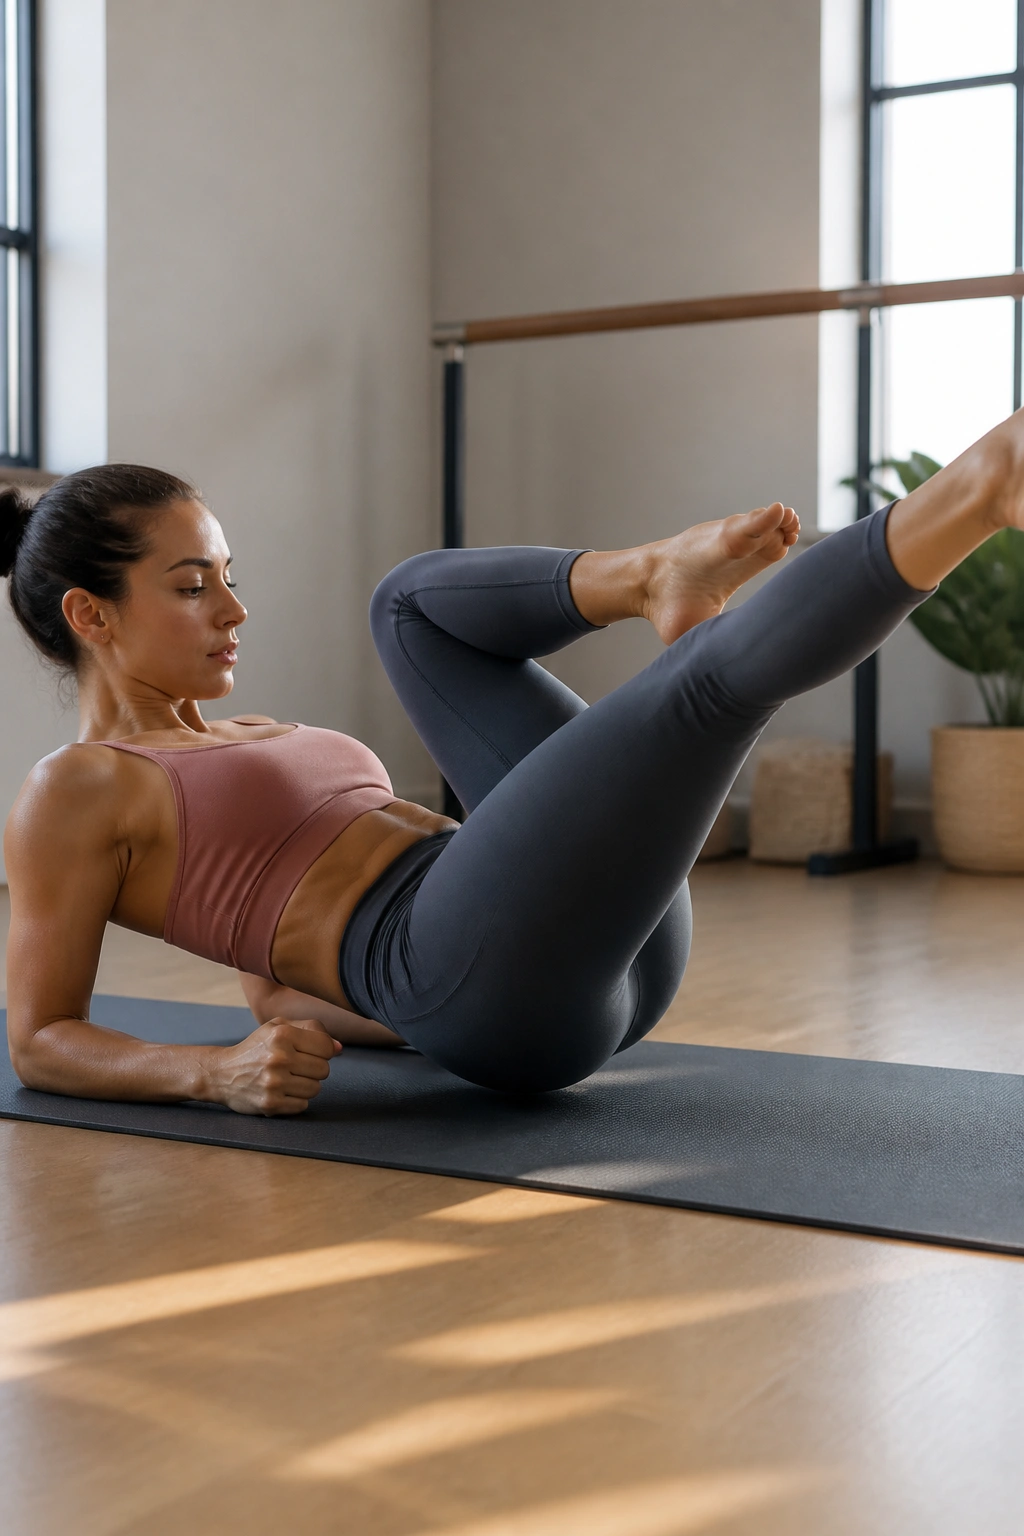
Find a mat. Sit on the floor, leaning back on your forearms. Lift both legs off the floor, keeping them straight. This is your starting position.
The Tuck
Bend your left knee, bringing it into your chest while keeping the right leg straight. Extend the left leg back out, and then switch, bringing the right knee into your chest. This is a rhythmic, fluid motion.
The Core Control
Do not let your lower back arch off the floor. Keep your belly button tucked in tight. If your back hurts, lift your legs higher toward the ceiling; the lower they are, the more pressure they put on your lower back.
The Pace
Find a rhythm that allows you to focus on the crunch. You want to feel your abs contracting to pull the knee in, not just the momentum of the leg movement. This is a fantastic exercise for the lower abs, which are notoriously difficult to target.
16. Wall-Sit with Arm Variations
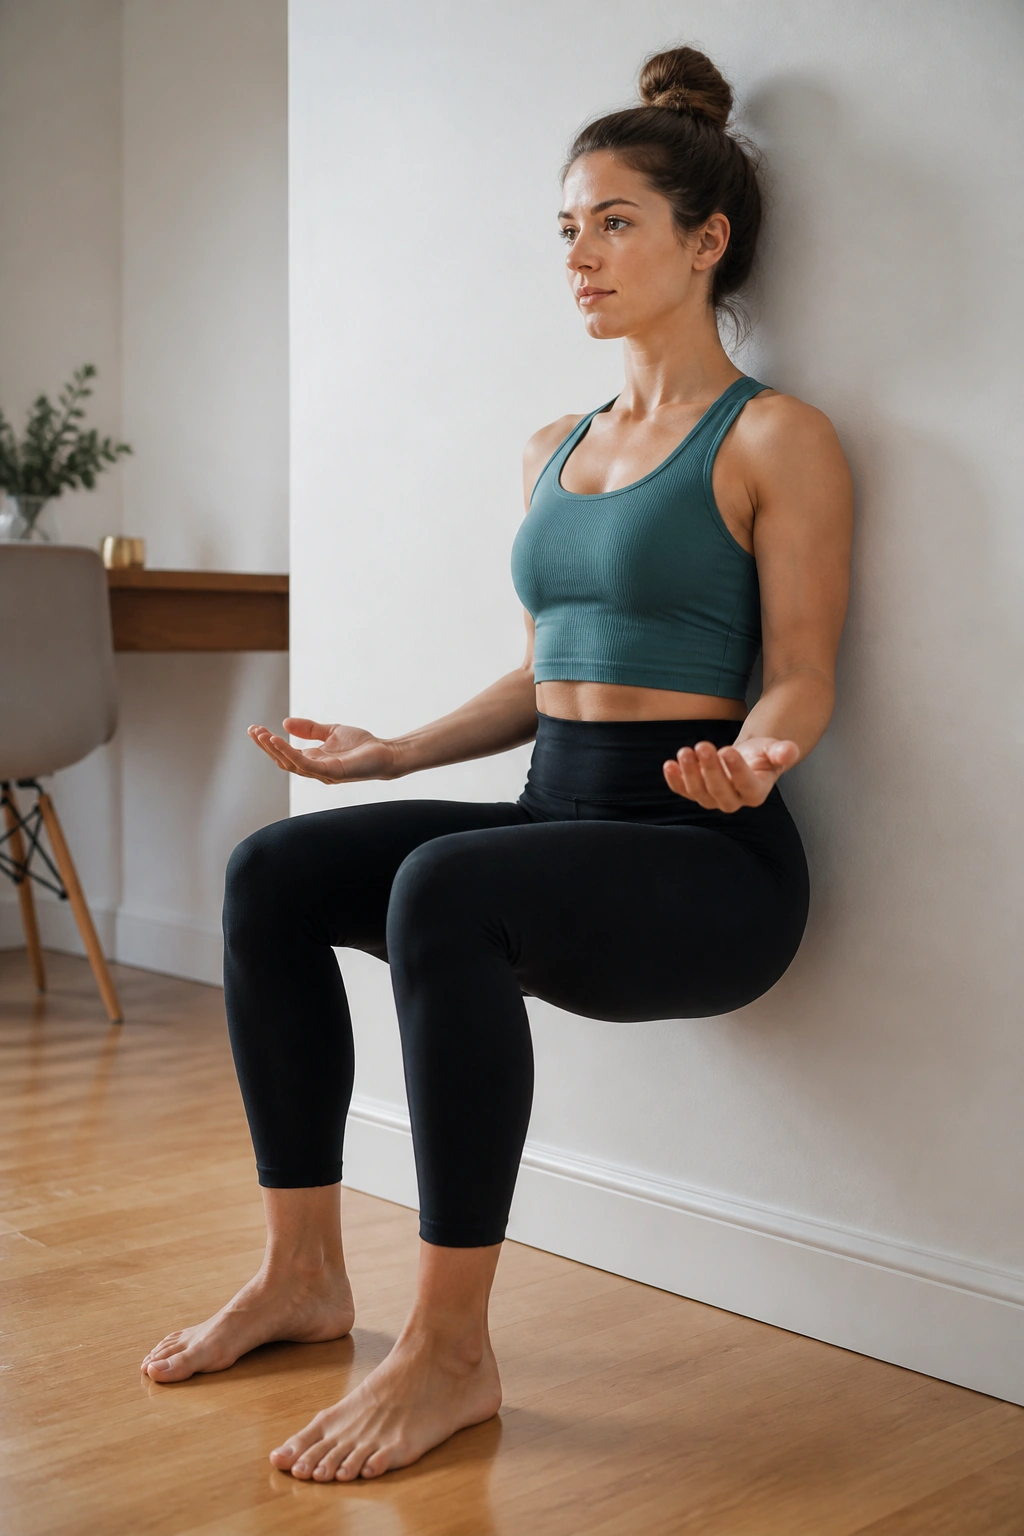
The wall-sit is a classic for a reason. Find a clear stretch of wall. Lean your back against it and slide down until your thighs are parallel to the floor. Your knees should be directly over your ankles.
The Hold
Press your lower back into the wall. You should not be able to slide your hand behind your back—if you can, tilt your pelvis forward to flatten your spine against the wall.
The Arm Add-On
To make this barre-style, hold your arms in front of you, bent at the elbows, palms facing the ceiling. Pulse your arms up and down an inch while your legs are burning. This forces your body to maintain stability in the legs while the upper body is dynamic.
The Endurance Factor
Hold for 45 to 60 seconds. The mental game here is significant. When the legs start to scream, count to 10 in your head. When you hit 10, count to 10 again. It distracts the brain from the physical fatigue.
17. The Tabletop Leg Lift
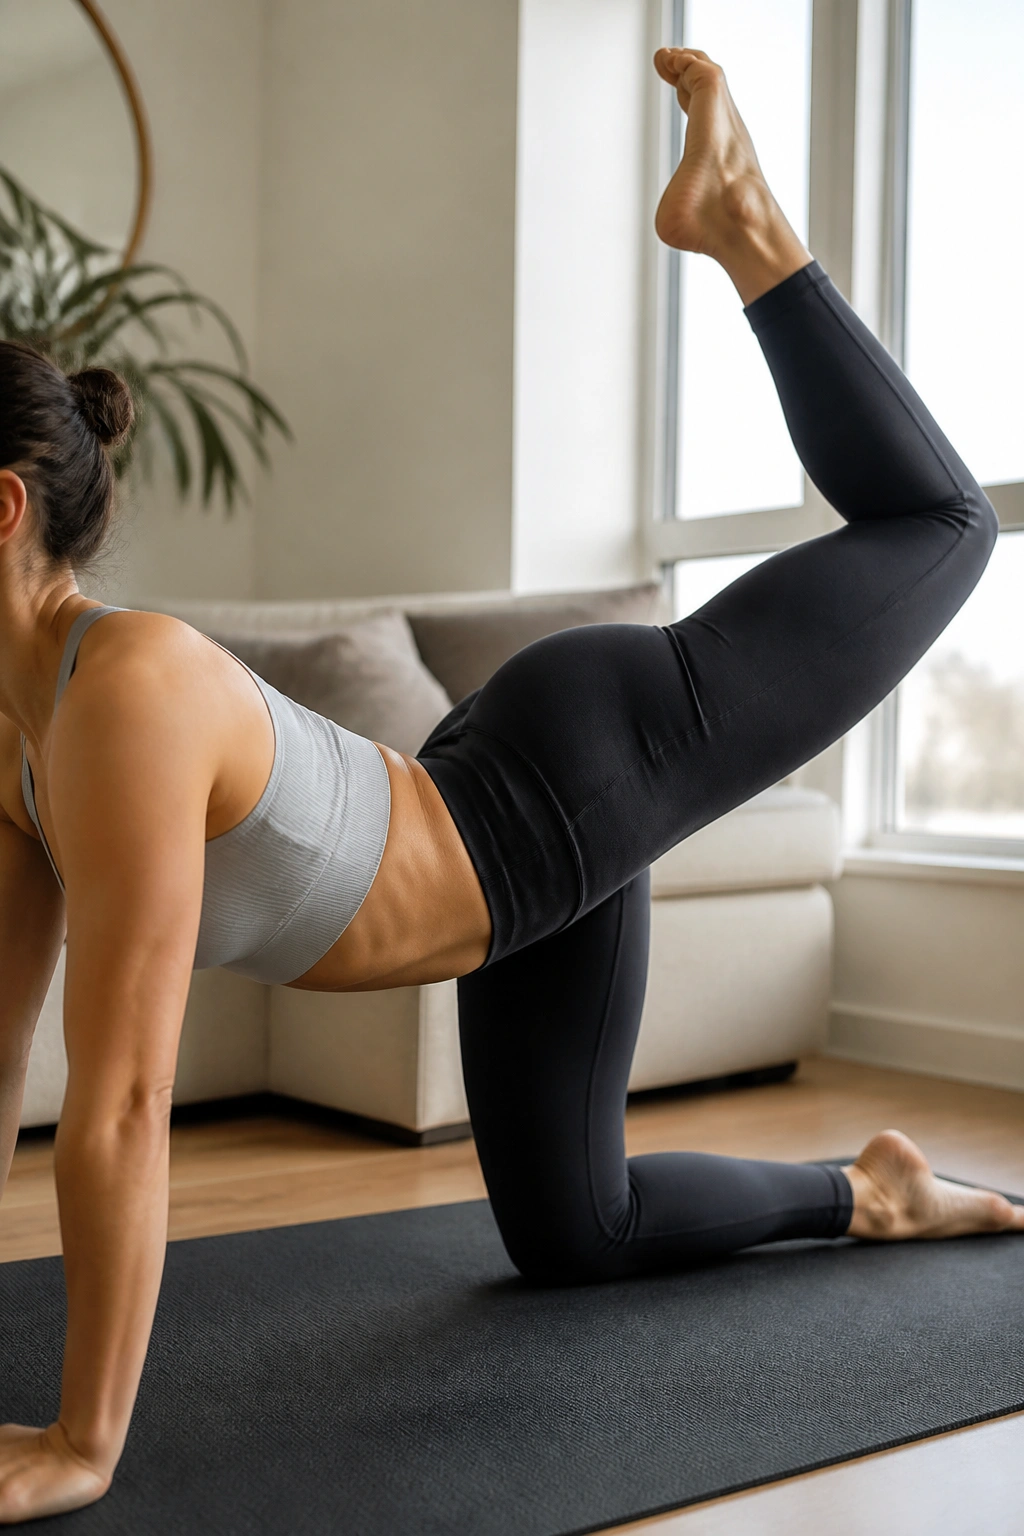
Get on all fours on your mat. Your hands should be directly under your shoulders, and your knees directly under your hips. This is your tabletop position.
The Lift
Keep your left knee bent at a 90-degree angle. Lift your left leg out to the side—like a fire hydrant—or straight up behind you toward the ceiling, keeping the knee bent. Let’s go with the ceiling lift: kick your heel up toward the sky.
The Squeeze
Focus on the squeeze in your glute at the very top of the movement. Do not let your back arch. If your back arches, you have exceeded your glute’s range of motion. Pulse the leg at the top for 20 reps, then lower and repeat on the other side.
Why It’s Effective
This is one of the best ways to isolate the gluteus maximus without any equipment. It takes the hamstrings out of the equation almost entirely, leaving the glute to do all the work.
18. Pilates-Inspired Scissor Kicks on the Floor
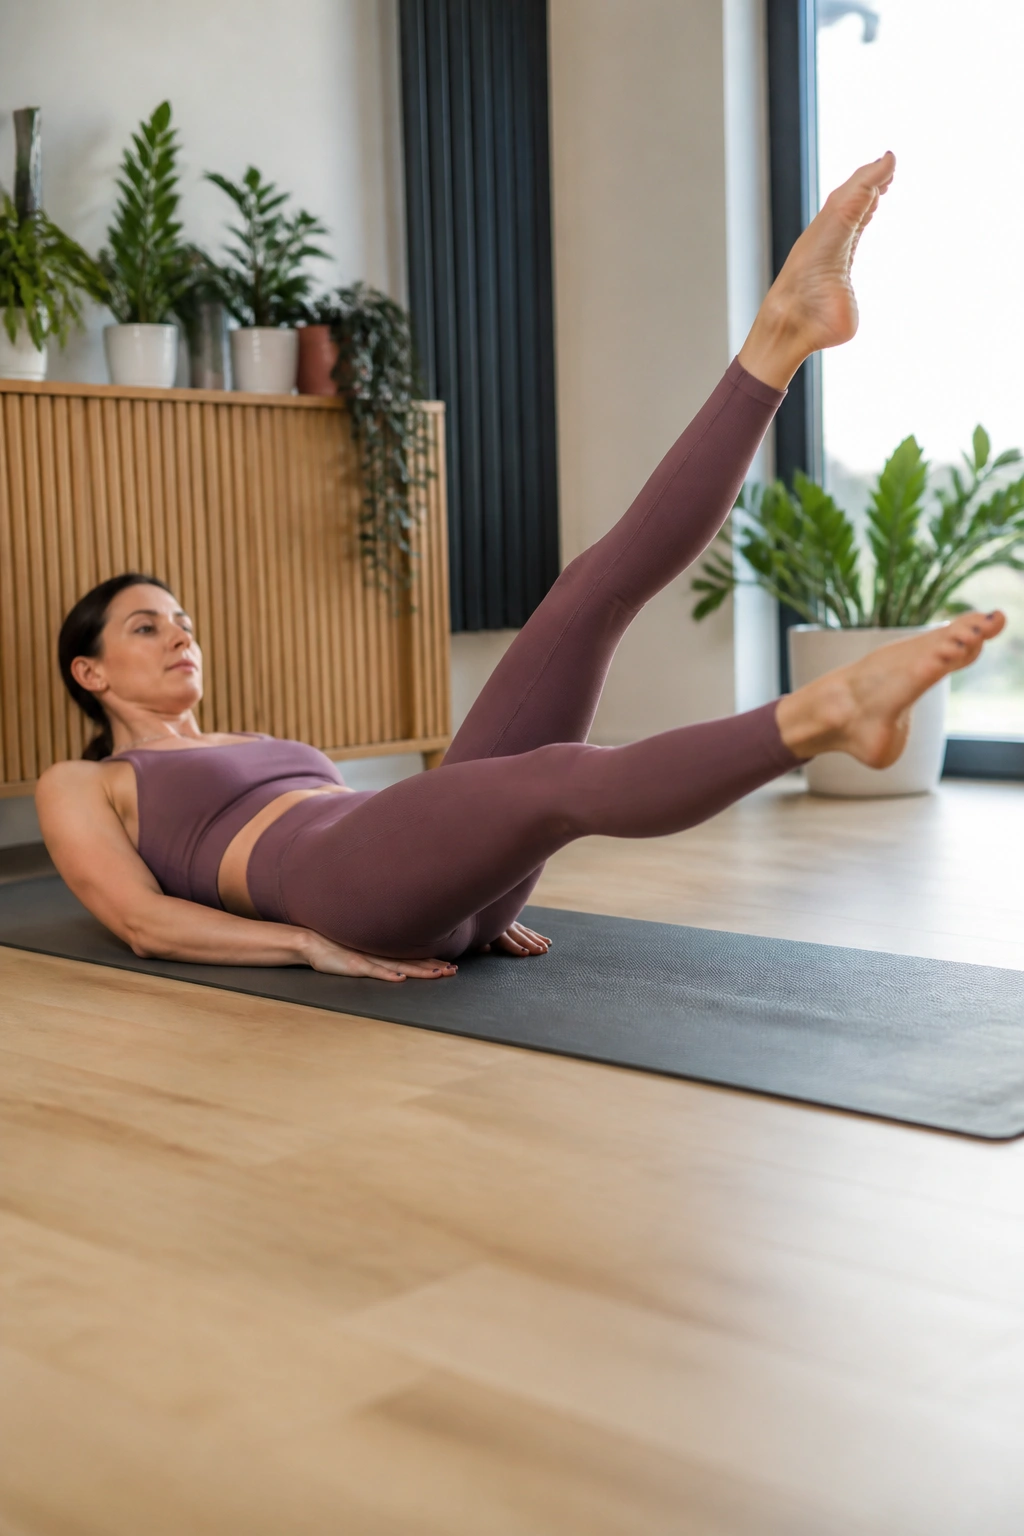
Lie flat on your back on your mat. Place your hands under your hips for support if you have any lower back sensitivity, or keep them by your sides if you have a strong core.
The Scissor
Lift both legs toward the ceiling, straight up. Lower your right leg until it is a few inches off the floor. Keep your left leg pointing straight up. Now, switch. Keep your torso still—do not let your hips rock back and forth.
The Breath
Inhale as you switch the legs, exhale as you hold the position for a beat. The movement should be controlled, not flailing. You should feel this in the lower and upper abdominals.
The Refinement
Point your toes to engage the muscles all the way down the leg. If you flex your feet, you will recruit more of the calves and hamstrings. For pure abdominal focus, point the toes and keep the legs as straight as humanly possible.
Final Thoughts
Consistency in barre training comes from embracing the small, incremental improvements. You will not see massive, sweeping changes after a single session, but you will notice the way your body holds itself during the day. You will feel a slight increase in your core engagement when you’re standing in line, or notice that your balance while putting on your shoes has improved. These are the markers of success in this discipline.
Remember that the “shake” is not a sign of failure; it is the physiological response to muscles being pushed to their absolute limit. It is the point where the nervous system is recruiting every available motor unit to complete the movement. Embrace that tremor. If you finish your home session feeling steady, calm, and perhaps a little bit tired in the muscles, you have done exactly what you set out to achieve. Keep your movements controlled, keep your core engaged, and focus on the quality of every single repetition. That is how you turn a living room floor into a training ground.
