



A magic circle can make a home Pilates session feel sharper in a matter of minutes. The ring is small, but it tells on you fast: press too hard and your shoulders creep up; press too softly and your body stops paying attention. For magic circle Pilates exercises at home, that feedback is the whole point.
What makes the circle so useful is not brute resistance. It is precision. The same ring can wake up your inner thighs, challenge your core, steady your shoulders, or keep your legs honest in a bridge, and it does all of that without turning the workout into a clumsy strength session. A good squeeze should feel controlled and quiet, not like you’re trying to crush a steering wheel.
There’s also a nice side effect people miss. The ring makes form more obvious. If your ribs flare, if your pelvis rocks, if your knees drift, you feel it immediately. That is gold when you’re working out on a mat in a living room, because no one is standing there to nudge your alignment back into place.
Start slowly. Keep the ring resistance moderate, move with control, and let the breath set the pace. The first move matters more than people think.
1. Magic Circle Hundred Hold
Tiny move. Serious burn. The Hundred with a magic circle is one of those Pilates exercises that looks gentle until your arms start pumping and your abs realize they’ve got a job to do.
The simplest version is this: hold the ring between your palms, arms reaching toward the ceiling or slightly over your chest, legs in tabletop or extended only as far as your low back can stay heavy on the mat. If your neck tends to complain, keep your head down. No shame in that. The point is clean core work, not a dramatic curl-up.
How to set it up
- Hold the ring lightly, with the elbows soft and the shoulders sliding down away from your ears.
- Press inward just enough to feel the chest and upper arms engage.
- Pump the arms from the shoulder joint, not the wrists.
- Match five arm pumps to each inhale and five to each exhale for the classic rhythm.
One good cue: keep the front ribs from popping up when the arms move.
If you want to make it tougher, lower the legs only a little, not a lot. That’s the trap with the Hundred. People chase height and forget control. A quiet midsection beats a bigger range every time.
2. Bridge with the Ring Between the Knees
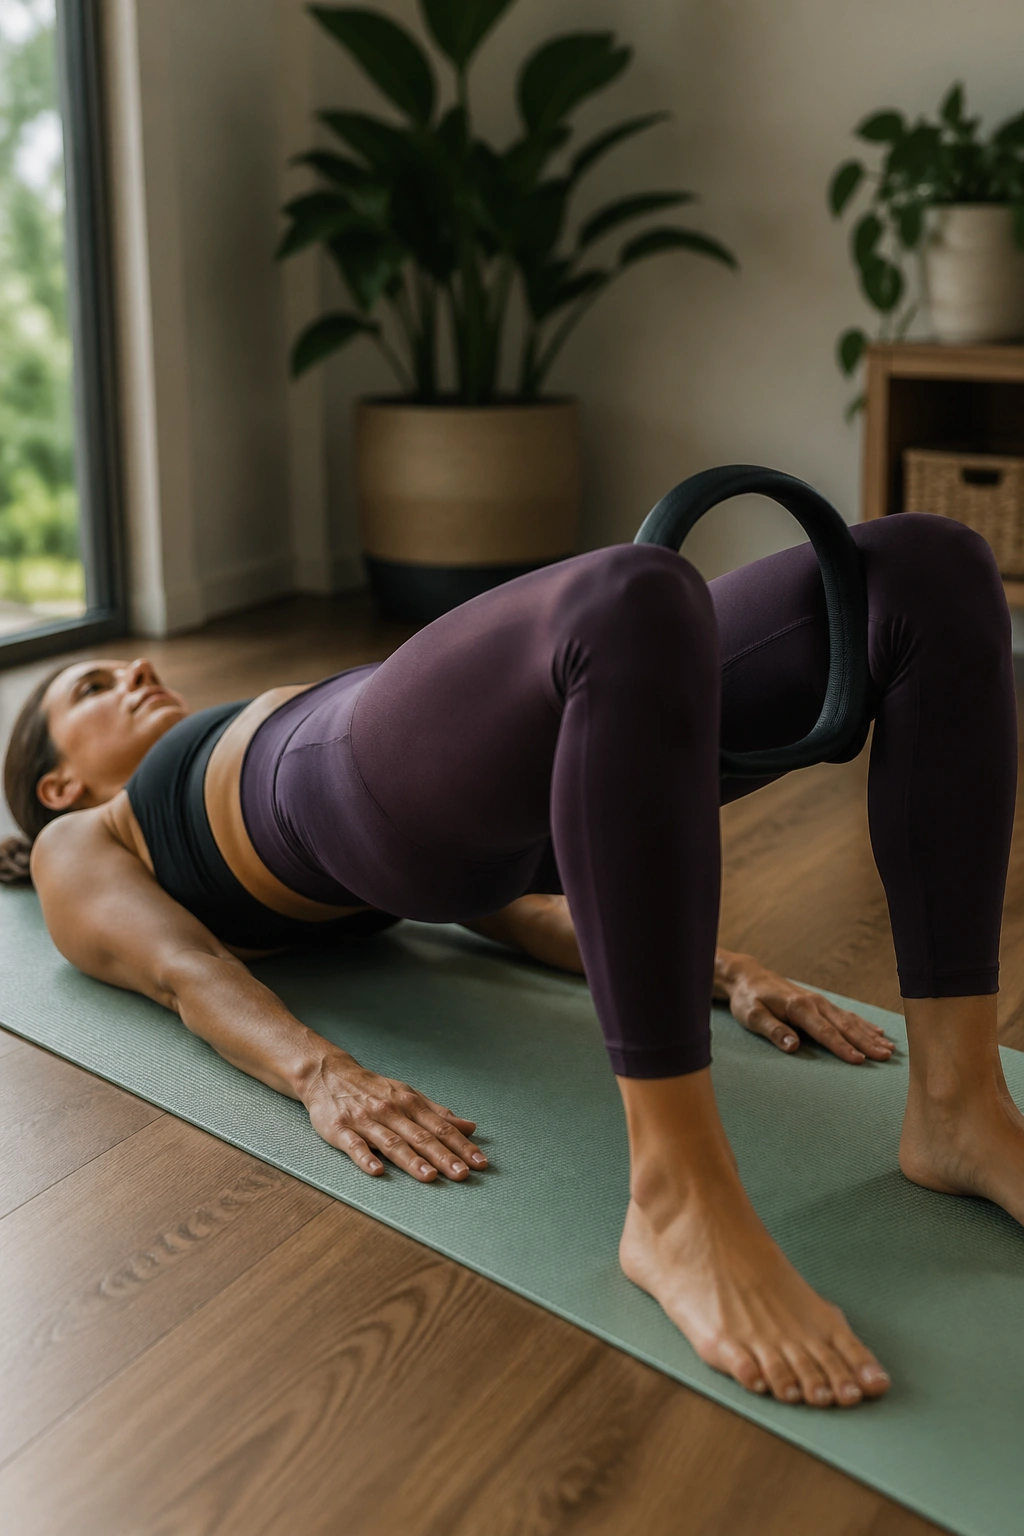
Why does a simple bridge suddenly feel more honest with a ring? Because the circle makes your thighs stop freeloading. The second you place the ring between the knees, you get a clearer line from inner thighs to glutes, and the whole shape becomes steadier.
Lie on your back with your feet hip-width apart and your knees bent. Place the ring just above the knees, then press into it gently as you curl your tailbone and lift the hips. The squeeze should stay steady, not frantic. At the top, the pelvis should feel level, not tipped one way or the other.
What to watch
- Feet stay grounded. If the heels lift, you’re pushing too hard.
- Knees track forward. Let them drift outward and the ring loses its job.
- Ribs stay down. If the chest flares, the low back will usually overwork.
Lower with control, one vertebra at a time. That slow roll down is where a lot of the value lives.
I like this version for people who feel bridges mostly in the hamstrings. The ring gives the glutes and inner thighs a clearer cue to share the load. It is a small change, but it changes the whole story of the exercise.
3. Side-Lying Leg Lift with the Ring
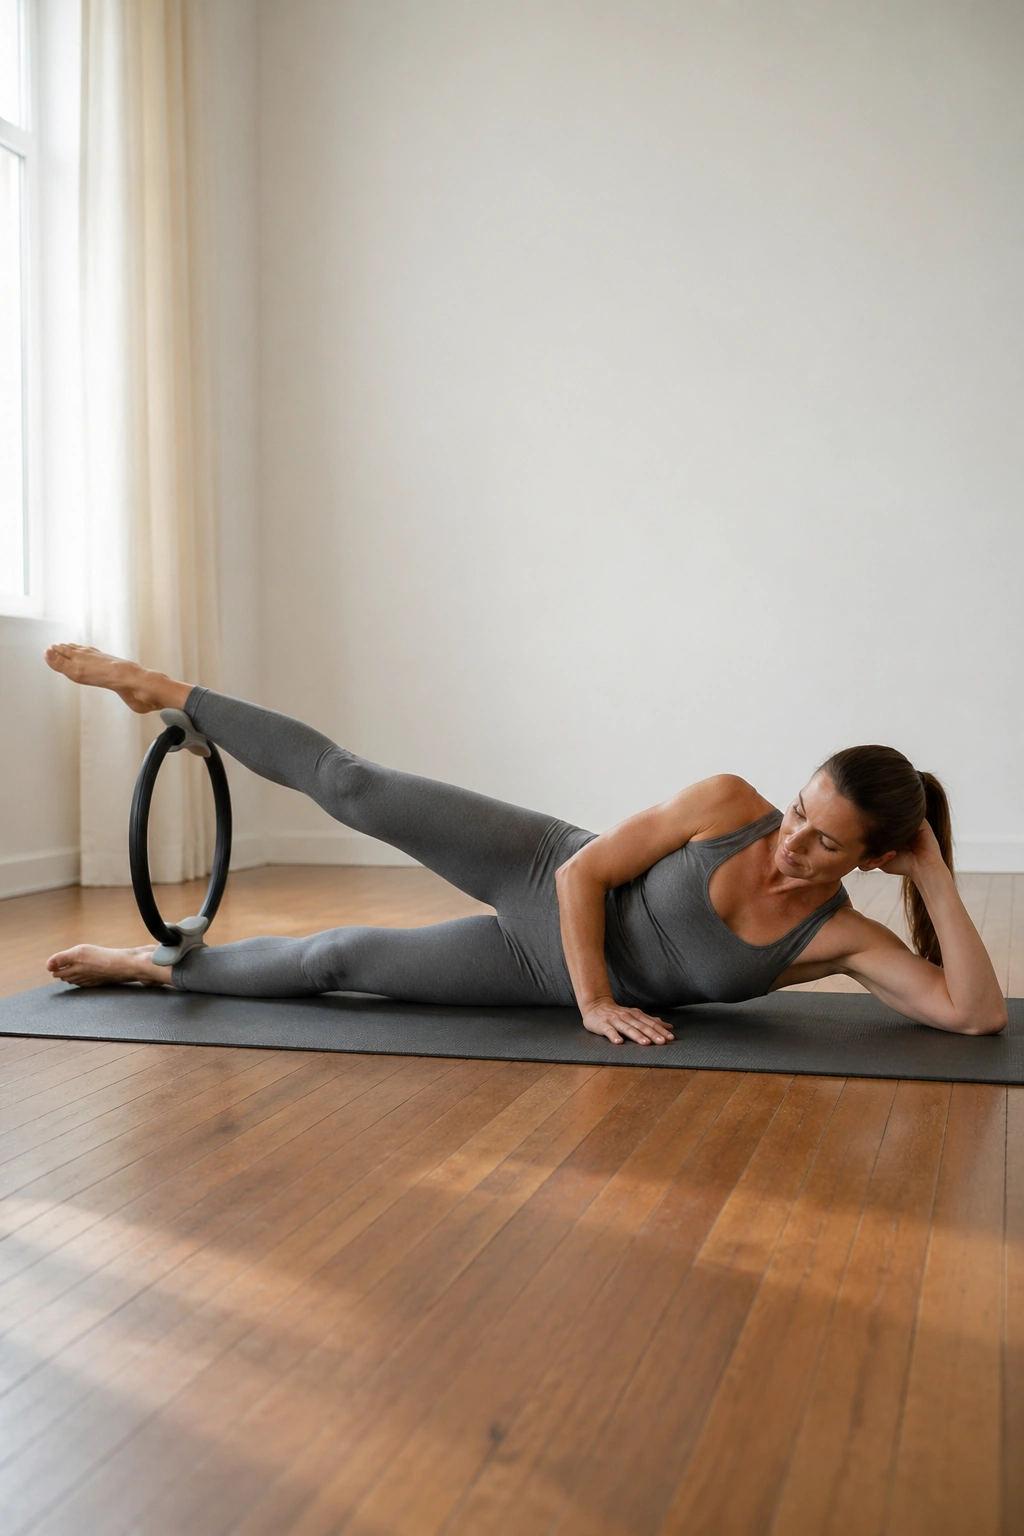
Side-lying work can look calm from across the room. Up close, it is a different animal. The ring makes it more specific, especially when you want the outer hip and inner thigh to stay awake instead of letting the top leg swing around.
Lie on your side with the ring between your ankles, legs long, and your lower waist gently lifted off the mat so you are not dumping into the hip. Press the ankles into the ring just enough to keep the line steady, then lift the top leg six to eight inches and lower it with control. Small range. Clean shape.
The part people rush
The lift is not the point. The stillness is. If your hips roll back, the exercise turns into a cheat. If your toes crank upward, the hip flexors take over. Keep the leg long, the foot neutral, and the waist lightly braced so the side body does some work too.
A few useful details:
- 8 to 10 slow lifts per side is plenty.
- Pause for one breath at the top if you want more challenge.
- Keep the ring from wobbling side to side.
This one is sneaky. It doesn’t look like much, and then the side hip starts talking. Loudly.
4. Dead Bug Press in Tabletop
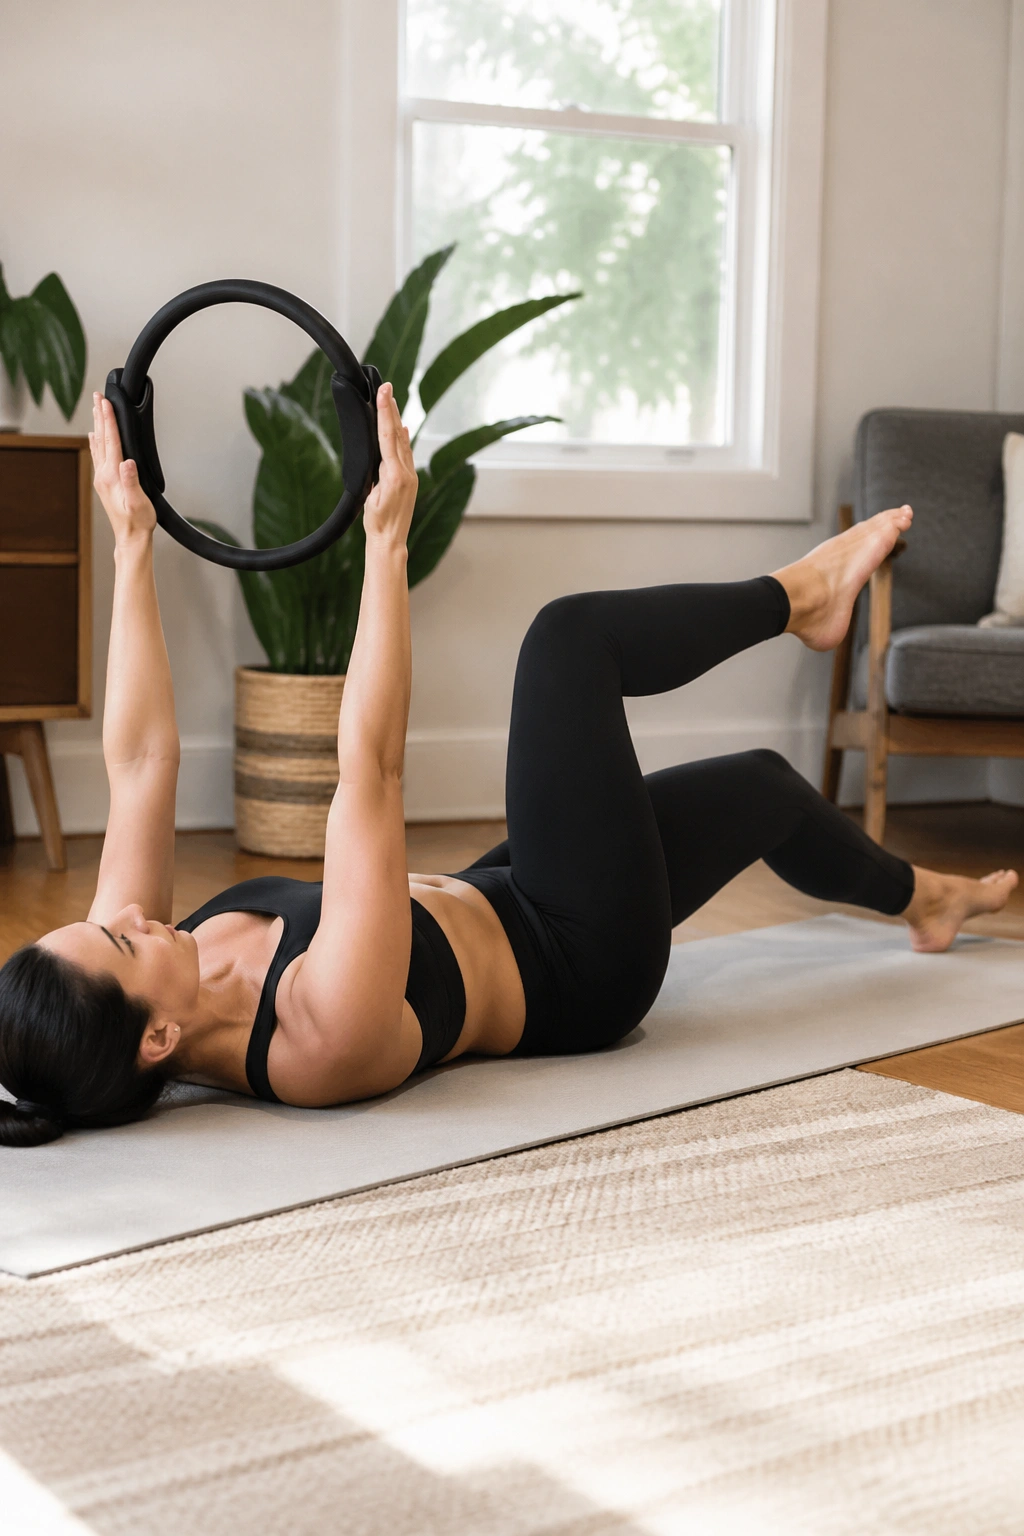
If your lower back likes to peel off the mat the moment your legs move, this is the move that tells the truth. Dead bug with a magic circle is one of the cleanest home Pilates exercises for core control because it gives your arms something specific to do while your legs try to stay quiet.
Lie on your back with your knees in tabletop. Hold the ring between your palms over your chest, then press gently into it as you lower one heel to tap the floor or extend one leg out. Switch sides slowly. The ring should stay centered; if it starts drifting, your shoulders are doing too much.
Keep the pelvis quiet
You want the low back to stay heavy and broad on the mat. That means the leg lowers only as far as you can manage without arching. Not one inch farther. People love to make dead bugs bigger than they should be. That usually just means more back strain.
- Exhale as the leg reaches away.
- Inhale as you return.
- Keep the chin slightly tucked, not jammed.
A nice version for beginners is heel taps. A harder version is a full leg extension with the same steady ring press. Both work. The difference is in how much honesty you can keep in your pelvis.
5. Magic Circle Chest Press on the Mat
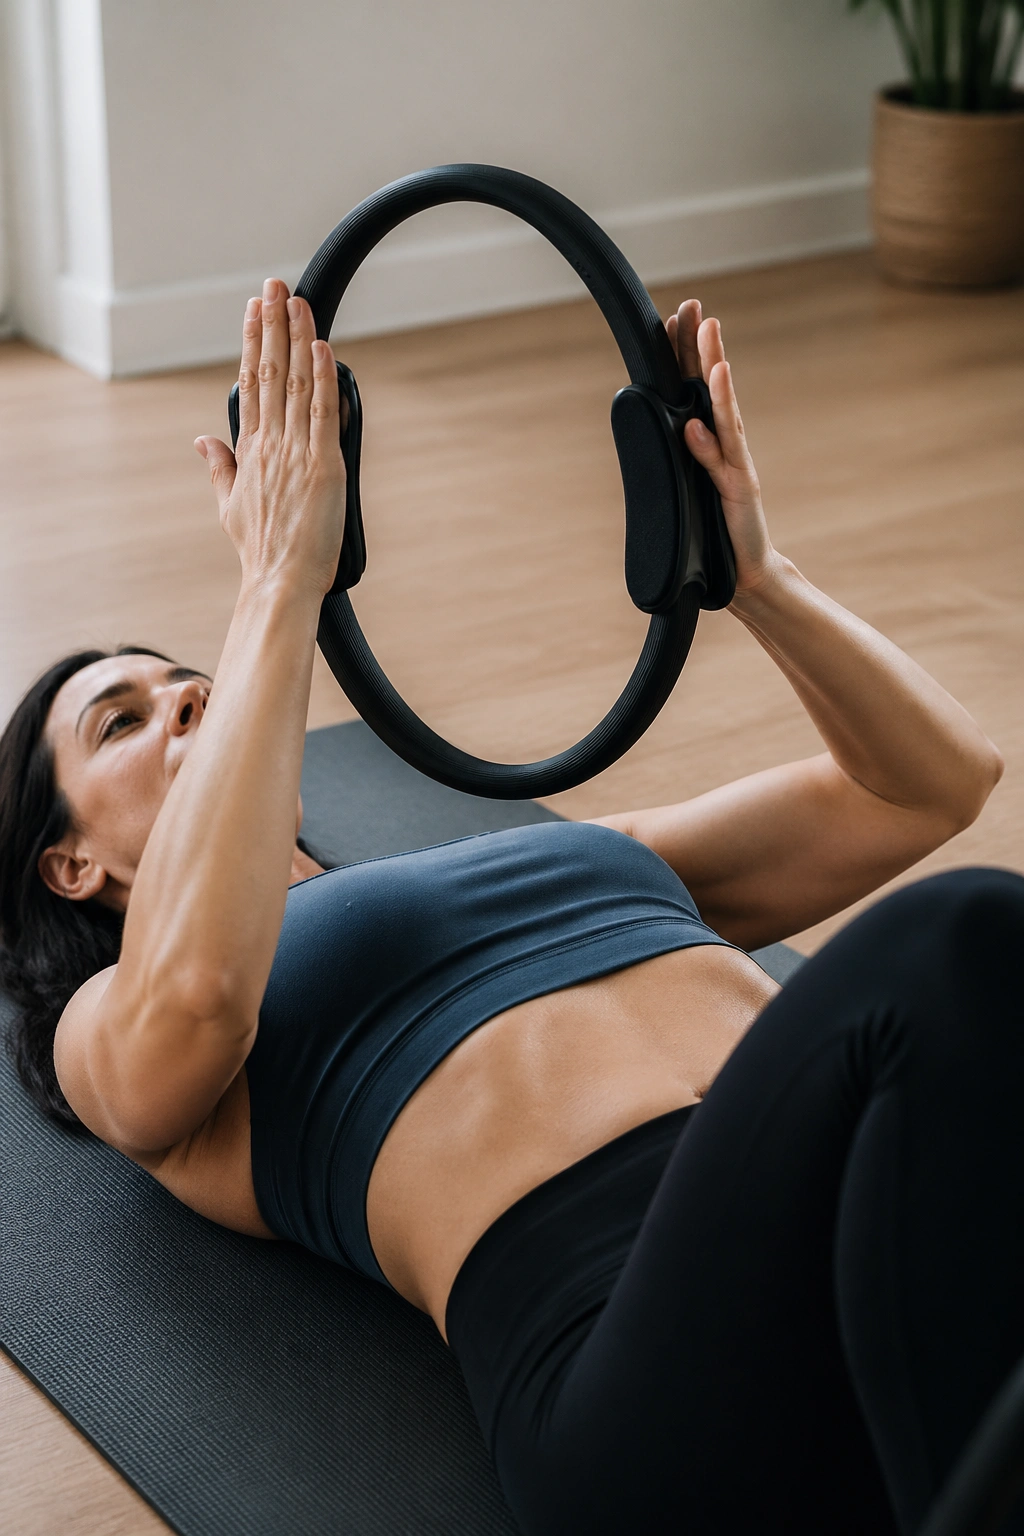
Not every Pilates ring exercise is about the legs. Some of the best ones are about the arms, chest, and the small stabilizers around the shoulders that people forget until they ache.
Lie on your back with your knees bent and the ring between your palms over the center of your chest. Press inward with moderate effort, then release just enough to keep tension in the ring. The chest should feel active, but the neck should stay loose. If your traps grab immediately, you’re pressing too high or too hard.
This one works well as a warm-up because it teaches the arms to connect to the ribs without a lot of drama. The movement is tiny. The effect is not.
A few practical notes:
- Keep the elbows slightly bent, not locked.
- Imagine the shoulder blades sliding down the back pockets.
- Press on the exhale for a cleaner rib cage.
You can also try the ring a little lower, around rib height, if that feels better on the shoulders. I prefer that position for tight chests. It keeps the chest open without turning the move into a shrug.
6. Kneeling Overhead Press
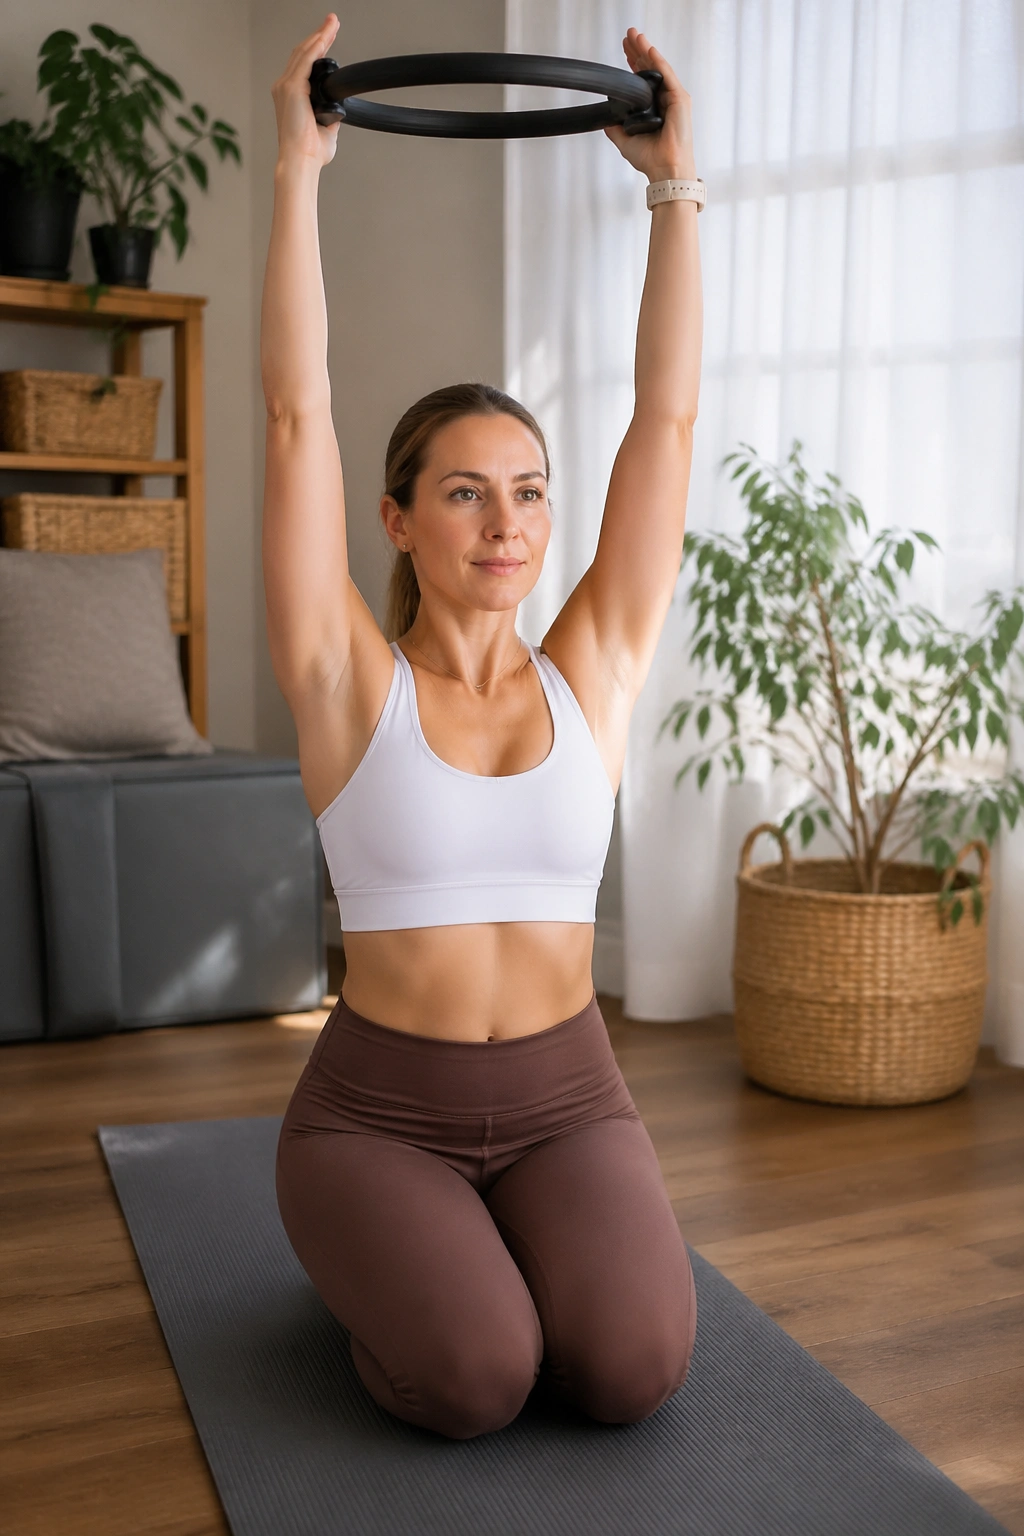
Half the benefit here is posture. Tall kneeling takes away a lot of the cheating that standing allows, so the minute you raise the ring overhead, you have to earn the shape.
Kneel on a mat with your hips stacked over your knees and the ring held between your palms at chest level. Press lightly, then reach the ring overhead without letting your ribs flare forward. Lower it back to shoulder height with the same control. The movement should feel smooth, almost boring, and that is a good sign.
What to watch in the ribs
The common mistake is easy to spot. As soon as the arms go up, the front of the body pops open and the low back arches. Nope. Keep the zipper line of the belly gently active and the pelvis stacked.
- Squeeze the ring only 20 to 30 percent.
- Reach long through the fingertips.
- Keep the neck tall, not poked forward.
If kneeling bothers your knees, double the mat or fold a towel under them. There is no prize for suffering on a hard floor. The ring is supposed to sharpen the work, not punish your joints.
7. Clamshell with the Ring
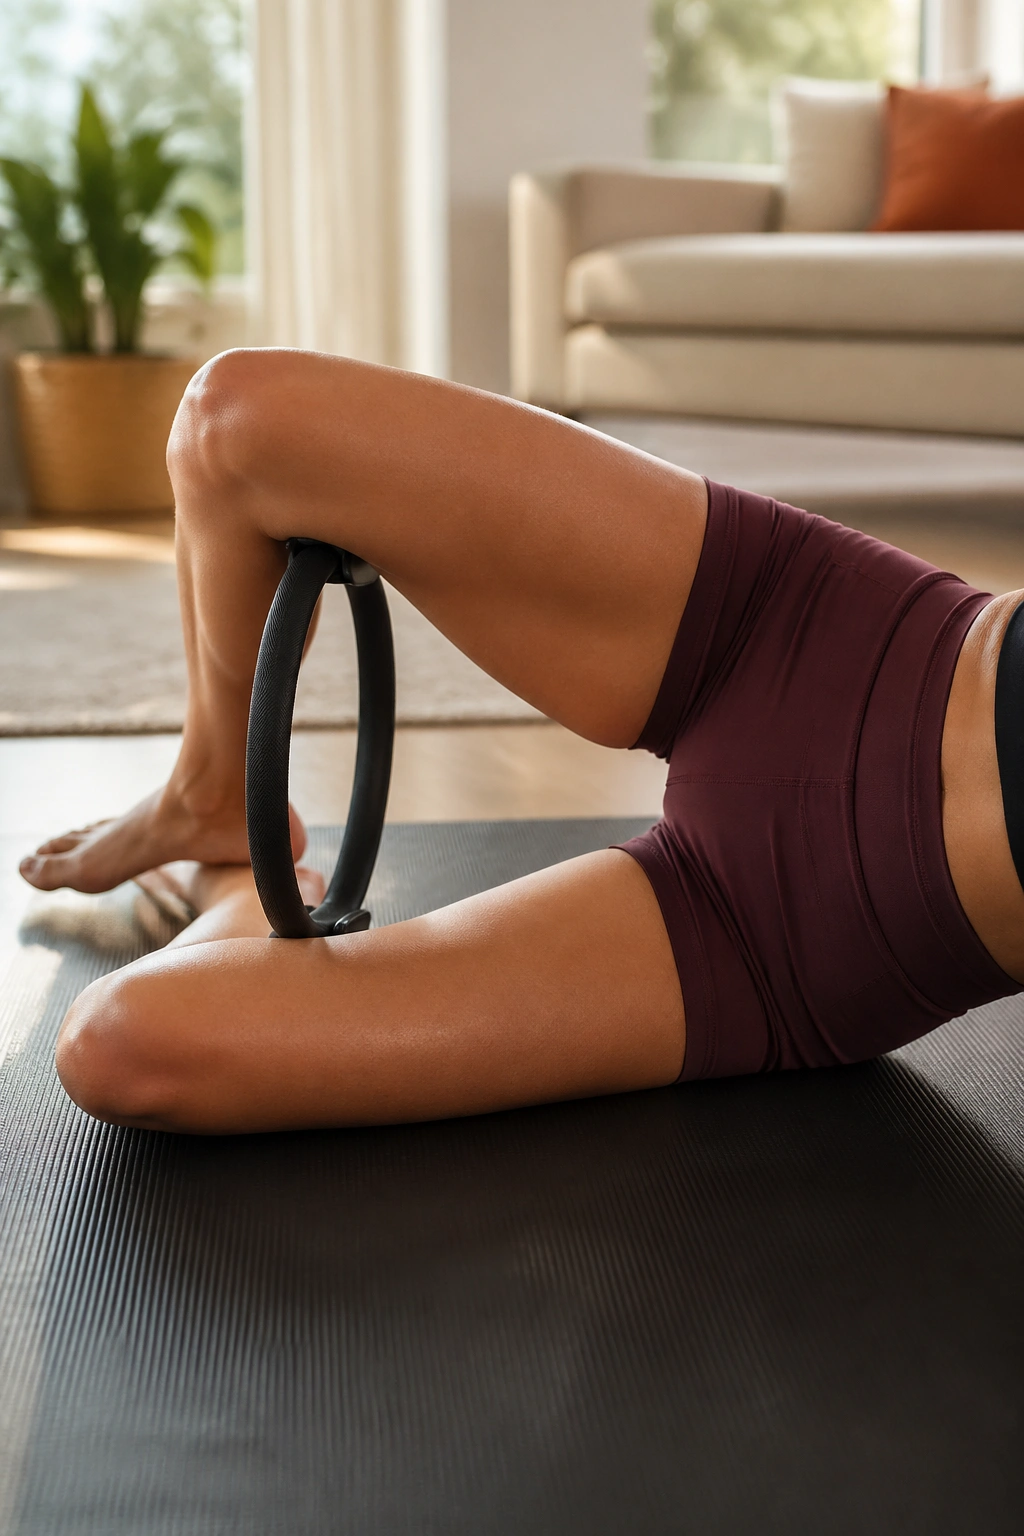
Clamshells are already good for the outer hips. Add the ring and they become more honest, because you can’t fling the knee open and call it control. The circle keeps you working through a smaller, better range.
Lie on your side with your knees bent and the ring just above the knees. Stack the hips, keep the feet together, and open the top knee while the ring gives you gentle resistance. Close with the same pace. The pelvis should stay still enough that a glass of water on your hip would survive. Maybe not a full glass. You get the idea.
Keep the pelvis stacked
This move gets sloppy fast if the waist collapses backward. A small towel under the waist can help you feel the side body. Also, don’t crank the top knee wide. Ten clean reps beat twenty wobbly ones.
- Think of the thigh rotating open, not the whole leg blasting upward.
- Keep the feet touching.
- Stop before the low back starts helping.
This is one of my favorite ring exercises for people who sit a lot. The glute medius wakes up, the hips feel more organized, and the entire side body gets less sleepy.
8. High Plank Ring Press
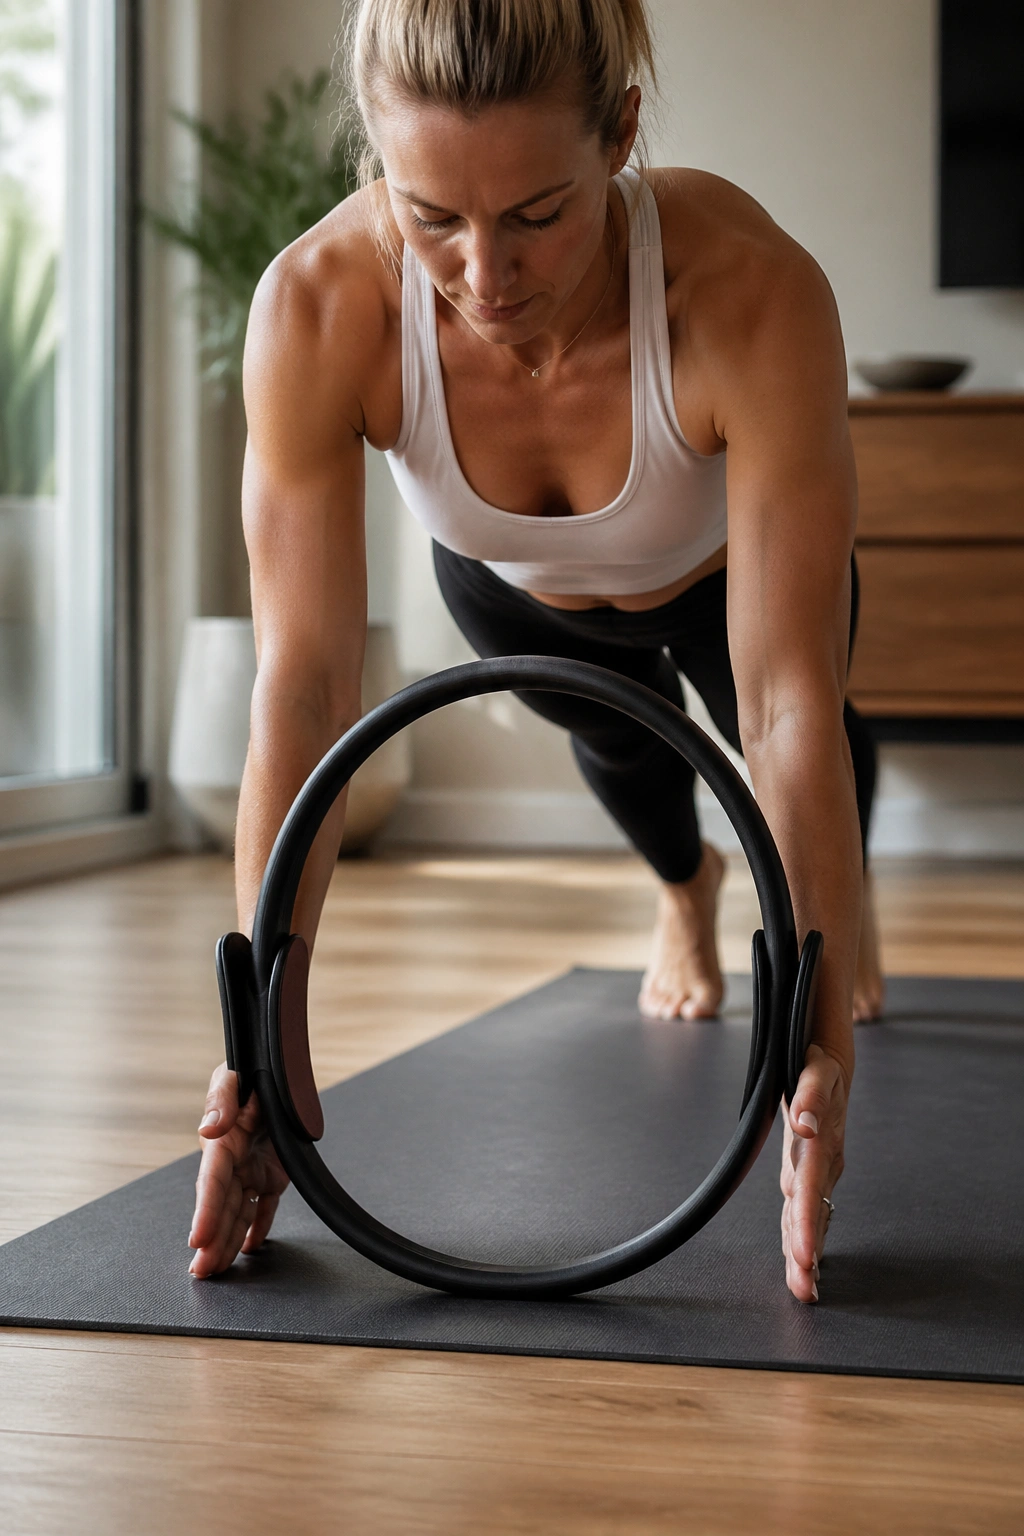
A plank with a magic circle between the palms is a small idea that gets big fast. Your chest has to stay broad, your ribs have to stay contained, and your shoulders can’t drift into chaos. That combination exposes weak links in a hurry.
Set up in a high plank with the ring between your hands at shoulder width. Press inward lightly while you hold the plank, then release just enough to keep the tension alive. If your wrists are cranky, do it on fists or on push-up handles. The point is not to torture the wrists. The point is to keep the upper body stable under load.
Why the ring changes the plank
The ring gives your arms a job besides “hang there.” That small inward pressure helps connect the chest to the trunk, which makes the plank feel more organized. It also stops the hands from drifting too wide, which can make the shoulders feel loose and sloppy.
- Keep the gaze slightly ahead of the fingertips.
- Push the floor away.
- Hold for 10 to 20 seconds, or breathe for 5 slow exhales.
Short holds are enough. A clean 15-second plank beats a sagging 45-second one, and I’ll take the cleaner version every time.
9. Standing Magic Circle Squat Press
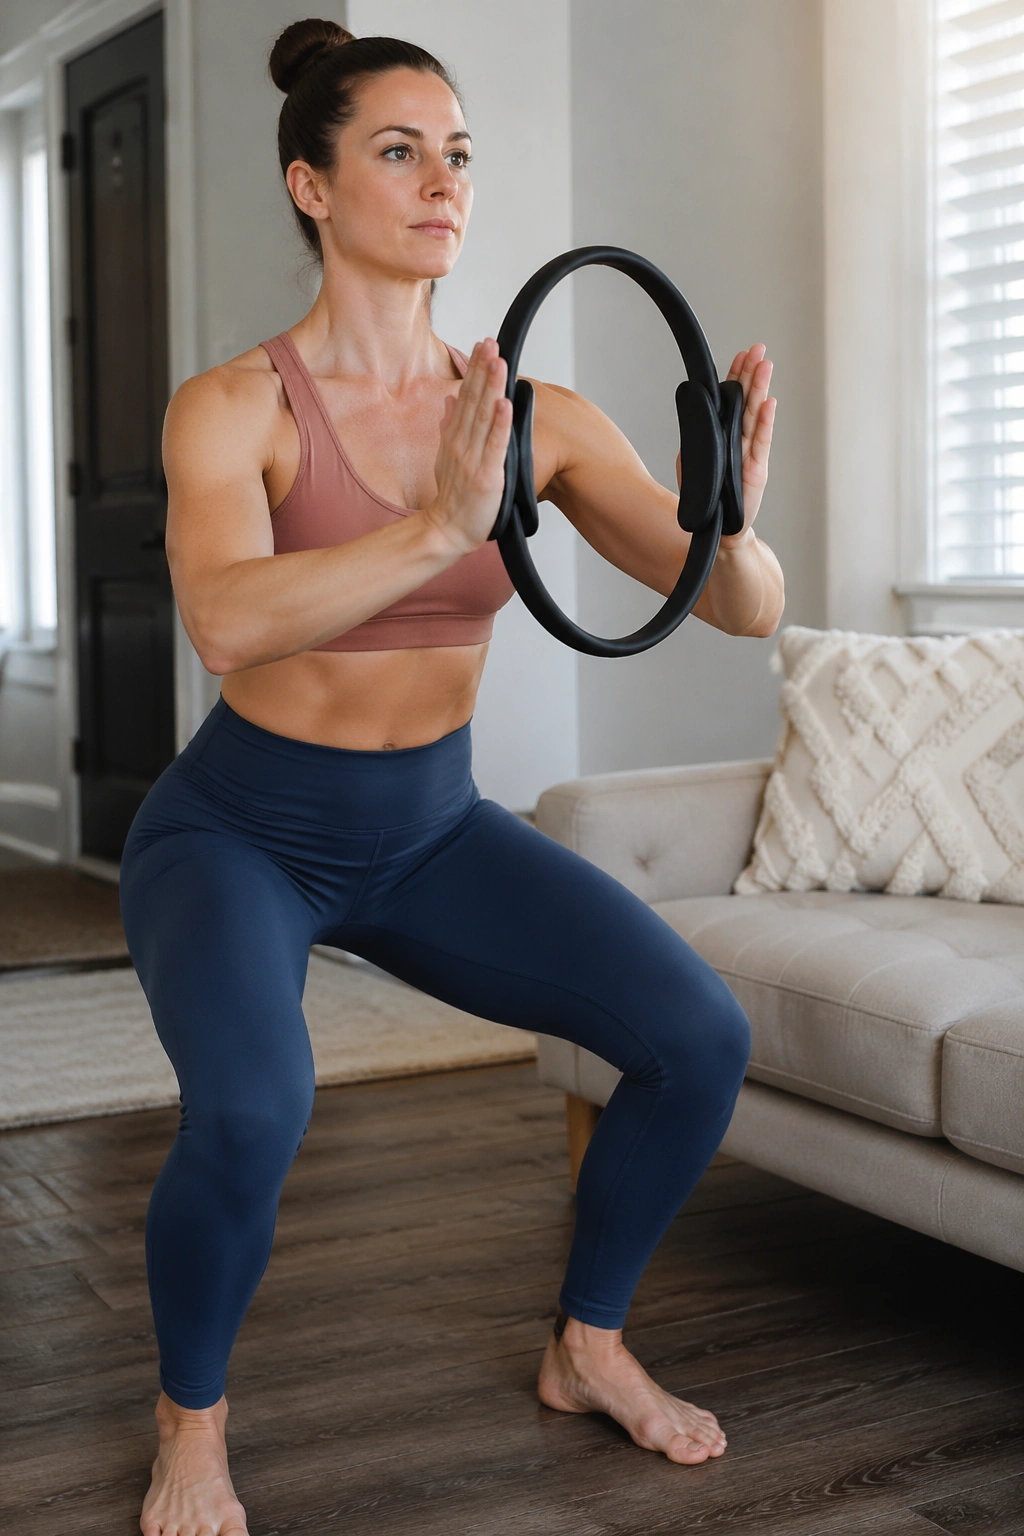
Standing work is where the ring starts to feel a bit more athletic, but not in a loud way. A squat press with the magic circle teaches the legs to share the load while the torso stays upright.
Stand with feet about hip-width apart and hold the ring between your palms at chest height. As you sit back into a small squat, press the ring inward. Stand up and ease the pressure a touch. The movement should feel smooth through the knees and quiet through the feet. No stomping. No bouncing.
This is a good one for people who want more lower-body work without turning the session into cardio. You get quads, glutes, inner thighs, and shoulder stability in the same move.
A few details that matter
- Keep the knees tracking over the second toe.
- Sit back only as far as you can keep the spine long.
- Press the ring on the way down or at the bottom, not both if that makes you tense.
If your heels want to lift, shorten the squat. That’s the fix. Not a deeper squat. The deeper version is not a badge. It is just a deeper version.
10. Seated Spine Twist Press
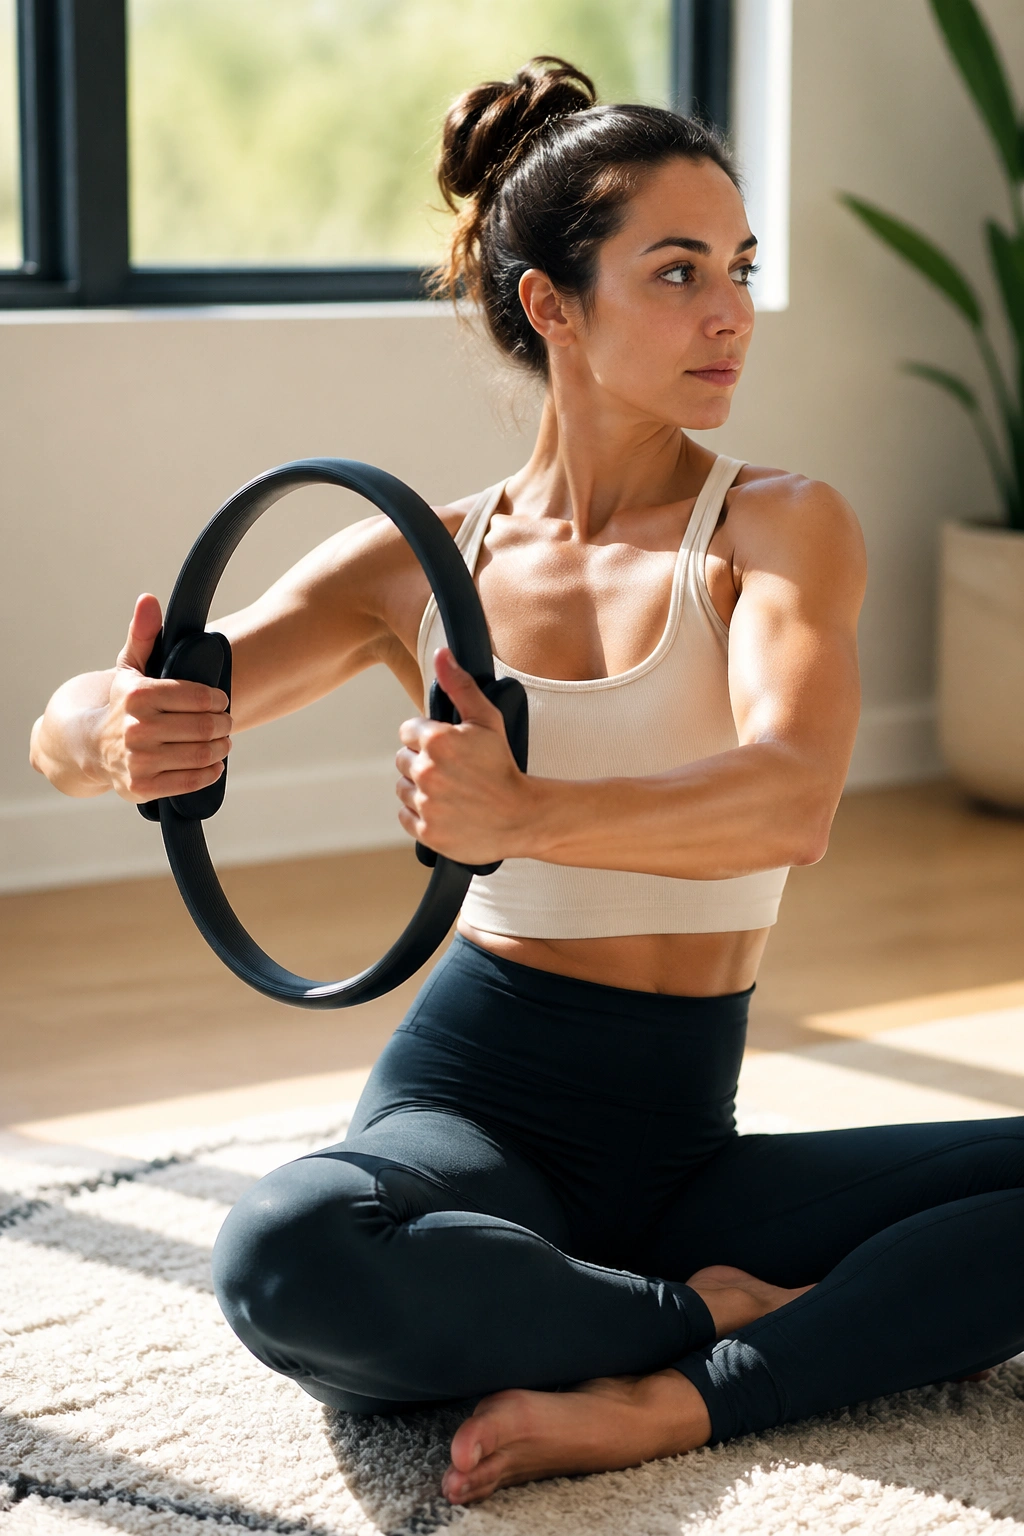
Seated twist work can go wrong in a hurry if the torso turns by flinging the arms instead of organizing the spine. The ring helps because it gives the hands a point of focus, and that makes the twist cleaner.
Sit tall with your legs crossed or extended in front of you if that is more comfortable. Hold the ring between your palms at chest height. Grow upward first, then rotate the rib cage to one side while pressing lightly into the ring. Return through center and switch sides. The pelvis should stay heavy on the mat.
How to use the breath
Exhale into the twist. That usually helps the ribs rotate without strain. Inhale to return and lengthen. If the shoulders rise toward the ears, the ring is probably too high or the twist is too big.
A short list of what to feel:
- Tall spine.
- Quiet hips.
- Rotation from the waist and ribs, not just the arms.
This move is better when it is smaller than you expect. I know that sounds underwhelming. It isn’t. A controlled twist teaches more than a flung one, and your back will thank you later.
11. Single-Leg Bridge March
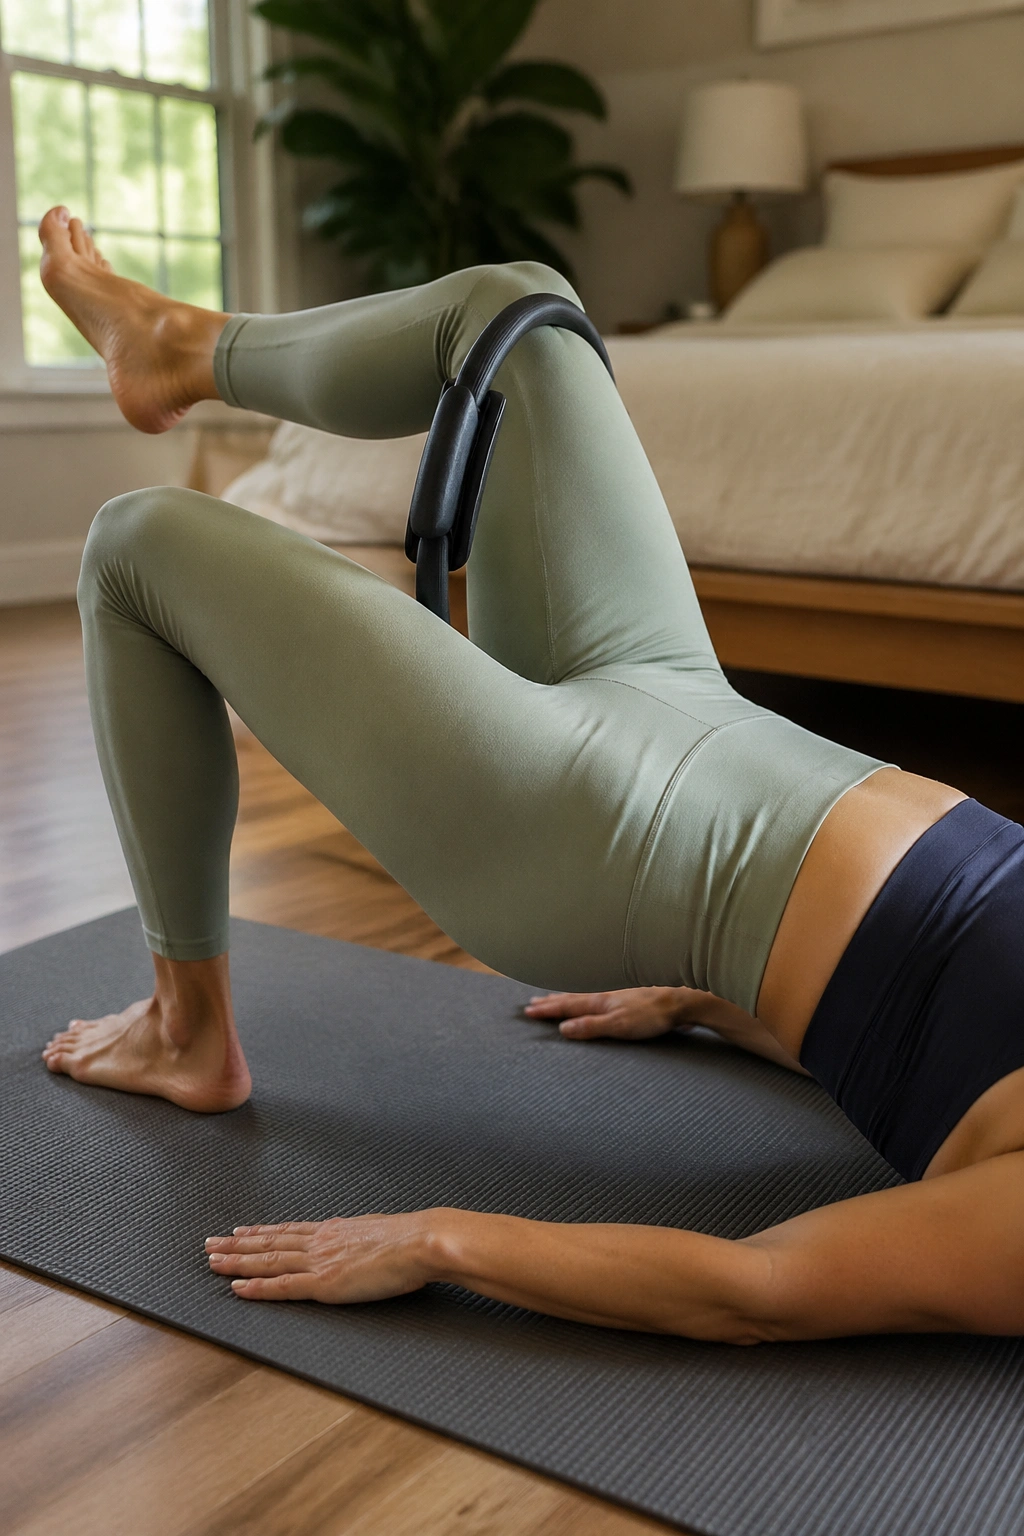
Here’s where a bridge stops being a bridge and starts asking about balance. Marching one leg at a time while holding the ring between the knees is one of the best tests of whether your pelvis is actually steady or just pretending.
Set up in a bridge with the ring between the knees and your hips lifted. Keep the squeeze light and lift one foot a few inches off the floor, then place it back down and switch sides. The hips should stay level. If one side drops, reduce the height of the bridge and make the march smaller.
What to feel
- The standing leg glute should do most of the work.
- The ring should stay centered.
- The belly should stay braced without gripping.
A lot of people make this too dramatic. They lift the knee too high, the pelvis twists, and the low back ends up rescuing the whole thing. Keep the lift tiny. That is not a weakness. That is control.
Try 6 to 8 marches per side. Slow enough that you can count them. Faster is not better here.
12. Mermaid Side Bend with the Ring
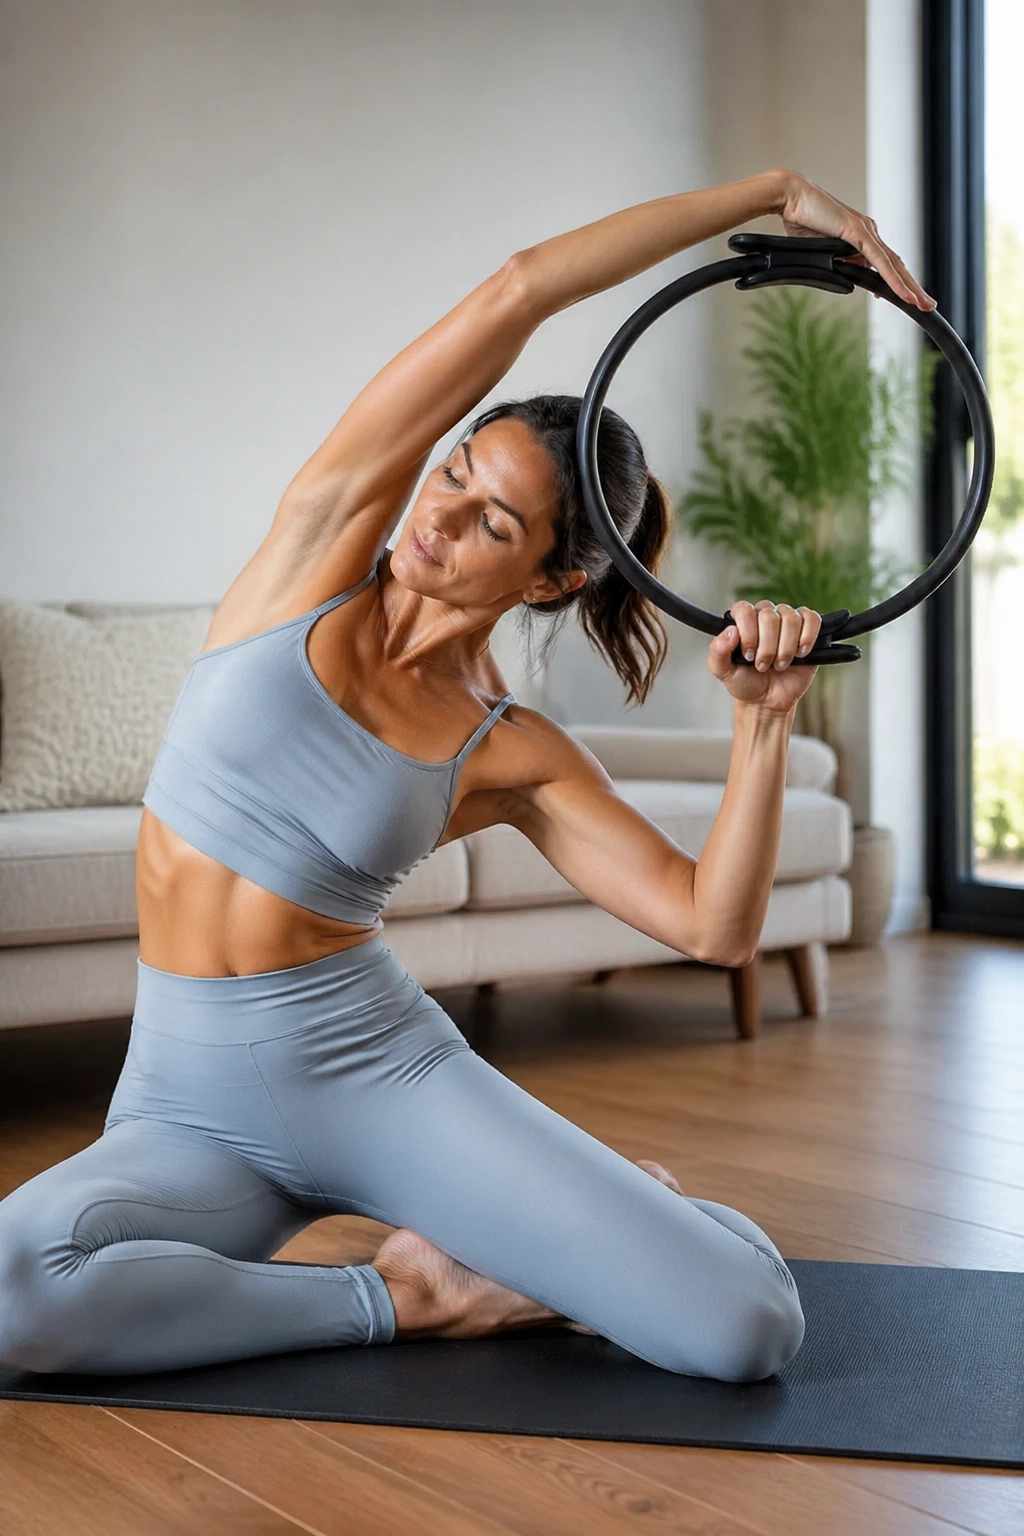
Mermaid with a magic circle feels elegant, but not in a fussy way. It opens the side body, stretches the ribs, and lets the shoulders move without collapsing the waist.
Sit to one side with your legs folded in a comfortable mermaid position. Hold the ring between your palms in front of your chest, then press lightly as you reach one arm overhead and side-bend toward the mat. Return with control and switch sides. The ring adds a little presence to the upper body, which helps keep the shape long instead of floppy.
The best part is the stretch through the side ribs. You can feel it between the waist and the armpit if you go slowly enough. That stretch is often tighter than people expect, especially after a day of sitting.
Use these cues:
- Keep both sit bones heavy.
- Reach the top arm long before folding sideways.
- Avoid collapsing into the lower shoulder.
There’s a satisfying breathiness to this move. It resets the body without making a scene, and I love that about it.
13. Rolling Like a Ball with the Ring
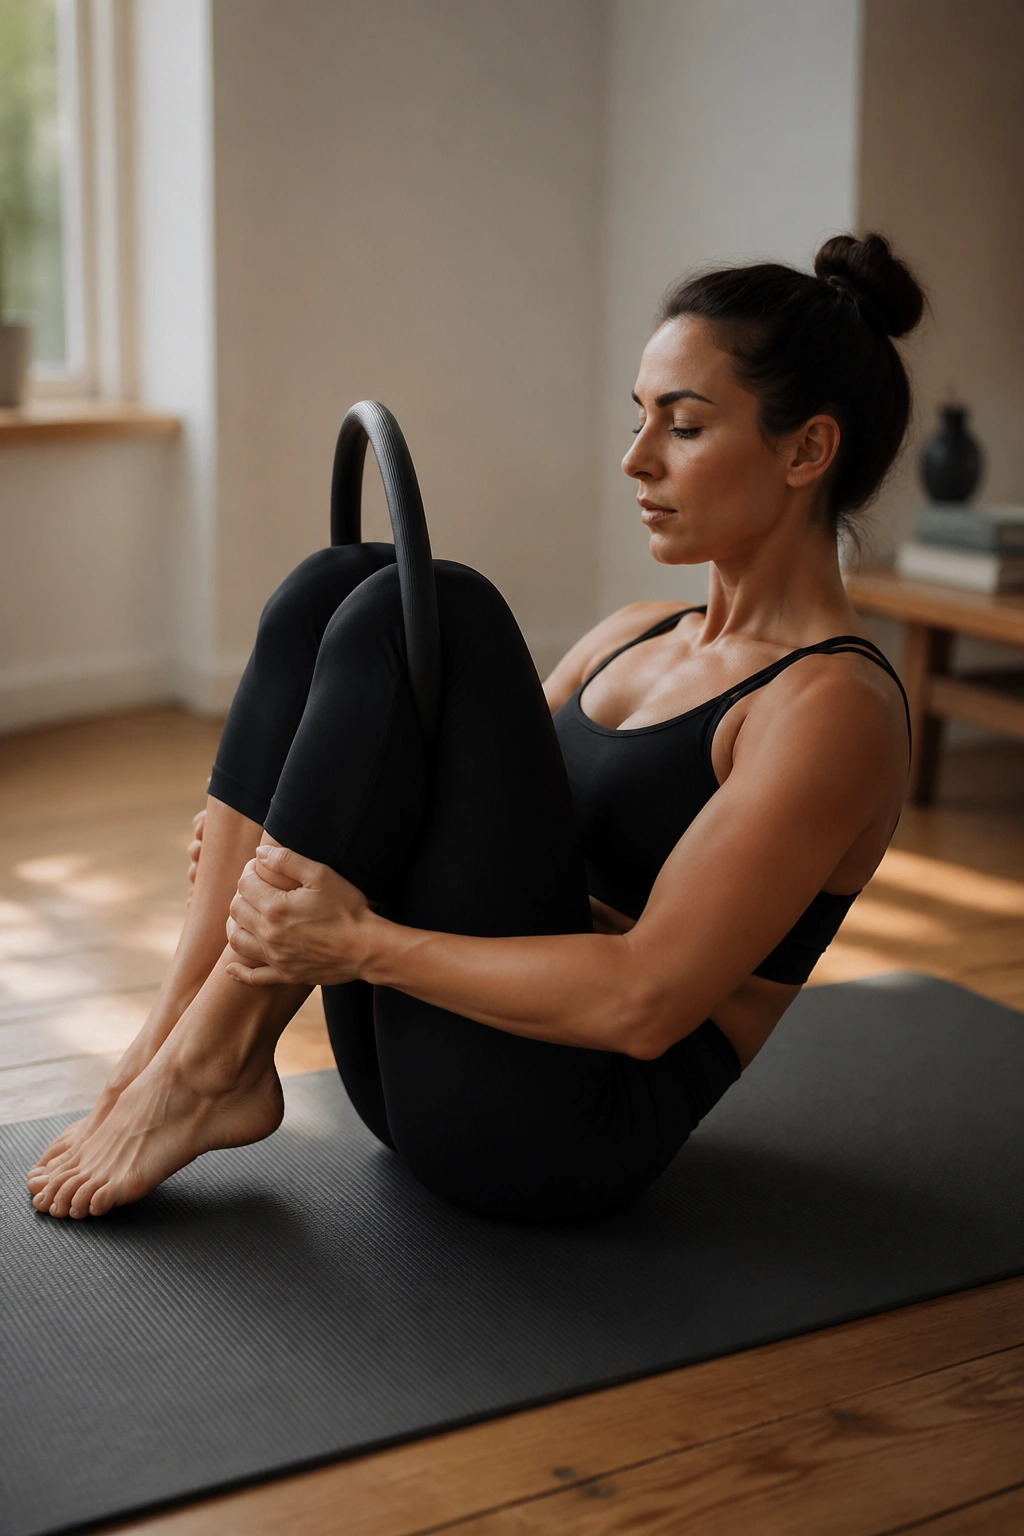
A lot of people think rolling like a ball is only about balance, but the ring changes the conversation. It keeps the knees and shins from wandering, and that makes the roll smoother and more contained.
Sit on the mat, draw the knees in, and place the ring between the thighs or just above the knees. Hold behind the thighs or around the shins, then round back into a small ball shape. Rock back onto the upper back and return to balance without letting the feet slap down. The movement should feel like a controlled roll, not a tumble.
Why the ring helps
The circle gives the legs a physical boundary. That matters because the knees love to drift apart when momentum takes over. Pressing the legs lightly into the ring keeps the shape compact and makes the roll more consistent.
- Keep the chin tucked slightly.
- Balance on the sit bones before each roll.
- Use the exhale to come back up.
If your tailbone is sensitive, sit on a folded towel. That tiny bit of lift can make the whole exercise feel much kinder. Small adjustments like that keep people practicing, which is the real win.
14. Teaser Prep with the Magic Circle
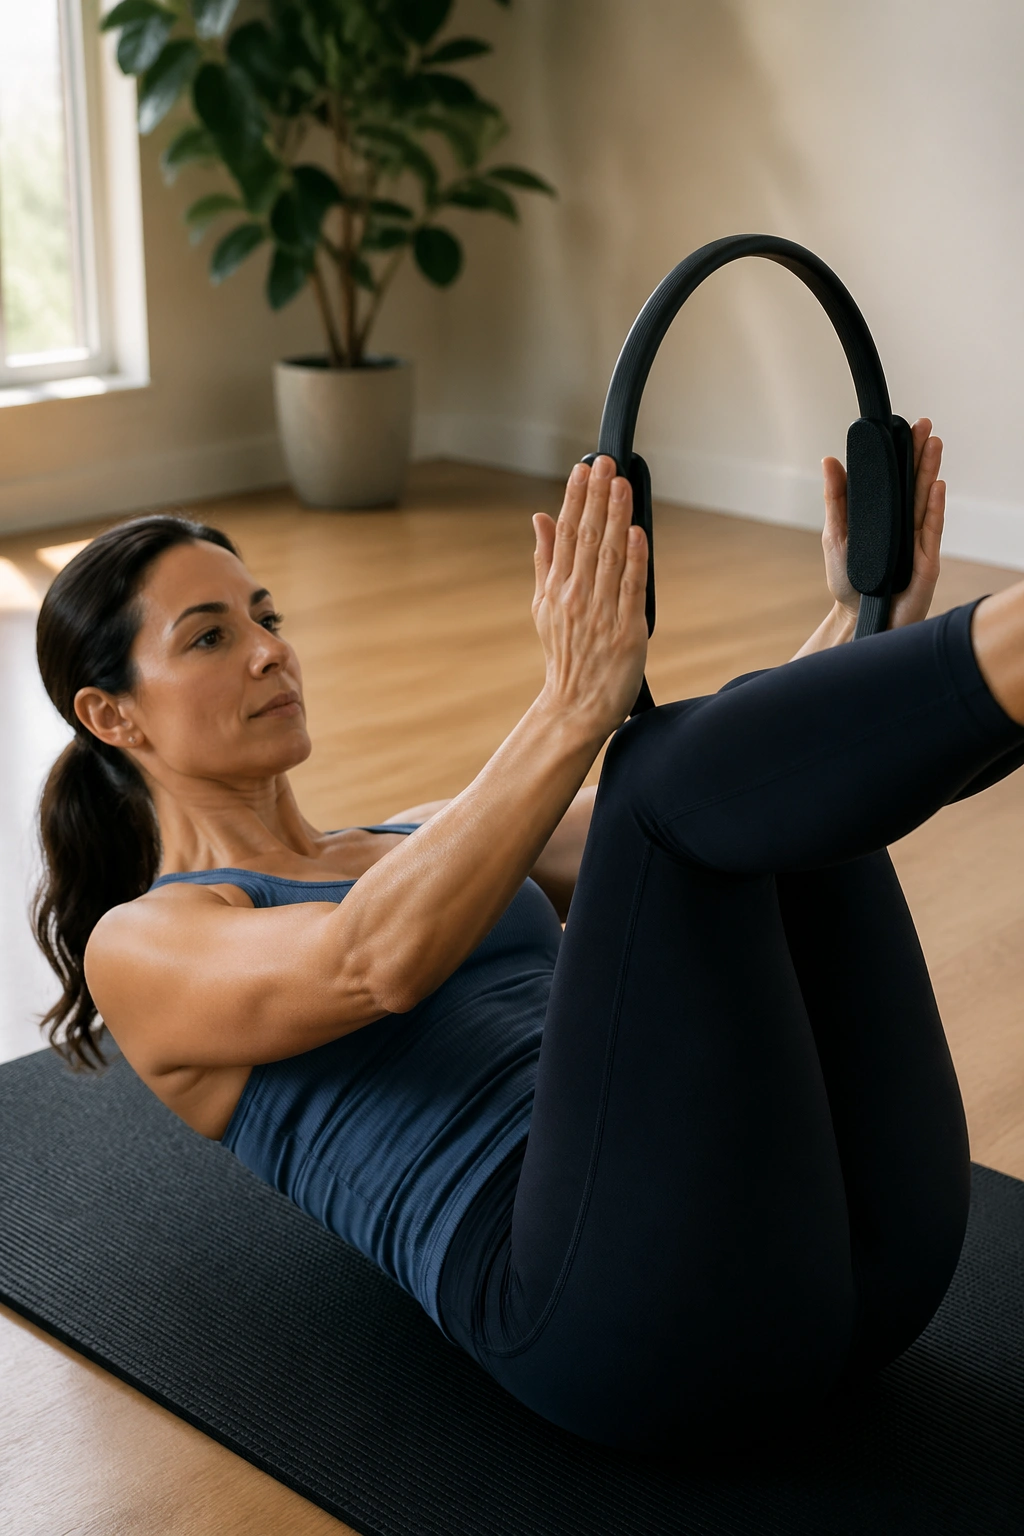
Teaser prep is where people either fall in love with Pilates or mutter at the ceiling. With the ring, the move gets a clearer shape because the arms have something to reach into while the torso lifts.
Lie on your back, knees bent, and hold the ring between your palms or just above the shins. As you exhale, curl the head, shoulders, and ribs up while one leg floats to tabletop. Reach the ring forward, not up into the sky. Lower with control. That reach matters. It keeps the chest from collapsing and the shoulders from hiding.
Where the teaser goes wrong
The usual mistake is speed. The second the lift gets fast, the neck starts working too hard and the low back loses support. Keep the motion slow enough that you can feel each segment of the spine leaving the mat.
- Start with one leg only if both legs are too much.
- Keep the ring steady between the hands.
- Stop before the lower back strains.
This is one of those exercises where less range gives you more quality. A half teaser with good form is more useful than a full teaser with shaky ribs and a clenched jaw.
15. Wall Roll-Down with Ring Overhead
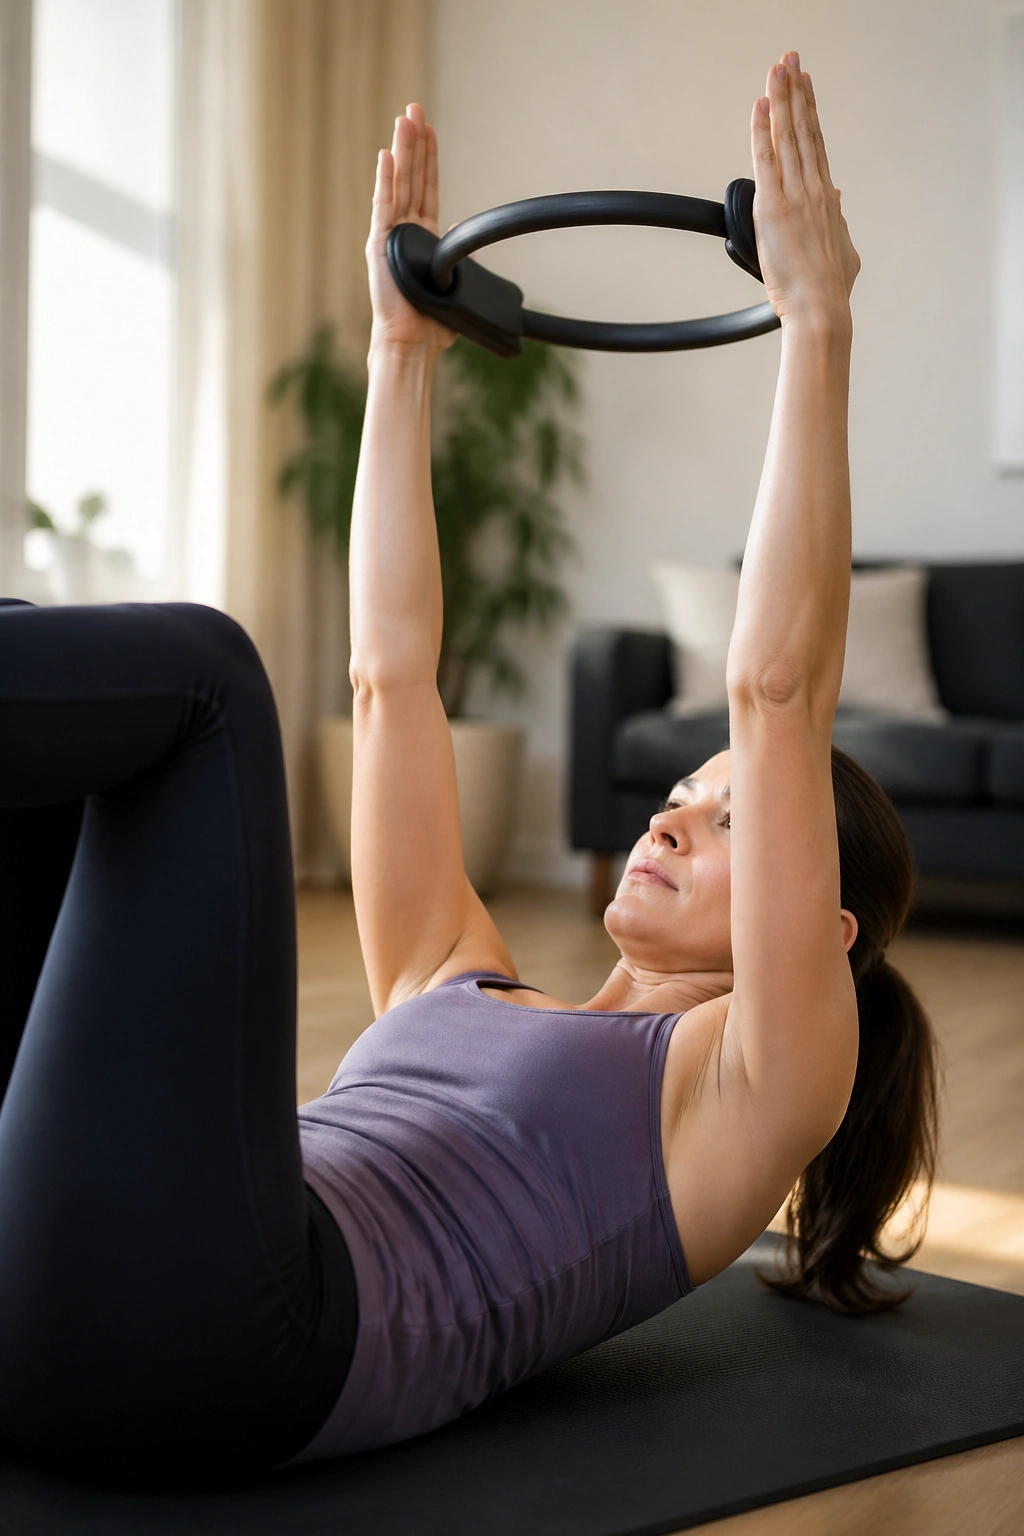
If you want a finisher that leaves the body long instead of fried, this is a good place to stop. A wall roll-down with the magic circle overhead gives you spinal articulation, shoulder opening, and a calm way to end the session without lying in a heap.
Stand with your back a short distance from the wall and hold the ring overhead with soft elbows. Press lightly, then nod the chin and roll the spine down one vertebra at a time, letting the ring travel with you. Keep the weight even through the feet. Roll back up slowly, stacking the spine until the head comes last. The movement should feel smooth, not forced.
Make it a finisher
This works well after a short circuit because it undoes the tension that tends to build in the shoulders and low back. If the hamstrings are tight, bend the knees a little. If the neck feels pinchy, lower the arms to chest height instead of reaching overhead.
- Roll down on the exhale.
- Let the shoulders stay soft.
- Keep the ring gently active, not squeezed hard.
Two or three slow passes are enough. That’s the kind of ending I like here: quiet, organized, and a little humbling. The body feels taller when you finish, which is a nice way to leave the mat.
