



People often walk into a studio thinking barre is all about the legs. They anticipate an hour of pulses, calf raises, and glute work. They leave surprised by the intensity of the abdominal work. You see, the magic of this discipline lies in the engagement of the transverse abdominis—that deep, corset-like muscle that wraps around your waist. It is not just about crunching; it is about holding, stabilizing, and breathing through the burn.
If you are looking to build a midsection that is not just visible, but functional and strong, you have come to the right place. These exercises do not rely on heavy weights or complicated gym machines. They use your own body weight, gravity, and the subtle, isometric movements that make barre so uniquely punishing.
Prepare to shake. When your muscles tremble during these movements, that is not weakness. That is change. It is the moment your muscle fibers are working at capacity, trying to keep you upright and steady. Do not stop when the shake starts—lean into it.
1. Standing Knee-to-Elbow
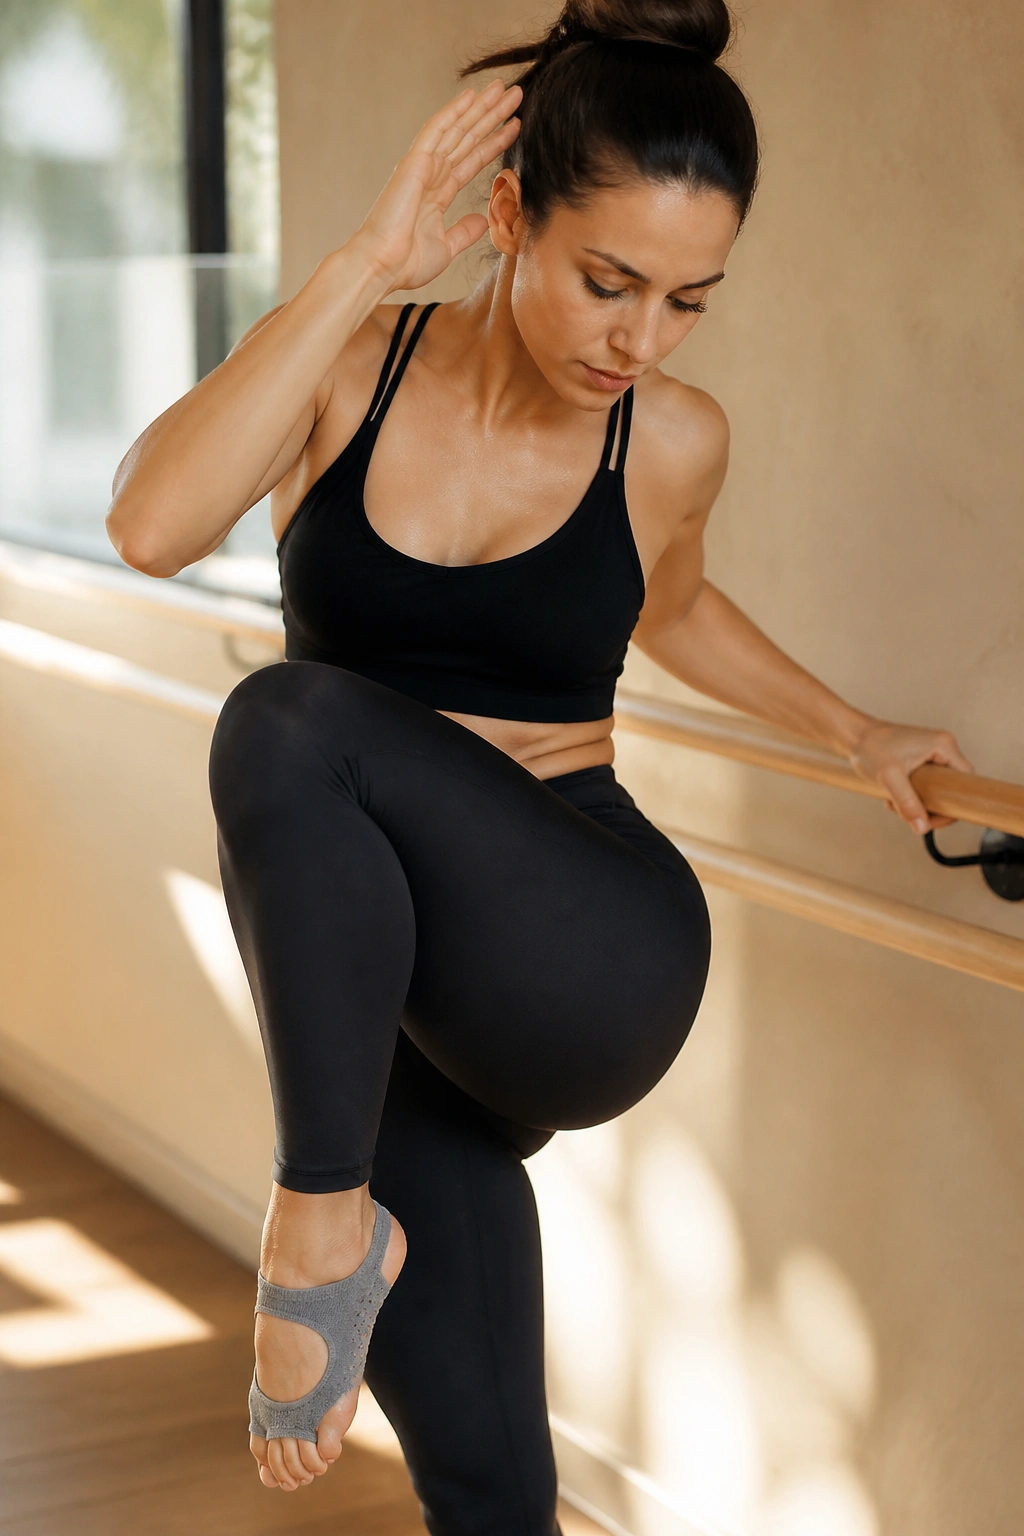
This is a classic barre move that requires more coordination than most people expect. By shifting your weight to one leg and bringing the opposite knee to meet your elbow, you engage the obliques while testing your balance. You are not just crunching; you are fighting for stability.
The Mechanics of the Move
Stand with one hand on the barre for support. Keep your standing knee slightly bent—never lock it out. As you bring your working knee up to the side, tilt your torso toward that same side. You should feel an immediate engagement in the side of your waist.
- Focus on the reach: Extend your arm overhead before starting the crunch to maximize the range of motion.
- The pivot point: Think about crunching your ribcage down toward your hip bone, rather than just lifting the leg.
- Keep it slow: If you rush through this, momentum will take over. The results live in the control.
Pro tip: Imagine you are squeezing a lemon between your ribs and your hip as you crunch. That visual cue helps you find the right muscle group every single time.
2. Plank with Knee Tucks
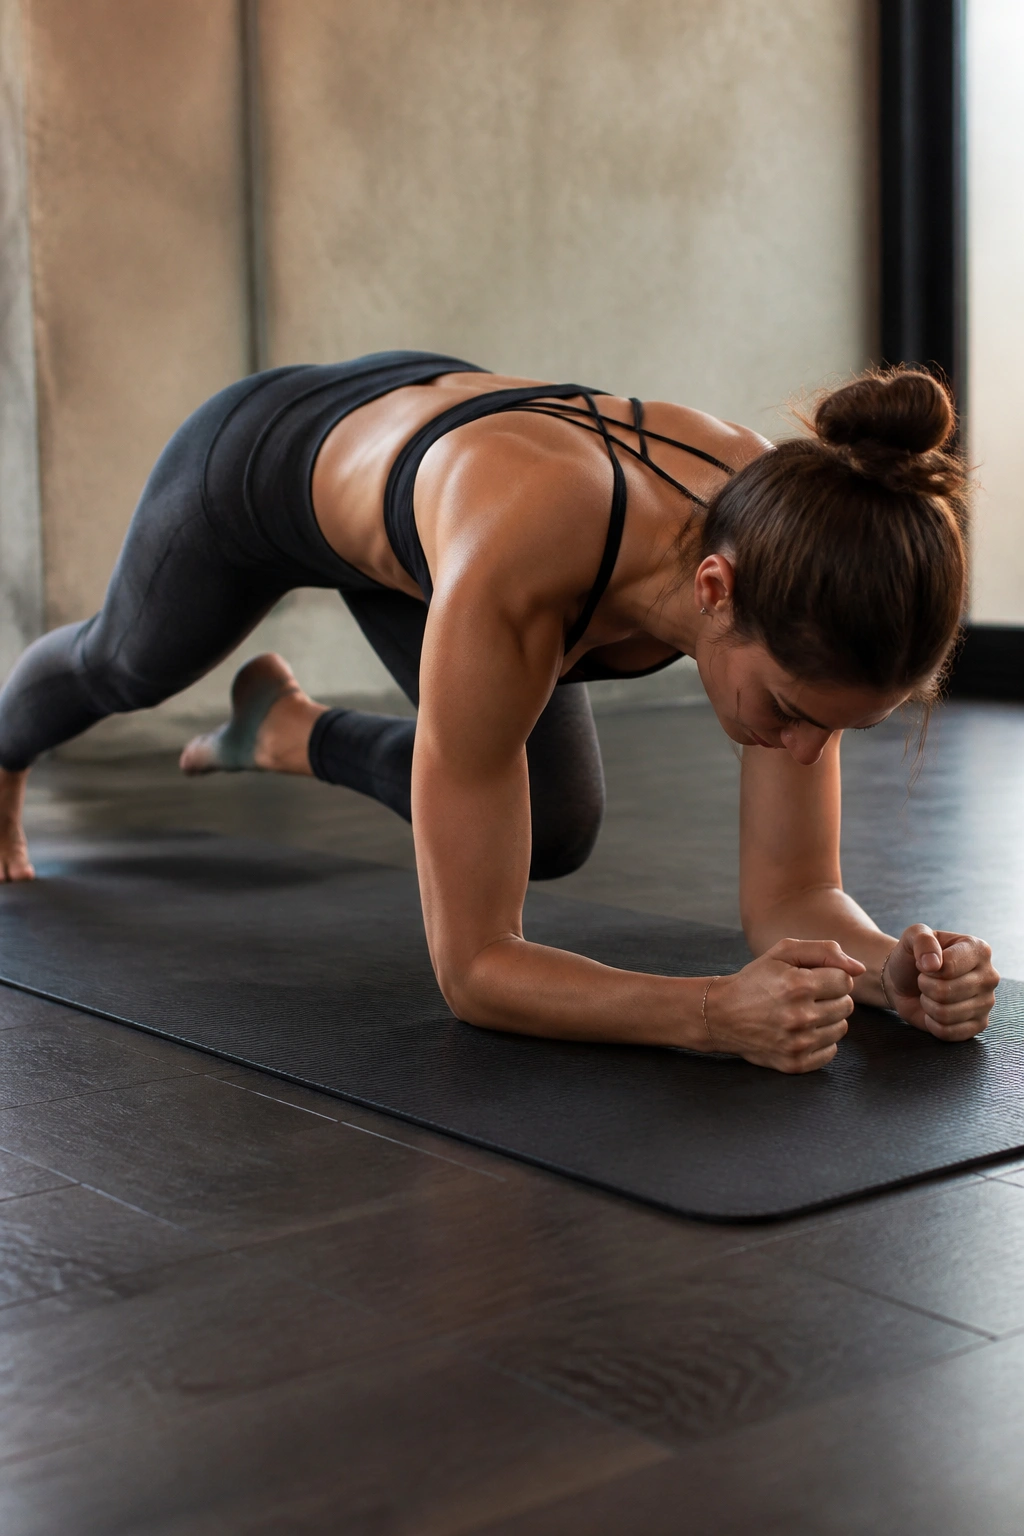
Planks are ubiquitous in fitness, but adding a knee tuck changes the game. This variation forces your lower abs to work overtime to pull your knees toward your chest while your upper body remains rigid. It is a dual-purpose movement that strengthens the entire trunk.
Start in a forearm plank position. Your elbows should be directly under your shoulders. Maintain a perfectly flat line from your head to your heels. If your lower back arches, you have lost the integrity of the move.
How to Execute Properly
- Engage your core by pulling your belly button toward your spine.
- Slowly tuck your right knee toward your right elbow.
- Return to the starting position without letting your hips drop.
- Repeat on the left side.
The most common mistake? Letting the hips pike up toward the ceiling. You want to keep the hips low and square to the floor throughout the tuck. If you cannot maintain a flat back, perform the tuck from your knees until your endurance improves.
3. Chair Pose Pulses
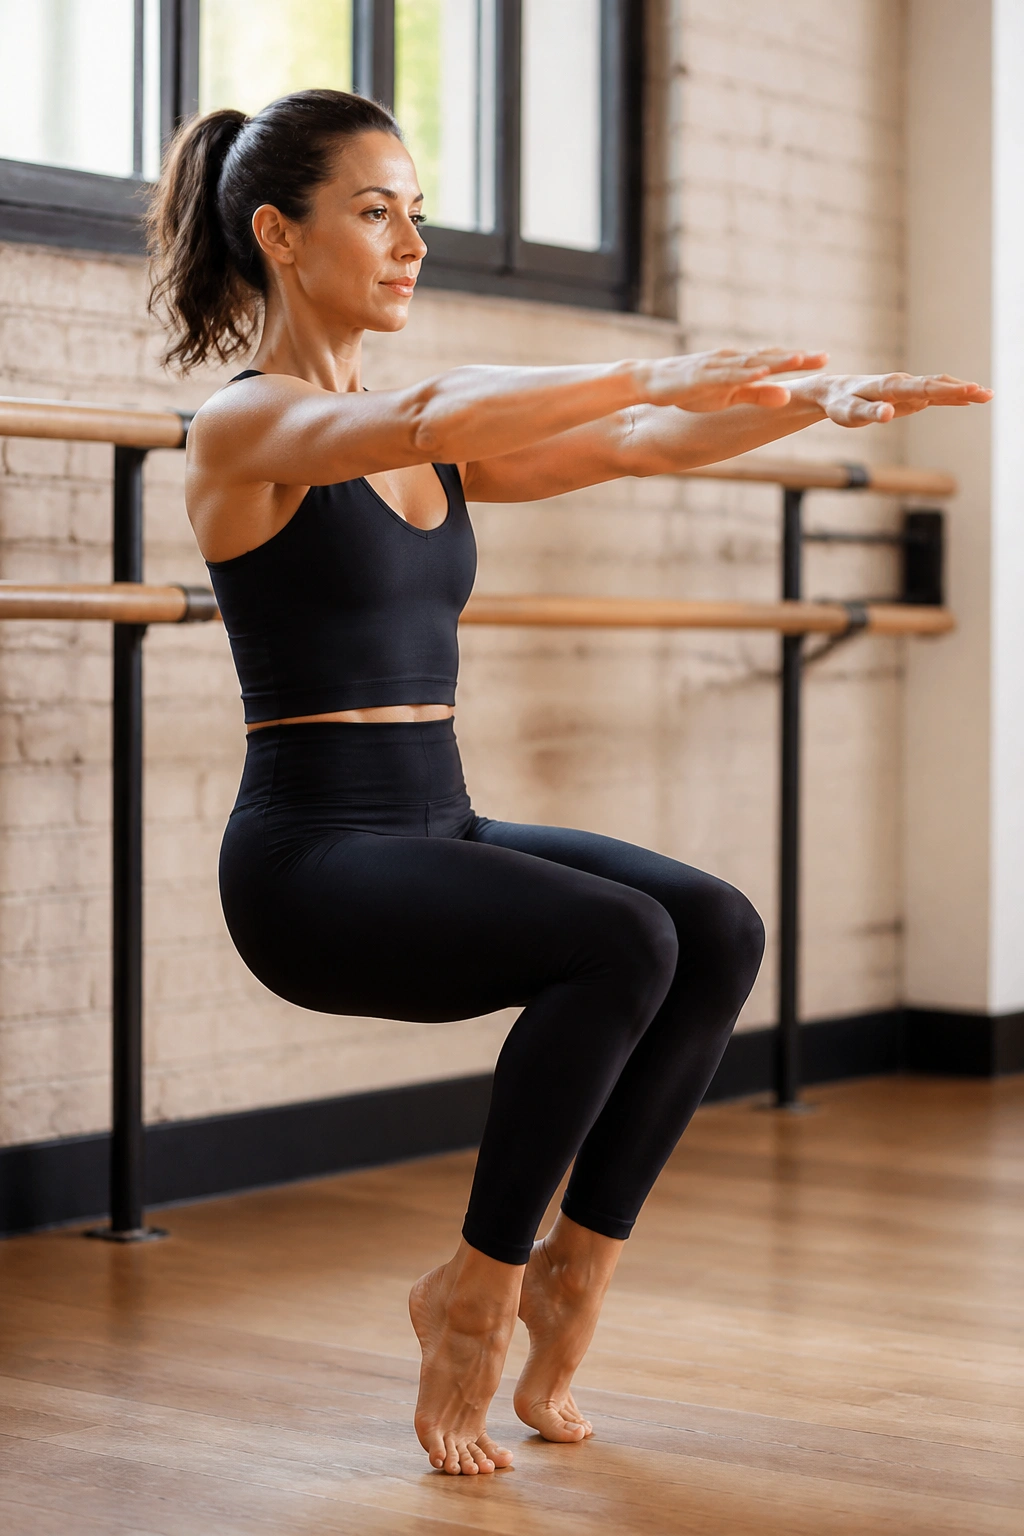
The chair pose is deceptive. It looks like you are simply sitting in an invisible seat, but the demand on the quadriceps and the deep abdominals is intense. In barre, we add a micro-pulse to keep the muscles under constant tension.
When you sit back into your heels, your core must engage to keep your torso upright. If you lean too far forward, you lose the abdominal contraction. If you lean too far back, you strain your lower back. You are looking for a vertical spine that feels like it is pressed against an imaginary wall.
Why the Pulse Matters
By pulsing, you prevent the muscle from resting. Even a one-inch movement up and down forces the stabilizer muscles to continuously adjust. This prevents adaptation and keeps the burn high.
- Keep the heels lifted: For an extra challenge, rise onto the balls of your feet.
- Check the tuck: Ensure your tailbone is pointing straight down, not flared out. A slight posterior pelvic tilt is the secret to finding your core here.
4. Supine Leg Lowers
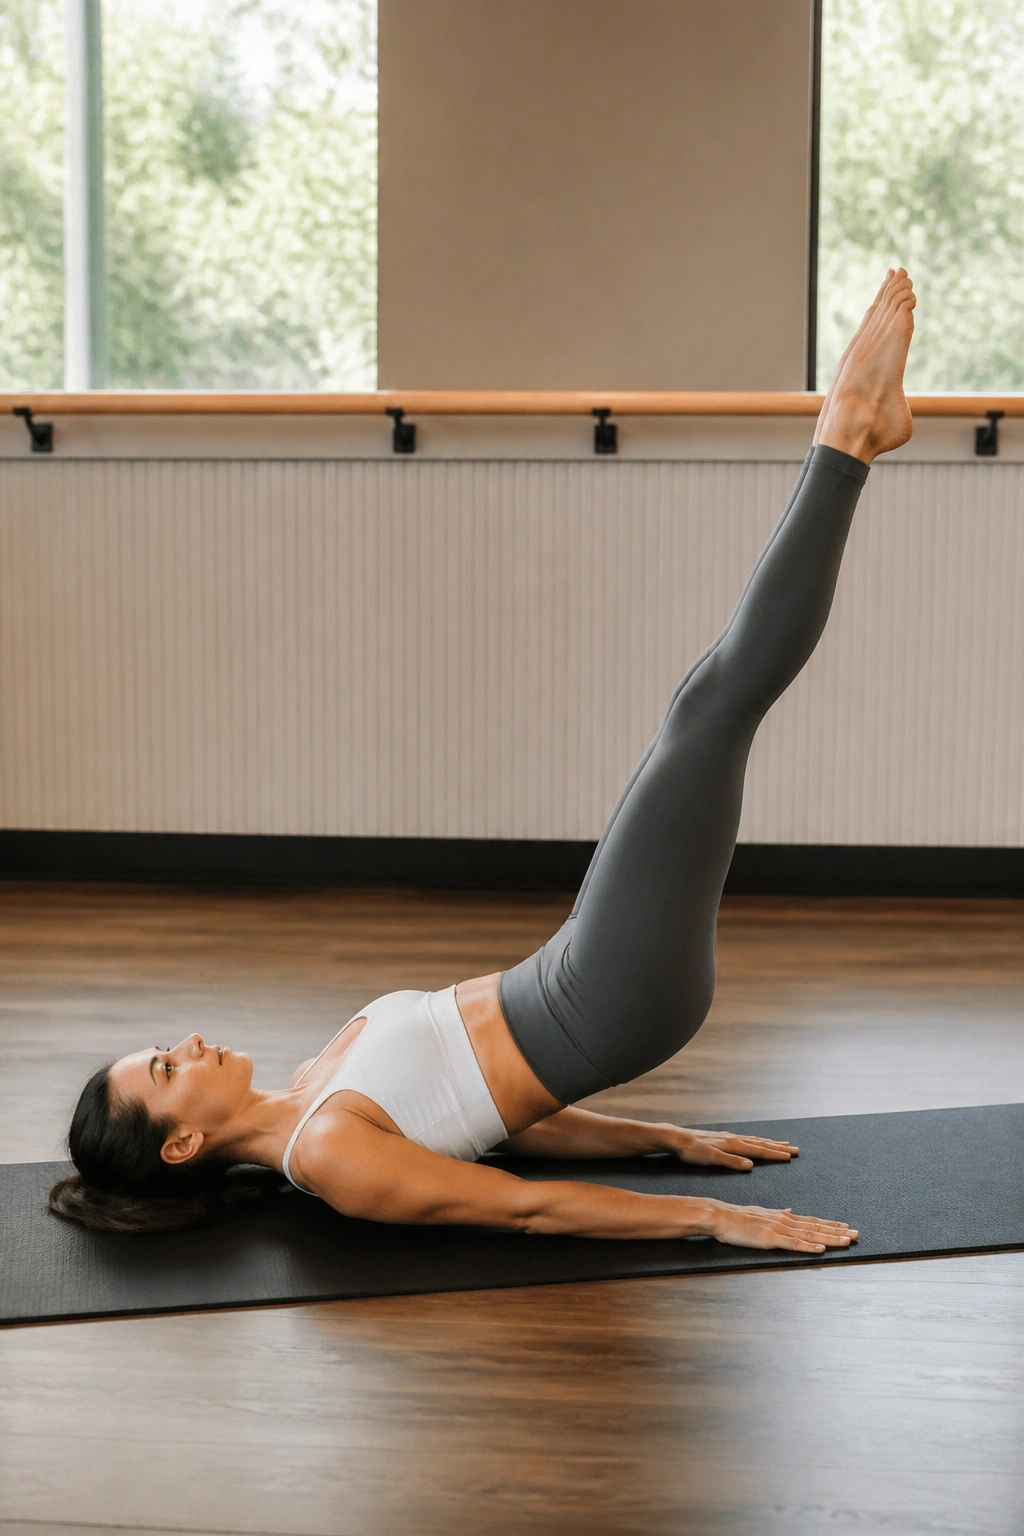
This move targets the lower rectus abdominis, the part of the core that is often the hardest to isolate. Lying flat on your back might feel like a rest, but once those legs start moving, the reality sets in.
Start by lying on your back with your legs extended straight toward the ceiling. Press your lower back into the mat—this is called the “imprint.” If you feel your back arching as your legs lower, stop immediately. Your core is only as strong as your ability to hold that spine flat.
Slowly lower both legs toward the floor. Only go as low as you can while keeping your back firmly glued to the mat. Then, lift them back to the starting position using your lower abs, not your hip flexors.
The secret: Move at a glacial pace. If you use momentum to swing your legs back up, you are bypassing the very muscles you want to strengthen.
5. The Hundred
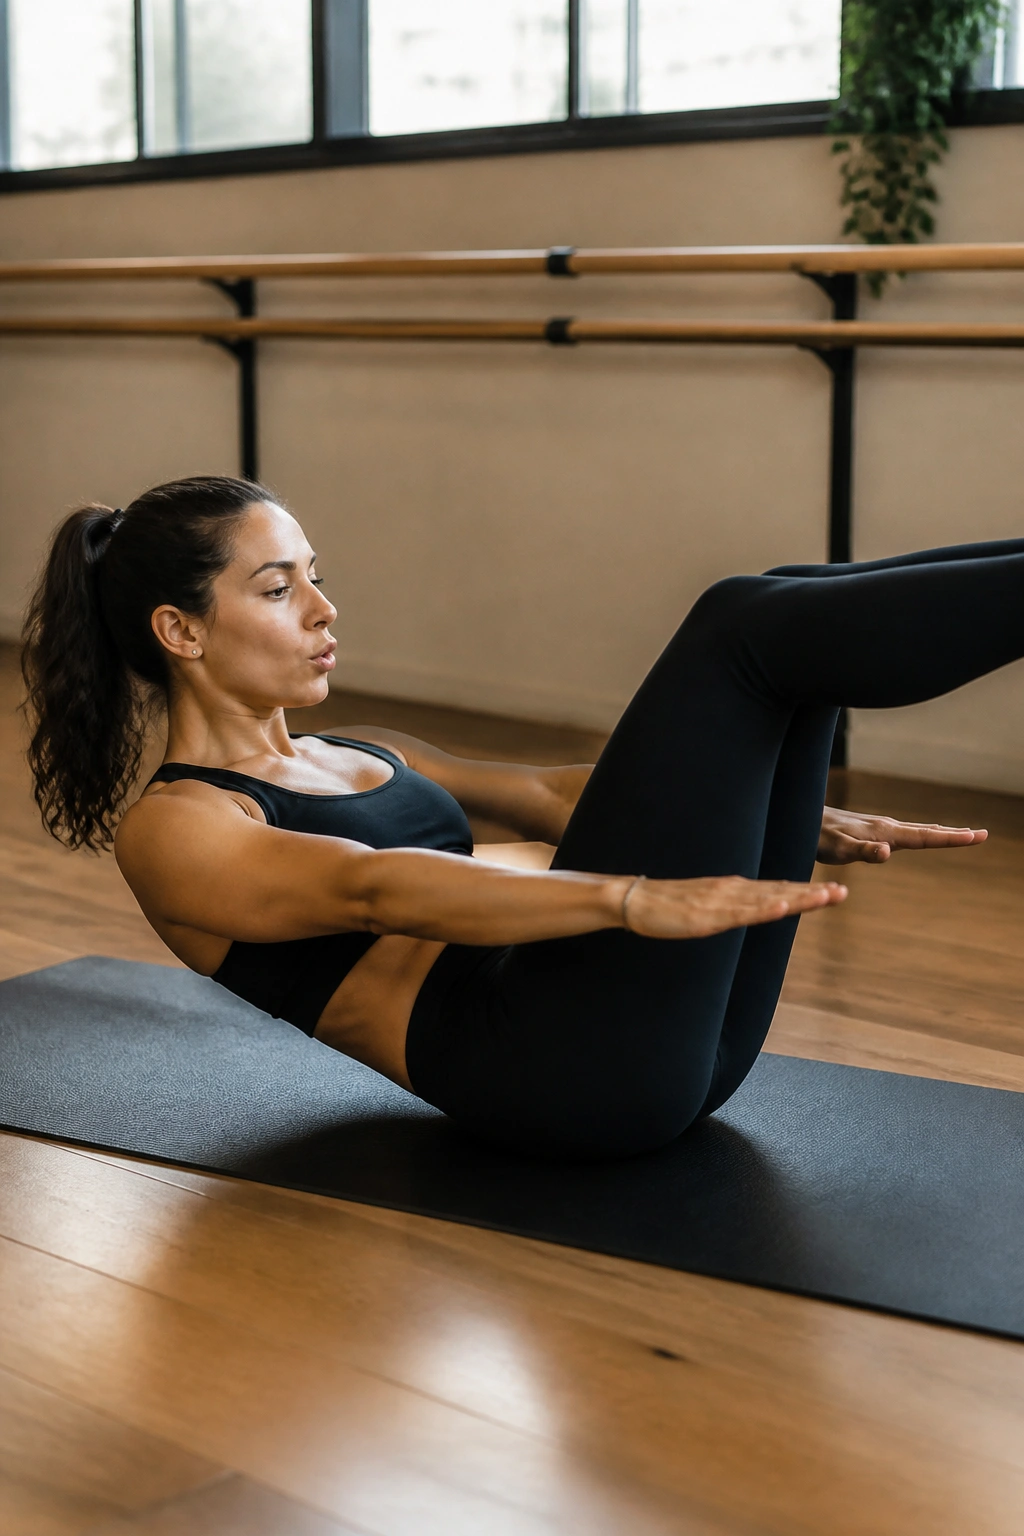
This is a staple of Pilates-inspired barre, and for good reason. It builds stamina and control. You sit in a curled position with your legs extended, pumping your arms vigorously while maintaining a deep abdominal contraction.
How to Build Stamina
The key here is the breath. You inhale for five pumps and exhale for five pumps. This rhythmic breathing acts as an anchor for your core. If you find your neck straining, gaze down toward your thighs rather than trying to look at your feet.
- Leg positioning: If straight legs are too difficult, bend your knees into a tabletop position.
- Arm intensity: Pump your arms as if you are slapping water. The tension in your arms should radiate from your core.
- The neck check: You should feel no tension in your neck. If you do, lower your head and shoulders to the mat and focus on the arm pumps and abdominal compression alone until your strength catches up.
6. Side Plank Hip Dips
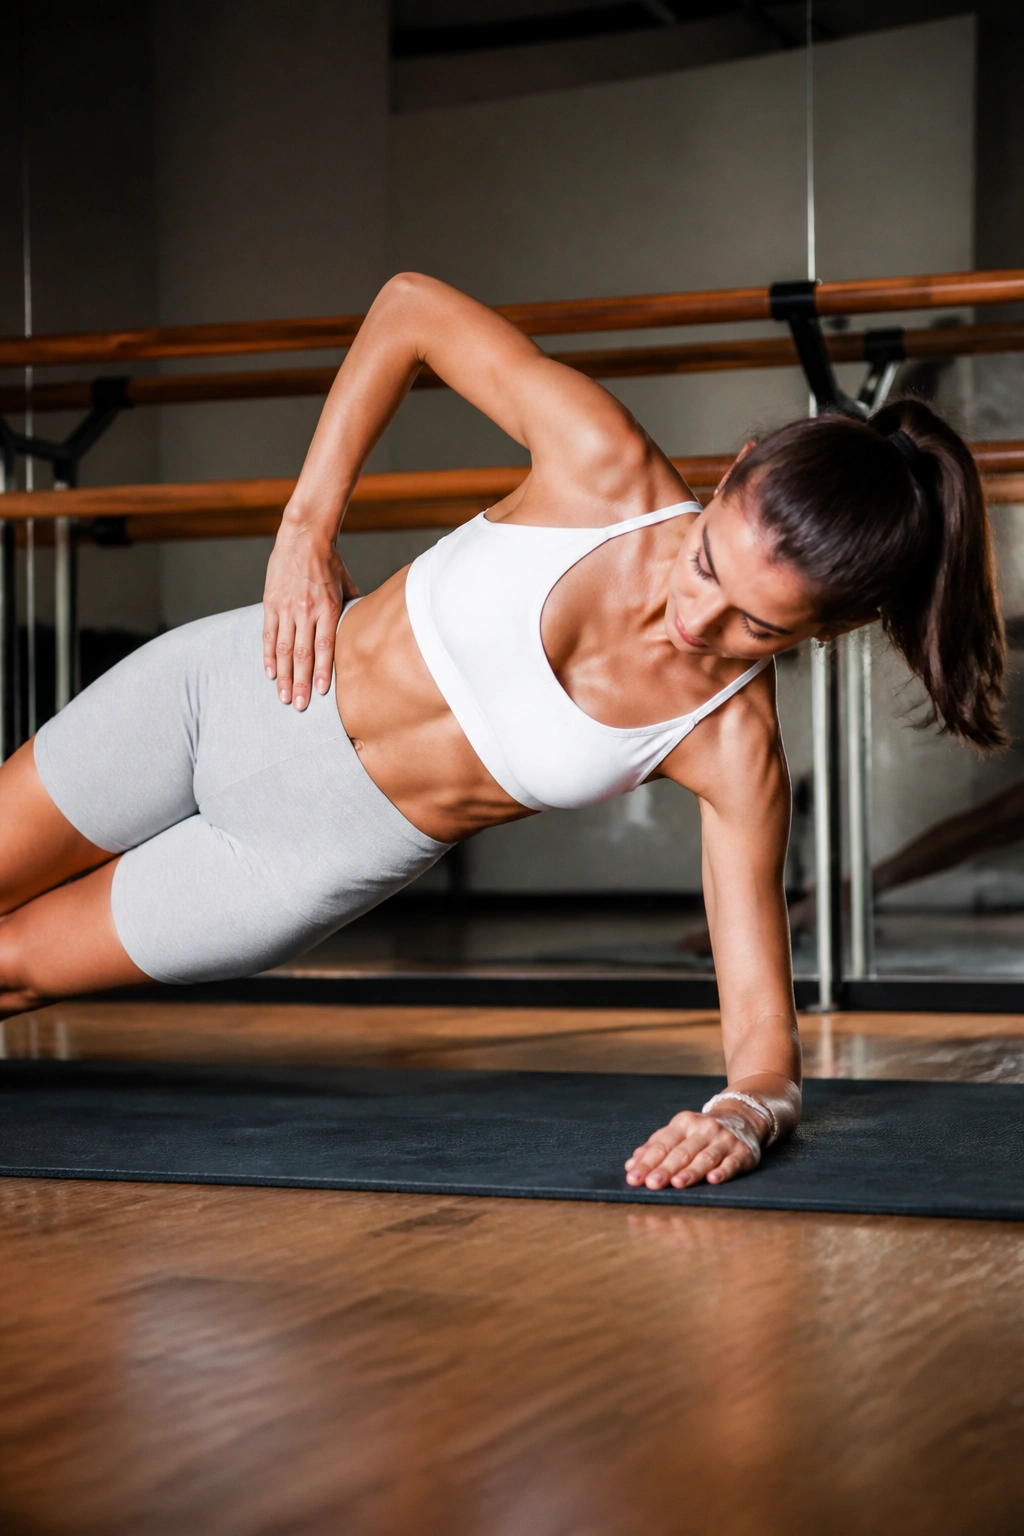
Standard side planks are great, but hip dips add a dynamic element that forces the obliques to fire in a way a static hold cannot replicate. This exercise is one of the most effective ways to carve out the waistline and improve lateral stability.
Start on your forearm with your body in a straight line. If you are struggling with balance, stack your feet or place the top foot in front of the bottom foot. Lower your hip toward the floor, tapping it lightly, and then use your side abs to lift it back to the start.
Focus on the lift, not the drop. It is easy to just collapse toward the floor. The work happens when you resist gravity on the way down and actively engage the oblique muscles to power the lift on the way up.
7. Standing Leg Lifts with Torso Twist
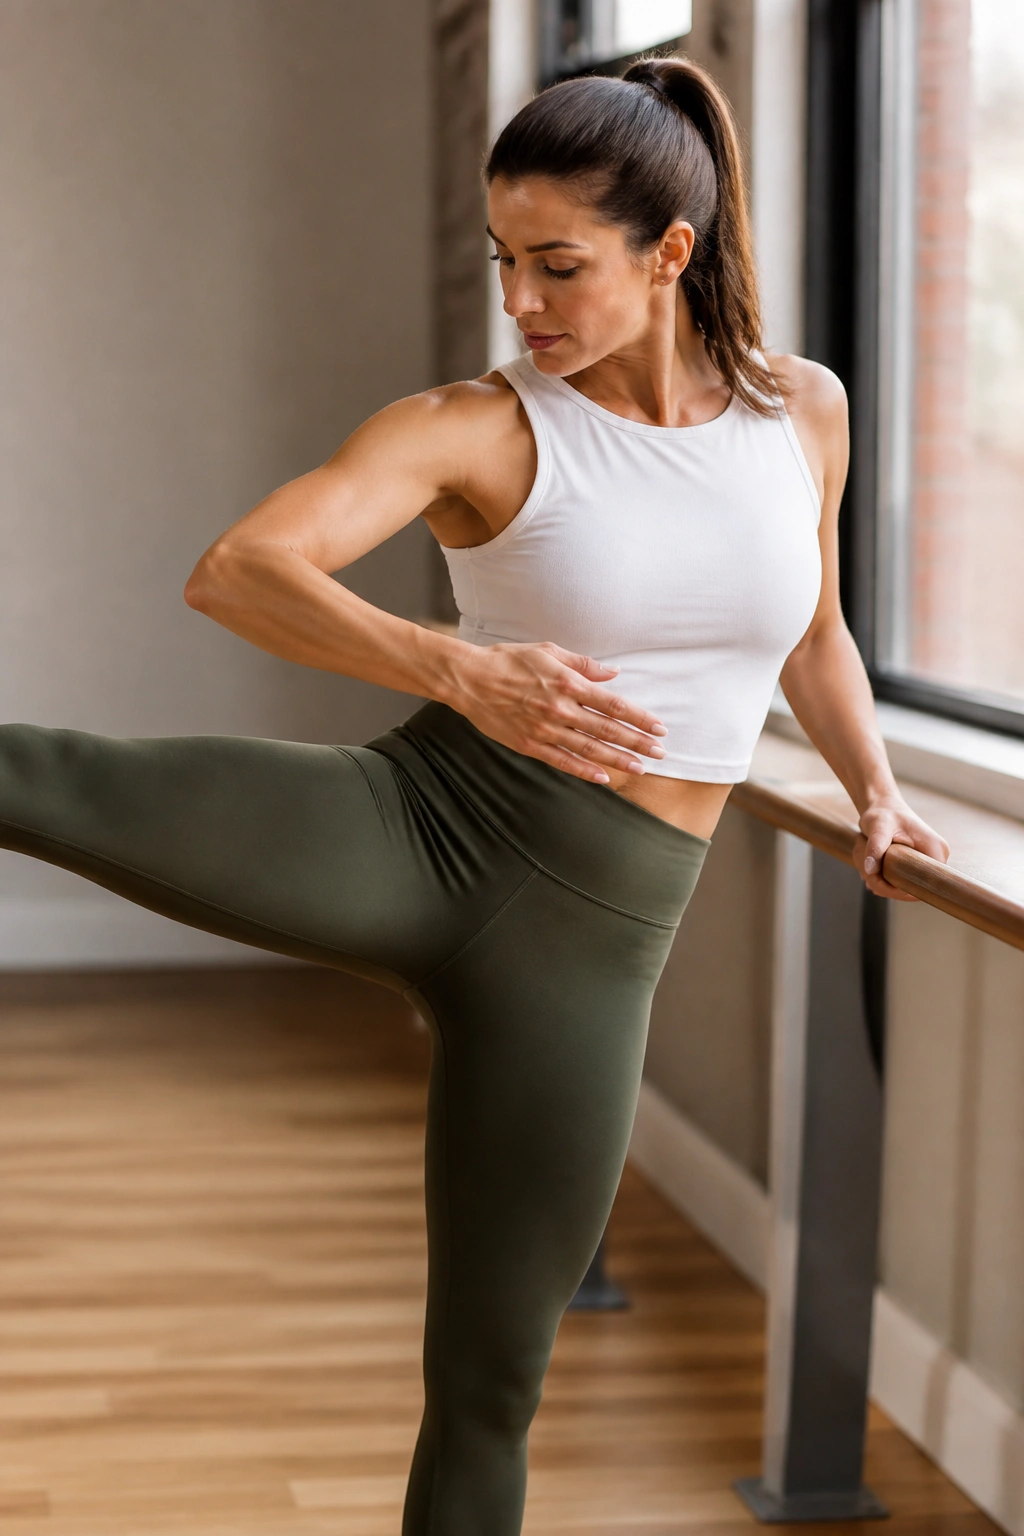
This move is brilliant because it forces your body to manage multiple planes of motion simultaneously. You are lifting a leg while rotating your torso, which demands massive engagement from the deep transverse abdominis.
Stand tall, gripping the barre with one hand. As you lift your outside leg to the side, twist your torso toward that working leg. You are not just waving your leg in the air; you are twisting your ribcage to create a contraction.
- The rhythm: Inhale as you prepare, exhale as you twist and lift.
- Avoid the lean: Do not lean your body away from the leg. Keep your torso as upright as possible.
- The range: It is better to have a smaller, more controlled range of motion than a wild, swinging kick.
8. Forearm Plank with Hip Twist
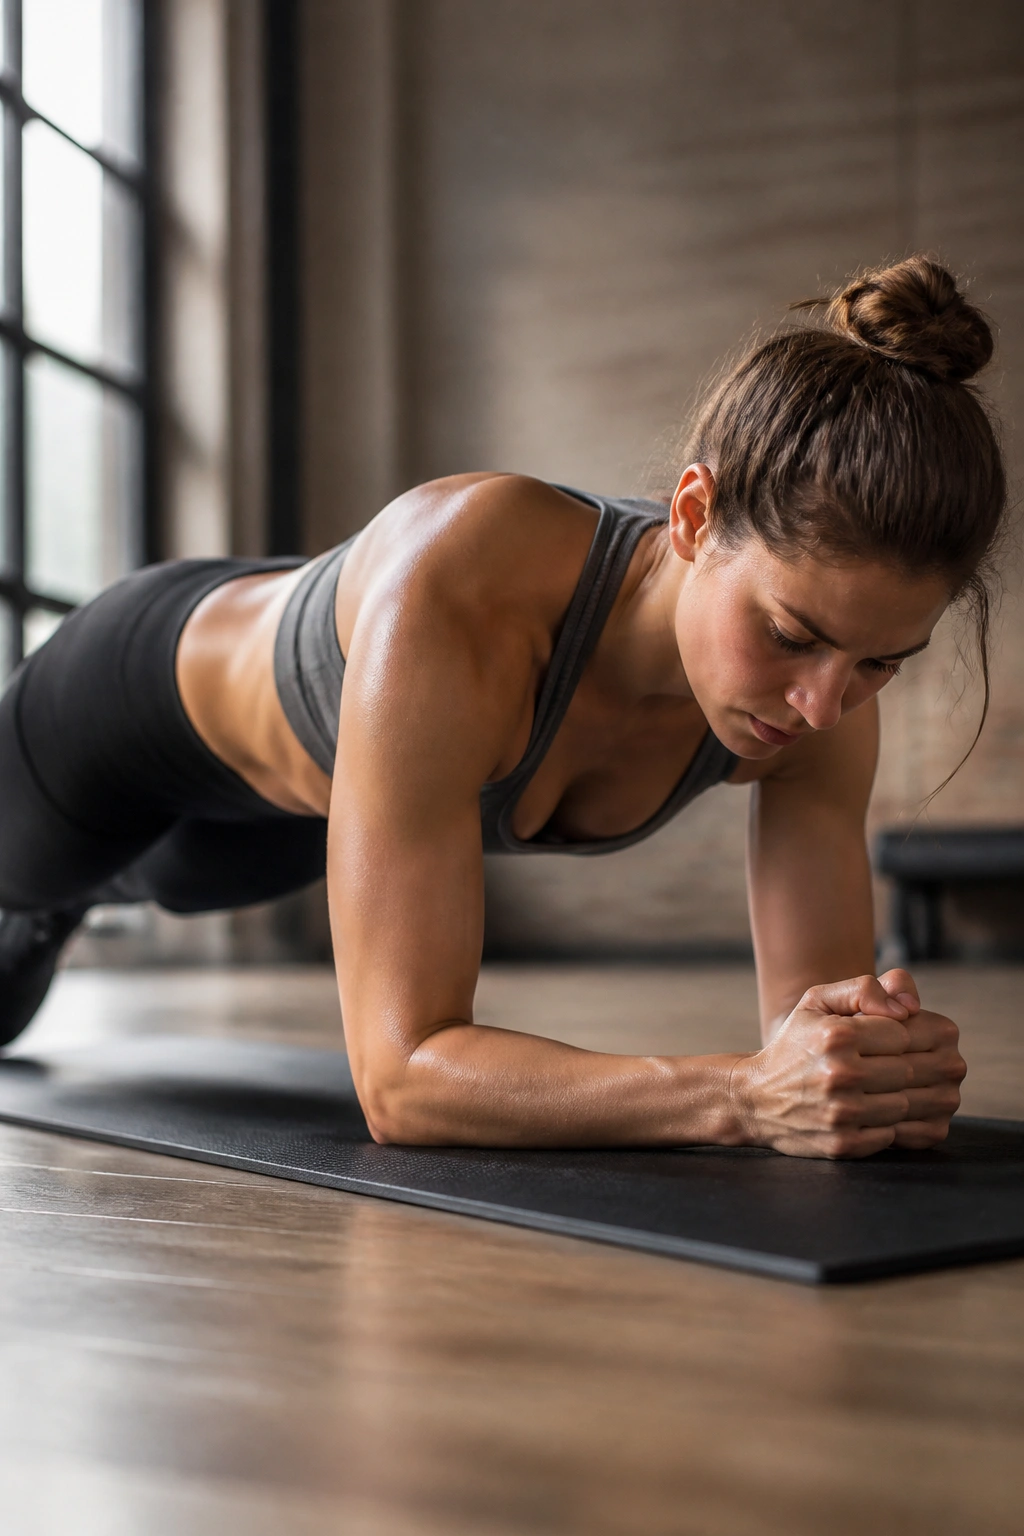
Similar to the hip dips, this variation keeps you on your forearms but introduces a rotational element. By tapping your hip side-to-side, you force your core to stop the rotation, which is actually a key function of the abdominal muscles.
Imagine there is a laser beam extending from your belly button. As you twist your hips, your torso should stay relatively still. You are twisting from the waist down, not the shoulders up.
This exercise will test your shoulder stability as well. Keep your elbows pushed firmly into the floor. If you start to feel this in your lower back, you are likely rotating too far. Shorten the range of the twist and focus on the abdominal squeeze.
9. V-Sit Crunches
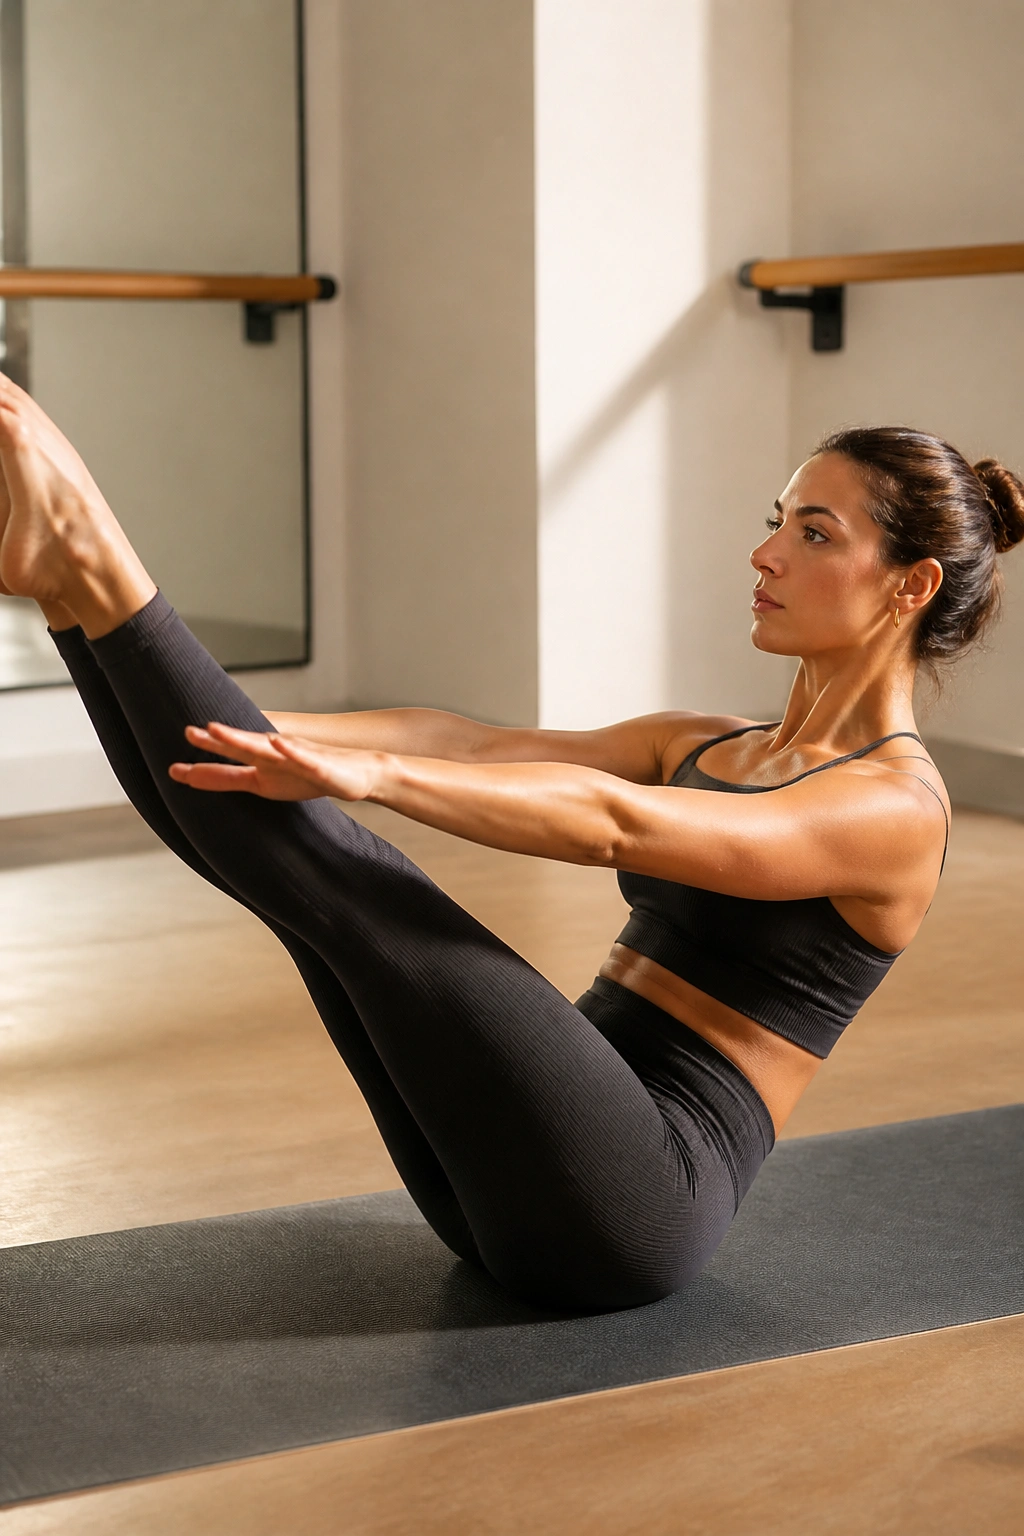
The V-sit is the ultimate test of core integration. Balancing on your sit bones with your legs and torso raised forms a “V” shape. From here, you draw your knees in toward your chest and extend them back out without letting your feet touch the floor.
Troubleshooting the V-Sit
Most people try this and feel it only in their hip flexors. That usually means their legs are doing too much of the work and the abs are doing too little. To fix this, focus on rounding your spine slightly.
- Create a C-curve with your spine.
- Keep your chest open—do not collapse your shoulders.
- Draw from the belly, not the thighs.
If you struggle to stay balanced, place your hands lightly behind your thighs for support, but try to gradually reduce the amount of weight you put into your hands as you get stronger.
10. Wall-Supported Hollow Body Hold
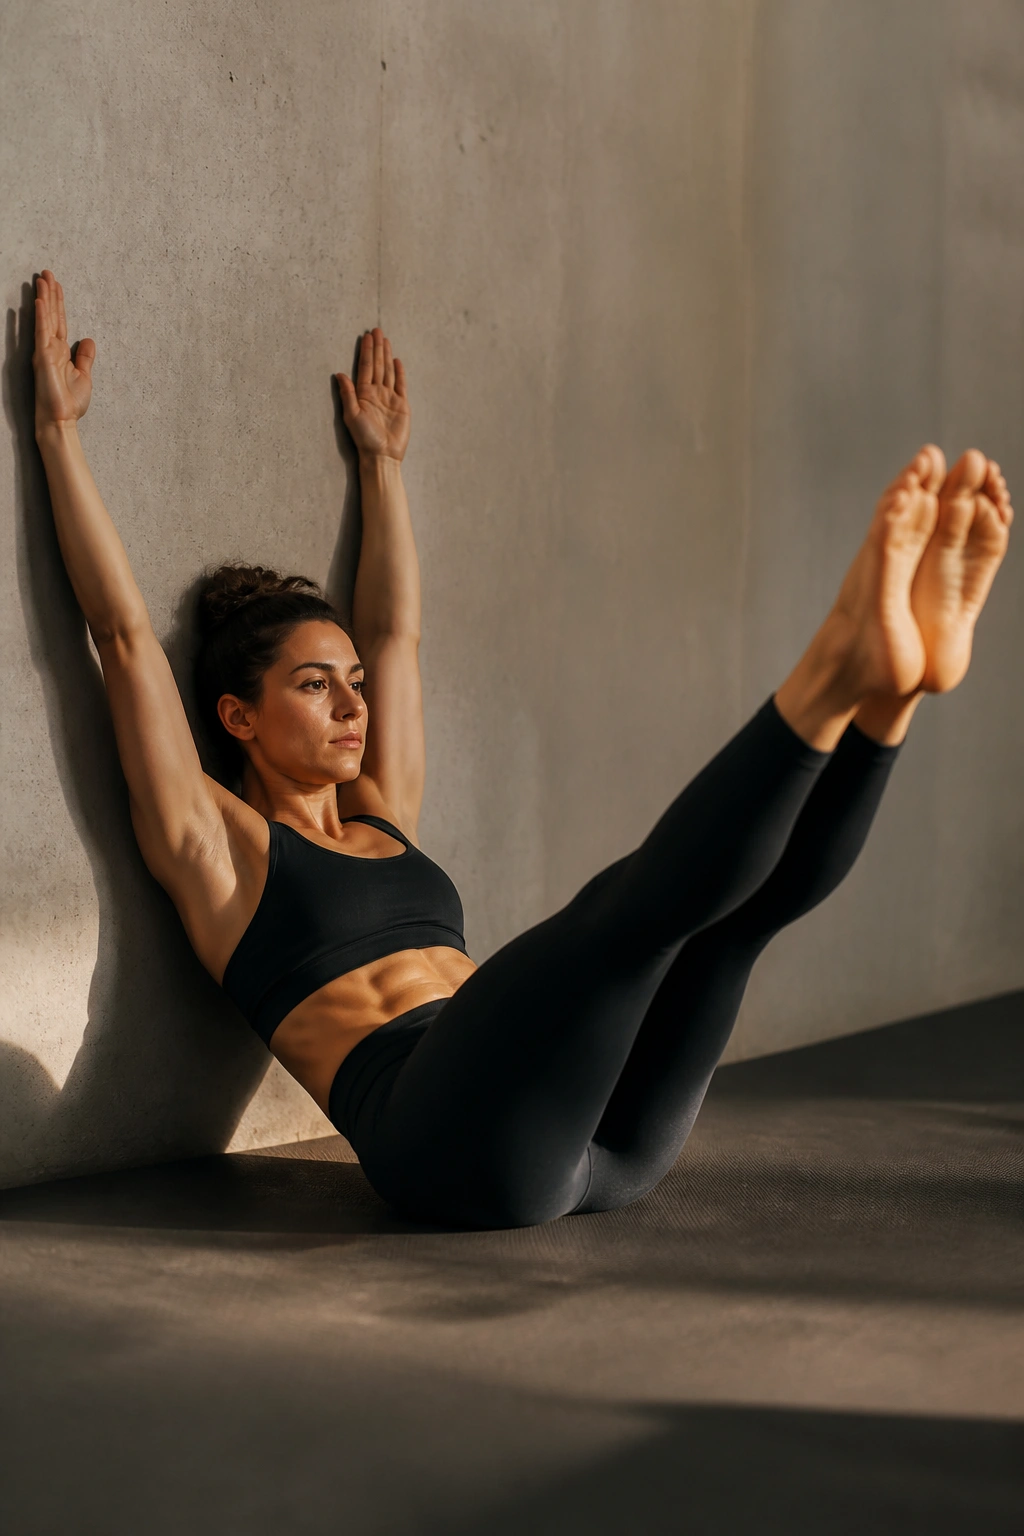
The hollow body hold is a gymnast’s secret weapon. By using the wall for feedback, you can ensure your spine is in the correct position. Lie on your back, press your lower back into the wall (or the floor, if you prefer), and lift your legs and shoulders slightly.
The “hollow” refers to the concave shape of your torso. You are essentially hollowing out your stomach. It is a static, isometric hold that builds immense internal pressure.
The test: If you can slide your hand under your lower back while you are holding this, you are not hollow. You are arched. Press down harder. Flatten the space between you and the floor. Hold for 30 seconds to start, and build up from there.
11. Standing Lunge with Torso Rotation
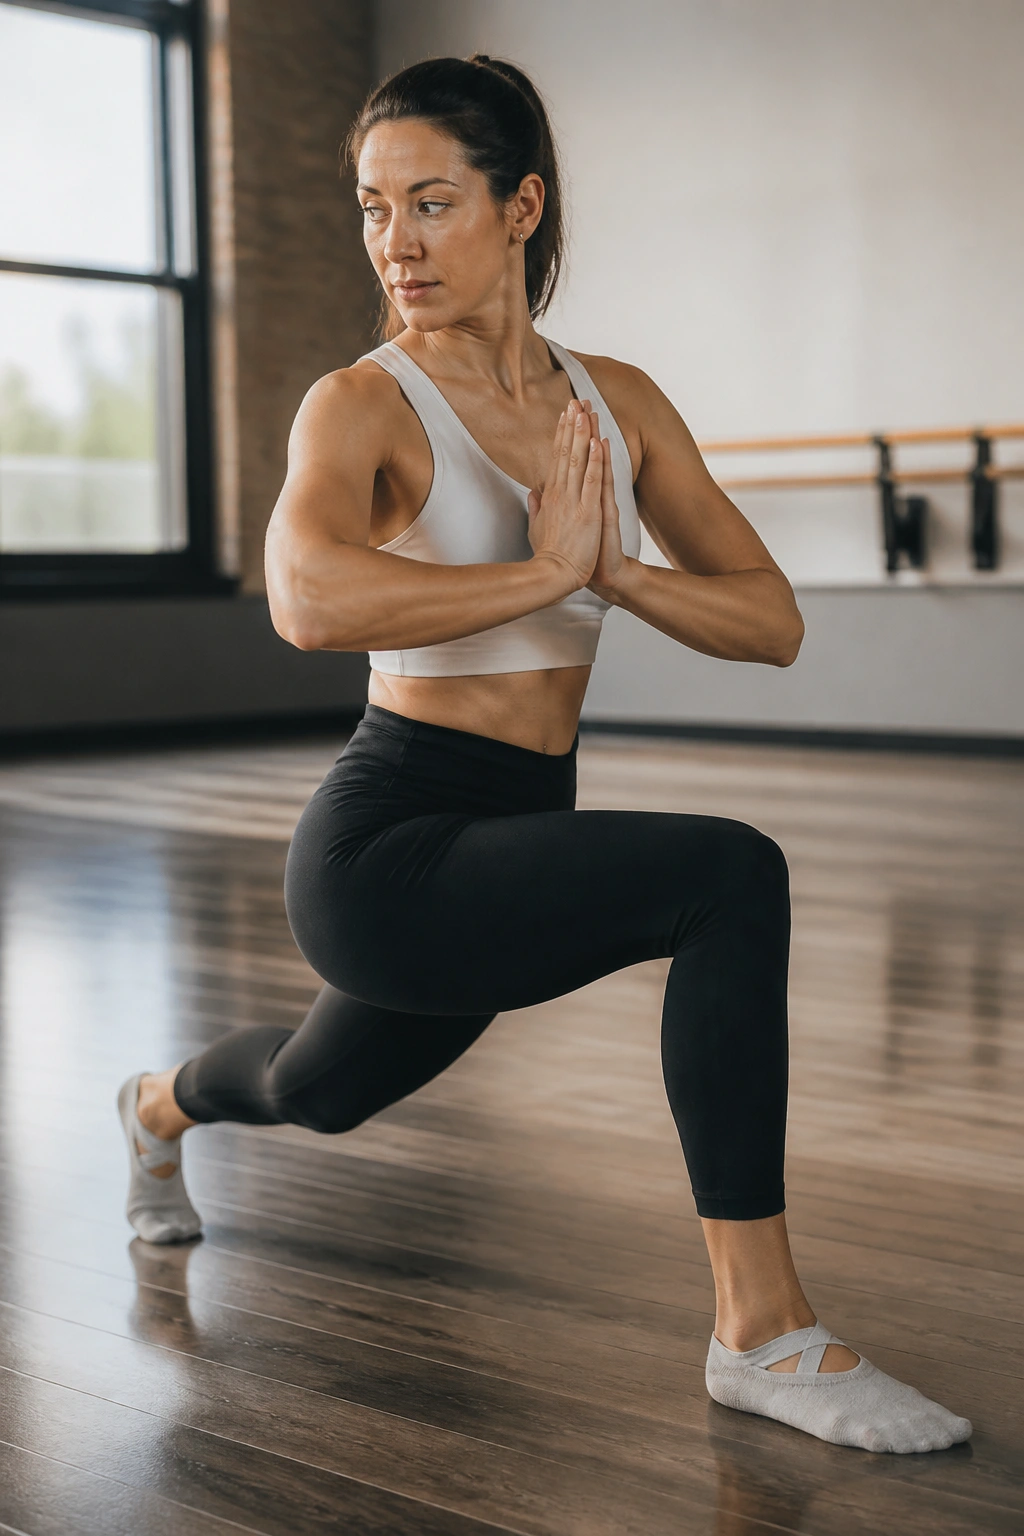
You might think lunges are for legs, but when you add a rotation, the core becomes the primary driver. As you step back into a lunge, rotate your torso toward the front leg. This creates a diagonal pull across your abdomen.
The balance required to rotate while lunging is significant. It forces the tiny stabilizing muscles of your core to fire rapidly to keep you from toppling over.
- The setup: Ensure your front knee is stacked over your ankle.
- The twist: Rotate your entire ribcage, not just your arms.
- The gaze: Look toward your back hand as you rotate to deepen the twist and challenge your balance.
12. Bicycle Crunches
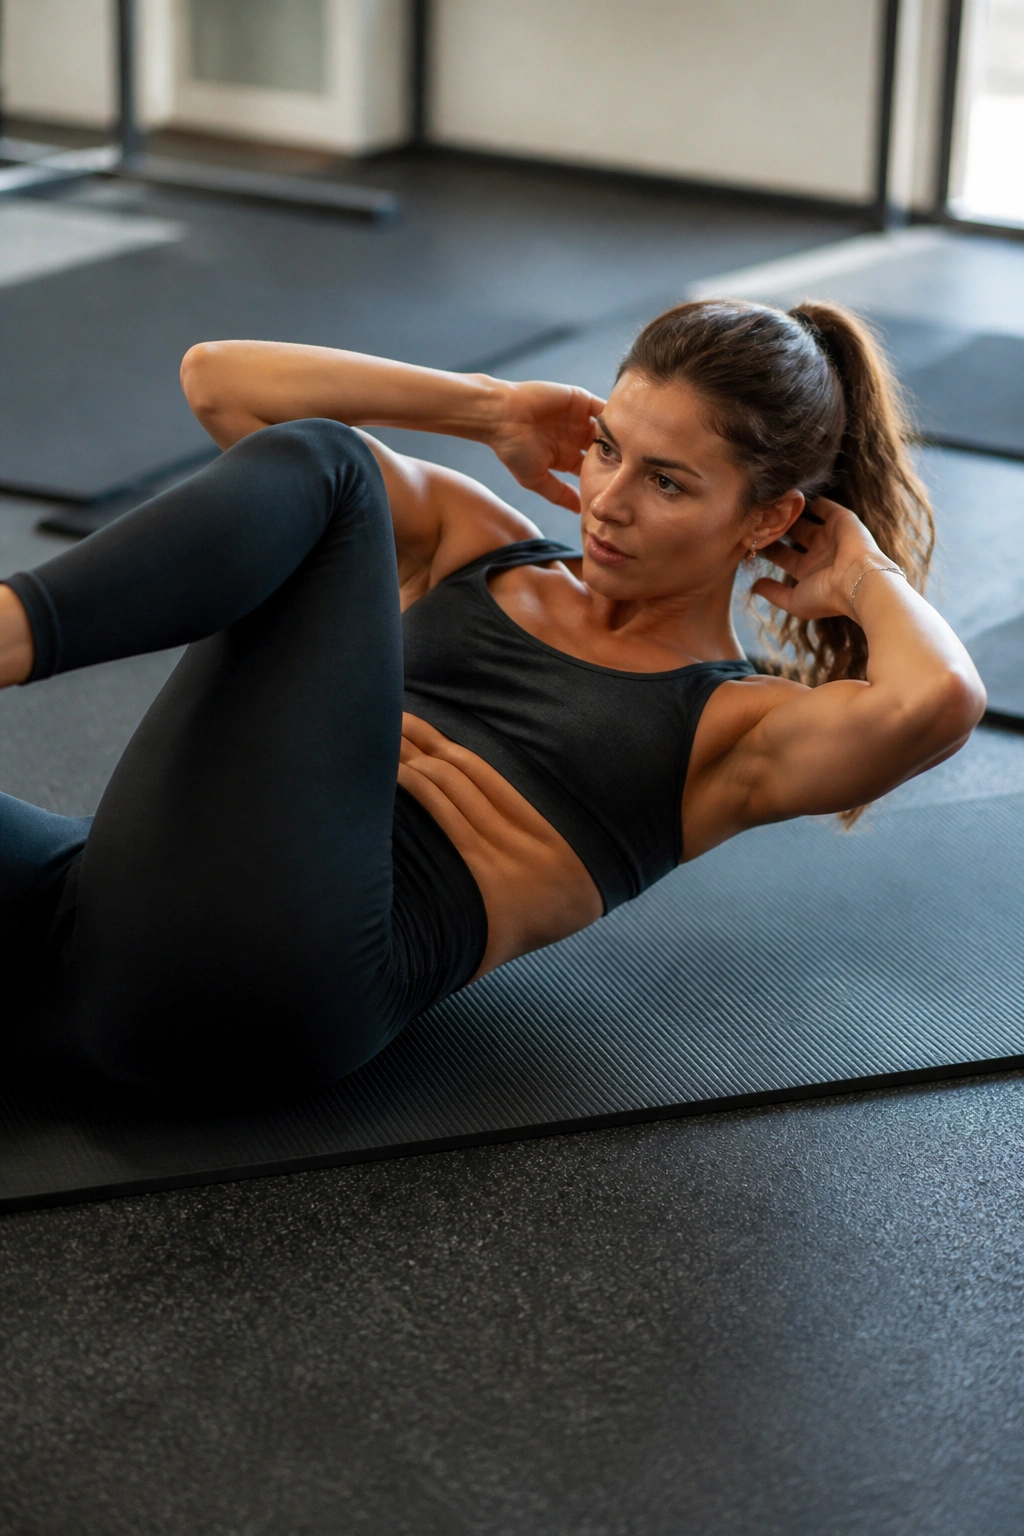
The bicycle crunch is a classic, but in barre, we do it differently. Instead of rushing through rapid-fire reps, we move slowly. We pause at the peak of the contraction.
Lie on your back, hands lightly behind your head. Bring your opposite elbow to your opposite knee. The magic happens in the hold. Pause for two full seconds at the top of the crunch. Feel the oblique muscle cramping slightly—that is the sweet spot.
By removing momentum, you force the muscles to hold that contraction rather than relying on speed to finish the set. If you are doing these fast, you are missing the point.
13. Boat Pose Holds
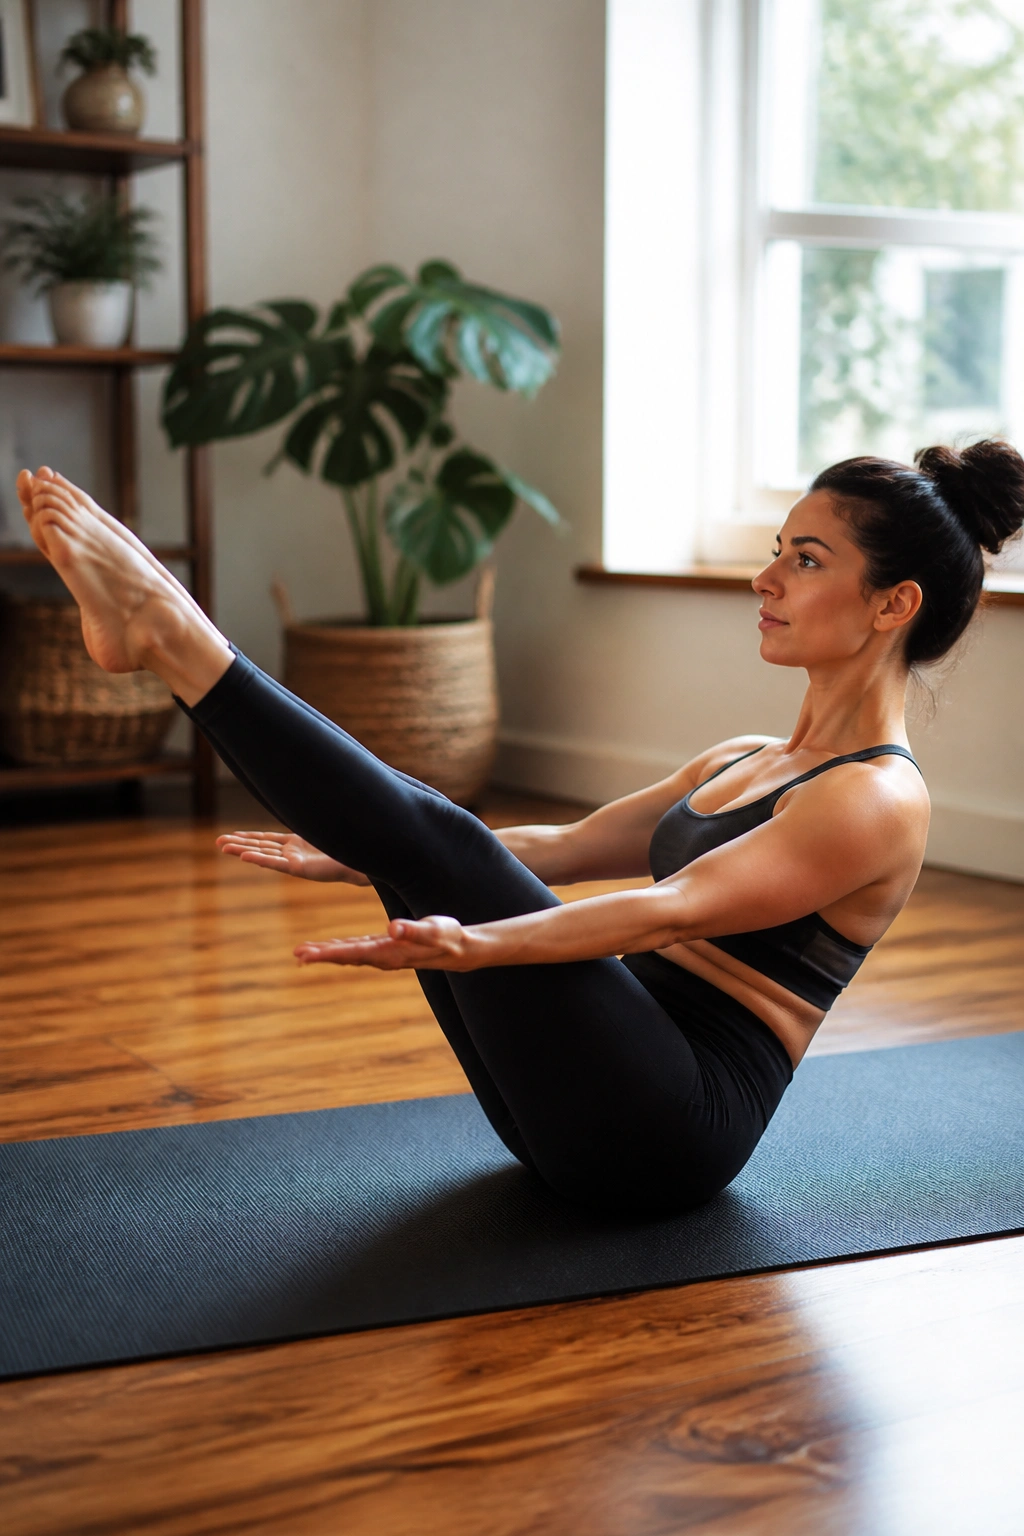
Boat pose is the yoga world’s contribution to core strength, and it translates perfectly to barre. Unlike the V-sit crunch, this is a static hold. You are not moving; you are fighting gravity.
Extend your arms alongside your legs, palms facing up. Keep your heart lifted. If you find your back rounding into a slouch, lift your chest higher. It is common to feel your hip flexors taking over here, too. To mitigate this, imagine you are trying to squeeze your thighs together. This helps shift the load from the legs to the lower abs.
Duration over intensity: Hold this for as long as you can maintain perfect form. As soon as your form breaks, drop your feet, take a breath, and reset.
14. Bridge with Leg Extension
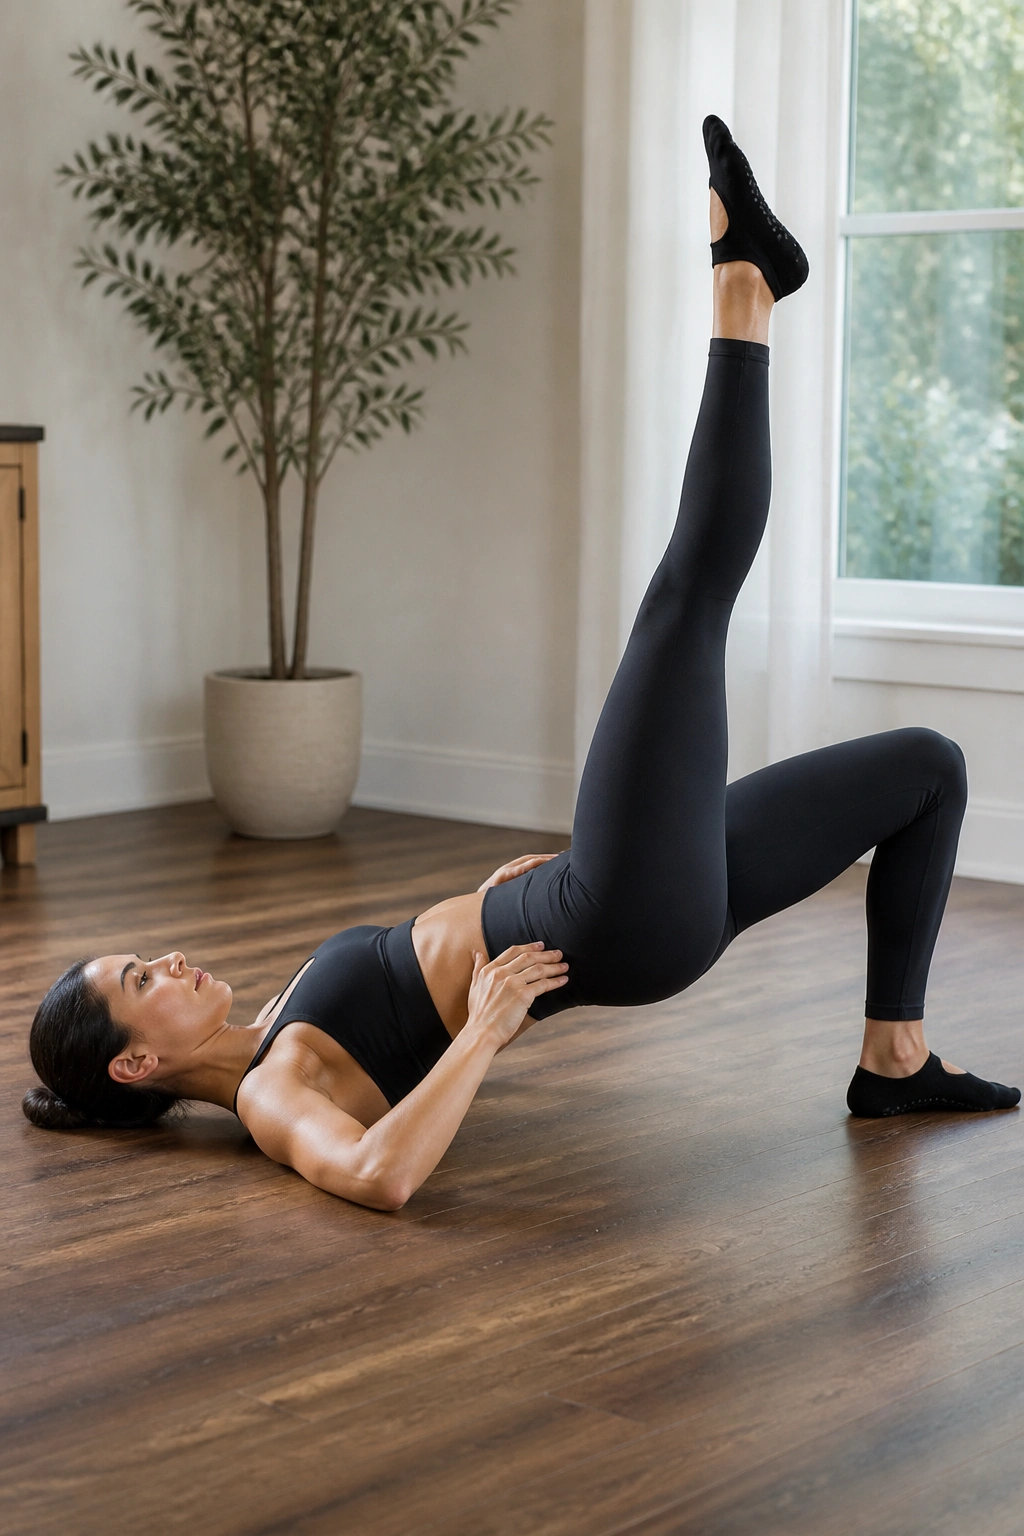
Bridge work is typically associated with glutes, but by lifting one leg into the air while holding the bridge, you engage the deep core stabilizers. You are fighting to keep your hips level despite the instability of having only one foot on the ground.
The Balancing Act
As you lift your hips, make sure you are not overarching your back. Drive through the heel of the planted foot. When you extend the other leg, keep the knees aligned.
- The level test: Place your hands on your hip bones. If one side is lower than the other, you are not engaging your core enough.
- The activation: Imagine pulling your belly button toward your spine before you lift the leg. This creates the stability you need to stay level.
15. Pilates Scissors
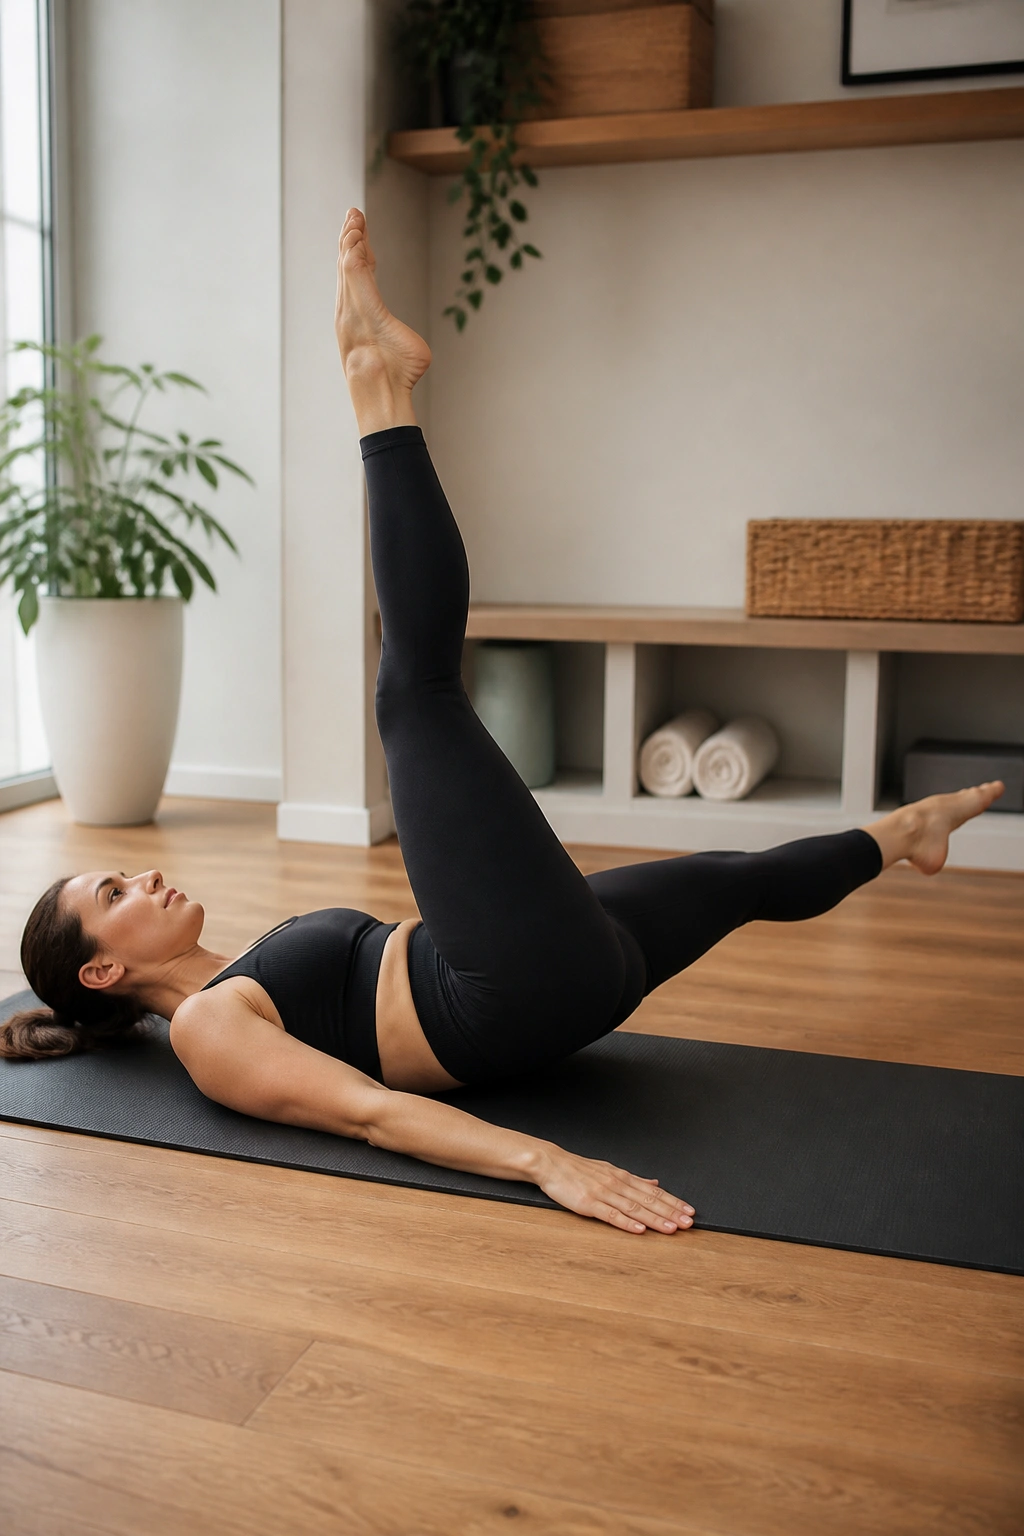
This is a dynamic, challenging exercise that demands flexibility and core control. Lying on your back, lift your legs to the ceiling. Lower one leg slowly toward the floor while pulling the other leg toward your face.
The “scissor” motion is fluid. You pulse the top leg twice while the bottom leg hovers just off the mat. Your core must remain completely still. If your torso rocks back and forth with your legs, you are losing the core engagement.
Think of your torso as a pillar. The legs are the only things moving. Everything from your ribs to your hips should be bolted to the mat.
16. Single-Leg Stretch
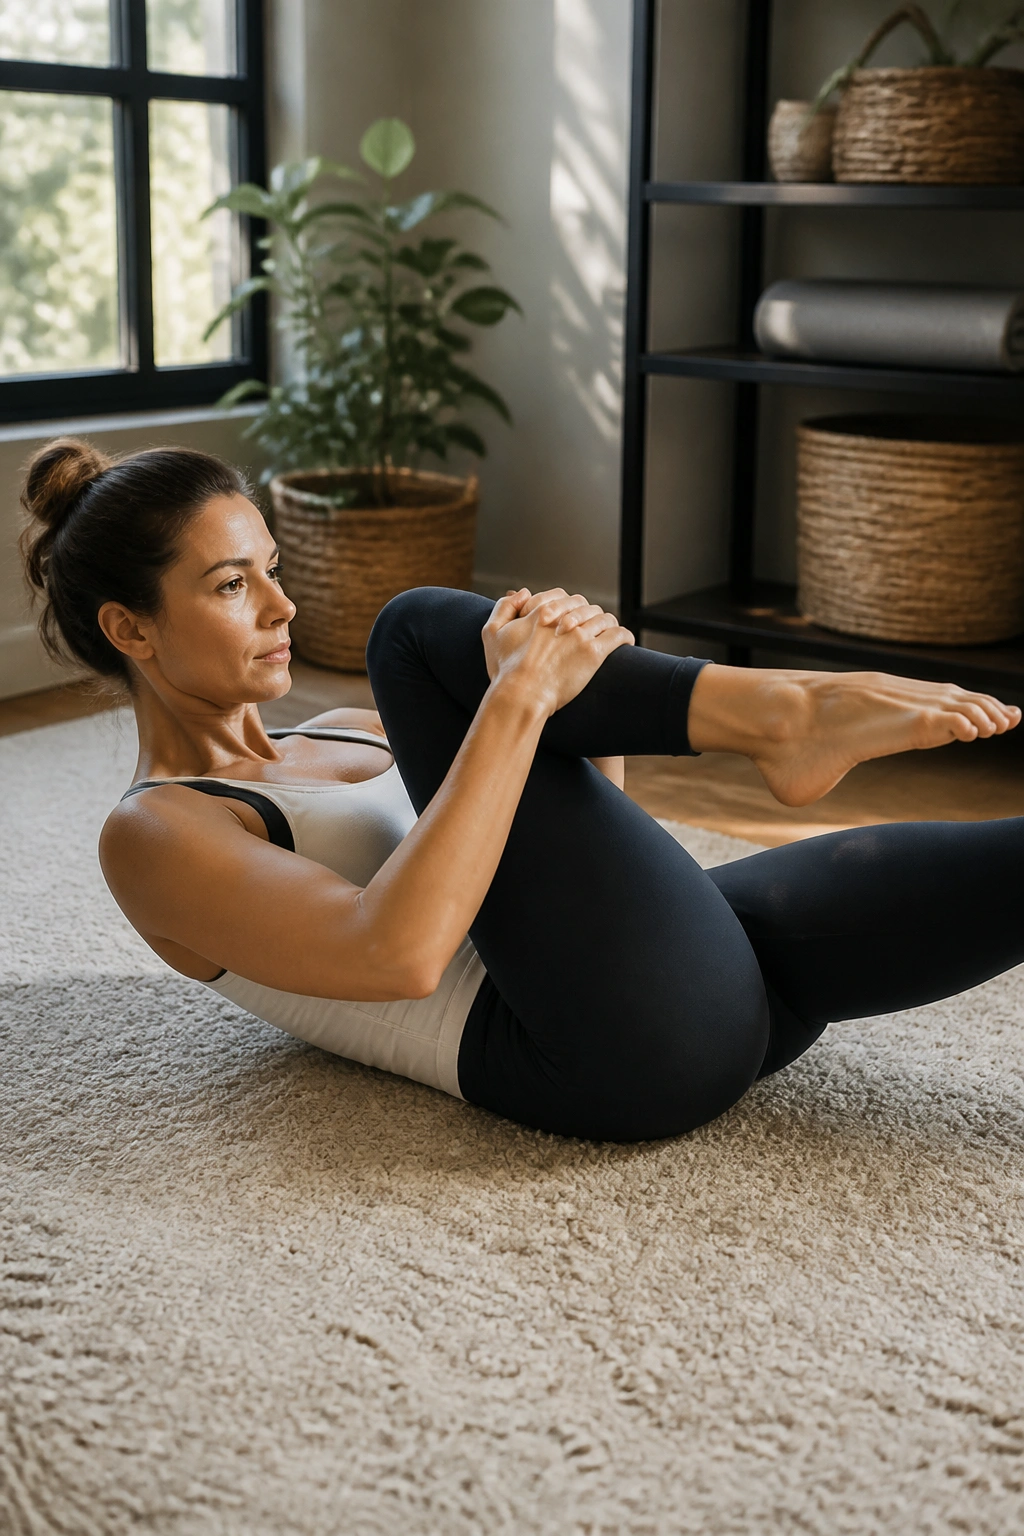
This is the ultimate test of coordinating movement with breathing. In the single-leg stretch, you are alternating knee-to-chest pulls while your torso remains curled up. It is continuous, rhythmic, and demanding.
The key to this movement is keeping the curl-up consistent. Do not let your shoulders drop down when you switch legs. Hold that abdominal contraction the entire time.
If your neck starts to hurt, it is usually because your lower back is arching, causing you to overcompensate with your upper body. Keep the back flat, and your neck will find relief.
17. Plank to Pike
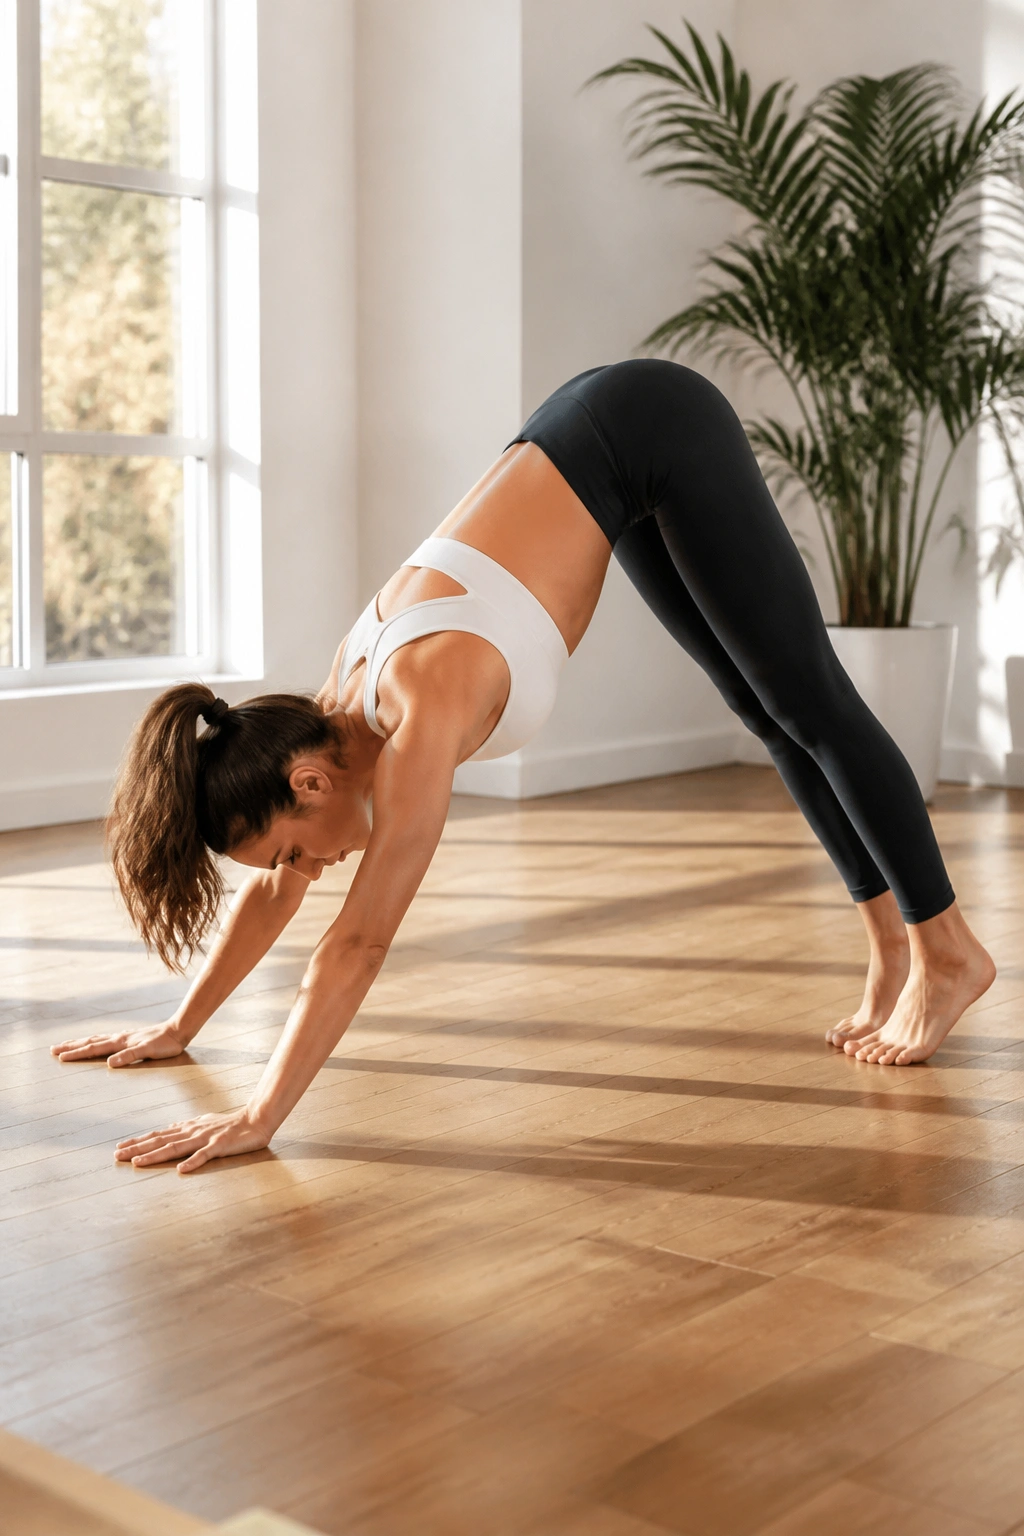
From a full plank (on your hands), pike your hips up toward the ceiling to form an inverted “V,” then return to the plank position. This is as much a shoulder workout as it is a core one.
The Piking Action
Do not just lift your hips; pull them up using your lower abs. Think of it as a heavy sack of cement that you are lifting with your stomach.
- Hand placement: Keep your fingers spread wide to protect your wrists.
- The return: When you return to the plank, do not let your hips sag below the level of your shoulders. You want to hit that perfect flat line every single time.
- The tempo: Slow and controlled is better than fast and jerky.
18. The Teaser
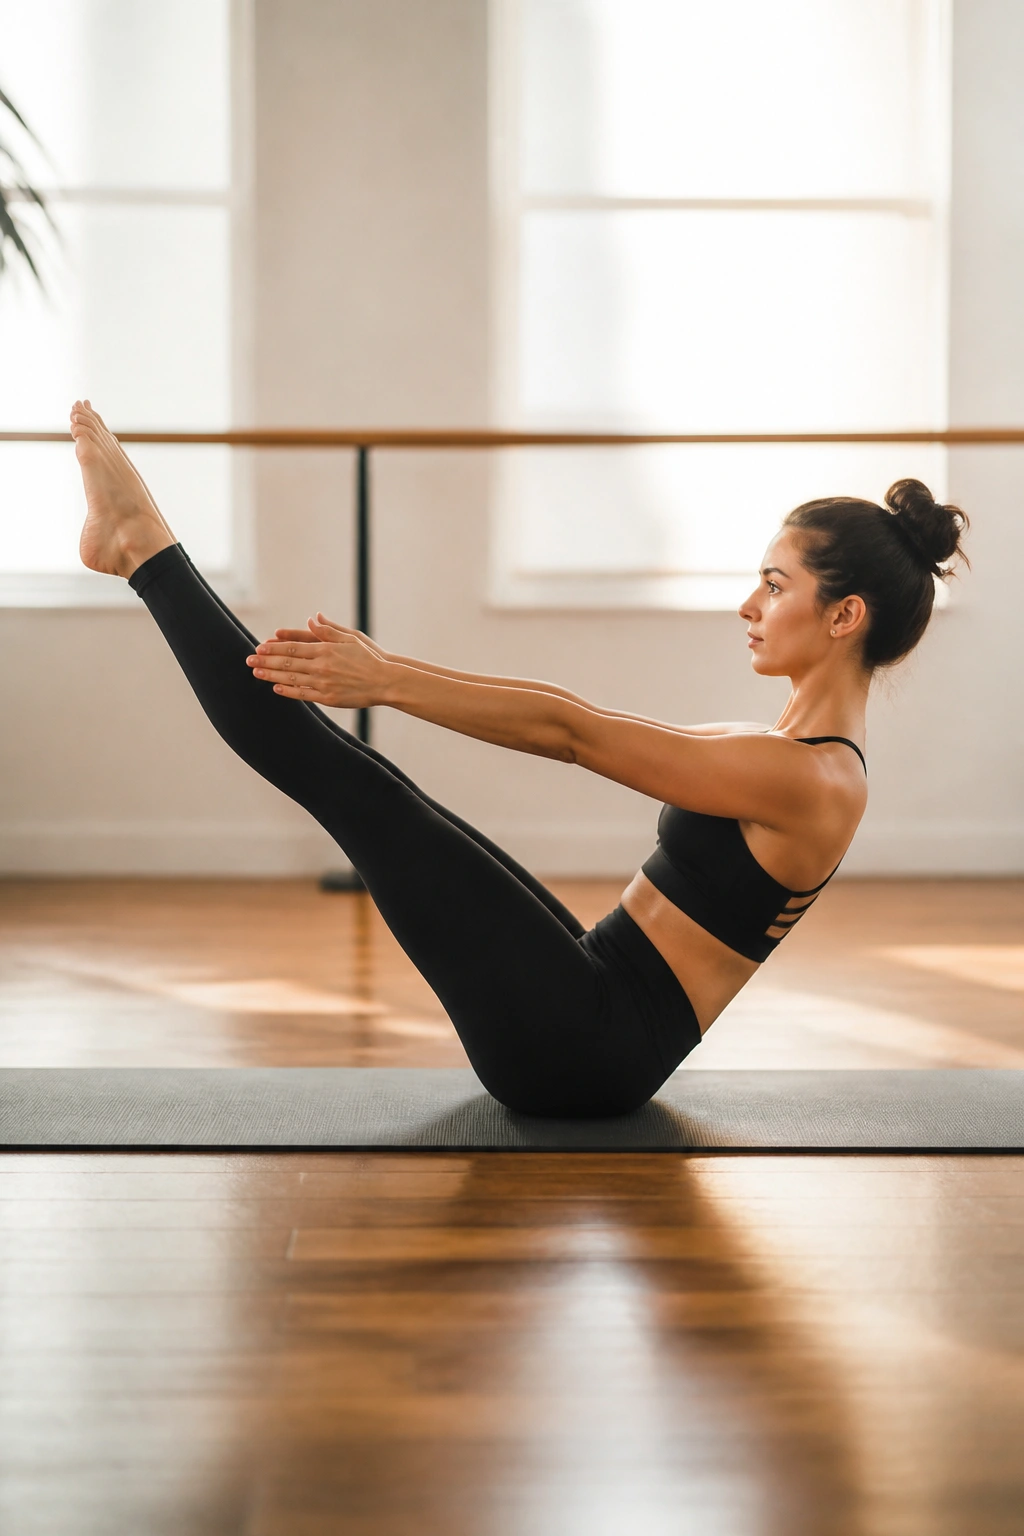
The Teaser is the grand finale of core work. It combines the V-sit and the hollow body hold. You start lying flat, then simultaneously lift your legs and torso to form a balance point on your sit bones.
It looks elegant, but it is notoriously difficult. If you cannot get into the full position, start by lifting your legs first, then curling your torso up.
Why it works: It requires every single abdominal muscle to fire at once. You are stabilizing, balancing, and crunching, all while fighting gravity. It is the perfect exercise to finish your session because it forces you to use all the strength you have built during the previous movements.
Final Thoughts
Building a stronger midsection through barre is not about finding the hardest exercise and doing it until you fail. It is about precision. It is about understanding that a two-inch pulse, when done with perfect alignment and deep breathing, is often more effective than a hundred sloppy crunches.
Consistency will always outweigh intensity. You do not need to do all eighteen of these movements in a single day. Pick three or four that challenge you, focus on the form, and execute them with total control. When those become easier, rotate in a few more. Listen to your body—it will tell you when you are cheating the movement and when you are truly engaging the muscles. Stay steady, breathe through the shakes, and remember that real core strength is built one deliberate movement at a time.
