



A kitchen chair, a folded towel, and a backpack full of books can do more than most people give them credit for. A solid set of upper body workouts at home does not need a bench press, a cable stack, or a spare room full of iron. It needs smart angles, clean form, and a little patience.
What catches most people off guard is how much progress you can make with plain bodyweight work if you stop treating it like a warm-up and start treating it like training. Push-ups build your chest and triceps. Rows train the back that push-ups ignore. Shoulder work, core tension, and slow eccentrics tie the whole thing together. Skip the balance, and your shoulders usually let you know about it.
The best home sessions are not fancy. They’re a handful of hard sets, a few simple household props, and movements you can repeat week after week without wrecking your joints. Start with the first push pattern, then the pull work, then the shoulder and stability drills. That mix matters more than people think.
1. Standard Push-Up
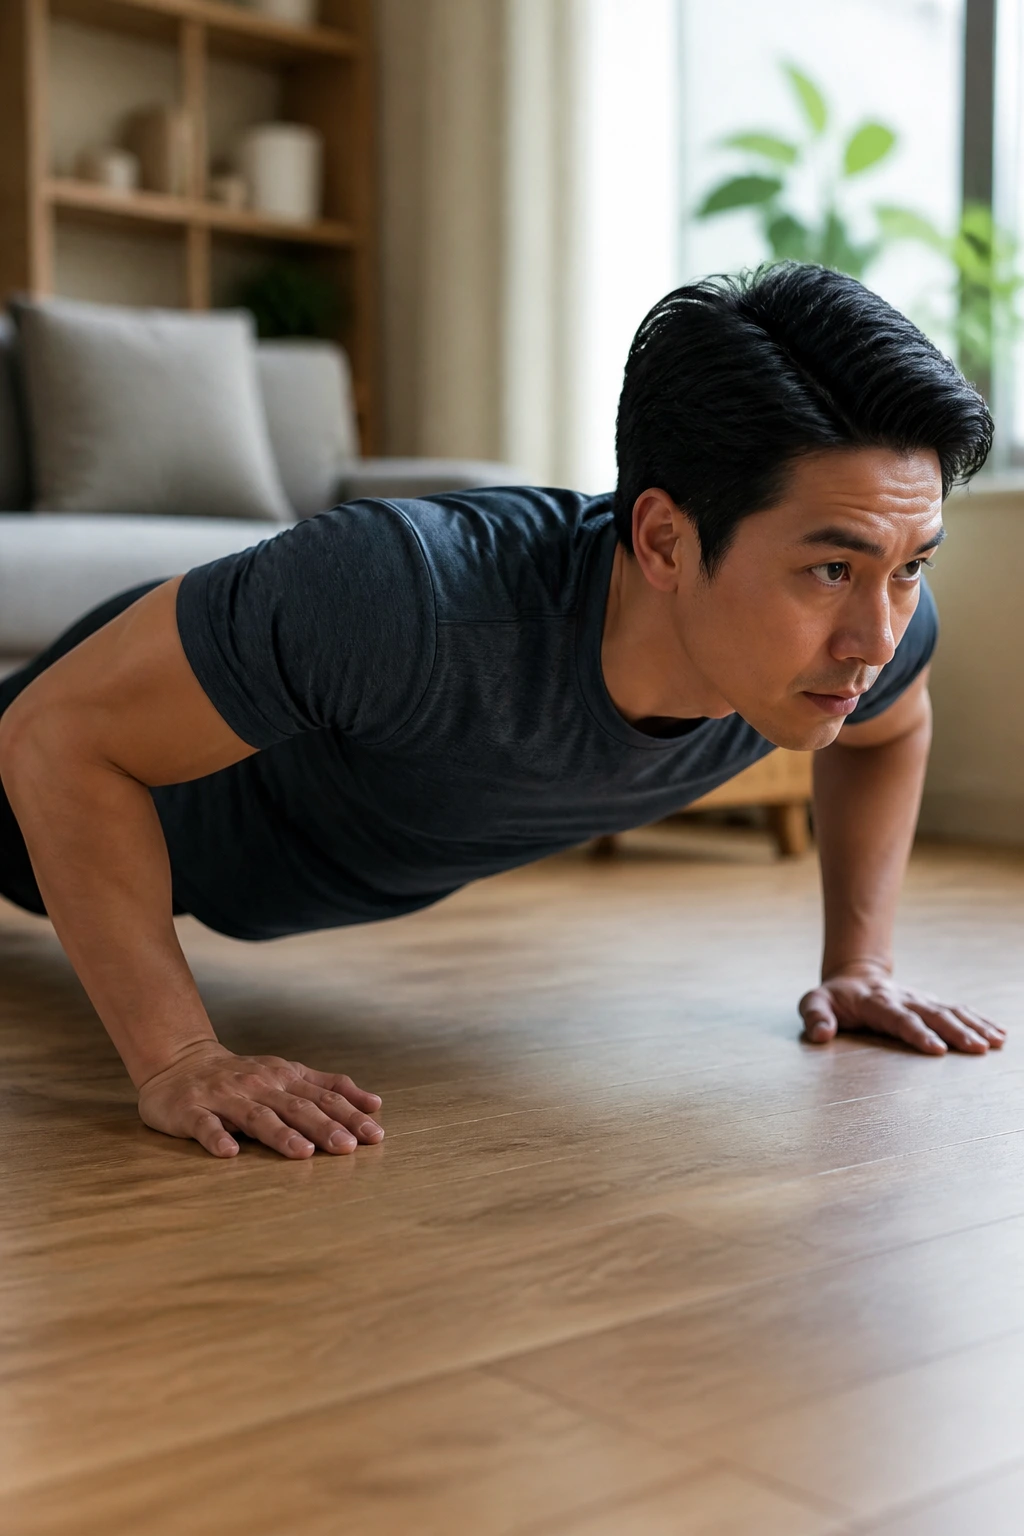
If you only had room for one upper body move, this would be the one. The standard push-up hits the chest, triceps, front shoulders, and serratus in one clean package, and it teaches the kind of full-body tension that makes every other press feel steadier. It also tells you the truth fast. If your hips sag or your head leads the way, the floor exposes it.
Why It Still Matters
Keep your hands just outside shoulder width, spread your fingers, and think about twisting the floor outward without actually moving your palms. That tiny brace helps your shoulders stay packed instead of dumping forward. Lower until your chest is an inch or two above the floor, then press back up with your ribs down and glutes tight.
A lot of people rush this one. Bad idea.
Do 3 to 5 sets of 6 to 15 reps, and stop a rep or two before form starts to slip. If you can only get 4 clean reps, that still counts. Build from there.
What Good Form Looks Like
- Head neutral, not craned forward.
- Elbows about 30 to 45 degrees from your torso.
- Body in one line from heels to shoulders.
- Chest touches first, not the belly.
Pro tip: If your wrists complain, place your hands on two sturdy books or grip the edge of dumbbells if you have them. That small change can make the movement much easier to tolerate.
2. Incline Push-Up
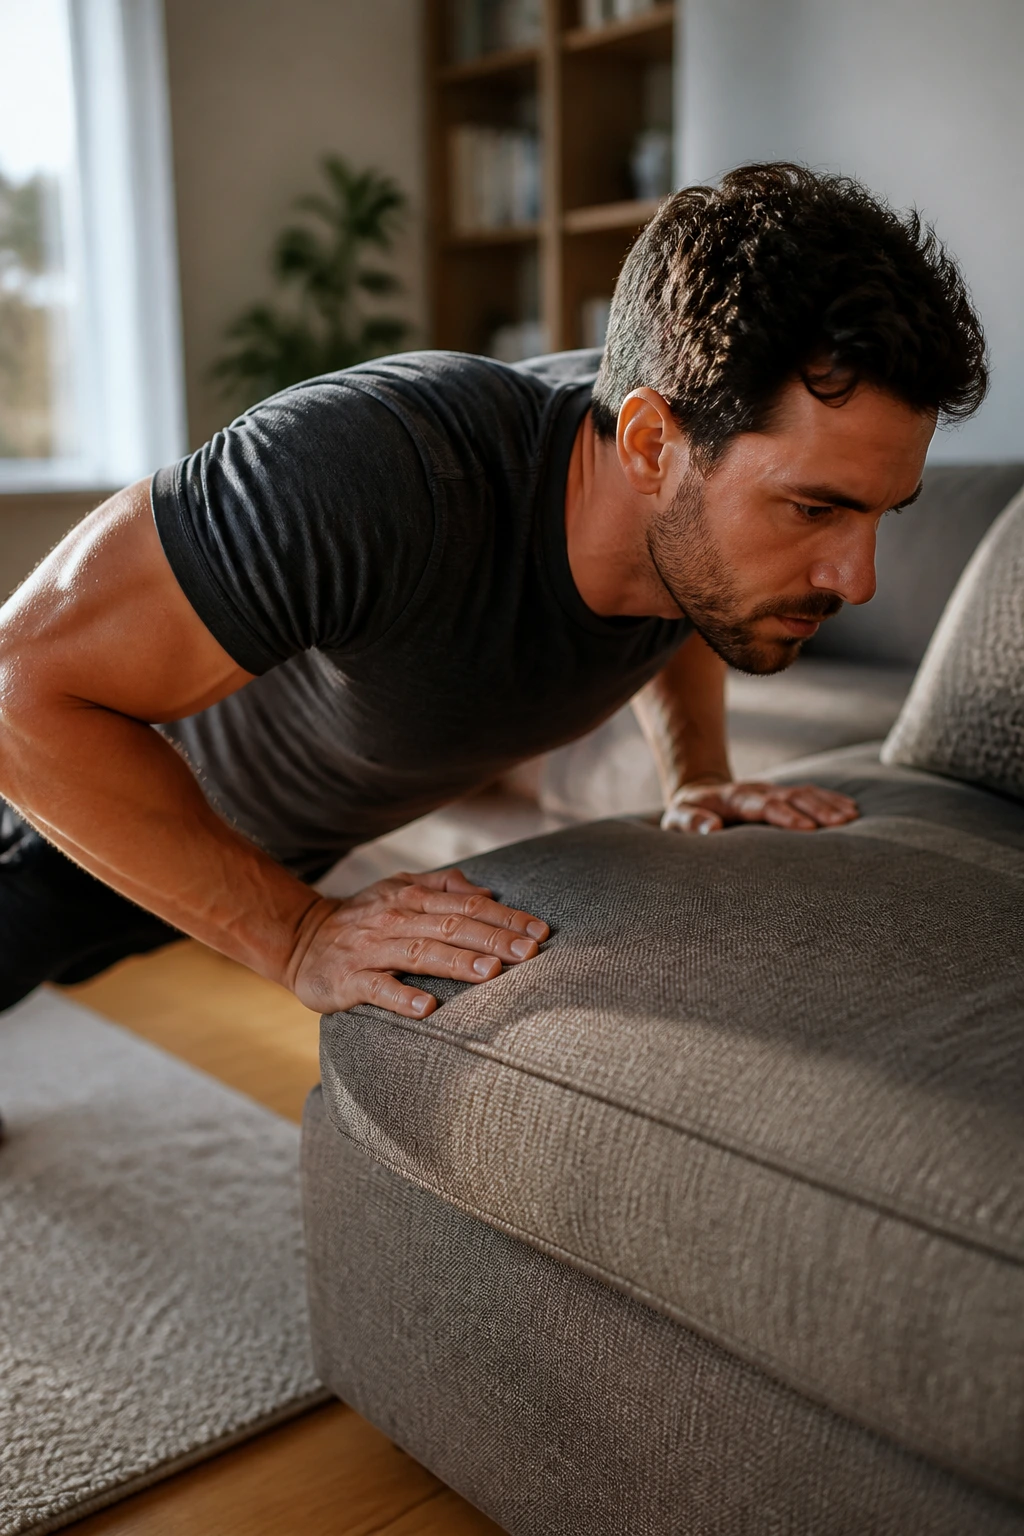
Why bother with incline push-ups if floor push-ups exist? Because the incline version lets you practice clean pressing mechanics without turning every set into a grind. Hands on a couch, sturdy bench, coffee table, or countertop shift some of your bodyweight away from your upper body, which makes this a smart choice for beginners, bigger bodies, or anyone rebuilding after time off.
The angle changes the feel more than people expect. A higher surface makes the rep easier and shorter; a lower surface makes it harder and closer to the floor version. That gives you a nice ladder to climb without guesswork.
Best Hand Height
Chest-height surfaces are usually too easy for long. Hip-height is a better sweet spot if you want real work. Keep your body straight, lower your chest toward the edge, and press through the whole palm instead of collapsing into the wrists.
A Clean Starting Dose
- 3 to 4 sets of 8 to 15 reps
- Slow the lowering phase to 2 to 3 seconds
- Pause for a beat at the bottom if you want more control
A short set on a proper angle beats a sloppy set on the floor. Every time.
3. Decline Push-Up
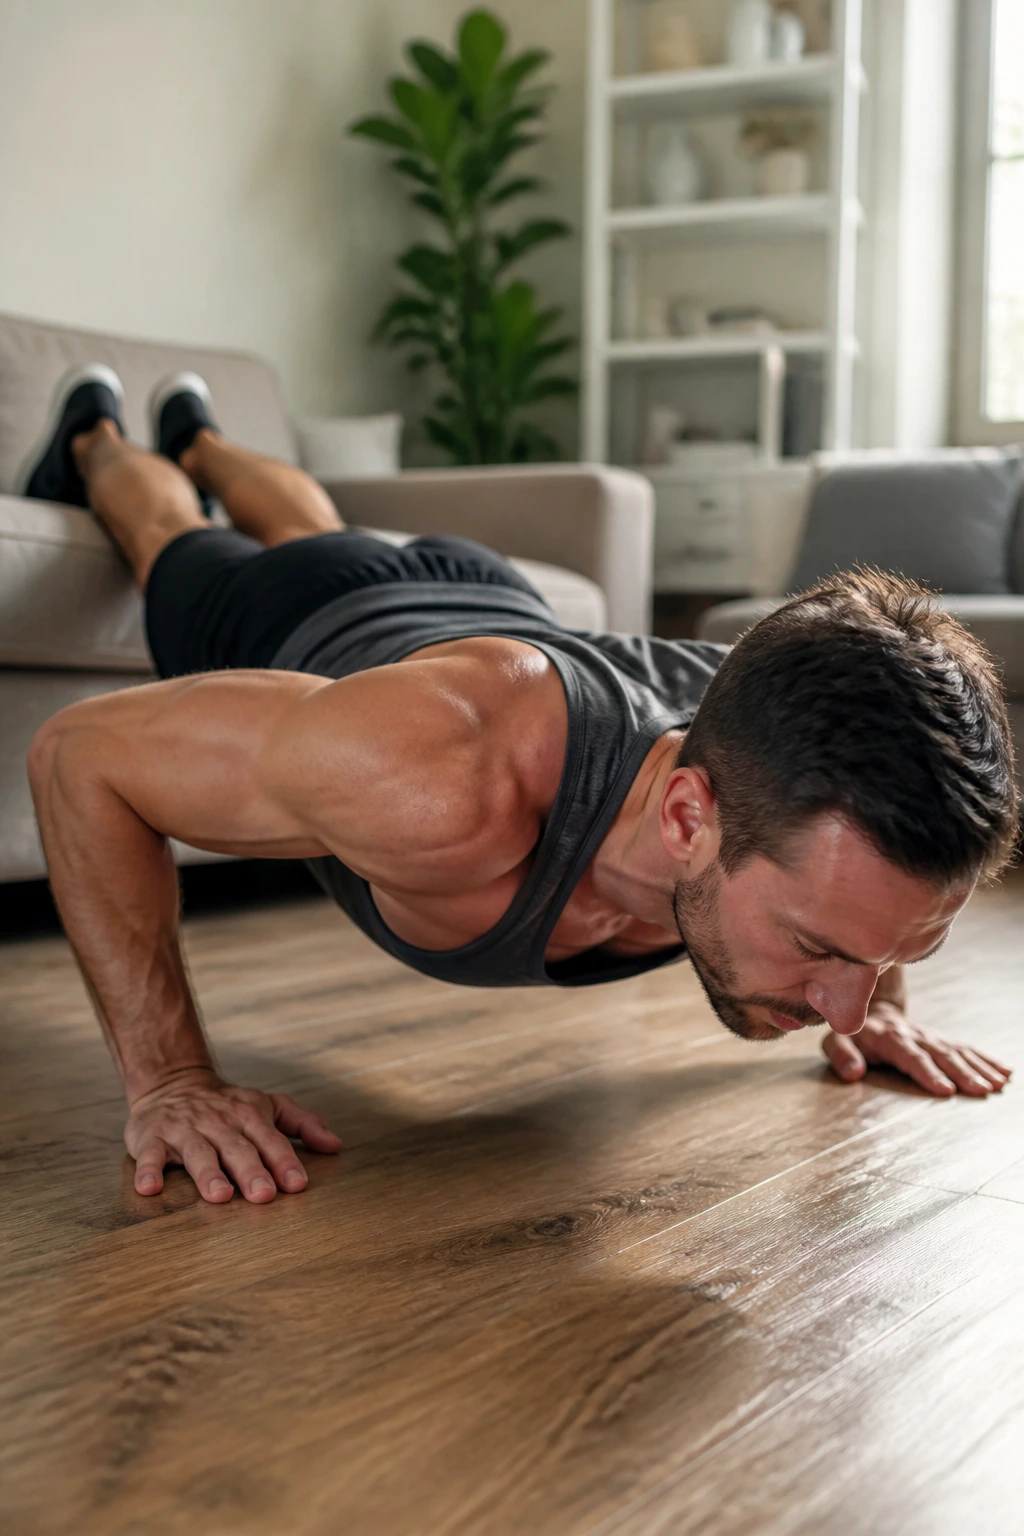
This is the one that makes people respect push-ups again. Put your feet on a couch, a sturdy chair, or the edge of a low bed, and the load shifts toward your upper chest and shoulders. The higher your feet go, the more the front of the shoulder gets involved, and the harder it becomes to keep your torso braced.
The trick is not to crank the feet so high that the lower back takes over. A foot elevation of about 12 to 24 inches is plenty for most people. Go higher only if your shoulders and core can keep up.
Decline push-ups work well when standard push-ups get easy but you’re not ready for handstand work. They also punish sloppy range. Good.
Use 3 to 4 sets of 4 to 10 reps, and lower under control for about 3 seconds. If the last two reps turn into a worm crawl, the feet are probably too high or the set is too long.
4. Wide-Grip Push-Up
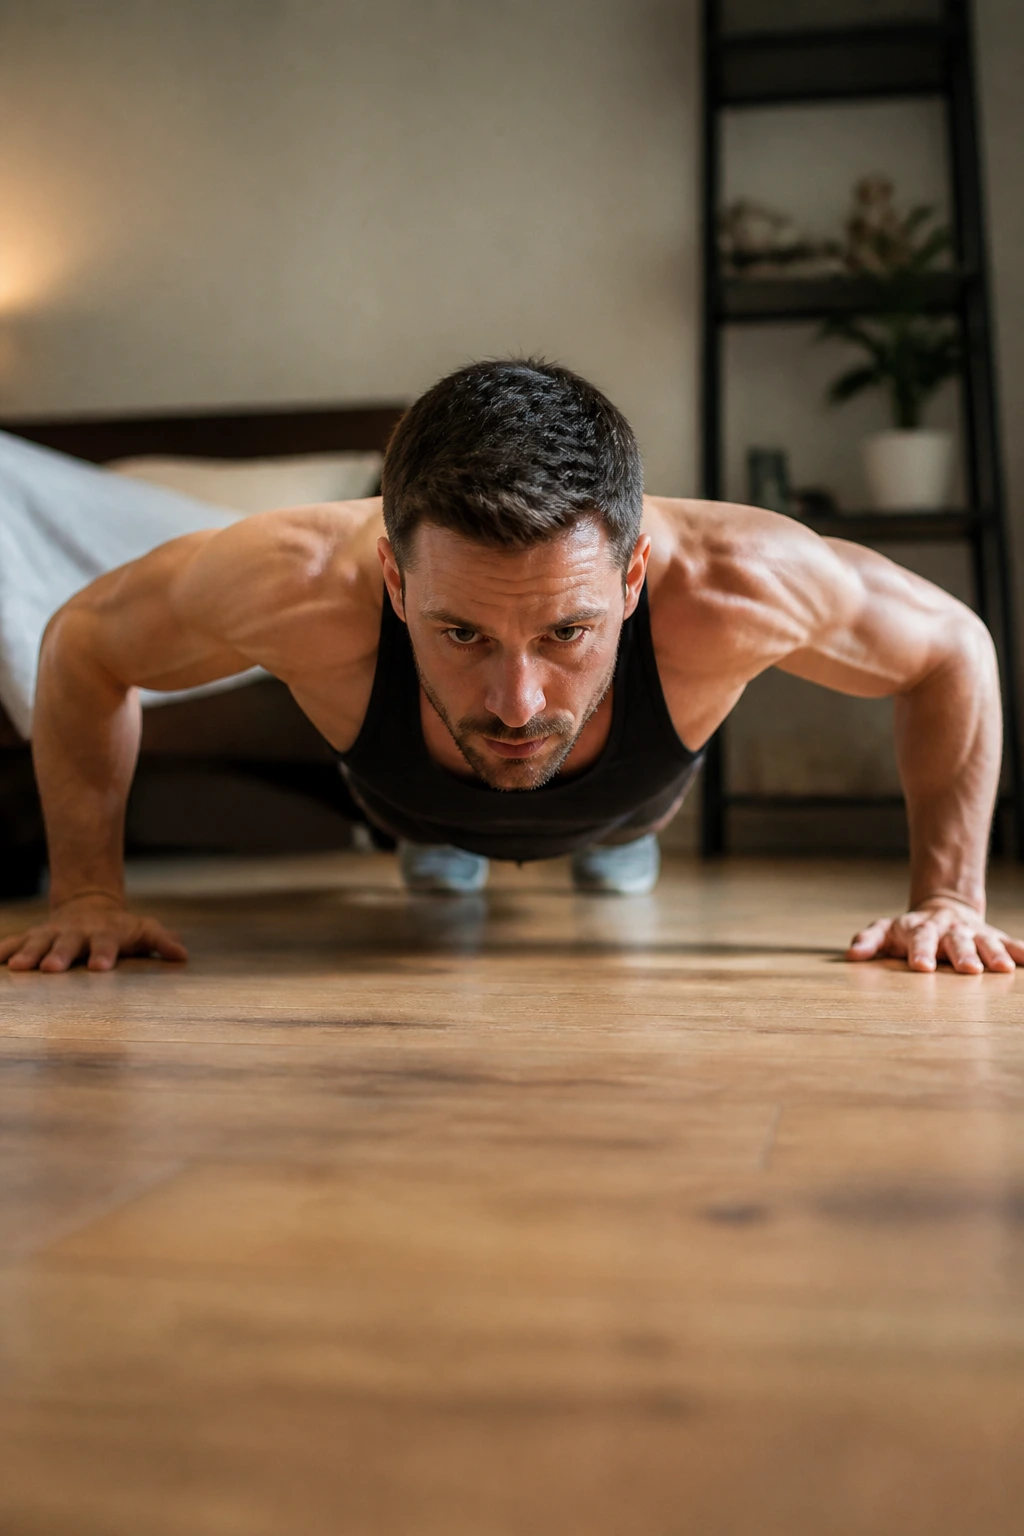
A wider hand position shifts more work toward the chest and away from the triceps, but only if you keep the elbows from flaring straight out like wings. That wide, flared look is where people get cranky shoulders. Keep the elbows at a comfortable angle, and think “wide enough to feel the chest, not so wide that the shoulder joint protests.”
I like this variation because it changes the feel of push-ups without needing extra gear. It also gives the chest a different line of tension than a standard push-up, which is useful if you’ve been stuck doing the same pressing pattern for months.
What to Watch For
- Hands about 1.5 times shoulder width
- Chest drops between the hands, not toward the face
- Neck stays long and relaxed
- Lower back doesn’t dip when fatigue hits
Try 2 to 3 sets of 8 to 12 reps. If your wrists or shoulders grumble, narrow the stance a little and try again. Tiny adjustments often fix a bad-feeling rep.
5. Diamond Push-Up

Unlike the wider version, the diamond push-up shifts the work hard into the triceps. The close hand position also asks more from the inner chest and front shoulders, which is why this one feels so different from a standard press. It’s a small change on paper and a nasty one in practice.
Not everyone needs to do these from the floor. If your wrists are stiff or your triceps are still catching up, put your hands on an incline surface and form the diamond there first. That keeps the movement useful without turning it into a joint fight.
Use a tight, controlled lowering phase. The elbows should track back rather than shooting out wide, and the chest should move toward the hands with control.
Best for: people who already own standard push-ups and want more triceps work without dumbbells.
Good starting point: 3 sets of 5 to 10 reps.
6. Pike Push-Up
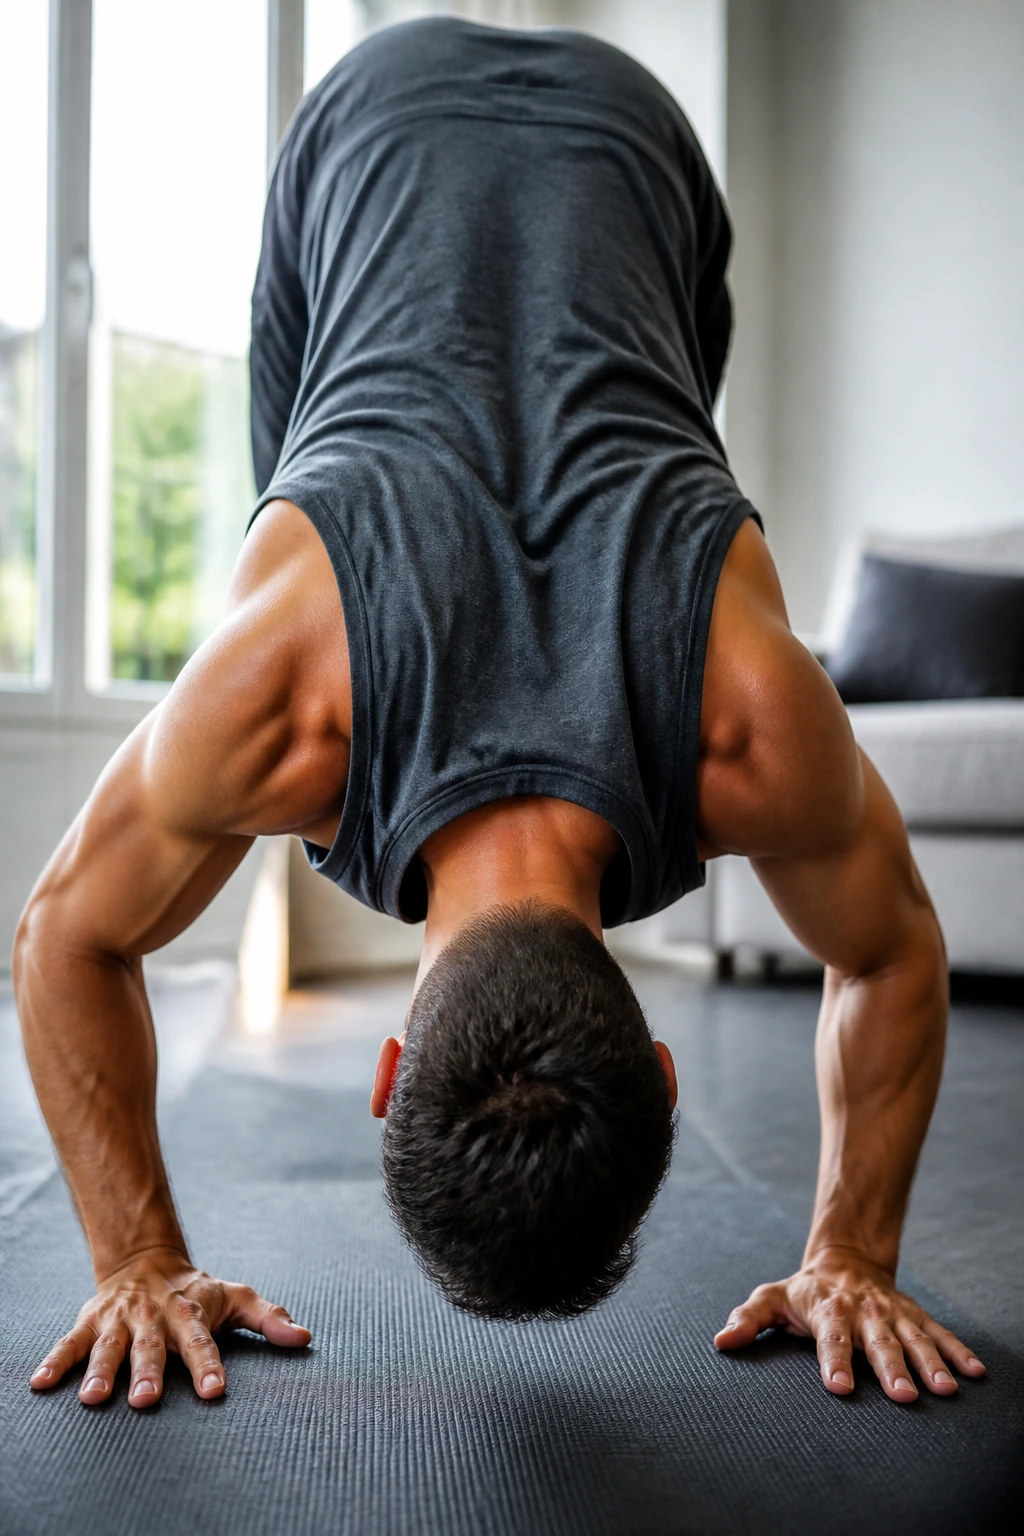
Shoulder day without dumbbells. That’s the big appeal here.
In a pike push-up, your hips stay high and your torso angles down toward the floor, which makes the movement behave a lot like an overhead press. The deltoids, especially the front part, do most of the work. The triceps and upper chest help, but the shoulders are the stars.
The Angle That Matters
Your hands should be about shoulder width, and your head should travel toward the floor between your hands. Think of making an upside-down V with your body. If the knees bend too much or the hips sink, the movement turns into a weird push-up hybrid and loses the shoulder emphasis.
A useful target is 3 sets of 5 to 8 clean reps. That’s enough to matter. If full reps are too tough, put your hands on the edge of a couch or step and keep the hips high. If they’re too easy, lift one foot slightly off the floor between reps.
Pike push-ups are honest. They do not care how many normal push-ups you can crank out.
7. Hand-Release Push-Up
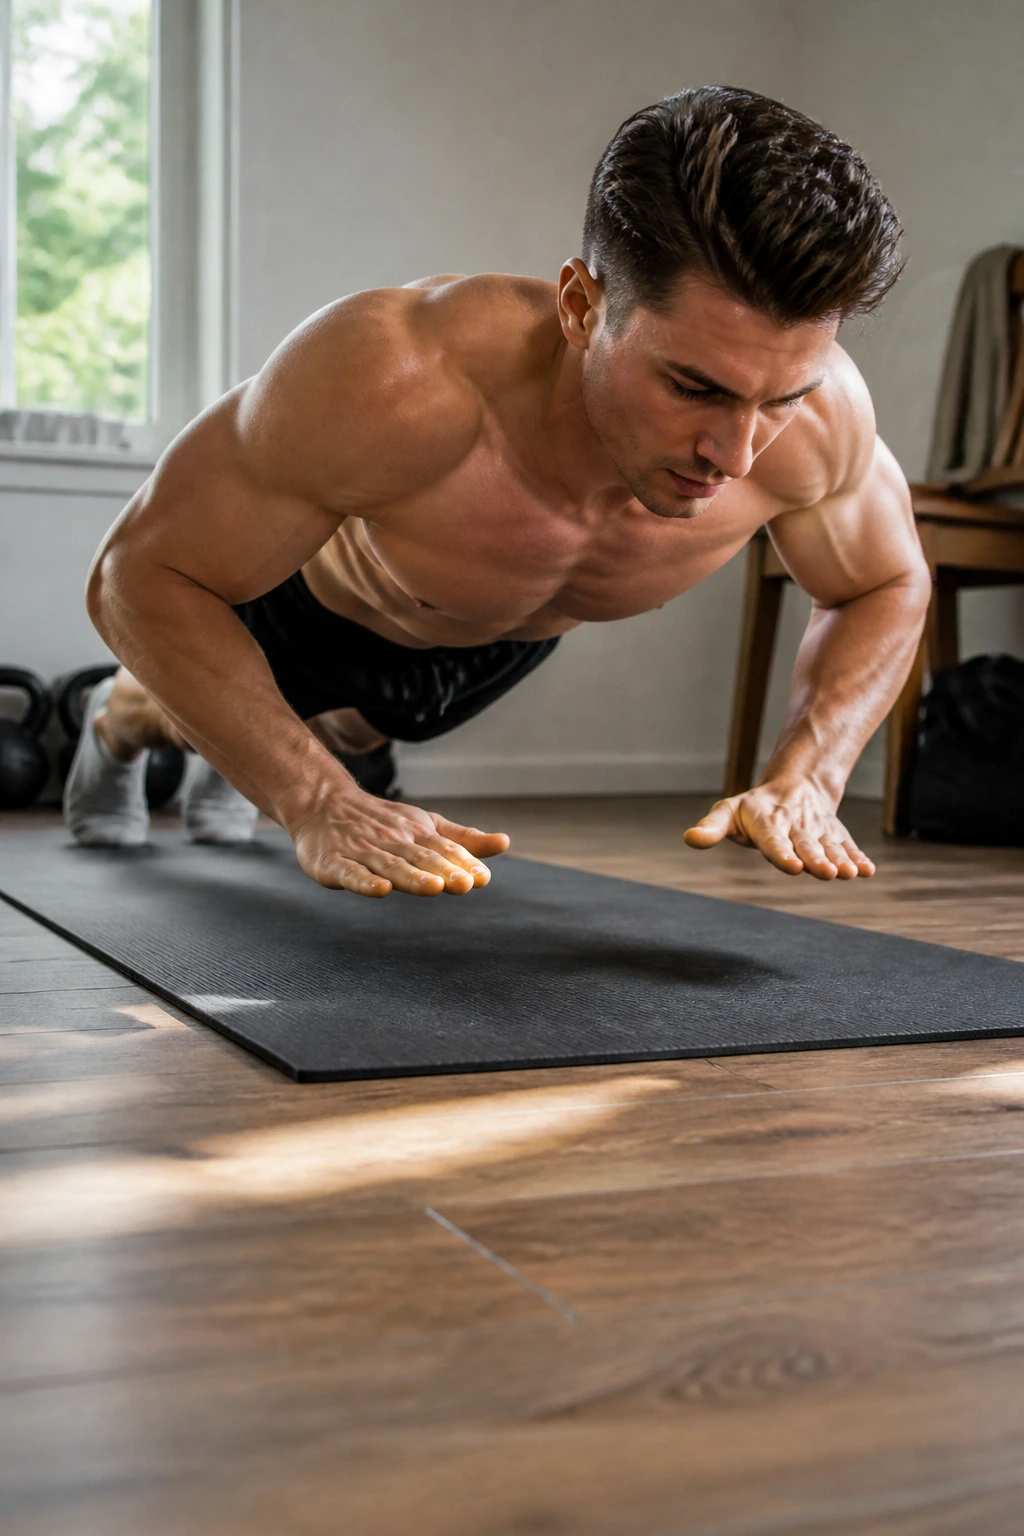
The pause matters.
A hand-release push-up forces you to lower all the way to the floor, briefly lift the hands, then press again from a dead stop. That small reset kills bouncing, cuts out sloppy momentum, and makes every rep start from the same place. It’s one of the cleanest ways to make push-ups harder without changing the exercise itself.
The floor contact also gives the chest a fuller range of motion. You feel the bottom position more, which is where many people cheat without meaning to. If you want stronger pressing mechanics and cleaner reps, this version earns its keep fast.
Use 3 to 4 sets of 6 to 12 reps. Keep the hands under or slightly outside the shoulders when you lift them off the floor, and make sure the hips do not rise first. Chest down. Hands off. Press.
One sentence version: no bounce, no excuses.
8. Archer Push-Up
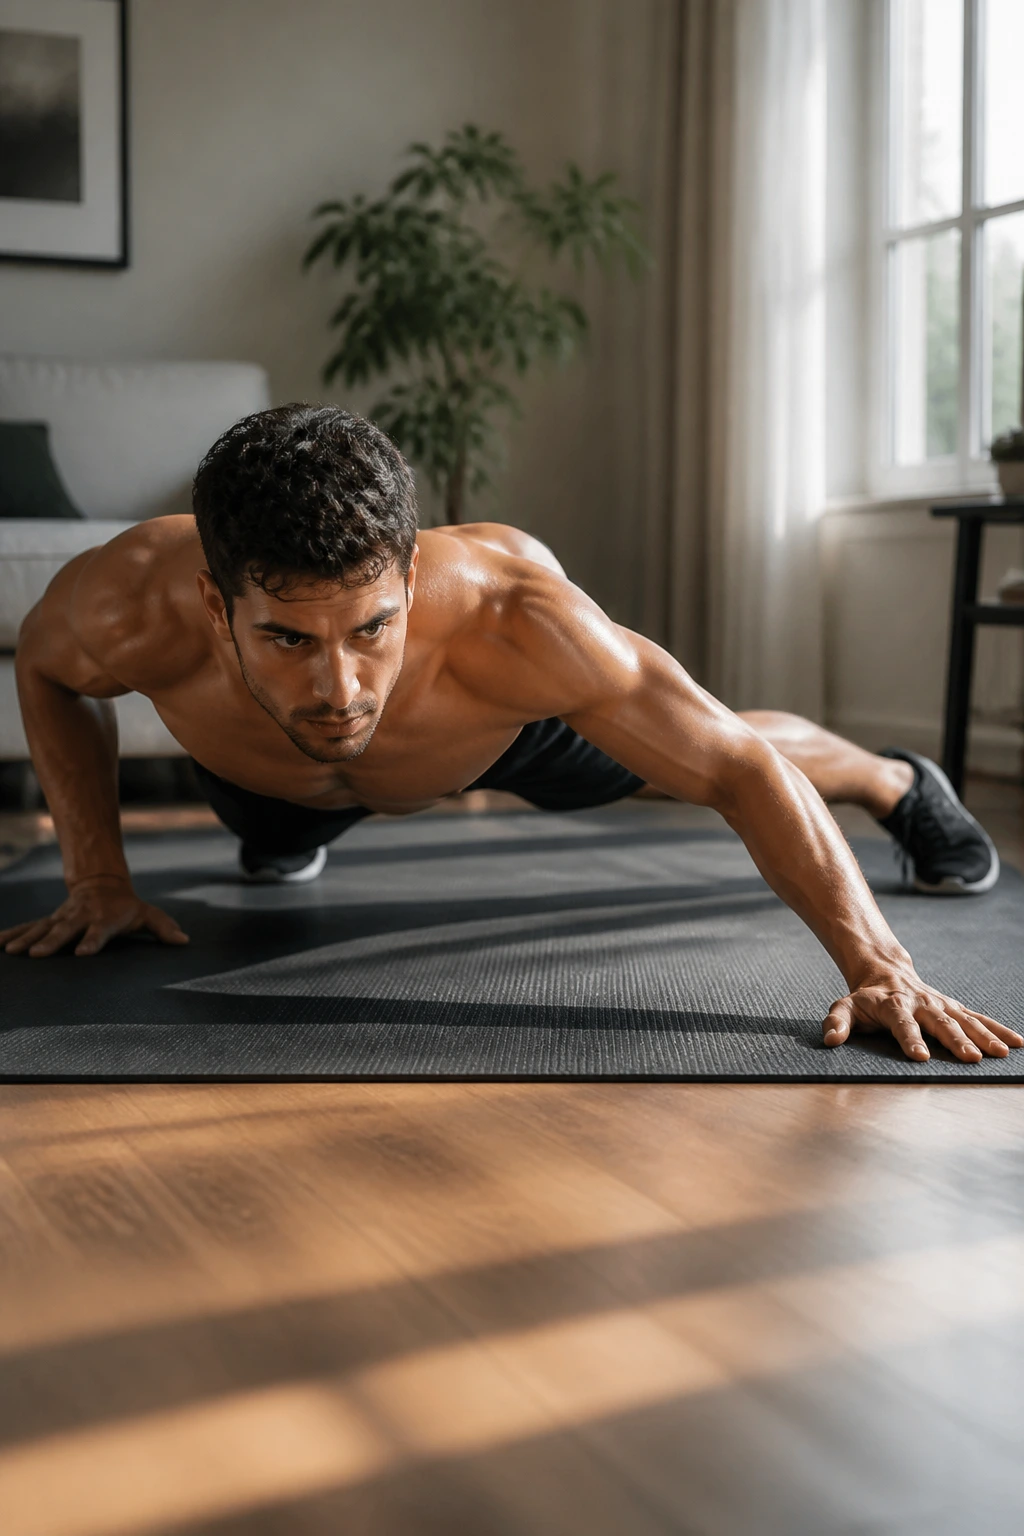
Why does this one feel so hard? Because one arm does most of the job while the other acts more like a support rail.
Archer push-ups are a bridge between two-arm push-ups and one-arm strength work. You spread your hands wider, shift your weight toward one side, and lower that side while the other arm stays straighter. The result is a lot of stress on the working side and a serious demand on shoulder control.
How to Scale It
- Keep your feet wider than normal for balance
- Shift only 70 to 80 percent of your weight to one side
- Use a shorter range of motion if needed
- Move slowly enough that you can feel which side is working
If full archers are too ambitious, do them on an incline or lower your chest only partway. That still teaches the side-to-side load shift.
A good target is 3 sets of 3 to 6 reps per side. Slow reps matter more here than high reps. A jerky archer push-up is mostly a party trick. A controlled one builds real strength.
9. Shoulder Tap Plank

This looks easy. It is not.
Shoulder taps train anti-rotation, which means your torso resists twisting while one hand leaves the floor. That makes the shoulders work harder than a normal plank, and it turns your core into a brace instead of decoration. If you’re trying to keep your upper body solid during pressing work, this drill has real value.
Put your hands under your shoulders, feet a little wider than hip width, and tap one shoulder at a time with the opposite hand. The hips should stay as still as possible. If they rock side to side, widen the feet and slow down.
Try 3 rounds of 20 to 40 taps or 20 to 30 seconds of slow, controlled tapping. The count matters less than the lack of wobble. If every tap shakes the whole body, the pace is too fast.
10. Plank to Push-Up
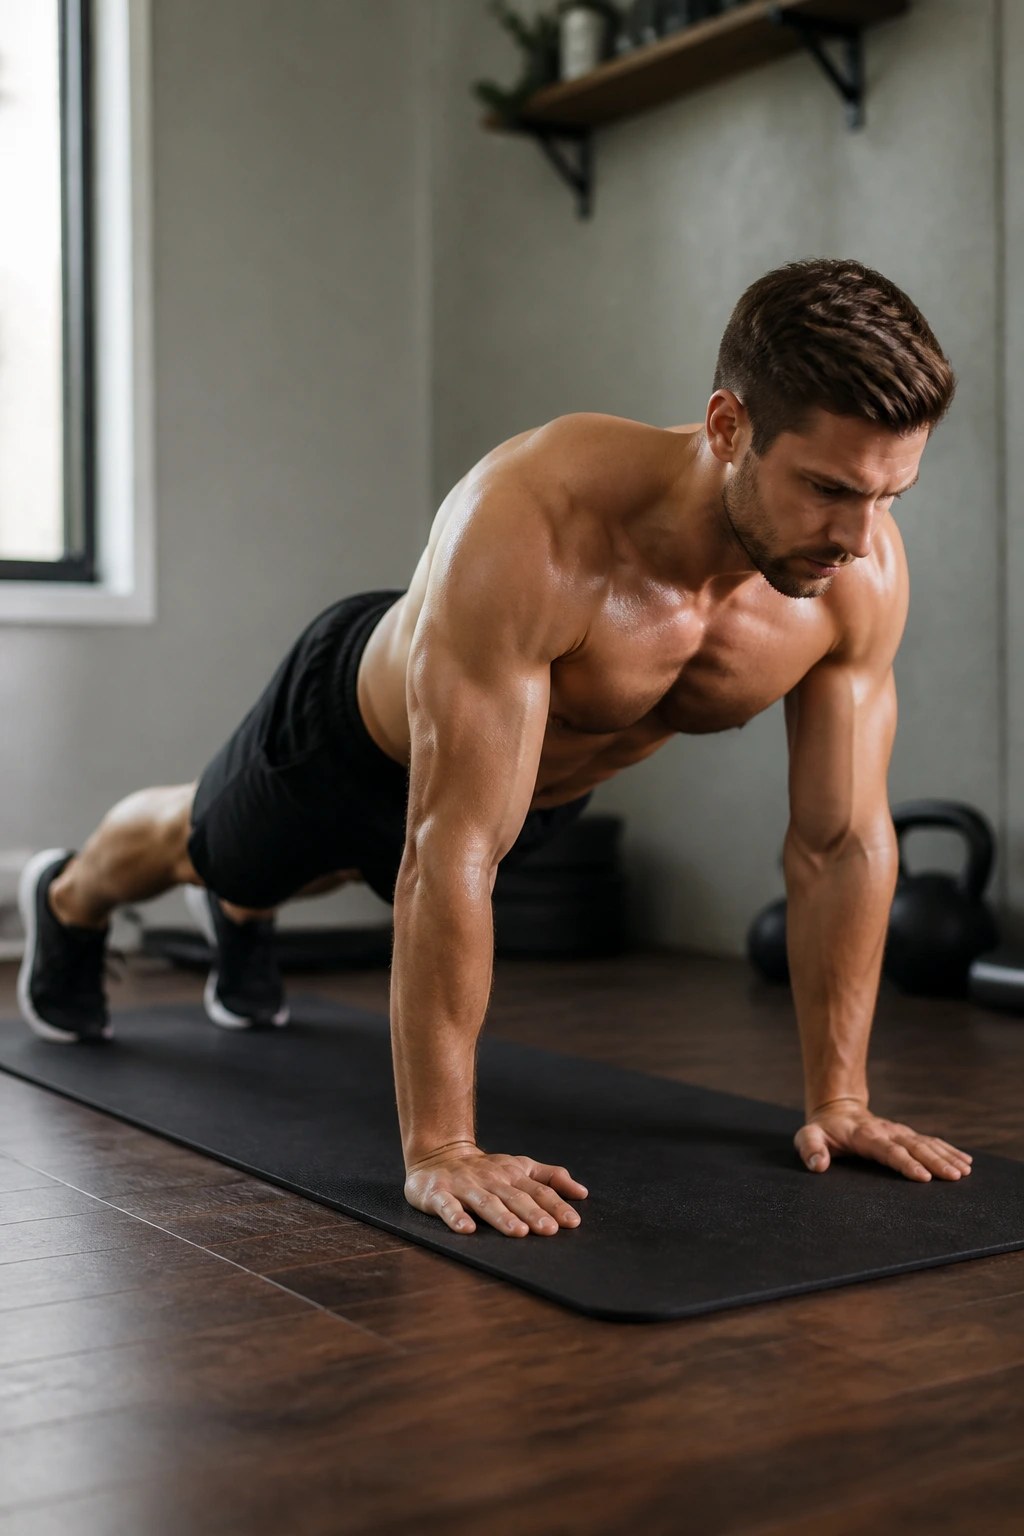
A still plank is one thing. A plank that turns into a push-up and back again is another.
This movement asks your triceps, shoulders, and core to keep the body rigid while the base keeps changing. That constant shift is the real challenge. You’re not just pressing; you’re controlling rotation and weight transfer at the same time.
How It Feels
One hand plants. The other follows. Then you reverse it and return to forearms. Done right, the hips stay level and the ribs stay tucked. Done poorly, the body snakes around like a fish on a dock.
Use 3 sets of 6 to 12 transitions. If your hips twist hard, slow the tempo and widen your feet. If your shoulders complain, reduce the range by staying on the same lead hand for two reps before switching. Small tweaks save the movement.
This one also makes a good finisher. It gets noisy fast.
11. Chair Dips
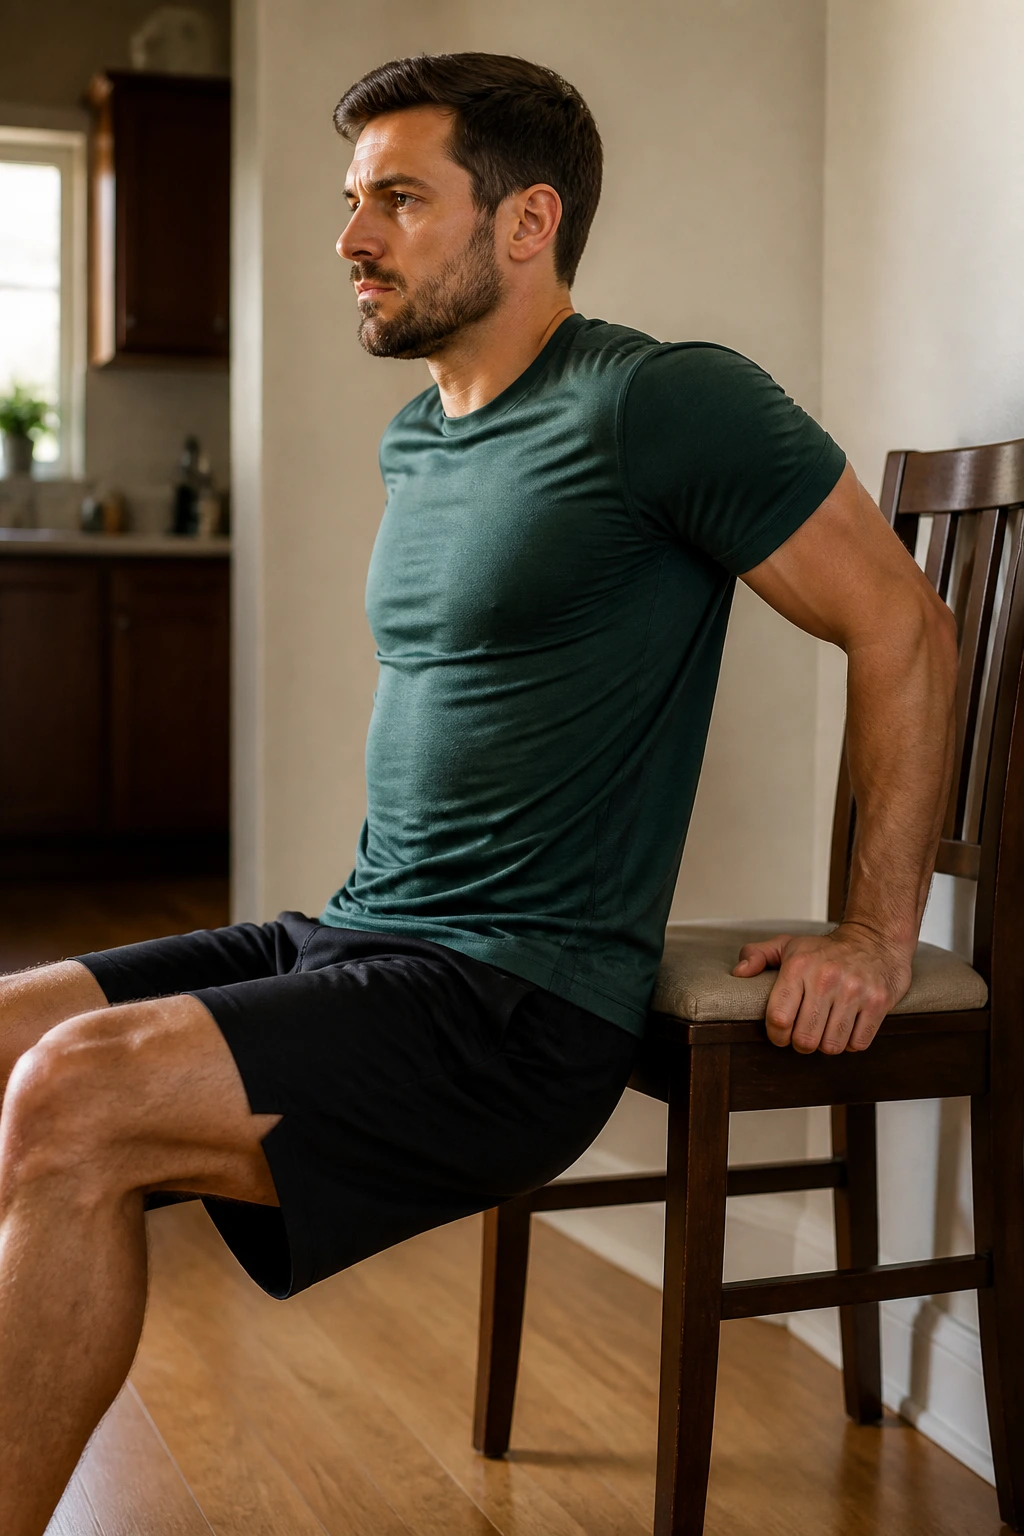
A sturdy chair, two hands, and some bodyweight are enough to light up the triceps and lower chest in a hurry. Chair dips are simple on the surface, but they get ugly when the shoulders drop too deep or the elbows flare too wide. That’s the part people ignore until the front of the shoulder starts talking back.
Keep your shoulders down and away from your ears. Lower only until your upper arms are about parallel to the floor, or a touch deeper if that still feels smooth. Going lower is not a trophy. It’s just a longer lever.
I prefer short, strong sets here. 2 to 3 sets of 6 to 12 reps is plenty for most home routines. If the chair wobbles, stop. If the shoulder pinches, stop. Floor-based triceps work is a better option than pushing through pain.
12. Bodyweight Triceps Extension
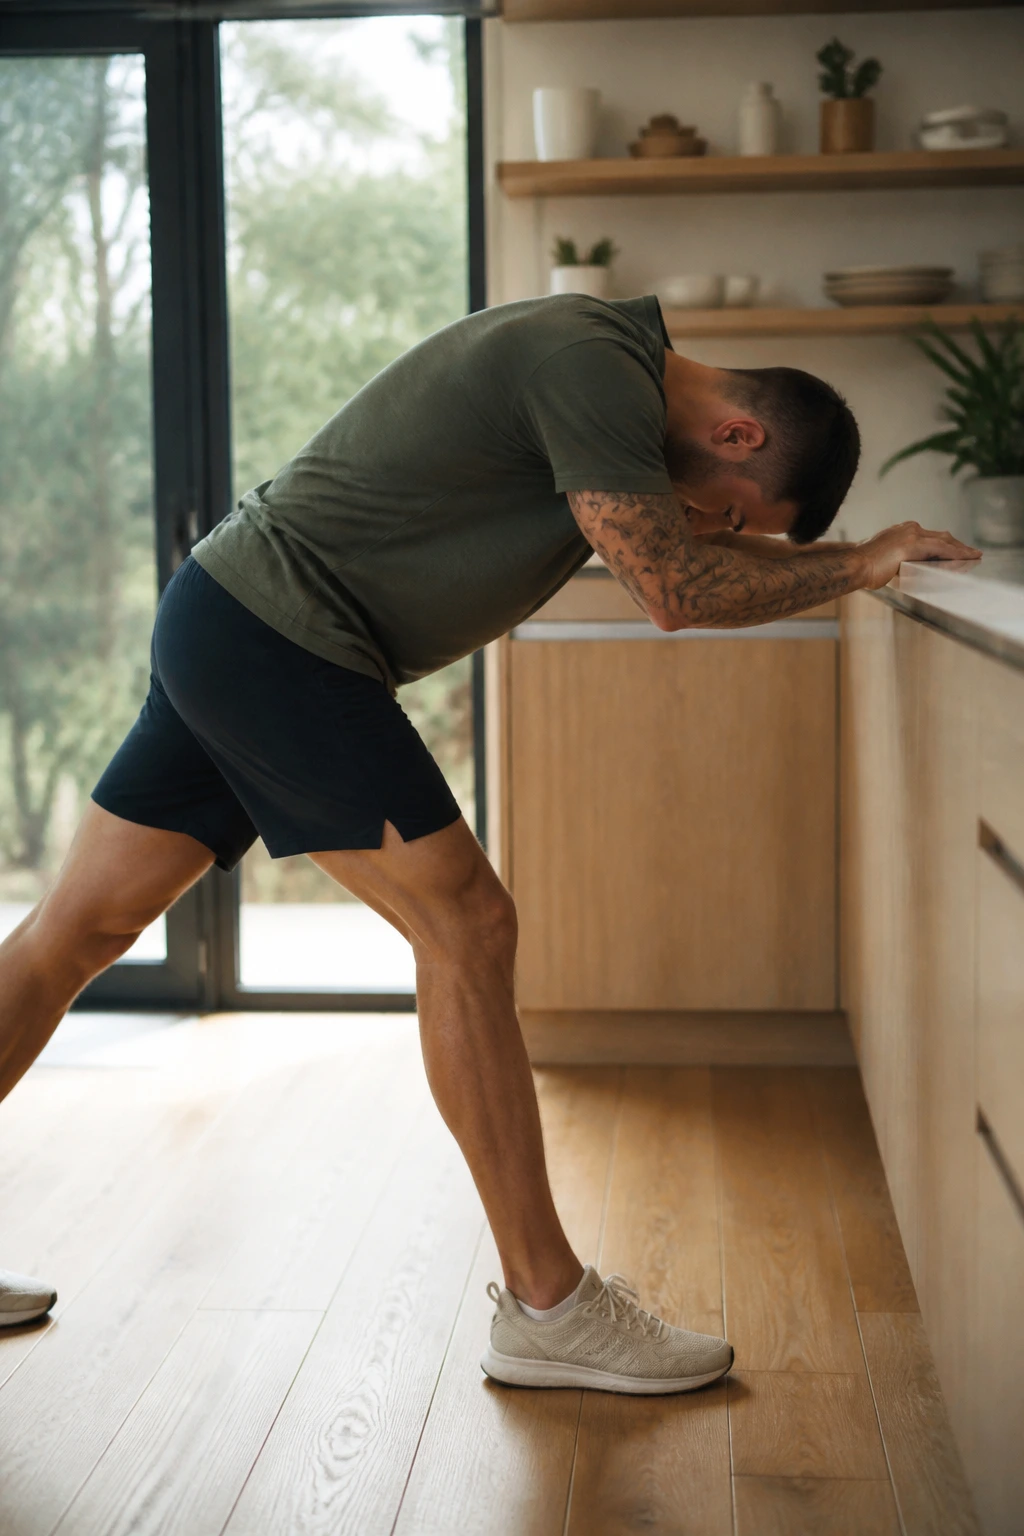
This one feels like a skull crusher without the dumbbells, and that’s why I like it.
Stand facing a wall, countertop, or sturdy table edge. Place your hands shoulder-width apart, lean your body forward, and bend at the elbows so your forehead moves toward your hands. The more your feet step back, the harder it gets. The less you lean, the easier it feels. It’s a nice sliding scale.
Why the Angle Works
Unlike dips, where the shoulder joint can feel crowded, triceps extensions keep the elbows working through a more direct bend-and-straighten pattern. That usually feels friendlier on the shoulders and gives the back of the arm a very direct hit.
- Keep the elbows tucked, not flared
- Move the forehead toward the hands, not the chest
- Stop before the shoulders roll forward
- Use a slower lower than lift
Do 3 sets of 8 to 15 reps. If you can breeze through 15 clean reps, step your feet farther back or lower the hand position a little.
13. Inverted Row Under a Sturdy Table
Pulling matters. A lot.
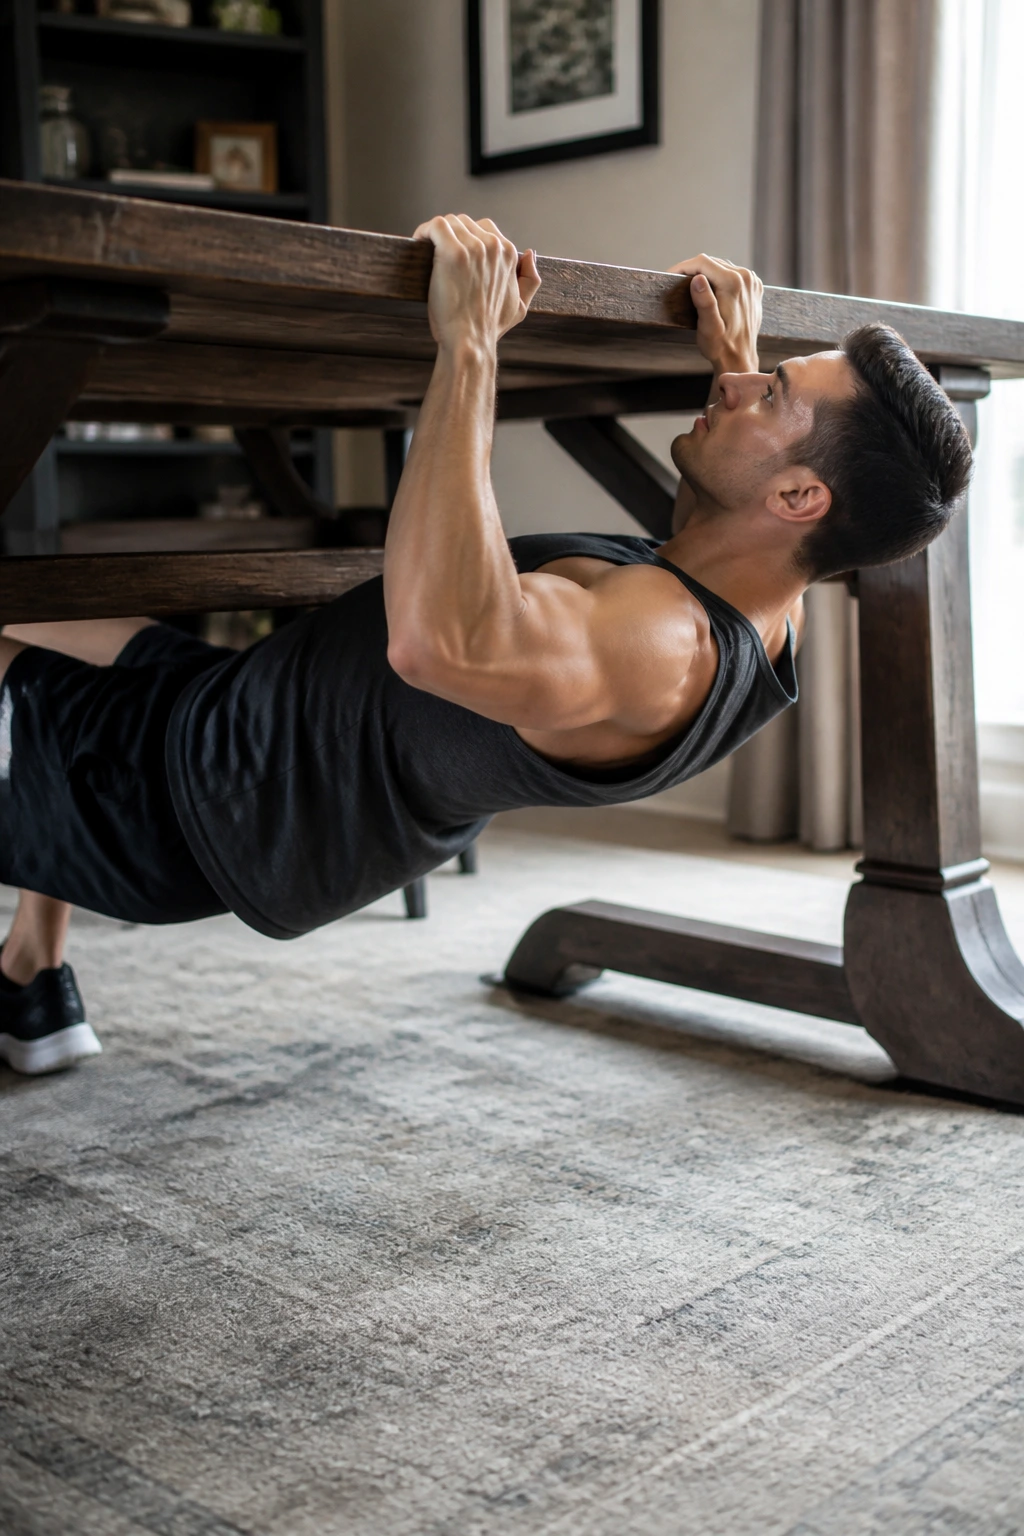
If your home routine is all pressing and no rowing, your shoulders will eventually feel lopsided. The inverted row fixes that by training the lats, mid-back, rear delts, and biceps in one shot. Use a stable table with a wide base, lie underneath it, grab the edge, and pull your chest toward the underside of the table.
Safety First
- The table must not wobble
- Your grip should feel solid before you pull
- Knees bent makes it easier
- Legs straight makes it harder
Pull the chest toward the edge while keeping the body stiff like a board. Lower under control. Do not yank your chin toward the table and call it a rep. The chest should lead, the shoulders should stay packed, and the body should rise as one unit.
Try 3 to 4 sets of 5 to 10 reps. If a table row is too hard, bend your knees. If it gets too easy, straighten the legs and elevate the feet a little.
14. Backpack Bent-Over Row
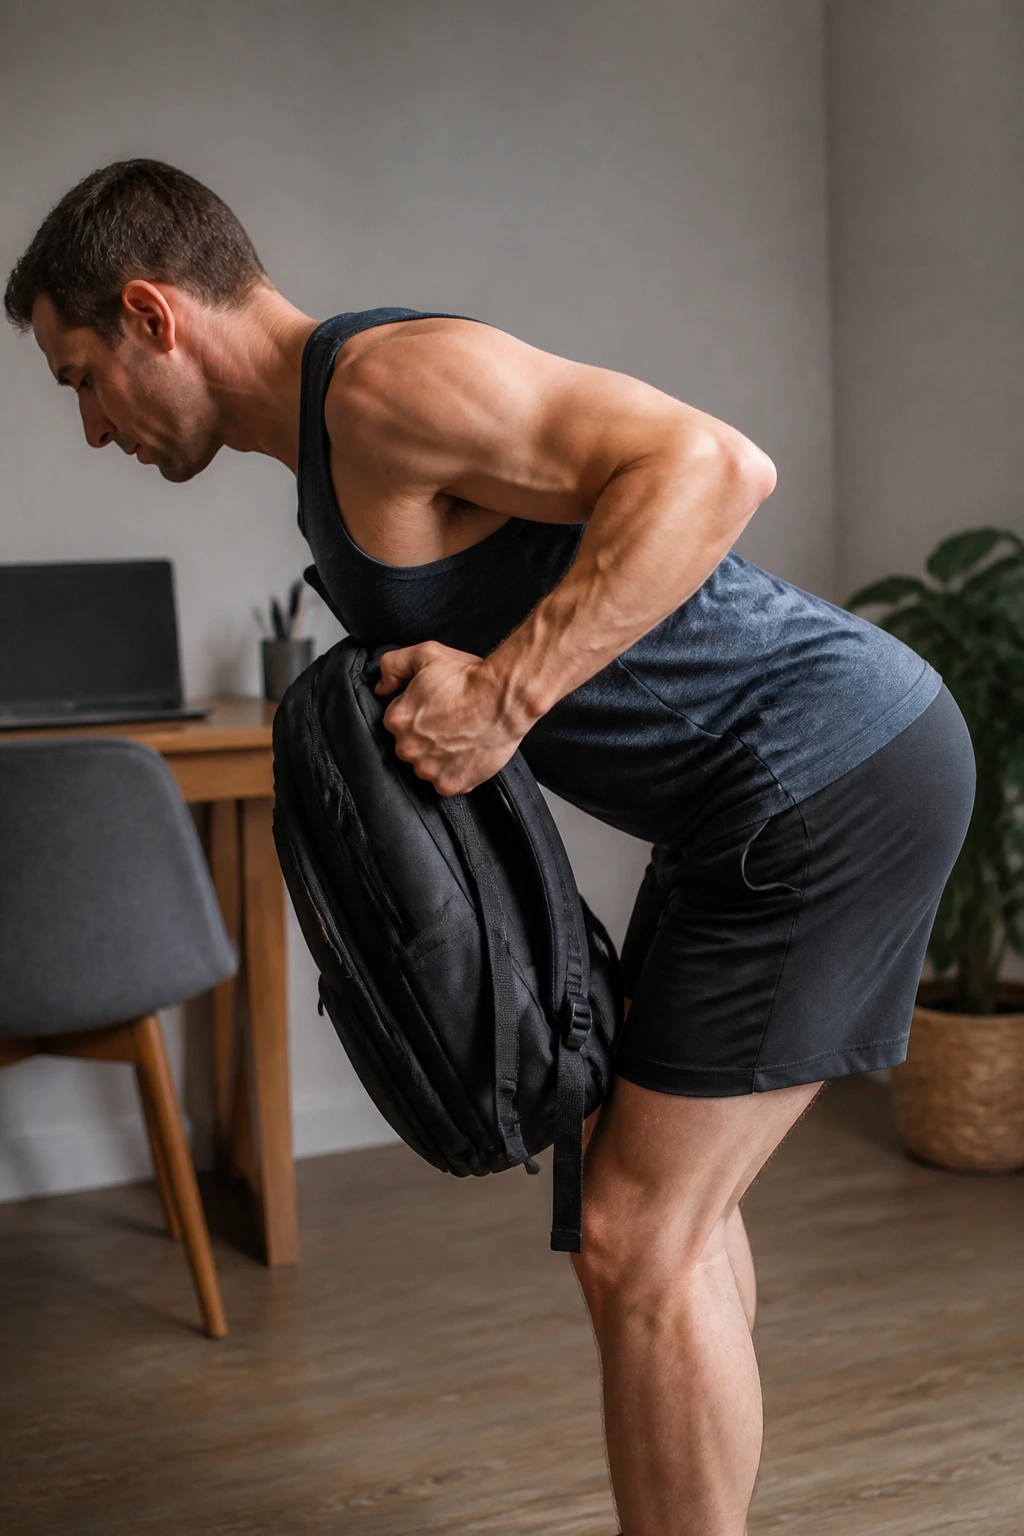
Unlike the table row, this one gives you a load you can change on the fly. Books, water bottles, or canned food in a backpack are enough to create real resistance, and the shape of the bag makes it easy to adjust weight fast.
Hinge at the hips until your torso leans forward about 45 degrees, keep a flat back, and row the backpack toward your lower ribs or hip line. That path matters. Pulling to the hip tends to hit the lats better than yanking high into the chest.
What Makes It Useful
You can row two hands at once, or one side at a time if you want to clean up imbalances. One-arm rows also make it easier to keep the shoulder blades moving through a full range.
- 3 sets of 8 to 12 reps
- Pause for 1 second at the top
- Lower slowly so the bag does not swing
A backpack row is not fancy, but it’s one of the best home pull exercises out there. Cheap. Simple. Effective.
15. Prone Y Raise
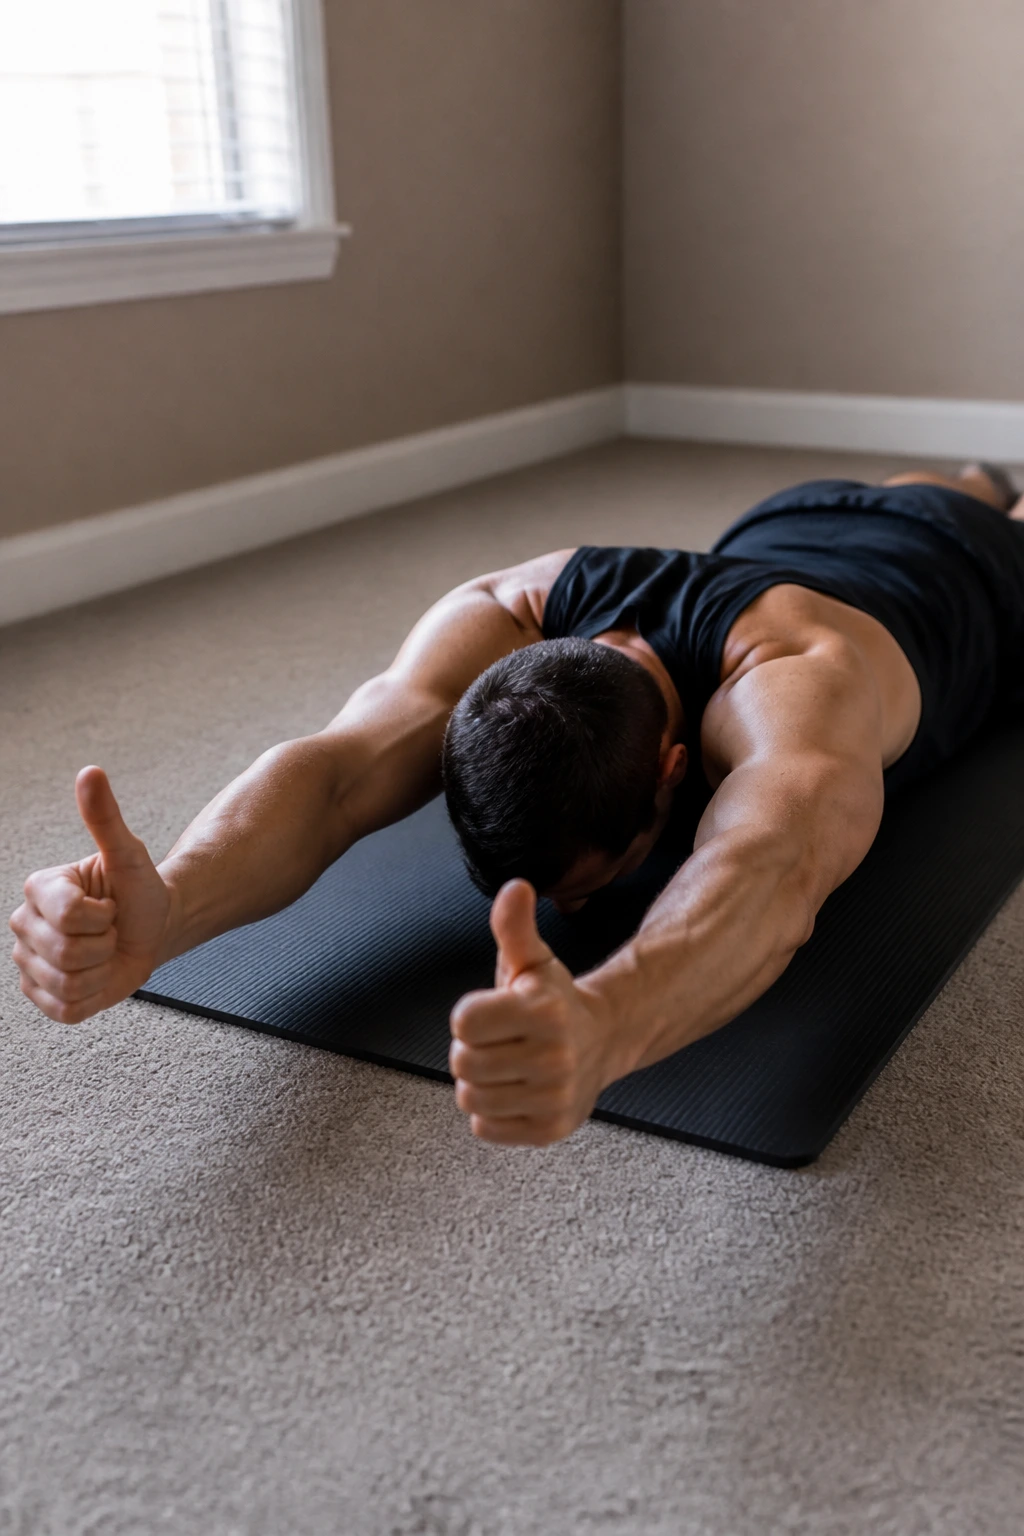
The lower traps do quiet work, and most people ignore them until the shoulders start feeling messy.
Lie face down on the floor with your arms angled overhead in a loose Y shape, thumbs pointing up. Lift the arms a few inches off the floor, keep the neck long, and hold for a second before lowering. The movement is small. That’s the point. You are not trying to fling your arms around; you’re teaching the upper back to switch on without shrugging.
This one feels almost too easy at first. Then it starts burning.
Use 2 to 3 sets of 10 to 15 reps, or hold each rep for 2 seconds if you want more control work. If your lower back arches hard, place a folded towel under the hips or reduce the lift height. Small, clean reps beat bigger ugly ones every time.
16. Prone T Raise
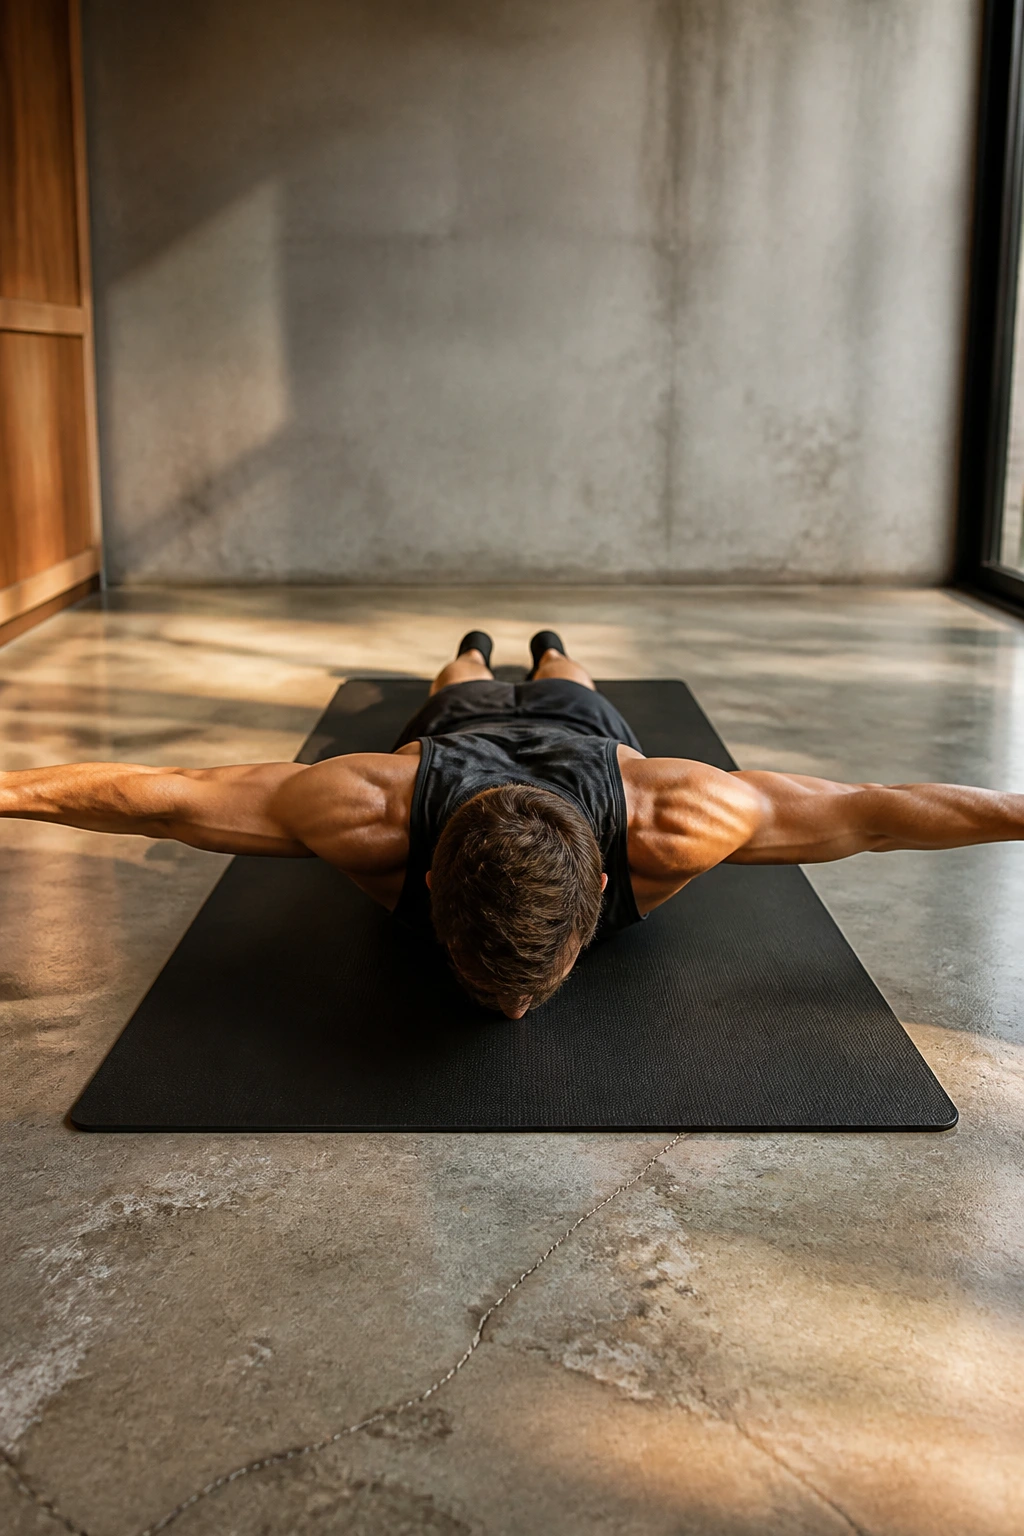
After a long desk day, the rear delts and rhomboids tend to feel asleep. The prone T raise wakes them up.
Lie face down and stretch your arms straight out to the sides so your body forms a T. Lift the arms a few inches, squeeze the shoulder blades lightly, then lower with control. Keep the palms facing the floor or slightly turned up, and resist the urge to shrug. Shrugging turns the exercise into a neck complaint.
Why It Belongs in a Home Routine
This is one of those moves that looks plain and works better than it should. It helps balance all the pressing work from push-ups and dips, and it gives your upper back the kind of attention it usually misses in home training.
Go with 2 to 3 sets of 8 to 12 reps. If the floor feels too easy, add a slow 3-second hold at the top. If you want a bit more load, hold very light water bottles, but only if you can keep the motion clean.
17. Wall Walks
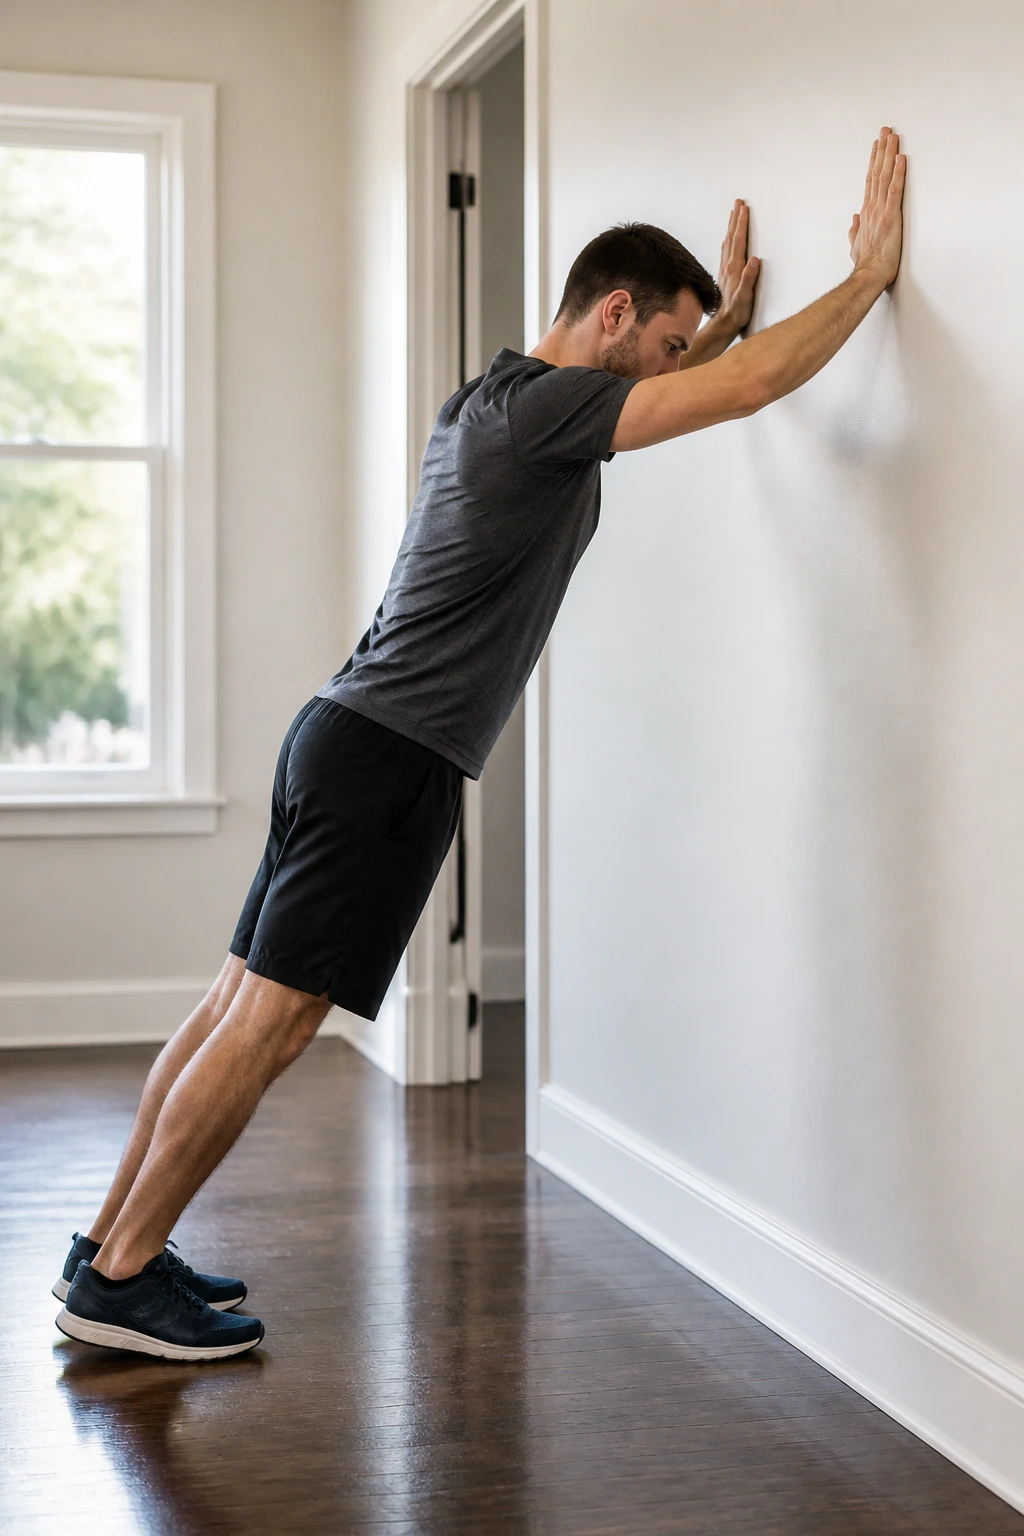
Want a shoulder drill that feels more like a stunt than a warm-up? Wall walks have that effect.
Start in a push-up position with your feet near a wall. Walk your feet up the wall while your hands move closer toward it, inch by inch, until your body is angled steeply and your shoulders are doing the heavy lifting. Some people keep going until the chest faces the wall in a near-handstand position. Others stop well short of that. Both are fine.
How to Scale It
- Stop halfway up if your core arches
- Keep the hands planted firmly under the shoulders
- Move slowly enough to control every shift
- Come down with the same control you used going up
Wall walks build shoulder strength, wrist tolerance, scapular control, and core tension at the same time. They are also brutally honest. If your lower back arches, you’ll know. If your shoulders are weak overhead, you’ll know faster.
Use 3 to 5 reps with full control, or hold the top position for 10 to 20 seconds if the climb is too much. No need to turn it into a circus.
18. Bear Crawl
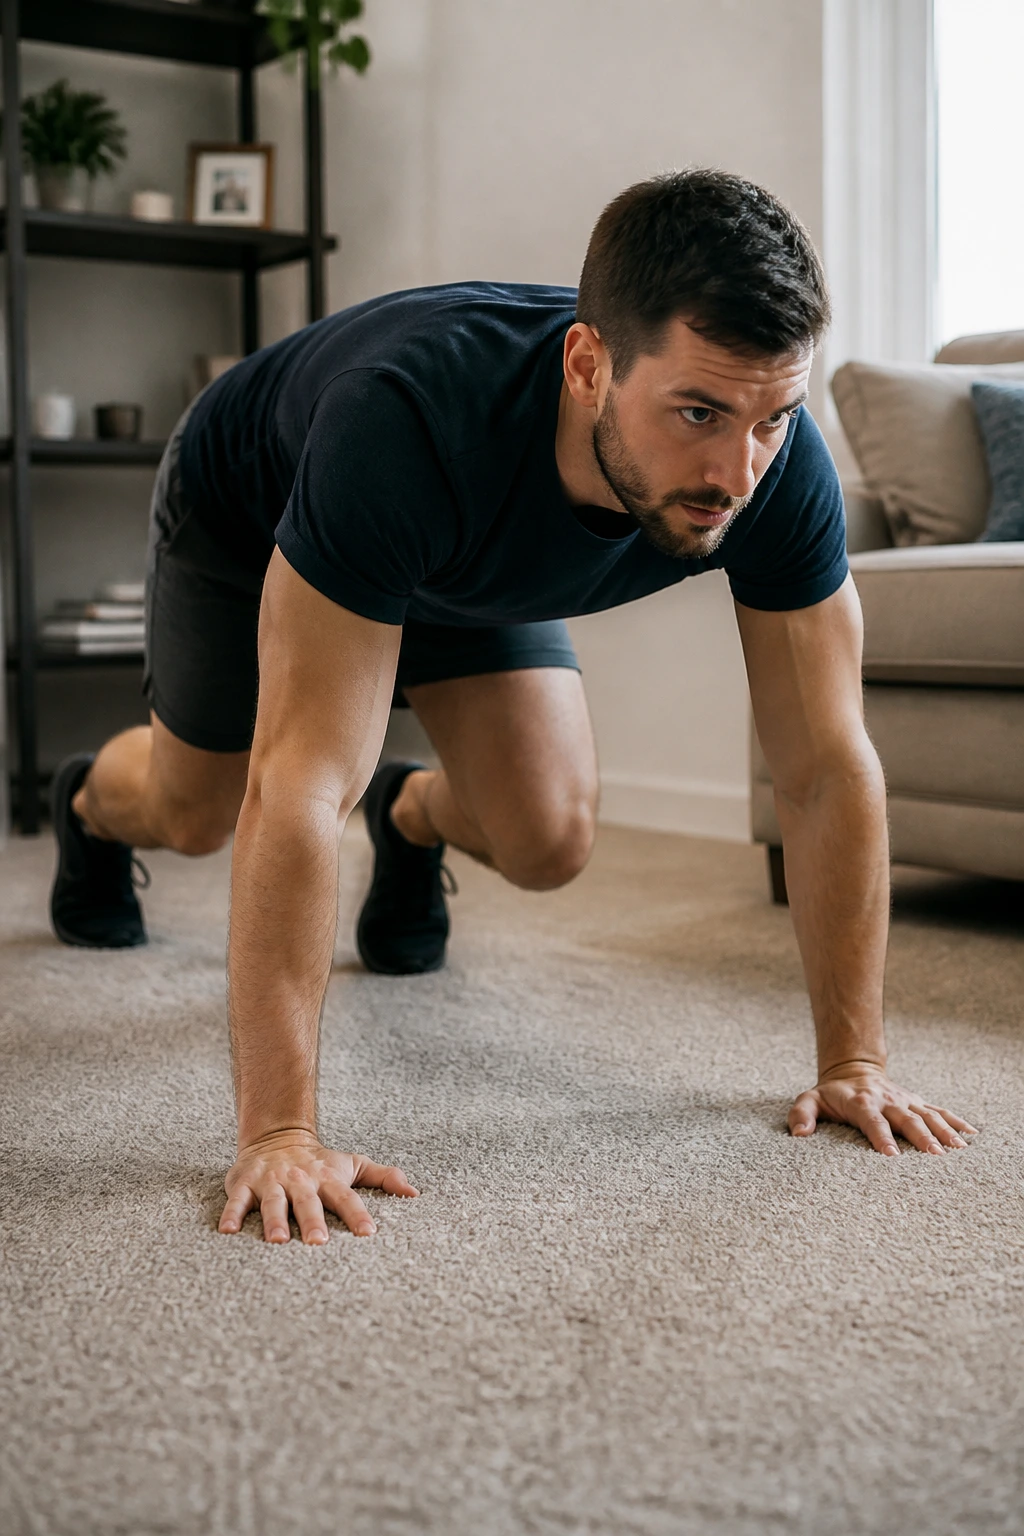
The bear crawl is the ugly duckling that pays off.
Get on hands and toes with your knees hovering about 1 to 2 inches off the floor. Crawl forward with the opposite hand and foot, then crawl back. Move slowly. The shoulders stay stacked, the hips stay low, and the core works overtime to stop the body from wobbling around. It’s part upper-body strength, part coordination, part conditioning.
Why It’s Worth Keeping
The crawl hits the shoulders, triceps, serratus, core, and upper back without needing any equipment. It also gets your heart rate up faster than people expect, which makes it a sneaky finisher at the end of a home workout.
- Crawl for 20 to 40 seconds
- Rest for 30 to 60 seconds
- Repeat for 3 to 5 rounds
Keep the steps small if space is tight. A living room works fine. A hallway works fine too. What matters is the control, not the distance.
Final Thoughts
A good home upper-body routine does not need to be complicated. It needs pushing work, pulling work, and enough shoulder control to keep the whole thing from turning into a mess. That is why the mix of push-ups, rows, dips, and floor drills matters more than chasing the hardest-looking variation.
If you want the cleanest path forward, pair one push move, one pull move, one shoulder move, and one core-stability drill in the same session. Then keep the reps honest. Two clean reps short of failure is usually a better place to stop than one ugly rep too far.
The small details do the real work here. A tighter plank. A slower lower. A backpack with a few extra books. That is how a home setup turns into a training plan.
