



If your shoulders slump after an hour at a desk, an upper body workout at home can do more than tighten your arms. It can make carrying groceries, reaching into a high cabinet, and holding better posture feel less annoying, which is the part most people forget when they chase arm definition.
You do not need a full gym for that. A chair, a floor, a resistance band, and a pair of light dumbbells cover most of the useful work. The women I’ve seen stick with home training usually stop doing random arm moves and start mixing push, pull, and shoulder stability in the same week.
That mix matters. Public health guidance has long pointed people toward muscle-strengthening work at least two days a week, and home training fits that idea neatly because it’s easy to repeat. A strong upper body is not about punishing yourself with endless push-ups. It’s about building enough control that your chest, back, shoulders, and arms stop feeling like separate parts.
And yes, some of these moves will burn. That’s the point. The first one is the kind of beginner-friendly press I like because it teaches the pattern without making your wrists or ego complain.
1. Wall Push-Ups for an Easy Upper Body Workout at Home
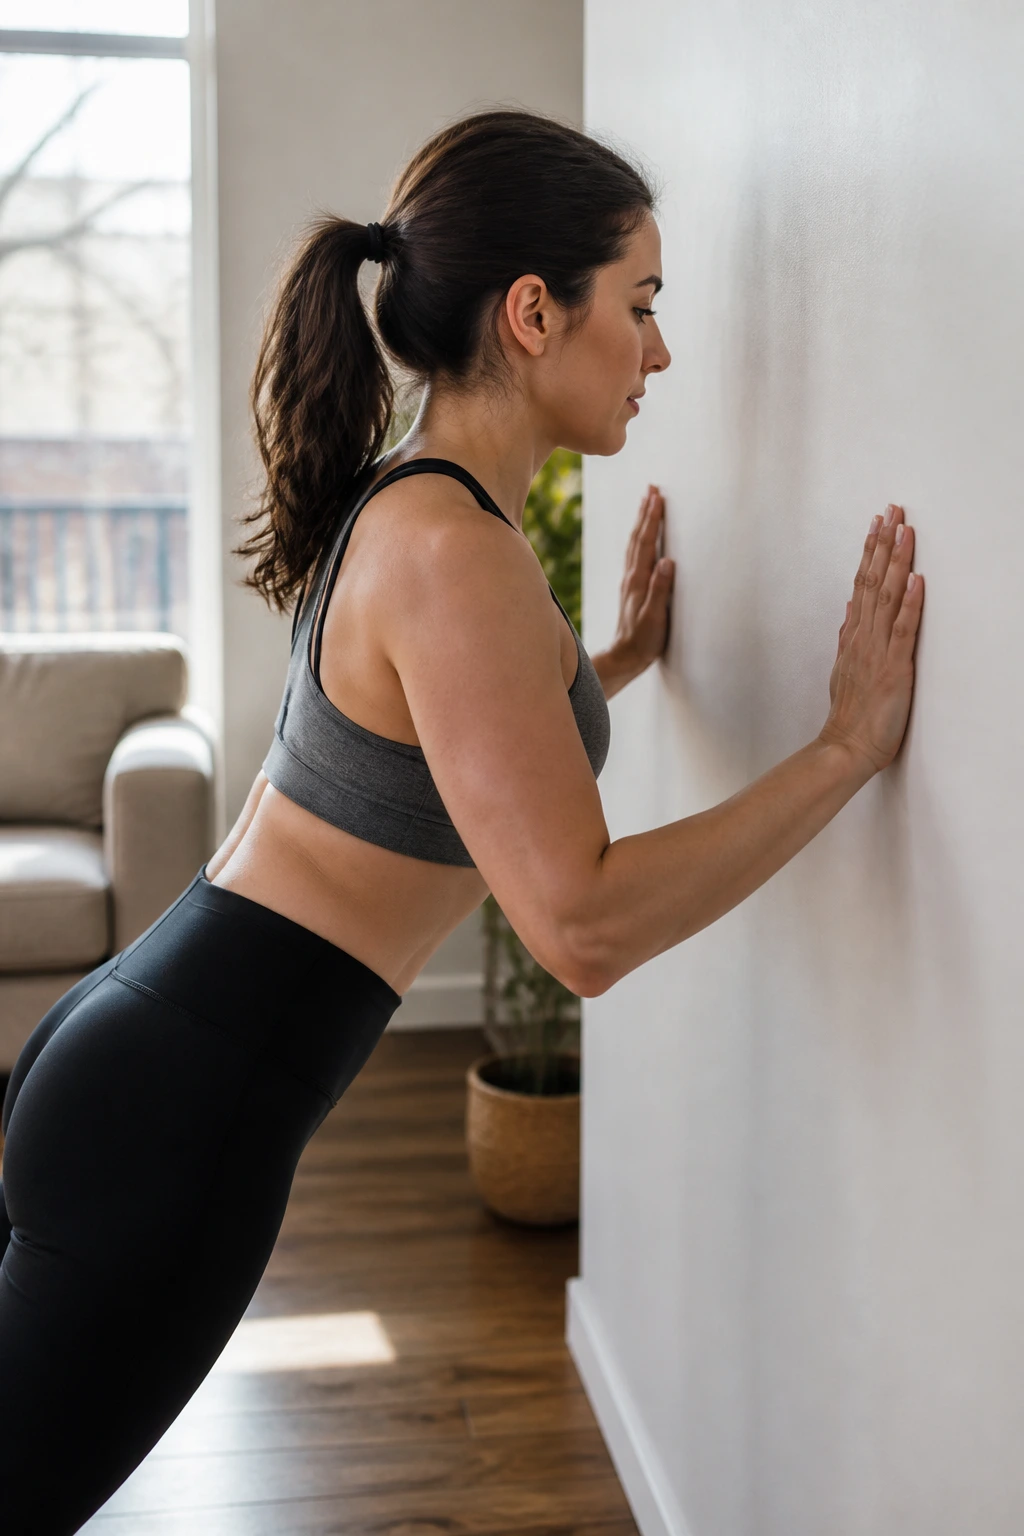
A wall push-up looks tame. It isn’t, once you slow it down and do 15 clean reps with your ribs tucked and your elbows moving at a sane angle. I like it as a first step because it wakes up the chest, triceps, and front shoulders without forcing you to fight the floor.
Why It Works
The wall changes the angle of the load, so you’re pressing a smaller portion of your body weight. That makes the movement friendlier on the wrists and a lot less intimidating than a floor push-up. It also gives you a chance to feel what a straight line from head to heel actually means.
- Place your hands at chest height.
- Step your feet back 12 to 24 inches.
- Lower your chest toward the wall for 2 full seconds.
- Press away until your arms are straight, but not locked hard.
Tip: Keep your hips from drifting back. If they do, you turn the move into a sloppy lean instead of a press.
Do 2 to 3 sets of 12 to 20 reps. If that feels too easy, step your feet farther away from the wall. Small change. Big difference.
2. Incline Push-Ups on a Couch or Sturdy Chair
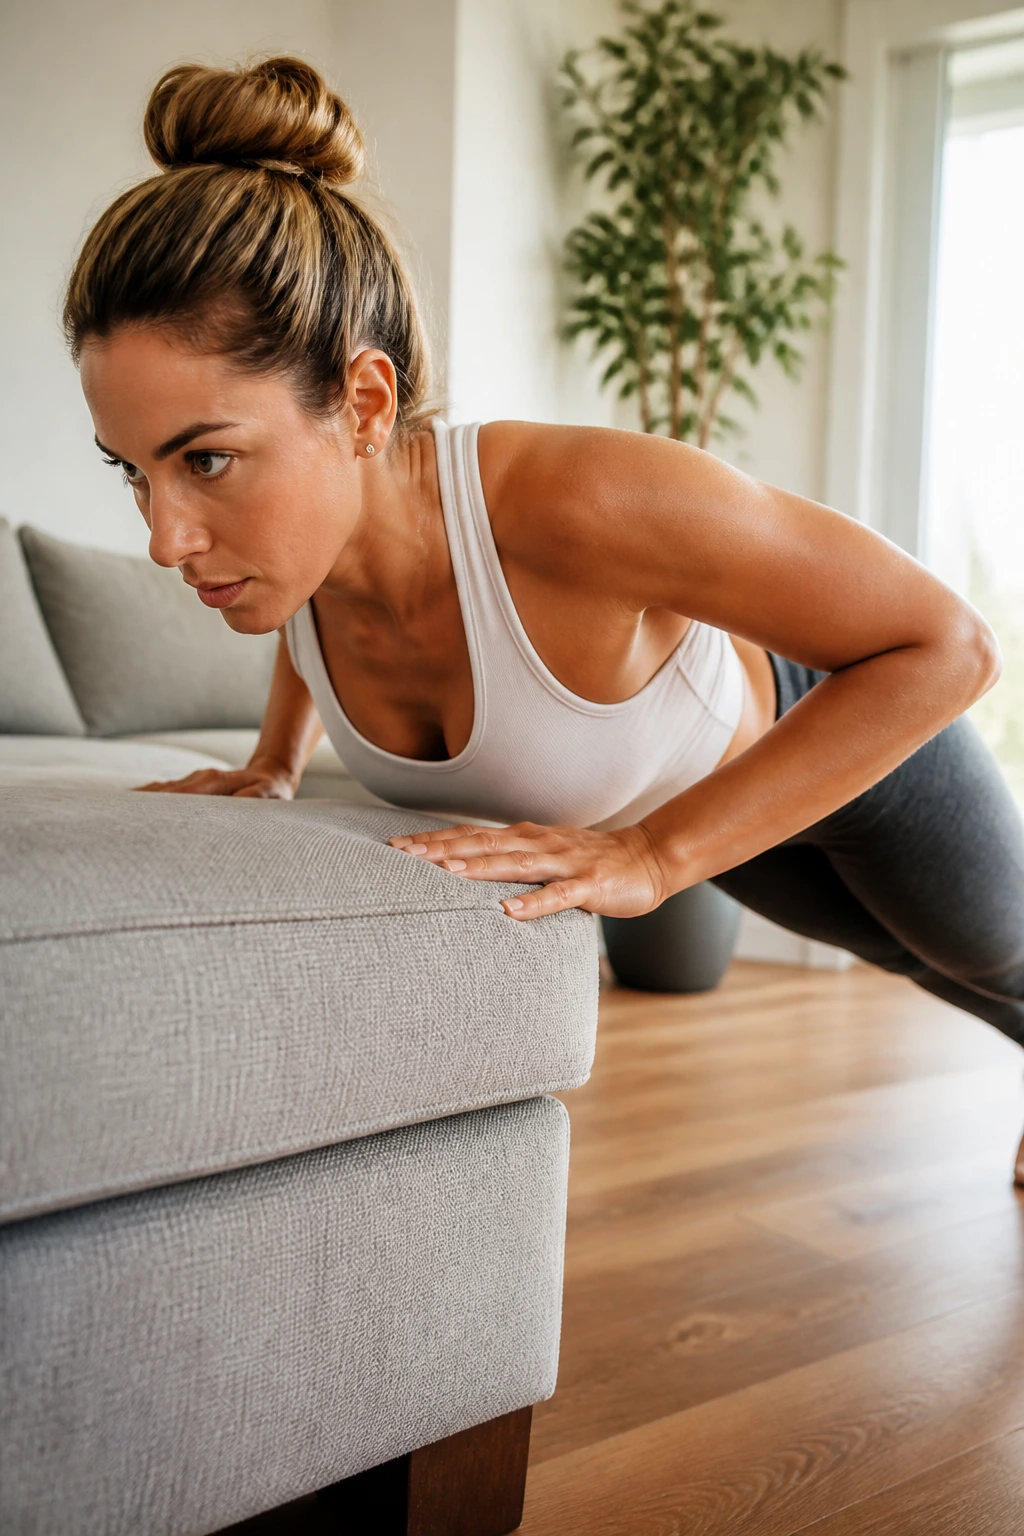
Why do incline push-ups feel so much more useful than wall push-ups? Because they sit right in that sweet spot where the move is still manageable, but your chest and triceps have to work for real. A couch, bench, or sturdy chair takes some load off your body and lets you practice stronger pressing mechanics.
The trick is height. A higher surface makes the push-up easier; a lower one makes it harder. That means you can use the same movement for weeks just by changing the angle, which is smarter than jumping straight to the floor and grinding your way through ugly reps.
How to Use It
Keep your hands a little wider than shoulder-width, lower your chest toward the edge of the couch, and stop when your elbows are bent around 45 degrees. If the cushion is soft, brace your core a little harder so your shoulders don’t sink.
I like 3 sets of 8 to 15 reps here. If you can hit 15 with a steady tempo, lower the incline. No drama. Just a cleaner angle.
3. Knee Push-Ups for Building Pressing Strength
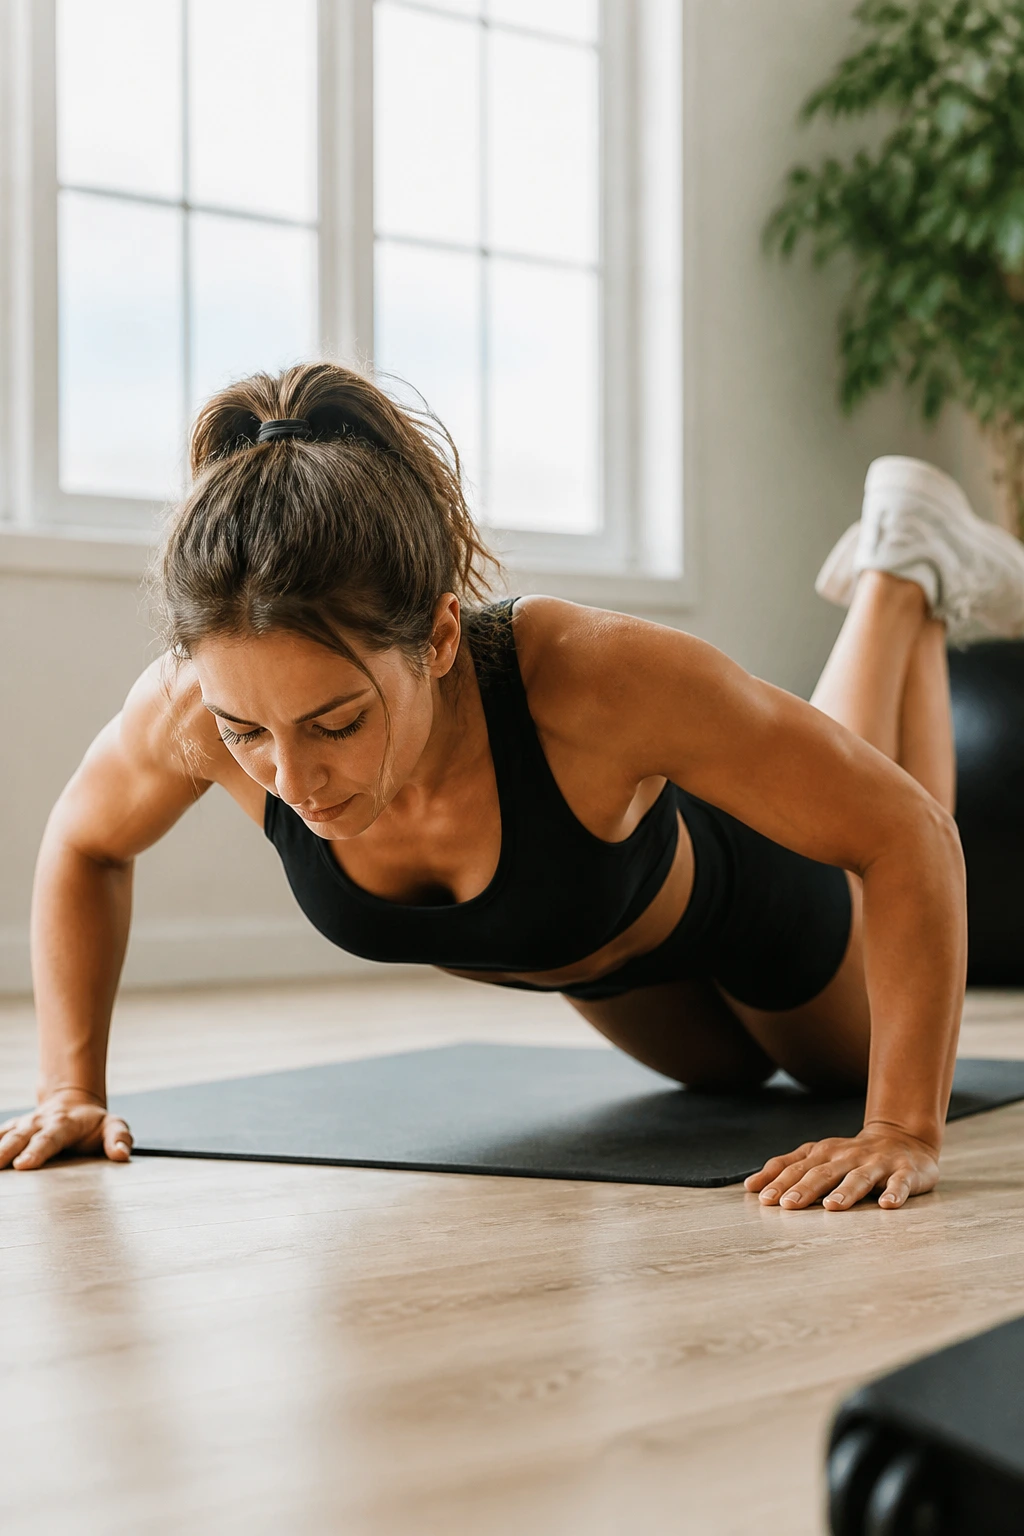
Knee push-ups are not a downgrade. They’re a bridge. That matters, because plenty of women skip them out of pride and end up stuck doing push-up attempts that never quite work.
Set your knees down, keep your hips slightly forward so your body still makes one long line from knees to head, and lower under control. If your lower back caves in, the rep is over before it starts. That’s the mistake I see most often.
Do 3 sets of 6 to 12 reps with a 3-second lower and a short pause near the bottom. That slow descent teaches control fast, and control is what lets you move on to full push-ups later. Not speed. Not flailing.
If your wrists are sensitive, put your hands on dumbbell handles or fold a mat under them. Tiny fix. Much better session.
4. Standard Push-Ups From the Floor
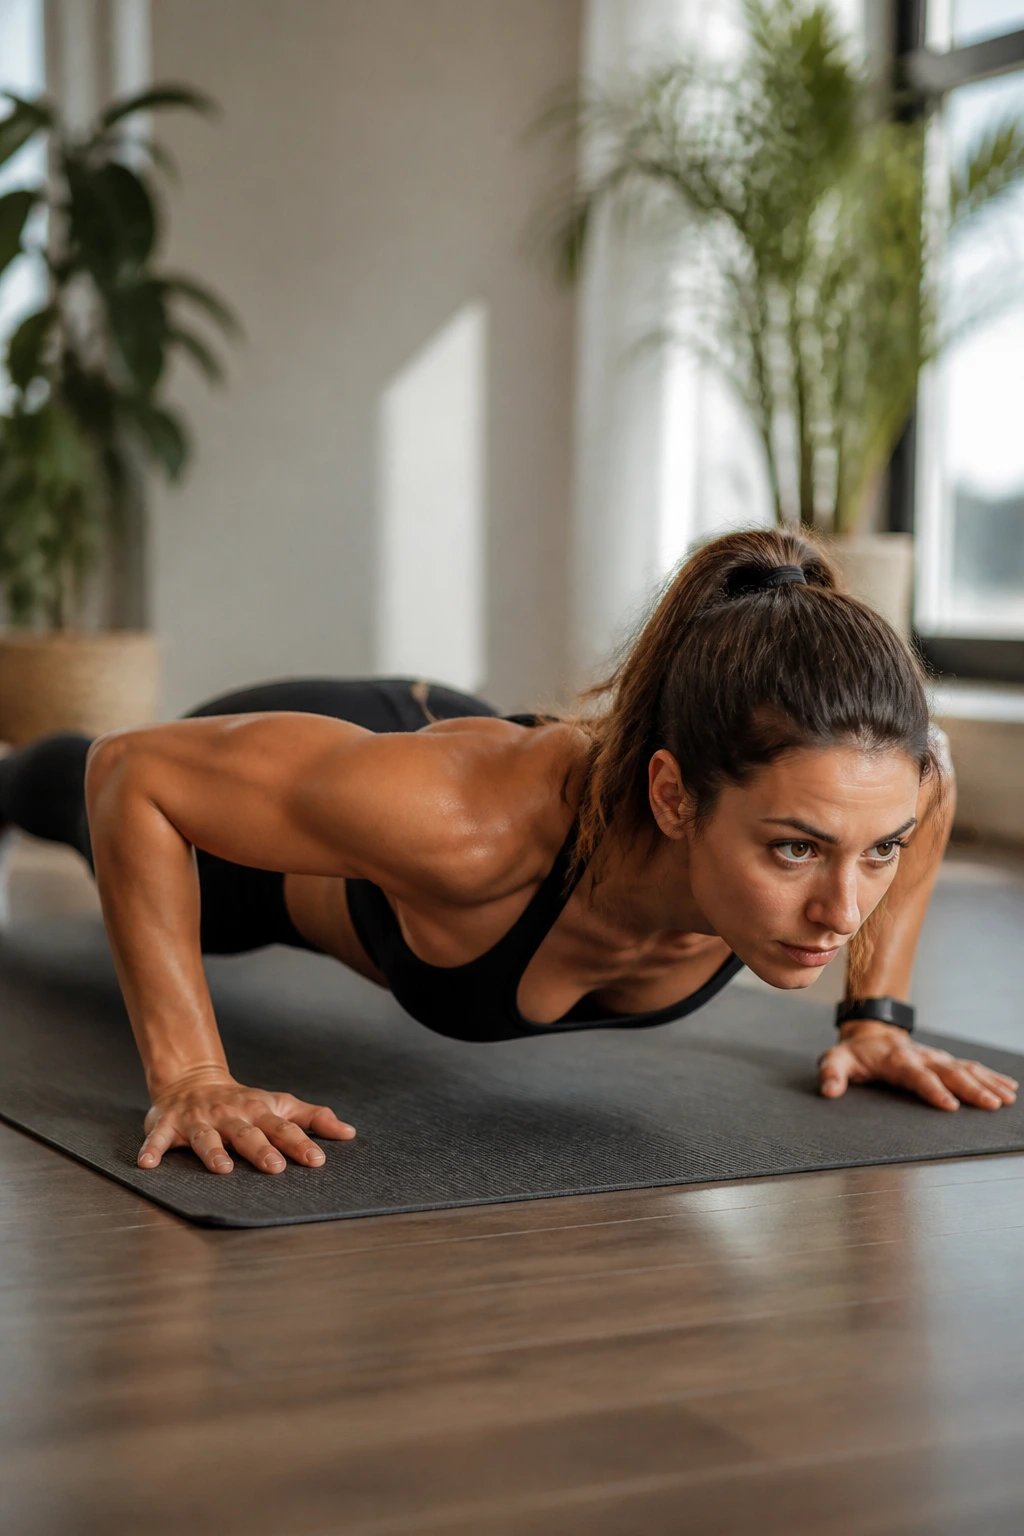
The floor push-up gets all the attention for a reason: it’s simple, brutally honest, and easy to measure. If your chest touches the floor with control and your torso doesn’t sag, you’ve got a real upper body rep.
Your hands should sit under or just outside your shoulders. Elbows should track about 30 to 45 degrees away from your sides, not flared out like chicken wings. Lower until your chest is close to the floor, then press through the whole hand, not just the heels of your palms.
A lot of people rush the bottom half and wonder why their reps look choppy. Slow down. Seriously. A cleaner rep with a smaller range beats a bigger rep that dumps stress into your lower back.
If full push-ups are still a stretch, do singles. One solid rep. Rest. Do another. That approach builds better than grinding out ten half-reps with your neck craned and your hips waving around.
5. Chair Triceps Dips for the Back of the Arms
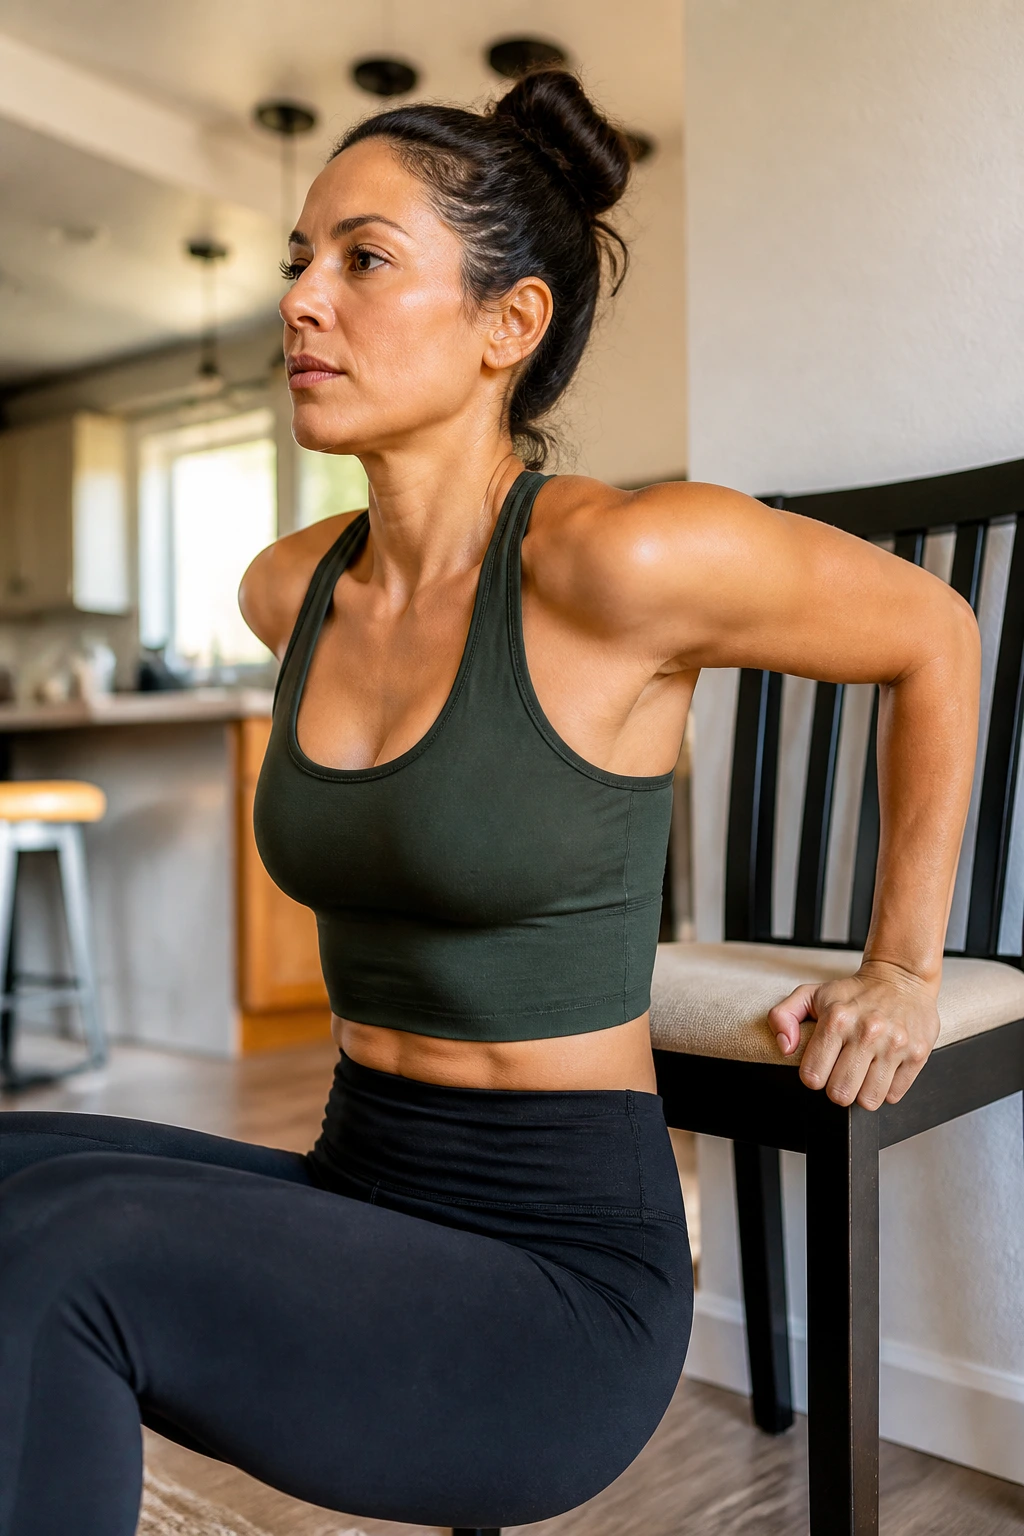
A sturdy chair at the edge of the kitchen can turn into a very useful triceps station. That said, chair dips are the one move on this list I’d warn people about first. They hit the back of the arms hard, but if your shoulders are cranky, the bottom position can feel pinchy fast.
What to Watch For
- Keep the chair pressed against a wall.
- Bend your knees to reduce load.
- Lower only until your upper arms are about parallel to the floor.
- Stop if the front of the shoulder feels sharp or jammed.
The best version is controlled and boring. Hands beside your hips, elbows pointing back, chest lifted, shoulders down. Don’t shrug. Don’t bounce. Don’t drop so low that your shoulders roll forward.
A good target is 2 to 3 sets of 8 to 12 reps. If that feels rough, keep one foot on the floor and treat it like an assisted dip. That version still works.
6. Dumbbell Floor Press for a Strong Upper Body Workout at Home
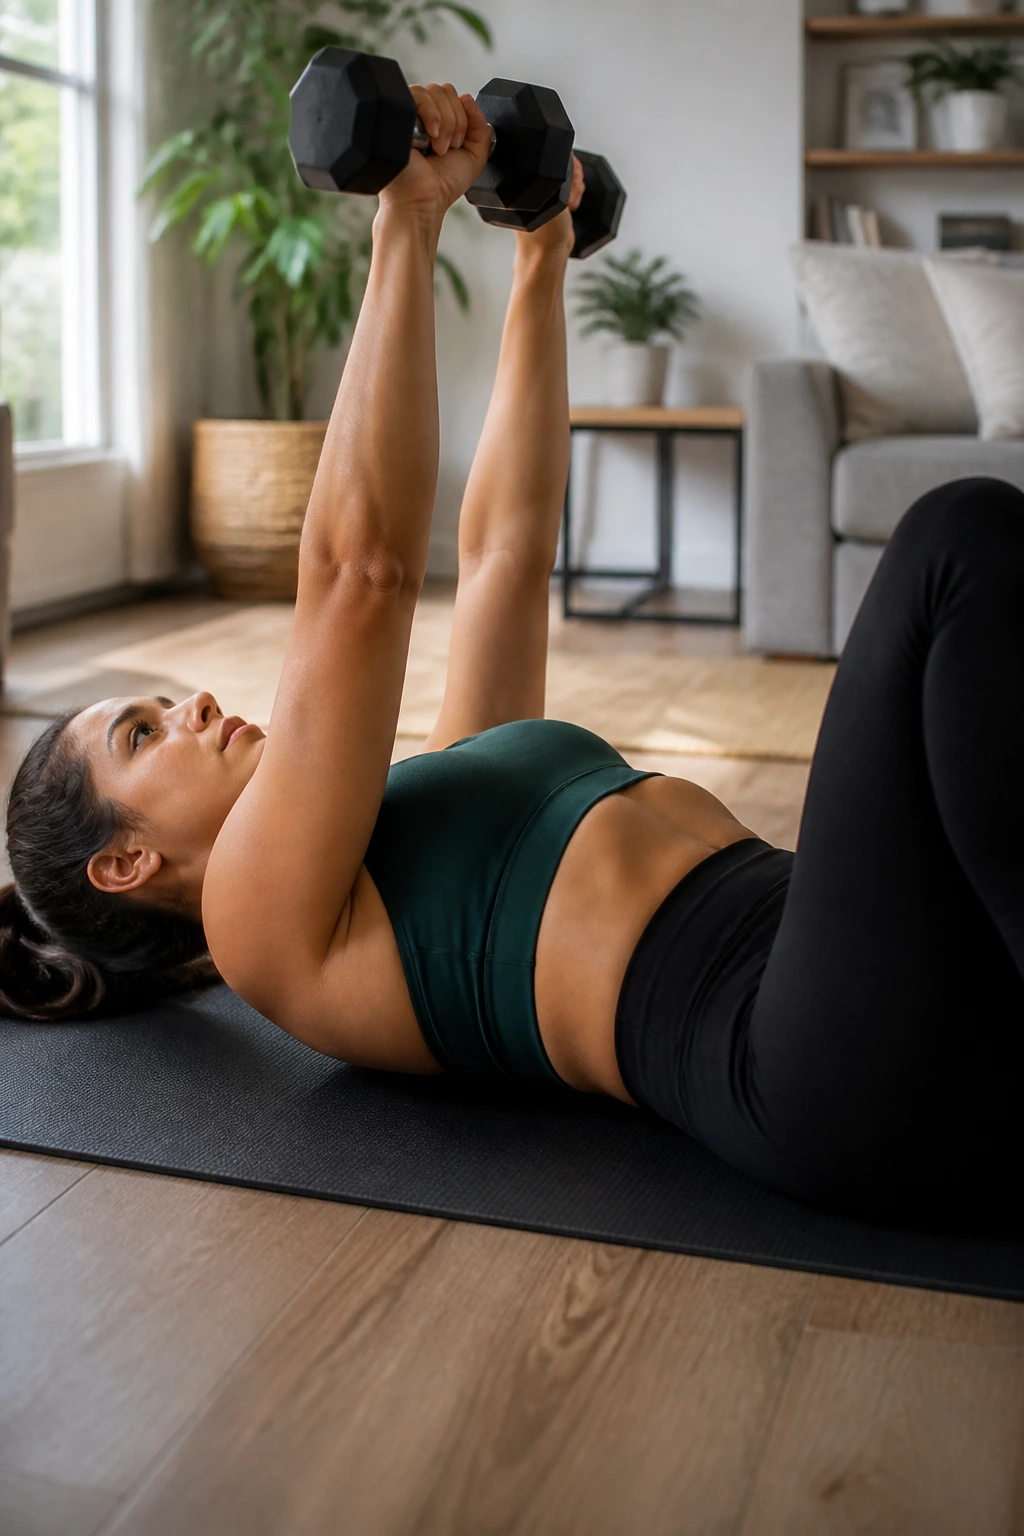
The floor press is one of my favorite home moves because it gives you a chest press without needing a bench. Your upper arms stop at the floor, which shortens the range a bit and usually feels friendlier on the shoulders than a deep press.
Lie on your back with your knees bent and dumbbells stacked over your chest. Lower them slowly until your upper arms touch the floor, then press up until the weights are over your shoulders again. The floor should stop the movement, not your lower back.
If you only have one dumbbell, do one side at a time. That version is slower, but it exposes weak spots fast. And sometimes that’s useful.
Use 3 sets of 8 to 12 reps with a 1-second pause on the floor if you want more chest work. If the weights bang together at the top, they’re too close or too heavy. Quiet reps are usually better reps.
7. Dumbbell Chest Flyes on the Floor
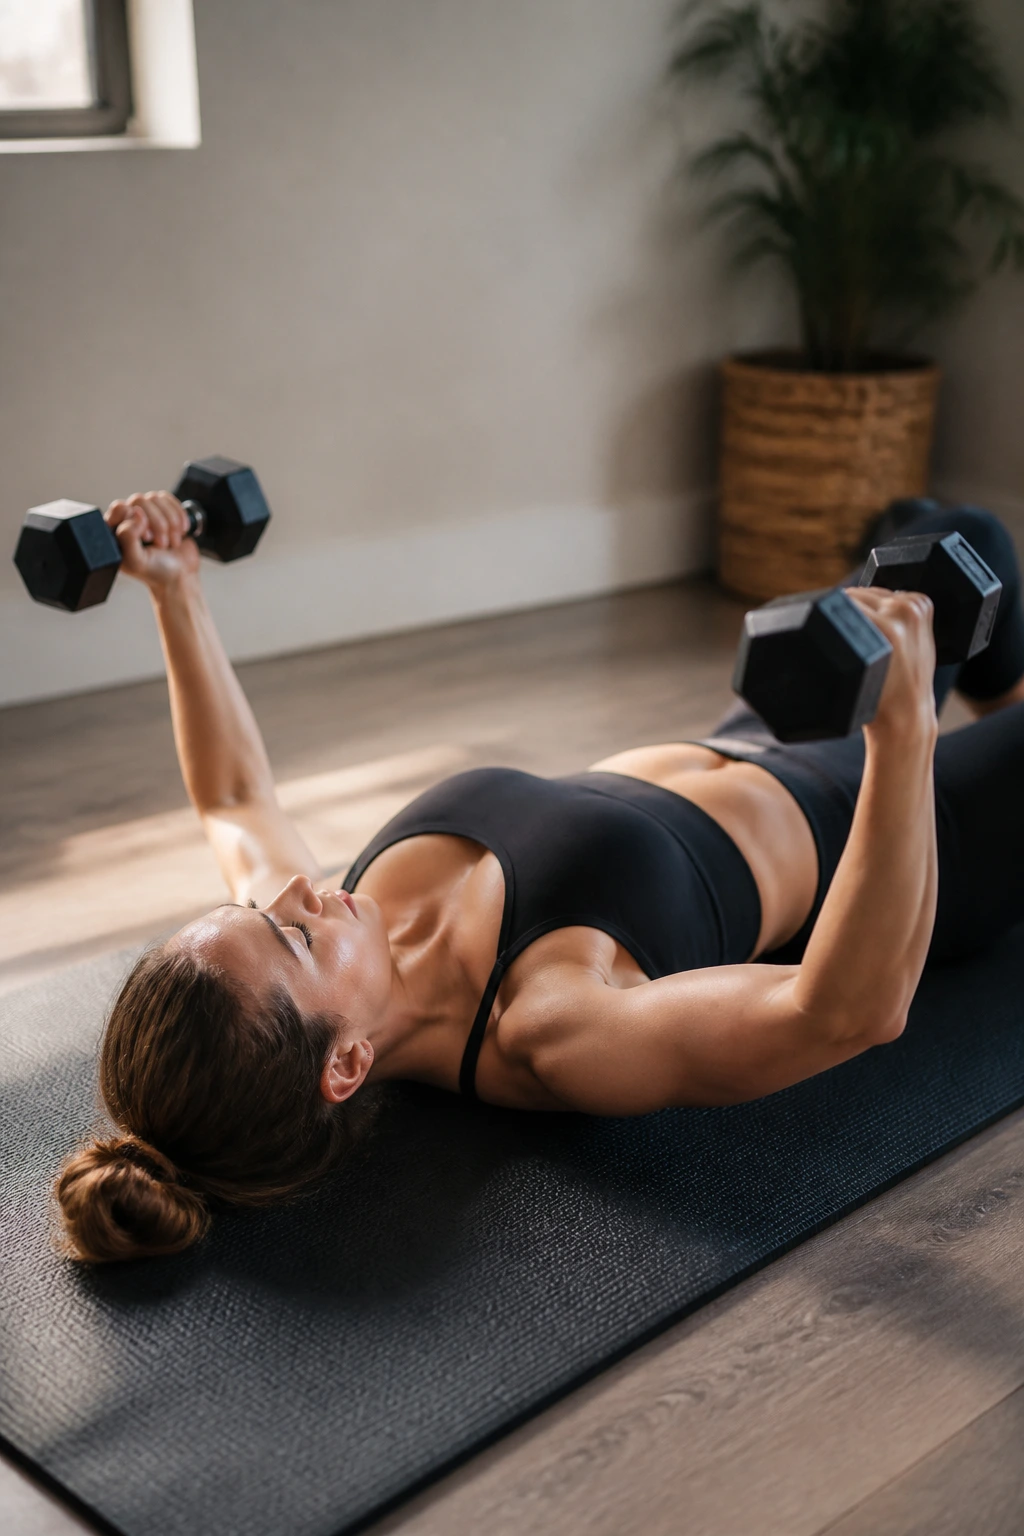
Why do flyes feel so strange compared with presses? Because they load the chest through a long arc instead of a straight push. That stretch can be useful, but only if you use light weight and keep your elbows softly bent the whole time.
Start on the floor, palms facing each other, dumbbells above the chest. Open your arms out to the sides until your upper arms lightly meet the floor, then squeeze your chest to bring the weights back together. The floor saves you from overreaching and dumping stress into the shoulder joint.
This is not the place to show off. Light dumbbells work better than heavy ones here. A pair of 3- to 8-pound weights is often enough for most people.
I’d keep it at 2 to 3 sets of 10 to 15 reps. If you feel the movement more in the front of the shoulder than the chest, shorten the range and slow the lowering phase down. That usually fixes it.
8. Bent-Over Dumbbell Rows for a Stronger Back
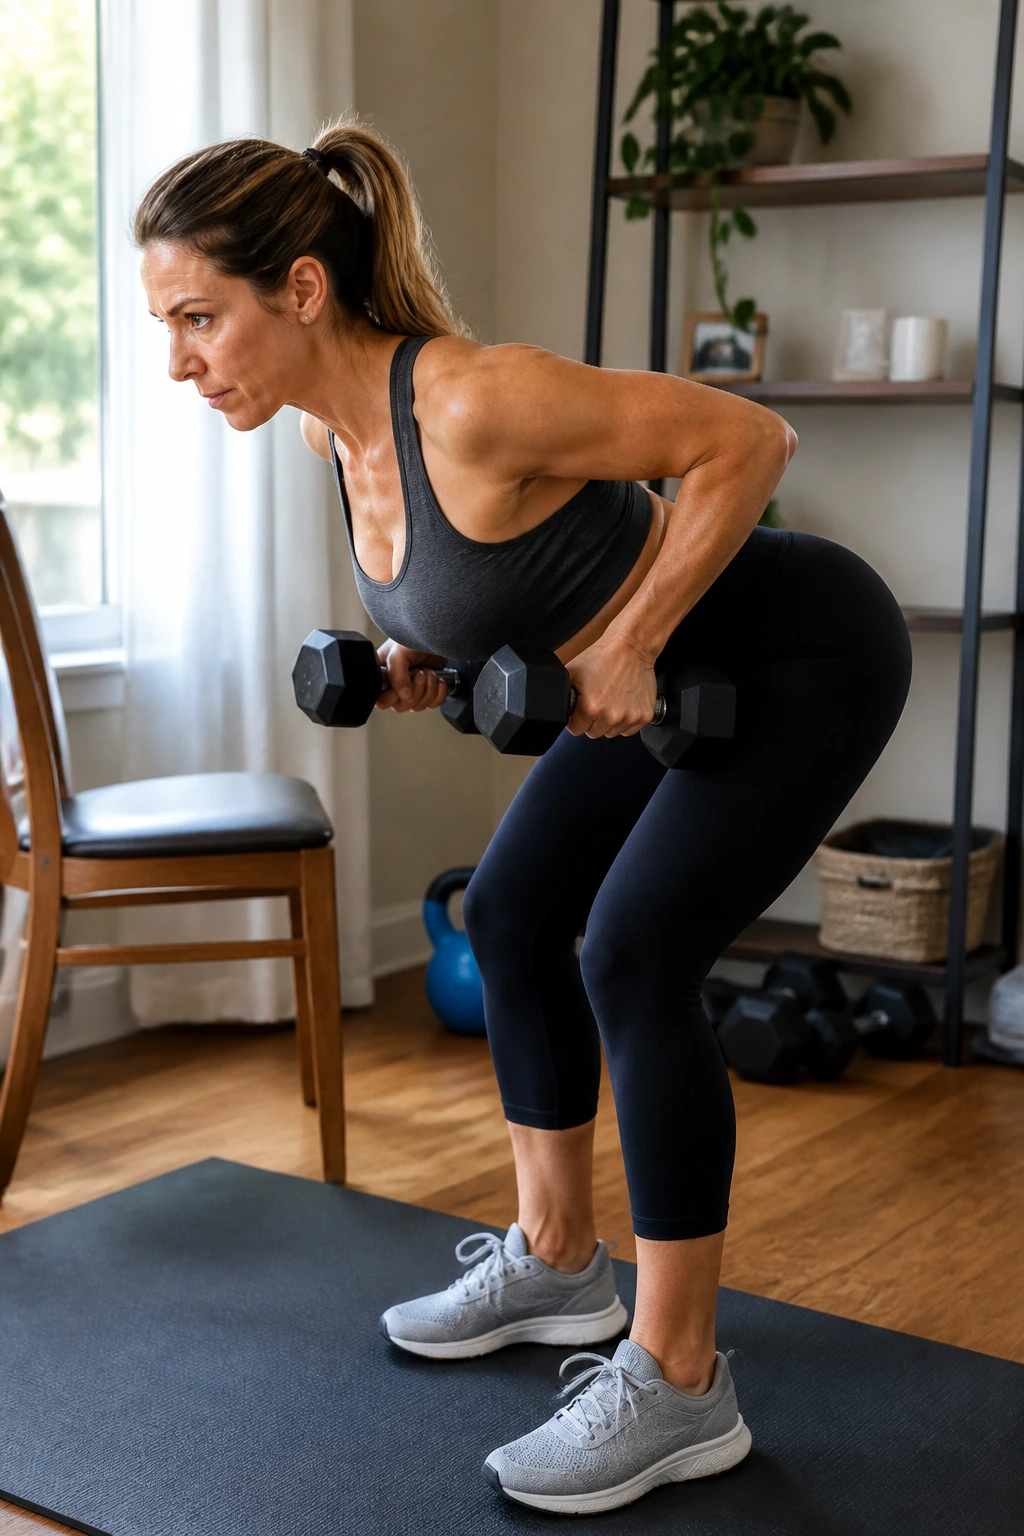
A row is the move most women underdo when they train at home, and that’s a shame. Pressing is visible. Rows are quieter. But rows are what help your shoulders sit in a better place all day.
Hinge at the hips until your torso is roughly at a 45-degree angle, knees soft, back flat. Pull the dumbbells toward your lower ribs, not your chest, and squeeze the shoulder blades together for a beat. Then lower with control.
Quick Form Cues
- Chest stays long.
- Neck stays neutral.
- Elbows travel close to the body.
- Weight moves in a straight line, not a swing.
Use 3 sets of 8 to 12 reps. If your lower back gets tired before your upper back does, brace your abs harder or support one hand on a chair. That isn’t cheating. It’s smart.
9. Single-Arm Couch-Supported Rows
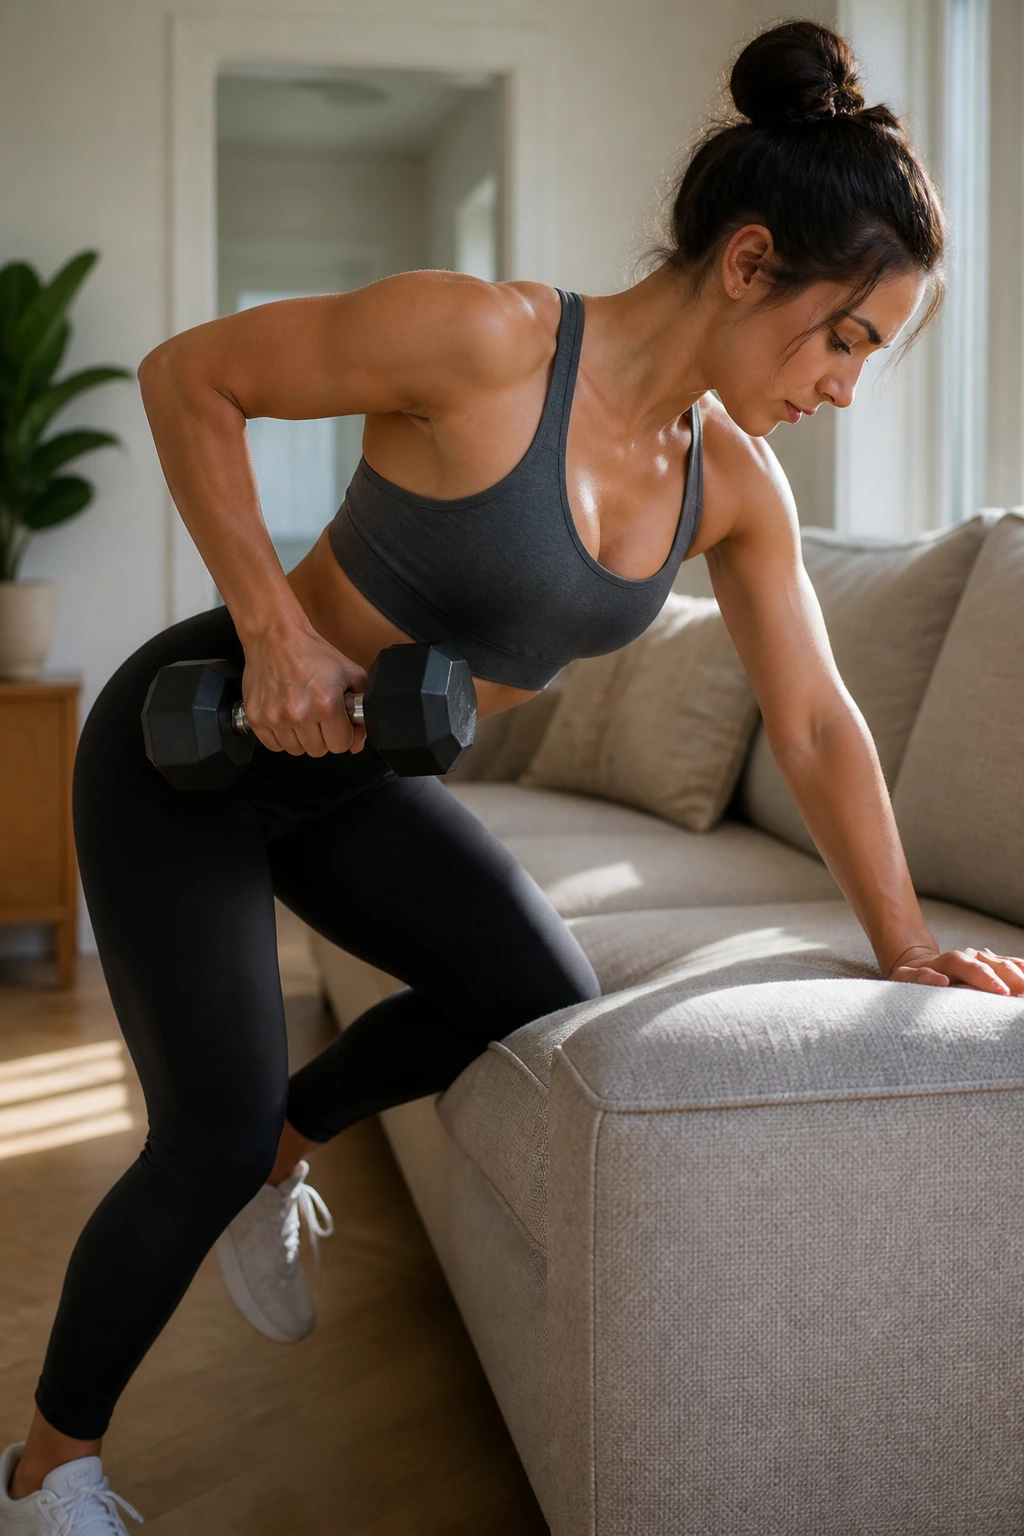
This one looks simpler than it feels. One hand and one knee on a couch or sturdy chair, the other hand holding a dumbbell, and you pull the weight toward your hip. The support lets you row with less wobble, which usually means a better contraction and less lower-back noise.
I like this version because it exposes side-to-side differences fast. If your left side is weaker, the rep count usually tells on it. Good. You want to know that.
Keep your torso square to the floor, then pull the elbow back and slightly up until the dumbbell clears your ribs. Pause for a second at the top. That pause matters more than most people think.
Do 3 sets of 10 reps per side. Start with the weaker side and match the stronger side to it. Don’t let the strong side bully the session.
10. Resistance Band Pull-Aparts for Posture
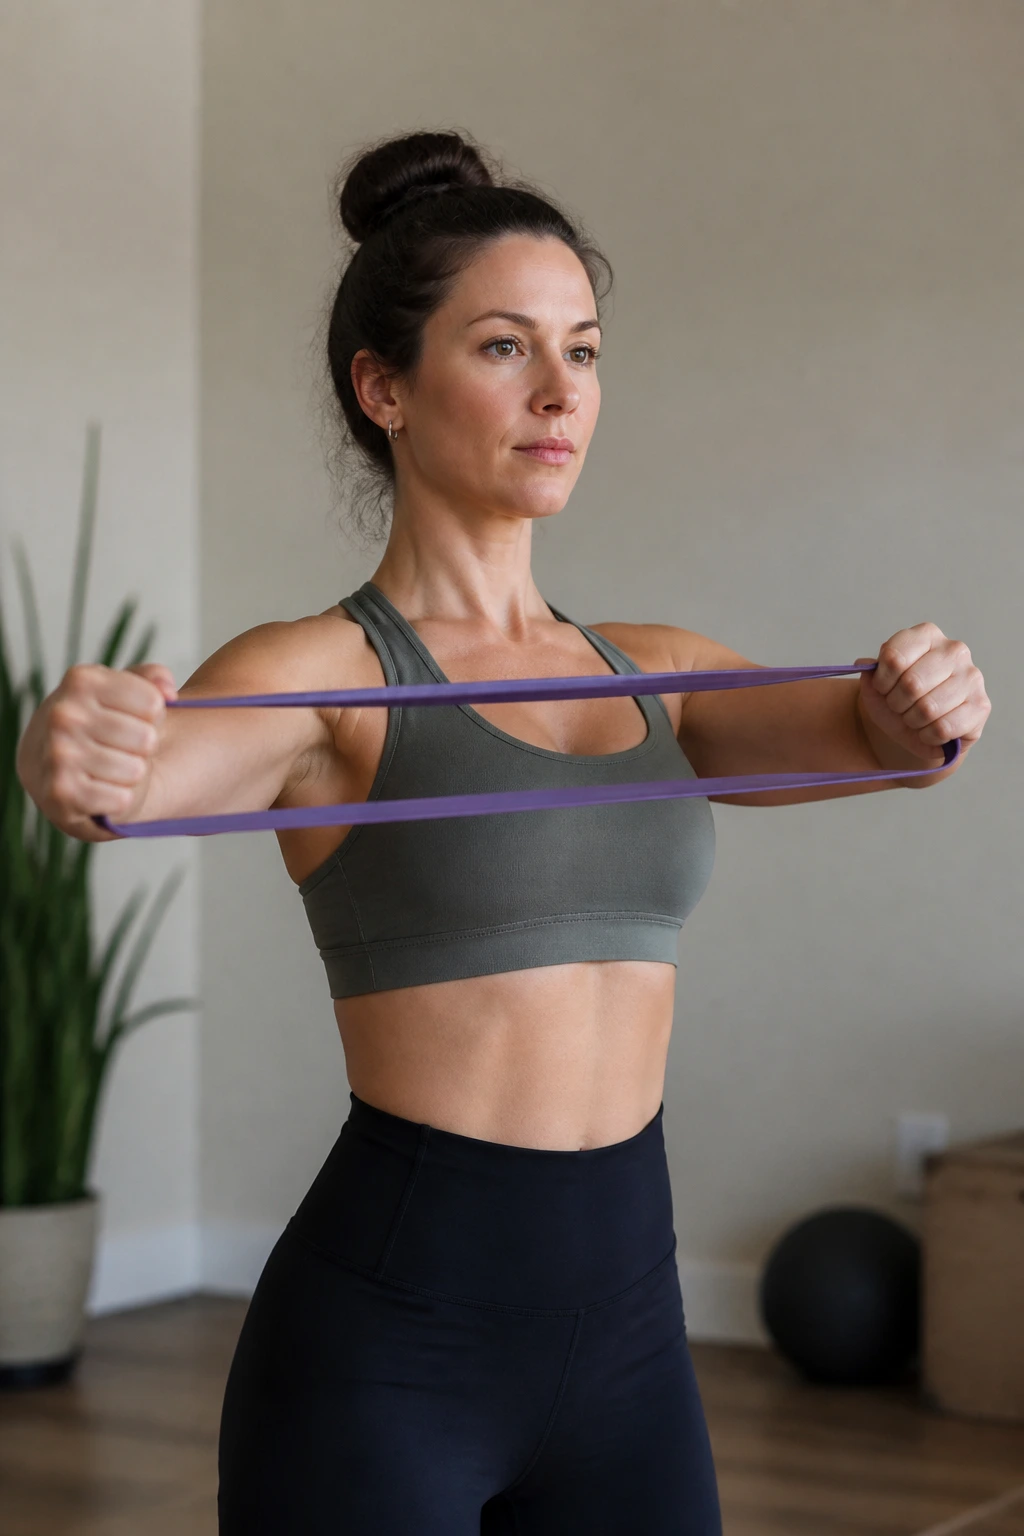
Why does a tiny band move do so much for posture? Because it wakes up the muscles between your shoulder blades, the rear delts, and the smaller stabilizers that pressing work tends to ignore. It’s a simple reset, and it’s useful before or after almost any upper body session.
Hold the band at chest height with straight arms. Pull it apart until your hands move out toward a wide T shape, then return slowly. The goal is not to yank harder every rep. The goal is to keep the shoulders down while the band gets stretched.
How to Get the Most From It
- Use a band that gives real tension by the last third of the pull.
- Keep your ribs from flaring forward.
- Think about widening the collarbones.
- Stop the rep before your neck starts to tense up.
I’d use 2 to 4 sets of 15 to 25 reps. Between sets of push-ups, it’s a nice way to keep your shoulders from feeling jammed up.
11. Standing Overhead Dumbbell Press
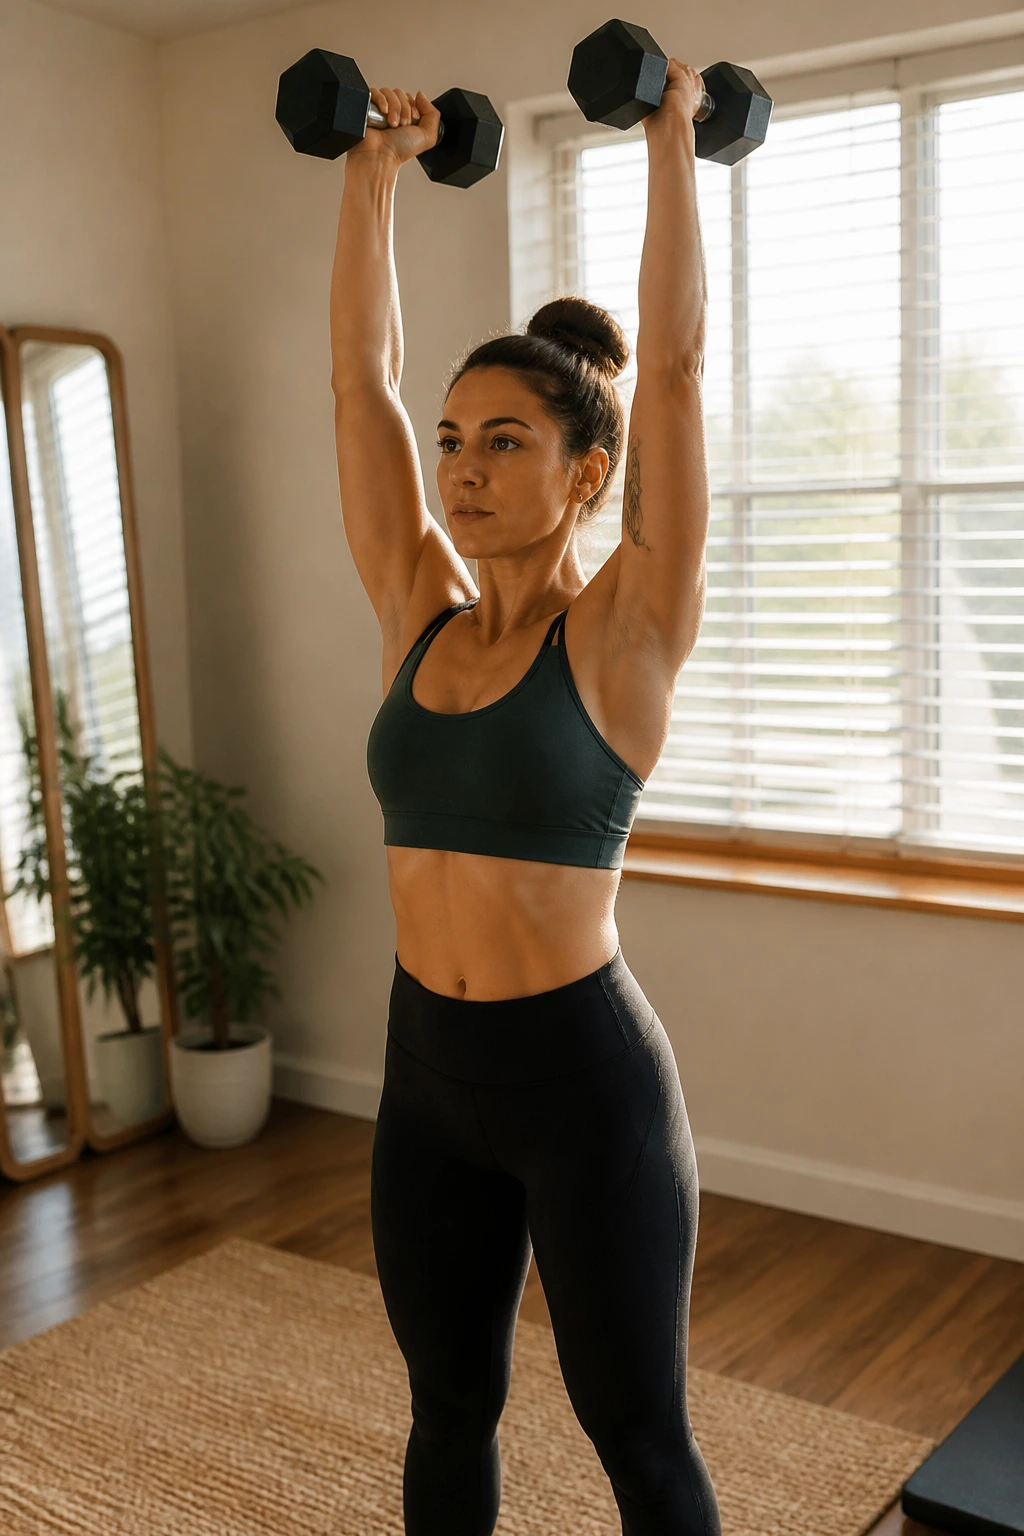
A standing overhead press tells the truth about your shoulders and your core. If your ribs pop forward every time you press, the weight is either too heavy or your bracing is too loose. There’s no place to hide.
Start with dumbbells at shoulder height. Squeeze your glutes, keep your ribs stacked over your hips, and press the weights straight overhead until your arms are nearly locked. Lower them to shoulder level with control. No leaning back. No hip drive. That’s a different exercise.
If standing bothers your lower back, do the same movement seated on a firm chair. That small change takes some of the cheating out of the lift and makes it easier to feel the shoulders doing the work.
A clean range is 3 sets of 6 to 10 reps. Once you can hit 10 without arching, move up in small weight jumps. Don’t rush the load. Shoulders hate sloppy progress.
12. Lateral Raises for Shoulder Shape
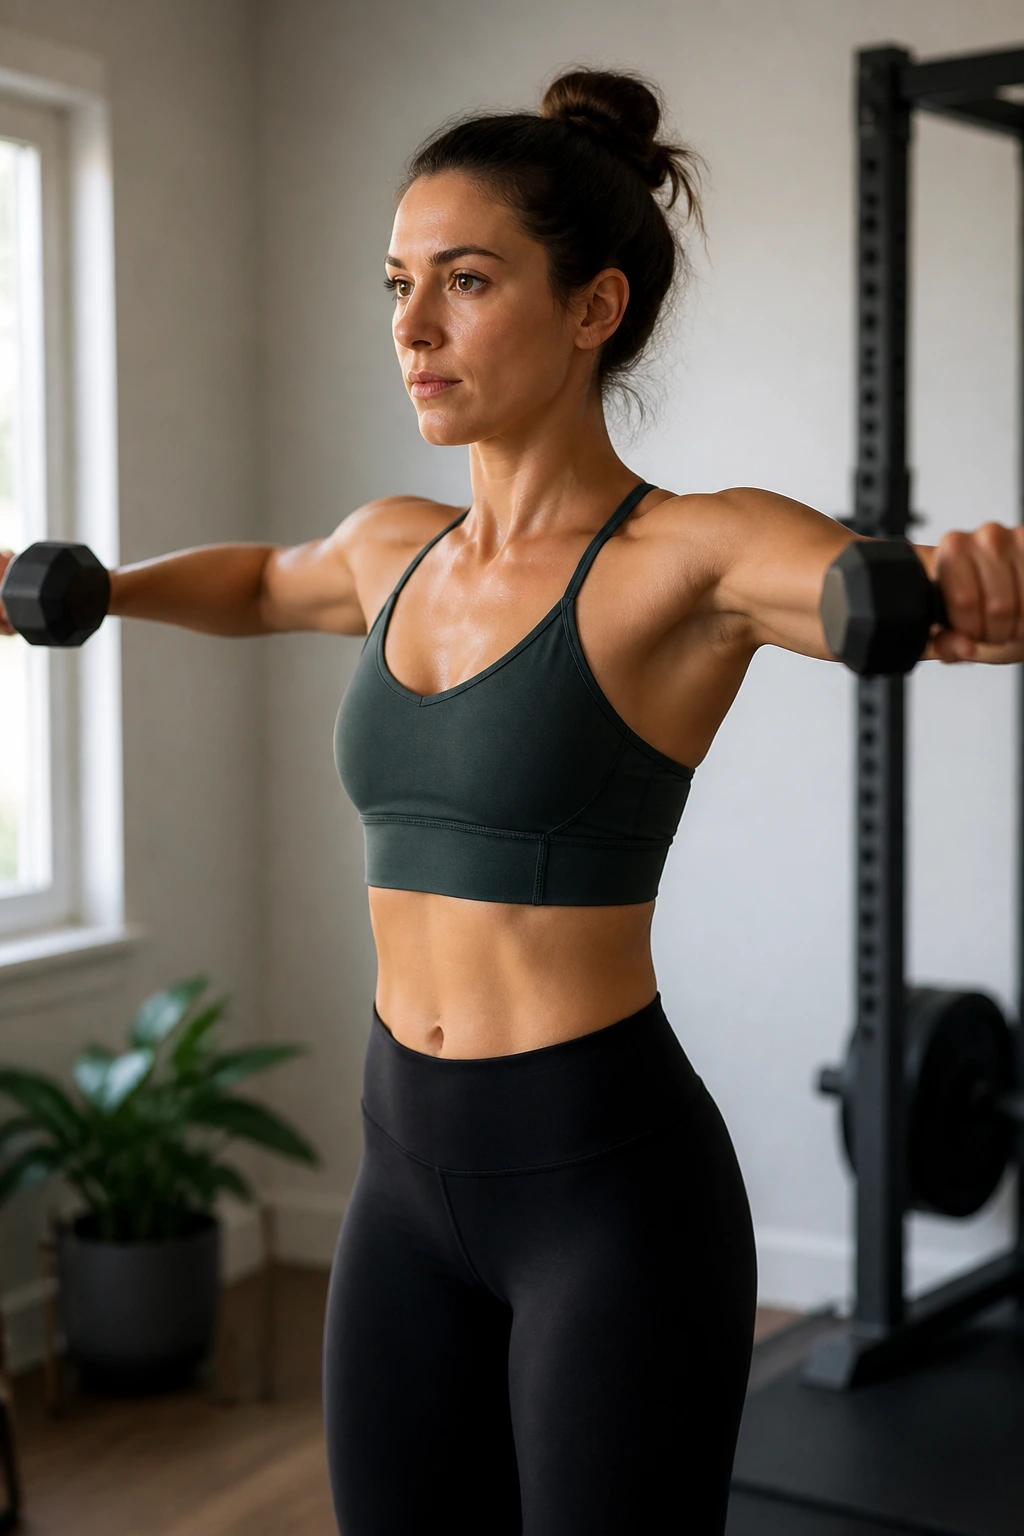
Tiny weights. Big burn. That’s the deal with lateral raises, and I mean that in the nicest possible way.
Hold light dumbbells at your sides, soften your elbows a touch, and lift the weights out until your arms are about level with your shoulders. Stop there. Higher is not better if your traps take over and your neck starts hiking up toward your ears.
What Makes Them Work
- The side delts do the heavy lifting.
- The movement is short, so control matters more than load.
- A slow lower makes the rep count more.
- Swinging the weights steals tension from the shoulder.
A lot of people use too much weight and end up making a weird half-shrug. Don’t do that. Go lighter than your ego wants. A controlled set of 12 to 20 reps usually feels better and looks cleaner.
If you only have water bottles, that can work too. The shoulder does not care about the brand label.
13. Reverse Flyes for Rear Delts and Upper Back
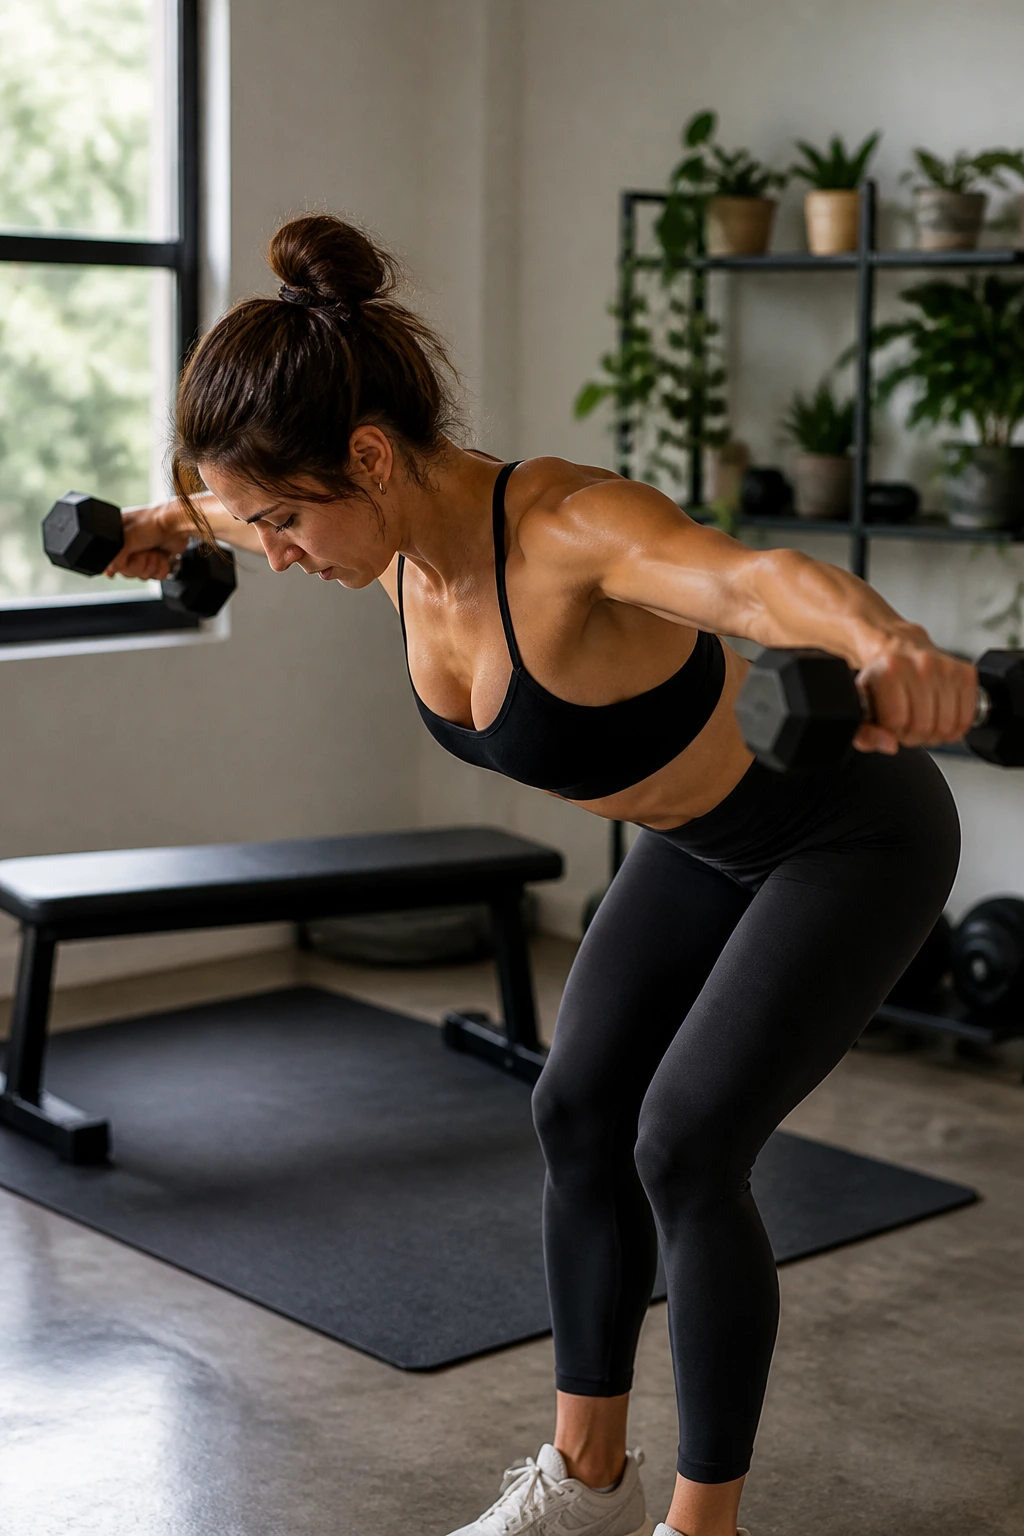
Reverse flyes are the opposite of all the chest-forward stuff people do all day. That makes them useful, especially if you sit a lot or tend to live in a rounded-shoulder position.
Hinge at the hips with a flat back, dumbbells hanging below your shoulders. Open your arms out to the sides with soft elbows, almost like you’re spreading your wings. Squeeze gently between the shoulder blades, then lower slowly. Gentle is the word here. You are not trying to pinch a pencil between your shoulder blades with force.
If your neck takes over, the weights are too heavy. Drop them. A clean reverse fly with 2-pound dumbbells beats a sloppy one with 10-pounders every time.
Use 2 to 3 sets of 12 to 15 reps. This move pairs well with pressing days because it helps balance out the front of the shoulders. That balance is boring to think about. It matters anyway.
14. Biceps Curls With Slow Lowering
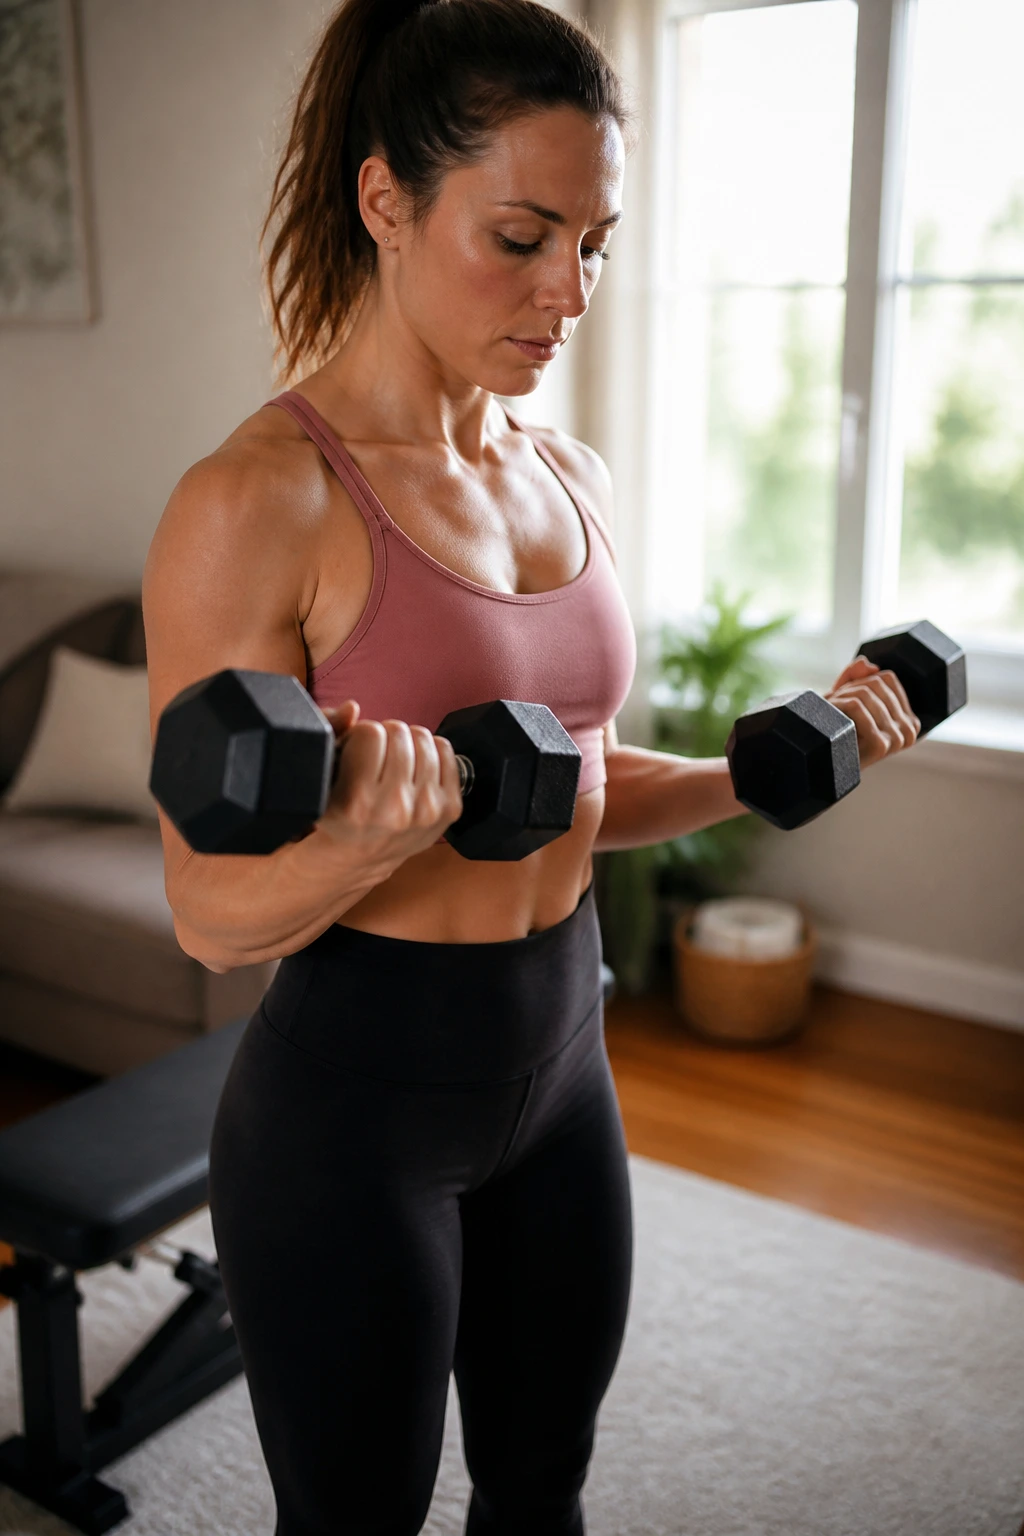
A clean curl looks almost too simple. Good. That’s a sign you’re not cheating.
Stand tall, let your arms hang by your sides, and curl the dumbbells up without swinging your torso. At the top, your biceps should be doing the work, not your shoulders. Lower for 3 full seconds. That slow descent is where a lot of the challenge lives.
What to Watch For
- Keep elbows close to your ribs.
- Keep wrists straight.
- Don’t lean back to help the lift.
- Pause for a beat at the top before lowering.
I like 3 sets of 8 to 12 reps for curls. If you feel them in your lower back, the weights are too heavy or you’re using momentum. And if you’re using momentum, you’re mostly practicing a weird body swing.
15. Hammer Curls for Arms and Forearms
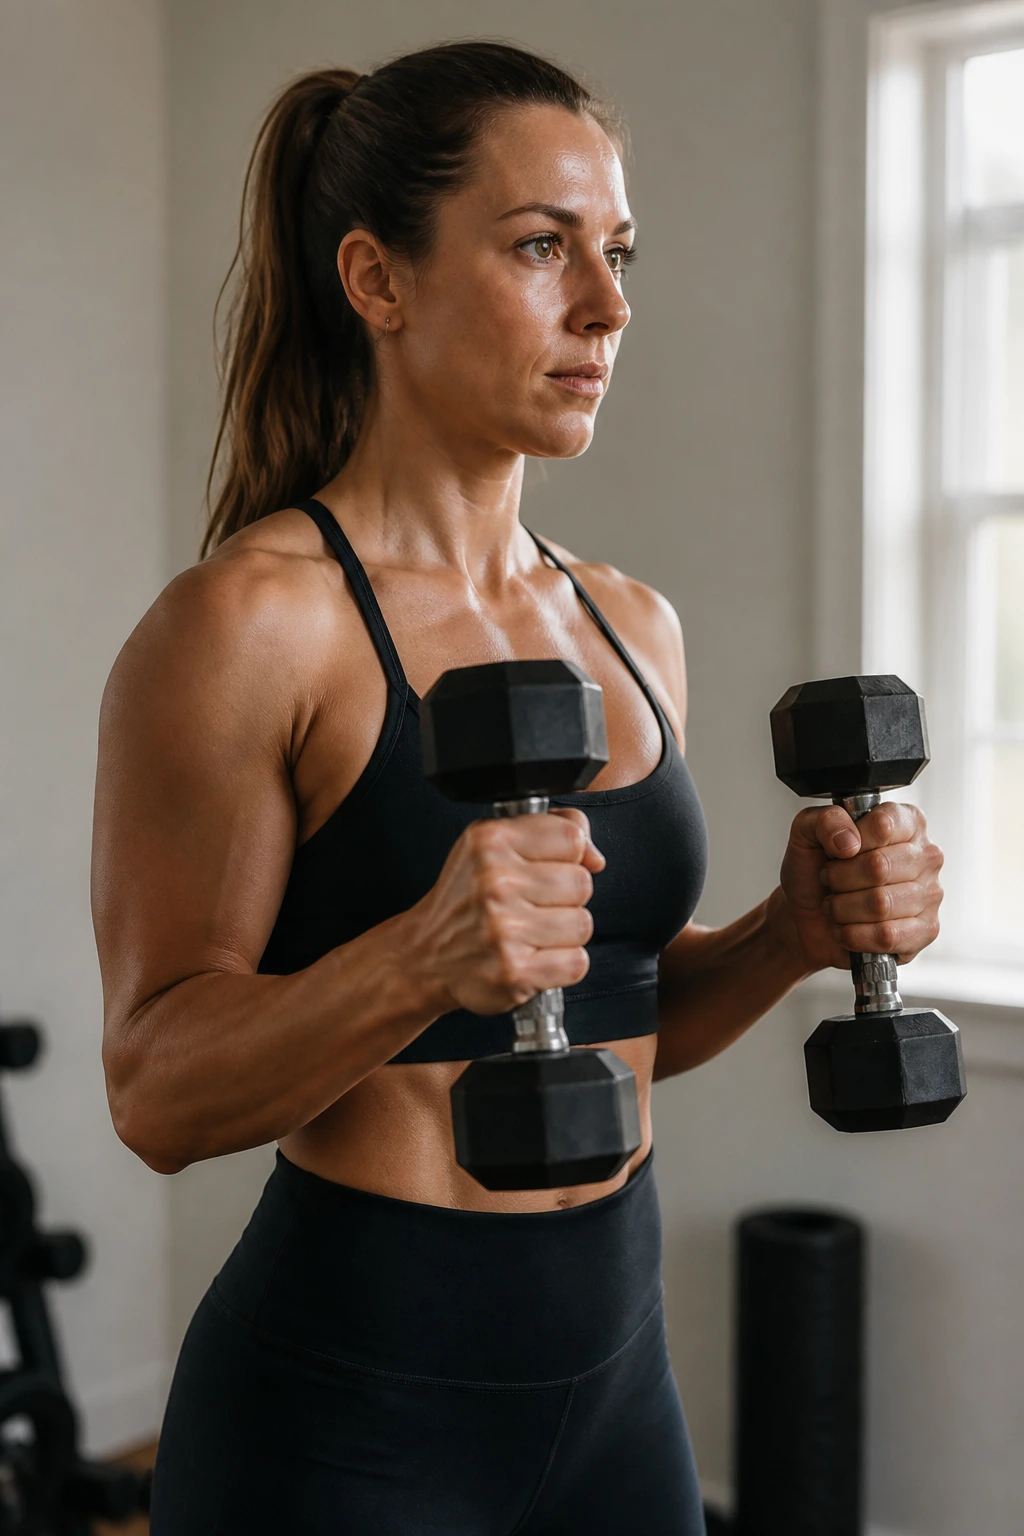
Hammer curls use a neutral grip, so your palms face each other the whole time. That small change shifts the work a bit into the brachialis and forearms, and a lot of people find them easier on the wrists than a standard curl.
They also carry over nicely to real life. Grocery bags, backpacks, dog leashes, diaper bags — all of that benefits from forearm strength more than most people admit.
Keep your elbows tucked, curl up without letting the shoulders roll forward, and lower with control. If you alternate arms, try not to twist your torso to help the weight along. That cheat shows up fast.
A solid range is 3 sets of 8 to 12 reps. If your forearms light up before your biceps do, that’s fine. It usually means the grip and arm are both getting work, which is exactly what you want here.
16. Triceps Kickbacks With a Tight Elbow
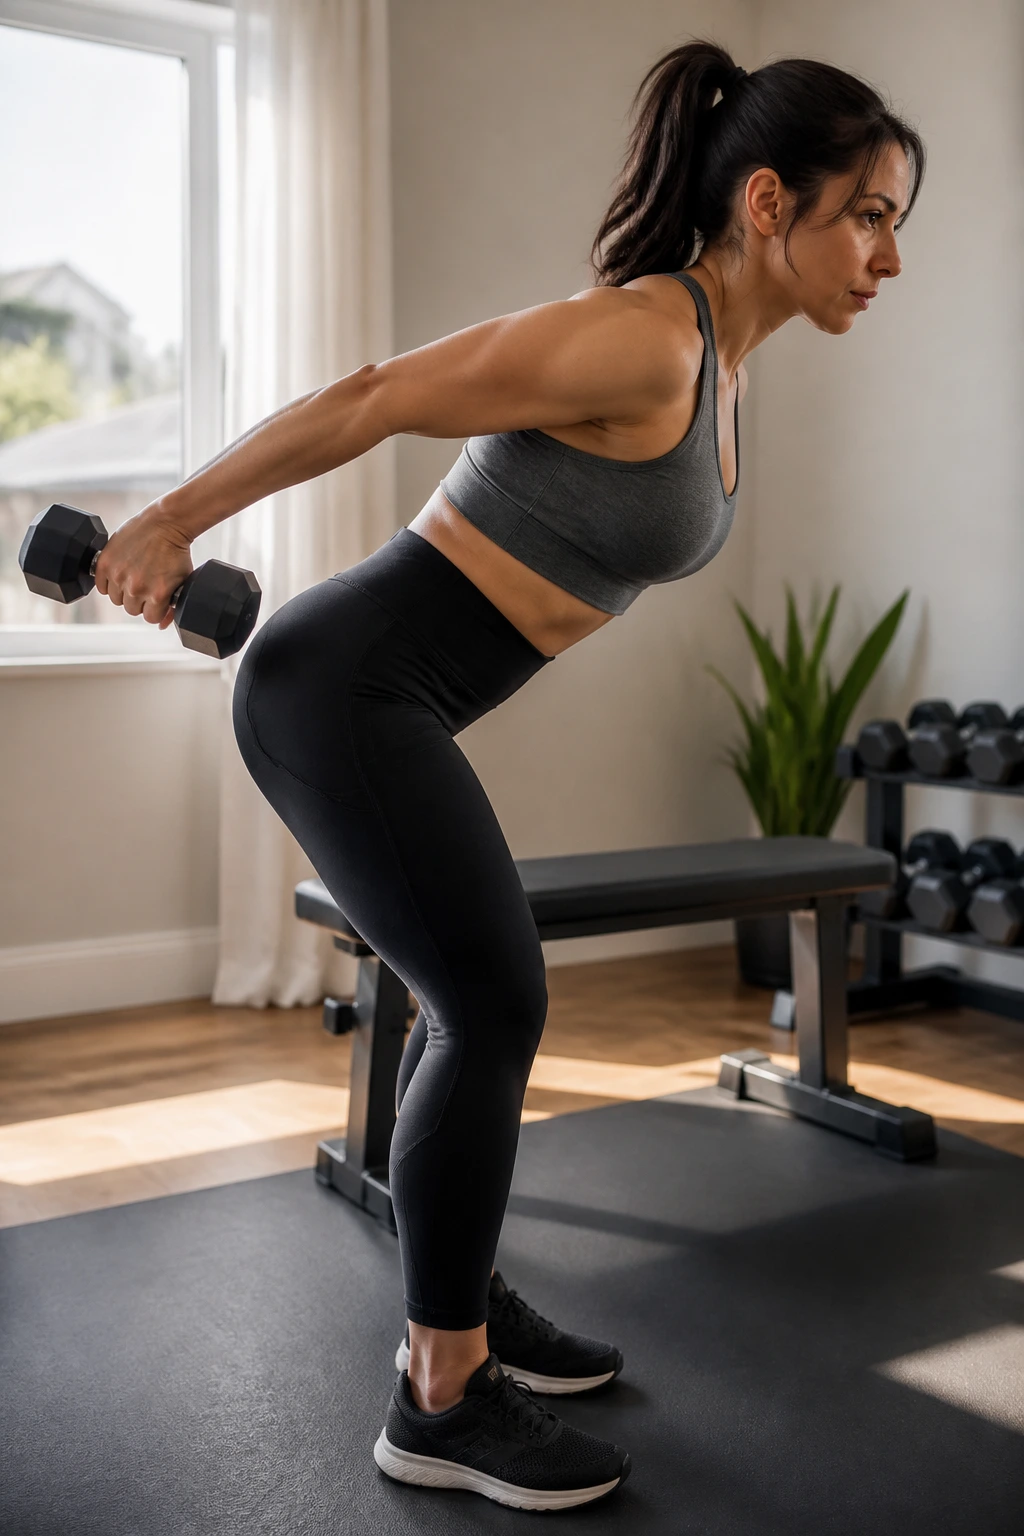
Triceps kickbacks look easy when someone else does them. Then you pick up the dumbbells and realize the lever makes them nastier than expected.
Hinge at the hips, upper arm locked close to your side, elbow bent about 90 degrees. Extend the forearm back until the arm is straight, squeeze the triceps for a second, then return slowly. The upper arm should barely move. If your shoulder is swinging, the weight is too heavy.
I prefer light weights here. The exercise is short, and the triceps still get plenty of tension with careful form. Heavy kickbacks usually turn into upper-arm flapping.
Use 2 to 3 sets of 12 to 15 reps. A one-second squeeze at the end gives this move a lot more value than rushing through it. If you only remember one thing: keep the elbow pinned.
17. Plank Shoulder Taps for Core and Shoulder Control
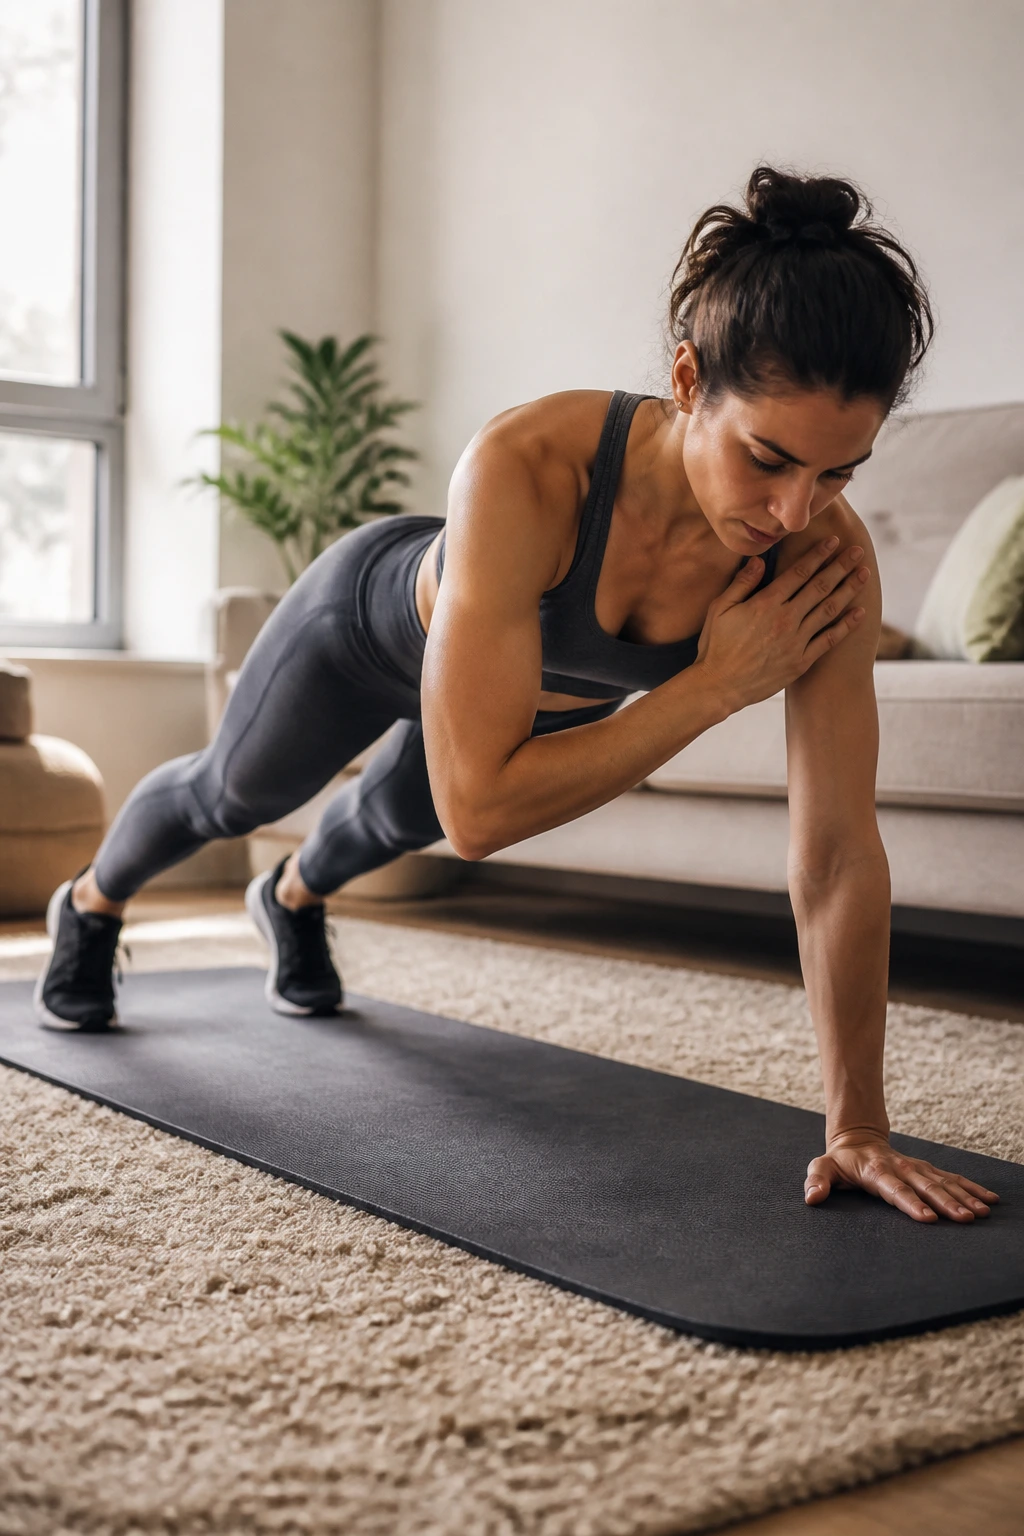
This is one of those moves that looks like a core drill and feels like a shoulder drill. Both are true.
Start in a high plank with your hands under your shoulders and your feet a little wider than hip-width. Tap your right shoulder with your left hand, then switch sides. The challenge is not the tap itself. It’s keeping your hips from rocking side to side like a loose chair.
If your body sways a lot, widen your feet a bit more. If that still feels shaky, put your hands on a couch or low bench. Raising the hands cuts the load and makes the movement easier to control.
Do 3 sets of 10 to 20 total taps. Slow taps work better than fast ones. Fast usually means sloppy, and sloppy shoulder taps stop being a control drill pretty quickly.
18. Pike Push-Ups for Upper Shoulder Strength
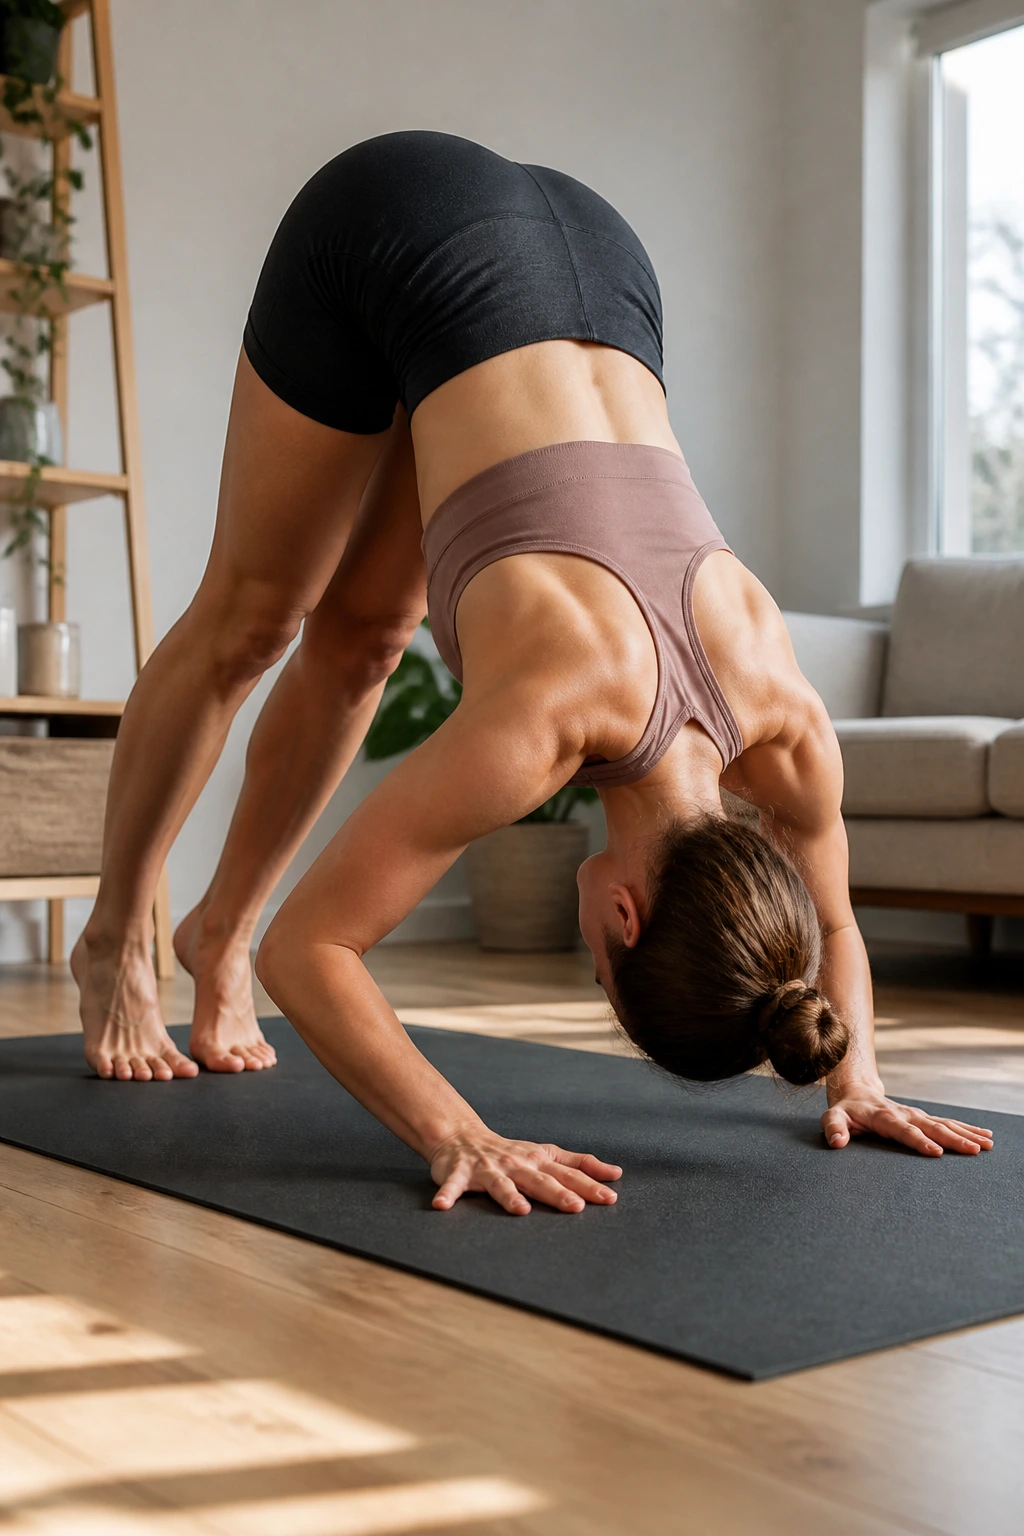
Pike push-ups hit the shoulders from a different angle, and that’s why they earn a place here. Your hips go up into an inverted V, your head lowers toward the floor between your hands, and the shoulders have to press hard to get you back out.
The position feels odd at first. That’s normal. Keep your hands shoulder-width apart, press your heels toward the floor if you can, and lower the head in a controlled line instead of diving forward. Your neck should stay long.
How to Make Them Manageable
- Put your hands on the floor and your feet on the floor first.
- If that’s too hard, raise your hands on a sturdy couch.
- Keep the elbows angled back, not flared wide.
- Stop before the lower back starts arching.
I’d keep these in the 5 to 10 rep range. They’re demanding. A few crisp reps go farther than a long set of half-control.
19. Bear Crawl Shoulder Taps for Stability
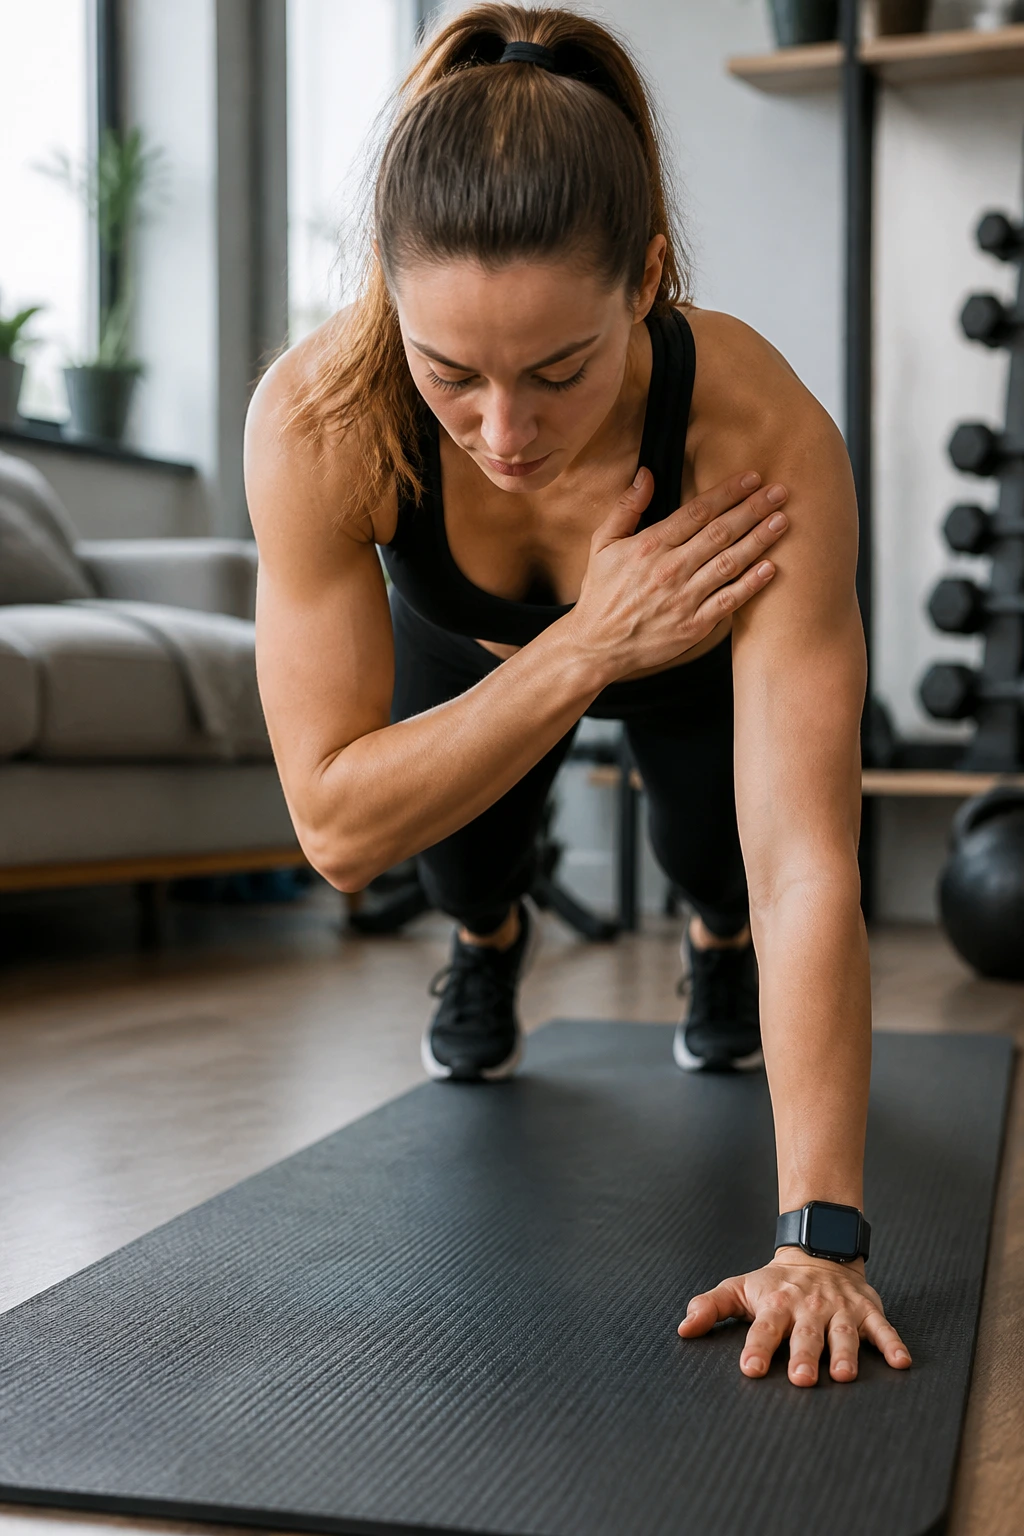
Want a move that wakes up the shoulders and the whole front of your body? This is it.
Come into a bear position with your knees hovering 1 to 2 inches off the floor. Hands stay under the shoulders, knees under the hips, then you lift one hand and tap the opposite shoulder without letting your torso swing. The floor is close, but that doesn’t make the drill easy. Not even close.
A wide base makes this cleaner. If your knees keep dropping or your hips twist hard, slow down and shorten the set. You can also do it with your hands on a sturdy bench if the floor version feels too demanding.
Try 3 sets of 6 to 10 taps per side. The burn shows up in the shoulders, but the real lesson is control. That control carries over to push-ups, planks, and almost every other press-based move on this list.
20. Superman Pulls for the Upper Back
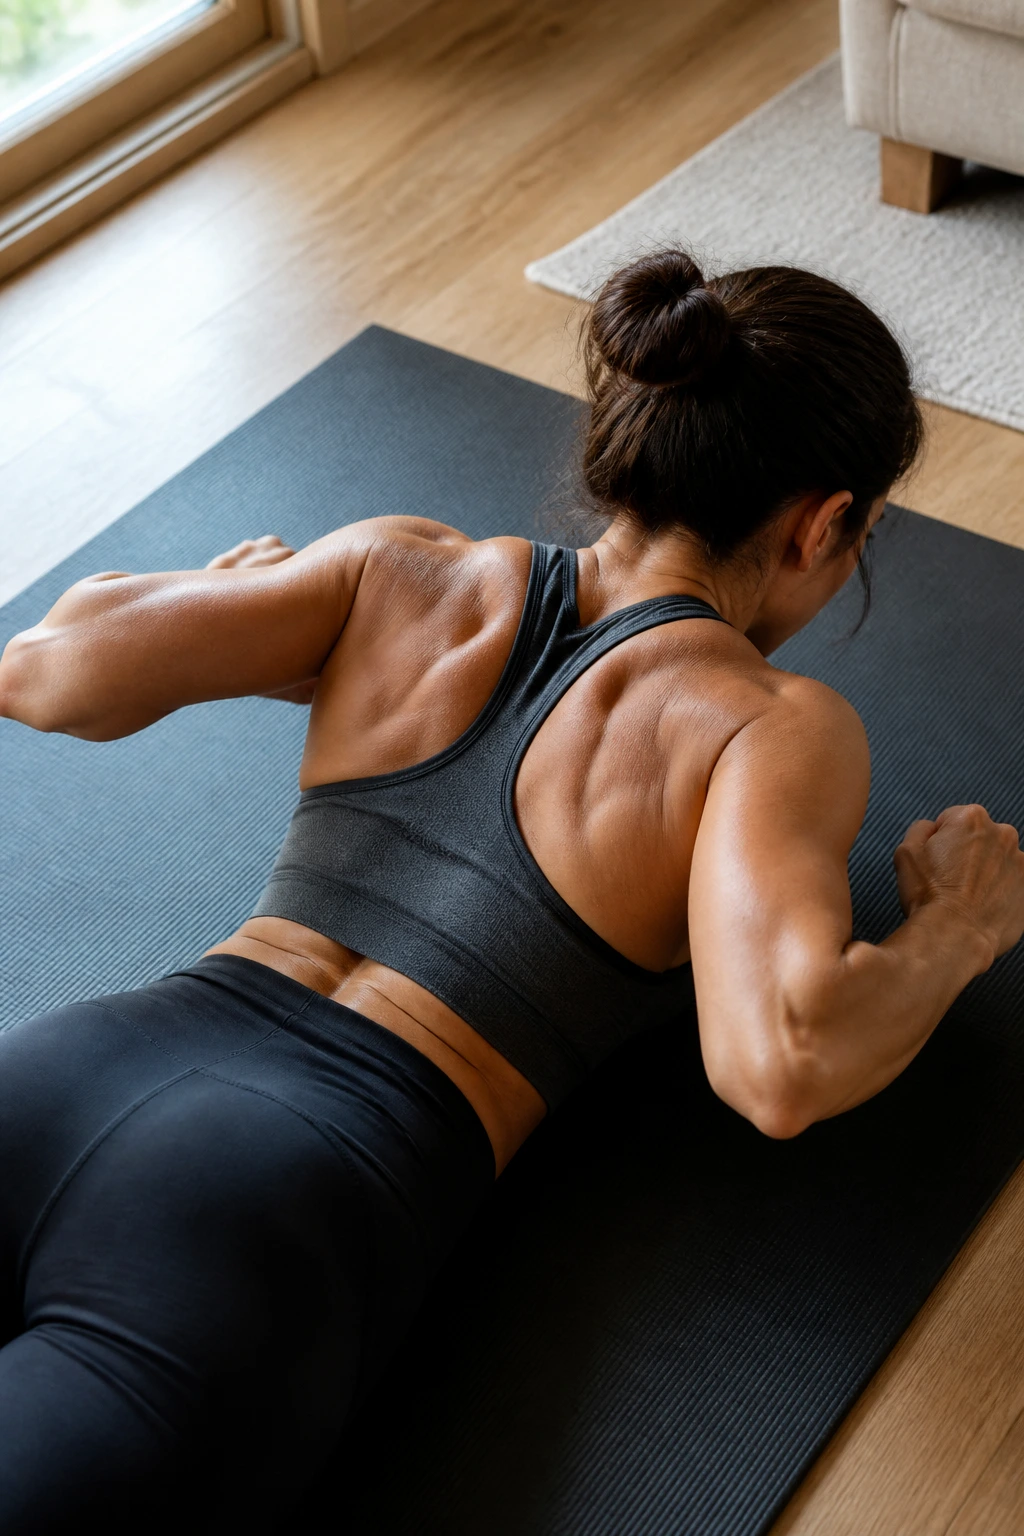
Lie face down on the floor and lift your chest slightly off the ground. Then pull your elbows down toward your ribs, as if you were trying to finish the bottom half of a lat pulldown. That’s the whole move.
It sounds small. It isn’t, especially if your upper back tends to sleep through the day. Superman pulls light up the muscles that help support your shoulders and improve your posture without needing any equipment.
Don’t throw your chest high into the air. That turns the move into a lower-back exercise. Keep the lift small, the neck long, and the squeeze focused between the shoulder blades.
A good target is 2 to 3 sets of 10 to 15 reps. If your low back feels cranky, leave your legs on the floor and keep the chest lift minimal. The upper back can still do the job.
21. Wall Angels for Posture and Mobility
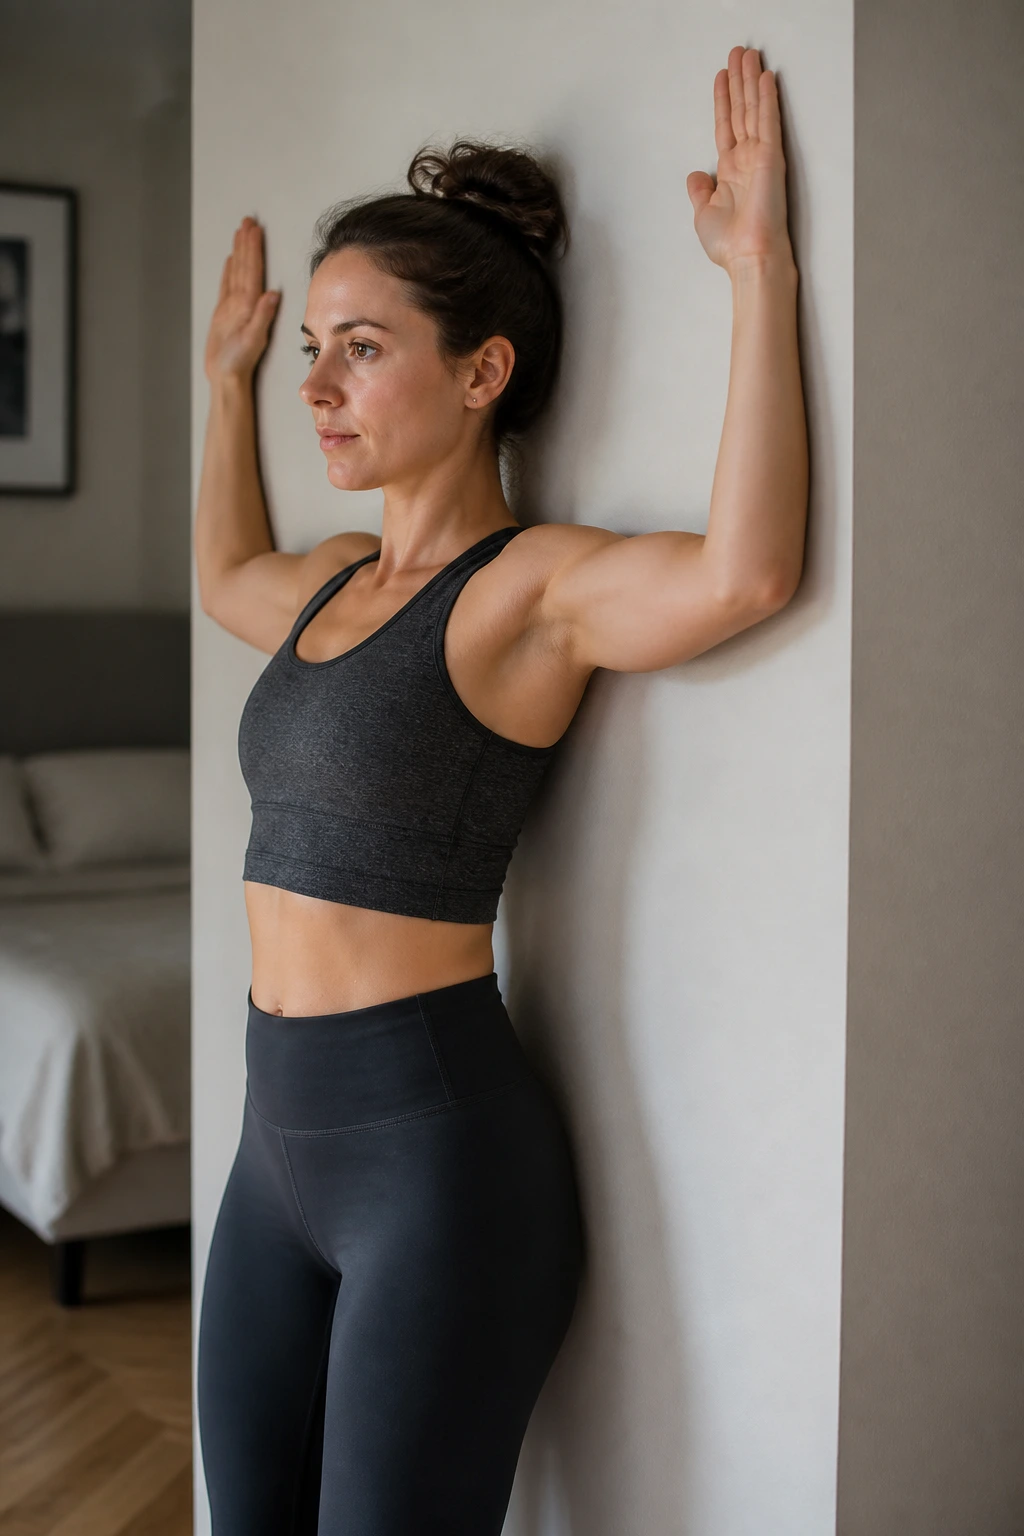
Wall angels are not flashy, and that’s exactly why they belong near the end of an upper body session. They remind your shoulders how to move after all the pressing, lifting, and tapping.
Stand with your back against a wall, feet a few inches forward, ribs tucked in. Press your lower back gently toward the wall, then raise your arms into a goalpost shape. Slide them up and down the wall as smoothly as you can. If your wrists or elbows lose contact, do not force them. Work with the range you have.
A lot of people discover one side moves better than the other. That’s normal. Try a slower rep on the tight side instead of trying to yank both shoulders into perfect symmetry.
Do 2 sets of 8 to 10 slow reps. This move works well after chest work, because it opens the front of the shoulders and gives your upper back a chance to reset.
22. Shadow Boxing Rounds for a Fast Upper Body Workout at Home
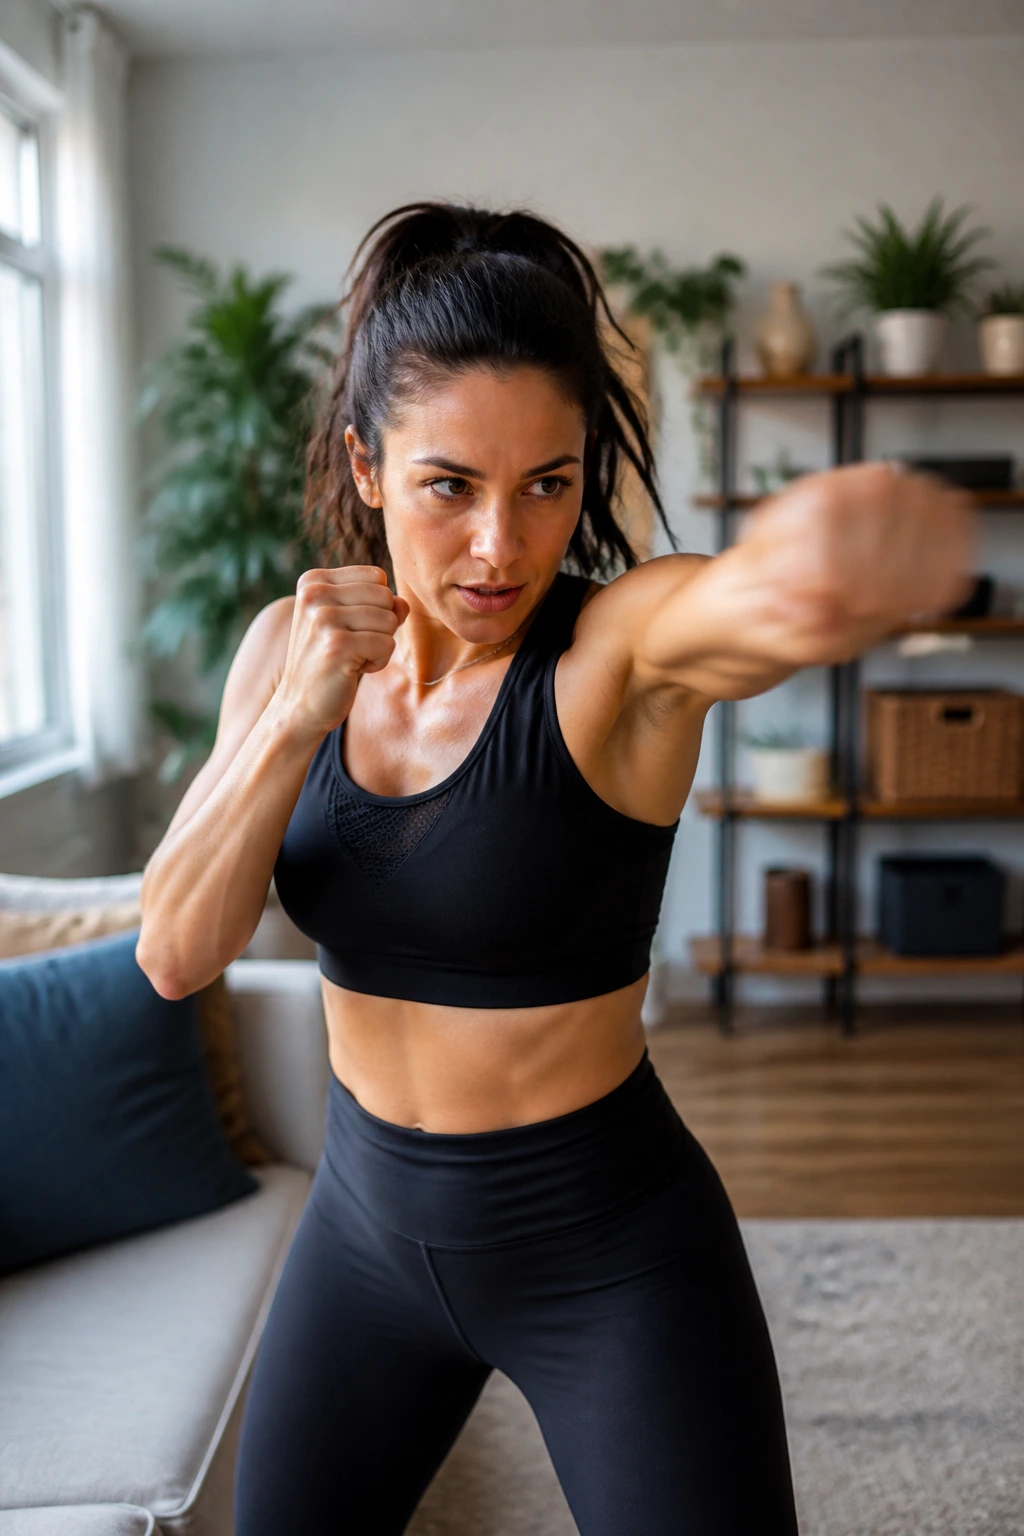
Shadow boxing is the move I’d pick when someone wants a home finisher that feels athletic instead of tedious. It drives the shoulders, arms, and upper back while forcing you to breathe and keep your hands up.
Throw straight jabs and crosses, then mix in hooks if your shoulders feel good. Keep your fists loose, wrists straight, and shoulders relaxed between punches. The power should come from your torso turning, not from wild arm swings. If you tense your neck, you’re doing too much.
How to Do It Well
- Work in 1- to 2-minute rounds.
- Rest 30 to 45 seconds between rounds.
- Stay light on your feet if space allows.
- Skip hand weights unless your form is already clean and stable.
Three rounds can be enough. Five rounds is plenty for most home sessions. It’s sweaty, it’s quick, and it leaves your upper body feeling awake instead of flattened.
Final Thoughts
The smartest upper body work at home usually looks a little plain. Push. Pull. Press. Stabilize. Then repeat it enough times that your shoulders stop feeling stiff when you reach for something overhead.
If you want the shortest route to progress, keep one push move, one row, one shoulder exercise, and one posture drill in your weekly mix. That combination covers more ground than endless curls ever will.
And if a workout leaves your neck tight and your lower back annoyed, the session was off. Clean reps, modest loads, and a little patience usually beat the harder-looking version. Every time.
