



Standing up from a chair should not feel like a small expedition. If it does, your legs, hips, and balance system are asking for attention.
The best senior exercises for strength, mobility, and balance rarely look dramatic. They look like the movements you use when you get out of bed, climb a step, reach for a shelf, turn to look behind you, or steady yourself when the floor feels a little slick. That is exactly why plain drills beat flashy ones here. They train the stuff that matters.
A strong body that moves like a rusted hinge is not much help. Loose joints without muscle are not much help either. The sweet spot is a mix of leg strength, ankle and hip mobility, and balance work that makes your feet, core, and posture pay attention. A sturdy chair, a wall, a counter, and a light resistance band can cover most of it.
No circus tricks needed.
Start with the chair stand.
1. Sit-to-Stand From a Chair
The chair stand is the closest thing this list has to a king move. It trains the legs, glutes, and trunk in one clean pattern, and it carries over to real life fast. If getting up from a sofa, a car seat, or a low toilet has started to feel awkward, this is where I’d begin.
Why It Matters
Every good stand starts with foot pressure and a little forward lean. That matters more than people think. If you rock backward or fling yourself up with your back, the legs never learn to do their job properly.
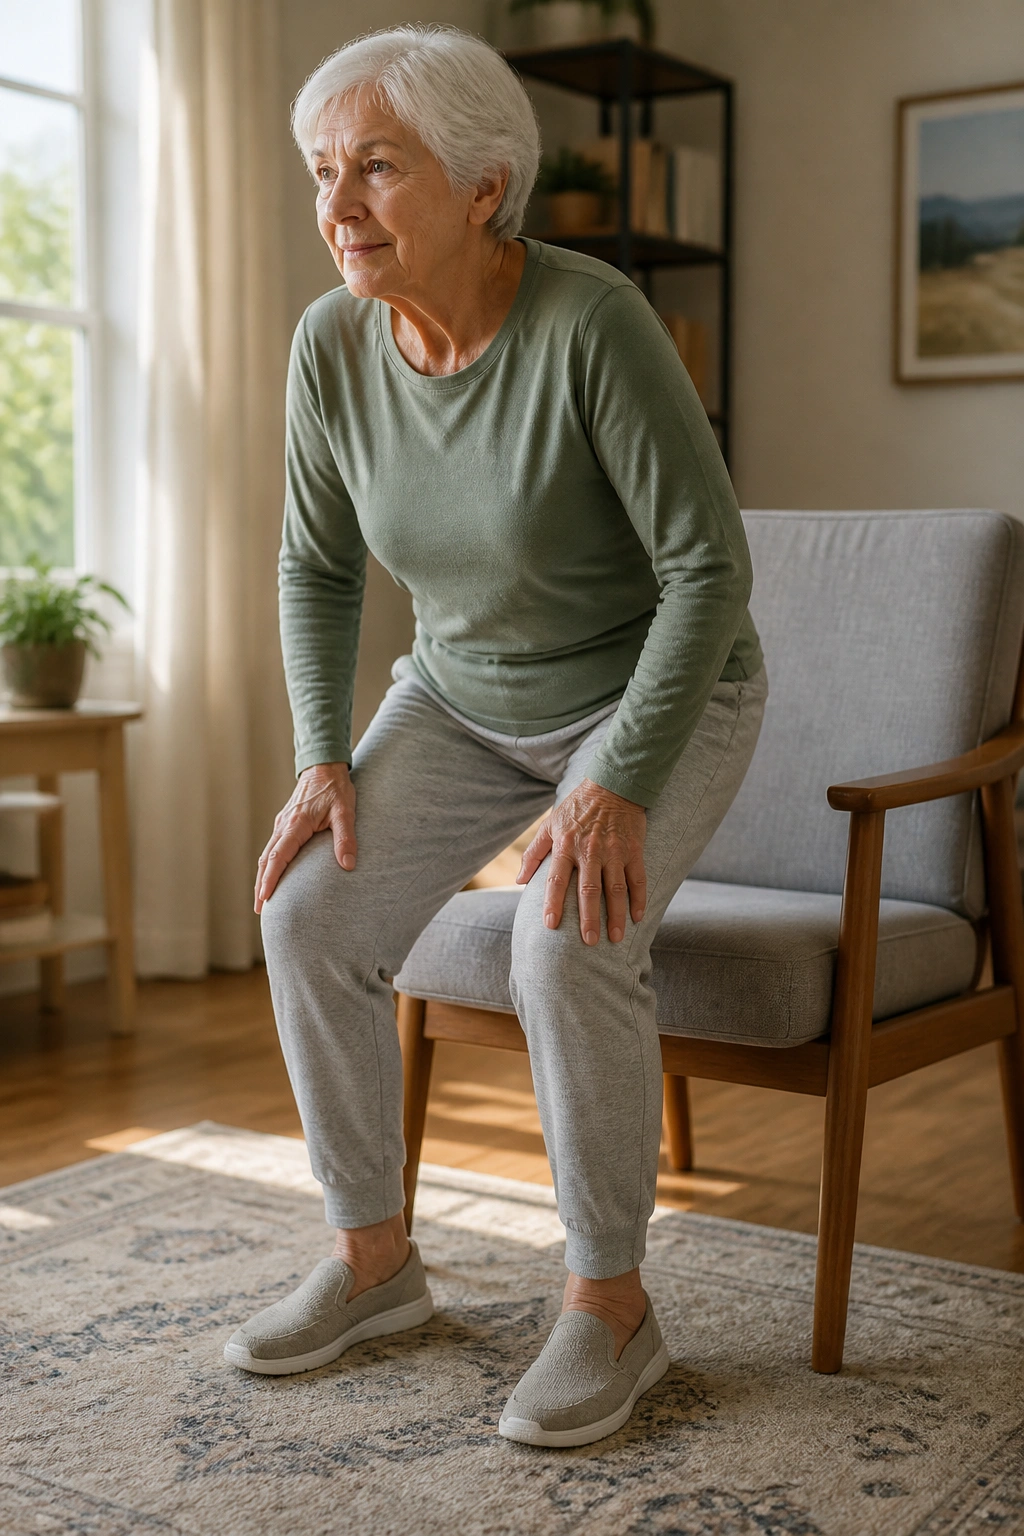
Keep a firm chair behind you. Feet stay flat, about hip-width apart, and your knees should point over your toes rather than cave inward. Lower with control, tap the seat, then stand again without collapsing back down.
- Do 2 to 3 sets of 5 to 10 reps.
- Use a chair that does not slide.
- Cross your arms only if the movement feels steady.
- Push through the whole foot, not the toes alone.
- Start higher if needed; a firm cushion makes this easier.
Best cue: lean your chest forward a little before you stand. That tiny shift makes the whole thing smoother.
2. Wall Push-Ups
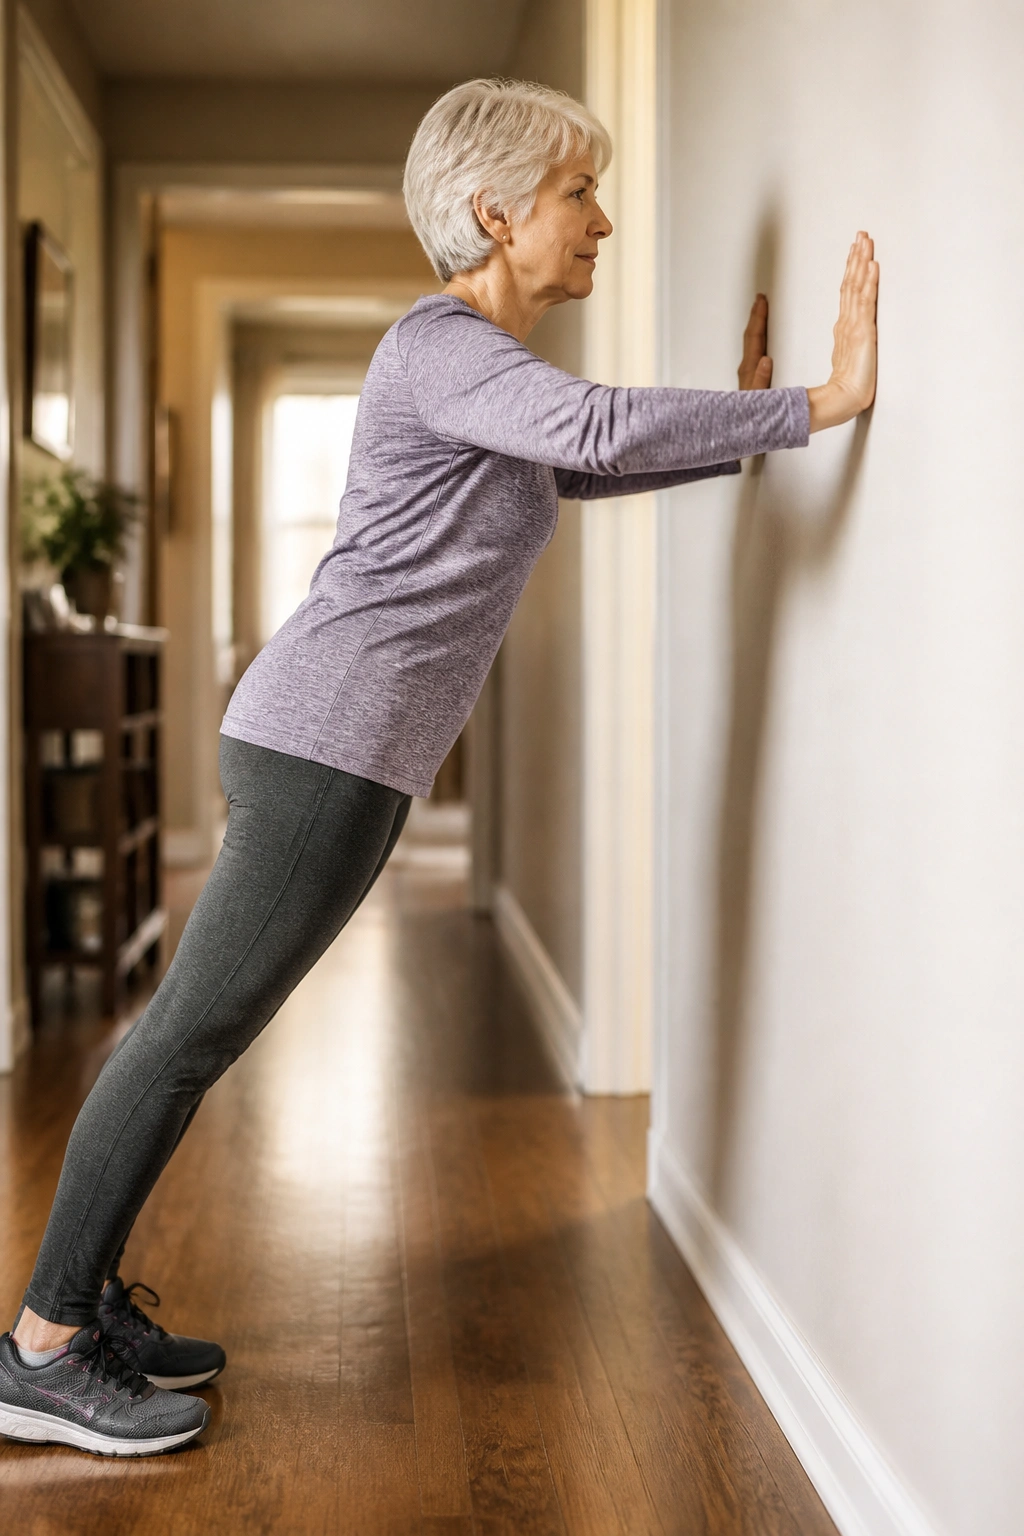
Wall push-ups are not a consolation prize. They are a smart way to train the chest, shoulders, triceps, and core without putting your wrists, elbows, or shoulders through a lot of strain.
A lot of older adults skip upper-body work because floor push-ups feel out of reach. Fair enough. The wall version still builds useful strength, and the angle is easy to change. Stand farther from the wall to make it harder. Step in closer to make it lighter.
Hands go on the wall a little wider than shoulder width. Body stays in a straight line from head to heels. Bend the elbows and bring your chest toward the wall, then press away with control. You want the body to move like one piece, not like your hips are lagging behind.
Two sets of 8 to 12 reps is a solid start.
If your shoulders feel pinchy, move your hands a little lower and keep your elbows at about a 45-degree angle from your ribs. That small adjustment matters. A lot.
3. Marching in Place With Tall Posture
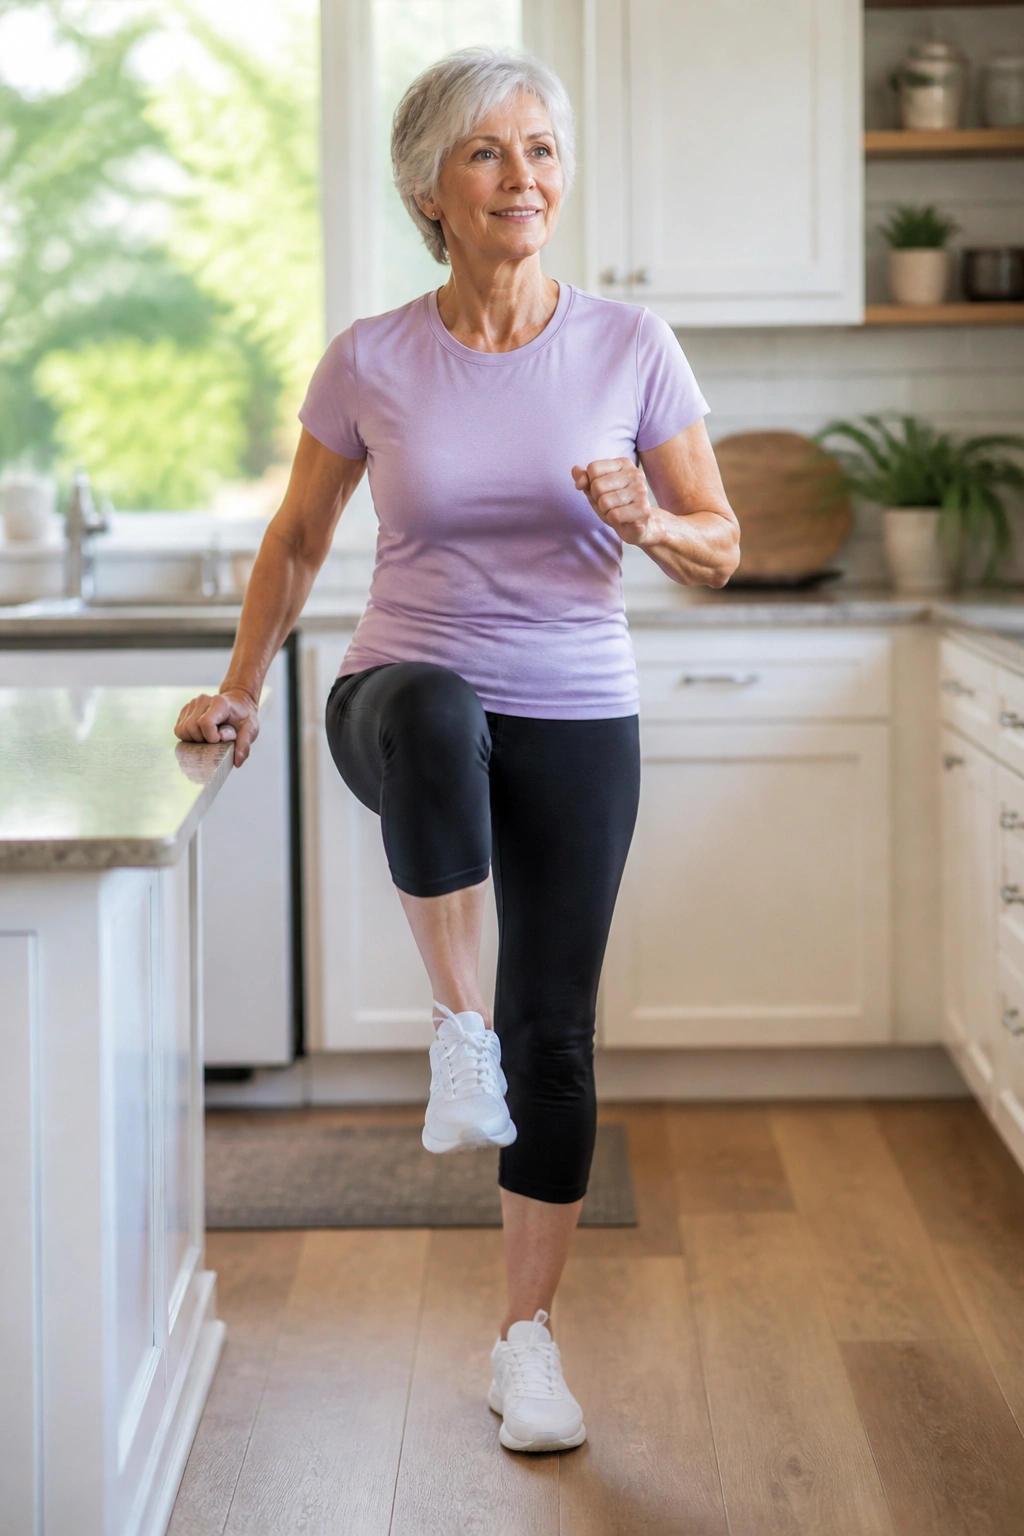
Why does marching in place earn a spot here? Because it teaches the body to balance on one leg for a split second at a time, and that is half of walking.
The real work happens in the hips and the feet. One knee lifts, the other leg stays tall, and the trunk has to keep you from tipping. It looks basic. It is not.
How to Use It
Stand near a counter or the back of a sturdy chair. Lift one knee to a comfortable height, lower it, then switch sides in a steady rhythm. Keep the ribs stacked over the hips, and do not lean back when the knee comes up.
- March for 30 to 60 seconds.
- Rest 20 to 30 seconds.
- Repeat 2 to 4 rounds.
- Swing the arms if that feels smooth.
- Hold the counter lightly if balance is shaky.
A one-sentence rule helps here: lift, lower, switch, breathe.
If the knees feel stiff, make the lift smaller and slower. The point is not height. The point is control.
4. Heel-to-Toe Walk Along the Counter
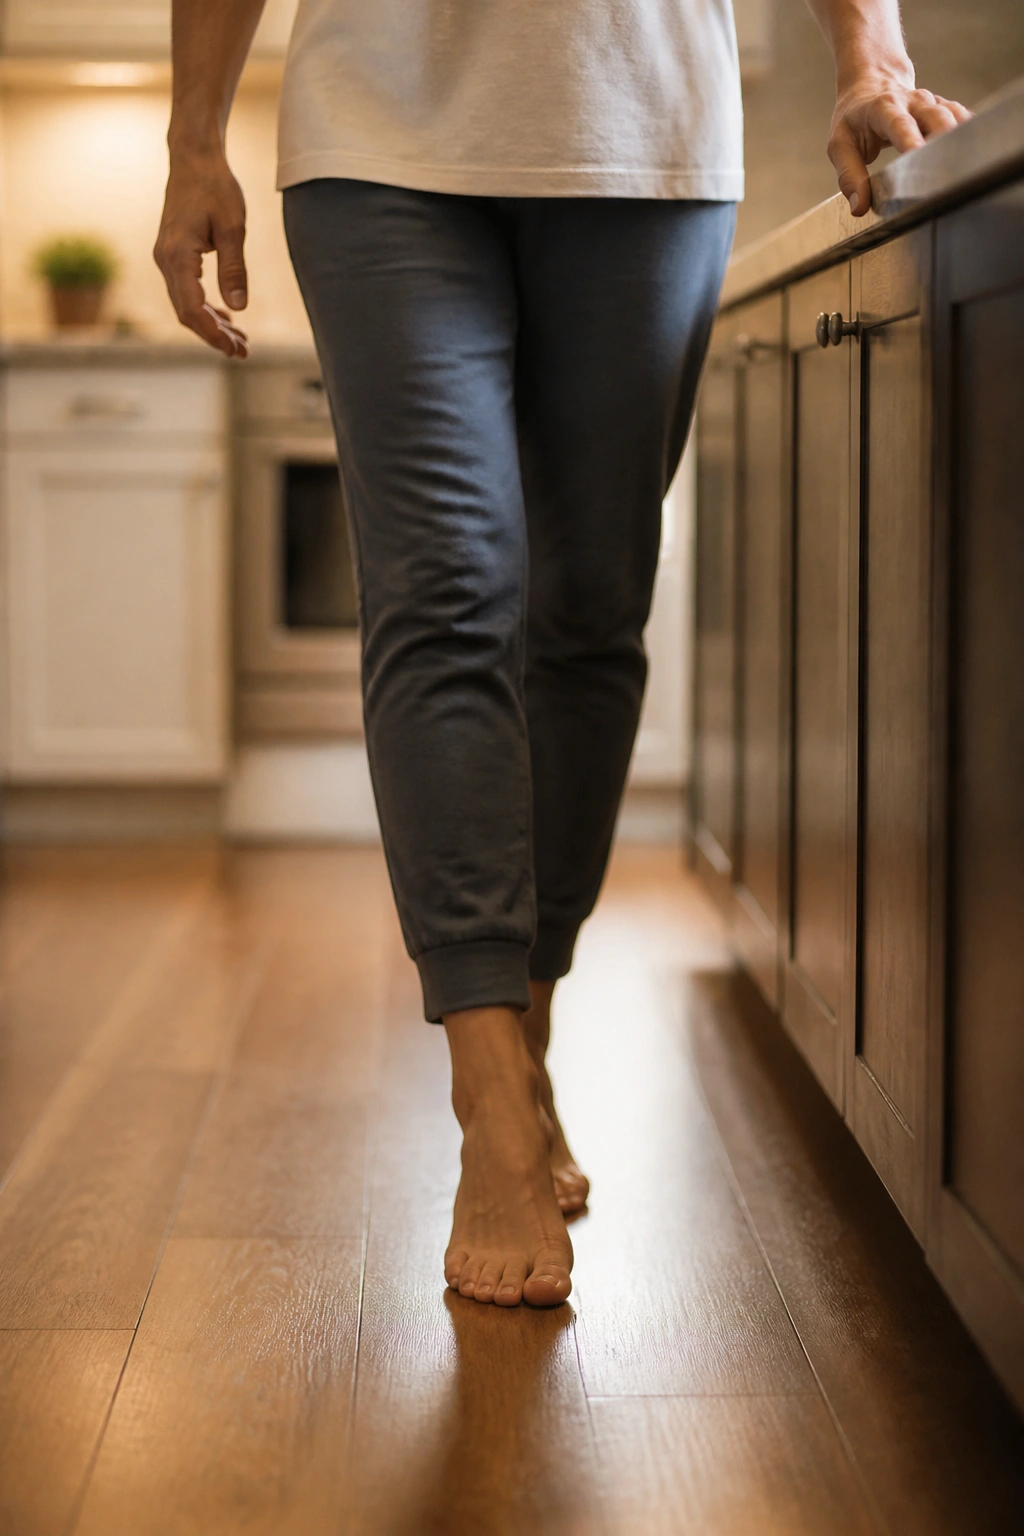
Picture someone walking a straight line in a narrow hallway with one hand ready near the wall. That’s the vibe here. Heel-to-toe walking challenges the tiny balance corrections that keep a person upright when turning, shifting, or stepping around clutter.
This drill wakes up the ankles and the small stabilizers in the feet. It also gives your brain a job. You have to place each foot carefully, which is exactly why it helps.
What to Watch For
Walk forward with the heel of one foot touching the toes of the other. Keep your eyes ahead, not glued to the floor. A light finger touch on the counter is fine; hanging your weight on the counter is not.
- Take 10 to 20 slow steps.
- Turn carefully and walk back.
- Keep the steps smooth, not rushed.
- Stop if you feel dizzy.
- Use a hallway or kitchen counter with space beside you.
The best sign you’re doing it right? A little wobble that gets smaller after a few tries. That’s normal. Your body is learning.
5. Calf Raises at the Counter
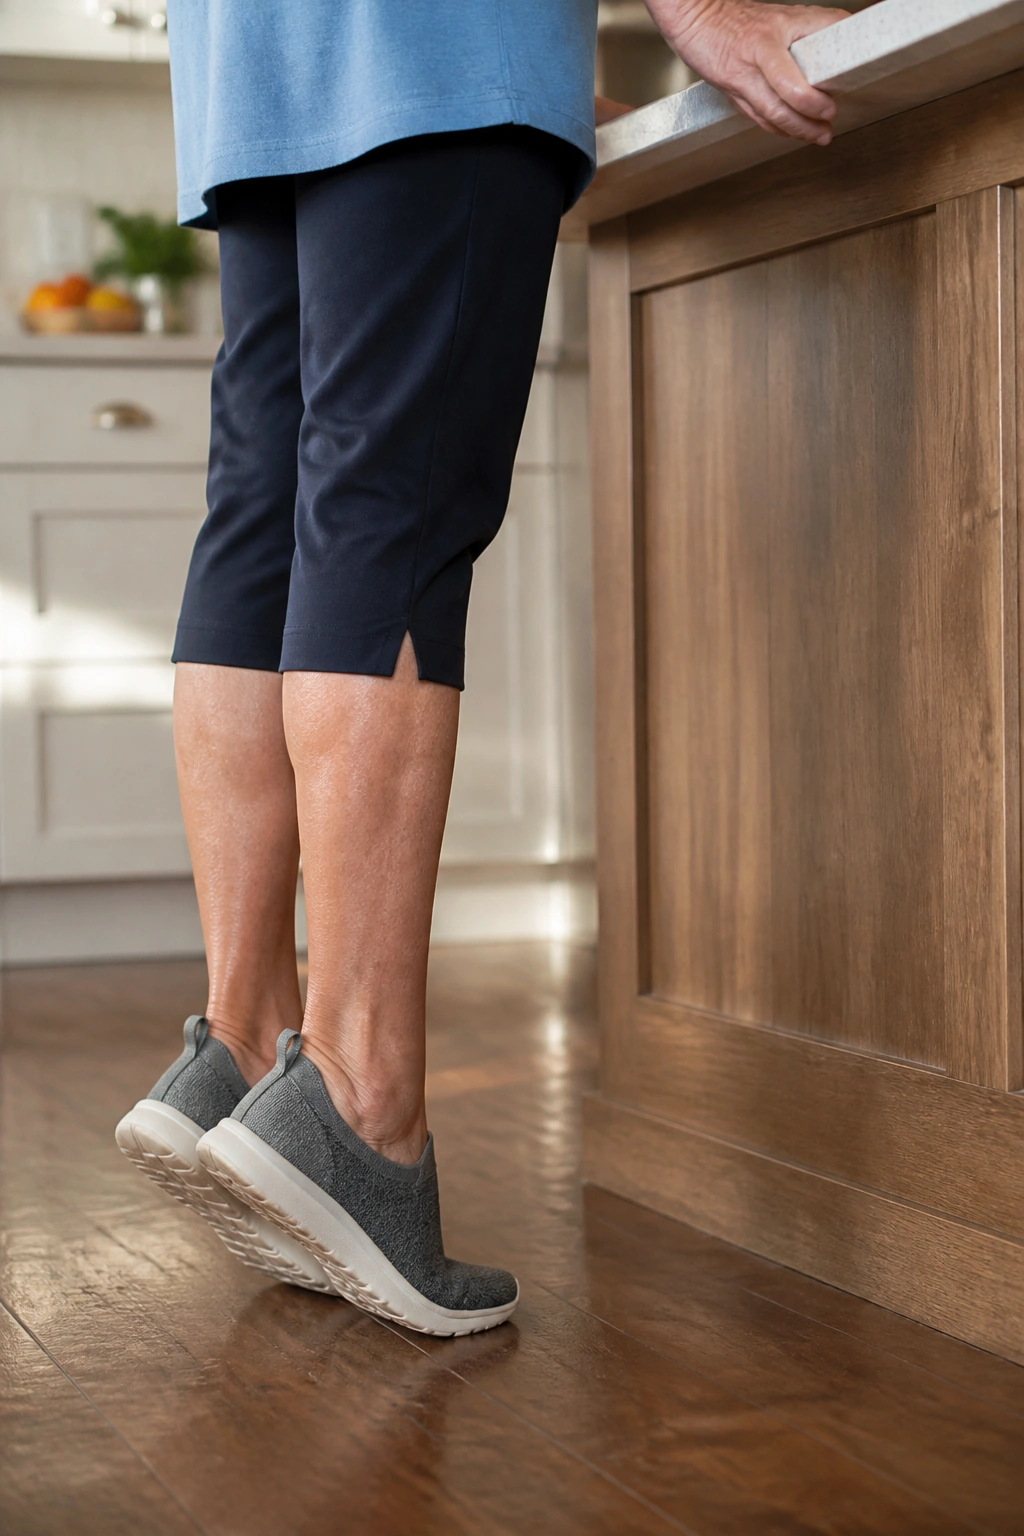
The calf raise looks boring. It isn’t. Strong calves help with walking speed, stair climbing, and the push-off phase of gait, which is a fancy way of saying they help your foot leave the ground cleanly instead of dragging.
Stand tall with one or both hands on a counter. Rise onto the balls of your feet, pause for a beat, and lower slowly until your heels settle all the way down. That slow lowering matters more than the lift.
A quick, bouncy calf raise is easy to fake. A controlled one is harder. That’s the useful version.
Try 2 to 3 sets of 10 to 15 reps. If both feet cramp, shorten the range and keep the movement smaller until the calves adapt. The ankles should move, but they should not feel jammed.
One small trick: keep your weight centered over the big toe and second toe, not rolled out onto the little toe side. That keeps the foot steadier and the ankle cleaner.
6. Side Leg Raises Holding a Chair
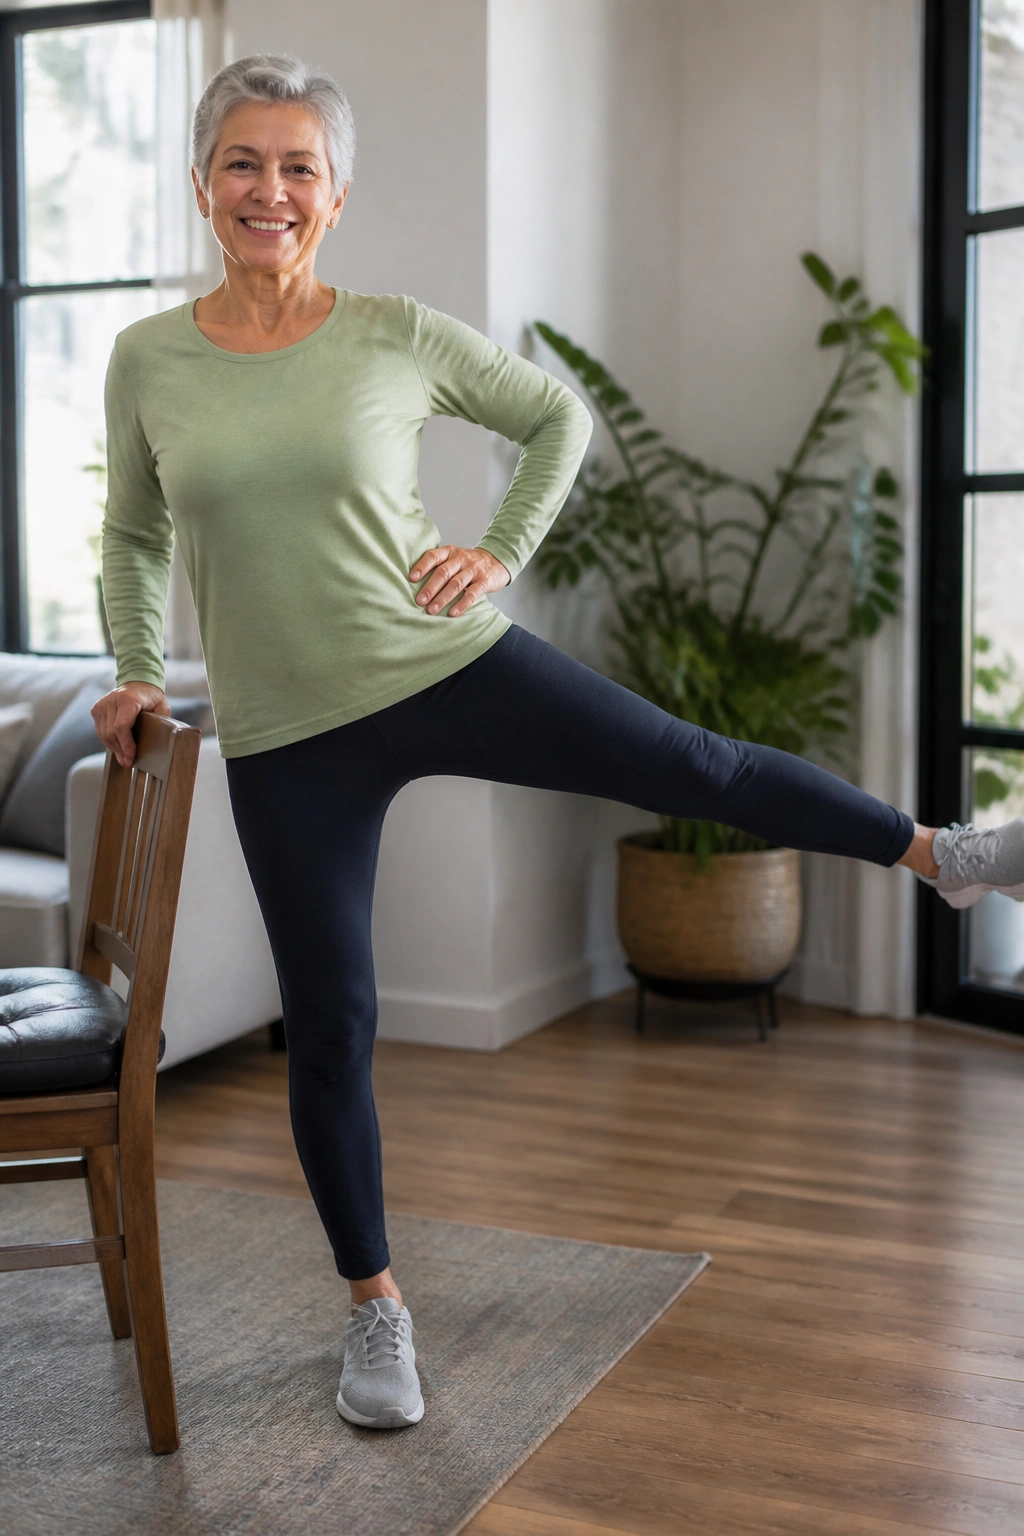
Side leg raises train the muscles that keep the pelvis level when you walk. They also help with the awkward side-to-side jobs people forget about, like stepping around a dog, getting into a car, or moving away from a curb.
Unlike forward walking drills, this one hits the outer hip, especially the glute medius. That muscle is a quiet hero. When it gets weak, knees can drift inward and the whole body starts to feel a little loose during standing tasks.
Stand tall behind a chair, hold on lightly, and move one leg straight out to the side without leaning the torso. The standing hip should stay stacked. No twisting. No swinging.
Who benefits most? Anyone whose knees buckle inward on stairs or anyone who feels wobbly when turning sideways.
Aim for 8 to 12 reps per side. If the leg does not lift high, that is fine. Height is not the goal. Clean form is.
7. Bird Dog for Core Control
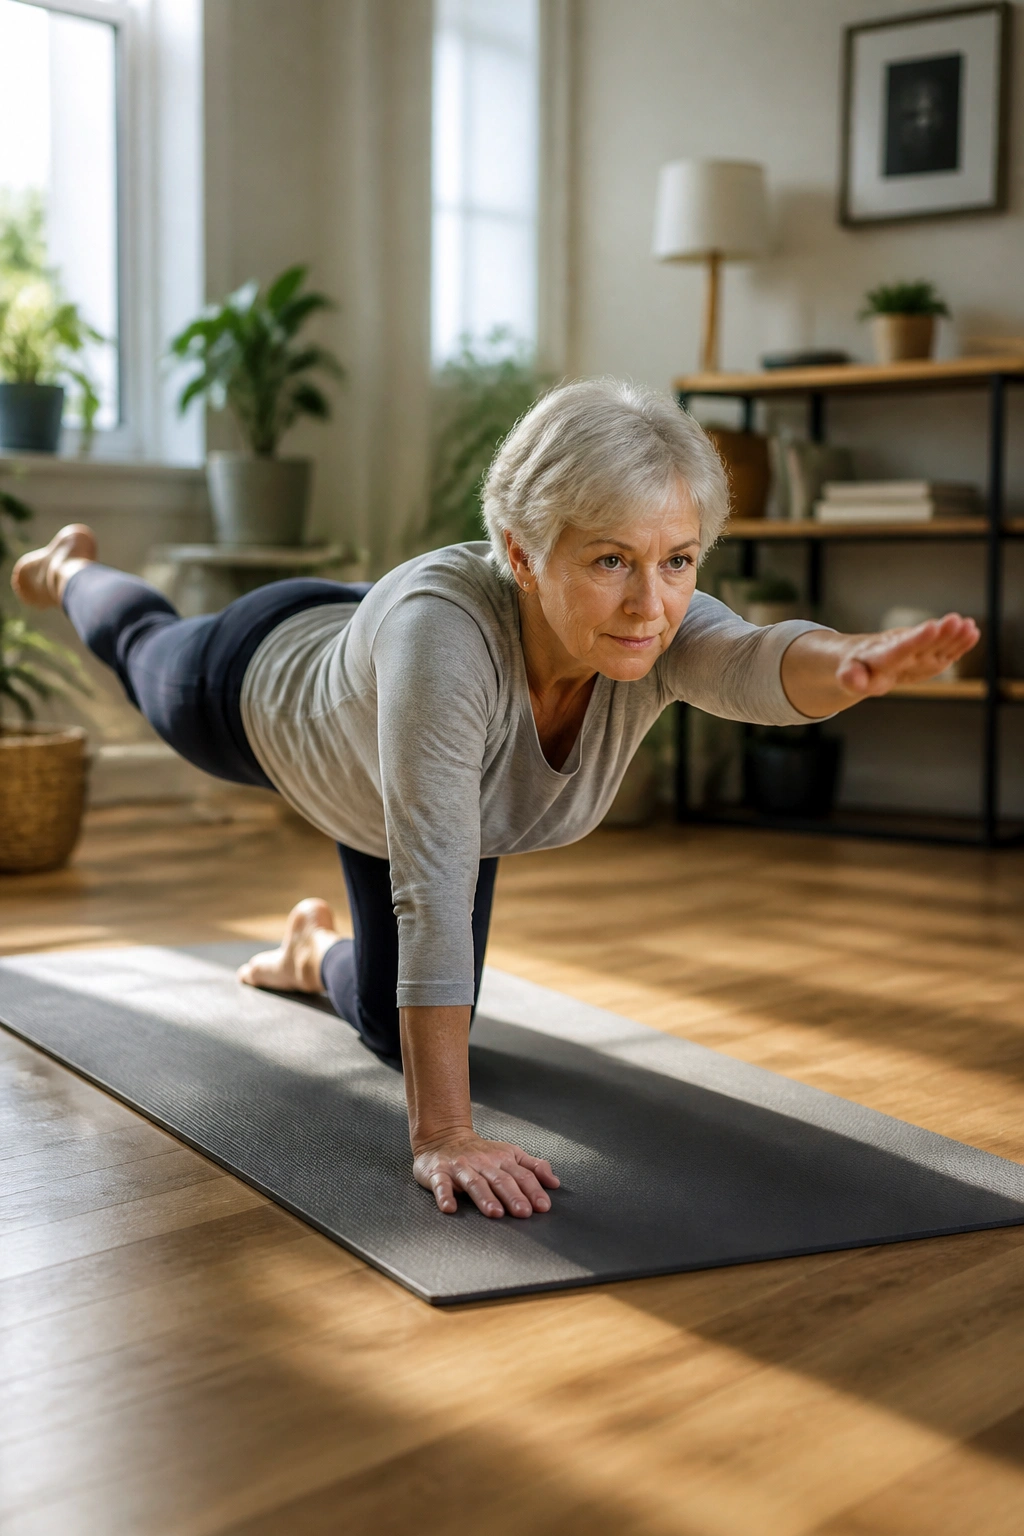
Bird dog is one of those drills that looks calm and turns out to be sneaky. You move one arm and the opposite leg while the trunk tries not to sway, and that cross-body control is gold for balance and walking.
Why It Works
Get onto hands and knees on a mat or folded towel. Reach one leg straight back while the opposite arm reaches forward. Pause for 2 to 3 seconds, then come back under control. The hips should stay level. The lower back should stay quiet.
If wrists complain, do the standing version with a hand on the counter and one leg reaching back. Same idea. Less floor work.
- Do 6 to 8 reps per side.
- Reach long, not high.
- Keep your neck in line with your back.
- Breathe out during the reach.
- Stop if the low back feels pinchy.
A good bird dog feels like length, not strain. That is the feeling to chase.
8. Step-Ups on a Low Step
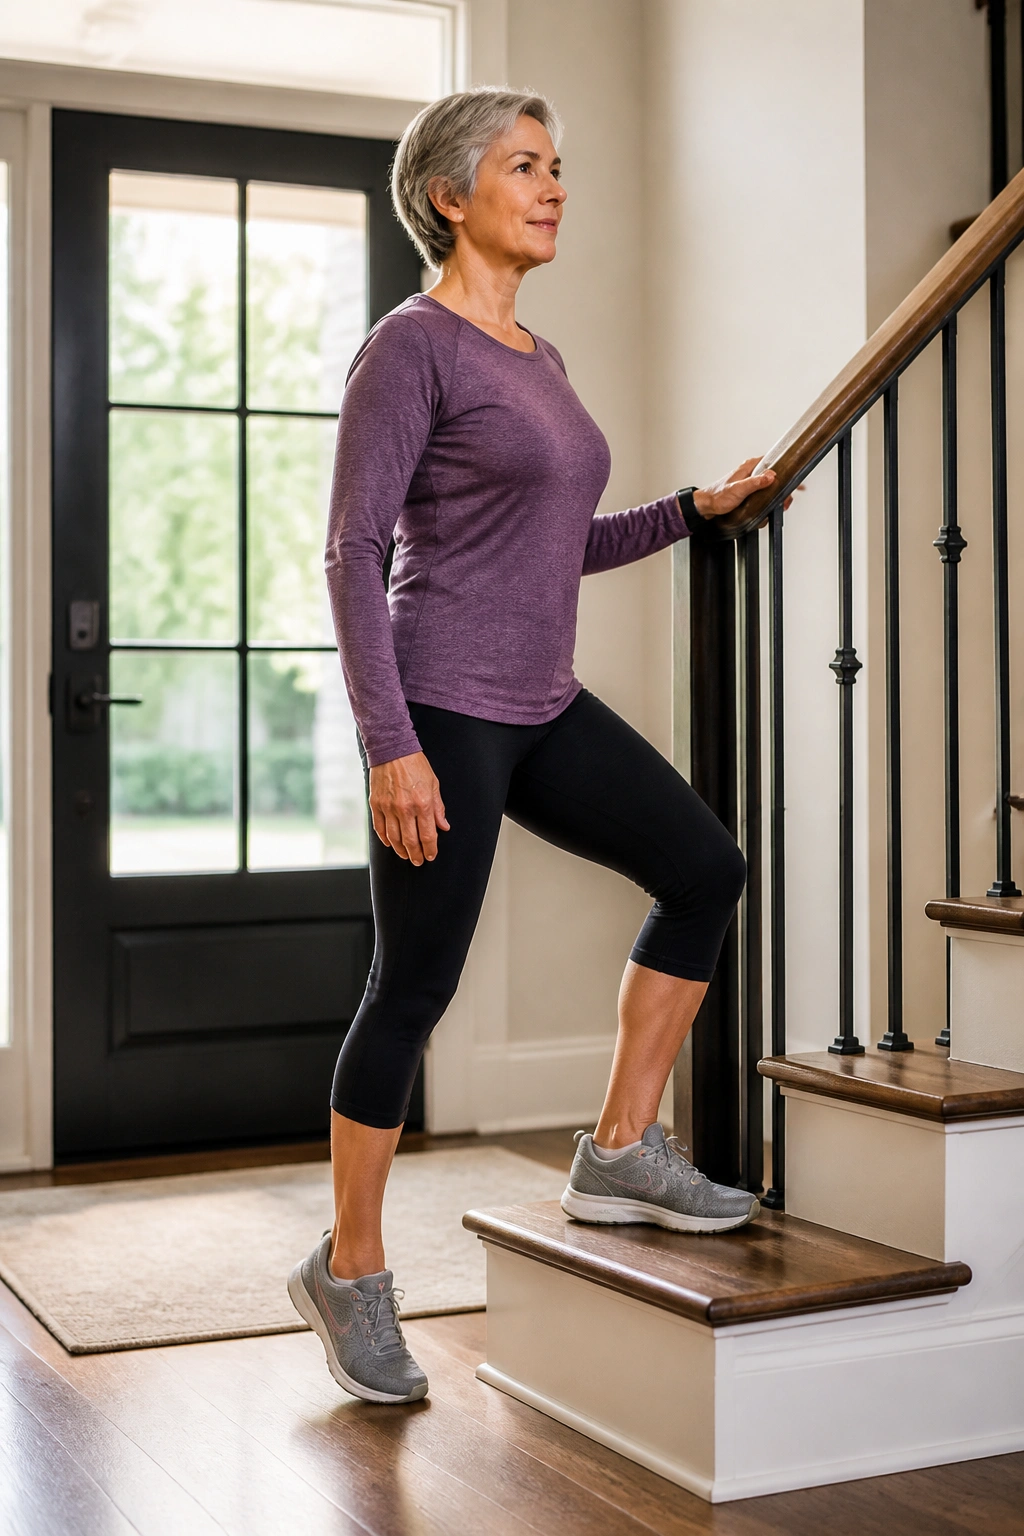
Step-ups are the closest thing this list has to stair practice, and stair practice pays off fast. They build thigh strength, glute strength, and single-leg balance in a way that walking alone never quite manages.
Use the bottom stair or a very low step at first. Place one whole foot on the step, press through the heel and midfoot, and bring the other foot up with control. Then lower slowly. Do not drop off the step like you are in a hurry.
The slow lower is where a lot of the work lives. That is the part that teaches the legs to absorb load and keep the knee steady.
A hand on the railing is smart. It is not cheating. It is a clean way to keep the drill safe while you build confidence.
Try 2 sets of 6 to 10 reps per leg. If the hip feels sloppy or the knee caves in, lower the step height. A little less range can give you a lot more control.
9. Glute Bridges on the Floor or Bed
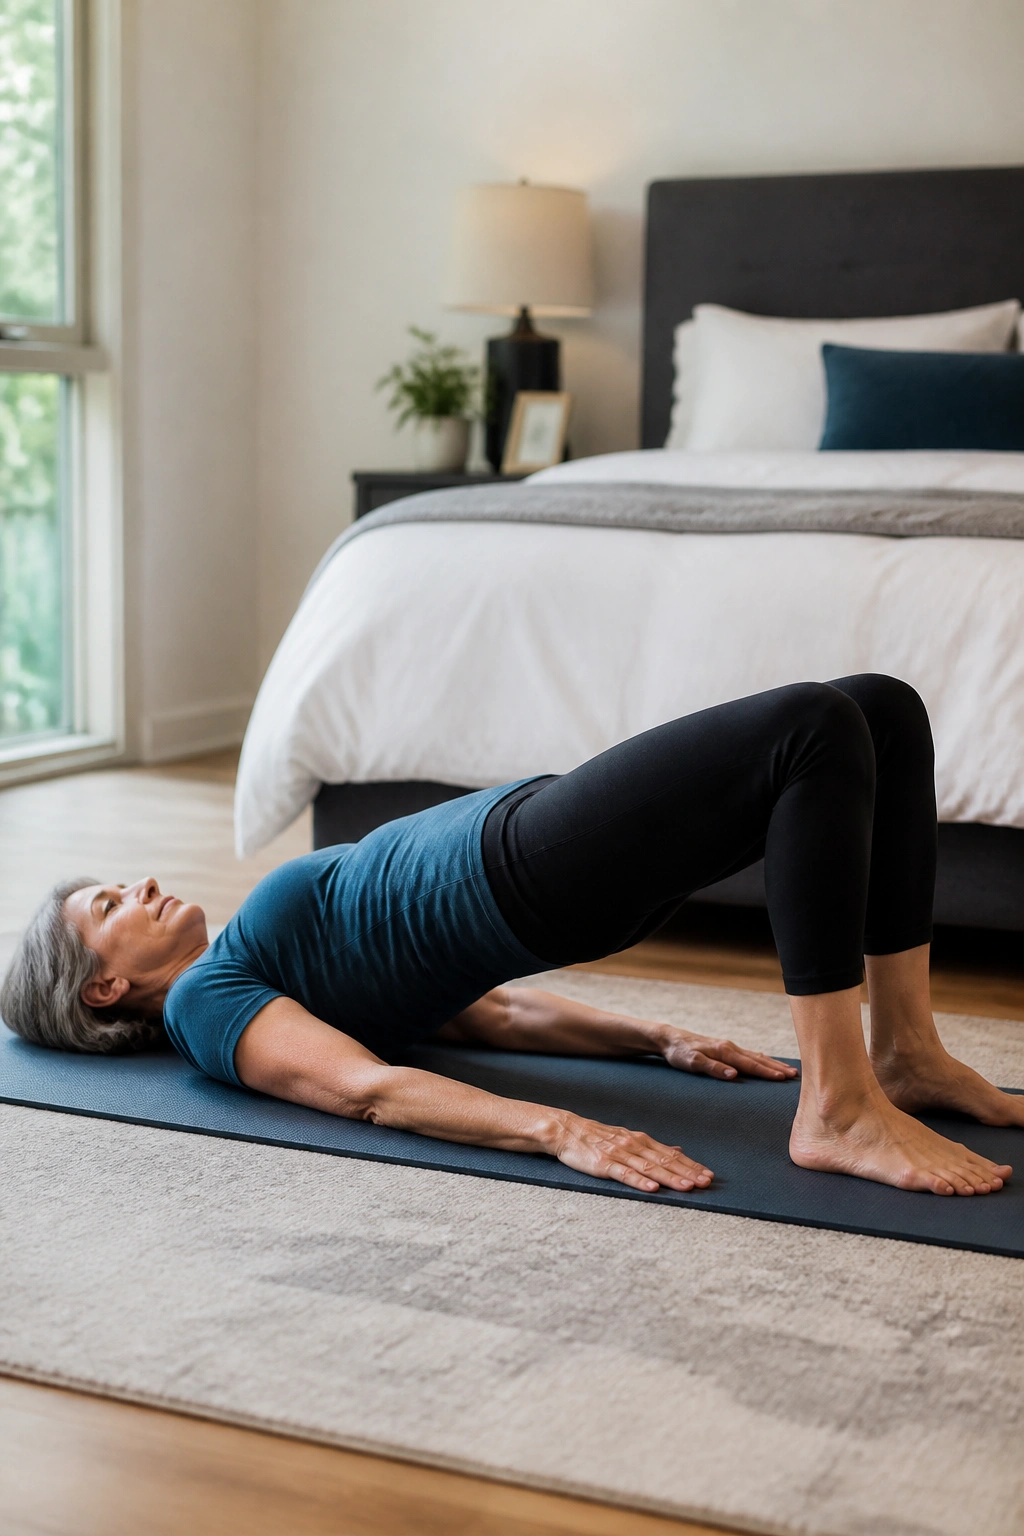
Why do glute bridges matter if most of the day is spent sitting? Because sitting turns the backside off. Bridges wake it up again. That matters for walking, standing, and protecting the lower back from doing all the work.
Lie on your back with knees bent and feet flat. Exhale, gently press your lower ribs down, and lift the hips until your body makes a smooth line from shoulders to knees. Lower with control. No throwing the hips into the air.
How to Keep Your Back Comfortable
Keep the lift small if your back arches. The goal is glute work, not a big lumbar bend. A slight tuck of the pelvis at the start often helps.
- Do 2 sets of 8 to 12 reps.
- Pause for 1 to 2 seconds at the top.
- Keep feet about hip-width apart.
- Push through the heels, not the toes.
- Stop if the low back starts taking over.
A bridge should feel like the backside turning on. If you mostly feel your hamstrings, move your feet a little closer to your hips and try again.
10. Resistance Band Rows
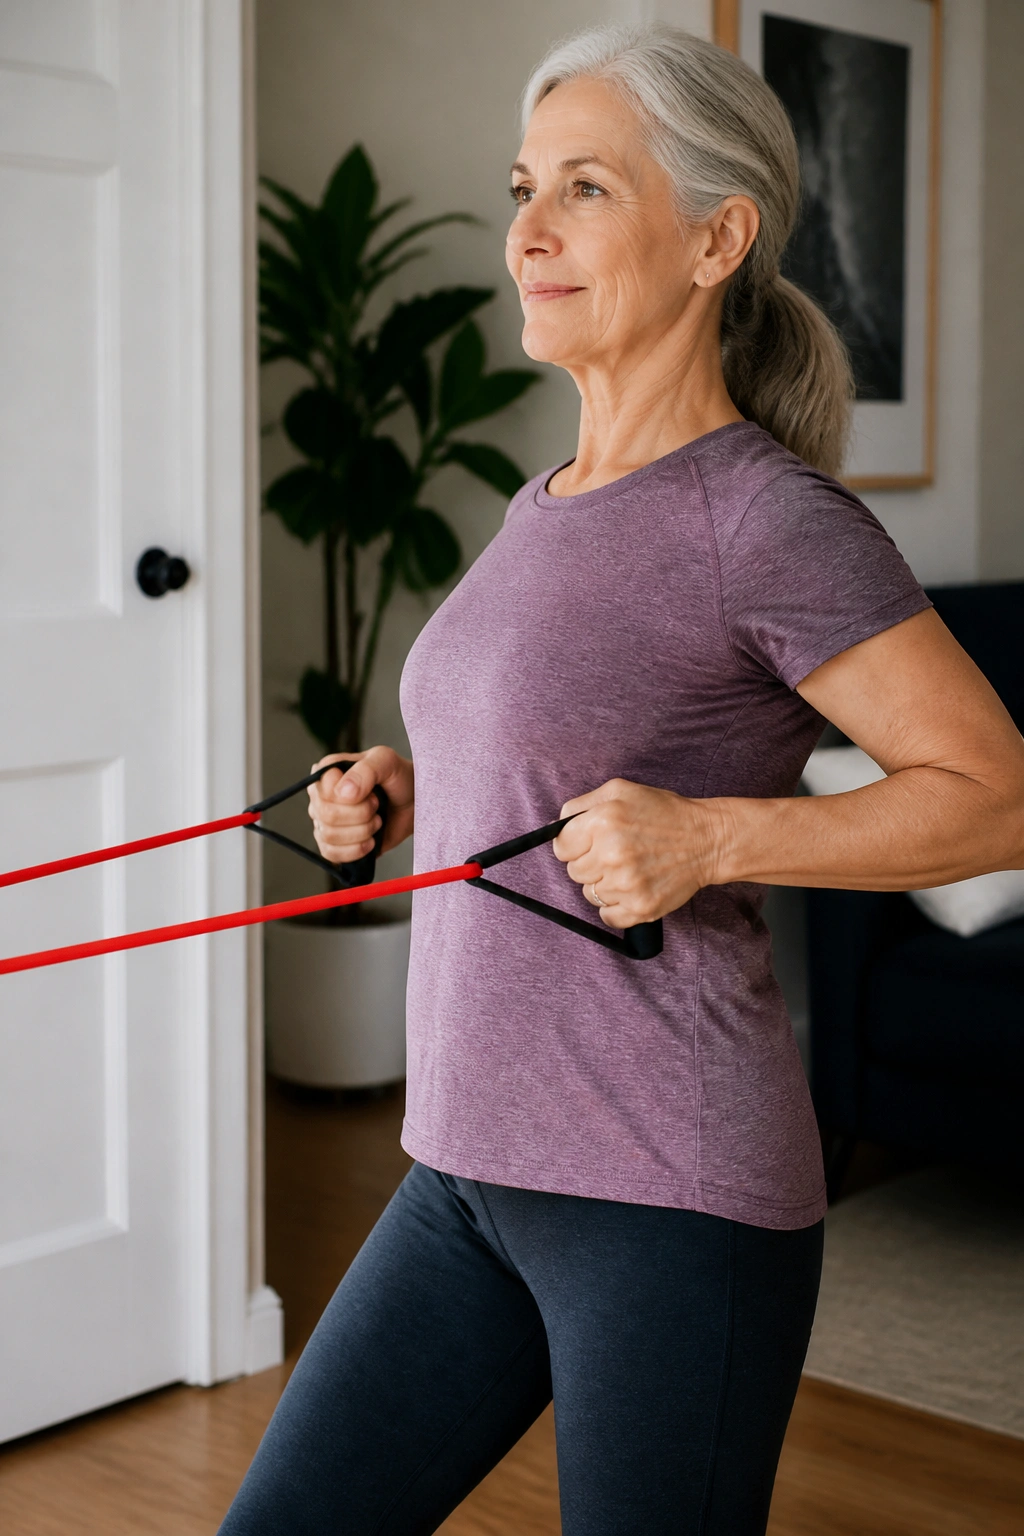
Posture is not about standing stiff. It is about having a back that can hold you up without a fight. Band rows train the upper back, rear shoulders, and the muscles between the shoulder blades, which helps the chest feel less collapsed.
Anchor a resistance band around a sturdy post or door anchor. Hold one end in each hand, start with arms extended, and pull the elbows back toward your ribs. Squeeze the shoulder blades together for a second, then return slowly.
A small detail matters here: keep the shoulders down as you row. If they creep up toward the ears, the neck gets involved and the whole thing turns into a shrug contest.
You can do this standing or seated. Seated rows are a smart option if standing for long periods feels tiring.
Two to three sets of 10 to 15 reps works well. Pick a band that makes the last few reps honest, but not ugly.
11. Supported Single-Leg Stand
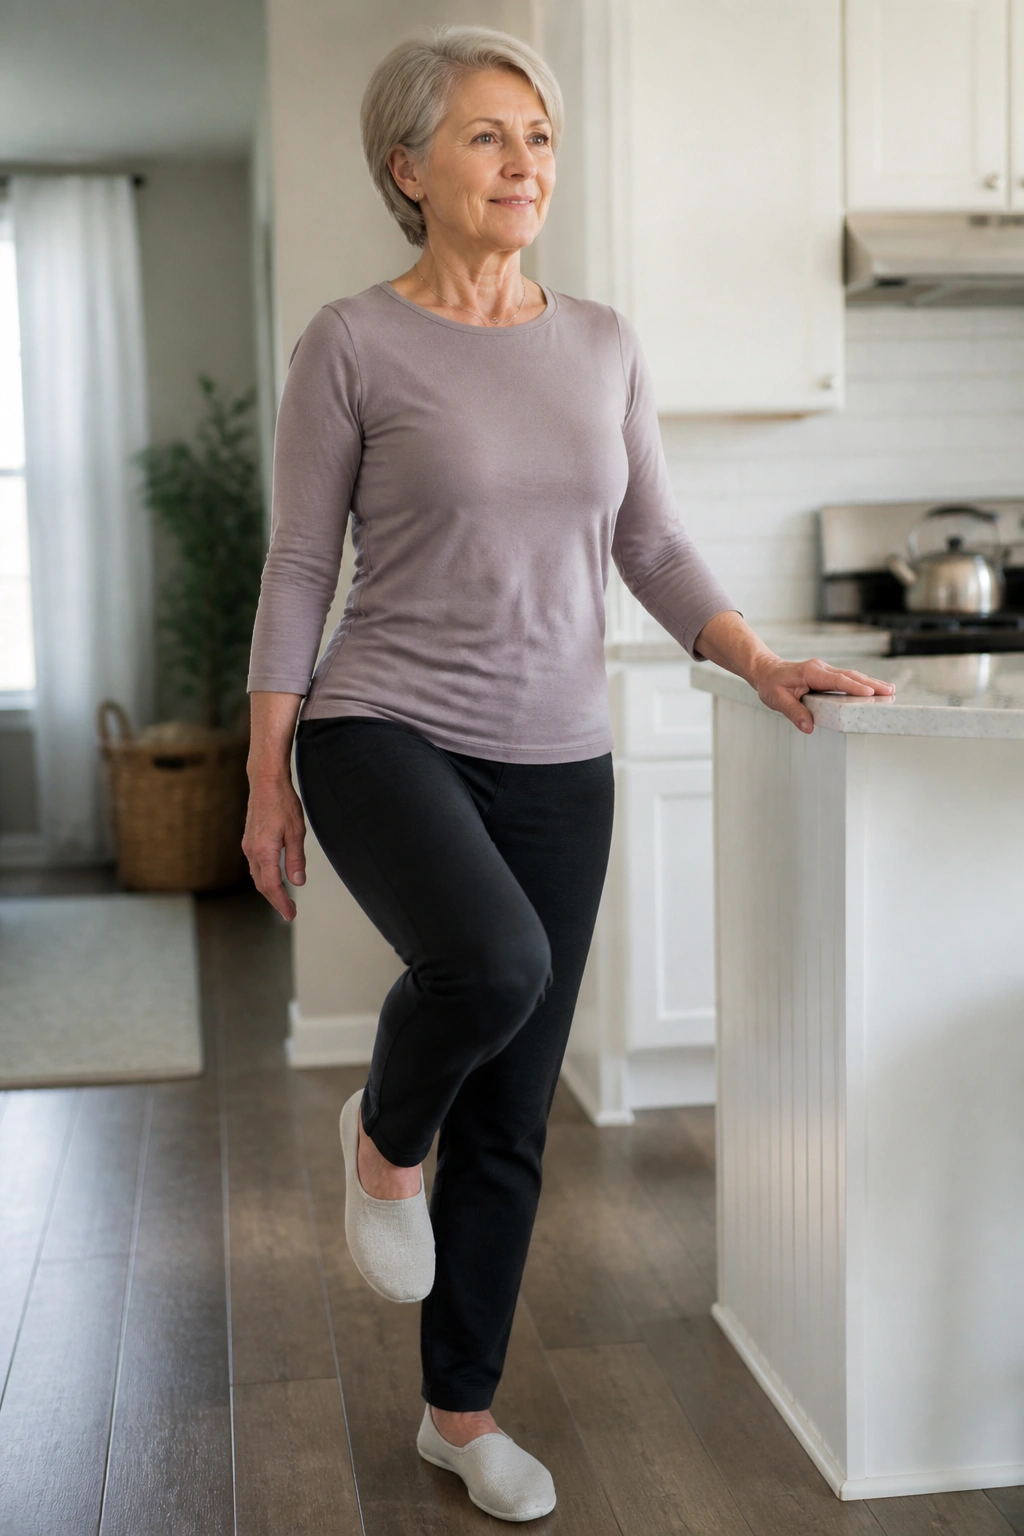
A single-leg stand looks simple until you try to hold it quietly. Then the ankle starts making tiny corrections, the foot wakes up, and the hip on the standing side has to keep the whole body from tilting.
Do this near a counter. Place one hand on the surface, lift one foot an inch or two off the ground, and hold. The standing knee should stay soft, not locked. Your eyes can stay forward on a fixed point.
Small Details That Matter
Keep the lifted foot relaxed. People often point the toes hard or curl the lifted leg awkwardly, and that does nothing useful. Quiet is better. Controlled is better.
- Hold 10 to 20 seconds per side.
- Repeat 3 to 5 times.
- Reduce hand support a little at a time.
- Switch sides instead of grinding through one leg.
- Stop if the standing ankle feels sharp or unstable.
The goal is not to win a one-legged contest. The goal is to make standing on one leg feel less strange.
12. Hip Hinge With a Broomstick
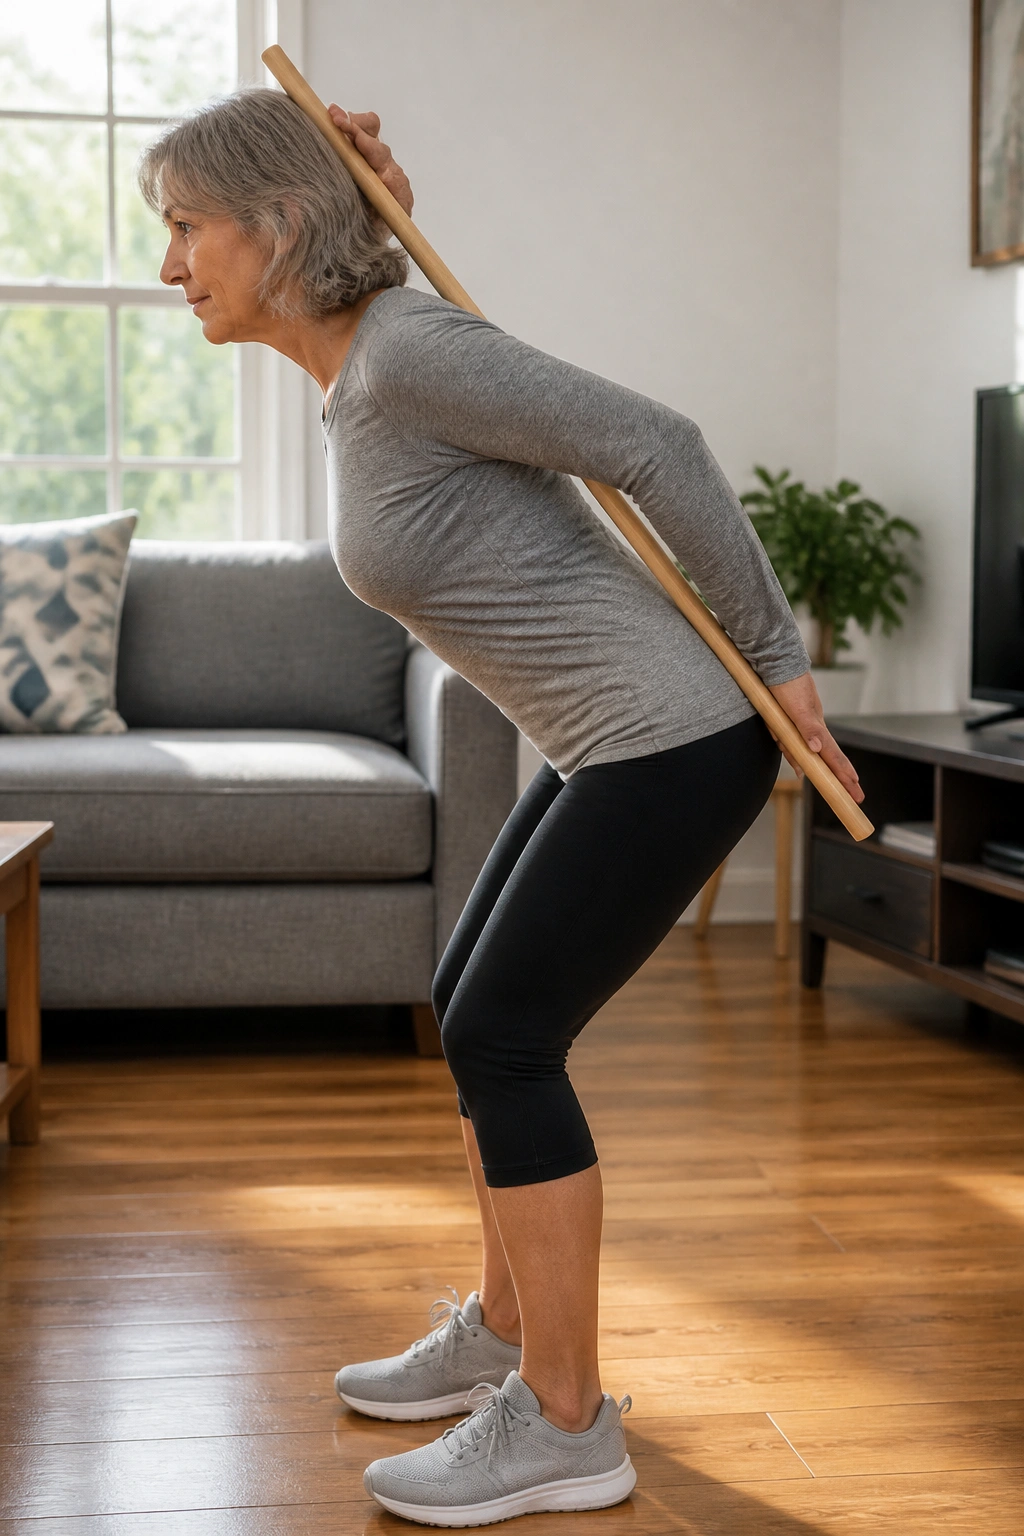
The hip hinge is one of the most useful movements on this list because it teaches you how to bend without collapsing. That matters when you pick up laundry, reach for the fridge, or lean over a sink.
Unlike a squat, the hinge sends the hips back while the spine stays long. That makes it a better drill for daily bending patterns. A broomstick or wooden dowel makes the shape easier to feel. Keep it touching the back of the head, upper back, and tailbone as you move.
Push the hips back, soften the knees, and stop when you feel the hamstrings stretch. Then stand by squeezing the glutes and driving the hips forward. The stick should stay in contact with all three points.
Use 6 to 10 slow reps. If the stick comes off the tailbone or the upper back rounds, shorten the range. A smaller hinge done well beats a bigger one done badly.
This is one of those exercises that pays you back when you least expect it. Groceries feel lighter. Reaching feels cleaner.
13. Seated Torso Rotation
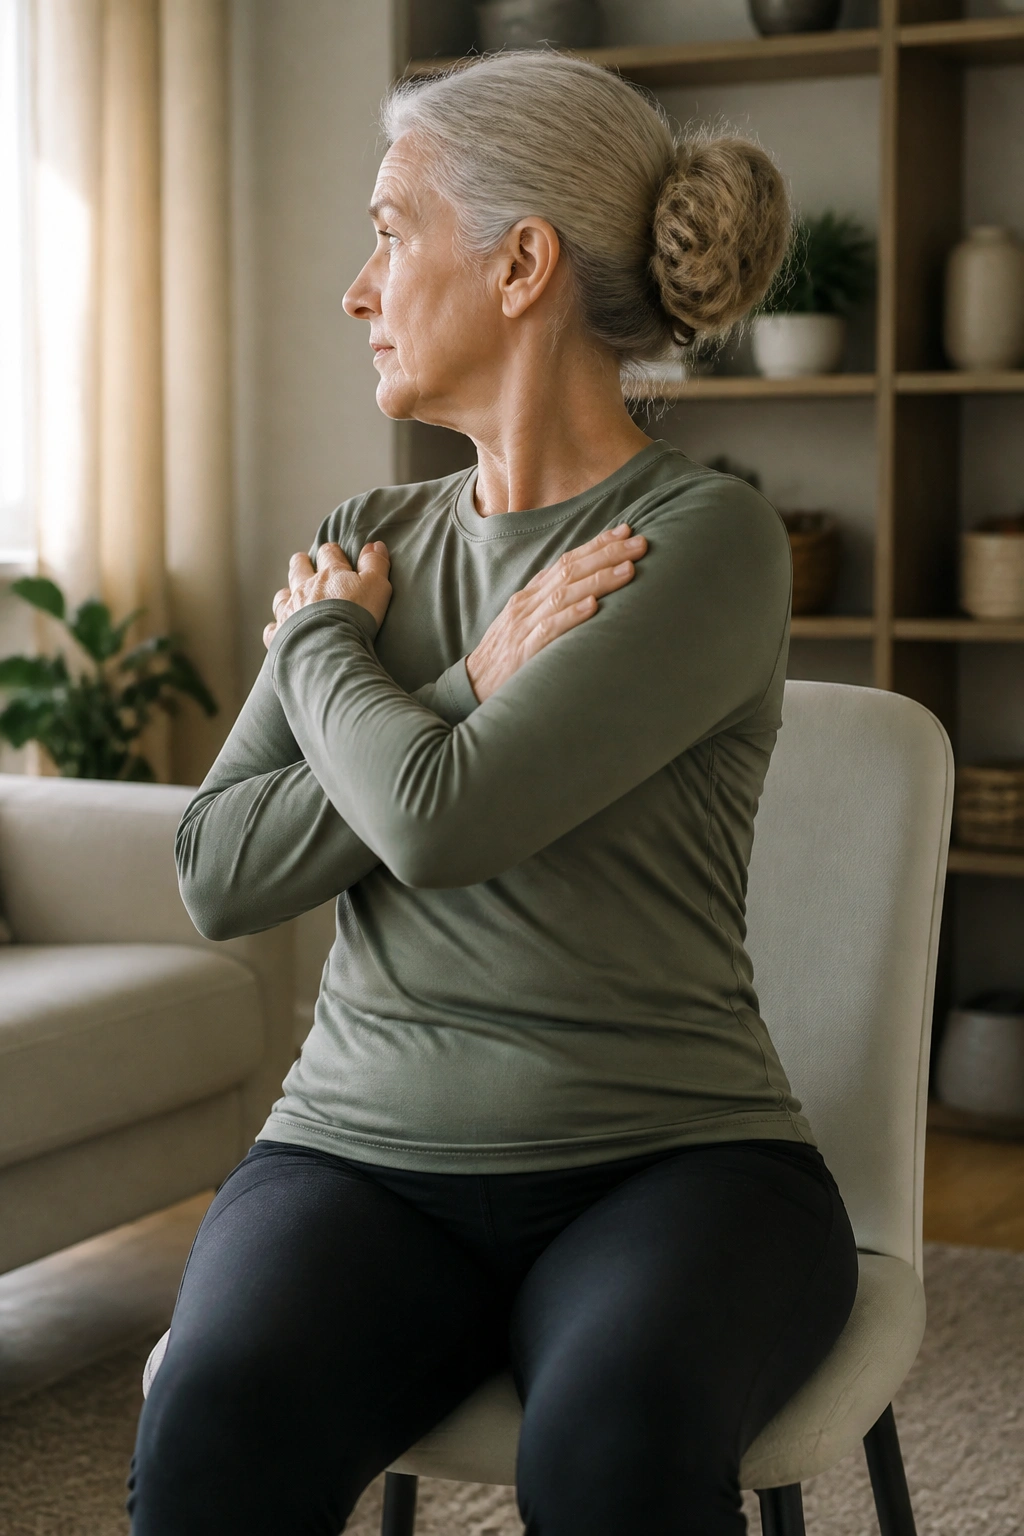
The ribs should move. Not wildly. Just enough to keep turning easy. Seated torso rotation helps with reaching, twisting, and looking over a shoulder without feeling stuck.
Sit tall in a chair with feet flat. Cross your arms over your chest or rest your hands lightly on your shoulders. Turn slowly to one side, breathe out, come back to center, then turn the other way. Keep the hips facing forward. The movement comes from the upper body, not from sliding the whole chair around.
If the lower back feels cranky, reduce the twist and make the motion smaller. There is no prize for cranking through end range.
A clean set is 6 to 8 reps per side. I like this one after a walk, because the torso often loosens up once the body has warmed a little.
One sentence says it best: rotate without yanking.
14. Overhead Reach and Side Bend
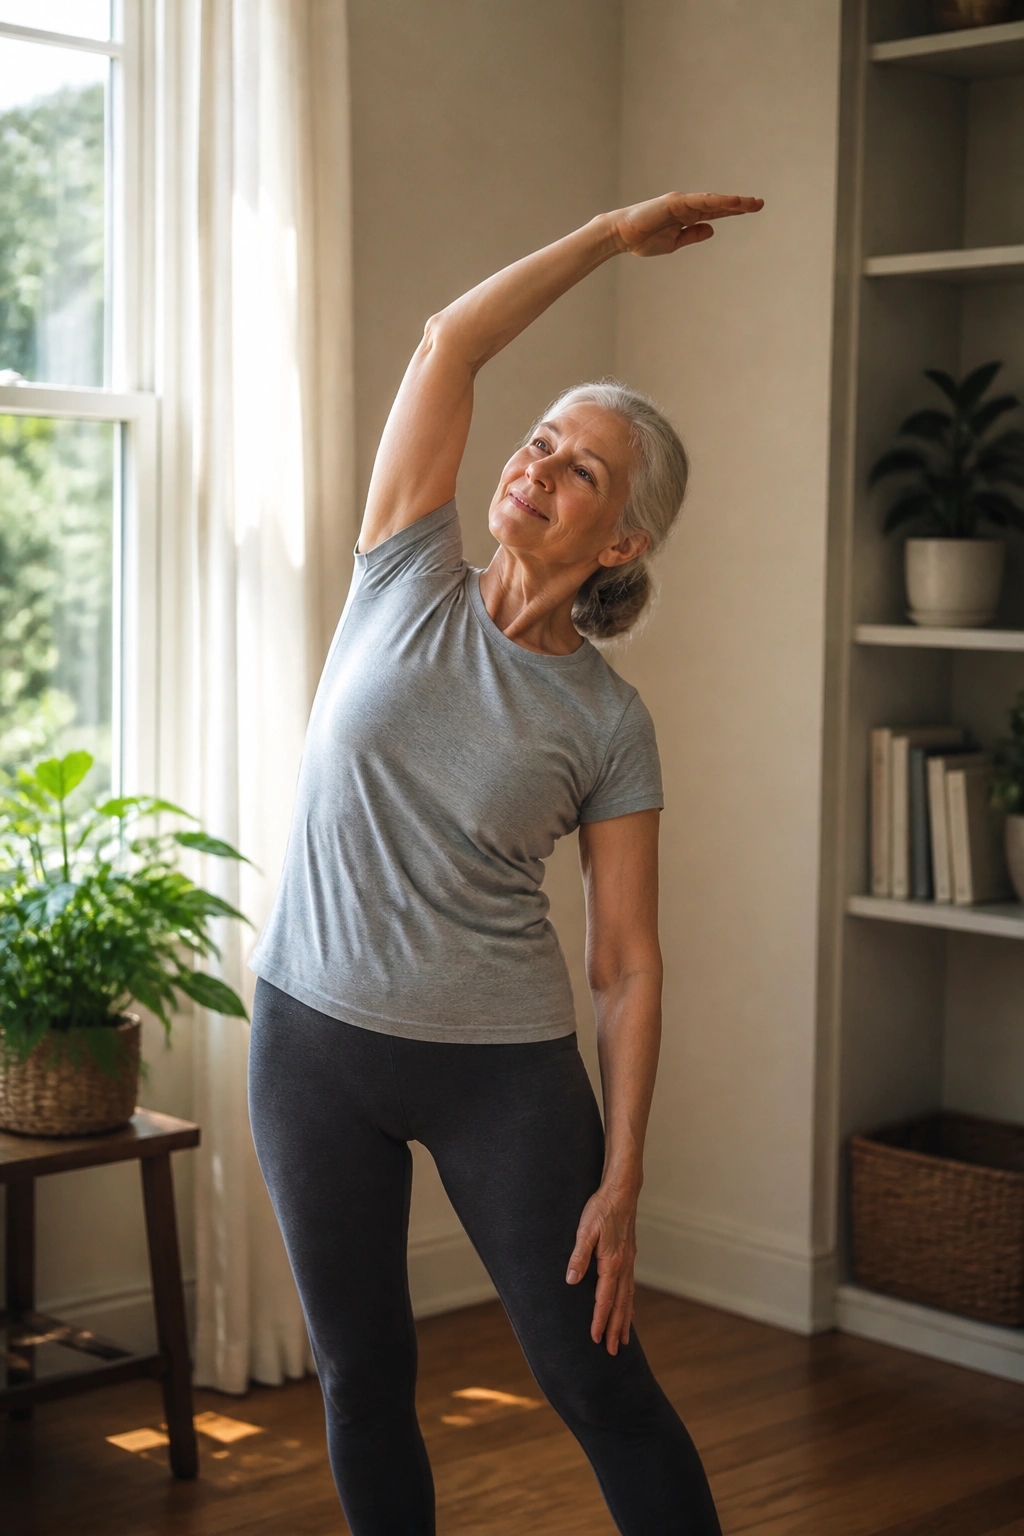
This move looks almost too easy, and that is part of why it gets skipped. The overhead reach and side bend opens the shoulders, ribs, and side body, which can make standing taller feel less forced.
Raise one arm overhead while the other hand slides down the side of the thigh. Then lean gently away from the raised arm. Come back to center and switch sides. Keep the shoulders down, especially on the reaching side.
Breathing matters here. A slow inhale on the way up and an exhale into the side bend can make the ribs move more freely. You do not need a giant stretch. A soft one is enough.
Do 5 to 8 repetitions per side. If the shoulder pinches overhead, keep the arm lower and reach out at a diagonal instead.
This drill is especially useful for people who spend too much time curled forward. And that includes a lot of us, not only older adults.
15. Side Steps With a Band
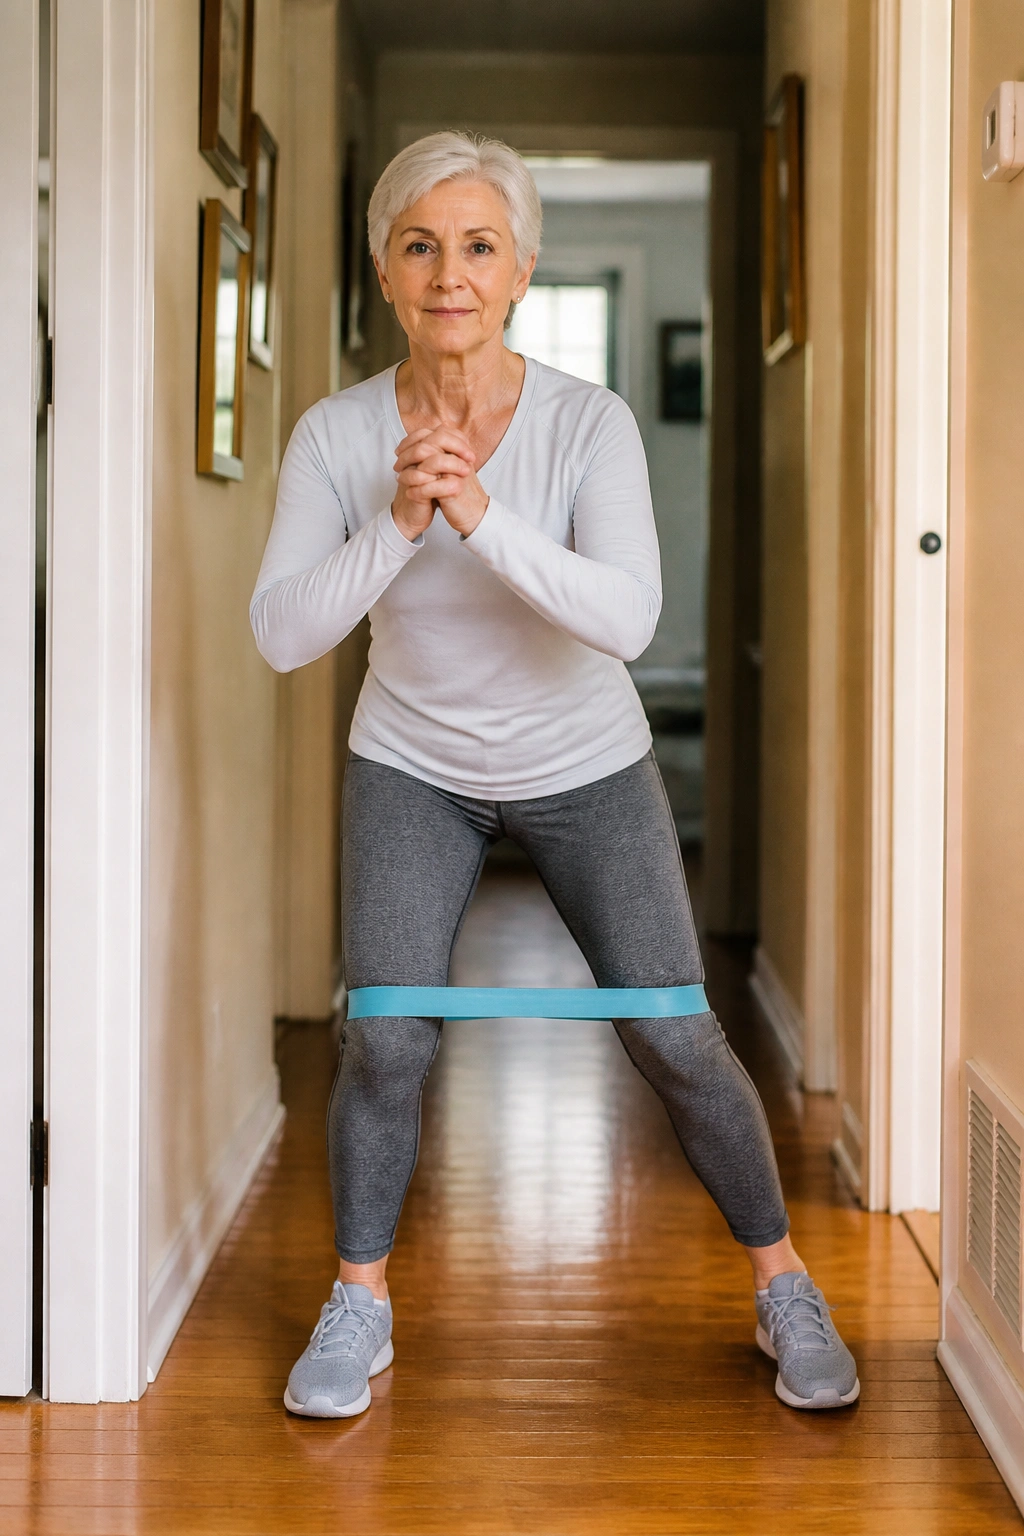
If you only walk forward, your hips miss a whole job. Side steps fix that. They train the muscles that keep the pelvis steady when you shift sideways, and that matters for stairs, curbs, and quick course corrections.
Loop a light band above the knees or around the ankles. Bend the knees a little, keep the feet parallel, and take small steps to the side without letting the knees cave inward. Stay low enough to feel the hips working, but not so low that the back takes over.
How to Get the Most From It
Keep the steps short and controlled. Big steps often turn sloppy fast.
- Step 6 to 10 times in one direction.
- Pause, then come back the same way.
- Keep your toes pointed forward.
- Stay out of the knees by keeping pressure in the heels and midfoot.
- Use no band at first if balance feels shaky.
A band that is too stiff can turn this into a fight. Start light. The outer hips should feel awake, not angry.
16. Ankle Circles and Foot Alphabet
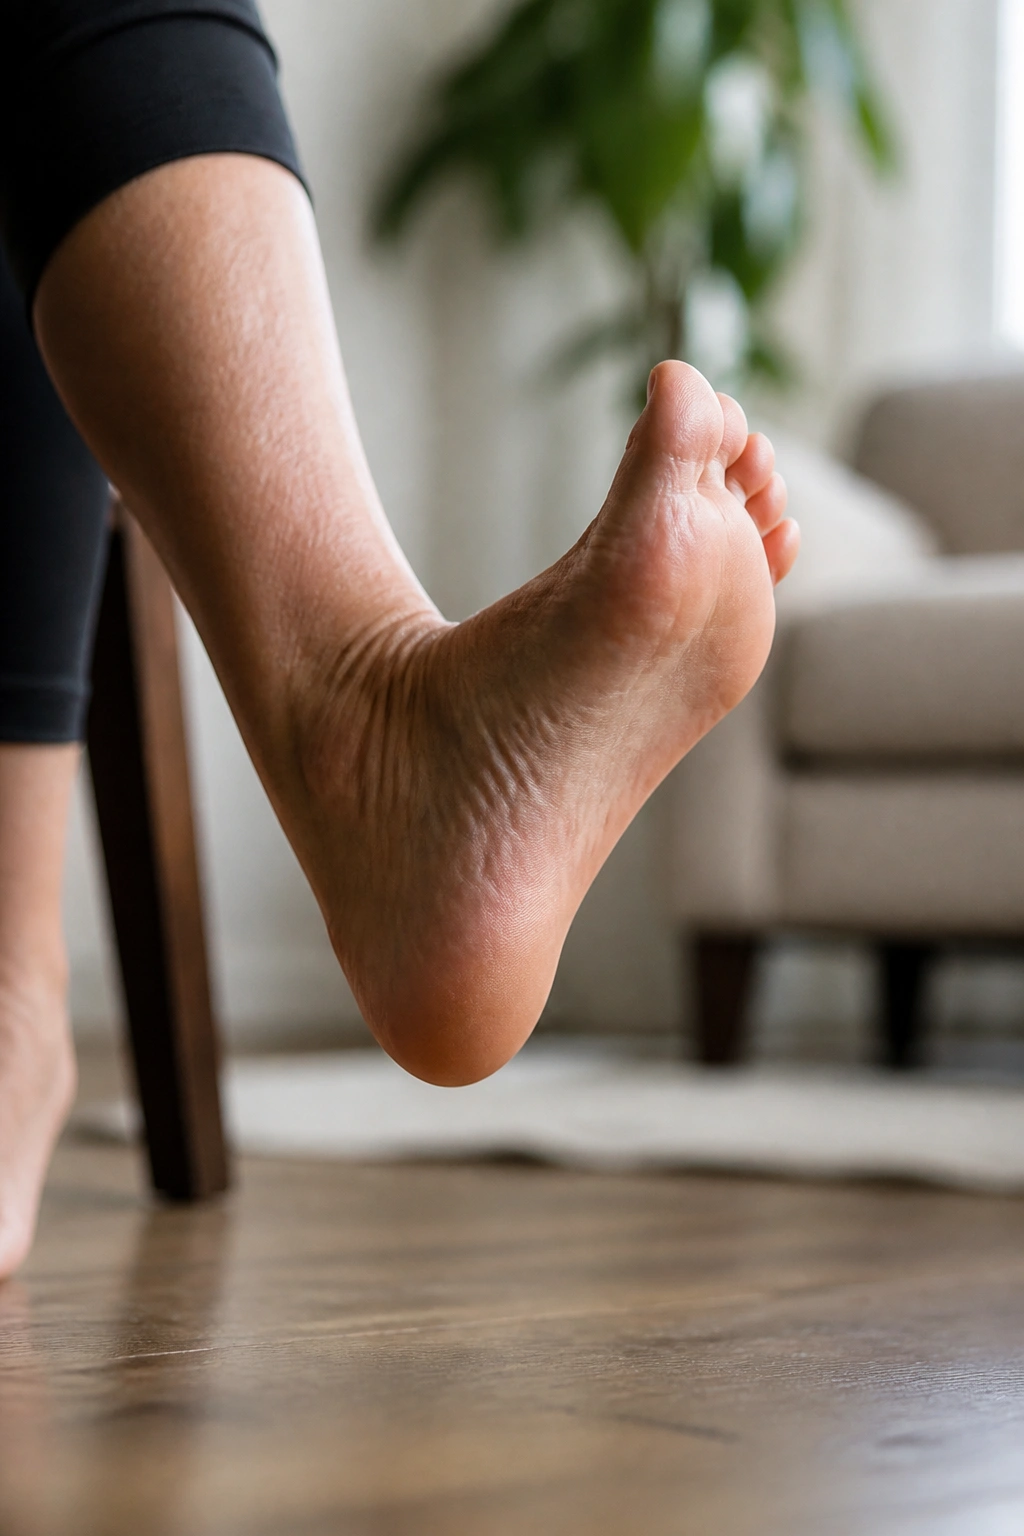
Ankle circles are not glamorous. They are useful anyway. The ankle is the first line of balance on the ground, and if it gets stiff, the whole walk starts to look stiff too.
Sit in a chair or on the edge of a bed. Lift one foot a few inches and circle the ankle slowly in one direction, then the other. After that, trace the alphabet in the air with your toes. The letters do not need to be neat. They need to be deliberate.
This is a great warm-up before standing drills or a gentle finish after a walk. It also helps if your feet tend to feel puffy or tight after long periods of sitting.
- Do 5 circles each way.
- Trace the full alphabet once per foot.
- Move slowly enough to feel the joint.
- Point and flex after the circles.
- Repeat on both sides.
A small joint can make a large difference. Strange, but true.
17. Farmer Carry With Light Weights
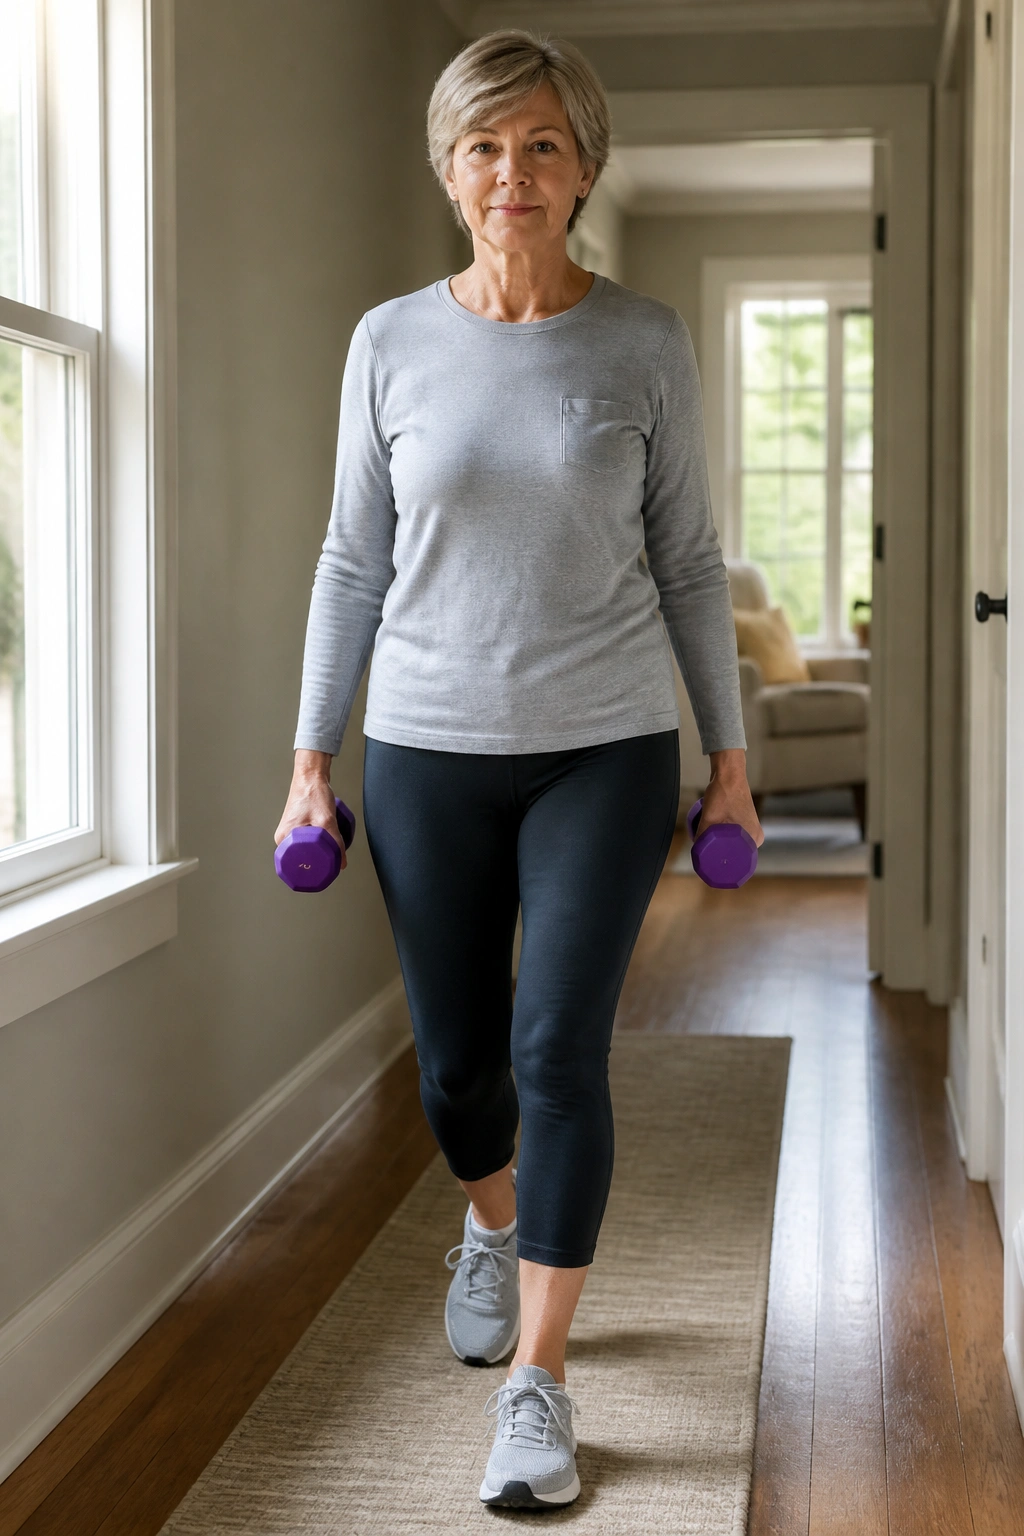
Farmer carries are one of the most honest strength moves you can do. Pick up a weight, hold it, and walk. That’s it. The catch is that your grip, shoulders, trunk, and legs all have to cooperate while you move.
Use light dumbbells, grocery bags, or water jugs. Stand tall, shoulders relaxed, and walk in a straight line for 20 to 40 steps. Don’t lean to one side. Don’t let the head drift forward. Keep the steps smooth and unhurried.
Unlike arm raises or machine work, the carry teaches the body to stabilize while moving, which is closer to real life than a lot of gym work. Carrying laundry, dog food, or a heavy bag from the car all feel a little easier when this drill is in the mix.
Start with 2 to 4 passes. If both hands feel too easy, try a suitcase carry with one weight in one hand only. That adds a balance challenge fast.
18. Standing Pallof Press
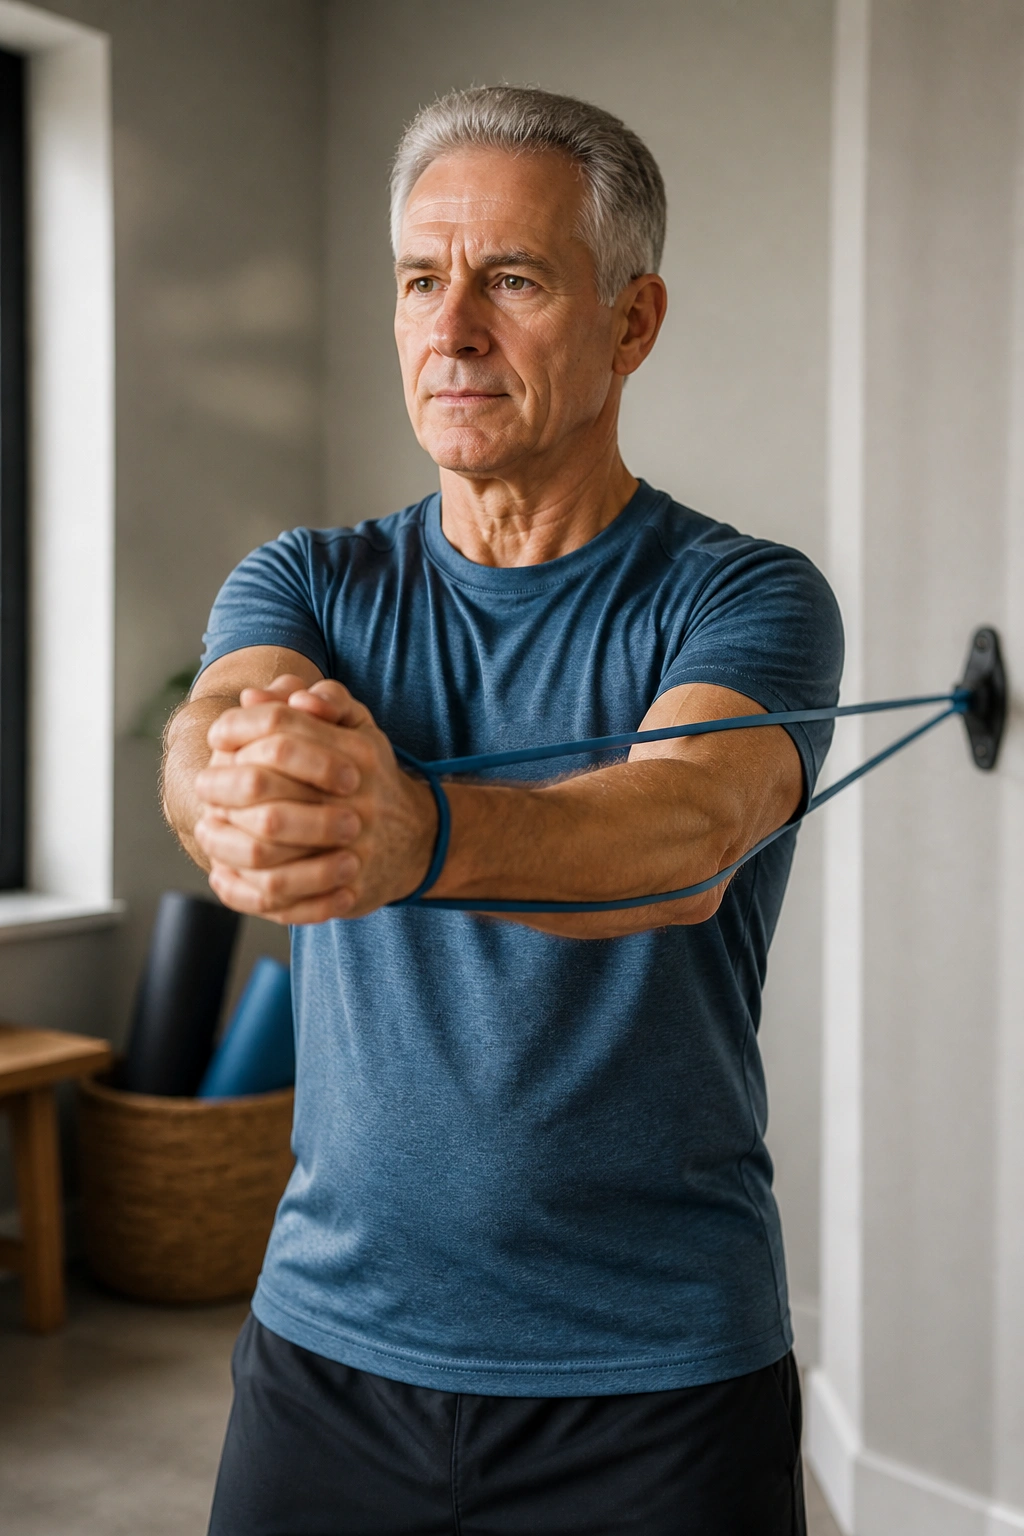
The Pallof press is one of my favorite quiet strength drills. It teaches the torso to resist twisting, and that matters for balance whenever the body turns, reaches, or carries a load.
Anchor a band to the side at chest height. Stand with feet hip-width apart, hold the band at the chest, then press it straight out and bring it back in. The band will try to rotate you. Your job is to stay square.
Why It Helps Balance
Balance is not only about standing on one foot. It is also about keeping the trunk steady while the arms and legs move. This drill trains that skill in a clean way.
- Do 8 to 12 presses per side.
- Keep the ribs stacked over the hips.
- Avoid twisting toward the anchor.
- Breathe out as you press.
- Use a lighter band if the body sways.
You can make this harder by standing in a split stance or by holding the press out for 2 to 3 seconds. No need to rush there. Clean reps beat shaky ones every time.
Final Thoughts
A good routine does not need eighteen exercises at once. Three or four from this list, done with care, can do more for daily movement than a long session you never repeat.
Pick one move for strength, one for mobility, and one for balance. Then keep the setup simple enough that you’ll actually do it. A chair by the wall, a band in a drawer, a pair of light weights by the couch — that’s enough to get rolling.
The best part is how ordinary these drills feel once they become familiar. Ordinary is a compliment here. It means the body has stopped making a fuss over the basics.
