



Most people assume that building leg strength requires a heavy barbell, a squat rack, and a spotter standing by just in case things go wrong. While heavy compound lifting has its place, it is not the only path to a stronger, more resilient lower body. Resistance loops, or mini-bands, offer something that iron often misses: constant, unrelenting tension through the entire range of motion. When you squat with a barbell, the bottom of the movement is often where you have the least resistance. With a loop band, that resistance stays active, forcing your stabilizer muscles to fire from the first inch to the last.
This isn’t just about making a workout harder; it is about filling in the gaps. Many of us suffer from “glute amnesia”—a state where our posterior chain remains chronically underactive because we spend too much time sitting. Loop bands force these muscles to wake up. They encourage better tracking of the knees, improve hip stability, and add a layer of metabolic stress that can leave your legs feeling jelly-like in a fraction of the time. You do not need thousands of dollars in gym equipment. You just need a high-quality latex or fabric band and a bit of focus on your form.
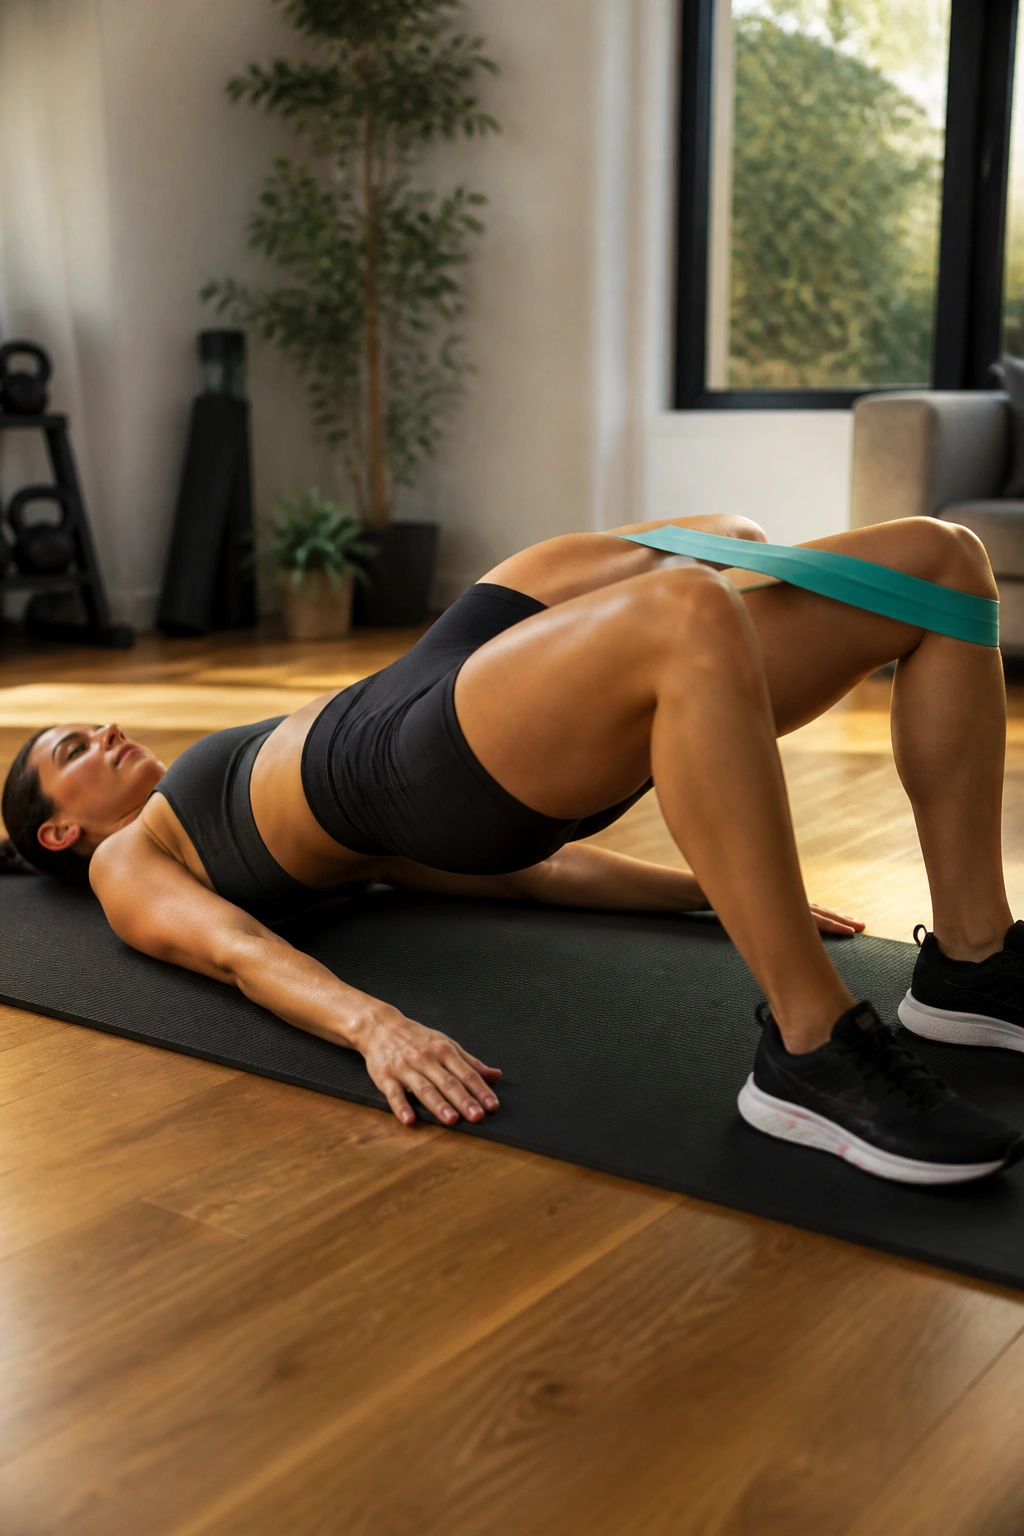
1. Glute Bridges with Abduction
The classic glute bridge is a fundamental movement, but wrapping a resistance band just above your knees changes the physics entirely. By placing the band here, you are forced to actively push your knees outward throughout the entire bridge. This recruits the gluteus medius, the smaller muscle on the side of your hip that is responsible for pelvic stability.
Why This Matters
If your knees cave inward during a squat, you likely have weak hip abductors. This exercise isolates that weakness. You aren’t just driving your hips toward the ceiling; you are simultaneously fighting the band’s urge to pull your knees together. That duality—the vertical thrust and the horizontal resistance—is what makes this a powerhouse movement for glute development.
How to Execute
Lie flat on your back, knees bent, feet hip-width apart, and the band positioned two inches above your knees. Drive through your heels to lift your hips until your body forms a straight line from shoulders to knees. At the very top, pause for two seconds and push your knees out against the band. Feel the outer hips light up. Lower slowly, maintaining tension on the band even on the descent. If you drop the hips too fast, you lose the primary benefit of the eccentric load.
Pro-Tip: Do not let your lower back take over the work. If you feel this in your lumbar spine, tuck your pelvis slightly—think about pulling your ribcage down toward your belly button—before you even start the lift.
2. Lateral Walks
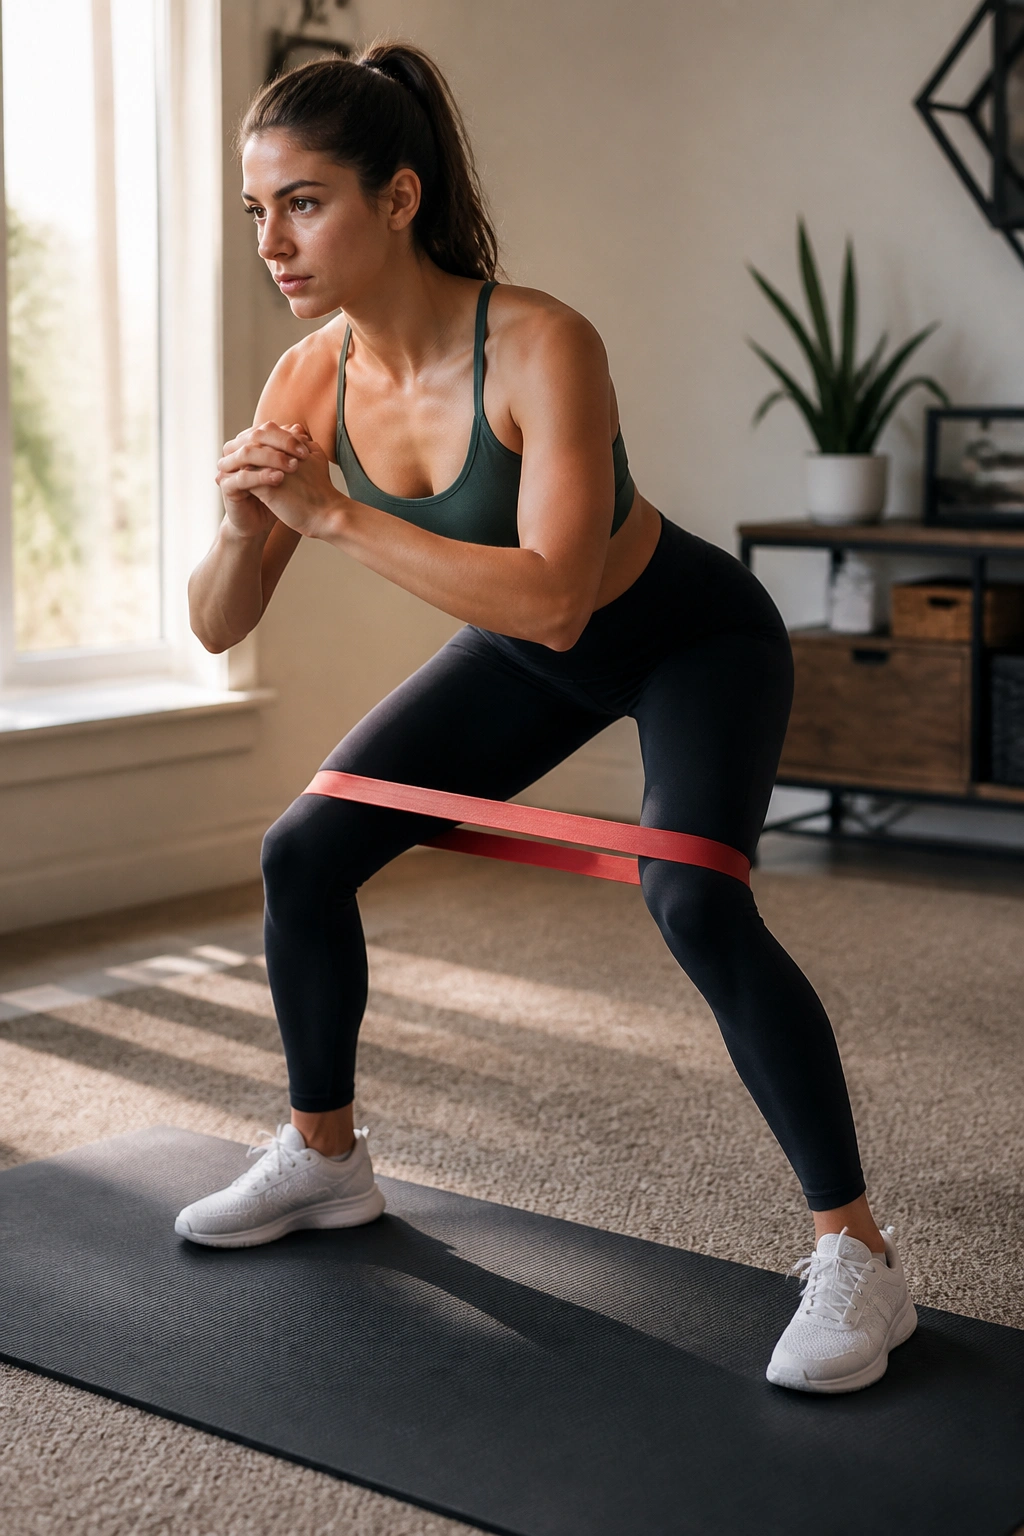
This is the “bread and butter” of loop band work. Lateral walks, often called monster walks, look simple, but they are notoriously difficult when performed with slow, deliberate control. The goal here is to keep constant tension on the band so the outer glutes never get a moment of rest.
The Mechanism of Action
When you step sideways, your lead leg is performing abduction (moving away from the centerline), while the trailing leg acts as a stabilizer. By maintaining a half-squat position throughout the movement, you are forcing the glutes to stay in a shortened, contracted state. This prevents them from relaxing at the top of the step.
Avoiding Common Errors
The biggest mistake people make with lateral walks is allowing their feet to drag or letting the knees collapse inward. If your feet are too close together, the band slackens, and the work stops. Keep your feet at least shoulder-width apart, even at the center of the movement. Take small, controlled steps—do not lunge or jump. Your hips should stay at the same level throughout the entire set. If you are bobbing up and down, your core is disengaging.
3. Clamshells
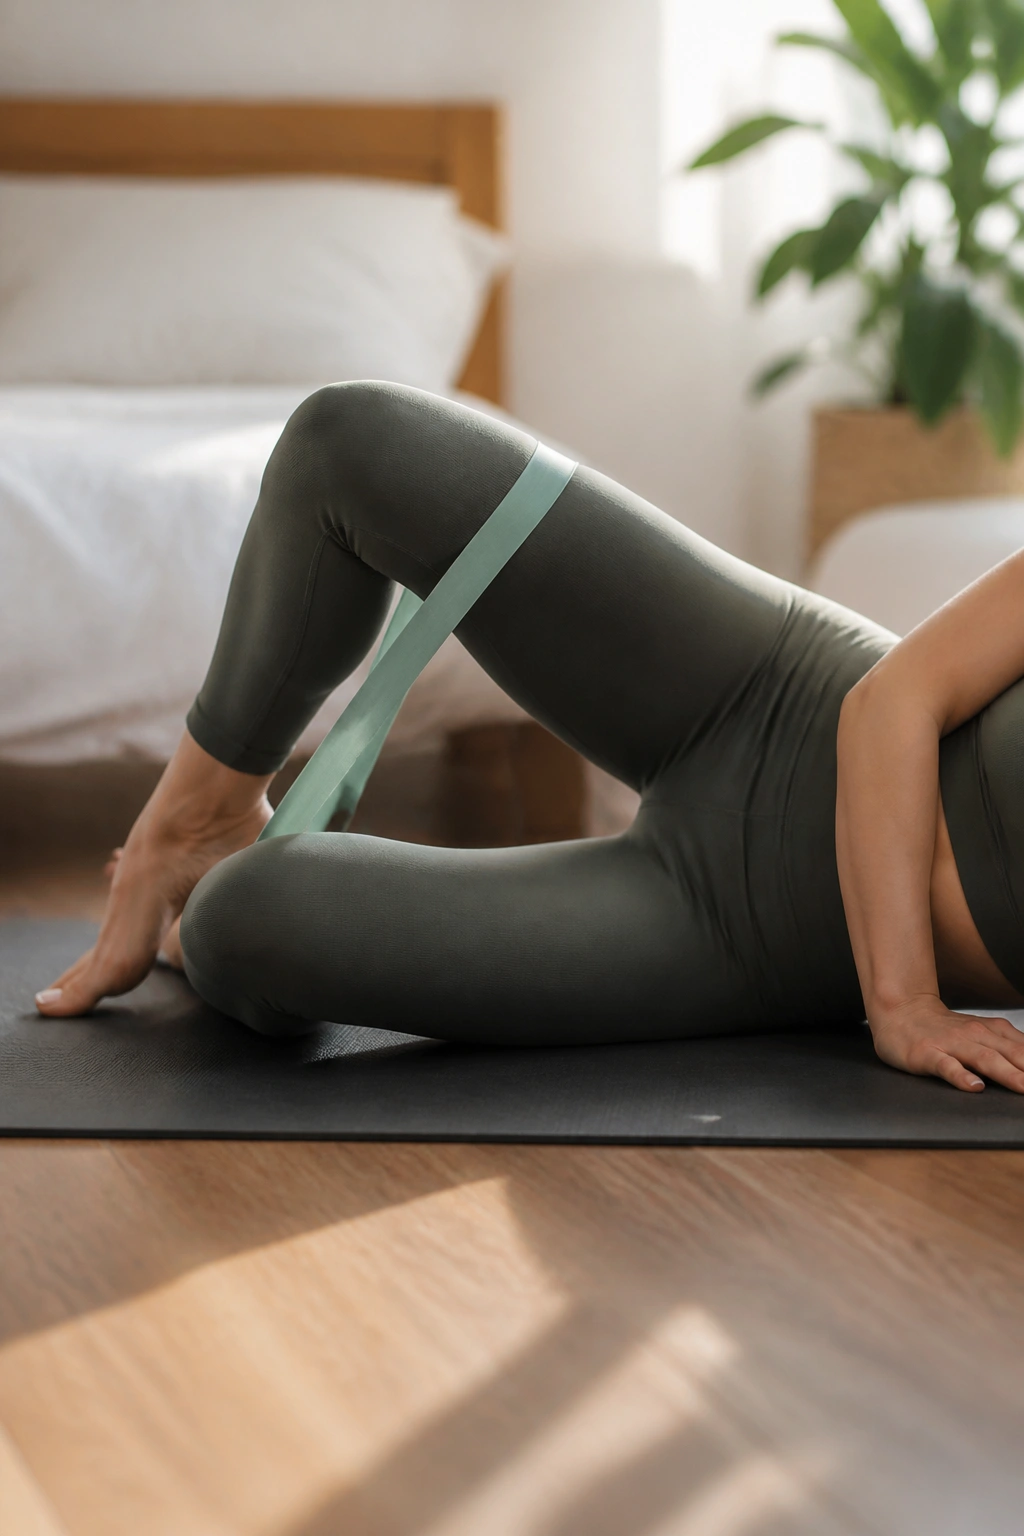
Clamshells are often dismissed as a “rehab” exercise for physical therapy, but that is a mistake. When performed with a heavy-resistance band, they are a formidable challenge for hip health and glute isolation. This movement targets the deep external rotators and the gluteus medius with pinpoint accuracy.
Mastering the Form
Lie on your side, knees bent at a 45-degree angle, with the band just above your knees. Keep your feet touching throughout the entire movement. Open your top knee as far as you can without letting your torso roll backward. Your hips must remain stacked directly on top of one another. If you roll back to gain range of motion, you are cheating the muscle out of the isolation it needs.
The “Burn” Factor
You should feel this in the meaty part of your upper glute, right near the hip joint. If you feel it in the front of your hip or your lower back, adjust your stance. The key is the squeeze at the peak of the opening. Hold that open position for a full second, feeling the intense contraction, before slowly returning the knee to the starting position. Treat this as a slow, controlled movement—not a frantic set of repetitions.
4. Banded Squats
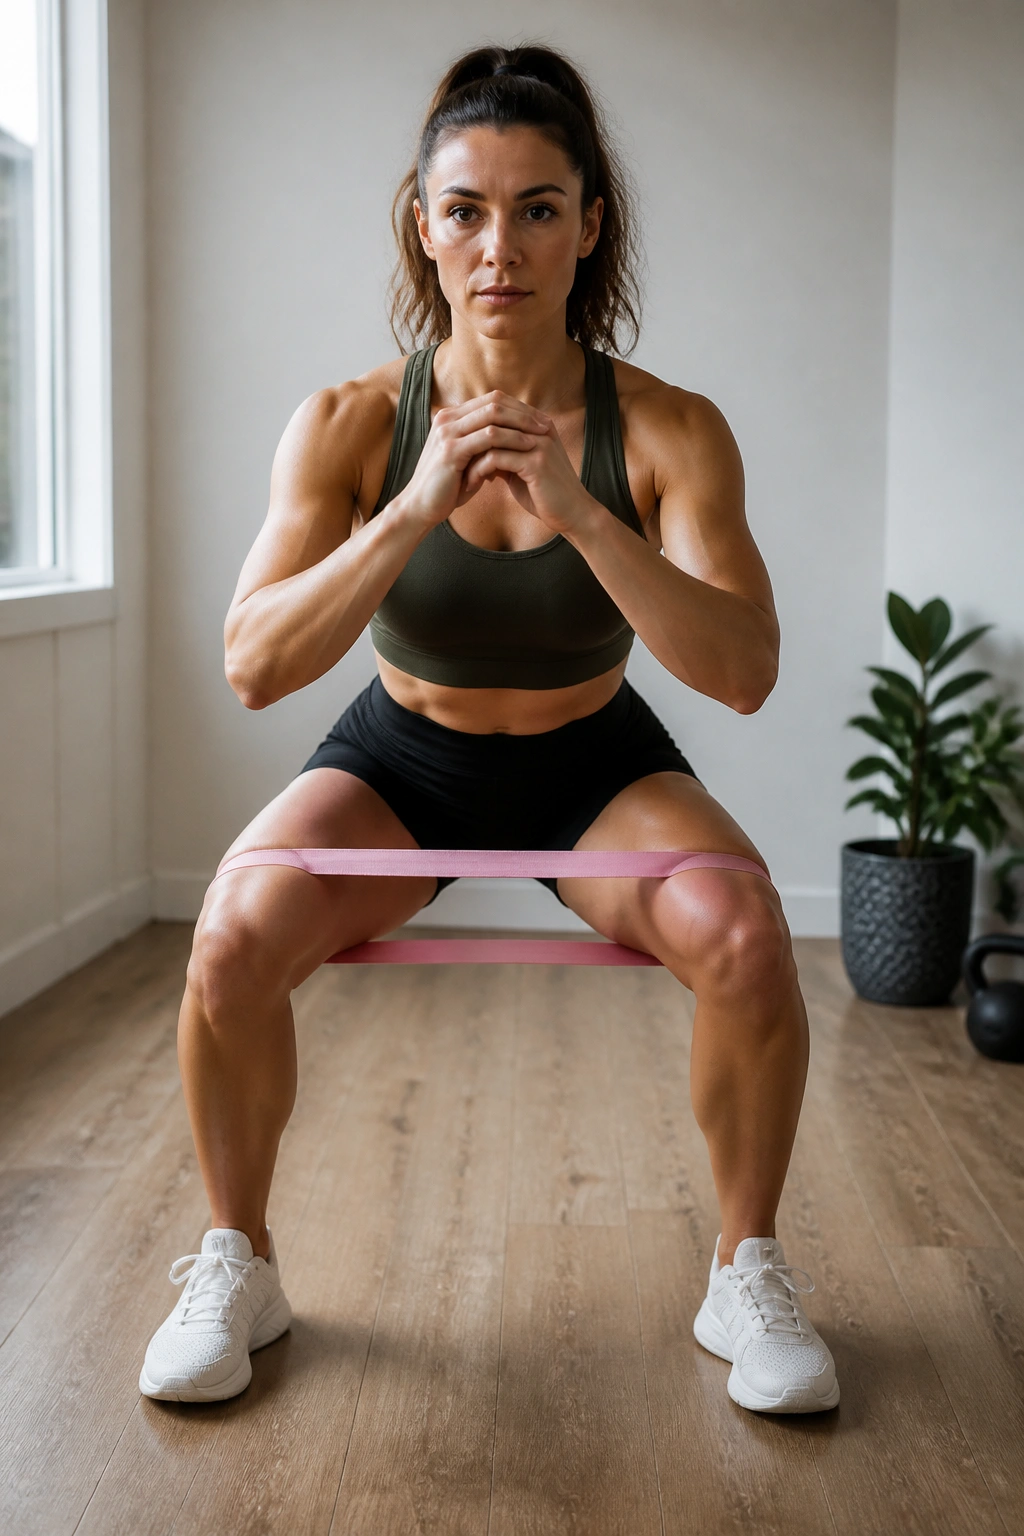
Adding a loop band to a standard squat turns a generic leg exercise into an active correction tool. The band forces your knees to track outward, which is the gold standard for squat mechanics. It prevents the dreaded “valgus collapse,” where knees cave in under load, which is a major contributor to knee pain.
Why This Works
The band provides a constant, external cue to “spread the floor.” By trying to push your knees out against the resistance, you naturally create more torque in the hips and stabilize the entire lower body. This allows you to sit deeper into the squat while maintaining a more upright torso. You aren’t just moving weight; you are building an automatic habit of perfect knee alignment.
Execution Details
Place the band just above the knees or around the ankles. If the band is at the ankles, the resistance is higher, but the cue to keep the knees out is less direct. Keep the band just above the knees for the best form correction. Keep your chest up, drive your hips back as if sitting into a chair, and ensure your knees stay in line with your toes from the very first inch to the bottom of the movement.
5. Glute Kickbacks
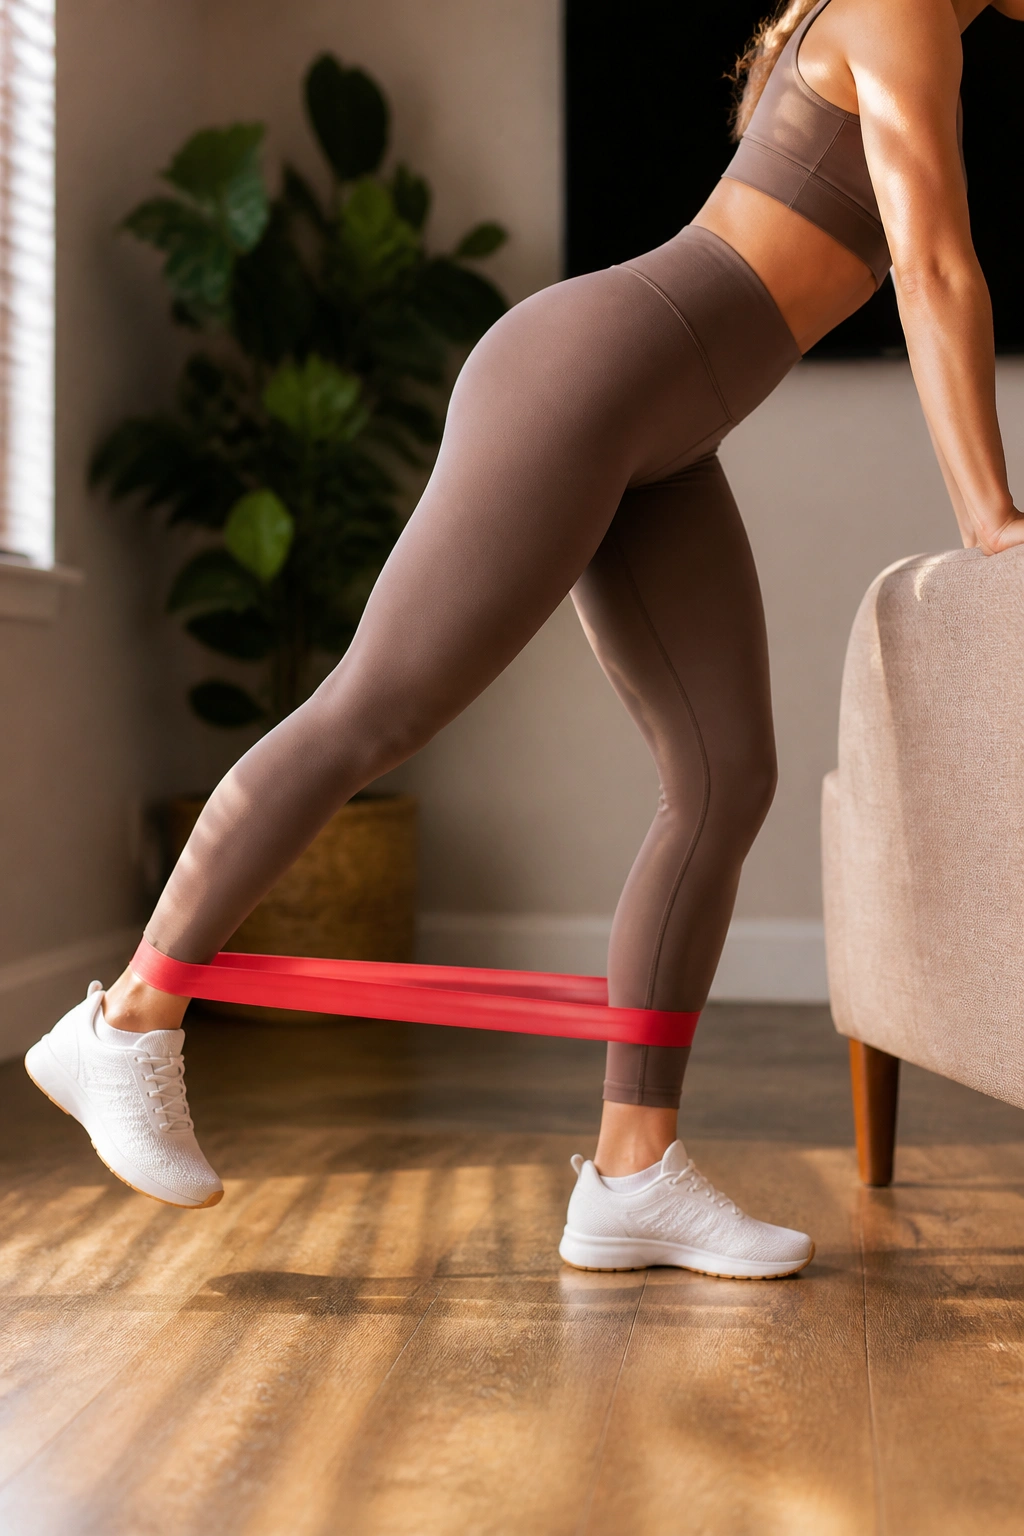
Standing glute kickbacks focus on the extension of the hip. Because the band provides resistance in the horizontal plane, it adds a challenge that gravity alone cannot replicate. You are working against the band to pull your leg backward, maximizing the contraction of the gluteus maximus.
Getting the Setup Right
Stand upright, band around your ankles. Shift your weight onto your left leg, maintaining a slight bend in the knee for stability. Use a wall or a sturdy chair for balance if you need it. From here, slowly extend your right leg straight back. Do not swing the leg—control the movement both backward and forward.
Key Nuance
The range of motion for a kickback is naturally small. You do not need to kick your leg up toward the ceiling. In fact, if you kick too high, your lower back will arch, and you will lose the glute contraction. Focus on squeezing the glute at the peak of the extension. Imagine you are trying to push a heavy door closed with your heel. That intent changes the muscle recruitment entirely.
6. Donkey Kicks
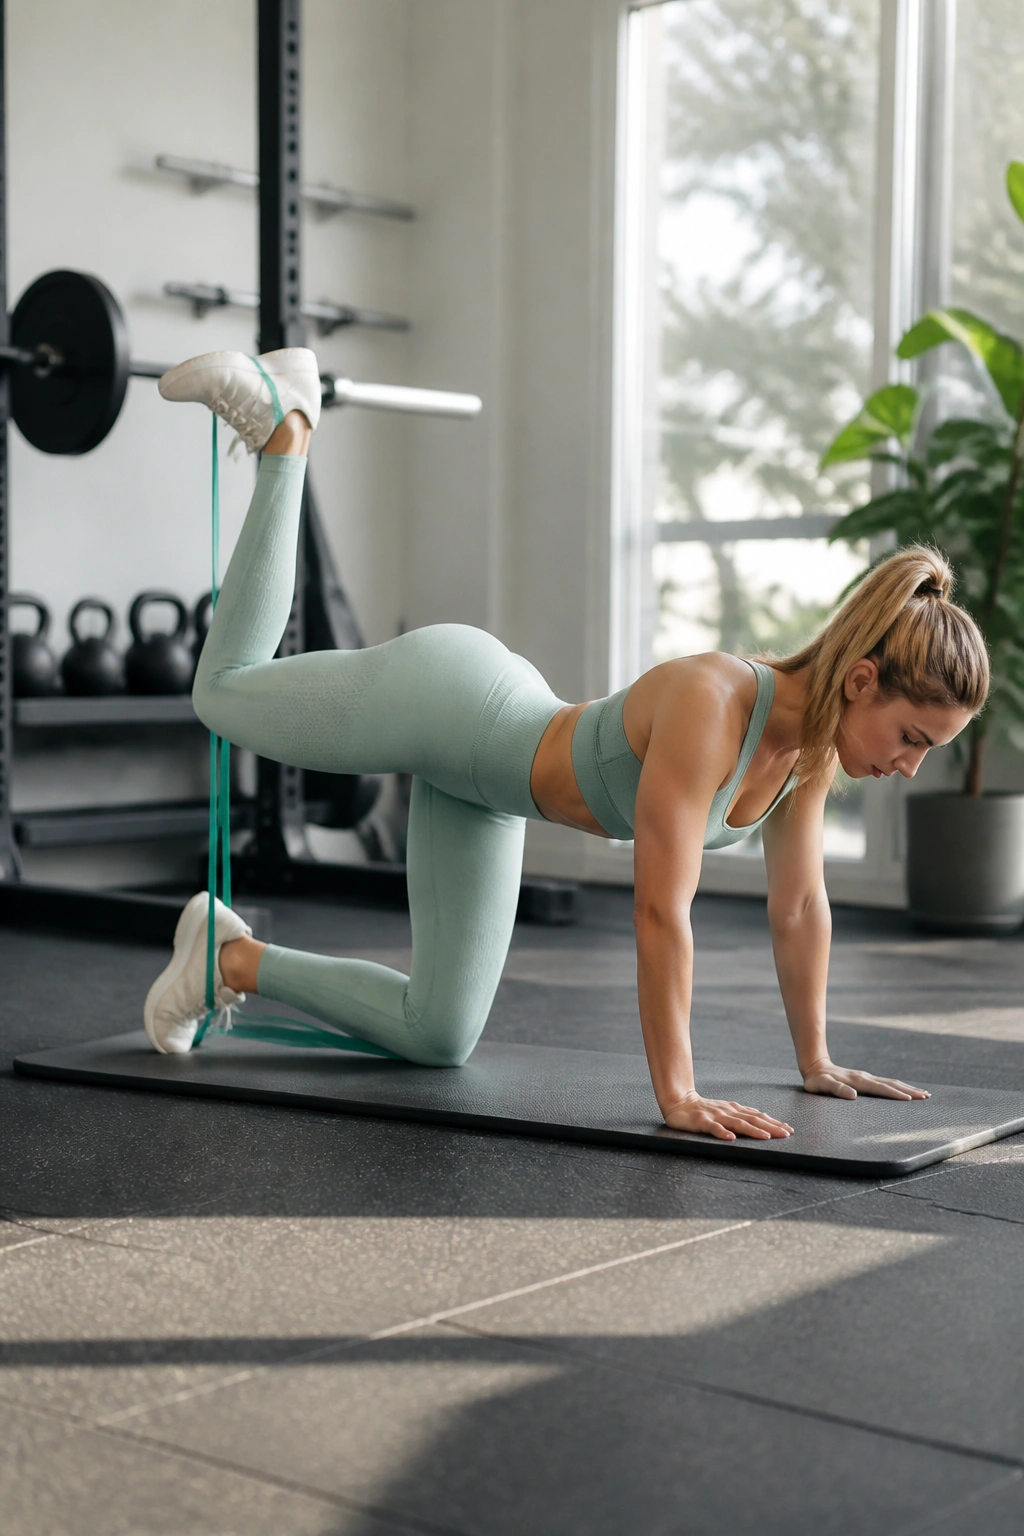
Donkey kicks are the ultimate way to target the gluteus maximus without putting stress on the lower back, provided you keep your core tight. The band adds resistance to the movement, making it much more than just a bodyweight drill.
The Importance of the Core
Get into a tabletop position—hands under shoulders, knees under hips—with the band around your feet. One end of the band should be mid-foot on the working leg, the other just above the knee on the stationary leg. Push your foot toward the ceiling, keeping your knee at a 90-degree angle. The most critical part of this movement is keeping your spine in a neutral, flat position.
Avoiding “Swing”
Many people use momentum to kick the leg up. Avoid this. You want to move with intention. Feel the glute stretching as your knee comes down, and feel it contracting as you push up. If you start to sway your hips to get your leg higher, stop. Lower the range of motion and refocus on engaging the glute directly. The target is the muscle, not the height of the kick.
7. Romanian Deadlifts (RDLs)
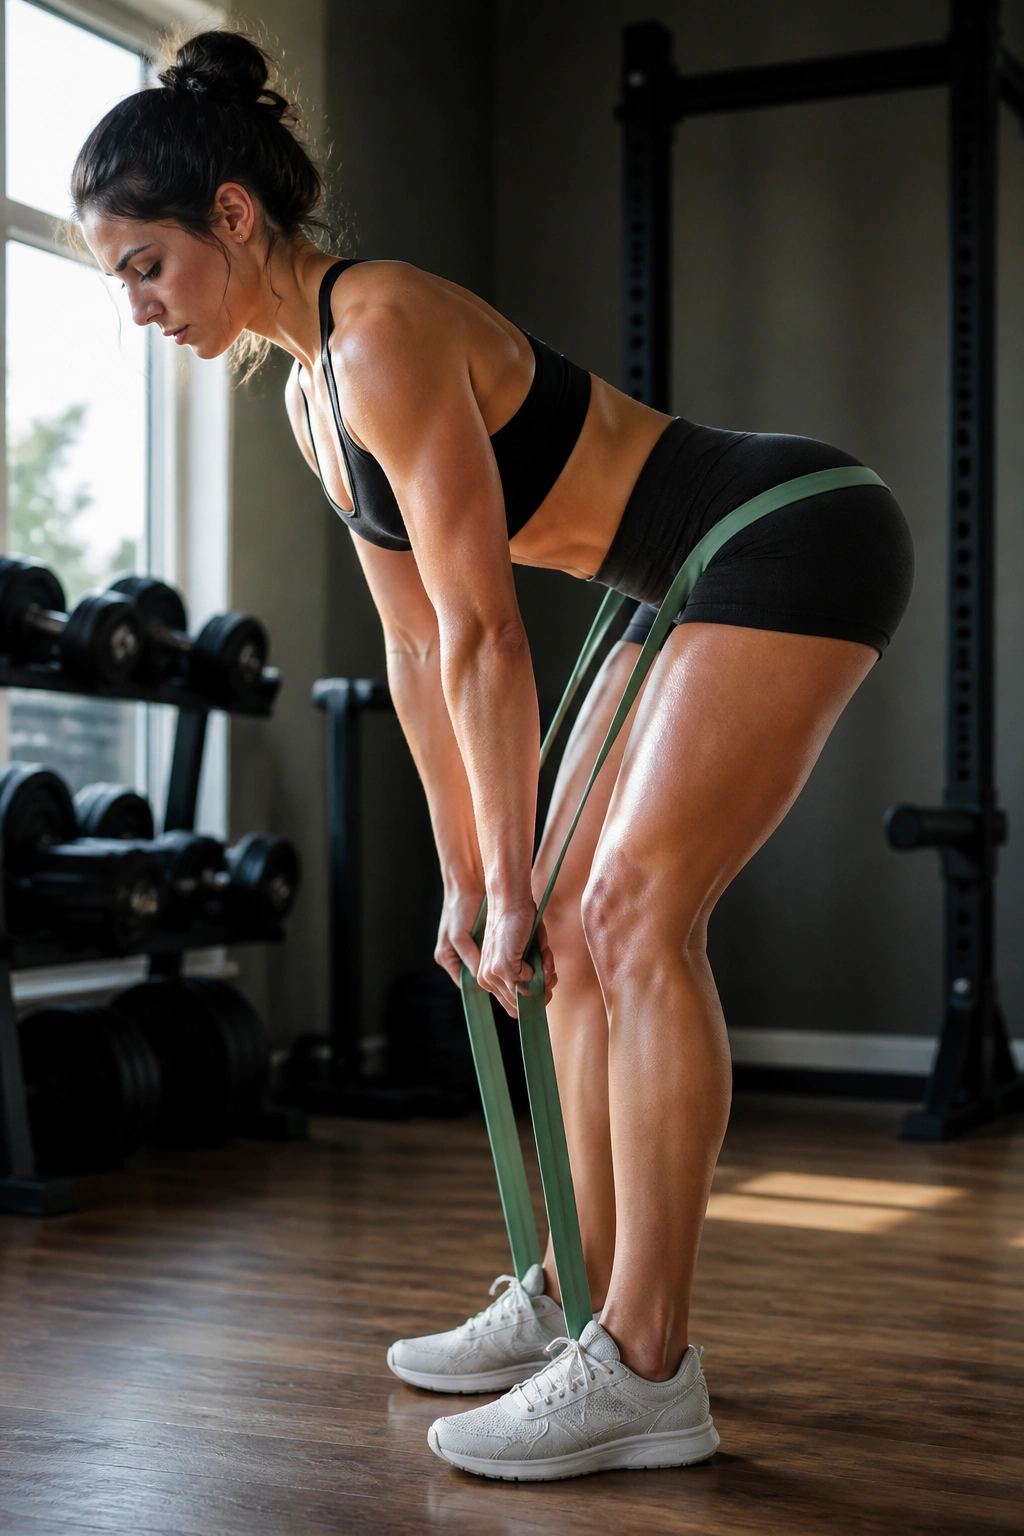
Yes, you can do RDLs with a band. While it is not the same as holding a 100-pound barbell, it provides a unique form of tension that is excellent for warming up or working on the eccentric (lowering) phase of the movement.
The Mechanics
Step inside the loop band. Bring the band up to your hips, holding it in place with your hands, or step on the band and hold the other end with your hands. Hinge at your hips, pushing your glutes backward while keeping your back straight. The band will provide tension at the bottom of the movement, which is exactly when you want to feel the stretch in your hamstrings.
Focus on the Stretch
Because the band provides lighter resistance than a barbell, use this time to focus on the mind-muscle connection. Feel your hamstrings lengthening as you lower. When you stand up, drive through your heels and squeeze your glutes at the top. This is an excellent exercise to perform as a “finisher” to exhaust the muscles after a heavier session.
8. Seated Abduction
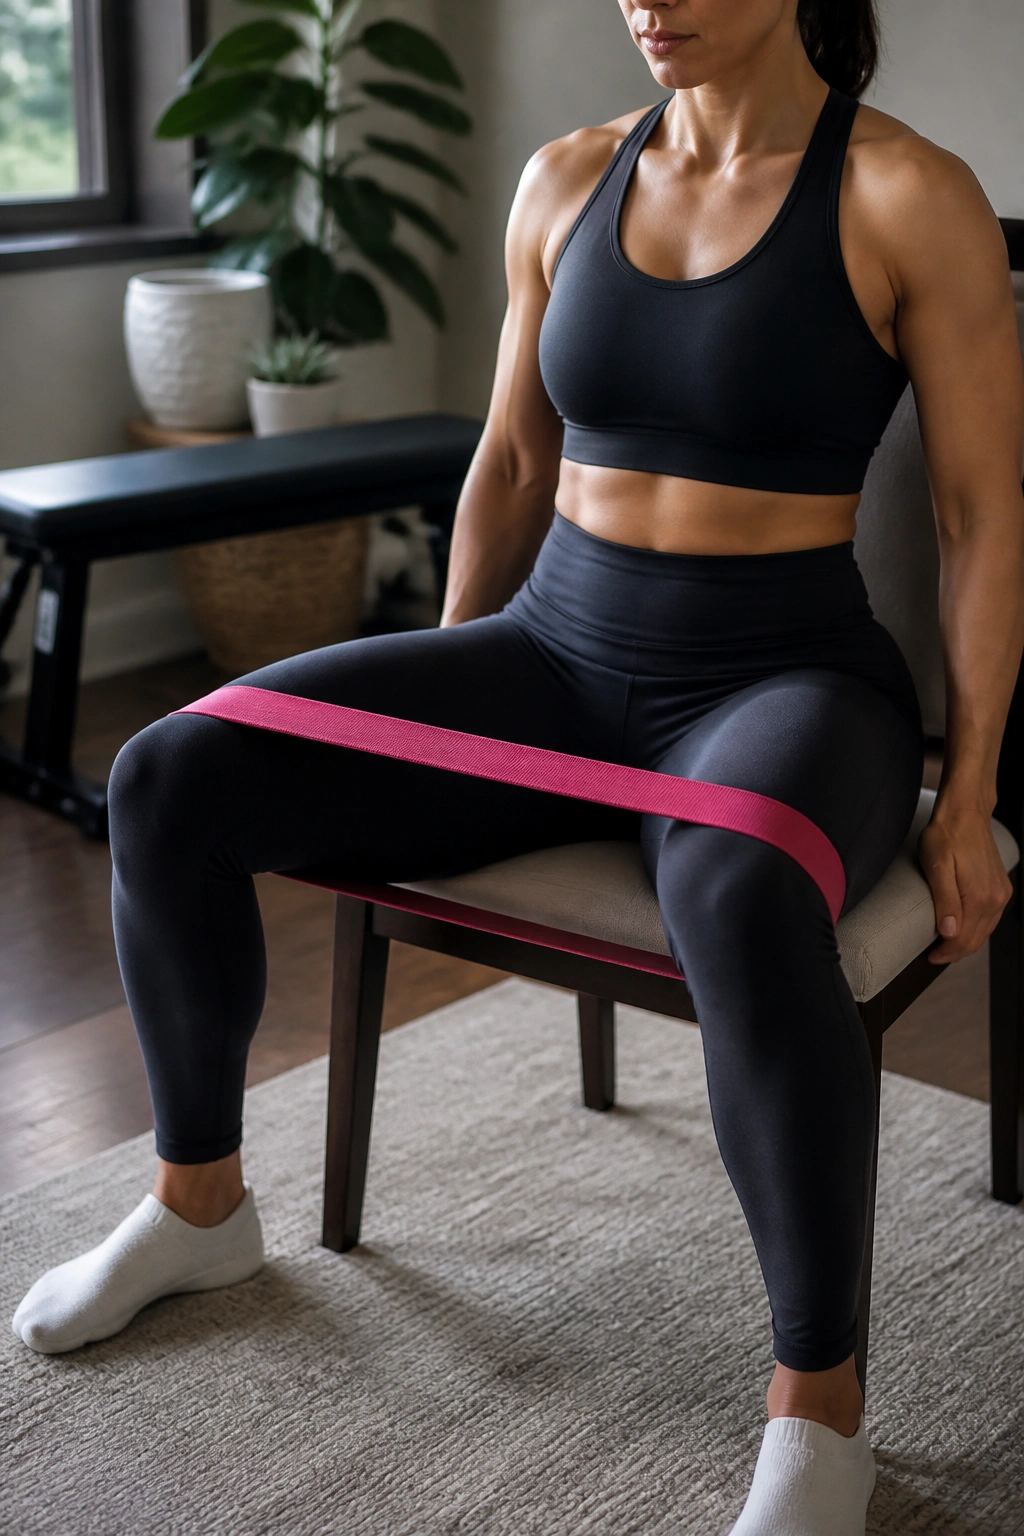
This is essentially a home-version of the “abductor machine” found in commercial gyms. It is highly effective for isolating the gluteus medius and minimus, which are essential for lateral movement and overall hip stability.
Positioning
Sit on the edge of a sturdy chair or bench, feet flat on the floor, with the band just above your knees. Keep your back straight—do not slump. Slowly push your knees outward, spreading the band as far as comfortable. Hold for a split second, then slowly return to the starting position.
Why Speed is Your Enemy
The tendency with seated abduction is to bounce the knees in and out rapidly. Resist this. The slower you move, the more you have to fight the band’s recoil. Use a “three-seconds out, one-second pause, three-seconds in” tempo. This constant time-under-tension is what forces the muscle fibers to adapt and strengthen.
9. Standing Hip Extension
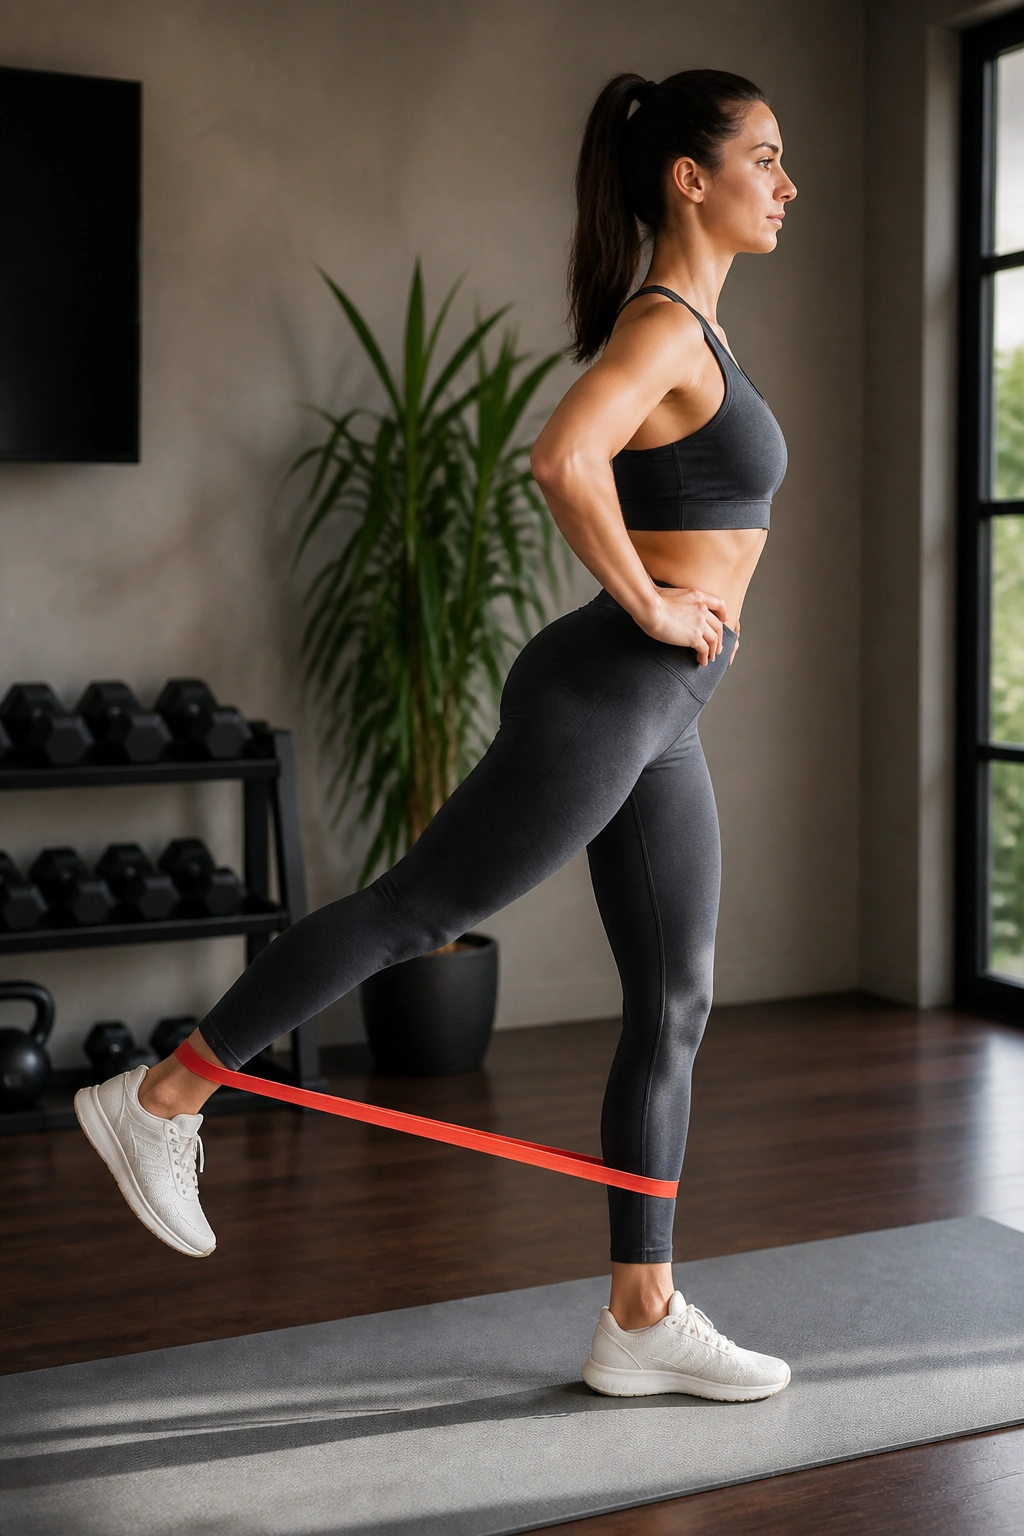
This exercise challenges your balance as much as your glute strength. By isolating one leg at a time while standing, you force the stabilizing leg (the one planted on the ground) to work overtime to keep you upright.
The Motion
Stand with the band around your ankles. Shift your weight to your left leg. Keeping your right leg straight, extend it out behind you as far as you can while maintaining an upright torso. Do not lean forward. If you lean forward, you turn this into a back exercise. Stay tall, core braced.
The Balance Component
This is a proprioception exercise. By moving the leg through space, your nervous system has to constantly adjust to keep your body centered. This is real-world functional strength—the kind that helps with walking, running, and moving through daily life without stumbling.
10. Reverse Lunges with Band
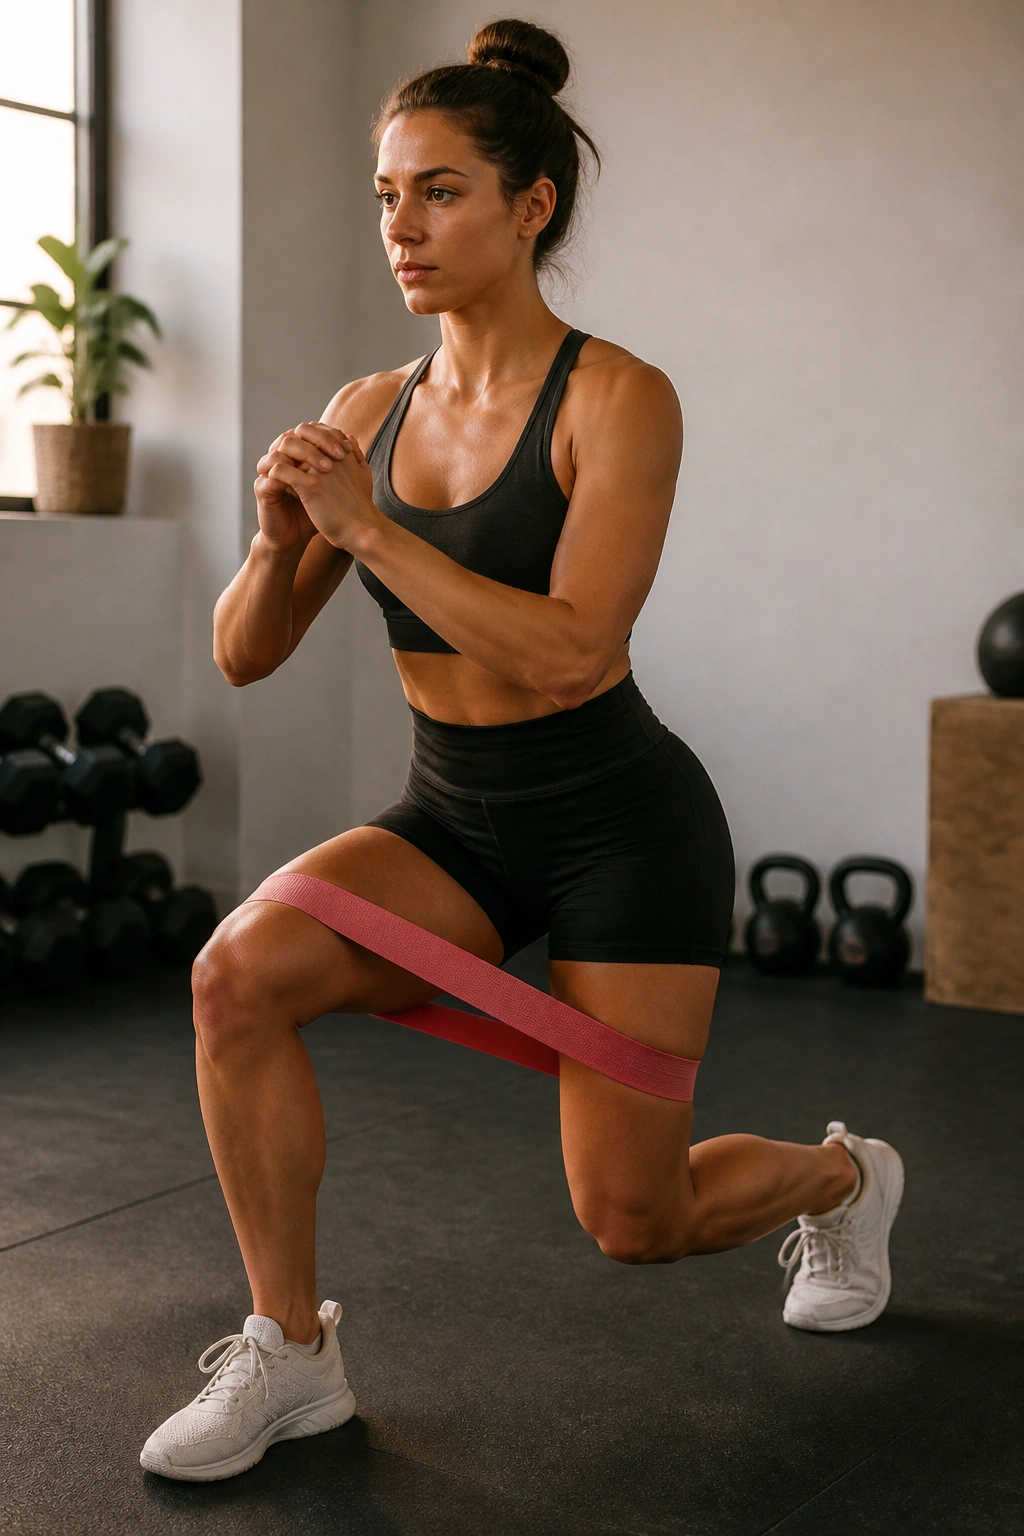
A reverse lunge is already a great movement for quad and glute development. Adding a band around the knees forces you to fight the urge to let your front knee cave in as you step back.
Adding the Resistance
With the band placed just above your knees, step back into a lunge. As you descend, the band will try to pull your front knee inward. You must actively fight this, keeping the knee pushed out over your toes. This simple adjustment turns a standard lunge into a corrective exercise for hip health.
Why Reverse over Forward?
Reverse lunges are generally kinder to the knee joint than forward lunges because the vertical force is more controlled. By stepping back, you shift the center of gravity and place more emphasis on the glute of the front leg. The band ensures that the glute medius is working just as hard as the quadriceps.
11. Sumo Walks
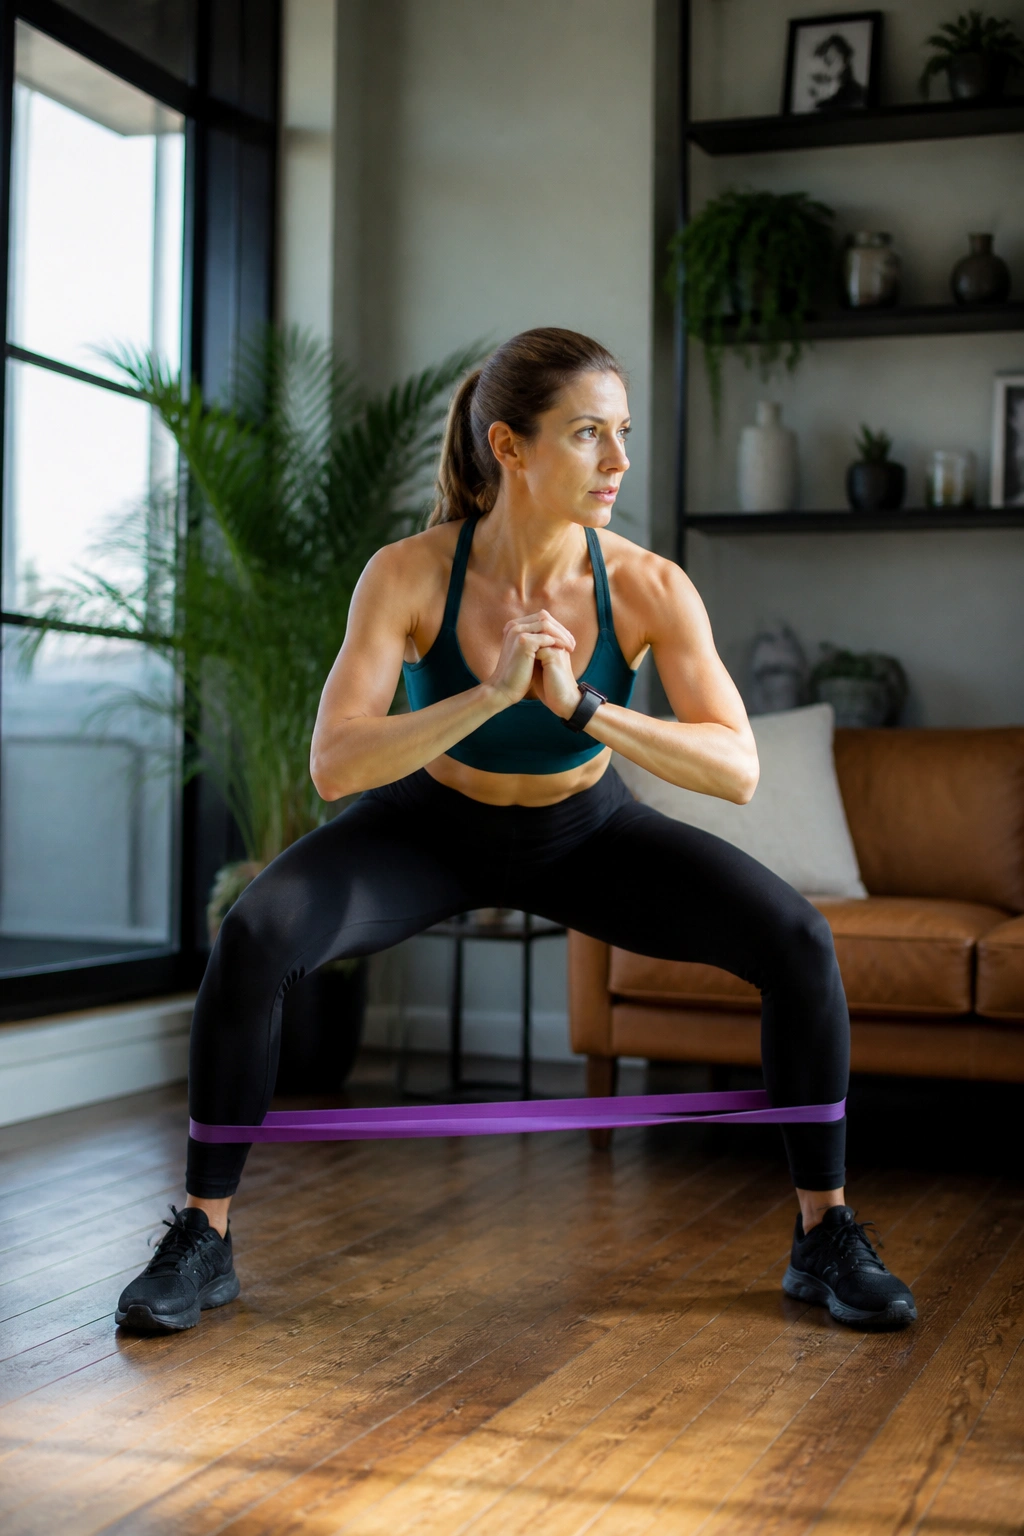
Think of this as a wider, deeper version of the lateral walk. By taking a wider stance and sitting lower, you change the angle of force, putting more stress on the inner thighs (adductors) and the bottom of the glute shelf.
The Stance
Widen your feet so the band is stretched almost to its limit before you even take a step. Squat down until your thighs are almost parallel to the floor. Now, perform your side steps. You will feel a significant difference in the inner thigh engagement compared to standard lateral walks.
Keep the Tension
If you stand up during the walk, you lose the tension on the inner thighs. Stay low. It’s supposed to burn. If it feels easy, you aren’t squatting deep enough or your steps are too small. Take small, controlled movements and never let the feet come together entirely.
12. Glute Bridge with Abduction Pulse
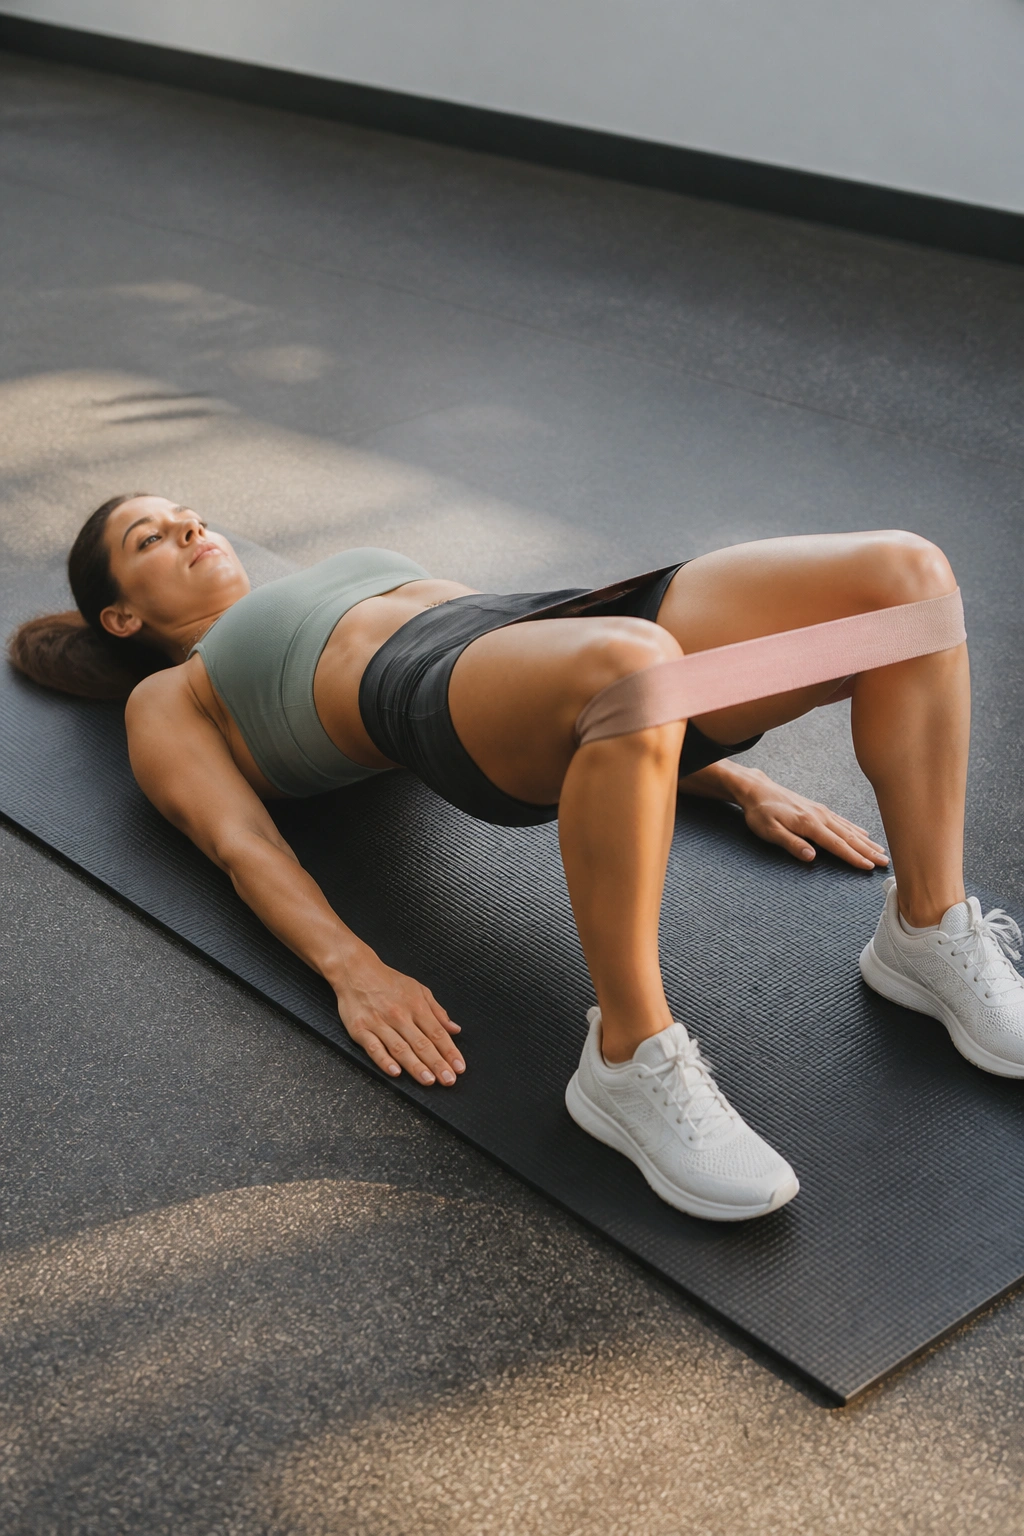
This is a variation of the glute bridge, but instead of just going up and down, you add an abduction pulse at the top. This keeps the glutes under intense tension for an extended period.
The Execution
Get into the top of a glute bridge position, holding the squeeze. Without dropping your hips, push your knees outward against the band 10 to 15 times. Then, lower your hips. This “pulsing” motion at the peak of the bridge flushes the muscle with blood and creates a massive metabolic burn.
Why It Works
By holding the bridge, you are working the gluteus maximus (the primary hip extender). By pulsing the knees, you are working the gluteus medius (the primary hip abductor). You are hitting two different parts of the glute with one movement. It is efficiency at its finest.
13. Fire Hydrants
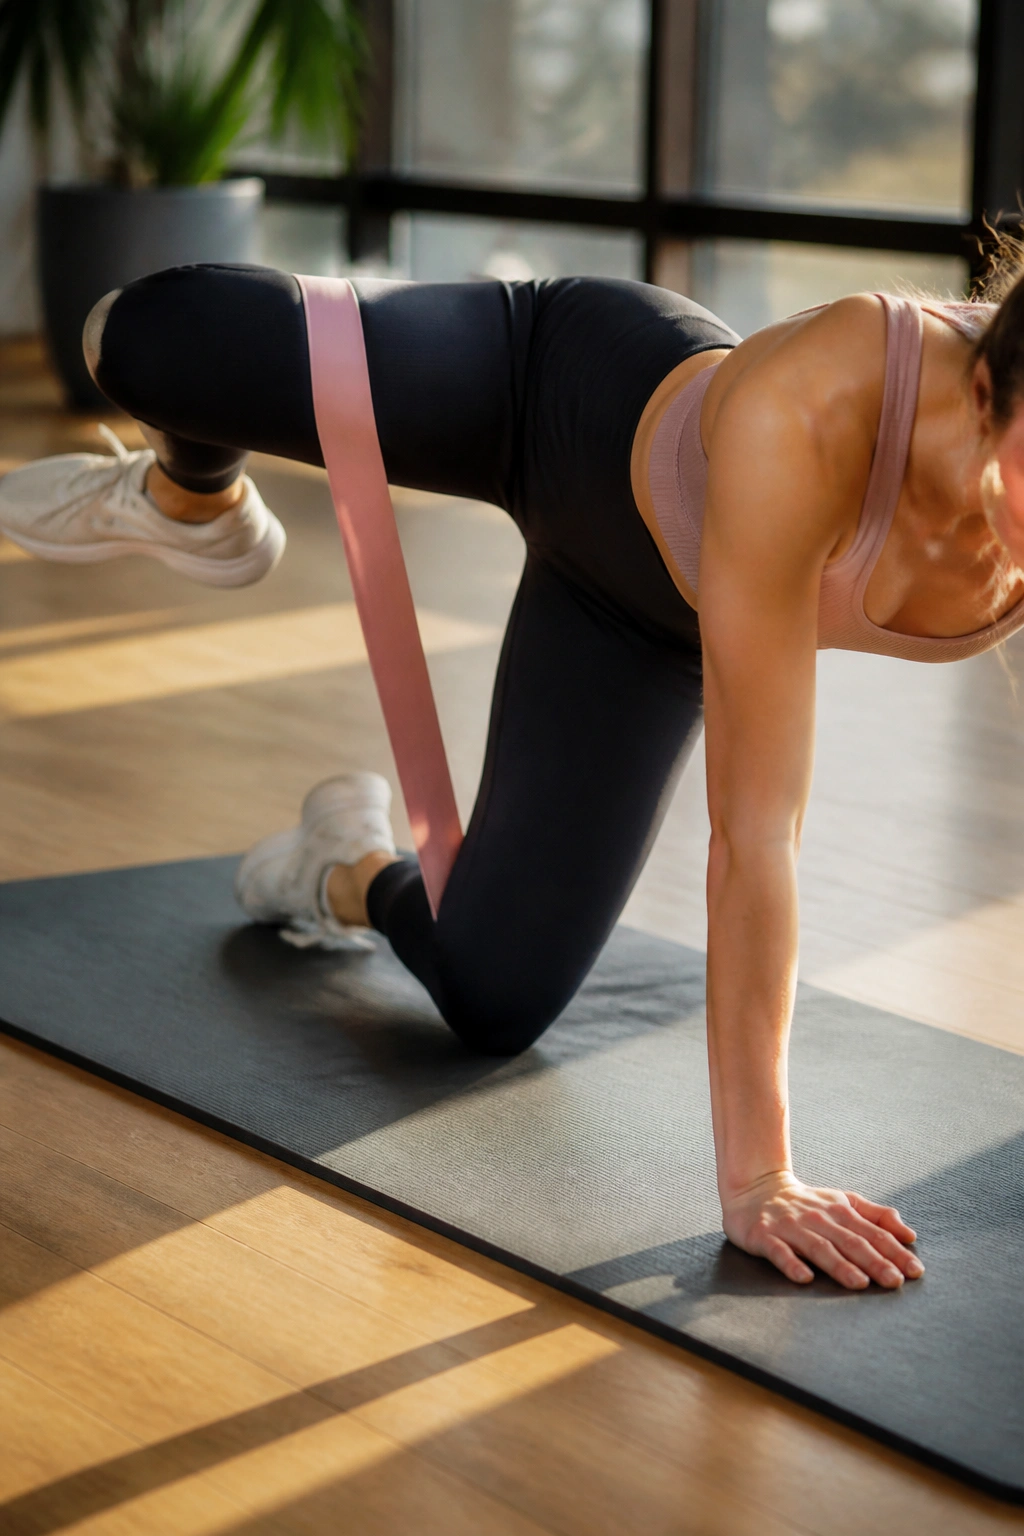
The fire hydrant is named for the obvious anatomical reason, but it remains one of the most effective exercises for targeting the gluteus medius and the hip rotators.
The Setup
On all fours, keep your back flat. Lift one leg out to the side, keeping the knee bent at a 90-degree angle. The movement should look like you are opening a gate at the hip. Do not rotate your torso. If your shoulder rises as your leg lifts, you are overcompensating.
The Range
You don’t need a massive range of motion here. Even a small lift, performed with control, is enough to activate the target muscle. If you feel this in your lower back, you are likely lifting the leg too high and causing your spine to rotate. Keep the movement small and concentrated.
14. Standing Leg Curls
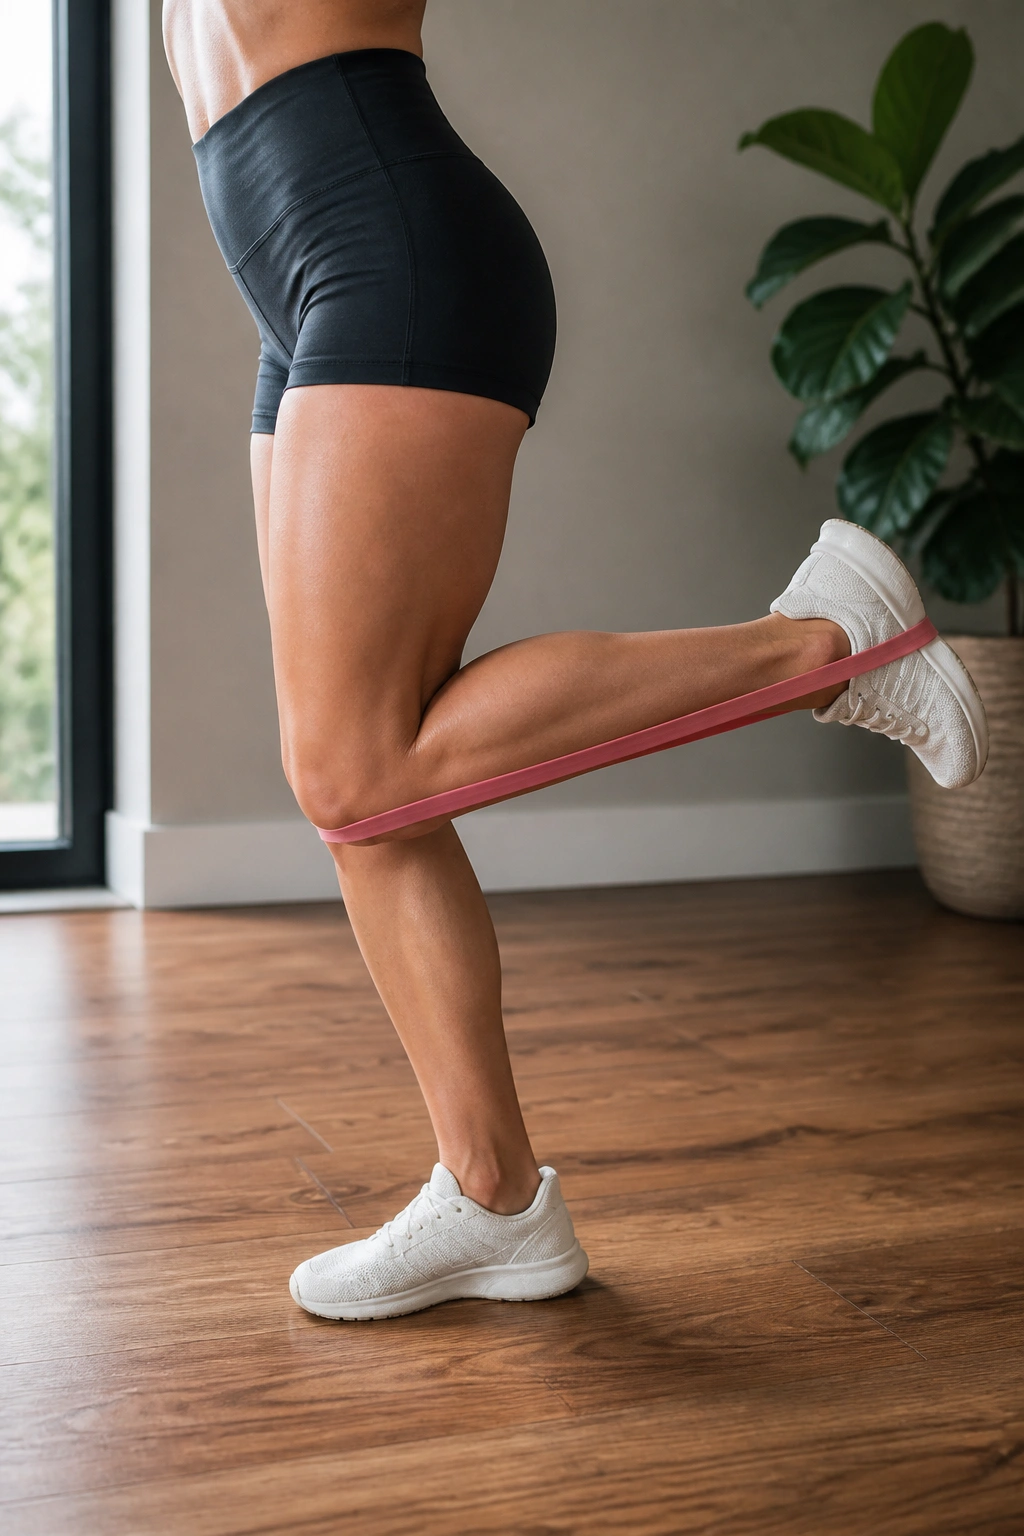
Usually, leg curls require a specialized machine. With a loop band, you can simulate this by standing and attaching the band to a stationary point—or simply by standing on one side of the band and looping it around the ankle of the other leg.
The Movement
Standing on one foot, loop the band around the ankle of your other leg. Using the band’s resistance, curl your heel toward your glute. This isolates the hamstrings, which are often the forgotten muscle in lower body routines.
Why Hamstrings Matter
The hamstrings are crucial for knee stability. If you only focus on quads and glutes, you create an imbalance. This standing variation is excellent because it requires balance, making it a “two-for-one” movement: strength and coordination.
15. Curtsy Lunges
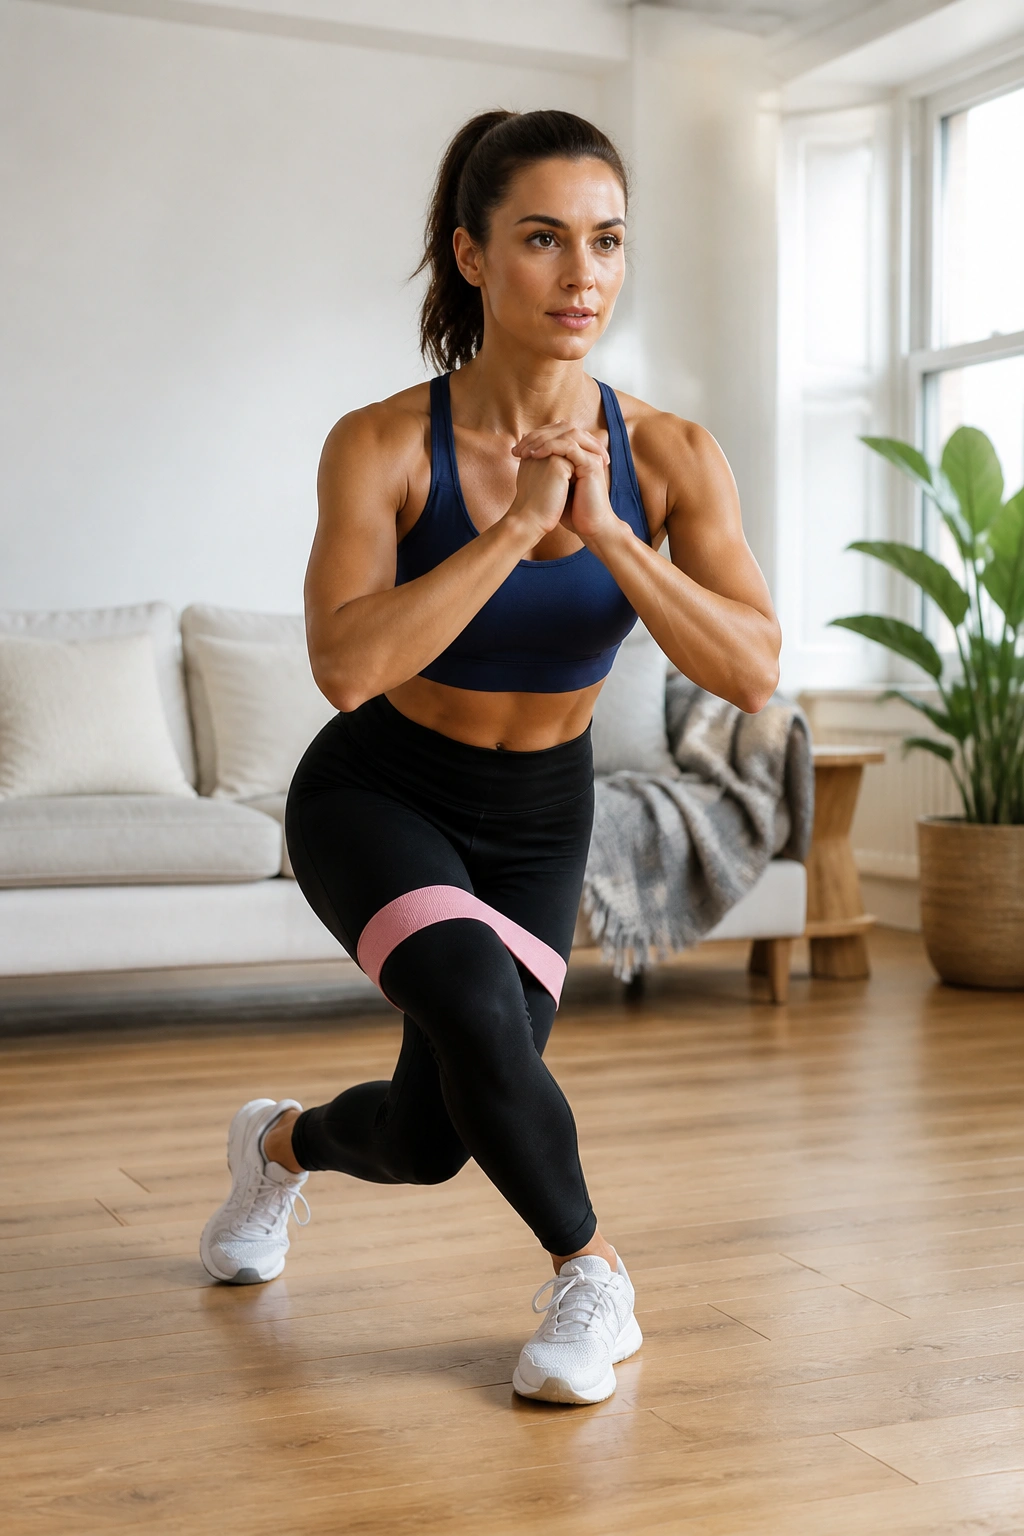
The curtsy lunge is a fantastic move for hitting the glute medius, specifically the fibers that are often ignored by forward-only movements. By stepping diagonally behind you, you put the glute in a stretched position under tension.
The Form
Step your right leg diagonally behind your left leg, lowering your hips as you would in a lunge. Your thighs should cross. Keep your torso upright. The band around your knees will force you to keep your lead leg stable, preventing the knee from wobbling as you cross over.
The Engagement
You will feel a deep stretch in the outside of the front hip. That is exactly where you want to feel it. That stretch is the muscle loading up, and the push back to the starting position is the muscle firing. It is a graceful movement that packs a serious punch.
16. Single-Leg Squat with Band
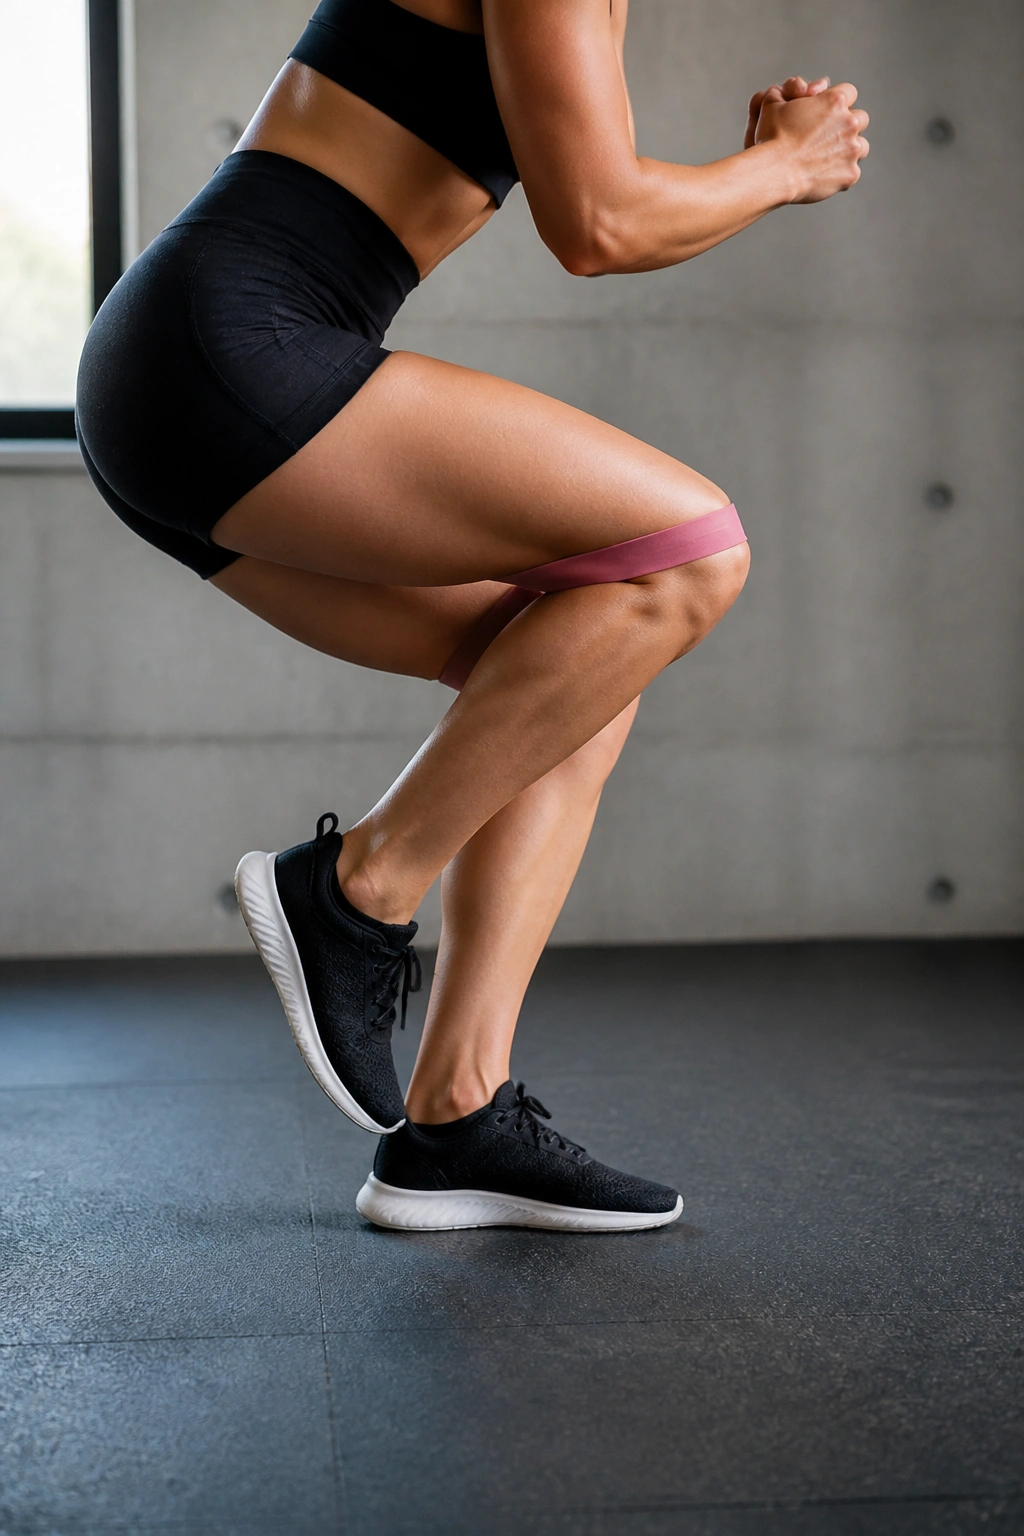
This is an advanced move. Doing a single-leg squat is hard; doing it with a band to force knee stability is even harder. Use a chair or wall for assistance if you need to, but do not rely on it.
The Challenge
With the band around your knees, lift one foot off the ground. Perform a squat with the other leg. The band will immediately try to pull your knee inward. You must fight it. This is the ultimate test of hip control and leg strength.
Don’t Rush
There is no winning in rushing a single-leg squat. If you move too fast, you lose your balance and the band snaps you out of position. Move slowly, focusing on that tripod of stability: your heel, the ball of your foot, and your pinky toe.
17. Plank with Leg Lift
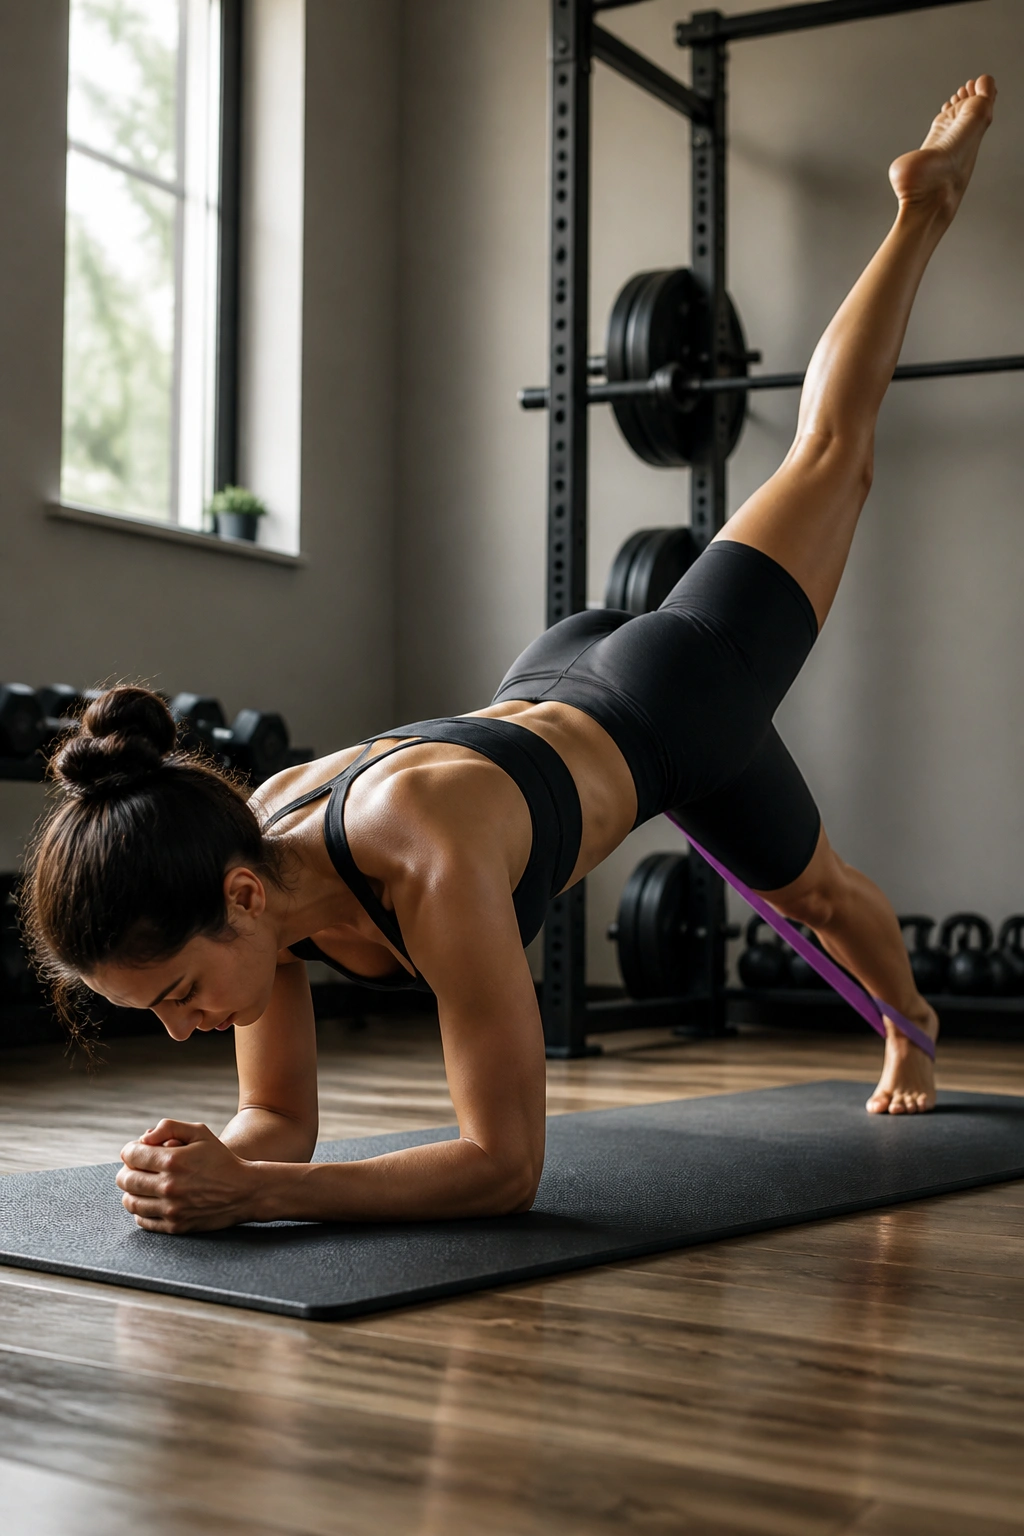
While this is technically a core exercise, it is a brilliant way to engage the glutes in a functional, stabilizing role.
The Position
Get into a forearm plank. Place the band around your ankles. Without shifting your hips or arching your back, lift one leg straight up toward the ceiling. The resistance of the band will make the lift much more taxing on the glute.
Avoiding “The Hips”
The most common mistake is rotating the pelvis to get the leg higher. Your hips should remain perfectly square to the floor. If you start to tip to the side, stop. The glute activation comes from the extension of the hip, not from twisting the torso.
18. Donkey Kick to Fire Hydrant Combo
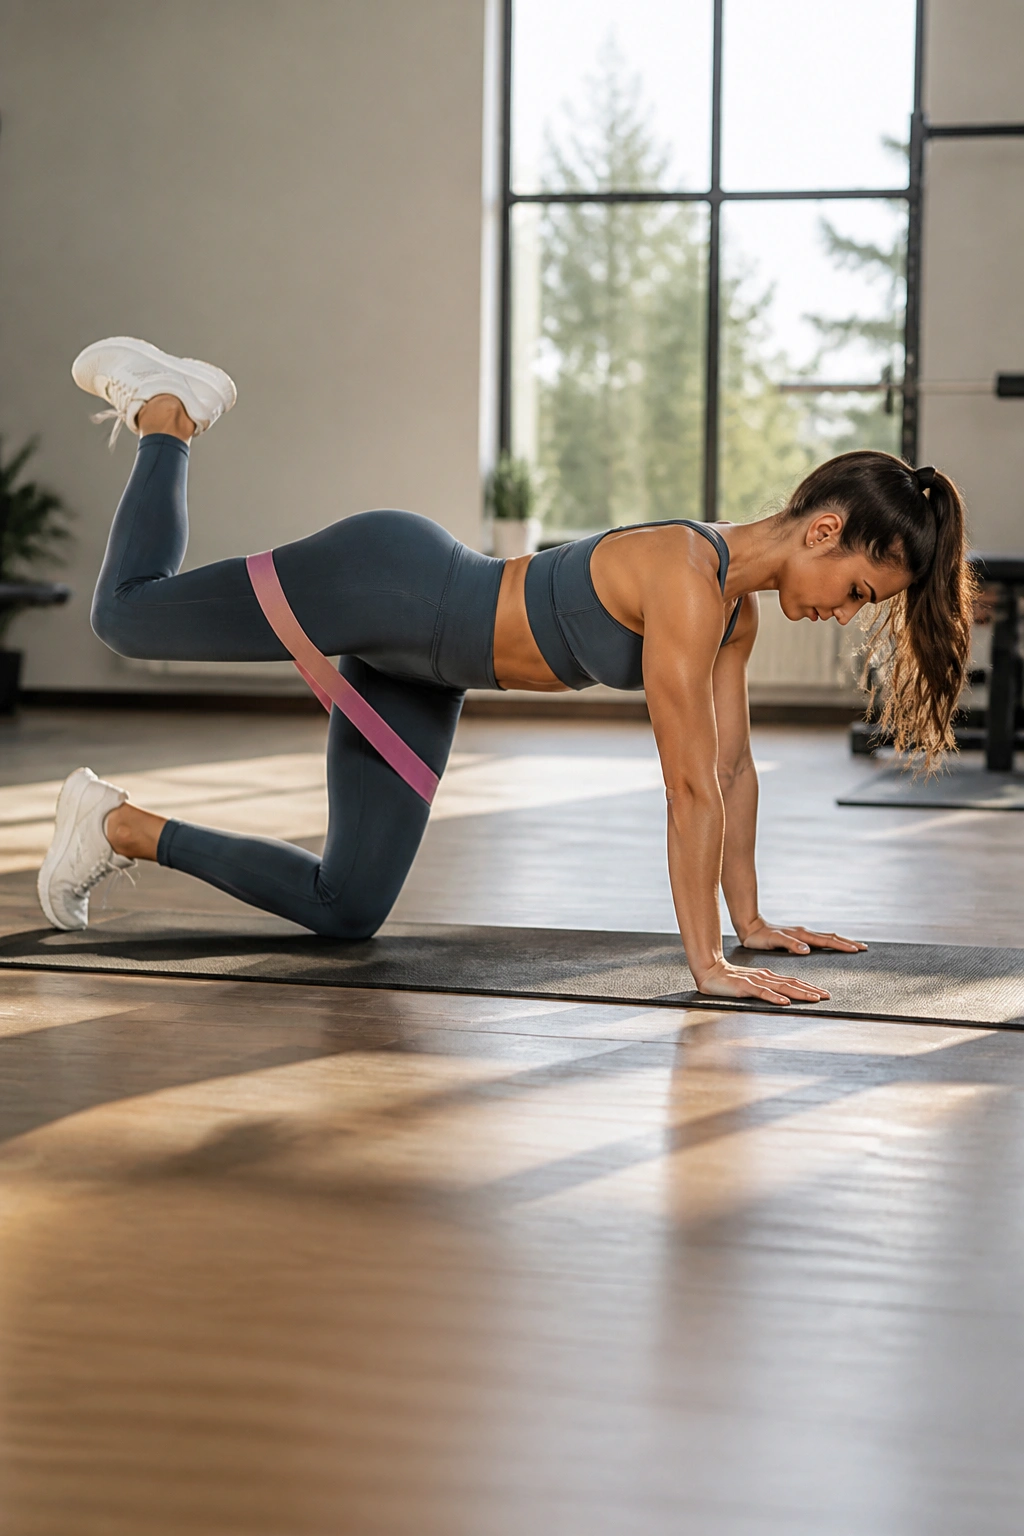
Why choose one when you can do both? Combining these two movements creates a “circuit” for the glutes that will force them to work through two different planes of motion without a break.
The Flow
Perform one donkey kick, bringing the leg back to center. Then, perform one fire hydrant, bringing the leg back to center. That is one repetition. By alternating these, you are hitting the gluteus maximus (the kickback) and the gluteus medius (the hydrant) back-to-back.
Consistency
Do not let your leg drop to the floor between the kick and the hydrant. Keep it hovering in the air. This constant state of tension is what makes this combo so effective for muscle endurance.
Final Thoughts
Building a stronger lower body is rarely about finding the “perfect” exercise; it is about finding movements that challenge your muscles in ways they aren’t used to. Resistance loops provide a simple, accessible, and highly effective way to add constant tension to your training. They don’t require heavy weights to be effective—they require focus, control, and a willingness to work through the burn.
Consistency is more important than intensity. You are better off performing a 15-minute loop band routine three or four times a week than doing a grueling, hour-long leg session once a month. Start with a lighter band to master the form, and as you get stronger, progress to thicker, higher-resistance bands. Your glutes, hips, and knees will thank you. Treat every repetition with as much respect as you would a heavy barbell lift, and you will see the results in both your strength and your stability.
