



A reformer can light up the glutes faster than people expect, but only when the springs, foot position, and pelvis are doing the same job at the same time. That’s the part most classes gloss over. They chase the burn and miss the mechanics.
Tiny spring changes everything.
The glutes are not one muscle, and they do not like being treated like one. Glute max drives extension and power. Glute med and glute min keep the pelvis steady when you stand on one leg, step sideways, or stop your hip from dumping into the carriage. A smart reformer Pilates glutes session hits both jobs: pressing and stabilizing, then pressing again from a slightly different angle.
The reformer is especially good for this because the moving carriage gives you feedback. Push too hard, and the carriage flies out. Lose your ribs, and your low back steals the work. Let the springs get too light, and the exercise turns into a sloppy leg swing instead of a glute drill. That feedback is useful. Annoying, sometimes. Useful.
Start with the move that seems easiest on paper and usually burns first when done well.
1. Frog Presses on the Footbar
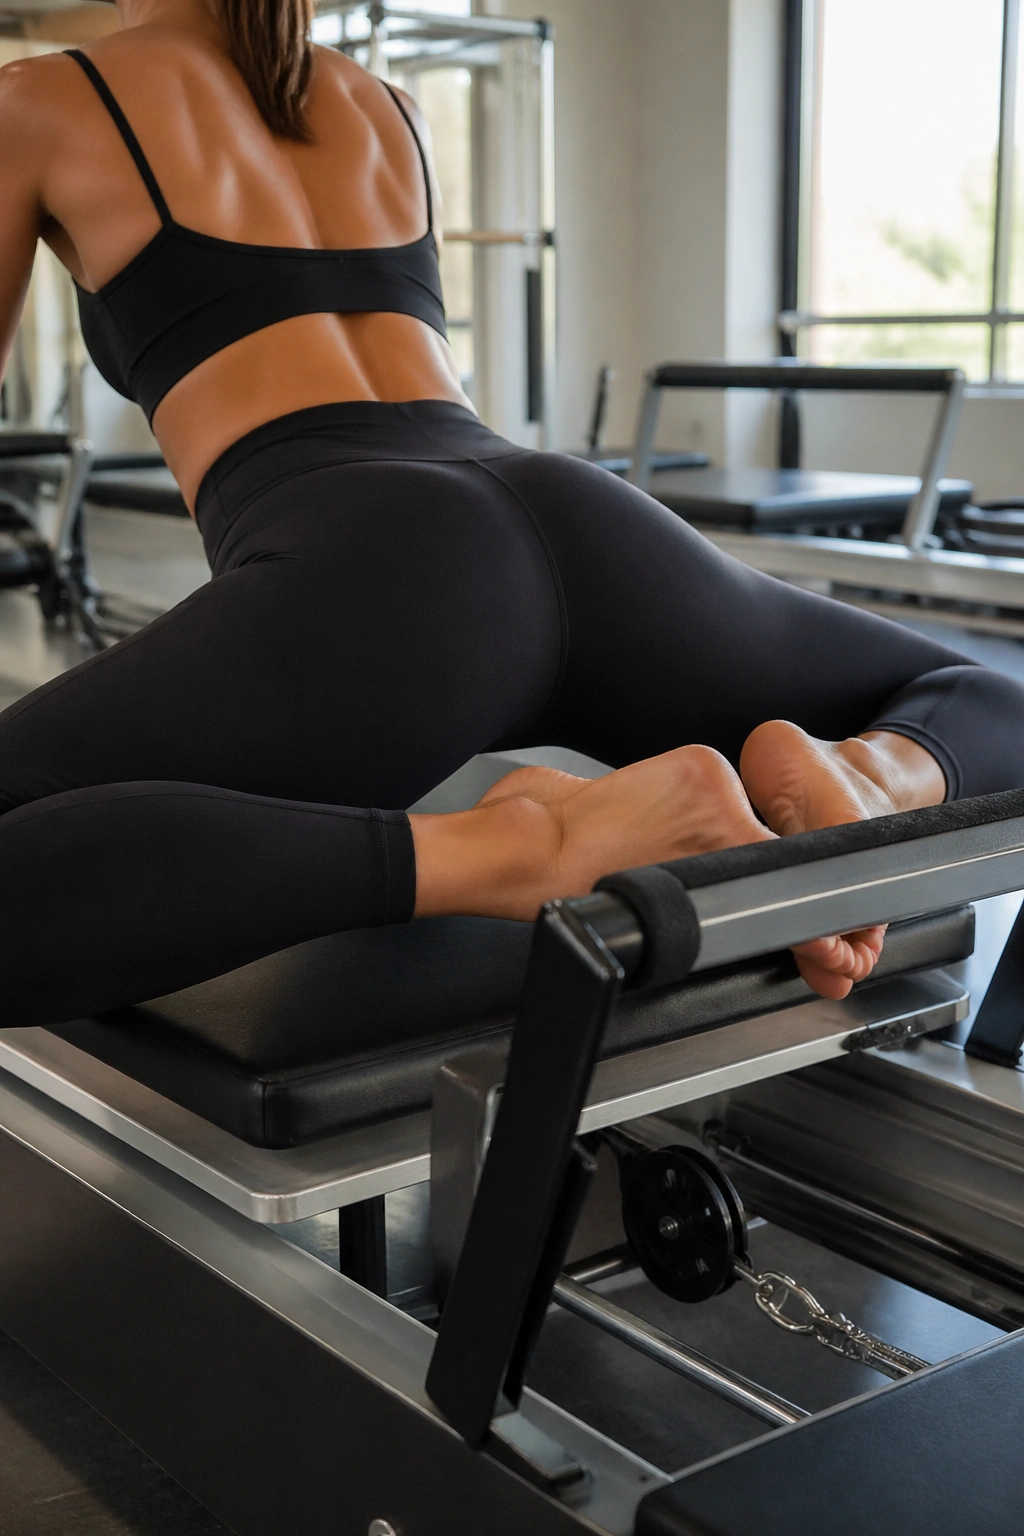
This is one of the cleanest ways to teach the glutes to switch on without letting the low back hijack the work. The shape looks simple: heels together, knees turned out, feet placed in a frog position on the footbar, then press the carriage away a few inches and pull it back with control. It feels small. It isn’t.
Why It Hits the Glutes
The frog position shortens the lever and puts the hips into a spot where the back of the hips has to work hard to move the carriage. If you press from the toes, the quads can take over fast. Heels together shifts more attention into the inner thighs and the glutes, which is exactly where the good burn tends to show up.
A medium spring usually works well here. Too heavy, and you’ll shove through the movement. Too light, and the carriage floats around without giving you much to hold.
Form Cues That Matter
- Keep the ribs heavy.
- Press out only until the knees stay soft and the pelvis stays still.
- Pause for one beat at full extension.
- Return slowly, like you’re trying not to wake the carriage.
Pro tip: If your lower back arches, make the range smaller before you make it harder.
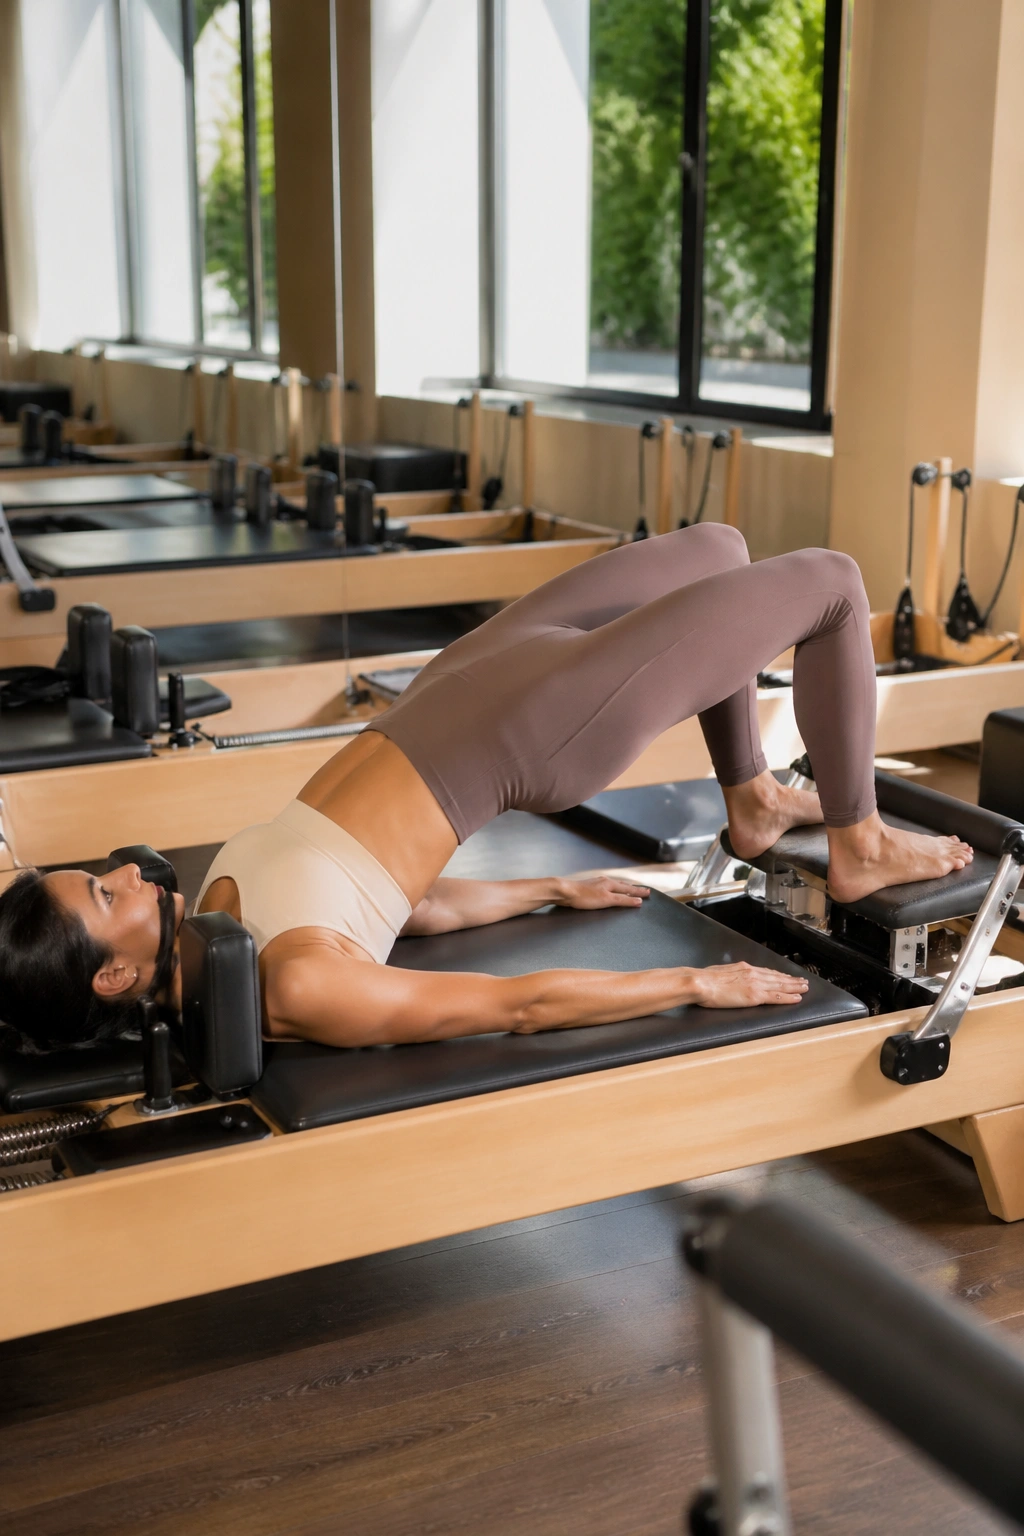
2. Bridge Pulses on the Footbar
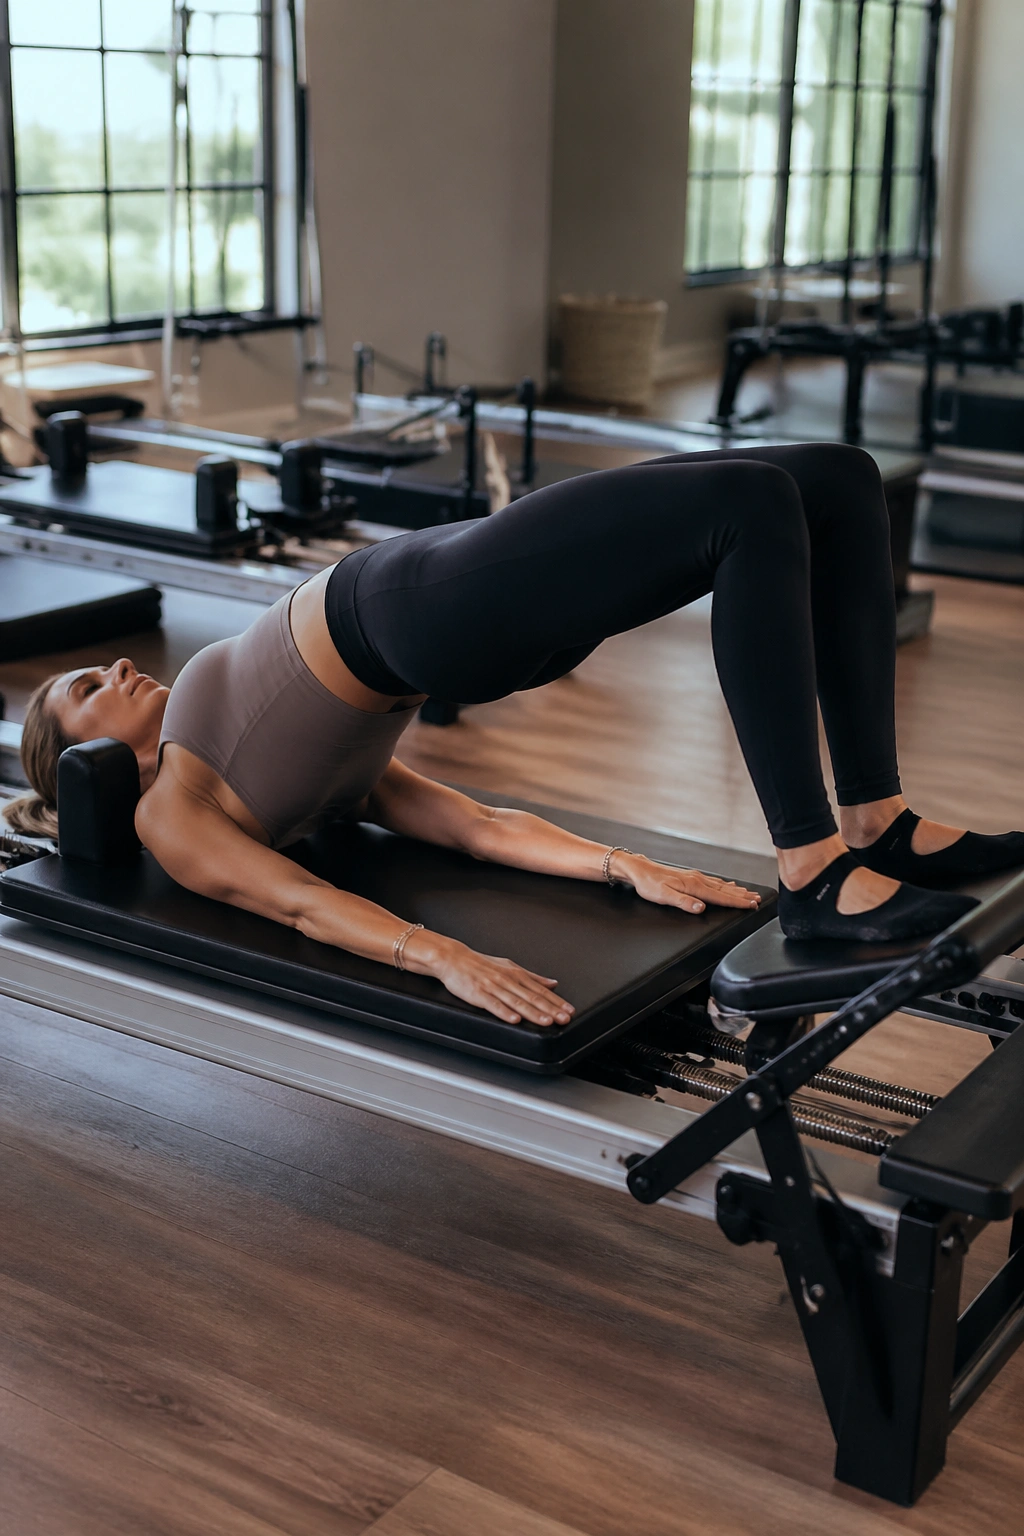
Why does a tiny bridge pulse burn more than a big one? Because the glutes never get a clean break. The muscle stays loaded, the pelvis stays lifted, and the carriage gives you just enough resistance to make every inch count.
Lie on your back with the feet on the footbar, hip-width apart, and lift into a bridge until your hips line up with your ribs and knees. From there, pulse the pelvis up and down one to two inches. Not a full drop. A small, steady bob. That’s the whole point.
Your glutes should feel the work first. If the hamstrings cramp, move your feet a little closer to your seat. If the low back takes over, lower the bridge by a notch and stop chasing height. High bridges look nice. Controlled bridges work better.
What Good Reps Feel Like
The movement should feel like a deep squeeze at the top of the hips, not a shove through the spine. The carriage stays quiet. The feet stay planted. The pelvis does not wobble side to side.
Twenty pulses is plenty. Ten honest pulses can be enough if you keep the top position clean.
3. Single-Leg Bridge Ladder
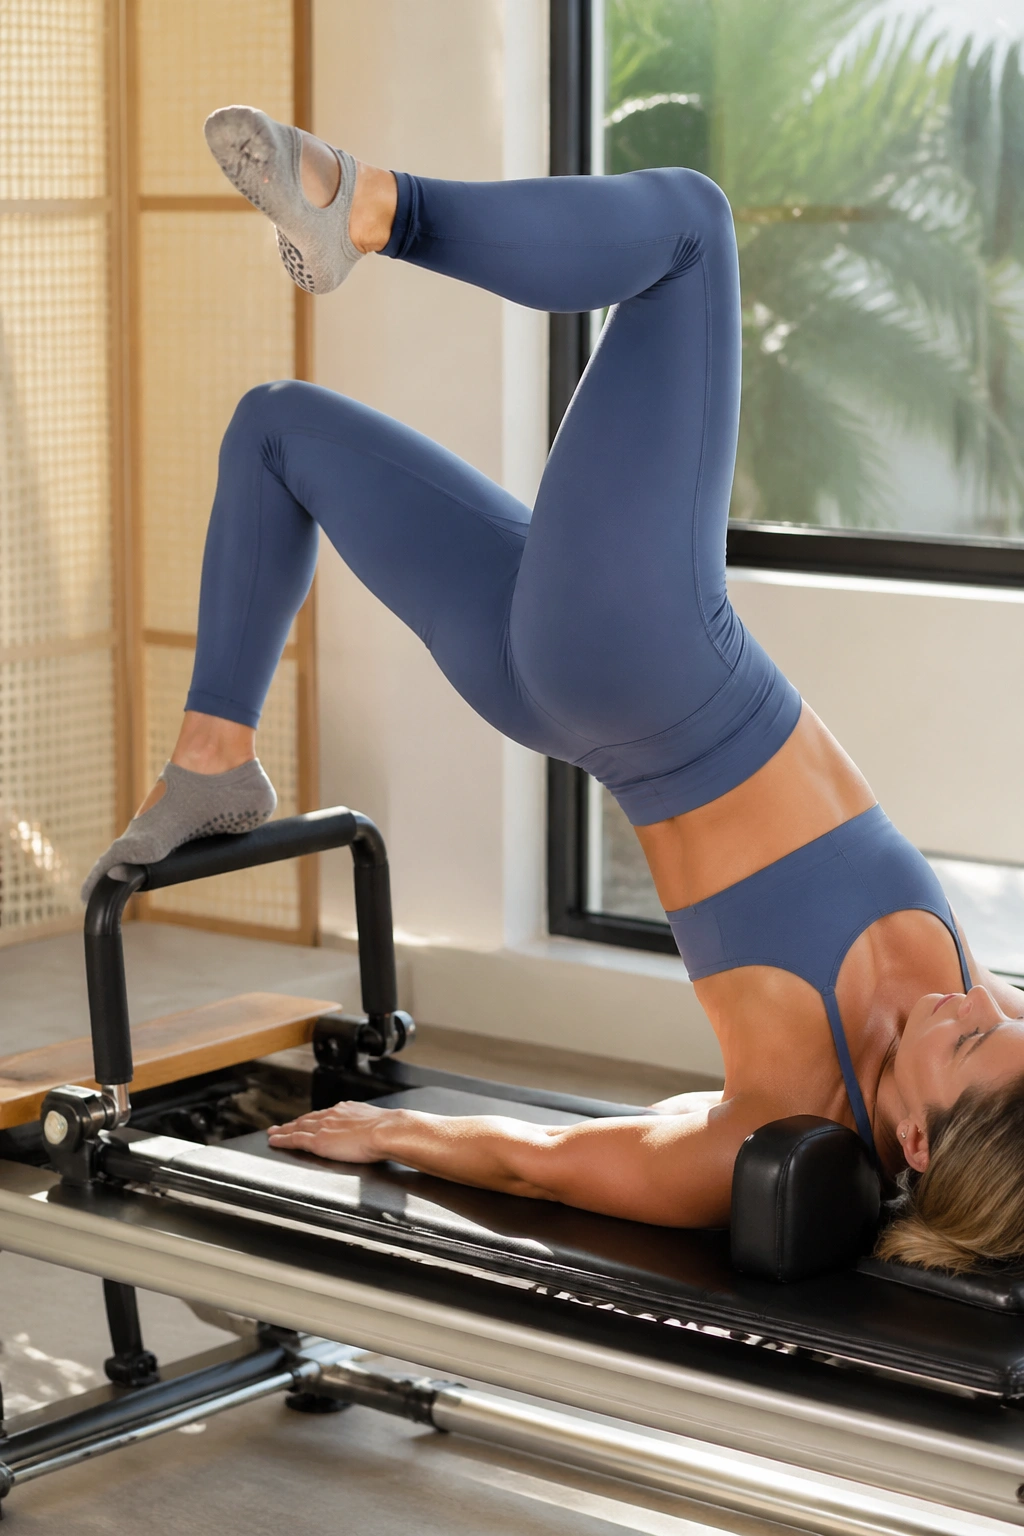
If one side feels weaker when you climb stairs or stand up from the floor, this is the drill that tells on it fast. Single-leg bridging on the reformer forces each glute to do its own job without borrowing from the other side. That is a blessing and a nuisance.
Set one foot on the footbar and lift the other leg to tabletop or extend it long, depending on how much balance you have that day. Press through the planted heel, lift the hips, and lower with control. Keep the pelvis square. No twisting. No cheating with a hip hike.
How to Run the Ladder
- 4 reps on the right.
- 4 reps on the left.
- 3 reps on the right.
- 3 reps on the left.
- 2 reps on the right.
- 2 reps on the left.
- 1 slow rep on each side.
That pattern keeps fatigue honest. It also reveals which side fades first. Usually, the weaker side starts to shake before the stronger side gives up.
A one-leg bridge should feel focused, not wild. If the carriage slams or the standing hip lifts, shorten the range. That tiny correction changes everything.
4. Feet-in-Straps Frog Presses
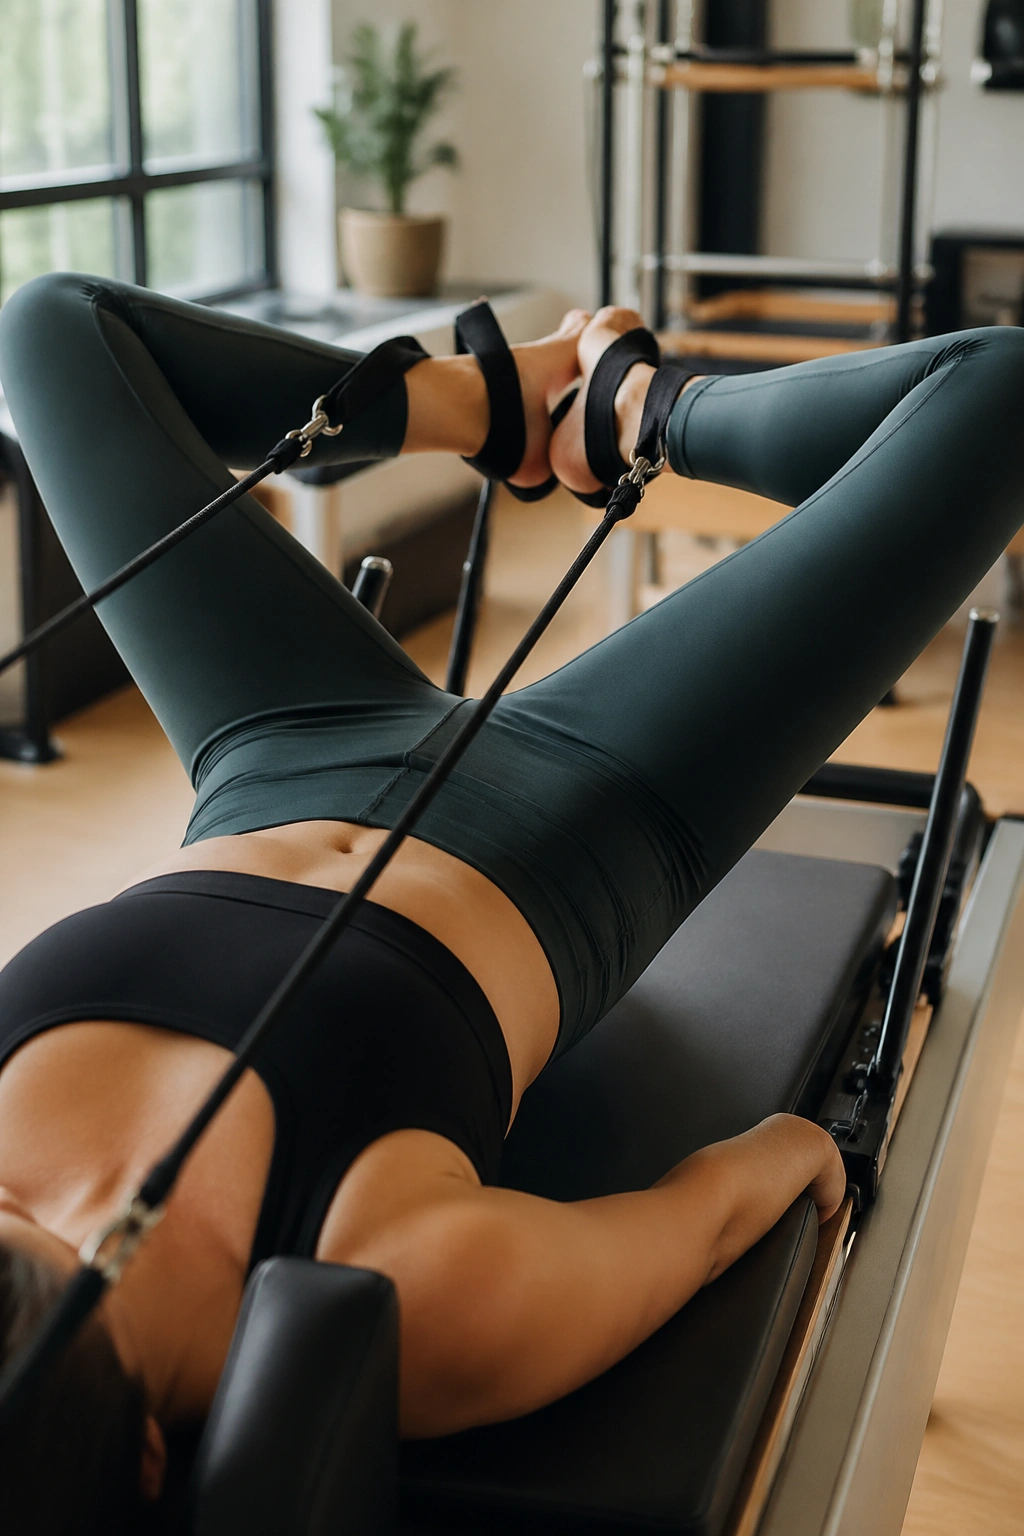
The version everyone skips is often the one that finds the back of the hips fastest. Feet in straps frog presses create a floating, almost suspended feel that makes the glutes work through a longer path than the footbar version.
Lie on your back, place both feet in the straps, bend the knees wide, and start with the heels together. Press the legs out to a soft diagonal, then return to the frog shape with control. A light or medium-light spring usually feels best here. Heavy springs can turn the exercise into a wrestling match with the straps.
The key is not to fling the legs open. The return matters just as much as the press. That’s where the outer hips and deep glute fibers have to keep the line of the legs steady.
Watch for This
If the pelvis rocks or the ribs pop up, the legs are moving too far. Keep the circle smaller than you think it should be. Small range, clean control, hard burn.
This one is especially good when you want glute work without a lot of spinal loading. Your back gets a quieter day. Your hips do not.
5. Small Circles in Straps
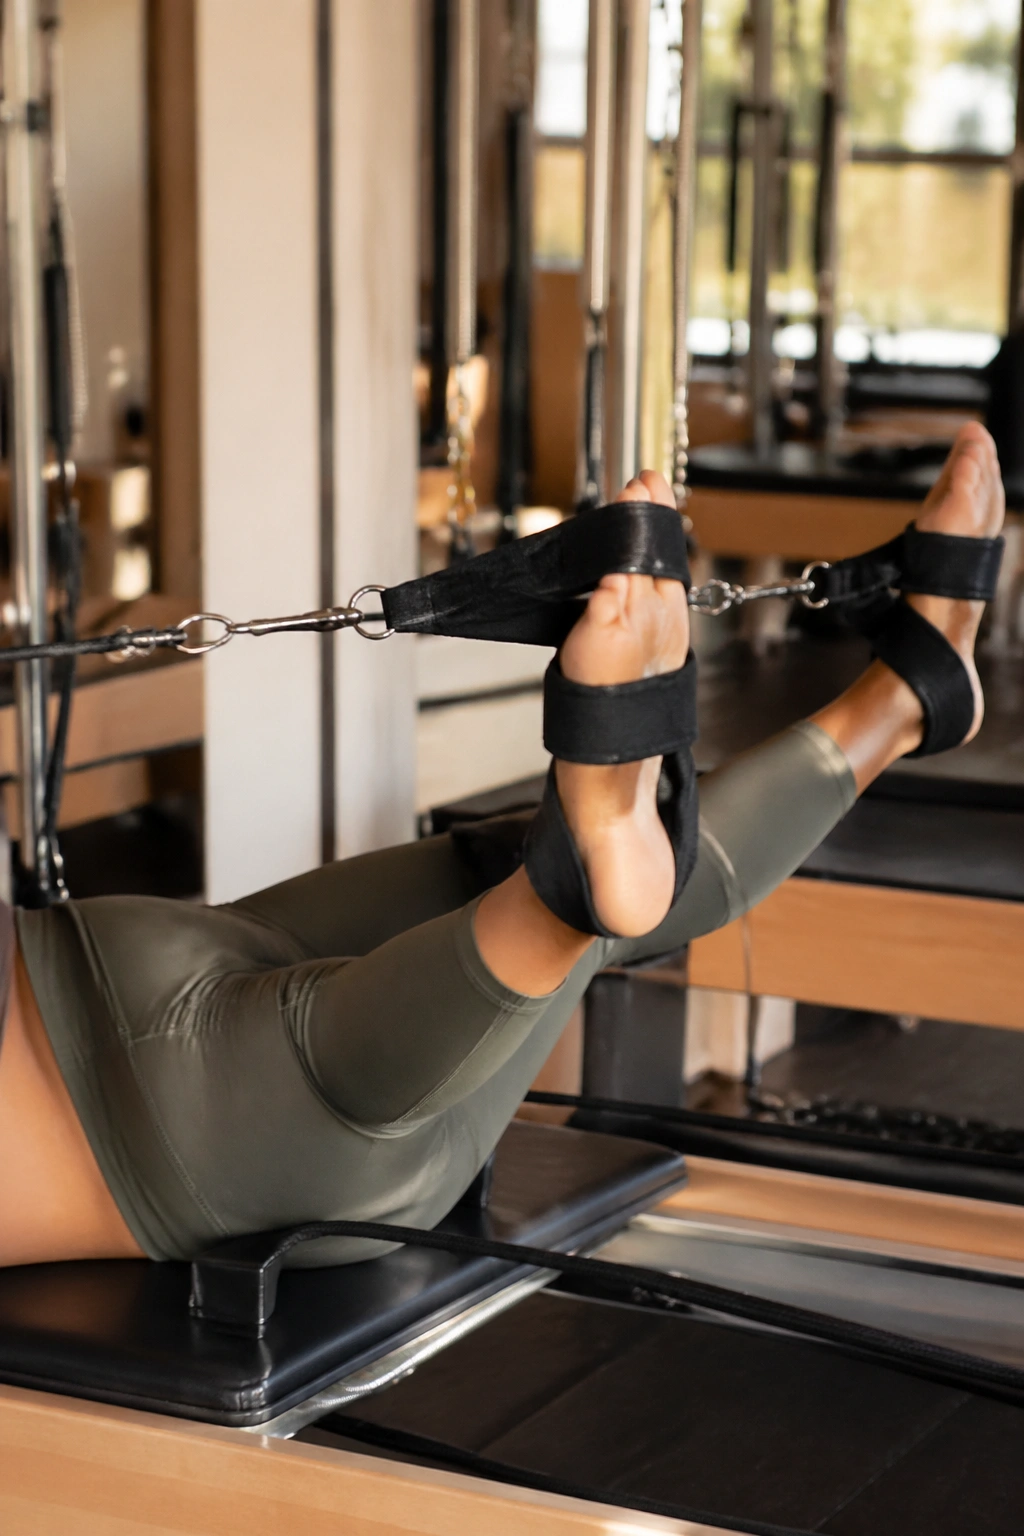
The first thing you notice is the shaking.
Small circles with the feet in straps look graceful from a distance, but the outer hips feel the work almost immediately when the circles stay tiny and precise. Start with legs long enough to feel tension in the straps, then draw a circle no bigger than a dinner plate. Eight circles one way. Eight the other.
The Size Rule
Big circles usually come from hip flexors and momentum. Small circles force the deep hip stabilizers to hold the leg path steady, and that is where the glute med gets pulled into the conversation.
The pelvis should stay quiet. If the low back arches or the hips start wobbling, the circle is too large. Shrink it. You will probably hate how small it feels at first. That’s normal.
Use a light spring and slow tempo. Faster circles usually look more interesting and feel less honest. Slower circles are the ones that tell the truth.
The best cue here is simple: imagine your thighbones are drawing neat little coins in the air, not carving giant loops.
6. Side-Lying Footbar Presses
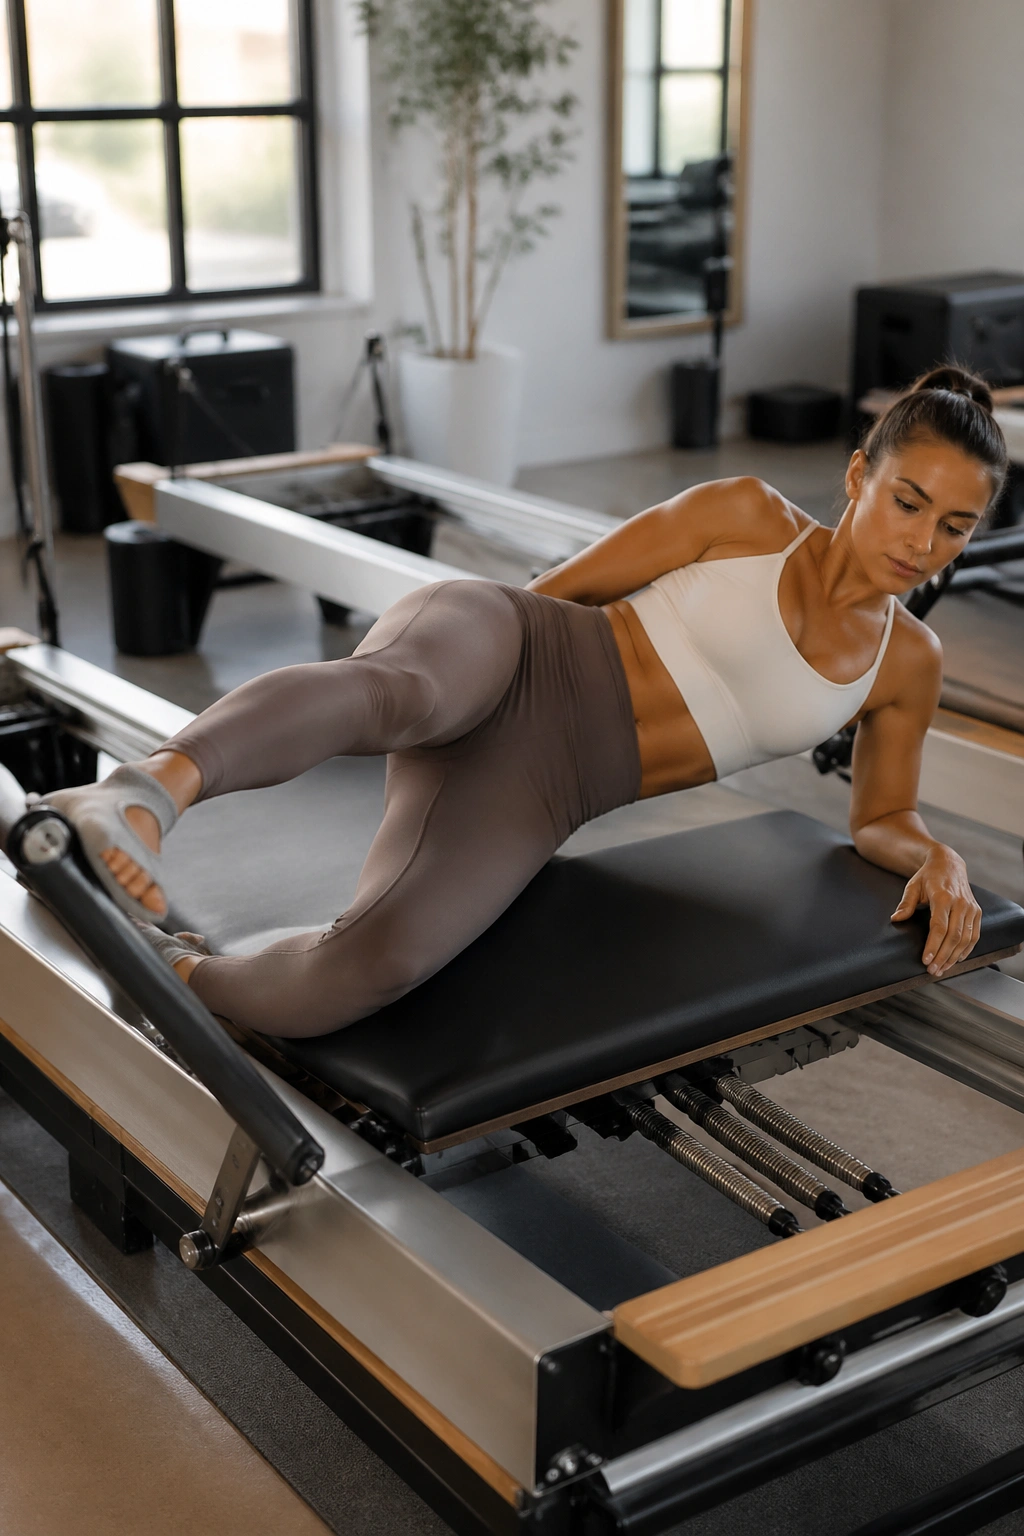
Outer hip, meet the carriage.
Side-lying footbar presses are one of those deceptively plain reformer Pilates glute moves that sneaks up on people who think side work is “easy.” Lie on your side on the carriage, line the bottom foot up on the footbar, and let the top leg rest in front or stack it over the lower leg if your balance is solid. Press the carriage away with the bottom leg, then return with control.
The bottom glute med works hard to keep the pelvis stacked. The standing leg in a regular squat does this job too, but the side-lying angle strips away a lot of help. That is why it burns.
What to Feel
- The outer hip of the working leg should light up.
- The waist should stay long.
- The rib cage should not roll backward.
- The carriage should move a few inches, not fly across the frame.
If you feel the front of the hip more than the side of the hip, shift the foot slightly back on the footbar and try again. The line of the leg matters more than people think.
This is a good one for people who want glute shaping without pounding through full standing work yet.
7. Quadruped Kickbacks on the Carriage
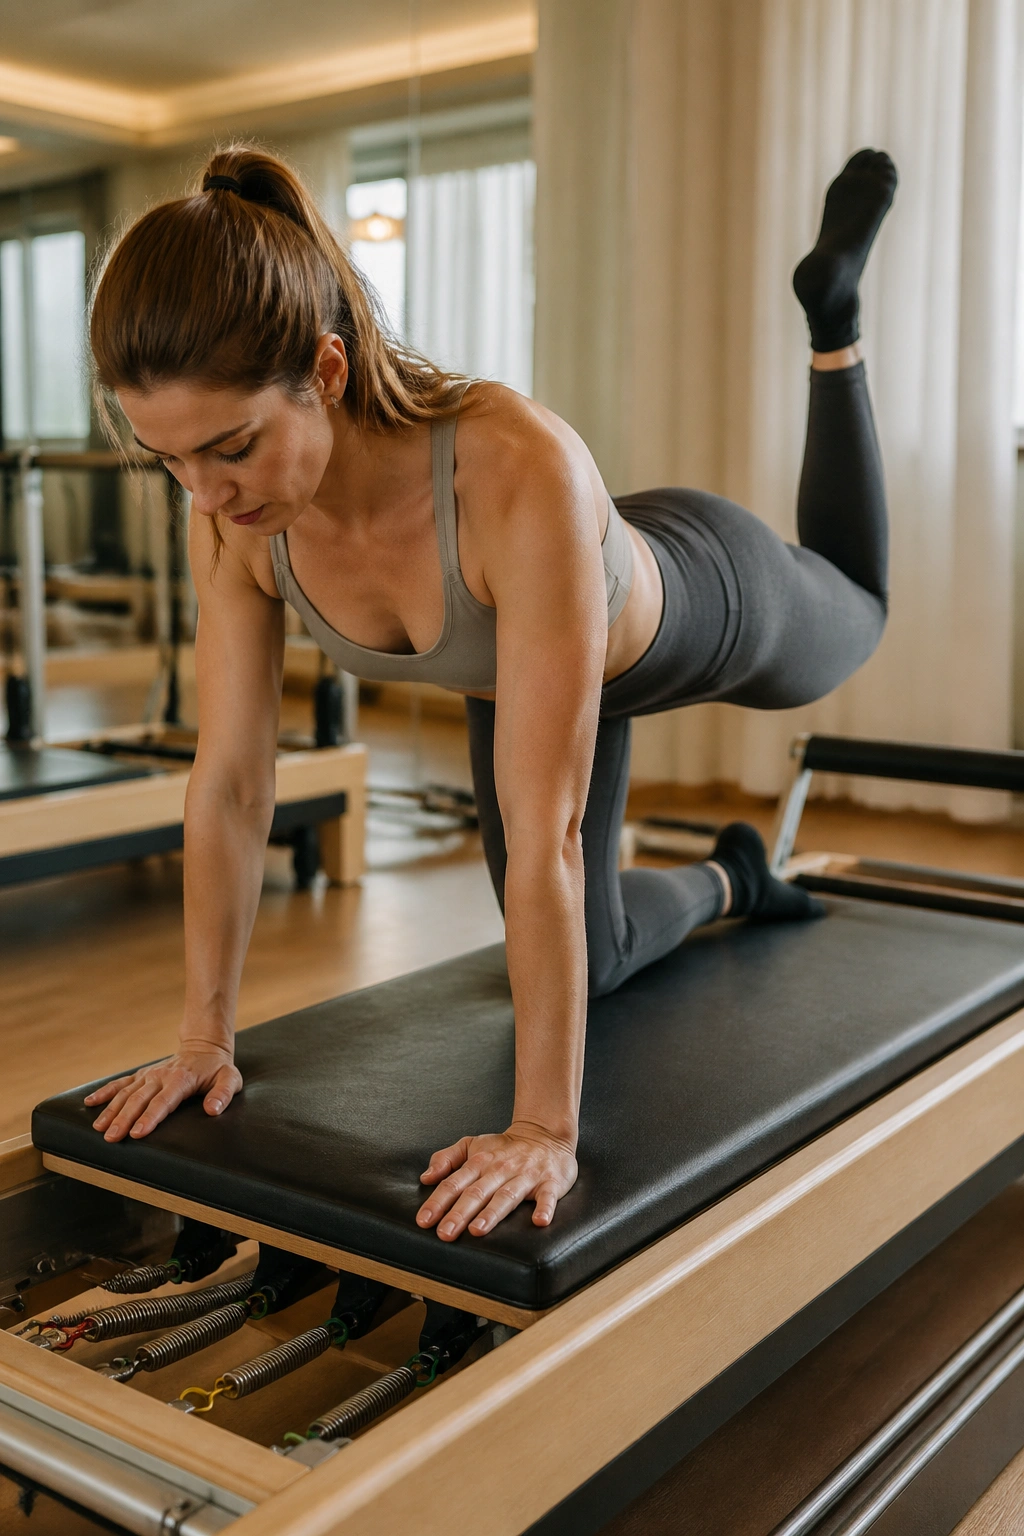
Four breaths is enough to feel this one if you do it honestly.
Get into all fours on the carriage with the hands under the shoulders and the knees under the hips. From there, bend one knee and press the sole of the foot toward the ceiling in a small kickback. The movement is tiny. The effort is not. Keep the belly lifted so the low back does not take a shortcut.
What Makes It Different
The moving carriage adds a little instability under the knees and hands, which means the body has to organize itself before the glute can drive the leg. That’s why this variation feels cleaner than a floor-based donkey kick for many people.
A few useful checks:
- Hips stay square.
- Neck stays long.
- The foot does not need to go high.
- The ribs do not flare.
A common mistake is chasing height and turning the movement into a low-back arch. Don’t. Stop the leg when the glute stops the movement. That point arrives sooner than most people expect.
If the shoulders wobble, widen the base of the hands a touch. Stability first. Burn second.
8. Long Box Donkey Kicks
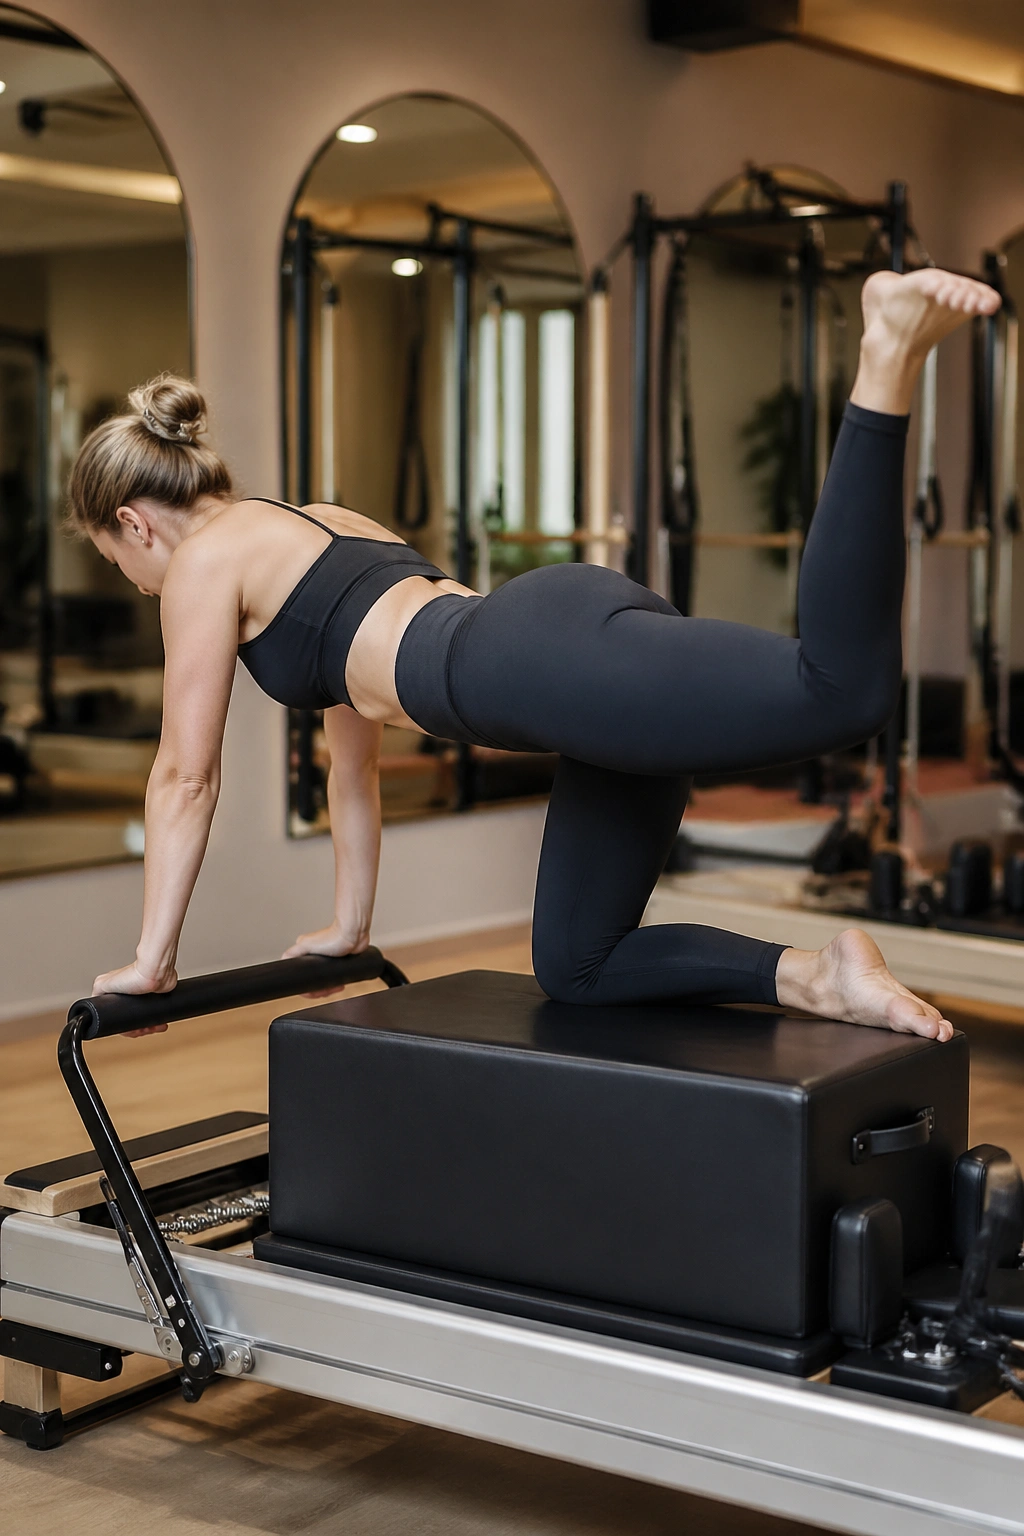
Some people only feel this in the hamstrings. That usually means they’re lifting too high.
Place the long box on the reformer, kneel or lie prone depending on your setup, and brace the hands on the front edge or footbar for support. Bend one knee and drive the heel upward in a donkey-kick pattern, keeping the thigh lined up with the hip. The goal is not altitude. The goal is contraction.
Why It Works
Prone work changes the angle completely. Instead of loading the glutes from a bridge shape, you ask them to extend the hip while the torso stays quiet. That is a good test of whether the glute max is actually doing the job or just pretending to.
A light spring usually keeps the carriage honest. Heavy resistance here often makes the pelvis tip or the rib cage arch. Not worth it.
You want to feel the back of the hip tighten at the top, hold for a beat, then lower without dropping the carriage with a bang. A slow, deliberate descent matters. The eccentric part of the rep is where a lot of the work hides.
9. Long Box Leg Lifts with External Rotation
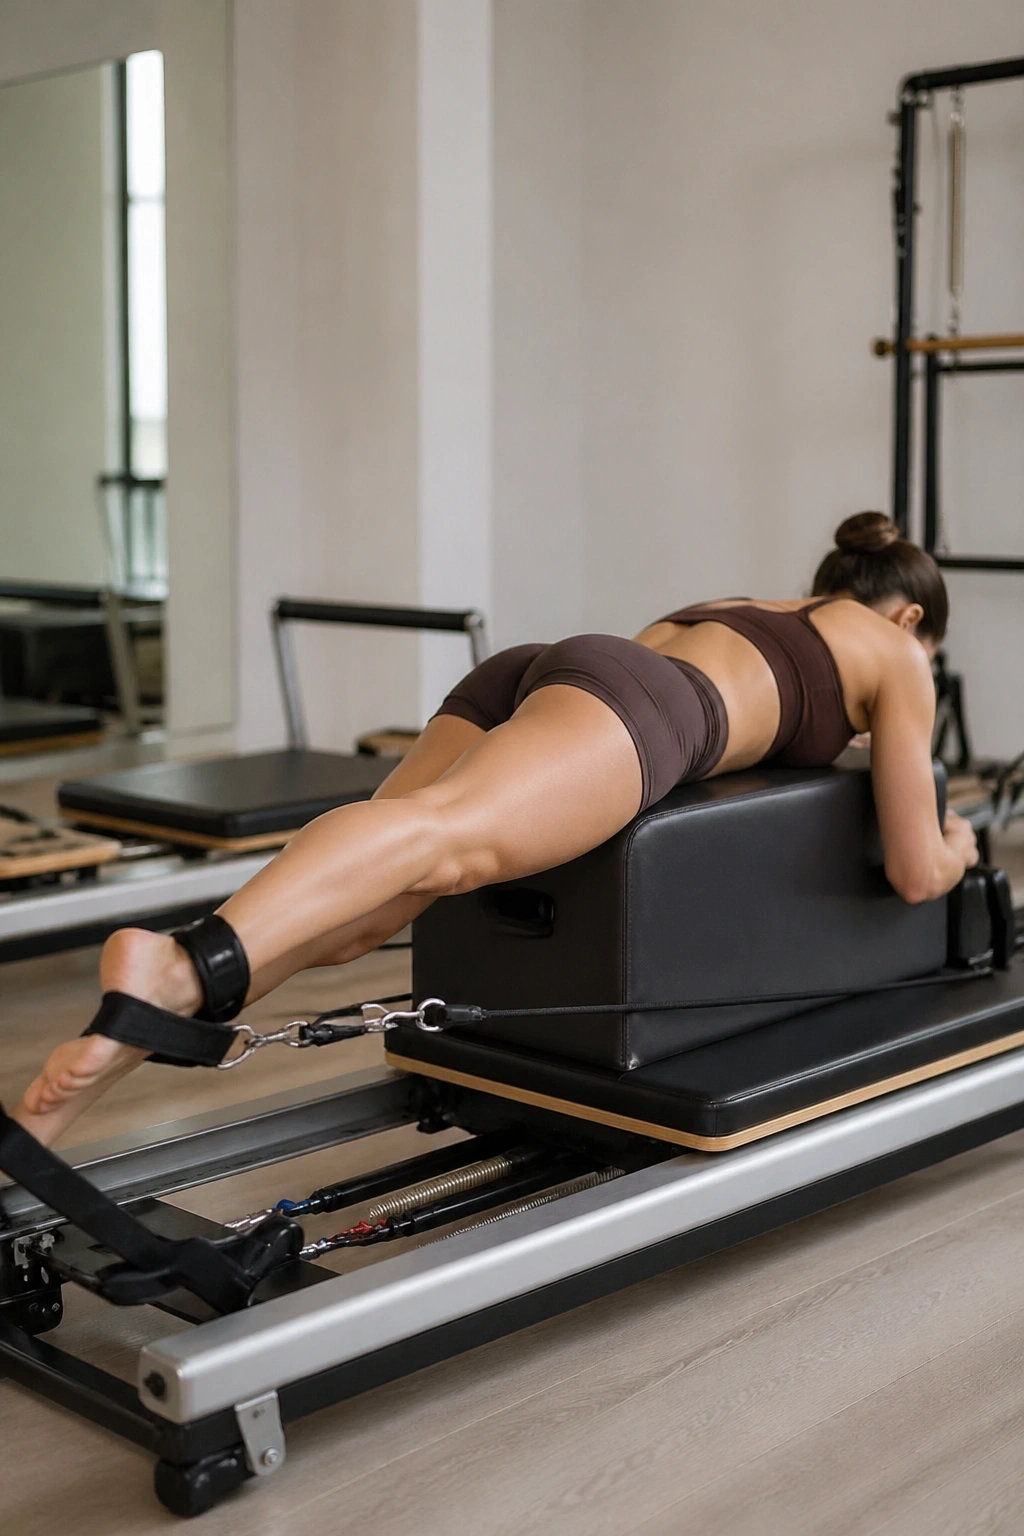
Want the upper glute to wake up? Turn the leg out a little and lift with less ego.
This variation starts much like the donkey kick, but the working leg stays slightly externally rotated. That tiny angle shift changes the line of pull enough to bring more of the side-glute fibers into play. It’s subtle. It’s not glamorous. It works.
Lie prone on the long box, support the upper body, and point the knee slightly outward before lifting the leg a few inches. The movement should stay small and controlled. If the pelvis starts to twist, the lift is too large.
The Angle Matters
The glute med and the upper fibers of the glute max help control this position. You’ll often feel the outer hip grab before the big glute burn shows up.
Use these cues:
- Keep both hip bones heavy.
- Lift from the hip, not the knee.
- Stop before the low back arches.
- Return slowly.
This one is especially useful if your regular bridges feel too front-loaded or if your outer hips tend to lag behind your stronger glute max.
10. Standing Scooter Presses
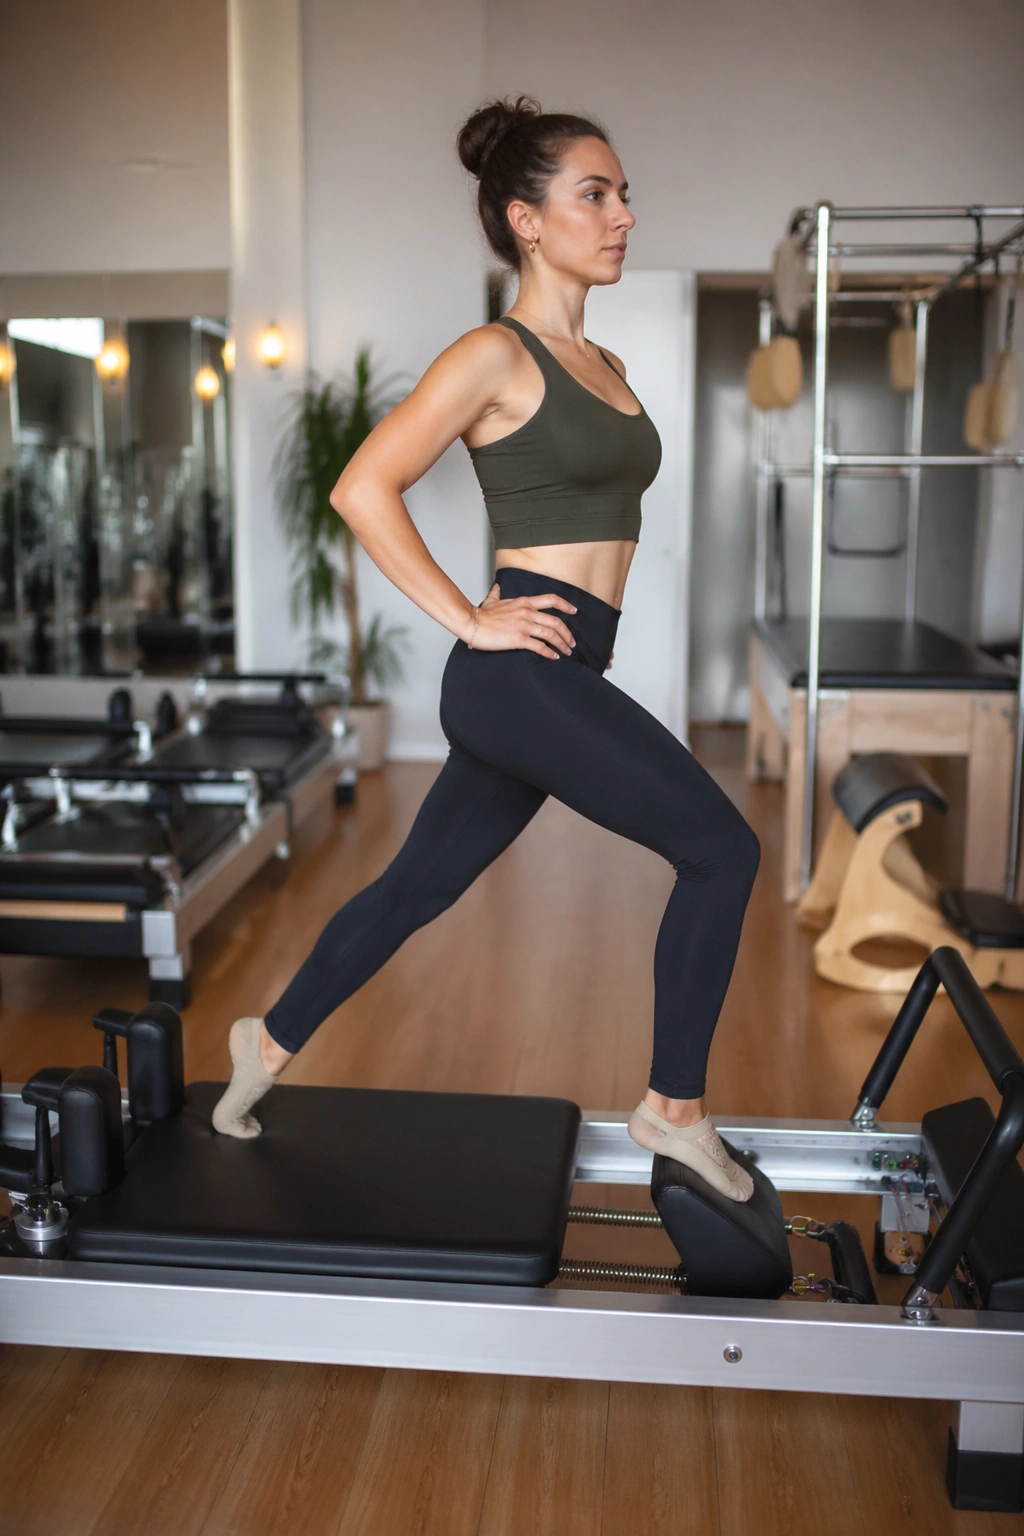
Standing work exposes lazy glutes fast.
A scooter press on the reformer usually looks calmer than it feels. One foot stays planted while the other presses the carriage back and returns, all while the torso remains tall and the standing hip stays square. It is a small-range standing drill with a nasty little payoff.
The standing leg has to stabilize while the working leg extends. That means you get glute max on one side and glute med on the other. Both matter. Both burn, if you set it up cleanly.
Setup That Helps
- Keep the standing knee soft.
- Hinge slightly at the hips.
- Avoid leaning the shoulders over the carriage.
- Press the carriage only as far as you can control it back.
A lot of people turn scooter presses into a push from the lower back. Bad trade. Keep the pelvis quiet and the rib cage stacked over the hips.
This is a good move when you want to feel glutes in a more upright, everyday pattern. Walking, climbing, standing on one leg — the reformer is just exaggerating the parts you usually skip.
11. Split Squats on the Reformer
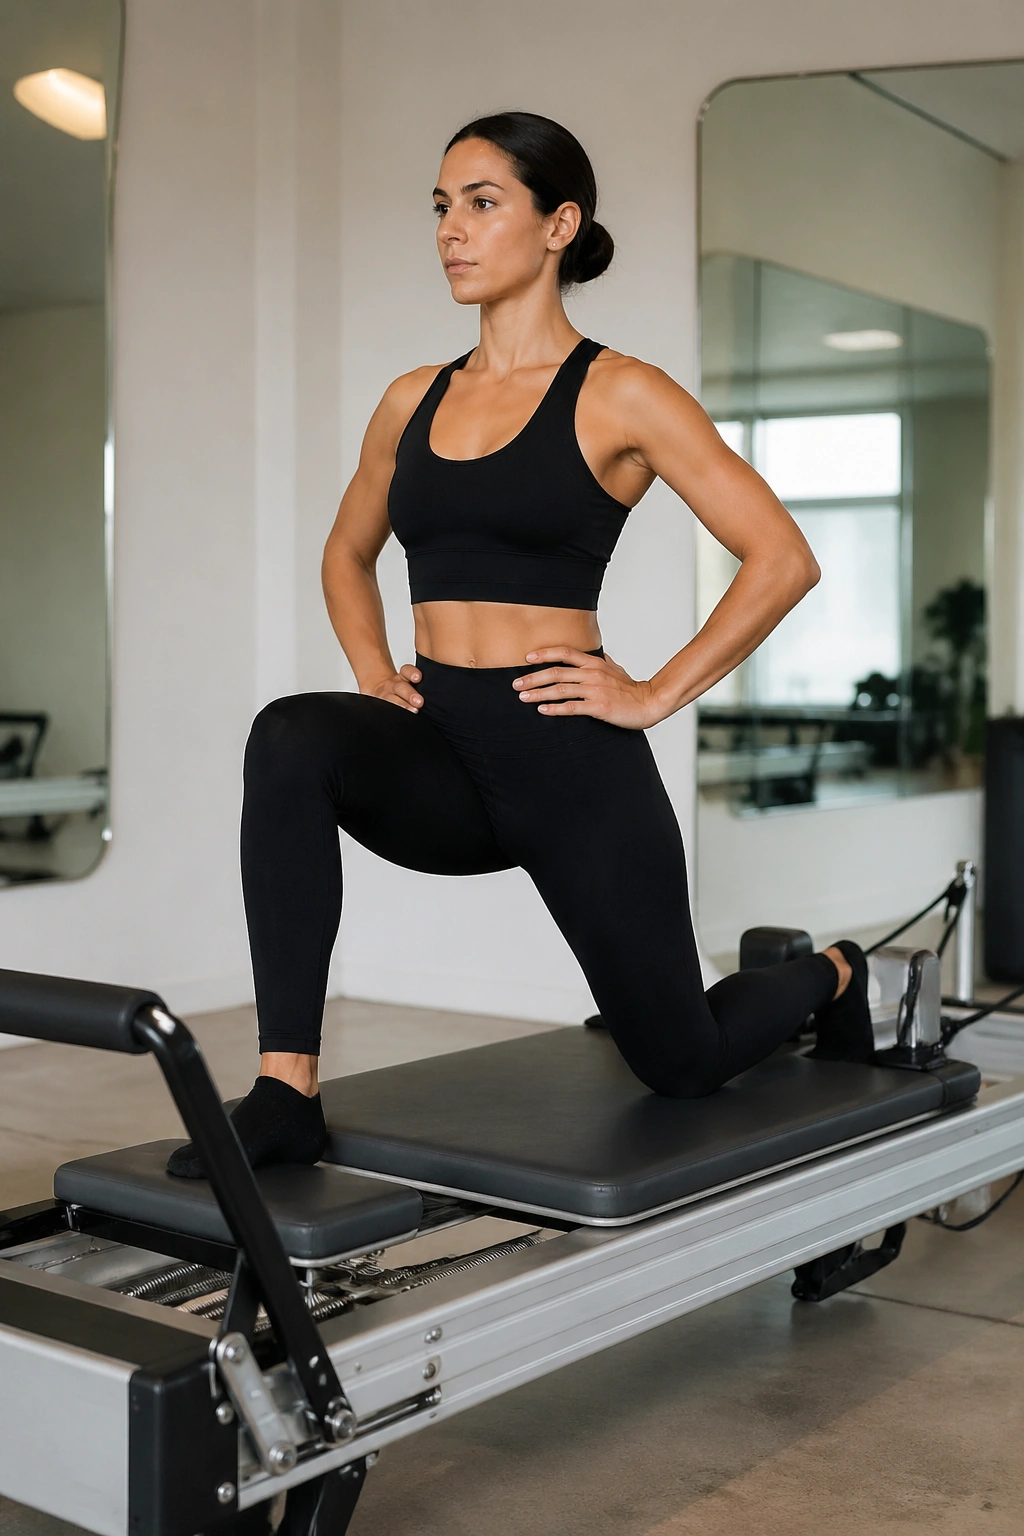
A split squat on the reformer is not about looking athletic. It is about finding the point where the front heel digs in and the back hip stops being lazy.
Set one foot forward and one foot back in a split stance with the carriage under light to medium spring tension. Lower into a controlled squat, then press back up without bouncing. The front leg usually does the heavy lifting here, but the back-side glute helps keep the pelvis from tipping and the carriage from drifting.
How Deep Should You Go?
Deep enough to feel the glute, not so deep that the pelvis tucks and the back rounds. That line is personal and changes from day to day. If your knee collapses inward, the stance is probably too narrow or too aggressive.
A few solid cues:
- Front heel stays rooted.
- Back hip stays long.
- Chest stays lifted without flaring the ribs.
- The carriage moves smoothly, not in a jerk.
If you want more glute emphasis, take a slightly longer stance and lean the torso forward a touch. Not much. Just enough to load the back half of the hip without dumping into the spine.
This one is honest. It tells you where you’re strong and where you’re faking it.
12. Side Splits
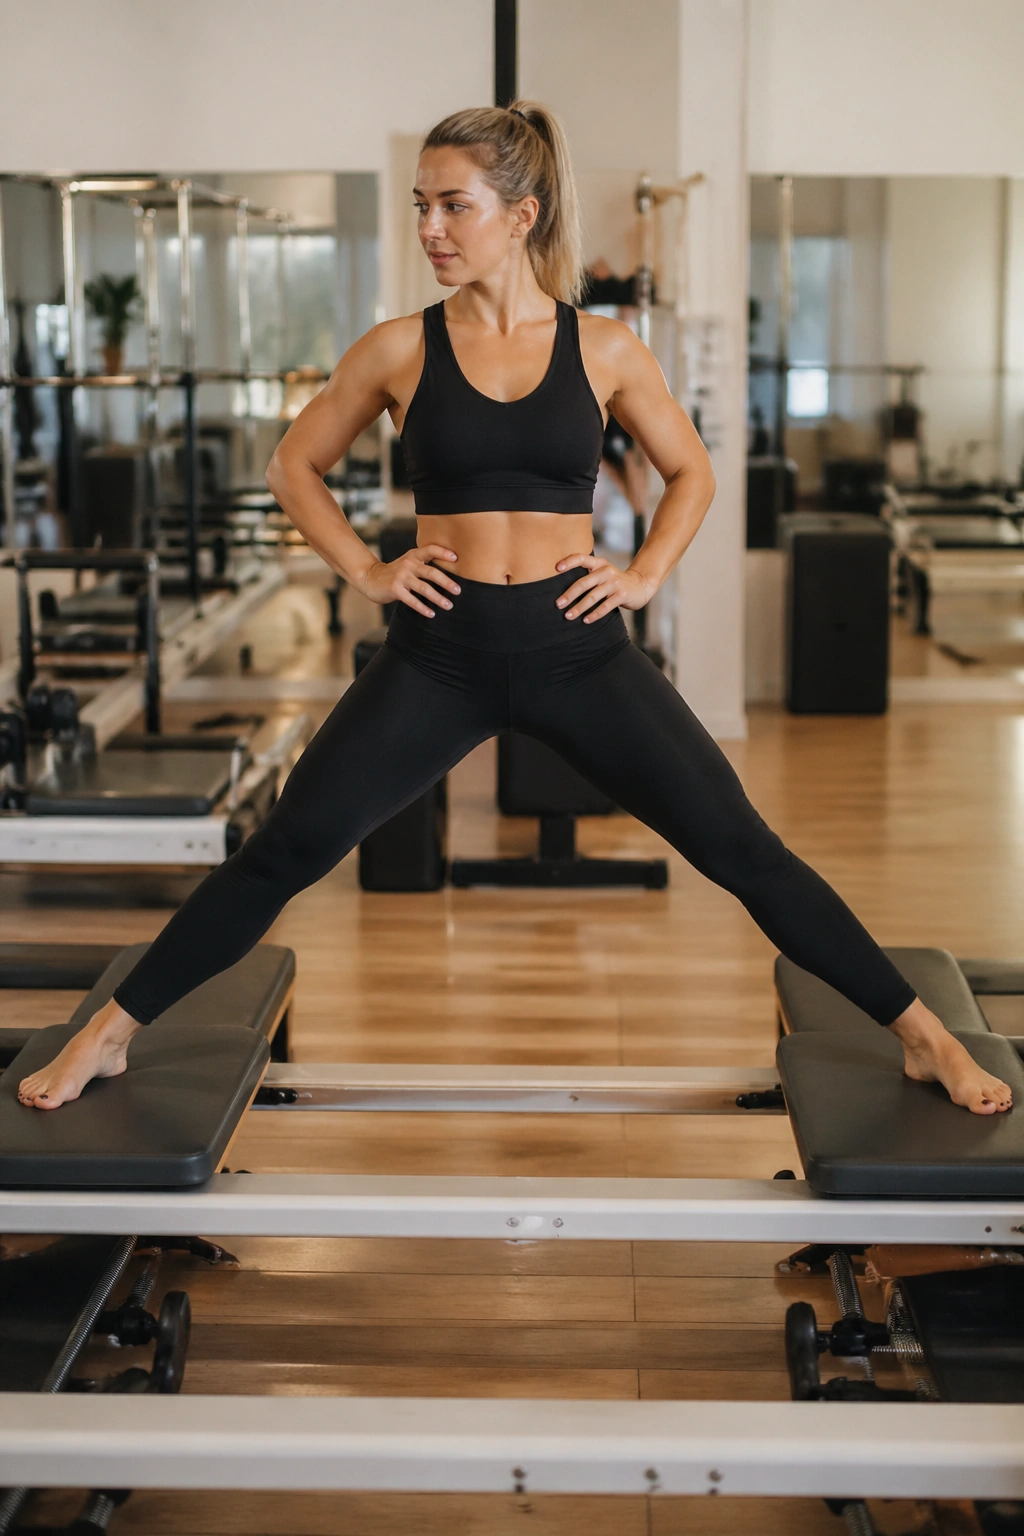
The side split is not about going wide. It’s about keeping the hips square while the glutes stop the carriage from sliding away.
Stand on the reformer in a split stance with each foot on a separate platform or carriage path, then press the legs apart a few inches and draw them back together under control. The glute med and the deep hip stabilizers are working hard here, especially when the knees stay soft and the torso stays centered.
What Makes It Hard
The side split asks the body to resist motion instead of creating a big flashy movement. That is harder than it looks. The outward press can feel easy for one rep and shaky by the third if your hips are drifting or your toes are gripping.
Use a light spring. Too much resistance turns it into a leg press. Too little and the carriage loses enough feedback to make the movement vague.
Watch for these mistakes:
- Collapsing into one hip.
- Locking the knees straight.
- Turning the torso to help the carriage move.
- Letting the feet roll inward.
The best side split is tidy, not dramatic. You should finish feeling the outer hips and the deep side of the seat, not just the inner thighs.
13. Elephant With a Hip Hinge Focus
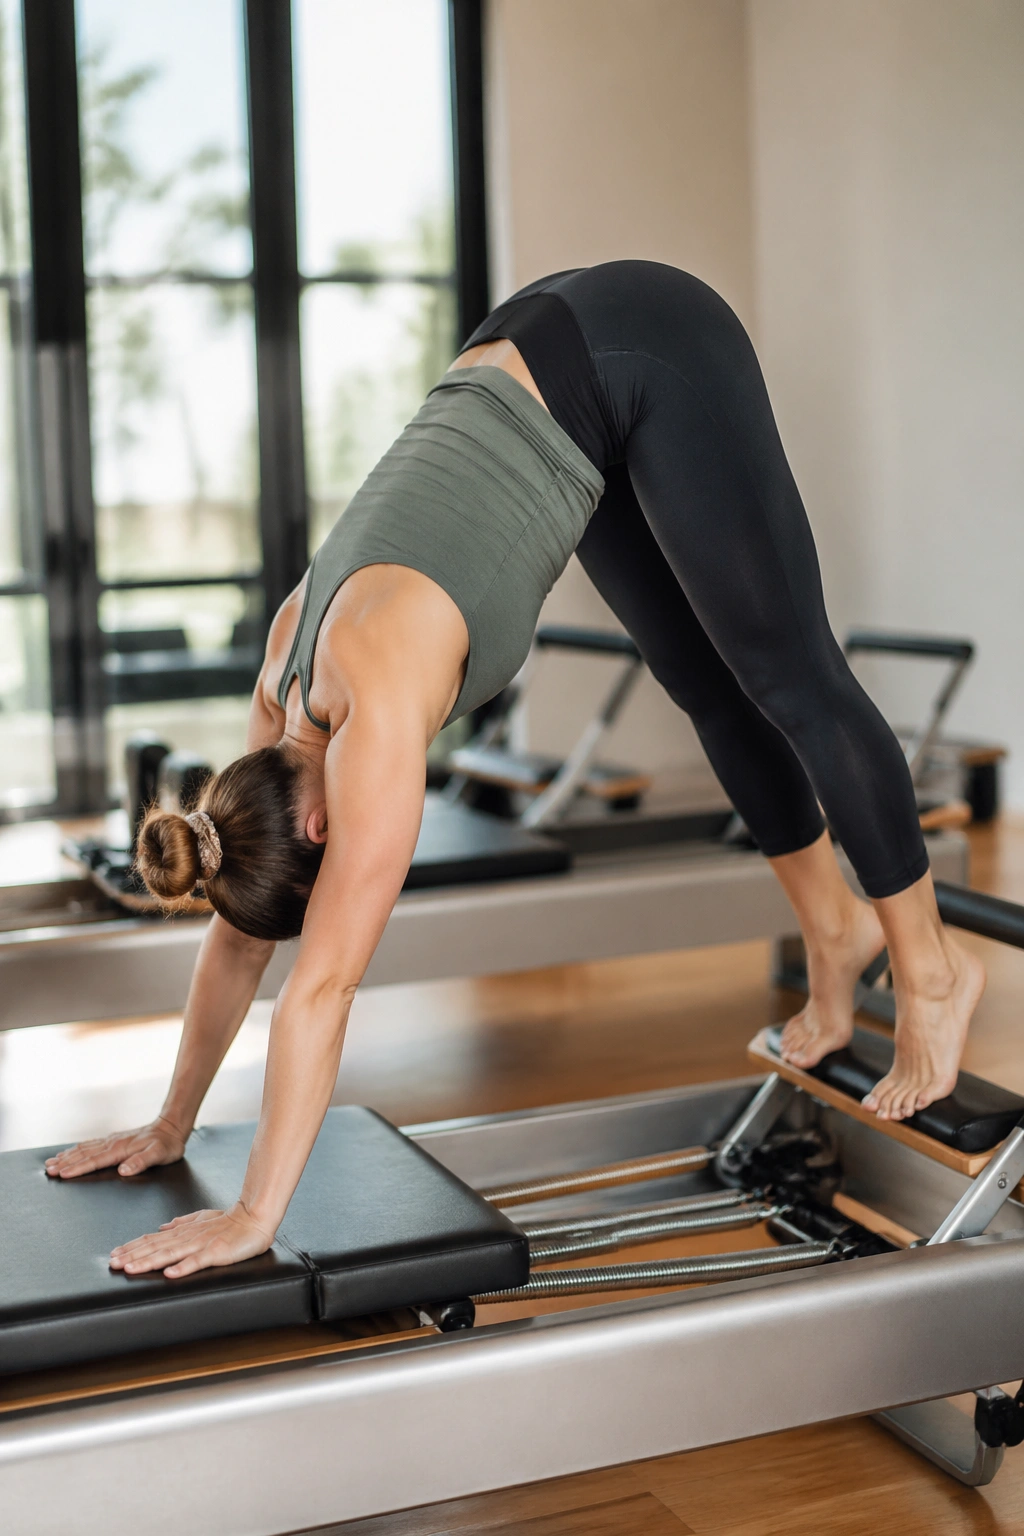
If your hamstrings cramp during bridges, elephant can teach you to hinge without stealing from the low back.
Place the feet against the footbar, hands on the carriage, hips lifted high, and walk into the familiar elephant shape. From there, press the carriage out and pull it back by folding and unfolding at the hips. The back stays long, the abs stay active, and the glutes help organize the hinge.
Why Glutes Care About This One
Elephant is not a pure glute move, but it ties the hamstrings and glutes together in a way that matters. It teaches the body to load the back of the legs without losing the line of the spine. That skill carries straight into squats, lunges, and even the walking pattern.
Keep the knees soft. Do not chase a huge carriage range. The movement should look calm from the outside, and your hips should feel like they are doing a controlled fold rather than a dump into the shoulders.
A useful cue: push the floor away through the heels while the sit bones lift. That image keeps the work in the back line where it belongs.
This one is a little humbling. Good. The glutes tend to behave better after it.
14. Semi-Circle Bridge
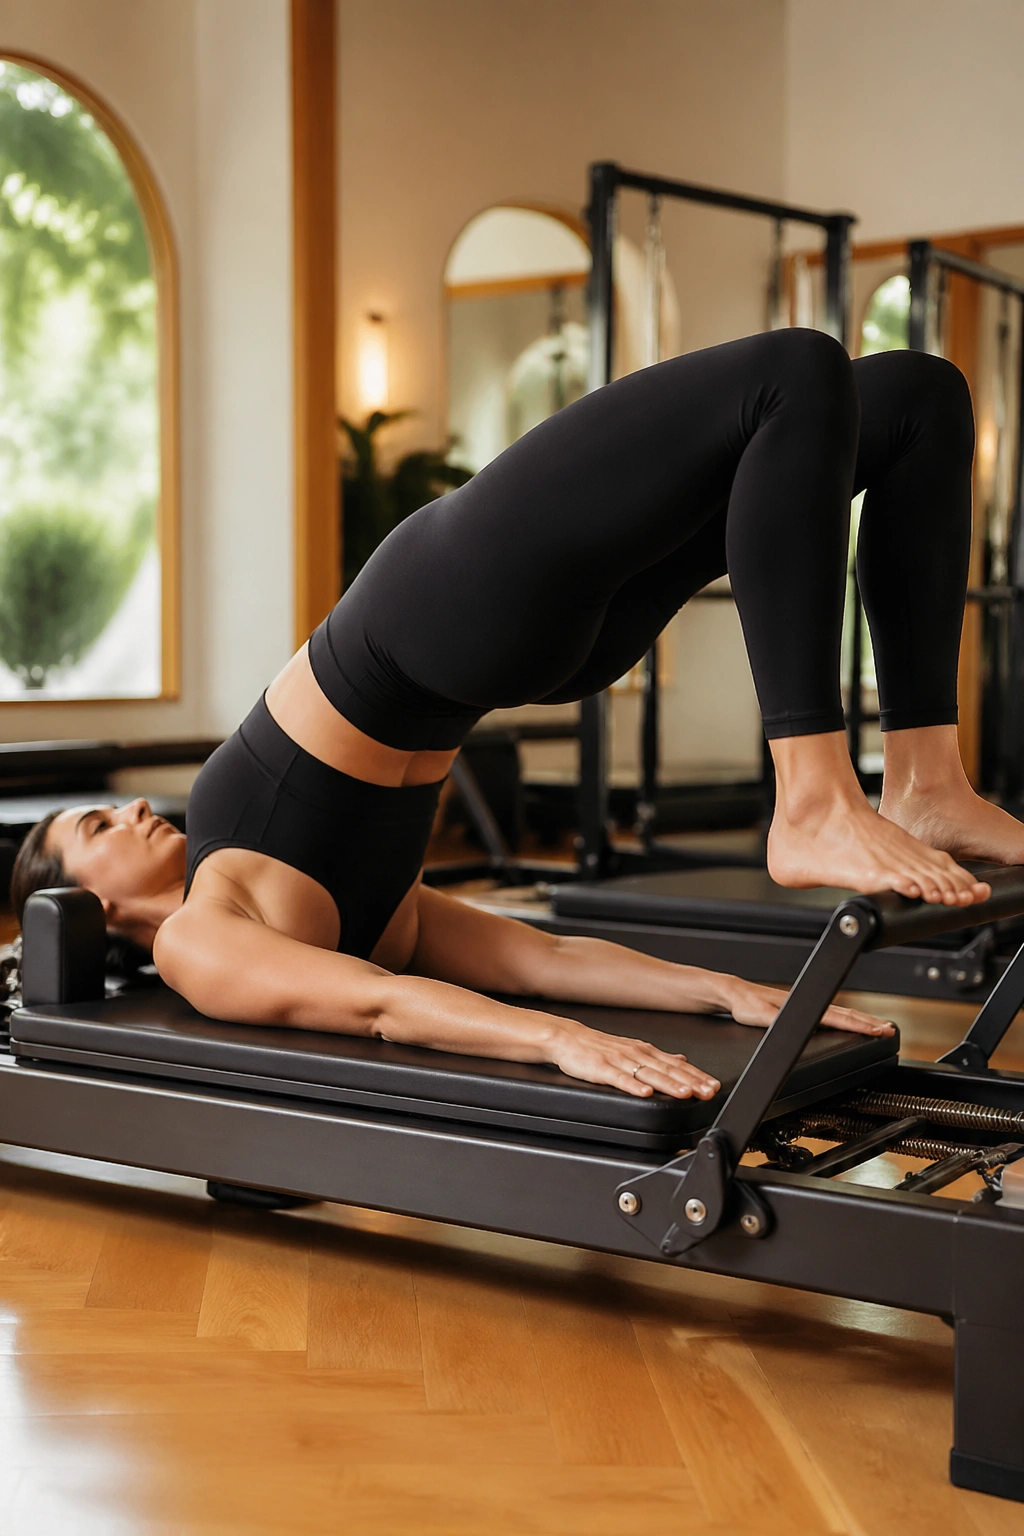
A semi-circle bridge is one of the prettiest glute burners on the reformer, and it earns the hype the old-fashioned way: by making the hips work through a long, controlled arc.
Start in bridge with the feet on the footbar and the carriage under light to medium tension. Press the carriage out, roll the spine down a little, then draw it back in and lift again. The hips travel in a smooth curve, not a sharp drop. The glutes stay loaded the whole time.
Why It Feels So Good
The semi-circle gives you both length and compression. The back of the hips has to hold the bridge while the spine rolls with control, and that combination lights up the glutes in a way that straight pulses do not always match.
The temptation is to over-arch at the top. Skip that. Keep the ribs contained, keep the chin relaxed, and let the hip joint do the work. If you lose the shape, the lower back starts writing checks the glutes should be paying.
This is a move where slow tempo matters more than extra reps. Six clean reps can do more than twelve sloppy ones.
15. Bridge Marches
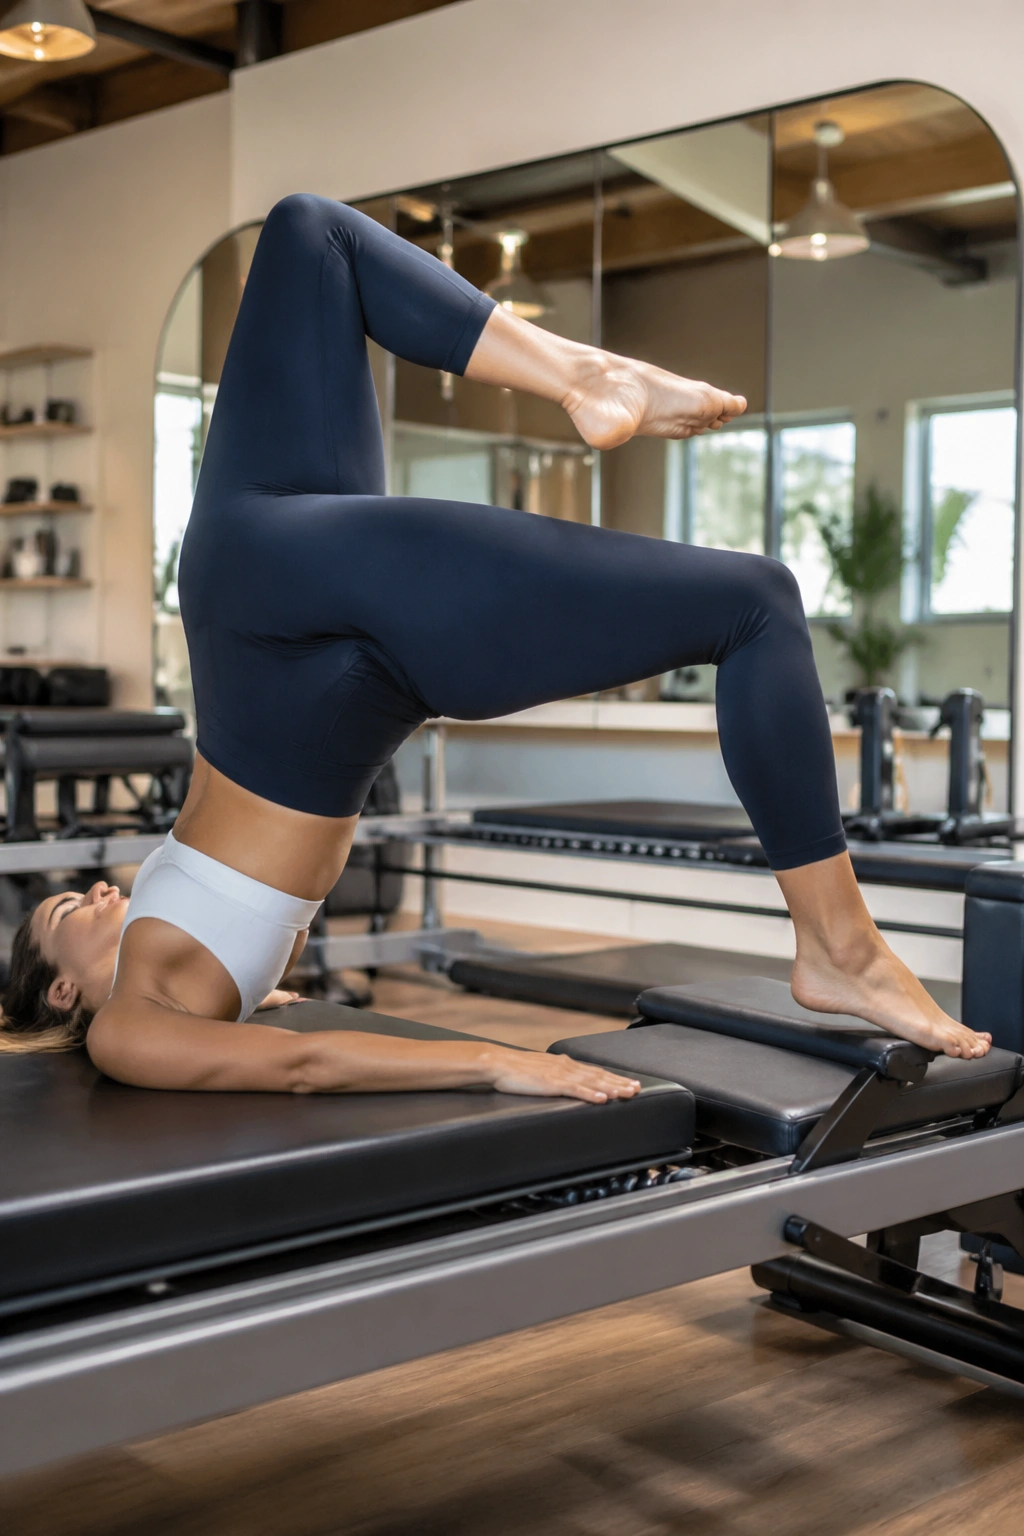
A bridge march is a quiet test of whether your pelvis can stay level when one leg leaves the floor for a second. That’s it. That’s the whole trick. And it is hard.
Lift into a bridge with the feet planted on the footbar, then march one foot a few inches off the bar, set it back down, and switch sides. The hips should stay as level as possible. No rocking. No twisting. No dramatic bounce.
The Real Work
The standing-side glute works to stabilize the pelvis while the lifted side gets just enough freedom to move. That makes bridge marches a clean anti-rotation drill, which is a fancy way of saying your hips have to stay honest.
A few cues keep it useful:
- Keep the bridge lower if needed.
- Lift the marching foot only a few inches.
- Press evenly through the grounded heel.
- Exhale before each lift.
If the pelvis drops, reduce the height of the bridge before you make the march harder. That small adjustment usually fixes the form immediately.
This is one of those exercises that looks easy in a mirror and feels like a problem set in the middle of your body.
16. Reverse Lunge Kickback Combo
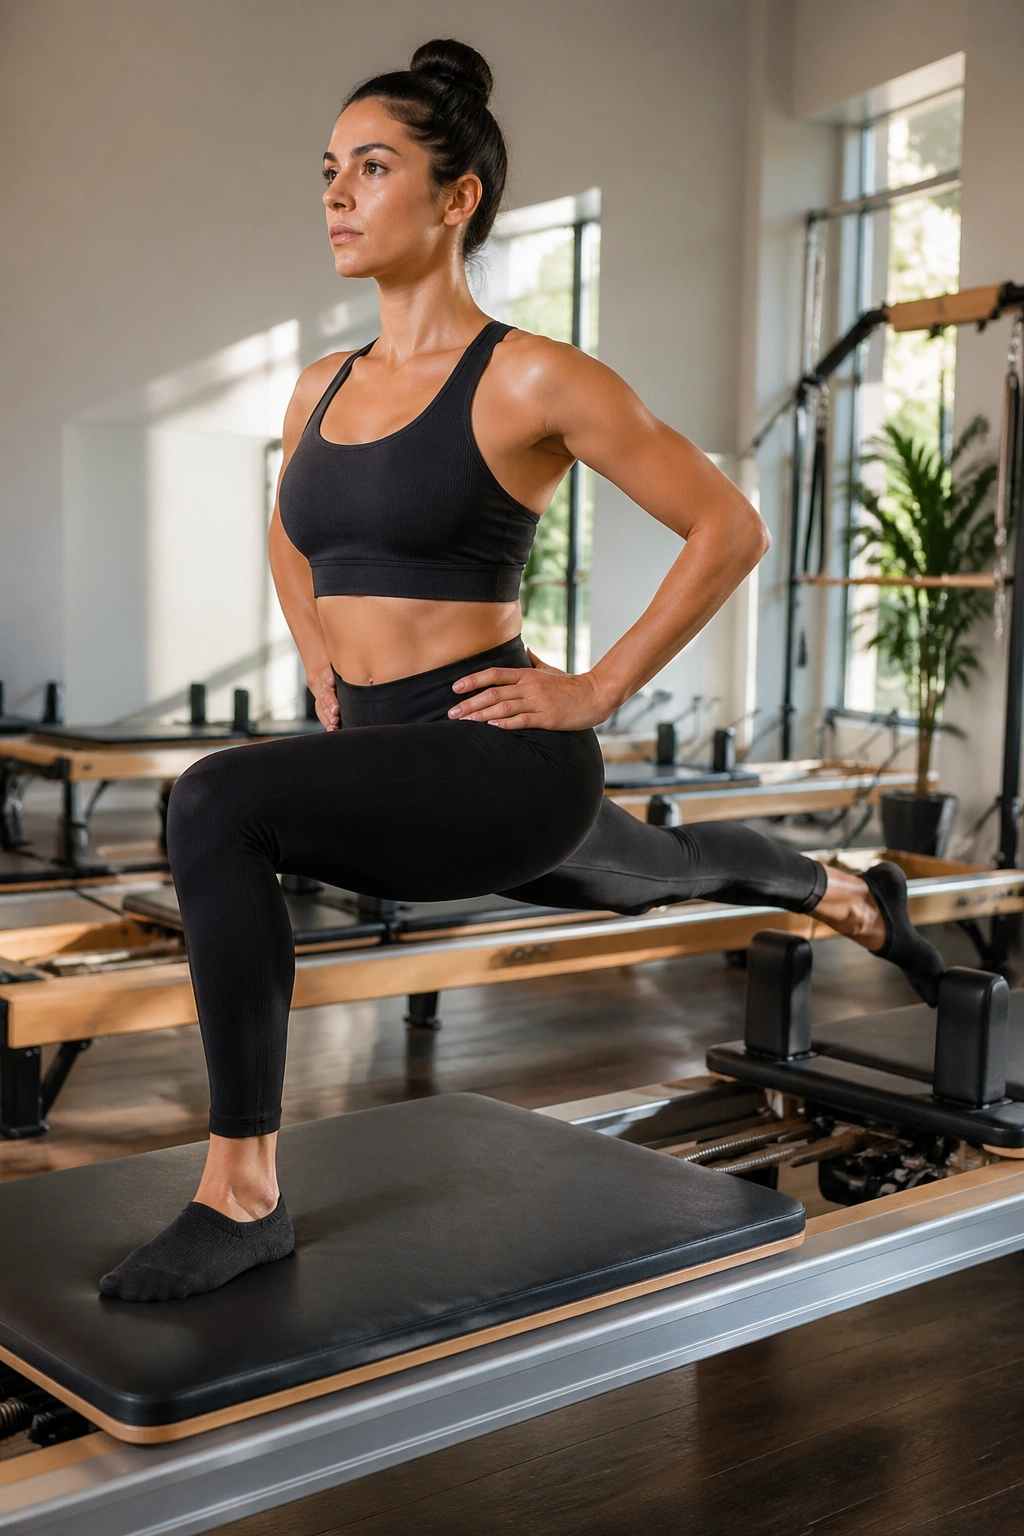
A split stance is one thing. A split stance with a kickback added is where the glutes start complaining in a good way.
Set up in a reverse lunge position on the reformer, using a stable foot on the platform and the other on the carriage. Lower into the lunge, then drive through the front heel as you rise and add a small kickback or hip extension on the back side if your setup allows it. The movement should stay smooth and controlled.
This combo loads the glutes in two directions: lowering under control and pressing out of the bottom. That makes it a strong pick if you want a more athletic feel without leaving the reformer.
What to Watch
The torso should not pitch forward to fake depth. Keep the chest open and the pelvis square. If the working knee caves inward, shorten the stance and slow down.
The glute on the front leg usually works hardest, but the back-side hip stabilizers matter too. That’s the part many people miss. They think the move is only about the “burn leg” when the other side is doing quiet, ugly work to keep the shape intact.
It’s a sharp drill. Treat it that way.
17. Standing Strap Kickbacks
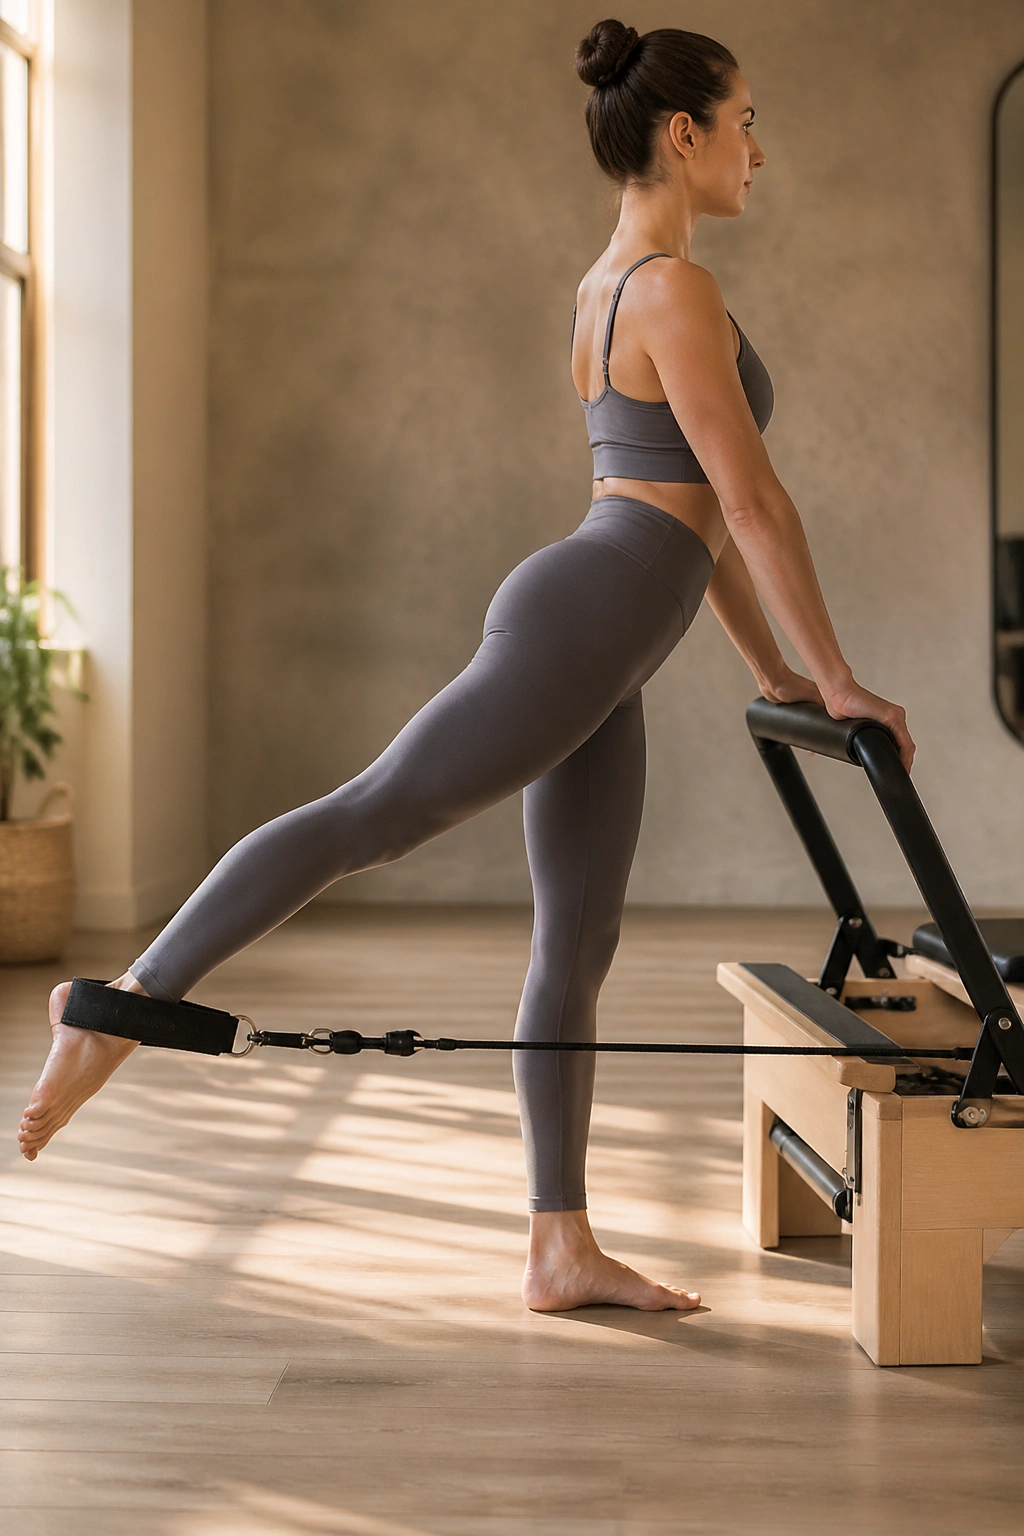
You do not need a giant leg swing here.
Stand facing the reformer with one foot in the strap behind you, hold the frame or shoulder block for balance, and press the leg straight back in a controlled kickback. The torso stays tall. The working leg stays long. The movement comes from the hip, not the spine.
Why This One Sticks
Standing strap kickbacks ask the glute max to extend the hip while the rest of the body resists leaning forward or twisting. That makes the exercise feel surprisingly local in the seat of the working leg, especially when the return is slow and the range stays modest.
Keep these points in mind:
- Avoid arching the low back.
- Keep the pelvis square to the front.
- Press back only as far as you can return cleanly.
- Use the standing leg as an anchor, not a prop.
If the foot in the strap starts swinging instead of pressing, the spring is probably too light or the pace is too fast. Slow down first. Change resistance second.
This is one of the better choices when you want a single-side glute drill that feels direct and does not need much setup drama.
18. Glute Burnout Ladder on the Reformer
The cleanest way to finish a glute session is not with one hero move. It’s with a short ladder that keeps changing the angle just enough to keep the muscles awake.
Run this as a circuit with minimal rest between moves:
- 8 frog presses on the footbar
- 8 bridge pulses
- 8 side split presses or holds
- 8 quadruped kickbacks on each side
- 8 standing strap kickbacks on each side
Then repeat the circuit one more time if your form stays tidy. If the pelvis starts tipping or the low back starts talking, stop after one round. There is no prize for sloppy reps.
How to Use It Well
This finisher works best after a main block of two or three stronger exercises, like split squats, semi-circle bridges, or single-leg bridges. It is not a warm-up. It is the last squeeze before you step off the machine and feel your legs remember every stair in the building.
A good glute session on the reformer usually mixes three things: a bilateral press, a unilateral stability drill, and a side-body move. That pattern keeps the glute max, glute med, and the deep hip stabilizers all earning their keep. If you only do one pattern, the body gets clever and starts hiding the work where it is easier.
That’s why these 18 reformer Pilates workouts for glutes work so well as a menu instead of a straight line. Pick one press, one bridge, one side-body drill, and one standing move. Rotate them. Keep the springs honest. And make the carriage tell you the truth.
