



A lot of people treat push-ups like a checkbox. They knock out a random set, feel the burn, and call it training. That works for a while, sure. Then the reps stall, the shoulders get cranky, and the chest never really changes the way it should.
The better path is messier, and more useful. Push up workouts for stronger upper body development work best when you treat them like real training: change the angle, slow the lowering, use pauses, build power, and track your numbers. A clean set of 8 is not the same thing as 8 half-reps with a sagging midsection and a neck craned forward like you’re trying to inspect the floor.
Push-ups hit the chest, triceps, front delts, serratus, and a surprising amount of core when you keep the torso tight. They also punish sloppy form fast. That is why I like them so much. You get honest feedback. No fancy machine can fake a rep that’s supposed to start from a dead stop on the floor, and no amount of enthusiasm makes a loose plank count.
If your wrists are touchy, use push-up handles or fists. If your shoulders feel better on an incline, use a bench or sturdy counter. And if your goal is real upper-body strength, not just a sweaty finish, pick a few of the workouts below and repeat them until the numbers move. Small progress. Clean reps. That’s the game.
1. Standard Push-Up Density Ladder
A ladder looks simple on paper. It isn’t easy once you’re halfway up it.
A clean ladder like 5-6-7-8-7-6-5 forces you to manage fatigue without falling apart, which is exactly what a lot of push-up routines miss. Rest 30 to 45 seconds between rungs, and stop one rep before your hips start to dip or your head starts hunting for the floor. The point is not to survive. The point is to keep every rep sharp enough to count.
How to run it
- Warm up with 8 scapular push-ups and 10 incline reps.
- Climb the ladder once from 5 to 8.
- Descend back to 5.
- Rest 90 seconds, then repeat for 2 to 4 rounds.
Use this when you want a blend of strength and endurance without turning the session into a grind. Never sprint the first two rungs. If the early sets feel too easy, slow your descent by one count and keep the same ladder.
2. Incline Push-Up Workout for Clean Volume

Can an easier push-up build more strength? Absolutely. If the incline lets you own the full range of motion, you’ll get better pressing volume without the ugly compensations that show up on the floor.
Set your hands on a bench, couch, counter, or even a sturdy box. A higher surface makes the movement friendlier; a lower surface makes it harder. I like starting somewhere around knee height for beginners, then lowering the hands over time as the reps get smoother. Four sets of 12 to 20 is a solid target, with 45 to 60 seconds of rest.
Why the incline matters
A good incline rep teaches you to stack the shoulders, brace the midsection, and press with control. If your elbows flare out or your lower back caves in, the height is too low. Raise the surface and earn the floor.
- Keep your body in one line from head to heels.
- Lower until your chest is close to the support.
- Press until the elbows are straight, but not snapped.
- Breathe out as you drive up.
This is not a “beginner only” move. I use incline work when I want more clean reps than the floor will give me.
3. Decline Push-Up Workout for Upper Chest and Shoulders

Put your feet on a chair, couch, or sturdy step and the movement changes fast. The shoulders take more load, the upper chest has to work harder, and the whole rep feels more demanding from the first descent.
A modest decline is plenty. Twelve to 18 inches is enough for most people, and going much higher too early turns the set into a sloppy handstand imitation. Four sets of 6 to 10 reps works well, with 75 to 90 seconds between sets. Keep the ribs down. If your lower back arches hard enough to hide a small animal, the setup is too aggressive.
The rep should still look like a push-up. That sounds obvious, but I see it broken all the time.
What to watch for
- Hands stay under the shoulders.
- Elbows travel at about 30 to 45 degrees.
- Neck stays long instead of craning forward.
- The chest touches first, not the chin.
Decline push-ups are one of the best bodyweight options when your standard floor reps have gone stale. They’re demanding without needing any equipment beyond something stable for your feet.
4. Close-Grip Push-Ups for Triceps Drive

If your triceps are weak, close-grip push-ups will tell you the truth in a hurry. They also show up bad elbow angle and sloppy lockout faster than almost anything else.
Bring the hands just inside shoulder width and keep the elbows tucked fairly close to the ribs. Don’t jam them hard against your sides; that usually feels awkward and shortens the rep. Five sets of 6 to 12 reps is a useful range here, especially if you pause for half a second at the top of each rep. That little pause keeps the triceps honest.
You’ll know you’re doing them right when the back of the arms starts complaining before the chest does. Fine. That’s the point.
A small tip matters here: if your wrists hate the narrow hand position, turn the hands slightly out or use push-up handles. Pain in the wrist is not a badge of honor. It usually means the hand position needs adjusting, not that you need to tough it out.
5. Wide-Grip Push-Ups for Chest Focus

Wide-grip push-ups ask a different question of the upper body. Instead of leaning so much on the triceps, they shift more work to the chest and outer shoulder line, especially when the range is deep and controlled.
The trick is not to go absurdly wide. Hands about 1.5 times shoulder width is enough for most people. Much wider than that can irritate the shoulders and trim the range so much that the rep turns into a half-press. Four sets of 8 to 15 reps works nicely. Keep the elbows from flaring straight out like wings. That’s the part that usually gets messy.
I like these on days when I want a chest-heavy session without loading a barbell. They’re also useful if standard push-ups feel too triceps-dominant and you want a little more chest recruitment.
One sentence, but it matters: wide does not mean loose. Keep the torso tight and the descent controlled.
6. Pause Push-Ups at the Bottom

Why pause at the hardest part of the rep? Because that’s where most people cheat.
A bottom pause strips away the bounce. You lower under control, hover an inch off the floor or lightly touch the chest down, then hold for 2 full seconds before pressing. Five sets of 5 to 8 reps is a hard but fair dose. Rest 60 to 90 seconds between sets and keep the pause dead still. No sinking. No shifting.
How to use it
- Lower for 2 to 3 seconds.
- Stop at the bottom and hold.
- Press up without bouncing.
- Reset every rep from a tight plank.
These are excellent for raw pressing strength, especially if your normal reps collapse near the bottom. They also expose weak core control fast. If the hips rise during the pause, the set is over. Do not fake the stillness.
7. Tempo Push-Ups with a Slow Lowering

A slow lowering phase changes everything. A rep that feels easy at normal speed can turn demanding fast when the descent takes four full counts.
Try a 4-1-1 tempo: four seconds down, one second held near the bottom, one second up. That gives the muscles more time under tension and makes each rep cleaner. Four sets of 6 to 10 is enough for most people. If you can keep the tempo without losing shape, you’ll feel the chest and triceps light up in a way standard push-ups rarely match.
This style works well when you want control more than raw speed. It’s a favorite of mine for home training because it doesn’t need extra gear to feel hard. Count out loud if you have to. Seriously. The moment you stop counting, the lowering usually speeds up.
A small warning: tempo push-ups punish ego. If six reps at this pace is your number, that’s your number.
8. Plyometric Push-Ups for Explosive Power

The floor feels different when you press fast enough to leave it.
Plyometric push-ups are about power, not burn. That means fewer reps, more rest, and cleaner intent. Start with 3 to 5 reps per set and take 90 seconds to 2 minutes between rounds. If you can pop the hands off the floor, great. If not, a quick, explosive push without full airtime still counts. The goal is a violent press with control on landing.
Land softly. That part matters more than the clap.
What makes them worth using
- They teach fast force production.
- They wake up the chest and triceps in a different way.
- They pair well with slower strength work on another day.
- They work best when fatigue is low.
I would not put plyometrics at the end of a brutal circuit. That’s the fast track to ugly reps and cranky wrists. Use them early in the session, when you’re fresh and the movement is crisp.
9. Diamond Push-Ups for Lockout Strength

Diamond push-ups are miserable in the best possible way. The hands come together under the chest, the elbows stay tucked, and the triceps get dragged into the spotlight.
The shape does not have to be a perfect diamond. In fact, a slightly wider triangle is often friendlier on the wrists and shoulders. Four sets of 5 to 12 reps is enough to make the back of the arms work hard. Keep the chest open and the neck relaxed. If you jam the shoulders forward, the rep turns into a joint test instead of a strength move.
I like these for lockout strength because they punish the top half of the press if you rush. The chest helps, sure, but the arms have to finish the job.
If your wrists complain, use handles or place your hands on dumbbells. Small adjustment. Big difference.
10. Hand-Release Push-Ups for Full Range

Most people cheat the bottom of a push-up without even noticing. Hand-release push-ups fix that fast.
Lower all the way down, let the chest touch the floor, then briefly lift the hands off the ground before pressing back up. That tiny hand lift removes the bounce and forces a full dead stop every rep. Four sets of 10 to 15 reps is a smart starting point, and the rest can stay around 60 seconds.
A simple setup
- Lie flat with the chest on the floor.
- Pull the hands off the ground for a split second.
- Plant the palms near the ribs.
- Press up from a dead stop.
These are honest. That’s why they work.
They’re also useful if you want a workout that exposes weak spots in the bottom range without needing more equipment. If the first few reps feel smooth and the later reps turn into a crawl, good. That means the movement is doing its job.
11. Shoulder Tap Push-Ups for Core and Control

A push-up plus a shoulder tap looks innocent until the hips start dancing around.
Do one push-up, then tap the opposite shoulder with one hand while keeping the body as quiet as possible. Alternate sides each rep. You can also do the tap from the top of each push-up if that feels cleaner. Three to four sets of 6 to 8 push-ups with 12 to 16 total taps is a solid session. Keep the feet a little wider than a standard push-up stance if you need more stability.
The value here is not just the press. It’s the anti-rotation work. Your core has to stop the torso from twisting while the arm leaves the floor, and that’s a useful skill for almost any upper-body routine.
One rep should look boring. If your hips swing side to side, shorten the range or widen the stance. Control first, speed later.
12. Archer Push-Ups for One-Side Load

Unlike a regular push-up, an archer push-up makes one arm do most of the work while the other stays long and helps with balance.
That shift matters. It loads one side harder, which is useful when standard push-ups stop feeling challenging. Set the hands wide, lower toward one side, and keep the opposite arm straighter. Three to five reps per side is plenty for most people, and four sets usually leaves enough gas in the tank to keep the form clean.
What to notice
- One elbow bends deeply.
- The other arm stays extended.
- The torso shifts slightly toward the working side.
- The chest stays square instead of twisting open.
Archer push-ups are a bridge, really. They sit between bilateral push-ups and one-arm progressions, which makes them valuable if you want more strength without jumping straight to something that’s too advanced.
They are not a vanity move. They’re a real test.
13. Offset Push-Ups with One Hand Raised

What happens when one hand is higher than the other? The body has to fight for balance, and the stronger side can’t do all the work.
Place one hand on a book, a dumbbell, or a small block about 2 to 4 inches high. The lower hand stays on the floor. That offset changes the load and makes the pressing side work through a slightly different path. Four sets of 6 to 8 reps per side is enough to feel it. Switch the raised hand each set so both sides get equal time.
I like this variation because it is simple and sneaky. It looks close to a normal push-up, so people underestimate it. Then the last three reps start wobbling.
If the height feels too steep, drop to a thinner object. If it feels too easy, raise the hand a little more. The best part is the adjustment is tiny, not dramatic. That makes it easier to progress without trashing form.
14. Staggered-Stance Push-Ups for Anti-Rotation

A staggered stance sounds small. It isn’t.
Move one hand slightly forward or one foot slightly ahead of the other so the body has to resist a twist as it presses. This version hits the chest and triceps, but the core has to work harder to keep the torso from rolling open. Four sets of 8 to 12 reps, then switch the lead side, makes a very neat upper-body session.
The beauty here is the subtlety. You’re not changing the exercise into something unrecognizable. You’re just forcing the body to stabilize in a less comfortable position.
Keep the hands about shoulder width apart and the feet wide enough to feel balanced. If the hips swing side to side, slow down. The whole point is control. A staggered rep that looks smooth is worth more than a rushed set of ten.
15. Mechanical Drop-Set Push-Up Workout

This one leaves your chest talking back.
A mechanical drop set starts with the hardest version you can handle, then drops to easier versions without rest. Say you begin with decline push-ups for 5 reps, move straight into standard push-ups for 8 reps, and finish with incline push-ups for 12 reps. Rest 90 seconds, then repeat for 3 to 4 rounds. The load gets lighter, but the effort stays high.
A clean sequence
- 5 decline push-ups
- 8 standard push-ups
- 12 incline push-ups
- 90 seconds rest
- Repeat 3 to 4 times
This works well for size and endurance because you extend the set without letting fatigue kill the whole session. It is also brutally efficient when time is short. No wasted motion. No setup drama.
The one rule: keep the movement quality decent on every drop. If the incline reps look like a collapse, you went too hard on the first tier.
16. EMOM Push-Up Workout

EMOM stands for every minute on the minute, and it’s one of the cleanest ways to train push-ups without getting sloppy.
Pick a number you can hit with good form, then start a timer for 10 minutes. Do your reps at the top of each minute, rest for whatever time remains, then repeat. Eight reps per minute is a fair starting point for a lot of people. If that feels easy, add a rep or extend the session to 12 minutes.
A simple 12-minute setup
- Minute 1: 8 reps
- Minute 2: 8 reps
- Minute 3: 8 reps
- Minute 4: 8 reps
- Minute 5: 8 reps
- Minute 6: 8 reps
- Minute 7: 8 reps
- Minute 8: 8 reps
- Minute 9: 8 reps
- Minute 10: 8 reps
- Minute 11: 8 reps
- Minute 12: 8 reps
The nice part is the pace. You never drift. You never wander. The clock keeps you honest.
If your form slips before the minute ends, lower the rep target. The workout should feel brisk, not desperate.
17. Ladder Combo Push-Up Circuit
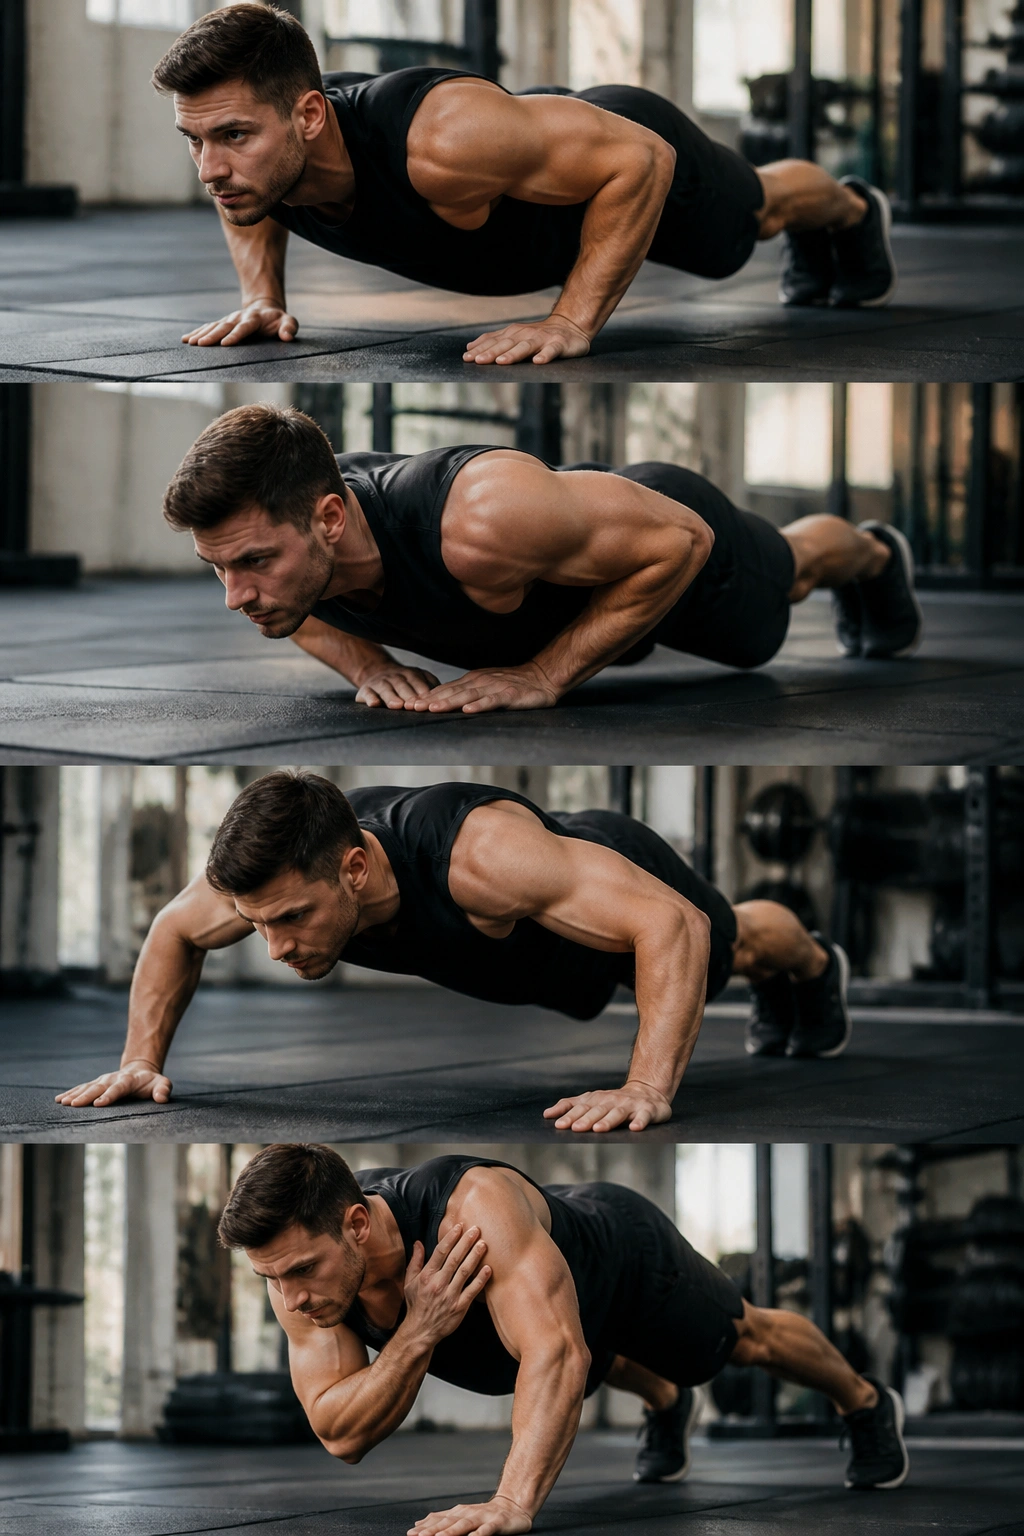
If you like a little chaos in your training, this circuit has a good kind of bite.
Instead of doing one push-up style for the whole session, stack three or four variations into a ladder that climbs and then backs down. A simple version looks like this: 2 standard push-ups, 2 close-grip push-ups, 2 wide-grip push-ups, 2 shoulder taps per side. Add one rep to each move every round until you hit 5, then come back down. Rest 45 to 60 seconds between rounds.
Why does this work? Because the body never fully settles into one groove. The chest, triceps, and core keep getting asked different questions, and that keeps the session from feeling stale.
It also keeps the ego from taking over. One movement might feel easy. The next one will not. That’s the fun part.
A small note: don’t rush the taps or the close-grip reps just because the ladder is climbing. The quality of the middle rungs decides whether the whole circuit builds strength or just noise.
18. Test-Day Push-Up Workout for Honest Progress

How do you know if you’re actually getting stronger, not just better at surviving fatigue?
Run a test day. Warm up with a few easy sets, then do one clean max-rep set with full range and no hip sag. Stop the set when the next rep would be ugly. After that, rest 2 to 3 minutes and do 2 back-off sets at about 70 percent of your max from the first set. That gives you both a benchmark and some useful extra work.
How to score it
- Count only full reps.
- Chest should reach floor depth or a consistent target.
- Hips stay in line with the shoulders.
- Film the set from the side if you can.
I would not test every week. That gets old fast and eats into recovery. Test when your training has actually changed enough to matter, then compare the number with the last honest attempt.
This is the section people skip, and it’s the one that tells the truth.
Final Thoughts

Pick fewer workouts than you think you need. Then repeat them long enough to let the numbers move. A strong upper body does not come from chasing novelty every session; it comes from getting better at a few hard patterns and keeping the reps clean when fatigue starts to chew on your form.
Mix one strength-heavy option, one volume day, and one control or power day each week. That might mean decline push-ups on Monday, tempo or pause reps later in the week, then an EMOM or ladder when you want density. Simple beats random. Clean beats sloppy. Every time.
And if a variation makes your wrists, elbows, or shoulders complain in a sharp way, change the hand angle, raise the surface, or drop back a step. The goal is stronger pressing, not a collection of irritated joints.
