



If you’re chasing workouts to help lose arm fat at home, start with the awkward truth: no exercise peels fat off one spot. Arms get leaner when overall body fat drops and the muscles underneath get stronger, which is why the best home workouts mix pushing, pulling, core work, and a little conditioning that gets you breathing harder.
That sounds less glamorous than a promise about one magic triceps move. It works better, though.
A wall, a sturdy chair, a backpack with a few books, and a pair of water bottles can do more than most people expect. You do not need a rack of weights or a fancy setup. You need clean reps, short rests, and enough consistency that your shoulders and triceps stop coasting through the day.
Arms also change slowly. Annoyingly slowly.
The good news is that slow change is still change, and the right mix of arm workouts at home can make sleeves fit differently, push-ups feel easier, and those back-of-arm jitters start to fade. The list below starts with beginner-friendly bodyweight work and moves toward harder finishers, so you can pick a starting point without guessing.
How These Workouts Help Reduce Arm Fat
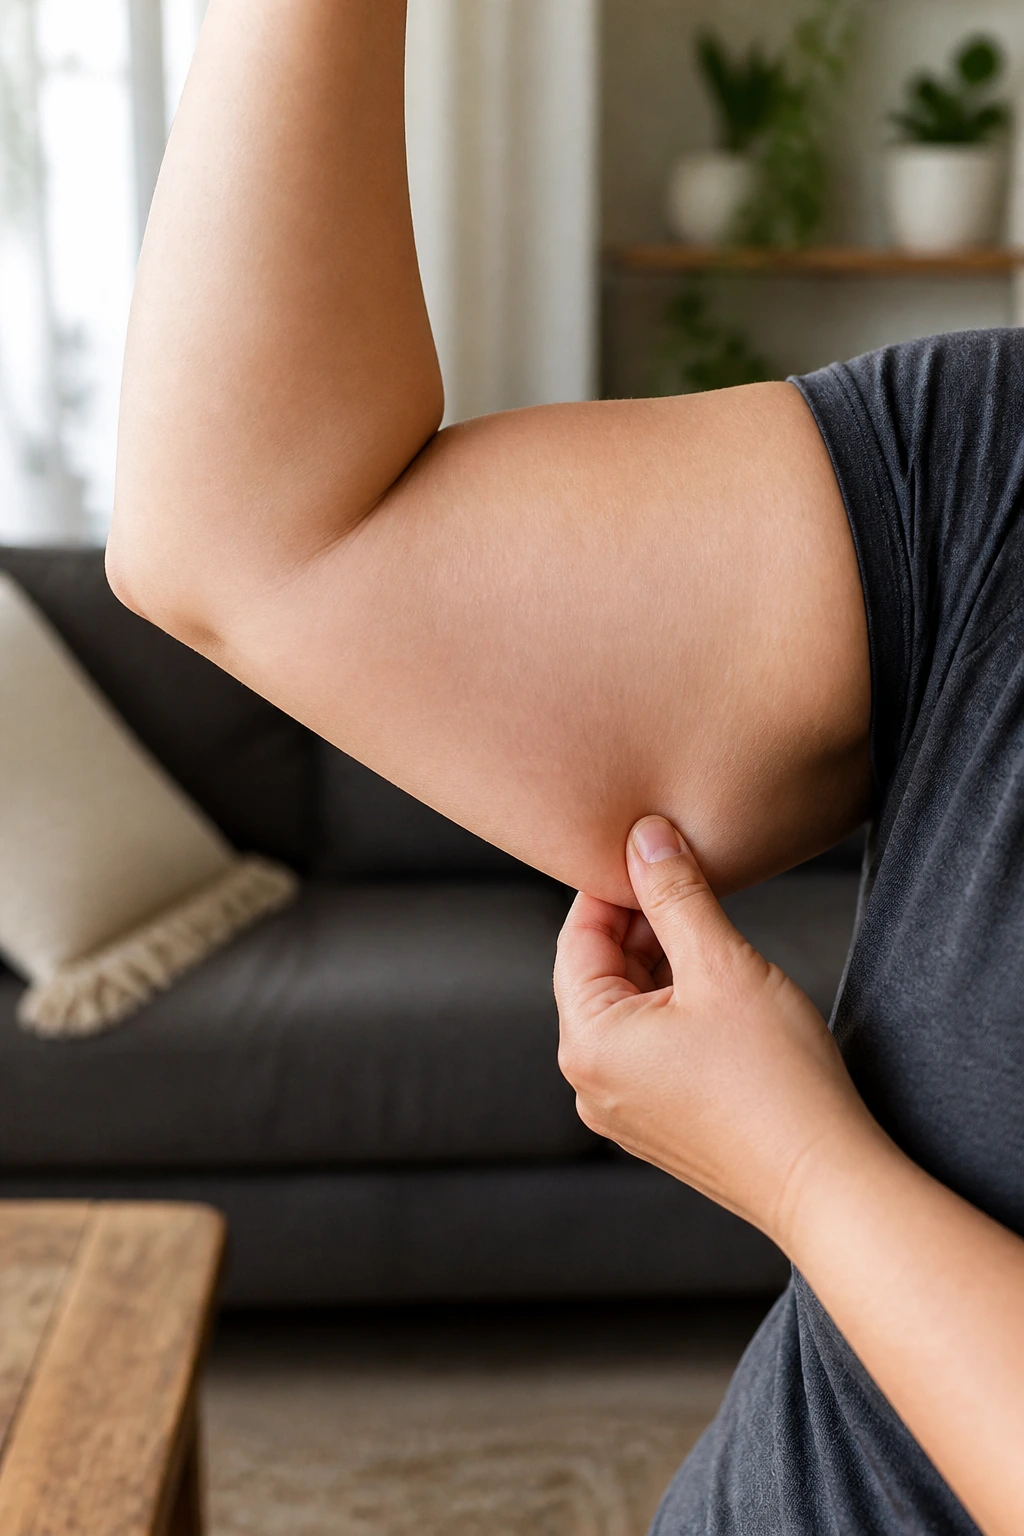
The reason arm workouts matter isn’t magic. It’s math, muscle, and repetition.
When you train the chest, shoulders, triceps, biceps, and upper back, you build the tissue that sits under the fat layer. That doesn’t mean your arms suddenly “melt,” because the body chooses where fat comes off. But stronger muscles do change the way your arms look while you’re losing weight, and they usually make every other upper-body move feel less miserable.
The other piece is calorie burn. A few isolation moves are useful, but the exercises that ask your whole body to brace — push-ups, crawls, boxing, jump rope — do more for total energy use. That matters when you want visible change.
The Weekly Rhythm That Works Best
A simple setup beats random effort. Three to five sessions a week is plenty for most people, and one of those sessions can be short and sweaty.
A useful pattern looks like this:
- 2 strength-focused days with push-ups, dips, curls, raises, and pike work
- 2 conditioning days with shadow boxing, mountain climbers, jump rope, or crawls
- 1 mixed circuit day that links several moves back to back
- Walking or light movement on the other days so your body is not stuck in a chair for 10 hours
Public activity guidelines generally call for about 150 minutes of moderate movement each week plus strength work on at least two days. That lines up nicely with arm-focused home training, because it gives you enough volume without turning every day into an arm massacre.
What Matters More Than the Fancy Move
A clean set of 10 push-ups is better than 25 sloppy ones. A controlled 30-second boxing round beats wild flailing. And if a movement hurts your shoulders or wrists, there is no prize for forcing it.
Pick the version you can repeat. Then make it a little harder by lowering the incline, adding a round, shortening the rest, or using a heavier backpack. That is how arm workouts at home start doing real work.
1. Wall Push-Ups for Arm Fat Loss
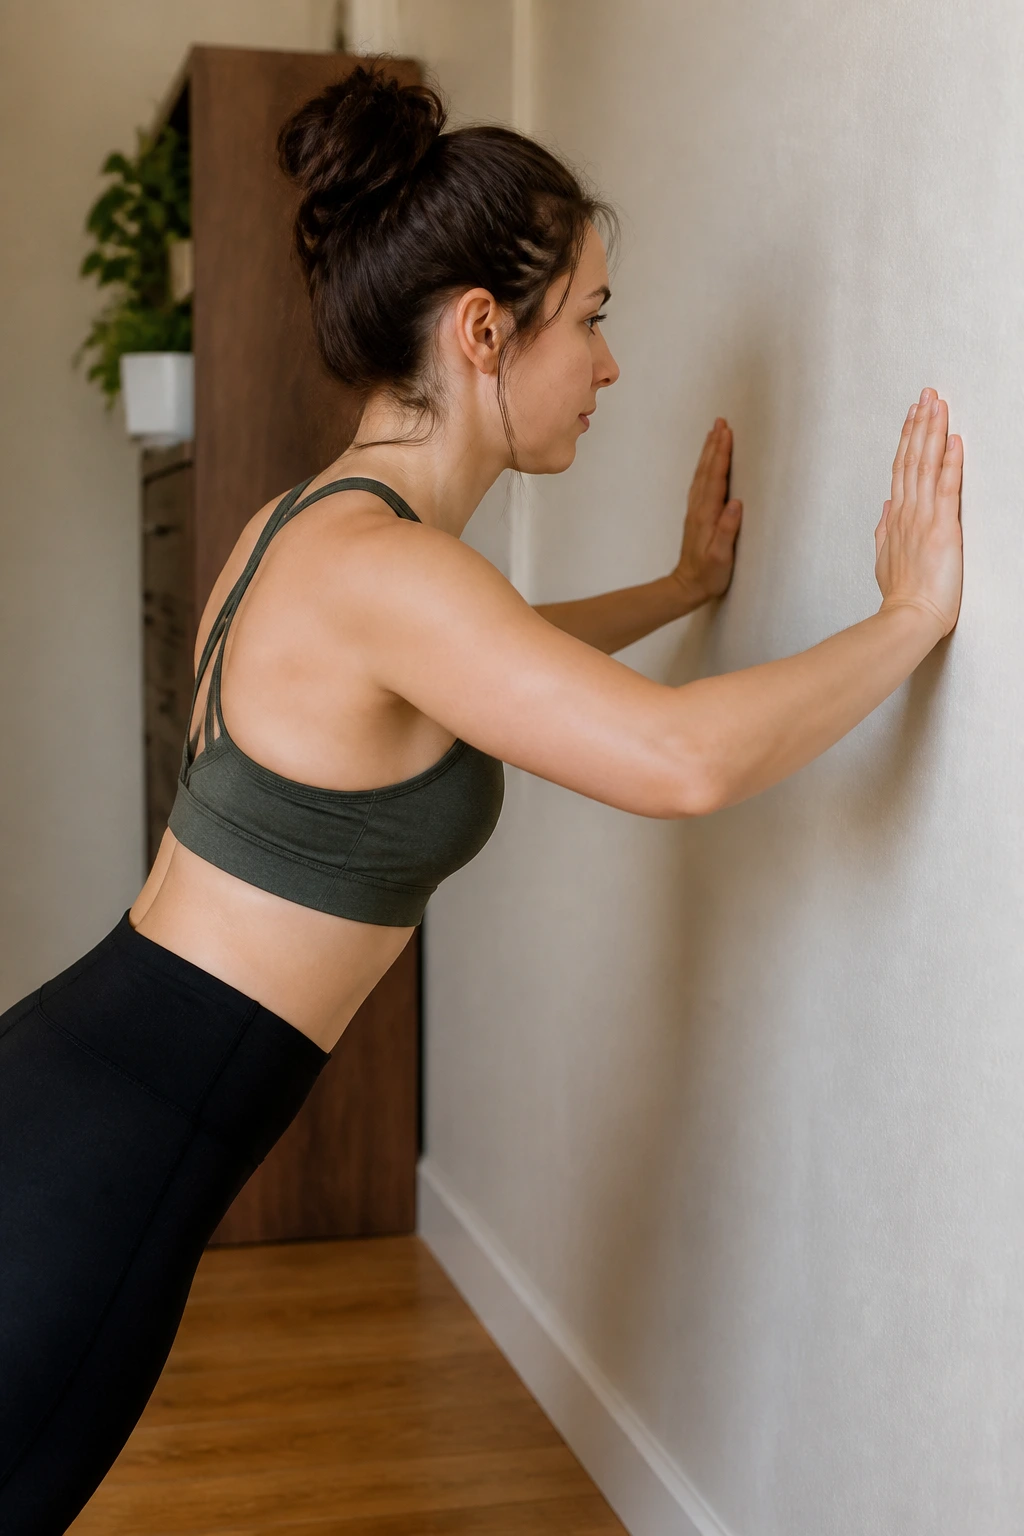
Wall push-ups look easy. That’s exactly why they’re useful.
They let you practice the pushing pattern without dumping your entire bodyweight into the movement. For anyone who has not done much upper-body work, that matters. Your triceps, chest, and front shoulders still have to fire, and because the movement is simple, you can stack up a lot of clean reps without turning the set into a fight.
Why It Helps
Wall push-ups are a smart starting point because they build tolerance. If your wrists ache on the floor or your core sags halfway through a standard push-up, the wall gives you a cleaner line and less strain.
They also make a good warm-up. Ten to twenty reps wake up the shoulders fast. You should feel heat in the upper arms, not pinching in the joints.
How to Do It
- Stand about arm’s length from a wall
- Place your hands on the wall at chest height
- Step your feet back until your body forms a straight line from head to heels
- Lower your chest toward the wall with elbows at about 30 to 45 degrees
- Push the wall away until your arms are straight again
Do 3 sets of 12 to 25 reps. If 25 feels easy, move your feet farther from the wall.
Pro tip: Slow the lowering phase to 3 seconds. That tiny change makes the set harder without needing any equipment.
2. Incline Push-Ups on a Counter or Couch
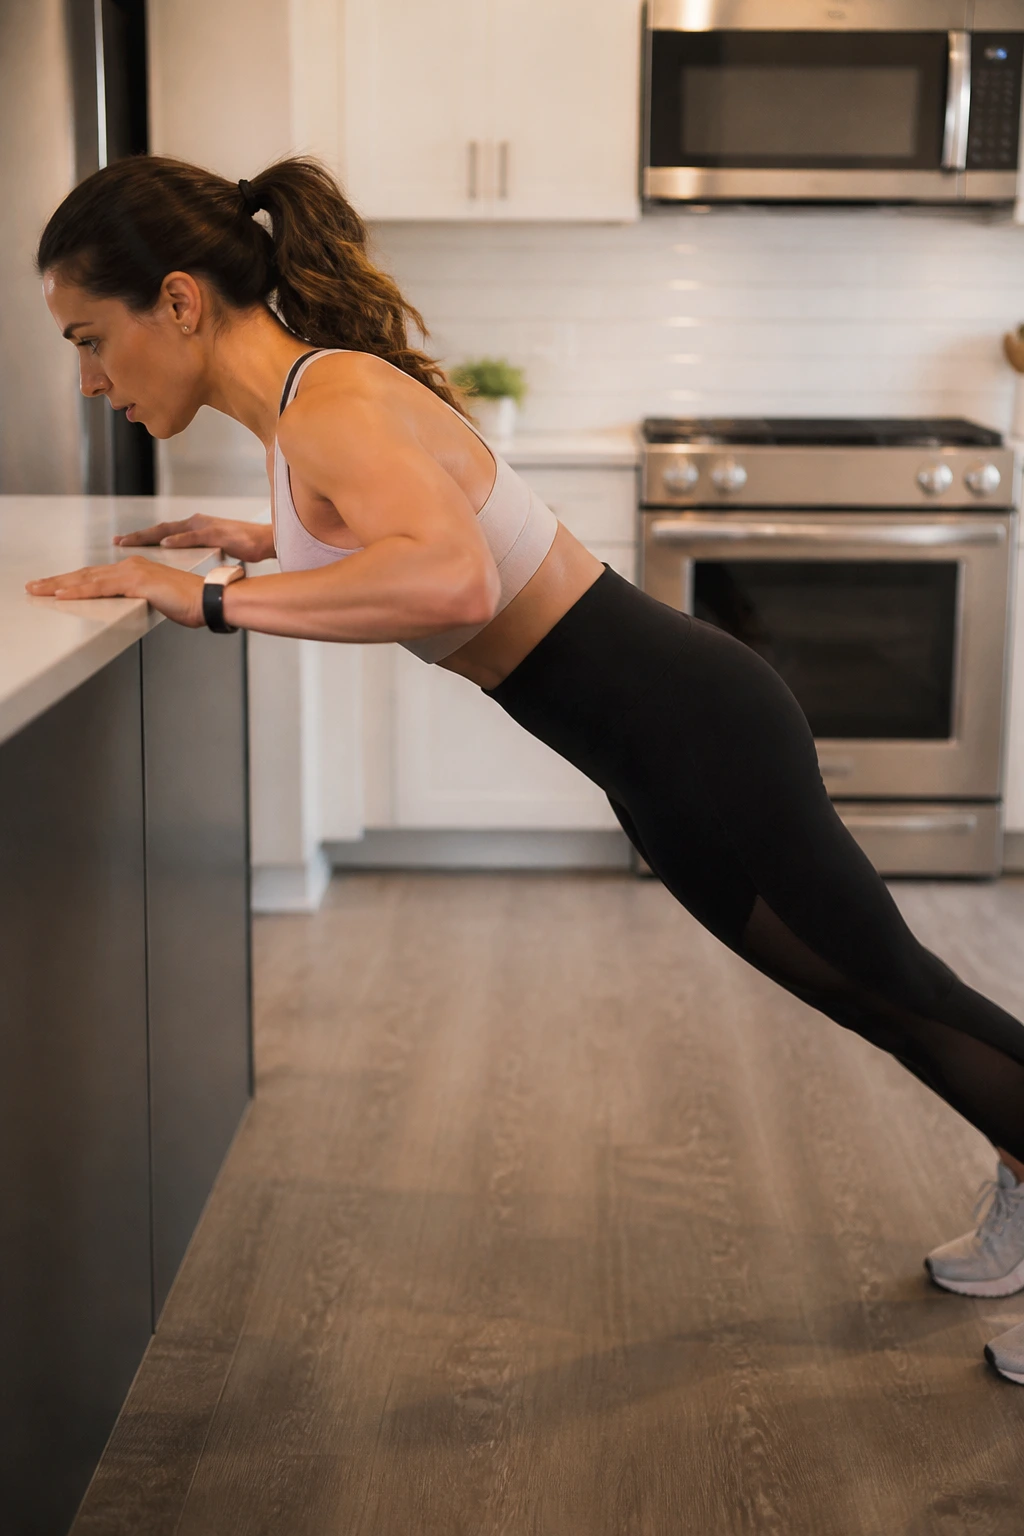
Need something harder than wall push-ups but not quite floor push-ups? Incline push-ups sit in that sweet spot.
A kitchen counter is easier than a coffee table. A coffee table is easier than the floor. That simple ladder makes incline push-ups one of the best home workouts for building upper-body strength without wrecking form.
What Makes Them Worth Doing
The angle changes everything. The lower the surface, the more bodyweight you have to move, so this move scales cleanly as you get stronger. It also teaches your body to stay tight from head to heel, which is a big deal if your middle collapses during regular push-ups.
Done well, incline push-ups load the chest, triceps, and shoulders while keeping the movement controlled. Done badly, they turn into half-reps with your hips hanging low. That version does not help much.
Form Cues That Matter
- Place your hands on a stable surface
- Keep your body in a straight line
- Lower until your chest is a few inches from the edge
- Press through your palms and keep your neck long
- Stop if your lower back starts to dip
Try 3 sets of 8 to 15 reps. If you can hit 15 with smooth form, lower the surface next time.
A clean incline push-up is a quiet little ego check. Good. That means it’s working.
3. Knee Push-Ups Done Strictly
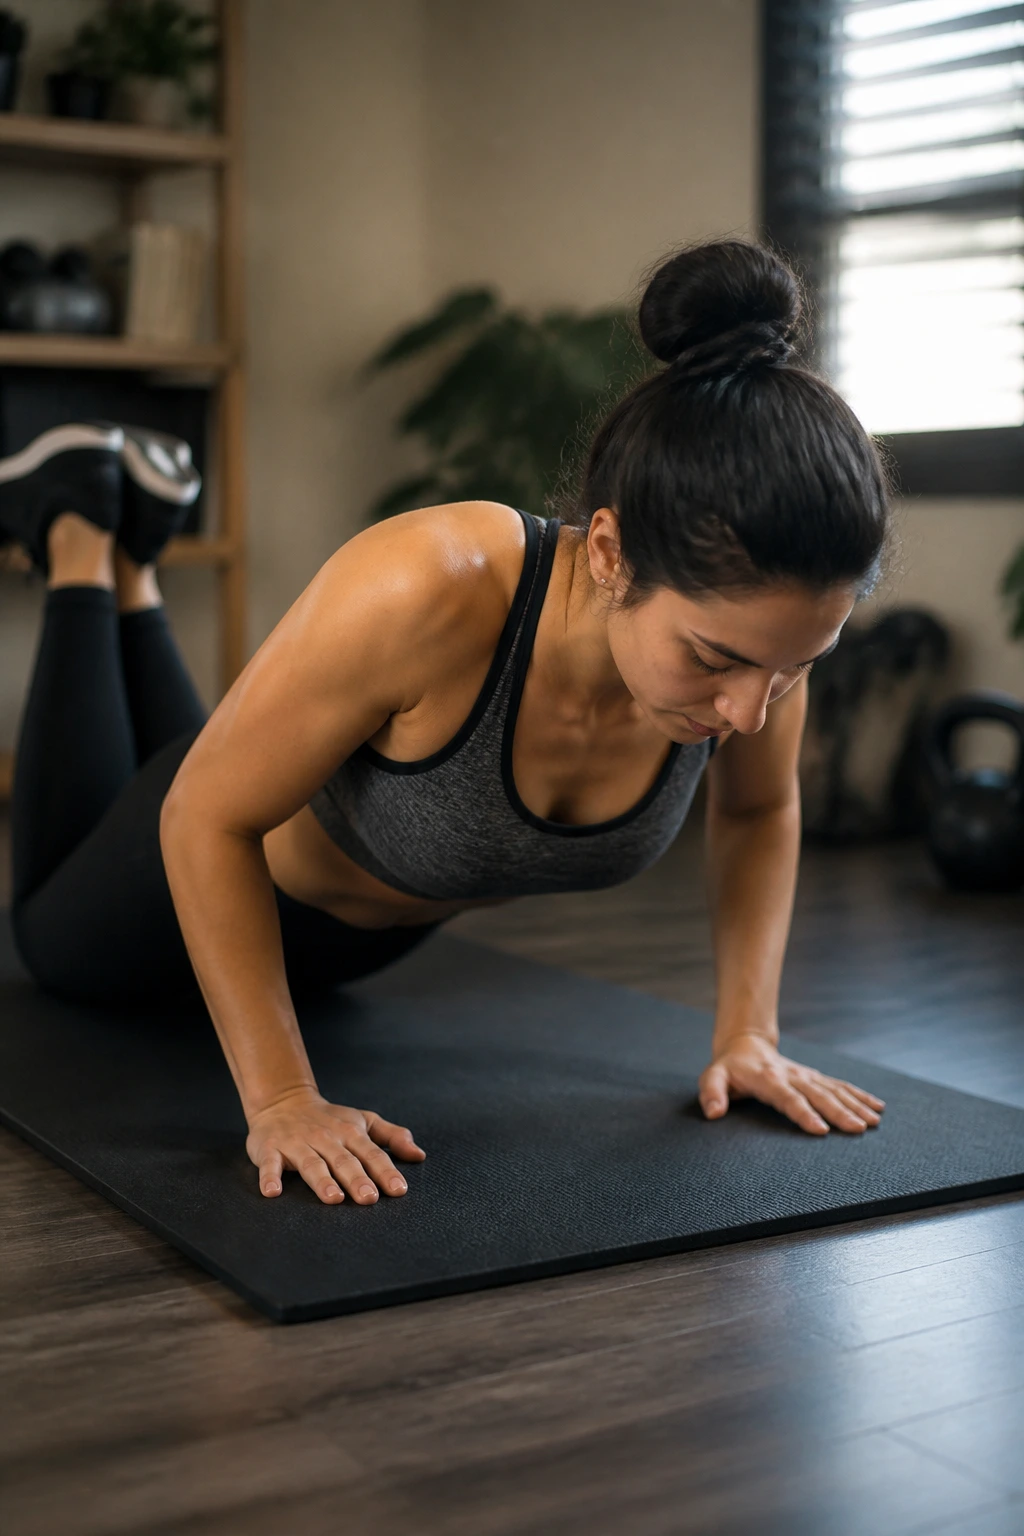
Knee push-ups get dismissed by people who only care about full push-ups, and that’s lazy thinking. They’re a real strength builder when they’re done with control.
What matters is the line from your shoulders to your knees. If your hips sag and your chest barely moves, you’re not practicing a useful pattern. If your body stays braced, your triceps and chest still have to do honest work.
Make Them Count
Start on the floor with hands a little wider than shoulder width. Drop to your knees, but keep your torso tight and your glutes lightly squeezed. Lower your chest until it’s just above the floor, then press back up.
The set should feel like a controlled challenge, not a collapse.
Use these cues:
- Keep your ribs tucked
- Don’t crane your neck
- Lower until your chest nearly touches the floor
- Stop the set when your form gets messy
Do 3 sets of 6 to 12 reps. If the top half feels easy, slow the descent to 2 or 3 seconds.
Knee push-ups are a bridge, not a consolation prize. That bridge matters.
4. Chair Triceps Dips
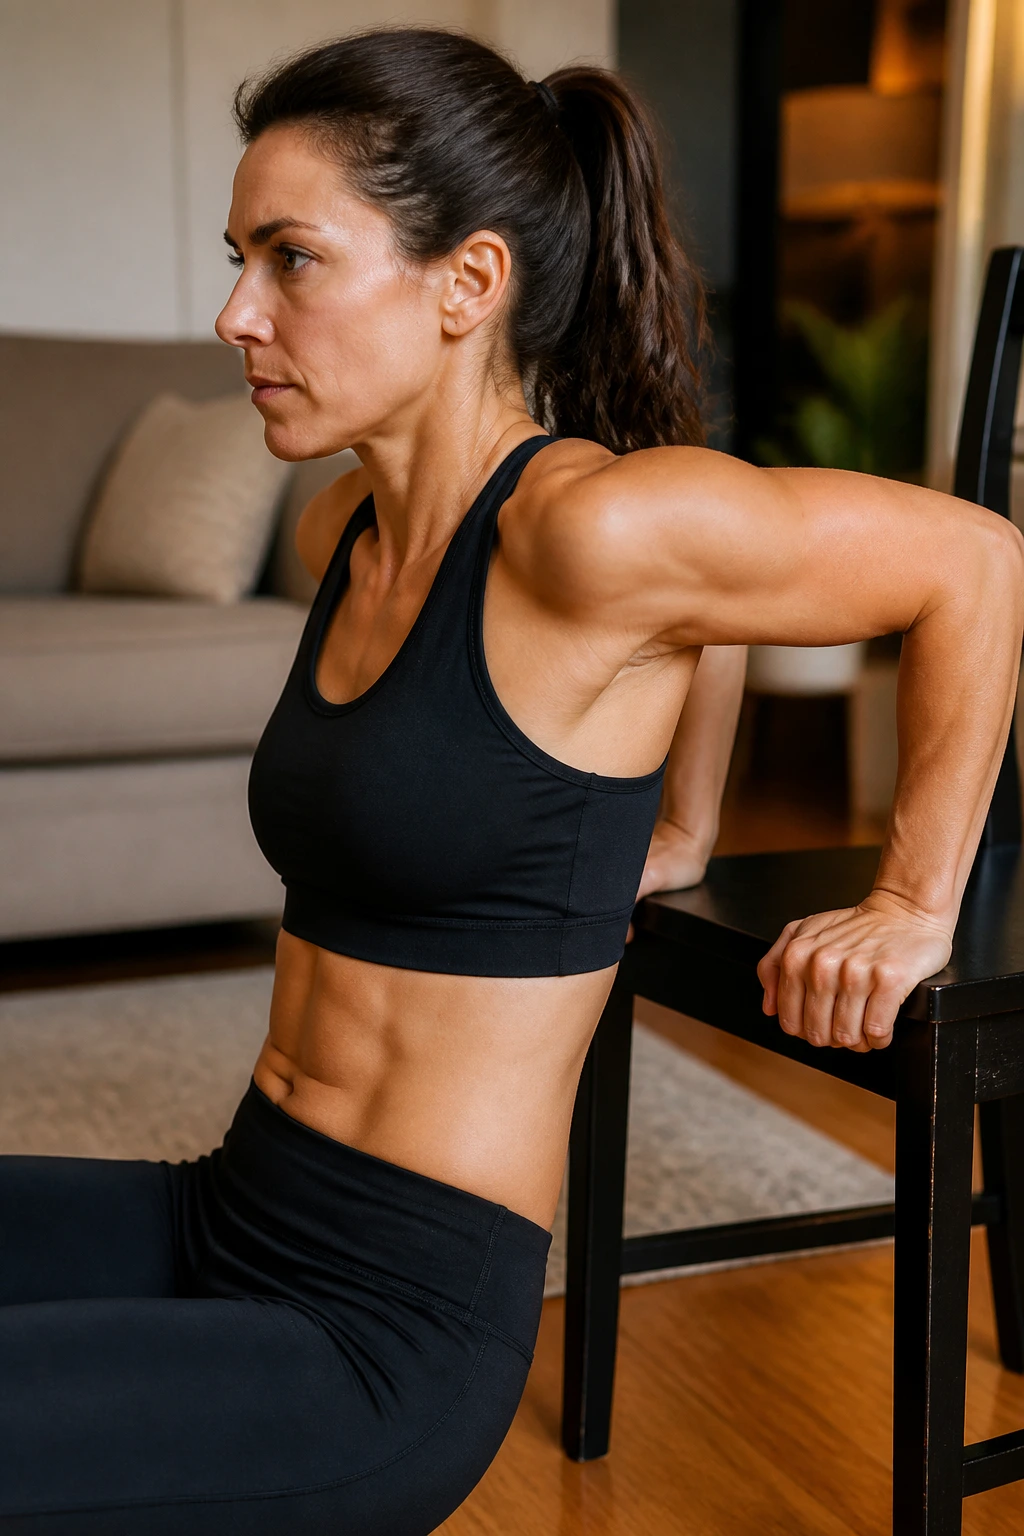
If the back of your arm is the part that bugs you most, chair triceps dips get straight to the point.
They hit the triceps hard because your elbows are doing the work instead of your chest. You’ll feel a deep burn fast. Sometimes too fast. That’s useful, but only if you keep the range sane and the chair stable.
The Setup That Saves Your Shoulders
Use a sturdy chair, bench, or low sofa edge. Put your hands on the edge beside your hips, slide forward, and keep your feet flat on the floor. Lower until your elbows hit about 90 degrees, then press yourself back up.
Do not sink so low that your shoulders roll forward. That’s where the move starts feeling cranky instead of productive.
What to Watch For
- Keep your shoulders down, not shrugged
- Move straight up and down
- Stop if the front of the shoulder pinches
- Keep the chair from sliding
Aim for 2 to 3 sets of 8 to 12 reps.
Important: If dips bother your shoulders, skip them. There are plenty of other ways to train the triceps at home, and no single move is sacred.
5. Plank Shoulder Taps
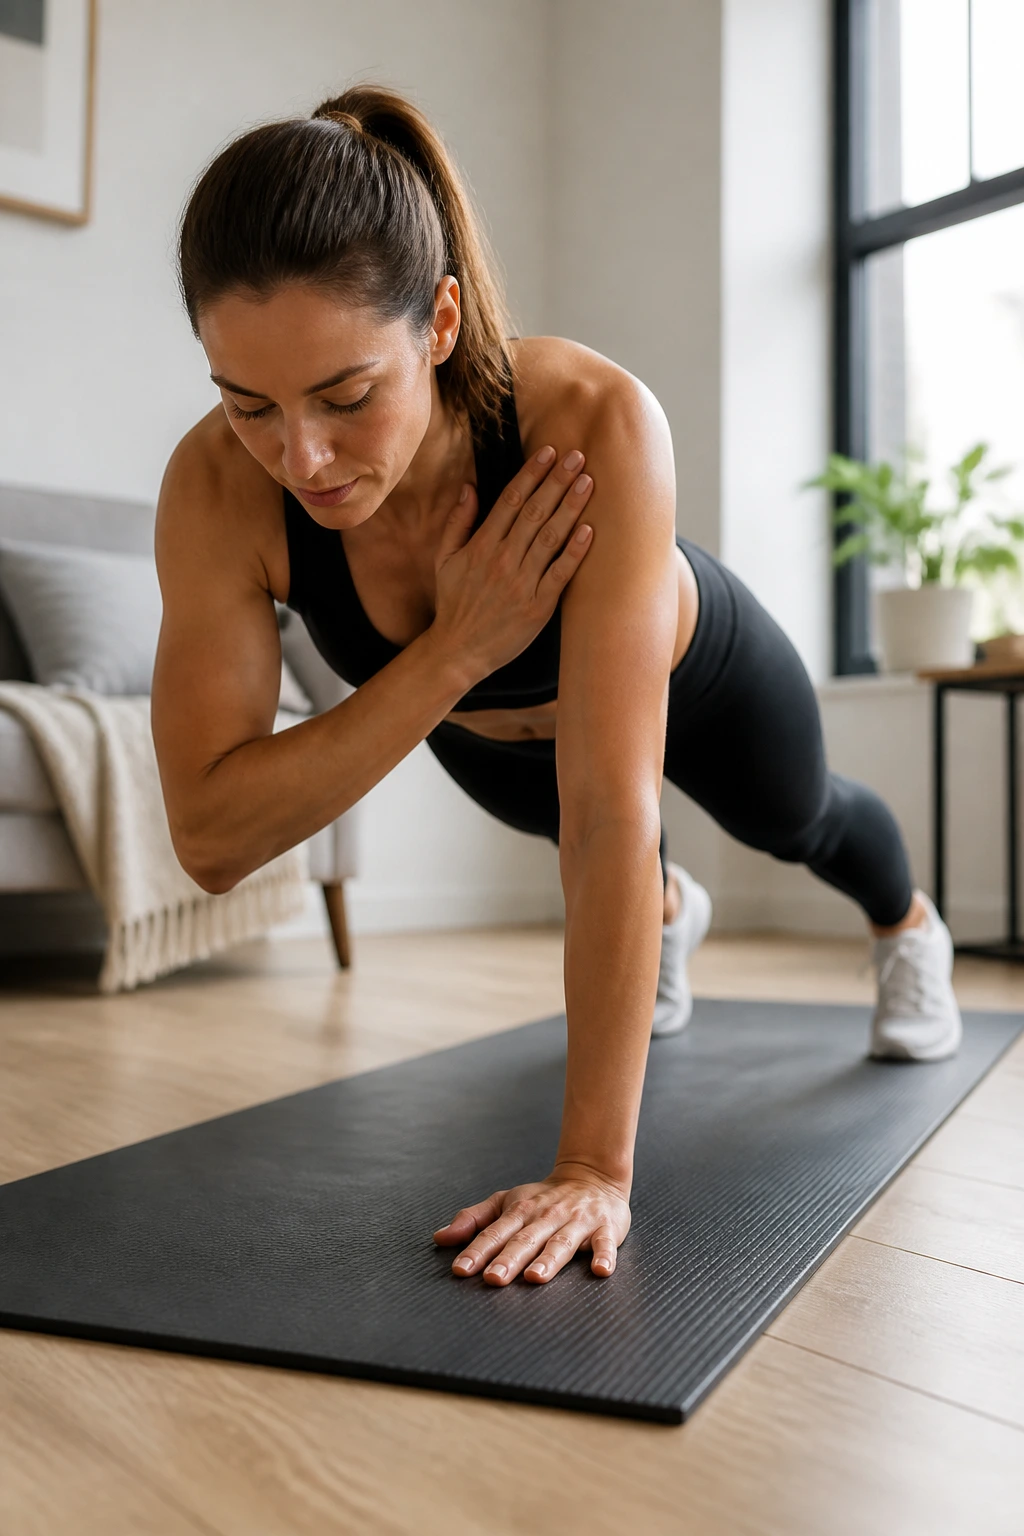
Can a small-looking move make your arms and core work hard? Absolutely.
Plank shoulder taps are sneaky. You are not moving through a huge range, but your body has to resist rotation every time one hand leaves the floor. That means the shoulders, triceps, and deep core muscles all stay switched on.
Why Your Arms Feel It
The real job here is stability. One hand supports most of your weight while the other reaches across to tap. If your hips wobble all over the place, the movement stops being useful. Keep the body quiet and the tap controlled.
That steady tension is why this move belongs in any home workout for leaner arms. It raises the heart rate a bit, too.
How to Do It Well
- Start in a high plank with hands under shoulders
- Set your feet a little wider than hip width
- Tap one shoulder with the opposite hand
- Return the hand to the floor and switch sides
- Keep the hips as still as you can
Do 3 sets of 20 taps or 30 to 40 seconds.
If your wrists hate planks, raise your hands on a sturdy bench or do the move on dumbbells or push-up handles.
6. Shadow Boxing Intervals for Leaner Arms

This is one of the sneakiest arm-fat-loss tools in the bunch.
Shadow boxing looks light from across the room. Up close, your shoulders know better. The arms keep snapping out, the guard keeps coming back to your face, and the heart rate climbs fast if you stay honest with the pace.
What Makes It Useful
Boxing-style intervals combine arm endurance with calorie burn. Every jab, cross, hook, and uppercut asks the shoulders to repeat the same pattern without slack. That repetition builds stamina in the upper body and gives you a conditioning hit at the same time.
You do not need to throw giant punches. Tight, fast, crisp punches work better than flailing.
A Simple Round Structure
- Fight stance: one foot slightly forward
- Hands up at cheek level
- Punch straight out and bring the hand back fast
- Rotate the hips a little with each punch
- Stay light on the balls of your feet
Try 6 rounds of 45 seconds on, 15 seconds off. If that feels too spicy, use 30 seconds on, 30 seconds off.
Tip: Exhale on each punch. It sounds small. It helps a lot.
7. Mountain Climbers
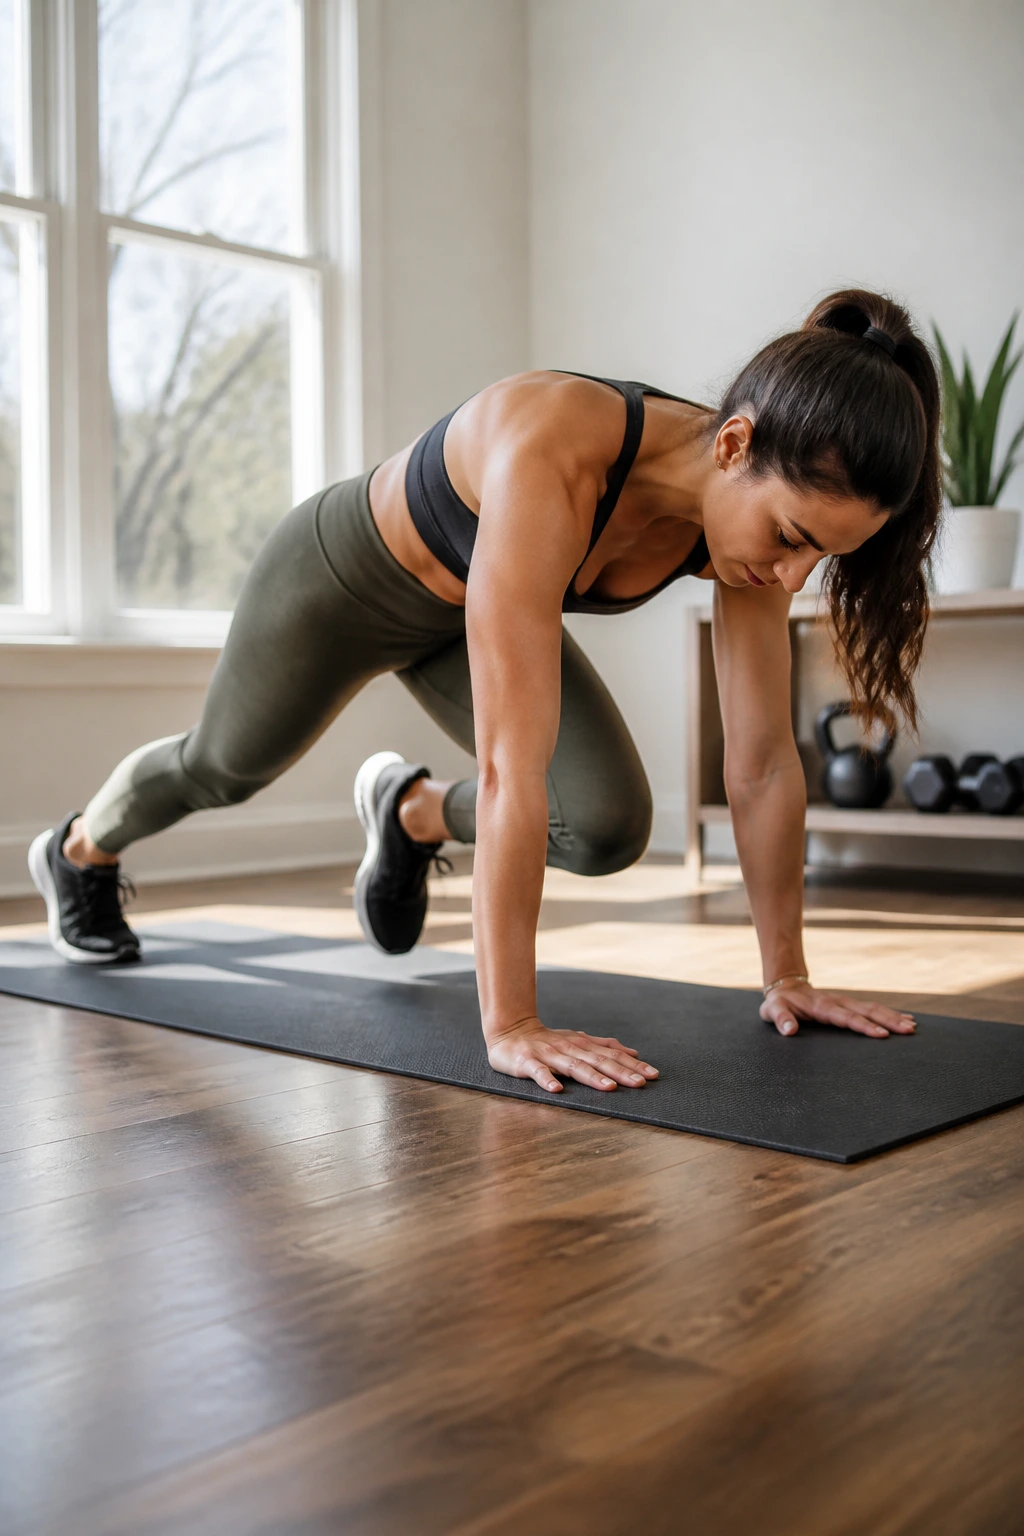
If your arms start shaking during mountain climbers, that’s not a problem. That’s the point.
This move is part cardio, part core drill, part upper-body hold. Your shoulders stay planted while your knees drive in fast, so the arms have to support your body the whole time. That makes mountain climbers one of the better home workouts when you want your pulse up and your upper body working together.
How to Keep Them Clean
Hands go under the shoulders. Body stays flat. Then one knee drives forward while the other leg shoots back. Switch fast, but don’t bounce your hips so high that the plank disappears.
The move should feel athletic, not chaotic.
What to Focus On
- Keep your shoulders stacked over your hands
- Pull the knees under the hips
- Brace your core so the back does not sag
- Move with a quick, sharp rhythm
- Slow down if the shoulders start sliding forward
Try 4 rounds of 30 to 40 seconds.
If regular mountain climbers feel sloppy, cross-body climbers are a good changeup because they hit the core a little more and force you to slow down.
8. Bear Crawls
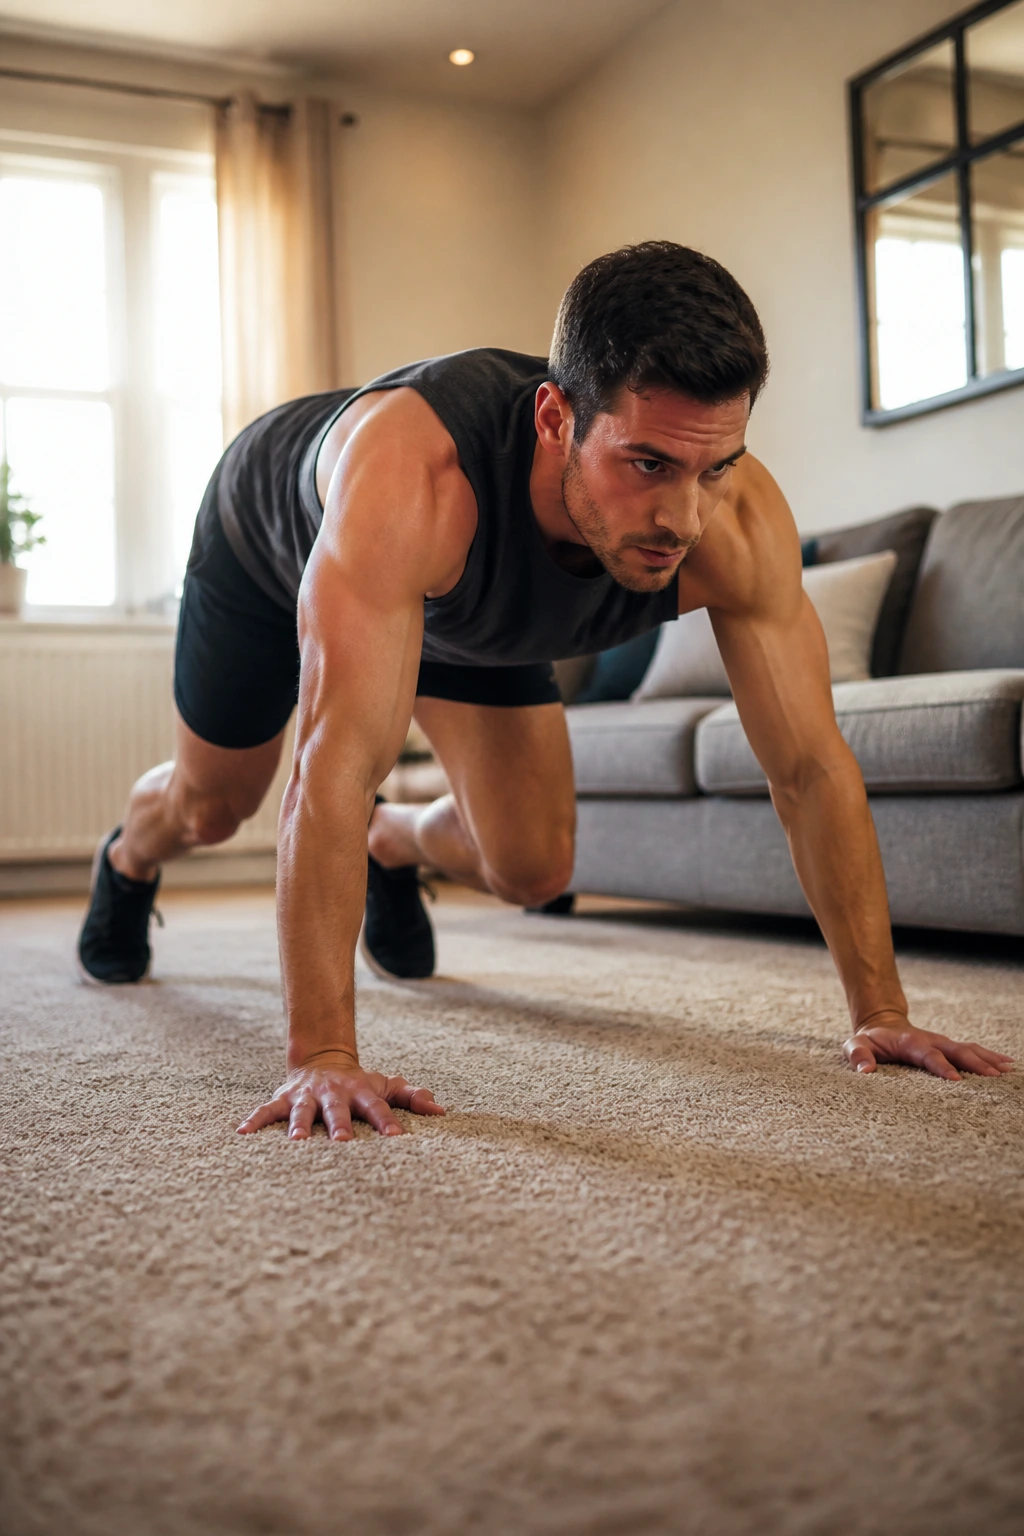
Bear crawls look ridiculous. They also work.
Drop into a quadruped position, lift your knees off the floor, and crawl forward. That simple setup loads the shoulders, triceps, and core while forcing the whole body to coordinate. It’s one of those moves that feels almost childish for the first five seconds and then turns mean.
Why They’re So Good
Bear crawls ask for strength and control at the same time. Your arms support bodyweight, your midsection keeps you from twisting, and your breathing gets louder fast. That makes them a strong choice when you want a home exercise that burns energy without needing equipment.
They’re also easy to scale. Short steps for beginners. Longer crawls for harder work.
A Clean Crawl
- Start on hands and feet with knees hovering 1 to 2 inches off the floor
- Keep your back flat
- Move opposite hand and foot together
- Crawl forward for 10 to 20 steps
- Crawl back with the same control
Do 3 to 5 rounds.
Watch this: If your knees slam the floor, reset. Hover, crawl, repeat. The hover is the job.
9. Pike Push-Ups
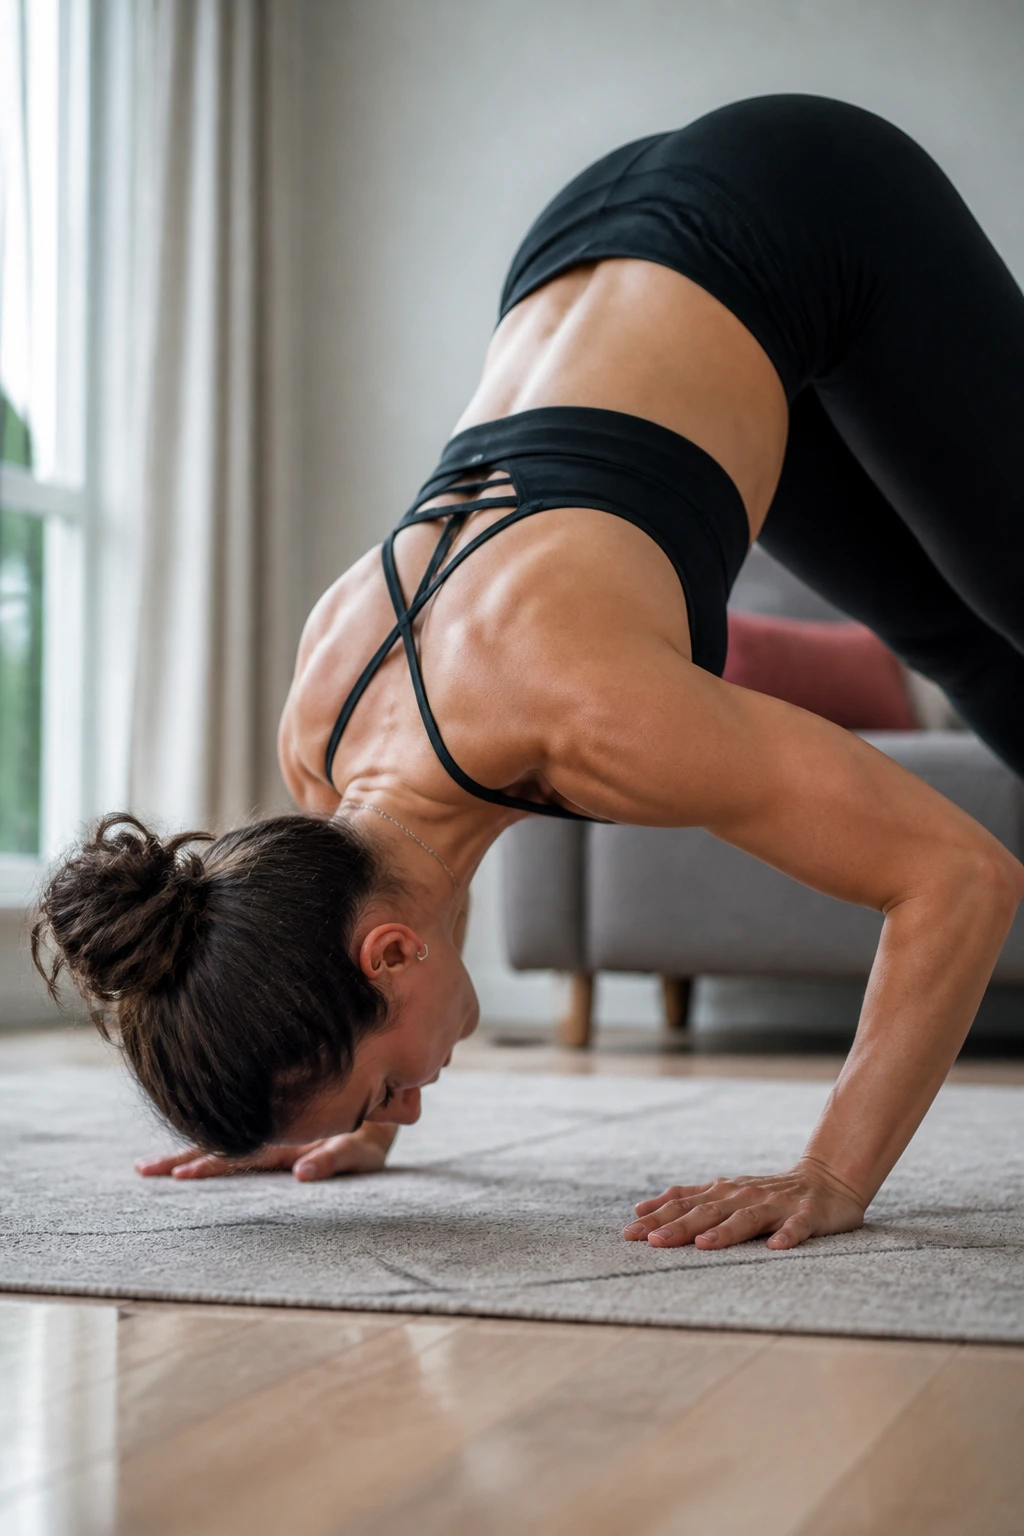
Pike push-ups are where the shoulders start doing the heavy lifting.
The body angle shifts the load upward, so the delts and triceps take over in a big way. If you’ve only been doing wall or incline push-ups, this one will feel different fast. Usually by rep three.
How to Scale It
Start in a pike position with hands on the floor and hips high, almost like an upside-down V. Your head lowers toward the floor between your hands, then you press back up. Keep the elbows angled back, not flared out wide.
If the full version is too hard, bend your knees a little. If that’s still rough, place your hands on yoga blocks or books to shorten the range. If it gets easy later, elevate your feet on a couch.
What Good Form Feels Like
- The shoulders carry most of the load
- The neck stays relaxed
- The elbows bend smoothly
- The head moves under control, not with a drop
Try 3 sets of 6 to 10 reps.
This one is not gentle. That’s why it works so well for upper-body strength at home.
10. Triceps Kickbacks with Water Bottles
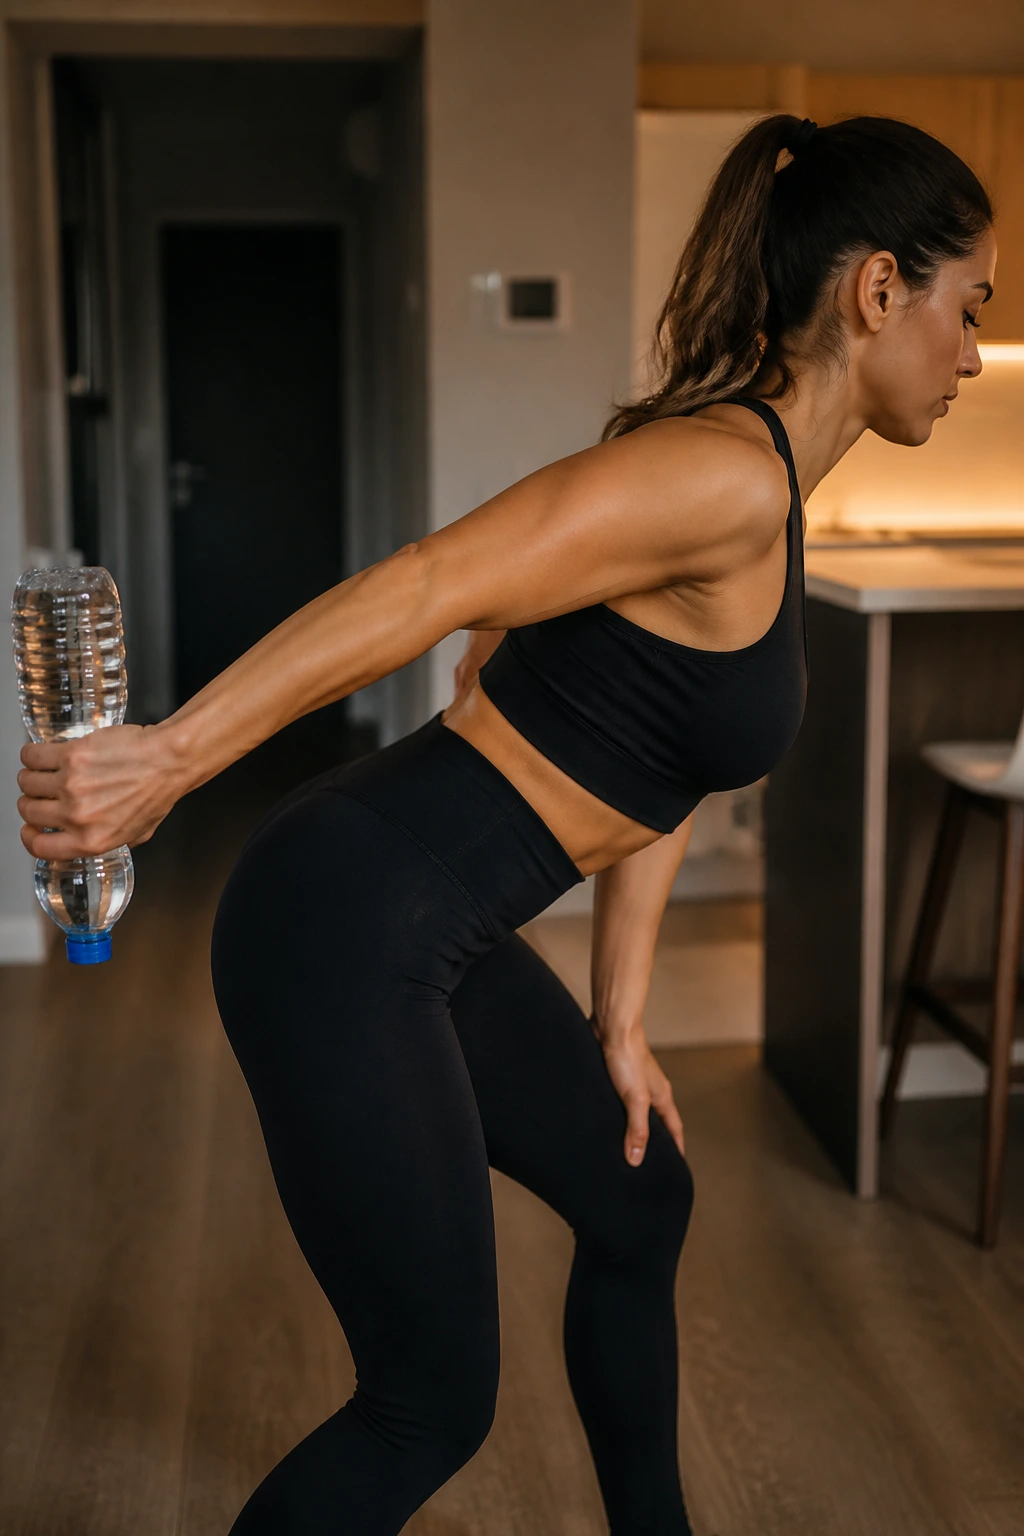
A pair of half-full water bottles is enough.
That’s the beauty of triceps kickbacks. They do not need heavy weights to be useful. They need control. If you swing your arm around like you’re shooing away a fly, the load disappears. If you keep the upper arm still and extend the forearm cleanly, the triceps light up.
Why This Small Move Matters
Kickbacks are a good isolation move for the back of the arm. They won’t burn as many calories as boxing or crawls, but they help build shape and strength where a lot of people want it most.
They also work well at the end of a workout when your arms are already a little tired. That’s when the burn gets honest.
Form Notes
- Hinge at the hips with a flat back
- Keep the upper arm level with your torso
- Extend the forearm until the arm is straight
- Pause for a beat at the top
- Lower slowly back to start
Do 3 sets of 12 to 15 reps on each arm.
If you can’t stop swinging, lighten the load. A heavier bottle does not help if your shoulder is doing half the job.
11. Biceps Curls with a Backpack or Band
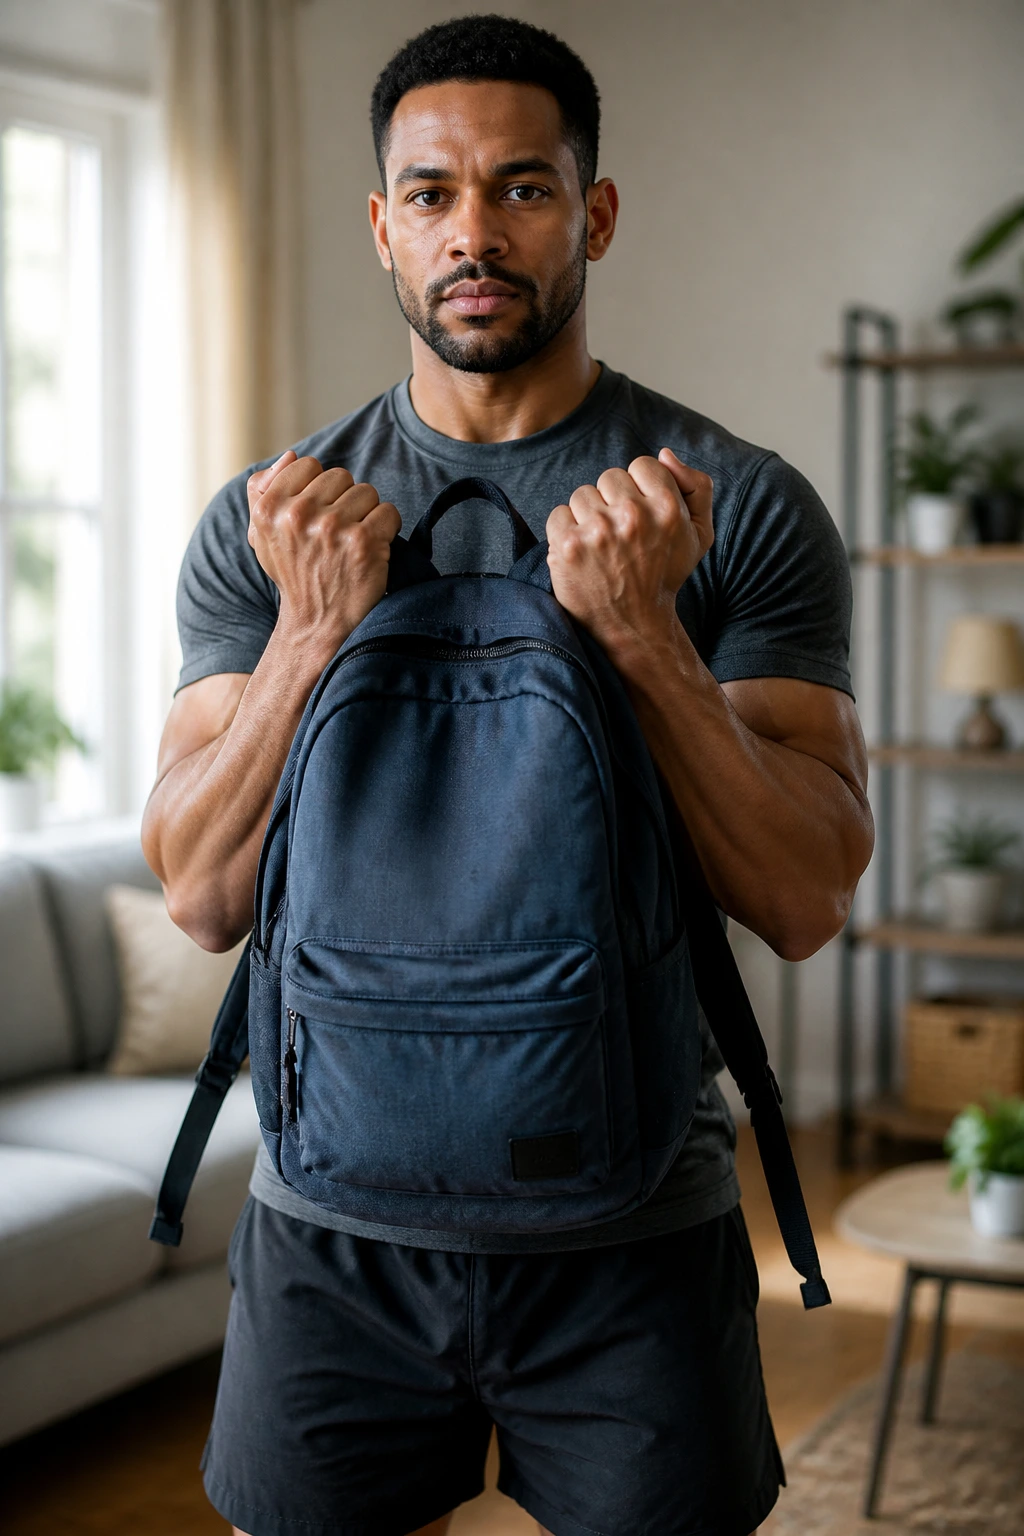
Strong biceps do more than fill out a sleeve.
They help balance all the pushing work, and that matters if you are doing push-ups, planks, and dips several times a week. A backpack loaded with books or canned goods is enough to make curls worth your time. Resistance bands work too, and they’re easier on the joints for a lot of people.
What to Use
A backpack is the easiest home option because the weight can change fast. Add one hardback book, then another. A band gives smoother tension if you already own one. Either version is fine, as long as you keep the motion strict.
A Clean Curl
Stand tall. Keep your elbows close to your sides. Curl the weight up without swinging your torso. Lower it under control, because the lowering part matters just as much as the lift.
Good cues:
- Elbows stay tucked
- Wrists stay straight
- Shoulders stay down
- The last 2 reps should feel slow, not sloppy
Try 3 sets of 10 to 15 reps.
If your back starts rocking, the backpack is too heavy. Simple fix.
12. Lateral Raises with Water Bottles

Want the upper arms and shoulders to look firmer from the side? Lateral raises help with that.
They train the side delts, which don’t get much attention in push-up-heavy routines. That makes them a good complement to all the triceps work. Just don’t get greedy with the weight. Heavy lateral raises turn into shrugging contests fast, and shrugging is not the point.
Why Light Weight Works Better Here
The shoulder joint likes control more than brute force on this move. A pair of one-liter water bottles or light dumbbells is enough for most people. Raise the arms to shoulder height, pause, and lower slowly.
If you swing, the momentum steals the work. If you go slow, the delts do the job.
Keep an Eye on These Details
- Soft bend in the elbows
- Palms facing the floor or slightly turned in
- Stop at shoulder height
- Do not shrug the shoulders up toward the ears
Do 3 sets of 12 to 20 reps.
This is one of those exercises that looks tiny and feels bigger than it should. Good sign. The muscles are paying attention.
13. Downward Dog to Plank Flows
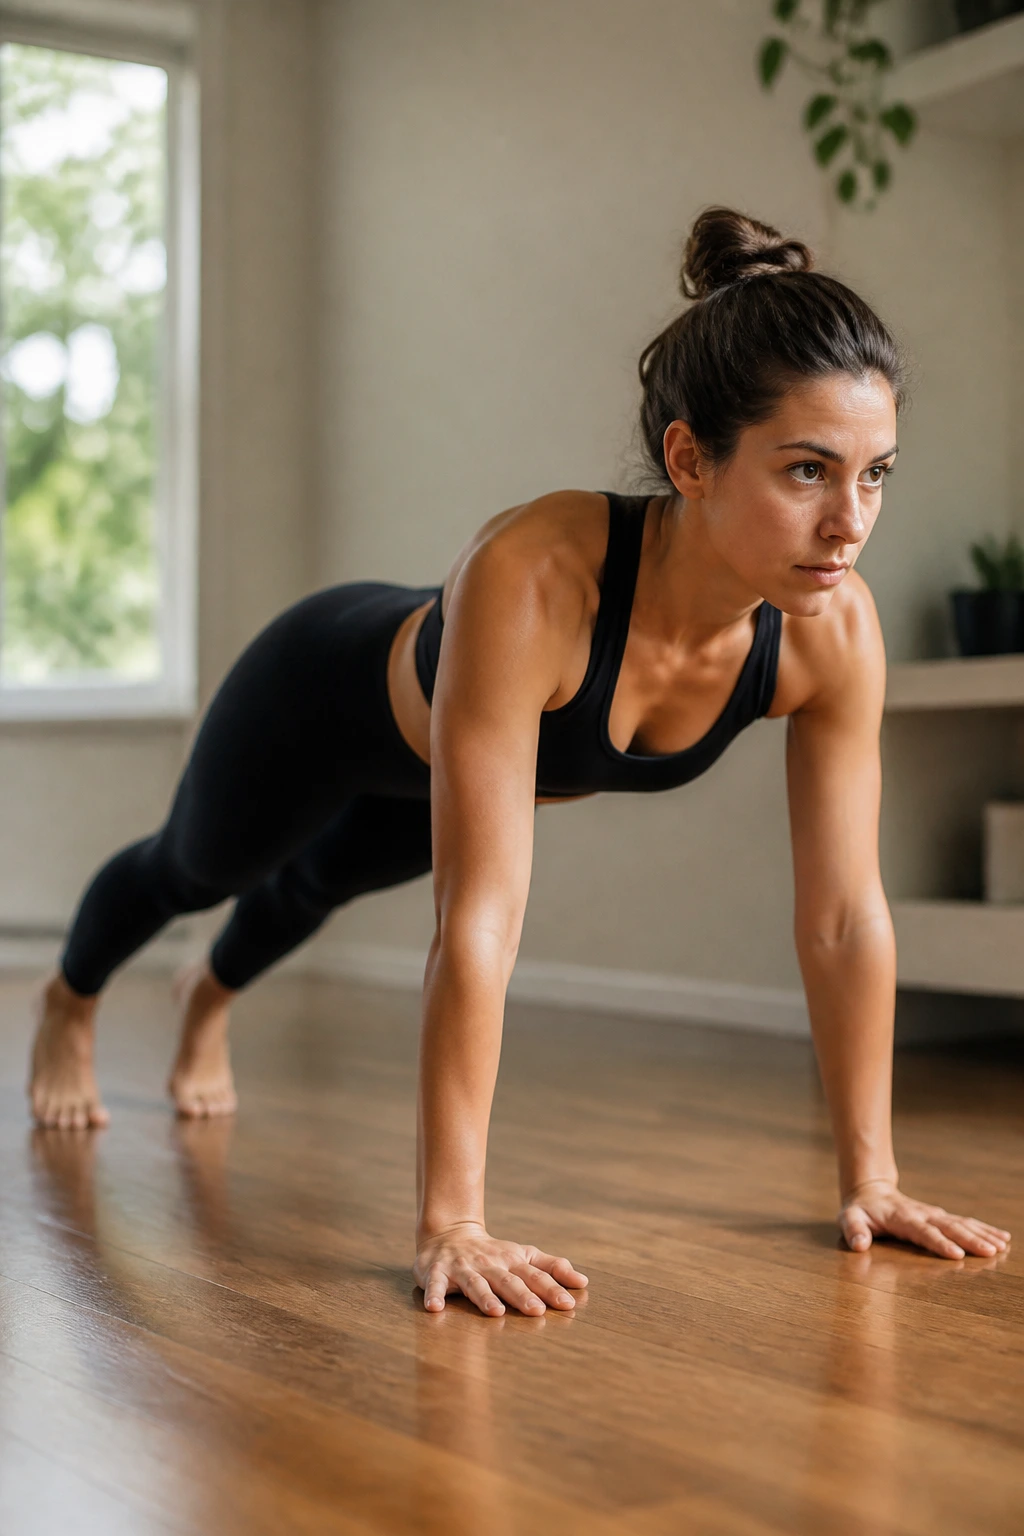
Your shoulders will feel the shift on the first rep.
Downward dog to plank flows blend strength, control, and a bit of mobility. One shape stretches the shoulders and hamstrings; the next shape asks the arms to hold your full body. That back-and-forth makes the move useful as a warm-up or a finisher, depending on how fast you move.
When to Use It
Use it if you want something that opens the shoulders without turning into a floppy yoga pose. The flow keeps the arms working, but it also gives the wrists and upper back a break between harder pressing moves.
It is especially handy on days when push-ups feel stale. The movement pattern is different enough that it wakes things up.
How It Should Look
- Start in a plank
- Push the hips back into downward dog
- Shift forward again into plank
- Move slowly enough that the shoulders stay in control
- Keep the hands planted the whole time
Try 3 sets of 6 to 10 slow flows.
If your wrists are sensitive, do the move on fists, handles, or a pair of folded towels to reduce the angle.
14. Jump Rope Intervals at Home
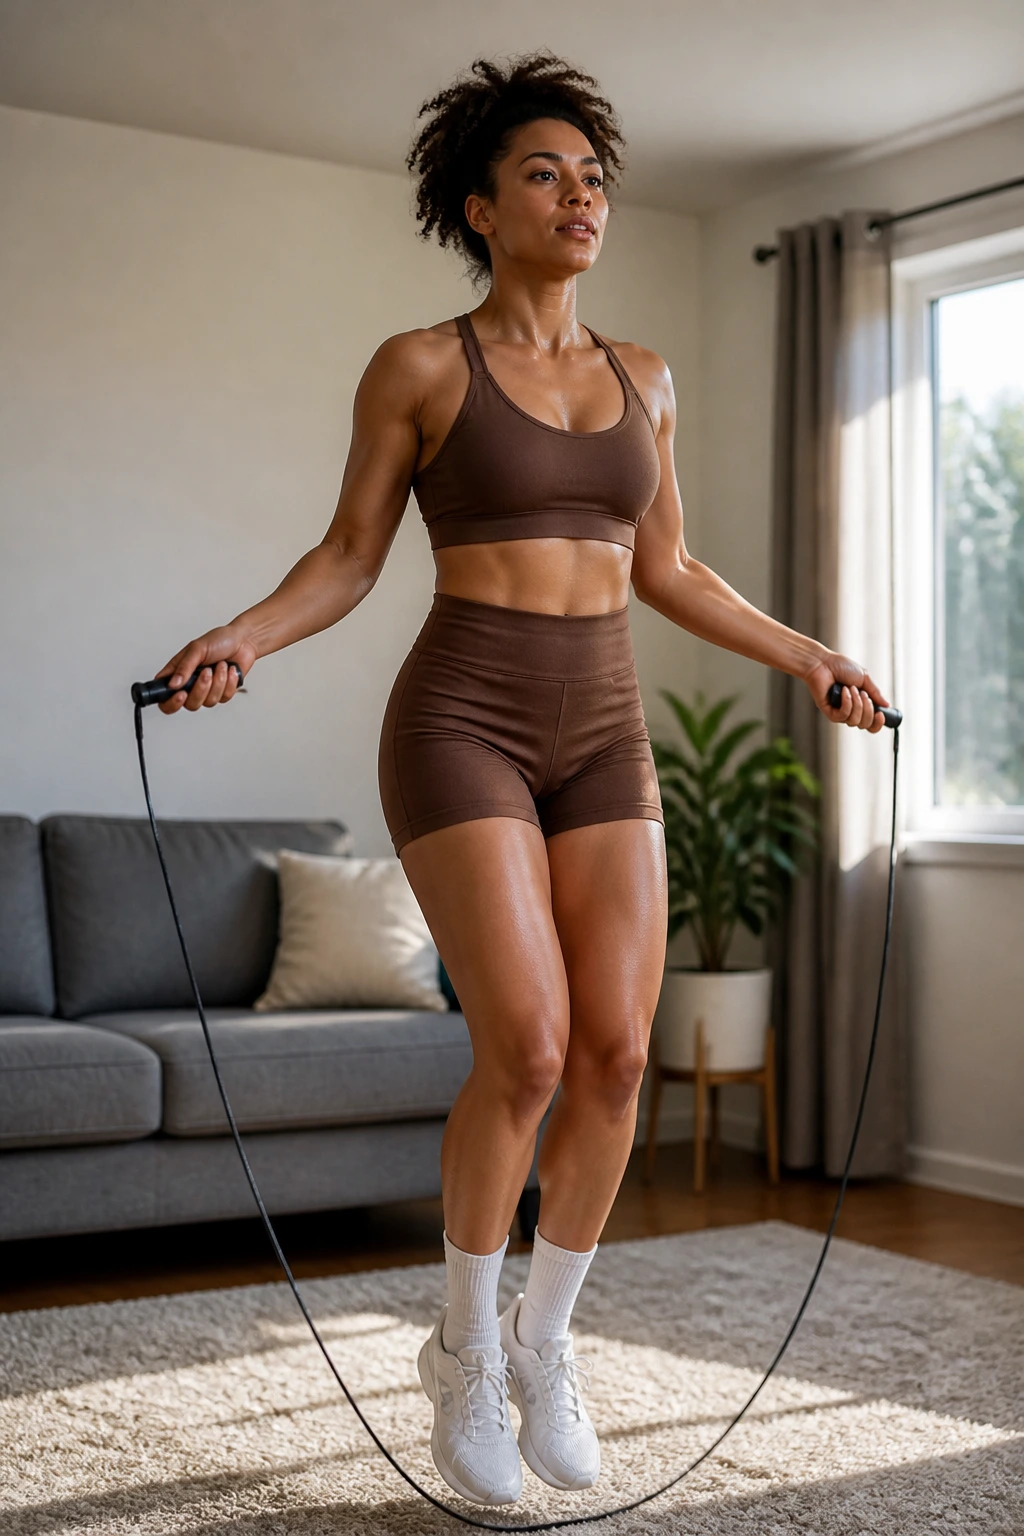
If you want a home move that burns energy fast and doesn’t ask much from the schedule, jump rope is hard to beat.
A real rope is great. An invisible rope works too if you’re in a small apartment and don’t want to smack the lamp. Either way, the arms and shoulders have to keep turning while the feet bounce. That combination is simple, noisy, and effective.
Why It Belongs in an Arm-Focused Plan
Jump rope is not an arm isolation move. That’s the point. It helps with total calorie burn while still making the shoulders, forearms, and upper back stay active the whole time. That makes it useful when arm fat loss is the goal but you still want something that feels like cardio.
The trick is not to jump huge. Small hops are enough.
Keep It Tidy
- Turn the rope with the wrists, not giant arm circles
- Keep the elbows close to your sides
- Hop only 1 inch or so off the floor
- Land softly on the balls of the feet
- Use a march or side-to-side step if impact bothers your joints
Try 8 to 12 rounds of 30 seconds on, 15 seconds off.
If you get tripped up constantly, slow the pace and shorten the swings. Wild rope turns waste energy fast.
15. 10-Minute Arm Burnout Circuit
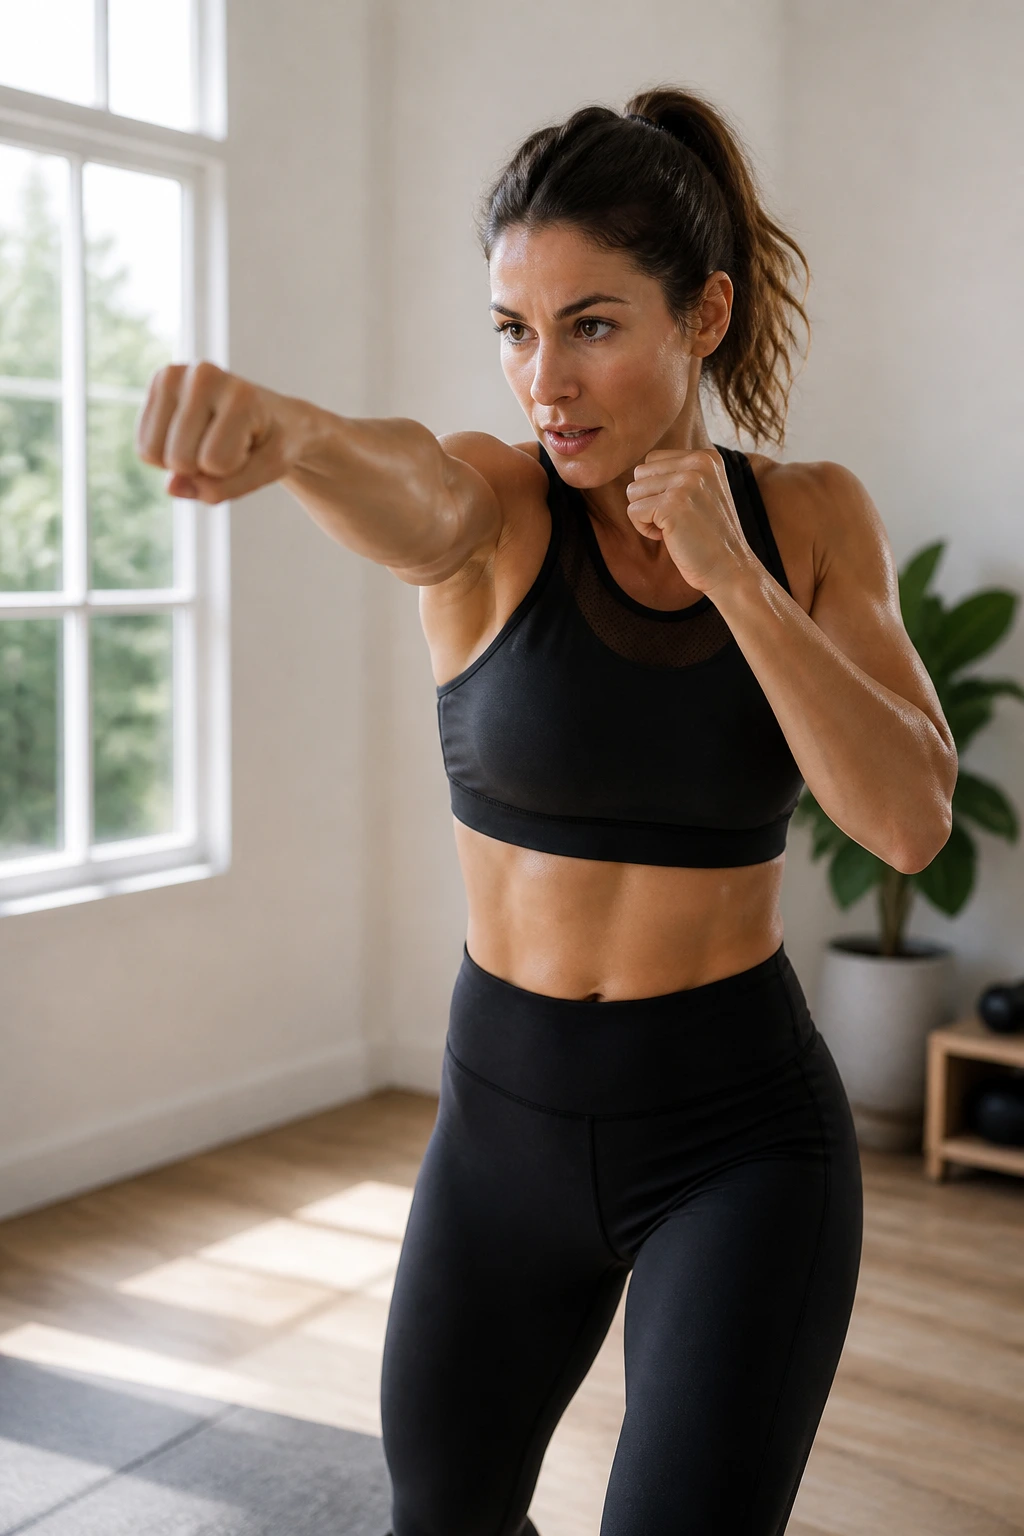
This is the one to use when you want a short workout that feels like work.
The circuit ties everything together: upper-body pushing, shoulder stability, cardio, and a little arm endurance. It’s not fancy. It doesn’t need to be. By the time you finish a few rounds, your arms should feel pumped, your breathing should be up, and your form should still be intact if you paced it right.
A Simple Circuit Template
Do each move for 30 seconds, rest 15 seconds between moves, and repeat the full circuit 3 times:
- Shadow boxing
- Incline push-ups
- Chair triceps dips
- Plank shoulder taps
- Mountain climbers
If that is too much, cut the work to 20 seconds and the rest to 20 seconds. If it feels too easy, move to 40 seconds of work and 10 seconds of rest.
How to Make It Count
Keep the reps clean. That matters more than speed.
The circuit should feel like a hard, tidy effort, not a collapse into bad form. If your shoulders are bouncing around or your lower back starts sagging, shorten the work interval and finish strong instead of sloppy.
This is the kind of workout that fits into a busy day and still leaves a mark.
Final Thoughts
Arms don’t lean out because you picked one magical exercise. They change when you repeat strength work, keep your heart rate up, and stay patient long enough for the body fat to come down.
That means the smartest move is rarely the hardest-looking one. Sometimes it’s wall push-ups done cleanly. Sometimes it’s a 10-minute circuit. Sometimes it’s jump rope in the hallway because that’s what you can actually repeat on a Tuesday night.
If a move hurts your shoulders, skip it. Dips are not sacred. Pike push-ups are not sacred. The point is to build a routine that hits the arms from different angles and keeps you coming back.
Pick three workouts from the list, do them three times a week, and make one thing harder when the reps stop feeling sharp. Cleaner form, shorter rest, a lower incline, a heavier backpack — small changes add up fast.
