



If regular push ups feel impossible, the right push up workouts can shrink that gap faster than most people expect.
The catch is that the first steps matter more than the first perfect floor rep. Start with angles your body can own — wall, counter, bench, or knees — and you learn the shape of the movement without turning every rep into a fight.
I have a soft spot for beginner push-up work that looks almost too easy on paper. That’s usually the good stuff. A clean set of six on a kitchen counter beats fifteen ugly floor reps with a sagging middle and shrugging shoulders.
Keep your hands under your shoulders or a touch wider, grip the surface instead of flattening your palms, and let your elbows travel at about a 30- to 45-degree angle from your ribs. If your wrists grumble, put your hands on dumbbells or push-up handles. That small change can keep the exercise usable long enough for your chest and triceps to catch up.
The 15 workouts below start where the floor still feels far away and end with plans that make a real push-up feel less like a stunt. Pick the version that lets you finish with shape intact, then stay with it until the last set feels crisp, not scrambled.
1. Wall Push-Up Reset Workout
A wall push-up is where a lot of good habits begin. It looks almost too gentle, which is exactly why it works for people who are brand new to push ups and don’t want their first session to feel like a wrestling match with gravity.
What it teaches
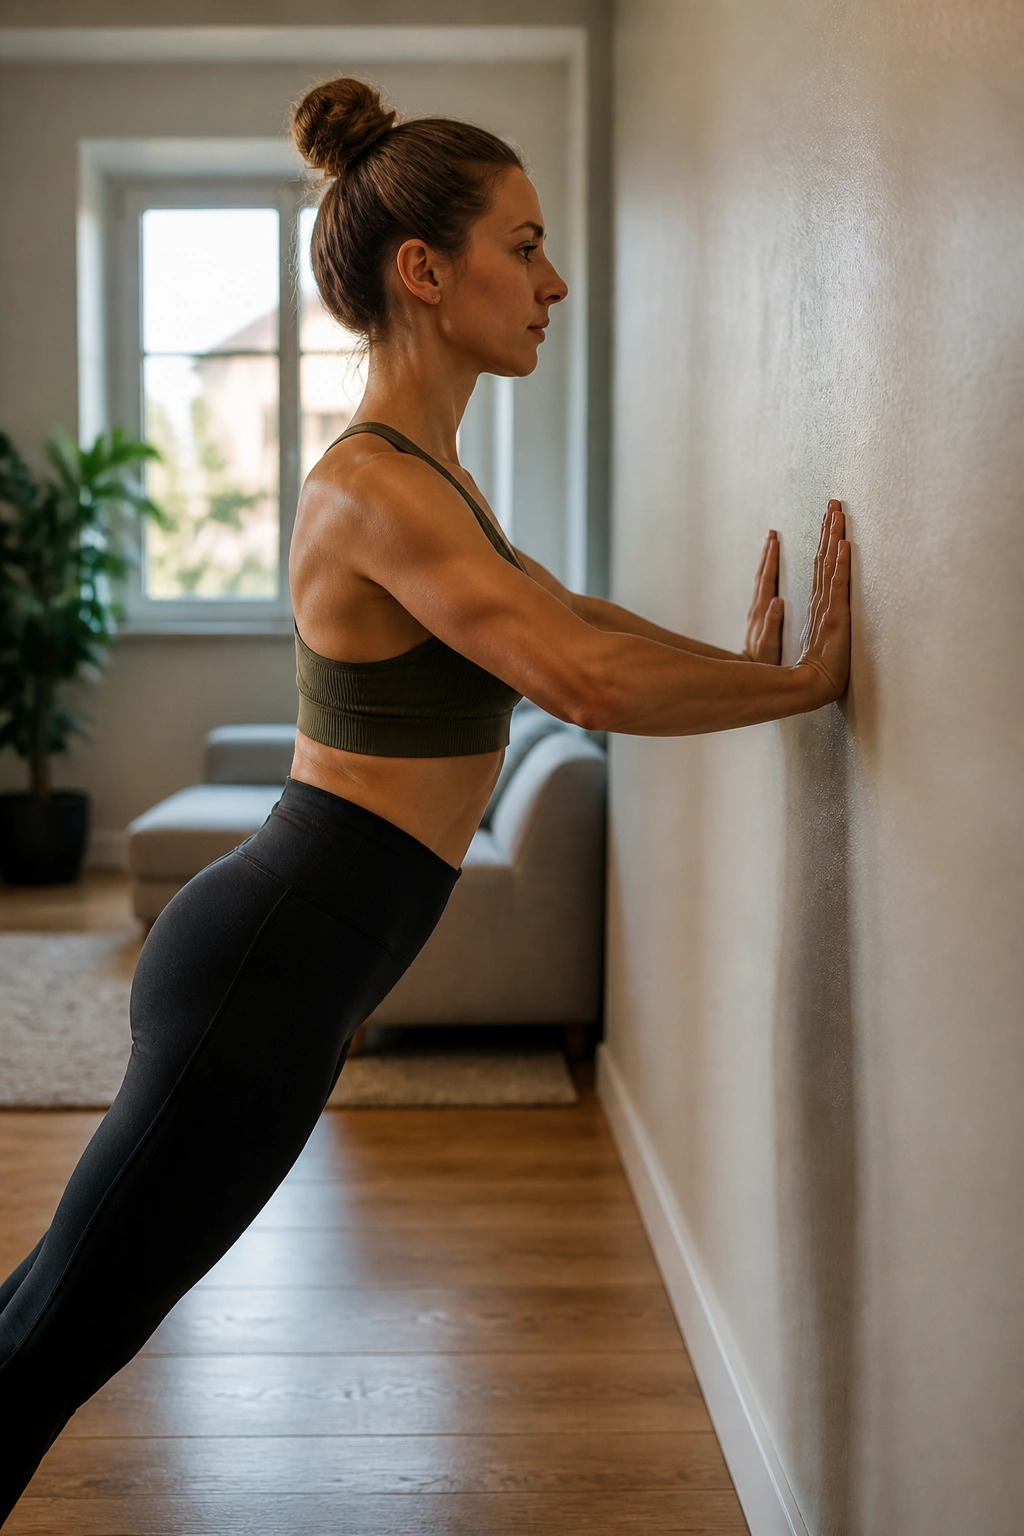
Stand about an arm’s length from a wall, place your hands at chest height, and walk your feet back until your body forms one straight line. Lower your chest toward the wall for 3 sets of 8 to 12 reps, resting 30 to 45 seconds between sets. Your torso should move as one piece; if your hips lead the way or your neck cranes forward, back up and make the angle easier.
A wall is forgiving, but it still tells the truth. If the hands are too high or your stance is too close, the rep turns short and sloppy. If the wall feels too easy after a set or two, move your feet 6 to 12 inches farther away and keep the same hand position.
- Best for learning hand placement and a straight body line.
- Good warm-up before incline or knee work.
- Easy to repeat on off days because the load is low.
- Makes breathing patterns easier to hear and feel.
Tip: stop each rep a hair before your nose or chest touches the wall. That little bit of control matters more than depth right now.
2. Incline Counter Push-Up Strength Sets

A counter turns a scary push-up into a real strength builder. The angle is low enough to challenge your chest and triceps, but high enough that your core can still do its job without everything falling apart.
Use a sturdy kitchen counter, a Smith machine bar, or a solid bench that does not wobble. Do 4 sets of 6 to 10 reps with 60 to 90 seconds of rest. If your last two reps turn into a neck reach or a hip sag, the surface is probably too low for the moment. Raise it.
This is the version I’d choose for someone who wants to feel a little work without the frustration of floor reps. The rep range is small on purpose. You should finish each set with at least 1 or 2 clean reps still in the tank.
The hands should stay planted the whole time, and the chest should travel toward the same spot on the edge of the counter every rep. That consistency is what builds confidence. Not heroics.
3. Knee Push-Up EMOM Workout
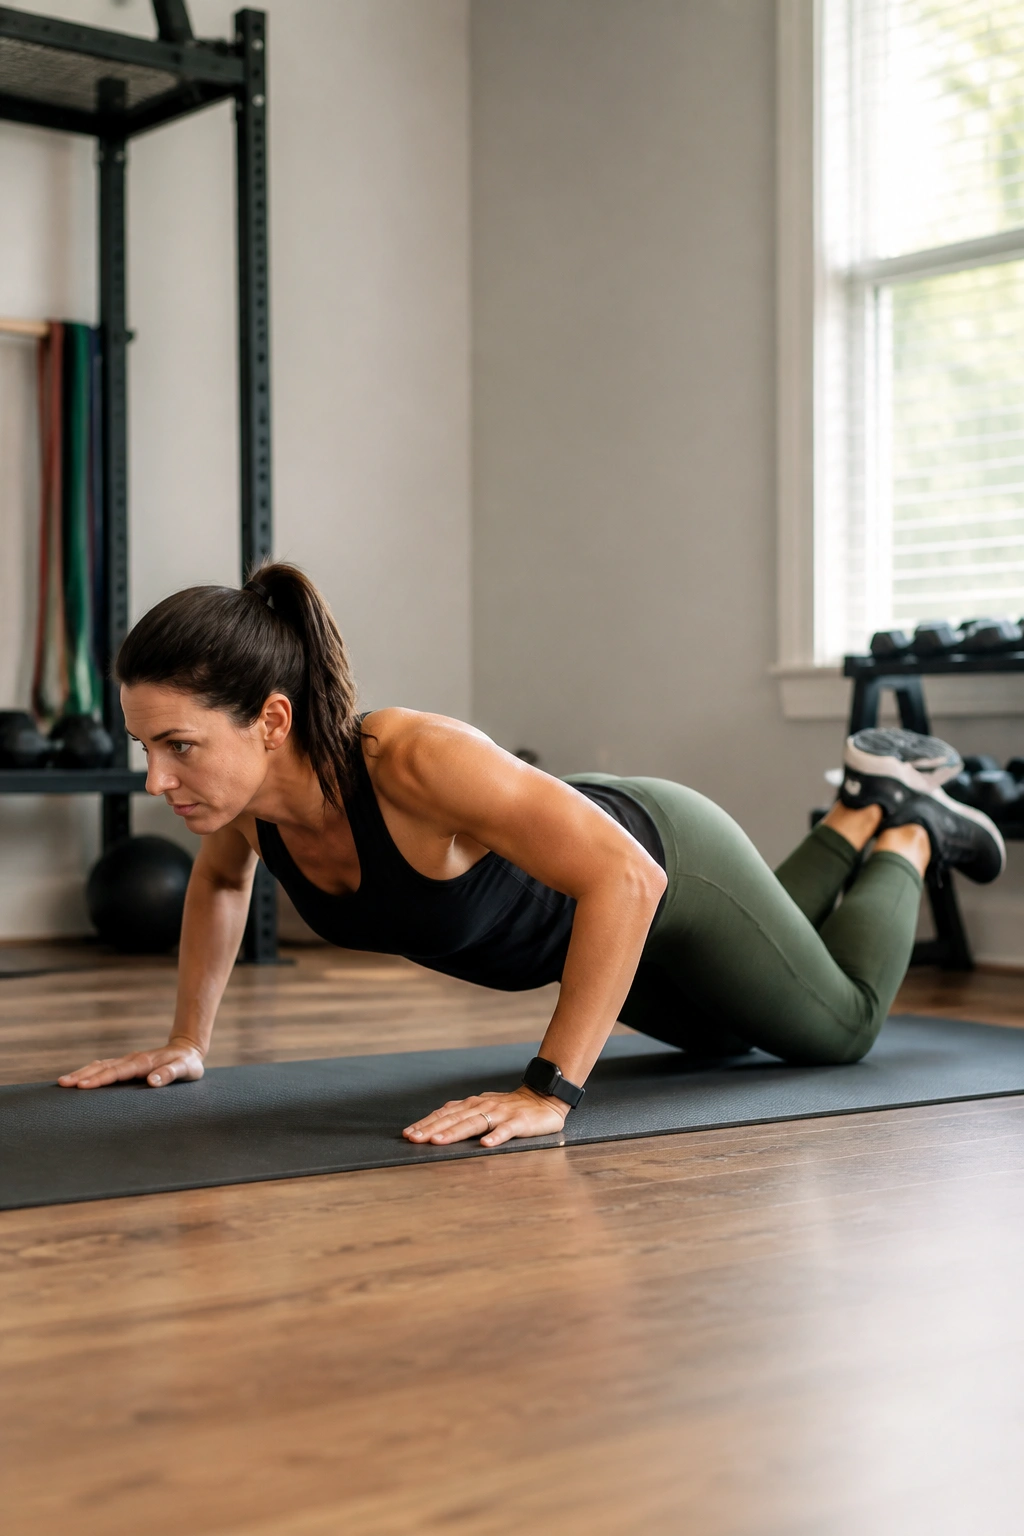
Can you build real pressing strength on your knees? Yes. And the time limit keeps you honest in a way that endless casual reps never do.
Set a timer for 10 minutes. At the top of each minute, perform 3 to 5 knee push-ups, then rest for the remainder of the minute. If five reps feel smooth, keep them. If the third rep already looks shaky, drop to three and make every one look the same.
How to pace the minute
The first few rounds should feel almost too easy. That is the point. You are teaching your body to repeat a good rep without chasing exhaustion, and beginners usually need more of that than they realize.
- Keep your hips slightly forward of your knees so the line from shoulders to knees stays firm.
- Lower under control, not in a flop.
- Exhale as you press away from the floor.
- Stop the set if your chin starts leading the movement.
If knee push-ups bother your knees, place a folded mat or towel under them. Small comfort fixes matter. People quit workouts over dumb friction all the time.
4. Negative Push-Up Workout

If you can lower yourself but can’t press back up yet, this is the workout that bridges the gap. The lowering phase, called the eccentric, is where you can build strength with more control than a full rep often allows.
Start at the top of an incline or floor position. Lower for 5 to 8 seconds until your chest is near the surface, then reset by coming back up on your knees or by stepping back to the top. Run 5 sets of 3 reps, resting 60 to 90 seconds between sets. The lowering should feel smooth and deliberate — no drop, no bounce, no sudden collapse.
What to watch for
- Your elbows should not flare wildly to the sides.
- The chest should stay proud, not sink first.
- The descent should be slow enough that you can count it.
- If you crash to the bottom, the angle is too hard.
Negatives are strangely humbling. One slow rep can teach more than ten frantic ones, because your body gets a clean lesson in position and tension. That lesson sticks.
5. Tempo Push-Up Workout

Tempo exposes everything. The weak spots, the rushed breathing, the little habit of dumping your hips when the rep starts to feel hard — all of it shows up fast when the rep is slowed down on purpose.
Use a 3-1-1 tempo: 3 seconds down, 1 second pause, 1 second up. Do 4 sets of 5 to 8 reps with 75 seconds of rest. If the floor version breaks your shape, move to an incline and keep the same tempo. The point is control, not punishment.
The pause at the bottom is the part most people skip when they try to do this on their own. Don’t. That one-second stop is where you learn whether your shoulders are stable and your core is doing anything useful at all.
Tempo work is especially good for people who rush through reps because they’re nervous or impatient. Slow down long enough and the exercise starts to make sense. The body usually cooperates once the ego steps out of the way.
6. Pause Push-Up Hold and Rep Workout

Unlike regular reps, this one makes the hardest point sit still. That can feel awkward the first time, and awkward is fine. Awkward usually means you’re actually training the weak link.
Lower into the bottom of a push-up and hold for 2 seconds when your chest is about 1 inch above the surface. Then press up. Do 4 sets of 4 to 6 reps with 60 to 75 seconds of rest. If the floor is too much, use a counter or bench and keep the same pause.
What to feel
You should feel the chest and triceps working hard while the shoulders stay packed rather than shrugged. If the pause turns into a full rest on the floor, you’ve gone too low or chosen too hard an angle.
A small pause changes the whole exercise. It removes bounce, kills sloppy momentum, and makes each rep honest. That honesty is useful when you’re new, because it shows you exactly where the sticking point lives.
Some beginners hate this workout at first. Fair. It is not flashy. It works anyway.
7. Push-Up Pyramid Workout

A pyramid is a nice way to build volume without throwing a beginner into a huge straight set. You climb up, then you come back down, and the changing rep counts keep the session from feeling like one long grind.
Try 1-2-3-4-5-4-3-2-1 on an incline or knees, resting 20 to 30 seconds between each rung. That gives you 25 total reps in a format that feels manageable because the middle gets broken up. If twenty-five is too much, stop at 4 on the way up and down. If it feels easy, use a lower incline next time.
Why the pyramid works
The early low reps give you practice without much fatigue. The middle rungs build enough tension to matter. The way back down lets you finish while your form is still recognizable.
A lot of beginners only need a small amount of work, repeated with care. The pyramid gives them that without the mental wall of “I have to do a big set right now.”
Good rule: when you can finish the top rung and still feel in control, lower the angle a notch.
8. Cluster Set Push-Up Workout

Cluster sets are the cleanest way to keep reps crisp when a straight set falls apart halfway through. Instead of forcing ten ugly reps in a row, you break them into tiny pieces and keep the quality high.
Do 3 clusters of 4 reps. Rest 15 to 20 seconds between mini-sets inside the cluster, then rest 90 seconds before the next cluster. Use an incline or knee variation if the floor makes the last rep ugly. The whole point is to preserve the rep shape, not to prove you can suffer.
This style works well for people whose first few push-ups are solid and whose form goes sideways once fatigue shows up. The mini-break gives your shoulders and trunk enough time to reset, so the next rep doesn’t start from a compromised position.
It also teaches pacing. That matters. A beginner who learns to stop before failure usually progresses faster than the one who chases one dramatic set and spends the next three days sore and confused.
9. Push-Up Ladder Workout

How is a ladder different from a pyramid? The jumps are bigger, and that small change gives the workout a different feel. Where a pyramid feels like a climb and return, a ladder feels like steady buildup with a deliberate push at the top.
Try 2-4-6-8-6-4-2 reps on an incline or knees, resting 30 to 45 seconds between rungs. If eight reps is too much, cap the ladder at six. If two feels like nothing, fine — the early rungs are there to prepare you for the top, not to impress anyone.
How to scale the rungs
- Use a higher surface if the top rung breaks your shape.
- Keep each rep identical; don’t speed up early.
- Rest longer after the top rung if your breathing is ragged.
- Stop the ladder if your hips start dipping or your elbows flare hard.
The ladder teaches your body to handle changing effort without panicking. That’s useful. Real progress rarely looks like one perfect straight line.
10. Mixed-Surface Push-Up Circuit
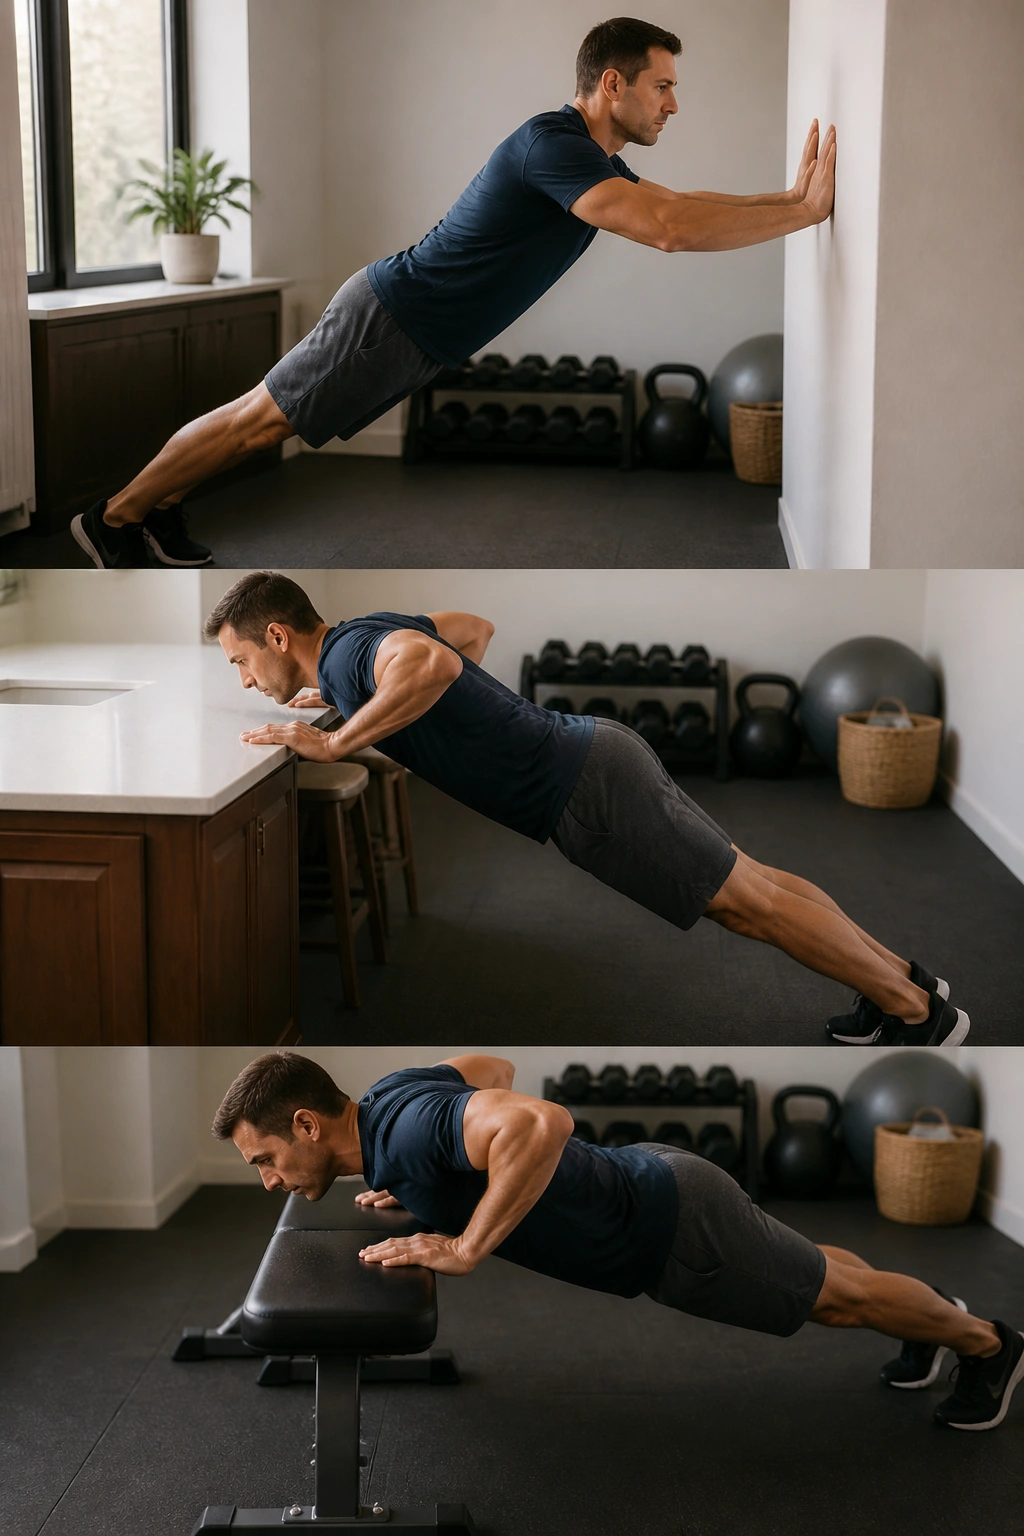
A mixed-surface circuit is one of the easiest ways to make push-up practice feel less intimidating. You move from a wall to a counter to a bench, and each surface gives you a slightly different dose of resistance without changing the movement much.
Do 8 wall push-ups, 6 counter push-ups, and 4 bench push-ups. Rest 30 to 45 seconds between surfaces, then repeat the circuit for 2 to 3 rounds. Use the same hand placement on each surface so the only thing changing is the angle.
This is a smart workout when a single surface feels boring or too hard. The wall warms up the pattern, the counter builds the work, and the bench adds a little bite at the end. By the time you get there, your shoulders and core already know what’s coming.
It also helps you notice where your form starts to slip. If the wall and counter feel smooth but the bench turns messy, you know exactly where the next step should be. No guessing.
11. Push-Up + Plank Combo Workout

A push-up isn’t the whole story. Your core keeps the torso from folding, and a short plank block reminds you that pressing strength and trunk control are connected whether you like it or not.
Run 4 rounds of 5 incline or knee push-ups, followed by a 20-second high plank, then 6 shoulder taps each side if your shoulders feel steady. Rest 45 seconds between rounds. If shoulder taps feel too messy, hold the plank and skip them for now.
What the plank adds
The plank makes you brace without moving, which is a useful skill for push-ups. If your rib cage pops up and your lower back sags during the plank, the push-ups will usually show the same problem.
Keep the plank short and sharp. There is no prize for suffering longer than needed. A tight 20-second hold is better than a sloppy minute.
This combo is especially good for beginners who can move their arms but lose body tension halfway down. You get a pressing pattern, a hold, and a little shoulder stability work in one session.
12. Density Timer Push-Up Workout

Can you get better without chasing a max-rep test? Yes. Set a timer, collect clean reps, and let the total do the work.
Use an 8-minute timer and accumulate 20 to 30 total push-ups in sets of 2 to 5 reps. Rest as long as you need between sets, but keep each rep clean. Write the total down. Next time, try to beat it by 1 to 3 reps or keep the same total with a slightly harder surface.
Density training is sneaky. It looks easy because the sets are small, then you notice how much your breathing and pacing matter once the clock starts ticking. The win here is not speed. It’s repeatable quality.
If your form falls apart before the timer ends, reduce the rep size immediately. A beginner who guards technique during density work usually gets better faster than one who keeps forcing ugly reps just to chase a number.
13. Top Hold to Full Rep Bridge Workout

The top of a push-up is not dead time. It’s a setup position, and beginners often ignore it even though it can make the full rep feel more stable and less wobbly.
Start with a 20-second high plank hold, then do 3 to 5 push-ups. Rest 45 to 60 seconds and repeat for 4 rounds. Use an incline if the floor makes the hold sag. The idea is to wake up the shoulders, brace the core, and then press while everything is switched on.
Why this bridge helps
That top hold teaches your shoulder blades to stay active instead of hanging loose. It also gives your wrists and hands a moment to settle before you add movement.
If the hold feels shaky after ten seconds, shorten it. That’s not failure; that’s information. The workout is telling you where the weak link sits.
This is a quiet, useful session. Nothing flashy. Just a good way to connect the start position to the rep itself.
14. Floor Push-Up Readiness Check

There’s a point where floor push-ups stop feeling like a stunt and start feeling like an honest strength exercise. The readiness check helps you find that point without turning every session into a test you may not pass.
Try 1 easy set on an incline, then move to the floor for 3 to 5 reps. If the floor set keeps your hips level, your chest lowers under control, and your neck stays neutral, you’re probably close to full floor work. If not, go back to the incline and stay there a while longer.
A few signs tell the story fast:
- Your chest hits roughly the same depth every rep.
- Your elbows travel at a similar angle each time.
- Your lower back doesn’t sag on the third rep.
- Your shoulders don’t crawl up toward your ears.
This is not a workout for proving toughness. It’s a checkpoint. People rush past it all the time and then wonder why floor push-ups feel awful. The fix is usually boring. Lower the surface. Repeat. Win quietly.
15. Three-Day Push-Up Rotation

If you want a plan, not just a menu, run these three sessions on alternate days. The setup keeps practice frequent enough to matter while giving your shoulders and wrists a break between efforts.
Three sessions, one week
Day 1: Incline strength
- 4 sets of 6 to 10 incline push-ups
- Rest 60 to 90 seconds
- Finish with 1 wall set of 10 reps as a warm-down
Day 2: Skill and control
- 5 sets of 3 negatives
- 3 sets of 4 pause reps
- Rest 60 seconds between sets
Day 3: Density and confidence
- 8-minute timer
- Aim for 20 to 30 total reps
- Use incline, knees, or a mix if needed
This rotation works because each day asks something different from you. One day builds strength, one day sharpens control, and one day teaches pacing under a clock. The body tends to respond well to that mix.
After a couple of repeats, lower the incline by one step or add one rep per set. Do not rush the jump to floor reps. The floor will still be there when your form is ready, and the clean reps you bank now will matter more than any ugly attempt you force too early.
Final Thoughts
The fastest path to better push-ups is rarely the most dramatic one. It’s the set you can repeat with good shape, decent breathing, and enough control to do it again tomorrow if needed.
Start higher than your ego wants. Lower the surface when the top end of the rep range feels boring, not when you’re already fighting for survival. That small shift keeps your joints happier and your progress steadier.
One clean rep counts more than three rushed ones. That sounds plain because it is plain, and that’s usually where the useful advice lives.
