



The first postpartum workout should feel almost too easy. If your breathing is still high, your core feels loose, and your energy comes in little bursts, that is normal — and it is exactly why postpartum exercises safe for beginners start with control, not sweat.
A walk that leaves you shaky or a plank that makes your stomach dome is not a win. After birth, the body is dealing with tissue healing, hormone shifts, sleep loss, and a core that may not yet feel like yours. That can happen after a vaginal birth or a C-section, and the fix is rarely to push harder. Usually, the better move is to start with pressure management, gentle strength, and motions that teach your ribs, pelvis, hips, and shoulders to work together again.
I like the quiet kind of starting point here. Breath first. Then mobility. Then a little strength. That order matters more than people think, because it keeps the work useful instead of random. The best beginner postpartum exercises are the ones that leave you feeling a little taller, a little looser, and not wrecked.
1. Diaphragmatic Breathing for Rib and Belly Pressure
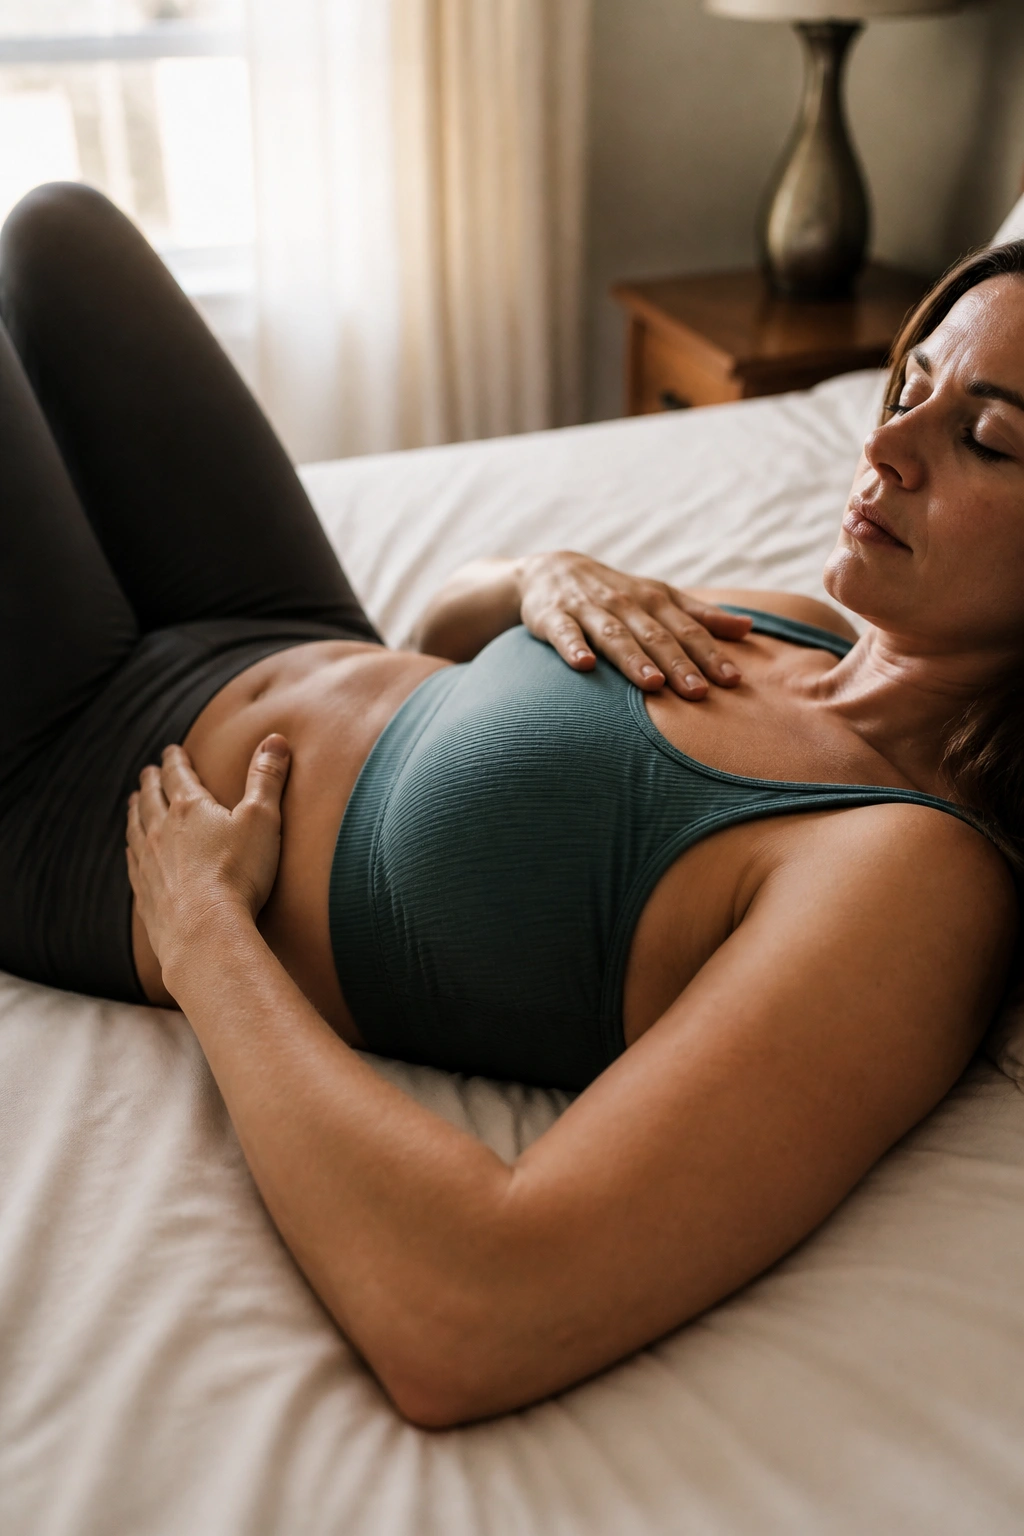
Start here. Not because it sounds fancy, but because it changes how everything else feels.
Lie on your back with your knees bent, sit in a chair, or prop yourself on a couch. Put one hand on your ribs and one on your belly. Breathe in through your nose for about 4 seconds and let the air spread into the sides of your ribs, not just the top of your chest. Exhale slowly for 5 to 6 seconds and feel your ribs soften downward.
That little shift helps your core and pelvic floor work as a unit again. You are not trying to suck your stomach in. You’re trying to let pressure move in a calmer way. Five breaths, rest, then five more is enough for a beginner session. One short set can change the tone of the whole day.
If your shoulders rise on the inhale, reset. If your belly clenches hard on the exhale, soften it. Small move. Big payoff.
2. Pelvic Floor Release and Gentle Kegels
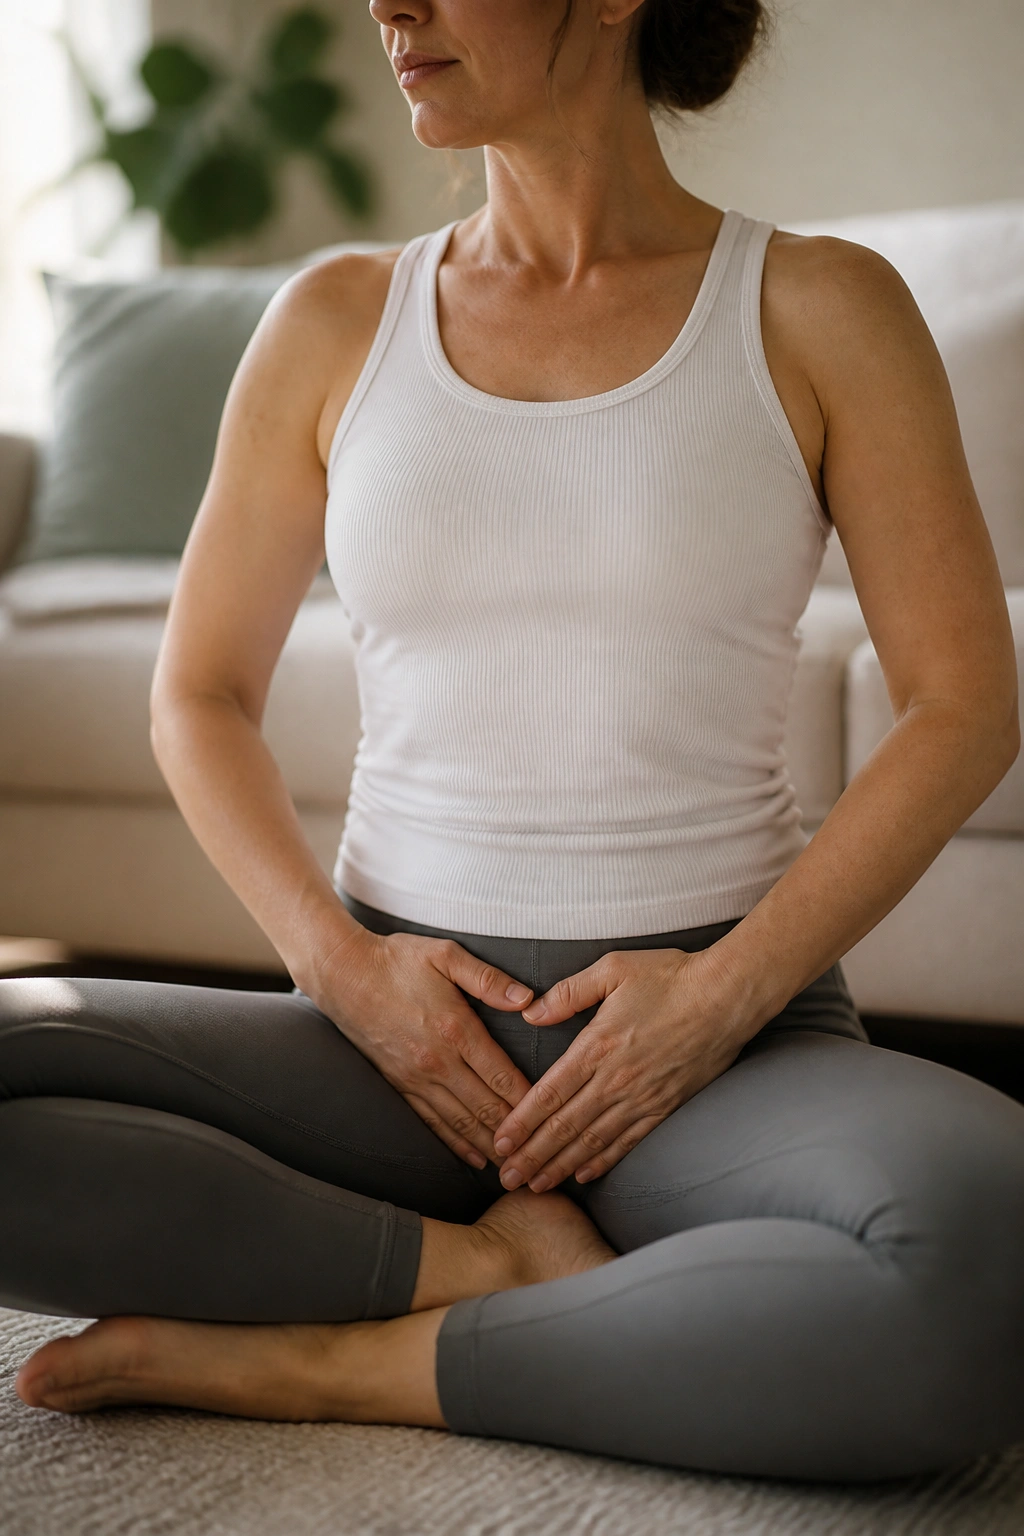
Do you need to squeeze first, or relax first? For a lot of postpartum beginners, the answer is relax first.
What It Should Feel Like
The pelvic floor is not just about tightening. After birth, some people feel weak there, but others feel guarded, tight, or a little stuck. If that sounds familiar, start with a slow inhale and imagine the sit bones widening. Then exhale and do a very light lift, almost like closing a zipper inside the pelvis.
How to Do It
Try 5 gentle contractions, holding each for 2 seconds, then fully let go for 4 to 6 seconds. Do not clench your butt cheeks or hold your breath. A good rep feels small and controlled, not like a hard squeeze. If you can’t relax after the contraction, stop there and come back to breathing for a few days.
A lot of people rush this part and treat Kegels like a cure-all. They are not. They help when they’re done well, and they help less when the floor is already tense. That’s why the release matters as much as the lift.
3. Walking in Short Bouts
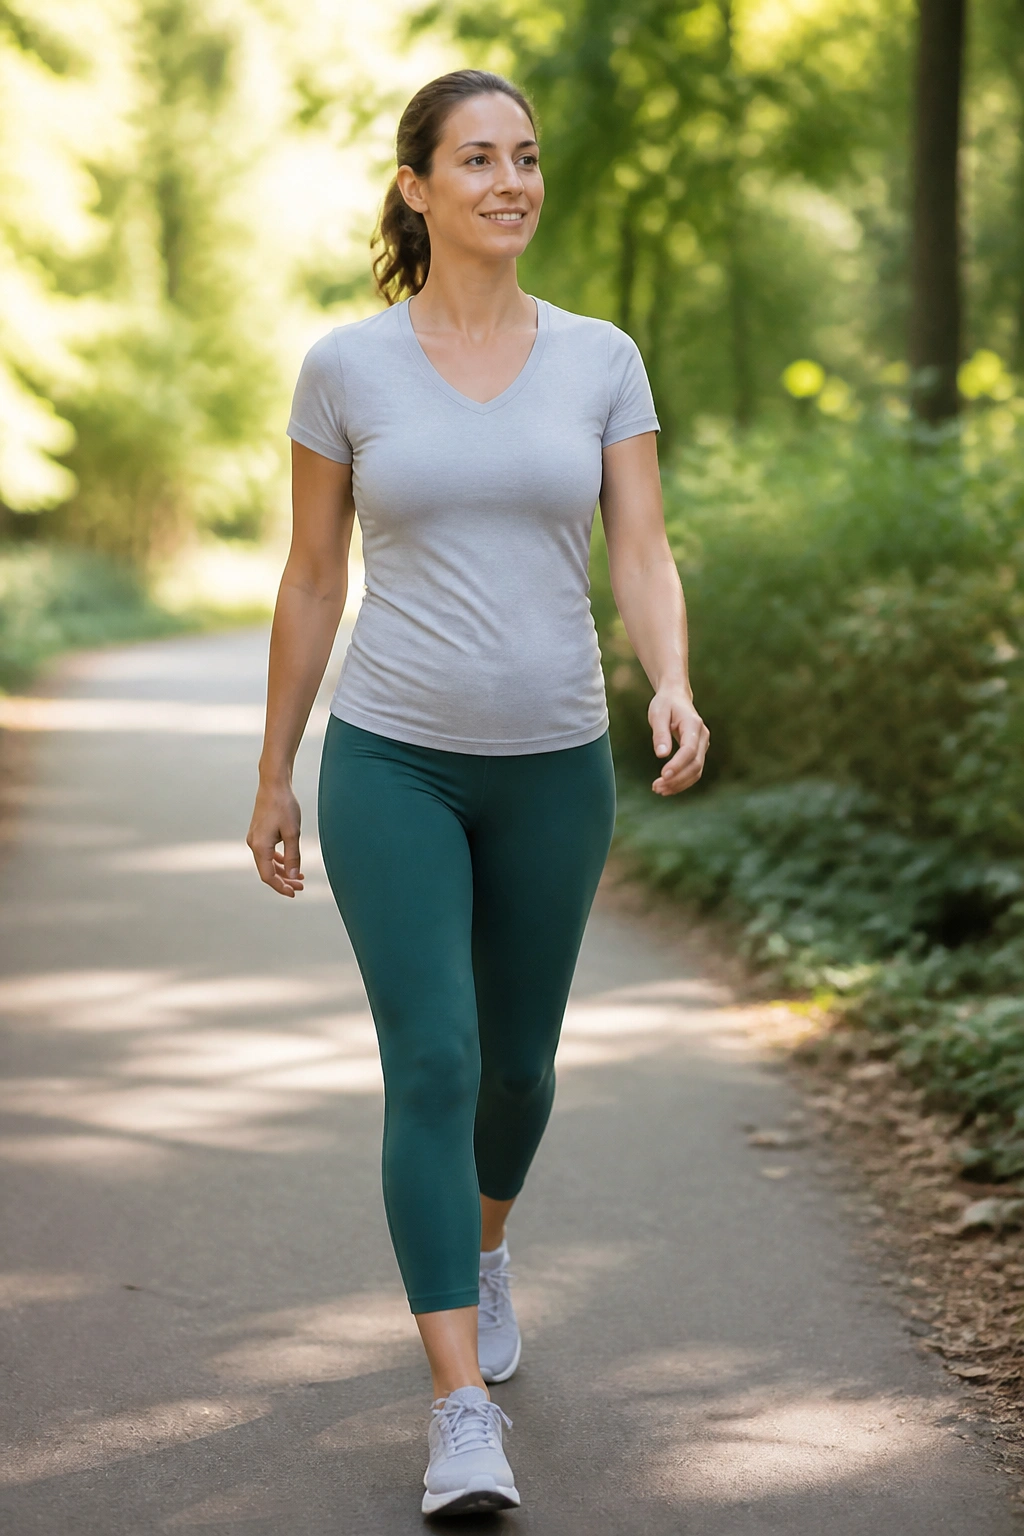
Walking is boring in the best way.
It gets your blood moving, wakes up your hips, and gives your core a chance to do light work without a big demand. If a full workout feels like too much, start with 5 minutes around the house, then 5 minutes outside, then maybe another 5 later in the day. You do not need a perfect route or a fancy stroller setup.
Here’s the part people miss: the right pace should let you talk in full sentences. If you’re gasping, bracing, or feeling pelvic heaviness, you went too far. That’s not failure. It’s data.
- Wear shoes with a stable sole, not mushy slides.
- Keep your stride short at first.
- Stop if bleeding gets heavier afterward.
- Use flat ground before hills.
- If a stroller makes you hunch, slow down and reset your shoulders.
Walking is also one of the easiest postpartum exercises safe for beginners to repeat, because it doesn’t ask for a mat, a band, or a quiet house. It just asks you to keep showing up.
4. Pelvic Tilts on the Floor or Bed
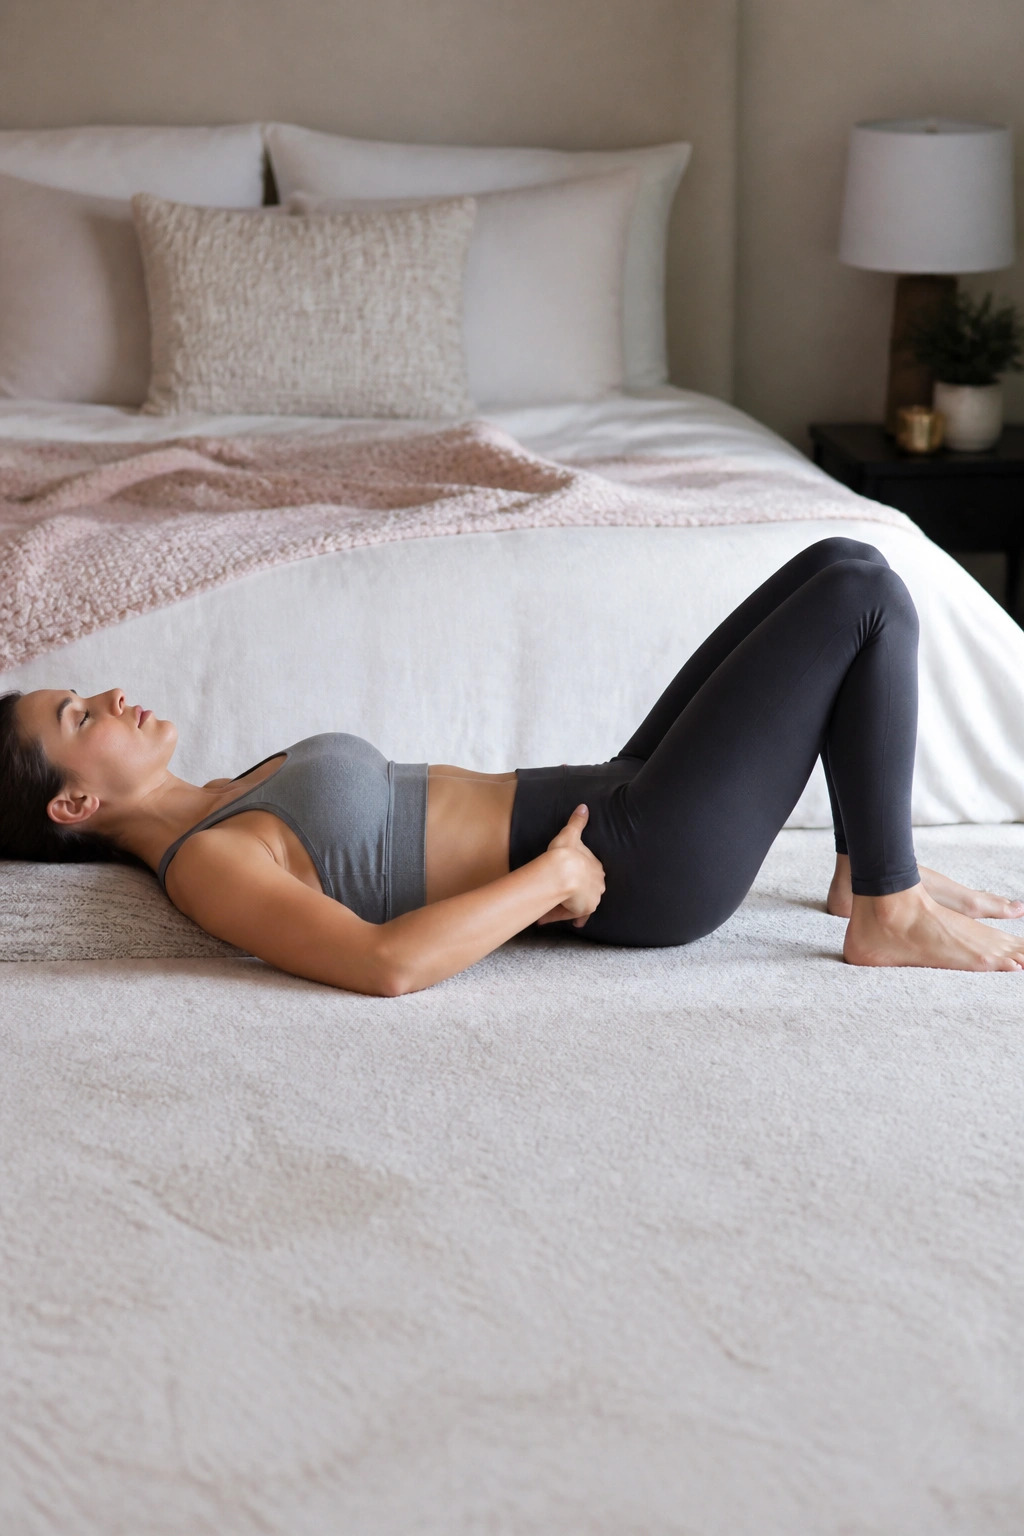
Tiny motion. Real value.
Lie on your back with knees bent and feet flat, or do it on a bed if the floor feels like too much. On an exhale, gently flatten the low back toward the surface by tipping the pelvis backward. On the inhale, release back to neutral. That’s the whole thing.
Eight to 10 reps is plenty. If you want to make it a little more structured, pause for one breath in the flattened position and notice whether your lower belly feels more connected. There should be no sharp pulling, no strain, and no sense that you’re forcing the movement.
This exercise is especially helpful if your back feels stiff from feeding, holding, and lifting. It also helps you find pelvic control before you move into leg work. A lot of postpartum people skip right past this because it looks too simple. I wouldn’t. Simple is the point.
5. Heel Slides for Low-Pressure Core Reconnection
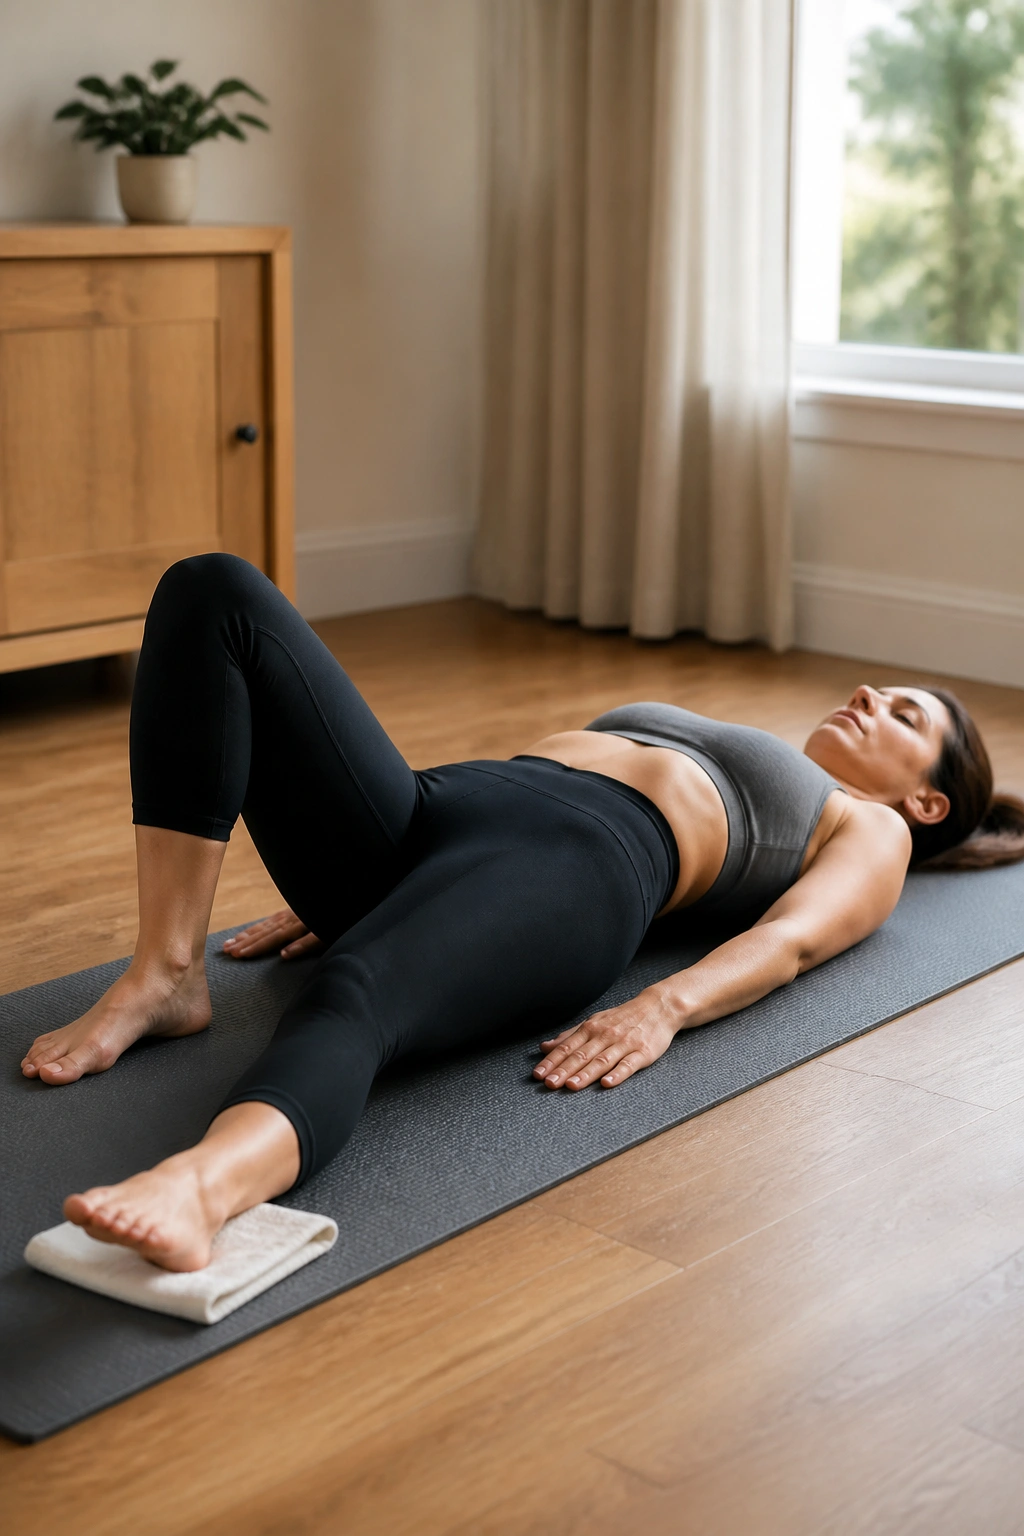
Heel slides are one of those moves that looks almost too calm to matter. Then you do them slowly and realize your stomach is working harder than you expected.
Lie on your back with knees bent, feet flat. Exhale, lightly brace, and slide one heel away from your body until the leg is almost straight. Inhale as you bring it back. Keep your pelvis still. If your lower belly pops up in the middle — that little ridge some people call doming — shorten the slide.
Six reps per side is enough at first. Use a towel under the heel if you’re on a rough floor so the motion stays smooth. The goal is control, not range. If you can only slide halfway and keep your shape, that’s the better rep.
This move is good for reconnecting the deep core without pressure spikes. It also teaches one leg to move while the trunk stays steady, which matters a lot when you’re walking, carrying a baby, or getting out of a car with one arm full of gear.
6. Glute Bridges with Small Range of Motion
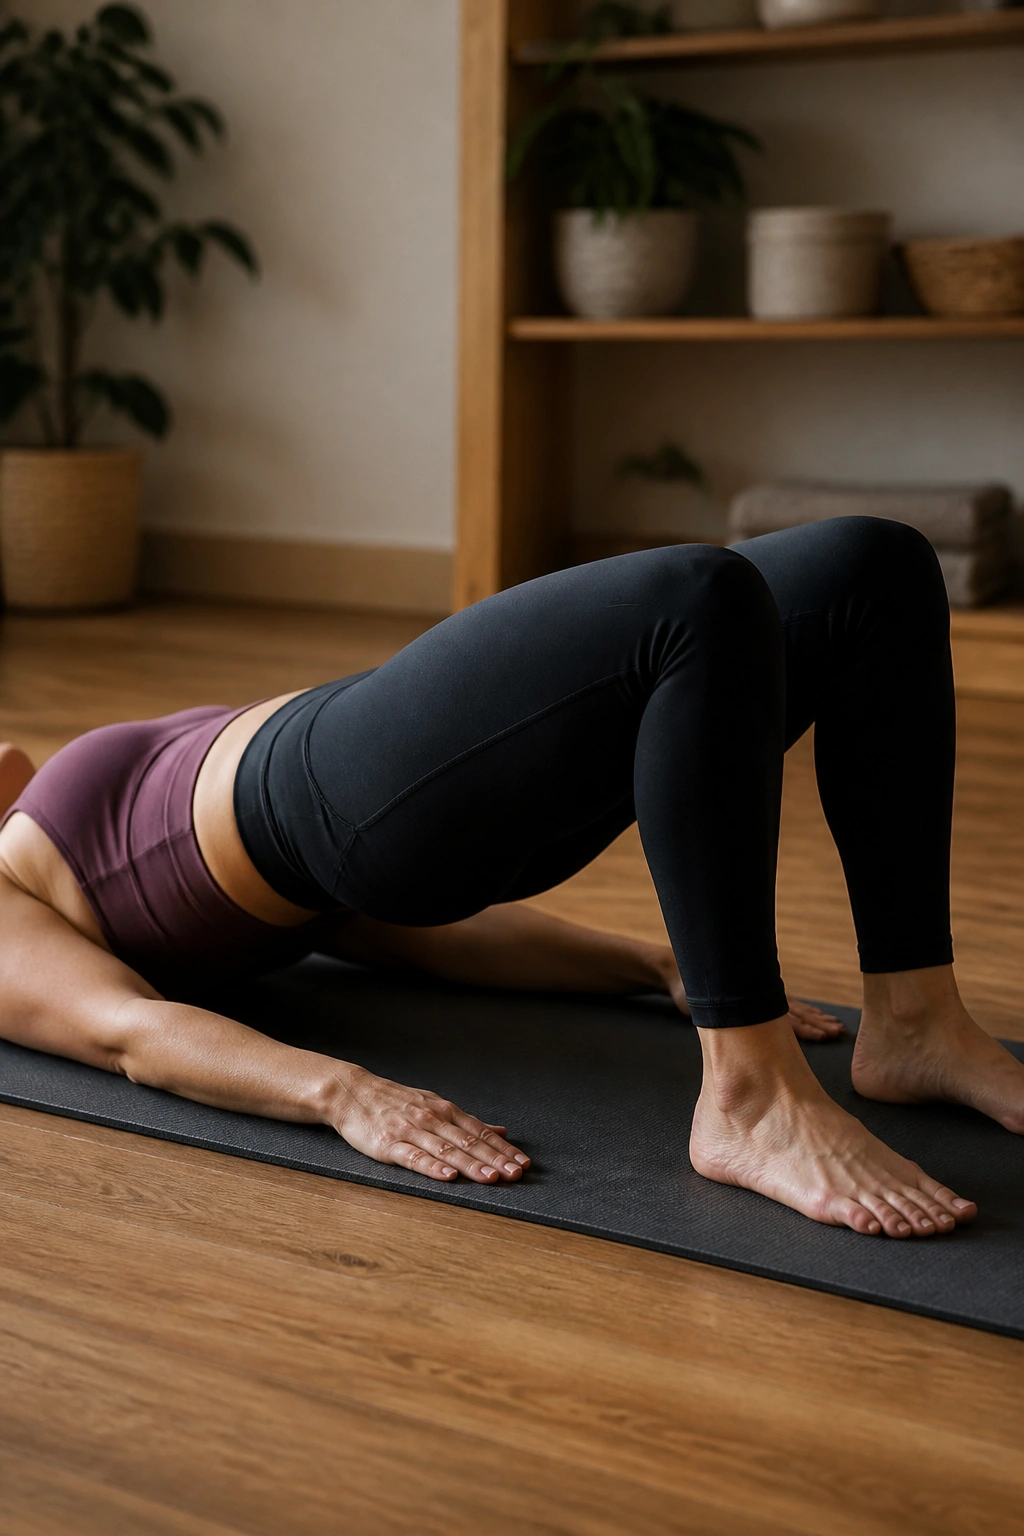
A postpartum bridge is not a gym bridge. Keep it small.
Lie on your back with knees bent and feet about hip-width apart. Exhale, squeeze your glutes, and lift your hips only a few inches — just enough to feel your thighs and butt turn on. Hold for 1 or 2 seconds, then lower with control. Six to eight reps is a fine start.
Why It’s Worth Keeping
Unlike crunches, which can push pressure forward into a still-sensitive midsection, bridges train the back of the body and help support the pelvis. They also wake up the glutes, which tend to get sleepy when you spend a lot of time sitting, nursing, or leaning over a bassinet.
What to Watch For
- Don’t over-arch the low back.
- Keep the chin relaxed.
- Stop if you feel heaviness in the pelvis.
- Move less if you feel the hamstrings cramp.
This is one of my favorite beginner strength exercises for the postpartum phase because it gives you something you can feel without beating you up.
7. Cat-Cow on Hands and Knees
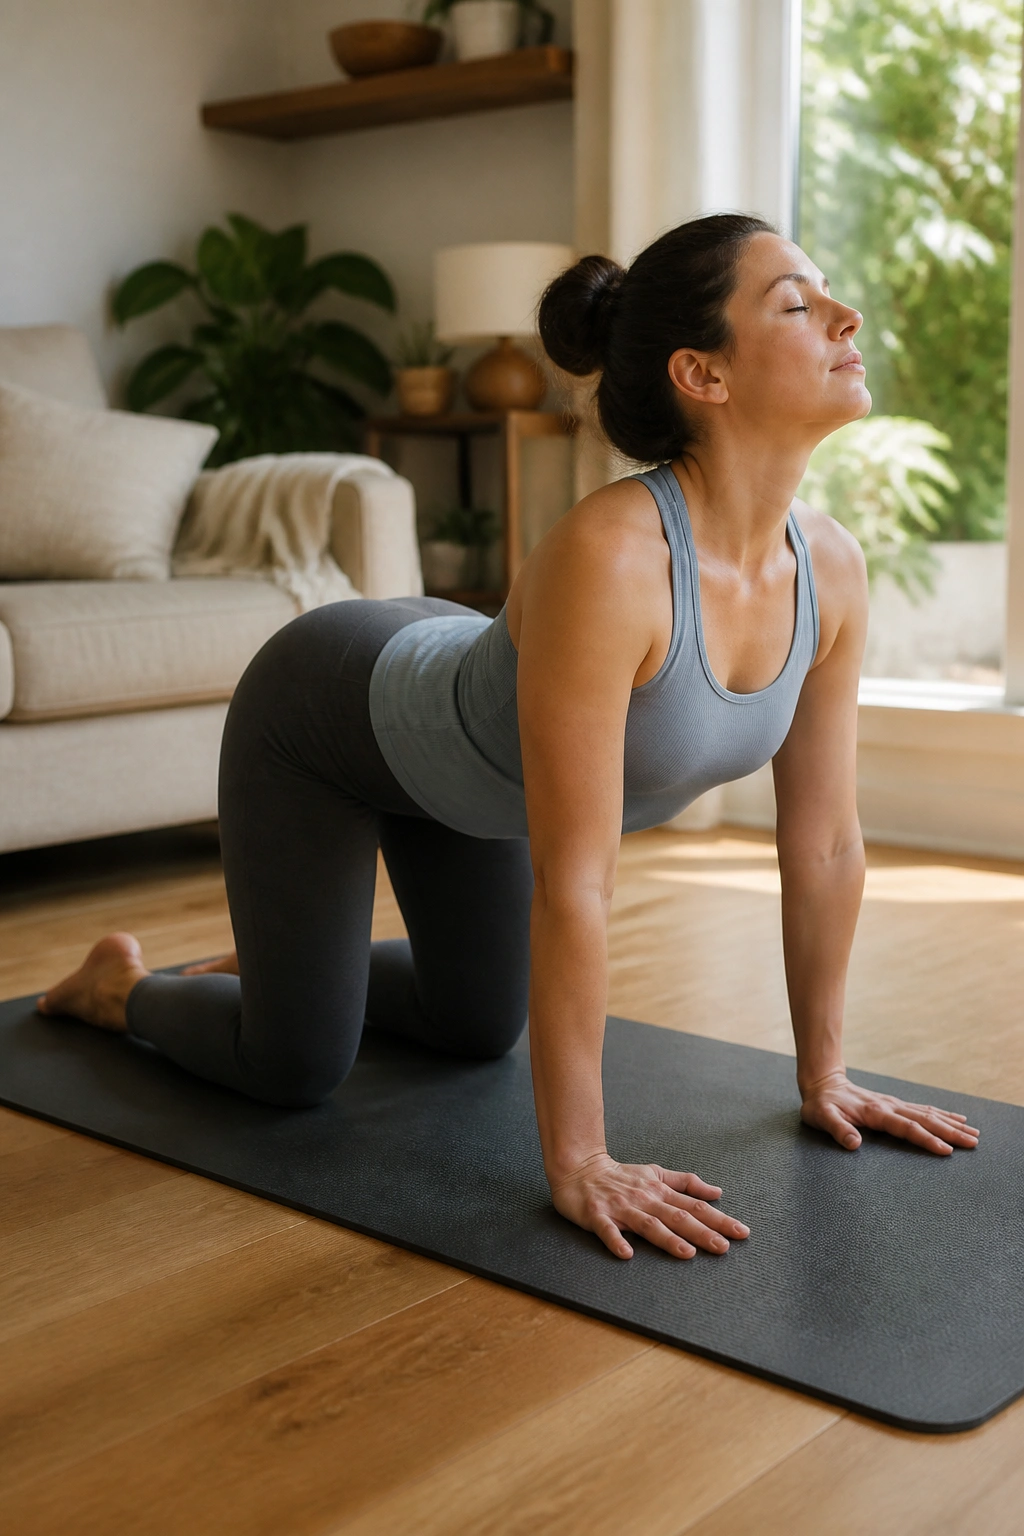
Your back wants to move after all that holding and hunching.
Get on hands and knees, or do this with your hands on a couch if the floor feels low and awkward. Inhale as you arch the back gently and lift the tailbone a bit. Exhale as you round the spine and soften the belly. Keep it slow, almost lazy.
Six to eight rounds is enough. If your wrists complain, come down to forearms or do the move with hands on a bench. The breath should lead the spine, not chase it. That’s the trick.
A lot of new parents carry tension between the shoulder blades and right around the low ribs. Cat-cow gives that whole area a chance to move without load. It also pairs well with breath work, which is why these two often belong together in the same short routine. Easy enough. Useful enough.
8. Bird Dog with a Slow Reach
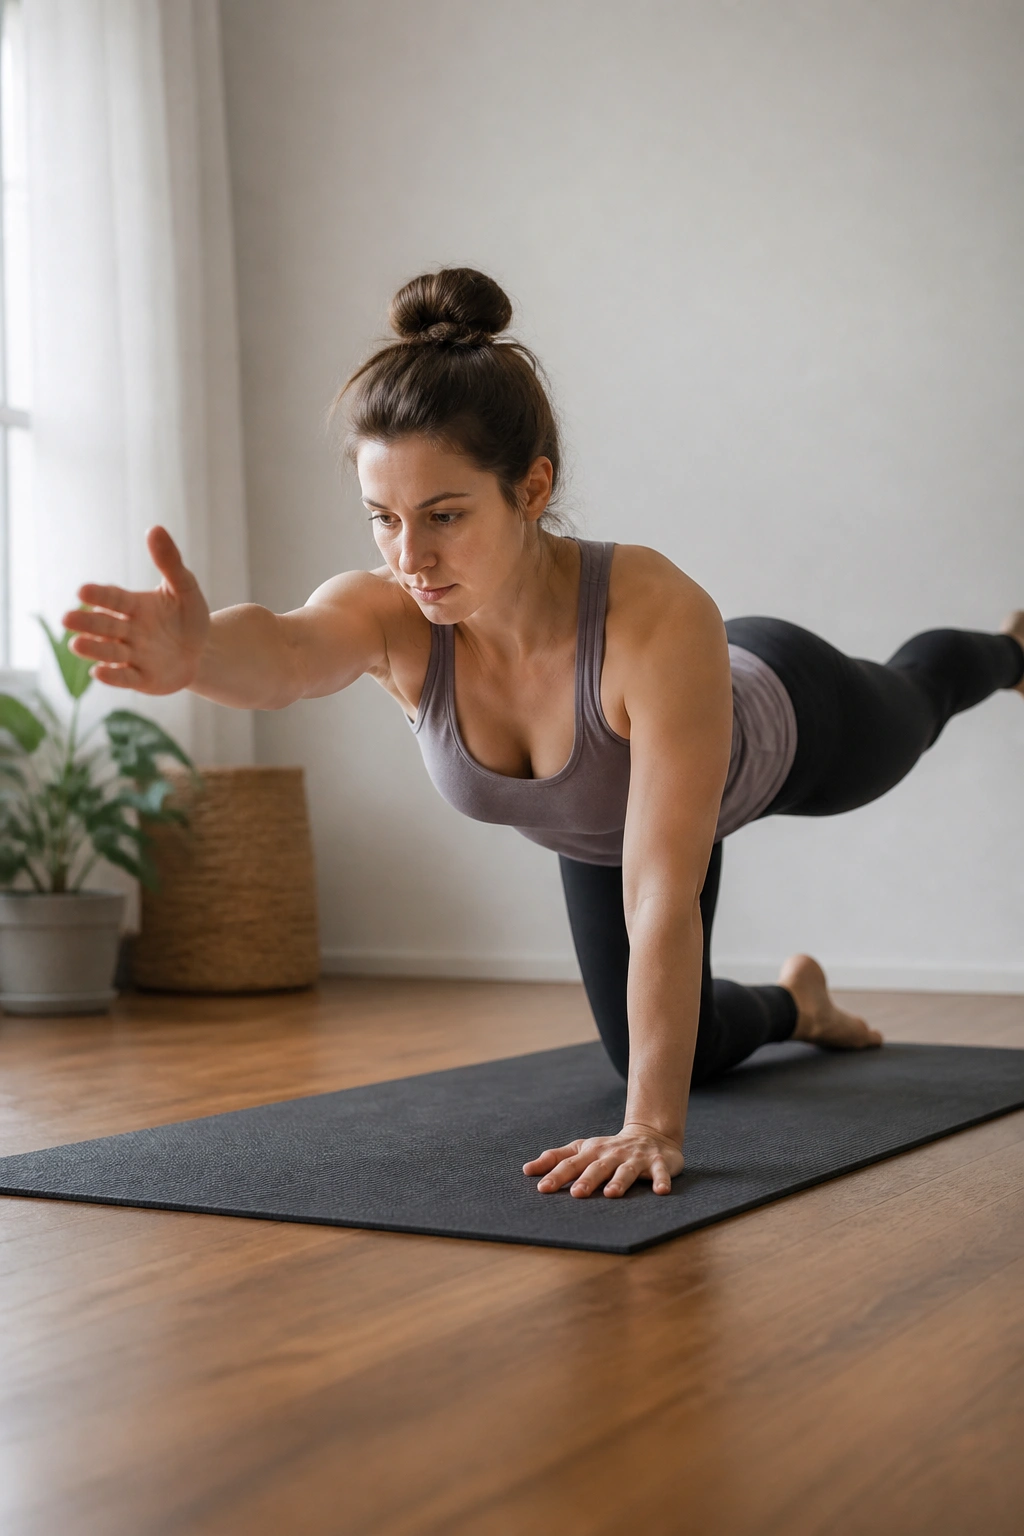
Why use such a plain-looking exercise? Because it teaches your trunk to stay steady while one arm or leg moves.
How to Get the Most From It
Start on hands and knees. Reach one leg back, toes down at first if that feels steadier. If that goes well, add the opposite arm. The full bird dog can be done in tiny range — just a hand lift or a short leg reach. Hold for 2 seconds, then switch sides.
What to Watch For
- Keep hips level.
- Don’t let the low back sag.
- Stop if the middle of the belly domes.
- Use a wall or couch if the floor is too much.
Three to five reps per side is enough to begin. I’d rather see a slow, tidy rep than a big reach with a wobbly spine. A controlled bird dog helps with carrying, reaching into a crib, and all the one-sided work that comes with life after birth. It’s not flashy. It works because it’s honest.
9. Wall Push-Ups for Chest and Shoulder Strength
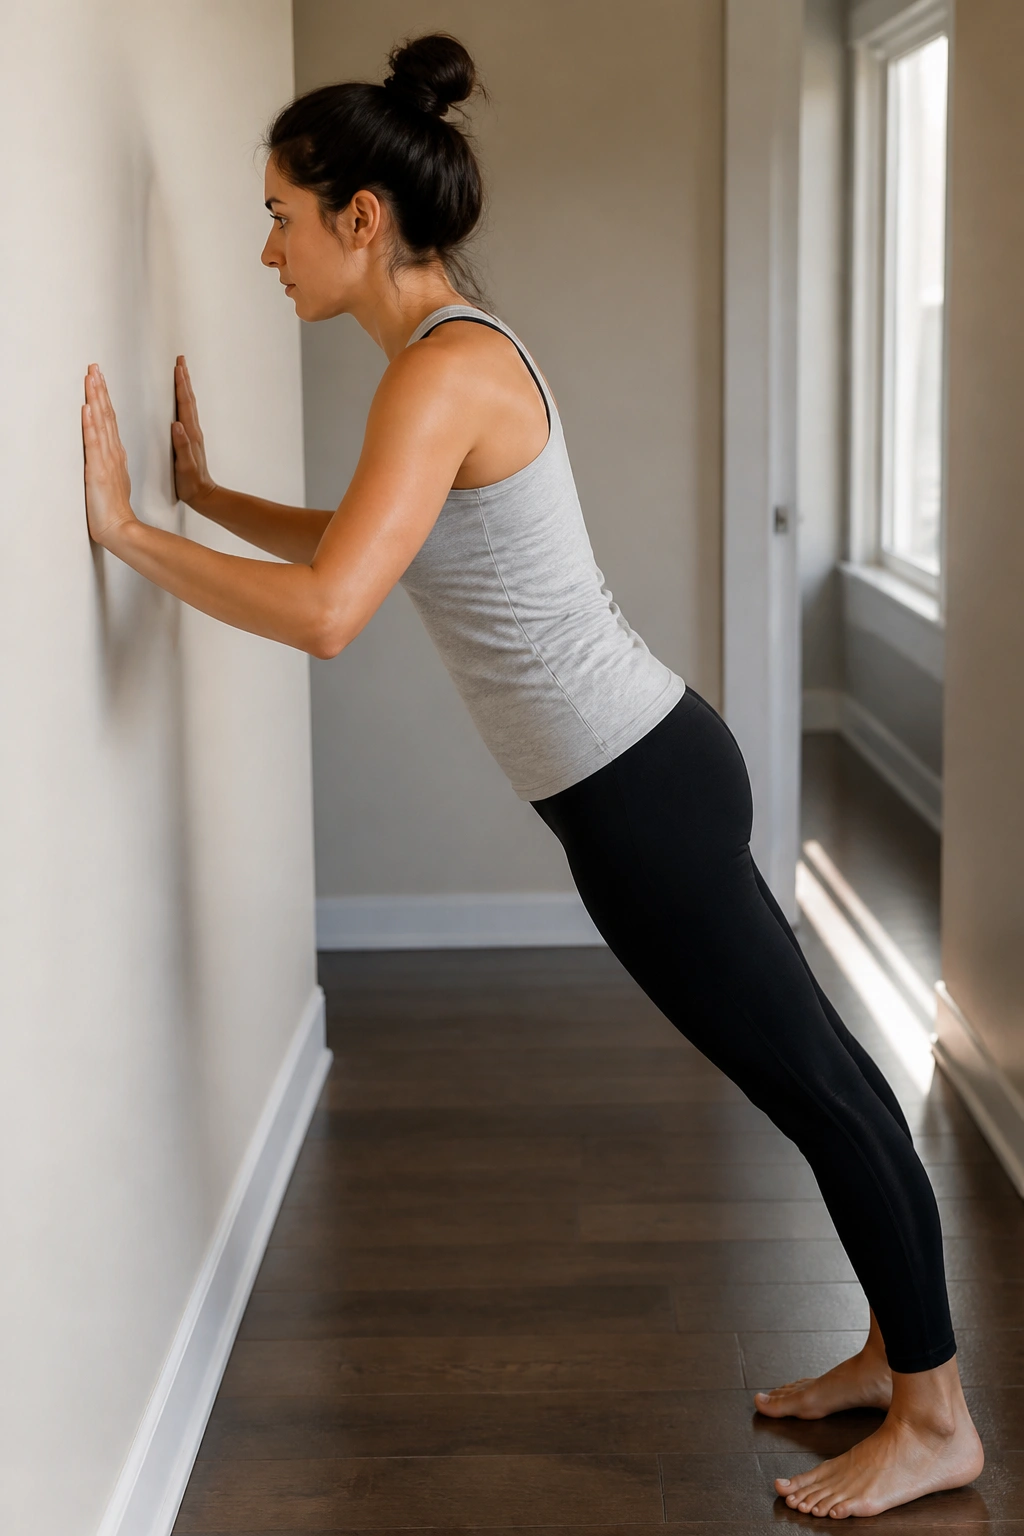
If your upper body feels tired from feeding, lifting, and carrying, wall push-ups can bring some shape back without pounding your core.
Stand an arm’s length from a wall, place your hands at shoulder height, and walk your feet back a little. Bend your elbows and lower your chest toward the wall, then press back to straight arms. Keep your body in one line from head to heels. Eight to 12 reps is a decent start.
If the move feels too easy, step your feet farther from the wall. If it feels too hard, stand closer. That tiny distance change is the whole game. A steeper angle makes it harder.
This is also a nice place to notice shoulder tension. If you shrug, widen your collarbones and try again. And if your wrists are sore, turn your hands out a little or do the push-up on a countertop instead of the wall. Small fix, big comfort.
10. Seated Marches for Deep Core and Hip Flexors
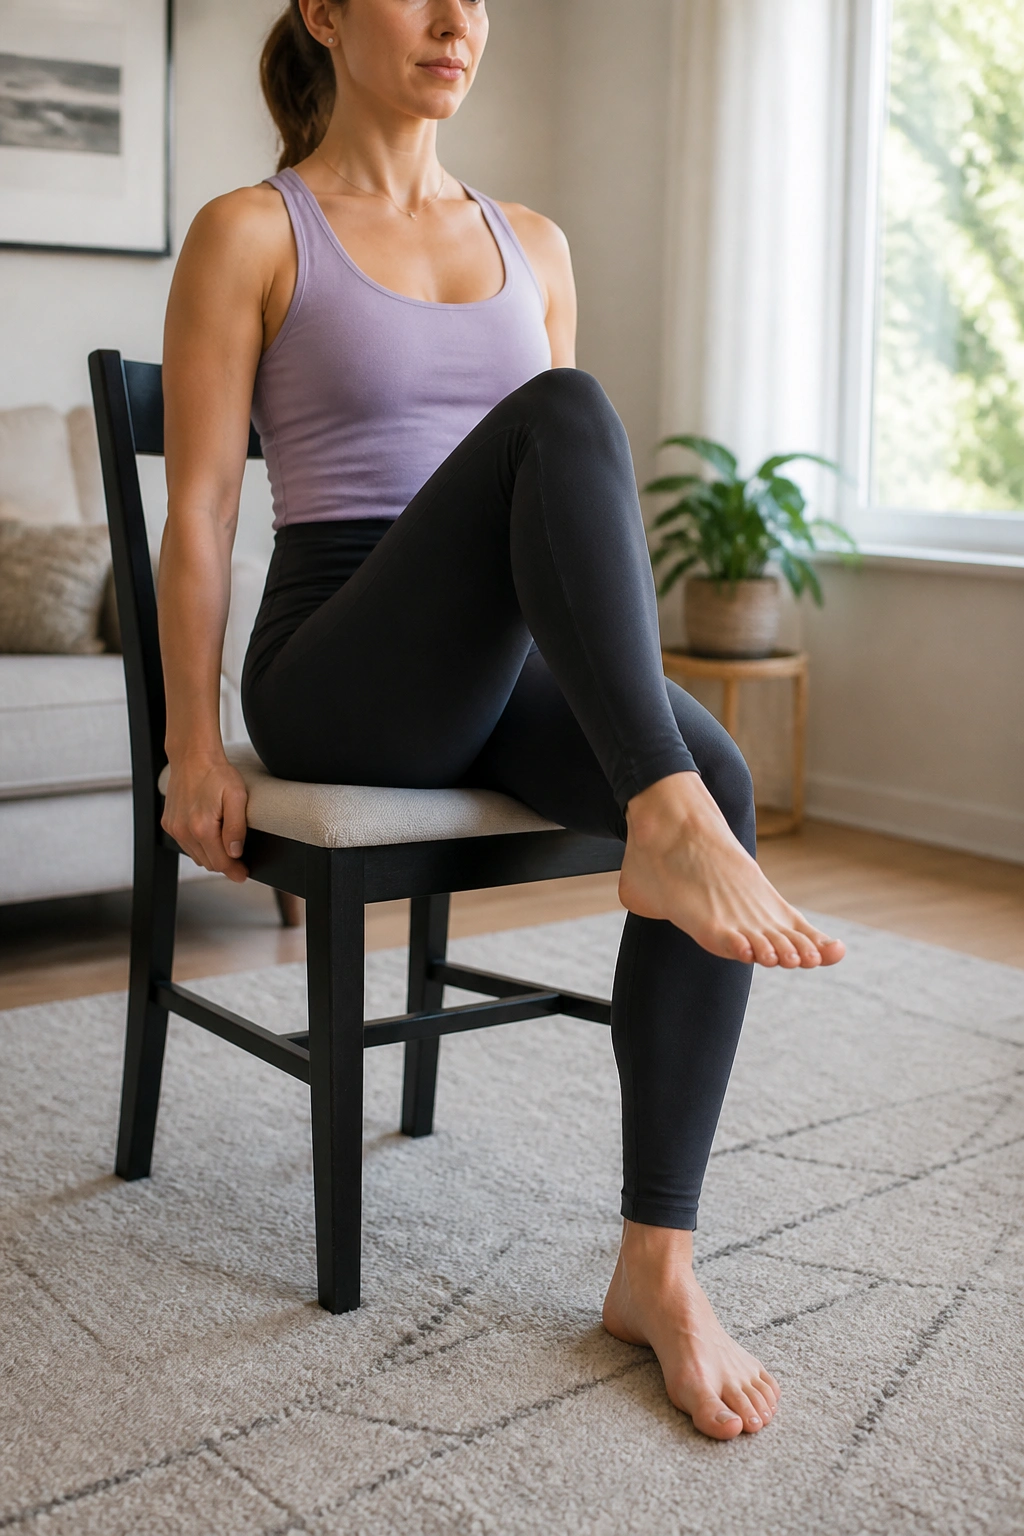
This one looks harmless. It isn’t, if you do it with good control.
Sit tall on a firm chair with both feet flat. Exhale and lift one knee a few inches, then lower it and switch sides. Keep your torso quiet. No leaning back. No rocking side to side. Ten marches per side is enough.
The point here is not height. It’s the relationship between your ribs, pelvis, and hips. If you can keep those pieces stacked while one leg moves, you’re teaching your body to coordinate again. That matters for stairs, getting in and out of the car, and those endless sit-stand moments no one warns you about.
- Sit on the front half of the chair.
- Keep your feet planted between reps.
- Exhale on each lift.
- Stop if you feel pressure downward.
It’s a good exercise for days when the floor is not happening. Those days count, too.
11. Clamshells for Hip Stability
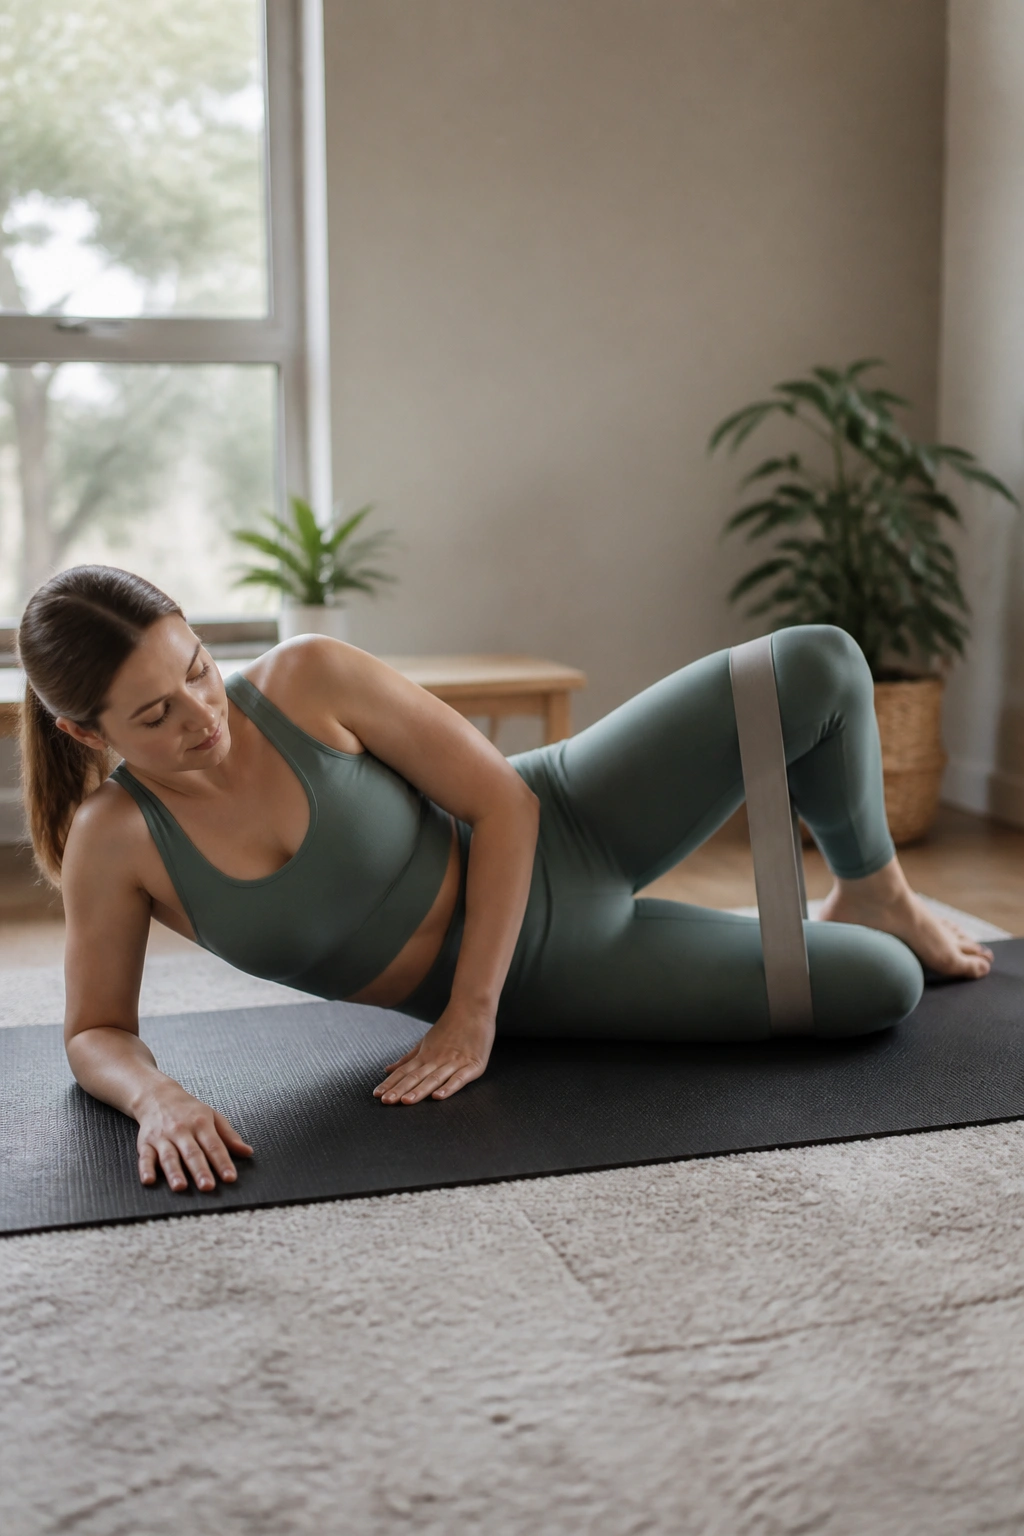
Weak-feeling hips are common postpartum, and clamshells are a clean way to start fixing that.
Lie on your side with knees bent and feet together. Keep your pelvis stacked and open the top knee like a clam shell, then lower it slowly. You should feel the side of the glute — not the front of the hip, and not your lower back. Eight to 12 reps per side is plenty.
A light miniband can wait. Start with body weight first. If your waist twists backward when you lift, you’re going too high. Tiny range, better muscle work. That’s the rule.
I like clamshells because they’re easy to fit in between naps or after a feeding, and they don’t need much space. They also help with knee tracking and pelvic stability, which matters when you’re walking a lot or carrying a baby on one side all day. Quiet work. Worth doing.
12. Side-Lying Leg Lifts for Outer Hip Endurance
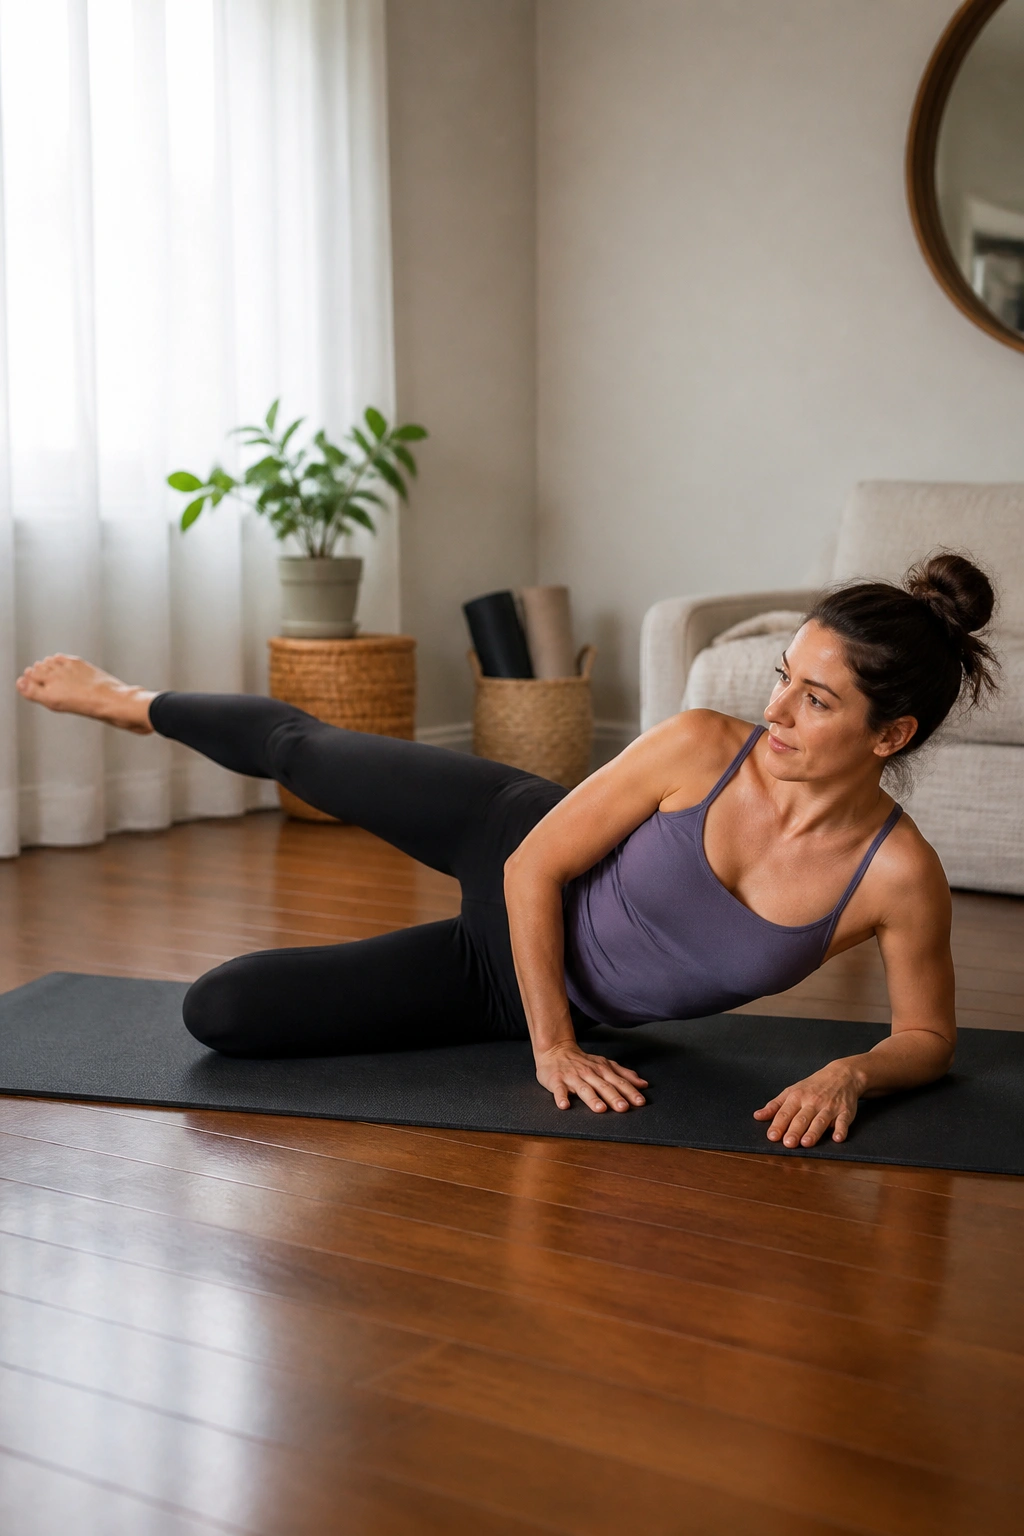
Clamshells and side-lying leg lifts are cousins, not twins.
Lie on your side with the bottom knee bent and the top leg straight. Keep the top toes slightly turned down and lift the leg to about hip height, maybe a little lower. Lower it with control. Eight to 10 reps per side is enough to start. If the leg swings, slow it down and shorten the lift.
Why do this one? Because the outer hip muscles help keep the pelvis steady when you stand on one leg, step over toys, or carry a car seat. They also matter for walking without feeling like one hip is collapsing inward.
A good version should feel steady and honest, not dramatic. If your low back starts doing the work, the lift is too high. That’s the cue to scale it back.
This exercise pairs nicely with clamshells. One trains external rotation. The other trains lateral lift. Together, they give the hips more of the support that baby life quietly demands.
13. Sit-to-Stand from a Chair
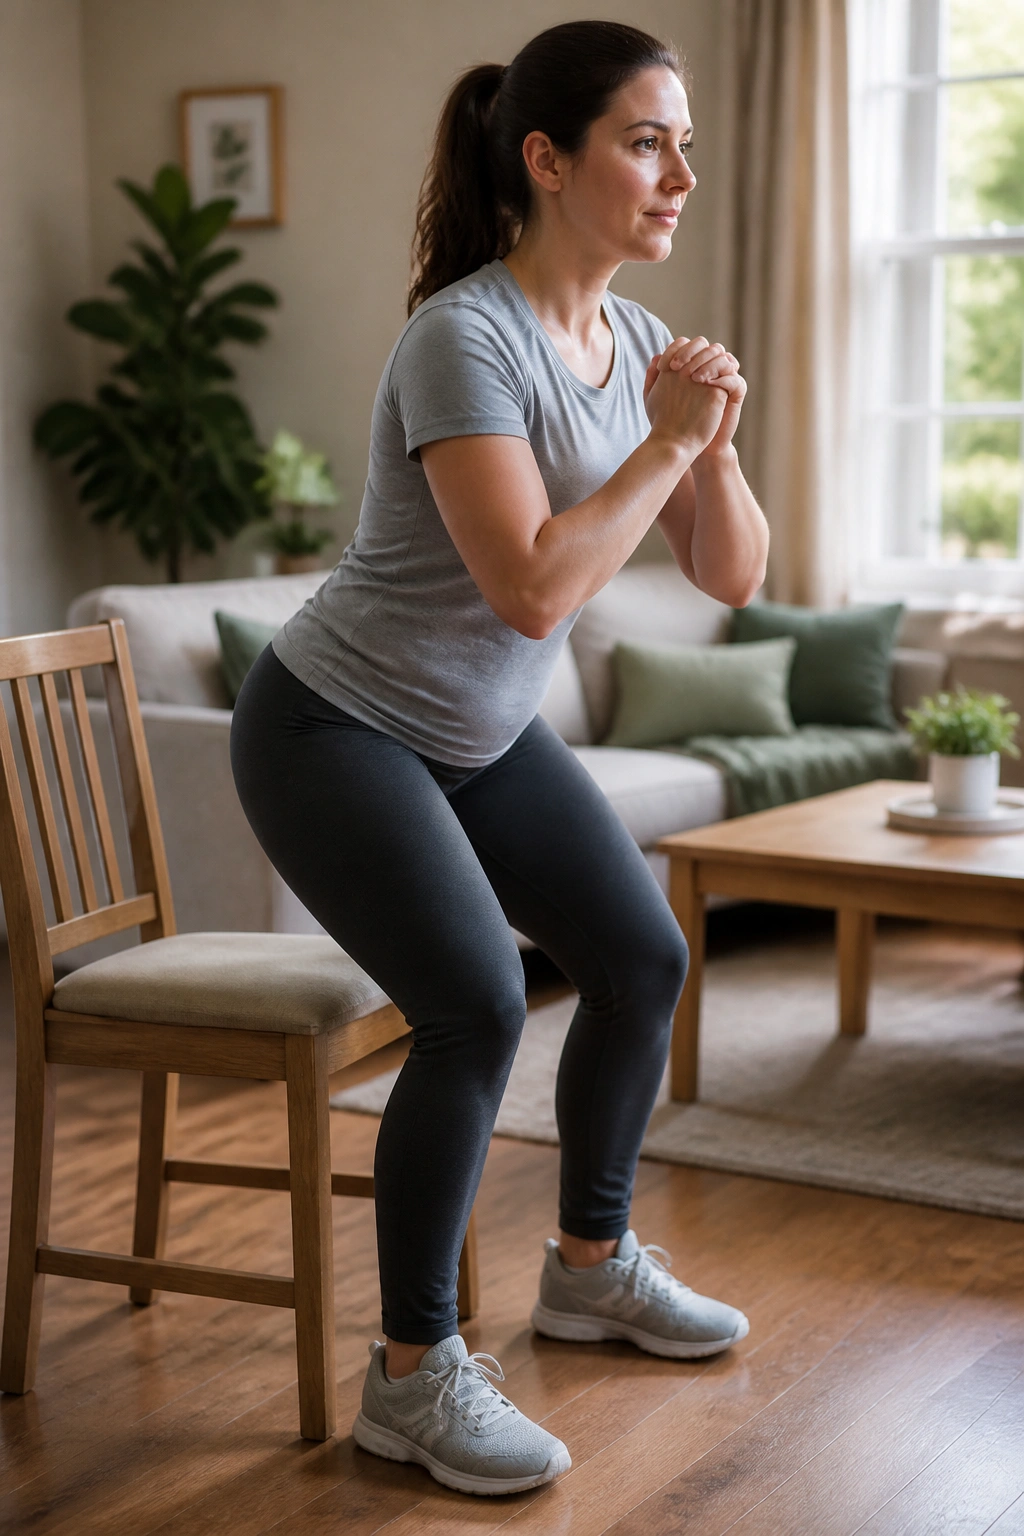
If I had to pick one strength move that feels practical fast, this would be near the top.
Sit on a sturdy chair with your feet under your knees. Lean forward a little, exhale, press through your heels, and stand up. Then sit back down with control. Six to 10 reps is enough, and you can use your hands on the chair arms or thighs if needed.
Why It’s Such a Good Choice
It’s the same pattern you use all day — getting up from feeding, standing from the couch, reaching for a bottle, standing to soothe a baby. Training it on purpose pays off in a way that isolated exercises sometimes don’t.
Make It Easier or Harder
- Use a taller chair to make it easier.
- Hold a wall or countertop if balance feels shaky.
- Slow the lowering phase to make it harder.
- Stop before you collapse into the chair.
A clean sit-to-stand should feel smooth through the legs and glutes, not jerky through the back. If that’s not happening yet, keep the range small and let the strength build.
14. Mini Squats with a Chair Behind You
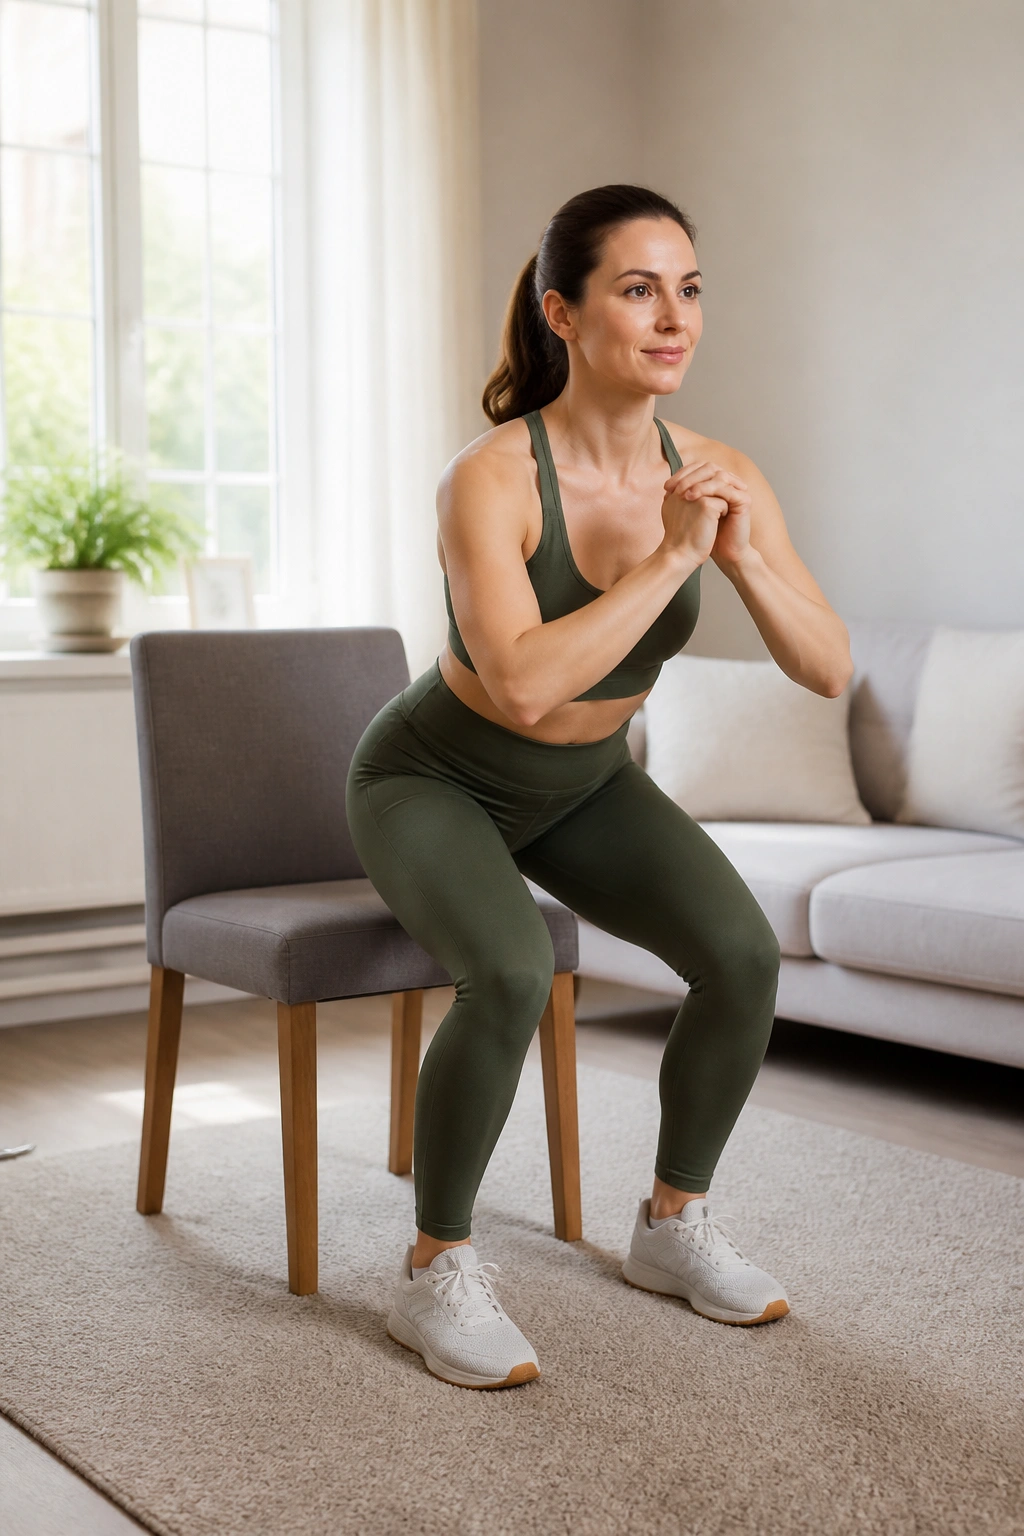
A deep squat is not the goal here. A tidy mini squat is.
Stand with feet about hip-width apart and place a chair behind you as a target. Reach your hips back a few inches as if you’re about to sit, then stand back up. Keep the chest lifted and the knees soft. Eight reps is a fine starting dose.
This version works because it teaches load without asking your body for much depth. You get leg and glute work, plus a little core control, while staying inside a manageable range. If your pelvic floor feels fine with sit-to-stand but you want a bit more challenge, this is a smooth next step.
- Keep your weight centered over the whole foot.
- Don’t let the knees cave inward.
- Exhale as you rise.
- Stop before your back rounds.
A lot of people rush squats because they think deeper is better. Not here. Better is quieter, steadier, and easier to repeat tomorrow.
15. Standing Calf Raises for Circulation and Balance
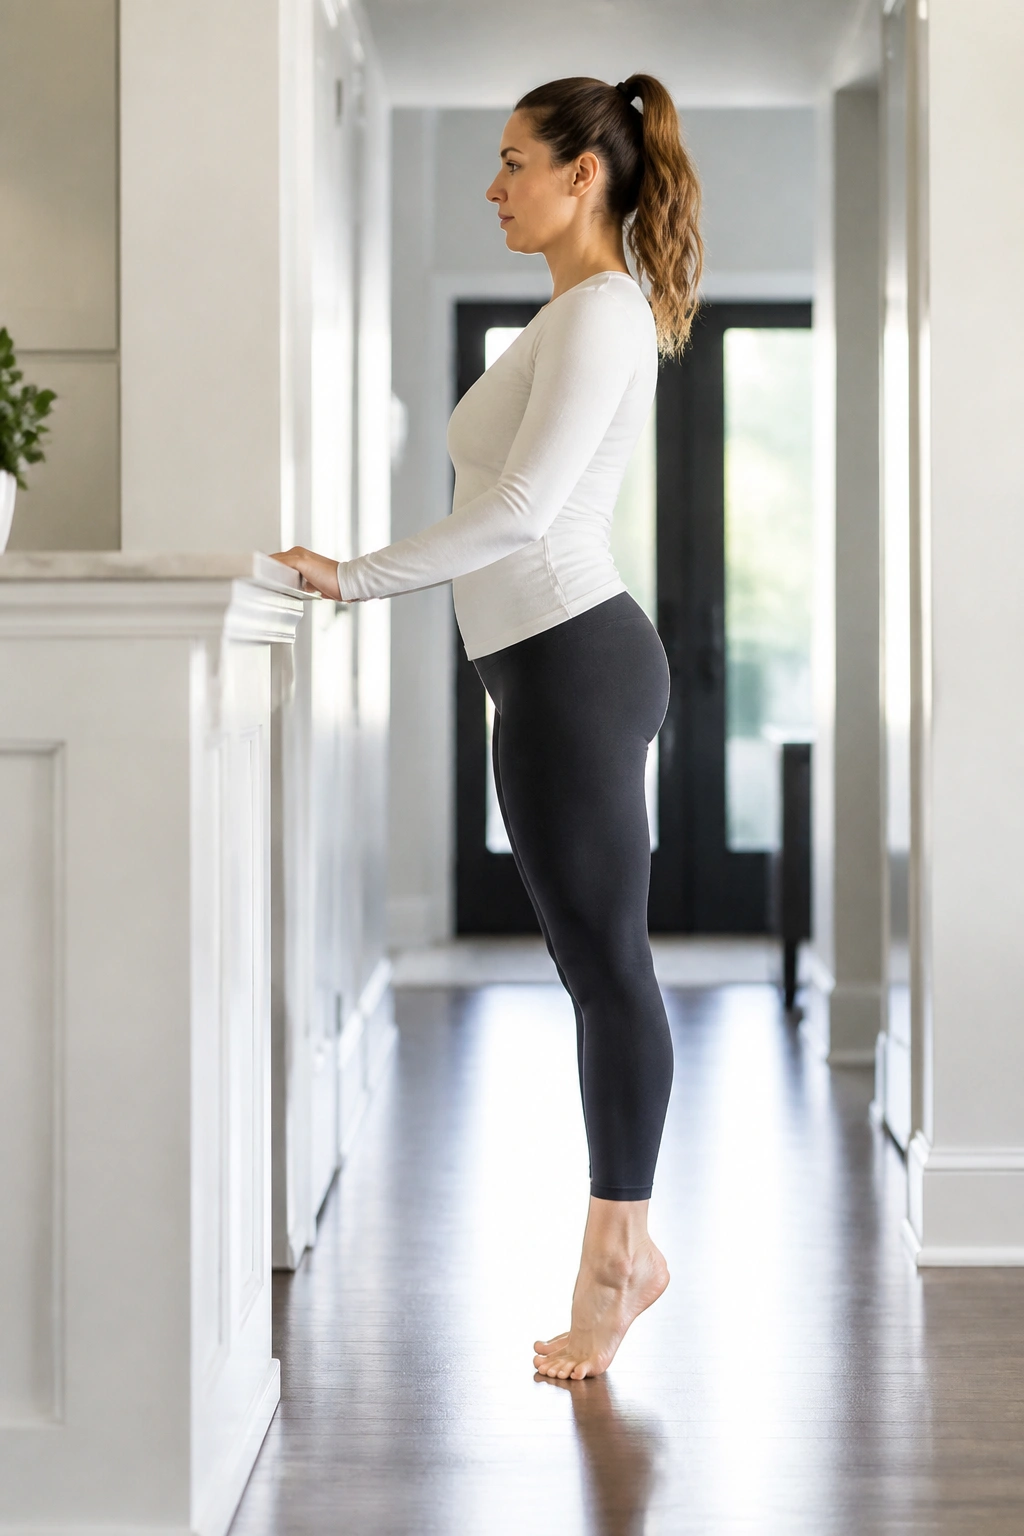
Standing calf raises are simple, and that’s part of their charm.
Hold a countertop or the back of a chair, stand tall, and lift your heels until you’re on the balls of your feet. Pause for a second, then lower slowly. Twelve to 15 reps works well. If balance feels off, do them with both hands on support and move in a slow rhythm.
These matter more than they get credit for. The calves help pump blood back up the legs, which can feel nice when you’ve been on your feet all day or sitting for long stretches. They also wake up the ankles and help your balance come back online.
One clean rep should feel smooth from the ankles up through the calves. If you’re bouncing or rushing, slow down. A controlled lower is more useful than a flashy lift. That’s true here and almost everywhere else in postpartum strength work.
16. Resistance Band Rows for Posture and Upper Back
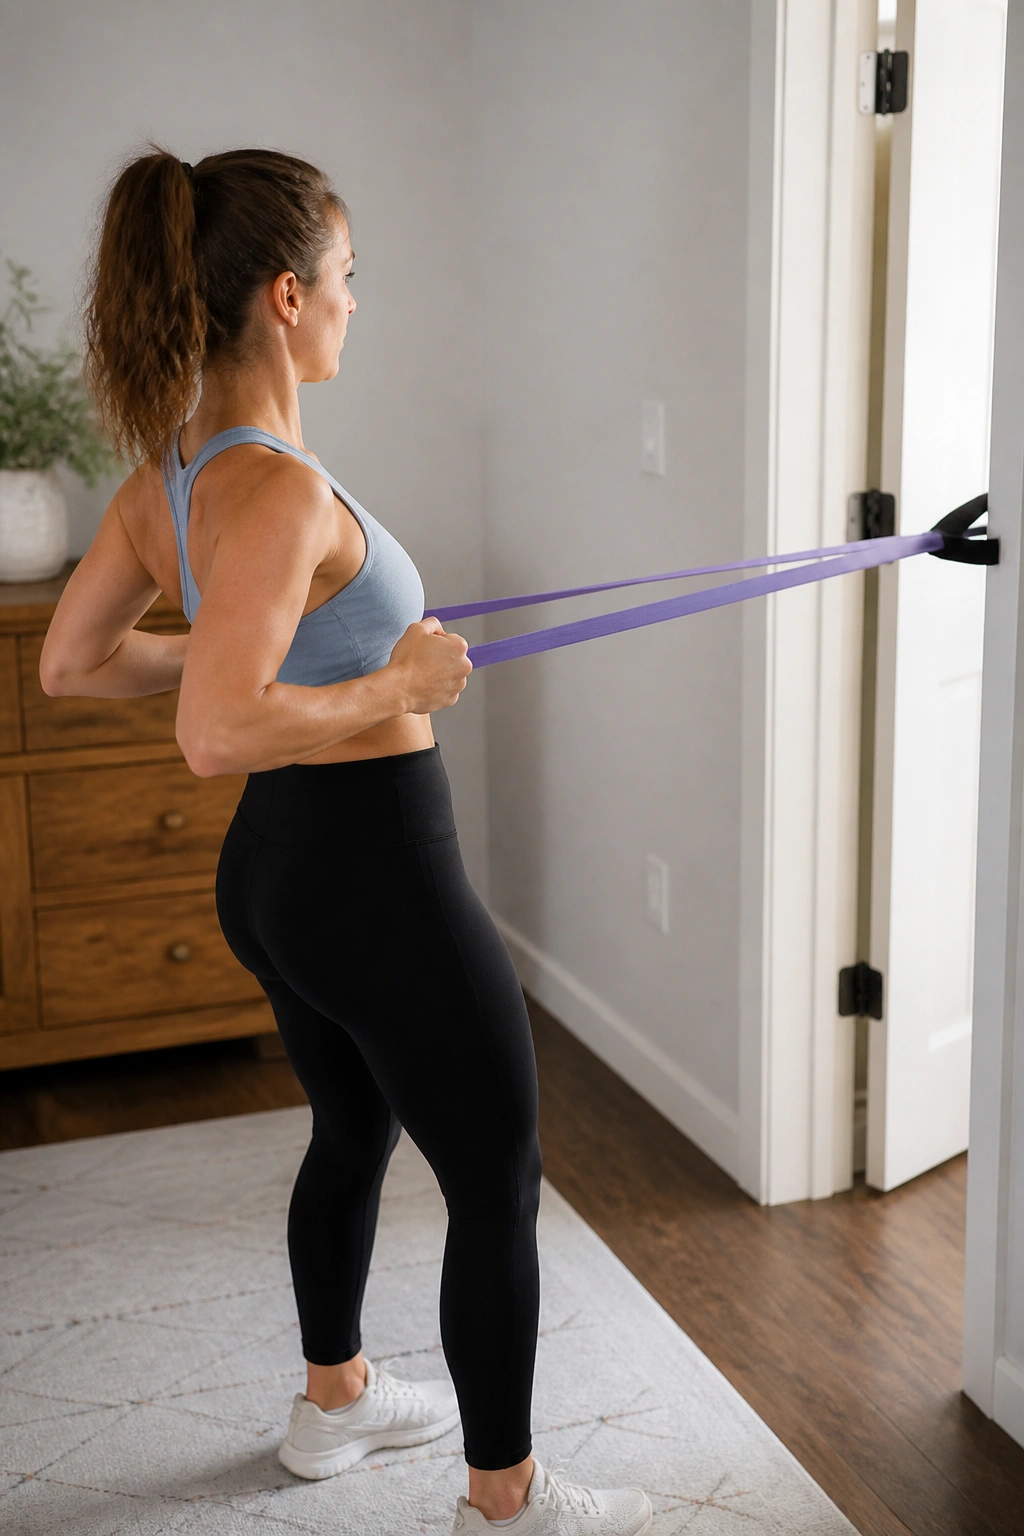
The upper back gets beat up after a lot of holding, feeding, and looking down.
Band Setup
Anchor a light resistance band around a sturdy post or closed door handle that won’t shift. Stand or sit tall, hold the ends, and pull your elbows back toward your ribs. Let the shoulder blades slide down and back, then return with control.
Rowing Cue
Think “chest open” rather than “arms yank.” Eight to 12 reps is plenty. If your neck tightens, lighten the band or shorten the pull. You should feel the work between the shoulder blades, not in the upper traps near your ears.
This is one of the better beginner postpartum exercises because it helps undo that rounded, protective shape that shows up after weeks of carrying a baby against your chest. It also supports the muscles you use for stroller pushing, carrier adjustments, and lifting with better posture. A band row is small medicine for a very common ache.
17. Suitcase Carry with a Light Weight
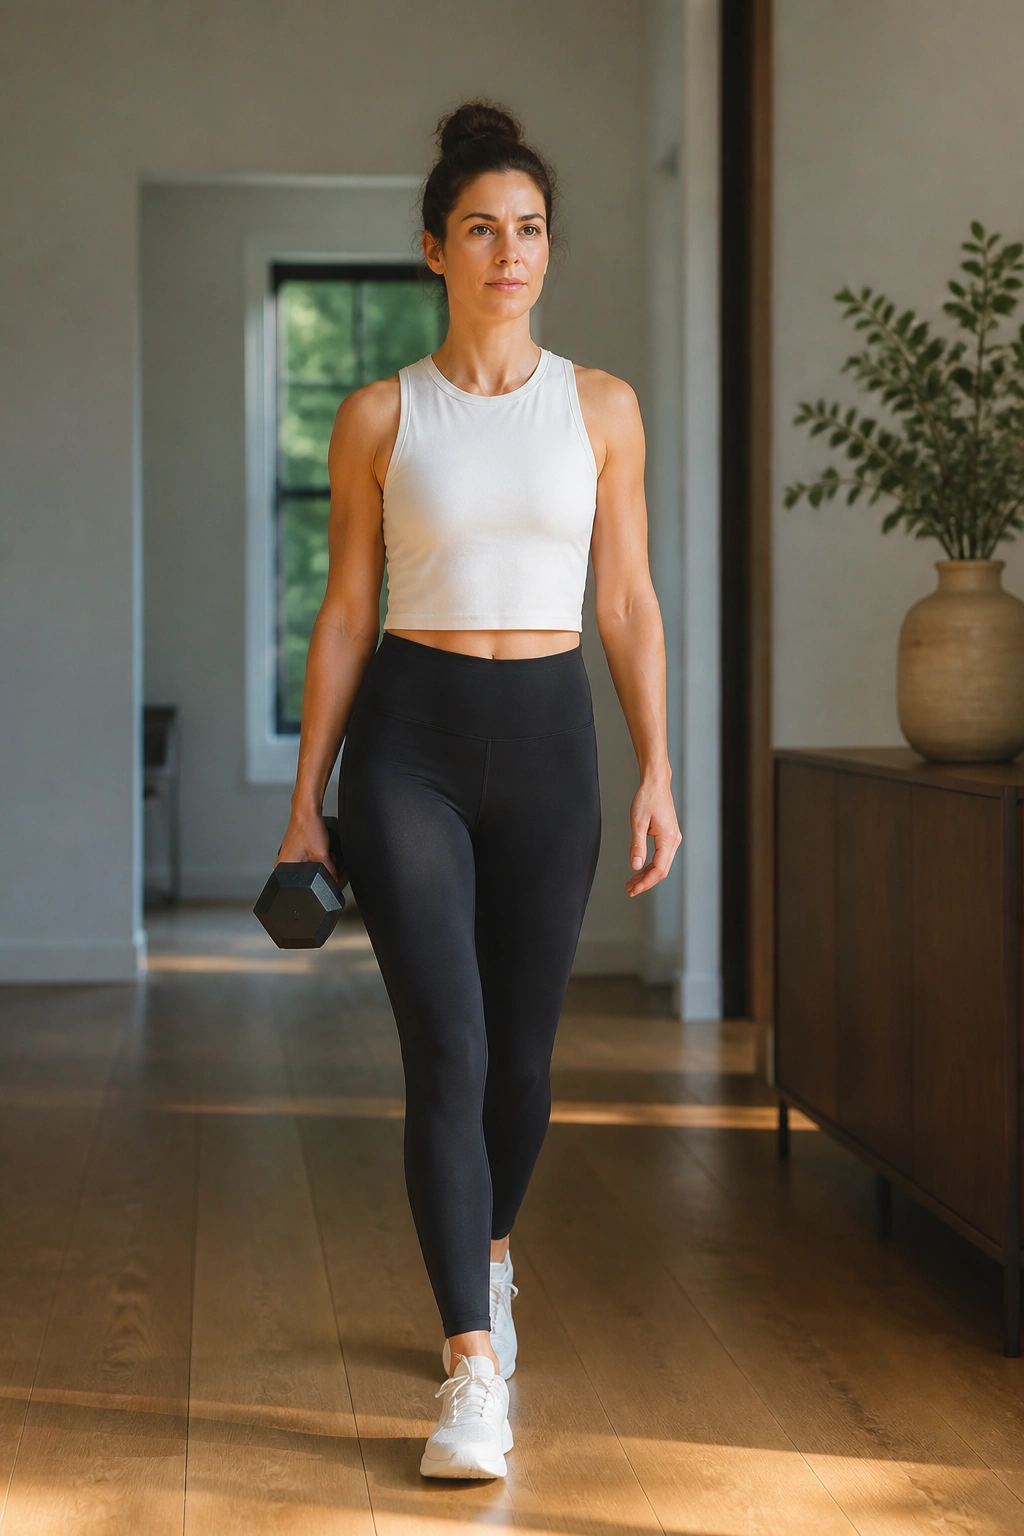
A core exercise does not need to look like a core exercise.
Hold one light dumbbell, kettlebell, or even a heavy grocery-style object in one hand and walk slowly for 20 to 30 seconds. Keep your ribs stacked over your pelvis, your shoulders level, and your torso upright. Switch hands and repeat. One or two rounds each side is enough at first.
This move trains the side of the core to resist leaning. That matters in daily life because postpartum life is full of one-sided tasks — carrying a diaper bag, lifting a car seat, holding a baby on one hip, opening doors with an elbow, all of it. A suitcase carry teaches your body to stay tall through that kind of load.
- Start lighter than you think.
- Walk on a flat, uncluttered surface.
- Stop if you feel pressure in the pelvis.
- Keep your steps slow and even.
If you want one strength drill that feels weirdly useful fast, this is it. Tall posture under one-sided load is the lesson.
18. Easy Brisk Walking Intervals and a Gentle Cool-Down
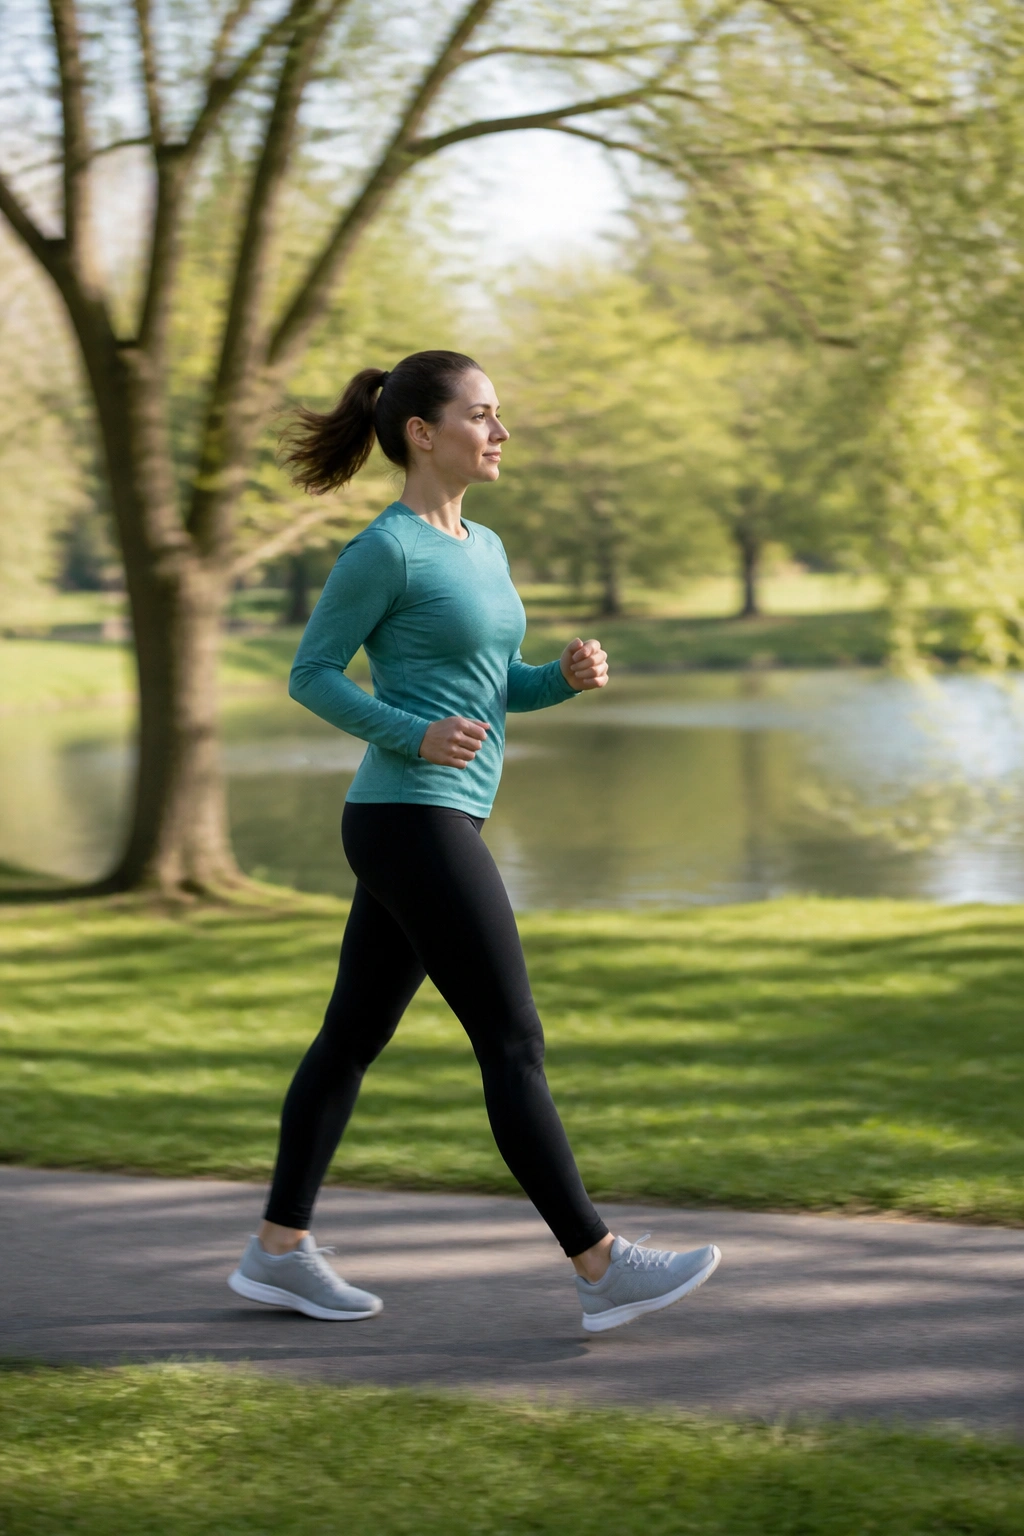
Once the basics feel steady, you can stitch them together into a simple postpartum workout plan that doesn’t chew you up.
Try 1 minute of brisk walking, then 2 minutes easy, and repeat that cycle 4 or 5 times. Brisk does not mean breathless. It means your pace is lively enough that you notice it, but calm enough that you can still speak in short sentences. After the walk, do 2 or 3 gentle breaths, a few shoulder rolls, and a light chest stretch against a wall or doorway.
If you want a starter session that stays friendly to a healing body, pair this walk with one or two floor moves earlier in the list. Breathing, heel slides, and rows make a neat little trio. On another day, walking and sit-to-stands may be enough. That flexibility is part of what makes a beginner postpartum routine work in real life.
The best sign you picked the right amount? You could do it again tomorrow. That is the bar. Not sweat, not soreness, not proving anything to anybody — just a body that feels a little more awake, a little more stable, and a little less borrowed.
