



Loose belly skin after baby is one of those postpartum changes that can feel unfair in a way people don’t always say out loud. The scale may be moving down, your clothes may fit better, and the midsection still has that soft, stretched look that makes you want to poke it in the mirror and sigh.
The best workouts for saggy belly skin after baby are not punishment sessions. They’re the kind of movements that rebuild support from the inside out: deep-core work, glute strength, posture training, and walking that gets your body moving without beating it up. That combo won’t erase loose skin overnight, because skin is its own thing, but it can change how the whole middle section sits and moves.
Postpartum bodies also bring their own plot twists. Diastasis recti, pelvic floor weakness, a tilted pelvis, C-section tenderness, and a nervous abdominal wall can all make the belly look and feel looser than it really is. If you have pain, doming down the center of the belly, leaking, heaviness, or a scar that pulls when you move, slow down and get checked by a clinician or pelvic floor physical therapist.
Start small. Stay honest about what your body gives you on a given day. Then build from there.
1. Diaphragmatic Breathing and Rib Expansion
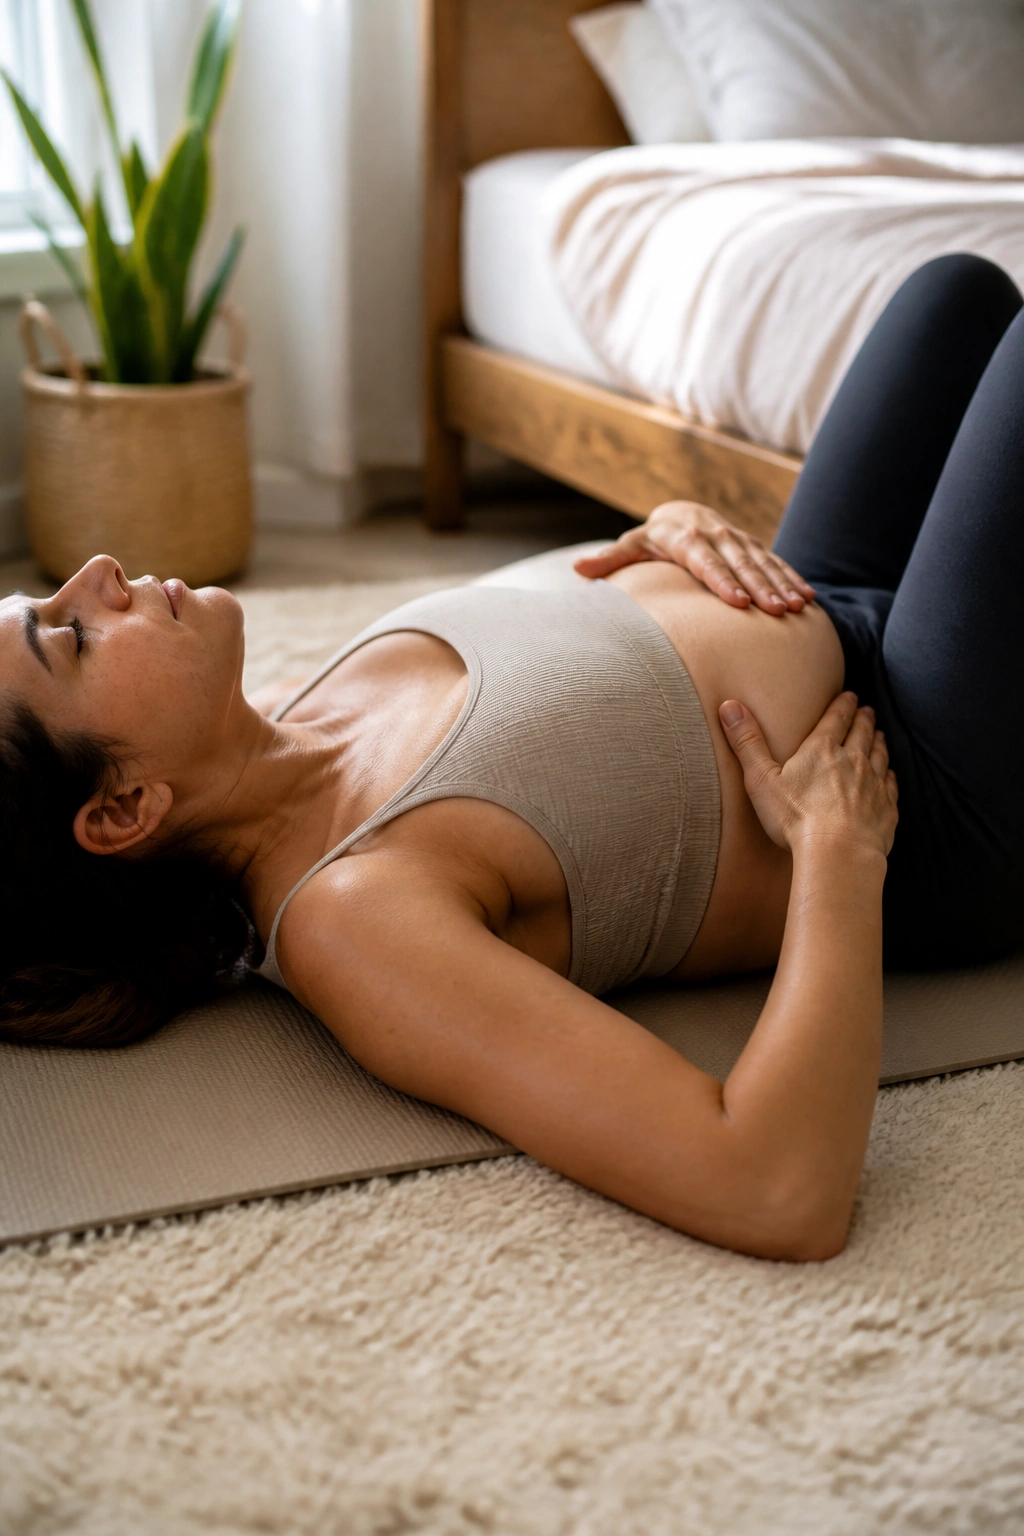
Start here, not with crunches. If you want a better-looking postpartum midsection, you need the deep system under the skin to work again before you pile on harder moves. Diaphragmatic breathing wakes up the transverse abdominis, the pelvic floor, and the lower ribs, which sounds clinical but feels simple: your belly and ribs should move in a way that helps pressure spread out instead of bulging forward.
How to do it
Lie on your back with your knees bent, or sit tall in a chair if the floor feels like too much. Put one hand on your lower ribs and one on your belly. Inhale through your nose for about 4 seconds, then exhale through your mouth for 6 to 8 seconds, like you’re fogging a mirror gently.
- Do 5 slow breaths per round.
- Repeat for 3 rounds.
- Aim for 1 to 3 sessions a day, especially before other core work.
- If your belly pushes up hard or you feel neck tension, soften the effort.
What to feel
The lower ribs should expand out on the inhale and settle in on the exhale. The belly will move, but it should not pop up like a dome. That’s the part people miss. You are not trying to suck everything in; you’re trying to teach pressure to behave.
A quiet breath can do more here than a hundred sloppy sit-ups.
2. Pelvic Tilts on the Floor
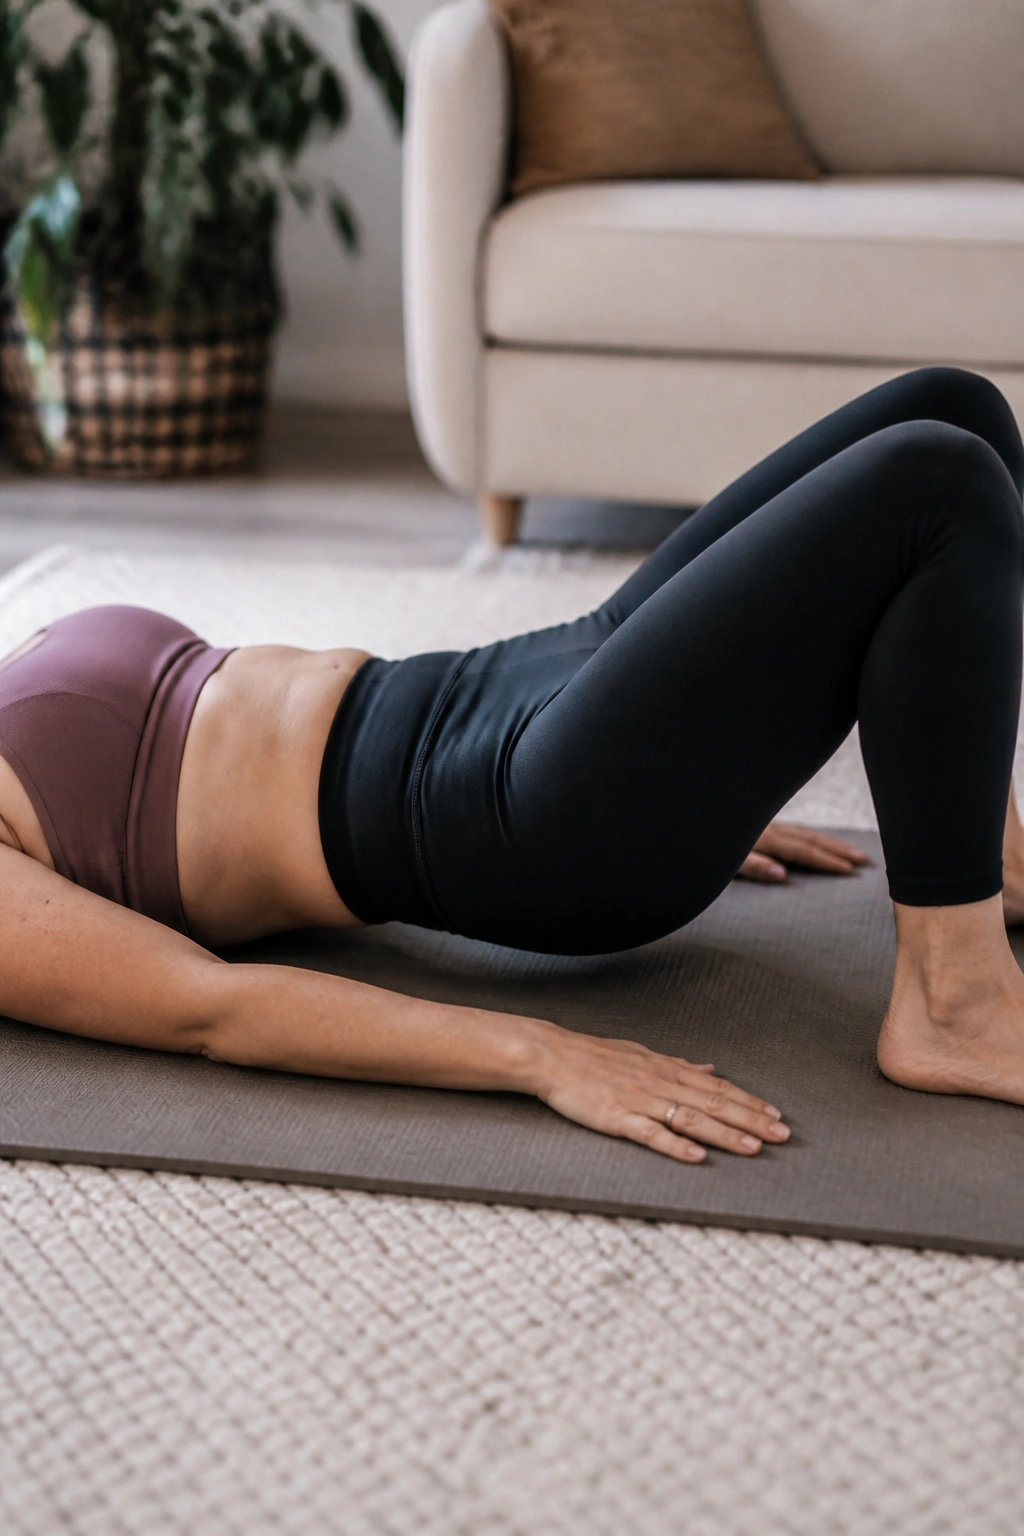
Why does a tiny pelvic tilt matter? Because postpartum bellies often look more pronounced when the pelvis tips forward and the lower back arches. That posture makes the front of the body stretch out, and the abs stop helping as much as they should. A pelvic tilt sounds boring. It isn’t.
Lie on your back with bent knees and feet flat. Exhale, then gently tip your tailbone toward the floor so your lower back gets a little longer. Inhale and return to neutral. The move should be small enough that nobody on the couch would notice, which is exactly the point. You’re teaching control, not chasing range.
Do 10 to 15 slow reps and keep your jaw, shoulders, and glutes relaxed. If you clench everything at once, the exercise turns into a shrug with a pelvis attached. Not useful.
One-sentence version: small motion, big signal.
If your abdomen domes, shorten the range and slow the exhale. If your lower back pinches, stop pressing so hard and let the movement stay soft. The goal is to make your center feel organized, not braced like a helmet.
3. Heel Slides for Deep Core Control
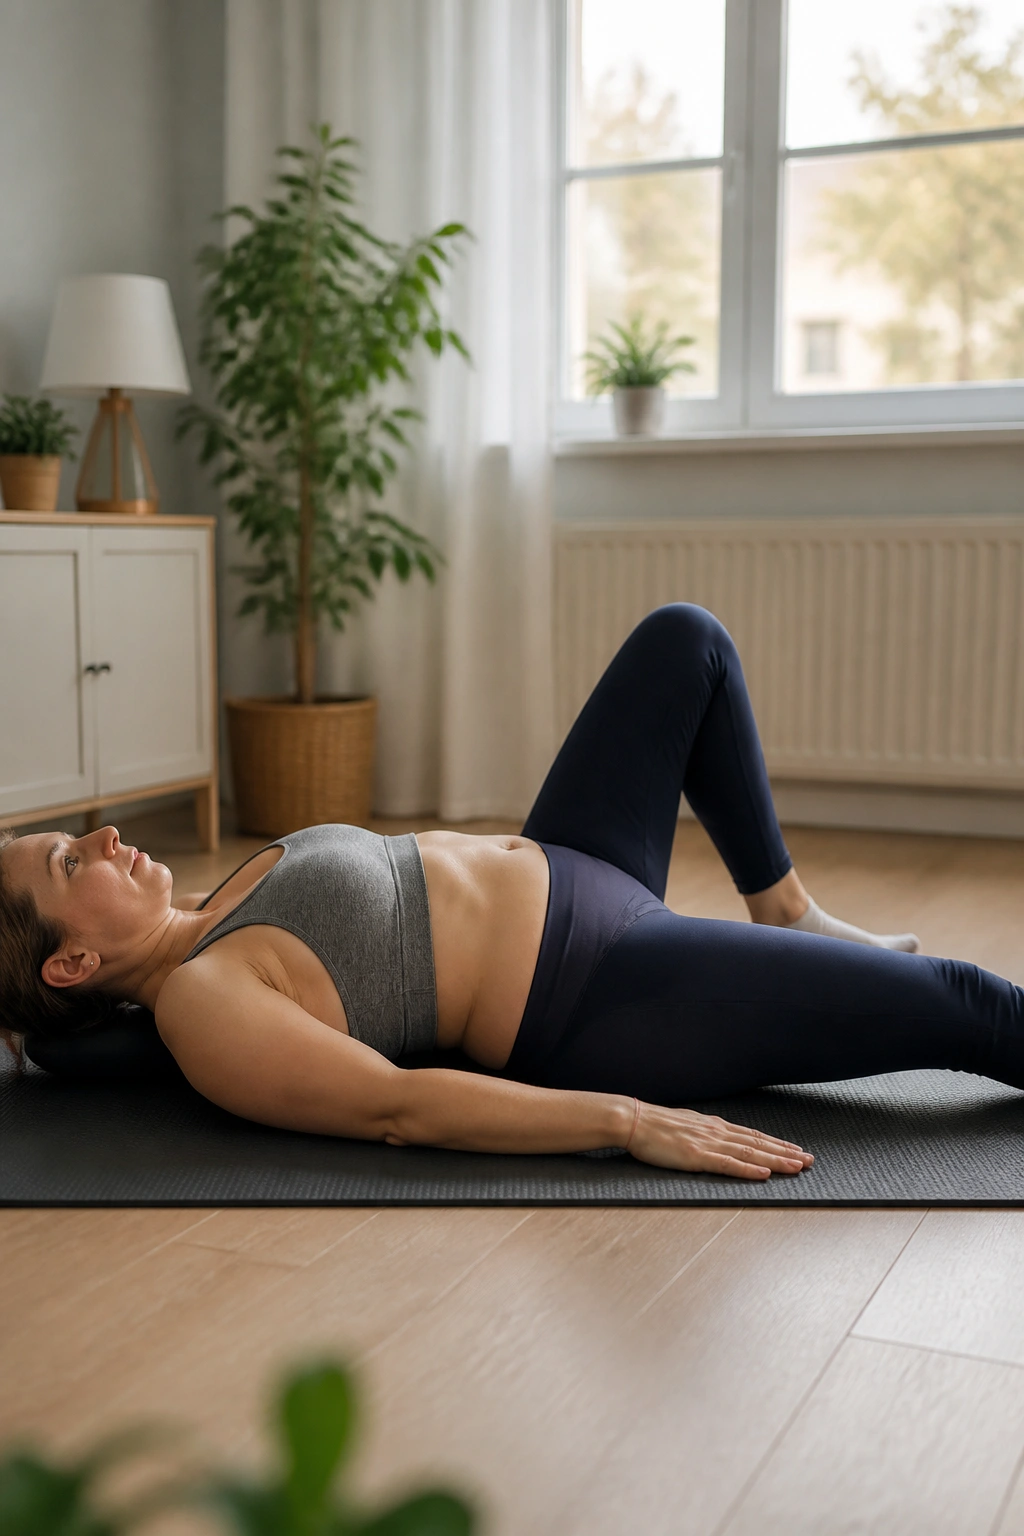
If lying on your back feels okay, heel slides are one of the most useful postpartum core drills around. They look almost too easy, which is usually a bad sign in fitness, but here the simplicity is the whole trick. Your job is to move one leg without letting the belly lose shape.
Set up the same way as a pelvic tilt. Exhale first, then slowly slide one heel away from you until the leg is nearly straight. Keep the ribs quiet and the pelvis level. Slide the heel back in, then switch sides.
What to watch
- The lower belly should stay flat or softly responsive, not poke upward.
- Your lower back should not arch off the floor.
- Move one leg at a time.
- Keep the exhale long enough to make the belly feel engaged before the leg moves.
Do 6 to 8 reps per side at first. That is plenty. More is not always better when your system is still learning how to hold tension again.
A lot of women try to rush straight into harder abs work because they want the belly to flatten faster. I get it. But heel slides are the kind of basic move that make the harder work possible later, and they tend to play nicely with diastasis recti recovery when you keep the pressure low.
4. Dead Bug Heel Taps
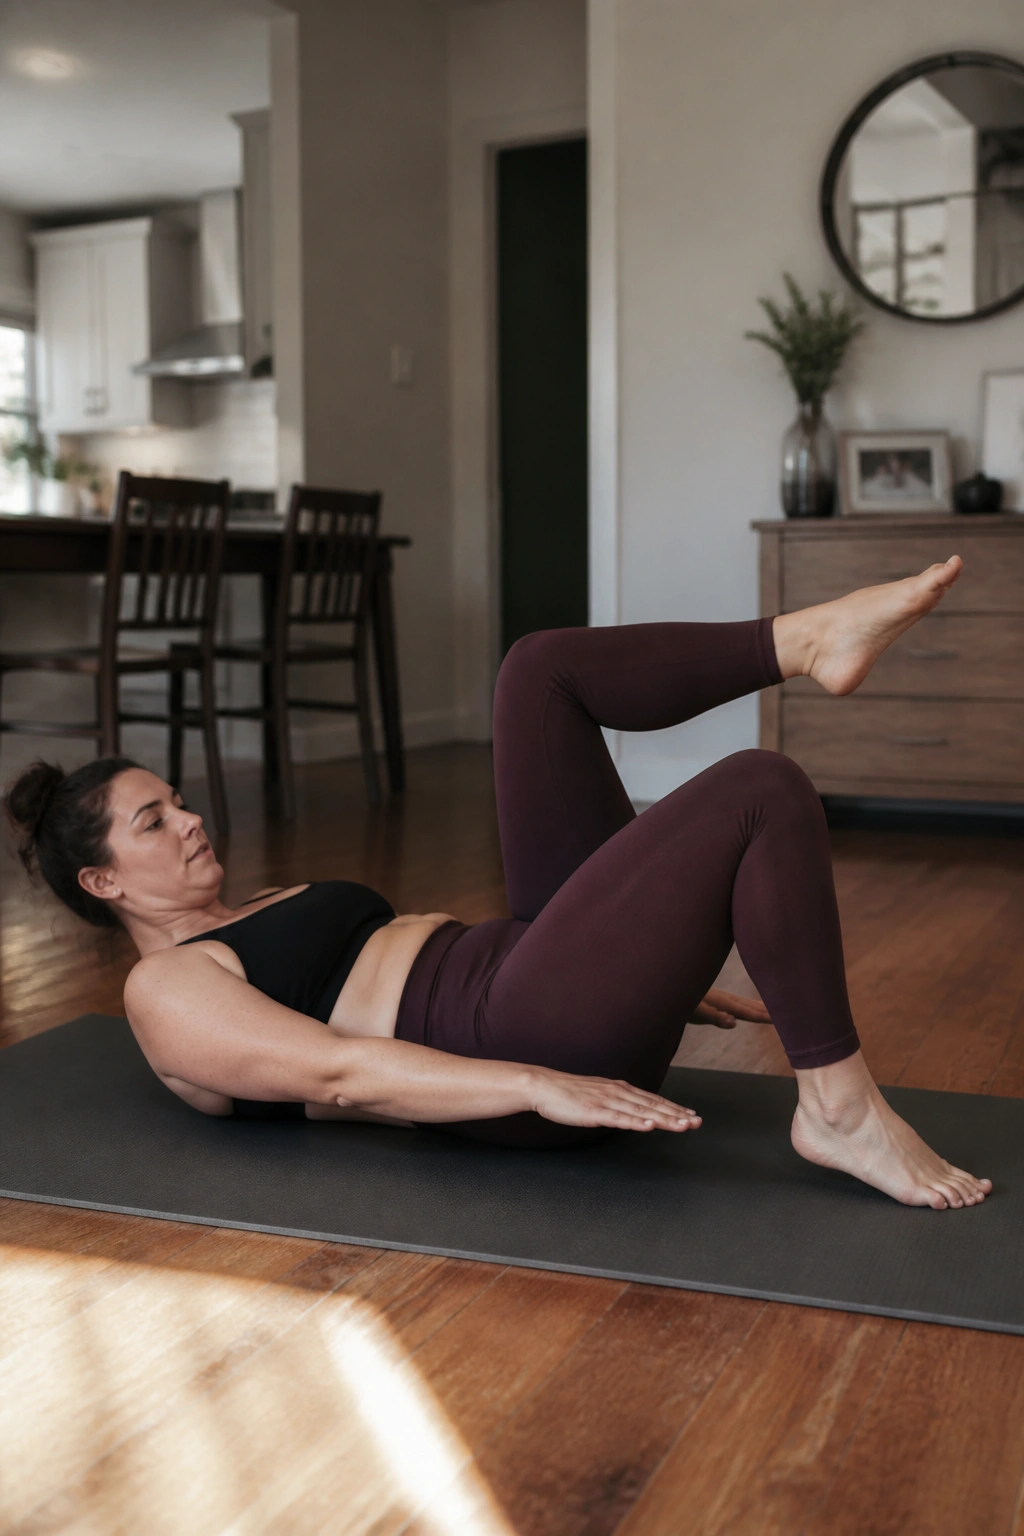
This looks easy. It usually isn’t. Dead bug heel taps challenge the exact thing a postpartum belly often needs most: the ability to hold shape while your arms and legs move away from center. That’s called anti-extension control, and it matters more than fancy crunches if the abdominal wall feels soft or split.
Lie on your back with your knees up at tabletop, if that feels safe. Exhale, bring the ribs down, then slowly lower one heel toward the floor and tap lightly before bringing it back. Keep the movement small enough that your lower back stays quiet. If the belly domes, the range is too big.
Make it easier
Start with a single heel reach instead of a full tap. Or keep one foot on the floor and move the other leg only. No shame in the regression. None.
Make it harder
Reach the opposite arm overhead, but only if you can keep the ribs from flaring. Add a 3-second exhale before each rep. That one detail changes the whole exercise.
Do 6 to 10 taps per side. If your abdomen loses shape, you’ve done enough for that set. Seriously.
5. Bird Dog Reaches
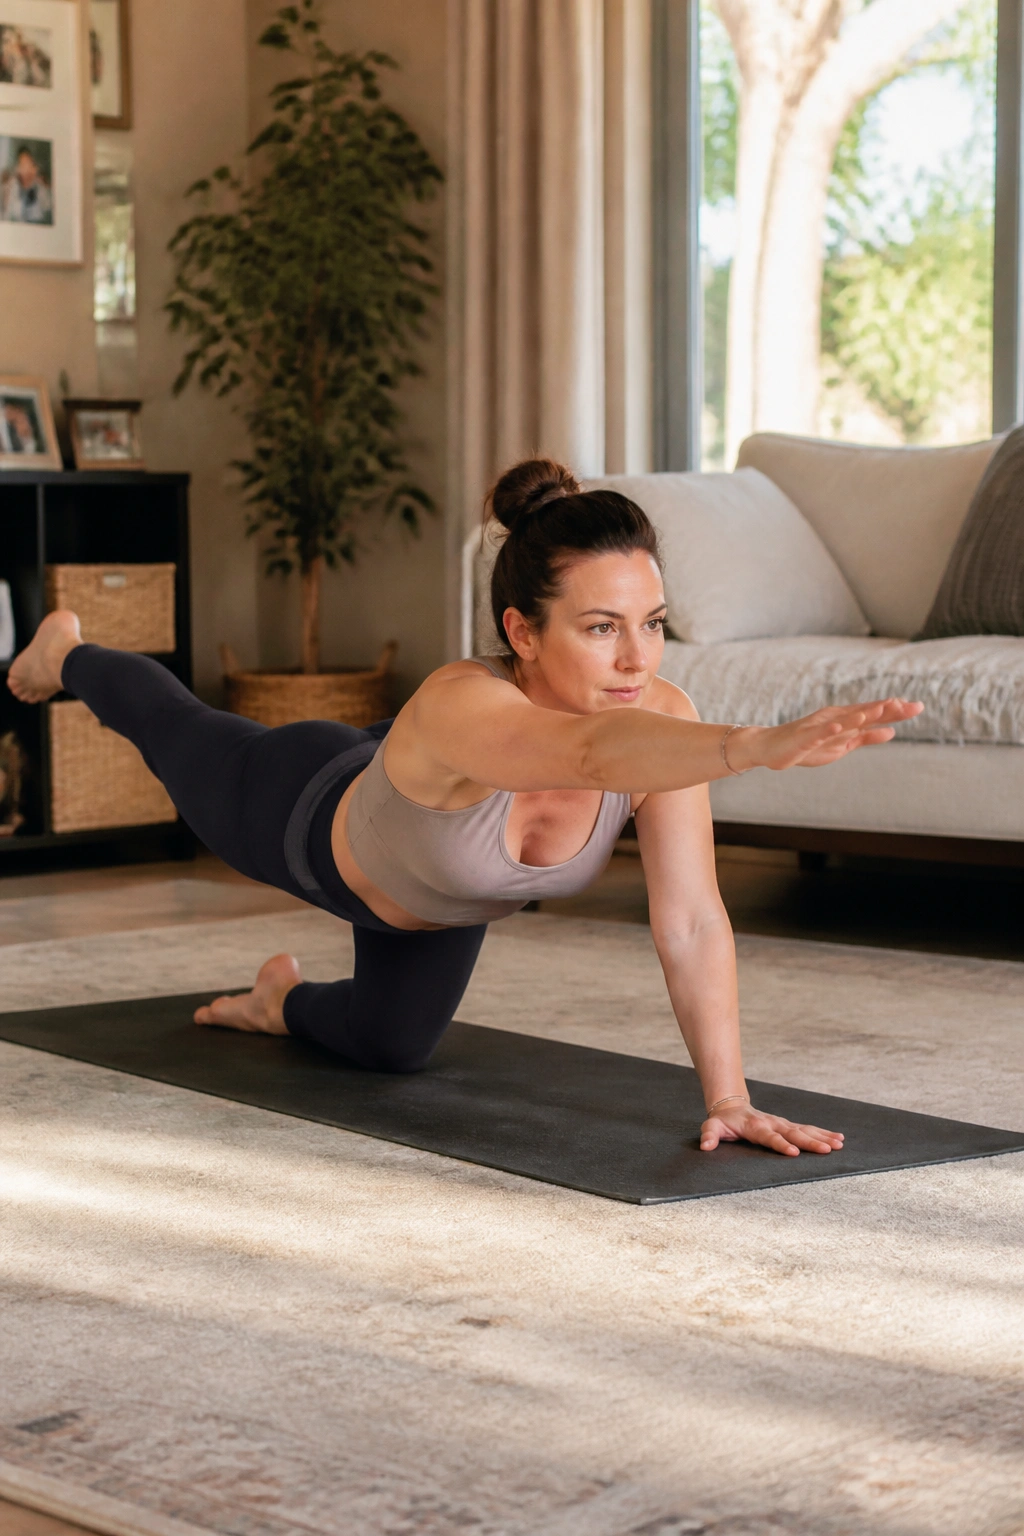
Why does the bird dog keep showing up in postpartum plans? Because it teaches the body to stay steady while the opposite arm and leg move, which is close to real life. You twist to grab a diaper bag. You lean to lift a sleeping baby. You carry a car seat and turn your torso in one clumsy motion. Bird dog trains the body not to fall apart when that happens.
Get on hands and knees with your wrists under shoulders and knees under hips. Exhale, extend one leg straight back and the opposite arm forward, then pause for 2 to 3 seconds. Bring both back in slowly. No swinging. No rushing. No trying to look strong for the floor.
A good bird dog feels calm in the middle and long through the limbs. If your lower back pinches, raise the leg only halfway. If your shoulders get grumpy, keep the hand on the floor and move the leg alone for a while.
Slow beats impressive here. Do 5 to 8 reps per side and keep the motion smooth enough that a glass of water on your lower back would probably stay put.
6. Glute Bridges and Hip Lifts
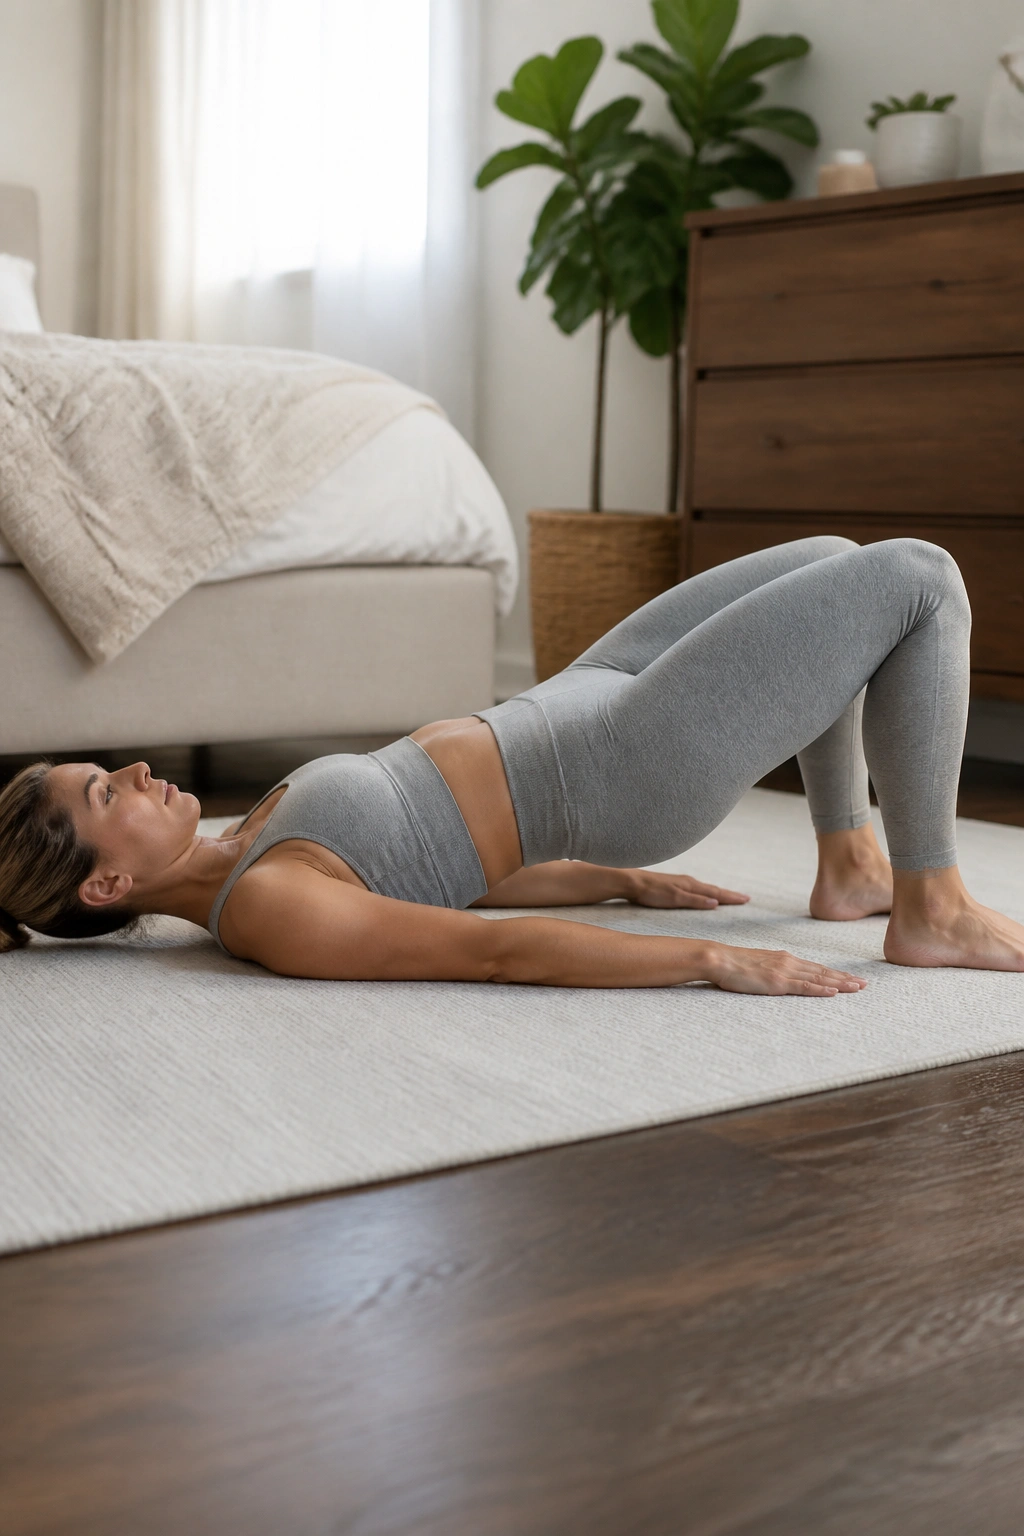
A stronger backside changes the belly more than people expect. When the glutes wake up, the pelvis tends to sit in a better position, which can take some strain off the lower back and stop the belly from jutting forward quite so much. That does not magically tighten loose skin, but it often changes the silhouette in a way that feels noticeable.
Lie on your back with your feet hip-width apart. Exhale, press through your heels, and lift your hips until your shoulders, hips, and knees form a long line. Stop before your ribs flare or your lower back takes over. Lower with control.
What to keep out of it
- Don’t fling your hips up fast.
- Don’t squeeze the butt so hard that your lower back arches.
- Don’t push your knees wide unless your pelvis stays steady.
- Don’t hold your breath on the lift.
Do 10 to 15 reps or hold the top for 20 to 30 seconds if that feels better. Add a mini band above the knees only when your form stays clean. If you feel the hamstrings cramping, slide your feet a little closer to your butt and try again.
That adjustment fixes the problem more often than people think.
7. Side Plank From the Knees
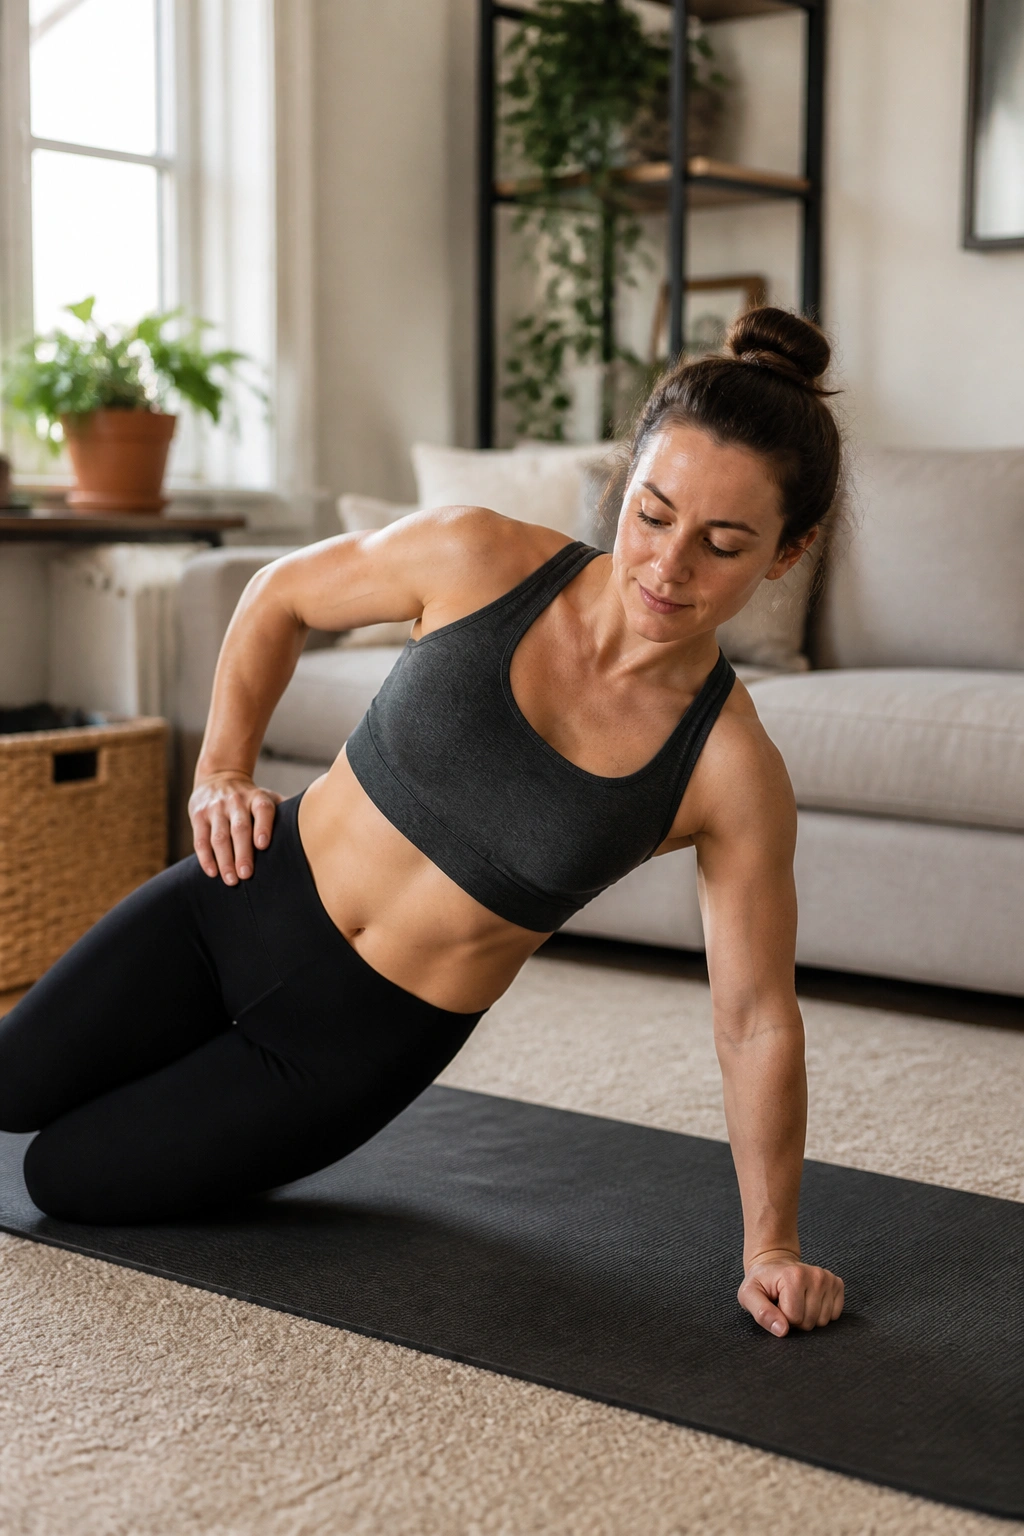
Unlike a front plank, a side plank from the knees puts less direct pressure on the front abdominal wall and more work on the obliques, hips, and the muscles that keep you from collapsing sideways. For postpartum bellies that still dome under stress, that’s a cleaner place to start.
Set your elbow under your shoulder, bend your knees, and stack your hips. Lift the hips just enough that your body forms a straight line from shoulder to knees. Hold for 10 to 20 seconds and breathe. If you’re shaking a little, fine. If your shoulder creeps toward your ear, reset and try again.
If the floor version feels rough
Do it against a wall first. Stand sideways with one forearm on the wall and gently press away while keeping the ribs stacked. That version still trains the same side body without making your belly work too hard too soon.
One-sentence truth: the waist often likes side work more than endless crunches.
Aim for 2 to 4 holds per side. You should feel the side of the trunk, the hip, and a little control through the midline. If you feel a bulge, back off.
8. Wall Plank or Counter Plank
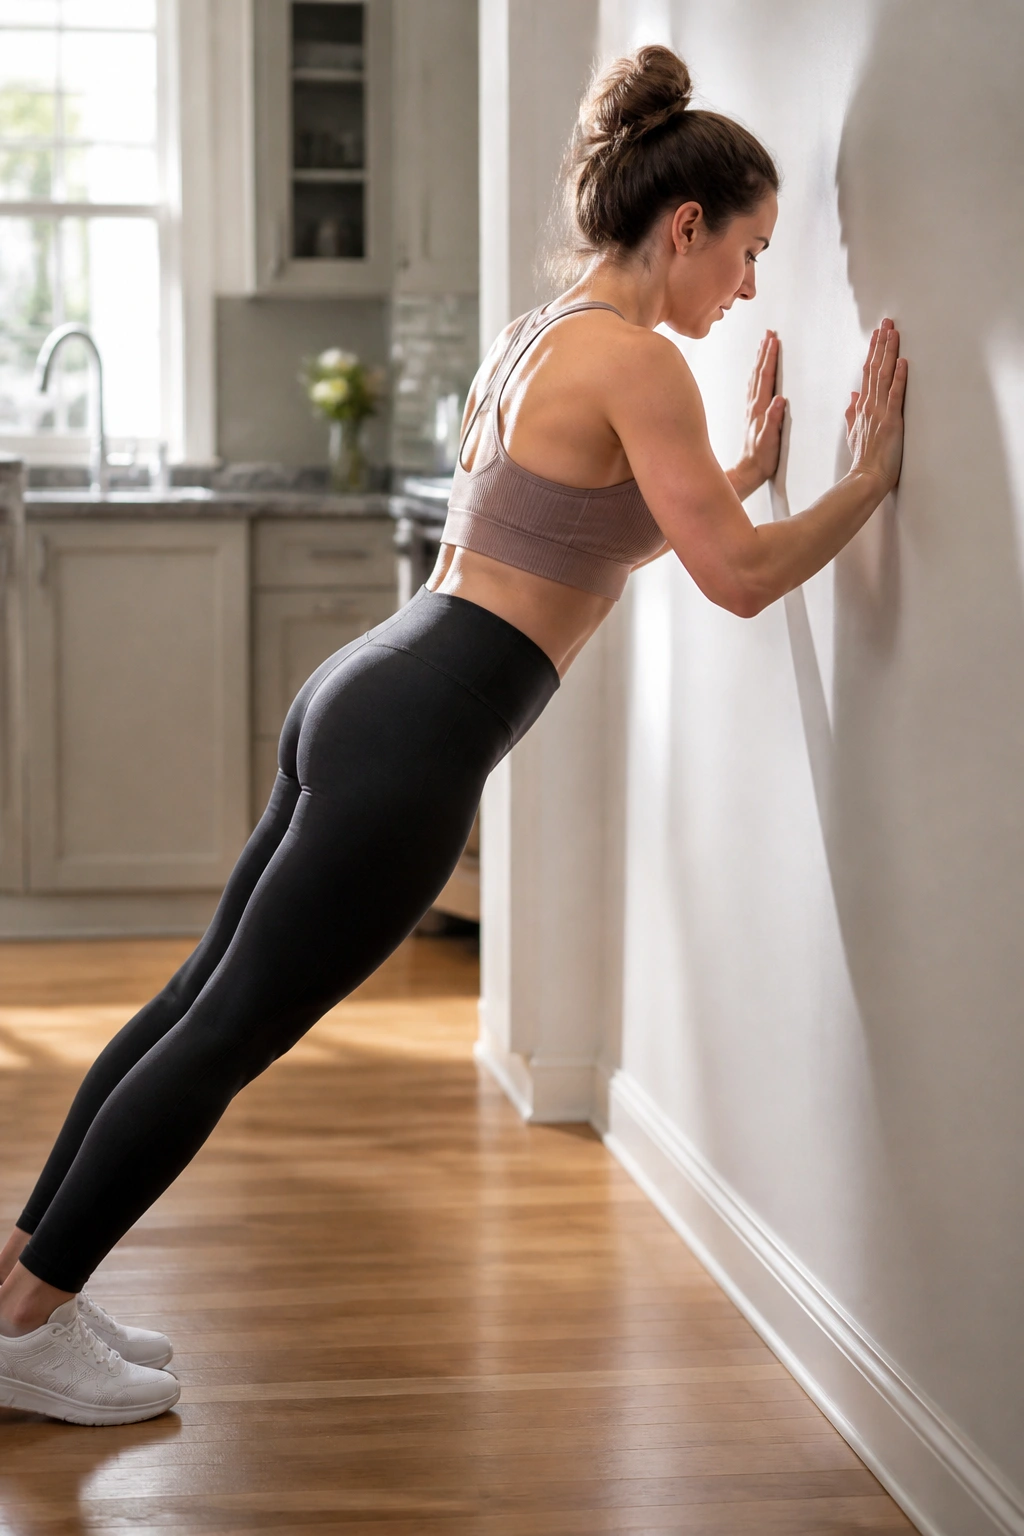
No floor drama required. A wall plank or counter plank is a smart bridge between breathing work and harder core training, especially if you had a C-section, still feel weak through the center, or just want to avoid too much pressure.
Place your hands on a wall or countertop and walk your feet back until your body makes a long line. Exhale gently, draw the ribs down, and hold. You should feel your shoulders, upper abs, and deep core working without the frantic wobble that floor planks can bring too early.
A wall plank is also useful if you’re one of those people who can do “all the right things” and still see the belly push out when the effort gets high. That push is a clue, not a failure. It means the pressure is leaking forward. Reduce the angle, shorten the hold, and keep breathing.
Do 20 to 30 seconds for 3 rounds. Move to a counter only when the wall version feels smooth. Move to the floor only when the counter version feels calm. There’s no medal for skipping steps.
9. Chair Squats
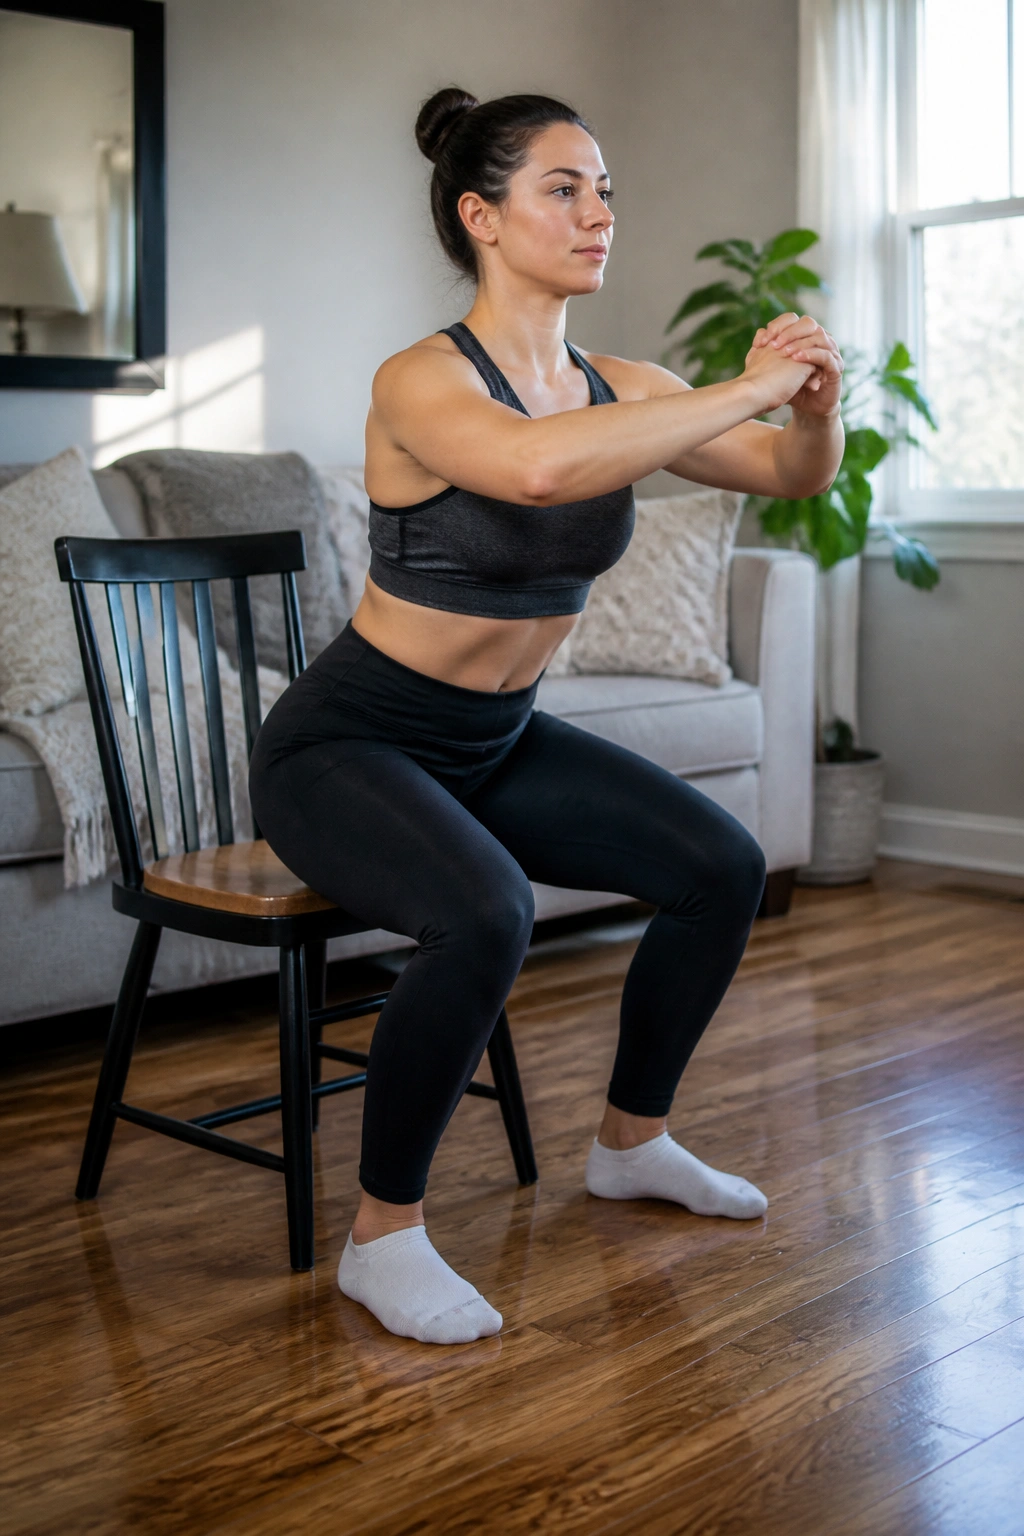
The first time you squat to a chair after baby, you may notice something strange: your legs do the work, but your belly also has opinions. That’s normal. Chair squats train the lower body, but they also teach the torso to brace in a more useful way than sucking in all day or gripping the stomach hard.
Stand in front of a sturdy chair with your feet about hip-width apart. Sit back until you touch the seat lightly, then stand up while exhaling. Keep your chest open and your weight in your heels and midfoot. If you drop straight down like a stone, the movement turns messy fast.
How to make them count
- Tap the chair, don’t plop.
- Keep knees tracking over the toes.
- Exhale as you stand.
- Stop one inch before your belly or back starts to compensate.
Do 8 to 12 reps for 2 to 4 sets. Add a dumbbell goblet hold only after the bodyweight version feels steady. If your knees wobble inward, use a taller chair or hold onto a counter with one hand.
One clean squat beats ten rushed ones every time.
10. Reverse Lunges With Support
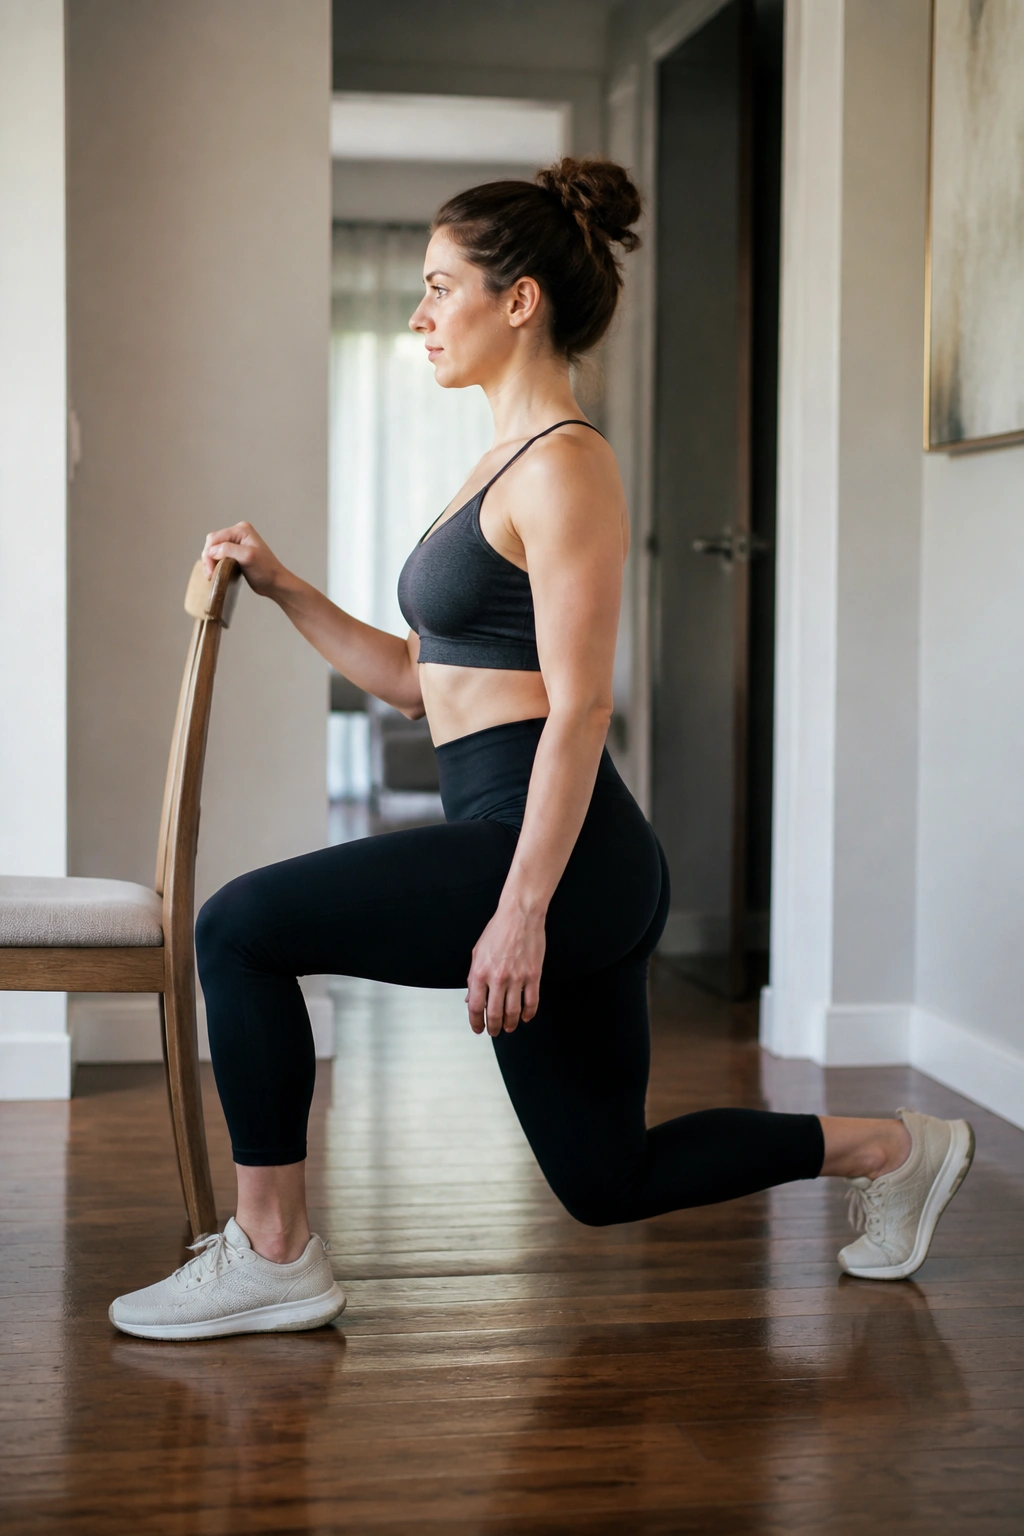
One leg at a time can be your friend. Reverse lunges are easier to control than forward lunges, and that matters when your core is still relearning how to keep the torso from pitching forward. They build glutes, quads, and balance without asking for a lot of impact.
Hold the back of a chair, a wall, or a countertop with one hand. Step one leg back, lower until both knees bend comfortably, then drive through the front heel to stand. Keep the torso tall. If you fold over at the waist, the load shifts away from the legs and straight into the lower back.
What makes these postpartum-friendly
The backward step gives you more room to stabilize before you lower. That means less surprise, less wobble, and less “where did my abs go?” when you hit the bottom. It also tends to feel better for people whose pelvis still feels sensitive.
Do 6 to 8 reps per side to start. If you need a tiny range of motion, use it. If you want a deeper challenge later, slow the lowering phase to 3 seconds. That little pause under control can light up the legs more than another sloppy rep ever will.
11. Step-Ups on a Low Stair
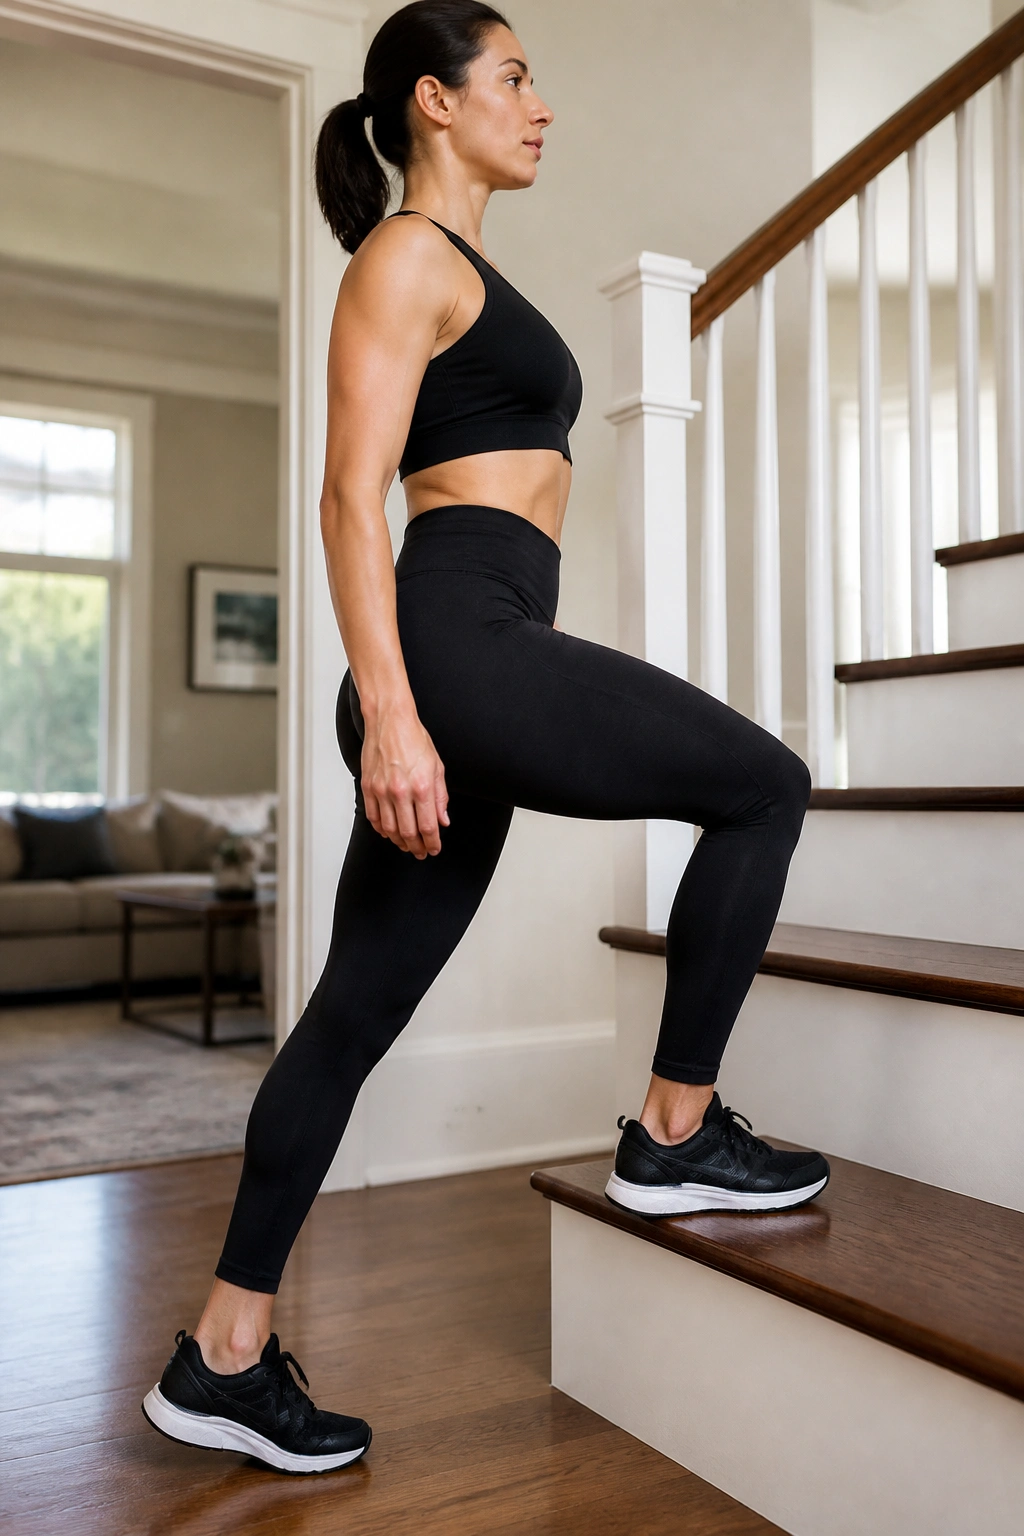
Can a stair change how your core feels? Yes, if you do it slowly enough. Step-ups are a home-friendly way to train single-leg strength, balance, and pelvic control, and they sneak in a useful dose of daily-life movement too. You climb. You carry. You recover. This is the same pattern, just cleaner.
Use a low step or bottom stair. Put your whole foot on the step, lean slightly forward from the hips, and stand up by pressing through the working leg. Lower with control. If you bounce off the back leg, you’re letting the easy side do too much.
Start low. Stay slow.
That’s the rule. A higher step is not automatically better, and a fast rep is usually worse. Keep your ribs stacked over your pelvis, because that’s where the belly starts to look more supported.
Try 6 to 10 reps per side for 2 to 3 sets. If you feel it in the knees, shorten the step height and slow the descent. If you feel it in your lower back, reduce the forward lean and make the movement smaller.
12. Resistance-Band Rows
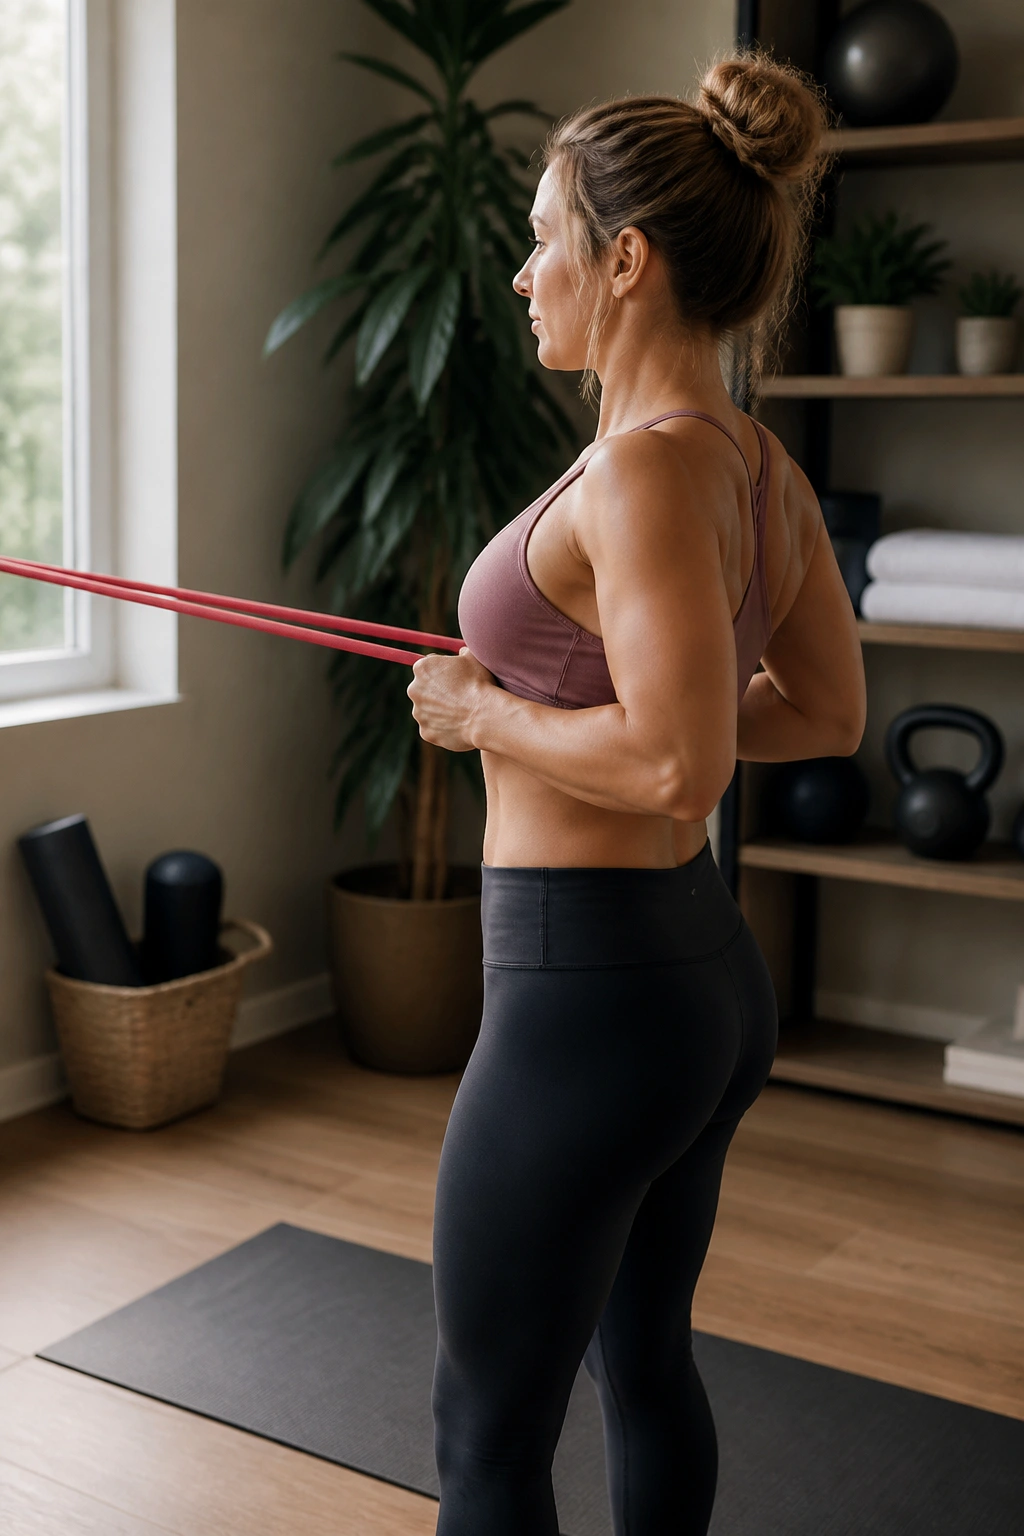
Rounded shoulders can make the belly look more pushed out than it really is. That’s one reason rows matter so much after baby, especially if you spend half the day feeding, holding, rocking, or staring down at a sleeping infant in your arms. Upper-back work helps stack the ribs over the pelvis, and that changes the line of the torso in a way people often notice before they can explain it.
Anchor a resistance band at chest height. Step back until you feel light tension, then pull the elbows toward your ribs while keeping the shoulders down. Pause for a second, then return slowly. You want the shoulder blades to glide, not pinch hard.
How rows help the midsection
A stronger upper back gives the core a better job. When the shoulders sit a little more open, the chest stops collapsing forward, and the belly has less reason to spill outward. It’s not magic. It’s posture plus strength, which is usually the boring answer that works.
Do 12 to 15 reps for 2 to 4 sets. If your neck takes over, lower the tension or stand closer to the anchor point. If the band snaps you forward on the way back, you’re using too much resistance.
13. Farmer Carries With Dumbbells
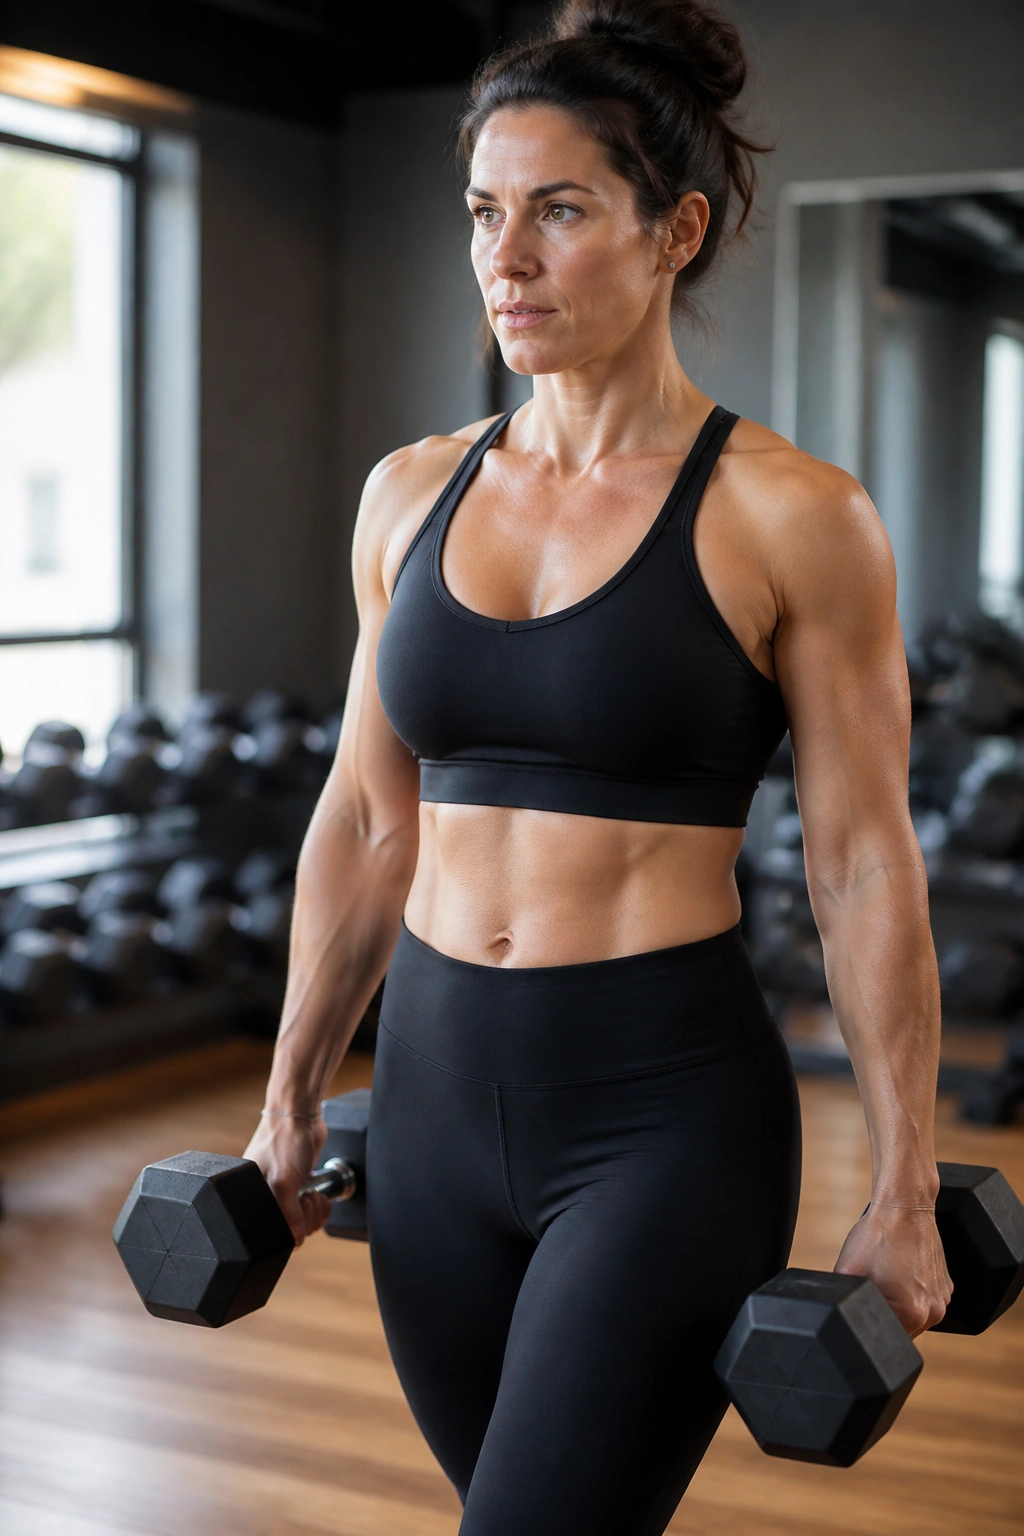
Carries are one of the most underrated belly workouts, and I mean that plainly. Walking while holding weight forces the trunk to resist side-bending, rotation, and that lazy sway that shows up when the core is undertrained. You feel it in the grip, the shoulders, the abs, and the hip stabilizers all at once.
Hold one dumbbell in each hand and walk for 20 to 40 seconds. Stay tall. Keep the ribs from flaring and avoid leaning back like you’re trying to look taller than you are. If the weight is so light that you can chatter nonstop and forget you’re carrying it, it’s probably too light to change much.
Start light
A suitcase carry with one dumbbell on one side is a good first version. That one challenges the side body in a way that tends to be very useful postpartum. If that feels easy and stable, move to both hands. If that feels easy and stable, make the walks longer, not wild.
Do 3 to 5 rounds with enough rest that your posture resets between sets. The point is not to suffer. The point is to teach your body to hold itself together while life keeps moving around it.
14. Brisk Walking Intervals
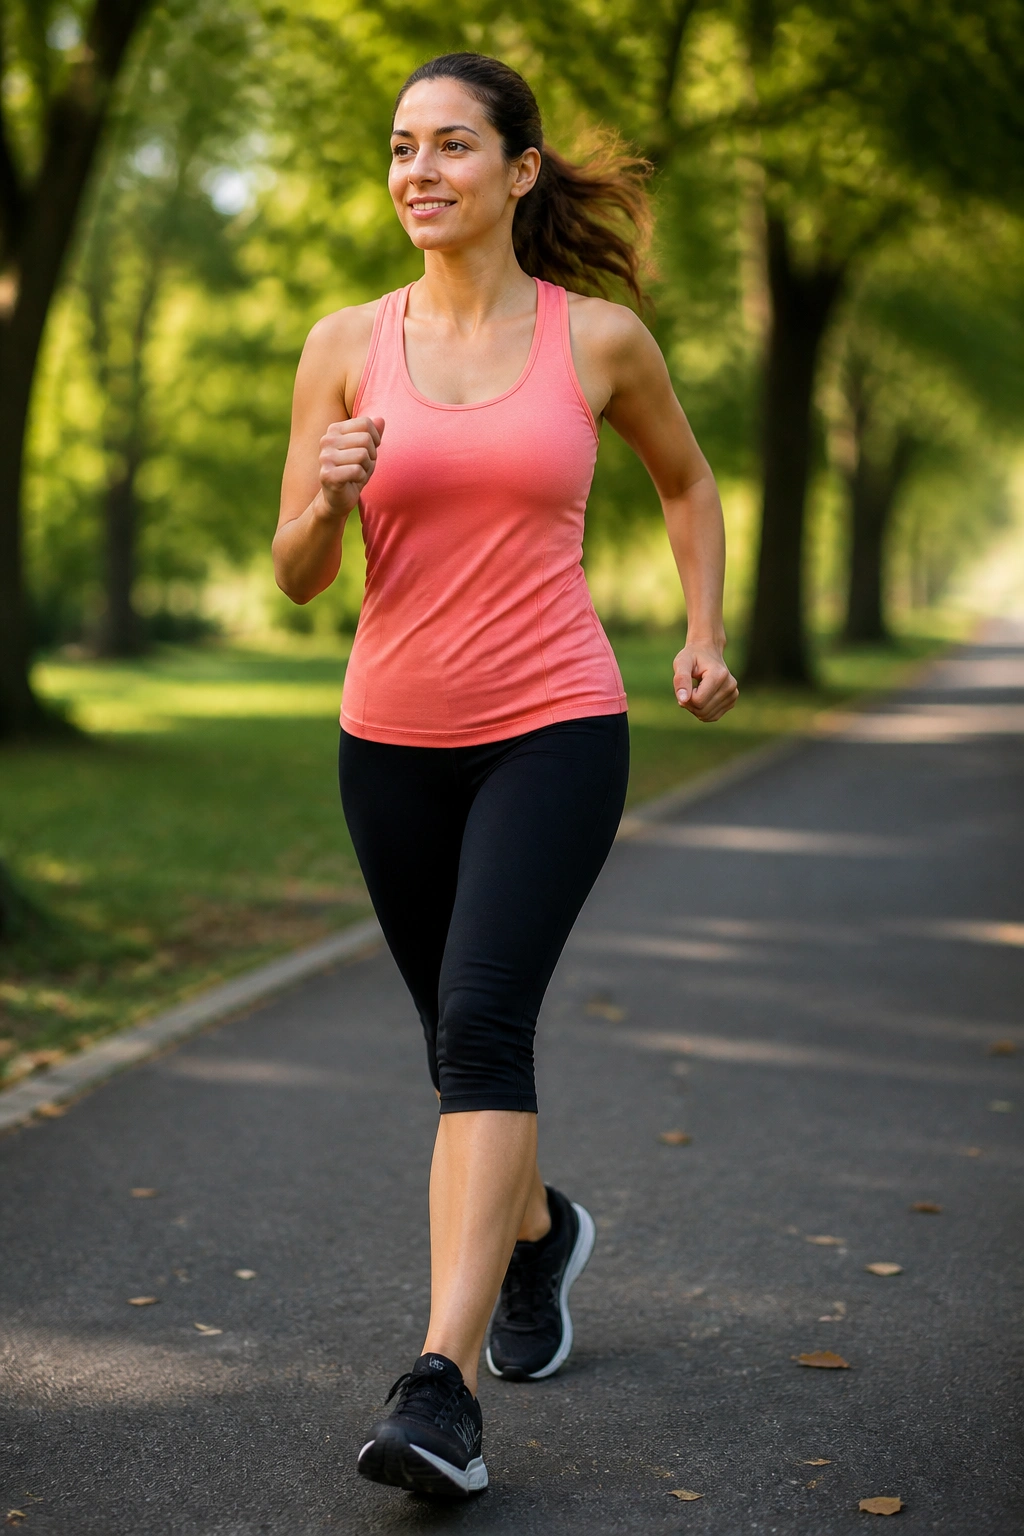
Walking gets dismissed all the time because it looks too ordinary. That’s a mistake. Brisk walking intervals can be one of the most useful ways to support postpartum fat loss, lower stress, and give your body more daily movement without smashing your recovery. It’s also much easier to repeat, which matters more than people like to admit.
Try a simple pattern: 1 minute brisk, 2 minutes easy, repeated for 20 to 30 minutes. The brisk part should feel like you can still talk, but not sing. If you’re pushing a stroller, use the pace as the guide rather than the gear. Honest brisk walking leaves you warm and a little breathy, not wrecked.
Some days you’ll want a power walk. Some days you’ll want a gentle loop around the block. Both count. The belly skin may not care about your pride, but it does respond to steady habits that help the whole body lean out a bit and hold itself better.
One-sentence reminder: repetition beats intensity here.
15. Low-Impact Cardio Circuits With Marches and Shadow Boxing
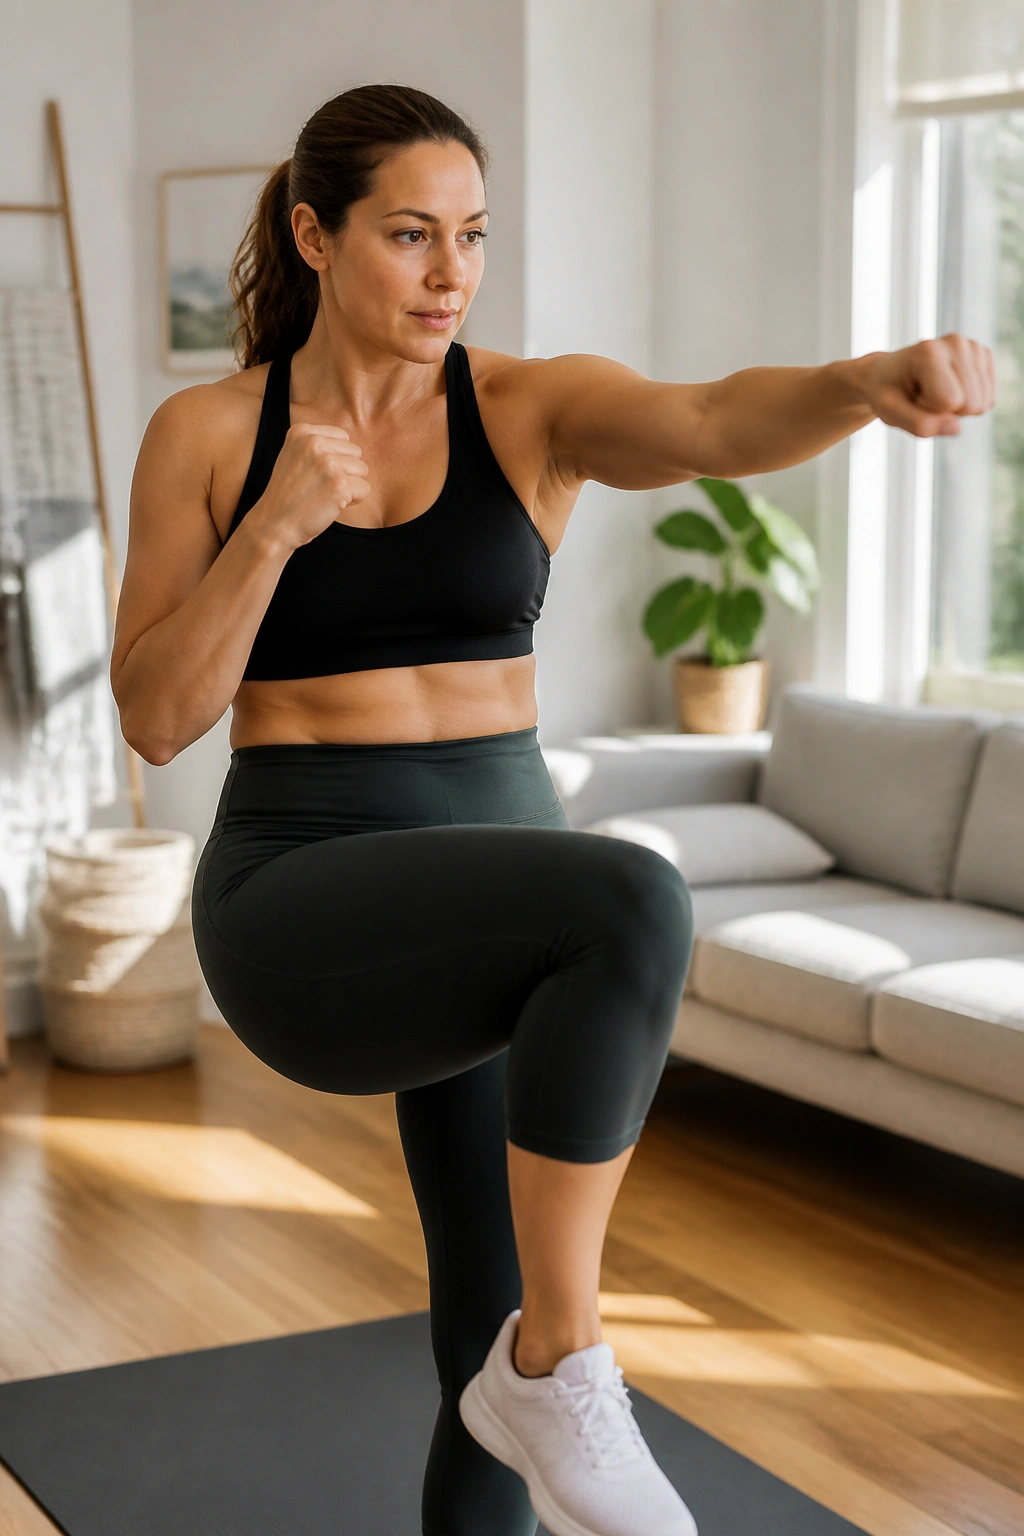
A short cardio circuit can pull a lot of weight when you’re postpartum and tired of complicated plans. Marches, shadow boxing, side steps, and squat-to-calf-raise combos get the heart rate up, improve circulation, and keep impact low. That matters if your joints feel loose, your pelvic floor is still recovering, or you simply don’t want to jump around on a body that has already done enough.
A simple 12-minute circuit
- 30 seconds marching in place with active arm swings
- 30 seconds shadow boxing with light, quick punches
- 30 seconds side steps with arm reaches
- 30 seconds squat to calf raise
- Rest 30 to 45 seconds
- Repeat for 3 rounds
Keep the movement smooth and the breathing steady. If the belly starts to bulge, slow the pace and shorten the range. If your pelvic floor feels heavy, stay with the marching and side steps for now. There is no prize for forcing a harder version before your body wants it.
This is the kind of workout I like for the days when motivation is thin and the baby’s schedule has already made its own plans. It’s short, it’s practical, and it tends to leave you feeling more awake instead of flattened. Do it 3 times a week, keep walking on the other days, and keep the deep-core work in the mix. The skin may take its own time, but strong movement changes what lives underneath it, and that changes the whole shape of the middle.
