



The “pooch”—that stubborn bit of softness just below the navel—is perhaps the most frustrating aspect of core fitness. You have likely tried the standard gym routines: hundreds of crunches, endless sit-ups, and maybe even some intense HIIT sessions. Yet, that lower belly remains. The problem is rarely just about body fat percentage; more often than not, it is about biomechanics and muscle recruitment.
If you are only doing traditional crunches, you are missing the deepest layer of your abdominal wall: the transverse abdominis. This muscle acts like a corset, wrapping around your spine and holding your internal organs in place. When this muscle is weak, your belly naturally pushes outward, creating a pooch regardless of how thin you are. To fix it, you need exercises that prioritize deep core engagement, pelvic stability, and slow, controlled movement. Stop chasing intensity and start chasing precision.
1. The Standard Forearm Plank
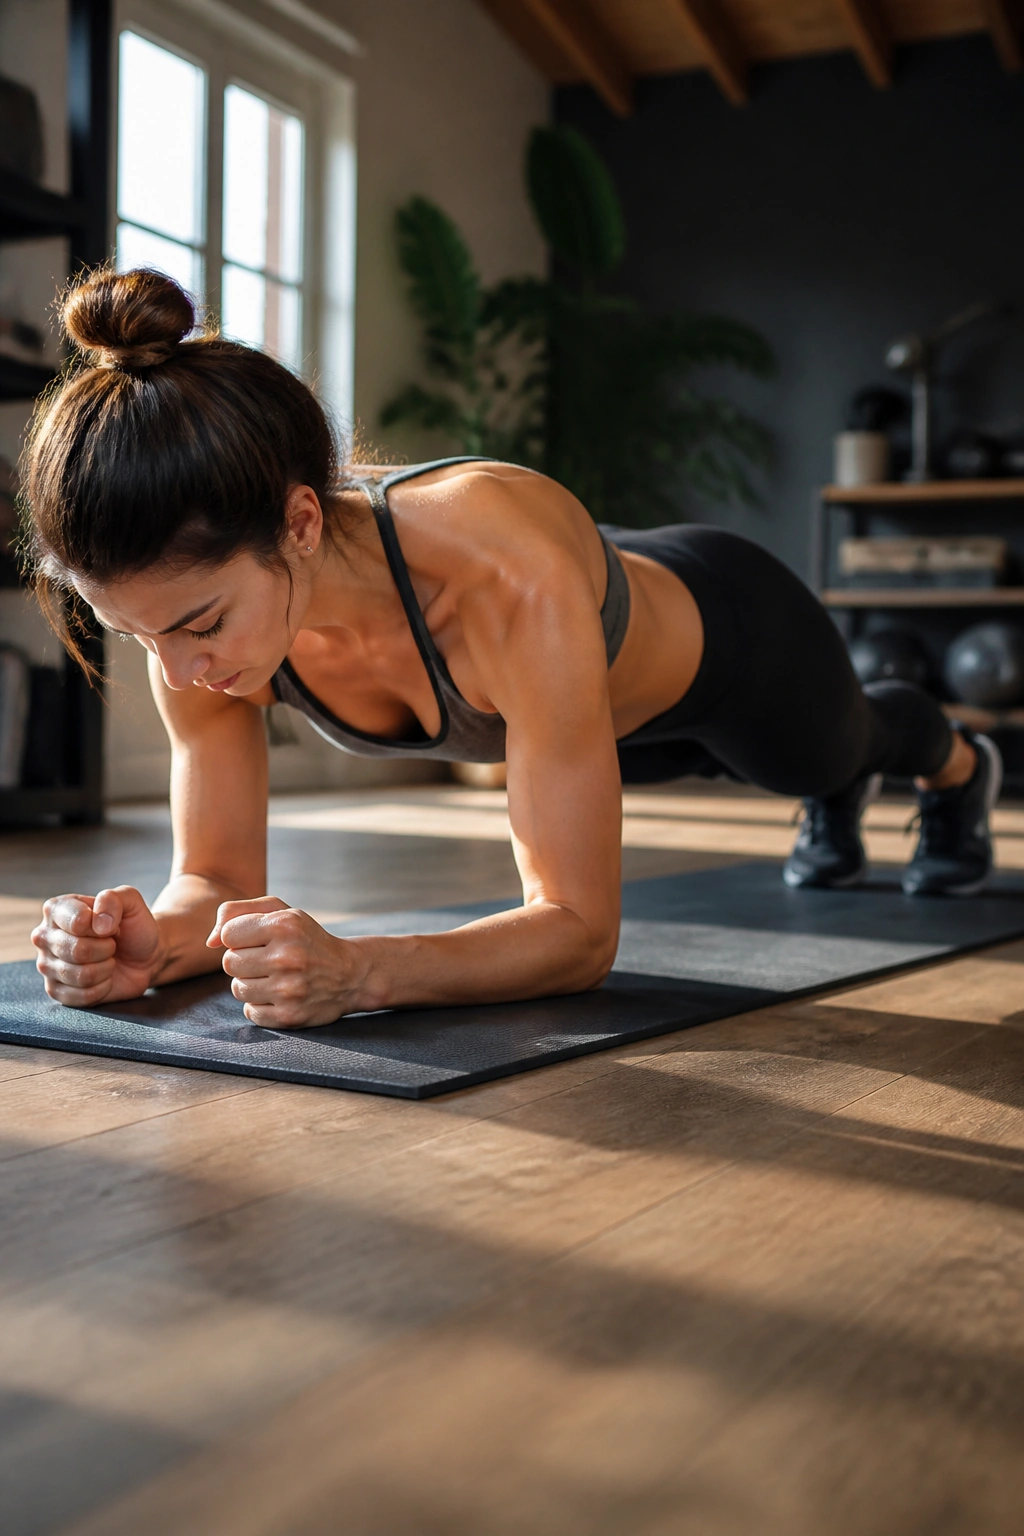
Most people treat the plank as an endurance test, holding it for minutes at a time while their lower back sags and their hips drop. That is counterproductive. When you allow your pelvis to tilt forward, you are essentially letting your belly hang, which defeats the purpose of the exercise. A true plank should be about creating rigid tension throughout your entire torso.
How to Get It Right
The goal isn’t to hold the position as long as you can; it is to hold it with perfect tension. Position your elbows directly under your shoulders. Squeeze your glutes—hard. If your glutes are relaxed, your lower back will take the strain. Draw your belly button toward your spine as if you are bracing for a punch to the stomach. Keep your neck neutral; don’t look up or down, just stare at the floor between your hands.
Pro tip: If you find yourself shaking uncontrollably after 10 seconds, that is fine. Focus on maintaining that hard, rigid tension for 30 seconds rather than limp-shaking for two minutes. Quality beats quantity every time.
2. The Dead Bug
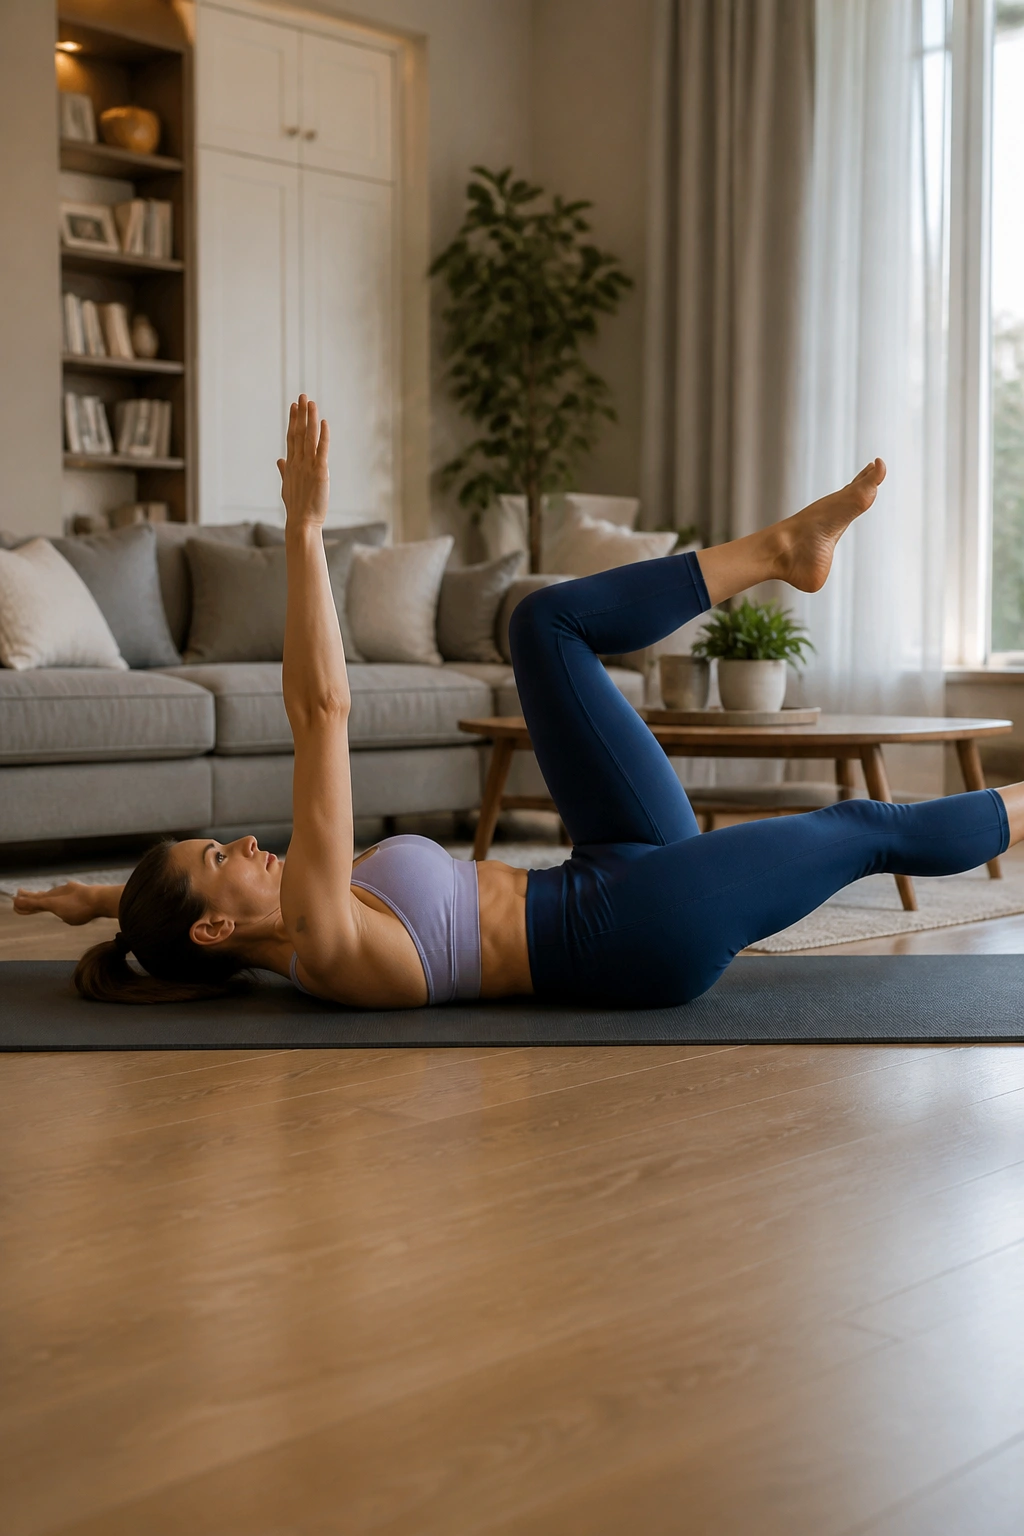
This is arguably the best move for connecting your brain to your lower abdominals. It requires zero equipment and forces you to use your core to stabilize your limbs against gravity. The “bug” in the name comes from the starting position: lying on your back with arms and legs in the air, resembling an overturned insect.
The mechanism is simple: you must maintain a perfectly flat lower back against the floor while moving opposite limbs. As you extend your right arm behind your head and your left leg straight out, your lower back will instinctively want to arch off the floor. Do not let it. That battle—keeping your spine glued to the mat while your extremities move—is where the deep abdominal work happens. If you cannot keep your back flat, stop the leg from going as low. Keep it higher in the air until your core strength catches up.
3. Reverse Crunches
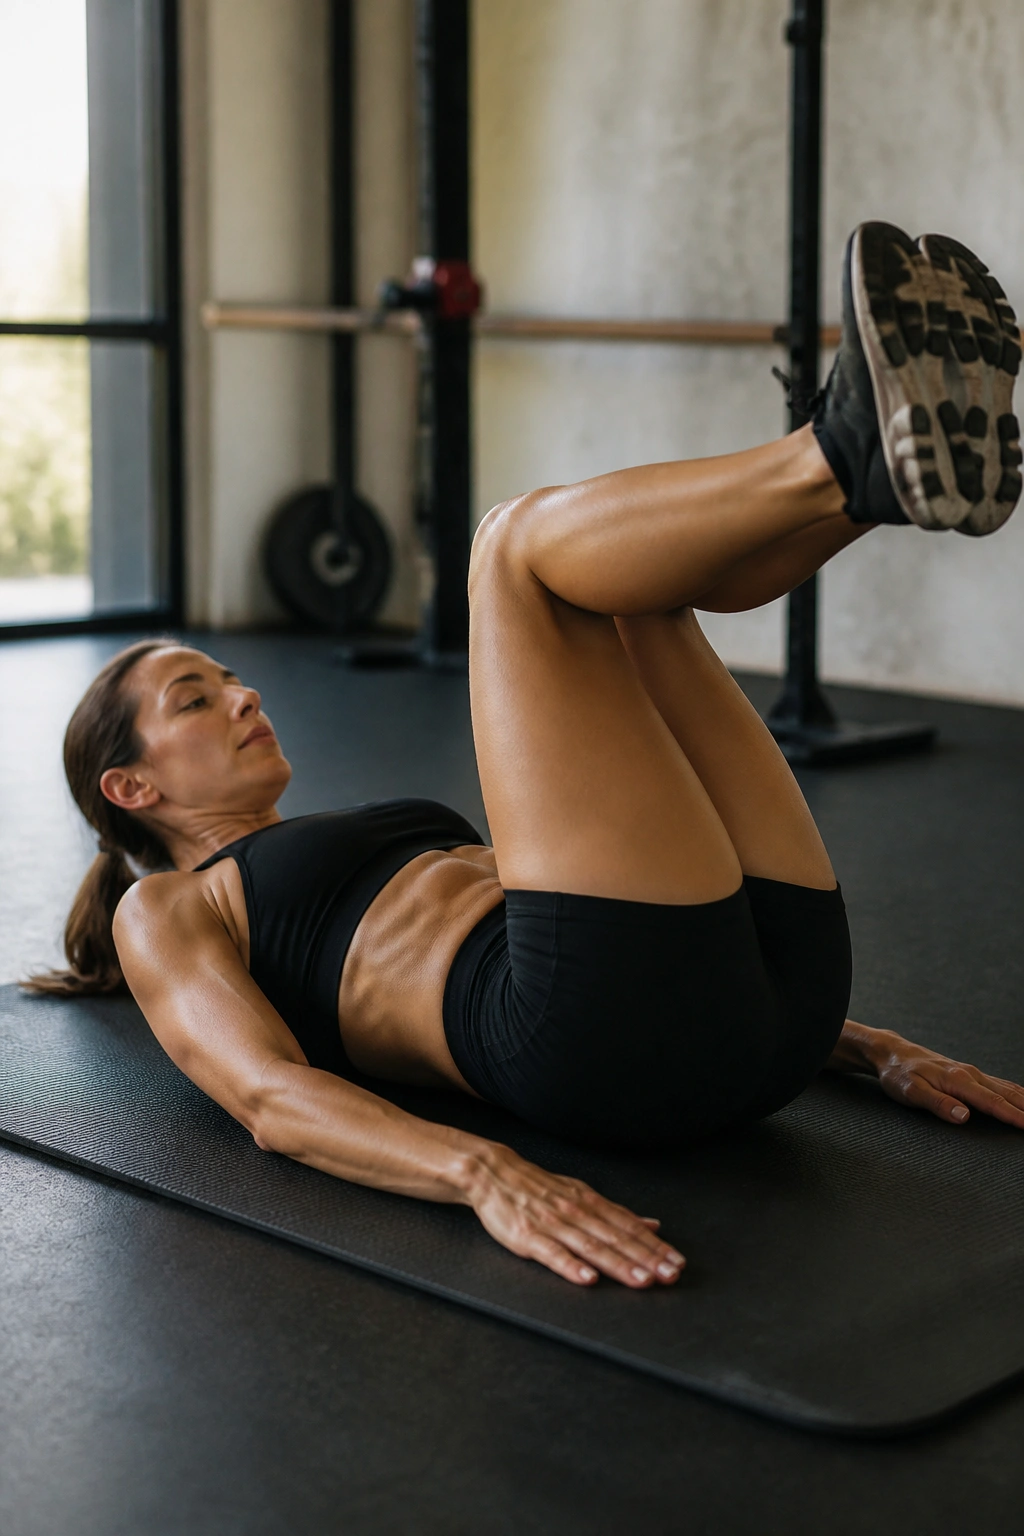
Standard crunches work the upper rectus abdominis—the “six-pack” muscle. To target the lower portion, you need to bring your legs to your torso, not your torso to your legs. The reverse crunch is the classic way to achieve this, but it is almost always performed incorrectly with momentum.
Forget about swinging your legs. Lay flat on your back, knees bent at 90 degrees, feet hovering just off the ground. Place your hands by your sides or under your hips for support. The movement should be tiny. You aren’t trying to touch your knees to your nose. Think about lifting your tailbone just an inch off the mat using only your lower abs. It should feel like a small, controlled pelvic curl. If you aren’t feeling a burn in the bottom two inches of your belly, you are likely using your hip flexors instead of your abs.
4. Leg Lowers
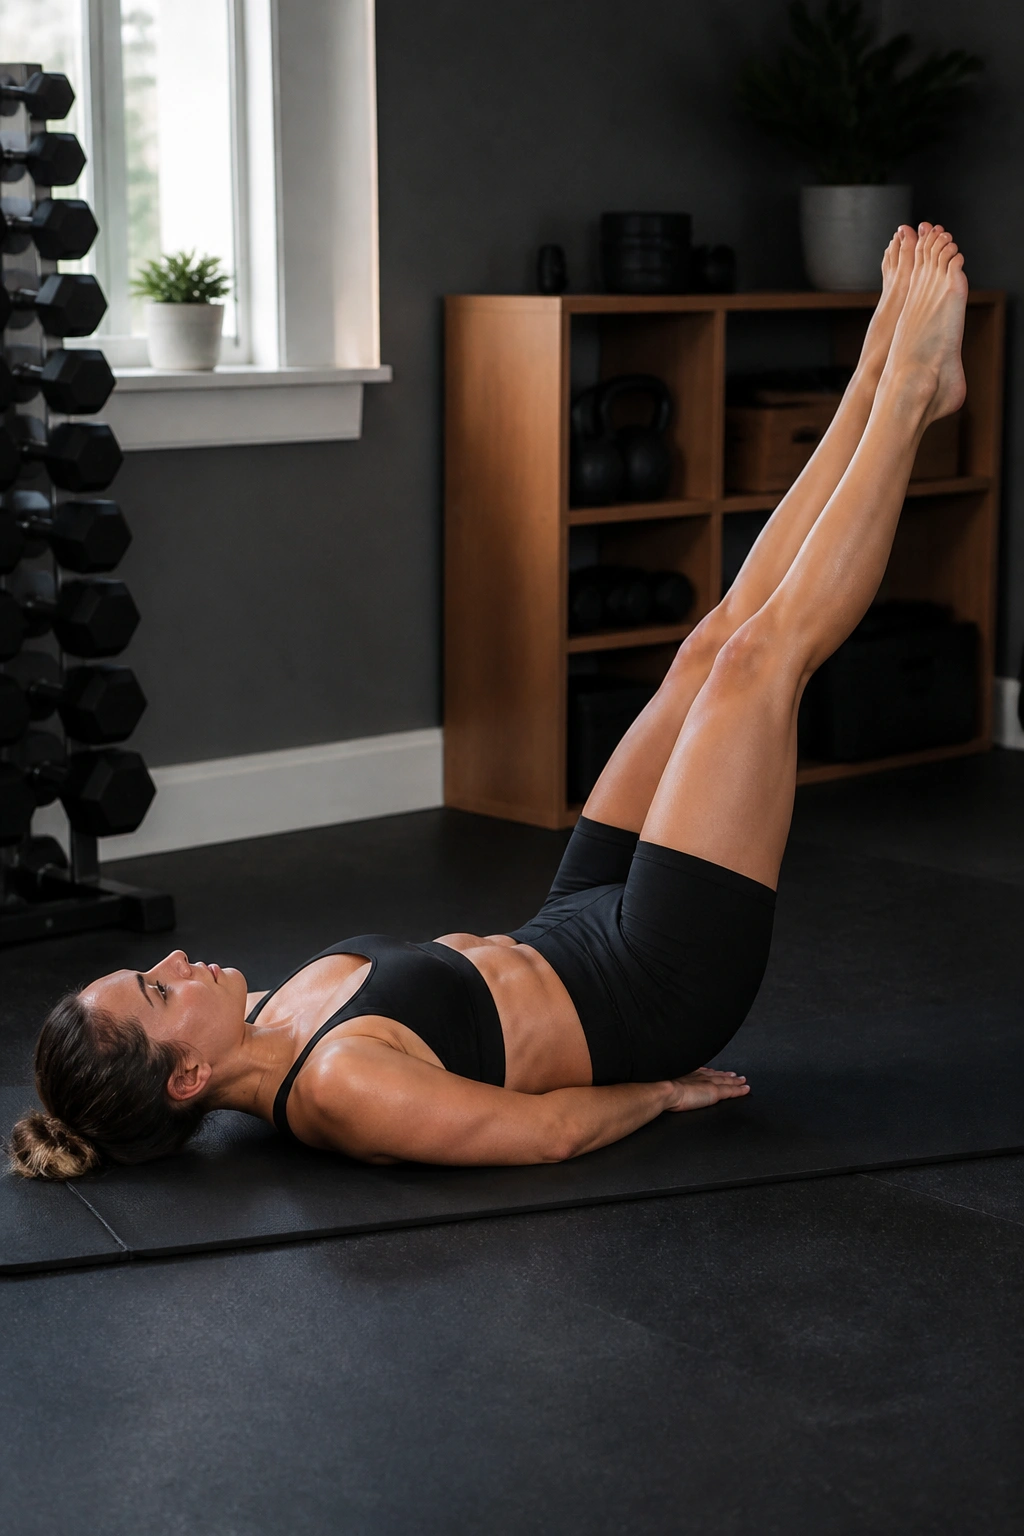
The leg lower is the ultimate test of lower ab control. Unlike a leg raise, where you are lifting the weight of your legs, the lower is about controlling the descent. The eccentric phase—the lowering part—is where the muscle fibers tear and repair, leading to strength gains.
Lie on your back, hands pinned under your glutes for lumbar support. Extend your legs straight up toward the ceiling. Inhale as you slowly lower your legs toward the floor. Only go as low as you can without your lower back arching. The moment your lower back loses contact with the floor, your hip flexors have taken over, and your abs have disengaged. Stop there, pause for a second, and use your lower abs to pull your legs back to the starting vertical position.
5. Mountain Climbers
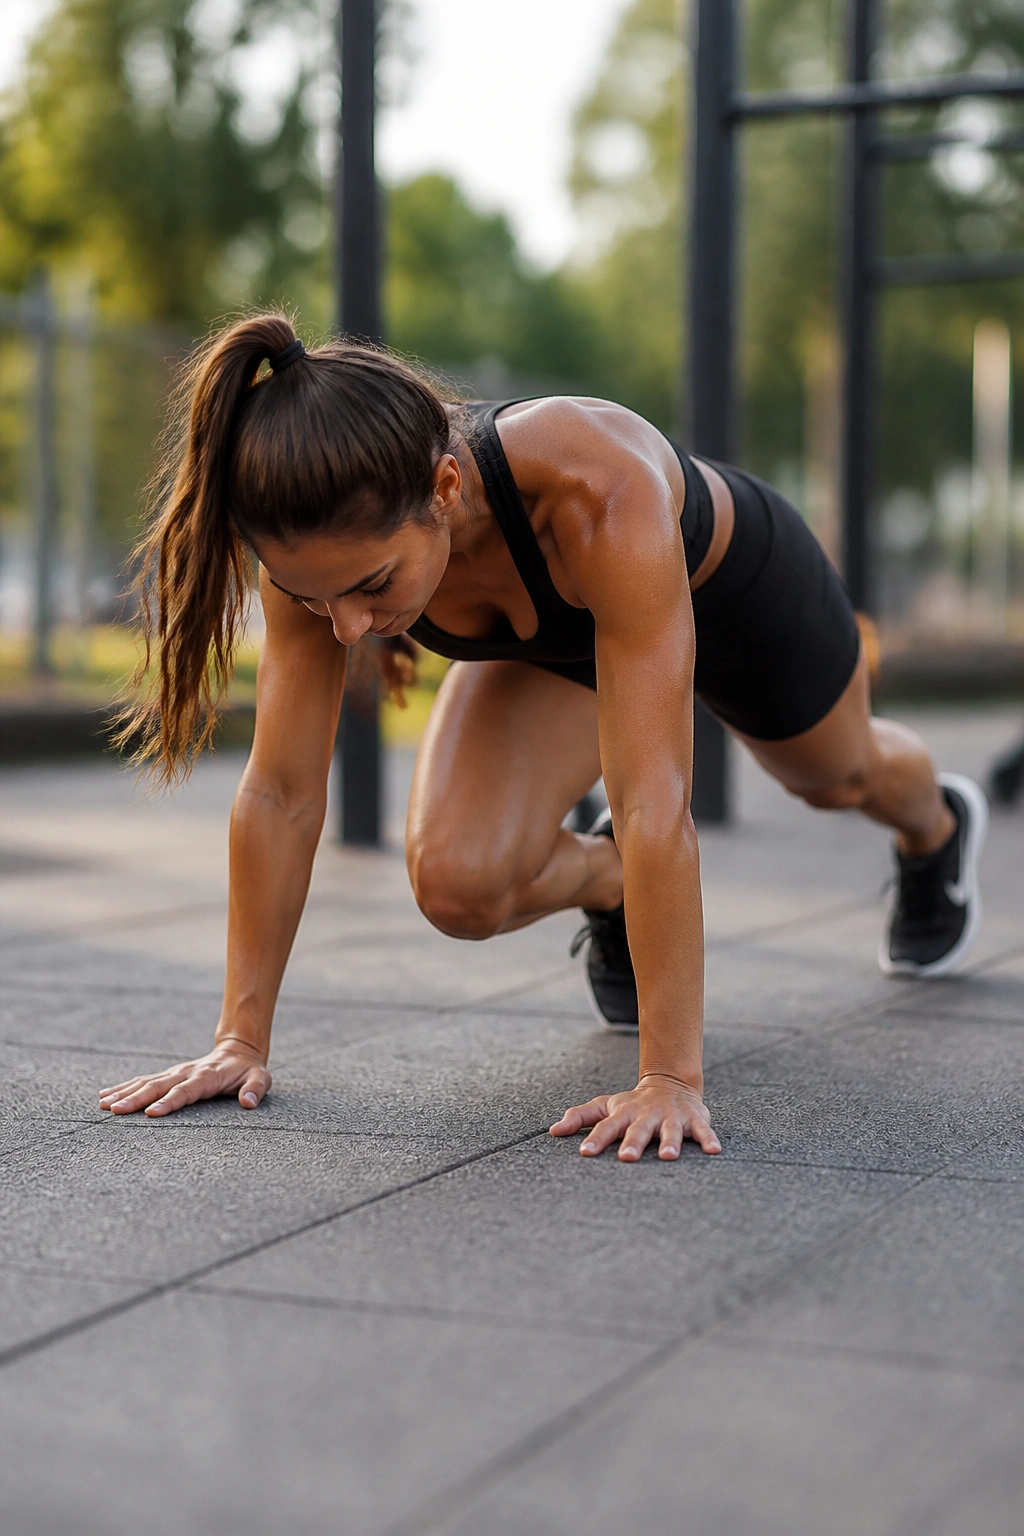
This exercise brings a cardio element to core training while keeping the body in a prone position. The key here is not speed, but stability. Most people turn mountain climbers into a chaotic sprint where their hips bounce up and down, putting unnecessary pressure on the shoulders and negating the core work.
The Slow-Motion Method
Try this for a change: do your mountain climbers in slow motion. When you bring your knee toward your chest, hold it there for a full second. Squeeze your lower abs to pull that knee in deeper. Keep your hips at the same height as your shoulders the entire time. By slowing it down, you eliminate the momentum that usually does half the work. You will find that this version is significantly more difficult—and significantly more effective—than the high-speed variety.
6. Hanging Leg Raises
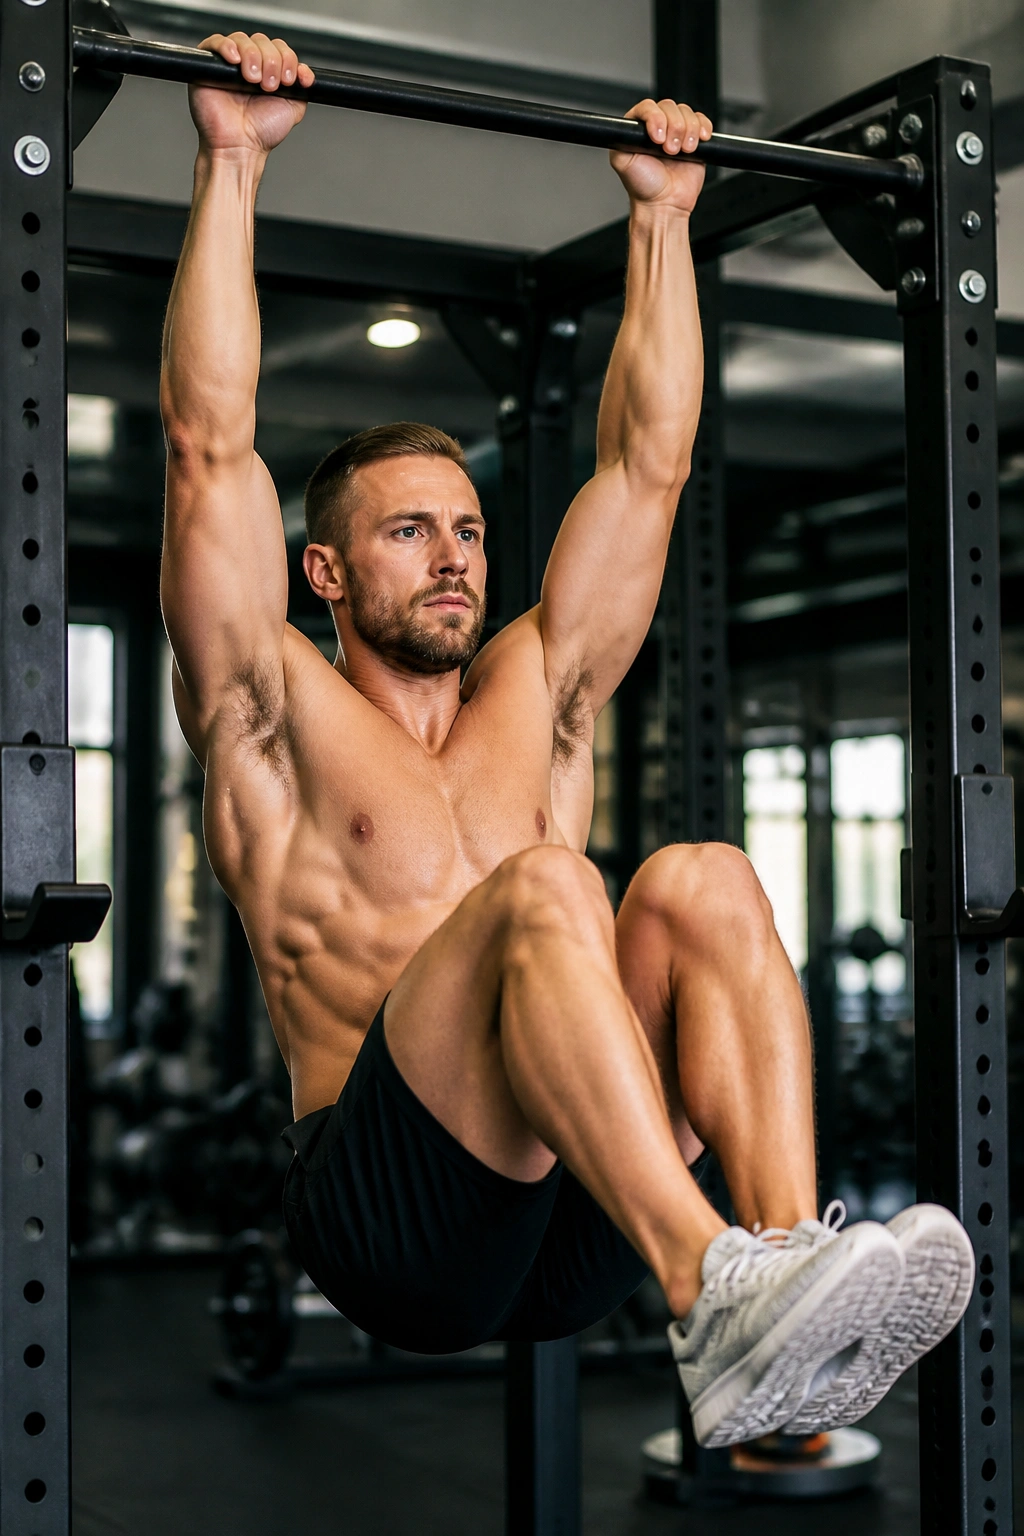
If you have access to a pull-up bar, this is the gold standard for developing the lower abdomen. Hanging forces your body to stabilize against a full range of motion. It is deceptively difficult because you have to fight the urge to swing.
Start by hanging from the bar with a firm grip. Engage your shoulders—do not let your ears sink into them—by depressing your scapula. As you lift your legs, focus on curling your pelvis upward. The goal is to get your knees to your chest, or your toes to the bar, but the tilt of the pelvis is the secret. If you lift your legs with straight hips, you are mostly training your quads and hip flexors. You must initiate the lift from your abs, pulling your pelvis toward your ribcage.
7. Flutter Kicks
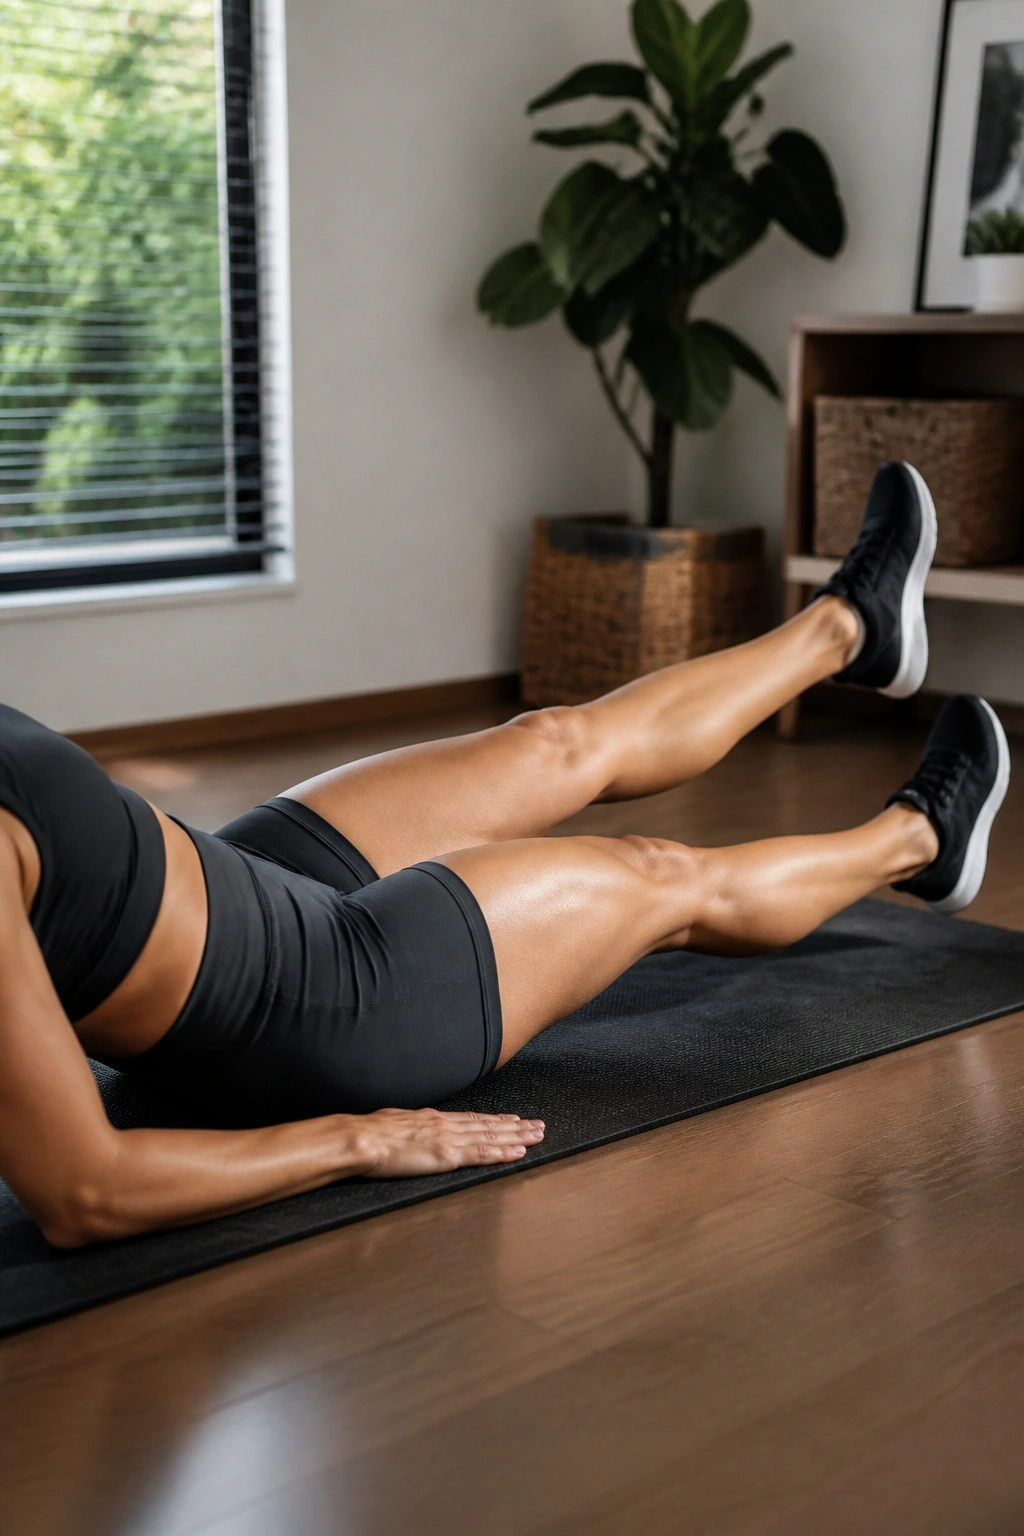
This is a low-impact movement that burns out the lower belly through endurance. Because the range of motion is small, you can keep the tension constant for a longer period.
Lie on your back, legs extended. Lift your head and shoulders slightly off the ground to increase the engagement of your upper abs as well. Keep your legs straight, pointing your toes to engage your quads. Kick your legs up and down in a small, rapid motion. The height of your legs matters: the closer they are to the floor, the harder your lower abs have to work to keep your back pressed down. If your back starts to arch, lift your legs higher toward the ceiling. This adjustment is your safety valve.
8. Pelvic Tilts
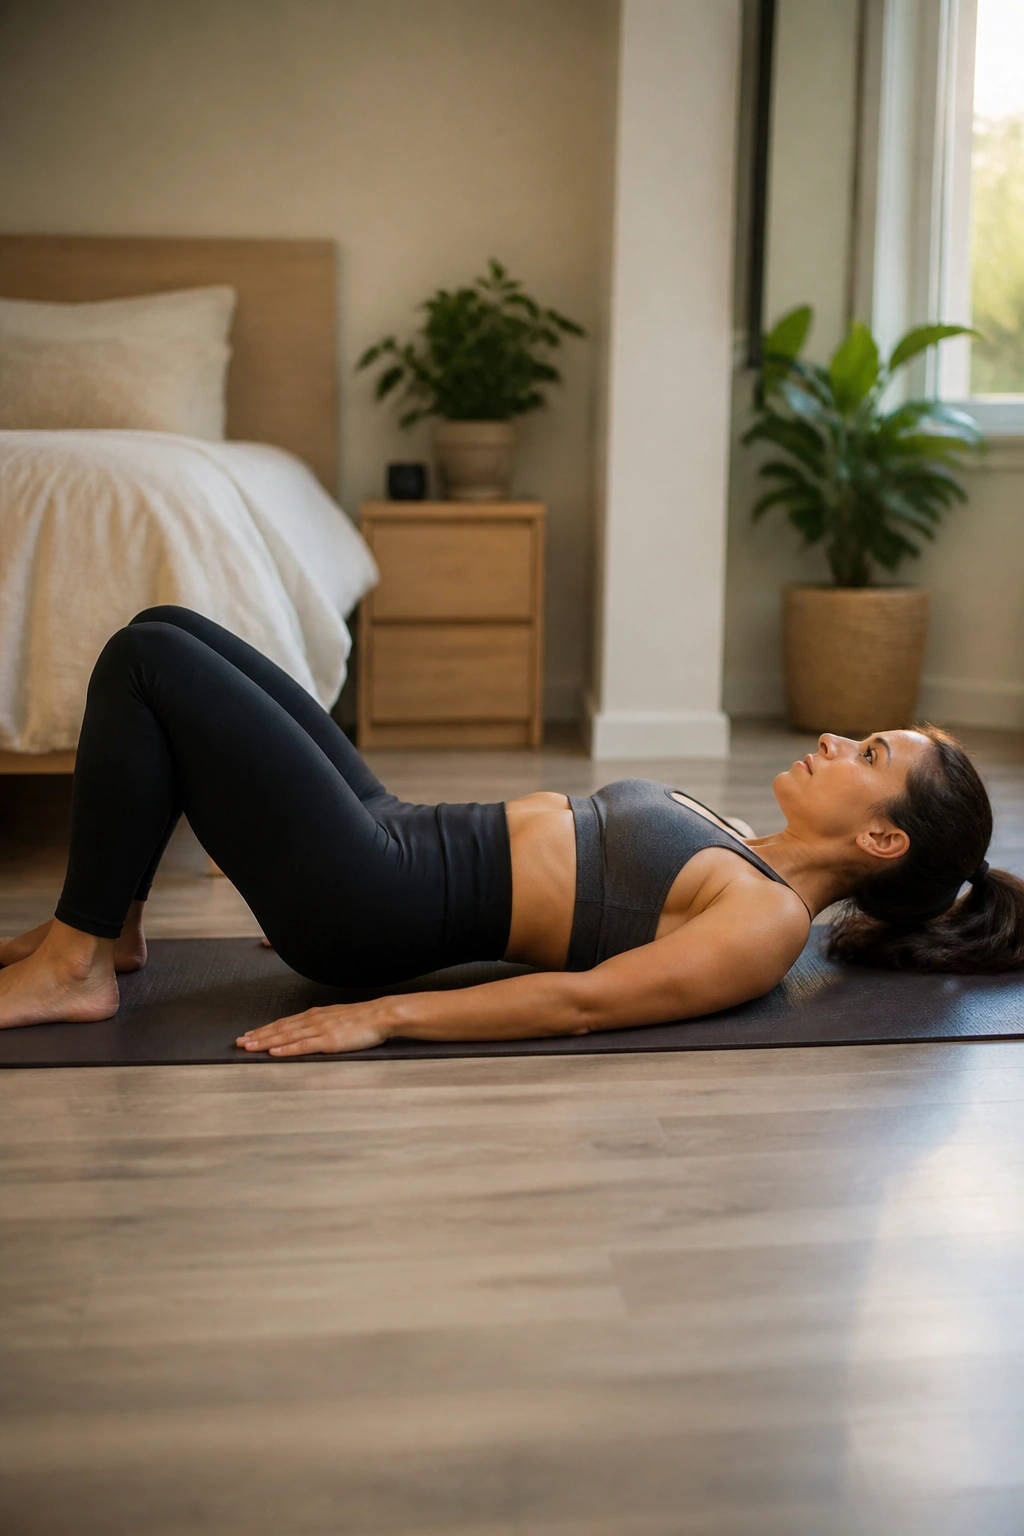
Sometimes the most effective exercises look like you aren’t doing anything at all. The pelvic tilt is a foundational movement in physical therapy for correcting anterior pelvic tilt, which is a common posture issue that makes the belly pooch out even when it is flat.
Lie on your back, knees bent, feet flat on the floor. Take a breath, and as you exhale, engage your core to press your lower back firmly into the mat. You are essentially trying to shrink the space between your spine and the floor. Hold that position for three seconds, feeling the deep contraction in the front of your abdomen, then release. It is subtle, but it teaches you how to engage the transverse abdominis—the “internal corset” that tightens the entire waistline.
9. Bicycle Crunches
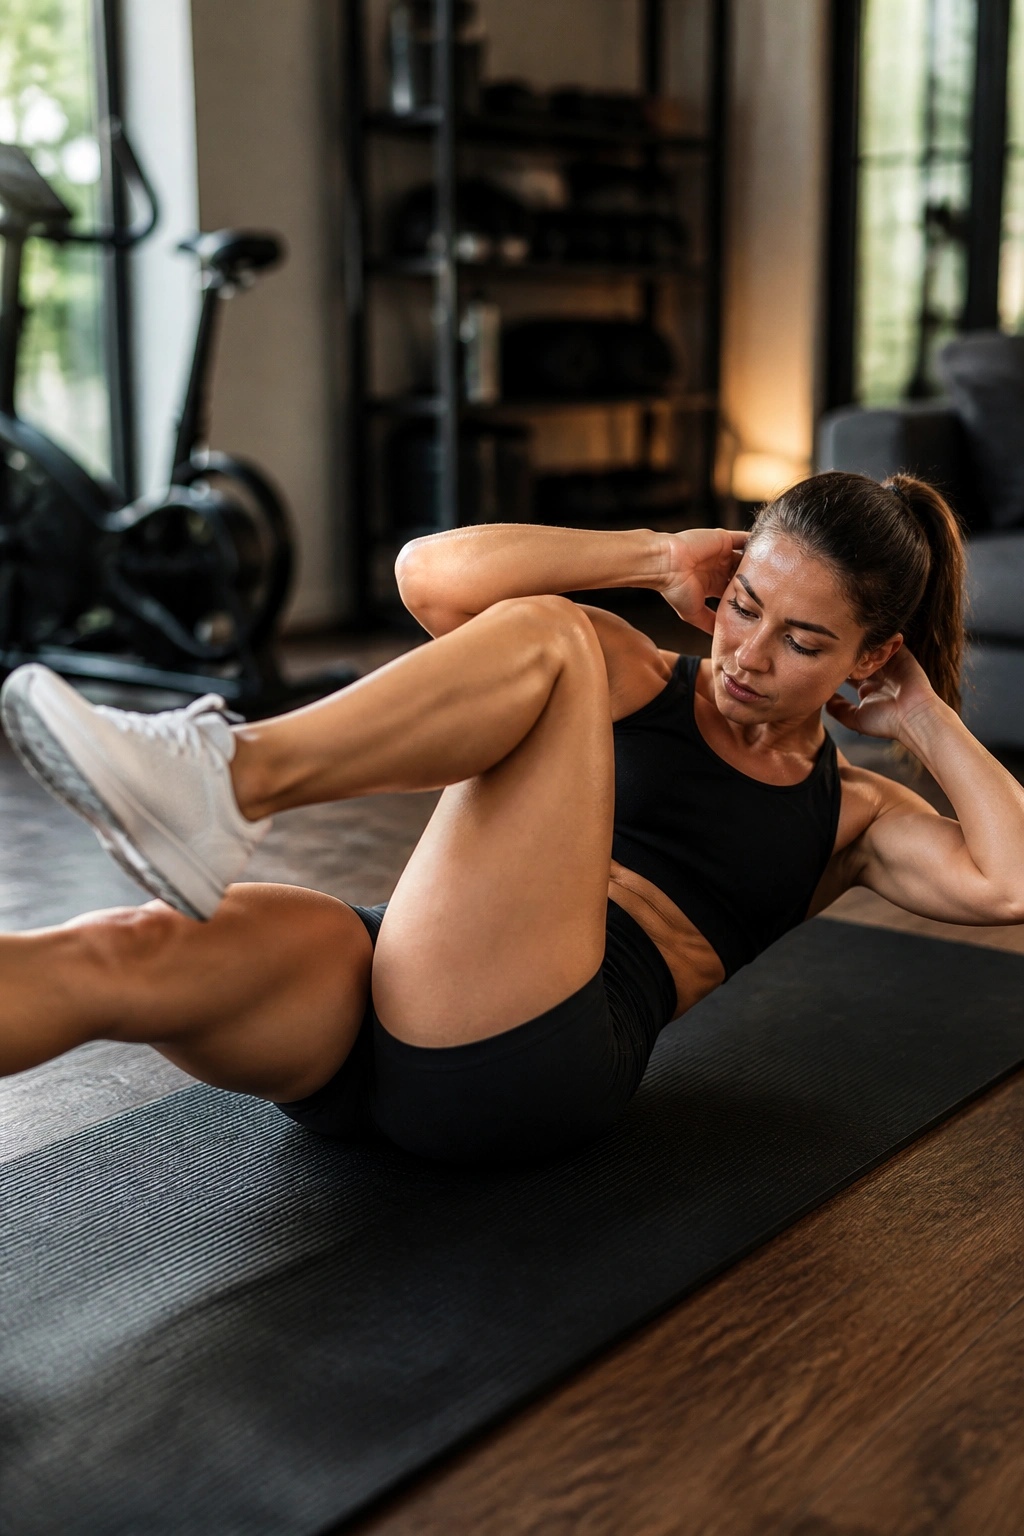
While often categorized as an oblique exercise, the bicycle crunch requires significant lower abdominal stabilization to maintain the position of the legs. The mistake most people make is moving the arms too fast and forgetting the legs entirely.
Rotate your torso so your right elbow moves toward your left knee, but keep the elbow wide. The other leg should be fully extended, hovering just above the ground. Focus on the extension. As you straighten that leg, drive the heel away from you. That extra reach forces your lower core to stabilize the weight of your leg as it extends. It’s an active, dynamic move that covers the entire circumference of the midsection.
10. Bird-Dog
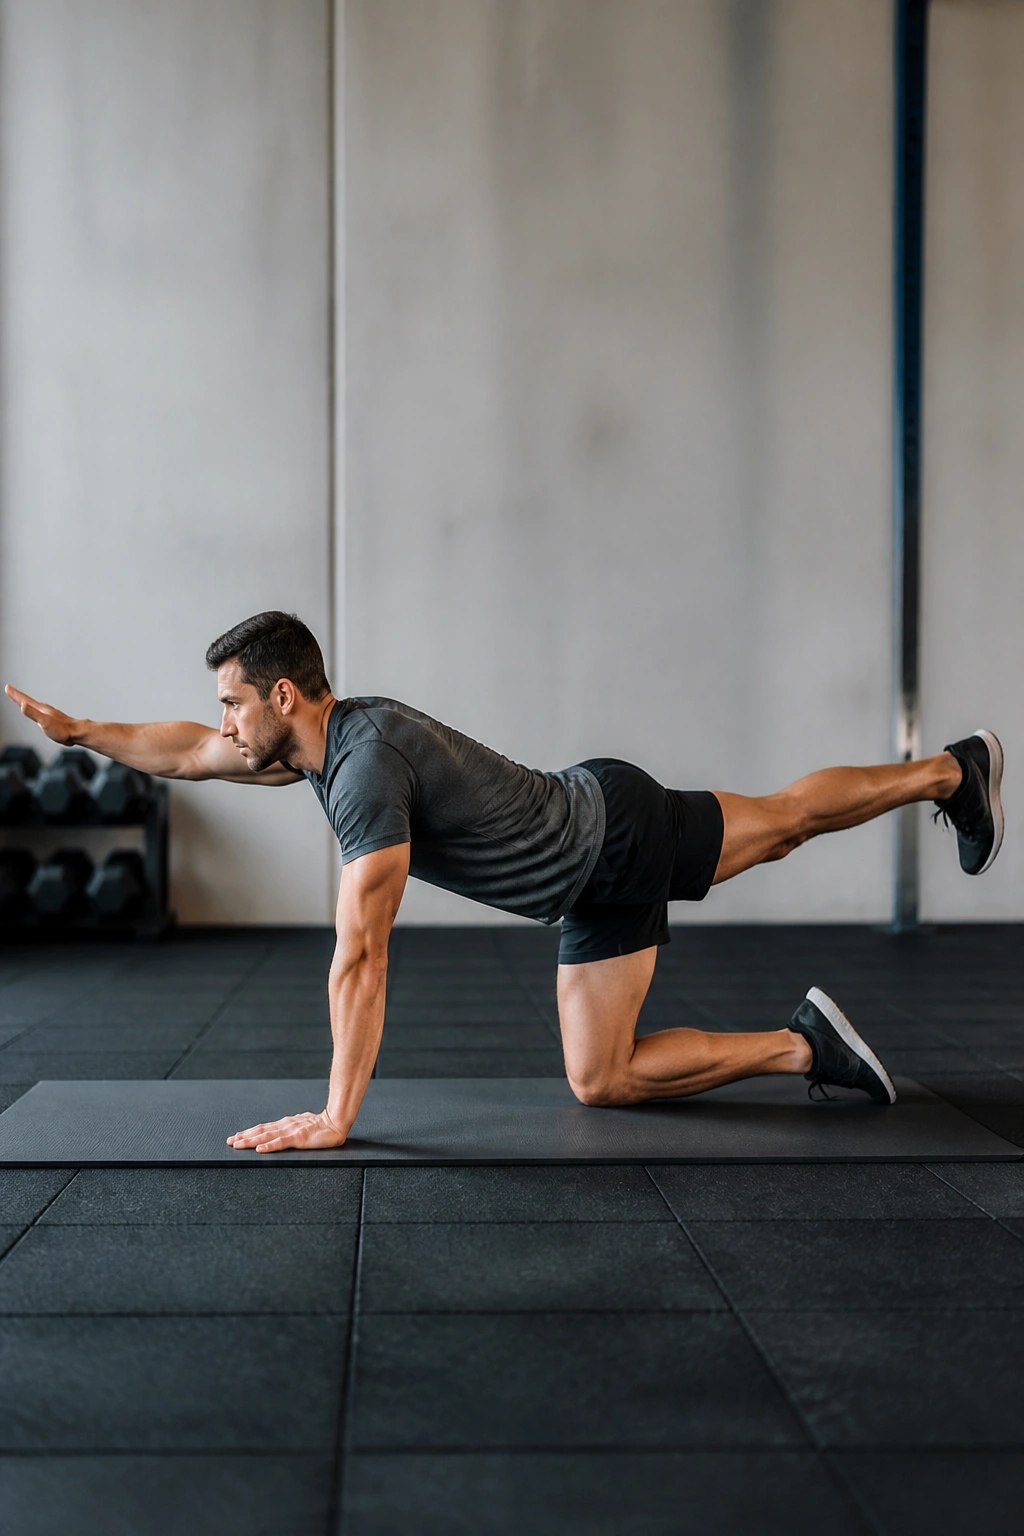
This is a spinal stability move that forces the core to work in opposition. By connecting opposite arm and opposite leg, you are training your core to prevent rotation, which is one of its primary anatomical functions.
Start on your hands and knees in a tabletop position. Keep your back flat. Extend your right arm forward and your left leg backward simultaneously. Do not let your hips tip. Imagine a glass of water balanced on your lower back. If you move too fast, the glass tips. Bring your elbow and knee together under your torso, rounding your back slightly to engage your abs, then extend again. This slow, deliberate motion fires the deep stabilizers that keep your waistline tight.
11. Hollow Body Holds
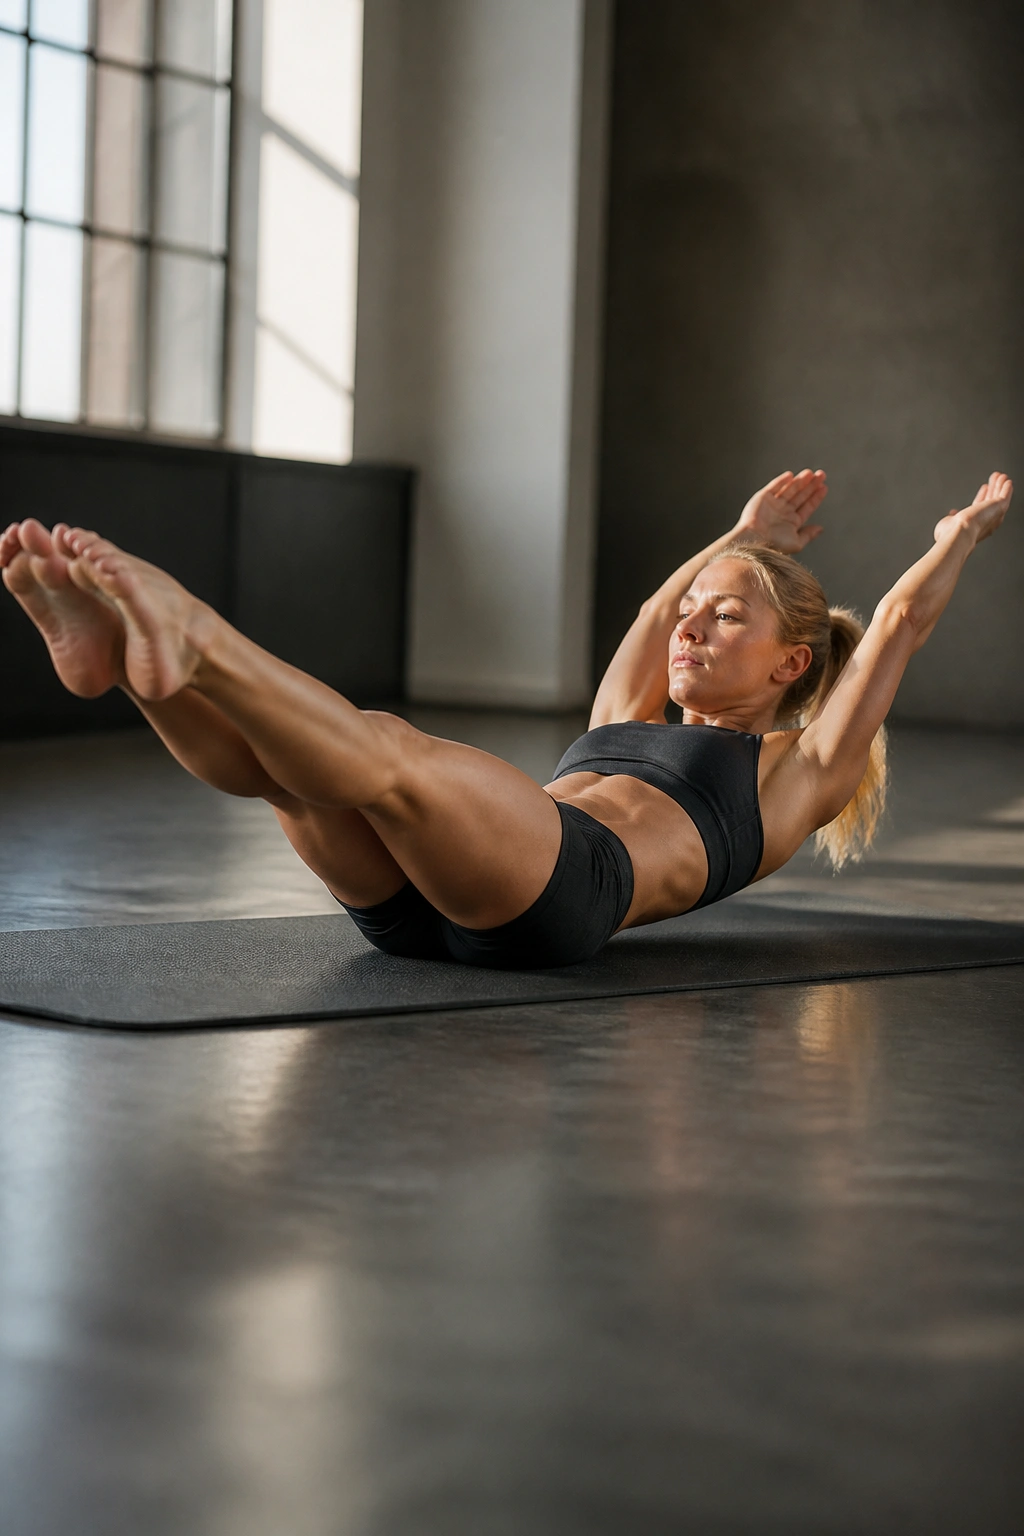
Gymnasts use this move to build an incredibly strong, dense core. It looks passive, but it is one of the most intense abdominal isometric holds you can perform. It is essentially a “banana” shape.
Lie flat on your back. Lift your legs about six inches off the floor and lift your shoulder blades off the floor, arms extended overhead. Your body should look like a shallow cradle. The pressure on your lower abs is immense because your legs and torso are acting as long levers. If you cannot hold this for 10 seconds, your core is not yet ready for the full range. Start by keeping your arms by your sides or bending your knees, then gradually extend as you get stronger.
12. Scissor Kicks
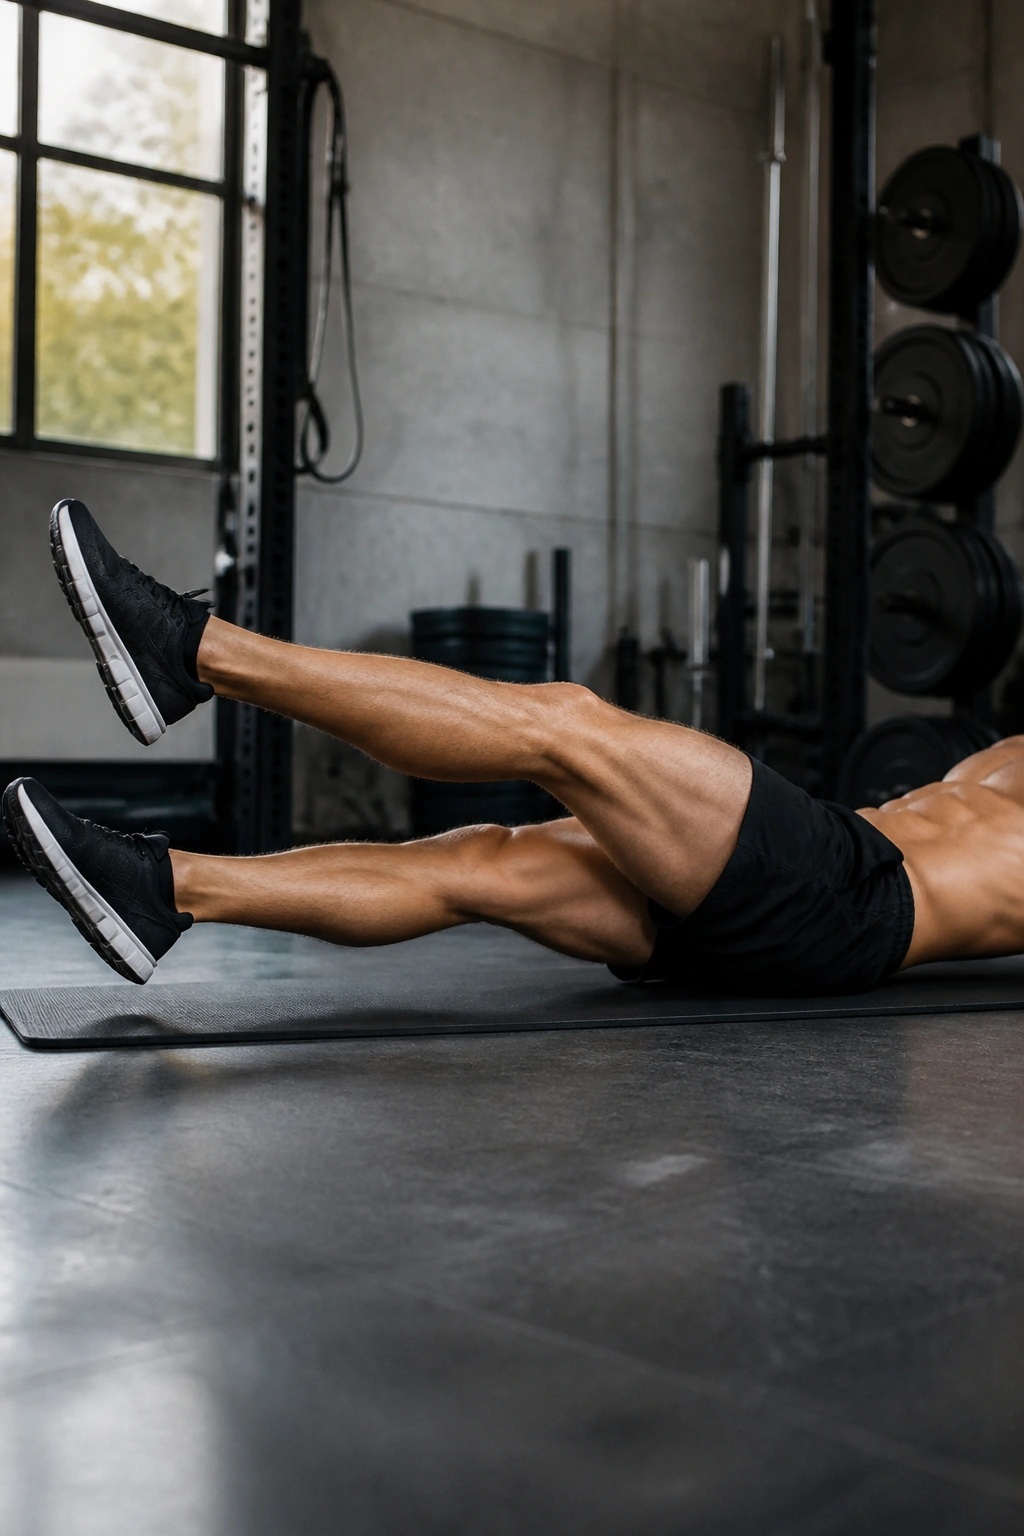
Scissor kicks are similar to flutter kicks but work in a lateral, crossing motion, which adds a bit of oblique engagement to the lower ab focus. The cross-body motion helps target the areas where the abs meet the hip line.
Lie on your back, hands under your glutes. Keep your legs straight. Instead of kicking up and down, cross your legs over each other in a scissoring motion. Think of it as “left over right, right over left.” Keep the movements tight and controlled. The key is to keep your feet low, about 45 degrees or less from the floor. The moment your lower back comes off the mat, you have gone too far. Reset and raise your feet a few inches higher.
13. V-Ups
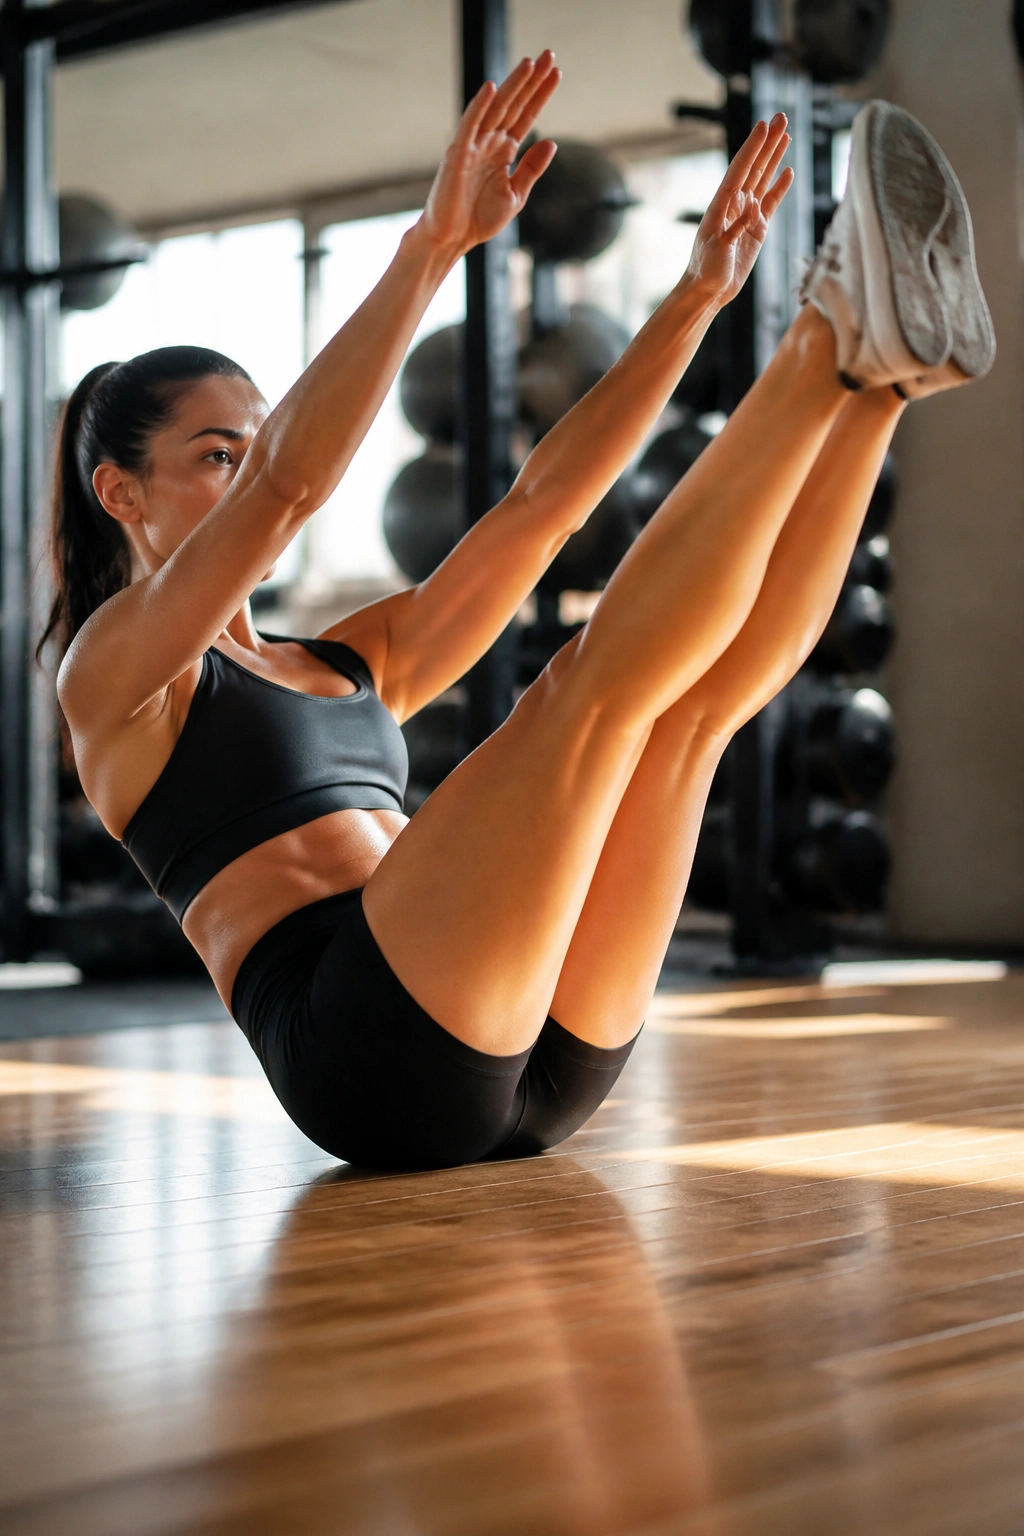
This is a compound movement that requires significant flexibility and strength. It brings both the upper and lower halves of your body together, which provides an intense contraction of the rectus abdominis.
Start lying flat with arms overhead and legs straight. In one smooth motion, fold your body in half, reaching your hands toward your toes. It is critical not to use momentum by swinging your arms. If you need to, you can bend your knees to perform “tuck-ups” initially, which is a slightly easier variation that still hits the lower abs hard. As you become more proficient, straighten your legs and aim to touch your toes at the peak of the V-shape.
14. Glute Bridges
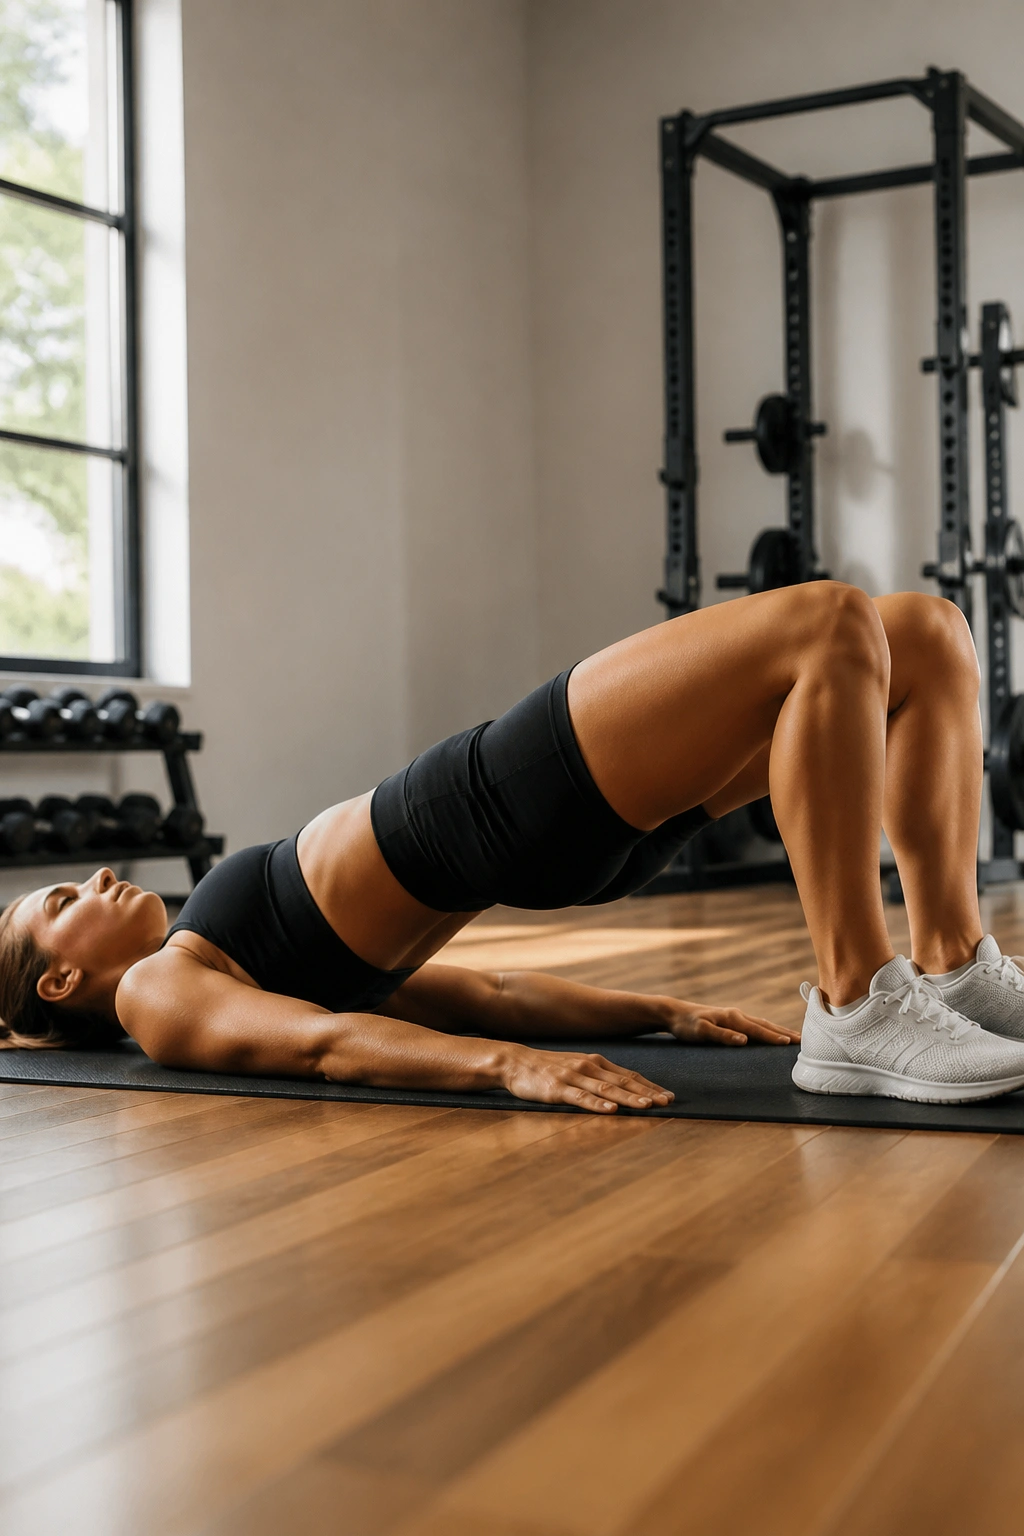
Wait, why is a glute exercise on a list for lower belly fat? Because your core works in a chain. If your glutes are weak, your pelvis tilts forward, causing the lower belly to protrude. Strengthening the posterior chain—your glutes and hamstrings—pulls the pelvis back into a neutral position, which immediately flattens the lower belly profile.
Lie on your back, knees bent, feet flat. Drive through your heels to lift your hips toward the ceiling. At the top of the movement, squeeze your glutes as hard as you can. Do not overarch your lower back. This exercise helps align your pelvis, which is often the structural fix people need to stop their stomachs from pooching.
15. Knee Tucks (Slider or Ball)
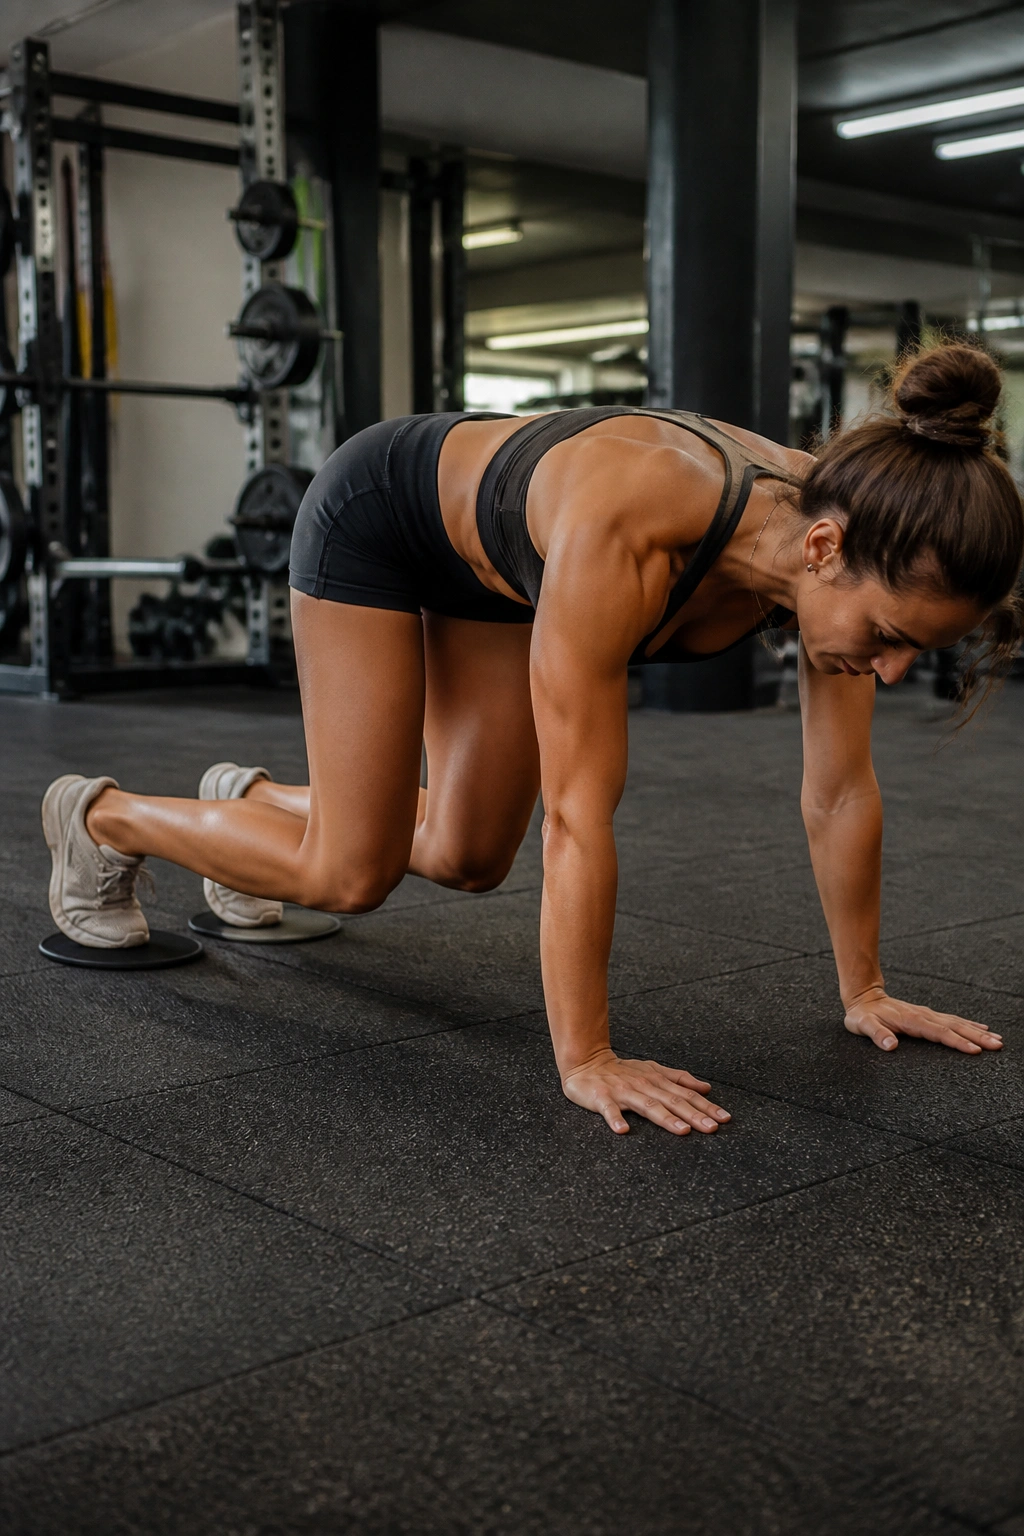
If you have access to gym sliders or a stability ball, use them. Knee tucks are a killer for the lower abs because they force you into a plank position and then require you to actively curl your knees toward your chest against resistance.
In a plank position with your toes on a pair of sliders (or your shins on a stability ball), pull your knees toward your chest. The movement should be powered entirely by your lower abdomen. Do not let your back sag. The challenge here is the return: control the sliding motion as your legs go back out. If you let them snap back, you lose the eccentric tension. Move with intent.
16. Bear Crawls
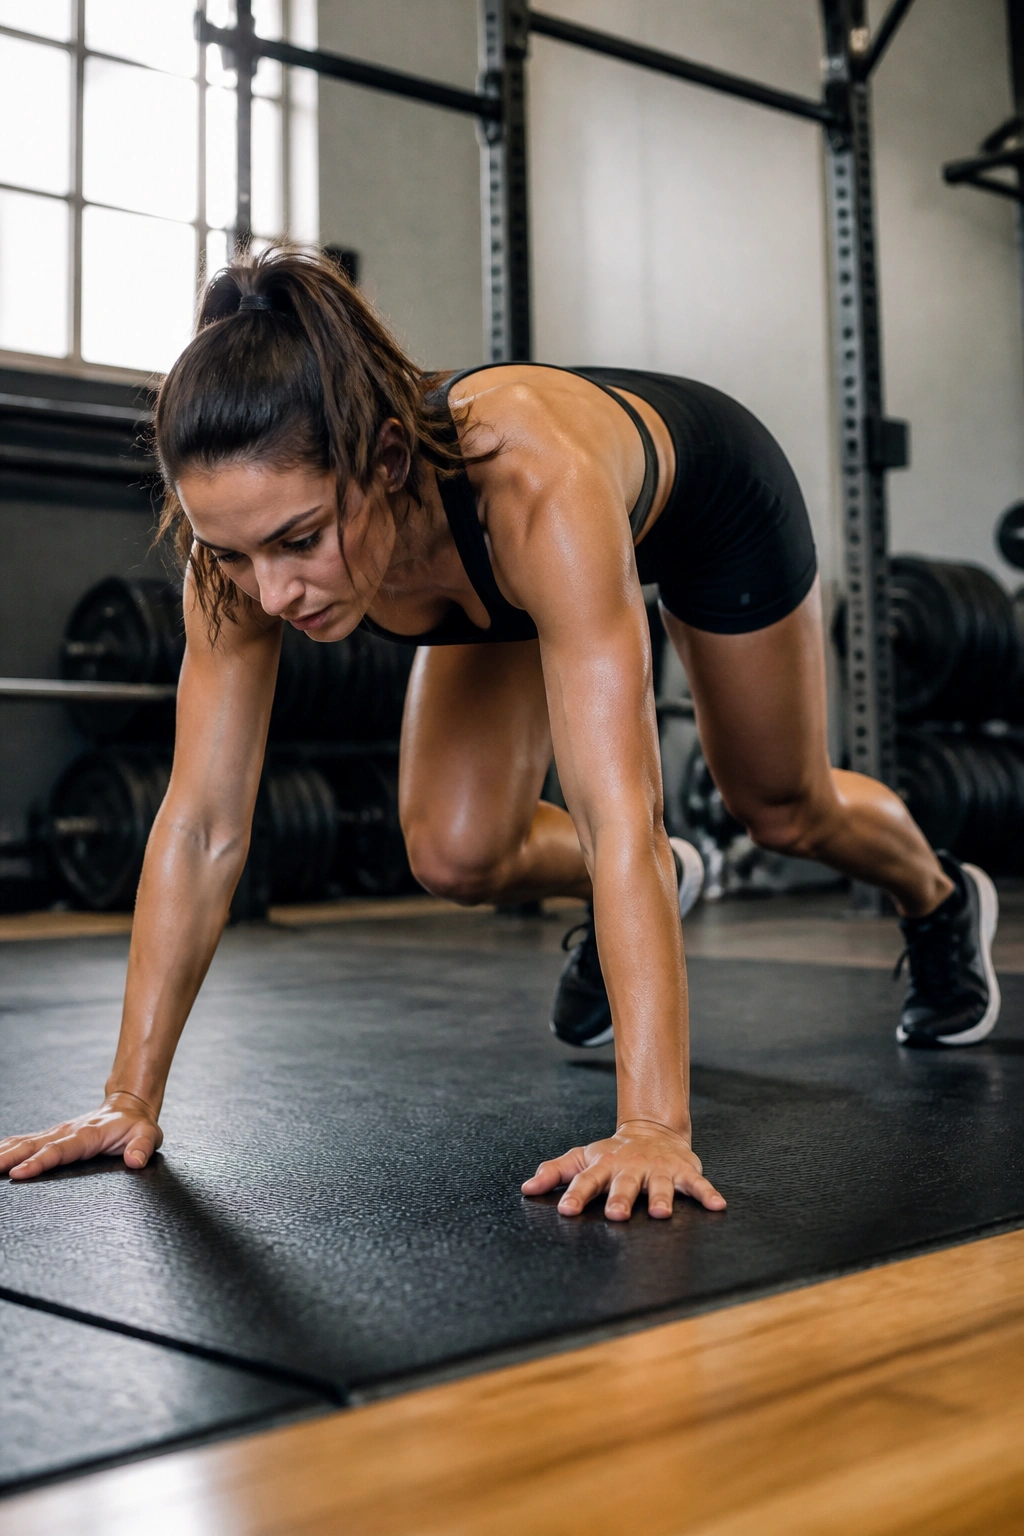
Bear crawls are a total-body conditioning tool that keeps the core under constant tension. The secret to a good bear crawl is keeping your knees as low to the ground as possible without touching it.
Start on all fours. Lift your knees two inches off the ground. Crawl forward by moving the opposite hand and foot together—right hand and left foot, then left hand and right foot. By keeping your torso parallel to the ground and your knees hovering, you are forcing your deep core muscles to stabilize your spine against every single step. It is grueling, but it is one of the most functional ways to build a “tight” midsection.
17. Heel Taps
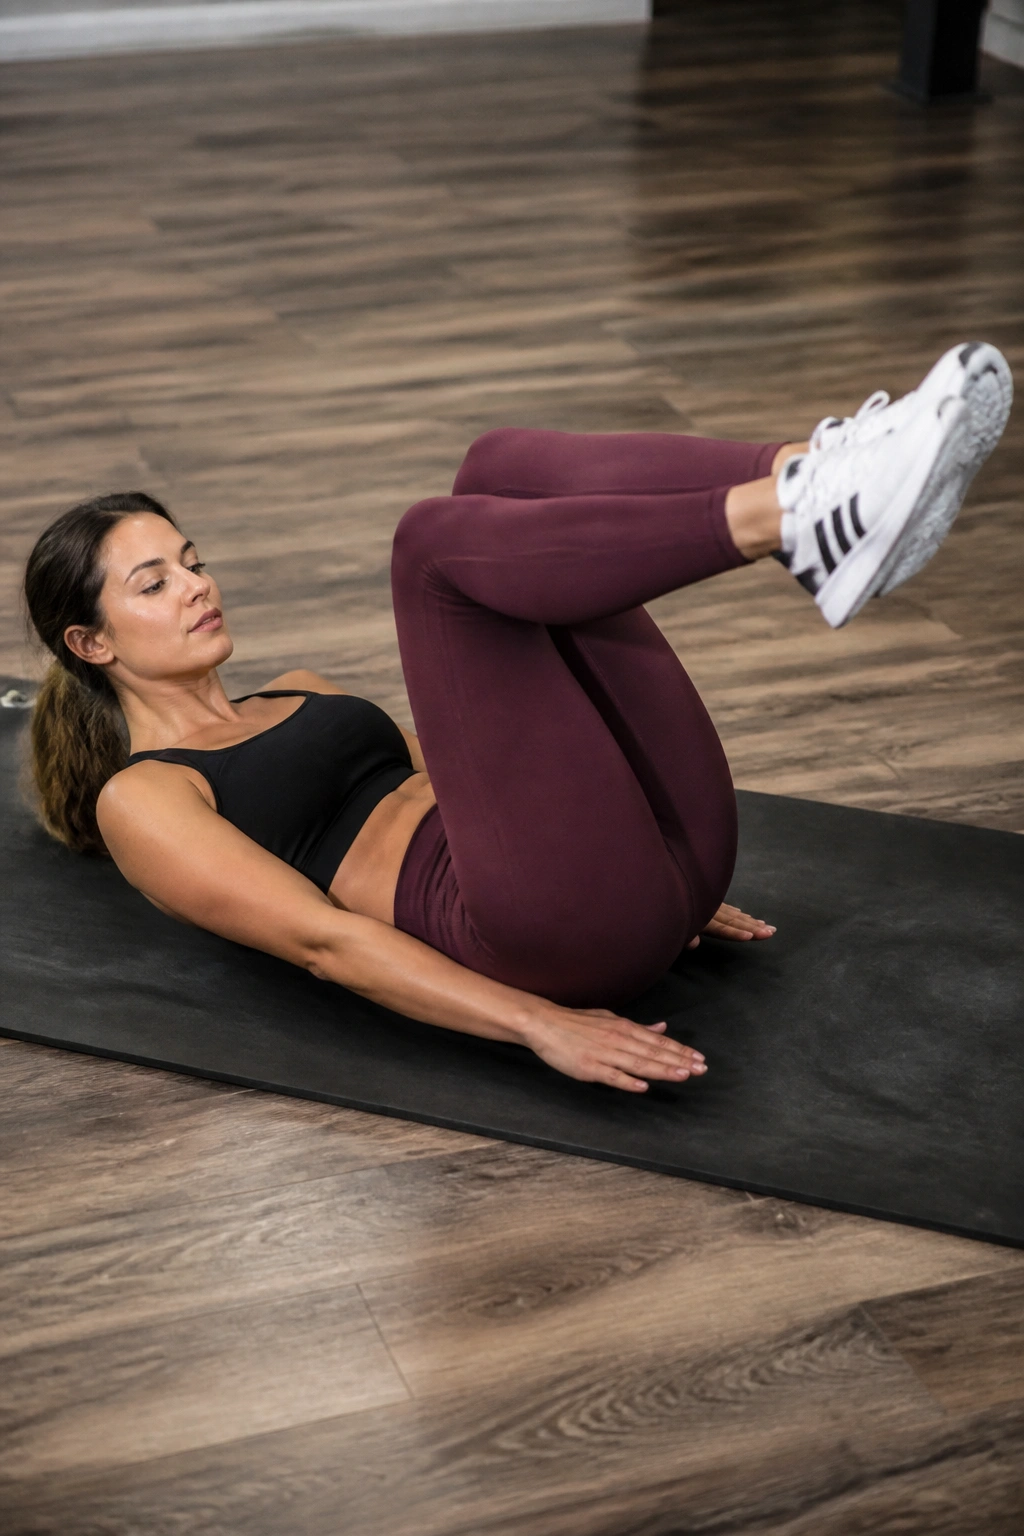
This is a variation of the dead bug that focuses on the lower abs while keeping the upper body static. It is excellent for those who find the coordination of the dead bug confusing.
Lie on your back, knees bent at 90 degrees, feet in the air. This is your starting position. With control, tap your right heel to the floor, then return it to the start. Then tap your left heel. The entire time, your lower back must remain pressed against the ground. If your back lifts, do not tap your heel all the way to the floor; just go halfway down. This move is all about the resistance you create against gravity.
18. The “Vacuum”

This is the oldest trick in the bodybuilding handbook. It isn’t a workout in the traditional sense, but it is a technique that directly trains the transverse abdominis, the muscle responsible for pulling the belly flat.
Stand up, hands on your knees. Exhale all the air out of your lungs. Once you are empty, suck your stomach in as hard as you can, pulling your navel toward your spine and up toward your ribcage. Hold this “sucked in” position for 10 to 20 seconds. It feels uncomfortable, but it creates a deep, intense contraction of that corset muscle. Practice this a few times a day. Over time, you will find it easier to keep your belly pulled in naturally, rather than letting it relax and pooch out.
Getting the Most From Your Routine

You can do every exercise on this list, but if you do not pay attention to your daily habits, the results will be slow. The most common mistake people make is ignoring their posture. If you sit at a desk all day with your shoulders slumped and your hips tucked, you are effectively lengthening your abdominal muscles and turning them off.
Posture and Muscle Memory
Throughout the day, try to catch yourself. Are you slouching? Is your belly relaxed and hanging forward? Actively pull your shoulders back and engage your deep core—just a 10% engagement is enough. This “bracing” builds the habit of keeping the muscles active. When you move to your workout, that mind-muscle connection will already be established, and you will get much more out of every rep.
The Role of Nutrition
No amount of core work will reveal a tighter belly if there is a layer of body fat covering it. That is a hard truth, but an important one. Exercises tighten and strengthen the muscle, but consistent, balanced nutrition reduces the body fat percentage that allows those muscles to be visible. Focus on whole foods, adequate protein, and hydration. If you are bloated, your lower belly will always look larger than it actually is. Sometimes the “pooch” is just inflammation from foods that don’t agree with you. Track how you feel after meals; if you notice consistent bloating, it might be worth adjusting your intake.
Final Thoughts
A tighter lower belly is rarely the result of a single “magic” exercise. It is a combination of strengthening the deep core muscles—the transverse abdominis—and fixing the posture that contributes to the protrusion in the first place. Consistency in these movements will teach your body how to hold itself differently.
Stop rushing through your repetitions. The exercises that produce the most change are usually the ones that feel the slowest and most agonizing. When you feel that deep burn, that isn’t the signal to stop; it is the signal that you are finally bypassing the superficial muscles and hitting the ones that actually hold your waist in tight. Stay the course, keep your back flat, and pay attention to your form over every single rep. That is how you see results.
